
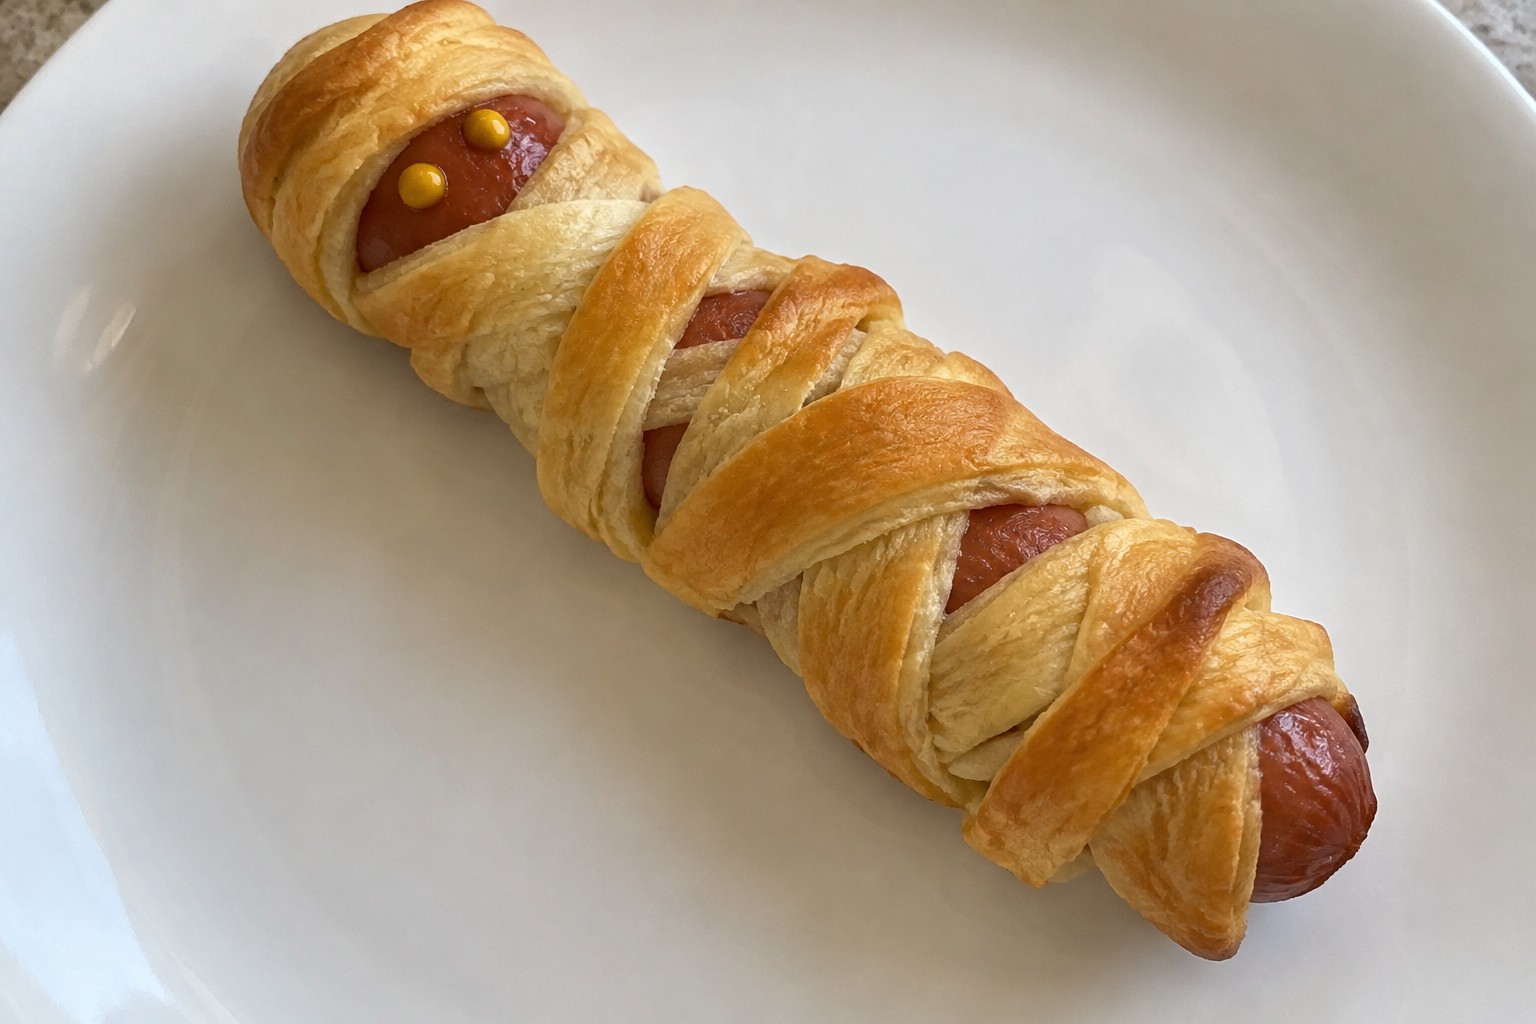
Halloween is a fun time for kids but it helps to have some food options that do not go overboard on sugar. These ideas use everyday ingredients and simple steps so you can make them without extra stress. You will find snacks and small meals that look festive while staying parent friendly. Each one works for parties or just a regular night at home. They are meant to keep kids happy and give you recipes you can actually use.
Helpful Tips Before You Start
These ideas work best when you plan for both fun and balance.
Pick Natural Colors
Use fruit purees or vegetable powders instead of artificial dyes. Kids still get bright results without the extra additives.
Make Batches Ahead
Prepare items like cut veggies or dough the day before. This keeps Halloween day calm and reduces last-minute work.
Offer Mixes of Sweet and Savory
Pair fruit skewers with cheese bites or mini pizzas. Parents appreciate options that do not lean only on sugar.
Let Kids Help with Simple Steps
Assign tasks like placing toppings or stirring dips. Hands-on time makes the food more appealing to them.
Jack-o’-Lantern Stuffed Bell Peppers with Brown Rice and Turkey
These stuffed peppers turn a regular weeknight meal into a Halloween activity kids can help with. Carving simple faces on the peppers gives them a jack-o’-lantern look while the filling stays hearty and familiar. Parents like that the main ingredients are lean turkey and brown rice, so the dish feels like a real dinner rather than just a snack.
The peppers soften during baking and the filling stays moist from the tomato sauce. Each bite has a mix of savory turkey, chewy rice, and mild seasoning that most kids accept without complaint. It works well for a family meal the night before trick-or-treating or as a colorful dish at a small Halloween gathering.
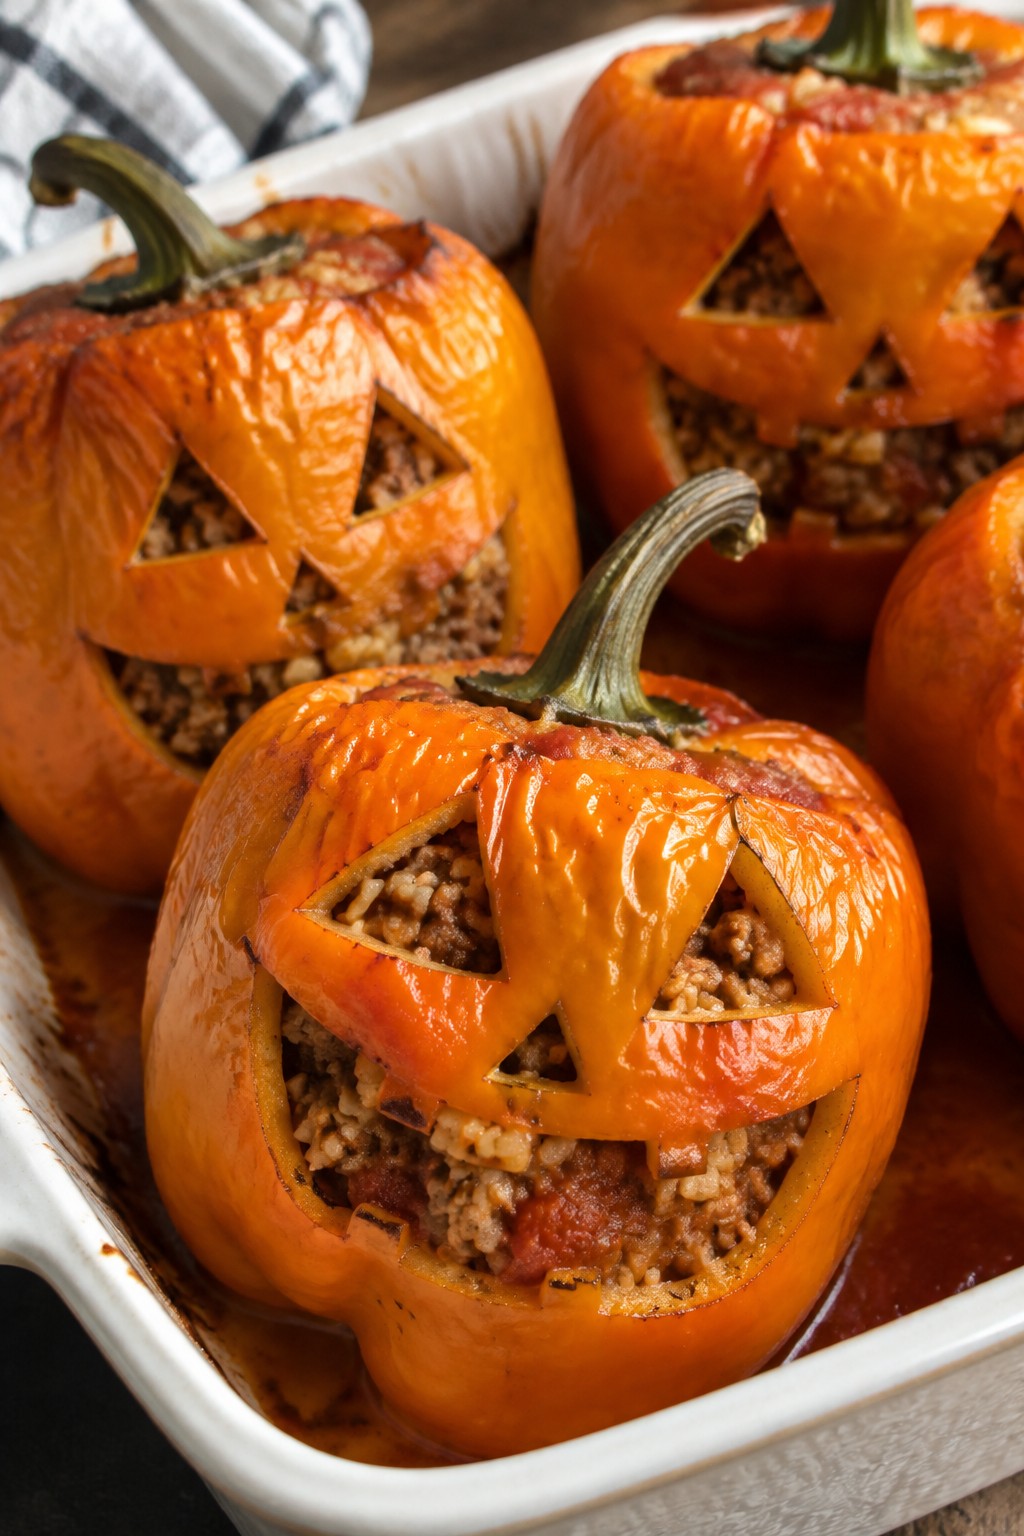
Serves 4 people.
Ingredients
- 4 large orange bell peppers
- 1 pound ground turkey
- 2 cups cooked brown rice
- 1 small onion, diced
- 2 cloves garlic, minced
- 1 cup tomato sauce
- 1 teaspoon dried oregano
- 1/2 teaspoon salt
- 1/4 teaspoon black pepper
- 1 tablespoon olive oil
Instructions
- Preheat the oven to 375 degrees. Cut the tops off each bell pepper and scoop out the seeds and membranes. Use a small knife to carve simple jack-o’-lantern faces on the front of each pepper. Set the prepared peppers aside in a baking dish.
- Warm the olive oil in a large skillet over medium heat. Add the diced onion and cook for 3 minutes until it starts to soften. Stir in the minced garlic and cook for 1 more minute.
- Add the ground turkey to the skillet. Cook while breaking it up with a spoon until no pink remains, about 6 to 7 minutes. Drain any excess liquid if needed.
- Stir the cooked brown rice, tomato sauce, oregano, salt, and black pepper into the turkey mixture. Cook for 2 minutes until everything is heated through and well combined.
- Spoon the filling evenly into the carved peppers, pressing down gently to pack them. Place the pepper tops back on if desired. Bake for 25 minutes until the peppers are tender.
Extra Tips
If the peppers tip over in the baking dish, slice a thin layer off the bottom of each one before stuffing so they sit flat. Leftovers reheat well in the microwave with a damp paper towel over the top to keep the rice from drying out. For a milder flavor, reduce the oregano to 1/2 teaspoon.Course: Main Course Cuisine: American Equipment: Large skillet, Baking dish, Cutting board
Ghostly Banana Yogurt Pops with Berry Faces
These pops offer a simple way to bring a Halloween touch to snack time without extra sugar or dyes. Kids enjoy decorating the berry faces, and parents like that the main ingredients stay wholesome and familiar. They fit well at parties, after-school snacks, or as a cool treat on warm fall days.
The yogurt freezes into a creamy white layer around the banana, while the fruit adds natural sweetness and a bit of chew. The result tastes mild and refreshing rather than heavy.
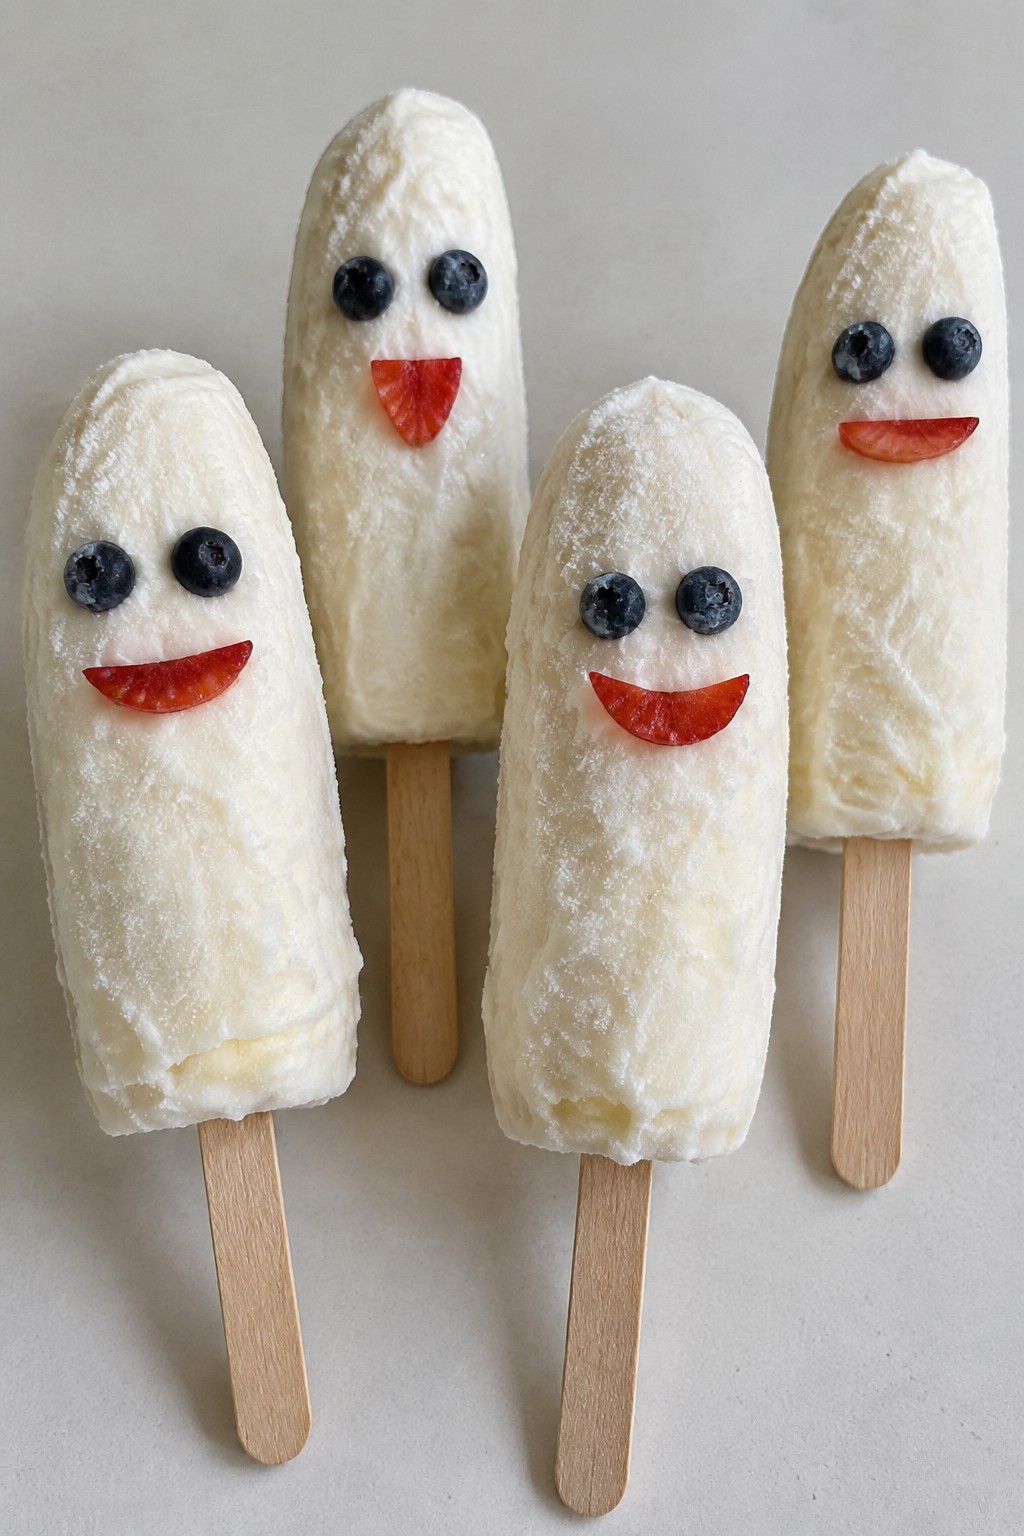
Serves 4 people.
Ingredients
- 4 ripe bananas
- 2 cups plain Greek yogurt
- 8 blueberries
- 4 strawberries
- 4 wooden popsicle sticks
Instructions
- Peel the bananas and insert one popsicle stick into the cut end of each banana.
- Spoon the Greek yogurt into a bowl. Hold each banana by the stick and roll or spread the yogurt evenly over the entire surface until fully coated.
- Place the coated bananas on a parchment-lined tray and freeze for at least three hours until firm.
- Slice the strawberries into thin pieces to form mouths. Use two blueberries per pop as eyes. Press the berry pieces gently into the frozen yogurt layer to create faces.
- Return the pops to the freezer for 15 minutes so the berries set in place before serving.
Extra Tips
Slice the strawberries just before decorating so they stay fresh and do not release extra juice onto the yogurt. If the yogurt feels too thick to spread, stir in one tablespoon of milk to loosen it slightly without changing the flavor. Store finished pops in a freezer bag for up to one week. Let them sit at room temperature for two minutes before eating so the coating softens enough to bite.Course: Snack Cuisine: American Equipment: Parchment-lined tray, mixing bowl, wooden popsicle sticks, freezer
Spiderweb Black Bean Hummus with Veggie Dippers
This black bean hummus turns into a simple Halloween snack with a yogurt spiderweb on top. Kids enjoy the fun design while parents like that it pairs protein-rich beans with fresh vegetables. The hummus comes out creamy and slightly earthy with a bright lime finish and a hint of cumin.
It works well for after-school snacks, small parties, or lunchbox additions when you want something quick and colorful. The veggie dippers stay crisp and provide a nice contrast to the smooth dip.
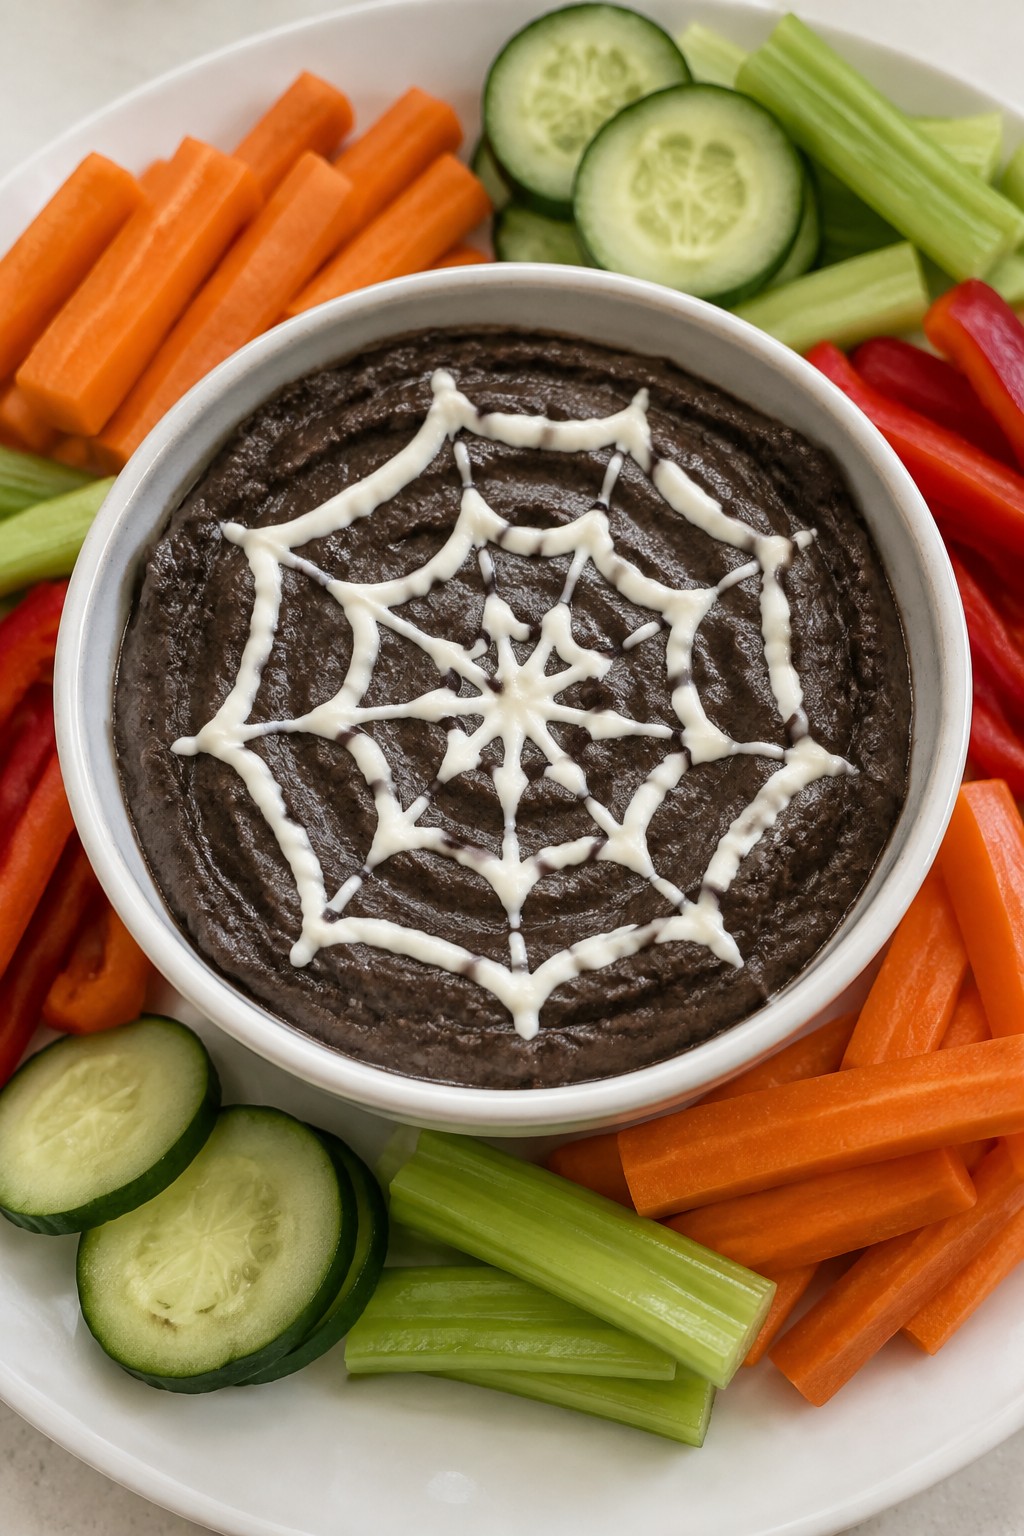
Serves 4 people.
Ingredients
- 2 (15 oz) cans black beans, drained and rinsed
- 3 tablespoons tahini
- 2 garlic cloves, minced
- 2 tablespoons lime juice
- 1 teaspoon ground cumin
- 1/2 teaspoon salt
- 3 tablespoons olive oil
- 1/4 cup plain Greek yogurt
- 2 carrots, cut into sticks
- 1 cucumber, sliced
- 2 celery stalks, cut into sticks
- 1 red bell pepper, sliced
Instructions
- Place the black beans, tahini, minced garlic, lime juice, cumin, salt, and olive oil in a food processor.
- Blend the mixture on high until it becomes smooth and creamy, stopping once to scrape down the sides if needed.
- Spoon the hummus into a shallow serving bowl and smooth the top with the back of a spoon.
- Add the Greek yogurt to a small zip-top bag and snip off one corner to create a small opening.
- Pipe the yogurt in three or four concentric circles on the hummus surface.
- Use a toothpick to drag lines from the center outward through the circles to form a web pattern.
- Arrange the carrot sticks, cucumber slices, celery sticks, and red bell pepper slices around the bowl for dipping.
Extra Tips
Pipe the yogurt web right before serving so the lines stay sharp. If the hummus feels too thick after blending, add an extra teaspoon of olive oil and pulse again. Leftovers keep covered in the fridge for up to two days, though the web may soften over time. Swap the Greek yogurt for sour cream if that is what you have on hand.Course: Appetizer Cuisine: American Equipment: Food processor, Serving bowl, Zip-top bag
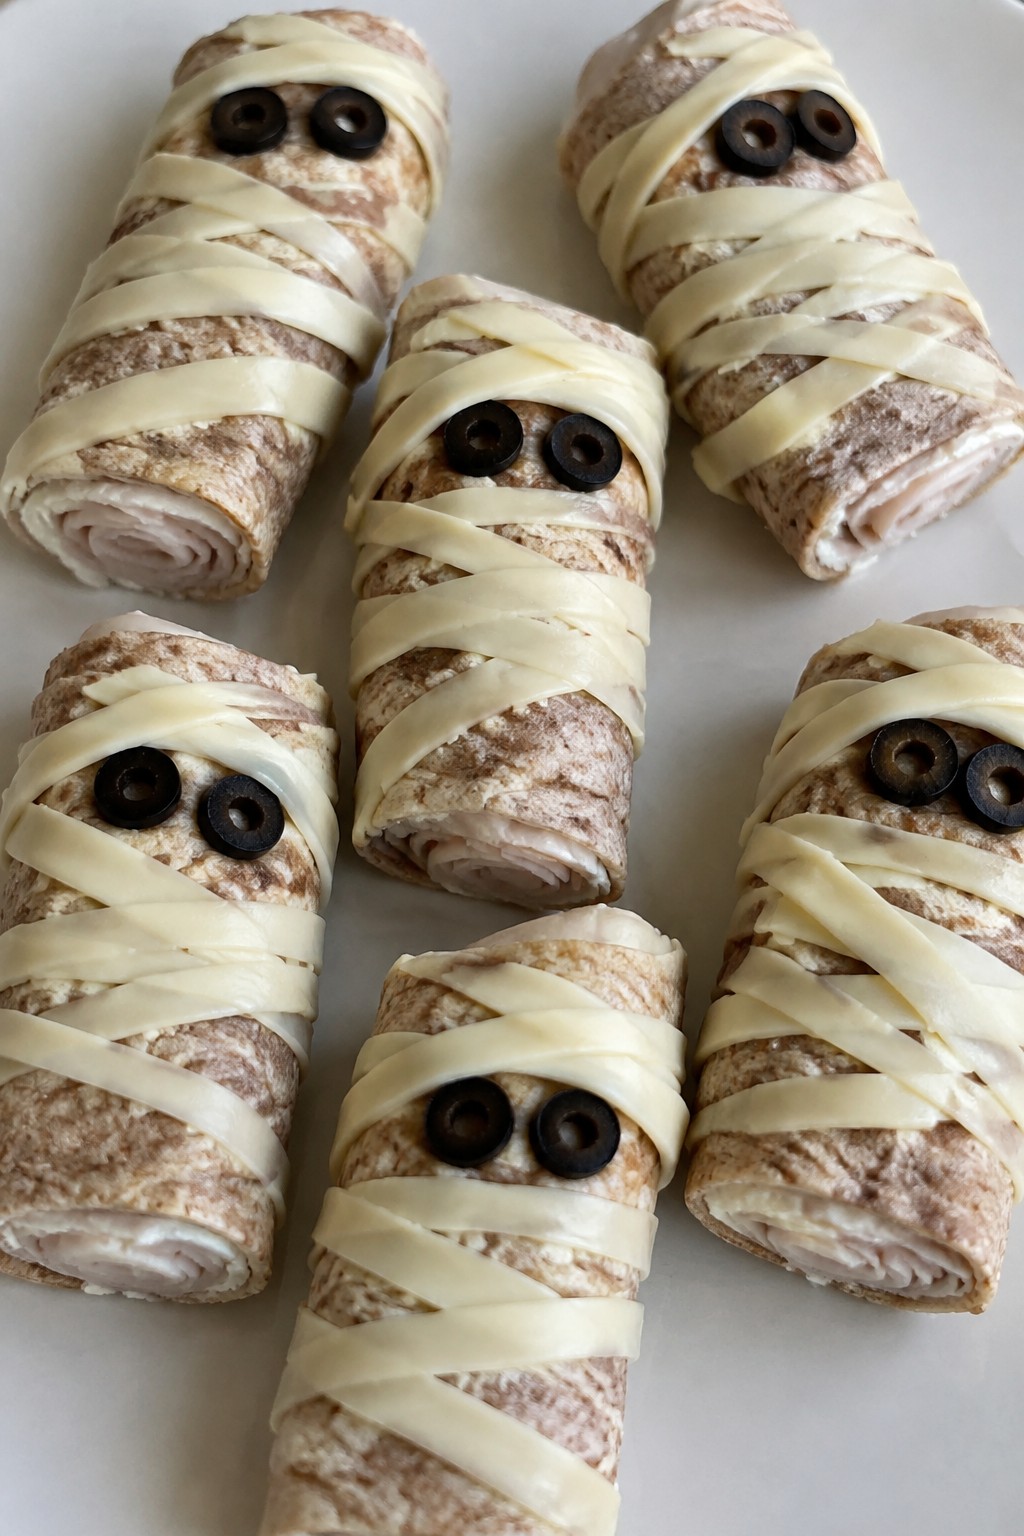
Mummy Turkey Roll-Ups in Whole Wheat Wraps
These roll-ups give kids a fun mummy look while giving parents a lunch or snack made with whole wheat and lean turkey. They work well for Halloween parties, after-school snacks, or quick weekend meals. The soft tortilla holds savory turkey and mild cheese with a light cream cheese spread.
Serves 4 people.
Ingredients
- 4 whole wheat tortillas (8-inch)
- ½ cup cream cheese, softened
- 8 ounces sliced turkey
- 8 slices mozzarella cheese
- 16 black olive slices
Instructions
- Lay each tortilla flat and spread 2 tablespoons of cream cheese evenly over the surface.
- Layer 2 ounces of sliced turkey over the cream cheese on each tortilla.
- Roll each tortilla tightly from one end to the other to form a log.
- Cut the mozzarella slices into thin strips about ¼ inch wide.
- Lay the cheese strips across each rolled tortilla in a crisscross pattern to create a mummy bandage look.
- Press two black olive slices onto one end of each roll to form eyes.
Extra Tips
Make the rolls a few hours ahead and store them wrapped in plastic in the fridge, then add the cheese strips and olives just before serving so the cheese stays neat. If the cream cheese is too firm to spread, let it sit at room temperature for 15 minutes. Skip the olives if your kids prefer plain rolls.Course: Appetizer Cuisine: American Equipment: Cutting board, Knife, Spreading knife
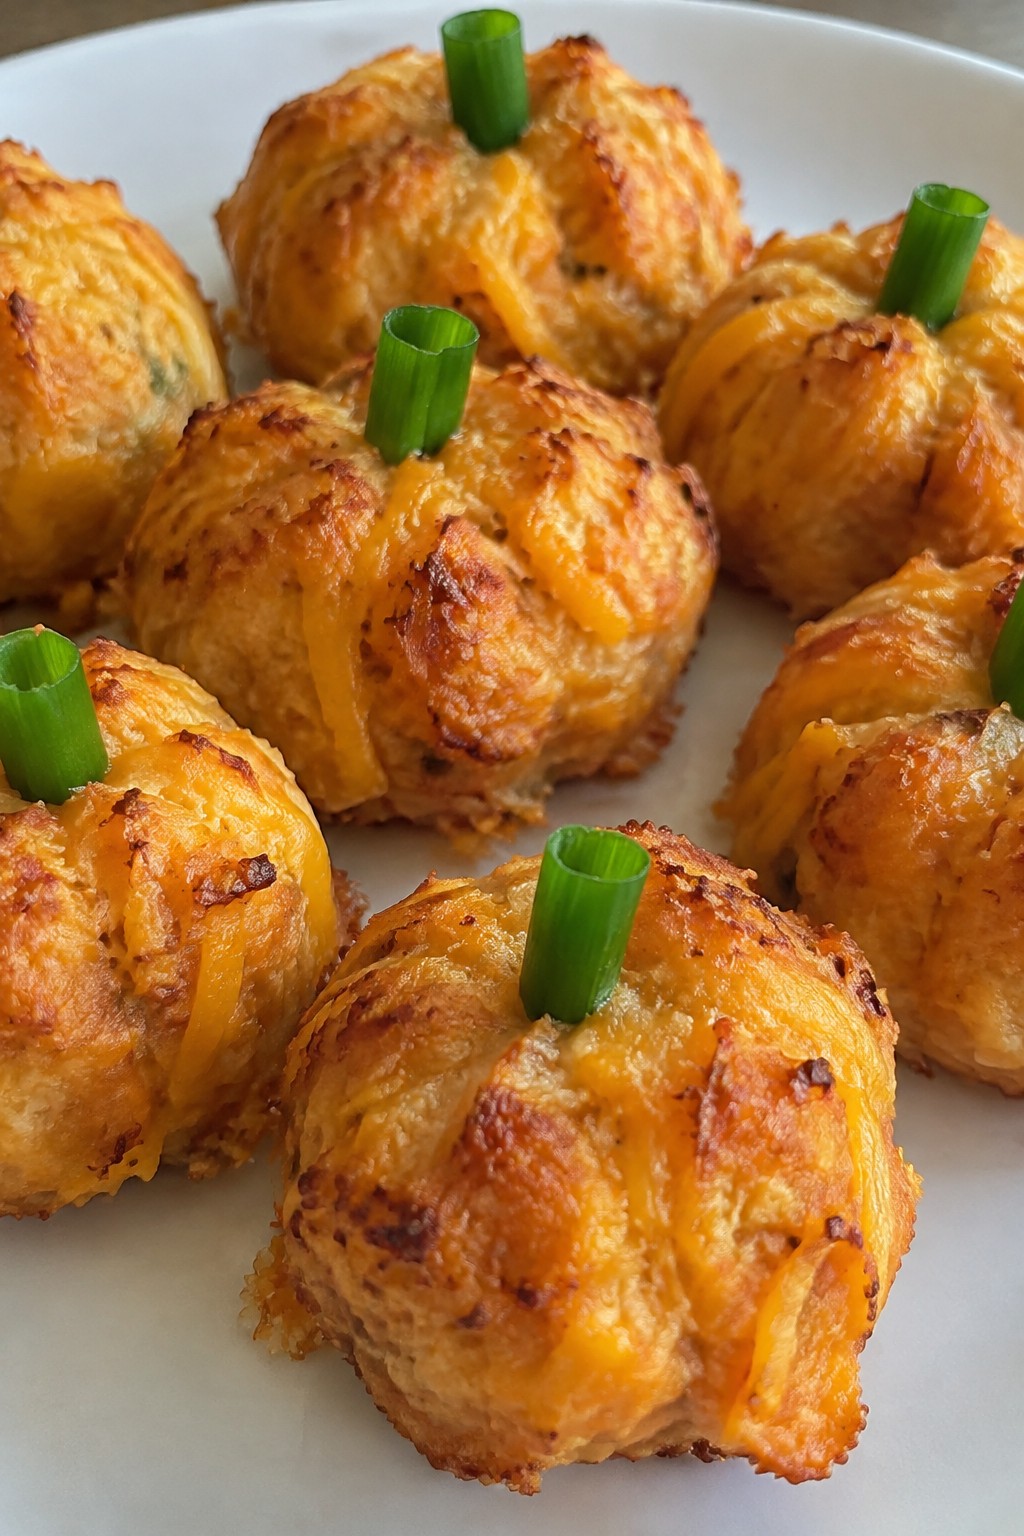
Pumpkin-Shaped Sweet Potato and Cheese Bites
These bites turn mashed sweet potato and cheese into a simple Halloween snack that kids enjoy shaping and eating. They work well for after-school snacks, lunch boxes, or a small party plate because the orange color and pumpkin form feel festive without needing extra decorations.
The texture is soft and slightly creamy from the sweet potato, with a light golden crust from baking. The cheese adds a mild savory note that balances the natural sweetness, making the bites appealing to picky eaters while still using whole ingredients.
Serves 4 people.
Ingredients
- 2 large sweet potatoes, peeled and cubed
- 1 1/2 cups shredded cheddar cheese
- 1 large egg
- 1/2 teaspoon salt
- 1/4 teaspoon black pepper
- 2 tablespoons olive oil
- 8 green onion stalks, cut into 1-inch pieces
Instructions
- Place the sweet potato cubes in a pot, cover with water, and boil until tender, about 12 minutes. Drain well.
- Return the sweet potatoes to the pot and mash until smooth. Let cool for 5 minutes.
- Stir in the cheddar cheese, egg, salt, and black pepper until evenly combined.
- Preheat the oven to 400°F and line a baking sheet with parchment paper. Brush the paper lightly with half the olive oil.
- Scoop about 2 tablespoons of the mixture and roll into a ball. Gently press vertical lines around the sides with a butter knife to create pumpkin ridges. Insert a green onion piece into the top as a stem. Repeat with the remaining mixture.
- Place the shaped bites on the prepared sheet and brush the tops with the remaining olive oil.
- Bake for 18 to 20 minutes until the edges turn golden. Cool for 3 minutes before serving.
Extra Tips
Form the mixture while it is still slightly warm so the cheese melts and helps hold the pumpkin shape. If the mixture feels too soft to shape, chill it for 10 minutes. These bites reheat well in a 350°F oven for 5 minutes if made ahead.Course: Appetizer Cuisine: American Equipment: Baking sheet, Mixing bowl, Pot, Potato masher
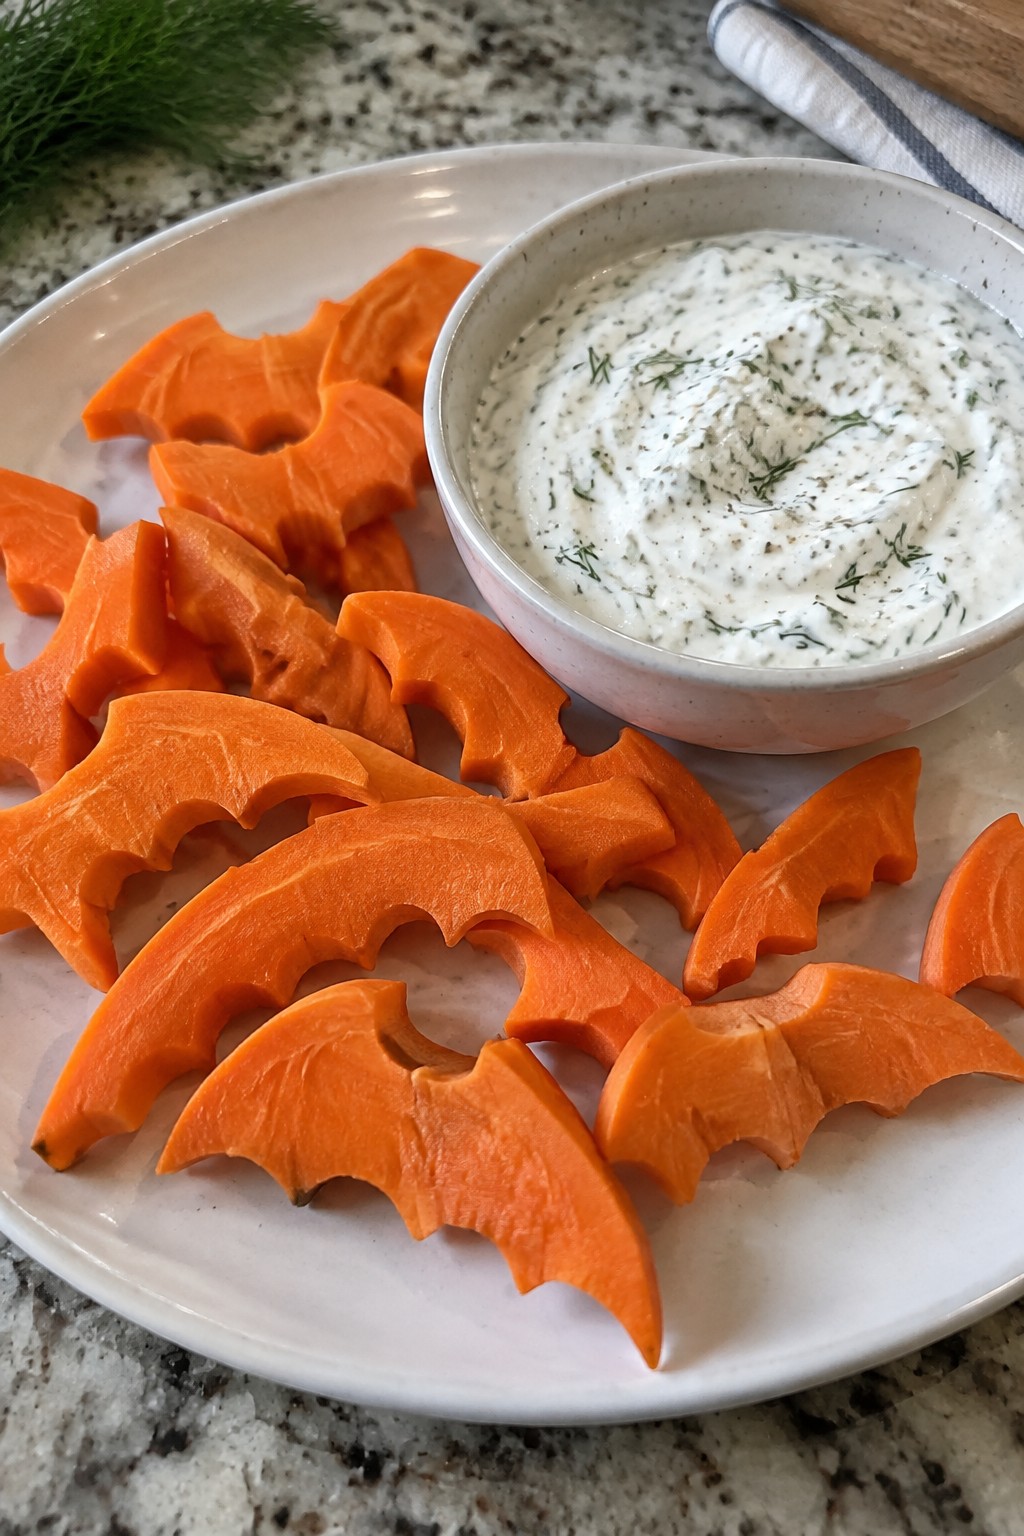
Bat-Winged Carrot Sticks with Creamy Ranch Dip
This snack turns plain carrots into a playful Halloween treat that still feels like real food. Kids like the bat wing shape while parents appreciate that the focus stays on fresh vegetables and a simple homemade dip. The carrots stay crisp and the ranch comes out cool and tangy with a light herb flavor.
The recipe works well for after-school snacks, party platters, or lunch boxes during the week leading up to Halloween. It requires almost no cooking and comes together quickly with items most kitchens already have.
Serves 4 people.
Ingredients
- 6 medium carrots
- 1/2 cup plain Greek yogurt
- 1/4 cup mayonnaise
- 1 tablespoon chopped fresh dill
- 1 teaspoon garlic powder
- 1 teaspoon onion powder
- 1 tablespoon lemon juice
- 1/4 teaspoon salt
- 1/8 teaspoon black pepper
Instructions
- Peel the carrots and trim the ends. Cut each carrot in half lengthwise, then slice each half on a slight diagonal to create tapered sticks that resemble small wings.
- Place the Greek yogurt, mayonnaise, dill, garlic powder, onion powder, lemon juice, salt, and black pepper in a medium bowl. Stir until the mixture is smooth and evenly combined.
- Arrange the carrot sticks on a plate or platter in pairs so the angled cuts face outward like bat wings. Serve the ranch dip in a small bowl alongside the carrots.
Extra Tips
Make the dip a few hours ahead and keep it covered in the fridge so the flavors have time to blend. If the dip thickens too much after chilling, stir in a teaspoon of water to loosen it. Skip the dill if kids prefer a milder taste and use dried parsley instead.
Course: Snack Cuisine: American Equipment: Mixing bowl, Knife, Cutting boardFrankenstein Avocado Toast on Whole Grain Bread
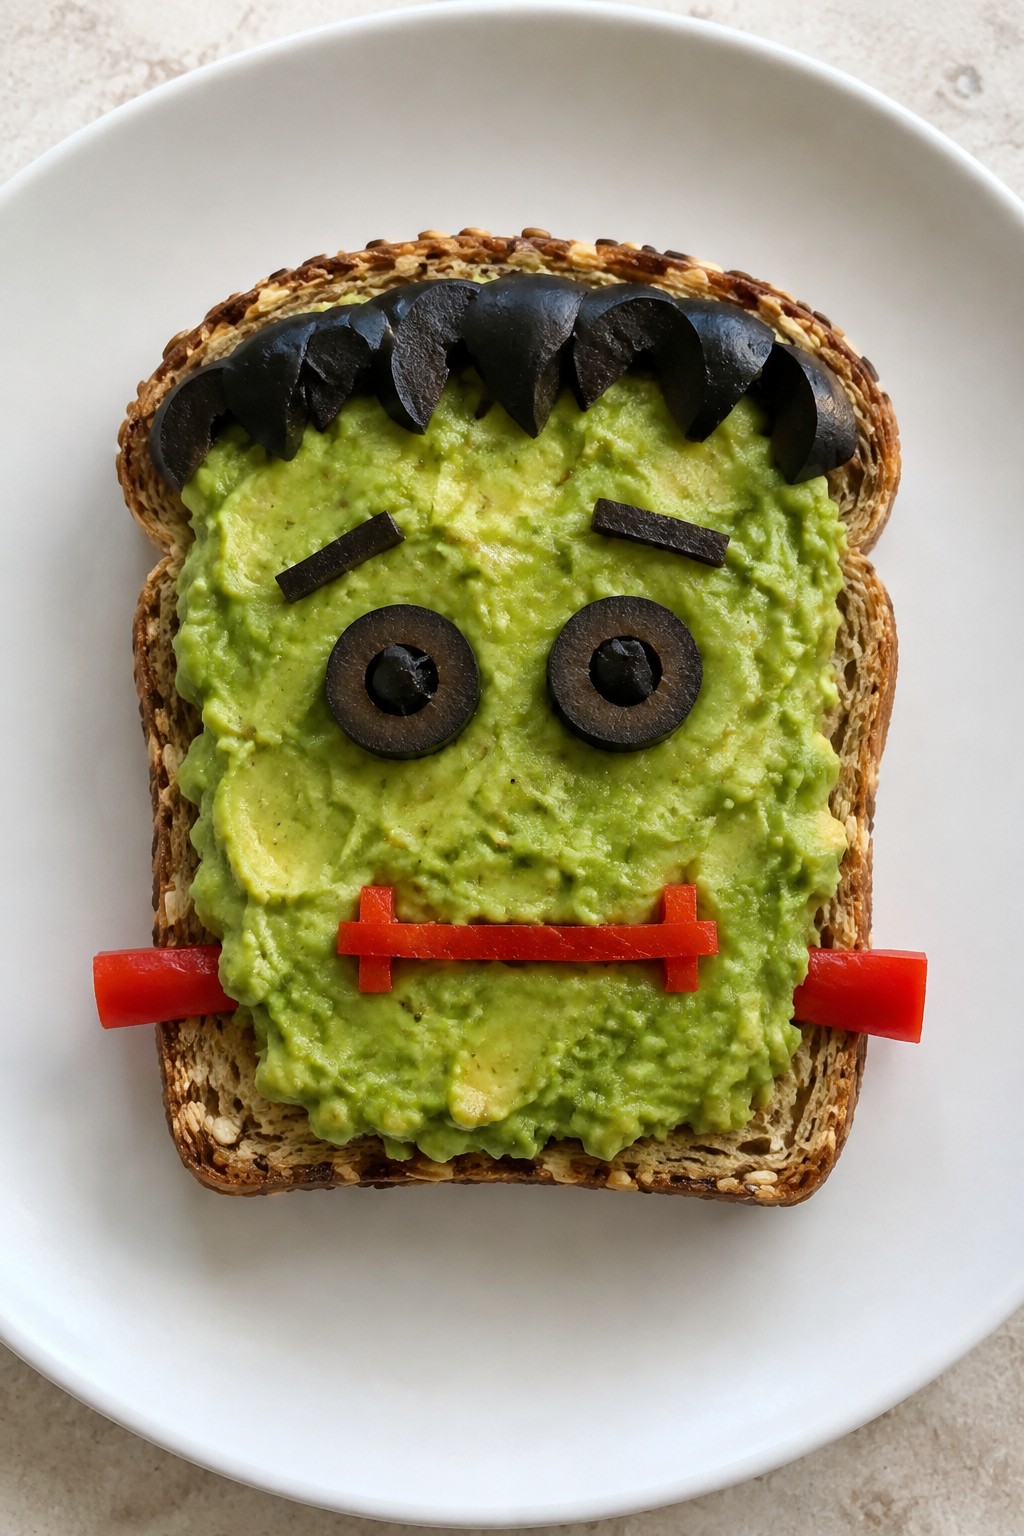
This Frankenstein Avocado Toast turns a simple healthy snack into a fun Halloween activity that kids can help assemble. The creamy avocado spreads easily over toasted whole grain bread, and a few simple toppings create a monster face that feels playful without adding extra sugar. It works well for an after-school snack or a light lunch during October.
The flavor stays mild and fresh, with the nutty taste of the bread balancing the smooth avocado. Kids enjoy the hands-on decorating step while parents appreciate the whole grain base and vegetable toppings.
Serves 4 people.
Ingredients
- 4 slices whole grain bread
- 2 ripe avocados
- 1 teaspoon lemon juice
- Pinch of salt
- 8 black olives
- 4 thin strips red bell pepper
Instructions
- Toast the 4 slices of whole grain bread until they reach a light golden color.
- Cut the avocados in half, remove the pits, and scoop the flesh into a bowl.
- Add the lemon juice and salt to the avocados, then mash with a fork until the mixture is mostly smooth with a few small chunks remaining.
- Spread the mashed avocado evenly over each slice of toast.
- Slice 4 of the black olives in half to create eyes and place two halves on each toast.
- Use the remaining whole black olives as bolts by positioning one on each side of the toast near the bottom edge.
- Lay one red bell pepper strip under the eyes to form a mouth on each piece.
Extra Tips
Cut the red bell pepper strips ahead of time so kids can focus on placing the olive eyes and bolts themselves. If the avocado starts to brown before serving, a light extra squeeze of lemon juice on top keeps the green color bright. Serve the toasts right after decorating so the bread stays crisp.Course: Snack Cuisine: American Equipment: Toaster, Mixing bowl, Knife
Witch’s Broom Pretzel Sticks with String Cheese
This recipe turns basic pantry items into fun witch brooms that kids like to assemble themselves. It fits well at Halloween gatherings or as a quick snack before trick-or-treating. The result offers a crunchy pretzel base paired with soft, mild cheese.
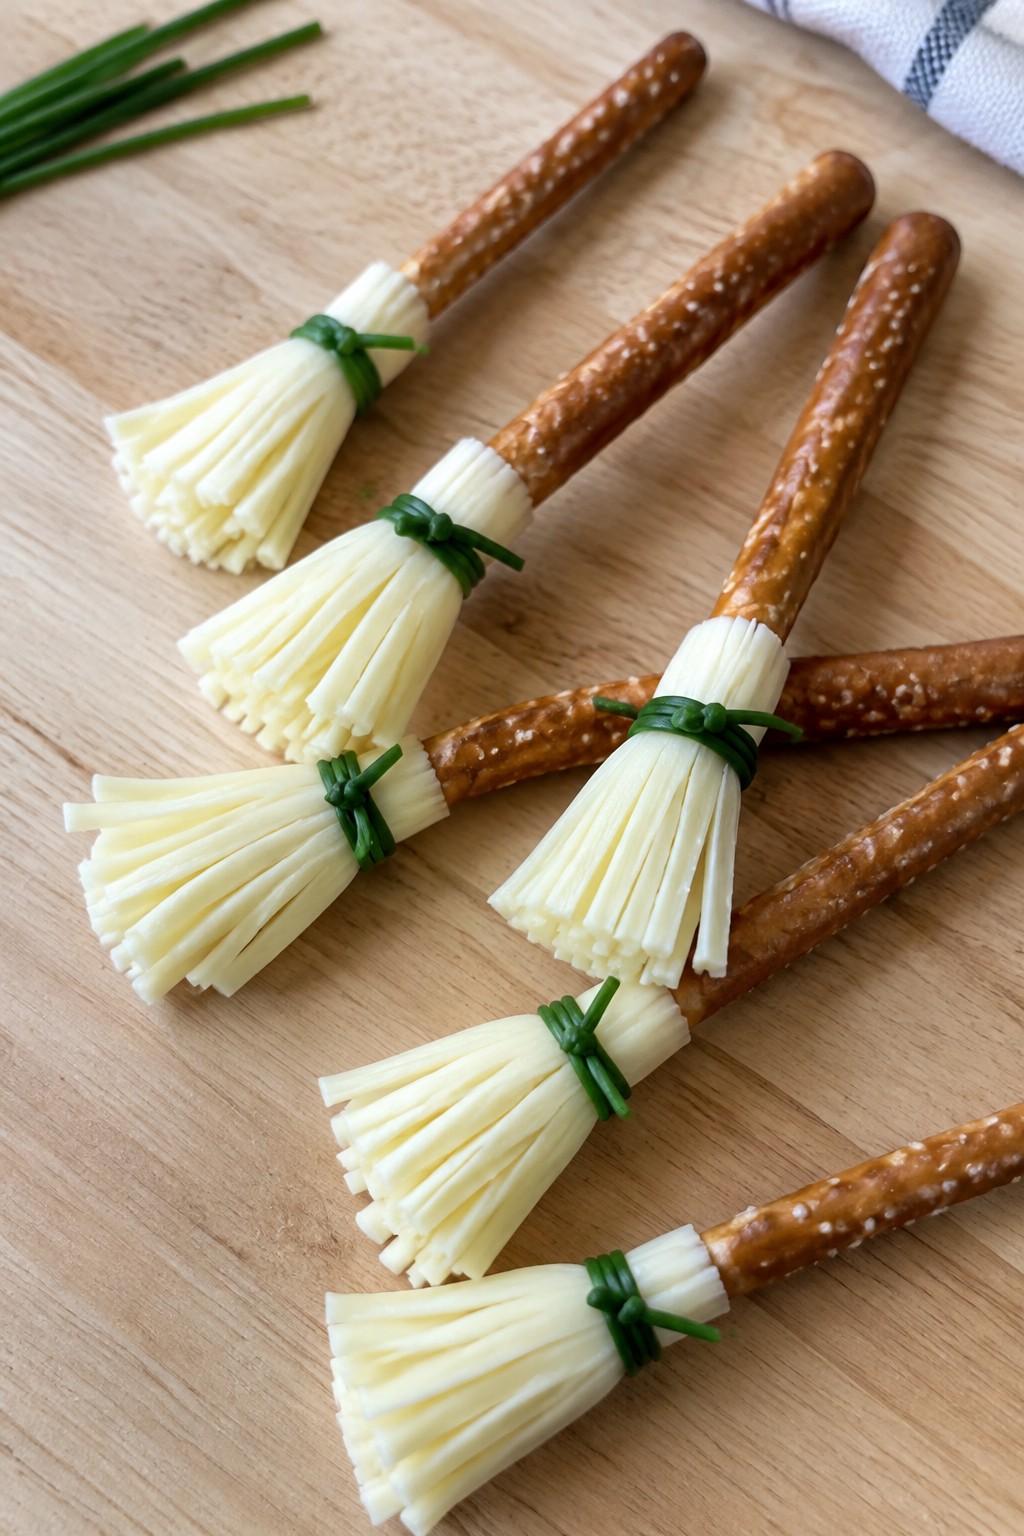
Serves 4 people.
Ingredients
- 8 pretzel rods
- 4 string cheese sticks
- 8 fresh chives
Instructions
- Pull each string cheese stick apart lengthwise into thin strips to form the broom bristles.
- Take a small handful of the cheese strips and press them against one end of a pretzel rod.
- Wrap one chive around the cheese strips and the pretzel rod, then tie it snugly to hold the bristles in place.
- Repeat the process with the remaining pretzel rods, cheese strips, and chives until all eight brooms are assembled.
- Place the finished brooms on a plate for serving.
Extra Tips
Use the freshest chives you can find so they bend without snapping when tied. These brooms hold their shape for a couple of hours at room temperature, making them easy to prepare ahead of a party. Let kids help separate the cheese strips for a simple activity that keeps them involved without needing the stove.Course: Snack Cuisine: American Equipment: Plate
Skeleton Celery Boats with Sunflower Seed Butter
These celery boats give kids a fun Halloween snack without any sugar overload. The sunflower seed butter fills the celery grooves and holds raisins in place to create simple skeleton shapes. Parents like the recipe because it uses basic ingredients and keeps the focus on vegetables.
The texture stays crisp from the celery and creamy from the seed butter. Raisins add a little chew and help the boats look like they have a spine and ribs when arranged on a plate.
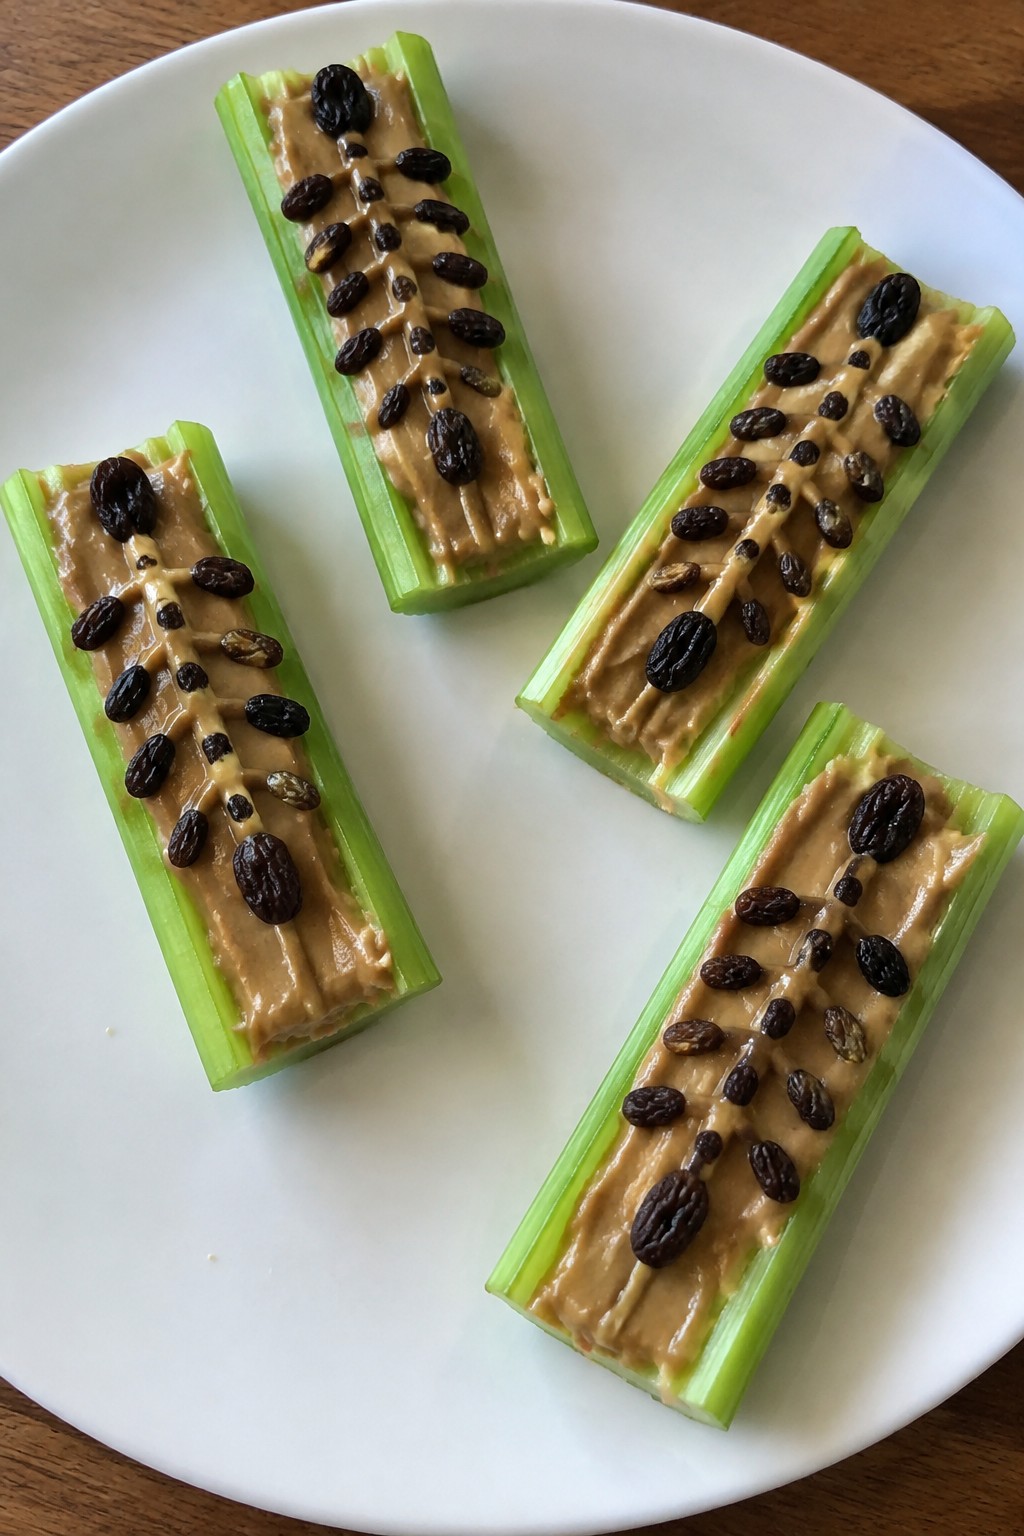
Serves 4 people.
Ingredients
- 8 celery stalks, cut into 4-inch lengths
- ½ cup sunflower seed butter
- ¼ cup raisins
Instructions
- Wash the celery stalks and pat them dry, then cut each stalk into 4-inch pieces.
- Spoon sunflower seed butter into the groove of each celery piece and spread it evenly with the back of the spoon.
- Place raisins in a line down the center of the sunflower seed butter on each piece to form the skeleton spine.
- Add a few extra raisins on either side of the line to suggest ribs.
- Arrange the finished celery boats on a plate so the pieces connect visually into one large skeleton shape.
Extra Tips
Cut the celery pieces the same length so the boats line up neatly on the plate. If the sunflower seed butter feels too thick, stir in a teaspoon of warm water to make spreading easier. Raisins can be pressed lightly into the seed butter so they stay in place when kids pick up the boats.Course: Snack Cuisine: American Equipment: Knife, Spoon, Cutting board
Monster Green Smoothie Bowls with Fruit Toppings
These green smoothie bowls give kids a playful way to eat spinach without complaints. The bright green base comes from blending spinach with sweet fruits, and the fruit toppings let everyone create silly monster faces right before eating. Parents like that the recipe hides vegetables in a naturally sweet treat that feels like dessert but counts as a solid breakfast or snack.
The bowls turn out thick and creamy with a mild banana-pineapple flavor that kids usually enjoy. They work well for Halloween morning or an after-school activity where children help arrange the fruit eyes and mouths.
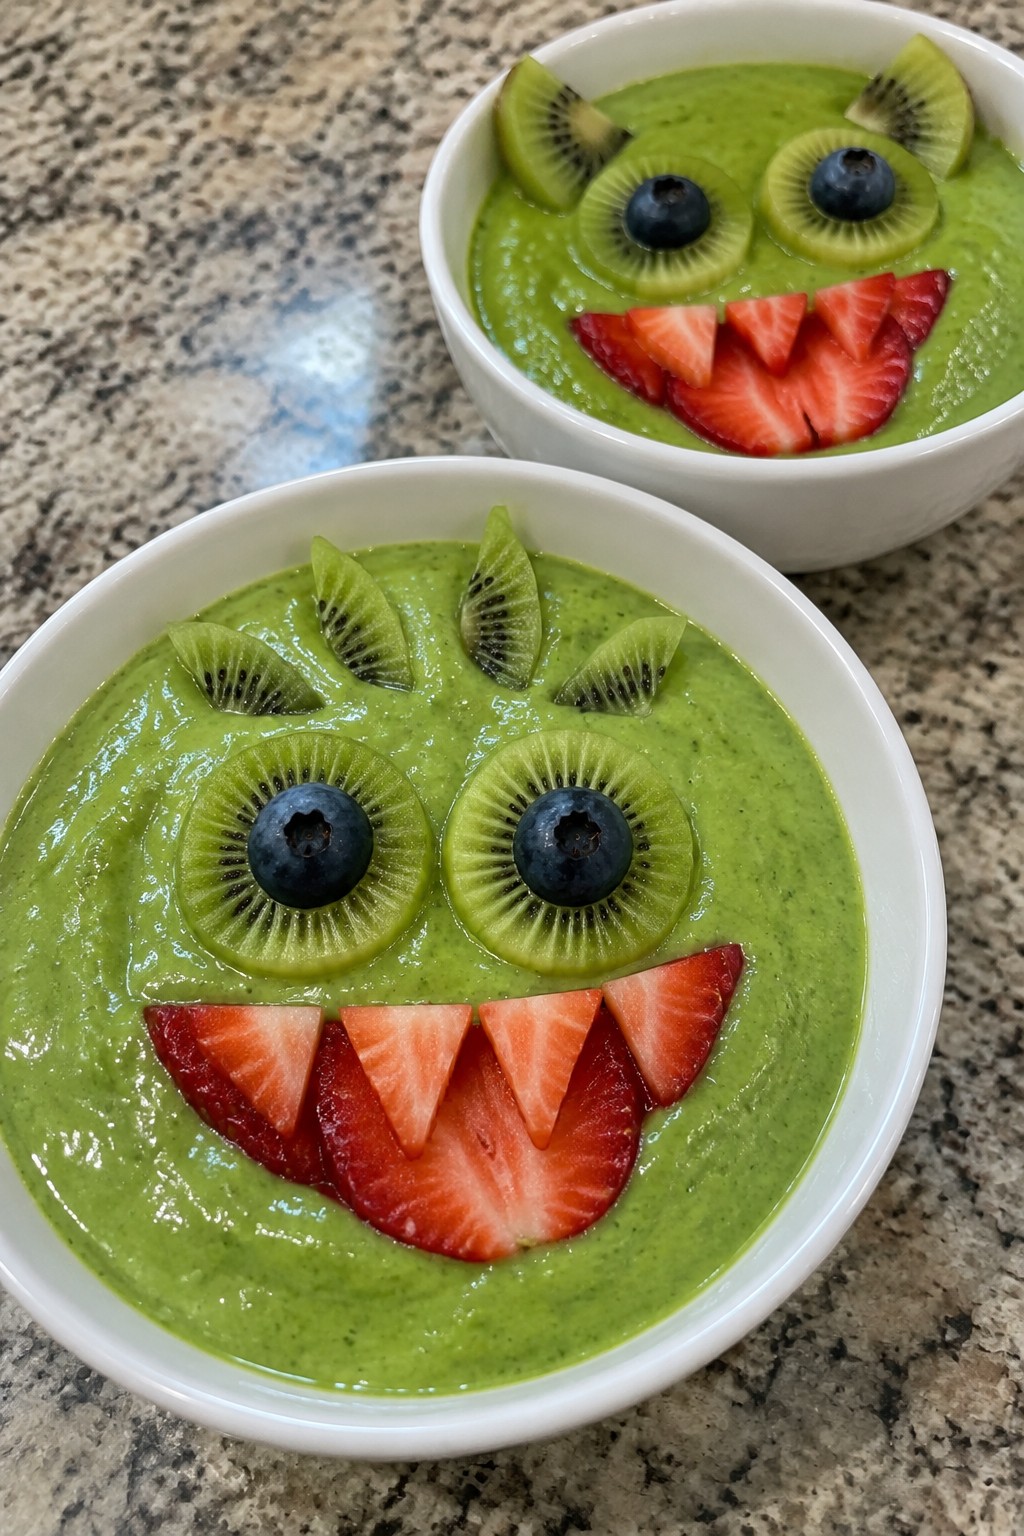
Serves 4 people.
Ingredients
- 4 frozen bananas
- 4 cups baby spinach
- 2 cups vanilla Greek yogurt
- 1 cup frozen pineapple chunks
- 1 cup milk
- 1 cup sliced strawberries
- 1/2 cup blueberries
- 2 kiwis, peeled and sliced
Instructions
- Place the frozen bananas, baby spinach, vanilla Greek yogurt, frozen pineapple chunks, and milk into a blender.
- Blend on high speed until the mixture is completely smooth and no spinach pieces remain.
- Divide the green smoothie evenly among four bowls.
- Arrange sliced strawberries, blueberries, and kiwi slices on top of each bowl to form monster faces, using the fruit to create eyes, mouths, and other features.
Extra Tips
Prepare the fruit slices ahead and store them in separate containers so kids can quickly build their own monsters at the table. If the smoothie thickens after sitting, stir in a splash of milk to loosen it before adding toppings. Skip the milk and use a dairy-free yogurt if you need a fully plant-based version.Course: Breakfast Cuisine: American Equipment: Blender, Serving Bowls
Spooky Stuffed Mushroom Caps with Quinoa
These Spooky Stuffed Mushroom Caps with Quinoa give kids a playful Halloween bite while keeping parents happy with a wholesome filling. The quinoa adds protein and texture, and the cheese helps everything hold together for easy eating at parties or weeknight dinners. They fit right into a spread of themed snacks without feeling out of place.
The mushrooms soften nicely in the oven, and the quinoa stays light with a little chew from the peppers. The overall taste stays mild and savory, so even picky eaters tend to try them.
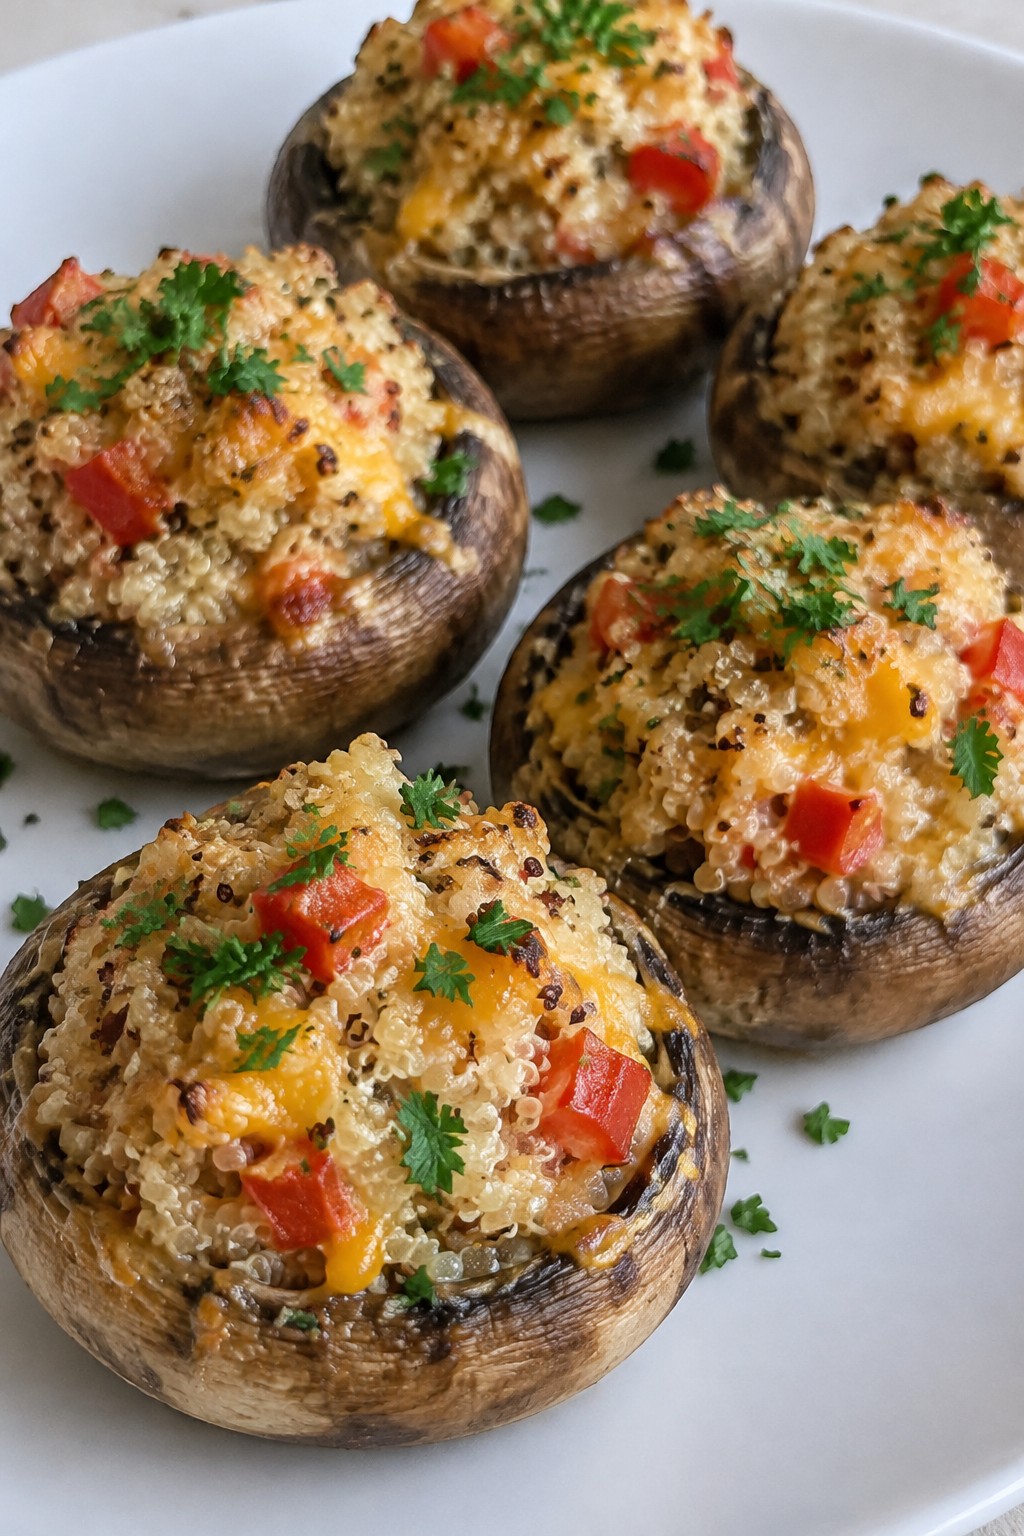
Serves 4 people.
Ingredients
- 12 large button mushrooms
- 1 cup cooked quinoa
- 3/4 cup shredded cheddar cheese
- 1/4 cup finely chopped red bell pepper
- 2 garlic cloves, minced
- 1 tablespoon olive oil
- 1/4 teaspoon salt
- 1/4 teaspoon black pepper
- 2 tablespoons chopped fresh parsley
Instructions
- Preheat the oven to 375°F and line a baking sheet with parchment paper.
- Wipe the mushrooms clean with a damp cloth, twist off the stems, and set the caps aside. Finely chop the stems.
- Warm the olive oil in a skillet over medium heat. Add the chopped mushroom stems, red bell pepper, and garlic. Cook for 4 minutes until the vegetables soften.
- Remove the skillet from the heat and stir in the cooked quinoa, 1/2 cup of the cheddar cheese, salt, and black pepper until evenly mixed.
- Spoon the quinoa mixture into the mushroom caps, pressing gently so the filling stays in place.
- Arrange the filled caps on the baking sheet and sprinkle the remaining 1/4 cup cheddar cheese on top.
- Bake for 18 minutes until the mushrooms are tender and the cheese has melted. Sprinkle with chopped parsley before serving.
Extra Tips
Stuff the caps up to a few hours ahead and keep them covered in the fridge until you are ready to bake. If the filling seems dry after mixing, add a teaspoon of water to loosen it. Leftovers reheat well in a 350°F oven for 8 minutes to bring back the texture.Course: Appetizer Cuisine: American Equipment: Baking sheet, Skillet, Mixing bowl
Candy Corn Layered Yogurt and Fruit Cups
This recipe creates a festive Halloween treat by stacking bright fruit layers with creamy yogurt to echo the look of candy corn. It gives kids a fun, colorful snack while parents can feel good about the simple ingredients and protein from the yogurt. The finished cups offer juicy bursts of fruit against a smooth, lightly sweet base.
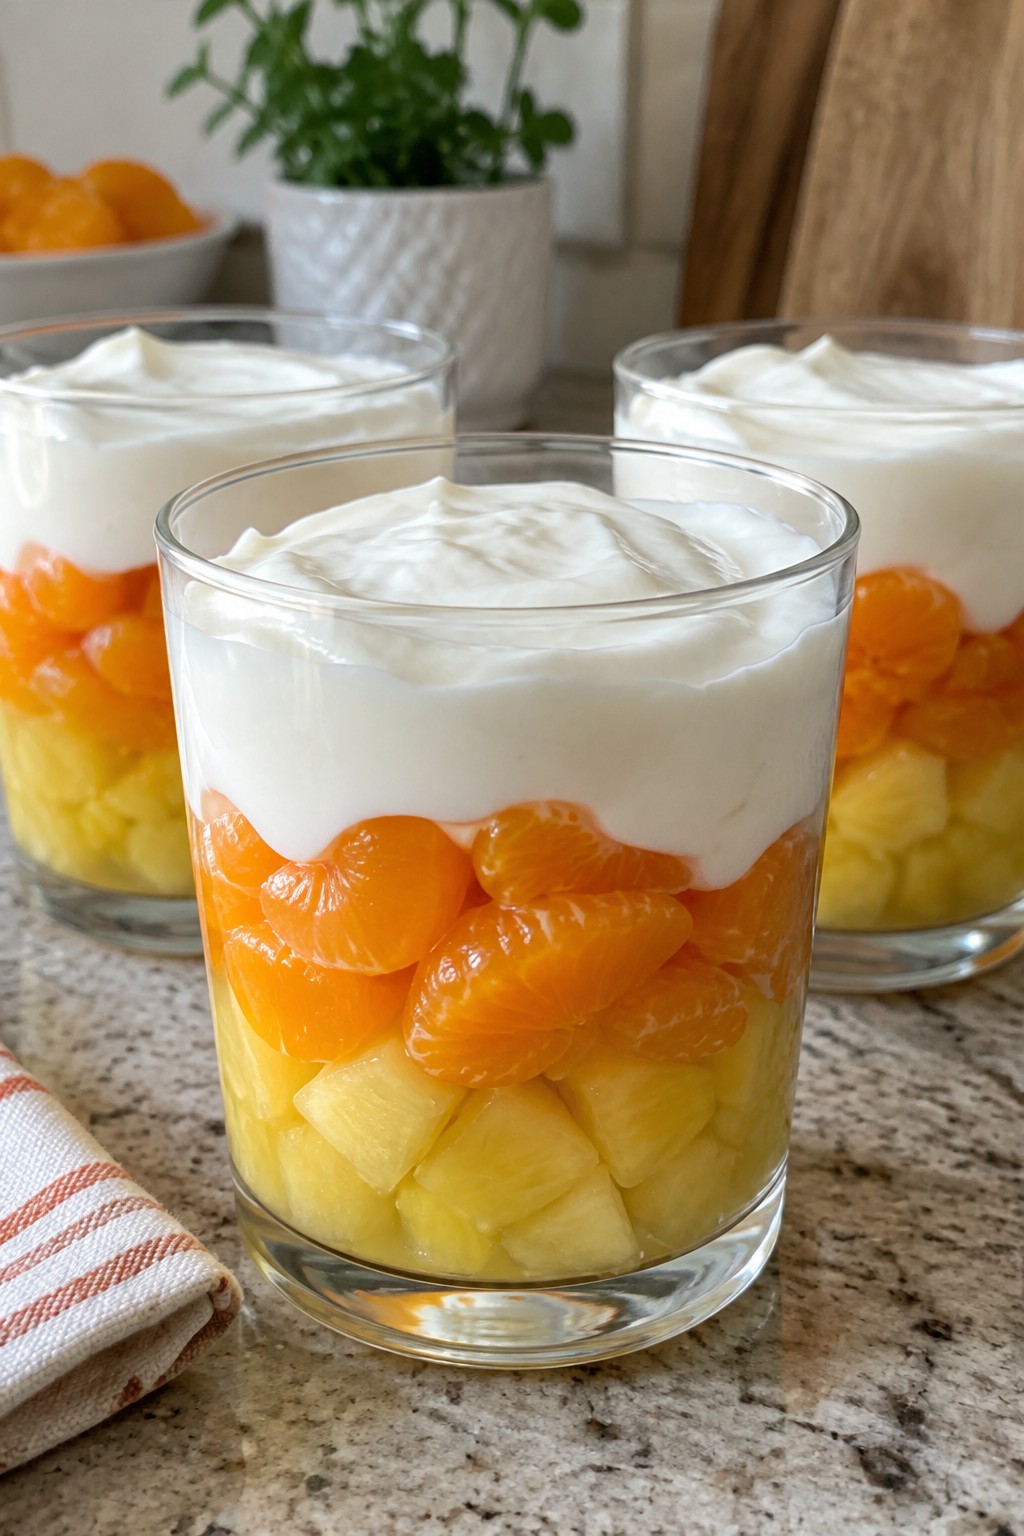
Serves 4 people.
Ingredients
- 2 cups vanilla yogurt
- 1 cup pineapple chunks
- 1 cup mandarin orange segments
Instructions
- Place the pineapple chunks evenly into the bottom of four clear cups to form the yellow base layer.
- Spoon about 1/4 cup of vanilla yogurt over the pineapple in each cup.
- Add the mandarin orange segments on top of the yogurt layer in each cup.
- Divide the remaining yogurt among the cups to create the final white layer on top.
Extra Tips
Use clear cups so the three distinct layers show through for the full candy corn effect. Assemble the cups no more than a few hours ahead and keep them chilled to prevent the fruit from releasing too much juice into the yogurt. If the vanilla yogurt is very sweet, you can swap in plain yogurt for the top layer only.Course: Snack Cuisine: American Equipment: Clear cups, Spoon
Pumpkin Patch Mini Pizzas on English Muffins
These mini pizzas turn English muffins into a fun fall activity that kids can help assemble. The orange cheese topping and green pepper stems create a simple pumpkin patch look without any extra tools. They work well for an after-school snack, a quick dinner before trick-or-treating, or a weekend lunch when you want something warm and hands-on.
The finished pizzas have a crisp muffin base, a layer of tangy sauce, and plenty of melted cheese that stretches when pulled apart. The green pepper strips add a fresh crunch that balances the richness of the cheese.
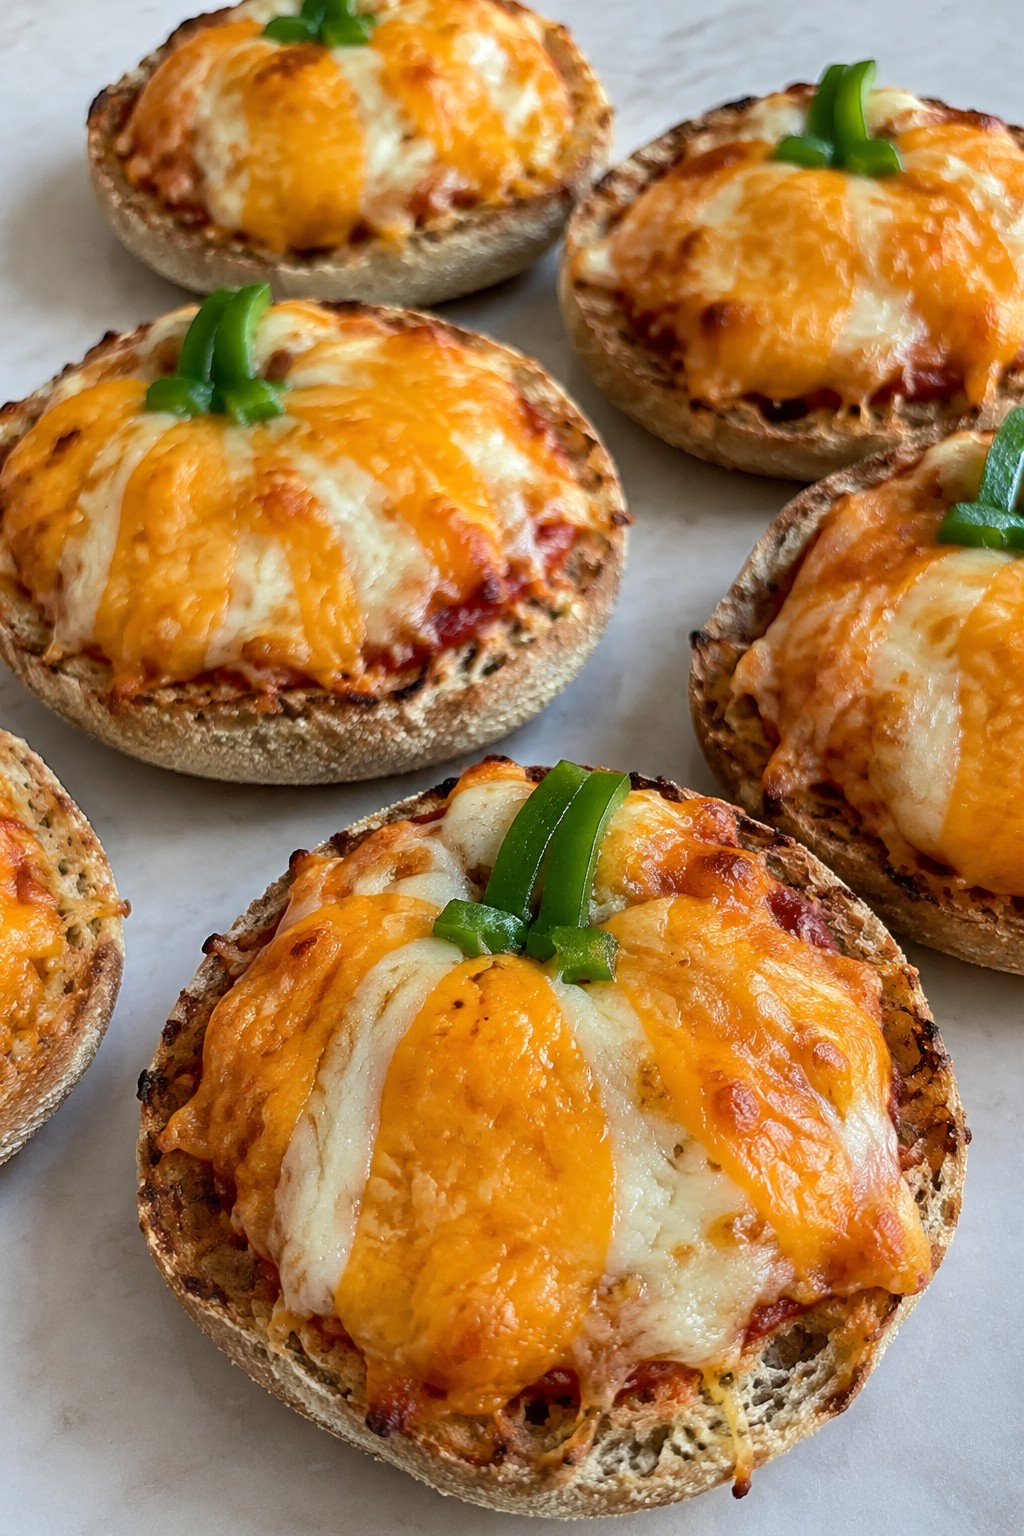
Serves 4 people.
Ingredients
- 4 English muffins, split in half
- 1 cup pizza sauce
- 1 ½ cups shredded mozzarella cheese
- ½ cup shredded cheddar cheese
- 1 green bell pepper, cut into thin strips
Instructions
- Preheat the oven to 400°F and line a baking sheet with parchment paper.
- Place the English muffin halves cut side up on the baking sheet.
- Spread about 2 tablespoons of pizza sauce on each muffin half.
- In a small bowl, toss the mozzarella and cheddar cheese together, then sprinkle the mixture evenly over the sauce on each muffin.
- Add two or three thin strips of green bell pepper to the top of each pizza to form a stem.
- Bake for 8 to 10 minutes until the cheese is fully melted and the edges of the muffins are golden.
- Remove from the oven and let the pizzas cool for 2 minutes before serving.
Extra Tips
Mixing the two cheeses gives a deeper orange color that reads as pumpkin without using food coloring. If the green bell pepper strips feel too firm for younger kids, slice them even thinner or swap in a few spinach leaves instead. These pizzas reheat well in a toaster oven for 3 minutes if you need to make them ahead.Course: Snack Cuisine: American Equipment: Baking sheet, Parchment paper, Mixing bowl
Haunted Apple Nachos with Yogurt Drizzle
This recipe turns crisp apple slices into a nacho-style snack that feels playful without extra sugar. The yogurt drizzle brings a creamy layer that pairs well with sweet and chewy toppings, making it easy for kids to enjoy while parents appreciate the fruit base.
It works well for after-school snacks or small Halloween gatherings. The texture stays fresh and crunchy, with just enough sweetness from the drizzle and add-ins to satisfy without feeling heavy.
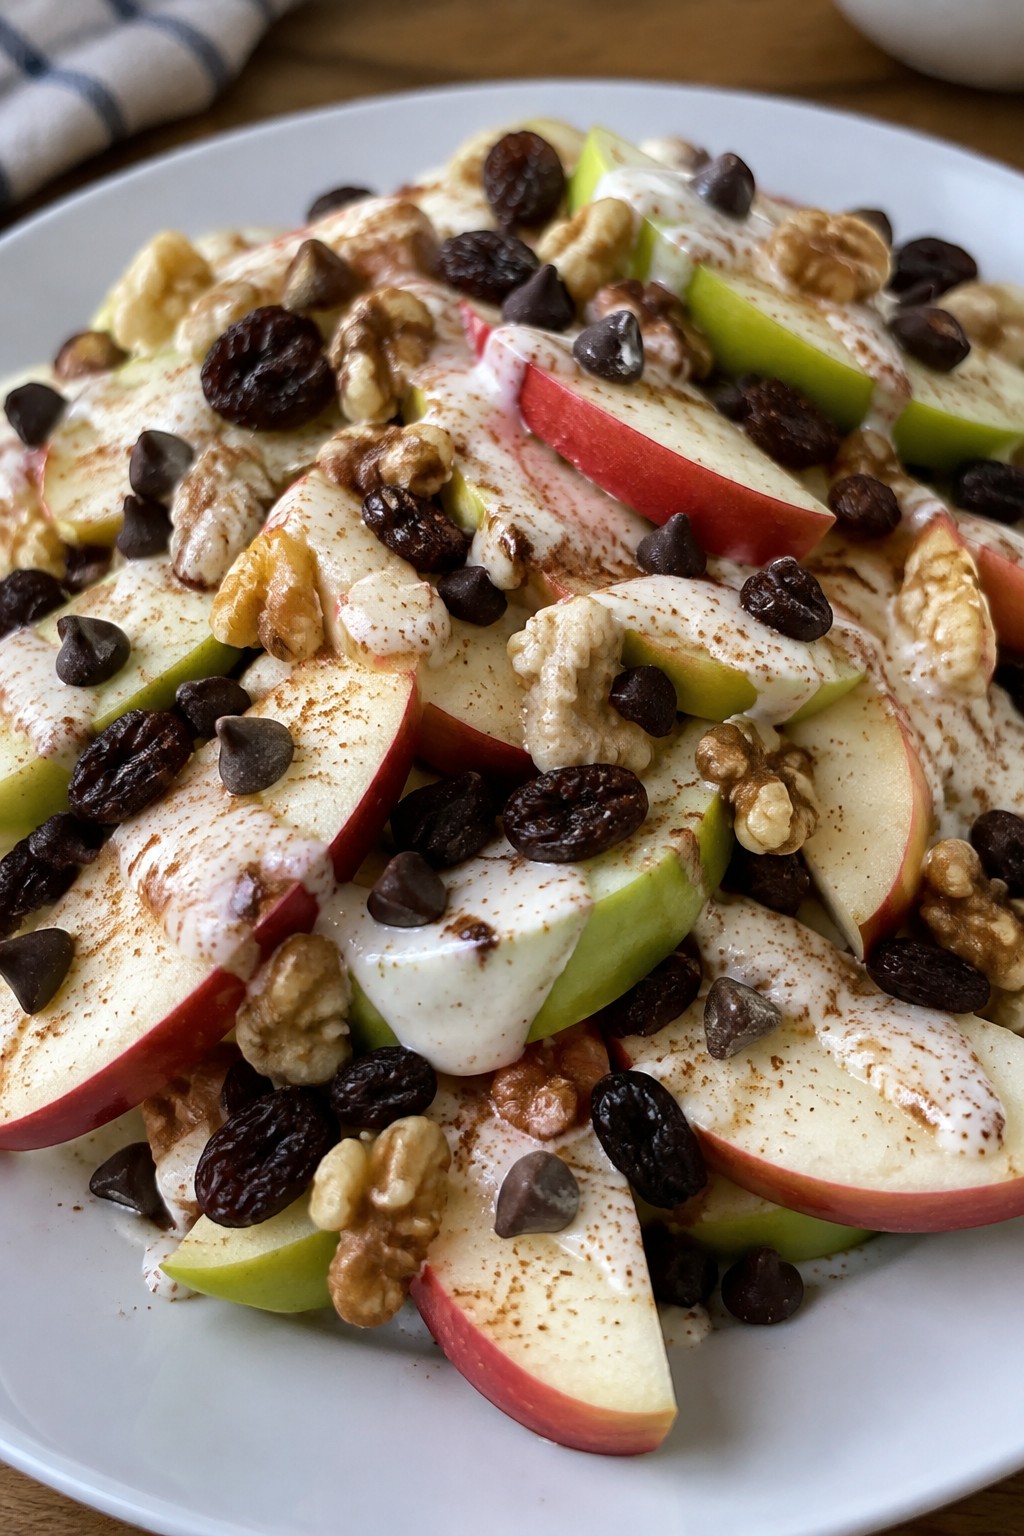
Serves 4 people.
Ingredients
- 4 medium apples, cored and cut into wedges
- 1 cup plain Greek yogurt
- 3 tablespoons honey
- 1/2 teaspoon ground cinnamon
- 1/4 cup mini chocolate chips
- 1/4 cup raisins
- 2 tablespoons chopped walnuts
Instructions
- Core and slice the apples into even wedges and arrange them in a single layer on a serving plate.
- In a small bowl, stir together the Greek yogurt, honey, and cinnamon until smooth.
- Spoon or drizzle the yogurt mixture evenly over the apple wedges.
- Scatter the mini chocolate chips, raisins, and chopped walnuts across the top.
- Serve right away while the apples remain crisp.
Extra Tips
Arrange the apple wedges in a circle so the yogurt drizzle reaches most pieces. If the yogurt thickens too much, add a teaspoon of water to loosen it for easier drizzling. Leftovers can be stored in the fridge for a few hours, though the apples soften over time.Course: Snack Cuisine: American Equipment: Mixing bowl, knife, cutting board, serving plate
Orange Bell Pepper Boats with Chicken Salad
These pepper boats turn a simple chicken salad into a playful Halloween snack that kids can grab and eat without much fuss. The bright orange shells stand out on a party table while the creamy filling stays mild enough for young tastes. It works well for after-school snacks, lunch boxes, or a quick bite before trick-or-treating.
The peppers stay crisp and the chicken salad stays light, giving a mix of crunch and creaminess in every bite.
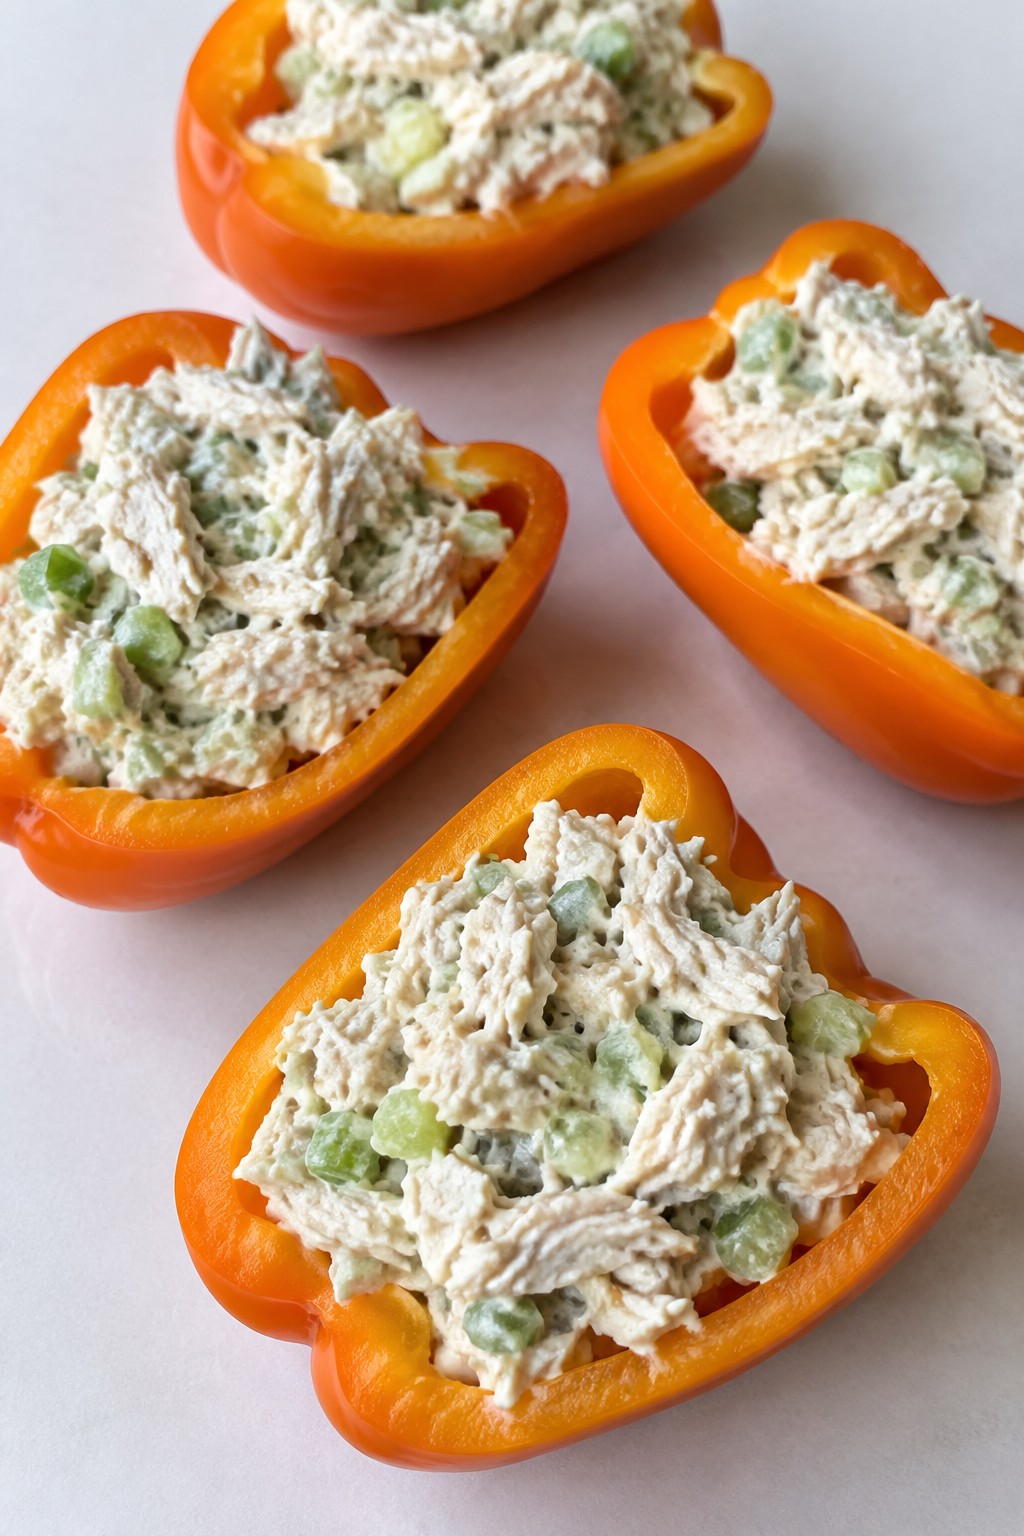
Serves 4 people.
Ingredients
- 4 orange bell peppers
- 2 cups shredded cooked chicken
- 1/4 cup mayonnaise
- 2 celery stalks, finely diced
- 1/2 teaspoon salt
- 1/4 teaspoon ground black pepper
Instructions
- Slice each orange bell pepper in half lengthwise and scoop out the seeds and white membranes to form boat shapes.
- Place the shredded chicken, mayonnaise, diced celery, salt, and black pepper in a mixing bowl.
- Stir the ingredients together until the chicken is evenly coated and the celery is distributed throughout.
- Spoon the chicken salad mixture into each prepared pepper half, filling them evenly.
- Arrange the filled boats on a plate and serve right away.
Extra Tips
Fill the boats just before serving so the pepper shells stay crisp instead of softening from the mayonnaise. If you need to make the salad ahead, store it covered in the fridge and add it to the peppers at the last minute. A light sprinkle of extra black pepper on top can add a little color contrast without changing the mild flavor kids like.Course: Snack Cuisine: American Equipment: Mixing bowl, knife, cutting board
