As the days grow shorter and the nights a little more mysterious, I can’t help but get excited about hosting the spookiest gathering of the year. What better way to impress your guests than with a bewitching selection of Halloween finger foods? From eerie Spider Deviled Eggs to whimsical Witch’s Broomstick Pretzels, these treats are sure to enchant everyone. Each recipe is crafted to delight the senses and stir up a little magic. Ready to explore our hauntingly delicious menu?
Spooky Spider Deviled Eggs
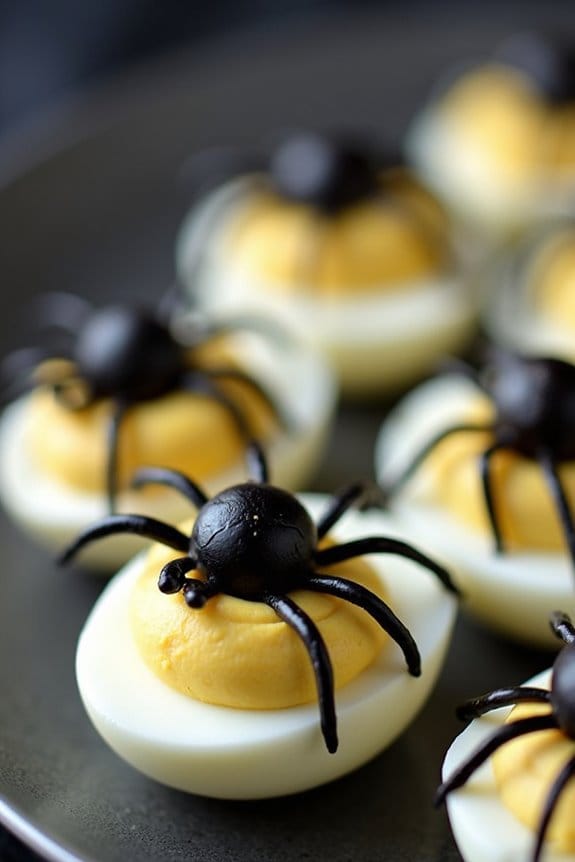
Get ready to delight and spook your guests with these ghoulishly charming Spooky Spider Deviled Eggs this Halloween. Perfect for adding a creepy yet delicious touch to your Halloween party spread, these deviled eggs are decorated to look like spiders, sure to intrigue both kids and adults.
This classic appetizer gets a Halloween makeover that’s as fun to make as it’s to eat. The creamy, tangy filling is a perfect balance to the slightly salty and savory olive spiders that top each egg half.
These Spooky Spider Deviled Eggs aren’t only visually appealing but also packed with flavor. The dish takes a traditional deviled egg recipe and adds a frightful twist that’s ideal for a festive gathering.
With just a few additional ingredients and a little creativity, you can transform your deviled eggs into a Halloween treat that will have everyone talking. This recipe serves 4-6 people, making it an excellent choice for a small gathering or as part of a larger buffet.
Ingredients (Serves 4-6):
- 6 large eggs
- 3 tablespoons mayonnaise
- 1 teaspoon Dijon mustard
- 1 teaspoon white vinegar
- Salt and pepper to taste
- 12 black olives, pitted
Cooking Instructions:
- Boil the Eggs: Place the eggs in a saucepan and cover them with water. Bring to a boil over medium-high heat. Once boiling, remove from heat, cover, and let them sit for about 10-12 minutes. This will guarantee the yolks are perfectly cooked.
- Cool and Peel: After the eggs are done, drain the hot water and transfer the eggs to a bowl of ice water to cool them quickly. Once cooled, gently peel the eggs, ensuring not to damage the whites.
- Prepare the Filling: Slice each egg in half lengthwise and carefully scoop out the yolks into a mixing bowl. Set the egg whites aside on a platter. Mash the yolks with a fork until they’re crumbly.
- Mix the Filling: Add mayonnaise, Dijon mustard, white vinegar, salt, and pepper to the mashed yolks. Mix until smooth and creamy. Taste and adjust seasoning if necessary.
- Fill the Eggs: Spoon or pipe the yolk mixture back into the egg white halves, distributing evenly.
- Create the Spider Toppings: Cut the black olives in half. Use one half for the spider body and slice the other half into thin strips to form the legs. Each egg half should have one olive half placed in the center for the body and 8 strips surrounding it for the legs.
- Serve: Arrange your Spooky Spider Deviled Eggs on a platter and serve them chilled. Enjoy the eerie delight they bring to your Halloween festivities!
Extra Tips:
For the best results, verify your eggs aren’t too fresh, as older eggs tend to peel more easily.
When making the spider decorations, you can use a sharp knife to cut the olives into more precise shapes. If you want to make the dish more colorful, consider mixing a bit of food coloring into the yolk mixture for a more dramatic effect.
Additionally, these eggs can be made a day in advance, allowing the flavors to meld and making party prep a bit easier. Just cover them tightly with plastic wrap and refrigerate until ready to serve.
Monster Eyeball Meatballs

Monster Eyeball Meatballs are a fun and spooky addition to your Halloween party menu. These savory bites aren’t only delicious but also delightfully eerie, making them a hit with both kids and adults. With a little creativity, you can transform ordinary meatballs into creepy eyeballs that will add a touch of fright to your festive table.
The combination of flavors from the meat, seasonings, and the tangy surprise of a mozzarella “eyeball” in the center creates a unique taste sensation that’s certain to be a conversation starter at your gathering.
Creating Monster Eyeball Meatballs is both simple and entertaining. The key is to mold the meatball mixture around the mozzarella cheese spheres, guaranteeing they’re securely enveloped. This not only gives the meatballs their signature “eyeball” look but also infuses each bite with a gooey, cheesy center.
When cooked, the mozzarella melts just enough to create a perfectly creepy appearance. To enhance the look, a slice of black olive serves as the “pupil,” making these meatballs a visually striking addition to your Halloween spread.
Ingredients for 4-6 people:
- 1 pound ground beef
- 1/2 cup breadcrumbs
- 1/4 cup grated Parmesan cheese
- 1/4 cup milk
- 1 egg
- 2 cloves garlic, minced
- 1 teaspoon Italian seasoning
- Salt and pepper to taste
- 12 small mozzarella balls (bocconcini)
- 12 slices of black olives
- 1 1/2 cups marinara sauce
Cooking Instructions:
- Preheat the Oven: Begin by preheating your oven to 375°F (190°C). This guarantees that the meatballs cook evenly and develop a nice crust.
- Prepare the Meatball Mixture: In a large mixing bowl, combine the ground beef, breadcrumbs, Parmesan cheese, milk, egg, minced garlic, Italian seasoning, salt, and pepper. Mix thoroughly until all ingredients are evenly incorporated.
- Shape the Meatballs: Take a small portion of the meatball mixture and flatten it in your hand. Place a mozzarella ball in the center and wrap the meat around it, forming a ball. Make sure the cheese is fully enclosed. Repeat until all the meat mixture is used.
- Add the “Pupils”: Place a slice of black olive on top of each meatball, pressing gently to secure it. This creates the appearance of an eyeball with a pupil.
- Bake the Meatballs: Arrange the meatballs on a baking sheet lined with parchment paper. Bake in the preheated oven for about 20-25 minutes, or until the meatballs are cooked through and lightly browned.
- Warm the Marinara Sauce: While the meatballs are baking, heat the marinara sauce in a saucepan over medium heat until it’s warmed through.
- Serve: Once the meatballs are done, remove them from the oven and let them cool slightly. Serve the meatballs on a platter, spooning the warm marinara sauce over them or serving it on the side for dipping.
Extra Tips:
To guarantee your Monster Eyeball Meatballs have the perfect shape and consistency, it’s important not to overmix the meatball ingredients, as this can make them tough.
If you’re preparing these for a large group, consider doubling the recipe and baking in batches. You can also prepare the meatballs in advance and freeze them, baking them directly from frozen when ready to serve.
For an extra spooky presentation, place the meatballs on a bed of spaghetti “worms” or use a Halloween-themed serving dish.
Witch’s Broomstick Pretzels

Transform your Halloween party into a magical experience with these delightfully spooky Witch’s Broomstick Pretzels. Perfect as finger food, these savory snacks aren’t only easy to make but also a fun addition to your festive table.
With a combination of crunchy pretzel rods and cheesy accents, they resemble miniature broomsticks, fitting the Halloween theme perfectly. Their simplicity in preparation makes them a great project to involve kids in the kitchen, allowing them to create their own edible broomsticks.
These Witch’s Broomstick Pretzels are a crowd-pleaser, with a delightful balance of salty and cheesy flavors that will leave your guests enchanted. You can serve them as a standalone snack or pair them with a variety of dips for extra flavor.
Whether you’re hosting a Halloween party or just looking to add a touch of whimsy to your snack time, these broomstick pretzels are sure to be a hit!
Ingredients (Serves 4-6):
- 12 pretzel rods
- 6 string cheese sticks
- Fresh chives (about 12 strands)
Cooking Instructions:
- Prepare the String Cheese:
- Unwrap each string cheese stick and cut them in half. With a small knife, carefully slice the lower half of each string cheese stick into thin strips, roughly halfway up, to create the broom’s bristles.
- Attach the Cheese to the Pretzel Rods:
- Take one half of the string cheese and firmly press the uncut end onto the end of a pretzel rod. Verify it’s secure, as this will form the head of the broomstick.
- Tie with Chives:
- Gently wrap a strand of fresh chive around the top of the cheese bristles to give the appearance of a broom tied together. Tie a small knot to secure the chive in place. Trim any excess chive if necessary.
- Repeat:
- Continue the process with the remaining cheese halves and pretzel rods until all 12 broomsticks are assembled.
- Serve:
- Arrange the Witch’s Broomstick Pretzels on a platter and serve them as part of your Halloween spread.
Extra Tips:
- For a more festive presentation, consider placing the broomsticks upright in a jar or small vase for an added visual effect.
- If you prefer a slightly melted look for the broom bristles, place the assembled broomsticks on a baking sheet and warm them in an oven at 200°F (93°C) for about 2-3 minutes. Keep an eye on them to prevent the cheese from melting too much.
- If chives aren’t available, you can use thin strips of green onion or parsley as an alternative for tying the brooms.
- These broomsticks can be prepared a few hours in advance and stored in the refrigerator until your event. Just verify they’re covered to prevent the cheese from drying out.
Ghostly Mozzarella Sticks
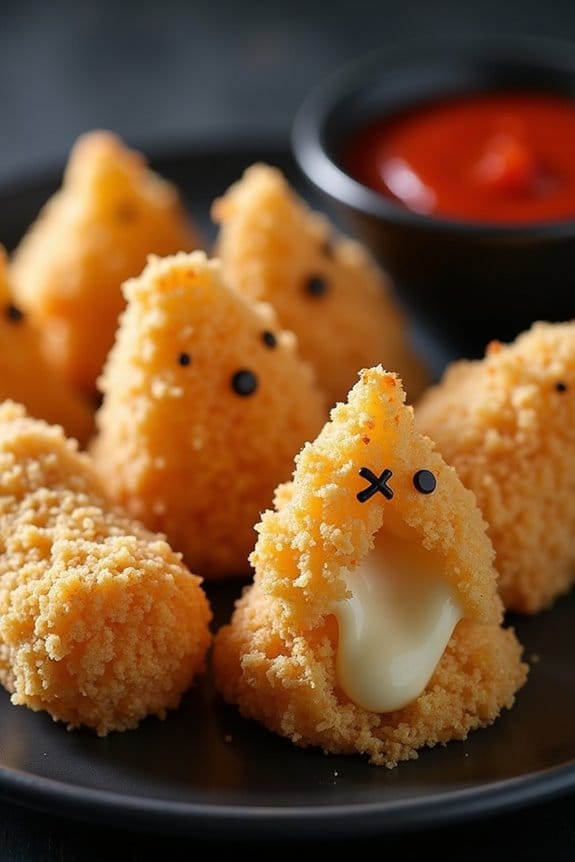
Ghostly Mozzarella Sticks are a spooky twist on a classic appetizer, perfect for any Halloween gathering. These cheesy delights are transformed into haunting ghost shapes that will add a playful and eerie touch to your snack table. With their gooey, delicious centers and crispy golden exteriors, these mozzarella sticks will surely be a hit with both kids and adults alike.
Plus, they’re easy to make, allowing you more time to focus on the other elements of your Halloween celebration. To achieve the ghostly appearance, mozzarella sticks are coated with a seasoned breadcrumb mixture, then fried to perfection. The key is in carving out ghost shapes from the cheese before coating and frying, making them look as spooky as they’re delicious.
Serve these with a side of marinara sauce for a bloody dip, and watch them disappear before your eyes. Whether you’re hosting a Halloween party or just looking for a fun cooking project, these Ghostly Mozzarella Sticks are certain to impress.
Ingredients for 4-6 People:
- 12 mozzarella cheese sticks
- 1 cup all-purpose flour
- 2 large eggs
- 2 tablespoons milk
- 1 cup seasoned breadcrumbs
- 1/2 teaspoon garlic powder
- 1/2 teaspoon onion powder
- 1/2 teaspoon Italian seasoning
- Salt and pepper to taste
- Vegetable oil for frying
- Marinara sauce for dipping
Cooking Instructions:
- Prepare the Cheese: Using a small knife, trim the mozzarella sticks into ghost shapes. This can be done by creating a wavy bottom edge and rounding off one end for the head.
- Set Up the Breading Station: In three separate shallow bowls, place the flour, beaten eggs mixed with milk, and seasoned breadcrumbs (mixed with garlic powder, onion powder, Italian seasoning, salt, and pepper).
- Coat the Cheese: Dredge each ghost-shaped mozzarella stick in flour, shaking off any excess. Dip them into the egg mixture, making certain they’re completely coated. Finally, roll them in the breadcrumbs, pressing gently to adhere. For a thicker coating, repeat the egg and breadcrumb steps.
- Chill the Coated Cheese: Place the coated mozzarella sticks on a baking sheet and freeze for at least 30 minutes. This helps prevent the cheese from melting too quickly during frying.
- Heat the Oil: In a deep frying pan or pot, heat vegetable oil to 350°F (175°C). Confirm there’s enough oil to submerge the mozzarella sticks completely.
- Fry the Sticks: Carefully add the mozzarella sticks to the hot oil, a few at a time, to avoid overcrowding. Fry them for about 2-3 minutes, or until they’re golden brown and crispy.
- Drain and Serve: Remove the fried mozzarella sticks with a slotted spoon and place them on a paper towel-lined plate to drain excess oil. Serve immediately with marinara sauce on the side.
Extra Tips:
For best results, make sure that the mozzarella sticks are thoroughly frozen before frying; this helps maintain their shape and prevents the cheese from oozing out.
Adjust the seasoning in the breadcrumbs to your preference, perhaps adding a pinch of cayenne for a spicy kick. If you’re preparing these in advance, you can freeze the breaded cheese sticks for up to a week and fry them just before serving.
Mummy Jalapeño Poppers
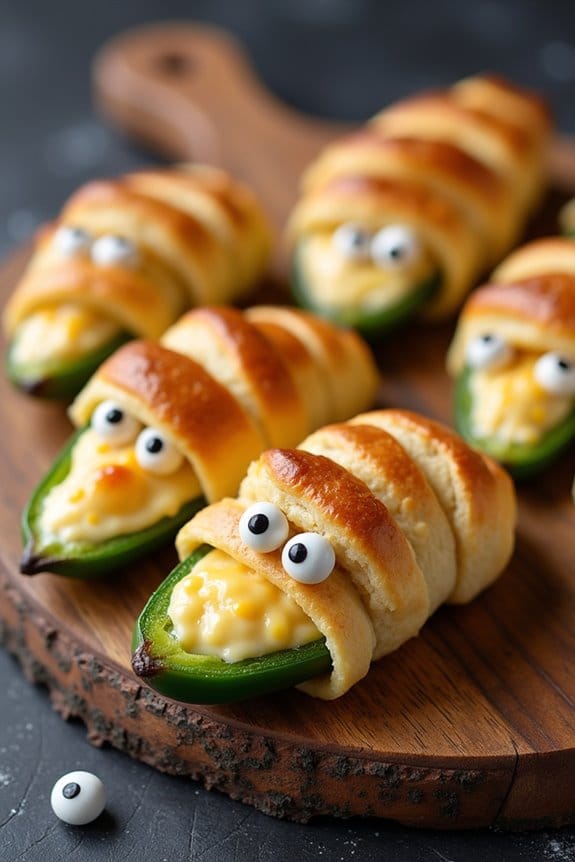
Mummy Jalapeño Poppers are a fun and spooky addition to your Halloween finger food spread. These delicious treats combine the spiciness of jalapeños with creamy cheese filling, all wrapped up in a flaky crescent roll “bandage.” Perfect for parties, they aren’t only visually appealing but also burst with flavor, making them a surefire hit with both kids and adults.
Whether you’re hosting a Halloween bash or simply looking to spice up your festive dinner, these poppers are the perfect choice.
The process of making Mummy Jalapeño Poppers is as enjoyable as devouring them. The jalapeños are halved and deseeded to reduce some of their heat, then stuffed with a mix of cheeses for a creamy bite. The real fun begins when you wrap them in thin strips of crescent roll dough to create the “mummy” effect.
Once baked to golden perfection, these poppers are sure to be the highlight of your Halloween table.
Ingredients for 4-6 people:
- 12 fresh jalapeño peppers
- 8 oz cream cheese, softened
- 1 cup shredded cheddar cheese
- 1 teaspoon garlic powder
- 1 teaspoon onion powder
- 1 package refrigerated crescent roll dough
- 1 egg, beaten
- Candy eyeballs or small edible eyes
Cooking Instructions:
- Prepare the Jalapeños: Preheat your oven to 400°F (200°C). Slice each jalapeño pepper in half lengthwise and carefully remove the seeds and membranes using a small spoon or knife to reduce the heat.
- Make the Cheese Filling: In a medium bowl, combine the softened cream cheese, shredded cheddar cheese, garlic powder, and onion powder. Mix until the ingredients are well combined and smooth.
- Stuff the Jalapeños: Fill each jalapeño half with the cheese mixture, ensuring it’s evenly distributed but not overflowing.
- Prepare the Dough: Unroll the crescent roll dough and, using a sharp knife or pizza cutter, cut it into thin strips about 1/4 inch wide.
- Wrap the Jalapeños: Wrap each stuffed jalapeño half with the dough strips, leaving small gaps to give a mummy appearance. Make sure to leave an opening for the eyes.
- Add the Eyes: Place candy eyeballs or small edible eyes onto the exposed cheese at one end of the jalapeño to give your mummy a face.
- Bake: Place the wrapped jalapeños on a baking sheet lined with parchment paper. Lightly brush the dough with the beaten egg to give it a nice glossy finish. Bake in the preheated oven for about 15-20 minutes or until the dough is golden brown and crisp.
- Serve: Let the poppers cool for a few minutes before serving. They’ll be hot coming out of the oven, so be cautious with the first bite.
Extra Tips:
For an even milder version, you can blanch the jalapeños in boiling water for a couple of minutes before stuffing them. This process helps to further reduce their spiciness.
Additionally, if you can’t find candy eyeballs, you can use small pieces of black olives or dots of mustard to create the eyes.
Be creative with the wrapping to achieve different mummy styles, and remember to keep an eye on them in the oven to avoid over-browning. Enjoy your spooky, tasty creations!
Creepy Crawly Crudités
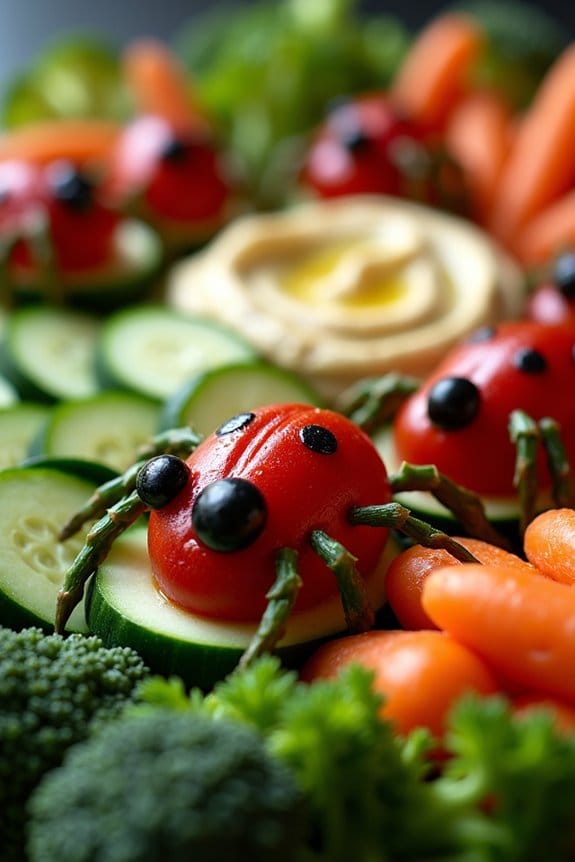
Halloween is the perfect time to delight your guests with spooky treats, and Creepy Crawly Crudités is a fun and healthy way to bring some eerie excitement to your snack table. This dish transforms ordinary vegetables into a chilling display of creepy crawlies, perfect for a Halloween party. The vibrant colors of fresh veggies are creatively arranged to resemble insects and spiders, providing both a visual treat and a nutritious snack option.
Whether you’re hosting a gathering for kids or adults, Creepy Crawly Crudités is sure to be a hit. This dish isn’t only visually appealing but also incredibly easy to prepare. With just a few simple ingredients, you can create a stunning platter that will intrigue and delight your guests. The key to this dish is in the presentation, using simple techniques to make your vegetables resemble creepy creatures.
Serve this with a variety of dips to enhance the flavors and offer a complete appetizer option. It’s a great way to encourage everyone, especially kids, to eat their veggies while having fun!
Ingredients for 4-6 servings:
- 1 cucumber
- 1 red bell pepper
- 1 yellow bell pepper
- 1 bunch of radishes
- 1 bunch of baby carrots
- 1 pint cherry tomatoes
- 1 bunch of asparagus
- 1 cup black olives
- 1 head of broccoli
- 1 cup hummus or ranch dressing for dipping
Cooking Instructions:
- Prepare the Vegetables: Wash all the vegetables thoroughly. Peel the cucumber and cut it into thin slices to create the body of your “caterpillars.” Slice the red and yellow bell peppers into thin strips for the “legs” of your bugs.
- Create the Insect Bodies: Use the radishes as the bodies of beetles. Slice them in half and set them flat on the platter. For spiders, use cherry tomatoes as the body, and attach pieces of asparagus as legs.
- Assemble the Crudités: On a large platter, arrange the cucumber caterpillars, radish beetles, and cherry tomato spiders. Use black olives cut in half to make eyes for your creations. Place the broccoli florets around the edges to mimic a forest floor.
- Add Details: Use thin slices of bell pepper to add antennae to the radishes and cucumber slices. Arrange baby carrots around the platter to add color and texture.
- Serve with Dip: Place a small bowl of hummus or ranch dressing in the center of the platter for dipping. Encourage your guests to sample the “creepy crawlies” with a healthy dip.
Extra Tips:
To make your Creepy Crawly Crudités even more realistic, consider using edible markers to draw patterns on the vegetable bodies or add small pretzel sticks as legs for a crunchy texture.
Feel free to get creative with the vegetable selection; zucchini and celery can also be used to create different shapes and textures. If you’re serving this dish to kids, involve them in assembling the platter—it’s a fun way to engage them in the kitchen and make eating vegetables more exciting.
Vampire Bat Wings
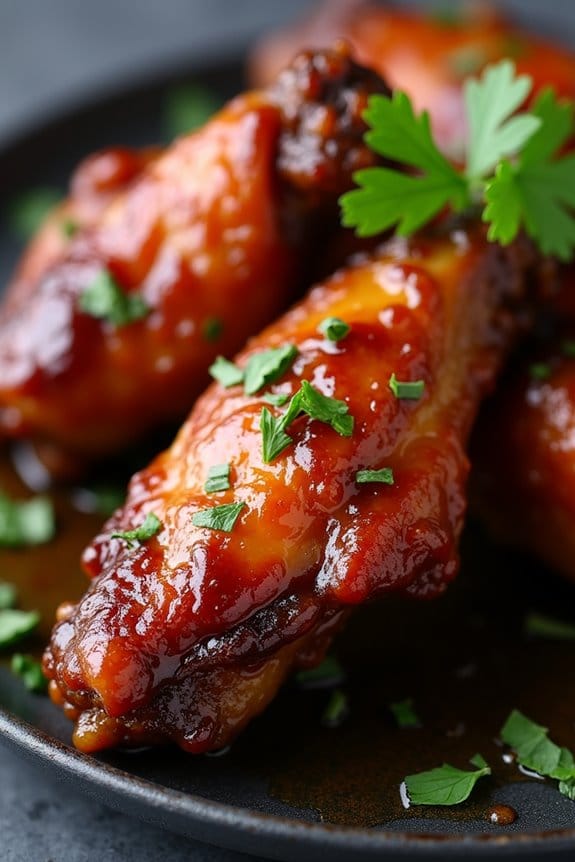
Transform your Halloween party into a spooky feast with these delicious and eerie Vampire Bat Wings. This dish is perfect for adding a touch of fright to your finger food selection. The wings are marinated and baked to perfection, ensuring they’re both juicy and full of flavor. The dark, glossy glaze gives them a sinister appearance, making them the perfect centerpiece for your Halloween spread. With a balance of sweet, spicy, and savory flavors, these wings will be a hit with your guests.
The key to making the wings look like they belong to a vampire bat is in the marinade and the cooking process. Balsamic vinegar and soy sauce create a deep, dark hue, while honey and brown sugar add a sticky sweetness. A touch of garlic and a hint of chili powder bring in the savory and spicy notes. Once marinated, the wings are baked until the skin is crispy and the meat tender, making them irresistible to both vampires and humans alike.
Ingredients for 4-6 people:
- 3 pounds chicken wings
- 1/2 cup balsamic vinegar
- 1/4 cup soy sauce
- 1/4 cup honey
- 2 tablespoons brown sugar
- 4 cloves garlic, minced
- 1 teaspoon chili powder
- 1/2 teaspoon salt
- 1/2 teaspoon black pepper
- Fresh parsley, chopped (for garnish)
Cooking Instructions:
- Prepare the Marinade: In a large bowl, combine the balsamic vinegar, soy sauce, honey, brown sugar, minced garlic, chili powder, salt, and black pepper. Whisk the ingredients together until the sugar is completely dissolved and the mixture is well blended.
- Marinate the Wings: Add the chicken wings to the bowl, ensuring they’re fully submerged in the marinade. Cover the bowl with plastic wrap and refrigerate for at least 2 hours, preferably overnight, to allow the flavors to penetrate the meat.
- Preheat the Oven: About 30 minutes before you’re ready to cook, preheat your oven to 400°F (200°C). Line a baking sheet with aluminum foil and place a wire rack on top. This will help the wings cook evenly and achieve a crispy texture.
- Arrange the Wings: Remove the wings from the marinade, allowing any excess to drip off. Arrange the wings in a single layer on the wire rack, making sure they aren’t touching each other. Reserve the marinade.
- Bake the Wings: Place the baking sheet in the preheated oven and bake for 35-40 minutes. Halfway through the cooking time, brush the wings with the reserved marinade to enhance the flavor and color.
- Finish the Wings: After baking, you can broil the wings for an additional 2-3 minutes to achieve extra crispiness. Keep a close eye on them to prevent burning.
- Garnish and Serve: Once cooked, remove the wings from the oven and let them rest for a few minutes. Sprinkle with freshly chopped parsley for a pop of color before serving.
Extra Tips: For even more flavor, consider adding a splash of hot sauce to the marinade if you prefer spicier wings. If you don’t have a wire rack, you can bake the wings directly on the foil-lined baking sheet, but be sure to flip them halfway through cooking for even crispiness. Additionally, to make the wings extra sticky, you can brush them with a little more honey before the final broil. Enjoy these Vampire Bat Wings hot, as they taste best when fresh out of the oven!
Frankenstein’s Finger Sandwiches
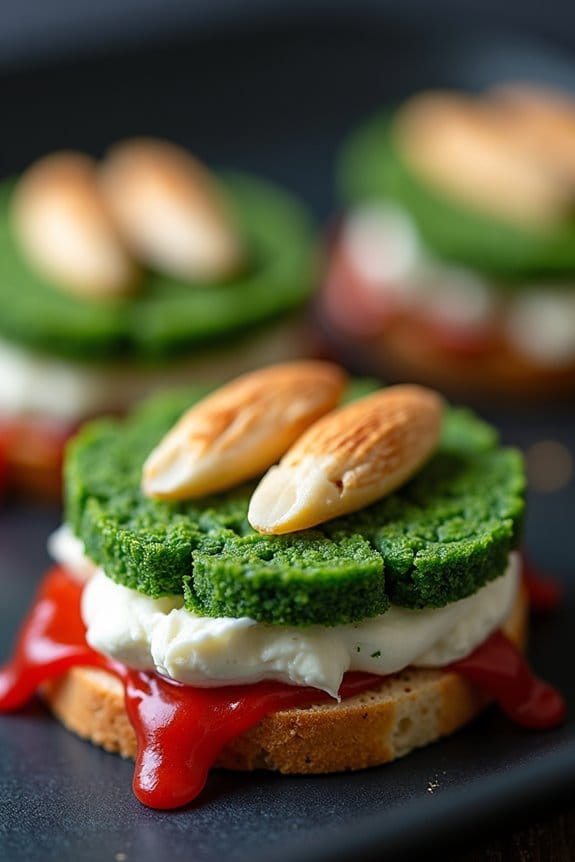
Frankenstein’s Finger Sandwiches are a spooky and delightful addition to your Halloween party menu. These eerie yet tasty treats are designed to look like Frankenstein’s fingers, adding an element of fun and fright to your table. Made with simple ingredients and a touch of creativity, they’re sure to impress your guests with both their appearance and flavor.
Perfect for serving children and adults alike, these finger sandwiches aren’t only delicious but also easy to assemble, making them an ideal choice for a festive gathering.
The key to creating convincing Frankenstein’s Finger Sandwiches lies in the attention to detail. The green-tinted bread gives the impression of Frankenstein’s skin, while the almond slice “fingernail” and red pepper “blood” add an authentic touch. Serve these finger sandwiches as part of your Halloween spread, and watch as your guests delight in their spooky presentation.
With a preparation time of just 20 minutes, you’ll have more time to enjoy the festivities and entertain your guests.
Ingredients (Serving Size: 4-6 people):
- 12 slices of white bread
- Green food coloring
- 1/2 cup of cream cheese
- 1/2 cup of finely chopped spinach
- 1/4 cup of mayonnaise
- 1/4 teaspoon of garlic powder
- 1/4 teaspoon of salt
- 1/4 teaspoon of black pepper
- 12 almond slices
- 1 small red bell pepper
Cooking Instructions:
- Prepare the Bread: Begin by trimming the crusts off the white bread slices and flatten each slice slightly with a rolling pin. Add a few drops of green food coloring to a small bowl of water, then lightly brush the colored water over each slice of bread to give them a greenish hue. Allow the bread to dry for a few minutes.
- Make the Filling: In a medium-sized bowl, combine the cream cheese, finely chopped spinach, mayonnaise, garlic powder, salt, and black pepper. Mix thoroughly until the ingredients are well combined and smooth.
- Assemble the Fingers: Spread a thin layer of the prepared cream cheese filling evenly over each slice of green-tinted bread. Roll each slice into a tight cylinder, starting from one of the shorter edges, to form the finger shape.
- Create the Fingernails: Gently press an almond slice onto one end of each rolled sandwich to resemble a fingernail. This will give the appearance of a fingertip.
- Add the Bloody Effect: Cut the red bell pepper into small, thin strips. Place a strip of red pepper at the base of each almond slice to mimic dripping blood.
- Serve and Enjoy: Arrange the completed Frankenstein’s Finger Sandwiches on a platter and serve them to your guests. They can be enjoyed immediately or stored in the refrigerator until it’s time to serve.
Extra Tips: For an extra spooky presentation, arrange the Frankenstein’s Finger Sandwiches on a dark or Halloween-themed serving plate. If you want to make the fingers appear more realistic, use a toothpick to create small, shallow lines across the bread for a knuckle effect.
Additionally, you can experiment with different fillings, such as guacamole or hummus, for a variation in flavor while maintaining the green color scheme. Remember, the key to these sandwiches is to have fun with the presentation, so let your creativity shine!
Brainy Cauliflower Dip
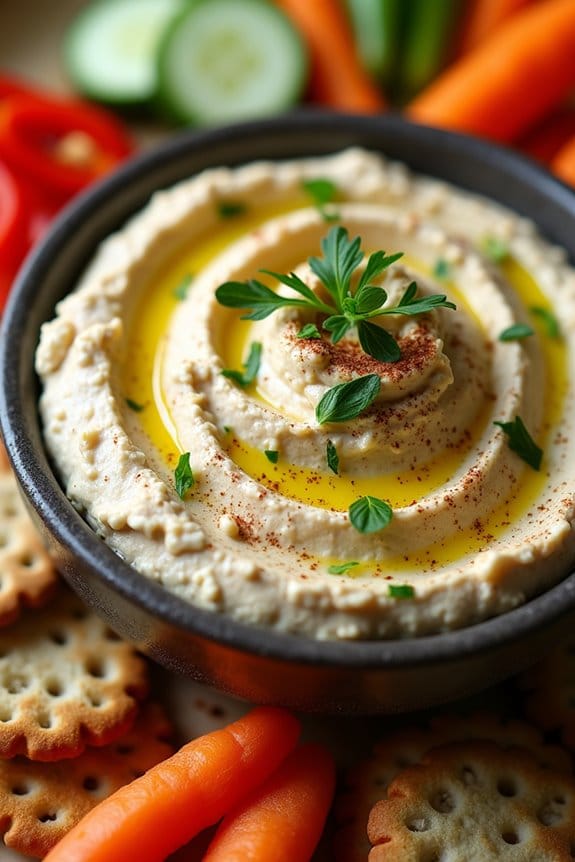
Brainy Cauliflower Dip is a deliciously spooky addition to your Halloween finger food spread. This creamy, savory dip isn’t only visually striking but also packed with flavor, making it a perfect appetizer for your festive gathering. The dip’s brain-like appearance is achieved by roasting a whole head of cauliflower until golden brown and tender, then pureeing it with a blend of rich, tangy ingredients. Serve it with an assortment of colorful fresh vegetables, crackers, or breadsticks for a ghoulishly good time.
The Brainy Cauliflower Dip isn’t only fun to look at but also a healthy option for your Halloween party. The cauliflower provides a subtle sweetness and creamy texture, while the addition of garlic, lemon juice, and tahini gives it a zesty and nutty flavor profile. This dish is simple to prepare, making it an ideal choice for hosts looking to create a memorable spread without spending hours in the kitchen.
Whether you’re entertaining kids or adults, this dip is sure to be a hit!
Ingredients (Serves 4-6):
- 1 large head of cauliflower
- 3 tablespoons olive oil
- 3 cloves garlic, minced
- 1/4 cup tahini
- 1/4 cup lemon juice
- 1/4 cup water
- 1 teaspoon ground cumin
- Salt and pepper to taste
- 1 tablespoon fresh parsley, chopped (optional, for garnish)
- Assorted vegetables, crackers, or breadsticks for serving
Cooking Instructions:
- Prepare the Cauliflower: Preheat your oven to 400°F (200°C). Remove the leaves and cut the stem of the cauliflower to create a flat base. Place the cauliflower on a baking sheet lined with parchment paper.
- Roast the Cauliflower: Drizzle the cauliflower head with 2 tablespoons of olive oil and sprinkle with salt and pepper. Use your hands to rub the oil and seasoning evenly over the cauliflower. Roast in the preheated oven for 45-50 minutes, or until the cauliflower is tender and golden brown.
- Cool and Blend: Allow the roasted cauliflower to cool slightly. Then, break it into florets and transfer them to a food processor. Add the minced garlic, tahini, lemon juice, water, remaining tablespoon of olive oil, cumin, and additional salt and pepper.
- Puree the Mixture: Blend the ingredients in the food processor until smooth and creamy. If the dip is too thick, add more water, one tablespoon at a time, until the desired consistency is reached.
- Serve: Transfer the dip to a serving bowl. Garnish with chopped fresh parsley if desired. Serve with an assortment of fresh vegetables, crackers, or breadsticks.
For best results, use a high-quality tahini for a smoother and more flavorful dip. If you prefer a bit of heat, consider adding a pinch of cayenne pepper or smoked paprika to the pureed cauliflower. This dip can be made a day in advance and stored in the refrigerator, allowing the flavors to meld; just be sure to let it come to room temperature before serving.
Skeleton Bone Breadsticks

Skeleton Bone Breadsticks are a spooktacular addition to your Halloween party spread. These breadsticks aren’t only delicious but also delightfully creepy, resembling bony fingers that will send a shiver down your spine. Crispy on the outside with a soft, chewy interior, they’re perfect for dipping into your favorite marinara or garlic butter sauce.
The twisted, bone-like appearance makes them a fun and thematic choice for the season, bringing a touch of ghoulish charm to your festivities. Creating these eerie breadsticks is simple and requires just a few ingredients that you may already have in your pantry. The dough is flavored with garlic and herbs, making it savory and aromatic.
Shaping the dough into bone-like forms is a fun activity that you can involve the whole family in, adding to the Halloween excitement. Whether you’re hosting a party or just enjoying a frightful family dinner, these Skeleton Bone Breadsticks are sure to be a hit.
Ingredients (Serves 4-6):
- 2 cups all-purpose flour
- 1 teaspoon salt
- 1 teaspoon sugar
- 1 packet (2 1/4 teaspoons) active dry yeast
- 1 cup warm water (about 110°F)
- 2 tablespoons olive oil
- 1 teaspoon garlic powder
- 1 teaspoon dried Italian herbs (such as oregano, basil, or thyme)
- 1 egg, beaten (for egg wash)
- Coarse salt or Parmesan cheese for sprinkling (optional)
Instructions:
- Prepare the Dough: In a large mixing bowl, combine the warm water, sugar, and yeast. Stir gently and let it sit for about 5 minutes until it becomes frothy, indicating the yeast is activated.
- Mix Dry Ingredients: In another bowl, whisk together the flour, salt, garlic powder, and Italian herbs. Gradually add this mixture to the yeast mixture, along with the olive oil, and stir until the dough begins to come together.
- Knead the Dough: Transfer the dough onto a floured surface and knead for about 8-10 minutes until it’s smooth and elastic. You can also use a stand mixer fitted with a dough hook for this step.
- Let the Dough Rise: Place the kneaded dough in a lightly oiled bowl, cover it with a damp cloth, and let it rise in a warm place for about 1 hour, or until it has doubled in size.
- Shape the Breadsticks: Once the dough has risen, punch it down to release the air. Divide it into 12 equal pieces. Roll each piece into a long, thin rope about 10 inches long. Twist the ends of each rope to resemble bone shapes.
- Preheat and Prepare for Baking: Preheat your oven to 400°F (200°C). Place the shaped dough pieces onto a baking sheet lined with parchment paper. Brush them with the beaten egg and sprinkle with coarse salt or Parmesan cheese, if desired.
- Bake the Breadsticks: Bake in the preheated oven for 15-20 minutes, or until the breadsticks are golden brown and crispy on the outside.
- Cool and Serve: Allow the breadsticks to cool slightly before serving. These are best enjoyed warm with a side of marinara sauce or garlic butter for dipping.
Extra Tips:
For an extra spooky effect, consider adding black sesame seeds or poppy seeds to the egg wash for a speckled, aged appearance on the skeleton bones.
If you’re short on time, you can use store-bought pizza dough as a quick alternative to making your own dough. When shaping the breadsticks, remember that imperfections add to the eerie, bone-like appearance, so let your creativity flow.
Finally, if you want to prepare these in advance, the shaped breadsticks can be refrigerated after shaping and baked just before serving.
Pumpkin Patch Cheese Balls

Pumpkin Patch Cheese Balls are a delightful and festive addition to any Halloween party spread. These tasty treats resemble mini pumpkins and are sure to impress your guests with their vibrant appearance and delicious flavors. Crafted from a combination of cream cheese, cheddar cheese, and spices, the cheese balls are rolled in crushed nacho chips for a crunchy outer layer. To complete the pumpkin look, a pretzel stick is inserted as the stem, and fresh parsley or cilantro is added as the leaves.
These cheese balls aren’t just visually appealing but also packed with flavor. They provide a creamy, cheesy bite with a hint of spice and a satisfying crunch. The balance of textures and flavors makes them an excellent finger food option for your Halloween gathering. This recipe serves 4-6 people, making it perfect for a small party or as part of a larger spread of Halloween-themed snacks.
Creamy, cheesy bites with a hint of spice and a satisfying crunch—perfect for your Halloween gathering.
Ingredients (serving size: 4-6 people):
- 2 cups shredded sharp cheddar cheese
- 8 ounces cream cheese, softened
- 1 tablespoon Worcestershire sauce
- 1 teaspoon garlic powder
- 1 teaspoon paprika
- Salt and pepper to taste
- 1 cup crushed nacho-flavored tortilla chips
- Pretzel sticks (about 12)
- Fresh parsley or cilantro leaves for garnish
Cooking Instructions:
- Prepare the Cheese Mixture: In a large mixing bowl, combine the shredded cheddar cheese, softened cream cheese, Worcestershire sauce, garlic powder, paprika, salt, and pepper. Mix well until all ingredients are thoroughly combined and the mixture is smooth.
- Shape the Cheese Balls: Using your hands, form the cheese mixture into small balls, each about the size of a golf ball. This should yield approximately 12 cheese balls.
- Coat with Crunch: Roll each cheese ball in the crushed nacho-flavored tortilla chips until fully covered. Press gently to guarantee the chips adhere to the cheese mixture.
- Create the Pumpkin Look: Insert a pretzel stick into the top of each cheese ball to resemble a pumpkin stem. Add a small parsley or cilantro leaf next to the pretzel stick for added effect, mimicking pumpkin leaves.
- Chill before Serving: Place the cheese balls on a tray and refrigerate for at least 30 minutes to allow them to firm up and the flavors to meld together.
Extra Tips:
For best results, make sure the cream cheese is fully softened before mixing to guarantee a smooth and uniform cheese mixture. If you prefer a spicier kick, consider adding a pinch of cayenne pepper or chopped jalapeños to the cheese mixture.
You can prepare the cheese balls a day in advance and store them in the refrigerator, but it’s best to add the pretzel sticks and parsley just before serving to keep the pretzels from becoming soggy.
Bloody Mary Shrimp Shooters

Bloody Mary Shrimp Shooters are a perfect addition to your Halloween finger food menu. These delightful appetizers combine the classic flavors of a Bloody Mary cocktail with succulent shrimp, offering a fun and spooky twist.
Served in shot glasses, they not only taste amazing but also make for a visually striking presentation that will impress your guests. The combination of the spicy, tangy Bloody Mary mix with the tender shrimp creates an unforgettable flavor experience that’s sure to be a hit at your Halloween gathering.
This recipe is designed to serve 4-6 people, making it ideal for a small get-together or as part of a larger spread of Halloween treats. By using fresh ingredients and a few simple steps, you can create a delicious and eye-catching appetizer that will have everyone coming back for more.
Whether you’re hosting a party or just want to enjoy a themed snack, these Bloody Mary Shrimp Shooters are sure to add some playful flair to your festivities.
Ingredients:
- 1 pound large shrimp, peeled and deveined
- 1 tablespoon olive oil
- Salt and pepper to taste
- 1 cup tomato juice
- 1 tablespoon horseradish
- 2 tablespoons vodka
- 1 tablespoon Worcestershire sauce
- 1 tablespoon hot sauce (adjust to taste)
- Juice of 1 lemon
- Celery salt for garnish
- 1 tablespoon fresh dill, chopped
- 6 shot glasses or small serving cups
Instructions:
- Prepare the Shrimp: Preheat your grill or a grill pan over medium-high heat. Toss the shrimp in olive oil and season with salt and pepper. Grill the shrimp for about 2 minutes on each side, or until they’re pink and opaque. Set aside to cool.
- Make the Bloody Mary Mix: In a mixing bowl, combine the tomato juice, horseradish, vodka, Worcestershire sauce, hot sauce, and lemon juice. Stir well until all ingredients are thoroughly mixed.
- Assemble the Shooters: Pour the Bloody Mary mixture evenly into the shot glasses, filling each about 3/4 full. Place one or two grilled shrimp into each glass, allowing the tails to hang over the edge for easy grabbing.
- Garnish and Serve: Sprinkle a pinch of celery salt and fresh dill over each shooter for added flavor and garnish. Serve immediately to enjoy the full, fresh flavors.
Extra Tips:
To add an extra spooky touch to your Bloody Mary Shrimp Shooters, consider using red food coloring in the Bloody Mary mix for a deeper, blood-like appearance.
You can also rim the glasses with celery salt by wetting the rim with a lemon wedge and dipping it into the salt before pouring the mix. If you prefer a non-alcoholic version, simply omit the vodka and adjust the other ingredients to taste.
Keep the shrimp chilled until just before serving to maintain freshness and prevent any spoilage.
Haunted Graveyard Brownies
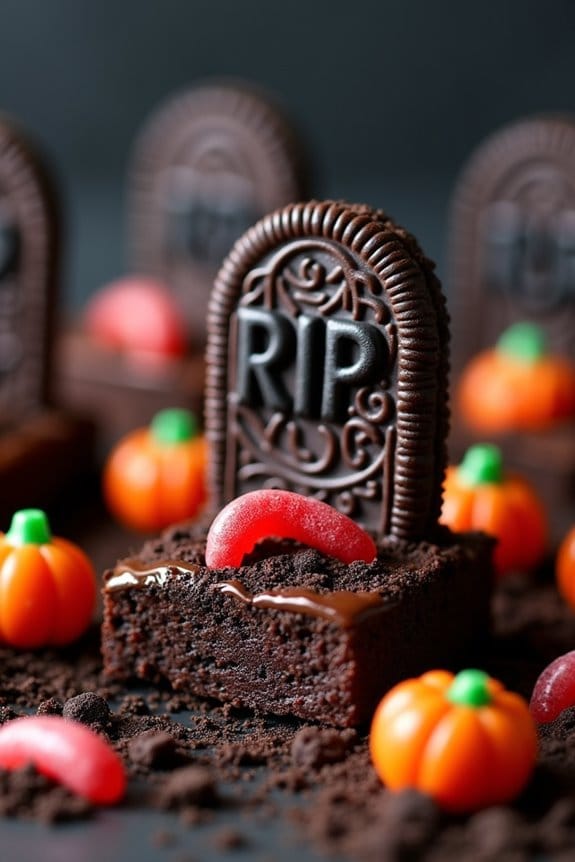
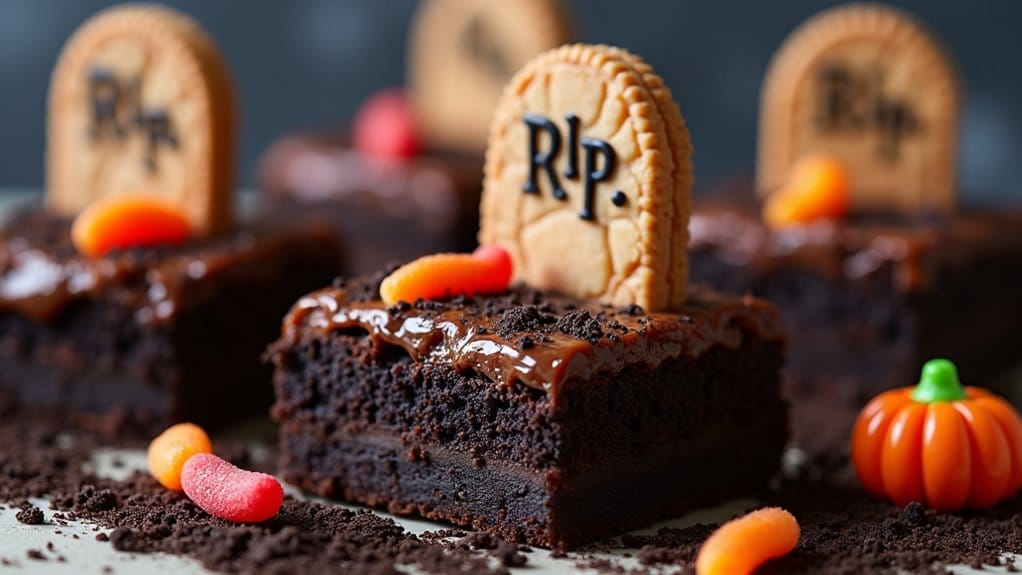
Haunted Graveyard Brownies are a spooky and delicious treat perfect for any Halloween gathering. These rich, fudgy brownies are transformed into a creepy graveyard scene with the use of clever decorations, making them a hit with both kids and adults alike.
Rich, fudgy brownies become a spooky Halloween graveyard scene, delighting both kids and adults with eerie decorations.
Whether you’re hosting a Halloween party or simply want to surprise your family with a themed dessert, these brownies are sure to impress with their delightful combination of taste and creativity.
Creating these Haunted Graveyard Brownies involves a few simple steps, from baking the brownies to decorating them with fun and eerie toppings. The process is straightforward and allows for a lot of creativity, so feel free to get the whole family involved in the decorating phase.
With the right ingredients and a touch of imagination, you can easily whip up a batch of these spooky treats for a serving size of 4-6 people.
Ingredients:
- 1 cup unsalted butter
- 2 cups granulated sugar
- 4 large eggs
- 1 teaspoon vanilla extract
- 1 cup all-purpose flour
- 1/2 cup unsweetened cocoa powder
- 1/2 teaspoon salt
- 1/2 teaspoon baking powder
- 1 cup chocolate chips
- 12 Oreo cookies, crushed
- 6 Milano cookies
- Black icing pen or melted chocolate
- Candy pumpkins or gummy worms for decoration
Cooking Instructions:
- Preheat the Oven: Preheat your oven to 350°F (175°C) and grease a 9×13-inch baking dish or line it with parchment paper for easy removal of the brownies.
- Prepare the Brownie Batter: In a large saucepan, melt the butter over low heat. Remove from heat and stir in the sugar until well combined. Add the eggs, one at a time, beating well after each addition. Stir in the vanilla extract.
- Mix Dry Ingredients: In a separate bowl, whisk together the flour, cocoa powder, salt, and baking powder. Gradually add this dry mixture to the wet ingredients, stirring until just combined. Fold in the chocolate chips.
- Bake the Brownies: Pour the batter into the prepared baking dish and spread it evenly. Bake in the preheated oven for 25-30 minutes, or until a toothpick inserted into the center comes out with a few moist crumbs. Allow the brownies to cool completely in the pan on a wire rack.
- Create the Graveyard Scene: Once cooled, spread the crushed Oreo cookies evenly over the surface of the brownies to resemble dirt. Use the black icing pen or melted chocolate to write “RIP” on each Milano cookie, and then insert them vertically into the brownies to represent tombstones.
- Add Finishing Touches: Decorate the graveyard scene with candy pumpkins or gummy worms to add a spooky touch. Feel free to get creative and add other Halloween-themed candies as desired.
Extra Tips: For an even more realistic graveyard effect, try adding some green-tinted coconut flakes to resemble grass. You can also use different types of cookies or candies to personalize the tombstones and decorations.
If you’re short on time, store-bought brownie mix can be used as a base, and kids will love participating in the decorating process. Remember, the goal is to have fun and enjoy a deliciously spooky treat!

