
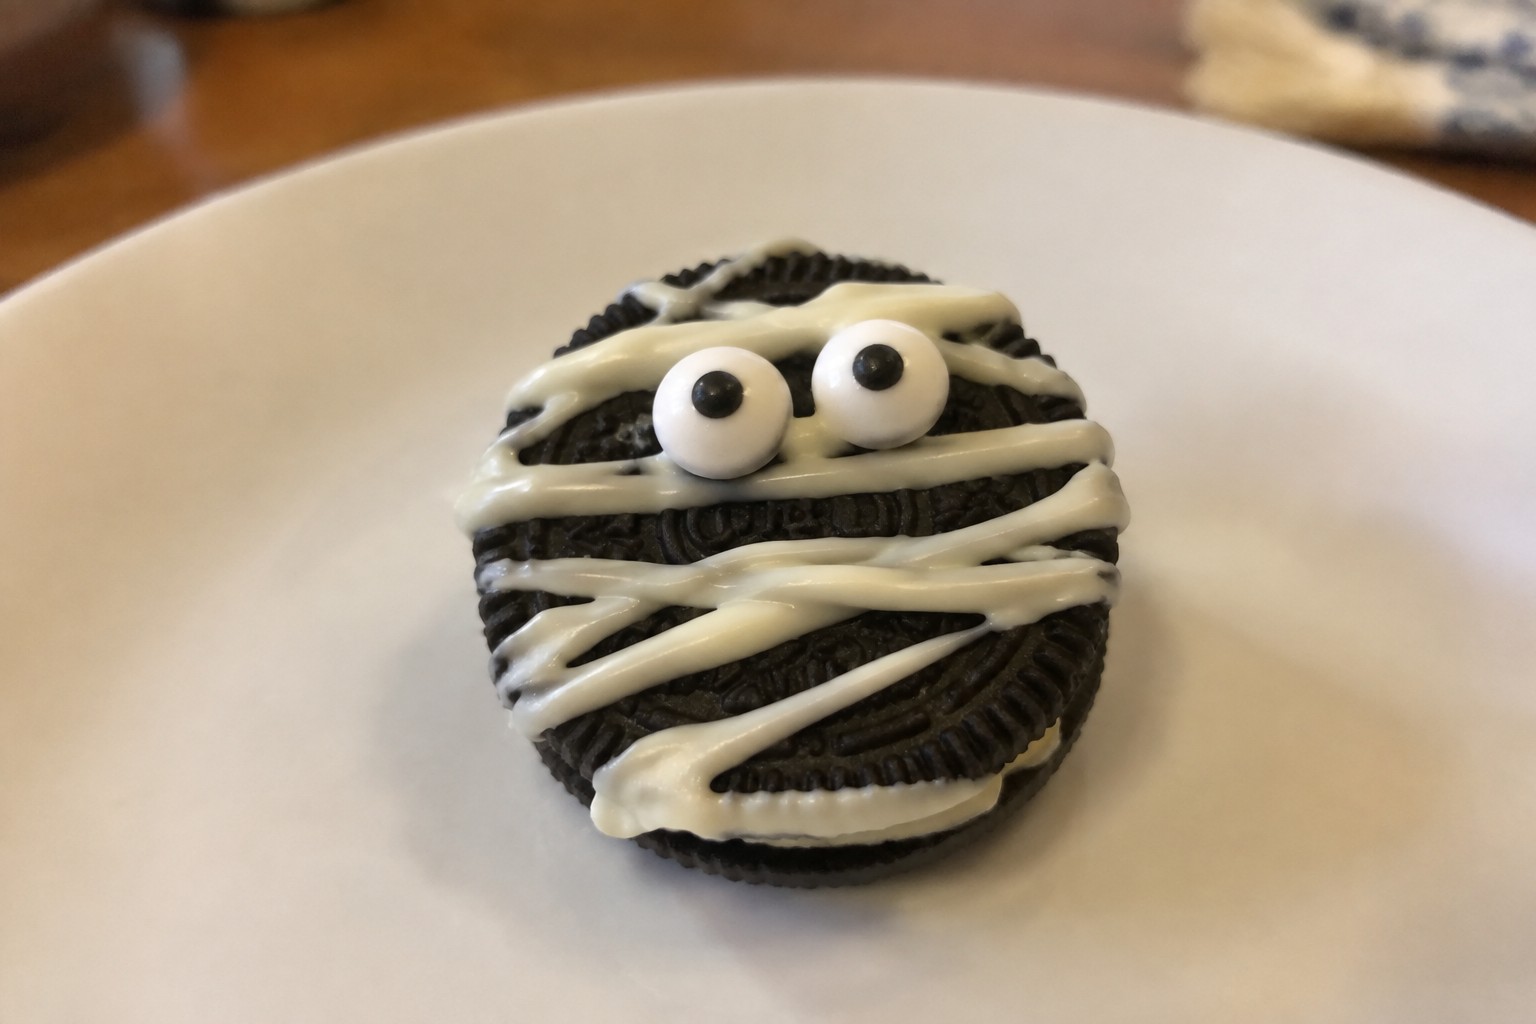
Halloween treats do not need to take a lot of time or special supplies. These 14 ideas focus on simple steps and common ingredients. You can pick what works for your schedule and what you already have in the kitchen. Each recipe gives clear directions so you can finish it without extra stress. They work well for school events, parties, or a quick family activity.
Helpful Tips Before You Start
These tips will help you finish the treats quickly and with less mess.
Set Up Your Station First
Lay out all ingredients and tools on the counter before you begin. This keeps the process moving without constant searching.
Melt Candy Coating in Batches
Microwave small amounts of chocolate or candy melts at a time. It prevents overheating and lets you work steadily.
Use Parchment Paper Sheets
Line your work surface and trays with pre cut parchment. It speeds up cleanup and makes moving treats easier.
Stick to Simple Decorations
Reach for sprinkles, candy eyes, and mini marshmallows instead of piping details. They add the Halloween look without extra steps.
Finish One Recipe at a Time
Complete all steps for one treat before starting the next. It reduces switching between tasks and keeps the kitchen organized.
Ghostly Marshmallow Cereal Treats
These treats bring a quick Halloween twist to a classic cereal bar. They come together fast with pantry staples and give you chewy squares with a bright white finish that looks right at home on a spooky snack table. Kids and adults both enjoy the simple sweet flavor and soft texture.
The recipe works well for last-minute parties or after-school fun because it needs little hands-on time and no oven. The finished bars stay light and slightly crisp from the cereal while the marshmallow keeps them tender.
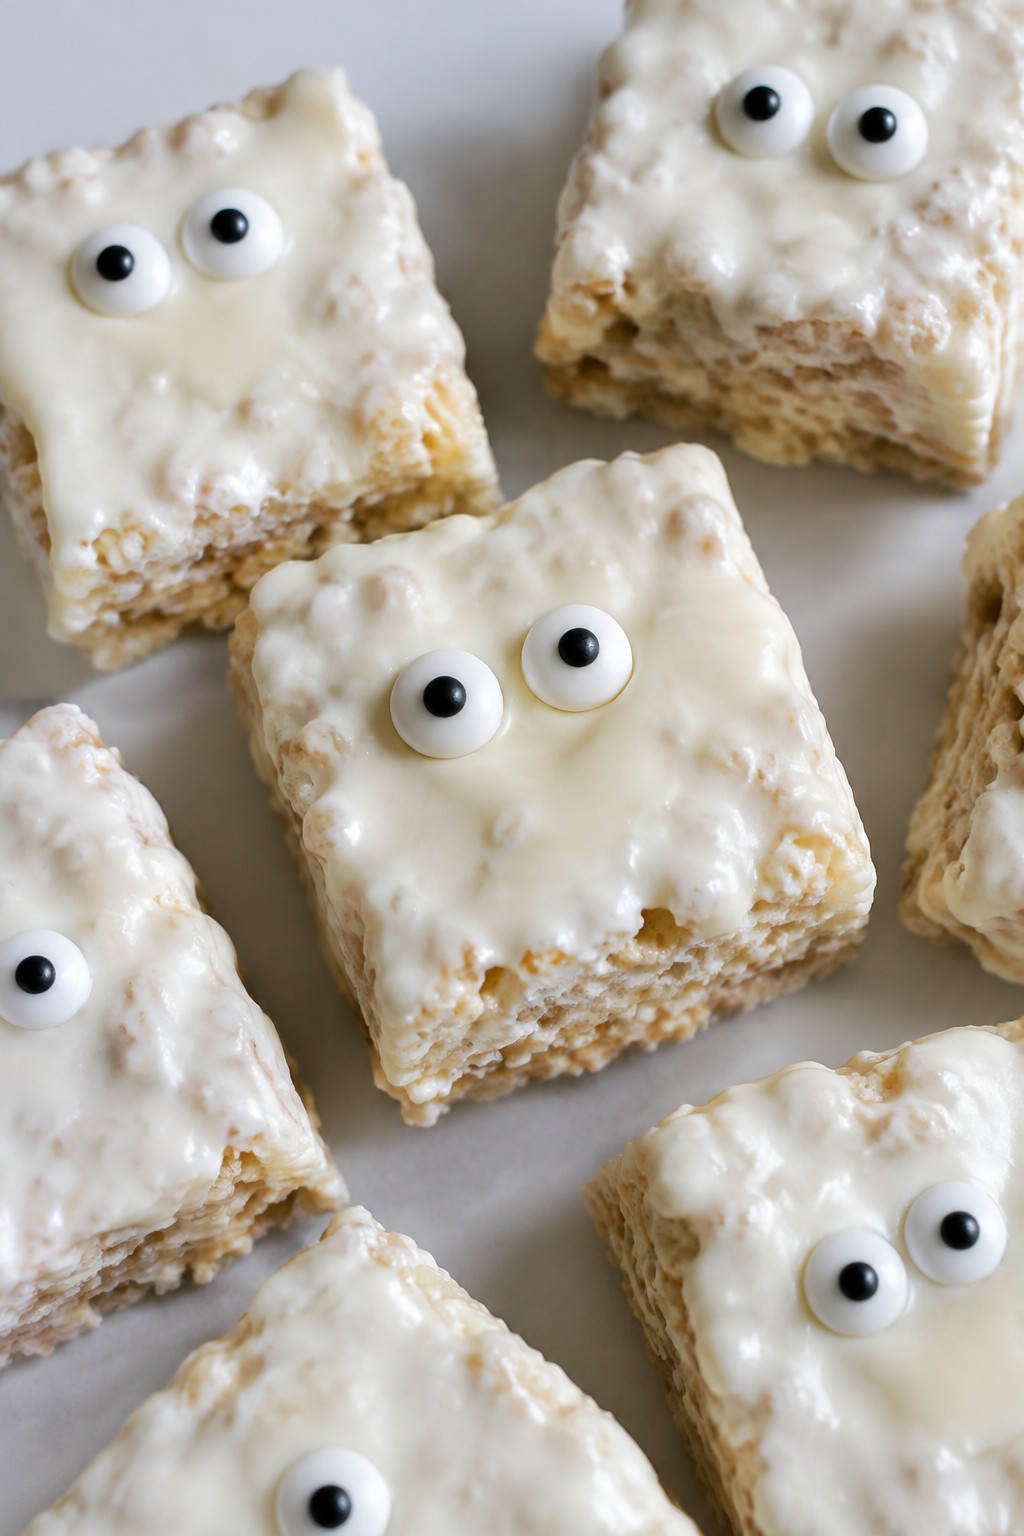
Serves 4 people.
Ingredients
- 3 tablespoons unsalted butter
- 4 cups mini marshmallows
- 6 cups crispy rice cereal
- 8 ounces white chocolate chips
- 16 candy eyes
Instructions
- Line an 8-inch square pan with parchment paper and set it aside.
- Melt the butter in a large pot over medium heat. Add the mini marshmallows and stir until the mixture is fully melted and smooth.
- Remove the pot from the heat and quickly stir in the crispy rice cereal until every piece is coated.
- Press the mixture firmly into the prepared pan using a spatula or lightly greased hands. Let it cool for 20 minutes.
- Cut the cooled slab into 8 rectangles.
- Melt the white chocolate chips in the microwave in 20-second bursts, stirring between each until smooth. Dip or spread the top of each rectangle with the melted chocolate.
- Immediately press two candy eyes onto each bar while the chocolate is still soft. Let the chocolate set for 10 minutes before serving.
Extra Tips
Press the cereal mixture firmly so the bars hold their shape after cutting. If the white chocolate thickens while you work, warm it for a few seconds to loosen it again. Store leftovers in an airtight container at room temperature for up to two days.Course: Dessert Cuisine: American Equipment: Large pot, 8-inch square pan, Microwave-safe bowl
Spiderweb Chocolate Fudge
This Spiderweb Chocolate Fudge adds a quick Halloween touch to a simple chocolate base. The creamy fudge comes together fast on the stove, then gets a white chocolate web piped on top for a festive look that still tastes like classic fudge.
It suits last-minute gatherings or after-school snacks when you want something sweet without much fuss. The result is smooth and rich with a slight snap from the hardened web on top.
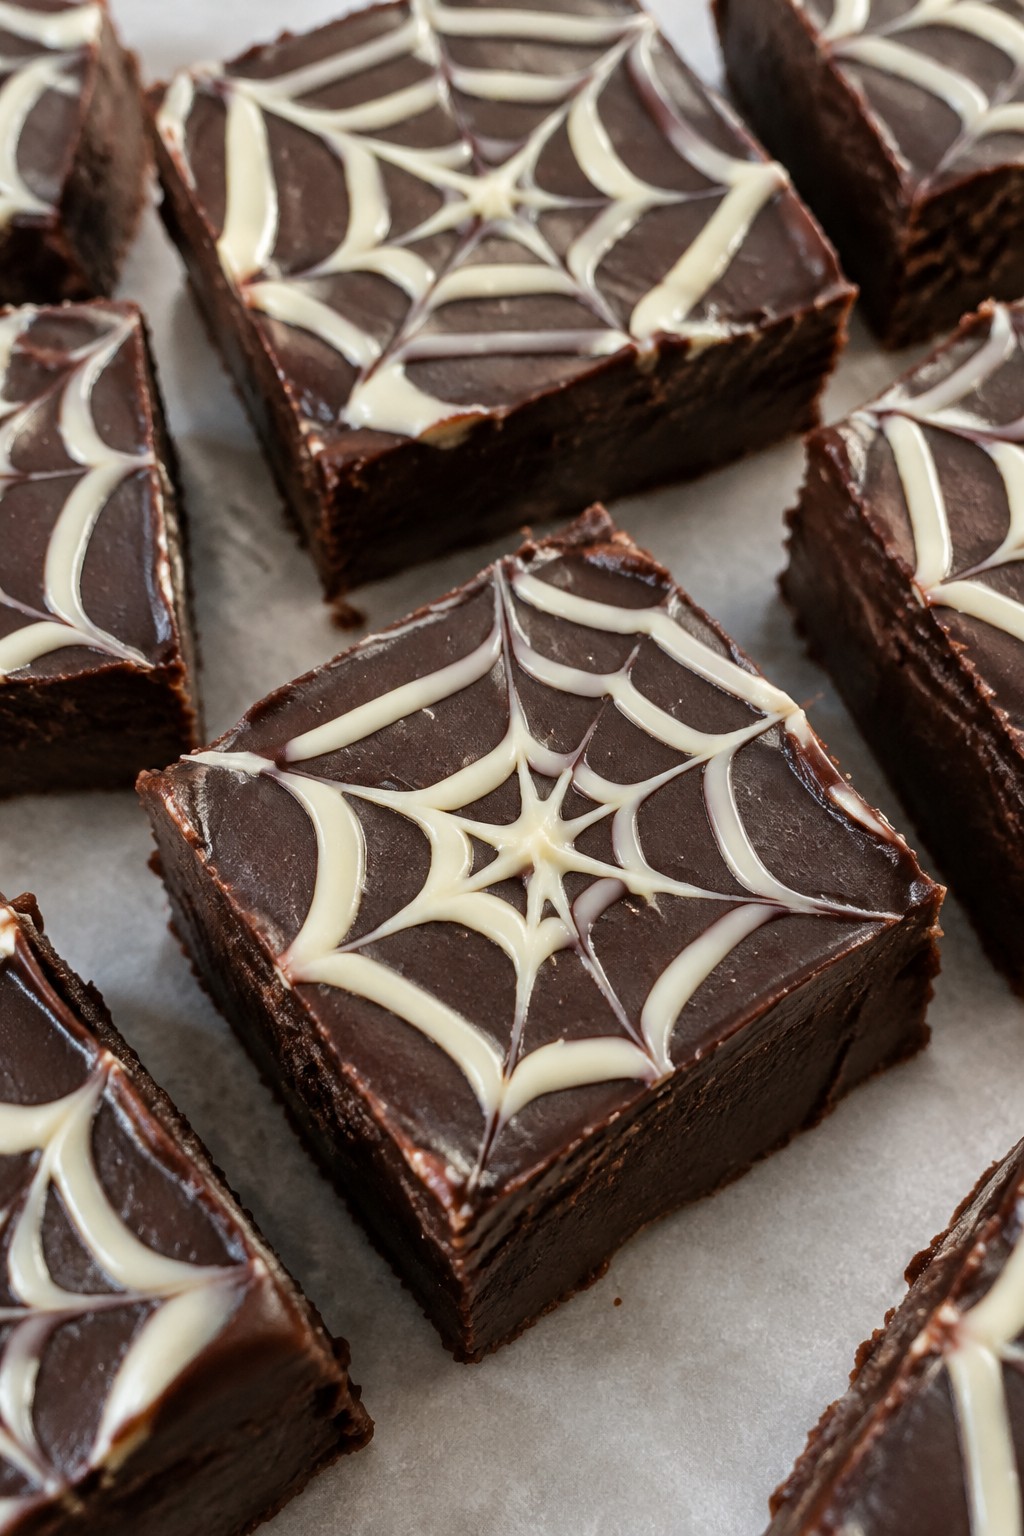
Serves 4 people.
Ingredients
- 1 1/2 cups semi-sweet chocolate chips
- 1/2 cup sweetened condensed milk
- 3 tablespoons unsalted butter
- 1 teaspoon vanilla extract
- 1/4 cup white chocolate chips
- Pinch of salt
Instructions
- Line a small loaf pan with parchment paper and set it aside.
- Combine the semi-sweet chocolate chips, sweetened condensed milk, and butter in a saucepan over low heat. Stir until the mixture melts into a smooth, thick fudge base.
- Remove the pan from heat and stir in the vanilla extract and salt until fully mixed.
- Pour the fudge into the prepared pan and smooth the top with a spatula.
- Melt the white chocolate chips in a microwave-safe bowl in short bursts, stirring between each until smooth. Spoon the melted white chocolate into a small zip-top bag, snip a tiny corner, and pipe circles and lines across the fudge to form a spiderweb pattern.
- Place the pan in the refrigerator for at least two hours until the fudge sets firmly. Cut into pieces once chilled.
Extra Tips
Pipe the white chocolate web while the fudge is still slightly soft so the lines sit neatly on top without sinking. Store leftovers in an airtight container in the fridge for up to five days. If the white chocolate thickens while piping, warm it for a few seconds to loosen it again.Course: Dessert Cuisine: American Equipment: Saucepan, Loaf Pan, Microwave-Safe Bowl, Spatula
No-Bake Pumpkin Spice Energy Balls
These no-bake pumpkin spice energy balls come together fast with pantry staples and give you a cozy fall snack without turning on the oven. They work well for quick Halloween party prep or after-school treats when you need something simple that still feels seasonal.
The texture is chewy with a light crunch from the oats, and the flavor leans warm from the pumpkin and spice blend with a touch of sweetness from honey.
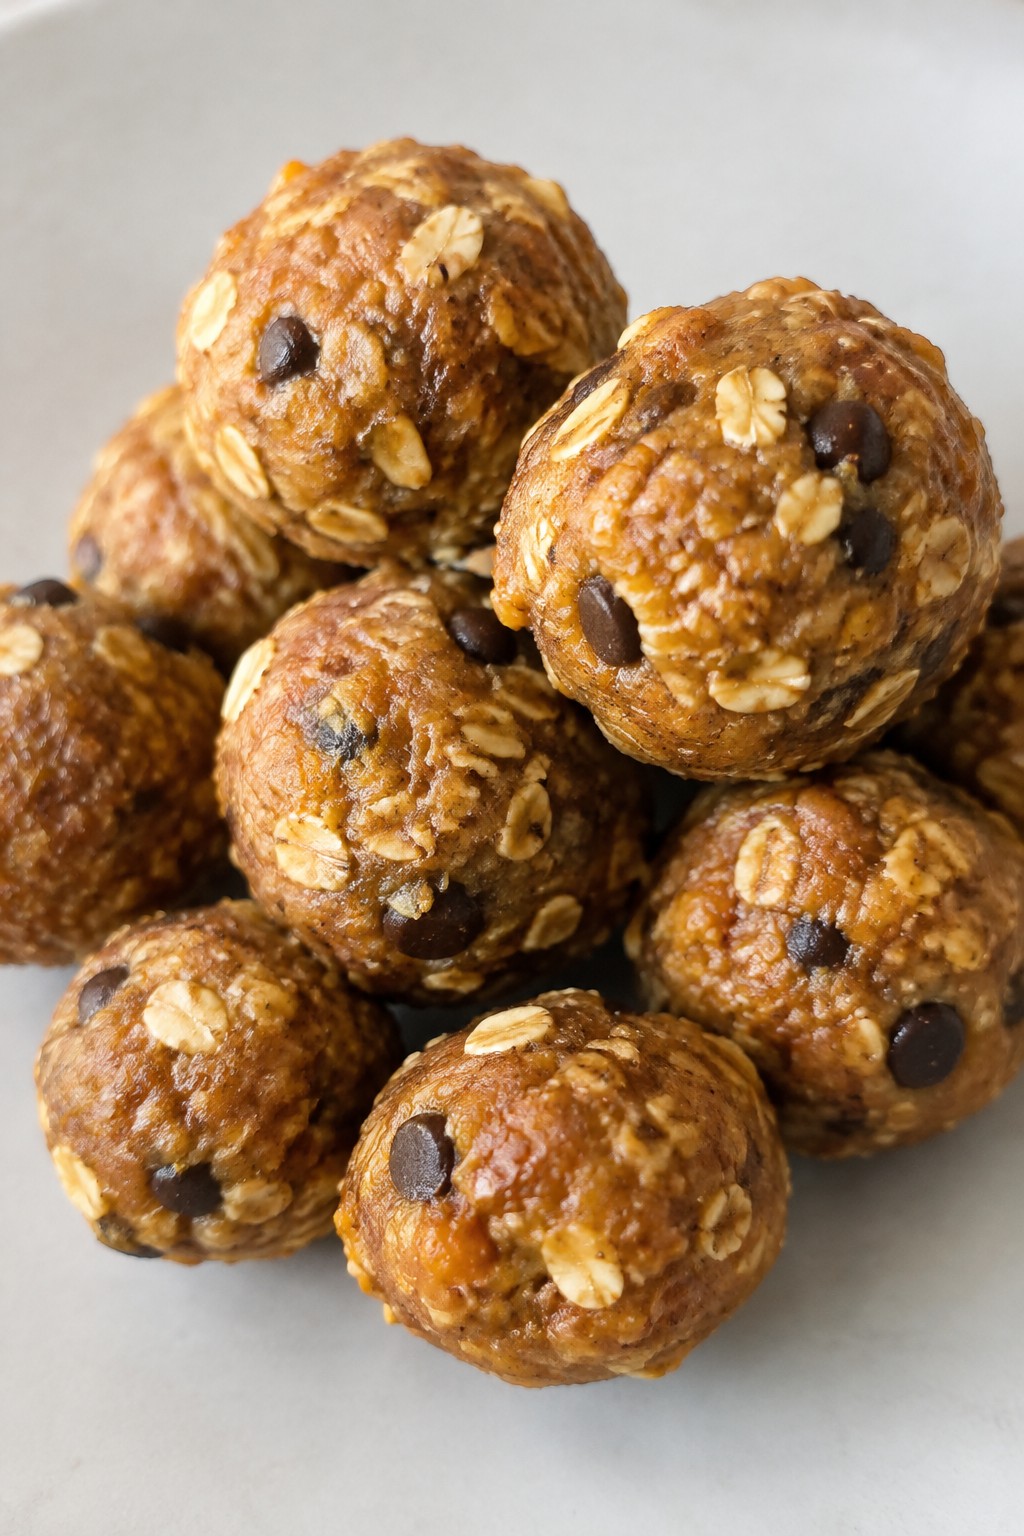
Serves 4 people.
Ingredients
- 1 cup rolled oats
- ½ cup pumpkin puree
- ¼ cup peanut butter
- 3 tablespoons honey
- 1 teaspoon pumpkin pie spice
- ½ teaspoon vanilla extract
- Pinch of salt
- 2 tablespoons mini chocolate chips
Instructions
- Add the rolled oats, pumpkin puree, peanut butter, honey, pumpkin pie spice, vanilla extract, and salt to a mixing bowl.
- Stir everything together until the mixture is evenly combined and starts to hold together.
- Fold in the mini chocolate chips until they are scattered throughout the dough.
- Scoop out small portions and roll them between your palms into balls about 1 inch wide.
- Place the finished balls on a plate or tray and chill them for 15 minutes to firm up before serving.
Extra Tips
Chill the balls longer if your kitchen is warm so they hold their shape better. Swap the peanut butter for almond butter if you prefer a milder taste, and store leftovers in an airtight container in the fridge for up to five days.Course: Snack Cuisine: American Equipment: Mixing Bowl, Spoon, Plate
Mummy Pretzel Rods with White Chocolate
These mummy pretzel rods bring a simple Halloween twist to a classic snack. They work well for last-minute parties or after-school activities with kids. The salty pretzel crunch balances the sweet white chocolate coating for an easy bite-sized treat.
The finished rods have a smooth outer layer with thin chocolate lines that mimic bandages. Candy eyes give each one a playful look that fits the holiday theme without extra effort.
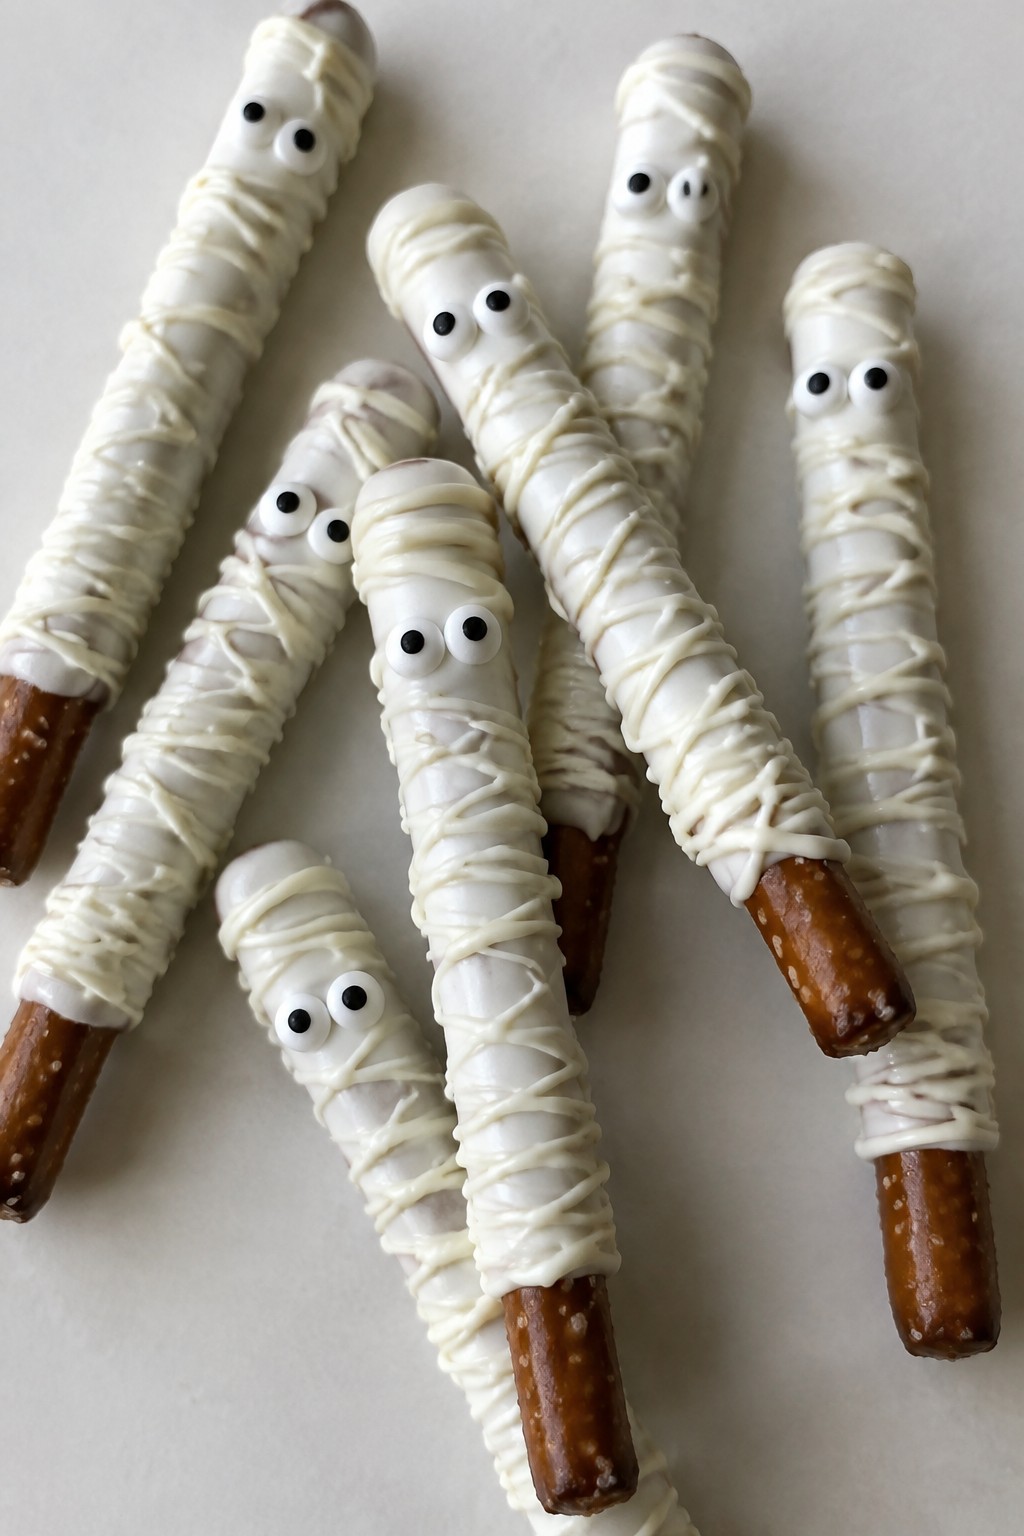
Serves 4 people.
Ingredients
- 12 pretzel rods
- 8 ounces white chocolate melting wafers
- 24 candy eyeballs
Instructions
- Line a baking sheet with parchment paper and set it aside.
- Place the white chocolate melting wafers in a microwave-safe bowl. Heat in 30-second intervals, stirring after each, until fully melted and smooth.
- Dip each pretzel rod into the melted white chocolate, covering about two-thirds of the rod and leaving the bottom third bare.
- Lay the dipped rods on the prepared baking sheet. Transfer the remaining melted chocolate to a small zip-top bag and snip off one corner.
- Pipe thin lines of chocolate across the coated portion of each rod to create the mummy bandage effect.
- Press two candy eyeballs onto the upper part of each rod while the chocolate is still soft. Let the rods set at room temperature until firm.
Extra Tips
Work quickly when adding the eyes so they stick before the chocolate hardens. If the melted wafers start to thicken during piping, warm the bag in the microwave for a few seconds. Keep the finished rods in an airtight container at room temperature to maintain the pretzel crunch.Course: Snack Cuisine: American Equipment: Microwave, Baking Sheet, Parchment Paper
Candy Corn Popcorn Snack Mix
This Candy Corn Popcorn Snack Mix turns basic popcorn into a quick Halloween snack. The blend of crunchy kernels, chewy candy corn, and a light white chocolate coating makes it easy to serve at parties or for an evening at home.
It works well when time is short but you still want something themed. The mix balances sweet and salty notes with plenty of texture from the popcorn and pretzels.
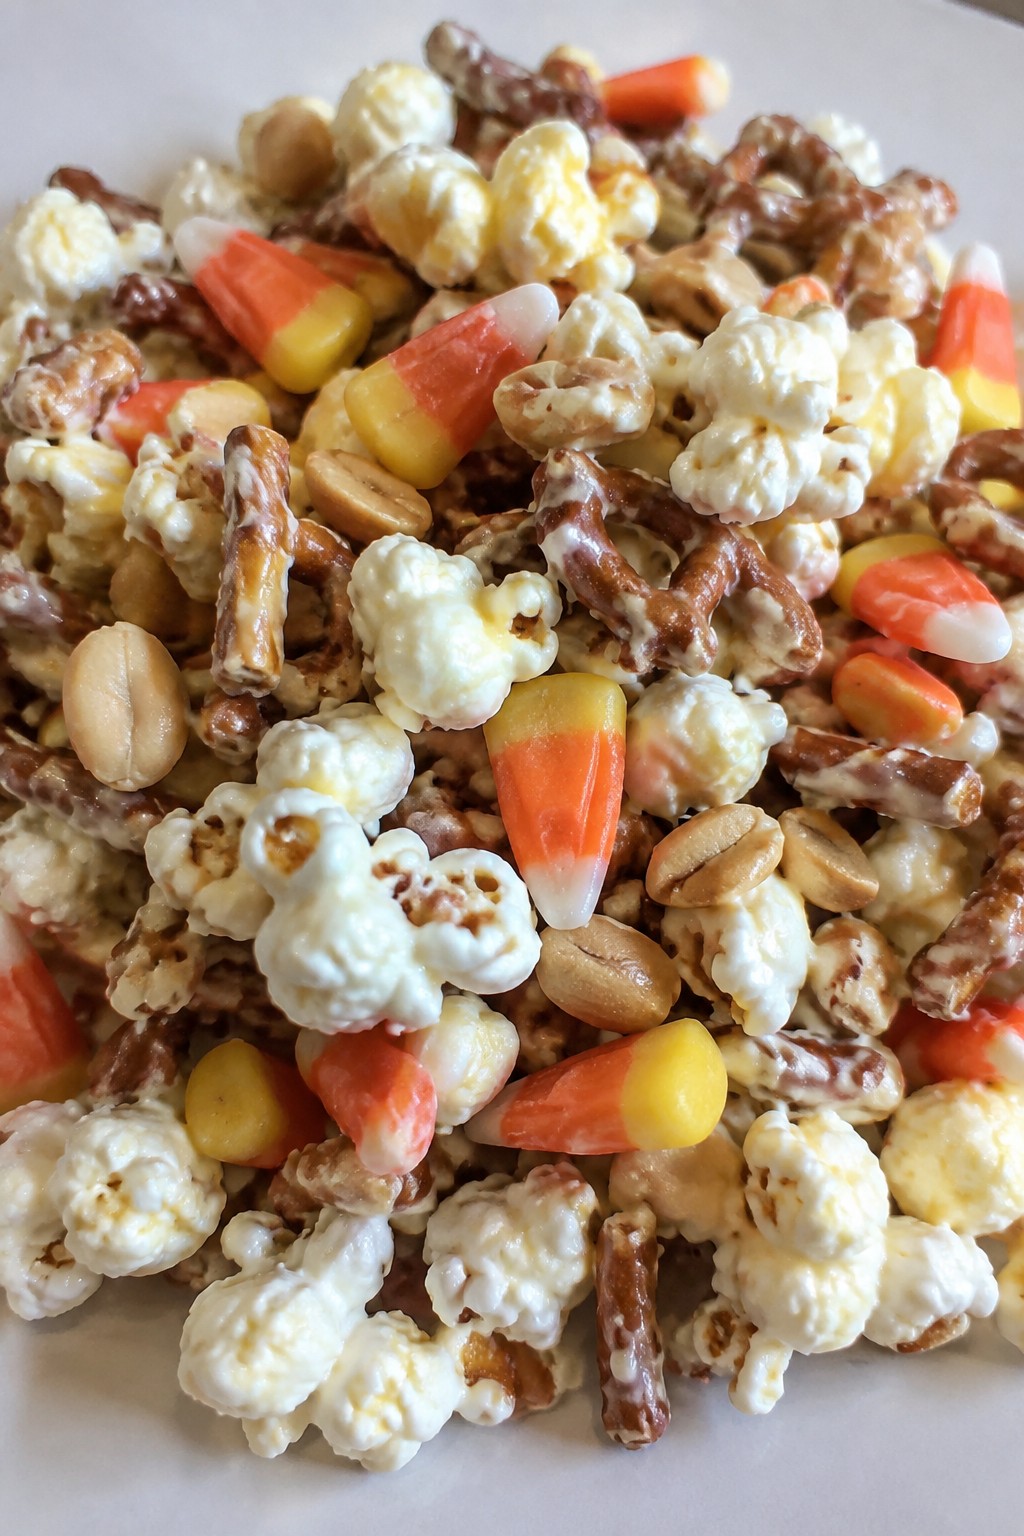
Serves 4 people.
Ingredients
- 8 cups popped popcorn
- 1 1/2 cups candy corn
- 1 cup pretzel pieces
- 1/2 cup roasted peanuts
- 4 ounces white chocolate
Instructions
- Place the popped popcorn in a large mixing bowl.
- Add the candy corn, pretzel pieces, and roasted peanuts.
- Break the white chocolate into pieces and melt it in the microwave using 20-second bursts, stirring after each until smooth.
- Drizzle the melted white chocolate over the popcorn mixture.
- Toss gently with a spatula until most pieces are lightly coated.
- Spread the mix onto a parchment-lined baking sheet and let it sit for 5 minutes to set before breaking into clusters.
Extra Tips
Use freshly popped popcorn so the mix stays light rather than dense. Work quickly once the white chocolate is melted to avoid clumping. Store leftovers in an airtight container at room temperature for up to two days.Course: Snack Cuisine: American Equipment: Large Mixing Bowl, Microwave, Baking Sheet, Parchment Paper
Witch Hat Ice Cream Cones
These Witch Hat Ice Cream Cones turn simple ingredients into a fun Halloween treat. The pointed cones form the hat shape while chocolate and cookies create the brim and finish. They work well for parties or quick after-school snacks because they need no baking and come together in minutes. The result gives a mix of crunchy cone, smooth ice cream, and firm chocolate coating.
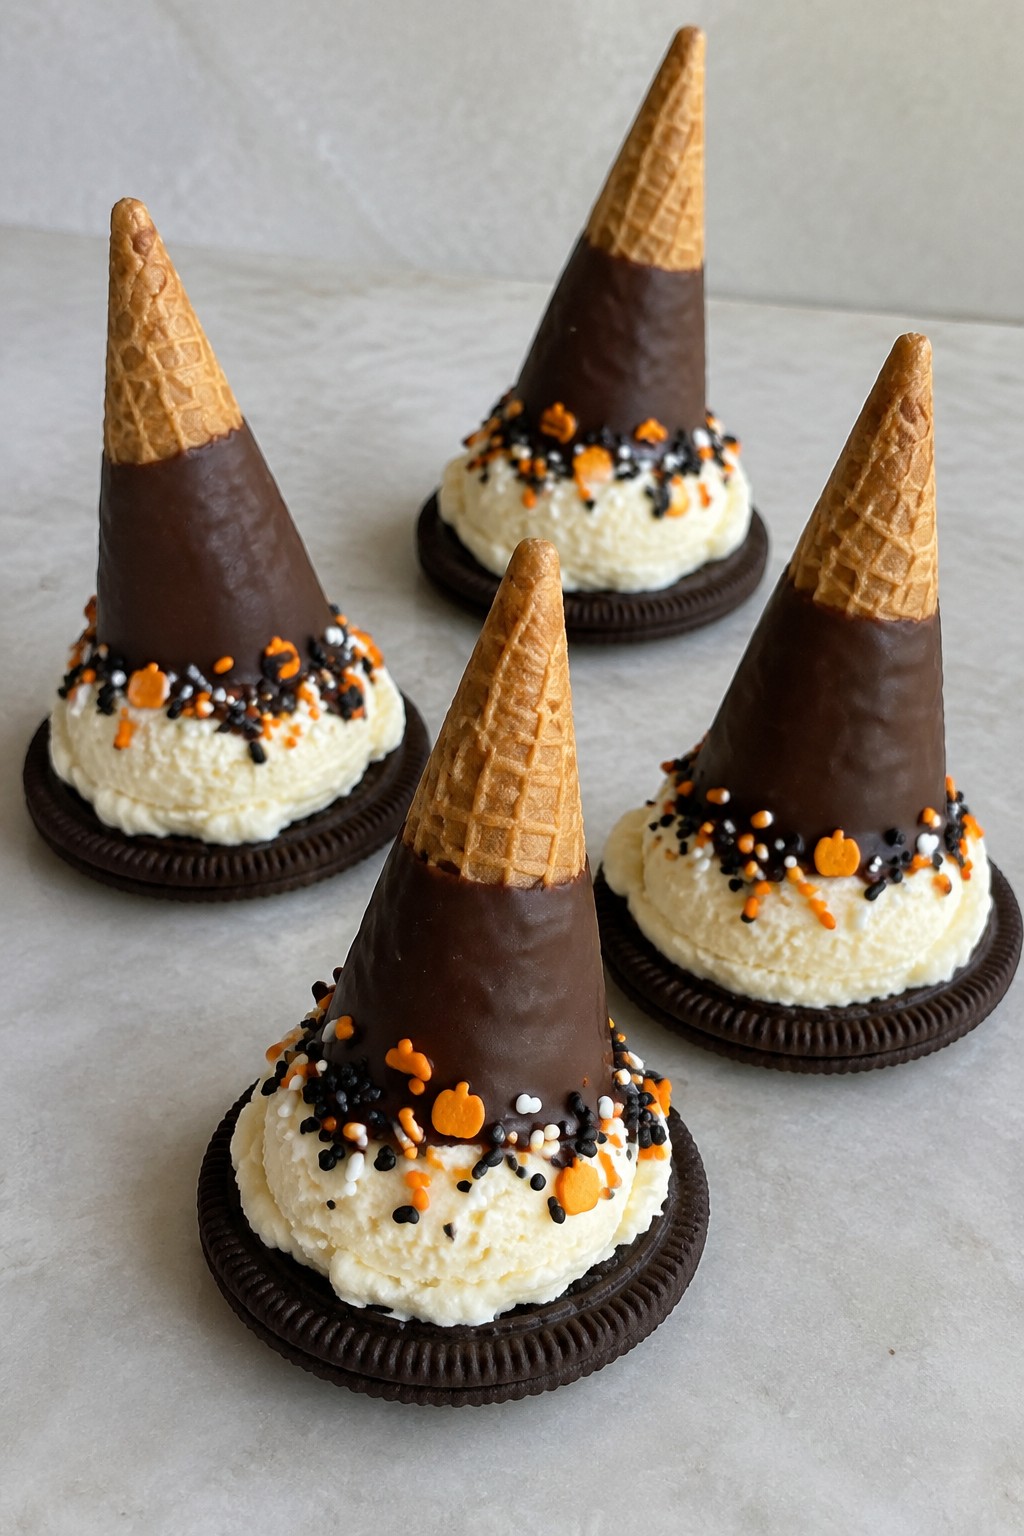
Serves 4 people.
Ingredients
- 4 sugar ice cream cones
- 1 cup semisweet chocolate chips
- 1 tablespoon coconut oil
- 4 Oreo cookies
- 4 scoops vanilla ice cream
- 2 tablespoons Halloween sprinkles
Instructions
- Line a baking sheet with parchment paper and set it aside.
- Place the chocolate chips and coconut oil in a microwave-safe bowl. Heat in 30-second intervals, stirring between each, until the mixture is fully melted and smooth.
- Dip the open end of each sugar cone into the melted chocolate, then immediately press it onto the center of an Oreo cookie to form the hat base. Set each assembled hat on the prepared baking sheet.
- Place the baking sheet in the refrigerator for 10 minutes to let the chocolate harden.
- Once set, scoop one portion of vanilla ice cream onto each cookie base and top with the chocolate-dipped cone hat.
- Add a light sprinkle of Halloween sprinkles around the brim before serving.
Extra Tips
Keep the ice cream in the freezer until right before assembly so the scoops hold their shape. If the chocolate thickens while working, warm it briefly in the microwave for a few seconds. These cones taste best served right after assembly, but you can prepare the chocolate-dipped hat bases ahead and store them in the fridge until needed.Course: Dessert Cuisine: American Equipment: Microwave-safe bowl, Baking sheet, Ice cream scoop
Frankenstein Brownie Squares
These Frankenstein Brownie Squares bring a playful Halloween touch to any gathering without extra fuss. The squares use a basic chocolate base that bakes fast, then get a quick layer of green frosting and simple face details. They offer a fudgy center with a sweet, creamy top that holds up well for parties or after-school snacks.
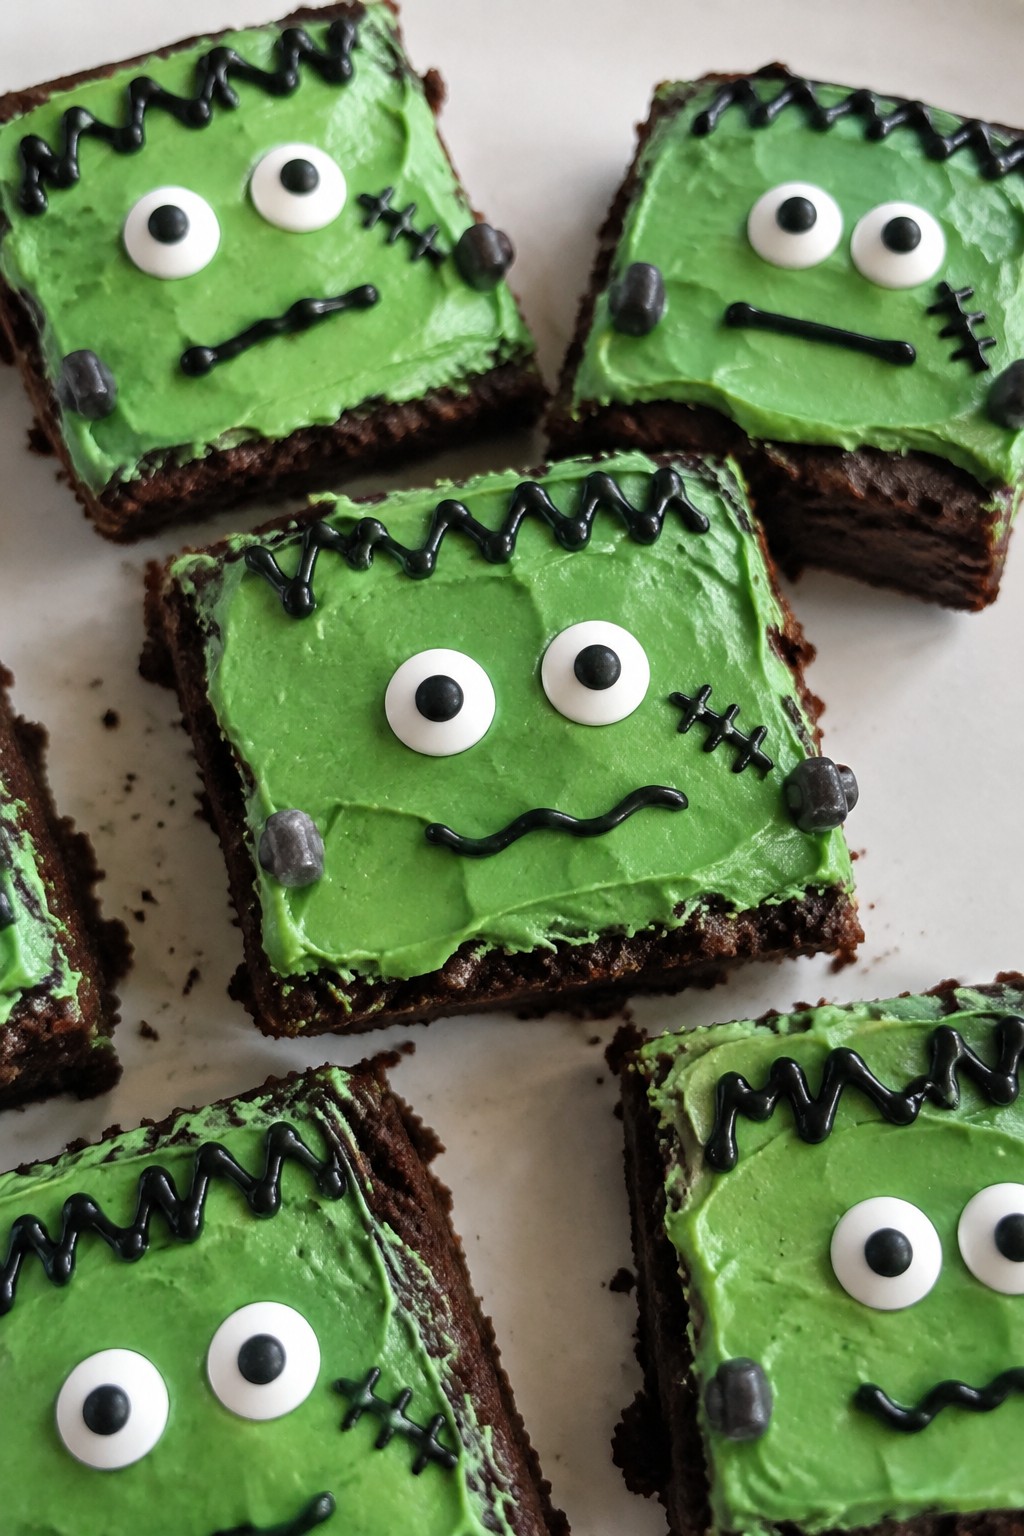
Serves 4 people.
Ingredients
- 1/2 cup unsalted butter, melted
- 1 cup granulated sugar
- 2 large eggs
- 1/2 cup all-purpose flour
- 1/3 cup cocoa powder
- 1 teaspoon vanilla extract
- 1/2 cup green frosting
- 8 candy eyes
- Black decorating gel
Instructions
- Preheat the oven to 350 degrees and line a small square pan with parchment paper.
- Stir the melted butter and sugar together in a mixing bowl until smooth.
- Add the eggs and vanilla extract, then mix until fully combined.
- Stir in the flour and cocoa powder until no dry streaks remain.
- Spread the batter evenly in the prepared pan and bake for 20 minutes.
- Let the brownies cool completely in the pan before lifting them out.
- Spread the green frosting over the top of the cooled brownies.
- Cut the frosted brownies into four squares.
- Place two candy eyes on each square and draw a mouth with the black decorating gel.
Extra Tips
Use a thicker frosting so the candy eyes stay in place without sliding. If the brownies feel too soft after cutting, chill them for 10 minutes to firm up the frosting layer before adding the faces. Store any leftovers in a single layer in an airtight container at room temperature for up to two days.Course: Dessert Cuisine: American Equipment: Mixing Bowl, Baking Pan, Oven
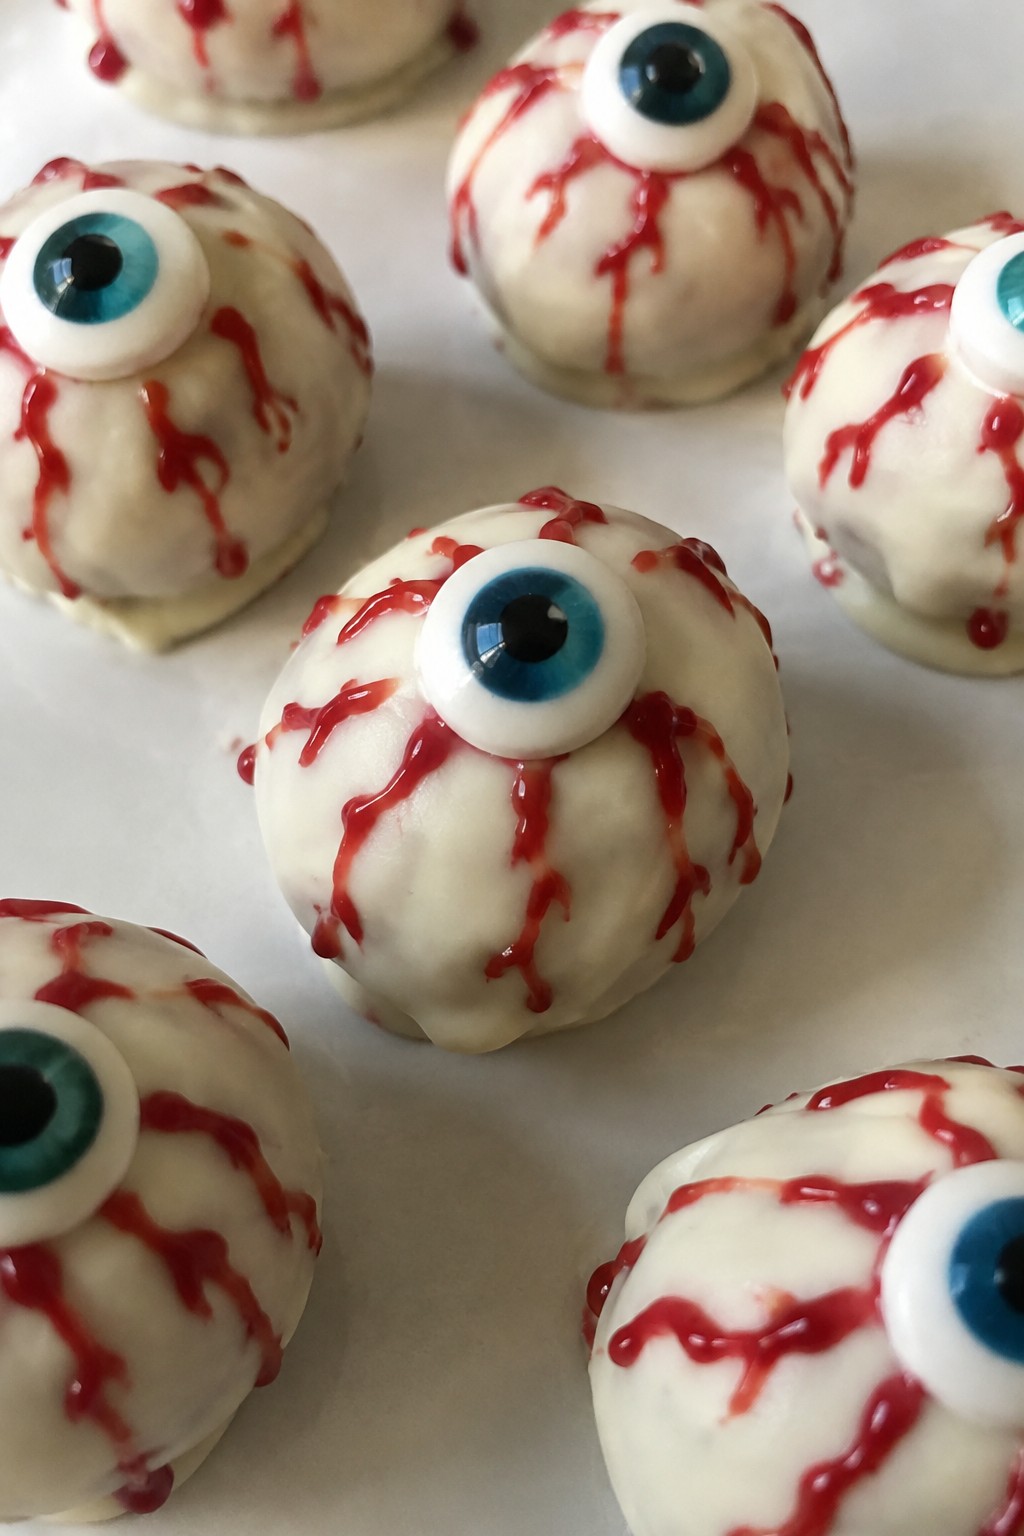
Bloody Eyeball Strawberry Truffles
These Bloody Eyeball Strawberry Truffles add a playful Halloween touch to a simple strawberry treat. They suit quick parties or school events since they require no baking and use basic ingredients most people keep on hand.
The center stays soft and fruity from fresh strawberries blended with cream cheese. White chocolate gives a mild sweetness on the outside, while the red gel and candy eye create the eyeball effect without extra fuss.
Serves 4 people.
Ingredients
- 1 cup strawberries, hulled and chopped
- 4 ounces cream cheese, softened
- 1 cup powdered sugar
- 8 ounces white chocolate, chopped
- 2 tablespoons red decorating gel
- 8 candy eyeballs
Instructions
- Place the chopped strawberries in a mixing bowl and mash them with a fork until they form a rough puree.
- Add the softened cream cheese and powdered sugar to the bowl. Stir until the mixture becomes smooth and holds together.
- Cover the bowl and chill the mixture in the refrigerator for 20 minutes to firm up.
- Scoop out the mixture and roll it into 8 small balls. Place the balls on a baking sheet lined with parchment paper.
- Melt the white chocolate in a microwave-safe bowl in 30-second bursts, stirring between each until smooth.
- Dip each chilled ball into the melted white chocolate to coat it fully. Return the coated truffles to the baking sheet.
- Use the red decorating gel to draw thin lines around each truffle for a bloody look. Press one candy eyeball onto the top of each truffle while the chocolate is still soft.
Extra Tips
Keep the truffles in the refrigerator until serving so the white chocolate shell stays firm. If the strawberry mixture feels too soft after chilling, add an extra spoonful of powdered sugar before rolling. The red gel works best when applied in short strokes rather than one long line, which helps it look like veins without running.Course: Dessert Cuisine: American Equipment: Mixing bowl, Fork, Baking sheet, Microwave-safe bowl
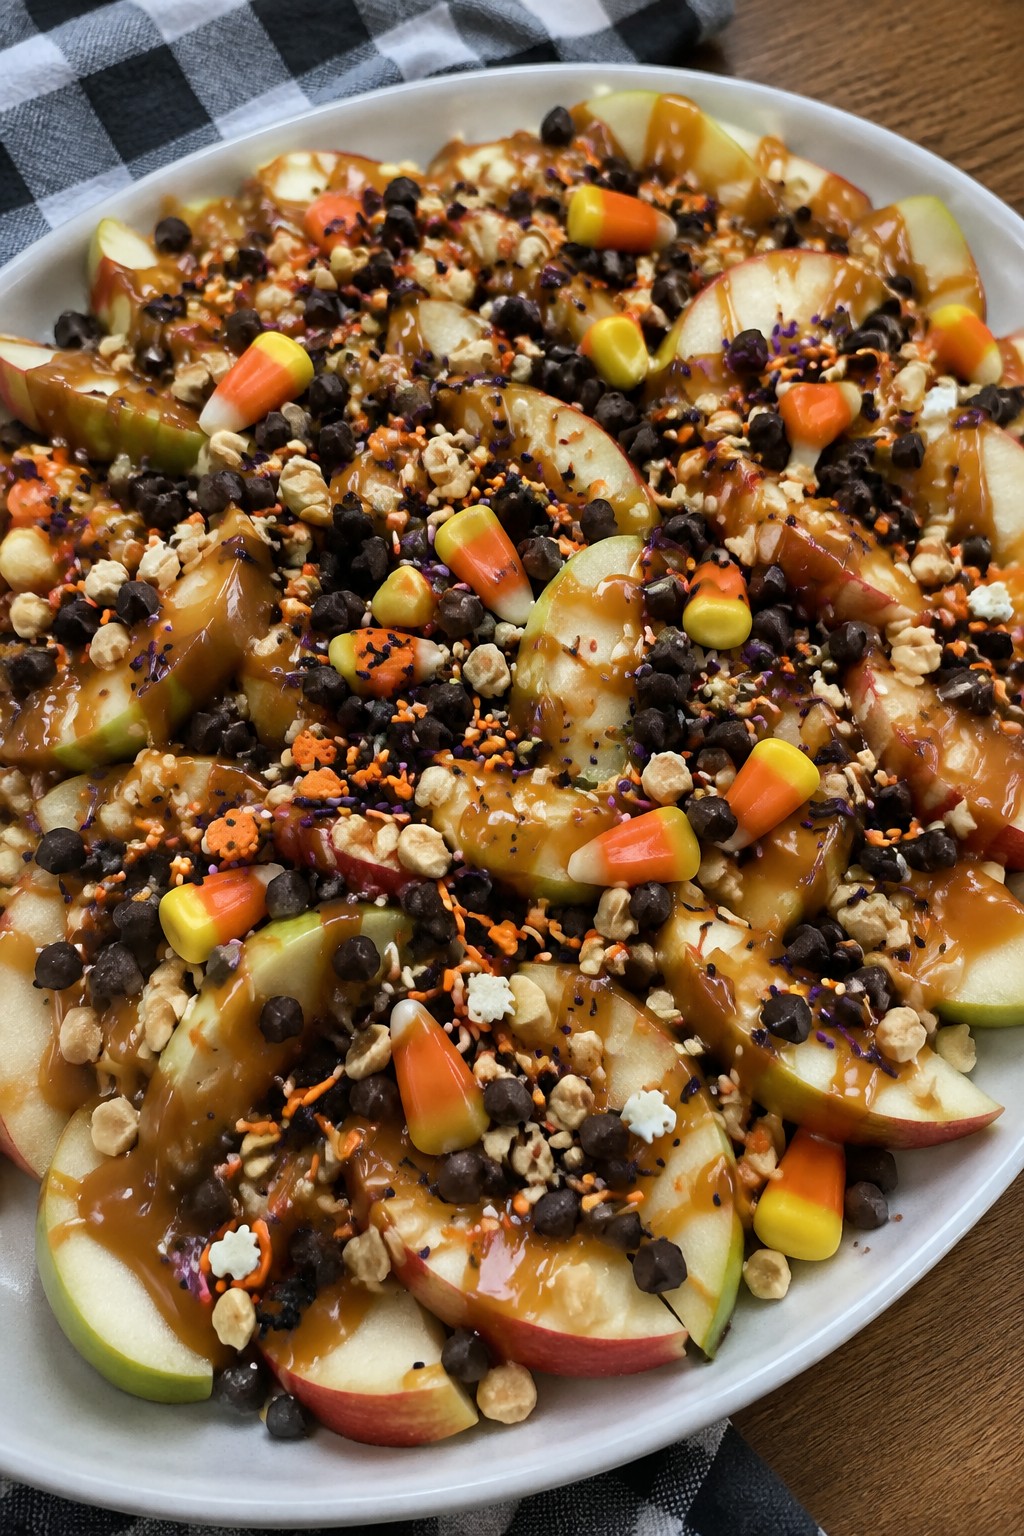
Caramel Apple Nachos with Toppings
This treat turns classic caramel apples into a shareable platter that comes together fast. It works well for Halloween parties or after-school snacks when you need something sweet without much effort.
The crisp apple slices pair with gooey caramel and a mix of crunchy and chewy toppings. Each bite gives a balance of tart fruit and rich sweetness that feels festive without extra work.
Serves 4 people.
Ingredients
- 4 medium apples, cored and sliced
- 1/2 cup caramel sauce
- 1/4 cup mini chocolate chips
- 2 tablespoons chopped peanuts
- 1/4 cup candy corn
- 2 tablespoons Halloween sprinkles
Instructions
- Core and slice the apples into thin wedges. Arrange them in a single layer on a large serving platter.
- Place the caramel sauce in a microwave-safe bowl and heat it for 15 to 20 seconds until it is pourable.
- Drizzle the warmed caramel evenly over the apple slices.
- Scatter the mini chocolate chips, chopped peanuts, candy corn, and Halloween sprinkles across the top.
Extra Tips
Serve the nachos right away so the apples stay crisp. Tart varieties like Granny Smith hold up best against the sweet toppings. If the caramel thickens, warm it again for a few seconds before drizzling leftovers.Course: Dessert Cuisine: American Equipment: Knife, Cutting board, Microwave-safe bowl, Serving platter
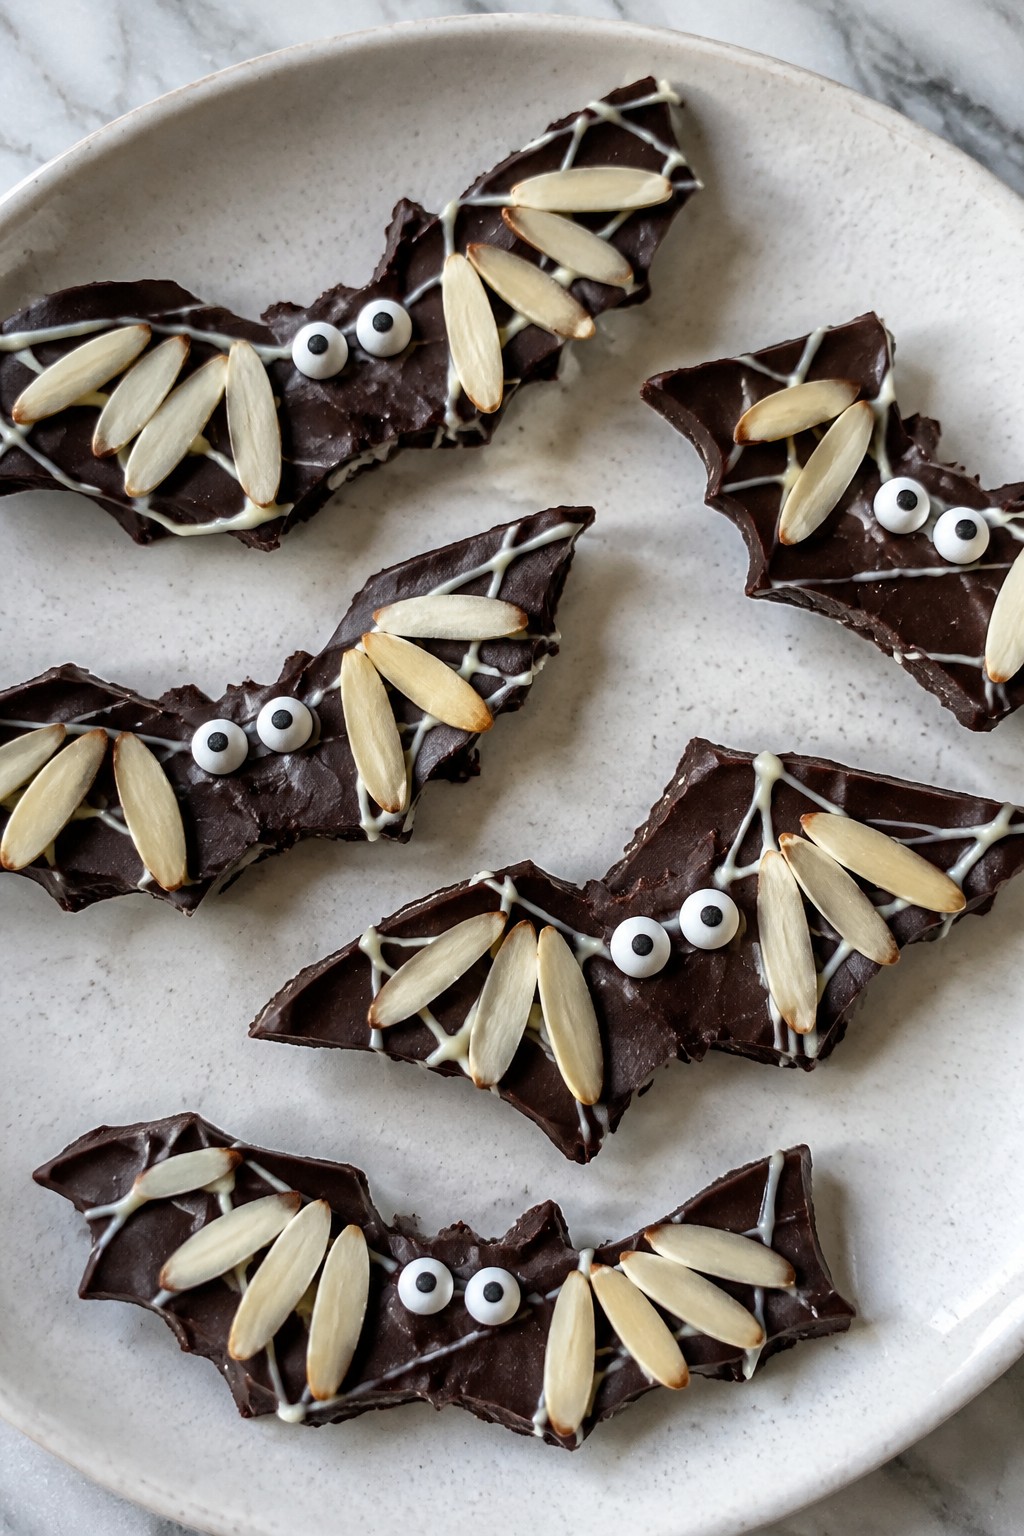
Bat Wing Chocolate Bark
This chocolate bark brings a simple spooky element to any Halloween gathering. It sets up quickly in the fridge and breaks into irregular pieces that look like bat wings once the almonds are arranged. The dark chocolate base tastes rich and slightly bitter while the white chocolate drizzle adds a touch of sweetness and the almonds give a light crunch.
Serves 4 people.
Ingredients
- 8 ounces dark chocolate chips
- 2 ounces white chocolate chips
- 1/4 cup slivered almonds
- 12 small candy eyes
Instructions
- Line a baking sheet with parchment paper and set it aside.
- Place the dark chocolate chips in a microwave-safe bowl and heat in 30-second bursts, stirring after each, until fully melted and smooth.
- Pour the melted dark chocolate onto the prepared parchment and spread it into a thin, even layer about 8 by 10 inches.
- Melt the white chocolate chips the same way in a clean bowl, then drizzle it lightly over the dark chocolate.
- While the chocolate is still soft, press pairs of slivered almonds into the surface to form wing shapes and add two candy eyes to each wing section.
- Refrigerate the bark for 20 minutes until firm, then break it into pieces along the almond shapes.
Extra Tips
Break the bark gently along the almond lines so each piece keeps its wing look. Store leftovers in an airtight container in the fridge to prevent the chocolate from softening. If you need a nut-free version, skip the almonds and use thin strips of black licorice instead. Course: Dessert Cuisine: American Equipment: Microwave-safe bowl, Baking sheet, Parchment paper
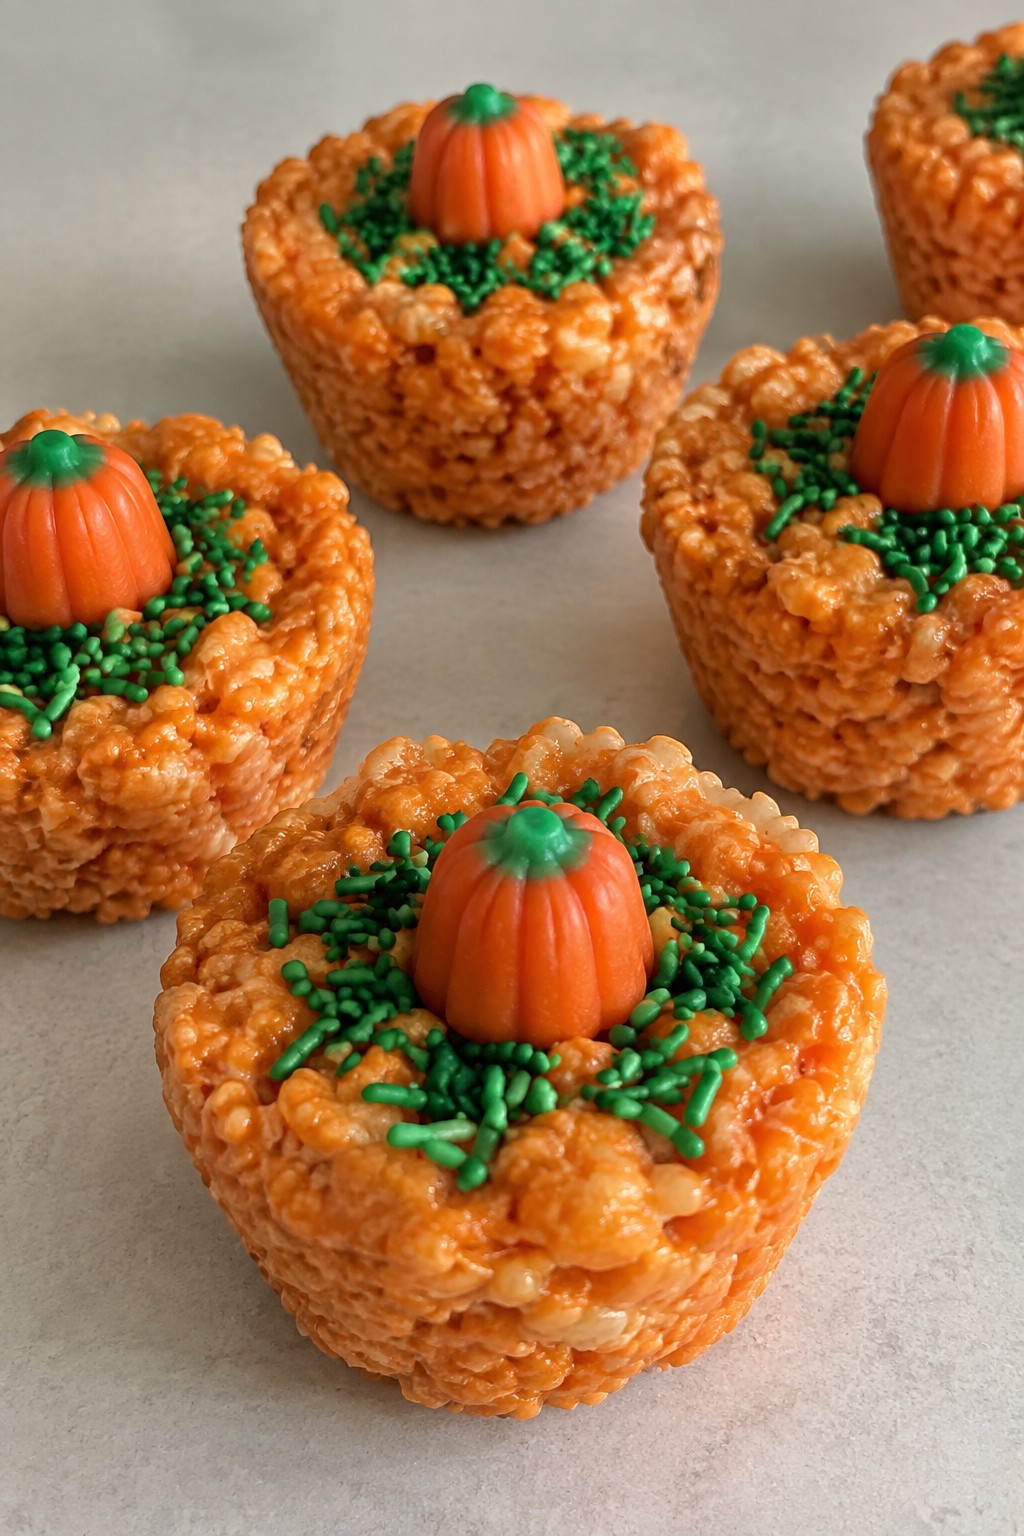
Pumpkin Patch Rice Krispie Cups
These cups turn classic Rice Krispie treats into a simple Halloween snack. They work well for last-minute parties or school events because they come together fast and need only a few ingredients. Each cup has a chewy, crispy texture with a mild sweet taste and bright orange color, finished with candy pumpkins on top to suggest a tiny patch.
Serves 4 people.
Ingredients
- 3 tablespoons butter
- 4 cups mini marshmallows
- 6 cups Rice Krispies cereal
- 1/2 teaspoon orange food coloring
- 12 candy pumpkins
- 2 tablespoons green sprinkles
Instructions
- Grease four muffin cups or line them with paper liners and set aside.
- In a large saucepan over low heat, melt the butter. Add the mini marshmallows and stir until fully melted and smooth.
- Remove the pan from heat and stir in the orange food coloring until the mixture is evenly tinted.
- Add the Rice Krispies cereal to the marshmallow mixture and stir quickly until every piece is coated.
- Divide the mixture among the four prepared muffin cups. Press it down firmly with a greased spoon or spatula to form compact cups.
- While the treats are still warm, press three candy pumpkins into the top of each cup and scatter green sprinkles over the surface.
Extra Tips
Press the mixture firmly while warm so the cups hold their shape once cooled. Add the candy pumpkins and sprinkles right away so they stick without extra icing. Store leftovers in an airtight container at room temperature for up to two days.Course: Dessert Cuisine: American Equipment: Large saucepan, Muffin tin, Mixing spoon
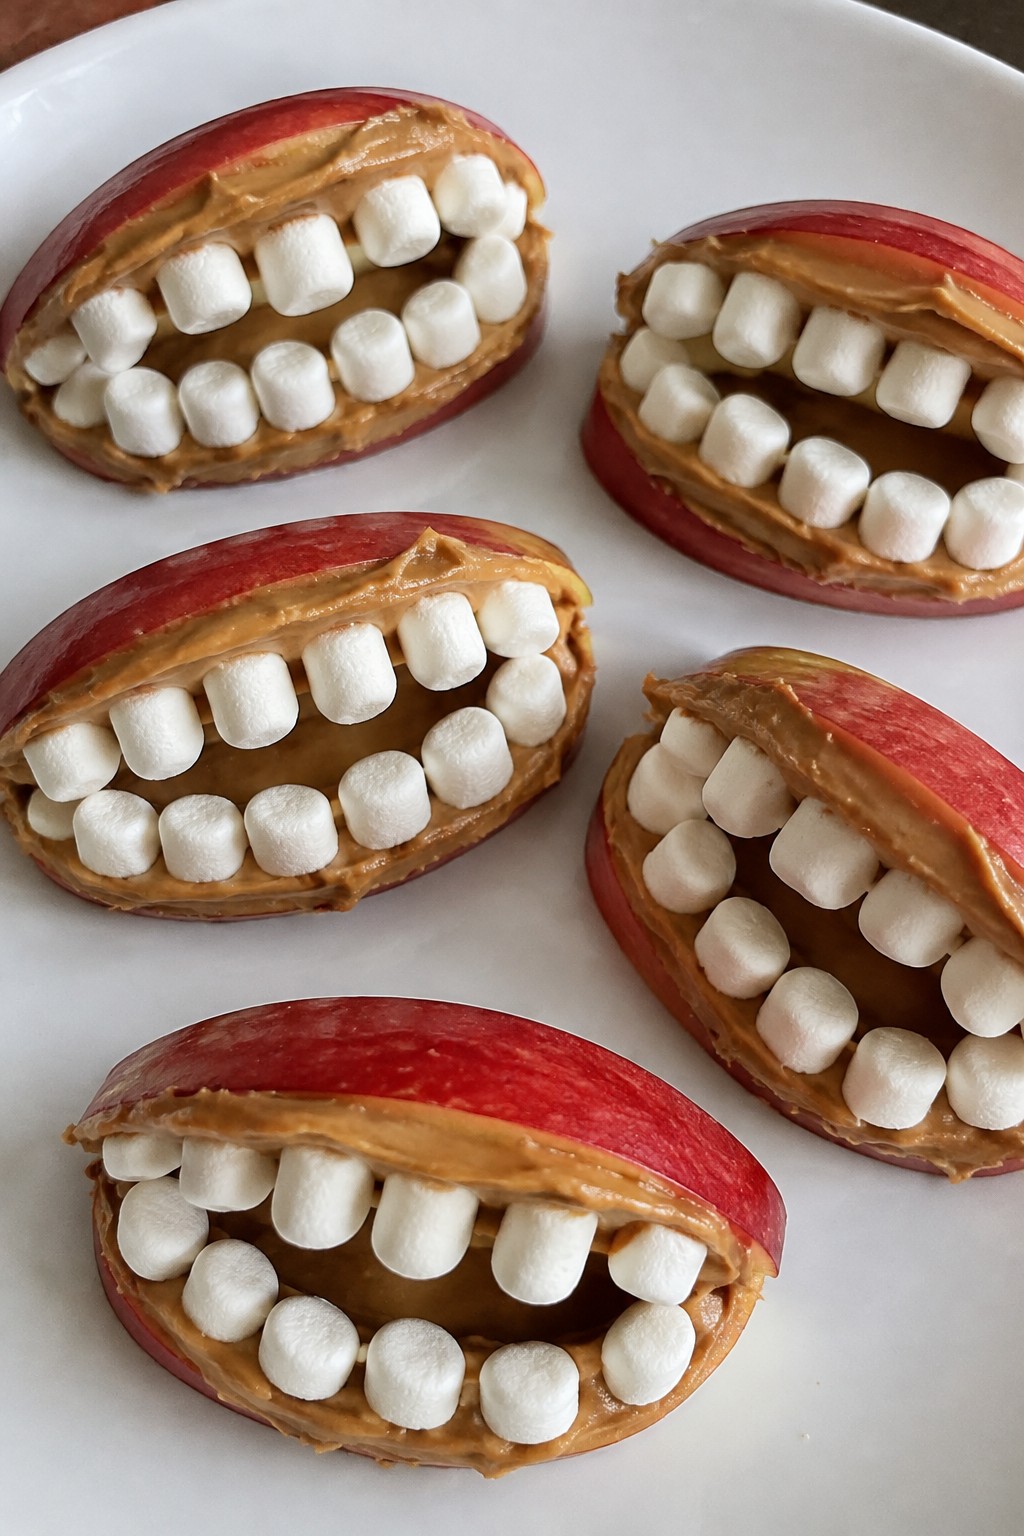
Monster Mouth Apple Slices
These apple slices come together fast with just a few ingredients and no baking required. They make a fun, hands-on treat for Halloween parties or after-school snacks when you want something quick that kids can help assemble.
The result is crisp apple with a creamy layer of peanut butter and chewy marshmallow pieces that look like teeth. The combination gives a nice mix of sweet, tart, and nutty flavors in every bite.
Serves 4 people.
Ingredients
- 2 large apples
- 1/4 cup creamy peanut butter
- 1/2 cup mini marshmallows
Instructions
- Wash the apples and cut each one into 8 wedges. Remove the core from each wedge.
- Spread a thin layer of peanut butter on one cut side of 8 wedges.
- Press mini marshmallows into the peanut butter on each wedge in a single row to form teeth.
- Place a second wedge on top of each prepared wedge, peanut butter side down, to create an open mouth shape.
Extra Tips
Use firm apples like Honeycrisp or Granny Smith so the wedges stay crisp once assembled. If the peanut butter is too thick to spread easily, warm it slightly in the microwave for 10 seconds. These are best eaten the same day since the apples can brown and the marshmallows soften over time.Course: Snack Cuisine: American Equipment: Knife, Cutting board, Spoon
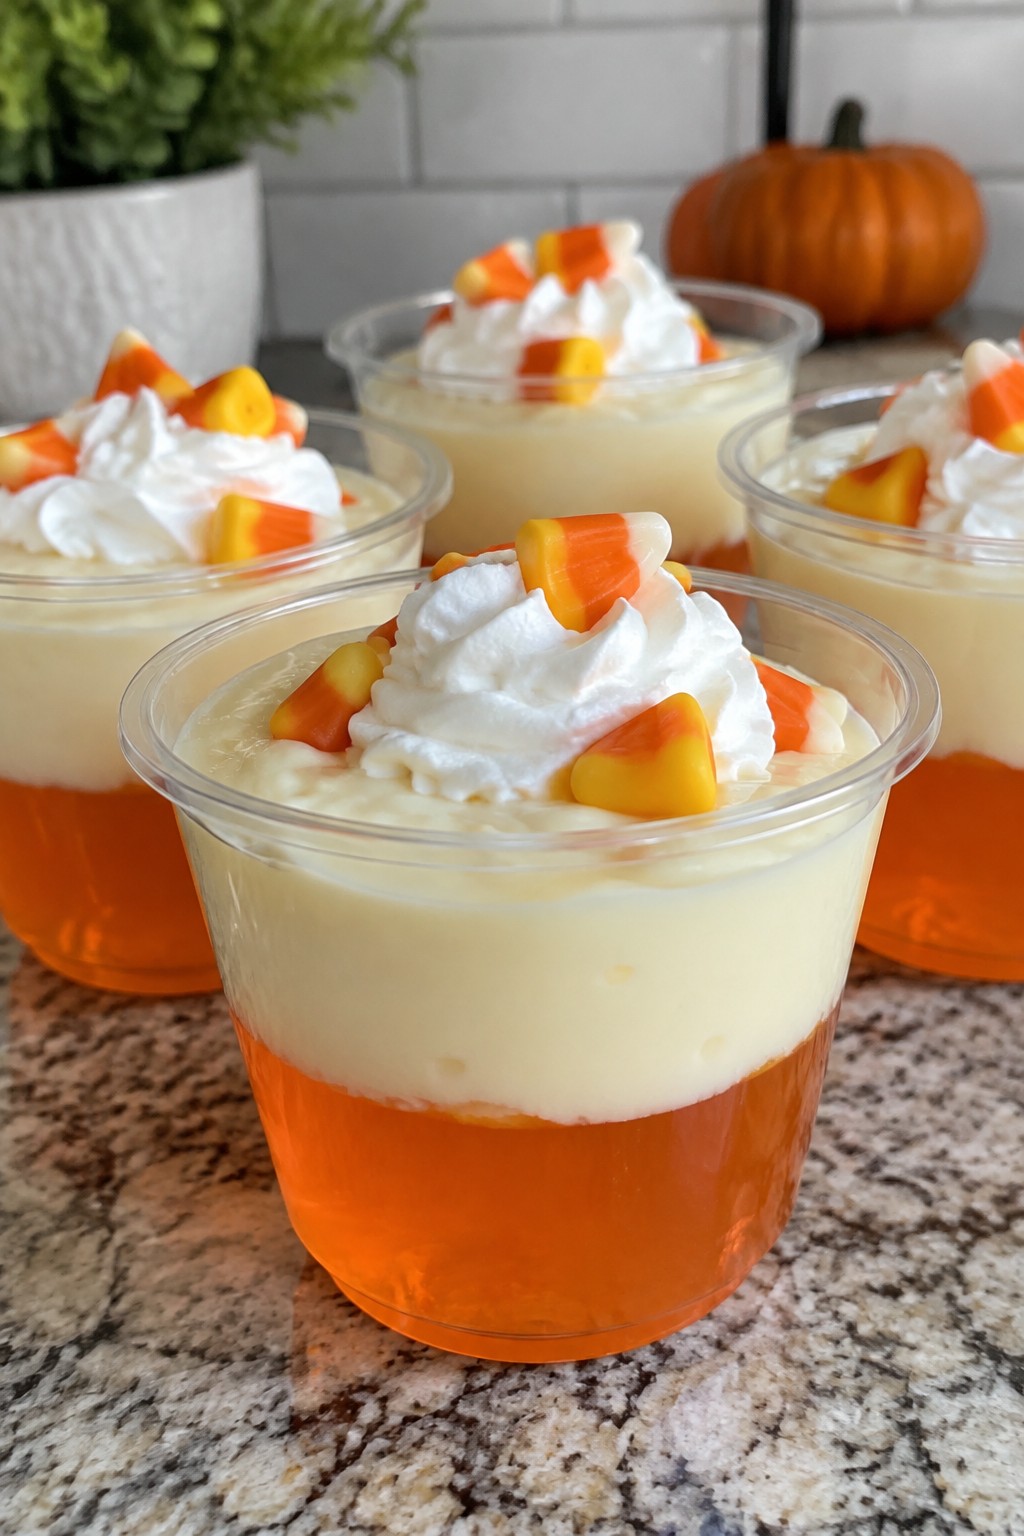
Orange Creamsicle Halloween Jello Cups
These cups capture the bright orange and vanilla flavors of a classic creamsicle in a fun, wobbly form. They come together with minimal effort and chill in the fridge, making them a handy choice for last-minute Halloween gatherings or after-school snacks. The layers stay light and creamy with a gentle citrus note that feels festive without any complicated steps.
Serves 4 people.
Ingredients
- 1 (3 oz) package orange gelatin
- 1 cup boiling water
- 1 cup cold water
- 1 (3.4 oz) package instant vanilla pudding mix
- 2 cups cold milk
- Whipped topping
- Candy corn
Instructions
- Pour the orange gelatin into a medium bowl and add the boiling water. Stir until the gelatin fully dissolves.
- Stir in the cold water, then divide the mixture evenly among four clear cups.
- Place the cups in the refrigerator and chill for at least two hours until the orange layer is firm.
- In a separate bowl, whisk the instant vanilla pudding mix with the cold milk until smooth and thickened.
- Spoon the vanilla pudding over the set orange layer in each cup to create the creamsicle effect.
- Return the cups to the refrigerator for another 30 minutes to let the pudding layer set.
- Top each cup with a dollop of whipped topping and a few pieces of candy corn before serving.
Extra Tips
Chill the cups on a tray so they stay level in the fridge. If the pudding thickens too quickly while mixing, add an extra splash of milk to loosen it for smoother spreading. Swap the candy corn for orange sprinkles if you prefer less sweetness on top. Leftovers keep covered in the refrigerator for up to two days.Course: Dessert Cuisine: American Equipment: Mixing bowls, Whisk, Refrigerator
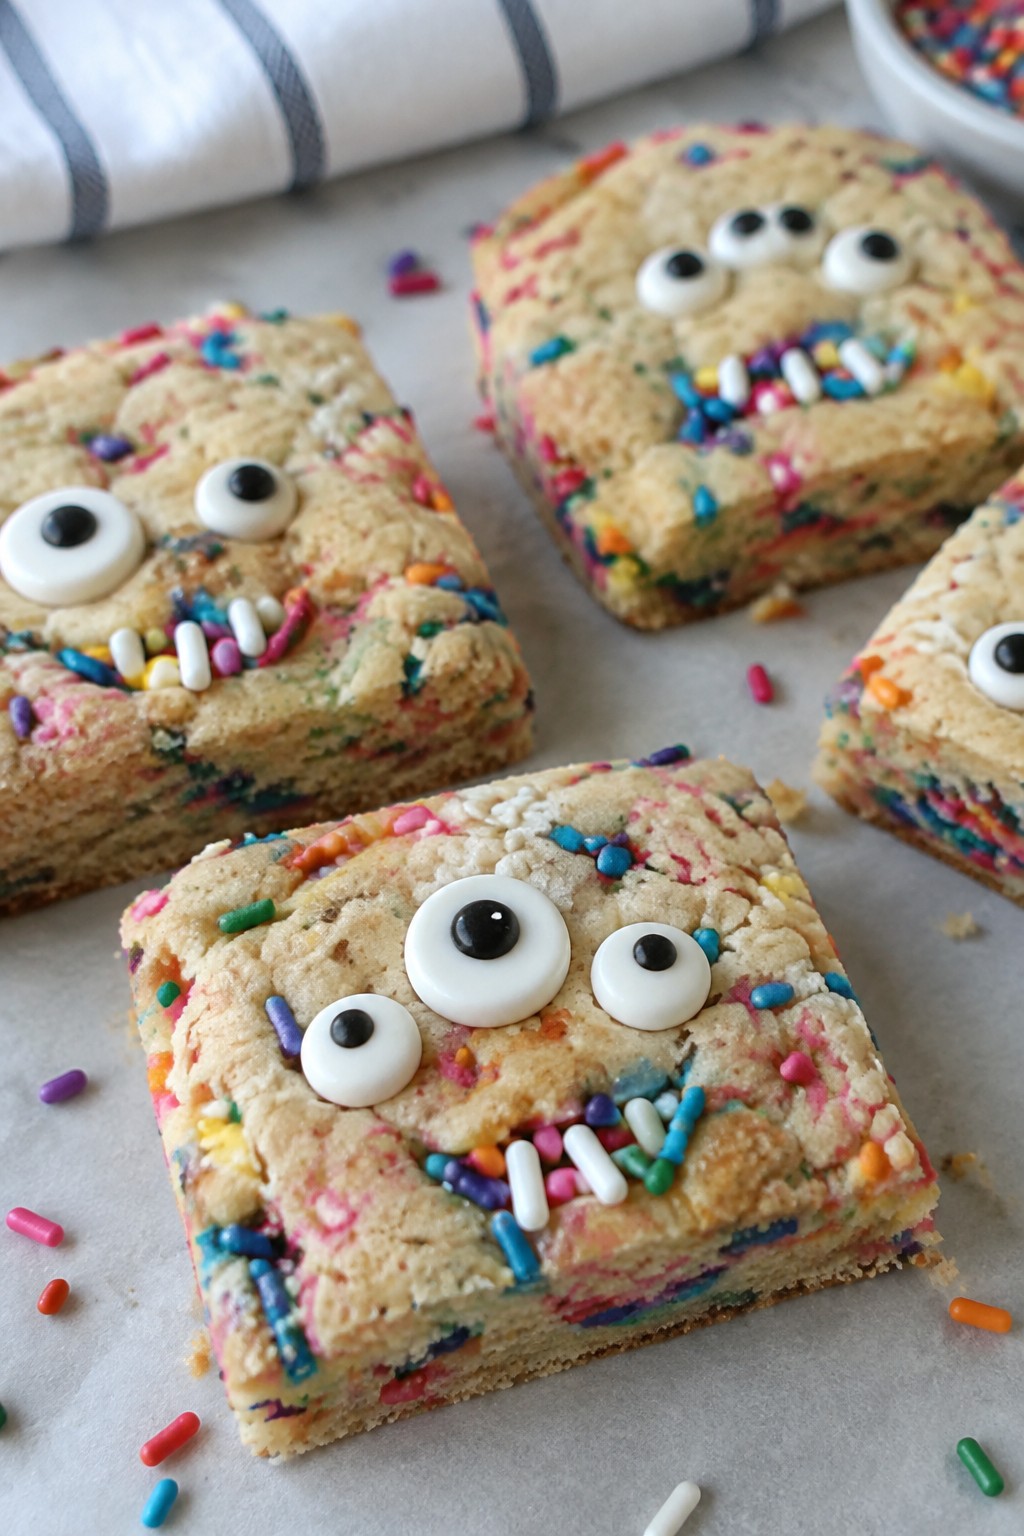
Sprinkle Monster Sugar Cookie Bars
These sprinkle monster sugar cookie bars make a fun addition to any Halloween table. They bake up soft and chewy with a sweet vanilla flavor that pairs well with the bright sprinkles mixed right into the dough.
The bars come together in one bowl and need only a short bake time, which makes them useful when you want something festive without much effort. Candy eyes added on top give them a playful monster look that fits the season.
Serves 4 people.
Ingredients
- 1/2 cup unsalted butter, softened
- 1/2 cup granulated sugar
- 1 large egg
- 2 teaspoons vanilla extract
- 1 1/4 cups all-purpose flour
- 1/2 teaspoon baking powder
- 1/4 teaspoon salt
- 1/2 cup rainbow sprinkles
- 8 candy eyes
Instructions
- Preheat the oven to 350 degrees and line a small square baking pan with parchment paper.
- In a mixing bowl, beat the softened butter and sugar together until light and creamy.
- Add the egg and vanilla extract, then mix until fully combined.
- Stir in the flour, baking powder, and salt until a soft dough forms.
- Fold the rainbow sprinkles into the dough until evenly distributed.
- Press the dough evenly into the prepared pan.
- Bake for 15 to 18 minutes until the edges turn lightly golden.
- Remove from the oven and immediately press the candy eyes into the top while the bars are still warm.
- Let the bars cool completely in the pan before cutting into four pieces.
Extra Tips
Press the candy eyes on right after baking so they stick without extra frosting. For a softer texture, avoid overbaking and check the center at the 15-minute mark. Store leftovers in an airtight container at room temperature for up to three days.Course: Dessert Cuisine: American Equipment: Mixing Bowl, Baking Pan, Oven
