
Looking to impress your holiday guests without spending hours in the kitchen?
I’ve curated a list of 10 easy Christmas recipes that you can prepare in no time.
Think festive Cranberry Brie Bites or an Easy Holiday Glazed Ham that melts in your mouth.
These dishes are not only quick to make but also brimming with seasonal flavors.
Ready to be the star of your holiday gathering?
Festive Cranberry Brie Bites

Festive Cranberry Brie Bites are a delightful and elegant appetizer that’s perfect for your holiday gatherings. These little bites are a wonderful combination of creamy brie cheese, tangy cranberry sauce, and the crunch of a flaky puff pastry.
They aren’t only visually appealing but also pack a punch of flavors that will leave your guests wanting more. This recipe is easy to prepare and can be made ahead of time, allowing you to enjoy the festivities with your loved ones without spending too much time in the kitchen.
Ideal for serving a party of 4-6 people, these Festive Cranberry Brie Bites are sure to be a hit. The bite-sized portions make them easy to serve and eat, eliminating the need for utensils. Whether you’re hosting a small gathering or a large celebration, these bites will be a crowd-pleaser and add a touch of sophistication to your holiday spread.
Ingredients (Serves 4-6):
- 1 sheet of puff pastry, thawed
- 8 oz of brie cheese, cut into small cubes
- 1/2 cup of cranberry sauce (homemade or store-bought)
- 1/4 cup of chopped pecans or walnuts (optional)
- 1 egg, beaten (for egg wash)
Cooking Instructions:
- Preheat the Oven: Start by preheating your oven to 375°F (190°C). This will guarantee that the puff pastry cooks evenly and becomes beautifully golden brown.
- Prepare the Puff Pastry: Roll out the thawed puff pastry on a lightly floured surface to smooth out any creases. Using a sharp knife or a pizza cutter, cut the pastry into 24 equal squares.
- Assemble the Bites: Place each puff pastry square into the wells of a mini muffin tin. Press gently to form a small cup. Into each cup, place a cube of brie cheese, a teaspoon of cranberry sauce, and a sprinkle of chopped nuts if using.
- Apply the Egg Wash: Brush the edges of the puff pastry with the beaten egg. This will give the pastry a nice golden color when baked.
- Bake: Place the muffin tin in the preheated oven and bake for 15-20 minutes, or until the puff pastry is golden brown and the cheese is bubbly.
- Cool and Serve: Allow the bites to cool slightly in the pan for about 5 minutes before transferring them to a serving platter. Serve warm or at room temperature.
Extra Tips: For an added burst of flavor, consider adding a small sprig of fresh rosemary or a pinch of orange zest on top of each bite before baking.
If you prefer a sweeter taste, opt for a cranberry sauce with added sugar or mix a bit of honey into the cranberry sauce. These Festive Cranberry Brie Bites can also be made a few hours in advance and reheated in the oven just before serving, making them a convenient and tasty option for your holiday menu.
Quick Garlic Herb Mashed Potatoes
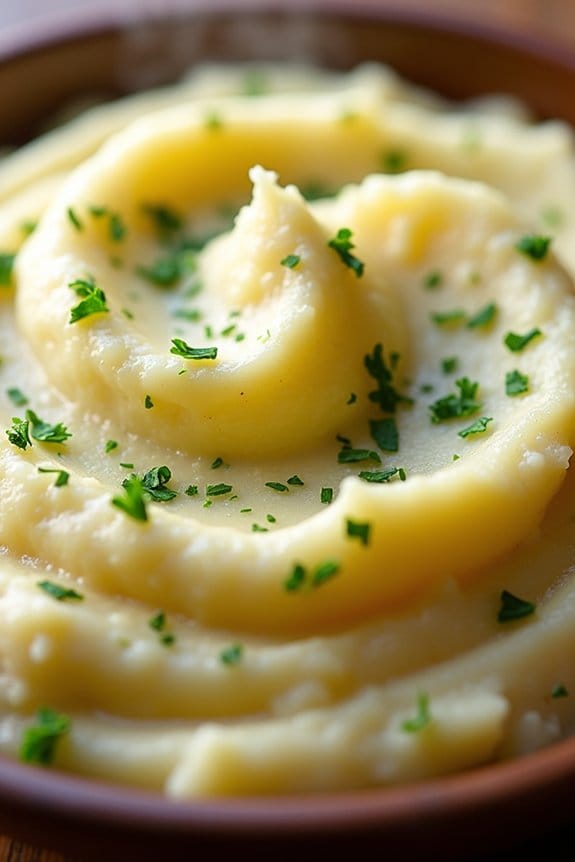
Quick Garlic Herb Mashed Potatoes are the perfect side dish for your holiday feast. This recipe combines creamy, buttery mashed potatoes with the aromatic flavors of garlic and herbs, creating a dish that’s both comforting and full of flavor.
Whether you’re hosting a big family gathering or a small festive dinner, these mashed potatoes will surely be a hit at your Christmas table.
The great thing about this recipe is its simplicity and speed. With just a handful of ingredients and minimal prep work, you can have this delicious side dish ready in no time.
Plus, the addition of fresh herbs gives it a gourmet touch that elevates the standard mashed potato dish. This recipe serves 4-6 people, making it ideal for a holiday meal.
Ingredients:
- 3 pounds of Yukon Gold potatoes, peeled and quartered
- 4 cloves of garlic, minced
- 1/2 cup of unsalted butter
- 1 cup of whole milk
- 1/4 cup of heavy cream
- 2 tablespoons of fresh parsley, finely chopped
- 1 tablespoon of fresh rosemary, finely chopped
- Salt and pepper to taste
Instructions:
- Prepare the Potatoes: Start by placing your peeled and quartered Yukon Gold potatoes into a large pot. Cover them with cold water and add a generous pinch of salt.
- Cook the Potatoes: Bring the water to a boil over medium-high heat. Once boiling, reduce the heat to a simmer and cook the potatoes for about 15-20 minutes, or until they’re fork-tender.
- Melt the Butter and Infuse the Garlic: While the potatoes are cooking, in a small saucepan over low heat, melt the butter. Add the minced garlic and cook until fragrant, about 1-2 minutes. Be careful not to burn the garlic.
- Drain and Mash Potatoes: Once the potatoes are cooked, drain them thoroughly and return them to the pot. Use a potato masher or a ricer to mash the potatoes until smooth.
- Mix in the Ingredients: Pour the melted garlic butter over the mashed potatoes. Gradually add the whole milk and heavy cream, stirring continuously until the potatoes are smooth and creamy.
- Add Herbs and Season: Stir in the fresh parsley and rosemary. Season the mashed potatoes generously with salt and pepper, adjusting to taste.
- Serve: Transfer the mashed potatoes to a serving dish and garnish with additional herbs if desired. Serve hot.
Extra Tips: For the best texture, make sure not to over-mash the potatoes as this can make them gluey.
Yukon Gold potatoes are recommended for their creamy texture, but you can also use russet potatoes if preferred. If you want to make this dish ahead of time, you can keep the mashed potatoes warm in a slow cooker on a low setting.
Just give them a stir and adjust seasoning before serving.
Easy Holiday Glazed Ham
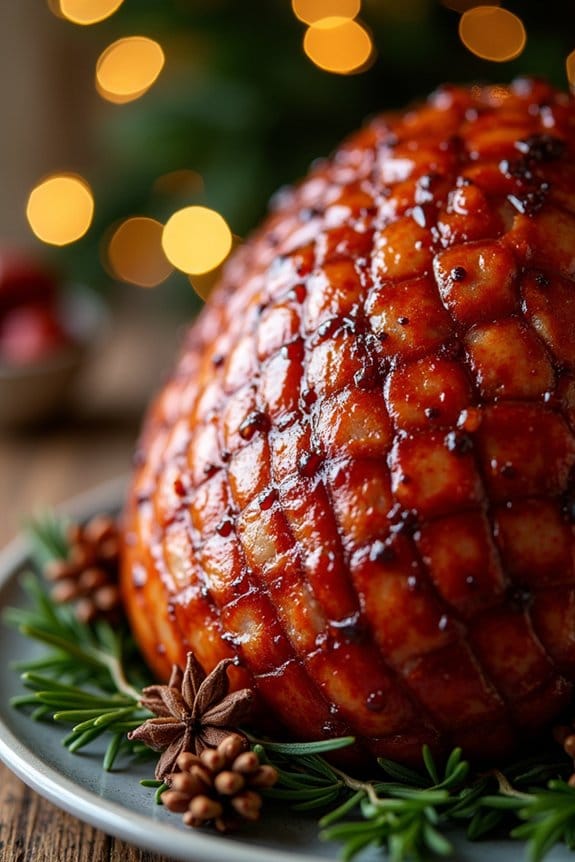
The holiday season is the perfect time to bring out a beautifully glazed ham that serves as a centerpiece on your festive table. An Easy Holiday Glazed Ham is an ideal choice for those who want to enjoy a delicious and impressive meal without spending too much time in the kitchen. This recipe highlights the natural, savory flavors of the ham and complements them with a sweet and tangy glaze that caramelizes perfectly in the oven, resulting in a mouth-watering dish that’s sure to please your family and friends.
The beauty of this dish lies in its simplicity and ability to feed a crowd with minimal effort. With just a few ingredients and straightforward steps, you can prepare a ham that not only looks stunning but tastes amazing. This recipe is designed to serve 4-6 people, making it perfect for an intimate holiday gathering or a special family dinner. Follow these instructions to create a ham that will be remembered fondly by all who taste it.
Ingredients (serves 4-6):
- 1 (5-6 pound) fully cooked, bone-in ham
- 1 cup brown sugar
- 1/2 cup honey
- 1/2 cup Dijon mustard
- 1/4 cup apple cider vinegar
- 1 teaspoon ground cloves
- 1/2 teaspoon ground cinnamon
- 1/2 teaspoon ground ginger
Cooking Instructions:
- Preheat the Oven: Begin by preheating your oven to 325°F (165°C). This temperature is ideal for slowly warming the ham without drying it out.
- Prepare the Ham: Remove the ham from its packaging and place it on a roasting rack inside a large roasting pan. Score the surface of the ham in a diamond pattern using a sharp knife, cutting about 1/4 inch deep. This allows the glaze to penetrate the meat and infuse it with flavor.
- Make the Glaze: In a medium saucepan, combine the brown sugar, honey, Dijon mustard, apple cider vinegar, ground cloves, ground cinnamon, and ground ginger. Cook over medium heat, stirring frequently, until the sugar has dissolved and the mixture is smooth and slightly thickened. This should take about 5-7 minutes.
- Glaze the Ham: Pour half of the glaze mixture over the scored ham, using a brush to spread it evenly across the surface. Be sure to cover the entire exposed area to guarantee maximum flavor.
- Bake the Ham: Place the ham in the preheated oven and bake for about 1 1/2 to 2 hours, basting with the remaining glaze every 30 minutes. The internal temperature should reach 140°F (60°C) when checked with a meat thermometer inserted into the thickest part of the ham, away from the bone.
- Rest and Serve: Once cooked, remove the ham from the oven and let it rest for about 15-20 minutes. This allows the juices to redistribute, making the meat tender and juicy. Slice and serve your beautifully glazed ham to your delighted guests.
Extra Tips:
For best results, choose a high-quality ham that’s already fully cooked, as this recipe focuses on enhancing its flavor with a glaze rather than cooking it from raw.
If you prefer a spicier kick, consider adding a small amount of cayenne pepper to the glaze.
Additionally, keep an eye on the ham during the baking process to prevent the glaze from burning; if necessary, loosely cover the ham with aluminum foil to protect it.
Finally, any leftover ham can be stored in the refrigerator for up to a week and used in sandwiches, soups, or salads, making it a versatile holiday staple.
Simple Caprese Skewers
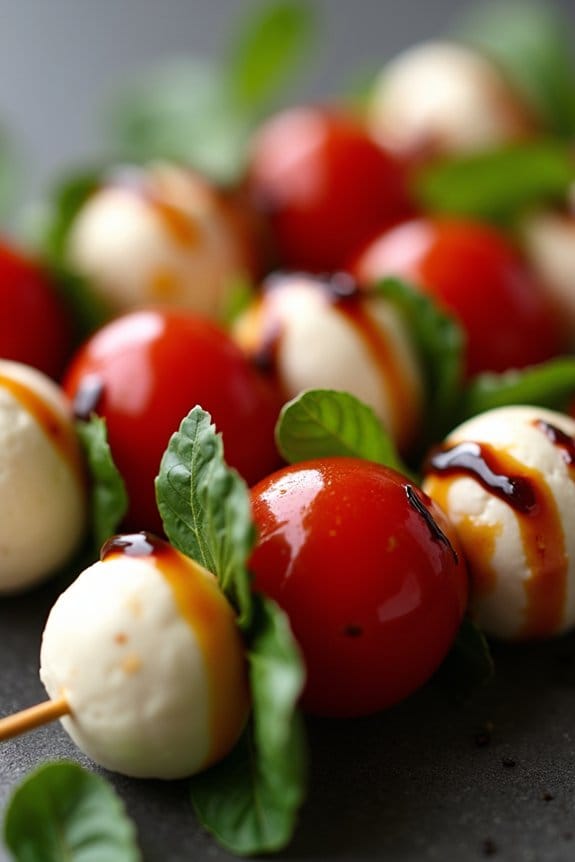
Caprese skewers are a delightful and easy appetizer that brings a touch of Italian flair to your Christmas festivities. They aren’t only visually appealing but also burst with fresh flavors from ripe tomatoes, creamy mozzarella, and fragrant basil. The best part is, they require minimal preparation and can be made in advance, making them a perfect choice for stress-free holiday hosting.
These skewers offer a revitalizing bite amidst the typically rich and hearty holiday spreads. The combination of juicy cherry tomatoes, soft mozzarella balls, and aromatic basil leaves, all drizzled with balsamic glaze, creates a harmonious balance of flavors. They aren’t just a treat for the taste buds but also a feast for the eyes, adding color and elegance to your Christmas table.
Ingredients for 4-6 people:
- 24 cherry tomatoes
- 24 mozzarella balls (bocconcini)
- 24 fresh basil leaves
- 2 tablespoons extra virgin olive oil
- 2 tablespoons balsamic glaze
- Salt and pepper to taste
- 24 wooden skewers (approximately 6 inches long)
Cooking Instructions:
- Prepare the Ingredients: Rinse and pat dry the cherry tomatoes and basil leaves. Drain the mozzarella balls and gently pat them dry with a paper towel to remove excess moisture.
- Assemble the Skewers: Start by threading a cherry tomato onto a skewer, followed by a basil leaf that you can fold in half if it’s large. Next, add a mozzarella ball. Repeat the sequence (tomato, basil, mozzarella) once more so each skewer has two of each component.
- Season the Skewers: Arrange the assembled skewers on a serving platter. Drizzle with the extra virgin olive oil, ensuring each skewer gets a light coating. Sprinkle a pinch of salt and a dash of pepper over the skewers to enhance their flavor.
- Add the Finishing Touch: Just before serving, drizzle the skewers with balsamic glaze. This adds a sweet and tangy note that complements the freshness of the tomatoes and basil.
Extra Tips:
For the best flavor, use high-quality ingredients, particularly when it comes to olive oil and balsamic glaze, as they highlight the simplicity of this dish.
Feel free to experiment with flavored oils or infused balsamic glazes for a unique twist. If preparing ahead of time, assemble the skewers and keep them covered in the refrigerator, but wait to drizzle with the balsamic glaze until just before serving to maintain their fresh appearance.
No-Bake Chocolate Peppermint Bars
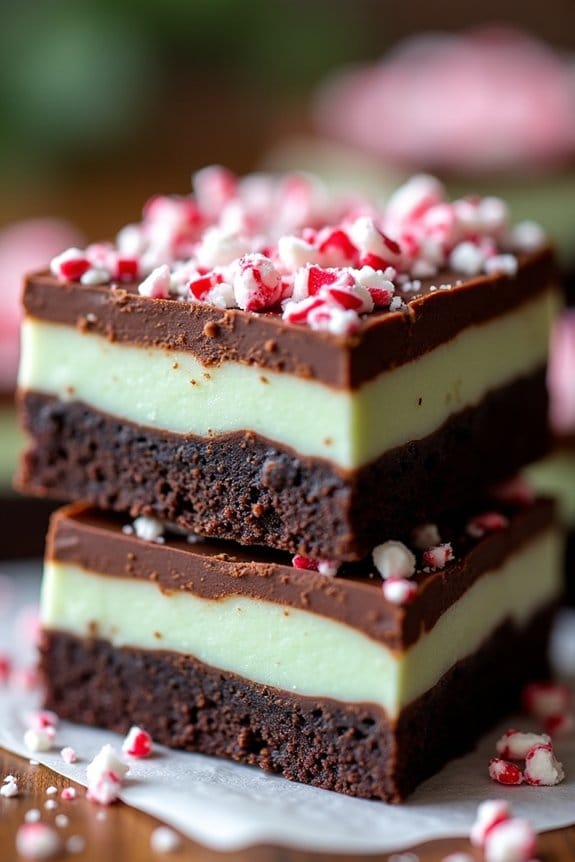
No-Bake Chocolate Peppermint Bars are a delightful and festive treat perfect for the holiday season. These bars combine the rich, creamy texture of chocolate with a rejuvenating hint of peppermint, making them an irresistible addition to any Christmas gathering.
The best part is that they require no baking, which means you can whip them up quickly without the need for an oven. This recipe is ideal for those who want to enjoy a delicious homemade dessert without spending hours in the kitchen.
This recipe is designed to serve 4-6 people, making it perfect for small gatherings or as a part of a larger dessert spread. The bars are made with a simple base of crushed cookies and butter, layered with a creamy peppermint filling, and topped with a smooth chocolate ganache.
The combination of flavors and textures will surely impress your family and friends, making it a holiday favorite for years to come.
Ingredients:
- 2 cups of chocolate sandwich cookies, crushed
- 1/2 cup unsalted butter, melted
- 1 1/2 cups powdered sugar
- 1/3 cup unsalted butter, softened
- 1 teaspoon peppermint extract
- A few drops of green food coloring (optional)
- 1 cup semi-sweet chocolate chips
- 1/4 cup heavy cream
- 1/4 cup crushed peppermint candies or candy canes
Instructions:
- Prepare the Cookie Base: In a medium bowl, combine the crushed chocolate sandwich cookies and melted butter. Mix until the crumbs are evenly coated with butter. Press the mixture firmly into the bottom of an 8×8 inch square baking dish to form an even layer.
- Make the Peppermint Filling: In a large bowl, beat together the powdered sugar, softened butter, peppermint extract, and a few drops of green food coloring (if using) until smooth and creamy. Spread this peppermint mixture evenly over the cookie base.
- Prepare the Chocolate Ganache: In a small saucepan, heat the heavy cream over medium heat until it just begins to simmer. Remove from heat and pour over the chocolate chips in a heatproof bowl. Let it sit for about 2 minutes, then stir until smooth and glossy.
- Assemble the Bars: Pour the chocolate ganache over the peppermint layer, spreading it evenly to cover the entire surface. Sprinkle the crushed peppermint candies over the chocolate layer for a festive touch.
- Chill the Bars: Place the baking dish in the refrigerator for at least 2 hours or until the bars are fully set. Once set, cut into squares and serve.
Extra Tips:
To make sure your No-Bake Chocolate Peppermint Bars turn out perfectly, use a food processor to achieve fine crumbs from the chocolate sandwich cookies, ensuring a solid base.
If you’re not a fan of green food coloring, you can skip it and keep the peppermint filling white. When cutting the bars, use a sharp knife for clean edges, and wipe the blade between cuts for the best presentation.
Finally, these bars can be made a day in advance, saving you time during your holiday preparations.
Speedy Stuffed Mushrooms

Stuffed mushrooms are a classic appetizer that can elevate any holiday gathering. Our Speedy Stuffed Mushrooms recipe guarantees that you can whip up a delicious starter without spending too much time in the kitchen. These bite-sized delights are perfect for a Christmas party, offering a savory filling that complements the earthy flavor of the mushrooms.
Whether you’re hosting a large gathering or a small family dinner, these stuffed mushrooms are sure to impress your guests with their rich taste and wonderful aroma. This recipe is designed to serve 4-6 people, making it an excellent choice for an intimate gathering.
The filling combines cream cheese, herbs, and breadcrumbs to create a creamy and flavorful stuffing that pairs beautifully with the mushrooms. The best part? The preparation is quick and easy, allowing you to spend more time enjoying the festive season with your loved ones. So, gather your ingredients and let’s get started on these delightful stuffed mushrooms.
Ingredients:
- 20 large button mushrooms
- 1 tablespoon olive oil
- 1/2 cup cream cheese, softened
- 1/4 cup grated Parmesan cheese
- 1/4 cup breadcrumbs
- 2 cloves garlic, minced
- 2 tablespoons fresh parsley, chopped
- 1 teaspoon dried thyme
- Salt and pepper to taste
Instructions:
- Prepare the Mushrooms: Preheat your oven to 375°F (190°C). Clean the mushrooms with a damp paper towel and remove the stems. Set the mushroom caps aside on a baking sheet lined with parchment paper.
- Make the Filling: In a skillet, heat the olive oil over medium heat. Add the minced garlic and cook for about 1 minute until fragrant. Remove from heat and in a mixing bowl, combine the garlic, cream cheese, Parmesan cheese, breadcrumbs, parsley, thyme, salt, and pepper. Mix well until all ingredients are thoroughly combined.
- Stuff the Mushrooms: Using a spoon, fill each mushroom cap with the cream cheese mixture, pressing slightly to ascertain the filling stays put. Be generous but ensure the filling doesn’t overflow too much.
- Bake the Mushrooms: Place the stuffed mushrooms in the preheated oven and bake for 15-20 minutes, or until the tops are golden brown and the mushrooms are tender.
- Serve: Once baked, remove the mushrooms from the oven and let them cool for a few minutes before serving. Arrange them on a platter and garnish with additional parsley if desired.
Extra Tips:
For an added crunch, you could sprinkle some additional breadcrumbs on top of the filling before baking. If you prefer a bit of heat, consider adding a pinch of red pepper flakes to the filling mixture.
Make sure not to overstuff the mushrooms as they’ll shrink slightly during baking, and too much filling might spill over. These stuffed mushrooms can also be prepared a day in advance and stored in the refrigerator; just pop them in the oven before your guests arrive for an easy and delicious appetizer.
5-Minute Cranberry Sauce
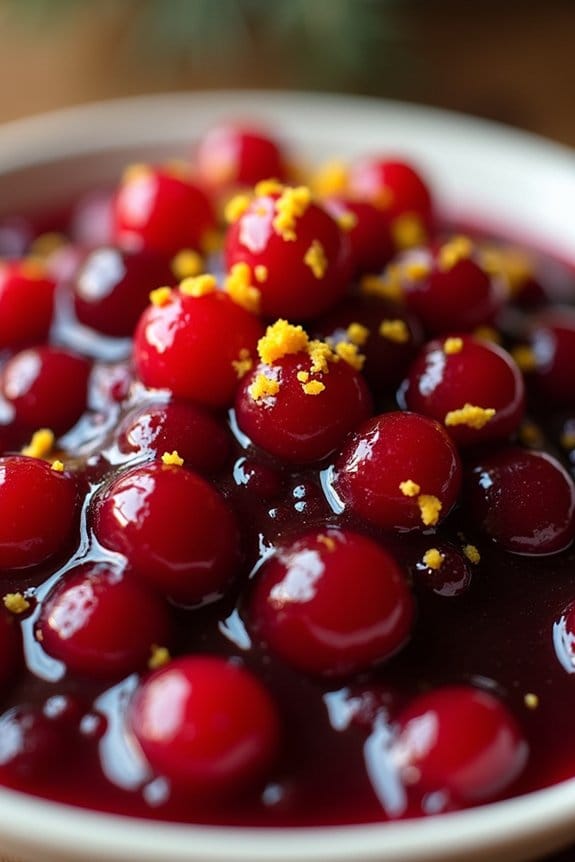
When it comes to holiday meals, cranberry sauce is an essential side dish that adds a burst of color and tangy flavor to the plate. This Minute Cranberry Sauce is a quick and easy recipe that saves you time without sacrificing taste, making it perfect for busy holiday preparations.
With just a few ingredients, you can have a fresh, homemade cranberry sauce that complements turkey, ham, or any main course beautifully. This recipe is designed to serve 4-6 people, guaranteeing everyone at your table gets to enjoy this classic holiday staple.
Utilizing fresh cranberries, this sauce is a delightful combination of sweet and tart, perfect for balancing the flavors of your Christmas feast. In just a few simple steps, you’ll have a fragrant, vibrant sauce ready to serve.
Ingredients:
- 12 oz (340 grams) fresh cranberries
- 1 cup granulated sugar
- 1 cup water
- 1 large orange, juiced and zested
- 1/4 teaspoon ground cinnamon
- 1/8 teaspoon ground nutmeg
- Pinch of salt
Cooking Instructions:
- Prepare the Ingredients: Rinse the cranberries thoroughly under cold water and discard any that are soft or damaged. Set them aside.
- Combine Base Ingredients: In a medium saucepan, combine the water, granulated sugar, and a pinch of salt. Place the saucepan over medium heat and stir until the sugar is completely dissolved, forming a simple syrup.
- Add Cranberries: Once the sugar has dissolved, add the cranberries to the saucepan. Bring the mixture to a gentle boil over medium heat. You’ll notice the cranberries begin to pop as they cook.
- Incorporate Citrus and Spices: Add the orange juice, orange zest, ground cinnamon, and ground nutmeg to the cranberry mixture. Stir well to guarantee the flavors are evenly distributed.
- Simmer the Sauce: Reduce the heat to low and let the sauce simmer for about 10 minutes, stirring occasionally. The cranberries will continue to pop, and the sauce will thicken as it cooks.
- Cool and Serve: Once the sauce has reached your desired consistency, remove it from the heat and let it cool slightly. The sauce will thicken further as it cools. Serve it warm or refrigerate it for later use.
Extra Tips:
To enhance the flavor of your cranberry sauce, consider adding a splash of brandy or a tablespoon of apple cider vinegar for a tangy twist.
If you prefer a smoother sauce, you can use an immersion blender to puree the mixture after it has cooled slightly. For a festive presentation, garnish the sauce with additional orange zest or a handful of chopped walnuts before serving.
Effortless Spinach and Artichoke Dip
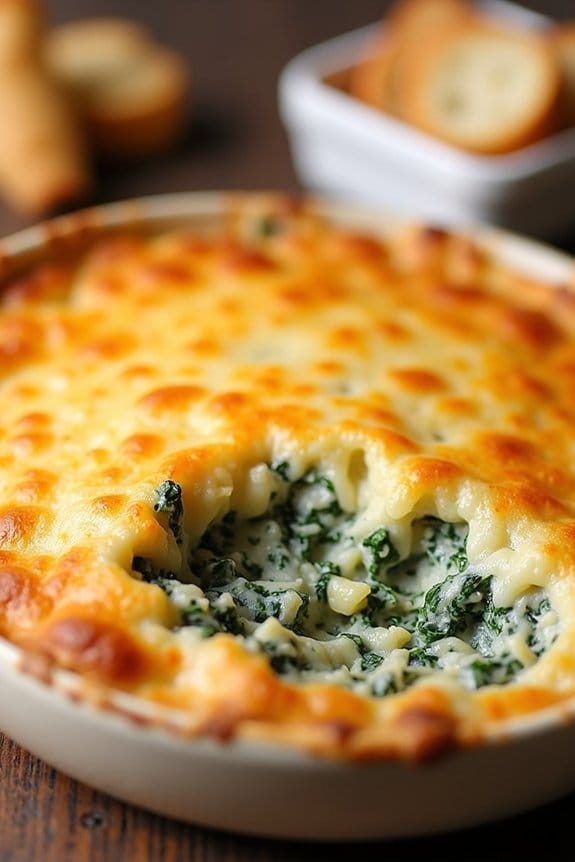
Effortless Spinach and Artichoke Dip is a classic appetizer that’s perfect for holiday gatherings, especially during Christmas. Its creamy texture and savory flavors make it a crowd-pleaser that can be served with a variety of dippers such as bread, crackers, or vegetables.
With minimal preparation and cooking time, this dip is ideal for those who want to enjoy the festivities without spending too much time in the kitchen. The combination of spinach and artichokes not only provides a delicious taste but also adds a nutritious element to your spread.
This recipe is designed to serve 4-6 people, making it a great option for small to medium-sized gatherings. By using a blend of cheeses and a hint of garlic, this dip achieves a rich and indulgent flavor profile.
The simplicity of the ingredients and the straightforward cooking method make it an uncomplicated choice for both novice and experienced cooks. Whether you’re hosting a Christmas party or attending a potluck, this Effortless Spinach and Artichoke Dip will surely impress your guests.
Ingredients:
- 1 (10-ounce) package frozen chopped spinach, thawed and drained
- 1 (14-ounce) can artichoke hearts, drained and chopped
- 1 cup mayonnaise
- 1 cup grated Parmesan cheese
- 1 cup shredded mozzarella cheese
- 1 teaspoon minced garlic
- 1/2 teaspoon salt
- 1/4 teaspoon black pepper
- Optional: a pinch of red pepper flakes for a bit of heat
Instructions:
- Preheat the Oven: Begin by preheating your oven to 350°F (175°C). This will guarantee that the dip bakes evenly and reaches the right consistency.
- Prepare the Spinach and Artichokes: In a medium-sized mixing bowl, combine the thawed and drained spinach with the chopped artichoke hearts. Confirm that any excess moisture is removed to prevent a watery dip.
- Mix the Ingredients: Add the mayonnaise, Parmesan cheese, mozzarella cheese, minced garlic, salt, and black pepper to the spinach and artichoke mixture. Stir until all the ingredients are well combined and evenly distributed. If you like a little kick, add a pinch of red pepper flakes.
- Transfer to Baking Dish: Spoon the spinach and artichoke mixture into an oven-safe baking dish. Use a spatula to spread it evenly across the dish, ensuring a uniform layer for consistent baking.
- Bake the Dip: Place the baking dish in the preheated oven and bake for 20-25 minutes, or until the top is golden brown and the dip is bubbly around the edges.
- Serve: Once baked, remove the dish from the oven and let it cool slightly before serving. This dip pairs wonderfully with sliced baguette, pita chips, or fresh vegetables.
Extra Tips:
For an added layer of flavor, consider topping the dip with additional shredded mozzarella or Parmesan cheese before baking. This will create a cheesy crust that complements the creamy interior.
If you prefer a smoother dip, you can pulse the spinach and artichoke mixture in a food processor before mixing in the cheeses. Keep in mind that this dip can be prepared a day in advance—simply cover and refrigerate it, then bake just before serving for a quick and easy appetizer that’s ready to enjoy.
Instant Gingerbread Mug Cake

Instant Gingerbread Mug Cake is a quick and delightful holiday treat that brings the cozy flavors of the festive season into your home with minimal effort. Perfect for a last-minute dessert or an impromptu gathering, this mug cake captures the essence of gingerbread with its warm spices and molasses flavor.
It’s a fantastic way to enjoy the holiday spirit without the time commitment of traditional baking, making it an ideal choice for busy holiday schedules. This recipe is designed to serve 4-6 people, allowing everyone to indulge in their own personal mug of sweet, spiced goodness.
The beauty of this recipe lies in its simplicity and speed; you can have delicious gingerbread cake ready in just a few minutes. Whether you’re entertaining guests or simply craving a comforting dessert, this Instant Gingerbread Mug Cake is sure to impress with its rich flavor and moist texture.
Ingredients:
- 1 cup all-purpose flour
- 1 teaspoon baking powder
- 1 teaspoon ground ginger
- 1 teaspoon ground cinnamon
- 1/4 teaspoon ground cloves
- 1/4 teaspoon salt
- 1/2 cup brown sugar
- 4 tablespoons unsalted butter, melted
- 1/2 cup milk
- 1/4 cup molasses
- 1 egg
- 1 teaspoon vanilla extract
Instructions:
- Prepare the Mugs: Select 4-6 microwave-safe mugs. Lightly grease the insides with a little butter or non-stick cooking spray to prevent sticking.
- Mix Dry Ingredients: In a medium-sized bowl, combine the flour, baking powder, ground ginger, ground cinnamon, ground cloves, and salt. Stir well to guarantee the spices and leavening agent are evenly distributed.
- Combine Wet Ingredients: In another bowl, whisk together the brown sugar, melted butter, milk, molasses, egg, and vanilla extract until smooth and well combined.
- Create Batter: Gradually add the dry ingredients to the wet ingredients, stirring continuously until you achieve a smooth batter. Make sure there are no lumps.
- Fill the Mugs: Divide the batter evenly among the prepared mugs, filling each about halfway to allow room for the cake to rise as it cooks.
- Microwave: Place one mug at a time in the microwave. Cook on high for 1 to 1.5 minutes, depending on the wattage of your microwave. The cake should rise and be firm to the touch when done. Avoid overcooking, as this can make the cake dry.
- Cool and Serve: Allow the mug cakes to cool for a minute before serving. Optionally, top with whipped cream or a sprinkle of powdered sugar for a festive touch.
Extra Tips:
When making Instant Gingerbread Mug Cake, adjust the cooking time based on your microwave’s power; a higher wattage may require less time. Always watch the first mug closely to determine the exact timing needed.
You can customize the flavor by adding a pinch of nutmeg or a dash of allspice to the spice blend. For a more indulgent treat, consider adding a few chocolate chips or drizzling caramel sauce over the top before serving.
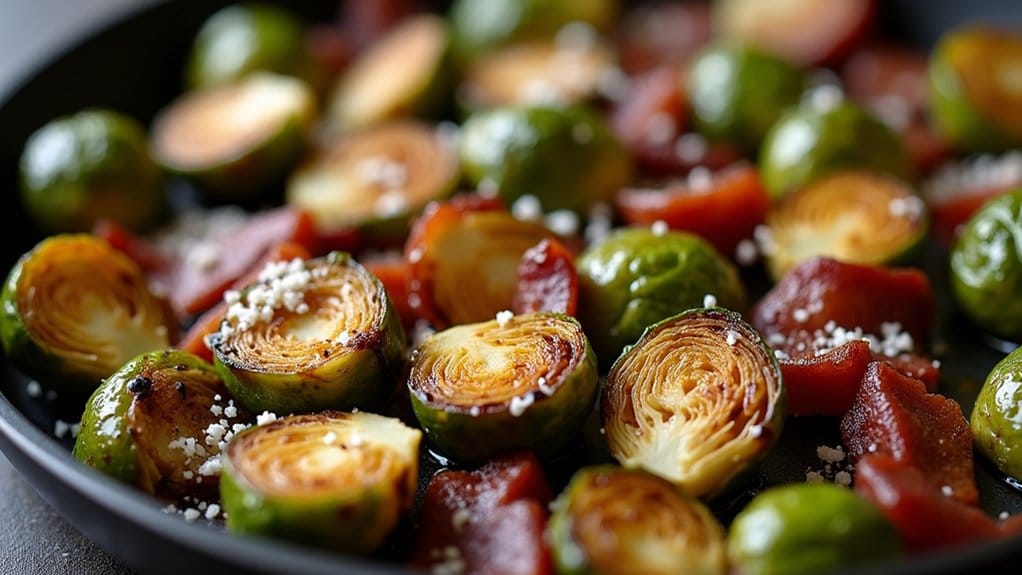
One-Pan Roasted Brussels Sprouts and Bacon
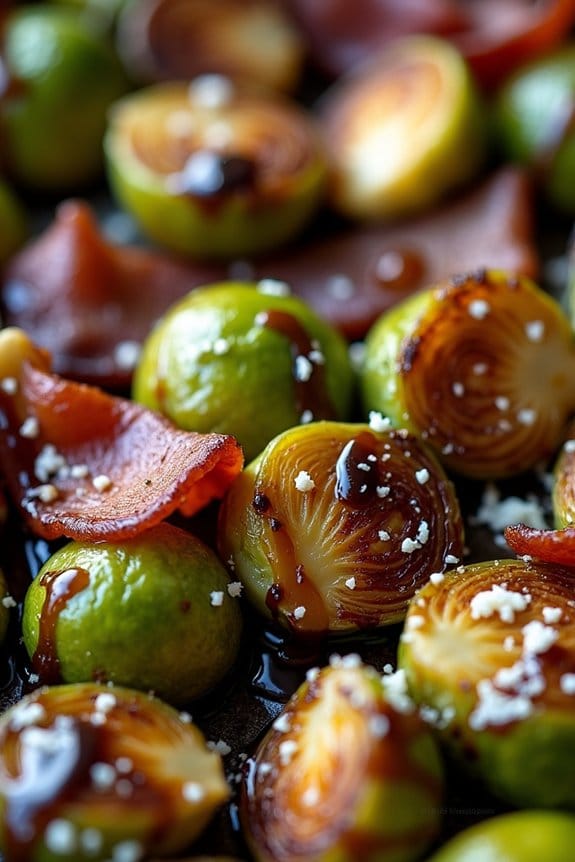
One-Pan Roasted Brussels Sprouts and Bacon is a delightful and easy-to-make dish that perfectly complements any holiday feast, particularly the festive Christmas dinner. This recipe combines the rich, savory flavor of bacon with the slightly nutty and earthy taste of Brussels sprouts.
The dish isn’t only simple to prepare but also requires minimal cleanup, making it a stress-free addition to your holiday menu. The bacon adds a crispy texture and a hint of smokiness that elevates the roasted Brussels sprouts, creating a harmonious blend of flavors that will impress your family and friends.
This dish serves as a great side to accompany your main course, offering both a nutritious and delicious option. The Brussels sprouts are roasted until they’re tender and caramelized, while the bacon becomes crispy and flavorful.
This combination isn’t only visually appealing with its vibrant colors but also incredibly appetizing. The dish is easy enough for novice cooks, yet sophisticated enough to be a showstopper at your Christmas dinner table. With just a few simple ingredients and steps, you can create a memorable dish that will be a hit at any gathering.
Ingredients for 4-6 servings:
- 1 1/2 pounds Brussels sprouts, trimmed and halved
- 6 slices of thick-cut bacon, chopped
- 3 tablespoons olive oil
- 1 teaspoon salt
- 1/2 teaspoon black pepper
- 2 tablespoons balsamic vinegar
- 1 tablespoon honey
- Optional: 1/4 cup grated Parmesan cheese
Cooking Instructions:
1. Preheat the Oven: Start by preheating your oven to 400°F (200°C). This temperature guarantees that the Brussels sprouts and bacon roast evenly, achieving the perfect caramelization and crispiness.
2. Prepare the Ingredients: In a large mixing bowl, combine the halved Brussels sprouts, chopped bacon, olive oil, salt, and black pepper. Toss everything together, making sure that the sprouts are evenly coated with the oil and seasonings.
3. Roasting Time: Spread the mixture evenly on a large baking sheet, ensuring the Brussels sprouts are cut side down for maximum browning. Place the baking sheet in the preheated oven and roast for about 25-30 minutes, or until the Brussels sprouts are tender and the bacon is crispy.
Stir halfway through the cooking time to guarantee even roasting.
4. Finishing Touches: Remove the baking sheet from the oven and drizzle the balsamic vinegar and honey over the roasted Brussels sprouts and bacon. Toss the ingredients gently to coat them evenly with the balsamic glaze. If desired, sprinkle the grated Parmesan cheese over the top for added flavor.
5. Serve: Transfer the roasted Brussels sprouts and bacon to a serving dish and serve immediately while hot. Enjoy this delightful side dish with your holiday meal.
Extra Tips:
To promote even cooking, try to select Brussels sprouts that are similar in size. If you have larger sprouts, you might want to quarter them instead of halving them.
Additionally, keep an eye on the bacon as it can cook quickly and become overly crispy if left unattended. If you prefer a sweeter glaze, you can adjust the amount of honey according to your taste.
For a touch of spice, consider adding a pinch of red pepper flakes to the mixture before roasting. This dish can easily be prepped ahead of time, allowing you to save time on the day of your celebration.
