
I absolutely love finding easy and thoughtful Christmas recipes that make perfect gifts. There’s such joy in sharing homemade treats during the holidays. From Cranberry Pistachio Biscotti to Zesty Lemon Sugar Scrub, I’ve found delightful options that are sure to bring smiles to your loved ones. These recipes are not only tasty but also add a lovely personal touch to your holiday gifting. Ready to explore these festive treasures?
Festive Cranberry Pistachio Biscotti

Festive Cranberry Pistachio Biscotti is a delightful, crunchy treat that adds a touch of elegance and flavor to your Christmas celebrations. This Italian-inspired biscuit is perfect for dipping into a warm cup of coffee or tea, making it an excellent addition to your holiday dessert table. The combination of tart cranberries and rich pistachios creates a balanced taste that’s both satisfying and festive.
The biscotti’s distinct twice-baked texture provides a delightful snap with every bite, making it an irresistible holiday favorite. Whether you’re gifting them to friends and family or serving them at your holiday gatherings, these biscotti are sure to impress. Their vibrant colors and fragrant aroma evoke the spirit of the season, while their ease of preparation allows you to focus on other festive activities.
The joy of baking these biscotti is that they store well, allowing you to prepare them ahead of time and enjoy them throughout the holiday season. With just a few simple ingredients and a straightforward process, you can create a batch of these charming cookies that will surely become a cherished holiday tradition.
Ingredients for 4-6 Servings:
- 2 cups all-purpose flour
- 1 cup granulated sugar
- 1 teaspoon baking powder
- 1/2 teaspoon salt
- 3 large eggs
- 1 teaspoon vanilla extract
- 1 teaspoon almond extract
- 1 cup dried cranberries
- 1 cup shelled pistachios
Cooking Instructions:
- Preheat and Prepare: Preheat your oven to 350°F (175°C). Line a baking sheet with parchment paper to prevent sticking.
- Mix Dry Ingredients: In a large bowl, whisk together the flour, sugar, baking powder, and salt. Verify that the ingredients are well combined.
- Combine Wet Ingredients: In another bowl, beat the eggs, vanilla extract, and almond extract until well blended.
- Form the Dough: Gradually add the wet ingredients to the dry ingredients, mixing until a dough forms. The dough will be sticky, but firm enough to handle.
- Add Cranberries and Pistachios: Gently fold in the dried cranberries and pistachios until they’re evenly distributed throughout the dough.
- Shape the Dough: Divide the dough in half. On a lightly floured surface, shape each half into a log about 12 inches long and 2 inches wide. Place the logs onto the prepared baking sheet.
- First Bake: Bake the logs for 25-30 minutes, or until they’re firm to the touch and slightly golden. Remove from the oven and allow them to cool for 10 minutes.
- Slice the Biscotti: Using a serrated knife, slice the logs diagonally into 1/2-inch thick slices.
- Second Bake: Arrange the slices cut side down on the baking sheet. Bake for an additional 10-12 minutes on each side, until they’re golden brown and crisp.
- Cool and Store: Remove from the oven and transfer the biscotti to a wire rack to cool completely before storing in an airtight container.
Extra Tips:
To ascertain the perfect crispness, make sure the logs are fully cooled before slicing. If you prefer a softer biscotti, reduce the second baking time slightly. For an extra festive touch, consider drizzling melted white chocolate over the cooled biscotti. This recipe is versatile; feel free to substitute the cranberries and pistachios with your favorite dried fruits and nuts. Enjoy your biscotti with a hot beverage, and they’ll stay fresh for up to two weeks when stored properly.
Decadent Chocolate Truffles

Indulge yourself this holiday season with these Decadent Chocolate Truffles, a perfect treat to complement your Christmas celebrations. These truffles are rich, creamy, and incredibly smooth, making them an irresistible delight for chocolate lovers.
Whether you’re planning a cozy night with family or hosting a festive gathering, these truffles are bound to impress your guests with their luxurious taste and elegant appearance. With a few simple ingredients and a bit of patience, you can create these delightful confections at home.
The beauty of these Decadent Chocolate Truffles lies in their simplicity and versatility. You can stick to the classic chocolate flavor or add a personal touch with various coatings and flavorings. From rolling them in cocoa powder or chopped nuts to infusing them with a hint of liquor or spices, the possibilities are endless.
This recipe yields a batch of truffles perfect for serving 4-6 people, making it an ideal choice for intimate gatherings or as a thoughtful homemade gift for your loved ones.
Ingredients for 4-6 People:
- 300g dark chocolate (70% cocoa)
- 200ml heavy cream
- 50g unsalted butter
- 1 teaspoon vanilla extract
- Pinch of salt
- Cocoa powder, for dusting
- Optional coatings: crushed nuts, shredded coconut, or chocolate sprinkles
Cooking Instructions:
- Prepare the Chocolate: Begin by finely chopping the dark chocolate into small pieces. Place the chocolate in a heatproof bowl and set it aside.
- Heat the Cream: In a small saucepan, gently heat the heavy cream over medium heat until it just begins to simmer. Don’t let it boil to avoid scorching the cream.
- Combine with Chocolate: Pour the hot cream over the chopped chocolate. Let it sit undisturbed for about 2-3 minutes to allow the chocolate to begin melting.
- Mix the Ganache: Gently stir the mixture with a spatula or whisk until the chocolate is completely melted and smooth. Stir in the unsalted butter, vanilla extract, and a pinch of salt until fully incorporated.
- Chill the Mixture: Cover the bowl with plastic wrap and refrigerate the ganache for about 2 hours, or until it’s firm enough to shape.
- Shape the Truffles: Once the ganache is set, use a melon baller or small spoon to scoop out small portions. Roll each portion between your palms to form smooth balls.
- Coat the Truffles: Roll the shaped truffles in cocoa powder or your choice of optional coatings like crushed nuts, shredded coconut, or chocolate sprinkles.
- Chill Before Serving: Place the finished truffles on a tray lined with parchment paper and refrigerate for another 30 minutes to firm up before serving.
Extra Tips:
For the best results, use high-quality dark chocolate as it greatly enhances the flavor of the truffles. You can experiment with different flavorings, such as adding a touch of liquor like Grand Marnier or Baileys to the ganache for a sophisticated twist.
If you find the ganache too soft to handle, chill it for a bit longer until it reaches the right consistency. Finally, make certain your hands are cool and dry when rolling the truffles to prevent them from melting.
Enjoy your Decadent Chocolate Truffles as a delightful treat or an elegant gift during the festive season!
Savory Herb-Infused Olive Oil
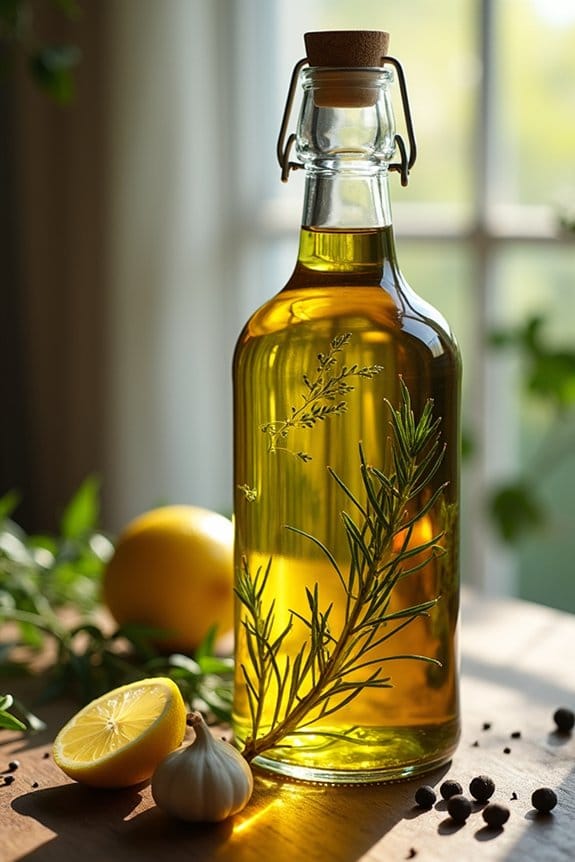
Infusing olive oil with fresh herbs is a fantastic way to elevate your cooking with a burst of flavor. This Savory Herb-Infused Olive Oil makes for a perfect addition to your holiday table, offering an aromatic and delicious dressing for salads, drizzling over roasted vegetables, or as a dipping oil for fresh bread.
It’s an easy and versatile recipe that can be prepared ahead of time, allowing the flavors to develop and intensify, making it an excellent choice for Christmas gatherings.
This recipe yields enough for 4-6 people, depending on usage, and can be customized with your favorite herbs. The key to a successful herb-infused olive oil is using high-quality, extra virgin olive oil and fresh herbs. This simple yet elegant recipe won’t only enhance the flavors of your dishes but also add a touch of sophistication to your holiday meals.
Ingredients for 4-6 People:
- 2 cups extra virgin olive oil
- 4 sprigs fresh rosemary
- 4 sprigs fresh thyme
- 2 sprigs fresh oregano
- 2 cloves garlic, peeled and slightly crushed
- 1 teaspoon black peppercorns
- Zest of 1 lemon
Cooking Instructions:
- Prepare the Herbs: Rinse and pat dry the rosemary, thyme, and oregano. Make sure they’re completely dry before using them to prevent any water from mixing with the oil.
- Heat the Olive Oil: In a small saucepan, pour the olive oil and gently warm it over low heat. You don’t want the oil to boil, just warm enough to infuse the flavors of the herbs.
- Infuse the Oil: Add the rosemary, thyme, oregano, garlic, black peppercorns, and lemon zest to the warmed oil. Allow the mixture to warm gently for about 10-15 minutes, stirring occasionally. The oil shouldn’t reach a boiling point.
- Cool and Strain: Remove the saucepan from heat and let the oil cool completely. Once cooled, strain the oil through a fine mesh sieve or cheesecloth into a clean, dry bottle or jar, discarding the solids.
- Store the Oil: Seal the bottle or jar tightly and store the infused oil in a cool, dark place. For the best flavor, let the oil sit for at least 24 hours before using. The infused oil can be kept for up to one month.
Extra Tips:
When making herb-infused olive oil, it’s essential to verify that all ingredients, especially the herbs, are thoroughly dried before adding them to the oil to prevent any water from causing spoilage.
Additionally, always use a clean, sterilized bottle or jar to store your infused oil to maintain its freshness and safety. If you prefer a stronger infusion, you can leave the herbs in the oil for a few days before straining.
Remember to label your bottle with the date it was made to keep track of its freshness.
Spiced Holiday Nuts
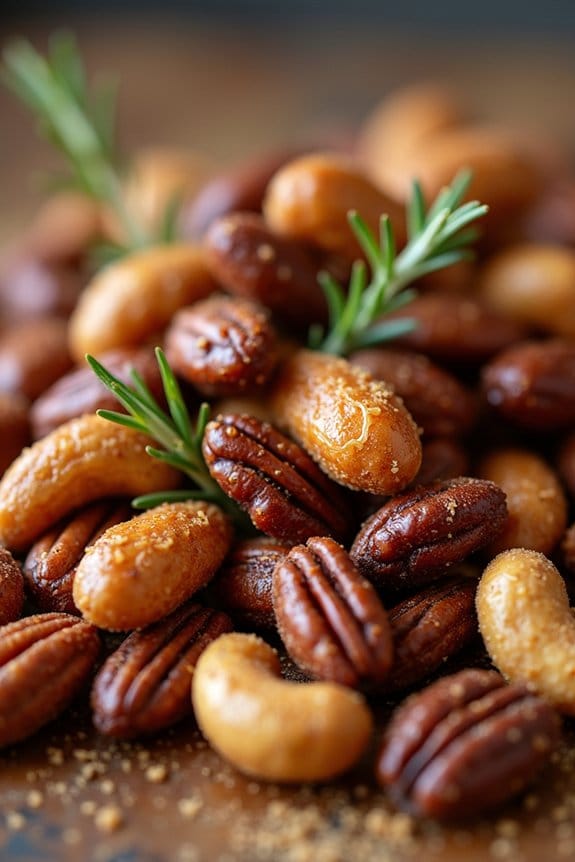
Nothing says the festive season like the warm, inviting aroma of spiced nuts roasting in the oven. These Spiced Holiday Nuts are a delightful combination of sweet and savory flavors, perfect for snacking or gifting during the Christmas season. This easy recipe combines a medley of your favorite nuts with a blend of spices that evoke the warmth and joy of the holidays.
Whether you’re entertaining guests or simply enjoying a cozy evening at home, these nuts are guaranteed to add a festive touch to your celebrations. The beauty of this recipe lies in its simplicity and versatility. You can easily tailor the spice blend to suit your personal taste or experiment with different types of nuts to create your ideal mix.
The end result is a crunchy, flavorful treat that pairs wonderfully with a glass of mulled wine or hot cocoa. Best of all, these Spiced Holiday Nuts can be made in advance, allowing you to enjoy the holiday season without the stress of last-minute preparations.
Ingredients (Serving Size: 4-6 people):
- 1 cup raw almonds
- 1 cup raw cashews
- 1 cup raw pecans
- 1/2 cup raw walnuts
- 2 tablespoons olive oil
- 3 tablespoons brown sugar
- 2 teaspoons ground cinnamon
- 1 teaspoon ground nutmeg
- 1 teaspoon ground ginger
- 1/2 teaspoon cayenne pepper
- 1 teaspoon salt
- 1 tablespoon fresh rosemary, chopped
- 1 tablespoon maple syrup
Cooking Instructions:
- Preheat the Oven: Start by preheating your oven to 350°F (175°C). This will guarantee the nuts roast evenly and develop a nice, golden color.
- Mix the Nuts: In a large mixing bowl, combine the almonds, cashews, pecans, and walnuts. Make sure the nuts are well mixed to guarantee even coating with the spice blend.
- Prepare the Spice Mixture: In a separate smaller bowl, whisk together the olive oil, brown sugar, ground cinnamon, nutmeg, ginger, cayenne pepper, and salt. Add the fresh rosemary and maple syrup, stirring until all ingredients are well combined.
- Coat the Nuts: Pour the spice mixture over the mixed nuts. Use a spatula or your hands to thoroughly mix and coat the nuts, ensuring each nut is covered in the spice blend.
- Spread on Baking Sheet: Line a baking sheet with parchment paper. Spread the coated nuts in a single layer on the prepared baking sheet. Make sure they’re spread out evenly to allow for uniform roasting.
- Roast the Nuts: Place the baking sheet in the preheated oven and roast for 15-20 minutes. Stir the nuts halfway through the roasting time to guarantee they roast evenly. Keep an eye on them to prevent burning.
- Cool and Serve: Once roasted, remove the nuts from the oven and allow them to cool completely on the baking sheet. As they cool, the nuts will become crunchy. Once cooled, transfer them to a serving bowl or an airtight container for storage.
Extra Tips:
When making Spiced Holiday Nuts, feel free to get creative with your spice blend by adding or substituting spices according to your preference. If you prefer less heat, reduce the amount of cayenne pepper. For a sweeter variation, increase the amount of brown sugar or add a touch more maple syrup.
Additionally, these nuts can be stored in an airtight container at room temperature for up to two weeks, making them an excellent make-ahead option for holiday gatherings or gifts.
Homemade Peppermint Bark
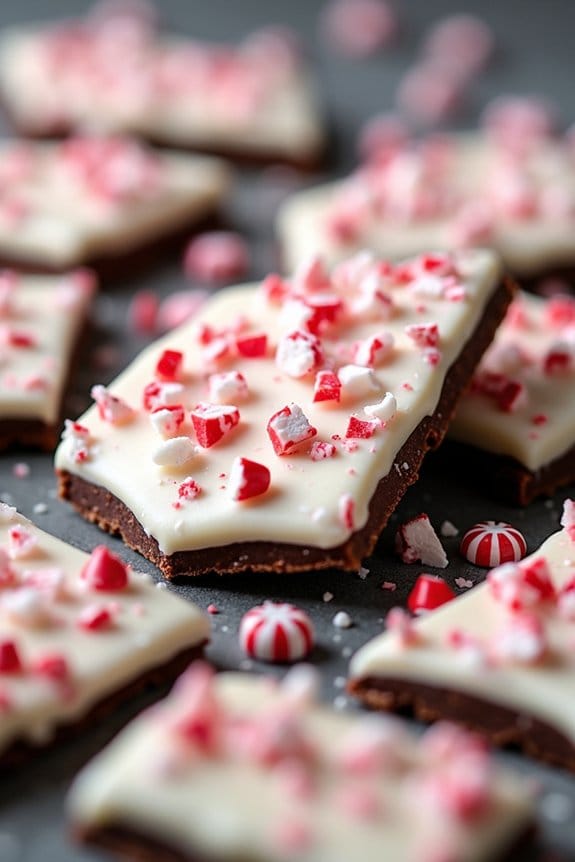
Homemade Peppermint Bark is a delightful and festive treat that’s perfect for the holiday season. This easy-to-make dessert combines the rich flavors of chocolate with the invigorating taste of peppermint, making it a crowd-pleaser at any Christmas gathering. Not only is it a wonderful addition to your holiday dessert table, but it’s also a thoughtful homemade gift for friends and family.
With its crisp layer of white chocolate and peppermint candy on top of a smooth dark chocolate base, this peppermint bark is as beautiful as it’s delicious. The beauty of Homemade Peppermint Bark lies in its simplicity and the minimal effort required to create a stunning and delicious dessert.
Whether you’re a seasoned chef or a novice in the kitchen, this recipe is straightforward and easy to follow. Plus, with just a handful of ingredients, you can whip up this festive treat in no time. Best of all, you can customize the thickness and peppermint intensity to suit your personal taste.
Here’s how to make enough Homemade Peppermint Bark to serve 4-6 people:
Ingredients:
- 12 ounces of dark chocolate chips or chopped dark chocolate
- 12 ounces of white chocolate chips or chopped white chocolate
- 1 teaspoon of peppermint extract
- 1 cup of crushed peppermint candies or candy canes
Instructions:
- Prepare the Baking Sheet: Line a baking sheet with parchment paper or a silicone baking mat. This will prevent the chocolate from sticking and make it easier to remove the bark once it has set.
- Melt the Dark Chocolate: In a microwave-safe bowl, melt the dark chocolate in 30-second intervals, stirring in between, until smooth. Alternatively, you can use a double boiler to melt the chocolate over simmering water.
- Spread the Dark Chocolate Layer: Pour the melted dark chocolate onto the prepared baking sheet, spreading it into an even layer about 1/4 inch thick using a spatula. Place the baking sheet in the refrigerator to allow the chocolate to set for about 20 minutes.
- Melt the White Chocolate: While the dark chocolate layer is setting, melt the white chocolate in a similar manner as the dark chocolate. Once melted, stir in the peppermint extract to incorporate the flavor evenly.
- Spread the White Chocolate Layer: Once the dark chocolate has set, remove the baking sheet from the refrigerator. Pour the melted white chocolate over the dark chocolate layer, spreading it evenly with a spatula.
- Add the Peppermint Topping: Quickly sprinkle the crushed peppermint candies evenly over the top of the white chocolate layer before it begins to set. Press the pieces gently into the chocolate to guarantee they adhere.
- Set and Break the Bark: Place the baking sheet back in the refrigerator for about 30 minutes or until the bark is completely hardened. Once set, break the bark into pieces of your desired size.
Extra Tips:
For the best results, use high-quality chocolate as it will yield a smoother and more flavorful bark. When melting the chocolate, be careful not to overheat it, as this can cause it to seize and become grainy.
If you prefer a softer texture, you can add a teaspoon of vegetable oil to the chocolate before melting. Additionally, feel free to experiment with different types of chocolate or add-ins like nuts or dried fruits for a unique twist.
Store the peppermint bark in an airtight container at a cool room temperature or in the refrigerator to keep it fresh for longer.
Gingerbread Cookie Mix in a Jar
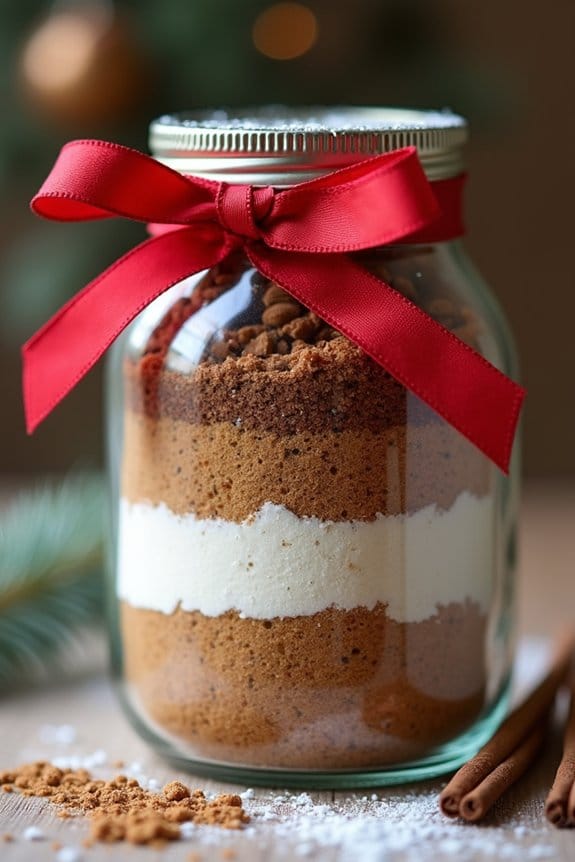
Gingerbread Cookie Mix in a Jar is a delightful and thoughtful gift that brings a taste of holiday cheer to any recipient. This festive jar contains all the dry ingredients needed to whip up a batch of delicious gingerbread cookies, making it a convenient and charming present for friends, family, or coworkers.
It’s also a fantastic way to include a personal touch in your gift-giving, as you can decorate the jar with ribbons, labels, and other festive embellishments to match the holiday spirit.
Creating a Gingerbread Cookie Mix in a Jar is as simple as layering the ingredients in a clear glass jar, which not only looks beautiful but also makes the baking process straightforward for the recipient. Once the jar is complete, all they need to do is add a few fresh ingredients and follow easy baking instructions to enjoy warm, aromatic gingerbread cookies straight from the oven.
This recipe is designed to yield approximately 24 cookies, perfect for serving 4-6 people.
Ingredients for Gingerbread Cookie Mix in a Jar (Serving Size: 4-6 people):
- 2 cups all-purpose flour
- 1 teaspoon baking soda
- 1/2 teaspoon salt
- 1 teaspoon ground ginger
- 1 teaspoon ground cinnamon
- 1/2 teaspoon ground nutmeg
- 1/2 teaspoon ground cloves
- 3/4 cup packed light brown sugar
- 1/2 cup granulated sugar
Cooking Instructions:
1. Prepare the Jar: Start by verifying your jar is clean and dry. Use a 1-quart glass jar with a lid to accommodate all the ingredients.
2. Layer the Ingredients: Begin layering the ingredients in the jar. Start with the flour, gently tapping the jar to level the layer. Add the baking soda and salt next. Follow with the ground ginger, cinnamon, nutmeg, and cloves, ensuring each layer is even and distinct.
Finally, add the brown sugar and granulated sugar, packing them down gently to fit.
3. Seal and Decorate: Once all the ingredients are layered, seal the jar tightly with the lid. Decorate the jar with ribbons, a gift tag, and a label with baking instructions.
4. Attach Baking Instructions: On the label, include these instructions for the recipient: “To bake cookies, preheat oven to 350°F (175°C). In a large bowl, cream together 3/4 cup softened butter and 1 large egg. Add the contents of this jar, mixing until a dough forms. Roll dough into 1-inch balls and place them on a baking sheet lined with parchment paper. Bake for 8-10 minutes or until edges start to brown. Cool on a wire rack.”
Extra Tips:
When assembling your Gingerbread Cookie Mix in a Jar, make sure each layer is compact and even. This not only helps in creating a visually appealing gift but also guarantees the ingredients don’t shift during storage and transport.
If you find it challenging to fit all ingredients, press down gently with a spoon between each layer. For a more festive touch, consider adding a small bag of holiday-themed sprinkles or a cookie cutter tied to the jar.
Remember to include clear and concise instructions to make the baking process as effortless as possible for the recipient.
Flavored Hot Chocolate Spoons
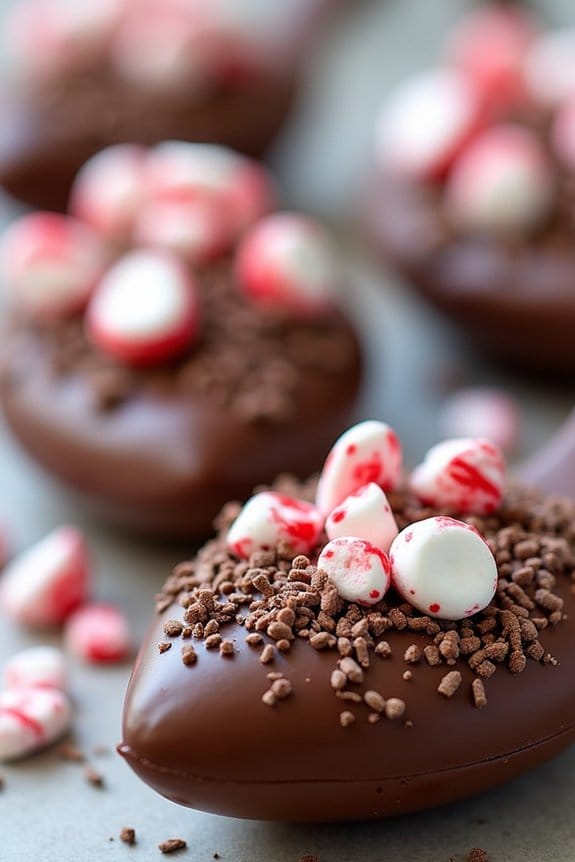
Flavored Hot Chocolate Spoons are a delightful and easy-to-make treat that will add a touch of festive indulgence to your holiday gatherings. These spoons aren’t only visually appealing but also incredibly versatile, allowing you to customize the flavors to suit your personal preferences or those of your guests.
Whether you want to stir them into a mug of hot milk or simply enjoy them as a candy, these spoons are sure to be a hit during the Christmas season. Perfect for serving 4-6 people, these Flavored Hot Chocolate Spoons are a great addition to any holiday party or a cozy night in.
They also make wonderful homemade gifts, wrapped in cellophane and tied with a festive ribbon. By combining rich chocolate with your choice of flavorings and toppings, you can create a unique and delicious experience for everyone.
Ingredients:
- 12 ounces of high-quality dark, milk, or white chocolate
- 2 teaspoons of peppermint extract (or any other extract of choice)
- 1/4 cup crushed candy canes
- 1/4 cup mini marshmallows
- 1/4 cup chocolate sprinkles
- 8-10 wooden or plastic spoons
Instructions:
- Prepare the Chocolate: Begin by finely chopping the chocolate. This will help it melt more evenly. Place the chopped chocolate in a microwave-safe bowl.
- Melt the Chocolate: Microwave the chocolate in 30-second intervals, stirring between each interval until it’s completely melted and smooth. Be careful not to overheat.
- Add Flavoring: Once the chocolate is melted, stir in the peppermint extract (or your chosen flavor extract) until it’s fully incorporated.
- Prepare the Spoons: Arrange your spoons on a baking sheet lined with parchment paper. This will make it easier to transport and cool your chocolate spoons.
- Fill the Spoons: Using a small spoon or piping bag, fill each spoon with the melted chocolate. Confirm that the chocolate fills the spoon’s bowl completely.
- Add Toppings: While the chocolate is still warm, sprinkle your chosen toppings (crushed candy canes, mini marshmallows, chocolate sprinkles) over the filled spoons. Press lightly to ensure they stick.
- Set the Chocolate: Allow the chocolate spoons to set at room temperature for about 1-2 hours or speed up the process by placing them in the refrigerator for about 30 minutes.
- Wrap and Store: Once the chocolate has set completely, wrap each spoon in cellophane or place them in a decorative box for gifting.
Extra Tips:
When making Flavored Hot Chocolate Spoons, it’s important to use high-quality chocolate as it will melt better and provide a richer flavor. You can experiment with different extracts such as vanilla, almond, or even orange for a unique twist.
To avoid the chocolate from seizing, confirm no water comes into contact with it during melting. If giving as gifts, consider pairing the spoons with a small jar of hot cocoa mix for a thoughtful present.
Zesty Lemon Sugar Scrub
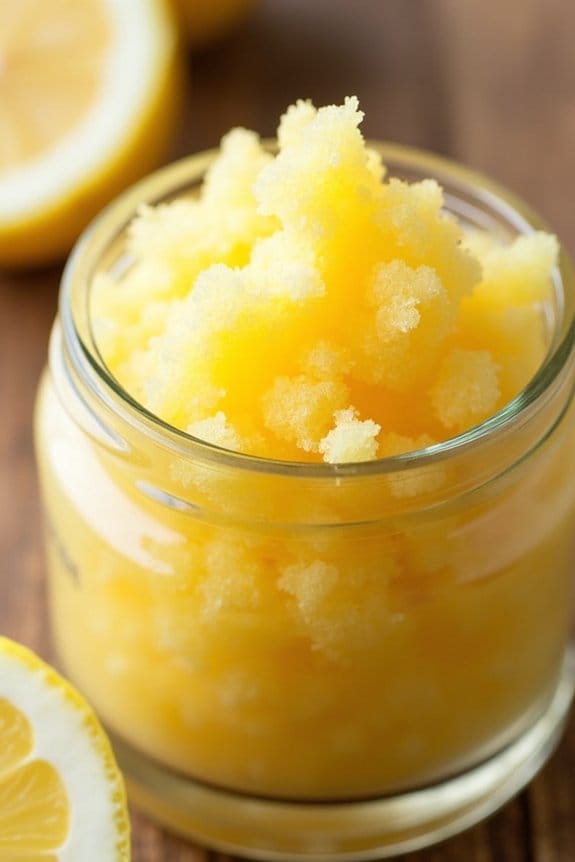
Zesty Lemon Sugar Scrub is a revitalizing and invigorating treat for your skin, perfect for the festive season. This easy DIY project combines the bright, uplifting scent of lemon with the exfoliating power of sugar, leaving your skin feeling smooth and rejuvenated. It’s a wonderful way to pamper yourself or to create thoughtful homemade gifts for friends and family during the holidays.
Creating a Zesty Lemon Sugar Scrub isn’t only simple but also a fun activity to do with loved ones. This scrub can be made in just a few minutes, using only a handful of ingredients that you likely already have in your kitchen. The natural oils in the lemon zest combined with coconut oil provide a moisturizing effect, while the sugar works to gently slough away dead skin cells. Here is how you can make enough for 4-6 small jars, perfect for gift-giving.
Ingredients for 4-6 servings:
- 2 cups granulated sugar
- 1/2 cup coconut oil (melted)
- Zest of 2 lemons
- 10-15 drops of lemon essential oil
- Optional: 1-2 drops of yellow food coloring (for visual appeal)
Instructions:
- Prepare the Ingredients: Begin by zesting the lemons. Make sure to avoid the white pith beneath the zest as it’s bitter. Melt the coconut oil in a saucepan over low heat or in short intervals in the microwave until it’s fully liquefied.
- Mix the Ingredients: In a large mixing bowl, combine the granulated sugar and the melted coconut oil. Stir the mixture until the sugar is uniformly coated with the oil.
- Add Fragrance and Color: Add the lemon zest and lemon essential oil to the sugar mixture. Stir well to guarantee the zest and essential oil are evenly distributed. If desired, add a drop or two of yellow food coloring for a vibrant look, mixing thoroughly until you reach the desired shade.
- Jar the Scrub: Spoon the mixture into clean, dry jars. Use a spatula to pack the scrub tightly and remove any air pockets. Seal the jars with lids and decorate with ribbons or labels for a festive touch.
- Store Properly: Store the scrub in a cool, dry place. It will keep for several weeks, making it ideal for preparing ahead of time for Christmas gifting.
Extra Tips: When using the Zesty Lemon Sugar Scrub, always apply it to wet skin to prevent irritation. Gently massage the scrub in circular motions, focusing on dry areas like elbows and knees. Rinse thoroughly with warm water and pat the skin dry.
If you find the scrub too coarse, you can adjust the texture by adding more coconut oil for a creamier consistency. Remember, this scrub is meant for external use only, and due to the presence of citrus, avoid using it on sunburned or sensitive skin.
Cheddar and Chive Savory Biscuits
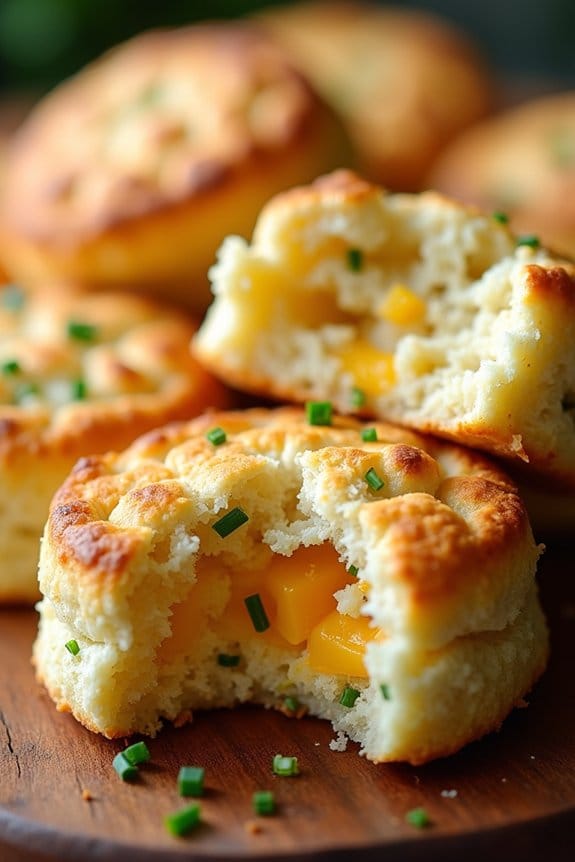
Cheddar and Chive Savory Biscuits are a delightful addition to any Christmas table, bringing a touch of warm, cheesy goodness that pairs perfectly with your holiday meals. These biscuits aren’t only quick and easy to make but also versatile enough to complement a variety of dishes, from roasted meats to hearty stews.
The combination of sharp cheddar and fresh chives creates a flavor profile that’s both rich and aromatic, making these biscuits a crowd-pleaser. Perfect for serving 4-6 people, these biscuits come together in no time, making them an ideal last-minute addition to your festive feast.
Whether you’re a seasoned baker or a beginner in the kitchen, this recipe guarantees a batch of fluffy, buttery biscuits with a golden crust and a soft, savory center. Let’s explore the ingredients and steps needed to create these delicious Cheddar and Chive Savory Biscuits.
Ingredients for 4-6 servings:
- 2 cups all-purpose flour
- 1 tablespoon baking powder
- 1 teaspoon salt
- 1/2 teaspoon garlic powder
- 1/4 teaspoon baking soda
- 1/2 cup unsalted butter, chilled and cubed
- 1 cup sharp cheddar cheese, shredded
- 2 tablespoons fresh chives, chopped
- 3/4 cup buttermilk
Cooking Instructions:
- Preheat the Oven: Start by preheating your oven to 425°F (220°C). This guarantees that the biscuits will bake evenly and achieve a perfect golden brown color.
- Prepare the Dry Ingredients: In a large mixing bowl, combine the all-purpose flour, baking powder, salt, garlic powder, and baking soda. Mix them together thoroughly to confirm that the baking powder and soda are evenly distributed, which is vital for the biscuits to rise properly.
- Incorporate the Butter: Add the chilled, cubed butter to the flour mixture. Using a pastry cutter or your fingers, cut the butter into the flour until the mixture resembles coarse crumbs. The small pieces of butter will create pockets of steam when baking, resulting in flaky biscuits.
- Add Cheese and Chives: Stir in the shredded cheddar cheese and chopped chives. Confirm they’re evenly distributed throughout the mixture for consistent flavor in each biscuit.
- Pour in the Buttermilk: Gradually pour in the buttermilk, stirring gently with a spatula until the dough just comes together. Be careful not to overwork the dough, as this can result in tough biscuits.
- Shape the Biscuits: Turn the dough out onto a lightly floured surface. Pat it into a rectangle about 1-inch thick. Use a biscuit cutter or a round glass to cut out biscuits, re-rolling the scraps as needed.
- Bake the Biscuits: Place the biscuits on a baking sheet lined with parchment paper. Bake in the preheated oven for 12-15 minutes, or until the tops are golden brown.
- Cool and Serve: Remove the biscuits from the oven and let them cool slightly on a wire rack before serving. Enjoy them warm for the best flavor and texture.
Extra Tips:
For the best results, always use chilled butter and buttermilk. This helps the biscuits rise better and achieve a flakier texture. If you don’t have buttermilk, you can easily make a substitute by adding a tablespoon of lemon juice or vinegar to regular milk and letting it sit for a few minutes.
Additionally, feel free to experiment with different types of cheese or herbs to suit your taste preferences. Remember, the key to perfect biscuits isn’t overworking the dough to maintain their light and tender crumb.
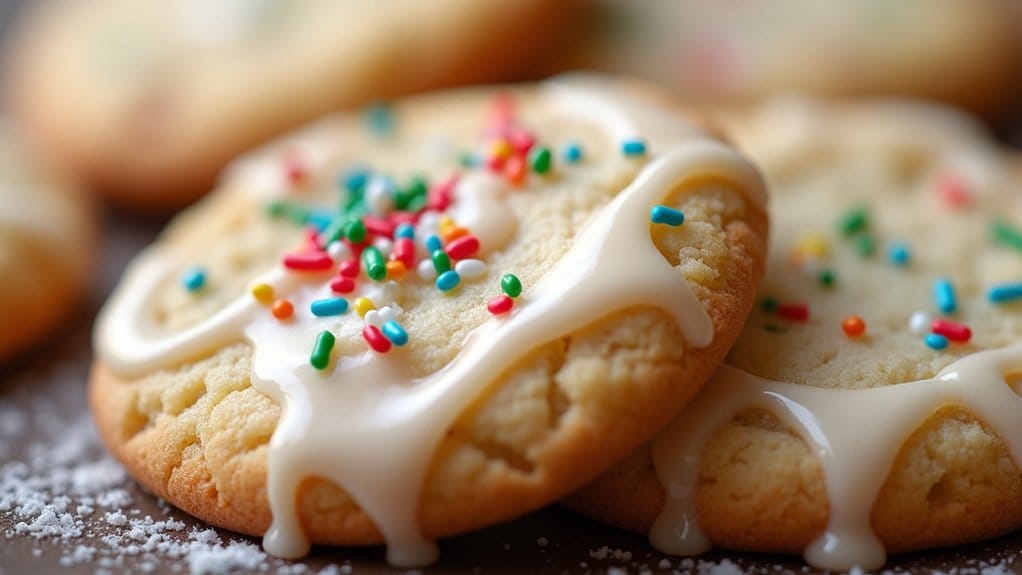
Vanilla Bean Sugar Cookies
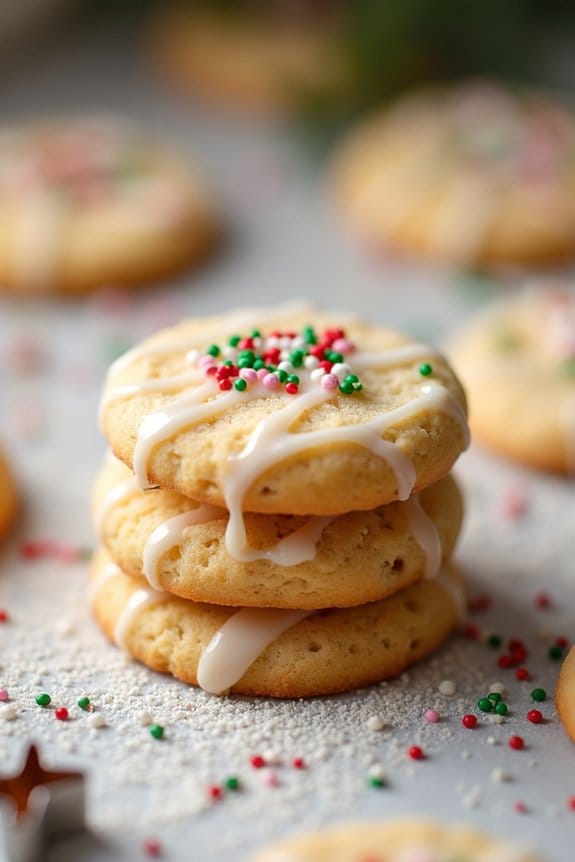
Vanilla Bean Sugar Cookies are a classic staple for Christmas festivities. Their delicate vanilla flavor and melt-in-your-mouth texture make them a favorite among both children and adults. The use of real vanilla bean gives these cookies an elevated taste, making them perfect for holiday gatherings or as gifts for friends and family.
Whether you’re a seasoned baker or a novice in the kitchen, this recipe is simple yet rewarding, capturing the essence of the holiday spirit in every bite.
These cookies aren’t only delicious but also versatile, allowing you to get creative with decorations. You can use festive cookie cutters to shape them into Christmas trees, stars, or any holiday-themed design. Decorate them with colorful icing, sprinkles, or edible glitter to add a personal touch.
These Vanilla Bean Sugar Cookies are sure to be a hit at any Christmas celebration, bringing joy and warmth to your holiday table.
Ingredients (serving size: 4-6 people):
- 2 ¾ cups all-purpose flour
- 1 teaspoon baking powder
- ½ teaspoon baking soda
- ½ teaspoon salt
- 1 cup unsalted butter, softened
- 1 ½ cups granulated sugar
- 1 large egg
- 2 teaspoons vanilla bean paste
- 2 tablespoons milk
- Optional: Icing, sprinkles, or edible glitter for decoration
Cooking Instructions:
- Preheat and Prepare: Preheat your oven to 350°F (175°C). Line two baking sheets with parchment paper or silicone baking mats to prevent sticking.
- Mix Dry Ingredients: In a medium bowl, sift together the flour, baking powder, baking soda, and salt. Set aside.
- Cream Butter and Sugar: In a large bowl, using an electric mixer, cream the softened butter and granulated sugar together on medium speed until light and fluffy, about 2-3 minutes.
- Add Wet Ingredients: Beat in the egg, vanilla bean paste, and milk until combined. Scrape down the sides of the bowl as needed to confirm everything is mixed well.
- Combine Mixtures: Gradually add the dry ingredients to the wet ingredients, mixing on low speed until a dough forms. Be careful not to overmix.
- Roll Out Dough: Divide the dough into two portions. Roll out each portion on a lightly floured surface to about ¼ inch thickness. Use your chosen cookie cutters to cut out shapes.
- Bake the Cookies: Place the cut-out cookies onto the prepared baking sheets, leaving about 1 inch of space between them. Bake for 8-10 minutes, or until the edges are lightly golden.
- Cool and Decorate: Let the cookies cool on the baking sheet for 5 minutes before transferring them to a wire rack to cool completely. Once cooled, decorate with icing, sprinkles, or edible glitter as desired.
Extra Tips: For a more pronounced vanilla flavor, you can add an extra teaspoon of vanilla bean paste or use the seeds from a whole vanilla bean. If you prefer a softer cookie, be sure not to overbake them. The cookies will continue to firm up as they cool on the baking sheet.
Additionally, if the dough becomes too soft to handle, refrigerate it for about 15-20 minutes before rolling it out again. This will help maintain the shape of your cookies during baking.
