
With the holiday season just around the corner, I’m on the hunt for easy, crowd-pleasing recipes that will shine at Christmas potlucks. There’s a special joy in watching guests’ faces light up when they spot a delicious dish. I still remember the first time I brought Cheesy Garlic Pull-Apart Bread to a gathering—it was gone in no time! If you’re aiming to impress without the stress, I’ve got the perfect recipes to make your celebration memorable. Curious to find out more? Keep scrolling!
Cheesy Garlic Pull-Apart Bread
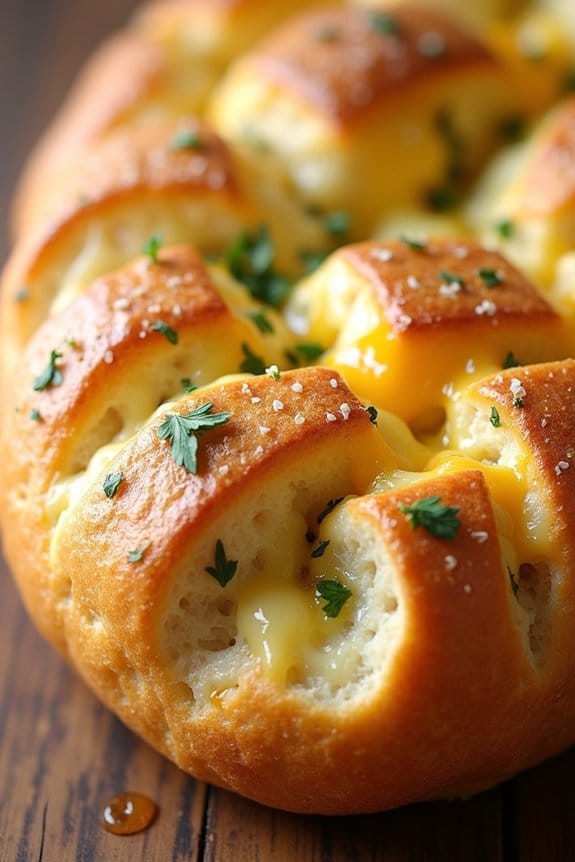
Cheesy Garlic Pull-Apart Bread is the ultimate crowd-pleaser for any holiday gathering, especially a Christmas potluck. This dish combines the comforting flavors of melted cheese and aromatic garlic with the satisfying texture of a crusty loaf. It’s easy to prepare, making it an ideal choice for hosts or guests looking to contribute something delicious without spending hours in the kitchen.
The pull-apart nature of the bread encourages sharing and creates a fun, interactive dining experience that everyone will enjoy.
The key to perfecting this recipe is selecting a good quality loaf of bread with a nice crust and soft interior. A sourdough or French baguette works wonderfully, as they hold up well to the filling and baking process. Once the bread is sliced and filled with the cheesy garlic mixture, it’s baked until the cheese is gooey and the bread is golden brown. The final result is a fragrant, mouthwatering centerpiece that will have your guests coming back for more.
Ingredients (Serving Size: 4-6 people):
- 1 large sourdough or French bread loaf
- 1 cup shredded mozzarella cheese
- 1 cup shredded cheddar cheese
- 1/2 cup unsalted butter, melted
- 4 cloves garlic, minced
- 1 tablespoon fresh parsley, chopped
- 1/2 teaspoon salt
- 1/4 teaspoon black pepper
Cooking Instructions:
- Preheat Oven: Start by preheating your oven to 375°F (190°C). This will guarantee that your bread bakes evenly and the cheese melts perfectly.
- Prepare the Bread: Place the bread loaf on a cutting board. Using a sharp bread knife, make diagonal cuts about 1 inch apart across the top of the loaf, making sure not to cut all the way through. Turn the loaf 90 degrees and make diagonal cuts in the opposite direction, again being careful not to cut through the bottom. This will create a crosshatch pattern.
- Prepare the Garlic Butter Mixture: In a small bowl, combine the melted butter, minced garlic, chopped parsley, salt, and pepper. Stir well to guarantee the ingredients are evenly distributed.
- Fill the Bread: Gently pull apart the bread sections and use a spoon or a brush to evenly distribute the garlic butter mixture into all the cuts and crevices. Be generous with the mixture to guarantee each piece is flavorful.
- Add the Cheese: Mix the mozzarella and cheddar cheeses together, then stuff the cheese mixture into the cuts of the bread, making sure to push it down into the crevices so it’s evenly distributed.
- Wrap and Bake: Wrap the entire loaf in aluminum foil and place it on a baking sheet. Bake in the preheated oven for 15 minutes to allow the cheese to start melting.
- Finish Baking: Carefully remove the foil from the top of the loaf and return it to the oven. Bake for an additional 10-15 minutes, or until the cheese is fully melted and the top of the bread is golden brown and crisp.
- Serve: Remove from the oven and let it cool for a few minutes before serving. Place it on a serving platter and encourage guests to pull apart pieces to enjoy.
Extra Tips: For a more robust flavor, consider adding additional herbs such as rosemary or thyme to the garlic butter mixture. If you prefer a spicier kick, sprinkle in a pinch of red pepper flakes. For an extra cheesy delight, try mixing in other cheeses like Monterey Jack or Gruyere.
Guarantee that the bread is fresh for the best texture, and avoid using pre-packaged shredded cheese as it may not melt as smoothly due to added anti-caking agents.
Cranberry Brie Bites
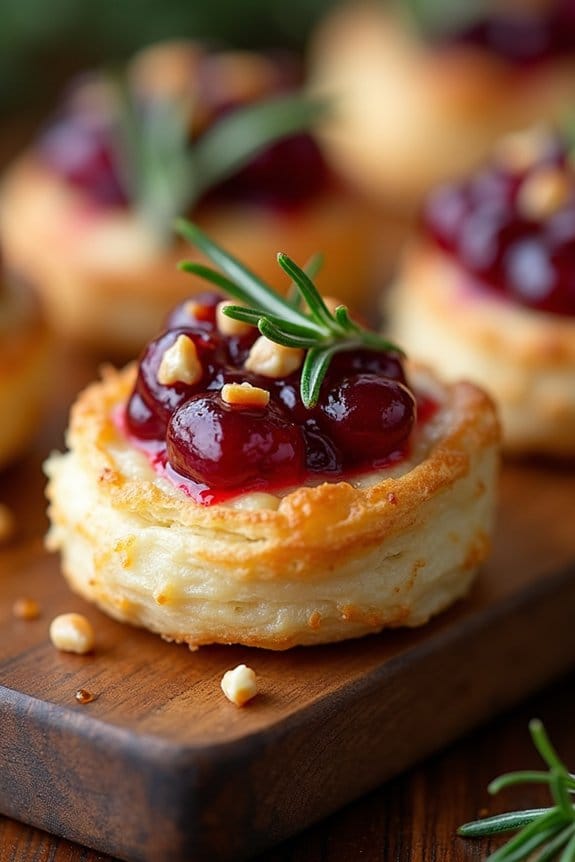
Cranberry Brie Bites are the perfect festive appetizer for your Christmas potluck. These bite-sized delights combine the creamy richness of Brie cheese with the tangy sweetness of cranberry sauce, all nestled in a flaky pastry shell.
They aren’t only delicious but also visually appealing, making them a hit at any holiday gathering. Plus, they’re incredibly easy to prepare and can be made ahead of time, allowing you to enjoy the festivities without the stress of last-minute cooking.
This recipe serves 4-6 people and is great for those who want to offer a sophisticated yet simple dish. The combination of flavors and textures in these bites guarantees that they’ll be loved by both adults and children alike. With just a few ingredients and a little bit of time, you can create a dish that’s sure to impress your family and friends.
Ingredients:
- 1 sheet of puff pastry, thawed
- 8 oz Brie cheese
- 1/2 cup cranberry sauce
- 1/4 cup chopped pecans (optional)
- 2 tablespoons honey
- Fresh rosemary sprigs for garnish (optional)
Instructions:
- Preheat the Oven: Preheat your oven to 375°F (190°C) to make sure it’s ready for baking.
- Prepare the Puff Pastry: Roll out the thawed puff pastry sheet on a lightly floured surface to smooth it out. Cut the pastry into 12 equal squares.
- Prepare the Muffin Tin: Lightly grease a mini muffin tin. Place each puff pastry square into the muffin tin wells, pressing down gently to form little cups.
- Cut the Brie: Slice the Brie cheese into small cubes that will fit into the pastry cups.
- Assemble the Bites: Place a piece of Brie into each pastry cup. Top each with a teaspoon of cranberry sauce and a sprinkle of chopped pecans, if using.
- Bake: Bake in the preheated oven for 12-15 minutes, or until the pastry is golden brown and the cheese is bubbly.
- Drizzle with Honey: Once out of the oven, drizzle a little honey over each bite for added sweetness.
- Garnish: If desired, add a small sprig of fresh rosemary to each bite for a festive touch.
Extra Tips:
To make your Cranberry Brie Bites extra special, consider using a high-quality Brie and homemade cranberry sauce if you have time.
You can prepare these bites a few hours in advance and store them in the fridge; just pop them in the oven for a few minutes to reheat before serving.
If you prefer a nuttier flavor, toast the pecans slightly before adding them to the bites.
Finally, be sure to watch them closely in the oven to avoid over-baking, as puff pastry can quickly go from golden brown to burnt.
Honey Glazed Ham
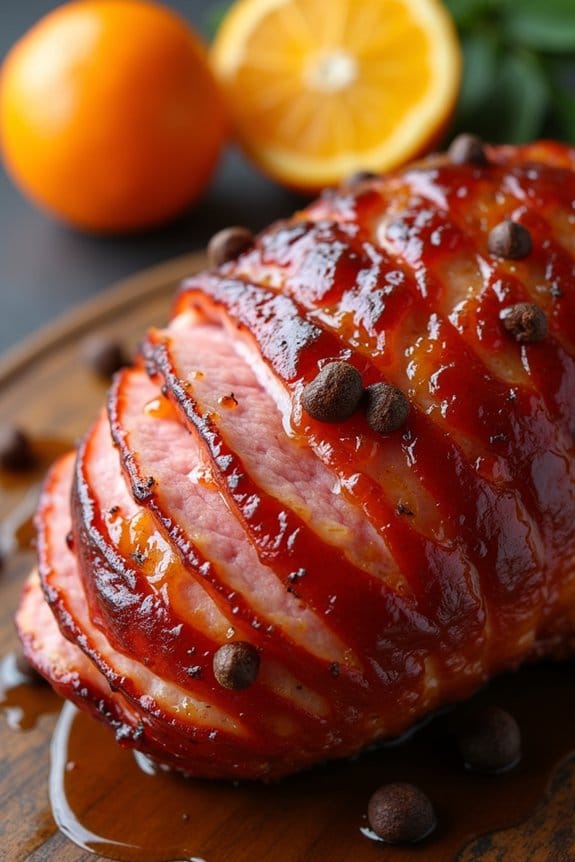
There’s nothing quite like a honey glazed ham to bring a touch of warmth and festivity to your Christmas potluck. This succulent dish, with its sweet and slightly tangy glaze, is a delightful centerpiece that promises to be a crowd-pleaser. Perfectly cooked to tender perfection, every slice is infused with the rich flavors of honey, mustard, and a hint of cloves, making it a memorable addition to your holiday spread.
Whether you’re a seasoned cook or hosting your first holiday gathering, this recipe combines simplicity with taste, guaranteeing you have more time to enjoy the company of friends and family.
The beauty of a honey glazed ham lies not just in its taste, but also in its make-ahead convenience. You can prepare the glaze in advance, allowing the flavors to meld together, and the ham itself can be cooked a day ahead and simply warmed before serving. This flexibility makes it an ideal choice for a potluck, freeing you up to focus on other holiday preparations.
Follow this recipe for a serving size that comfortably feeds 4-6 people, providing generous portions for each guest.
Ingredients for Honey Glazed Ham (Serves 4-6):
- 1 (4 to 5-pound) fully cooked boneless ham
- 1 cup honey
- 1/2 cup brown sugar
- 1/2 cup Dijon mustard
- 1/4 cup apple cider vinegar
- 1/2 teaspoon ground cloves
- 1/2 teaspoon ground cinnamon
- 1/4 teaspoon black pepper
- 10-12 whole cloves (optional for garnish)
- Orange slices for garnish (optional)
Cooking Instructions:
- Preheat the Oven: Begin by preheating your oven to 325°F (165°C). This will guarantee your ham is cooked evenly and retains its moisture.
- Prepare the Ham: If your ham isn’t pre-sliced, use a sharp knife to score the surface in a diamond pattern. This allows the glaze to penetrate the meat, enhancing its flavor.
- Make the Glaze: In a medium saucepan over medium heat, combine the honey, brown sugar, Dijon mustard, apple cider vinegar, ground cloves, ground cinnamon, and black pepper. Stir the mixture until the sugar has dissolved and the glaze has thickened slightly, about 5 minutes.
- Apply the Glaze: Place the ham in a roasting pan and brush it generously with about half of the glaze. If desired, insert whole cloves into the scored sections for added flavor and a decorative touch.
- Bake the Ham: Cover the ham loosely with aluminum foil and bake in the preheated oven for 1 1/2 to 2 hours, basting with the remaining glaze every 30 minutes. Remove the foil during the last 30 minutes of baking to allow the glaze to caramelize and the ham to develop a golden-brown crust.
- Rest and Serve: Once done, remove the ham from the oven and let it rest for about 10 minutes before slicing. This resting period allows the juices to redistribute, guaranteeing each slice remains moist and flavorful. Garnish with orange slices if desired, and serve warm.
Extra Tips:
When selecting your ham, opt for one that’s already fully cooked to simplify the process. This recipe works well with both boneless and bone-in hams, so choose based on your preference.
If you have leftovers, honey glazed ham makes for an excellent addition to sandwiches or salads the next day. Additionally, feel free to experiment with the glaze by adding a splash of bourbon or a pinch of allspice for a unique twist.
Caprese Skewers
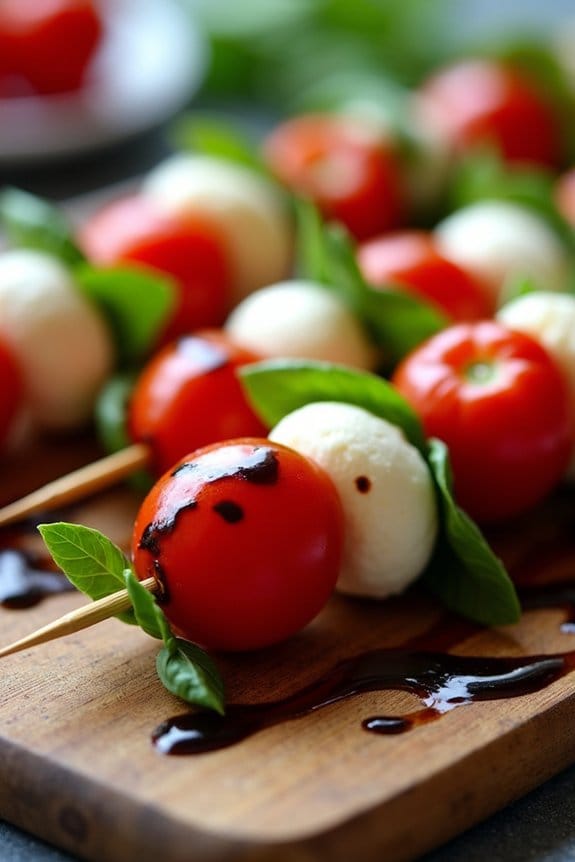
Caprese Skewers are a delightful and easy option for a Christmas potluck. They capture the essence of the classic Caprese salad in a convenient, hand-held format. The vibrant colors and fresh flavors of the tomatoes, mozzarella, and basil make them a festive addition that both looks beautiful on the table and delights the palate with every bite.
These skewers aren’t only simple to assemble, but they also require minimal ingredients, making them a quick and hassle-free choice for your holiday gathering. The combination of juicy cherry tomatoes, creamy mozzarella balls, and fresh basil leaves is accentuated by a drizzle of balsamic glaze, adding a touch of tangy sweetness.
This recipe serves 4-6 people and can easily be doubled or tripled to accommodate larger crowds. Caprese Skewers are best served fresh, but they can be prepared a few hours in advance, making them a perfect option for busy holiday schedules.
Ingredients
- 20 cherry tomatoes
- 20 small mozzarella balls (bocconcini)
- 20 fresh basil leaves
- 20 wooden skewers (6-inch)
- Salt and pepper to taste
- Balsamic glaze for drizzling
Instructions
- Prepare Ingredients: Rinse the cherry tomatoes and basil leaves under cold water and pat them dry with a clean kitchen towel. Drain the mozzarella balls from their liquid and set them aside.
- Assemble Skewers: Start by threading a cherry tomato onto each skewer, followed by a basil leaf and a mozzarella ball. Repeat this sequence until all the skewers are assembled, ensuring that each skewer has a tomato, basil leaf, and mozzarella ball.
- Season the Skewers: Lay the skewers out on a serving platter. Lightly sprinkle them with salt and pepper to enhance their flavor.
- Drizzle with Balsamic Glaze: Just before serving, drizzle the skewers with balsamic glaze. Be cautious not to overdo it; a light drizzle is sufficient to complement the flavors without overpowering them.
- Serve: Arrange the skewers decoratively on the platter and serve immediately, or cover them with plastic wrap and refrigerate for up to 2 hours before serving.
Extra Tips
For an enhanced flavor profile, consider using heirloom cherry tomatoes if available, as their varied colors and sweetness can add an extra dimension to the dish.
If you prefer a bit more tang, you can marinate the mozzarella balls in olive oil, garlic, and Italian herbs for about 30 minutes before assembling the skewers. Additionally, if you don’t have balsamic glaze, you can make a simple reduction by simmering balsamic vinegar until it thickens to your desired consistency.
Roasted Vegetable Platter
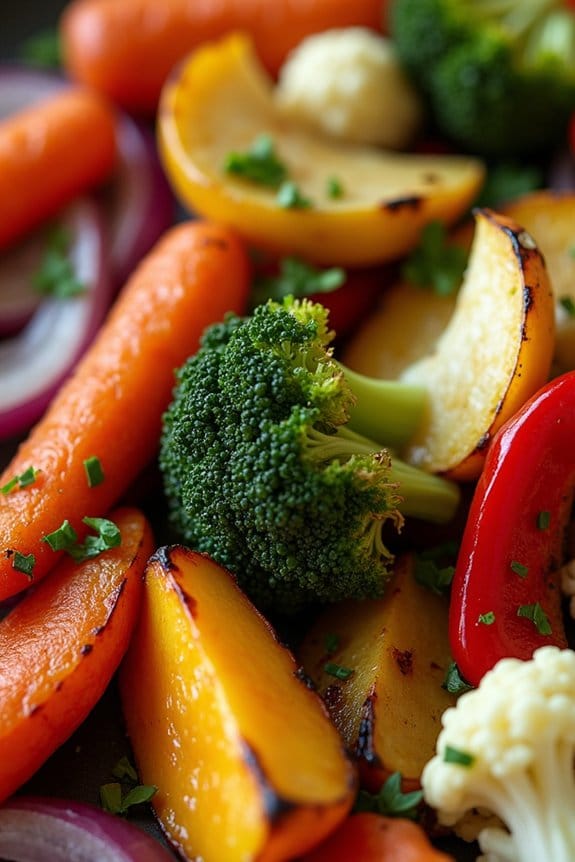
Roasted Vegetable Platters are a delightful and colorful addition to any Christmas potluck. They aren’t only visually appealing with their vibrant array of colors, but they also offer a healthy option that balances out the richer dishes typically found at holiday gatherings.
Preparing a Roasted Vegetable Platter is relatively simple and can be customized to include your favorite seasonal vegetables, making it both versatile and accommodating for various dietary preferences.
The key to a successful Roasted Vegetable Platter is to select a mix of vegetables that roast well together and complement each other in flavor and texture. This recipe is designed to serve 4-6 people and features a harmonious blend of root vegetables, squashes, and cruciferous options, guaranteeing a satisfying and nutritious dish.
The roasting process brings out the natural sweetness of the vegetables while adding a subtle caramelized flavor that everyone will enjoy.
Ingredients (Serves 4-6):
- 2 medium carrots, peeled and cut into sticks
- 2 medium parsnips, peeled and cut into sticks
- 1 small butternut squash, peeled and cubed
- 1 red bell pepper, seeded and sliced
- 1 yellow bell pepper, seeded and sliced
- 1 small red onion, cut into wedges
- 1 cup broccoli florets
- 1 cup cauliflower florets
- 3 tablespoons olive oil
- 1 teaspoon salt
- 1 teaspoon black pepper
- 1 teaspoon dried thyme
- 1 teaspoon garlic powder
- Fresh parsley for garnish
Instructions:
- Preheat the Oven: Begin by preheating your oven to 425°F (220°C). This temperature is ideal for roasting as it allows the vegetables to cook evenly and develop a nice caramelization.
- Prepare the Vegetables: While the oven is heating, wash and prepare all the vegetables. Make sure to cut them into similar sizes to promote even cooking. Place the prepared vegetables into a large bowl.
- Season the Vegetables: Drizzle the olive oil over the vegetables in the bowl. Add the salt, black pepper, dried thyme, and garlic powder. Use your hands or a spatula to toss everything together until the vegetables are evenly coated with the oil and seasoning.
- Arrange on a Baking Sheet: Spread the seasoned vegetables in a single layer on a large baking sheet. Avoid overcrowding the pan as this can lead to steaming rather than roasting, which prevents the vegetables from becoming crispy.
- Roast: Place the baking sheet in the preheated oven and roast the vegetables for 25-30 minutes. Halfway through the cooking time, stir the vegetables to make certain they roast evenly. The vegetables should be tender and have a golden-brown color when done.
- Garnish and Serve: Remove the roasted vegetables from the oven and transfer them to a serving platter. Garnish with freshly chopped parsley before serving.
Extra Tips:
To elevate the flavor profile of your Roasted Vegetable Platter, consider adding a splash of balsamic vinegar or a sprinkle of grated Parmesan cheese before serving.
You can also incorporate other vegetables like Brussels sprouts or sweet potatoes based on personal preference or availability. For added convenience, you can prepare the vegetables and seasoning ahead of time, storing them in the refrigerator until you’re ready to roast.
Just verify they’re brought to room temperature before placing them in the oven to promote even cooking.
Deviled Egg Christmas Trees

Deviled Egg Christmas Trees are a festive and delightful way to add a touch of holiday cheer to your Christmas potluck gathering. This creative twist on the classic deviled egg won’t only impress your guests with its presentation but also tantalize their taste buds. Each egg half is transformed into a cute little Christmas tree, complete with green-tinted filling and garnished with colorful decorations that mimic ornaments.
This recipe is perfect for a serving size of 4-6 people, making it an ideal choice for intimate gatherings or as an appetizer amongst a variety of dishes. The combination of creamy yolk filling with the slight crunch of bell pepper and the tang of mustard creates a harmonious balance of flavors that will leave everyone reaching for more.
Plus, these Christmas trees aren’t just visually appealing but also straightforward to prepare, allowing you to focus on enjoying the festive season with friends and family.
Ingredients:
- 6 large eggs
- 3 tablespoons mayonnaise
- 1 teaspoon Dijon mustard
- 1 teaspoon white vinegar
- Salt and pepper to taste
- Green food coloring
- 2 tablespoons finely chopped fresh parsley
- 1 small red bell pepper
- 1 small yellow bell pepper
- 1 small carrot
- 6 pretzel sticks (for tree trunks)
Instructions:
- Boil the Eggs: Place the eggs in a saucepan and cover them with water. Bring to a boil over medium-high heat. Once boiling, cover the saucepan and remove it from heat. Let the eggs sit for about 10-12 minutes.
- Prepare the Eggs: After the eggs have cooked, transfer them to a bowl of ice water to cool, which makes peeling easier. Once cooled, peel the eggs and slice them in half lengthwise. Carefully remove the yolks and place them in a mixing bowl.
- Make the Filling: Mash the yolks with a fork until smooth. Add mayonnaise, Dijon mustard, white vinegar, and a pinch of salt and pepper. Mix until creamy and well combined. Add a few drops of green food coloring to achieve a festive green, then stir in the chopped parsley for added flavor and color.
- Decorate the Eggs: Spoon or pipe the green yolk mixture back into the egg whites, forming a small mound to resemble a tree. Dice the red and yellow bell peppers into tiny pieces, and slice the carrot into thin rounds. Use these to decorate the trees with “ornaments” and “stars” atop each tree.
- Add the Tree Trunks: Break pretzel sticks into smaller pieces, and insert one piece into the bottom of each egg to act as the tree trunk.
Extra Tips:
For added flavor, consider mixing in some finely chopped chives or dill into the filling. If you don’t have green food coloring, spinach puree can be a natural alternative.
To guarantee a smooth filling, sift the egg yolks through a fine mesh sieve before mixing with other ingredients. For best results, make these deviled egg Christmas trees a few hours before serving to allow flavors to meld, but avoid preparing them too far in advance to keep the filling fresh and vibrant.
Sweet Potato Casserole
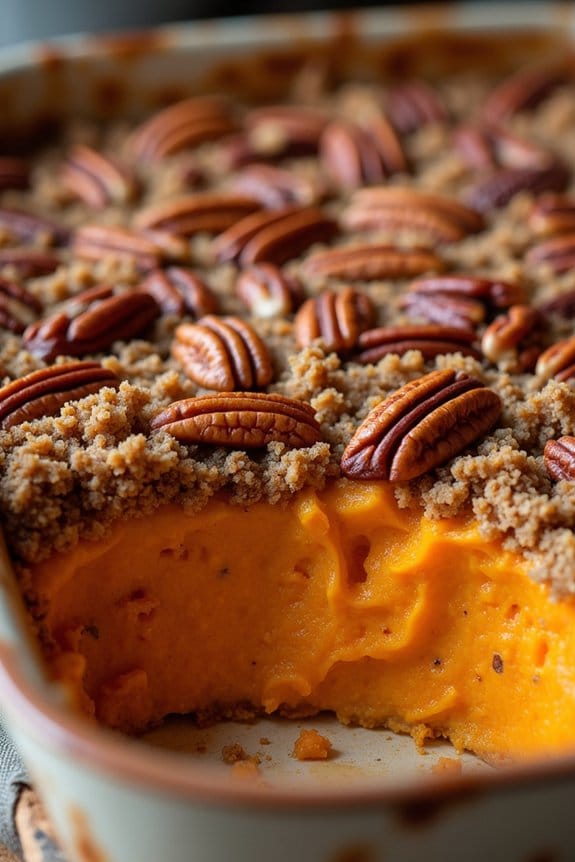
Sweet Potato Casserole is a warm and inviting dish that’s perfect for any Christmas potluck. This classic recipe combines creamy and buttery mashed sweet potatoes with a crunchy and sweet pecan topping. It’s a crowd-pleaser with its blend of textures and flavors—sweet, nutty, and slightly savory. This recipe isn’t only delicious but also straightforward to prepare, making it a go-to dish for both novice and experienced cooks alike.
The origin of sweet potato casserole can be traced back to the southern United States, where sweet potatoes have been a staple ingredient in many traditional dishes. Over time, the casserole has become a holiday favorite, especially when jazzed up with marshmallows or nuts. For this recipe, we’ll focus on a pecan topping that adds a delightful crunch and depth of flavor. This version serves 4-6 people, making it ideal for a cozy family gathering or a small holiday potluck.
Ingredients:
- 4 medium-sized sweet potatoes
- 1/3 cup of unsalted butter, melted
- 1/2 cup of granulated sugar
- 1/2 cup of milk
- 2 large eggs
- 1 teaspoon of vanilla extract
- 1/2 teaspoon of salt
For the topping:
- 1/2 cup of chopped pecans
- 1/2 cup of brown sugar
- 1/3 cup of all-purpose flour
- 1/3 cup of unsalted butter, melted
Cooking Instructions:
- Prepare the Sweet Potatoes: Preheat your oven to 350°F (175°C). Start by peeling and chopping the sweet potatoes into large chunks. Boil them in a large pot of water until they’re tender, about 15-20 minutes. Drain and let them cool slightly.
- Mash the Sweet Potatoes: In a large mixing bowl, mash the cooked sweet potatoes until smooth. You can use a potato masher or an electric mixer to make this easier.
- Combine Ingredients: Add the melted butter, granulated sugar, milk, eggs, vanilla extract, and salt to the mashed sweet potatoes. Mix until all the ingredients are well combined and the mixture is smooth.
- Prepare the Casserole Dish: Pour the sweet potato mixture into a lightly greased 9×13-inch baking dish, spreading it out evenly.
- Make the Topping: In a separate bowl, mix together the chopped pecans, brown sugar, flour, and melted butter until crumbly.
- Add the Topping: Sprinkle the pecan mixture evenly over the sweet potato layer in the baking dish.
- Bake the Casserole: Place the casserole in the preheated oven and bake for 25-30 minutes, or until the topping is golden brown and the sweet potatoes are heated through.
- Serve: Allow the casserole to cool for a few minutes before serving. Enjoy the delightful combination of creamy sweet potatoes and crunchy topping.
Extra Tips:
For a richer flavor, consider adding a pinch of cinnamon or nutmeg to the sweet potato mixture. If you prefer a sweeter topping, you can include mini marshmallows alongside the pecans.
Keep an eye on the casserole in the oven; if the topping starts to brown too quickly, cover it loosely with foil to prevent burning. This dish can be prepared a day in advance—just cover and refrigerate, then bake before serving.
Gingerbread Cookies

Gingerbread cookies are a timeless favorite during the holiday season, loved for their warm spices and delightful crunch. Perfect for a Christmas potluck, these cookies can be decorated with festive icing to add a personal touch to your holiday spread.
Whether shaped into classic gingerbread men or fun holiday motifs, these cookies are sure to bring smiles and festive cheer to any gathering.
The recipe for these classic gingerbread cookies is simple and yields a batch of approximately 24 cookies, making it perfect for serving 4-6 people. The key to a perfect gingerbread cookie lies in the balance of spices and the richness of the molasses, creating a cookie that’s both flavorful and aromatic.
Let’s explore the ingredients and steps needed to create this delightful holiday treat.
Ingredients:
- 3 cups all-purpose flour
- 1 teaspoon baking soda
- 2 teaspoons ground ginger
- 1 teaspoon ground cinnamon
- 1/2 teaspoon ground cloves
- 1/4 teaspoon ground nutmeg
- 1/2 teaspoon salt
- 3/4 cup unsalted butter, softened
- 3/4 cup packed brown sugar
- 1 large egg
- 1/2 cup molasses
- 1 teaspoon vanilla extract
- Icing and sprinkles (optional for decorating)
Instructions:
- Preheat and Prepare: Preheat your oven to 350°F (175°C). Line two baking sheets with parchment paper to prevent the cookies from sticking.
- Mix Dry Ingredients: In a medium-sized bowl, whisk together the flour, baking soda, ginger, cinnamon, cloves, nutmeg, and salt. Set aside this dry mixture for later.
- Cream Butter and Sugar: In a large mixing bowl, cream the softened butter and brown sugar together using an electric mixer on medium speed until the mixture is light and fluffy, about 2-3 minutes.
- Add Wet Ingredients: Beat in the egg, molasses, and vanilla extract into the butter-sugar mixture until well combined. The mixture should be smooth and creamy.
- Combine Ingredients: Gradually add the dry ingredients to the wet mixture, stirring with a wooden spoon or mixer on low speed until just combined. Be careful not to overmix.
- Chill the Dough: Wrap the dough in plastic wrap and refrigerate for at least 1 hour. Chilling the dough helps in easier handling and prevents the cookies from spreading too much while baking.
- Roll and Cut: Once chilled, roll out the dough on a lightly floured surface to about 1/4 inch thickness. Use cookie cutters to cut out desired shapes and place them on the prepared baking sheets, leaving some space between each cookie.
- Bake: Bake the cookies in the preheated oven for 8-10 minutes, or until the edges are firm and the centers are set. Allow them to cool on the baking sheet for 5 minutes before transferring them to a wire rack to cool completely.
- Decorate: Once cooled, you can decorate the cookies with icing and sprinkles if desired.
Extra Tips:
For the best flavor, make the dough a day ahead and let it chill overnight. This allows the spices to meld together beautifully, enhancing the overall taste of the cookies.
When rolling out the dough, lightly dust both the rolling pin and surface with flour to prevent sticking. If you want softer cookies, reduce the baking time slightly, and for crispier cookies, extend the baking time by a couple of minutes.
Chocolate Peppermint Bark
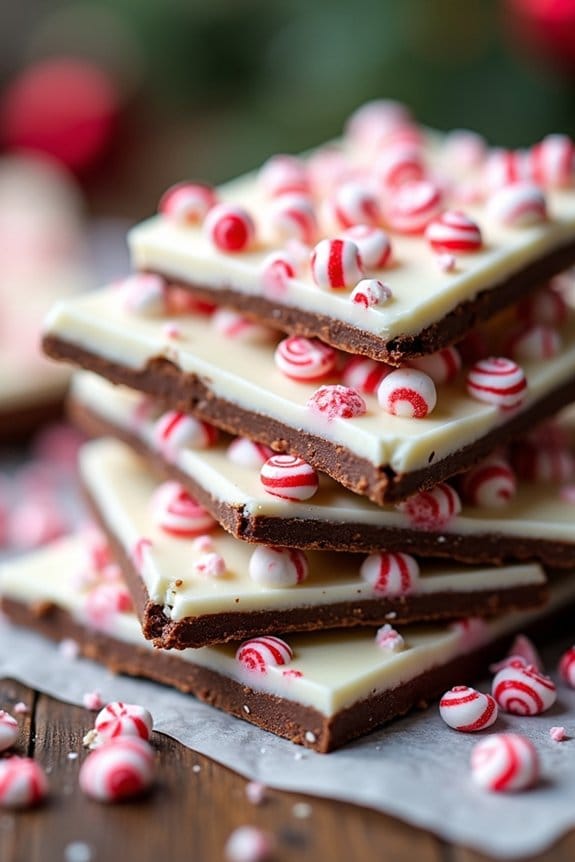
Chocolate Peppermint Bark is a delightful and festive treat perfect for any Christmas potluck. This simple yet elegant dessert combines rich chocolate and invigorating peppermint, creating a deliciously addictive combination that’s sure to impress your family and friends. The best part is that it requires minimal effort and can be made in advance, allowing you to focus on other holiday preparations.
This recipe yields enough bark to serve 4-6 people, making it an ideal addition to your holiday spread. The layers of chocolate are perfectly complemented by the crunch of peppermint candy, creating a texture and flavor that’s both satisfying and celebratory. Whether you’re a seasoned cook or a kitchen novice, this recipe is easy to follow and promises a sweet success every time.
Ingredients (for 4-6 people):
- 12 oz semi-sweet chocolate chips
- 12 oz white chocolate chips
- 1/2 teaspoon peppermint extract
- 1 cup crushed peppermint candies
Cooking Instructions:
- Prepare the Baking Sheet: Line a baking sheet with parchment paper. This will prevent the chocolate from sticking and make it easier to remove once set.
- Melt the Semi-Sweet Chocolate: In a microwave-safe bowl, melt the semi-sweet chocolate chips in the microwave in 30-second increments, stirring after each interval until smooth and fully melted. This usually takes about 1-2 minutes.
- Add Peppermint Extract: Once the chocolate is melted, stir in the peppermint extract. Mix well to verify the flavor is evenly distributed throughout the chocolate.
- Spread the Chocolate: Pour the melted chocolate onto the prepared baking sheet and spread it into an even layer using a spatula. Aim for a thickness of about 1/4 inch.
- Chill the Chocolate Layer: Place the baking sheet in the refrigerator for about 15-20 minutes, or until the chocolate layer is set and firm.
- Melt the White Chocolate: While the semi-sweet chocolate layer is setting, melt the white chocolate chips in a similar manner – using 30-second increments in the microwave and stirring until smooth.
- Layer the White Chocolate: Once melted, pour the white chocolate over the semi-sweet chocolate layer. Spread it evenly with a spatula, covering the entire surface.
- Add Crushed Peppermint: Immediately sprinkle the crushed peppermint candies over the white chocolate layer, pressing them lightly into the surface to verify they adhere as the chocolate sets.
- Final Chill: Return the baking sheet to the refrigerator for an additional 30 minutes, or until the entire bark is completely set and firm.
- Break into Pieces: Once set, remove the bark from the refrigerator and gently peel it off the parchment paper. Use a sharp knife or your hands to break it into rustic, bite-sized pieces.
Extra Tips:
When making Chocolate Peppermint Bark, verify that both layers of chocolate are completely set before proceeding to the next step. This will help maintain the distinct layers and prevent them from blending together.
Additionally, if you prefer a different chocolate combination, feel free to experiment with dark or milk chocolate instead of semi-sweet. The peppermint candies can also be swapped with other festive toppings like sprinkles or nuts for variety.
Store the bark in an airtight container in a cool place to keep it fresh and crisp.
Festive Fruit Salad
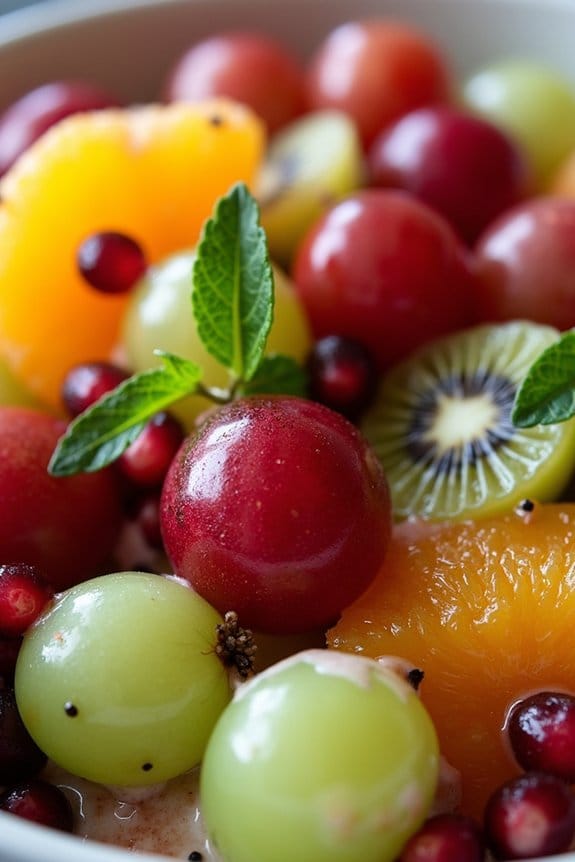
A Christmas potluck is never complete without a delightful and revitalizing dish to cleanse the palate. The Festive Fruit Salad is the perfect choice, bringing together a vibrant combination of seasonal fruits that won’t only add color to your table but also a burst of natural sweetness.
This salad is a beautiful blend of texture and flavor, offering a perfect balance between the crispness of apples and the juiciness of citrus, all tied together with a light and zesty dressing. It’s a dish that’s easy to prepare, visually appealing, and sure to be a hit among guests of all ages.
The Festive Fruit Salad isn’t only a feast for the eyes, it’s also a healthy option amidst the indulgent treats typically found at Christmas gatherings. Packed with vitamins and minerals, this dish offers a nutritious alternative that doesn’t compromise on taste.
Whether you’re hosting or attending a potluck, this salad is a straightforward yet impressive contribution that can be prepared in advance, ensuring you spend less time in the kitchen and more time enjoying the holiday festivities with loved ones.
Ingredients (Serves 4-6):
- 2 red apples, cored and diced
- 2 green apples, cored and diced
- 1 cup red grapes, halved
- 1 cup green grapes, halved
- 2 kiwis, peeled and sliced
- 1 pomegranate, seeds only
- 2 oranges, peeled and segmented
- 1/2 cup dried cranberries
- 1/4 cup chopped fresh mint leaves
- 1/2 cup Greek yogurt
- 2 tablespoons honey
- 1 tablespoon fresh lime juice
Instructions:
- Prepare the Fruits: Start by washing all the fruits thoroughly. Core and dice the red and green apples into bite-sized pieces. Halve the red and green grapes, peel and slice the kiwis, and segment the oranges. Remove the seeds from the pomegranate. Place all these prepared fruits in a large mixing bowl.
- Add Dried Fruits and Mint: Add the dried cranberries to the bowl of fresh fruits. Chop the fresh mint leaves finely and sprinkle them over the fruits. The mint will add a revitalizing aroma and a burst of flavor that complements the sweetness of the fruits.
- Make the Dressing: In a small bowl, combine the Greek yogurt, honey, and fresh lime juice. Whisk them together until you achieve a smooth and creamy consistency. This dressing will act as a tangy and sweet coating for the fruits, enhancing their natural flavors without overpowering them.
- Combine and Serve: Pour the yogurt dressing over the fruit mixture and gently toss everything together until all the fruits are well coated with the dressing. Be careful not to crush the fruits while mixing. Transfer the salad to a serving dish and garnish with a few extra mint leaves for decoration. Serve immediately or refrigerate for up to an hour before serving to allow the flavors to meld.
Extra Tips:
To prevent the apples from browning, you can toss them in a little bit of lemon or lime juice before adding them to the salad. If you prepare the salad in advance, store it in an airtight container and add the dressing just before serving to keep the fruits crisp and fresh.
Feel free to experiment by adding other seasonal fruits such as pears or berries to the mix. This dish is versatile, and you can adjust the ingredients based on availability and preference.
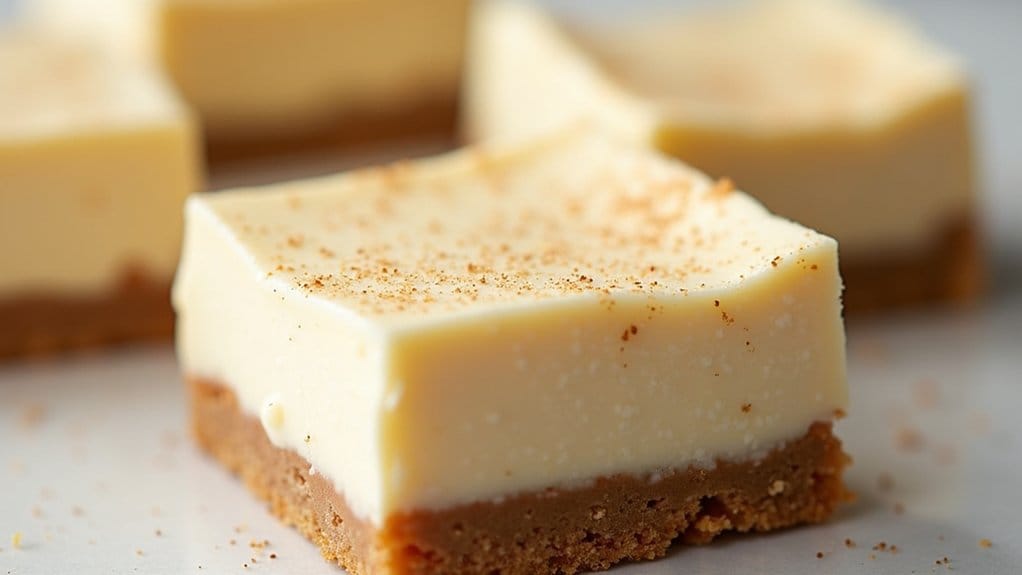
Eggnog Cheesecake Bars
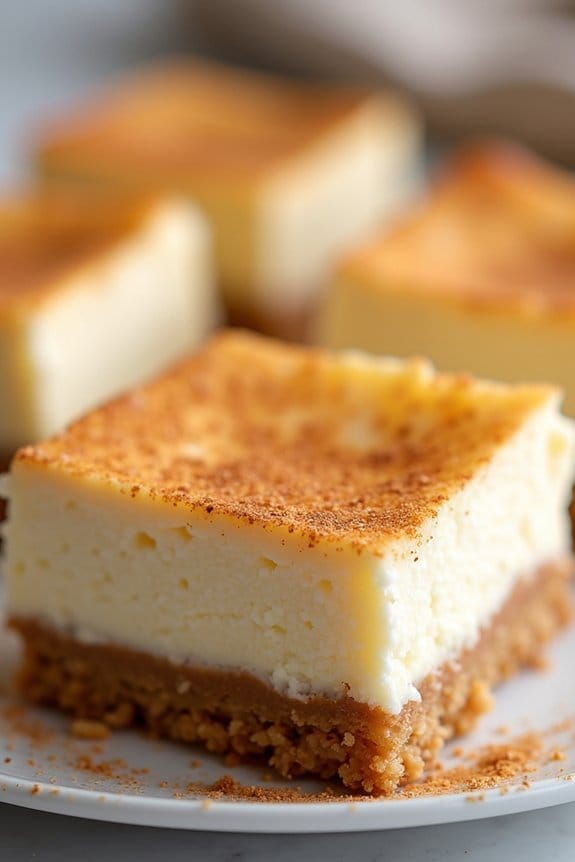
Eggnog Cheesecake Bars are a delightful holiday treat that combines the creamy richness of cheesecake with the festive flavors of eggnog. Perfect for a Christmas potluck or any holiday gathering, these bars are easy to make and sure to impress your guests.
The smooth and creamy filling is flavored with nutmeg and cinnamon, and sits atop a buttery graham cracker crust, making each bite a perfect blend of holiday cheer.
The preparation is straightforward and can be done a day ahead of time, giving you one less thing to worry about during the busy holiday season. These bars are also versatile enough to be dressed up with your favorite toppings, such as a dollop of whipped cream or a sprinkle of nutmeg, making them not just a treat for the taste buds but also a visually appealing dessert.
Ingredients (Serves 4-6)
- 1 cup graham cracker crumbs
- 1/4 cup unsalted butter, melted
- 2 tablespoons granulated sugar
- 2 (8 oz) packages cream cheese, softened
- 1/2 cup granulated sugar
- 2 tablespoons all-purpose flour
- 3/4 cup eggnog
- 2 large eggs
- 1 teaspoon vanilla extract
- 1/2 teaspoon ground nutmeg
- 1/4 teaspoon ground cinnamon
Cooking Instructions
1. Prepare the Crust: Preheat your oven to 325°F (163°C). In a medium-sized bowl, combine the graham cracker crumbs, melted butter, and 2 tablespoons of sugar. Mix until the crumbs are evenly coated with butter.
Press the mixture firmly into the bottom of a 9×9-inch baking pan to form an even layer. Bake for 10 minutes, then remove from the oven and allow it to cool while you prepare the filling.
2. Make the Filling: In a large mixing bowl, beat the softened cream cheese with an electric mixer until smooth and creamy. Add the 1/2 cup sugar and flour, and beat until well combined. Gradually add the eggnog, continuing to mix until the batter is smooth.
Beat in the eggs one at a time, followed by the vanilla extract, nutmeg, and cinnamon.
3. Assemble and Bake: Pour the cheesecake mixture over the cooled crust, spreading it evenly. Bake in the preheated oven for 35-40 minutes, or until the center is set and the edges are slightly golden.
The center should still have a slight jiggle when you gently shake the pan.
4. Cool and Serve: Remove from the oven and allow the cheesecake to cool at room temperature for about an hour. Then, refrigerate for at least 4 hours, or overnight, to fully set.
Once chilled, cut into bars and serve. You can garnish with a sprinkle of nutmeg or a dollop of whipped cream if desired.
Extra Tips
For the best texture, make sure all your ingredients are at room temperature before you start mixing. This helps everything blend more smoothly and prevents lumps in your cheesecake filling.
If you’re short on time, you can speed up the cooling process by placing the bars in the freezer for a short period, but be sure not to let them freeze completely.
Additionally, use a sharp knife to cut the bars cleanly, wiping the blade with a damp cloth between cuts for a neat presentation.
