

There’s something magical about Christmas cookies that makes them irresistible. But let’s be honest, too much sugar can sometimes take the joy out of indulging. That’s why I’ve been on a mission to find healthier cookie alternatives that still pack a punch of flavor. Picture a rich dark chocolate avocado cookie or a chewy almond flour snickerdoodle. These are deliciously guilt-free treats that might just become your new holiday favorites.
Wholesome Gingerbread Cookies
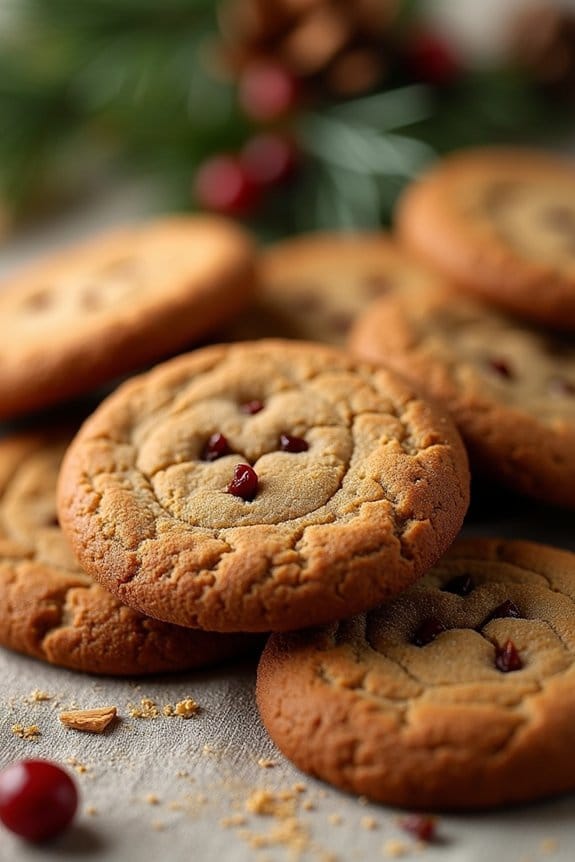
Indulge in the festive spirit with these Wholesome Gingerbread Cookies, a healthier twist on the classic holiday treat. These cookies are made with nutrient-rich ingredients, guaranteeing that while you satisfy your sweet tooth, you also nourish your body. Perfectly spiced and naturally sweetened, these wholesome cookies are ideal for sharing with family and friends during the holiday season, making them a delightful addition to your Christmas cookie platter.
This recipe is designed to serve 4-6 people, offering a generous portion to enjoy. The combination of whole wheat flour, coconut oil, and natural sweeteners like molasses and maple syrup provides a depth of flavor and a chewy texture that’s hard to resist. Whether you’re a gingerbread traditionalist or trying them for the first time, these cookies will surely become a staple in your holiday baking routine.
Ingredients:
- 2 1/2 cups whole wheat flour
- 1 tablespoon ground ginger
- 1 tablespoon ground cinnamon
- 1/2 teaspoon ground cloves
- 1/2 teaspoon ground nutmeg
- 1/2 teaspoon baking soda
- 1/4 teaspoon salt
- 1/2 cup coconut oil, melted
- 1/2 cup molasses
- 1/4 cup pure maple syrup
- 1 teaspoon vanilla extract
- 1 large egg
Instructions:
- Prepare the Dry Ingredients: In a large mixing bowl, whisk together the whole wheat flour, ground ginger, ground cinnamon, ground cloves, ground nutmeg, baking soda, and salt. Guarantee that all the spices are evenly distributed throughout the flour for consistent flavor in each cookie.
- Mix Wet Ingredients: In a separate bowl, combine the melted coconut oil, molasses, maple syrup, vanilla extract, and egg. Whisk these ingredients together until smooth and well-incorporated. The mixture should have a thick and sticky consistency.
- Combine Wet and Dry Ingredients: Gradually add the wet mixture into the dry ingredients, stirring with a spatula or wooden spoon until a dough forms. The dough should be slightly sticky but manageable. If it feels too dry, add a tablespoon of water to help it bind.
- Chill the Dough: Wrap the dough in plastic wrap and refrigerate for at least 1 hour. Chilling is vital as it helps the dough firm up, making it easier to roll out and cut into shapes.
- Preheat the Oven: Preheat your oven to 350°F (175°C). Line a baking sheet with parchment paper to prevent the cookies from sticking and to guarantee even baking.
- Roll and Cut the Cookies: Once the dough is chilled, roll it out on a lightly floured surface to about 1/4-inch thickness. Use cookie cutters to cut out desired shapes and place them on the prepared baking sheet, leaving some space between each cookie for spreading.
- Bake: Bake the cookies in the preheated oven for 8-10 minutes, or until the edges are lightly browned. Be careful not to overbake, as they’ll continue to firm up as they cool.
- Cool and Serve: Allow the cookies to cool on the baking sheet for a few minutes before transferring them to a wire rack to cool completely. Once cooled, they’re ready to be enjoyed!
Extra Tips:
For a more festive touch, you can decorate your Wholesome Gingerbread Cookies using natural decorations such as dried fruit pieces, nuts, or a simple icing made from powdered sugar and a splash of almond milk.
If you prefer softer cookies, reduce the baking time slightly and keep an eye on them to guarantee they don’t overbake. Additionally, you can store these cookies in an airtight container for up to a week, allowing you to prepare them ahead of time for holiday gatherings.
Almond Flour Snickerdoodles

Almond Flour Snickerdoodles are a delightful twist on the classic holiday cookie, offering a healthier option without sacrificing flavor or texture. These cookies are made with almond flour, which provides a nutty flavor and a tender crumb. Combined with a generous dusting of cinnamon and sugar, these snickerdoodles become a festive treat that everyone will enjoy.
Perfect for holiday gatherings or just a cozy night in, Almond Flour Snickerdoodles are bound to be a hit. Aside from being delicious, these cookies are also gluten-free, making them suitable for those with dietary restrictions. They’re easy to make, requiring just a few simple ingredients and minimal preparation time.
With a chewy center and a crispy, cinnamon-sugar-coated exterior, these cookies capture the essence of the holiday season. Whether you’re an experienced baker or a novice, you’ll find this recipe straightforward and rewarding.
Ingredients (Serves 4-6):
- 2 cups almond flour
- 1/4 cup coconut flour
- 1/2 teaspoon baking soda
- 1/4 teaspoon cream of tartar
- 1/4 teaspoon salt
- 1/2 cup unsalted butter, softened
- 1/2 cup granulated sugar
- 1 large egg
- 1 teaspoon vanilla extract
- 2 tablespoons granulated sugar (for coating)
- 1 tablespoon ground cinnamon (for coating)
Instructions:
- Preheat the Oven: Begin by preheating your oven to 350°F (175°C). Line a baking sheet with parchment paper to prevent the cookies from sticking and to guarantee even baking.
- Mix Dry Ingredients: In a medium bowl, whisk together the almond flour, coconut flour, baking soda, cream of tartar, and salt. This helps to evenly distribute the leavening agents and salt throughout the flour.
- Cream Butter and Sugar: In a large bowl, beat the softened butter and 1/2 cup of granulated sugar using a hand mixer or stand mixer on medium speed until light and fluffy. This should take about 2-3 minutes.
- Add Egg and Vanilla: Add the egg and vanilla extract to the creamed butter and sugar. Mix until fully incorporated and the mixture is smooth.
- Combine Wet and Dry Ingredients: Gradually add the dry ingredients to the wet ingredients, mixing on low speed until a dough forms. Be careful not to overmix, as this can toughen the cookies.
- Prepare Cinnamon-Sugar Coating: In a small bowl, combine the remaining 2 tablespoons of granulated sugar and 1 tablespoon of ground cinnamon. Mix well.
- Shape and Coat Cookies: Scoop tablespoon-sized portions of dough and roll them into balls. Roll each ball in the cinnamon-sugar mixture until fully coated.
- Bake the Cookies: Place the coated dough balls on the prepared baking sheet, spacing them about 2 inches apart. Gently press each ball to slightly flatten it. Bake in the preheated oven for 10-12 minutes, or until the edges are lightly golden.
- Cool and Serve: Allow the cookies to cool on the baking sheet for a few minutes before transferring them to a wire rack to cool completely. Serve and enjoy!
Extra Tips:
For best results, make sure your butter is at room temperature before you begin. This guarantees it incorporates well with the sugar, creating a smooth and fluffy mixture.
If you prefer a less sweet cookie, you can reduce the amount of sugar used in the coating. Additionally, storing the cookies in an airtight container at room temperature will keep them fresh for up to a week.
Finally, feel free to experiment by adding a pinch of nutmeg or a splash of almond extract to enhance the holiday flavors.
Dark Chocolate Avocado Cookies

Dark Chocolate Avocado Cookies are a delightful and healthier twist on the traditional chocolate cookie, perfect for the festive season. These cookies are made with ripe avocados that provide a creamy texture and replace a significant amount of butter or oil, making them a nutritious alternative.
The rich dark chocolate not only adds a deep, indulgent flavor but also offers a dose of antioxidants, making these cookies both a delicious and guilt-free holiday treat.
These cookies are ideal for serving a group of 4-6 people, guaranteeing that everyone gets a taste of their chocolaty goodness. They’re easy to prepare and bake, making them a convenient option for those busy holiday schedules.
Whether you’re serving them at a Christmas party or enjoying them with a warm cup of cocoa, Dark Chocolate Avocado Cookies are sure to be a hit with friends and family alike.
Ingredients:
- 1 ripe avocado, mashed
- 1 cup dark chocolate chips
- 1 cup all-purpose flour
- 1/2 cup unsweetened cocoa powder
- 1/2 cup brown sugar
- 1/4 cup granulated sugar
- 1 large egg
- 1 teaspoon vanilla extract
- 1/2 teaspoon baking soda
- 1/4 teaspoon salt
Instructions:
- Preheat the Oven: Start by preheating your oven to 350°F (175°C). This guarantees that your cookies will bake evenly.
- Prepare the Wet Ingredients: In a large mixing bowl, mash the ripe avocado until smooth without lumps. Add the brown sugar, granulated sugar, egg, and vanilla extract to the mashed avocado. Mix these ingredients thoroughly until they’re well combined and smooth.
- Combine Dry Ingredients: In a separate bowl, whisk together the all-purpose flour, unsweetened cocoa powder, baking soda, and salt. Guarantee that these dry ingredients are evenly mixed.
- Mix Wet and Dry Ingredients: Gradually add the dry ingredients to the wet mixture. Stir until all the components are well incorporated, forming a thick dough.
- Fold in Chocolate Chips: Gently fold the dark chocolate chips into the dough, guaranteeing they’re evenly distributed throughout the mixture.
- Shape the Cookies: Line a baking sheet with parchment paper. Using a spoon or cookie scoop, drop heaping tablespoons of dough onto the prepared baking sheet. Space them about 2 inches apart to allow for spreading.
- Bake: Place the baking sheet in the preheated oven and bake for approximately 10-12 minutes, or until the cookies are set around the edges but still soft in the center.
- Cool and Serve: Remove the cookies from the oven and let them cool on the baking sheet for about 5 minutes. Transfer them to a wire rack to cool completely before serving.
Extra Tips: For the best results, guarantee your avocado is very ripe; this will give the cookies a creamier texture.
You can also try adding a pinch of cinnamon or a handful of chopped nuts for additional flavor and crunch. If you prefer a sweeter cookie, consider increasing the amount of granulated sugar slightly.
These cookies can be stored in an airtight container at room temperature for up to a week, making them a convenient make-ahead option for holiday gatherings.
Oatmeal Raisin Spice Cookies

Oatmeal Raisin Spice Cookies are a delightful and healthy treat perfect for the festive holiday season. These cookies combine the chewy texture of oats with the natural sweetness of raisins, and a warm blend of spices that evoke the cozy feelings of Christmas. Not only are they delicious, but they’re also a healthier alternative to traditional cookies, as they contain whole grain oats and are naturally sweetened with honey or maple syrup, making them a great option for those looking to indulge without the guilt.
These cookies are easy to make and perfect for sharing with family and friends during your holiday gatherings. They’re also quite versatile, allowing you to experiment with different types of dried fruits and nuts to suit your personal preferences. Whether you’re serving them at a holiday party or gifting them in a festive tin, Oatmeal Raisin Spice Cookies are sure to be a hit.
Ingredients (serving size: 4-6 people):
- 1 cup rolled oats
- 3/4 cup whole wheat flour
- 1/2 teaspoon baking soda
- 1/2 teaspoon baking powder
- 1/2 teaspoon ground cinnamon
- 1/4 teaspoon ground nutmeg
- 1/4 teaspoon ground allspice
- 1/4 teaspoon salt
- 1/2 cup coconut oil, melted
- 1/3 cup honey or maple syrup
- 1 large egg
- 1 teaspoon vanilla extract
- 1 cup raisins
Cooking Instructions:
- Preheat the Oven: Start by preheating your oven to 350°F (175°C). Line a baking sheet with parchment paper to prevent the cookies from sticking.
- Mix Dry Ingredients: In a large bowl, combine the rolled oats, whole wheat flour, baking soda, baking powder, ground cinnamon, ground nutmeg, ground allspice, and salt. Stir until all the dry ingredients are evenly mixed.
- Prepare Wet Ingredients: In a separate bowl, whisk together the melted coconut oil, honey or maple syrup, egg, and vanilla extract. Make sure the mixture is smooth and well combined.
- Combine Wet and Dry Mixtures: Gradually add the wet ingredients to the dry ingredients, stirring until everything is just combined. Be careful not to overmix, as this can result in tough cookies.
- Add Raisins: Gently fold the raisins into the cookie dough, ensuring they’re evenly distributed throughout the mixture.
- Shape the Cookies: Using a tablespoon or cookie scoop, drop rounded spoonfuls of dough onto the prepared baking sheet, leaving some space between each cookie to allow for spreading.
- Bake: Place the baking sheet in the preheated oven and bake for 10-12 minutes, or until the edges of the cookies are golden brown and the centers are set.
- Cool: Remove the cookies from the oven and let them cool on the baking sheet for a few minutes before transferring them to a wire rack to cool completely.
Extra Tips: For an added crunch, consider adding a handful of chopped nuts, such as walnuts or pecans, to the cookie dough. If you prefer a softer cookie, slightly underbake them by reducing the cooking time by a minute or two.
These cookies can be stored in an airtight container for up to a week, making them a perfect make-ahead dessert for your holiday festivities. Remember, if you want to make a larger batch, this recipe can easily be doubled.
Coconut Macaroons With a Twist
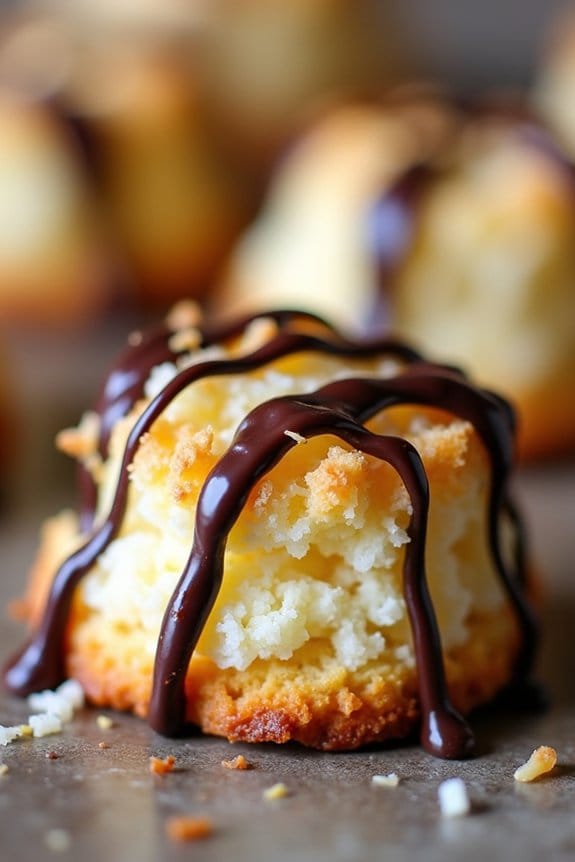
Coconut Macaroons With a Twist are a delightful treat to share with your family and friends during the festive season. These cookies aren’t only delicious but also bring a unique flavor combination that stands out from the traditional macaroons. The twist in this recipe involves incorporating a hint of citrus and a touch of almond, which enhances the natural sweetness of the coconut and adds a rejuvenating zest.
Perfect for those looking to indulge in a healthier dessert option, these macaroons are gluten-free and use natural sweeteners, making them a guilt-free holiday treat.
Whether you’re a seasoned baker or a beginner, these Coconut Macaroons With a Twist are simple to make and require minimal ingredients. The recipe yields enough cookies to serve 4-6 people, making it ideal for small gatherings or as a contribution to a holiday cookie exchange. With their chewy texture and burst of flavor, these macaroons are sure to become a favorite on your Christmas cookie platter.
Ingredients for 4-6 Servings:
- 3 cups unsweetened shredded coconut
- 3 large egg whites
- 1/2 cup honey or maple syrup
- 1 teaspoon almond extract
- Zest of 1 lemon
- Pinch of salt
- Optional: 1/4 cup dark chocolate chips for drizzling
Cooking Instructions:
- Preheat the Oven: Begin by preheating your oven to 325°F (165°C). Line a baking sheet with parchment paper to prevent the macaroons from sticking and to guarantee even baking.
- Mix the Ingredients: In a large mixing bowl, combine the shredded coconut, egg whites, honey or maple syrup, almond extract, lemon zest, and a pinch of salt. Stir the mixture well until all the ingredients are fully incorporated, and the coconut is evenly moistened.
- Shape the Macaroons: Using a small cookie scoop or two spoons, form the mixture into small mounds, about 1 to 1.5 inches in diameter. Place them on the prepared baking sheet, leaving some space between each mound to allow for slight spreading during baking.
- Bake the Macaroons: Place the baking sheet in the preheated oven and bake for 15-20 minutes, or until the macaroons are golden brown on the edges and set in the center. Keep an eye on them to prevent over-browning.
- Cool the Macaroons: Once baked, remove the macaroons from the oven and let them cool on the baking sheet for 5 minutes. Then, transfer them to a wire rack to cool completely.
- Optional Chocolate Drizzle: If desired, melt the dark chocolate chips in a microwave-safe bowl or using a double boiler. Drizzle the melted chocolate over the cooled macaroons and allow it to set before serving.
Extra Tips: For a more pronounced citrus flavor, you can add a tablespoon of fresh lemon juice to the macaroon mixture. If the coconut mixture seems too wet and difficult to shape, try refrigerating it for 10-15 minutes to firm up. When drizzling chocolate, use a fork or a piping bag for a more controlled application.
These macaroons store well in an airtight container at room temperature for up to 5 days, making them perfect for preparing in advance. Enjoy these Coconut Macaroons With a Twist as a sweet, festive addition to your holiday celebrations!
Chia Seed Thumbprint Cookies
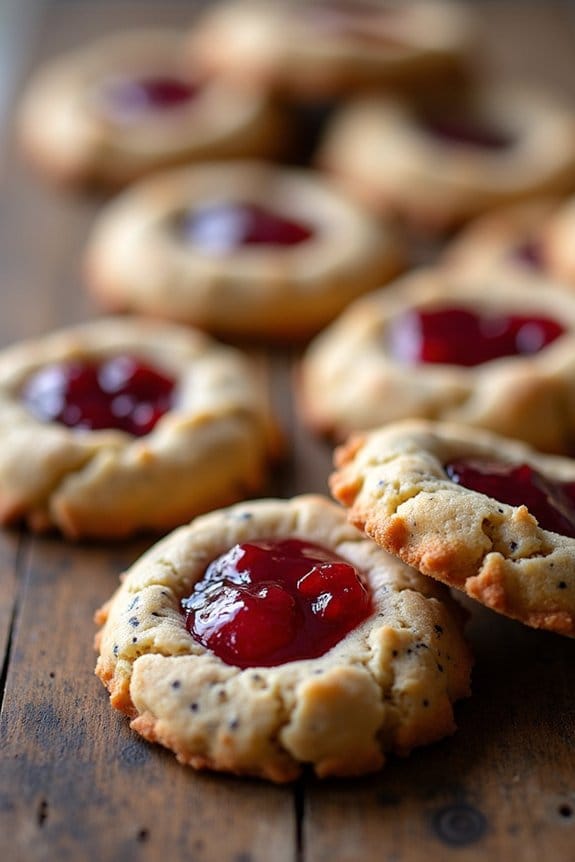
Chia Seed Thumbprint Cookies are a delightful and nutritious twist on a classic holiday treat. These cookies aren’t only deliciously satisfying with their crisp edges and soft centers, but they also pack a healthy punch with the addition of chia seeds. Chia seeds are rich in omega-3 fatty acids, fiber, and protein, making them an excellent choice for a guilt-free indulgence during the festive season.
The thumbprint design, filled with your favorite jam, adds a touch of nostalgia and a burst of flavor to these delightful cookies. Perfect for a serving size of 4-6 people, these Chia Seed Thumbprint Cookies are easy to prepare and certain to be a hit at any holiday gathering. The combination of wholesome ingredients guarantees that you’re serving a treat that’s both delicious and nutritious.
Enjoy these cookies with a warm cup of tea or coffee, and they’ll surely become a cherished part of your holiday traditions.
Ingredients:
- 1 cup all-purpose flour
- 1/2 cup almond flour
- 1/4 cup chia seeds
- 1/2 teaspoon baking powder
- 1/4 teaspoon salt
- 1/2 cup unsalted butter, softened
- 1/4 cup honey or maple syrup
- 1 teaspoon vanilla extract
- 1 large egg
- 1/2 cup of your favorite fruit jam (such as raspberry or strawberry)
Instructions:
- Preheat and Prepare: Start by preheating your oven to 350°F (175°C). Line a baking sheet with parchment paper to prevent the cookies from sticking and guarantee even baking.
- Mix Dry Ingredients: In a medium-sized bowl, combine the all-purpose flour, almond flour, chia seeds, baking powder, and salt. Stir well to guarantee the baking powder is evenly distributed throughout the mixture.
- Cream Butter and Sweetener: In a large bowl, beat the softened butter with an electric mixer until smooth and creamy. Add the honey (or maple syrup) and vanilla extract, continuing to mix until the ingredients are well incorporated.
- Combine Wet and Dry Ingredients: Add the egg to the butter mixture and beat until combined. Gradually add the dry ingredient mixture to the wet ingredients, mixing on low speed until a dough forms.
- Shape and Indent: Scoop tablespoon-sized amounts of dough and roll them into balls. Place the balls onto the prepared baking sheet, spacing them about 2 inches apart. Use your thumb or the back of a spoon to make an indentation in the center of each cookie ball.
- Fill with Jam: Carefully spoon about 1/2 teaspoon of your chosen fruit jam into each indentation, ensuring it’s not overflowing to prevent messy baking.
- Bake: Place the baking sheet in the preheated oven and bake for 12-15 minutes, or until the cookies are lightly golden around the edges. Allow them to cool on the baking sheet for a few minutes before transferring to a wire rack to cool completely.
Extra Tips: When making Chia Seed Thumbprint Cookies, confirm your butter is softened to room temperature for easier mixing. If you prefer a less sweet cookie, reduce the amount of honey or maple syrup slightly.
Feel free to experiment with different jams or even homemade fruit preserves to fill the thumbprints. These cookies can be stored in an airtight container for up to a week, making them a convenient make-ahead option for holiday parties. Enjoy the creative process and make your cookies a festive addition to your holiday dessert table!
Flourless Peanut Butter Blossoms

Flourless Peanut Butter Blossoms are a delightful twist on the classic holiday cookie, combining the rich flavors of peanut butter with the subtle sweetness of chocolate. These cookies are perfect for those looking to indulge during the festive season without the guilt of overindulging in refined flour.
With their soft texture and a smooth chocolate kiss at the center, they’re sure to be a hit at any Christmas gathering. The best part? They’re incredibly easy to make, requiring just a few simple ingredients that you probably already have in your pantry.
This recipe yields about 24 cookies, making it perfect for serving 4-6 people. The absence of flour not only makes these cookies a great gluten-free option, but it also adds to the peanut buttery goodness, as the focus remains on the nutty, rich flavors.
Ideal for a quick dessert after Christmas dinner or a sweet treat during a holiday movie marathon, these Flourless Peanut Butter Blossoms are sure to become a staple in your holiday baking repertoire.
Ingredients:
- 1 cup creamy peanut butter
- 1/2 cup granulated sugar
- 1/2 cup packed brown sugar
- 1 large egg
- 1 teaspoon vanilla extract
- 1 teaspoon baking soda
- 24 chocolate kisses, unwrapped
Cooking Instructions:
- Preheat the Oven: Start by preheating your oven to 350°F (175°C). This guarantees that the cookies bake evenly and develop a delightful golden brown color.
- Mix the Ingredients: In a large mixing bowl, combine the peanut butter, granulated sugar, brown sugar, egg, vanilla extract, and baking soda. Stir until all ingredients are well incorporated and the mixture is smooth.
- Shape the Dough: Using a tablespoon or a small cookie scoop, portion out the dough and roll it into 1-inch balls. Place the dough balls on a baking sheet lined with parchment paper, spacing them about 2 inches apart to allow for spreading.
- Bake the Cookies: Place the baking sheet in the preheated oven and bake for 8-10 minutes. The cookies should be slightly puffed and just starting to turn golden around the edges.
- Add Chocolate Kisses: Immediately after removing the cookies from the oven, gently press a chocolate kiss into the center of each cookie. The heat from the cookies will slightly melt the chocolate, helping it adhere to the cookie.
- Cool the Cookies: Let the cookies cool on the baking sheet for about 5 minutes before transferring them to a wire rack to cool completely. This helps them set and prevents them from breaking apart.
Extra Tips:
For an added depth of flavor, consider using natural peanut butter, which has a more robust nutty taste compared to conventional varieties.
If you’re looking to vary the recipe, try substituting the chocolate kisses with mini peanut butter cups or dark chocolate squares for a different twist.
Always verify that the peanut butter you use is well-stirred to avoid any separation of oils, which can affect the texture of the cookies.
Finally, these cookies can be stored in an airtight container for up to a week, making them a great make-ahead option for busy holiday schedules.
Matcha Green Tea Shortbread
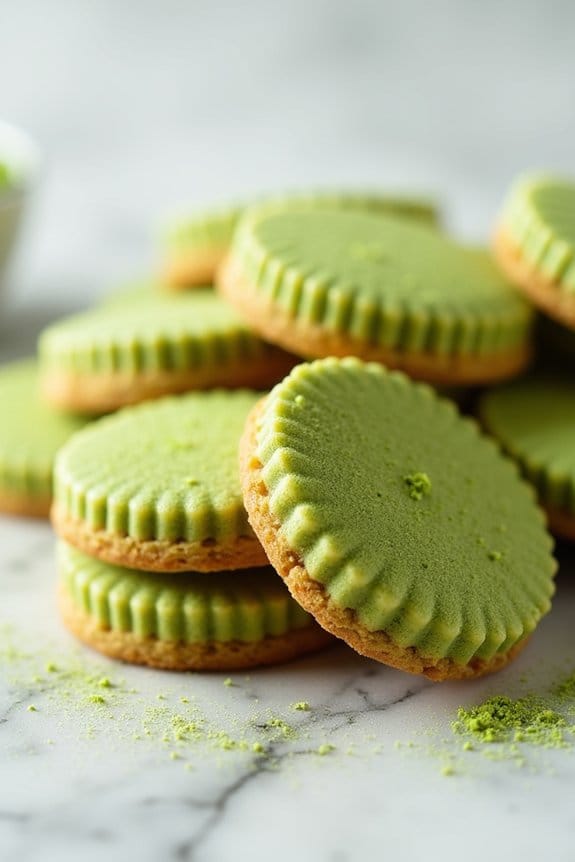
Matcha Green Tea Shortbread is a delightful twist on traditional shortbread cookies, combining the earthy flavors of matcha green tea with the buttery goodness of shortbread.
These cookies are perfect for the holiday season, offering a unique and vibrant green color that’s bound to stand out on your cookie platter. The subtle sweetness paired with the umami notes of matcha makes these cookies a sophisticated treat that will impress your family and friends.
This recipe yields about 24-30 cookies, making it ideal for serving 4-6 people during your festive gatherings. Whether you’re a matcha enthusiast or looking to try something new, these cookies are easy to make and offer a healthy, antioxidant-rich option for your Christmas celebrations.
Ingredients:
- 1 cup unsalted butter, softened
- 1 cup powdered sugar
- 2 cups all-purpose flour
- 2 tablespoons matcha green tea powder
- 1 teaspoon vanilla extract
- 1/4 teaspoon salt
Instructions:
- Prepare the Dough: In a large mixing bowl, cream together the softened butter and powdered sugar until light and fluffy. This should take about 3-5 minutes using an electric mixer.
- Incorporate Matcha: Sift in the matcha green tea powder and mix until fully incorporated, guaranteeing there are no lumps. The mixture should have a uniform green color.
- Add Dry Ingredients: Gradually add the all-purpose flour and salt to the mixture, stirring gently to combine. Mix just until the flour is fully incorporated and the dough comes together. Avoid overmixing to maintain a tender texture.
- Flavor with Vanilla: Add the vanilla extract to the dough and mix until evenly distributed. This will enhance the overall flavor profile of the cookies.
- Chill the Dough: Divide the dough in half and shape each portion into a log, about 2 inches in diameter. Wrap each log in plastic wrap and refrigerate for at least 1 hour. Chilling helps the dough firm up, making it easier to slice.
- Preheat the Oven: Preheat your oven to 325°F (165°C) and line a baking sheet with parchment paper.
- Slice and Bake: Remove the dough from the refrigerator and slice each log into 1/4-inch thick rounds. Place the rounds on the prepared baking sheet, spacing them about 1 inch apart.
- Bake: Bake the cookies in the preheated oven for 12-15 minutes or until the edges just begin to turn golden. The center should remain soft but not doughy.
- Cool: Allow the cookies to cool on the baking sheet for about 5 minutes before transferring them to a wire rack to cool completely.
Extra Tips:
To assure the best flavor and texture, use high-quality matcha green tea powder for this recipe. Culinary-grade matcha is perfect for baking and will provide a vibrant color and rich taste.
If you prefer a sweeter cookie, you can roll the dough logs in granulated sugar before slicing. Additionally, these cookies can be stored in an airtight container for up to a week, making them a convenient make-ahead option for your holiday festivities.
Enjoy your Matcha Green Tea Shortbread with a cup of tea for a delightful festive treat!
Vegan Chocolate Chip Cookies

Indulge in the delightful world of vegan treats with this scrumptious Vegan Chocolate Chip Cookies recipe. Perfectly chewy on the inside with a slight crisp on the outside, these cookies are sure to be a hit at your holiday gatherings or any time of the year. Made with wholesome ingredients, these cookies aren’t only delicious but also healthier than your traditional cookie recipes.
Whether you’re catering to dietary preferences or just looking to try something new, these cookies won’t disappoint.
These vegan chocolate chip cookies are made using plant-based ingredients without compromising on flavor. The recipe uses coconut oil and almond milk to replace traditional butter and milk, while flaxseed meal acts as a binding agent in place of eggs. The result is a batch of cookies that are soft, chewy, and packed with chocolatey goodness.
Perfect for a serving size of 4-6 people, these cookies are ideal for sharing with friends and family during the festive season.
Ingredients:
- 1 cup all-purpose flour
- 1/2 teaspoon baking soda
- 1/4 teaspoon salt
- 1/4 cup coconut oil, melted
- 1/2 cup brown sugar
- 1 teaspoon vanilla extract
- 1 tablespoon flaxseed meal
- 2 1/2 tablespoons water
- 1/4 cup almond milk
- 1/2 cup vegan chocolate chips
Cooking Instructions:
- Preheat the Oven: Start by preheating your oven to 350°F (175°C). Line a baking sheet with parchment paper to prevent the cookies from sticking and guarantee even baking.
- Prepare the Flax Egg: In a small bowl, combine the flaxseed meal and water. Stir well and let it sit for about 5 minutes until it thickens and becomes gel-like. This mixture will act as an egg substitute in your cookies.
- Mix Dry Ingredients: In a medium-sized bowl, whisk together the all-purpose flour, baking soda, and salt until well combined. Set aside.
- Combine Wet Ingredients: In a large mixing bowl, combine the melted coconut oil, brown sugar, and vanilla extract. Mix until smooth. Add in the prepared flax egg and almond milk, and stir until the mixture is homogeneous.
- Incorporate Dry Ingredients: Gradually add the dry ingredients to the wet ingredients, stirring until just combined. Be careful not to overmix, as this can result in tougher cookies.
- Add Chocolate Chips: Fold in the vegan chocolate chips, ensuring they’re evenly distributed throughout the dough.
- Shape the Cookies: Scoop tablespoons of dough onto the prepared baking sheet, spacing them about 2 inches apart to allow for spreading. Gently flatten each scoop with your fingers or the back of a spoon.
- Bake the Cookies: Place the baking sheet in the preheated oven and bake for 10-12 minutes, or until the edges are lightly golden. The centers might look slightly undercooked, but they’ll firm up as they cool.
- Cool and Serve: Remove the cookies from the oven and let them cool on the baking sheet for 5 minutes before transferring them to a wire rack to cool completely. Enjoy warm or at room temperature.
Extra Tips: When making these Vegan Chocolate Chip Cookies, it’s important not to overmix the dough once the dry ingredients are added. Overmixing can lead to a dense, tough cookie texture.
Additionally, using a good quality vegan chocolate chip will guarantee a delicious, rich flavor. If you prefer a nutty twist, consider adding a handful of chopped nuts to the dough. For those who enjoy a hint of spice, a pinch of cinnamon can elevate the flavor profile of these cookies.
Enjoy experimenting with these variations to suit your taste!
Cranberry Pistachio Biscotti
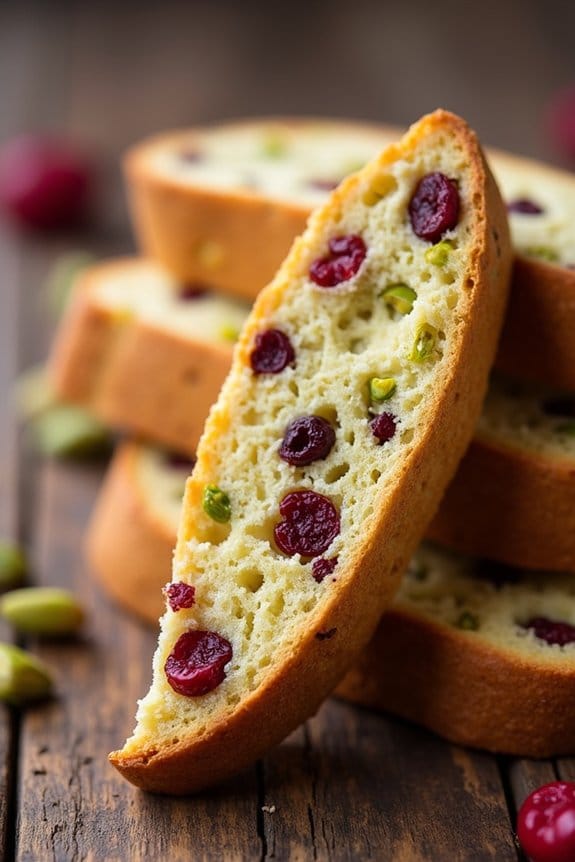
Cranberry Pistachio Biscotti is a delightful and festive treat perfect for the Christmas season. These biscotti are a blend of tart dried cranberries and crunchy pistachios, offering a beautiful combination of flavors and textures. Biscotti, which means “twice baked” in Italian, are known for their crispiness, making them perfect for dunking in your favorite hot beverage. The vibrant red and green of the cranberries and pistachios make these cookies not only delicious but visually appealing, adding a touch of holiday cheer to your dessert table.
Baking these biscotti at home allows you to control the ingredients, making them a healthier option compared to store-bought cookies. By using whole wheat flour and reducing the sugar content, you can enjoy a guilt-free indulgence. These biscotti are perfect for gift-giving or enjoying with family and friends during the holiday season. With a little preparation, you can create a batch of these delightful cookies that will be a hit at any Christmas gathering.
Ingredients (Serves 4-6):
- 1 3/4 cups whole wheat flour
- 1/2 cup granulated sugar
- 1 teaspoon baking powder
- 1/4 teaspoon salt
- 2 large eggs
- 1 teaspoon vanilla extract
- 1 teaspoon almond extract
- 1/2 cup dried cranberries
- 1/2 cup shelled pistachios
Cooking Instructions:
- Preheat and Prepare: Preheat your oven to 350°F (175°C). Line a baking sheet with parchment paper to prevent the biscotti from sticking and guarantee even baking.
- Mix Dry Ingredients: In a medium-sized bowl, whisk together the whole wheat flour, sugar, baking powder, and salt. This helps to evenly distribute the baking powder throughout the flour, securing even rising.
- Combine Wet Ingredients: In a separate large bowl, beat the eggs, vanilla extract, and almond extract together until well combined. The almond extract enhances the flavor of the pistachios and adds a subtle nutty aroma.
- Form the Dough: Gradually add the dry ingredients to the wet mixture, mixing until a dough forms. The dough will be slightly sticky. Fold in the dried cranberries and pistachios until evenly distributed.
- Shape the Biscotti: Transfer the dough onto the prepared baking sheet. With floured hands, shape the dough into a log approximately 12 inches long and 3 inches wide. Flatten the top slightly for even baking.
- First Bake: Bake in the preheated oven for 25-30 minutes, or until the log is light golden brown. Remove from the oven and allow it to cool for about 10 minutes. This cooling period is essential for slicing without crumbling.
- Slice and Second Bake: Using a sharp serrated knife, slice the log diagonally into 3/4-inch thick slices. Arrange the slices cut side down back on the baking sheet.
- Final Baking: Return the slices to the oven and bake for an additional 10-12 minutes on each side, until golden and crisp. Allow the biscotti to cool completely on a wire rack before serving.
Extra Tips:
For a more pronounced nutty flavor, you can toast the pistachios in a dry skillet for a few minutes before adding them to the dough. Additionally, if you prefer a sweeter biscotti, consider drizzling melted dark chocolate over the cooled biscotti or dipping one end in chocolate for a festive touch.
To keep the biscotti fresh, store them in an airtight container at room temperature for up to two weeks. Enjoy these with a cup of coffee or tea for a perfect holiday treat!
