

As the holiday season approaches, I can’t help but think about the joy of gathering with family and friends around a table filled with festive dishes. Picture savory roasted turkey sandwiches paired with zesty cranberry relish or honey-glazed ham served with a tangy mustard sauce. How about some bite-sized beef Wellington for a tasty twist? From creamy potato gratin to a colorful antipasto platter, every dish is made to celebrate togetherness. Ready to explore some delicious ideas?
Roasted Turkey Sandwiches With Cranberry Relish
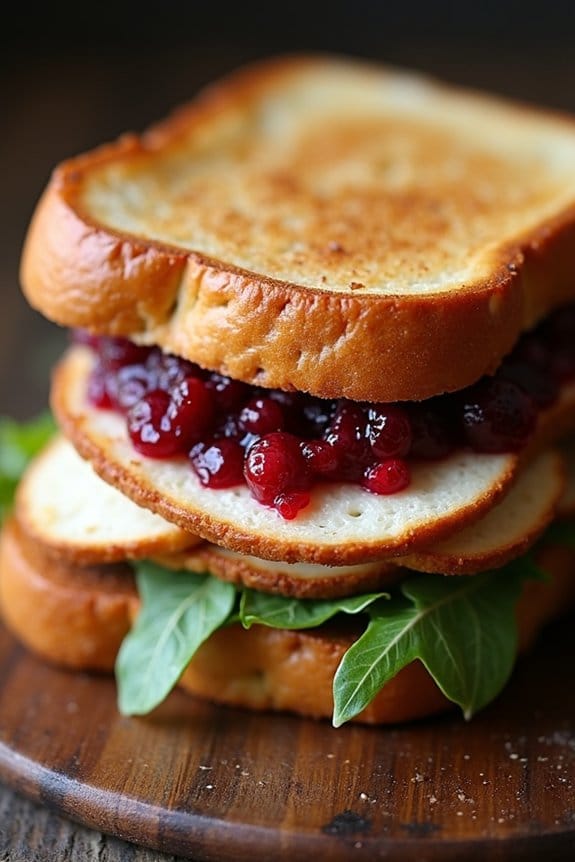
Roasted Turkey Sandwiches With Cranberry Relish are a delightful twist on the classic holiday flavors, perfect for a cozy Christmas lunch. This dish combines tender roasted turkey with a tangy and slightly sweet cranberry relish, all nestled between slices of fresh bread. The combination of savory and sweet makes these sandwiches a standout on any holiday menu.
Whether you have leftover turkey from a festive feast or you’re cooking fresh for the occasion, these sandwiches are sure to be a hit.
Creating these sandwiches is a simple yet rewarding process. The cranberry relish adds a revitalizing burst of flavor that pairs perfectly with the rich taste of turkey. By using quality bread and fresh ingredients, you can elevate this dish to a gourmet experience.
These sandwiches are ideal for feeding a crowd of 4-6 people, offering a satisfying and flavorful meal that captures the essence of Christmas.
Ingredients (Serves 4-6):
- 2 pounds of roasted turkey (sliced)
- 12 slices of fresh bread (sourdough or multigrain recommended)
- 1 cup of cranberry relish
- 1/2 cup of mayonnaise
- 1 tablespoon of Dijon mustard
- 1 cup of fresh arugula or mixed greens
- Salt and pepper to taste
- Butter for toasting the bread
Cooking Instructions:
- Prepare the Cranberry Relish: If you’re making the cranberry relish from scratch, combine fresh or frozen cranberries with sugar, orange zest, and a splash of orange juice. Cook over medium heat until the cranberries burst and the mixture thickens. Let it cool before using.
- Slice the Turkey: If you’re not using leftover turkey, roast a turkey breast in the oven until fully cooked and juicy. Allow it to rest before slicing it thinly.
- Mix the Spread: In a small bowl, mix the mayonnaise with Dijon mustard. This will be used as a spread for the sandwiches to add a creamy texture and enhance the flavor.
- Toast the Bread: Lightly butter one side of each slice of bread. Heat a skillet over medium heat and toast the buttered side until golden brown. This adds a nice crunch and prevents the bread from getting soggy.
- Assemble the Sandwiches: On the un-toasted side of the bread, spread a generous layer of the mayonnaise and mustard mix. Layer slices of turkey, a spoonful of cranberry relish, and a handful of arugula or mixed greens. Top with the other slice of bread, toasted side up.
- Serve and Enjoy: Cut the sandwiches in half for easier handling and serve immediately while the bread is still warm and crispy.
Extra Tips:
To enhance the flavor, consider seasoning the turkey with herbs like thyme or rosemary before roasting. If you prefer a more robust flavor, try adding a slice of Swiss or cheddar cheese to the sandwich.
Additionally, using a panini press can give the sandwiches a delightful crispy texture. The cranberry relish can be made up to two days in advance, allowing the flavors to meld beautifully.
Enjoy your Roasted Turkey Sandwiches With Cranberry Relish with a side of chips or a fresh salad for a complete meal.
Honey-Glazed Ham With Mustard Sauce

A honey-glazed ham with mustard sauce is a classic and delectable centerpiece for any Christmas lunch. This dish combines the sweetness of honey with the tanginess of mustard to create a perfect balance of flavors that will delight your taste buds. The ham is baked to perfection, with a caramelized glaze that adds a beautiful sheen and mouth-watering aroma to your holiday spread. The accompanying mustard sauce is simple yet flavorful, enhancing the succulent taste of the ham.
This recipe is designed to serve 4-6 people, making it ideal for a small family gathering or an intimate festive celebration. Whether you’re an experienced cook or trying your hand at preparing a holiday ham for the first time, this recipe is straightforward and easy to follow. With just a few ingredients and steps, you can create a delicious and impressive dish that will have your guests coming back for seconds.
Ingredients:
- 1 (5-pound) bone-in ham
- 1 cup honey
- 1/2 cup Dijon mustard
- 1/4 cup brown sugar
- 2 tablespoons apple cider vinegar
- 1 tablespoon whole grain mustard
- 1 teaspoon ground cloves
- 1 teaspoon garlic powder
- Salt and pepper to taste
Cooking Instructions:
- Preheat the Oven: Start by preheating your oven to 325°F (165°C). This guarantees that the ham will cook evenly throughout.
- Prepare the Ham: Place the ham on a large roasting pan with the flat side down. Score the surface of the ham in a crisscross pattern, making shallow cuts about an inch apart. This allows the glaze to penetrate and flavor the meat deeply.
- Make the Glaze: In a medium saucepan over medium heat, combine the honey, Dijon mustard, brown sugar, apple cider vinegar, whole grain mustard, ground cloves, and garlic powder. Stir the mixture continuously until the sugar is dissolved and the glaze is smooth.
- Glaze the Ham: Generously brush half of the prepared glaze over the scored surface of the ham. Make sure to cover all the cuts and surface area for a rich flavor.
- Bake the Ham: Place the ham in the preheated oven and bake for 1 1/2 to 2 hours, or until the internal temperature reaches 140°F (60°C). Baste the ham with the remaining glaze every 30 minutes to keep it moist and flavorful.
- Rest the Ham: Once cooked, remove the ham from the oven and let it rest for about 10 minutes before carving. This allows the juices to redistribute and results in a more tender and juicy ham.
Extra Tips:
When selecting your ham, opt for a bone-in ham for more flavor and moisture. If you prefer a smokier taste, consider using a smoked ham.
Adjust the amount of mustard in the glaze according to your taste preference; you can add more for a sharper flavor. To prevent burning, keep an eye on the glaze as the sugar can caramelize quickly.
Finally, don’t discard the pan drippings – they can be used to make a delicious sauce or gravy to accompany the ham.
Beef Wellington Bites

Beef Wellington Bites are the perfect appetizer for your Christmas lunch, offering a delightful twist on the traditional Beef Wellington. These bite-sized morsels are packed with flavor, combining tender beef, savory mushrooms, and a crispy puff pastry shell.
They’re not only delicious but also present beautifully on a festive platter, making them an excellent choice for entertaining guests. This dish is ideal for serving 4-6 people and is a wonderful way to bring a touch of elegance to your holiday meal without the need for a full-sized Wellington.
The preparation is straightforward, and the results are sure to impress. Here’s how to make these scrumptious bites:
Ingredients:
- 1 pound beef tenderloin, cut into 1-inch cubes
- Salt and pepper to taste
- 1 tablespoon olive oil
- 1 tablespoon butter
- 1/2 cup finely chopped mushrooms
- 1 small shallot, finely chopped
- 1 clove garlic, minced
- 1 tablespoon Dijon mustard
- 1 sheet of puff pastry, thawed
- 1 egg, beaten
- 1 tablespoon chopped fresh parsley (optional)
Cooking Instructions:
- Prepare the Beef: Season the beef tenderloin cubes with salt and pepper. Heat olive oil in a skillet over medium-high heat. Sear the beef cubes for about 1-2 minutes on each side until browned but not cooked through. Remove from the skillet and set aside to cool.
- Make the Duxelles: In the same skillet, add butter and melt over medium heat. Add mushrooms, shallot, and garlic, cooking until the mixture is soft and most of the liquid has evaporated, about 5-7 minutes. Stir in the Dijon mustard and cook for an additional minute. Remove from heat and let cool.
- Prepare the Puff Pastry: Roll out the puff pastry sheet on a lightly floured surface. Cut the pastry into squares large enough to enclose each beef cube with a little room to spare.
- Assemble the Bites: Place a small amount of the mushroom mixture in the center of each pastry square. Top with a beef cube. Fold the corners of the pastry over the beef, sealing them together to form a neat package. Place seam-side down on a baking sheet lined with parchment paper.
- Bake: Preheat the oven to 400°F (200°C). Brush the tops of the pastry with the beaten egg to guarantee a golden finish. Bake in the preheated oven for about 12-15 minutes or until the pastry is golden brown.
- Serve: Once baked, remove from the oven and let cool slightly before serving. Garnish with chopped fresh parsley if desired.
Extra Tips:
For the best flavor, use fresh, high-quality beef tenderloin. Ascertain that the beef isn’t overcooked during the searing process, as it will continue to cook in the oven.
The puff pastry should be kept cold until ready to use to guarantee it puffs up nicely. If you find the edges of the pastry aren’t sticking together, use a little water to help seal them.
These bites are best enjoyed fresh out of the oven, but they can also be prepared ahead of time and baked just before serving.
Spinach and Feta Stuffed Mushrooms

Spinach and Feta Stuffed Mushrooms are a delightful and savory appetizer or side dish that’s perfect for a Christmas lunch. These bite-sized morsels are packed with a creamy filling of spinach, feta cheese, and aromatic herbs, all encased in tender, juicy mushroom caps. The blend of flavors is both rich and invigorating, making it a crowd-pleaser for vegetarians and meat-lovers alike.
Their elegant appearance and delicious taste make them an ideal addition to a festive holiday spread. This dish isn’t only tasty but also quite simple to prepare, requiring minimal ingredients and effort. The combination of earthy mushrooms with the creamy, tangy filling makes for a satisfying bite.
Furthermore, this recipe is versatile, allowing for customization by adding different herbs and spices or incorporating additional ingredients like sun-dried tomatoes or pine nuts. Whether served as an appetizer or alongside the main course, Spinach and Feta Stuffed Mushrooms are sure to impress your guests.
Ingredients (Serves 4-6):
- 24 large button or cremini mushrooms
- 2 tablespoons olive oil
- 1 small onion, finely chopped
- 2 cloves garlic, minced
- 5 ounces fresh spinach, chopped
- 1/2 cup feta cheese, crumbled
- 1/4 cup cream cheese, softened
- 1/4 cup breadcrumbs
- 1 tablespoon fresh dill, chopped
- Salt and pepper to taste
- 1/4 cup grated Parmesan cheese
Cooking Instructions:
- Prepare the Mushrooms: Preheat the oven to 375°F (190°C). Clean the mushrooms by gently wiping them with a damp cloth or paper towel. Remove the stems and set the caps aside. Chop the stems finely.
- Cook the Vegetables: In a large skillet, heat the olive oil over medium heat. Add the chopped onion and cook until it becomes translucent, about 5 minutes. Add the garlic and cook for an additional minute, taking care not to let it burn.
- Add Spinach and Mushroom Stems: Stir in the chopped mushroom stems and cook for another 3-4 minutes until they’re tender. Add the spinach and cook until it wilts, about 2 minutes. Remove from heat and let it cool slightly.
- Mix the Filling: In a large mixing bowl, combine the cooked vegetables with the feta cheese, cream cheese, breadcrumbs, and dill. Season with salt and pepper to taste. Mix until the ingredients are well incorporated.
- Stuff the Mushrooms: Spoon the filling into each mushroom cap, pressing gently to fill them completely. Arrange the stuffed mushrooms on a baking sheet lined with parchment paper.
- Bake: Sprinkle the grated Parmesan cheese over the stuffed mushrooms. Bake in the preheated oven for 20-25 minutes, or until the mushrooms are tender and the tops are golden brown.
- Serve: Allow the mushrooms to cool slightly before serving. They can be enjoyed warm or at room temperature.
Extra Tips:
For the best results, choose mushrooms that are large and firm to make stuffing easier. If you prefer a spicier kick, consider adding a pinch of red pepper flakes to the filling. To make the dish gluten-free, substitute the breadcrumbs with gluten-free breadcrumbs or crushed nuts.
These stuffed mushrooms can be prepared ahead of time and stored in the refrigerator until ready to bake, making them a convenient option for busy holiday cooking schedules.
Creamy Potato Gratin

Creamy Potato Gratin is a classic and comforting dish that’s perfect for a Christmas lunch. This indulgent side dish features layers of thinly sliced potatoes bathed in a rich, creamy sauce and topped with a golden crust. Its velvety texture and savory flavor make it a delightful accompaniment to your holiday meal, complementing a variety of main dishes like roasted meats or baked ham.
To create a memorable Creamy Potato Gratin for your Christmas lunch, you’ll want to focus on using quality ingredients and precise layering techniques. The process involves cooking the potatoes in a garlicky cream mixture until tender and then baking them to perfection with a crisp, cheesy topping. This recipe serves 4-6 people, making it an ideal choice for a small to medium-sized gathering.
Ingredients for 4-6 servings:
- 2 pounds of Yukon Gold potatoes
- 2 cups of heavy cream
- 2 cloves of garlic, minced
- 1 teaspoon of salt
- 1/2 teaspoon of black pepper
- 1/4 teaspoon of nutmeg
- 1 cup of grated Gruyère cheese
- 1/2 cup of grated Parmesan cheese
- 2 tablespoons of unsalted butter
- Fresh thyme sprigs (for garnish)
Cooking Instructions:
- Prepare the Potatoes: Preheat your oven to 350°F (175°C). Peel the potatoes and slice them into thin, even rounds, about 1/8 inch thick. This can be done using a mandolin or a sharp knife to guarantee uniform slices.
- Make the Cream Mixture: In a medium saucepan over medium heat, combine the heavy cream, minced garlic, salt, black pepper, and nutmeg. Stir the mixture and bring it to a gentle simmer. Remove from heat once it starts to bubble.
- Layer the Potatoes: Butter a 9×13-inch baking dish with the unsalted butter. Arrange a layer of potato slices on the bottom of the dish. Pour a portion of the cream mixture over the potatoes and sprinkle with Gruyère cheese. Repeat the layering process until all ingredients are used, finishing with a layer of Gruyère and Parmesan cheese on top.
- Bake the Gratin: Cover the baking dish with aluminum foil and bake in the preheated oven for 45 minutes. Then, remove the foil and continue baking for an additional 20-30 minutes, or until the top is golden brown and crispy, and the potatoes are tender when pierced with a fork.
- Garnish and Serve: Allow the gratin to cool for a few minutes before serving. Garnish with fresh thyme sprigs for a touch of color and flavor.
Extra Tips:
When making Creamy Potato Gratin, it’s important to slice the potatoes evenly to guarantee they cook uniformly. Using a mandolin is highly recommended for this task.
If Gruyère isn’t available, you can substitute it with another melting cheese like Swiss or Fontina. For added flavor, consider adding caramelized onions between the layers of potatoes.
Finally, allow the gratin to rest for a few minutes after baking; this will help the layers set and make serving easier.
Baked Brie With Pomegranate and Pecans
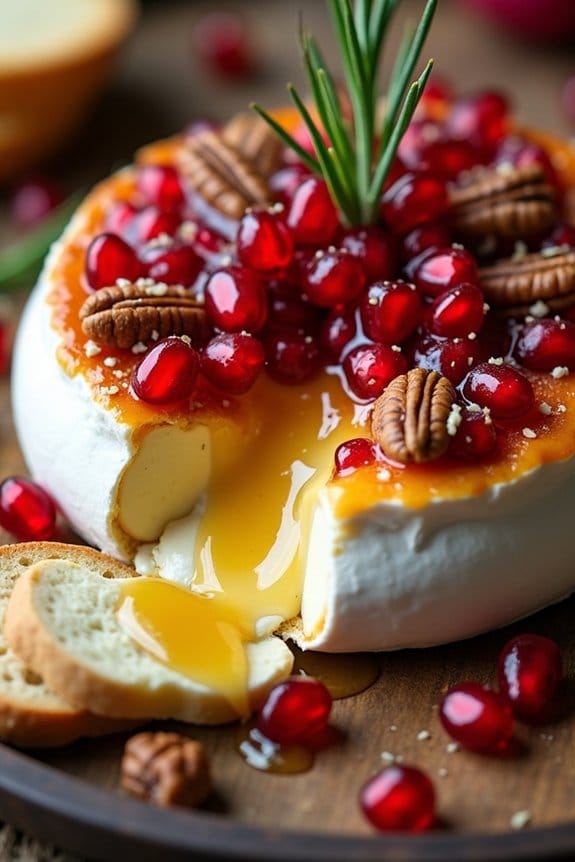
This Baked Brie With Pomegranate and Pecans is a delightful appetizer perfect for a festive Christmas lunch. The combination of creamy, warm brie with the sweet and tart burst of pomegranate seeds, the crunch of toasted pecans, and a hint of honey makes for a heavenly bite.
Served with crusty bread or crackers, it’s a crowd-pleaser that’s both elegant and incredibly easy to make. The dish not only looks stunning with its vibrant colors but also offers a harmonious blend of textures and flavors.
It’s an excellent choice for those who want to impress their guests with minimal effort. This recipe serves 4-6 people, making it ideal for a small gathering or family lunch.
Ingredients for 4-6 servings:
- 1 wheel of Brie cheese (about 8 ounces)
- 1/2 cup pomegranate seeds
- 1/4 cup pecans, chopped
- 2 tablespoons honey
- 1 tablespoon fresh rosemary, chopped
- Crackers or sliced baguette, for serving
Instructions:
- Preheat the Oven: Begin by preheating your oven to 350°F (175°C). This guarantees that the oven is at the right temperature for evenly baking the brie.
- Prepare the Brie: Place the wheel of brie on a baking sheet lined with parchment paper. This will make it easier to transfer and serve later.
- Add the Toppings: Sprinkle the chopped pecans over the top of the brie. Drizzle honey evenly over the pecans and brie. The honey will help the pecans adhere and add sweetness to the dish.
- Bake the Brie: Place the baking sheet in the preheated oven. Bake the brie for about 10-15 minutes or until the cheese is soft and slightly bubbling. Be careful not to overbake as it might become too runny.
- Garnish and Serve: Remove the brie from the oven, and let it stand for a few minutes. Then, sprinkle the fresh rosemary and pomegranate seeds generously over the top. Transfer the baked brie to a serving platter.
- Serve: Serve the Baked Brie with an assortment of crackers or slices of baguette for dipping. Encourage guests to scoop some of the toppings along with the cheese for the full flavor experience.
Extra Tips:
When selecting the brie, opt for a wheel that isn’t too ripe, as it will hold its shape better while baking. The pecans can be toasted lightly in a dry pan for extra flavor before adding them to the brie.
If pomegranates aren’t in season, you can substitute them with dried cranberries for a similar tartness. Finally, feel free to customize the dish with other nuts or herbs that you prefer, such as walnuts or thyme, to suit your taste.
Spinach and Cheese Puff Pastry Twists

Spinach and Cheese Puff Pastry Twists are a delightful addition to your Christmas lunch table. These savory twists combine the rich flavors of spinach and cheese, all encased in a flaky, golden puff pastry. They’re perfect as an appetizer or even as a side dish, adding a touch of elegance to your festive spread.
The combination of creamy cheese and nutritious spinach wrapped in puff pastry creates a pleasing texture and flavor that everyone will love. This recipe is easy to follow and can be prepared in advance, making it a convenient choice for holiday gatherings.
The twists aren’t only delicious but also visually appealing, with their golden, crispy exterior. Whether you’re hosting family and friends or attending a potluck, these Spinach and Cheese Puff Pastry Twists will surely impress your guests and leave them wanting more.
Ingredients (Serves 4-6):
- 1 sheet of puff pastry, thawed
- 1 cup fresh spinach, chopped
- 1 cup ricotta cheese
- 1/2 cup grated Parmesan cheese
- 1 egg, beaten
- 1 tablespoon olive oil
- Salt to taste
- Pepper to taste
Instructions:
- Preheat the Oven: Preheat your oven to 400°F (200°C) to get it ready for baking the twists.
- Prepare the Spinach: In a skillet over medium heat, add the olive oil and sauté the chopped spinach until wilted. This should take about 3-4 minutes. Remove from heat and let it cool slightly.
- Mix the Filling: In a bowl, combine the cooked spinach, ricotta cheese, Parmesan cheese, salt, and pepper. Mix well until all ingredients are evenly incorporated.
- Roll Out the Pastry: On a floured surface, roll out the puff pastry sheet to remove any creases from folding. It should be roughly a 12×12 inch square.
- Spread the Filling: Evenly spread the spinach and cheese mixture over one half of the puff pastry sheet. Fold the other half over the filling, pressing down gently to seal the edges.
- Cut and Twist: Using a sharp knife or pizza cutter, cut the filled pastry into strips about 1 inch wide. Take each strip and twist it gently to form a spiral.
- Prepare for Baking: Place the twisted strips on a baking sheet lined with parchment paper. Brush the tops with the beaten egg to give them a nice golden finish.
- Bake: Place the baking sheet in the preheated oven and bake for about 15-20 minutes, or until the twists are golden brown and puffed.
- Serve: Once baked, remove the twists from the oven and let them cool slightly before serving. They’re best enjoyed warm.
Extra Tips:
When preparing Spinach and Cheese Puff Pastry Twists, make certain that the puff pastry is properly thawed but still cold to the touch for the best results. If the pastry becomes too warm, it might be difficult to work with, leading to less-defined twists.
Additionally, feel free to experiment with different cheeses or add a pinch of nutmeg to the filling for an extra layer of flavor. These twists can also be made ahead of time and reheated in the oven just before serving, making them a stress-free option for your holiday entertaining.
Smoked Salmon and Dill Quiche

Indulge in the delightful flavors of a Smoked Salmon and Dill Quiche for a festive Christmas lunch. This dish combines the rich, smoky notes of salmon with the fresh herbaceous taste of dill, all enveloped in a creamy, savory custard.
Perfectly nestled within a golden, flaky pastry, this quiche isn’t only visually appealing but also a symphony of flavors that will impress your family and friends. Its balance of elegance and comfort makes it an ideal centerpiece for your holiday dining table.
Quiches are incredibly versatile, allowing you to prepare them in advance and serve either warm or at room temperature. This makes the Smoked Salmon and Dill Quiche a stress-free option for your holiday gathering. The savory custard is enhanced by the addition of crème fraîche, providing a rich texture that complements the tender, smoky salmon.
This recipe serves 4-6 people, guaranteeing that everyone at your table can enjoy a slice of this delectable dish.
Ingredients
- 1 pre-made pie crust (9-inch)
- 6 oz smoked salmon, sliced into small pieces
- 4 large eggs
- 1 cup crème fraîche
- 1/2 cup whole milk
- 1/4 cup fresh dill, chopped
- 1/4 cup finely chopped red onion
- 1 tablespoon capers, drained
- Salt and black pepper, to taste
- 1 tablespoon olive oil
Cooking Instructions
- Preheat the Oven: Set your oven to 375°F (190°C) to guarantee it reaches the proper temperature while you prepare the other ingredients.
- Prepare the Pie Crust: Roll out the pre-made pie crust and gently press it into a 9-inch pie dish. Trim any excess dough hanging over the edges and prick the bottom with a fork to prevent bubbling.
- Blind Bake the Crust: Line the pie crust with parchment paper and fill it with pie weights or dried beans. Bake for 10 minutes, then remove the weights and parchment. Bake for an additional 5 minutes until lightly golden. This guarantees a crispy base.
- Sauté the Onions: In a small skillet, heat the olive oil over medium heat. Add the chopped red onion and sauté for about 3 minutes, or until soft and translucent. Remove from heat and let cool slightly.
- Make the Custard: In a mixing bowl, whisk together the eggs, crème fraîche, and milk until smooth. Stir in the chopped dill, sautéed onions, capers, salt, and pepper. Adjust seasoning to taste.
- Assemble the Quiche: Scatter the smoked salmon pieces evenly over the pre-baked crust. Carefully pour the custard mixture over the salmon, ensuring even distribution.
- Bake the Quiche: Place the quiche in the preheated oven and bake for 30-35 minutes, or until the custard is set and the top is golden brown. A knife inserted in the center should come out clean.
- Cool and Serve: Allow the quiche to cool for at least 10 minutes before slicing. This helps the custard set and makes it easier to slice cleanly.
Extra Tips
When making a quiche, it’s important to guarantee that the pie crust is properly blind-baked to prevent it from becoming soggy once the filling is added.
If you don’t have crème fraîche, you can substitute with sour cream or a mixture of heavy cream and a bit of lemon juice for a similar tangy richness. Additionally, this quiche can be made a day in advance and gently reheated in the oven before serving, making it an excellent choice for stress-free holiday preparation.
Winter Vegetable Soup With Herb Croutons
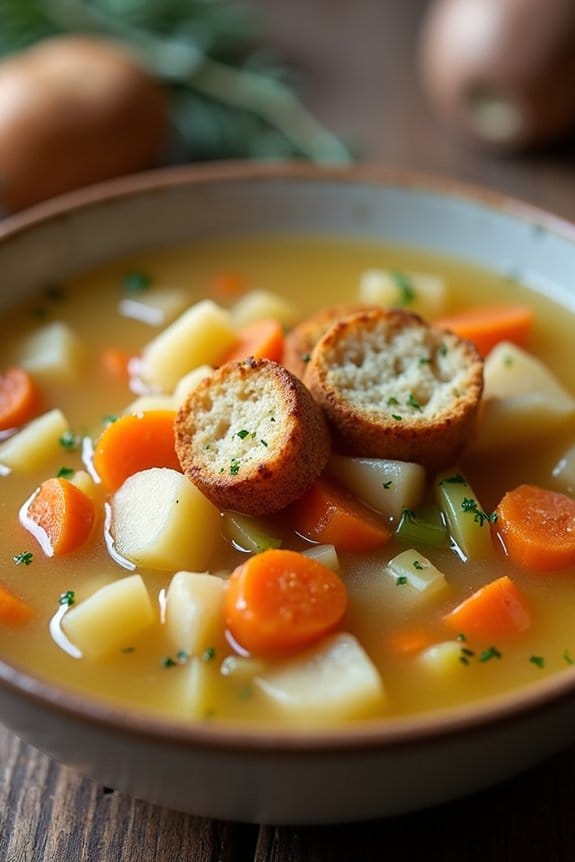
Winter Vegetable Soup With Herb Croutons is a delicious and heartwarming dish perfect for a cozy Christmas lunch. This soup is packed with seasonal vegetables that provide both nutrition and vibrant flavors, making it an ideal choice for a festive meal. The addition of herb croutons adds a delightful crunch and an aromatic touch that complements the soothing broth.
This recipe is perfect for serving 4-6 people and features a variety of winter vegetables such as carrots, parsnips, and leeks. The herb croutons are made from crusty bread seasoned with a blend of herbs, providing a fragrant and crispy topping to the soup. Together, they create a comforting dish that captures the essence of the holiday season.
Ingredients:
- 2 tablespoons olive oil
- 1 large onion, chopped
- 2 cloves garlic, minced
- 3 carrots, peeled and sliced
- 2 parsnips, peeled and sliced
- 1 leek, cleaned and sliced
- 2 potatoes, peeled and diced
- 1 small head of cabbage, shredded
- 6 cups vegetable broth
- 1 bay leaf
- Salt and pepper to taste
- 1/4 cup fresh parsley, chopped
- 4 cups crusty bread, cubed
- 2 tablespoons butter
- 1 teaspoon dried thyme
- 1 teaspoon dried oregano
Cooking Instructions:
- Prepare the Vegetables: Begin by heating the olive oil in a large pot over medium heat. Add the chopped onion and minced garlic, sautéing until the onion becomes translucent and fragrant, about 5 minutes.
- Add the Vegetables: Add the carrots, parsnips, leek, and potatoes to the pot. Stir well to combine with the onions and garlic, and cook for an additional 5 minutes until the vegetables begin to soften.
- Simmer the Soup: Pour in the vegetable broth and add the shredded cabbage and bay leaf. Increase the heat to bring the mixture to a boil, then reduce the heat to low and let it simmer for 25-30 minutes, or until all the vegetables are tender. Season with salt and pepper to taste.
- Make the Herb Croutons: While the soup is simmering, prepare the croutons. Preheat your oven to 375°F (190°C). In a large bowl, toss the cubed bread with melted butter, dried thyme, and oregano. Spread the bread cubes in a single layer on a baking sheet and bake for 10-12 minutes, or until they’re golden brown and crispy.
- Finish the Soup: Once the vegetables are tender, remove the bay leaf and stir in the chopped parsley. Check the seasoning and adjust if necessary.
- Serve: Ladle the soup into bowls and top each serving with a handful of herb croutons. Serve immediately for a warm and hearty meal.
Extra Tips: To enhance the flavor of the soup, consider roasting the vegetables before adding them to the pot. This will bring out their natural sweetness and add depth to the dish. You can also experiment with different herbs for the croutons, such as rosemary or basil, to suit your personal taste.
For a creamier texture, blend a portion of the soup and mix it back into the pot before serving. Enjoy this delightful winter vegetable soup as a standalone dish or pair it with a simple salad for a complete meal.
Festive Antipasto Platter

A Festive Antipasto Platter is the perfect way to start your Christmas lunch with a burst of flavors and colors. This platter offers a delightful assortment of cured meats, cheeses, olives, marinated vegetables, and more. It’s an easy, no-cook dish that can be prepared ahead of time and arranged beautifully to impress your guests. The variety of textures and tastes guarantees there’s something for everyone, making it an ideal centerpiece for your holiday gathering.
The secret to a great antipasto platter is choosing high-quality ingredients that complement each other. A mix of savory, sweet, crunchy, and creamy components will create a balanced and inviting spread. You can customize the platter with your favorite items, but the following recipe provides a classic selection that serves 4-6 people. This antipasto platter isn’t only delicious but also visually appealing, adding a festive touch to your table.
Ingredients for 4-6 people:
- 200g thinly sliced prosciutto
- 200g salami, sliced
- 150g chorizo, sliced
- 200g assorted cheeses (such as mozzarella, cheddar, and brie)
- 150g mixed marinated olives
- 1 jar (around 200g) artichoke hearts, drained
- 1 jar (around 200g) roasted red peppers, drained
- 1 cup cherry tomatoes
- 1 small bunch of grapes
- 1/2 cup dried figs or apricots
- 1/2 cup nuts, such as almonds or walnuts
- Fresh herbs for garnish (such as basil or rosemary)
- Assorted crackers or slices of crusty bread
Cooking Instructions:
- Prepare the Ingredients: Begin by slicing the cheeses into cubes or wedges and arranging them on a large serving platter. Wash the cherry tomatoes and grapes, then pat them dry with a paper towel.
- Assemble the Meats: Roll or fold the prosciutto, salami, and chorizo into bite-sized portions. Place them in clusters around the platter, ensuring they’re easily accessible.
- Add the Vegetables: Drain the artichoke hearts and roasted red peppers. Arrange these along with the marinated olives around the meats and cheeses, offering a variety of colors and textures.
- Include the Fruits and Nuts: Fill in the gaps with cherry tomatoes, grapes, dried figs or apricots, and nuts. These elements not only add flavor but also enhance the visual appeal of the platter.
- Final Touches: Garnish the platter with fresh herbs such as basil or rosemary for an aromatic touch. Arrange crackers or slices of crusty bread around the edges of the platter or in a separate basket.
- Serve and Enjoy: Allow the platter to sit at room temperature for about 15 minutes before serving to let the flavors meld together. This will also enhance the texture and taste of the cheeses and meats.
Extra Tips:
When creating your Festive Antipasto Platter, feel free to incorporate seasonal elements such as pomegranate seeds or fresh figs if they’re available. For an added touch of elegance, you can drizzle some balsamic glaze over the vegetables or serve it on the side as a dip.
Classic Caesar Salad With Homemade Dressing
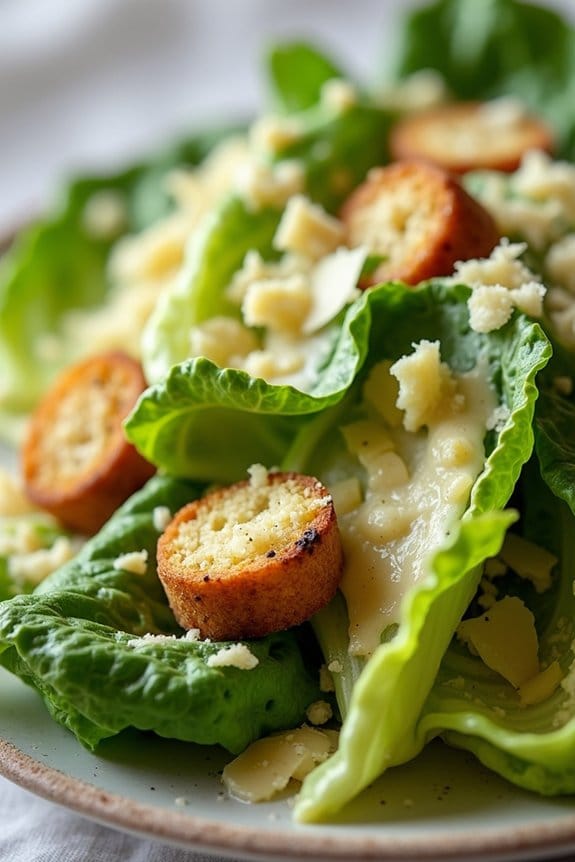
The Classic Caesar Salad is a timeless favorite that brings together crisp romaine lettuce, crunchy croutons, and a rich, tangy dressing. This dish is perfect for a Christmas lunch, offering a rejuvenating yet satisfying option that complements any holiday spread.
Making the dressing from scratch elevates the flavors, guaranteeing a fresh and authentic experience that store-bought versions simply can’t match. With just a few key ingredients and straightforward preparation, this salad is both impressive and easy to assemble.
The star of the Caesar Salad is certainly the homemade dressing, which combines the boldness of garlic and anchovies with the creaminess of egg yolks and olive oil. The addition of Parmesan cheese adds a savory depth, while lemon juice provides a bright, zesty finish.
Paired with crisp romaine lettuce and golden croutons, this salad offers a delightful combination of textures and flavors. This recipe will serve 4-6 people, making it an ideal choice for a small family gathering or intimate holiday meal.
Ingredients:
- 3 heads of romaine lettuce, washed and chopped
- 1 cup croutons
- 1/2 cup grated Parmesan cheese
For the Dressing:
- 2 large egg yolks
- 2-3 anchovy fillets, finely chopped
- 2 cloves garlic, minced
- 1 teaspoon Dijon mustard
- 2 tablespoons fresh lemon juice
- 1/2 cup olive oil
- Salt and pepper to taste
Instructions:
1. Prepare the Lettuce: Start by washing and drying the romaine lettuce. Chop it into bite-sized pieces and place it in a large salad bowl.
2. Make the Dressing: In a medium bowl, whisk together the egg yolks, minced garlic, chopped anchovy fillets, and Dijon mustard until smooth. Slowly drizzle in the olive oil while continuing to whisk, making sure the mixture emulsifies.
Once combined, add the fresh lemon juice, and season with salt and pepper to taste. Mix until the dressing is smooth and creamy.
3. Combine Ingredients: Pour the dressing over the chopped romaine lettuce. Toss gently to ensure each leaf is coated with the dressing.
4. Add Croutons and Cheese: Sprinkle the croutons and grated Parmesan cheese over the dressed lettuce. Toss lightly to distribute evenly.
5. Serve: Transfer the salad to individual serving plates or a large serving platter. Garnish with additional Parmesan cheese if desired. Serve immediately to maintain the crispness of the lettuce.
Extra Tips:
When preparing the dressing, it’s essential to whisk continuously as you slowly add the olive oil to achieve a stable emulsion. Using high-quality olive oil and fresh lemon juice will greatly enhance the flavor of your dressing.
For the croutons, consider using day-old bread; simply cut it into cubes, drizzle with olive oil, and bake until golden brown. Additionally, if you’re concerned about using raw egg yolks, you can use pasteurized eggs or substitute with a tablespoon of mayonnaise for a similar creamy texture.
Maple-Glazed Brussels Sprouts and Bacon
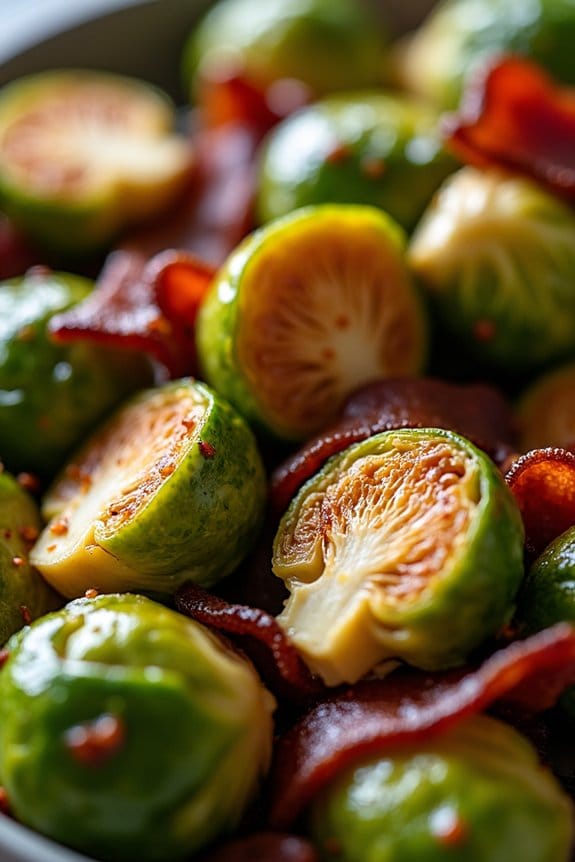
Looking to impress your family and friends this holiday season? Maple-Glazed Brussels Sprouts and Bacon is a delightful dish that combines the natural sweetness of maple syrup with the savory goodness of crispy bacon, making it an irresistible addition to your Christmas lunch menu.
The caramelized edges of the Brussels sprouts, paired with the smokiness of the bacon, create a harmonious blend of flavors that will surely be a crowd-pleaser at your festive gathering. This dish not only adds vibrant color to your table but also offers a satisfying texture that complements any main course.
The beauty of this recipe lies in its simplicity and the ease with which it can be prepared. By using fresh ingredients and minimal seasoning, you allow the natural flavors of the Brussels sprouts and bacon to shine. The maple glaze adds a touch of sweetness without overwhelming the dish, balancing the savory elements perfectly.
Whether you’re an experienced cook or a beginner in the kitchen, this recipe is straightforward and will yield delicious results every time.
Ingredients for 4-6 servings:
- 1 ½ pounds of Brussels sprouts, trimmed and halved
- 6 slices of bacon, chopped
- 2 tablespoons of olive oil
- ¼ cup of pure maple syrup
- Salt and pepper to taste
- 1 tablespoon of apple cider vinegar
Cooking Instructions:
- Preheat the Oven: Begin by preheating your oven to 400°F (200°C). This temperature is perfect for roasting, guaranteeing that the Brussels sprouts become tender inside while developing a crispy exterior.
- Prepare the Brussels Sprouts and Bacon: In a large mixing bowl, toss the halved Brussels sprouts with olive oil, making sure they’re evenly coated. Season with salt and pepper to taste. Add the chopped bacon to the bowl and mix well.
- Roast the Brussels Sprouts and Bacon: Spread the Brussels sprouts and bacon mixture in a single layer on a large baking sheet. This allows for even cooking and prevents steaming. Place the baking sheet in the preheated oven and roast for about 20-25 minutes, stirring halfway through, until the Brussels sprouts are golden brown and the bacon is crispy.
- Prepare the Maple Glaze: While the Brussels sprouts are roasting, combine the maple syrup and apple cider vinegar in a small saucepan. Heat over low heat, stirring occasionally until the mixture is warmed through and slightly thickened.
- Combine and Serve: Once the Brussels sprouts and bacon are done roasting, remove them from the oven and transfer them back to the mixing bowl. Pour the warm maple glaze over the Brussels sprouts and bacon, tossing to coat evenly. Serve immediately while hot.
Extra Tips:
When preparing this dish, make sure that the Brussels sprouts are all roughly the same size for even cooking. If some are notably larger, consider quartering them.
For a richer flavor, you can use smoked bacon, which adds an extra depth to the dish. If you prefer a bit of heat, a pinch of red pepper flakes can be added to the maple glaze for a subtle kick.
Finally, this recipe can be easily doubled to accommodate larger gatherings, making it a versatile option for any holiday celebration.
Raspberry and White Chocolate Trifle

Raspberry and White Chocolate Trifle is a delightful dessert that combines the tartness of raspberries with the creamy sweetness of white chocolate. This trifle is perfect for Christmas lunch, as it offers a festive look with its vibrant colors and layers. Not only is it visually appealing, but the flavor combination is bound to impress your guests.
This dish is easy to assemble, making it a great option for those who want a show-stopping dessert without spending hours in the kitchen. The layers of sponge cake, raspberry coulis, white chocolate custard, and fresh raspberries come together to create a harmonious blend of flavors and textures. This recipe serves 4-6 people, making it ideal for a small gathering or family celebration.
Ingredients:
- 200g sponge cake or ladyfingers
- 300g fresh raspberries
- 100g white chocolate, chopped
- 500ml whole milk
- 150ml heavy cream
- 4 egg yolks
- 100g granulated sugar
- 2 tablespoons cornstarch
- 1 teaspoon vanilla extract
- 2 tablespoons raspberry liqueur (optional)
- Fresh mint leaves for garnish (optional)
Cooking Instructions:
- Prepare the White Chocolate Custard: In a saucepan, heat the milk over medium heat until it begins to simmer. Remove from heat and set aside. In a separate bowl, whisk together the egg yolks, sugar, and cornstarch until smooth. Slowly pour the hot milk into the egg mixture, whisking constantly. Return the mixture to the saucepan and cook over medium heat, stirring continuously, until the custard thickens. Remove from heat, add the chopped white chocolate and vanilla extract, and stir until the chocolate is melted and the custard is smooth. Let it cool completely.
- Make the Raspberry Coulis: In a blender, puree half of the fresh raspberries until smooth. Strain the puree through a sieve to remove the seeds and set aside. If desired, mix in the raspberry liqueur for an extra festive touch.
- Assemble the Trifle: Cut the sponge cake or ladyfingers into pieces and layer them at the bottom of a trifle dish or individual serving glasses. Drizzle half of the raspberry coulis over the cake layer. Pour a layer of cooled white chocolate custard over the coulis, spreading it evenly.
- Add Raspberries: Scatter a portion of the remaining fresh raspberries over the custard layer. Repeat the layering process with the remaining cake, raspberry coulis, custard, and raspberries until all ingredients are used, finishing with a layer of raspberries on top.
- Chill the Trifle: Cover the trifle with plastic wrap and refrigerate for at least 2 hours or overnight. This allows the flavors to meld and the layers to set.
- Serve and Garnish: Just before serving, whip the heavy cream until soft peaks form and dollop or pipe it over the top of the trifle. Garnish with fresh mint leaves for a festive touch.
Extra Tips:
For a richer flavor, consider using a high-quality white chocolate. Confirm all ingredients are cooled properly before assembling the trifle to prevent the layers from blending too much. If you prefer a less sweet dessert, you can reduce the sugar in the custard.
This trifle can be made a day in advance, allowing you more time to enjoy the festivities on Christmas day.
