
The holiday season is a time for joy, laughter, and delicious food that everyone can enjoy. If you’re like me, hosting family and friends is a cherished tradition, and making sure there are gluten-free options is a must. Last year, I stumbled upon some delightful recipes that became instant favorites, like a creamy butternut squash soup and a decadent flourless chocolate yule log. These dishes transformed our Christmas lunch into a memorable feast for all. Ready to discover these gluten-free gems?
Festive Butternut Squash Soup
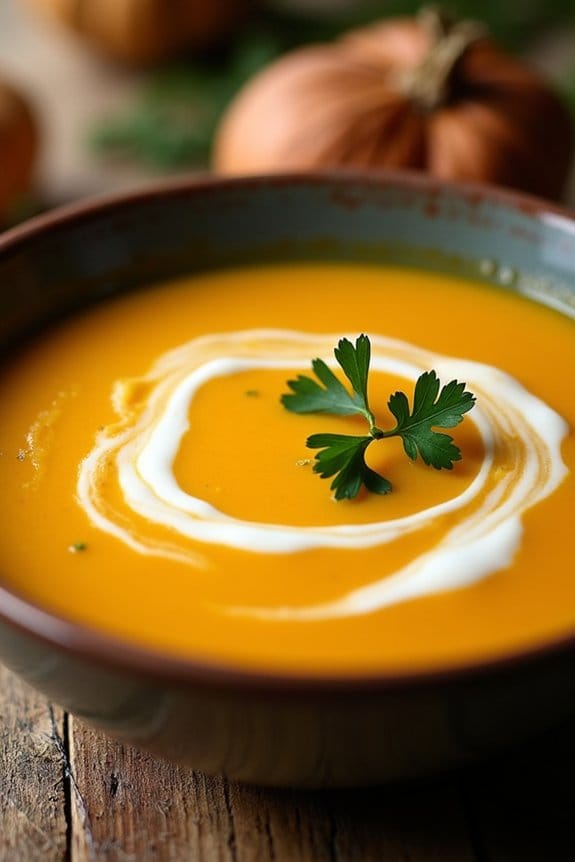
Festive Butternut Squash Soup is a perfect starter for your gluten-free Christmas lunch. This creamy, vibrant soup not only adds a splash of color to your holiday table but also packs a punch of flavor with its blend of spices and roasted vegetables. The natural sweetness of butternut squash is complemented by the warmth of nutmeg and cinnamon, creating a comforting dish that’s both festive and satisfying.
This soup is a great option for those looking to accommodate gluten-free diets without sacrificing taste. It’s easy to prepare, allowing you to enjoy the holiday with family and friends instead of spending the entire day in the kitchen. Serve it as an appetizer or a light main course, and watch as your guests revel in the rich taste and texture of this delightful dish.
Ingredients (Serves 4-6)
- 1 medium butternut squash, peeled and cubed
- 2 tablespoons olive oil
- 1 large onion, chopped
- 2 cloves garlic, minced
- 1 teaspoon ground cinnamon
- 1/2 teaspoon ground nutmeg
- 4 cups vegetable broth (gluten-free)
- Salt and pepper, to taste
- 1/2 cup coconut milk
- Fresh parsley for garnish
Cooking Instructions
- Preheat the Oven: Begin by preheating your oven to 400°F (200°C). This will guarantee your butternut squash roasts to perfection.
- Prepare the Butternut Squash: Place the cubed butternut squash on a baking sheet lined with parchment paper. Drizzle with 1 tablespoon of olive oil and season with salt and pepper. Toss to coat the squash evenly.
- Roast the Squash: Roast the squash in the preheated oven for 25-30 minutes, or until tender and slightly caramelized. Stir halfway through the cooking time to guarantee even roasting.
- Sauté Onions and Garlic: While the squash is roasting, heat the remaining tablespoon of olive oil in a large pot over medium heat. Add the chopped onion and cook until translucent, about 5 minutes. Add the minced garlic and sauté for another minute until fragrant.
- Add Spices: Stir in the ground cinnamon and nutmeg, allowing the spices to cook for about 30 seconds to release their flavors.
- Combine Ingredients: Add the roasted butternut squash to the pot, followed by the vegetable broth. Bring the mixture to a boil, then reduce the heat and let it simmer for 10-15 minutes.
- Blend the Soup: Remove the pot from heat and use an immersion blender to puree the soup until smooth. Alternatively, you can carefully transfer the soup to a blender and blend in batches.
- Finish with Coconut Milk: Stir in the coconut milk and adjust the seasoning with salt and pepper to taste. Reheat the soup gently if needed.
- Serve: Ladle the soup into bowls and garnish with fresh parsley before serving.
Extra Tips
When selecting your butternut squash, look for one with a firm skin and no soft spots to guarantee freshness. If you prefer a spicier kick, consider adding a pinch of cayenne pepper or curry powder when adding the cinnamon and nutmeg.
For a creamier texture, you can also substitute the coconut milk with heavy cream, but verify it’s gluten-free if needed. Finally, this soup can be made a day ahead and reheated before serving, which can help enhance the flavors.
Gluten-Free Savory Stuffed Mushrooms
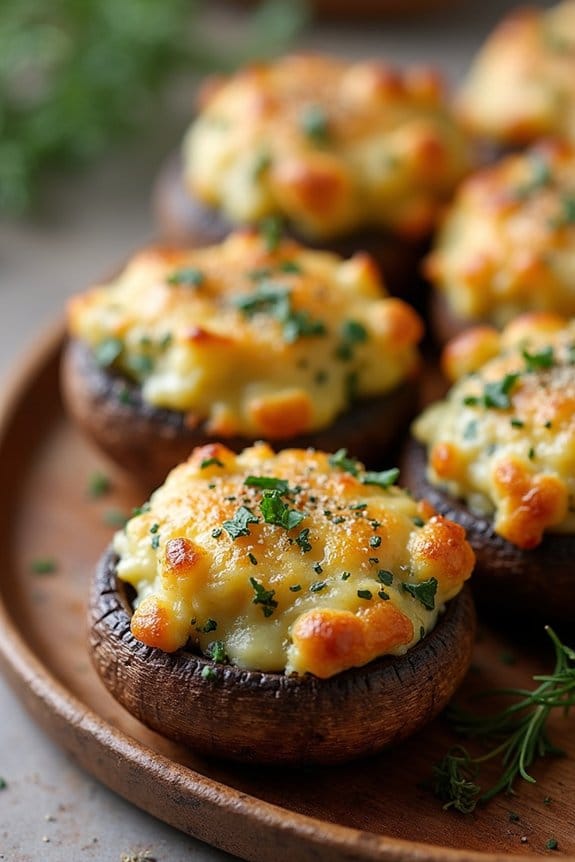
Gluten-Free Savory Stuffed Mushrooms are a delightful appetizer or side dish perfect for a festive Christmas lunch. These mushrooms are packed with a flavorful filling of herbs, cheese, and gluten-free breadcrumbs, making them a delicious treat for anyone, especially those on a gluten-free diet.
Whether you’re hosting a holiday gathering or looking for a tasty addition to your menu, these stuffed mushrooms will certainly impress your guests with their rich flavors and appealing presentation.
The dish features large, juicy mushroom caps filled with a savory mixture that blends the umami flavor of the mushrooms with the aromatic notes of garlic, parsley, and thyme. The addition of cheese helps to bind the filling together, while the gluten-free breadcrumbs add a satisfying texture.
This recipe isn’t only easy to prepare but also versatile, allowing you to customize the filling with your favorite ingredients or to accommodate any dietary restrictions. Serve these tasty morsels warm, and watch them disappear from the table in no time.
Ingredients (Serves 4-6):
- 18-20 large button mushrooms
- 2 tablespoons olive oil
- 1 small onion, finely chopped
- 3 cloves garlic, minced
- 1/4 cup gluten-free breadcrumbs
- 1/4 cup grated Parmesan cheese
- 1/4 cup cream cheese, softened
- 2 tablespoons fresh parsley, chopped
- 1 teaspoon fresh thyme leaves
- Salt and pepper to taste
Cooking Instructions:
- Prepare the Mushrooms: Preheat your oven to 375°F (190°C). Carefully wipe the mushrooms clean with a damp cloth and remove the stems. Set the caps aside and finely chop the stems.
- Cook the Filling: In a skillet over medium heat, heat the olive oil. Add the chopped mushroom stems and onion, and sauté for about 5 minutes until the onion becomes translucent. Add the minced garlic and cook for another 1-2 minutes until fragrant.
- Mix the Filling: In a mixing bowl, combine the sautéed mushroom mixture with the gluten-free breadcrumbs, Parmesan cheese, cream cheese, chopped parsley, and thyme. Season with salt and pepper to taste. Mix until all ingredients are well incorporated and the filling is cohesive.
- Stuff the Mushrooms: Using a small spoon, fill each mushroom cap generously with the prepared filling, pressing it down slightly to guarantee it stays in place.
- Bake the Mushrooms: Place the stuffed mushroom caps on a baking sheet lined with parchment paper. Bake in the preheated oven for 20-25 minutes, or until the mushrooms are tender and the tops are golden brown.
- Serve: Once done, remove the mushrooms from the oven and let them cool for a few minutes before serving. Enjoy them warm as an appetizer or side dish.
Extra Tips:
For an even richer flavor, consider adding cooked bacon bits or chopped nuts like walnuts or pecans to the filling mixture. If you want a bit of spice, a pinch of cayenne pepper or red pepper flakes can add a nice touch of heat.
When selecting mushrooms, choose ones that are firm and fresh for the best texture and taste. If you prefer a vegan version, swap out the cheese for a dairy-free alternative and the cream cheese for a nut-based option.
Always check the packaging of your ingredients to confirm they’re certified gluten-free, especially the breadcrumbs.
Herb-Crusted Rack of Lamb
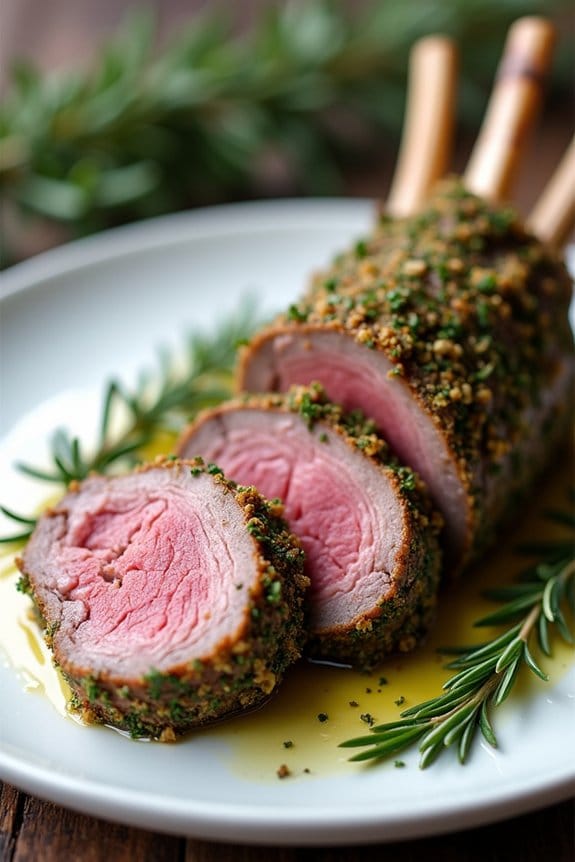
Herb-Crusted Rack of Lamb is an elegant and flavorful centerpiece for your gluten-free Christmas lunch. This dish features tender lamb with a savory herb crust, providing a delightful mix of flavors and textures that will impress your holiday guests. The combination of fresh herbs, garlic, and a touch of mustard creates a fragrant and mouth-watering crust that perfectly complements the rich taste of the lamb.
This recipe not only guarantees your meal is gluten-free but also maintains the traditional essence of a festive feast.
When preparing Herb-Crusted Rack of Lamb, it’s important to select a quality cut of meat and use fresh herbs for peak flavor. The rack of lamb is seared to lock in juices, then coated with the herb mixture and oven-roasted to perfection. This method results in a beautifully crisp crust while keeping the lamb juicy on the inside. The process is straightforward yet delivers an impressive result that will certainly be a highlight of your holiday menu.
Ingredients for 4-6 servings:
- 2 racks of lamb, frenched (about 1.5 to 2 pounds each)
- 2 tablespoons olive oil
- Salt and black pepper, to taste
- 1/2 cup gluten-free breadcrumbs
- 1/4 cup fresh parsley, finely chopped
- 2 tablespoons fresh rosemary, finely chopped
- 2 tablespoons fresh thyme, finely chopped
- 3 cloves garlic, minced
- 2 tablespoons Dijon mustard
Cooking Instructions:
- Preheat the Oven: Begin by preheating your oven to 400°F (200°C), making sure it’s ready for roasting the lamb after it’s prepared.
- Prepare the Lamb: Pat the racks of lamb dry with paper towels. Season generously with salt and black pepper on all sides to enhance the flavor.
- Sear the Lamb: Heat the olive oil in a large skillet over medium-high heat. Once hot, sear the racks of lamb, fat side down, for about 3-4 minutes until browned. Turn and sear the other side for another 2 minutes. This step locks in the juices and adds a rich flavor.
- Make the Herb Crust: In a bowl, combine the gluten-free breadcrumbs, parsley, rosemary, thyme, and minced garlic. Mix well to make sure the herbs are evenly distributed.
- Coat the Lamb: Brush the seared lamb racks with Dijon mustard, which helps the herb crust adhere. Press the breadcrumb mixture onto the mustard-coated lamb, ensuring an even layer on all sides.
- Roast the Lamb: Place the herb-crusted lamb racks on a baking sheet or roasting pan, bone side down. Roast in the preheated oven for about 15-20 minutes for medium-rare, or until the internal temperature reaches your desired doneness (135°F/57°C for medium-rare).
- Rest and Serve: Remove the lamb from the oven and let it rest for 5-10 minutes before slicing. This allows the juices to redistribute throughout the meat. Slice between the bones and serve warm.
Extra Tips:
For a perfectly cooked Herb-Crusted Rack of Lamb, it’s vital to use a meat thermometer to check the internal temperature, confirming it meets your preferred level of doneness.
Additionally, allowing the meat to rest after cooking helps retain its juices for a tender and juicy result. Feel free to experiment with different herbs according to your taste, but make sure to maintain a good balance to not overpower the lamb’s natural flavor.
Finally, pairing this dish with a gluten-free side such as roasted vegetables or a fresh salad will complement the rich flavors of the lamb beautifully.
Citrus-Glazed Roasted Turkey Breast
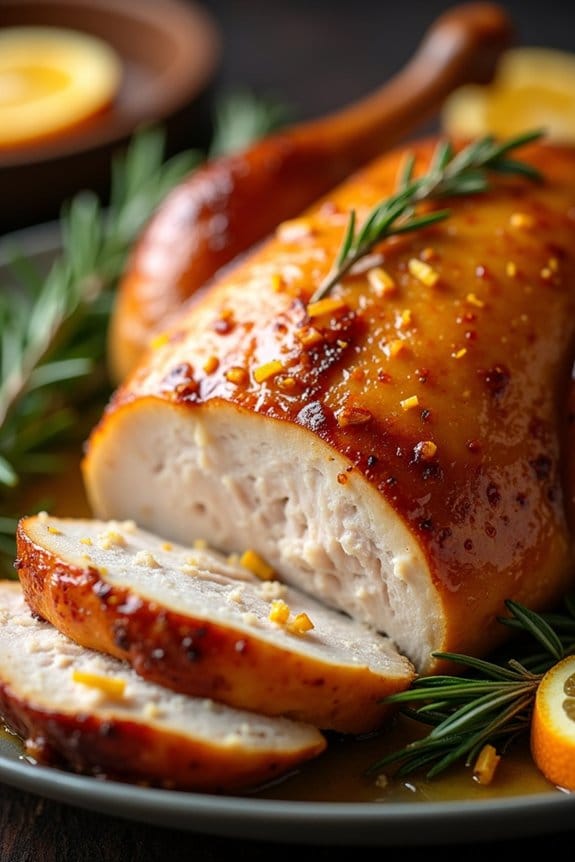
Citrus-Glazed Roasted Turkey Breast is a delightful centerpiece for a gluten-free Christmas lunch. This recipe combines the succulent juiciness of turkey breast with a tangy, aromatic citrus glaze, creating a dish that’s both festive and invigorating. Perfect for those looking to enjoy a balanced meal, this turkey breast is marinated in a blend of citrus juices and herbs, then roasted to perfection. The result is a tender, flavorful turkey that pairs beautifully with traditional holiday sides.
The citrus glaze not only adds a bright, zesty flavor but also helps keep the turkey moist during roasting. This recipe serves 4-6 people, making it ideal for a family gathering or an intimate holiday meal. The combination of orange, lemon, and lime in the glaze brings a vibrant taste that complements the natural flavors of the turkey, making it a memorable addition to your Christmas menu.
Ingredients (Serves 4-6):
- 1 turkey breast (about 3-4 pounds)
- 1/2 cup freshly squeezed orange juice
- 1/4 cup freshly squeezed lemon juice
- 1/4 cup freshly squeezed lime juice
- Zest of 1 orange
- Zest of 1 lemon
- 1/4 cup olive oil
- 2 tablespoons honey
- 2 teaspoons salt
- 1 teaspoon black pepper
- 1 teaspoon garlic powder
- 1 teaspoon onion powder
- 1 tablespoon fresh rosemary, chopped
- 1 tablespoon fresh thyme, chopped
Cooking Instructions:
- Preheat and Prepare: Preheat your oven to 375°F (190°C). Rinse the turkey breast under cold water and pat dry with paper towels. Place it in a roasting pan, skin side up.
- Make the Citrus Glaze: In a mixing bowl, combine the orange juice, lemon juice, lime juice, orange zest, lemon zest, olive oil, honey, salt, black pepper, garlic powder, onion powder, rosemary, and thyme. Whisk until the ingredients are well combined.
- Marinate the Turkey: Pour half of the citrus glaze over the turkey breast, making sure it’s evenly coated. Reserve the remaining glaze. Allow the turkey to marinate at room temperature for 30 minutes to an hour, or cover and refrigerate for up to 4 hours for deeper flavor.
- Roast the Turkey: Place the marinated turkey breast in the preheated oven. Roast for approximately 1.5 to 2 hours, or until the internal temperature reaches 165°F (74°C). Baste the turkey with the reserved glaze every 30 minutes to keep it moist and flavorful.
- Rest and Serve: Once cooked, remove the turkey from the oven and let it rest for 10-15 minutes before slicing. This allows the juices to redistribute, guaranteeing each slice is juicy and tender. Serve with your choice of gluten-free sides.
Extra Tips:
When selecting your turkey breast, look for one that’s of uniform thickness to promote even cooking. If available, organic or free-range turkey tends to have better flavor and texture.
If you prefer a slightly sweeter glaze, increase the honey to 3 tablespoons. For an intense citrus flavor, add extra zest to the marinade. Always use a meat thermometer to check for doneness to prevent overcooking.
Finally, if the turkey skin begins to brown too quickly, cover it loosely with aluminum foil during roasting.
Quinoa and Cranberry Stuffed Peppers
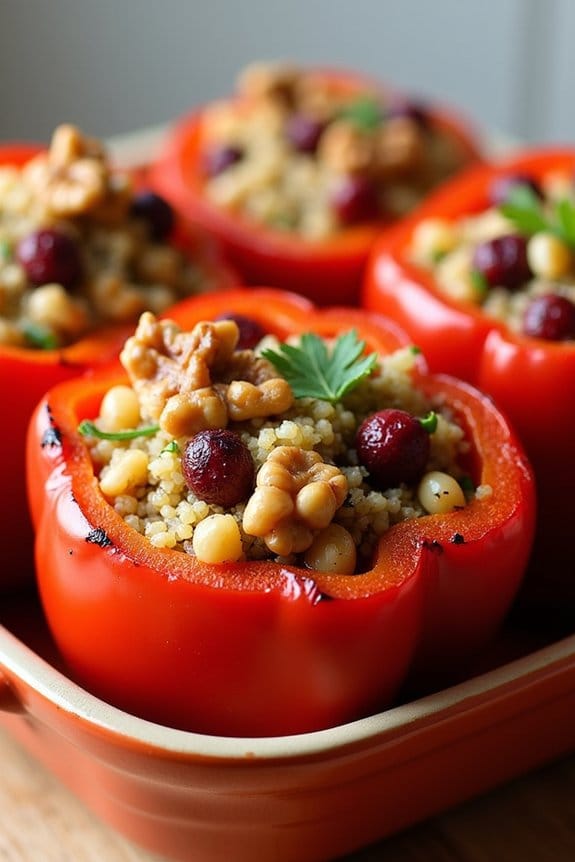
Quinoa and Cranberry Stuffed Peppers are a delightful and colorful addition to any gluten-free Christmas lunch menu. This dish combines the nutty flavor of quinoa with the sweet and tart bursts of cranberries, all nestled inside vibrant bell peppers.
These stuffed peppers not only bring a pop of color to your holiday table but also deliver a satisfying and nutritious meal that accommodates various dietary preferences. Perfect for both vegetarians and those who are gluten intolerant, this recipe guarantees that everyone at your table can enjoy a delicious and festive meal.
Beyond their visual appeal, Quinoa and Cranberry Stuffed Peppers are packed with protein, fiber, and essential nutrients, making them a hearty main or side dish. The preparation involves cooking quinoa to a fluffy perfection, mixing it with cranberries, herbs, and spices, and then baking it inside bell peppers until everything melds into a harmonious blend of flavors.
Whether you’re preparing them as a main dish or as a festive side, these stuffed peppers are sure to impress your guests with their taste and presentation.
Ingredients for 4-6 people:
- 6 large bell peppers (any color)
- 1 cup quinoa
- 2 cups vegetable broth
- 1 cup dried cranberries
- 1/2 cup chopped walnuts
- 1/4 cup chopped fresh parsley
- 1/2 teaspoon ground cinnamon
- 1/2 teaspoon ground cumin
- Salt and pepper to taste
- 2 tablespoons olive oil
- 1 medium onion, chopped
- 2 cloves garlic, minced
- Juice of 1 lemon
Cooking Instructions:
- Prepare the Quinoa: Rinse the quinoa under cold water. In a medium saucepan, bring the vegetable broth to a boil. Add the quinoa, reduce the heat to low, cover, and simmer for about 15 minutes or until the quinoa is cooked and the liquid is absorbed. Fluff with a fork and set aside.
- Prepare the Bell Peppers: Preheat your oven to 375°F (190°C). Cut the tops off the bell peppers and remove the seeds and membranes. Lightly brush the outside of the peppers with a little olive oil and place them in a baking dish.
- Sauté Aromatics: In a large skillet, heat the olive oil over medium heat. Add the chopped onion and minced garlic, sautéing until they’re soft and fragrant, about 5 minutes.
- Mix the Filling: In a large bowl, combine the cooked quinoa, sautéed onion and garlic, dried cranberries, chopped walnuts, parsley, cinnamon, cumin, salt, pepper, and lemon juice. Mix well to confirm all ingredients are evenly distributed.
- Stuff the Peppers: Spoon the quinoa mixture into each bell pepper, packing it in gently. Place the stuffed peppers upright in the baking dish.
- Bake the Peppers: Cover the baking dish with aluminum foil and bake in the preheated oven for 30 minutes. Then remove the foil and bake for an additional 15 minutes, or until the peppers are tender and slightly charred on the edges.
- Serve and Enjoy: Remove the stuffed peppers from the oven and let them cool slightly before serving. Garnish with additional parsley if desired.
Extra Tips: When choosing bell peppers, look for ones that are roughly the same size so they bake evenly. If you prefer a bit of a kick, consider adding a pinch of red pepper flakes or a dash of hot sauce to the quinoa mixture.
To save time, you can prepare the quinoa filling a day in advance and store it in the refrigerator, then stuff and bake the peppers on the day of your event.
Honey Mustard Glazed Carrots
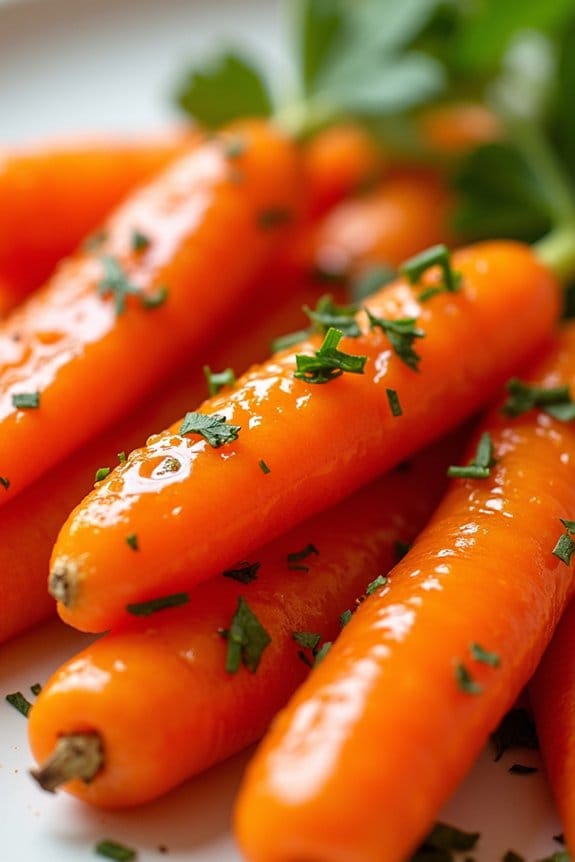
Honey Mustard Glazed Carrots are a delightful addition to any gluten-free Christmas lunch. This dish combines the sweetness of fresh carrots with a tangy and slightly spicy honey mustard glaze, creating a perfect balance of flavors that complement any festive meal.
Whether you’re serving a traditional roast or a plant-based feast, these glazed carrots bring vibrant color and a sophisticated taste to your table.
Carrots, known for their natural sweetness, truly shine in this recipe. The glaze, made from honey and mustard, enhances the carrots’ flavors while providing a glossy finish. This dish isn’t only delicious but also quick and easy to prepare, making it a fantastic option for busy holiday kitchens.
It can be made ahead of time and reheated just before serving, making it convenient for those juggling multiple dishes.
Ingredients (serves 4-6):
- 2 pounds of carrots, peeled and cut into sticks
- 3 tablespoons of honey
- 3 tablespoons of Dijon mustard
- 2 tablespoons of olive oil
- 1 tablespoon of apple cider vinegar
- Salt and pepper to taste
- 2 tablespoons of fresh parsley, chopped (optional, for garnish)
Cooking Instructions:
- Prepare the Carrots: Start by peeling the carrots and cutting them into even-sized sticks, about 2-3 inches long. This guarantees they cook evenly.
- Blanch the Carrots: Bring a large pot of salted water to a boil. Add the carrots and blanch them for about 4-5 minutes until they’re just tender but still have a slight crunch. Drain the carrots and set them aside.
- Make the Glaze: In a small mixing bowl, combine the honey, Dijon mustard, olive oil, and apple cider vinegar. Whisk these ingredients together until the mixture is smooth and well combined.
- Coat the Carrots: In a large skillet over medium heat, add the blanched carrots. Pour the honey mustard glaze over them and toss to confirm each carrot is evenly coated.
- Cook the Carrots: Allow the carrots to cook in the glaze for about 5-7 minutes, stirring occasionally, until the glaze thickens and the carrots are fully coated and tender.
- Season and Serve: Season the glazed carrots with salt and pepper to taste. Transfer them to a serving dish and garnish with fresh parsley if desired. Serve warm.
Extra Tips: To enhance the flavors even more, consider adding a pinch of cayenne pepper to the glaze for a subtle kick.
If you prefer a more caramelized finish, you can roast the glazed carrots in a preheated oven at 400°F (200°C) for an additional 10 minutes after coating them in the skillet. This will deepen the glaze’s color and add a slightly smoky flavor to the dish.
Almond Flour Yorkshire Puddings

Yorkshire puddings are a classic accompaniment to any roast dinner, and now you can enjoy them gluten-free with this delightful recipe using almond flour. These light and fluffy puddings are perfect for a Christmas lunch, serving as the ideal vessel for soaking up rich, savory gravies. Made with almond flour, they aren’t only gluten-free but also bring a subtle nutty flavor that pairs well with traditional holiday dishes.
For those who are gluten intolerant or simply looking to try something new this holiday season, almond flour Yorkshire puddings are a simple yet impressive addition to your Christmas spread. With a few basic ingredients and some easy-to-follow steps, you can whip up these delightful puddings that will surely become a family favorite.
Ingredients (Serves 4-6):
- 1 cup almond flour
- 1 cup milk (dairy or non-dairy)
- 3 large eggs
- 1/2 teaspoon salt
- 1 tablespoon melted butter or oil
- 1/2 teaspoon baking powder
Cooking Instructions:
- Preheat the Oven: Begin by preheating your oven to 425°F (220°C). Place a muffin or popover tin in the oven to heat up as well. This is vital for achieving the signature rise and crispiness of Yorkshire puddings.
- Prepare the Batter: In a large mixing bowl, whisk together the almond flour, milk, eggs, salt, and baking powder until smooth. Make sure there are no lumps, and the batter is slightly runny.
- Heat the Tin with Fat: Remove the hot tin from the oven and carefully add a small amount of melted butter or oil to each compartment. The fat should sizzle when it hits the hot tin, which is essential for the puddings to rise properly.
- Pour the Batter: Quickly pour the batter into each compartment, filling them about halfway. The batter should start to cook immediately upon contact with the hot tin.
- Bake the Puddings: Return the tin to the oven and bake for 20-25 minutes without opening the oven door. This will guarantee the puddings rise properly. They should be golden brown and puffed up when done.
- Serve Immediately: Once baked, remove the puddings from the oven and serve them immediately with your favorite roast and gravy.
Extra Tips:
Achieving the perfect rise and texture in gluten-free Yorkshire puddings can be tricky, so here are a few tips: Make sure your oven and muffin tin are fully preheated before adding the batter. This helps create steam, which is vital for the rise.
Avoid opening the oven door while baking, as this can cause the puddings to deflate. If you prefer a dairy-free version, substitute the milk with any non-dairy milk of your choice.
Finally, if you find the almond flavor too pronounced, you can mix in a bit of tapioca starch to balance the flavors and help with the structure. Enjoy these gluten-free delights as part of your festive feast!
Garlic Mashed Cauliflower
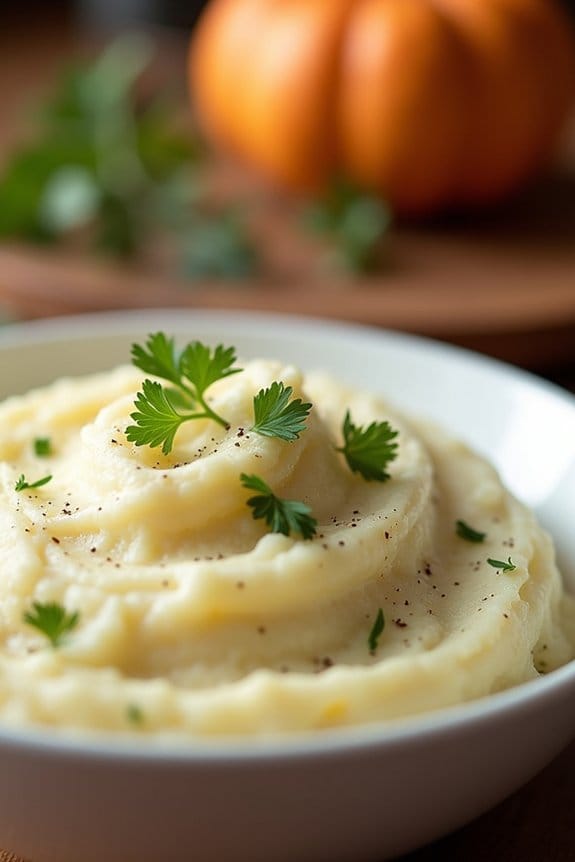
For those looking to enjoy a flavorful and creamy side dish without the gluten, Garlic Mashed Cauliflower is the perfect addition to your Christmas lunch table. By substituting cauliflower for traditional potatoes, you not only cut down on carbs but also create a dish that’s lighter and equally satisfying.
The creamy texture combined with a hint of garlic makes this dish a crowd-pleaser, guaranteeing that everyone, even those with dietary restrictions, can enjoy it. Cauliflower is a versatile vegetable that absorbs flavors beautifully, making it an ideal candidate for mashing.
When cooked and blended with garlic, butter, and a touch of cream, this dish becomes velvety smooth. Whether serving it alongside a festive turkey or a hearty roast, Garlic Mashed Cauliflower is sure to complement your meal beautifully. Plus, it’s simple to prepare, meaning you can spend more time celebrating with loved ones and less time in the kitchen.
Ingredients for 4-6 servings:
- 2 medium heads of cauliflower
- 4 cloves of garlic, peeled and minced
- 4 tablespoons unsalted butter
- 1/4 cup heavy cream
- Salt to taste
- Freshly ground black pepper to taste
- 1/4 cup grated Parmesan cheese (optional)
- Chopped fresh parsley for garnish (optional)
Cooking Instructions:
- Prepare the Cauliflower:
- Begin by removing the leaves and core from the cauliflower heads. Cut the cauliflower into florets of similar size to guarantee even cooking.
- Cook the Cauliflower:
- Fill a large pot with water and bring it to a boil. Add a pinch of salt. Once boiling, add the cauliflower florets. Cook until the cauliflower is tender and can be easily pierced with a fork, approximately 10-15 minutes.
- Drain and Dry:
- Once cooked, drain the cauliflower in a colander. Allow it to sit for a minute to let the steam evaporate any excess moisture.
- Sauté the Garlic:
- In the same pot, melt the butter over medium heat. Add the minced garlic and sauté until fragrant, for about 1-2 minutes, being careful not to let it burn.
- Mash the Cauliflower:
- Return the drained cauliflower to the pot with the garlic and butter. Use a potato masher or a hand blender to mash the cauliflower to your desired consistency.
- Add Cream and Season:
- Stir in the heavy cream and mix until well combined. Season with salt and freshly ground black pepper to taste. If using, mix in the grated Parmesan cheese for an added layer of flavor.
- Garnish and Serve:
- Transfer the mashed cauliflower to a serving bowl, and garnish with chopped fresh parsley if desired. Serve hot alongside your favorite holiday dishes.
Extra Tips:
For a smoother consistency, you can use a food processor or immersion blender instead of a masher, which will give the cauliflower a texture more akin to traditional mashed potatoes.
If you prefer a richer taste, consider adding a bit more butter or cream. Keep in mind that the mashed cauliflower will thicken as it cools, so it’s best served immediately after preparation. Adjust the garlic amount according to your preference for a milder or more robust flavor.
Flourless Chocolate Yule Log
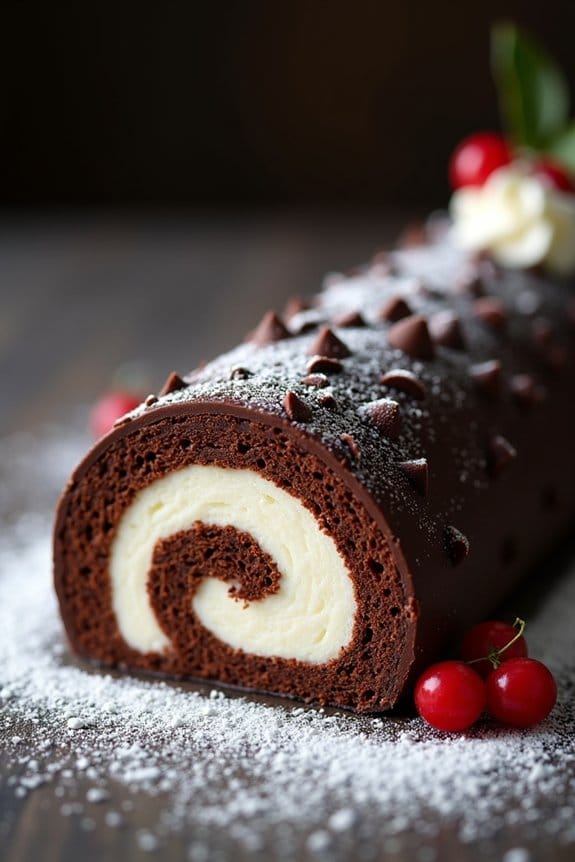
Indulge in a festive treat with this decadent Flourless Chocolate Yule Log, a perfect centerpiece for your gluten-free Christmas lunch. This dessert combines rich chocolate flavors with a light, airy texture, making it a delightful ending to any holiday feast. The absence of flour doesn’t compromise its taste or structure; instead, it enhances the chocolate’s richness, offering a luxurious experience for your taste buds. A creamy filling and a smooth ganache create layers of flavor, while the traditional log shape adds a touch of holiday magic to your table.
Creating a Flourless Chocolate Yule Log might seem intimidating, but with the right approach, it becomes an enjoyable and rewarding process. The recipe includes a light sponge cake made from eggs, sugar, and cocoa powder, rolled with a luscious filling, and coated with a glossy chocolate ganache. This combination of flavors and textures is sure to impress your family and friends. Whether you’re a seasoned baker or a beginner, this guide will help you prepare a yule log that will be remembered for its taste and elegance.
Ingredients (Serves 4-6):
- 6 large eggs, separated
- 1 cup granulated sugar
- 1/2 cup unsweetened cocoa powder
- 1 teaspoon vanilla extract
- 1/4 teaspoon salt
- 1 cup heavy cream
- 2 tablespoons powdered sugar
- 1 teaspoon vanilla extract (for filling)
- 4 ounces dark chocolate, chopped
- 1/2 cup heavy cream (for ganache)
Cooking Instructions:
1. Prepare the Baking Sheet: Preheat your oven to 350°F (175°C). Line a 10×15 inch jelly roll pan with parchment paper, making sure the paper slightly overhangs on all sides for easy removal later.
2. Make the Sponge Cake: In a large bowl, beat the egg yolks with 1/2 cup of the granulated sugar until the mixture is thick and pale. Stir in the vanilla extract and cocoa powder until well combined.
In another bowl, beat the egg whites with the salt until soft peaks form. Gradually add the remaining 1/2 cup of sugar, beating until stiff peaks form. Gently fold the egg whites into the yolk mixture in three additions, taking care not to deflate the batter.
3. Bake the Cake: Pour the batter into the prepared pan, spreading it evenly with a spatula. Bake for 15-18 minutes, or until the cake springs back when touched. Avoid over-baking, which can make rolling difficult.
4. Roll the Cake: While the cake is still warm, carefully lift it out using the parchment paper. Place it on a clean surface and roll it gently with the paper inside. Allow it to cool completely in this rolled shape to prevent cracking later.
5. Prepare the Filling: In a chilled bowl, whip 1 cup of heavy cream with powdered sugar and vanilla extract until stiff peaks form. Carefully unroll the cooled cake and spread the whipped cream evenly over the surface. Roll the cake back up, this time without the parchment paper.
6. Make the Ganache: Heat 1/2 cup of heavy cream in a saucepan until it just begins to simmer. Remove from heat and add the chopped dark chocolate, stirring until smooth and glossy. Allow the ganache to cool slightly before spreading it over the rolled cake.
7. Decorate and Serve: Use a fork to create a bark-like texture on the ganache. Chill the yule log in the refrigerator for at least 1 hour before serving. Dust with powdered sugar for a snowy effect and slice with a sharp knife.
Extra Tips:
When preparing your Flourless Chocolate Yule Log, make sure your eggs are at room temperature for easier whipping and better volume. Be gentle when folding the egg whites into the yolk mixture to maintain the cake’s lightness.
If the cake cracks slightly while rolling, don’t worry — the ganache will cover any imperfections. For an added touch, you can decorate the log with edible holly leaves or meringue mushrooms to enhance its festive appearance. Enjoy your delightful creation with a hot cup of cocoa or coffee for the ultimate Christmas treat.
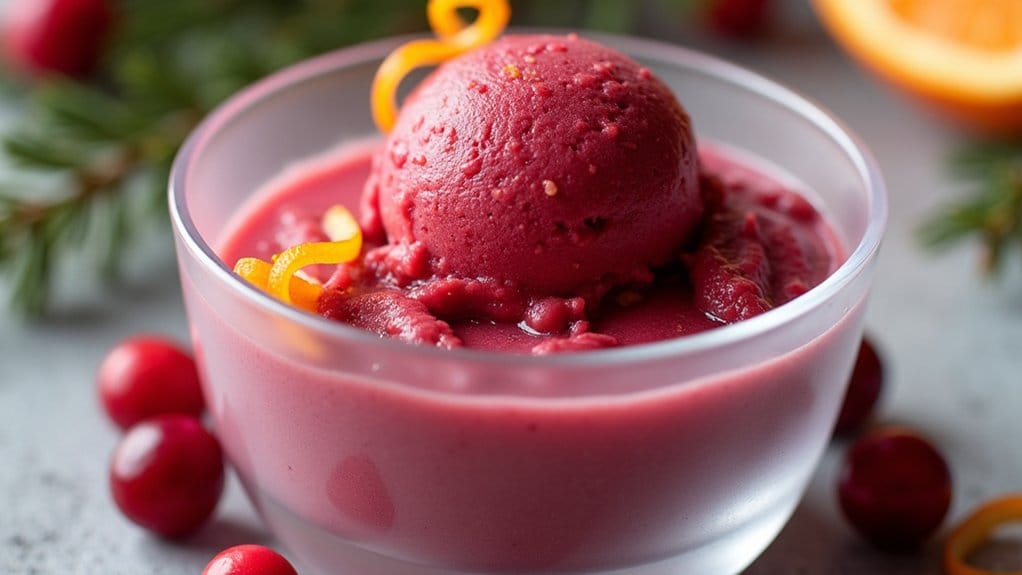
Cranberry Orange Sorbet
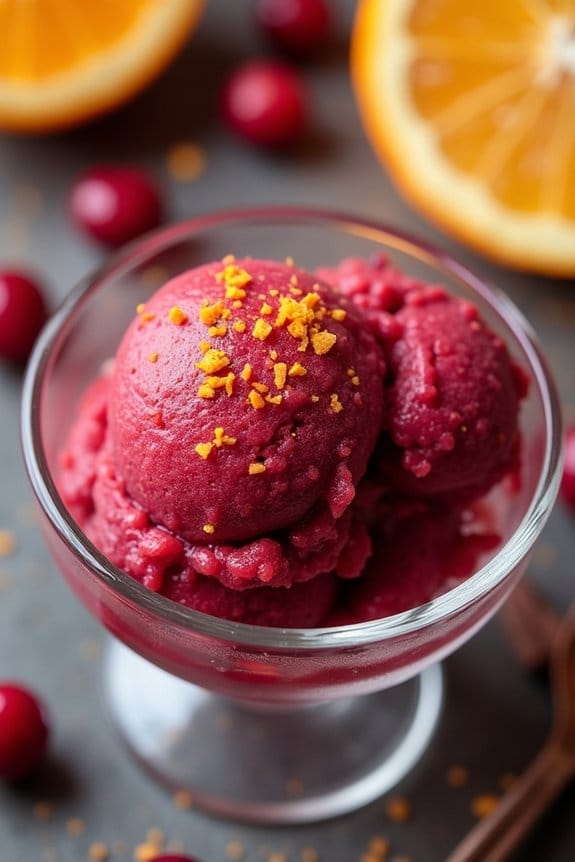
Cranberry Orange Sorbet is a invigorating and zesty dessert that perfectly complements a gluten-free Christmas lunch. This delightful sorbet combines the tartness of cranberries with the sweet citrusy notes of fresh oranges, offering a vibrant and palate-cleansing finish to your festive meal.
Not only is it a visual treat with its deep red hue, but it’s also incredibly simple to make, requiring just a few ingredients and a bit of time in the freezer. Ideal for serving 4-6 people, this sorbet is a great make-ahead option, allowing you to focus on other Christmas preparations.
The natural flavors shine through in this recipe, making it a crowd-pleaser for both kids and adults alike. It’s a healthier alternative to richer desserts, and its lightness will leave your guests feeling satisfied without being overly full.
Ingredients (for 4-6 servings):
- 2 cups fresh cranberries
- 1 cup freshly squeezed orange juice
- Zest from 1 orange
- 1 cup granulated sugar
- 1 cup water
- 1 tablespoon lemon juice
- A pinch of salt
Cooking Instructions:
- Prepare the Cranberry Base: Begin by rinsing the fresh cranberries under cold water and picking out any that are damaged. Set them aside to drain.
- Make the Simple Syrup: In a medium saucepan, combine the granulated sugar and water. Heat over medium heat, stirring occasionally, until the sugar is completely dissolved. This should take about 3-5 minutes.
- Cook the Cranberries: Add the cranberries to the saucepan with the simple syrup. Bring the mixture to a boil, then reduce heat to a simmer. Cook for about 10 minutes, or until the cranberries have burst and softened.
- Blend the Mixture: Remove the saucepan from heat and let it cool slightly. Transfer the cranberry mixture to a blender and add the orange juice, orange zest, lemon juice, and a pinch of salt. Blend until the mixture is smooth.
- Strain the Mixture: Pour the blended mixture through a fine-mesh sieve into a large bowl, pressing down with a spatula to extract as much liquid as possible. Discard the solids left behind.
- Chill and Freeze: Cover the strained mixture and refrigerate for at least 2 hours until thoroughly chilled. Once chilled, pour the mixture into an ice cream maker and churn according to the manufacturer’s instructions. Transfer the sorbet to a lidded container and freeze for at least 4 hours before serving.
Extra Tips:
For a smoother texture, verify that the mixture is well strained to remove any pulp or seeds. If you don’t have an ice cream maker, you can still make this sorbet by pouring the mixture into a shallow dish and freezing it.
Stir the mixture every 30 minutes with a fork to break up the ice crystals until it reaches the desired consistency. Additionally, for a more intense orange flavor, you can add a little more orange zest. Always make sure to serve the sorbet in chilled bowls for the best experience.
