

As the holiday season approaches, the joy of hosting a memorable Christmas lunch fills the air. Picture a table adorned with elegant dishes that are sure to impress and delight. From the delicate flavors of smoked salmon canapés to the indulgence of a chocolate hazelnut yule log, there’s something for everyone. Let’s embark on a culinary journey that will elevate your festive gathering. Get ready to create a spread your guests will talk about for years to come.
Smoked Salmon and Cucumber Canapés
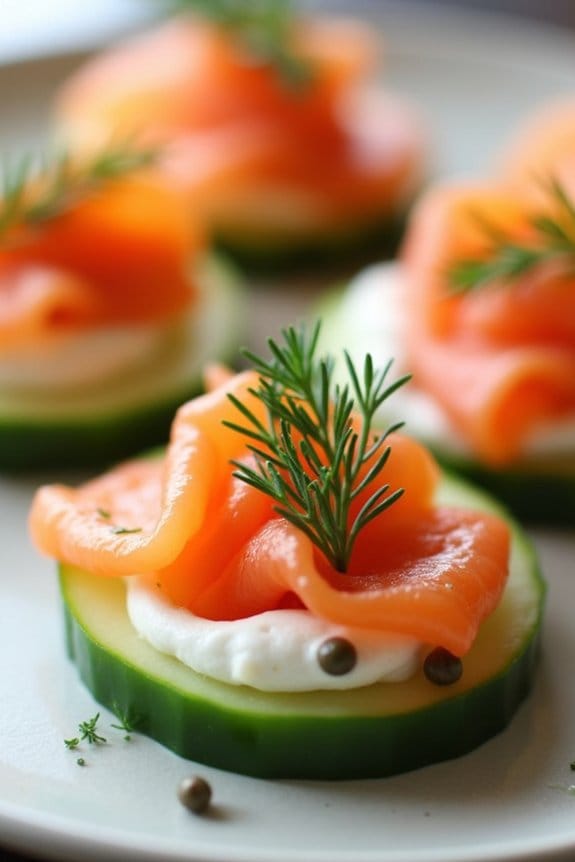
Elevate your Christmas lunch with these Smoked Salmon and Cucumber Canapés, a delightful appetizer that combines the smoky richness of salmon with the invigorating crispness of cucumber.
These canapés aren’t only elegant but also incredibly easy to assemble, making them perfect for a festive gathering. The harmony of flavors and textures will impress your guests, setting a sophisticated tone for the rest of your holiday meal.
Ideal for serving 4-6 people, these canapés are light yet satisfying, making them an excellent starter. The key to their appeal is the quality of the ingredients, so opt for the best smoked salmon you can find and fresh cucumbers.
These delicate bites are finished with a tangy cream cheese spread and a hint of dill, which enhance the natural flavors of the salmon and cucumber.
Ingredients:
- 200g smoked salmon, thinly sliced
- 1 large cucumber
- 200g cream cheese, softened
- 1 tablespoon lemon juice
- 1 tablespoon fresh dill, finely chopped
- 1 teaspoon capers, drained and chopped
- Salt and pepper, to taste
- 1 baguette or a pack of blinis (optional, if you prefer a base)
Instructions:
- Prepare the Cream Cheese Spread: In a small bowl, combine the softened cream cheese, lemon juice, chopped dill, and capers. Mix well until all the ingredients are thoroughly combined. Season with salt and pepper to taste, and set aside.
- Slice the Cucumber: Using a sharp knife or a mandoline, slice the cucumber into thin, even rounds. Aim for slices that are about 1/4 inch thick to confirm they’re sturdy enough to hold the toppings but still delicate.
- Assemble the Canapés: If using a baguette or blinis, slice the baguette into 1/4 inch rounds and lightly toast if desired. Spread a dollop of the cream cheese mixture onto each cucumber slice (or bread base if using).
- Add the Smoked Salmon: Cut the smoked salmon slices into pieces that will fit neatly on top of the cucumber or bread. Gently place a piece of smoked salmon on each canapé.
- Garnish and Serve: Finish each canapé with a small sprig of fresh dill on top. Arrange the canapés on a serving platter, and refrigerate until ready to serve. This will help the flavors meld and keep the canapés fresh.
Extra Tips:
For an added touch of flavor, consider drizzling a little olive oil or a squeeze of fresh lemon juice over the top of the canapés just before serving.
Be sure to dry the cucumber slices with a paper towel before assembling to prevent the canapés from becoming soggy.
If you want to prepare ahead of time, you can make the cream cheese spread the day before and refrigerate it. However, it’s best to assemble the canapés close to serving time to maintain their freshness and texture.
Pomegranate and Pear Salad With Candied Walnuts
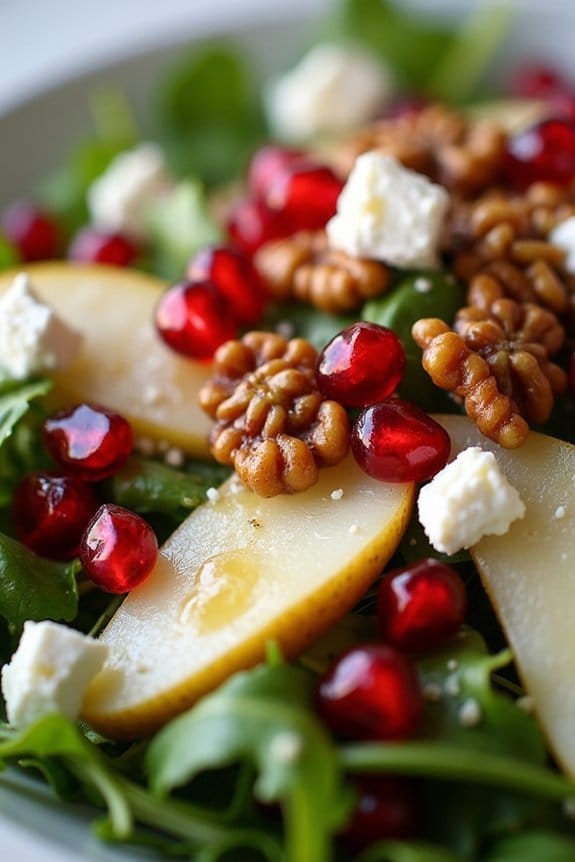
This elegant Pomegranate and Pear Salad with Candied Walnuts is a perfect addition to your Christmas lunch menu. It’s a revitalizing and festive dish that combines sweet, tart, and nutty flavors, offering a delightful contrast to the richer dishes often found on holiday tables.
The juicy pomegranate seeds add a burst of color and tanginess, while the ripe pears lend a subtle sweetness. Topping it off with crunchy candied walnuts adds a layer of texture and a hint of indulgence that makes this salad truly special.
Not only is this salad visually stunning, but it also packs a punch in the flavor department. The combination of fresh greens, creamy goat cheese, and a light homemade vinaigrette ties everything together beautifully, guaranteeing that each bite is a perfect balance of flavors.
It’s simple to prepare and can be made ahead of time, which makes it an ideal choice for a stress-free holiday meal. Whether served as a light appetizer or a revitalizing side dish, this salad is sure to impress your guests.
Ingredients (Serves 4-6):
- 1 large head of mixed greens or arugula
- 2 ripe pears, thinly sliced
- 1 cup pomegranate seeds
- 1/2 cup crumbled goat cheese
- 1/2 cup candied walnuts
- 2 tablespoons balsamic vinegar
- 1 tablespoon honey
- 1/3 cup extra-virgin olive oil
- Salt and pepper to taste
Instructions:
- Prepare the Dressing: In a small bowl, whisk together the balsamic vinegar, honey, salt, and pepper. Slowly drizzle in the olive oil while whisking continuously until the dressing is well emulsified and smooth.
- Prepare the Greens: Rinse and dry the mixed greens or arugula thoroughly. Place them in a large salad bowl and toss gently to ensure they’re evenly distributed.
- Slice the Pears: Carefully slice the pears into thin wedges. If desired, you can toss them lightly with a bit of lemon juice to prevent browning.
- Assemble the Salad: Add the sliced pears and pomegranate seeds to the greens. Gently toss the salad to combine the ingredients, being careful not to bruise the greens.
- Add the Toppings: Sprinkle the crumbled goat cheese and candied walnuts over the top of the salad. These ingredients should be added lastly to maintain their texture and prevent them from becoming soggy.
- Dress the Salad: Drizzle the prepared vinaigrette over the salad just before serving. Use tongs to toss everything together lightly, ensuring the dressing coats all the ingredients without overwhelming them.
Extra Tips:
When making this salad, feel free to experiment with different types of pears, such as Bartlett or Bosc, depending on your preference for sweetness or texture.
For the candied walnuts, you can make them at home by toasting walnuts with sugar and a pinch of salt in a skillet until caramelized, or purchase pre-made ones for convenience.
If you’re making the salad ahead of time, keep the dressing separate until just before serving to keep the greens fresh and crisp.
Finally, if goat cheese isn’t to your taste, feta or blue cheese can be used as alternative options. Enjoy your festive and vibrant salad!
Creamy Pumpkin Soup With Sage
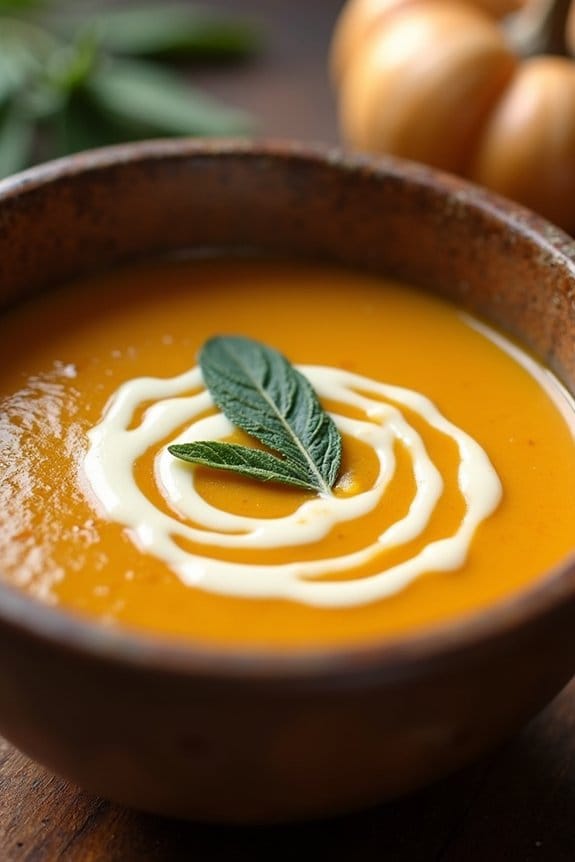
Creamy Pumpkin Soup With Sage is a delightful and elegant dish perfect for a Christmas lunch. This velvety soup combines the earthy sweetness of pumpkin with the aromatic flavor of fresh sage, resulting in a comforting and festive starter. Its rich texture and warm spices make it a delightful addition to any holiday table, setting the tone for a cozy and sophisticated meal.
Whether you’re hosting a large family gathering or an intimate dinner, this soup is sure to impress your guests with its simplicity and depth of flavor. The secret to this soup’s elegance lies in the harmonious blending of ingredients and the careful seasoning that brings out the natural sweetness of the pumpkin without overwhelming it.
The addition of sage not only enhances the flavor profile but also provides a lovely aroma that fills the kitchen, creating a truly festive atmosphere. With a few simple steps, you’ll have a bowl of creamy goodness that not only warms the body but also the soul.
Ingredients (serves 4-6):
- 2 tablespoons olive oil
- 1 medium onion, chopped
- 2 cloves garlic, minced
- 1 teaspoon fresh sage leaves, chopped
- 1/2 teaspoon ground nutmeg
- 4 cups pumpkin puree (fresh or canned)
- 4 cups vegetable broth
- 1 cup heavy cream
- Salt and pepper to taste
- Fresh sage leaves for garnish (optional)
Instructions:
- Prepare the Ingredients: Begin by gathering and measuring all your ingredients. Chop the onion and mince the garlic, making certain they’re ready for cooking.
- Sauté Aromatics: In a large pot or Dutch oven, heat the olive oil over medium heat. Add the chopped onion and garlic, sautéing for about 5 minutes until the onion becomes translucent and fragrant.
- Add Spices: Stir in the chopped sage leaves and ground nutmeg, cooking for an additional minute to allow the spices to release their flavors.
- Incorporate Pumpkin: Add the pumpkin puree to the pot, stirring well to combine with the sautéed mixture. Cook for 2-3 minutes to allow the flavors to meld.
- Pour in Broth: Slowly pour in the vegetable broth, stirring continuously to maintain a smooth consistency. Bring the mixture to a gentle simmer.
- Simmer the Soup: Allow the soup to simmer gently for about 20 minutes, stirring occasionally, to guarantee all flavors are well integrated.
- Blend for Creaminess: Use an immersion blender to blend the soup directly in the pot until it reaches a smooth and creamy consistency. Alternatively, carefully transfer the soup in batches to a countertop blender.
- Finish with Cream: Stir in the heavy cream, and let the soup heat through for another 5 minutes. Season with salt and pepper according to your taste.
- Serve: Ladle the hot soup into bowls and garnish with fresh sage leaves if desired. Serve immediately to enjoy the soup’s full flavor and warmth.
Extra Tips:
For maximum flavor, consider roasting fresh pumpkin pieces in the oven before pureeing them for the soup. This step enhances the natural sweetness and adds a deeper, caramelized flavor.
If you prefer a thicker soup, reduce the amount of vegetable broth slightly or simmer the soup longer to achieve your desired consistency. Finally, keep in mind that the quality of the pumpkin puree will greatly impact the final taste, so use a high-quality or homemade puree if possible.
Herb-Crusted Rack of Lamb
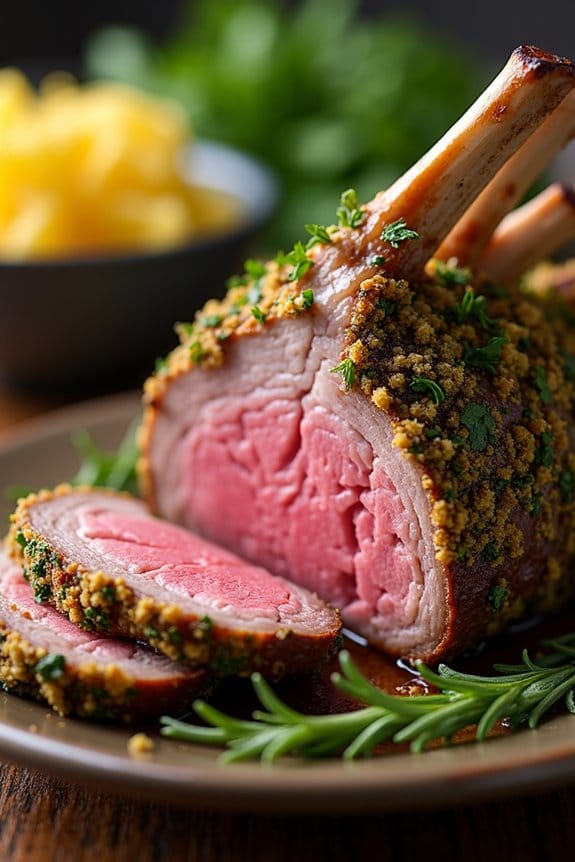
Indulge your family and friends this Christmas with a sumptuous Herb-Crusted Rack of Lamb, a centerpiece that exudes elegance and sophistication. This dish combines the tender juiciness of lamb with an aromatic crust made of fresh herbs and breadcrumbs, creating a delightful harmony of flavors. Perfect for an intimate holiday lunch, this recipe promises to impress with its simplicity and the richness of its ingredients, making it both a feast for the eyes and the palate.
The beauty of this dish is in its preparation – a straightforward process that maximizes flavor while allowing the natural taste of the lamb to shine through. Whether you’re a seasoned cook or a novice in the kitchen, this recipe is designed to be approachable and rewarding. The herb crust, made with a blend of fresh rosemary, thyme, parsley, and garlic, not only enhances the lamb’s natural flavors but also provides a crispy and fragrant finish that will leave your guests yearning for more.
Ingredients for 4-6 servings:
- 2 racks of lamb, frenched (about 1.5 to 2 pounds each)
- Salt and freshly ground black pepper
- 2 tablespoons olive oil
- 1 cup fresh breadcrumbs
- 2 tablespoons Dijon mustard
- 2 tablespoons fresh rosemary, finely chopped
- 2 tablespoons fresh thyme, finely chopped
- 2 tablespoons fresh parsley, finely chopped
- 3 cloves garlic, minced
- Zest of 1 lemon
Cooking Instructions:
- Prepare the Lamb: Preheat your oven to 400°F (200°C). Season the racks of lamb generously with salt and black pepper. Heat the olive oil in a large ovenproof skillet over medium-high heat. Sear the lamb racks for about 4 minutes on each side until browned. Remove from heat and set aside to cool slightly.
- Make the Herb Crust: In a small bowl, combine the breadcrumbs, rosemary, thyme, parsley, garlic, and lemon zest. Mix well until all ingredients are evenly distributed.
- Coat the Lamb: Brush the cooled racks of lamb with Dijon mustard on all sides. Press the herb mixture onto the mustard-coated lamb, guaranteeing an even and firm coating. The mustard will help the herb crust adhere to the lamb.
- Roast the Lamb: Place the herb-crusted lamb racks back into the skillet or on a baking sheet. Roast in the preheated oven for 18-25 minutes, depending on your desired level of doneness. For medium-rare, aim for an internal temperature of 130°F (54°C).
- Rest and Serve: Once the lamb reaches your preferred doneness, remove it from the oven and let it rest for at least 10 minutes before slicing. This allows the juices to redistribute throughout the meat, maximizing flavor and tenderness.
Extra Tips: To guarantee the perfect herb crust, make sure your breadcrumbs are fresh and not too fine – they should have some texture to them. If you don’t have fresh herbs on hand, you can substitute with dried herbs, but remember to use a bit less as dried herbs have a more concentrated flavor.
Be careful not to overcook the lamb; using a meat thermometer is the best way to guarantee precise cooking. Finally, when serving, slice the lamb between the ribs to create individual chops with a stunning presentation that will surely dazzle your guests.
Lemon and Thyme Roasted Chicken
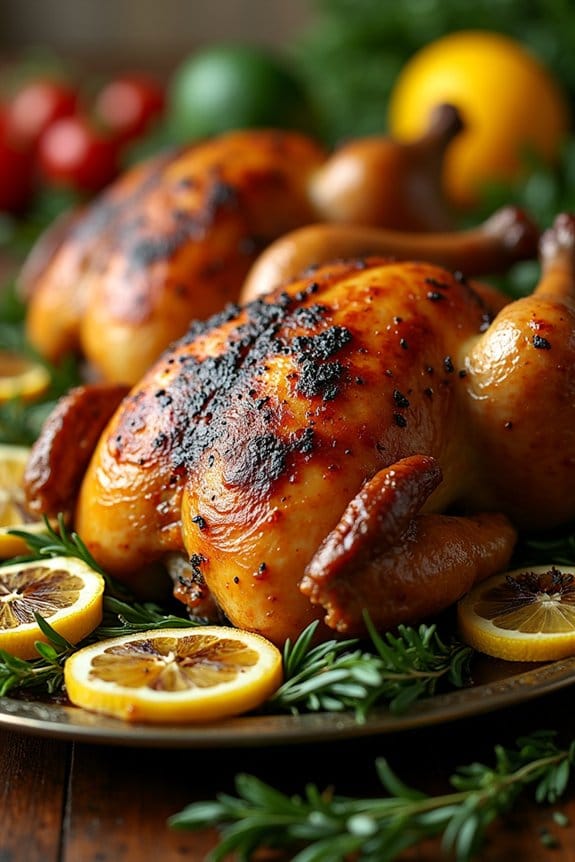
Lemon and Thyme Roasted Chicken is a delightful main dish that brings elegance and flavor to any Christmas lunch. This recipe combines the zesty freshness of lemon with the earthy aroma of thyme, resulting in a beautifully roasted chicken that’s both juicy and aromatic. Perfect for a holiday meal, this dish is sure to impress your family and friends with its simplicity and depth of flavor.
Whether you’re a seasoned cook or a kitchen novice, this recipe is designed to be straightforward yet sophisticated, ensuring a successful outcome every time.
The key to this dish is in the preparation and seasoning, allowing the natural flavors of the chicken to stand out. By using a combination of lemon juice, zest, and fresh thyme, the chicken is infused with a burst of freshness that complements the richness of the roast.
Served alongside classic side dishes or seasonal vegetables, this Lemon and Thyme Roasted Chicken will be the centerpiece of your Christmas lunch, creating a memorable and delicious dining experience for 4-6 people.
Ingredients:
- 1 whole chicken (about 4-5 pounds)
- 2 lemons
- 5-6 sprigs of fresh thyme
- 1/4 cup olive oil
- 1 tablespoon salt
- 1 teaspoon black pepper
- 4 cloves garlic, minced
- 1 onion, quartered
- 1/2 cup chicken broth
Cooking Instructions:
- Preheat the Oven: Begin by preheating your oven to 425°F (220°C). This high initial temperature will help to crisp the skin of the chicken.
- Prepare the Chicken: Rinse the chicken thoroughly under cold water and pat dry with paper towels. Removing excess moisture is essential for achieving a crispy skin.
- Seasoning: In a small bowl, mix olive oil, minced garlic, salt, and black pepper. Rub this mixture all over the chicken, ensuring even coverage. Cut one lemon in half and squeeze its juice over the chicken. Stuff the cavity of the chicken with the squeezed lemon halves, a few sprigs of thyme, and the quartered onion.
- Add Aromatics: Thinly slice the second lemon and place the slices on top of the chicken and around the roasting pan along with the remaining thyme sprigs. Pour the chicken broth into the bottom of the roasting pan to keep the chicken moist during cooking.
- Roasting: Place the chicken in the preheated oven and roast for 15 minutes at 425°F (220°C). Then, reduce the oven temperature to 350°F (175°C) and continue roasting for an additional 1 to 1.5 hours, or until the internal temperature reaches 165°F (74°C) and the juices run clear when the thickest part of the thigh is pierced.
- Resting: Once cooked, remove the chicken from the oven and let it rest for about 10-15 minutes before carving. Resting allows the juices to redistribute, ensuring a moist and flavorful chicken.
Extra Tips:
For an even more flavorful chicken, consider marinating it in the lemon, thyme, and garlic mixture for a few hours or overnight in the refrigerator. You can also add other herbs such as rosemary or sage for a more complex flavor profile.
When carving, make sure to use a sharp knife for clean cuts. Serve the chicken with the roasted lemon slices and some of the pan drippings drizzled on top for added flavor.
If you have leftovers, they make a fantastic base for chicken salad or sandwiches. Enjoy your elegant Christmas lunch with this delightful dish!
Truffle Mashed Potatoes
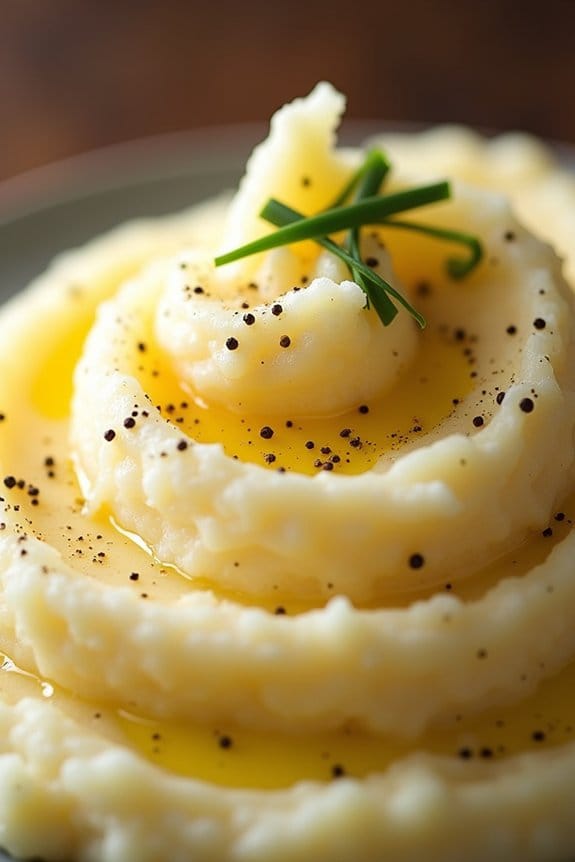
Truffle Mashed Potatoes are a luxurious twist on the classic side dish, elevating any Christmas lunch with their rich flavors and creamy texture. The indulgent aroma of truffle oil infuses the potatoes, providing a decadent taste that complements a variety of main courses.
These mashed potatoes are perfect for those looking to impress their guests with a dish that’s both comforting and sophisticated. The use of high-quality ingredients, such as Yukon Gold potatoes and fresh cream, guarantees that every bite is a delight.
This recipe serves 4-6 people, ideal for a family gathering or a small festive celebration. The preparation and cooking time is minimal, allowing you to focus on other dishes while still delivering a standout side dish.
The key to perfect Truffle Mashed Potatoes lies in achieving a smooth consistency without losing the earthy notes of the truffle. By following this recipe, you’ll create a memorable addition to your holiday table that will leave everyone asking for seconds.
Ingredients:
- 3 pounds Yukon Gold potatoes
- 1 cup heavy cream
- 1/2 cup unsalted butter
- 2 tablespoons truffle oil
- Salt to taste
- Freshly ground black pepper to taste
- 2 tablespoons chopped fresh chives (optional)
Instructions:
- Prepare the Potatoes: Start by peeling the Yukon Gold potatoes and cutting them into evenly sized chunks. This guarantees they cook uniformly.
- Boil the Potatoes: Place the potato chunks in a large pot and cover them with cold water. Add a generous pinch of salt. Bring the water to a boil over medium-high heat, then reduce the heat to a simmer. Cook the potatoes for about 15-20 minutes or until they’re tender and easily pierced with a fork.
- Heat the Cream and Butter: While the potatoes are boiling, heat the heavy cream and butter in a small saucepan over low heat until the butter is melted. Stir occasionally to combine, and make sure it doesn’t boil.
- Drain and Mash: Once the potatoes are cooked, drain them thoroughly and return them to the pot. Use a potato masher or a ricer to mash the potatoes until smooth and lump-free.
- Mix in Cream and Butter: Gradually pour the warm cream and butter mixture into the mashed potatoes, stirring continuously, until the potatoes reach your desired consistency.
- Add Truffle Oil and Season: Stir in the truffle oil, then season the mashed potatoes with salt and freshly ground black pepper to taste. Mix well to guarantee an even distribution of flavors.
- Garnish and Serve: If desired, garnish the mashed potatoes with chopped fresh chives before serving. Serve hot as a delightful accompaniment to your Christmas lunch.
Extra Tips:
For the best results, use Yukon Gold potatoes as they provide a naturally creamy texture. Avoid over-mixing the potatoes, which can make them gluey.
If you prefer a stronger truffle flavor, you can adjust the amount of truffle oil to suit your taste, but start with a smaller amount, as truffle oil can be quite potent.
Also, consider keeping some potato water before draining; you can use it to adjust the consistency of the mashed potatoes if needed. Always taste and adjust the seasoning before serving for the perfect flavor balance.
Honey-Glazed Carrots With Pecans
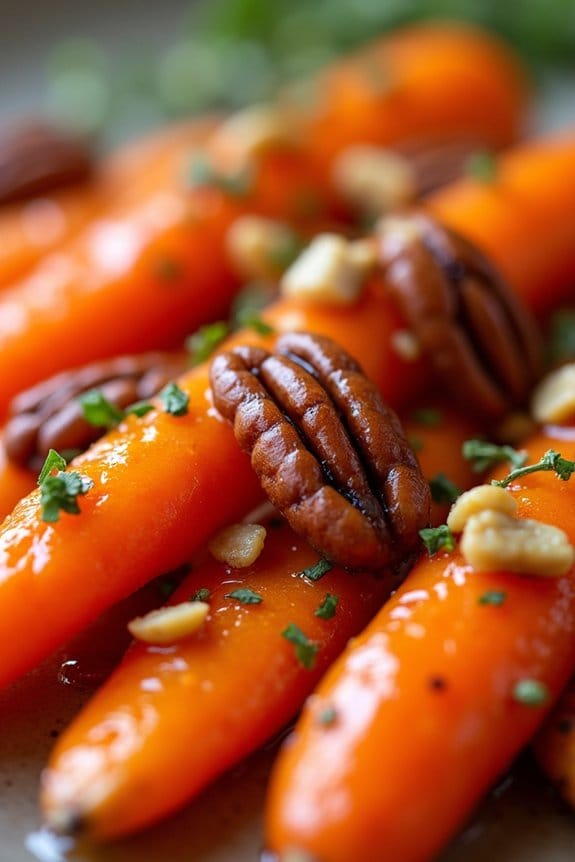
Honey-Glazed Carrots With Pecans is a delightful and elegant dish that perfectly complements any Christmas lunch spread. The natural sweetness of the carrots is enhanced by a luscious honey glaze, while the added crunch of pecans provides a delightful contrast in texture.
This dish isn’t only visually appealing with its vibrant colors but also incredibly flavorful, making it a favorite among both adults and children. It’s simple to prepare and can be made in advance, allowing you to enjoy the company of your guests without feeling stressed in the kitchen.
This recipe is perfect for those who are looking to add a touch of sophistication to their holiday meal. The combination of ingredients creates a harmony of flavors that’s both comforting and festive, making it ideal for a Christmas celebration.
Plus, the recipe is versatile enough to be served as a side dish or even as a vegetarian main course. With just a few ingredients and steps, you’ll be able to prepare a dish that will surely impress your family and friends.
Ingredients (serves 4-6):
- 2 pounds of carrots, peeled and cut into sticks
- 1/4 cup of honey
- 2 tablespoons of unsalted butter
- 1/2 cup of pecans, roughly chopped
- 1 teaspoon of salt
- 1/2 teaspoon of freshly ground black pepper
- 1 tablespoon of fresh thyme leaves (optional)
- 2 tablespoons of olive oil
Cooking Instructions:
- Prepare the Carrots: Preheat your oven to 400°F (200°C). Line a large baking sheet with parchment paper for easy cleanup. Arrange the peeled and cut carrot sticks evenly on the baking sheet. Drizzle them with olive oil and sprinkle with salt and pepper. Toss the carrots until they’re well coated with the oil and seasonings.
- Roast the Carrots: Place the baking sheet in the preheated oven and roast the carrots for about 25-30 minutes, or until they’re tender and slightly caramelized, stirring halfway through to guarantee even cooking.
- Prepare the Honey Glaze: While the carrots are roasting, melt the butter in a small saucepan over medium heat. Once melted, add the honey and stir until fully combined. Allow the mixture to simmer for about 2 minutes, then remove from heat.
- Toast the Pecans: In a small skillet over medium heat, toast the chopped pecans for about 3-4 minutes, stirring frequently, until they’re golden brown and fragrant. Be careful not to burn them.
- Combine and Serve: Once the carrots are roasted, remove them from the oven and drizzle with the honey glaze. Add the toasted pecans and toss everything together gently until the carrots are fully coated. If desired, sprinkle with fresh thyme leaves for an extra burst of flavor. Serve warm.
Extra Tips:
To make this dish even more flavorful, consider adding a splash of balsamic vinegar to the honey glaze for a tangy twist. You can also experiment with different herbs, such as rosemary or parsley, to suit your personal taste.
If preparing this dish in advance, you can roast the carrots and prepare the glaze separately, then combine them just before serving to guarantee the perfect texture. Finally, if you prefer a softer texture, you can parboil the carrots for a few minutes before roasting.
Garlic and Herb Buttered Asparagus
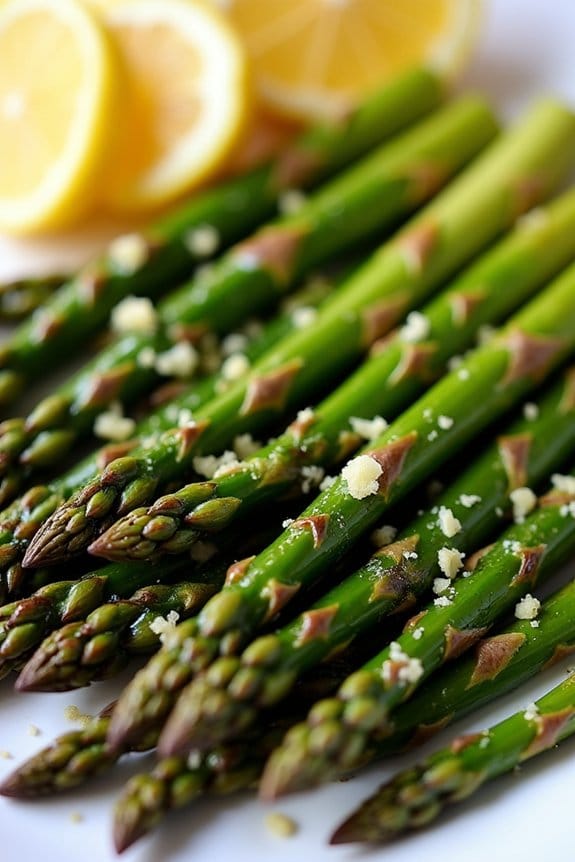
Garlic and Herb Buttered Asparagus is a simple yet sophisticated dish that adds a touch of elegance to your Christmas lunch. This recipe combines the fresh, crisp taste of asparagus with the rich, aromatic flavors of garlic and herbs. The butter enhances the natural sweetness of the asparagus, making it a delightful side dish that pairs beautifully with a variety of main courses.
Whether you’re hosting a large gathering or a small family meal, this dish is sure to impress your guests with its vibrant colors and irresistible taste. Perfect for a serving size of 4-6 people, this recipe can easily be adjusted to suit your needs. The preparation is straightforward, allowing you to focus on the rest of your Christmas meal without stress.
With just a handful of ingredients, you can create a dish that looks as stunning as it tastes. The combination of garlic, herbs, and butter creates a savory glaze that coats each stalk of asparagus, making it a mouthwatering addition to your holiday table.
Ingredients:
- 2 pounds of fresh asparagus
- 4 tablespoons unsalted butter
- 4 cloves garlic, minced
- 1 tablespoon fresh thyme leaves
- 1 tablespoon fresh rosemary, finely chopped
- Salt, to taste
- Freshly ground black pepper, to taste
- Lemon wedges, for serving (optional)
Instructions:
- Prepare the Asparagus: Start by rinsing the asparagus under cool water. Pat them dry with a clean towel. Trim the woody ends of the asparagus by snapping or cutting them off.
- Melt the Butter: In a large skillet over medium heat, melt the unsalted butter. Add the minced garlic to the skillet and sauté for about 1 minute until it becomes fragrant. Be careful not to brown the garlic, as this can make it taste bitter.
- Add the Herbs: Stir in the fresh thyme leaves and finely chopped rosemary. Allow these to cook for an additional minute, ensuring they release their flavors into the butter.
- Cook the Asparagus: Add the asparagus to the skillet, tossing them gently to coat them evenly with the garlic and herb butter. Season with salt and freshly ground black pepper to taste.
- Sauté the Asparagus: Cook the asparagus over medium heat for 5-7 minutes, turning occasionally, until they’re tender yet still crisp. The asparagus should be bright green and slightly caramelized.
- Serve: Transfer the asparagus to a serving dish. Optionally, squeeze fresh lemon juice over the top for a burst of brightness. Serve immediately while hot.
Extra Tips:
For the best results, choose asparagus stalks that are firm and bright green. If you prefer a little zest, adding a pinch of lemon zest to the dish can enhance the flavor profile.
If you want to prepare this dish in advance, you can blanch the asparagus in boiling water for 2-3 minutes, then plunge them into an ice bath to stop the cooking process. This will keep them vibrant and ready for a quick sauté when it’s time to serve.
Adjust the herbs according to your preference; parsley or chives can be excellent substitutes if you want to experiment with different flavors.
Cranberry and Brie Puff Pastry Bites

Cranberry and Brie Puff Pastry Bites are the perfect blend of savory and sweet, making them an ideal appetizer for an elegant Christmas lunch. The buttery, flaky layers of puff pastry encase a rich and creamy brie cheese that melts into a gooey center, complemented by the tartness of cranberry sauce. Each bite-sized piece is a delicious explosion of flavors and textures, making them a favorite for both adults and children alike.
Whether you’re hosting a large gathering or having a small family meal, these delightful appetizers are certain to impress your guests.
These puff pastry bites aren’t only exquisite in taste but also incredibly easy to prepare. With minimal ingredients and simple steps, you’ll have a sophisticated dish that looks like it took hours to prepare. The balance of flavors is perfect for the festive season, and their charming appearance makes them a beautiful addition to any holiday table.
Serve them warm, straight from the oven, for a delightful treat that will have everyone reaching for seconds.
Ingredients for 4-6 servings:
- 1 sheet of puff pastry, thawed
- 1/2 cup cranberry sauce (store-bought or homemade)
- 1 wheel of brie cheese (approximately 8 ounces)
- 1 egg, beaten (for egg wash)
- Fresh rosemary sprigs (optional, for garnish)
Cooking Instructions:
- Preheat the Oven: Start by preheating your oven to 375°F (190°C). This guarantees your puff pastry cooks evenly and comes out perfectly golden.
- Prepare the Puff Pastry: Roll out the thawed puff pastry sheet on a lightly floured surface. Use a knife or a pizza cutter to cut the pastry into small squares, about 2×2 inches. Depending on the size of your pastry sheet, you should get around 16 squares.
- Prepare the Brie: Cut the brie cheese into small cubes, approximately 1-inch in size. You’ll need one cube per pastry square.
- Assemble the Bites: Place each puff pastry square into the cups of a mini muffin tin, pressing gently to form a small cup. Add a cube of brie into each pastry cup, followed by a spoonful of cranberry sauce on top.
- Egg Wash and Bake: Brush the edges of the pastry with a beaten egg to give them a golden, glossy finish. Place the muffin tin in the preheated oven and bake for 15-20 minutes, or until the pastry is puffed and golden brown.
- Garnish and Serve: Once baked, remove the bites from the oven and allow them to cool slightly. For an extra touch of elegance, garnish each bite with a small sprig of fresh rosemary before serving.
Extra Tips:
For best results, make sure your puff pastry is fully thawed before you begin working with it, as this will make it easier to handle and cut. If you’re using homemade cranberry sauce, ensure it’s not too runny; a thicker consistency works best.
These bites can be assembled a few hours in advance and stored in the refrigerator until you’re ready to bake them, making it a stress-free option for holiday entertaining. Additionally, feel free to experiment with different types of cheese or add a sprinkle of nuts for added texture.
Classic Tiramisu With a Festive Twist

Indulge in the rich layers of a classic Italian dessert with a delightful holiday flair by making a Classic Tiramisu with a Festive Twist. This elegant dish combines the creamy, coffee-soaked tradition of tiramisu with a hint of holiday flavors, perfect for your Christmas lunch gathering.
Imagine a dessert where the balance of mascarpone, espresso, and cocoa meets the warm spices of cinnamon and nutmeg, topped with a whisper of orange zest for an unexpected seasonal brightness. This tiramisu is the ideal way to end a festive meal, leaving your guests with a memorable taste of the holidays.
The recipe serves 4-6 people, making it perfect for intimate gatherings or a cozy family meal. With a few straightforward steps, you can create a dessert that not only pleases the palate but also adds a touch of sophistication to your holiday table.
This tiramisu is prepared in advance and chilled, allowing you to focus on other aspects of your Christmas celebration while the flavors meld beautifully in the fridge.
Ingredients:
- 1 cup strong brewed espresso, cooled
- 1 tablespoon coffee liqueur (optional)
- 4 large eggs, separated
- 1 cup granulated sugar
- 8 ounces mascarpone cheese, at room temperature
- 1 teaspoon vanilla extract
- 1 teaspoon ground cinnamon
- 1/2 teaspoon ground nutmeg
- Zest of 1 orange
- 24 ladyfinger cookies
- Unsweetened cocoa powder, for dusting
- Dark chocolate shavings, for garnish
Instructions:
- Prepare the Coffee Mixture: In a shallow dish, combine the cooled espresso with the coffee liqueur (if using). Stir well and set aside to allow the flavors to blend.
- Beat the Egg Yolks: In a mixing bowl, whisk together the egg yolks and half of the sugar until the mixture becomes thick and pale. This should take about 3-5 minutes of vigorous whisking.
- Incorporate Mascarpone: Gradually add the mascarpone cheese to the egg yolk mixture, stirring gently until smooth and fully combined. Fold in the vanilla extract, cinnamon, nutmeg, and orange zest. Mix until just combined and set aside.
- Whip the Egg Whites: In a separate clean bowl, beat the egg whites until soft peaks form. Gradually add the remaining sugar and continue to beat until stiff peaks form, guaranteeing the sugar is fully dissolved.
- Combine the Mixtures: Gently fold the egg whites into the mascarpone mixture using a spatula. Work slowly to maintain the airy texture, folding until no white streaks remain.
- Assemble the Tiramisu: Quickly dip each ladyfinger into the coffee mixture, guaranteeing they’re moist but not soggy. Layer them in the bottom of a serving dish. Spread half of the mascarpone mixture over the ladyfingers, smoothing it out evenly.
- Repeat the Layers: Add another layer of coffee-dipped ladyfingers and top with the remaining mascarpone mixture. Smooth the top layer and cover the dish with plastic wrap.
- Chill: Refrigerate the tiramisu for at least 4 hours, preferably overnight, to allow the flavors to meld and the dessert to set.
- Serve and Garnish: Before serving, dust the top with a generous layer of cocoa powder and garnish with dark chocolate shavings for an elegant finish.
Extra Tips:
For the best texture and flavor, confirm that the mascarpone cheese is at room temperature before mixing. This will help it blend smoothly with the other ingredients.
If you prefer a stronger coffee flavor, you can increase the amount of espresso or soak the ladyfingers slightly longer. For a non-alcoholic version, simply omit the coffee liqueur.
Finally, for an extra festive presentation, consider serving the tiramisu in individual glasses or jars, making it easy for guests to enjoy a personal portion.
Chocolate Hazelnut Yule Log

The Chocolate Hazelnut Yule Log is a classic festive dessert that brings a touch of elegance to any Christmas lunch. This delightful dessert combines the rich flavors of chocolate and the nutty crunch of hazelnuts, all wrapped up in a light, fluffy cake roll.
The Yule Log, or “Bûche de Noël” as it’s traditionally known in France, isn’t only delicious but also visually stunning, making it a perfect centerpiece for your holiday table. Whether you’re hosting a family gathering or an intimate lunch, this dessert is bound to impress your guests and leave them asking for seconds.
Creating a Chocolate Hazelnut Yule Log involves several components, including a tender chocolate sponge cake, a creamy hazelnut filling, and a decadent chocolate ganache. The key to a successful Yule Log is in the rolling technique, which guarantees a seamless spiral and a beautiful presentation.
This recipe is designed to serve 4-6 people, making it ideal for smaller gatherings. Each bite offers a perfect balance of flavors and textures, with the smooth ganache contrasting the light sponge and the nutty filling providing an irresistible crunch.
Ingredients (serving size: 4-6 people):
- 1/2 cup all-purpose flour
- 1/4 cup cocoa powder
- 1 teaspoon baking powder
- 1/4 teaspoon salt
- 4 large eggs, separated
- 1/2 cup granulated sugar
- 1 teaspoon vanilla extract
- 3/4 cup heavy cream
- 1/4 cup hazelnut spread (such as Nutella)
- 1/2 cup chopped toasted hazelnuts
- 1 cup dark chocolate, chopped
- 1/2 cup heavy cream
- Powdered sugar, for dusting
Instructions:
- Prepare the Cake Batter: Preheat your oven to 350°F (175°C) and line a 10×15-inch jelly roll pan with parchment paper. In a medium bowl, sift together the flour, cocoa powder, baking powder, and salt. In a separate large bowl, beat the egg yolks with half of the sugar until pale and thick. Stir in the vanilla extract.
- Beat Egg Whites: In another clean bowl, beat the egg whites until soft peaks form. Gradually add the remaining sugar and continue to beat until stiff peaks form. Gently fold the egg whites into the yolk mixture, being careful not to deflate the mixture.
- Combine and Bake: Gradually fold in the dry ingredients until just combined. Pour the batter into the prepared pan and smooth the top. Bake for 10-12 minutes, or until the cake springs back when lightly pressed.
- Roll the Cake: Immediately after removing from the oven, dust a clean kitchen towel with powdered sugar and invert the cake onto it. Peel off the parchment paper. Carefully roll the cake up in the towel, starting from the short end. Let it cool completely.
- Prepare the Filling: In a medium bowl, beat the heavy cream until stiff peaks form. Gently fold in the hazelnut spread and chopped hazelnuts until well combined.
- Fill and Roll the Cake: Unroll the cooled cake and spread the hazelnut filling evenly over it. Roll the cake back up without the towel and place it seam-side down on a serving platter.
- Make the Ganache: Heat the heavy cream in a small saucepan until it begins to simmer. Remove from heat and pour over the chopped dark chocolate. Let it sit for 2 minutes, then stir until smooth.
- Decorate the Yule Log: Spread the ganache evenly over the rolled cake, using a spatula to create a bark-like texture. Allow the ganache to set for about 30 minutes before serving.
Extra Tips:
To guarantee your Chocolate Hazelnut Yule Log rolls smoothly without cracking, make sure the cake is warm (but not hot) when you roll it for the first time with the towel. This helps set the shape and makes it easier to handle when adding the filling.
If you’re short on time, the ganache can be prepared in advance and gently reheated before spreading. For added decoration, consider dusting the log with additional powdered sugar or garnishing with chocolate shavings and whole hazelnuts.
