
Planning a Christmas party always fills me with joy, especially when it comes to creating the perfect spread of appetizers. There’s just something magical about a table filled with festive bites like Cranberry Brie Bites and Bacon-Wrapped Dates. I’ve noticed that certain appetizers, such as Mini Caprese Skewers and Spinach and Artichoke Dip, are always the first to disappear. Curious about what makes these treats so irresistible? Let’s explore the top festive appetizers everyone loves.
Cranberry Brie Bites
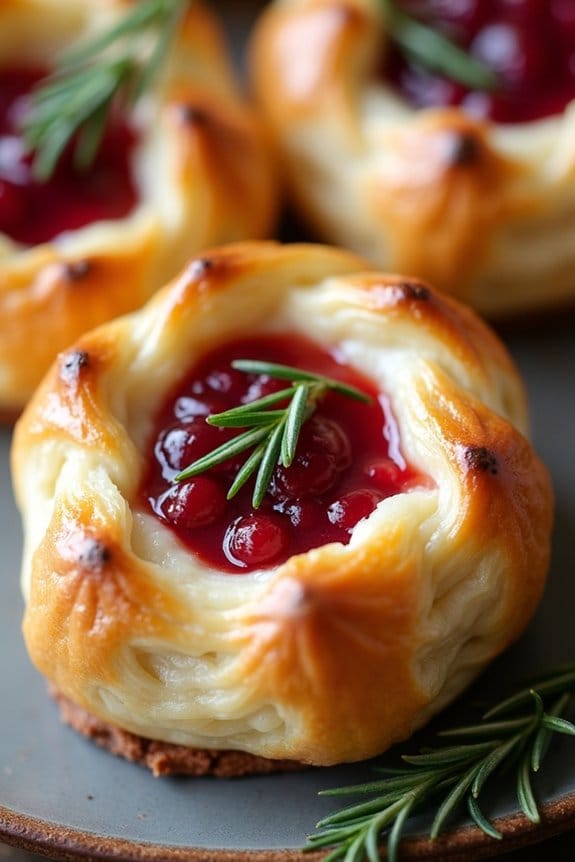
Cranberry Brie Bites are a delightful and festive appetizer, perfect for holiday gatherings or Christmas parties. These bite-sized treats combine the creamy richness of Brie cheese with the tart sweetness of cranberry sauce, all encased in a flaky pastry shell. They aren’t only delicious but also visually appealing, making them a hit on any appetizer table.
The combination of flavors and textures in these bites makes them irresistible to guests of all ages.
These Cranberry Brie Bites are incredibly easy to make and require just a few simple ingredients. They’re ideal for serving a crowd, as the recipe is designed to serve 4-6 people. Whether you’re hosting a large party or an intimate family gathering, these appetizers are bound to impress.
The best part is that they can be prepared in advance, allowing you to spend more time enjoying the festivities and less time in the kitchen.
Ingredients for 4-6 Servings:
- 1 sheet of puff pastry, thawed
- 1/2 cup cranberry sauce (homemade or store-bought)
- 8 oz Brie cheese, cut into small cubes
- 1 egg, beaten
- Fresh rosemary or thyme sprigs for garnish (optional)
Cooking Instructions:
- Preheat the Oven: Start by preheating your oven to 375°F (190°C). This guarantees that your pastry will bake evenly and become nice and flaky.
- Prepare the Puff Pastry: On a lightly floured surface, roll out the thawed puff pastry sheet to smooth out any creases. Cut the pastry into 12 equal squares.
- Fill the Pastry: Place a cube of Brie cheese in the center of each square, followed by a teaspoon of cranberry sauce. Be careful not to overfill to avoid leakage during baking.
- Seal and Shape: Carefully fold each corner of the pastry squares over the filling to meet in the center, pinching the edges to seal. This will create a small pouch.
- Prepare for Baking: Arrange the filled pastry pouches on a baking sheet lined with parchment paper. Brush the tops with the beaten egg to give them a golden finish.
- Bake: Place the baking sheet in the preheated oven and bake for 15-20 minutes, or until the pastry is golden brown and puffed.
- Garnish and Serve: Once baked, remove the bites from the oven and let them cool slightly. Garnish with fresh rosemary or thyme sprigs, if using, before serving.
Extra Tips:
- To make preparation even easier, you can pre-cut the Brie and pastry squares the day before. Store them separately in the fridge until you’re ready to assemble and bake.
- If you prefer a sweeter flavor, consider using a cranberry-orange sauce or adding a drizzle of honey over the Brie before sealing the pastry.
- These bites can be served warm or at room temperature, making them versatile for any party setup. However, they’re best enjoyed fresh from the oven when the Brie is warm and gooey.
Prosciutto-Wrapped Asparagus
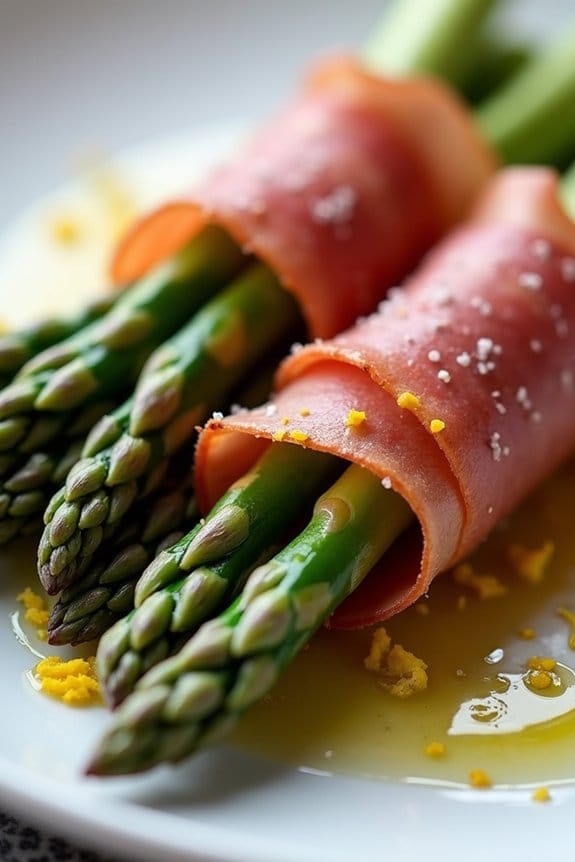
Prosciutto-Wrapped Asparagus is an elegant and savory appetizer that’s perfect for holiday gatherings like a Christmas party. This dish combines the earthy flavor of fresh asparagus with the salty, rich taste of prosciutto, creating a delightful contrast in every bite. The crispness of the asparagus paired with the tender wrapping of prosciutto makes it a crowd-pleaser that’s both simple to prepare and visually appealing on any festive table.
This dish can be easily prepared ahead of time, allowing you to focus on other party preparations. The prosciutto adds a gourmet touch to the appetizer, making it suitable for both casual and formal holiday celebrations. Whether you’re hosting a large party or an intimate gathering, Prosciutto-Wrapped Asparagus is sure to impress your guests with its flavor and presentation.
Ingredients for 4-6 servings:
- 24 asparagus spears, trimmed
- 12 slices of prosciutto
- 2 tablespoons olive oil
- Salt and freshly ground black pepper, to taste
- 1 tablespoon lemon juice
- 1 teaspoon lemon zest (optional)
Cooking Instructions:
- Preparation: Preheat your oven to 400°F (200°C). Wash the asparagus spears thoroughly and trim the woody ends. You can do this by gently bending the asparagus until it snaps at its natural breaking point.
- Wrap the Asparagus: Cut each prosciutto slice in half lengthwise. Take one piece of prosciutto and wrap it around an asparagus spear, starting from the bottom and spiraling up to the tip. Repeat this process for all the asparagus spears.
- Arrange on Baking Sheet: Place the wrapped asparagus on a baking sheet lined with parchment paper. Confirm they’re in a single layer to cook evenly.
- Season and Drizzle: Lightly drizzle olive oil over the asparagus. Sprinkle salt and freshly ground black pepper to taste. Be cautious with the salt, as prosciutto is naturally salty.
- Bake: Place the baking sheet in the preheated oven and bake for 10-15 minutes, or until the prosciutto is crispy and the asparagus is tender.
- Finish with Lemon: Once baked, remove the asparagus from the oven and drizzle lemon juice over them. If desired, sprinkle with lemon zest for an added citrusy flavor.
Extra Tips:
For the best results, choose thin asparagus spears as they tend to cook more evenly and quickly. If your asparagus is thicker, consider blanching them in boiling water for 2-3 minutes before wrapping with prosciutto to guarantee they’re tender once baked.
Additionally, using parchment paper on your baking sheet will prevent the prosciutto from sticking and make cleanup easier. This dish is best served warm but can also be enjoyed at room temperature, making it a versatile addition to your Christmas party spread.
Holiday Cheese Ball
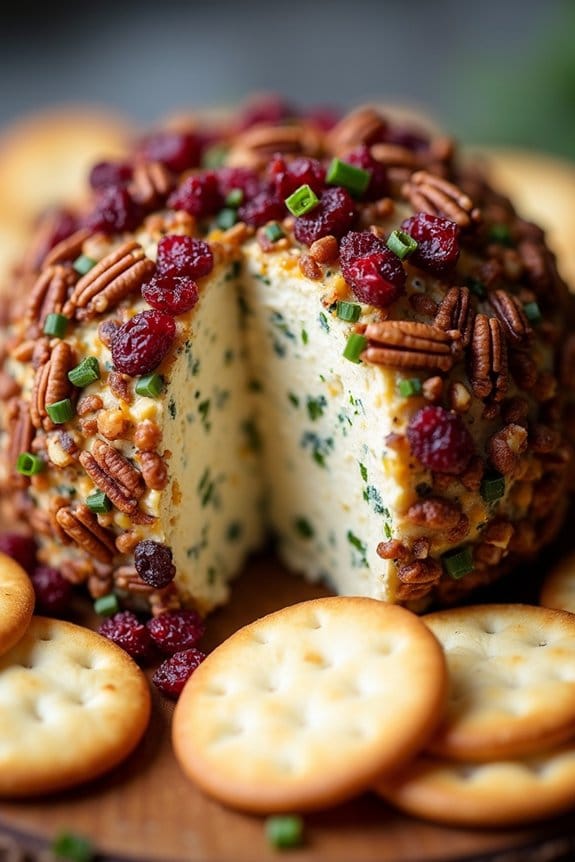
The Holiday Cheese Ball is a delightful and festive appetizer that’s perfect for any Christmas party. This savory treat combines a rich blend of cheeses with a variety of herbs and spices, forming a flavorful centerpiece for your appetizer table.
Easy to prepare and even easier to enjoy, the cheese ball can be made ahead of time, allowing you to focus on other holiday preparations. Its creamy texture and zesty taste make it a hit among guests of all ages.
One of the best things about a Holiday Cheese Ball is its versatility. You can customize it with your favorite ingredients or adjust the seasoning to suit your taste. Whether served with crackers, breadsticks, or fresh vegetables, this appetizer is sure to impress.
The presentation is also a treat for the eyes, as you can roll the cheese ball in nuts, herbs, or dried fruits for an extra festive touch. Let’s plunge into this delicious holiday recipe that serves 4-6 people.
Ingredients:
- 8 ounces cream cheese, softened
- 1 cup shredded sharp cheddar cheese
- 1/2 cup crumbled blue cheese
- 1/4 cup finely chopped green onions
- 1 tablespoon Worcestershire sauce
- 1 teaspoon garlic powder
- 1/2 teaspoon onion powder
- 1/4 teaspoon salt
- 1/4 teaspoon black pepper
- 1 cup chopped pecans (or walnuts)
- 1/4 cup dried cranberries, finely chopped
- Crackers or breadsticks for serving
Instructions:
- Prepare the Cheese Mixture: In a large mixing bowl, combine the softened cream cheese, shredded cheddar cheese, and crumbled blue cheese. Mix the cheeses together until well blended, using a hand mixer or a wooden spoon.
- Add Seasonings: Stir in the chopped green onions, Worcestershire sauce, garlic powder, onion powder, salt, and black pepper. Confirm that all the ingredients are thoroughly combined to achieve a uniform flavor throughout the cheese ball.
- Form the Cheese Ball: Once the cheese mixture is well combined, shape it into a ball using your hands. If the mixture is too sticky, you can refrigerate it for 10-15 minutes to make it easier to handle.
- Coat the Cheese Ball: On a large plate, spread out the chopped pecans and dried cranberries. Roll the cheese ball over the nuts and cranberries, pressing lightly to confirm they adhere to the surface evenly. Make sure the entire cheese ball is covered.
- Chill: Wrap the cheese ball in plastic wrap and refrigerate for at least 2 hours, or until firm. This allows the flavors to meld together and the cheese ball to set properly.
- Serve: Once chilled, remove the plastic wrap and place the cheese ball on a serving platter. Surround it with your choice of crackers or breadsticks and serve immediately.
Extra Tips:
For an extra burst of flavor, consider adding a splash of hot sauce or a pinch of cayenne pepper to the cheese mixture if you prefer a bit of heat.
Additionally, you can experiment with different toppings, such as chopped fresh herbs like parsley or chives, or even bacon bits for a savory twist.
Remember to adjust the seasoning according to your taste, and feel free to make the cheese ball a day in advance to save time on the day of your party. Enjoy the compliments from your guests as they indulge in this delicious holiday appetizer!
Stuffed Mushrooms
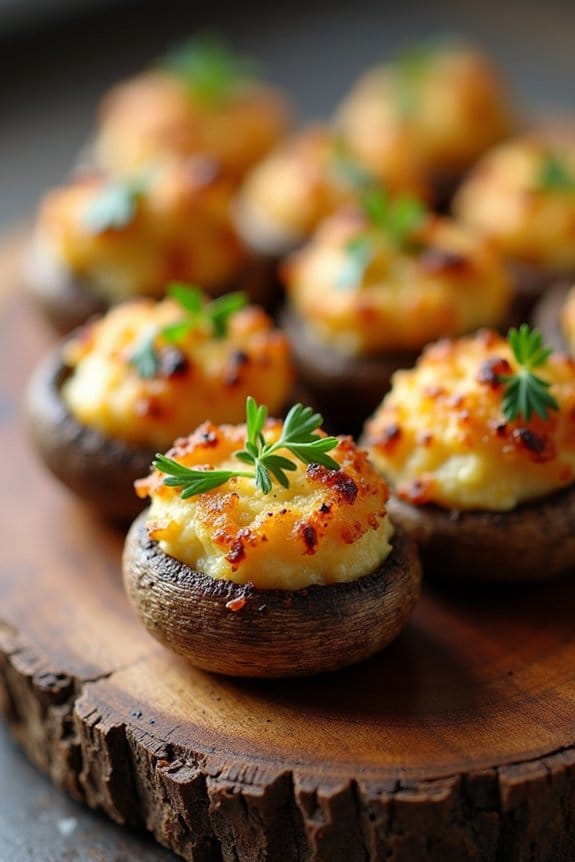
Stuffed mushrooms make for an irresistible appetizer at any Christmas party, bringing together the earthy flavor of mushrooms with a savory stuffing. These bite-sized delights are perfect for mingling guests who want to snack while they chat. The filling, a delightful mixture of cream cheese, garlic, herbs, and breadcrumbs, guarantees each mushroom cap is bursting with flavor. With a crispy top and a creamy center, they’re sure to become a crowd favorite.
Preparing stuffed mushrooms isn’t only about flavor; it’s also about creating a visually appealing dish that will impress your guests. The process is straightforward, making it an ideal choice for hosts who want to prepare something special without spending hours in the kitchen. The key is to balance the flavors and textures, assuring a perfect bite every time. Here’s how you can prepare this delicious dish for your holiday gathering.
Ingredients for 4-6 servings:
- 16 large white button mushrooms
- 1 tablespoon olive oil
- 1/2 cup cream cheese, softened
- 1/4 cup grated Parmesan cheese
- 1/4 cup breadcrumbs
- 2 cloves garlic, minced
- 2 tablespoons fresh parsley, chopped
- 1/2 teaspoon dried thyme
- Salt and pepper to taste
Cooking Instructions:
- Preheat the Oven: Start by preheating your oven to 375°F (190°C). This will make sure that it’s ready for baking once you have prepared the stuffed mushrooms.
- Prepare the Mushrooms: Clean the mushrooms with a damp cloth to remove any dirt. Carefully remove the stems and set them aside. You’ll use these stems in the filling, so don’t discard them.
- Chop the Stems: Finely chop the reserved mushroom stems. This will add texture and enhance the flavor of your stuffing.
- Sauté Ingredients: Heat the olive oil in a pan over medium heat. Add the chopped mushroom stems and minced garlic, sautéing for about 3-4 minutes until the stems are soft and the garlic is fragrant.
- Mix the Filling: In a mixing bowl, combine the sautéed mushroom stems and garlic with the cream cheese, Parmesan cheese, breadcrumbs, parsley, thyme, salt, and pepper. Mix until everything is well incorporated and forms a cohesive filling.
- Stuff the Mushroom Caps: Using a spoon, fill each mushroom cap generously with the cream cheese mixture. Press slightly to make certain the filling is compact and stays in place.
- Bake the Mushrooms: Place the stuffed mushrooms on a baking sheet lined with parchment paper. Bake them in the preheated oven for 15-20 minutes, or until the tops are golden brown and the mushrooms are tender.
- Serve: Once baked, let the mushrooms cool slightly before serving. Arrange them on a platter and garnish with additional chopped parsley for a burst of color.
Extra Tips:
When preparing stuffed mushrooms, choose uniformly sized mushrooms to assure even cooking. You can prepare the filling ahead of time and refrigerate it until you’re ready to stuff the mushrooms.
If you want to add an extra layer of flavor, consider including cooked and crumbled bacon or chopped sun-dried tomatoes into the filling. These additions can elevate the dish and provide a delightful contrast to the creamy filling.
Mini Caprese Skewers
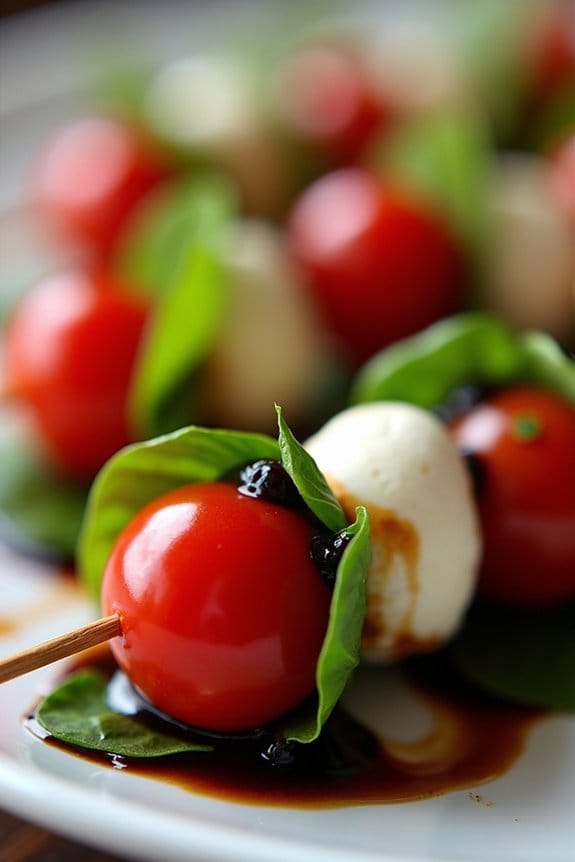
Mini Caprese Skewers are an elegant and delightful appetizer that captures the essence of Italian cuisine. Perfect for Christmas parties, these skewers bring together the classic flavors of ripe tomatoes, fresh basil, and creamy mozzarella in a bite-sized form. Their vibrant colors and fresh taste make them a popular choice for holiday gatherings.
Plus, they’re incredibly easy to assemble, making them a stress-free addition to your party menu. The beauty of Mini Caprese Skewers lies in their simplicity and the quality of the ingredients used. When preparing this dish, it’s important to select the freshest produce and the best mozzarella you can find.
The skewers can be assembled in advance, allowing you to enjoy the festivities with your guests without spending too much time in the kitchen. A drizzle of balsamic glaze enhances the flavors and adds a touch of sophistication, making these skewers a standout appetizer.
Ingredients (Serves 4-6):
- 20 cherry tomatoes
- 20 fresh basil leaves
- 20 small mozzarella balls (bocconcini)
- 20 wooden skewers or toothpicks
- Salt to taste
- Black pepper to taste
- Extra virgin olive oil
- Balsamic glaze
Cooking Instructions:
- Prepare Ingredients: Start by washing the cherry tomatoes and fresh basil leaves under cold water. Pat them dry with a clean kitchen towel. Drain the mozzarella balls from their liquid and set aside.
- Assemble the Skewers: Take a wooden skewer or toothpick and begin by threading one cherry tomato onto it. Follow this with a basil leaf and then a mozzarella ball. Repeat this sequence (tomato, basil, mozzarella) until you have assembled all 20 skewers.
- Season the Skewers: Arrange the assembled skewers on a serving platter. Drizzle them lightly with extra virgin olive oil. Sprinkle a pinch of salt and a dash of black pepper over the skewers to enhance the flavors.
- Add the Finishing Touch: Drizzle a small amount of balsamic glaze over the skewers. The glaze should be used sparingly as it’s quite potent and can overpower the other flavors if overused.
- Serve: Serve the Mini Caprese Skewers immediately or refrigerate them for up to two hours before serving. If storing in the fridge, cover them with plastic wrap to keep them fresh.
Extra Tips:
For the best results, choose cherry tomatoes that are firm and vibrant in color. If mozzarella balls aren’t available, you can cut a block of fresh mozzarella into small cubes. This dish can easily be doubled or tripled for larger gatherings.
If you prefer a homemade touch, you can make your own balsamic reduction by simmering balsamic vinegar until it thickens. Remember to allow the skewers to come to room temperature before serving if they’ve been refrigerated, as this will enhance their flavors.
Spinach and Artichoke Dip
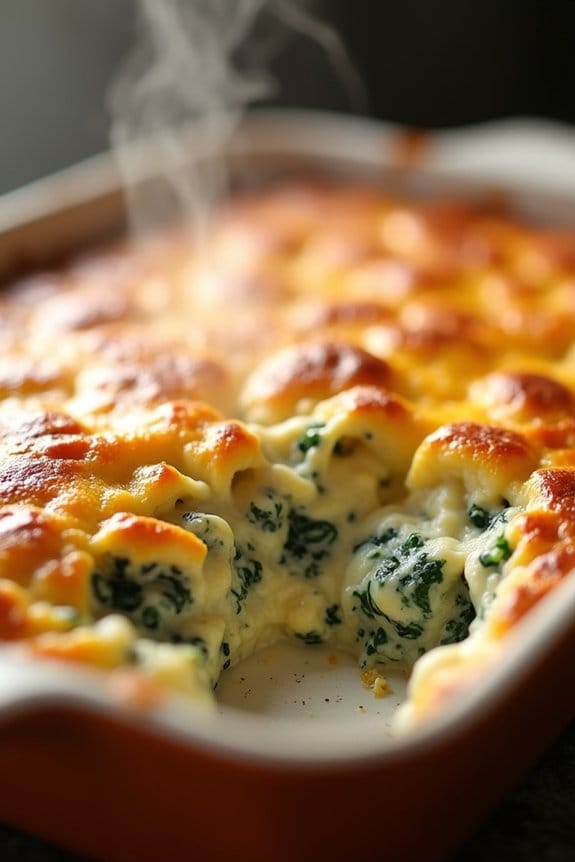
Spinach and Artichoke Dip is a classic appetizer that never fails to impress at any Christmas party. Its creamy, cheesy texture combined with the savory flavors of spinach and artichokes makes it a crowd-pleaser for guests of all ages. This dish is perfect for dipping with tortilla chips, crackers, or even fresh vegetables, making it a versatile addition to your holiday spread.
The beauty of Spinach and Artichoke Dip lies in its simplicity and the fact that it can be prepared ahead of time, allowing you to focus on other aspects of your party planning. This recipe yields a generous serving for 4-6 people, guaranteeing everyone gets to indulge in this delightful treat. Whether you’re hosting a small gathering or a large festive celebration, this appetizer is sure to be a hit.
Ingredients:
- 1 (10 oz) package frozen chopped spinach, thawed and drained
- 1 (14 oz) can artichoke hearts, drained and chopped
- 1 cup sour cream
- 1 cup mayonnaise
- 1 cup grated Parmesan cheese
- 1 cup shredded mozzarella cheese
- 2 cloves garlic, minced
- 1 teaspoon onion powder
- 1/2 teaspoon salt
- 1/4 teaspoon black pepper
Cooking Instructions:
- Prepare the Spinach and Artichokes: Begin by thawing the frozen chopped spinach. Once thawed, drain it thoroughly to remove any excess moisture. Similarly, drain the canned artichoke hearts and chop them into small, bite-sized pieces.
- Mix the Base Ingredients: In a large mixing bowl, combine the sour cream, mayonnaise, Parmesan cheese, and mozzarella cheese. Stir well until the mixture is smooth and the cheeses are evenly distributed.
- Add the Vegetables and Seasonings: To the cheese mixture, add the prepared spinach and chopped artichokes. Stir in the minced garlic, onion powder, salt, and black pepper. Mix everything together until completely incorporated.
- Transfer to Baking Dish: Preheat your oven to 350°F (175°C). Transfer the spinach and artichoke mixture into an oven-safe baking dish, spreading it evenly across the dish.
- Bake the Dip: Place the dish in the preheated oven and bake for about 25-30 minutes, or until the top is golden brown and bubbly. Keep an eye on it to ascertain it doesn’t burn.
- Serve and Enjoy: Once baked, remove the dish from the oven and allow it to cool slightly before serving. Pair the dip with your choice of dippers such as tortilla chips, crackers, or fresh vegetable sticks.
Extra Tips:
For a slightly different flavor profile, consider adding a pinch of red pepper flakes for a bit of heat or a squeeze of lemon juice for a hint of brightness. If you prefer a creamier dip, you can substitute cream cheese for half of the mayonnaise.
Additionally, this dip can be made a day in advance and stored in the refrigerator; just cover it well and bake it just before serving to guarantee it’s warm and fresh for your guests.
Smoked Salmon Canapés
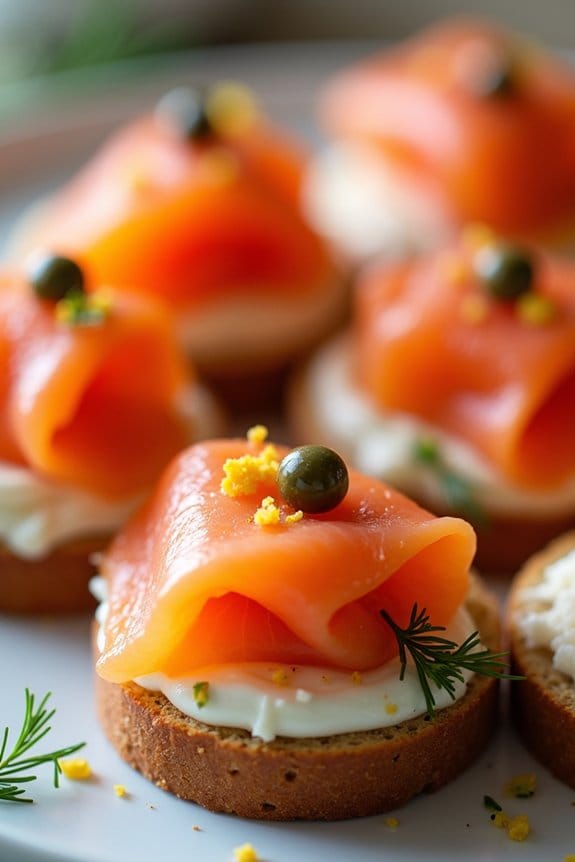
Smoked Salmon Canapés are the perfect appetizer for your Christmas party, offering a delightful combination of flavors and elegance that will impress your guests. This dish combines the rich, smoky taste of salmon with creamy cheese and invigorating garnishes, all atop a crispy base.
It’s a sophisticated yet simple dish that can be prepared ahead of time, allowing you to enjoy your party without being tied to the kitchen. The vibrant colors and tantalizing flavors make these canapés a festive treat that will surely be a hit.
Preparing Smoked Salmon Canapés is a wonderful way to showcase your culinary skills without the need for extensive cooking. The key is to use high-quality ingredients that complement each other perfectly.
The smooth, smoky salmon pairs beautifully with a creamy spread, while a hint of lemon and fresh dill add a revitalizing brightness to each bite. The crunch of the base provides a satisfying texture contrast that makes these canapés irresistible. Easy to assemble, this recipe allows you to create a gourmet experience with minimal effort, perfect for any holiday gathering.
Ingredients for 4-6 servings:
- 12 slices of smoked salmon
- 6 slices of rye or pumpernickel bread
- 1/2 cup cream cheese
- 1 tablespoon sour cream
- 1 tablespoon lemon juice
- 1 tablespoon capers, drained
- 1/4 cup fresh dill, finely chopped
- Freshly ground black pepper
- Lemon zest for garnish (optional)
Cooking Instructions:
- Prepare the Base: Begin by toasting the slices of rye or pumpernickel bread until they’re golden brown and crisp. Once toasted, cut each slice into two or three smaller pieces, creating a base for the canapés.
- Make the Creamy Spread: In a mixing bowl, combine the cream cheese, sour cream, lemon juice, and half of the chopped dill. Mix until smooth and well combined. This mixture will serve as the creamy base for the smoked salmon.
- Assemble the Canapés: Spread a generous layer of the cream cheese mixture onto each piece of toasted bread. Confirm the spread is evenly distributed to create a balanced flavor in every bite.
- Add the Salmon: Take a slice of smoked salmon and lay it gently over the cream cheese spread. If necessary, fold or cut the salmon to fit the bread base neatly.
- Garnish with Flavor: Place a few capers on top of the salmon for an added burst of flavor. Finish each canapé with a sprinkle of the remaining fresh dill, a crack of black pepper, and a touch of lemon zest for an extra citrusy note.
- Serve and Enjoy: Arrange the canapés on a serving platter and refrigerate for at least 15 minutes before serving to allow the flavors to meld together.
Extra Tips:
For the best results, choose high-quality smoked salmon, as its flavor will greatly impact the overall taste of the canapés. If you prefer a bit more tang, consider using a flavored cream cheese, such as garlic and herb.
You can also experiment with different bases, such as blinis or crackers, to create a variety of textures. To save time, prepare the cream cheese mixture in advance and store it in the refrigerator until ready to use.
This recipe is versatile, so feel free to adjust the toppings and garnishes to suit your taste preferences. Enjoy your festive creation!
Sausage-Stuffed Puff Pastry

Sausage-Stuffed Puff Pastry is a delectable appetizer that combines the flaky goodness of puff pastry with a savory sausage filling. Perfect for a holiday gathering, this dish is sure to impress your guests with its delightful combination of textures and flavors.
The crispy, golden-brown pastry envelops a rich and savory sausage mixture, making it a festive treat that captures the spirit of the season. Whether you’re hosting a Christmas party or a casual holiday get-together, these sausage-stuffed pastries are sure to be a hit.
This recipe is designed to serve 4-6 people, making it an ideal choice for a small gathering or an appetizer at your holiday table. The preparation is straightforward, and the results are simply mouthwatering. By using store-bought puff pastry, you can save time without compromising on taste.
The savory sausage filling is seasoned to perfection, guaranteeing each bite is bursting with flavor. Follow these instructions to create a delicious appetizer that will leave your guests asking for seconds.
Ingredients:
- 1 package (17.3 ounces) frozen puff pastry sheets, thawed
- 1 pound bulk sausage (mild or spicy, based on preference)
- 1/2 cup breadcrumbs
- 1/4 cup grated Parmesan cheese
- 1/4 cup finely chopped onion
- 2 cloves garlic, minced
- 1 tablespoon chopped fresh parsley
- 1 tablespoon Dijon mustard
- 1 egg, beaten (for egg wash)
- Salt and pepper to taste
Instructions:
- Preheat the Oven: Preheat your oven to 400°F (200°C). Line a baking sheet with parchment paper and set aside.
- Prepare the Sausage Filling: In a large mixing bowl, combine the sausage, breadcrumbs, Parmesan cheese, chopped onion, minced garlic, fresh parsley, Dijon mustard, salt, and pepper. Mix thoroughly until all ingredients are evenly incorporated.
- Roll Out the Puff Pastry: Unroll the thawed puff pastry sheets on a lightly floured surface. Using a rolling pin, gently roll each sheet into a rectangular shape, ensuring it’s smooth and even.
- Assemble the Pastries: Spoon the sausage mixture evenly along one edge of each puff pastry sheet, leaving a small border. Roll the pastry over the filling to enclose it completely, forming a log. Press the edges to seal.
- Cut and Prepare for Baking: Using a sharp knife, cut the logs into 1-inch pieces. Arrange them on the prepared baking sheet, leaving space between each piece for expansion during baking.
- Apply Egg Wash: Brush the tops of each pastry piece with the beaten egg. This will give the pastries a beautiful golden color as they bake.
- Bake: Place the baking sheet in the preheated oven and bake for 20-25 minutes, or until the pastries are puffed and golden brown.
- Serve: Allow the pastries to cool slightly before serving. Arrange them on a platter for your guests to enjoy.
Extra Tips:
For added flavor, consider incorporating additional herbs such as thyme or rosemary into the sausage mixture. If you prefer a spicier kick, opt for a hot sausage or add a pinch of red pepper flakes.
Ascertain that the puff pastry remains cold while working with it to maintain its flakiness; if it begins to soften, return it to the refrigerator for a few minutes. Finally, these pastries can be prepared ahead of time and frozen; simply bake them directly from the freezer, adding a few extra minutes to the baking time.
Festive Deviled Eggs

Deviled eggs are a classic appetizer that never goes out of style, especially during the holiday season. With their creamy filling and festive decorations, these Festive Deviled Eggs will be a hit at any Christmas party. Not only are they delicious, but they also add a touch of elegance to your appetizer spread.
This recipe enhances the traditional deviled eggs with a few festive tweaks, including a hint of Dijon mustard and a sprinkle of paprika for added flavor and color. The addition of fresh herbs and red pimentos makes these eggs as visually appealing as they’re tasty.
These Festive Deviled Eggs are perfect for serving 4-6 people, making them an ideal choice for smaller gatherings or as part of a larger buffet. The key to making these eggs special is in the details, from the perfectly hard-boiled eggs to the smooth, flavorful filling.
With a little preparation and creativity, you can create a dish that not only looks great but also tantalizes the taste buds of your guests. So, roll up your sleeves and get ready to make these delightful treats that are sure to captivate.
Ingredients:
- 6 large eggs
- 3 tablespoons mayonnaise
- 1 tablespoon Dijon mustard
- 1 teaspoon white vinegar
- Salt to taste
- Pepper to taste
- Paprika for garnish
- Fresh parsley for garnish
- Pimentos for garnish
Instructions:
- Boil the Eggs: Place the eggs in a single layer in a saucepan. Cover them with cold water, about an inch above the eggs. Bring the water to a boil over medium-high heat. Once boiling, cover the saucepan, remove from heat, and let the eggs sit for 10-12 minutes.
- Cool and Peel: After the eggs have cooked, transfer them to a bowl of ice water to stop the cooking process. Let them cool for at least 5 minutes. Carefully peel the eggs under running water to guarantee smooth surfaces.
- Prepare the Filling: Slice each egg in half lengthwise. Remove the yolks and place them in a bowl. Mash the yolks with a fork until smooth. Add mayonnaise, Dijon mustard, vinegar, salt, and pepper to the yolk mixture. Stir until well combined and creamy.
- Fill the Egg Whites: Spoon or pipe the yolk mixture back into the egg whites. A piping bag or a plastic bag with the corner snipped off can be used for a more decorative look.
- Garnish: Sprinkle a bit of paprika over the filled eggs for a pop of color. Finely chop fresh parsley and sprinkle a small amount over each egg. Top each egg with a small piece of pimento for a festive touch.
Extra Tips:
For best results, use eggs that are a few days old as they’re easier to peel. Make sure your yolk mixture is smooth to guarantee a creamy texture; you can use a food processor if desired.
If you’re preparing these eggs in advance, keep them covered in the refrigerator to maintain freshness. Feel free to experiment with other garnishes such as chives or dill to suit your taste preferences. Additionally, using a piping tool can give your deviled eggs a professional appearance, enhancing their presentation at your holiday gathering.
Bacon-Wrapped Dates
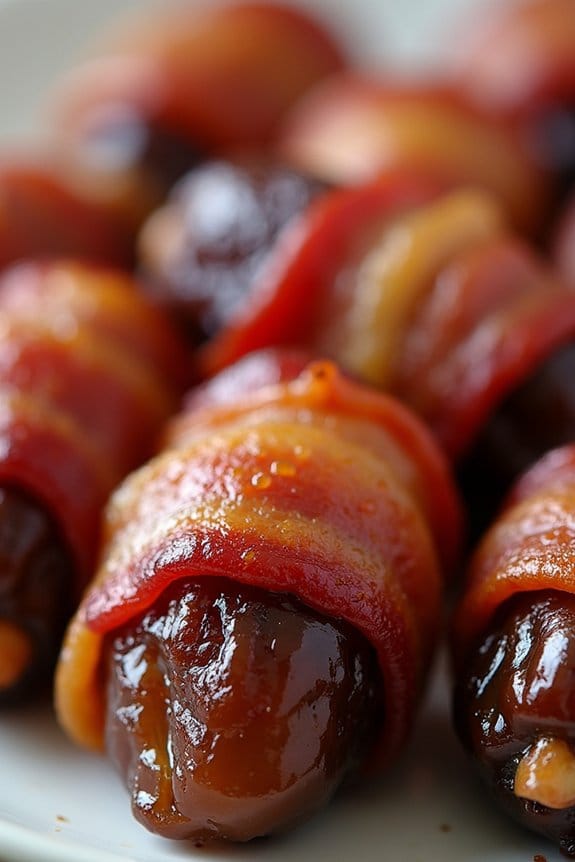
Bacon-Wrapped Dates are a delightful combination of sweet and savory flavors, perfect for your Christmas party appetizer spread. They’re easy to prepare, yet elegant enough to impress your guests. The sweetness of the dates pairs beautifully with the salty, smoky flavor of the bacon, creating a mouthwatering bite-sized treat.
These appetizers aren’t only delicious but also quick to prepare, making them an ideal choice for party hosts seeking a stress-free cooking experience. The beauty of Bacon-Wrapped Dates lies in their simplicity. With just a few ingredients, you can create a dish that’s both visually appealing and incredibly tasty.
This recipe serves 4-6 people, making it suitable for small gatherings or as part of a larger selection of appetizers. The dish’s versatility means you can easily adjust the quantities to cater to larger crowds or double up the recipe if needed. Whether you’re a seasoned cook or a kitchen novice, this appetizer is straightforward and certain to be a hit at your holiday celebration.
Ingredients (Serves 4-6):
- 18-24 pitted Medjool dates
- 9-12 strips of bacon
- 18-24 whole almonds (optional)
- Toothpicks
Cooking Instructions:
- Preheat your oven: Start by preheating your oven to 375°F (190°C). Line a baking sheet with parchment paper or aluminum foil to prevent sticking and make cleanup easier.
- Prepare the dates: If you wish to add a crunchy element, stuff each pitted date with a whole almond. Simply press the almond into the center where the pit was removed.
- Wrap the dates: Cut each bacon strip in half. Wrap one half around each date, securing it with a toothpick. Confirm the bacon overlaps slightly to prevent it from unraveling during cooking.
- Arrange on the baking sheet: Place the bacon-wrapped dates on the prepared baking sheet with the seam side down. Make sure they’re evenly spaced to confirm even cooking.
- Bake: Place the baking sheet in the preheated oven. Bake for 15-20 minutes, or until the bacon is crispy and golden brown. Turn the dates halfway through cooking to confirm even browning.
- Rest and serve: Remove from the oven and let the bacon-wrapped dates cool for a few minutes. This will allow the bacon to firm up and make them easier to handle. Serve warm.
Extra Tips: For an extra layer of flavor, consider brushing the bacon with a glaze made of maple syrup and a touch of Dijon mustard before baking. This will add a subtle sweetness and enhance the savory notes.
If you’re preparing this dish ahead of time, you can assemble the bacon-wrapped dates and refrigerate them for a few hours before baking. Just confirm they’re brought to room temperature before placing them in the oven.
Finally, if you prefer a spicier version, sprinkle a little cayenne pepper or smoked paprika over the bacon before baking for an added kick.
Sweet and Spicy Pecans
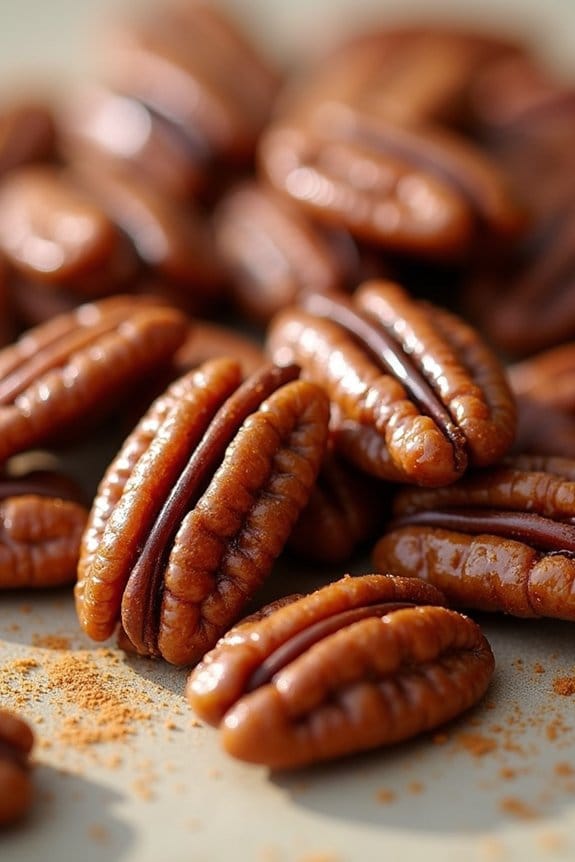
Sweet and Spicy Pecans are a delightful snack that perfectly balances the sugary allure of sweetness with a kick of spice. Perfect for a Christmas party, these pecans are a hit with both kids and adults alike. The nuts are coated in a tantalizing mixture of sugar and spices, then roasted to perfection, resulting in a crisp and flavorful treat that’s both sophisticated and satisfying.
They make an excellent appetizer or can be added to a cheese board for a bit of crunch.
Not only are Sweet and Spicy Pecans delicious, but they’re also incredibly easy to prepare. With just a few simple ingredients, you can whip up a batch in no time, leaving you more time to enjoy the festivities with your guests. Plus, they store well, so you can make them ahead of time and have one less thing to worry about on the day of your party.
Ingredients (Serving size: 4-6 people):
- 2 cups pecan halves
- 1/4 cup granulated sugar
- 1 tablespoon unsalted butter, melted
- 1 tablespoon honey
- 1 teaspoon ground cinnamon
- 1/2 teaspoon cayenne pepper
- 1/2 teaspoon salt
Cooking Instructions:
- Preheat the Oven: Start by preheating your oven to 350°F (175°C). This temperature will guarantee the pecans roast evenly without burning.
- Prepare the Coating: In a large mixing bowl, combine the granulated sugar, melted butter, honey, ground cinnamon, cayenne pepper, and salt. Stir the mixture until all ingredients are well combined and the sugar is dissolved.
- Coat the Pecans: Add the pecan halves to the bowl with the sugar-spice mixture. Toss the pecans thoroughly until each one is evenly coated with the mixture. Make sure there are no clumps of sugar or spices.
- Arrange on Baking Sheet: Line a baking sheet with parchment paper or a silicone baking mat. Spread the coated pecans in a single layer on the prepared baking sheet. Confirm they aren’t too crowded to allow even roasting.
- Roast the Pecans: Place the baking sheet in the preheated oven and roast the pecans for about 10-12 minutes. Stir the pecans halfway through the cooking time to guarantee they roast evenly on all sides. They should be golden brown and fragrant when done.
- Cool and Serve: Remove the pecans from the oven and let them cool on the baking sheet for about 10 minutes. As they cool, they’ll become crisp. Once cooled, transfer them to a serving bowl and enjoy.
Extra Tips: When making Sweet and Spicy Pecans, it’s important to monitor them closely as they roast. Pecans can quickly go from perfectly toasted to burnt, so keep an eye on their color and aroma.
If you prefer less spice, you can adjust the cayenne pepper to your liking or omit it altogether for a purely sweet treat. These pecans can also be stored in an airtight container at room temperature for up to a week, making them a convenient make-ahead option for your party.
Mini Quiches

Mini quiches are delightful bite-sized appetizers perfect for a Christmas party. These versatile little treats can be customized with a variety of fillings to suit every guest’s taste.
Whether you prefer classic combinations like spinach and cheese or more adventurous flavors like bacon and sun-dried tomatoes, mini quiches are guaranteed to be a hit at any festive gathering. Their flaky crust and savory filling make them an irresistible addition to the holiday table.
Preparing mini quiches isn’t only easy but also a fun activity to do with family and friends. You can make the pastry from scratch or opt for store-bought pie crusts to save time.
The filling can be prepared ahead of time, allowing you to focus on other party preparations. With a little bit of planning, you’ll have a tray of golden mini quiches ready to impress your guests.
Ingredients (Serves 4-6 people)
- 1 pre-made pie crust or homemade pastry dough
- 4 large eggs
- 1/2 cup heavy cream
- 1/2 cup milk
- 1/2 cup shredded cheese (such as cheddar or gruyere)
- 1/4 cup cooked and crumbled bacon (optional)
- 1/4 cup chopped spinach or other vegetables
- Salt and pepper to taste
- 1/4 teaspoon nutmeg (optional)
- 1 tablespoon chopped fresh herbs (such as chives or parsley)
Cooking Instructions
1. Preheat and Prepare: Preheat your oven to 375°F (190°C). Lightly grease a mini muffin tin or line it with mini cupcake liners to prevent sticking.
2. Roll and Cut the Pastry: Roll out your pie crust or pastry dough on a floured surface to about 1/8 inch thick. Use a round cookie cutter or a glass to cut out circles that will fit into the cups of the muffin tin.
Gently press each circle into the cups, making certain the dough fits snugly.
3. Prepare the Filling: In a medium-sized bowl, whisk together the eggs, heavy cream, and milk until well combined. Stir in the shredded cheese, crumbled bacon, chopped spinach, salt, pepper, nutmeg, and herbs until evenly distributed.
4. Fill the Quiches: Carefully pour the egg mixture into each pastry-lined cup, filling each about 3/4 full to allow for expansion as they bake.
5. Bake: Place the muffin tin in the preheated oven and bake for 15-20 minutes, or until the quiches are puffed and lightly golden. A toothpick inserted into the center should come out clean.
6. Cool and Serve: Allow the mini quiches to cool in the pan for a few minutes before gently removing them. Serve warm or at room temperature for the best flavor.
Extra Tips
For extra flavor, consider adding sautéed onions or mushrooms to the filling. If you’re using multiple types of fillings, label each quiche with a small toothpick flag to identify the different flavors.
To guarantee the quiches don’t stick, be generous with the greasing of the muffin tin, or better yet, use non-stick spray. Finally, remember that mini quiches can be made in advance and frozen; just reheat them in the oven before serving to keep them crisp and delicious.
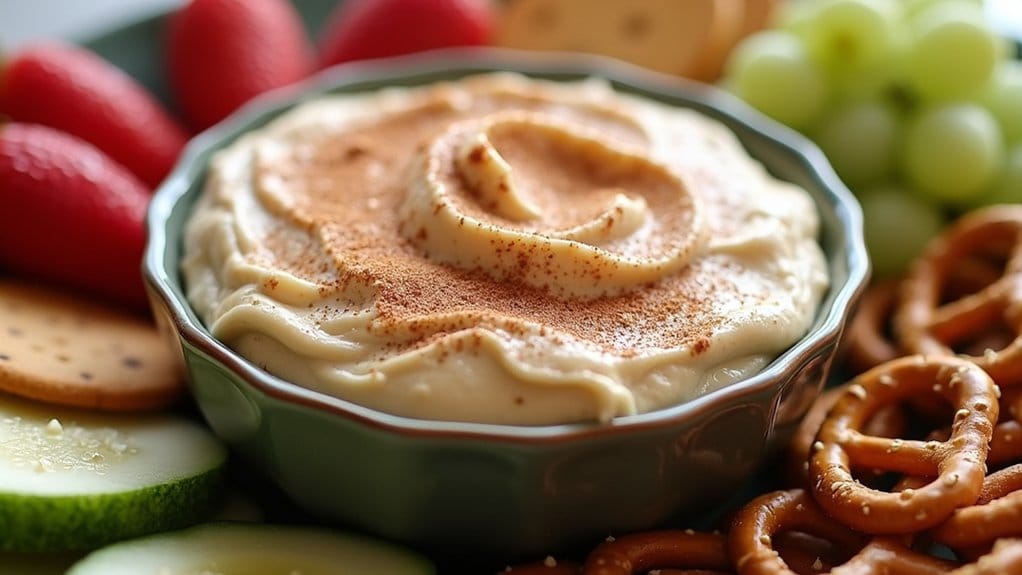
Gingerbread Cookie Dip
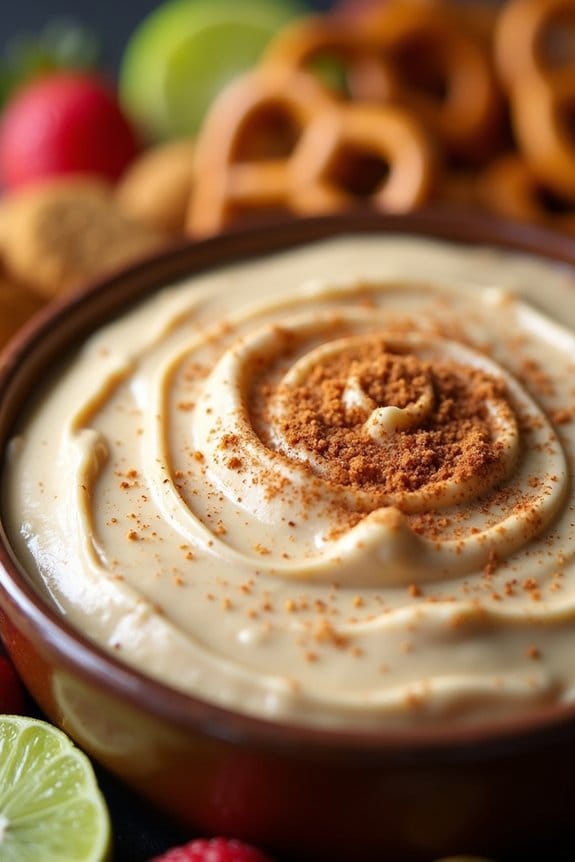
Gingerbread Cookie Dip is a delightful and festive appetizer that will be a hit at any Christmas party. This creamy, spiced dip captures the essence of gingerbread cookies in a smooth, dippable form that pairs perfectly with a variety of dippers. Whether you choose to serve it with graham crackers, pretzels, or fresh fruit, this dip is bound to bring holiday cheer to your gathering.
Its rich flavor profile, featuring ginger, cinnamon, and nutmeg, makes it a warm and inviting treat that guests of all ages can enjoy. This recipe for Gingerbread Cookie Dip serves 4-6 people, making it ideal for small gatherings or as part of a larger appetizer spread. The preparation is quick and easy, allowing you to focus on other party preparations while still offering a homemade treat.
The combination of cream cheese, brown sugar, and molasses creates a luscious base, while the spices add a seasonal touch that evokes the classic taste of gingerbread. This dip not only tastes amazing but also adds a touch of elegance to your holiday table.
Ingredients:
- 8 oz cream cheese, softened
- 1/2 cup brown sugar
- 1/4 cup molasses
- 1 teaspoon ground ginger
- 1 teaspoon ground cinnamon
- 1/2 teaspoon ground nutmeg
- 1/2 teaspoon vanilla extract
- 1/4 teaspoon salt
- 1 cup whipped topping
Cooking Instructions:
- Begin by placing the softened cream cheese in a medium-sized mixing bowl. Use an electric mixer to beat the cream cheese until it’s smooth and creamy, guaranteeing there are no lumps. This step is essential for achieving a smooth texture in the final dip.
- Gradually add the brown sugar to the cream cheese, continuing to mix until the sugar is fully incorporated. This will help dissolve the sugar and create a sweet base for the dip.
- Slowly pour in the molasses while mixing on low speed. The molasses will give the dip its characteristic gingerbread flavor and a rich, dark color. Mix until the molasses is well blended into the cream cheese mixture.
- Add the ground ginger, cinnamon, nutmeg, vanilla extract, and salt to the bowl. Mix these spices in thoroughly to guarantee they’re evenly distributed throughout the dip, giving it that warm, spiced flavor profile.
- Gently fold in the whipped topping using a spatula. Be careful not to overmix, as you want to maintain the light and airy texture that the whipped topping provides.
- Transfer the dip to a serving bowl and refrigerate for at least 30 minutes to allow the flavors to meld together. This chilling step is significant for achieving the best flavor and consistency.
Extra Tips:
For an extra festive touch, consider garnishing the dip with a sprinkle of crushed gingerbread cookies or a dusting of cinnamon before serving.
You can also experiment with different dippers to offer guests a variety of textures and flavors. If you find the dip too thick after chilling, simply let it sit at room temperature for a few minutes before serving to soften slightly.
Adjust the spice levels to your liking; feel free to add a pinch more cinnamon or nutmeg if you desire a stronger flavor.
