

Planning a Christmas party can sometimes feel overwhelming. That’s why I love make-ahead recipes that help simplify the process. Picture setting out savory stuffed mushrooms or a vibrant cheese and charcuterie board with ease. These dishes, like mini quiches and cranberry brie bites, add a festive touch without the stress. Ready for more time-saving holiday treats?
Savory Stuffed Mushrooms
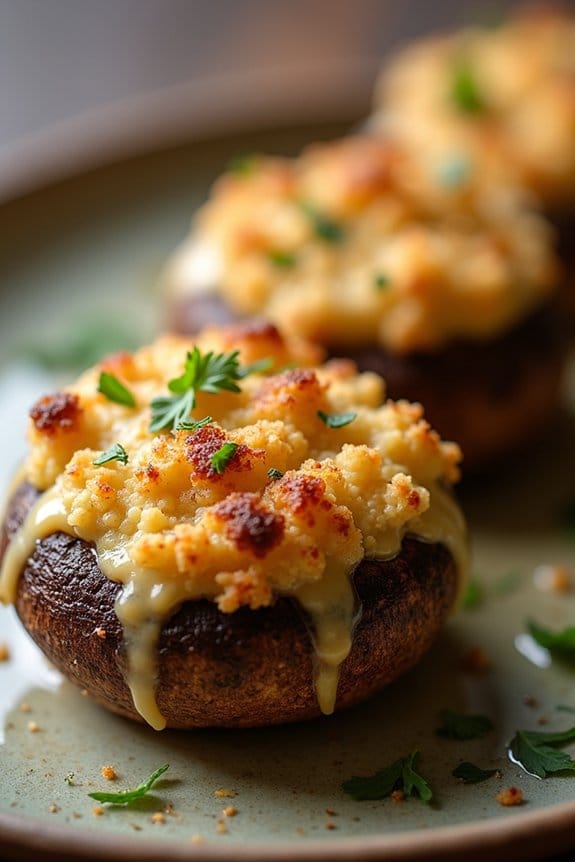
Savory Stuffed Mushrooms are an elegant appetizer perfect for any Christmas party, offering a delicious blend of flavors and textures. These bite-sized delights are filled with a savory mixture of cream cheese, garlic, herbs, and breadcrumbs, which complement the earthy taste of the mushrooms.
They can be prepared in advance, making them a convenient option for busy holiday hosts who want to offer their guests something both sophisticated and satisfying.
Preparing these stuffed mushrooms involves selecting fresh, firm mushroom caps that are then filled with a rich mixture of cheeses and spices. With the ability to be made ahead of time and simply baked when needed, they allow you to spend less time in the kitchen and more time enjoying your holiday festivities.
This recipe serves 4-6 people, making it an ideal choice for a cozy gathering or a festive buffet.
Ingredients:
- 16 large button mushrooms
- 3 tablespoons olive oil
- 1/4 cup finely chopped onion
- 2 cloves garlic, minced
- 1/2 cup cream cheese, softened
- 1/4 cup grated Parmesan cheese
- 1/4 cup breadcrumbs
- 2 tablespoons chopped fresh parsley
- 1 teaspoon dried thyme
- Salt and pepper to taste
- 1 tablespoon butter, melted
Cooking Instructions:
- Prepare the Mushrooms: Preheat your oven to 375°F (190°C). Gently clean the mushrooms with a damp cloth and remove the stems, setting them aside. Arrange the mushroom caps on a baking sheet, with the open side facing up.
- Make the Filling: Finely chop the reserved mushroom stems. Heat the olive oil in a pan over medium heat, and sauté the onions and chopped mushroom stems until they’re soft, about 5 minutes. Add the garlic and cook for another minute until fragrant.
- Mix the Ingredients: In a mixing bowl, combine the cream cheese, Parmesan cheese, sautéed onion and mushroom mixture, breadcrumbs, parsley, thyme, salt, and pepper. Stir until well combined.
- Stuff the Mushrooms: Using a spoon, fill each mushroom cap generously with the cheese mixture, pressing it lightly into the cap.
- Bake the Mushrooms: Drizzle the stuffed mushrooms with melted butter and place them in the oven. Bake for 20-25 minutes, or until the tops are golden brown and the mushrooms are tender.
- Serve: Allow the stuffed mushrooms to cool slightly before serving. Enjoy them warm as a delightful appetizer.
Extra Tips:
For best results, choose mushrooms that are similar in size to guarantee even cooking. If you want to prepare them ahead of time, you can assemble the mushrooms and store them covered in the refrigerator for up to a day before baking.
Additionally, feel free to get creative with the filling by adding chopped cooked bacon or substituting different herbs to suit your taste preferences.
Cheese and Charcuterie Board

Creating a Cheese and Charcuterie Board for your make-ahead Christmas party is a delightful way to impress your guests with minimal effort. This versatile dish offers a perfect blend of flavors and textures, incorporating a variety of cheeses, cured meats, fruits, nuts, and crackers.
It not only looks visually appealing, gracing any holiday table with its vibrant colors and arrangements, but also provides a satisfying and interactive eating experience for everyone. Preparing this board ahead of time allows you to focus on enjoying the festivities rather than being tied to the kitchen.
By selecting an assortment of high-quality ingredients, you can guarantee that there’s something for every palate. You can customize the board as per your guests’ preferences or dietary needs, making it an inclusive and welcoming option. Here’s a simple guide to assembling a Cheese and Charcuterie Board that serves 4-6 people.
Ingredients:
- 3 types of cheese (e.g., brie, aged cheddar, blue cheese)
- 3 types of cured meats (e.g., prosciutto, salami, chorizo)
- 1 small jar of fig or berry jam
- 1 bunch of grapes
- 1 apple, sliced
- 1 pear, sliced
- 1/2 cup mixed nuts (e.g., almonds, walnuts)
- 1/2 cup dried fruits (e.g., apricots, cranberries)
- 1/2 cup olives
- 1 French baguette or artisanal crackers
- Fresh rosemary or thyme sprigs for garnish
Instructions:
1. Select a Board:
Choose a large wooden or marble board on which to arrange your ingredients. Make sure it’s clean and dry before you begin setting up your items.
2. Prepare Cheeses:
Cut the cheeses into various shapes like cubes, wedges, or slices. This not only makes them easier to eat but also enhances the visual appeal. Leave one cheese, such as the brie, whole so guests can cut as desired.
3. Arrange Meats:
Roll or fold the cured meats and place them on the board. Try to spread them out to create balance and visual interest across the board.
4. Add Fruits and Nuts:
Place the grapes, apple slices, and pear slices around the cheeses and meats. Sprinkle the mixed nuts and dried fruits in small clusters to add texture and color.
5. Include Extras:
Add a small dish or ramekin with the fig or berry jam. Position the olives in another small dish or directly on the board, guaranteeing they’re easily accessible.
6. Bread and Crackers:
Slice the baguette and arrange it on the board or place artisanal crackers in neat stacks. This provides a base for guests to combine with cheese and meats.
7. Garnish:
Finally, tuck in fresh rosemary or thyme sprigs around the board for a festive touch and an aromatic element.
Extra Tips:
For peak freshness, assemble the Cheese and Charcuterie Board on the day of your party. However, you can pre-slice the cheeses and arrange them in airtight containers in the refrigerator a day ahead.
Always let the cheeses come to room temperature before serving to enhance their flavors. Experiment with different types of cheeses and meats to tailor the board to your guests’ tastes. Providing small cheese knives and toothpicks will make it easier for guests to serve themselves.
Make-Ahead Mini Quiches

Mini quiches are a delightful addition to any Christmas party spread. These bite-sized treats aren’t only delicious but also incredibly convenient, as they can be made ahead of time and simply reheated before serving. The creamy, savory filling encased in a flaky pastry shell is sure to please both vegetarians and meat lovers alike. Perfect as an appetizer or a finger food, these mini quiches are versatile enough to be filled with a variety of ingredients, allowing you to tailor them to your personal taste or dietary needs.
The beauty of make-ahead mini quiches lies in their simplicity and the ability to customize each batch. Whether you prefer classic combinations like spinach and feta or more adventurous flavors like smoked salmon and dill, mini quiches offer a canvas for your culinary creativity. This recipe will guide you through preparing a basic quiche filling and pastry base, ensuring you have a delightful appetizer ready to impress your guests.
Ingredients for 4-6 servings:
- 1 package of pre-made mini phyllo pastry shells (approximately 24 shells)
- 4 large eggs
- 1 cup heavy cream
- 1/2 cup grated cheese (cheddar, Swiss, or your choice)
- 1/2 cup cooked bacon or ham, diced (optional)
- 1/2 cup fresh spinach, chopped (or other vegetables like bell pepper or mushrooms)
- Salt and pepper to taste
- 1/4 teaspoon nutmeg (optional)
- 2 tablespoons chopped fresh herbs (such as chives, parsley, or dill)
Instructions:
- Preheat and Prepare: Preheat your oven to 375°F (190°C). Arrange the mini phyllo pastry shells on a baking sheet, ensuring they’re evenly spaced.
- Prepare the Filling: In a large mixing bowl, whisk together the eggs and heavy cream until well combined. Add in the grated cheese, diced bacon or ham (if using), chopped spinach, salt, pepper, nutmeg, and fresh herbs. Stir until all ingredients are evenly distributed throughout the egg mixture.
- Fill the Shells: Carefully spoon the egg mixture into each phyllo shell, filling them nearly to the top. Be mindful not to overfill, as the filling will expand slightly as it cooks.
- Bake the Quiches: Place the baking sheet with the filled shells into the preheated oven. Bake for 15-20 minutes, or until the egg filling is set and the tops are golden brown.
- Cool and Store: Once baked, remove the mini quiches from the oven and allow them to cool on the baking sheet for a few minutes. If making ahead, let them cool completely before storing in an airtight container in the refrigerator.
- Reheat and Serve: If serving later, reheat the mini quiches in a preheated oven at 350°F (175°C) for about 5-7 minutes, or until warmed through. Serve hot or at room temperature.
Extra Tips:
When making these mini quiches ahead of time, it’s important to let them cool completely before storing to maintain the texture of the pastry. For an extra layer of flavor, consider adding a small amount of mustard or roasted garlic to the egg mixture.
Additionally, if you want a gluten-free option, look for gluten-free pastry shells or make your own using gluten-free flour. These mini quiches can also be frozen after baking; simply thaw and reheat when needed, making them an even more convenient option for busy holiday preparations.
Cranberry Brie Bites
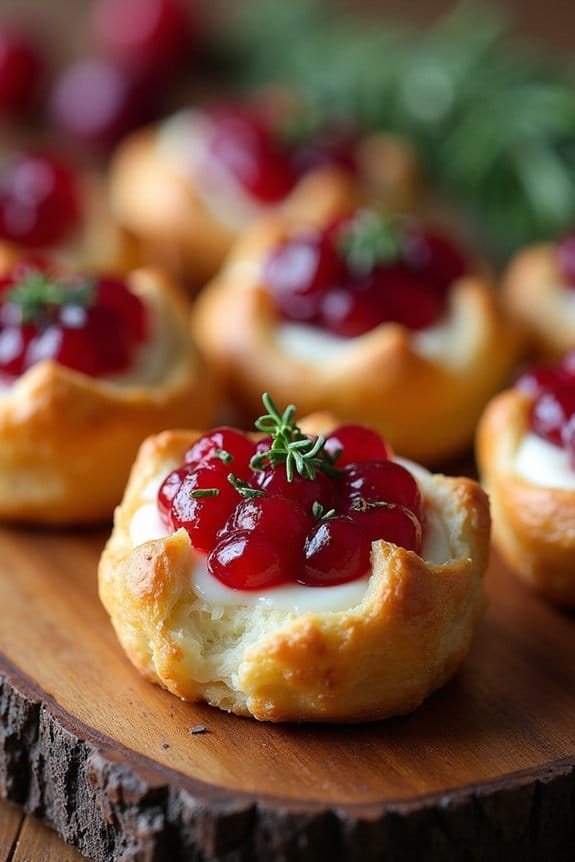
Cranberry Brie Bites are the perfect make-ahead appetizer for your Christmas party. These delectable morsels combine the creamy richness of Brie cheese with the tart sweetness of cranberry sauce, all encased in a flaky puff pastry shell. Not only are they delicious, but they also offer the convenience of being prepped ahead of time, allowing you to enjoy the festivities without being tied to the kitchen.
These bites are sure to be a crowd-pleaser, leaving your guests asking for more. The combination of flavors and textures makes Cranberry Brie Bites a standout dish. The buttery puff pastry creates a crisp outer layer that contrasts beautifully with the smooth, melty Brie and the vibrant cranberry topping.
This recipe is designed to serve 4-6 people, making it ideal for an intimate gathering or as part of a larger spread of hors d’oeuvres. With a few simple ingredients and easy steps, you’ll have a gourmet appetizer that looks as impressive as it tastes.
Ingredients (serving size: 4-6 people):
- 1 sheet of puff pastry, thawed
- 8 ounces of Brie cheese
- 1/2 cup of cranberry sauce (homemade or store-bought)
- 1 egg, beaten
- Fresh thyme leaves (optional, for garnish)
Instructions:
- Prepare the Puff Pastry: Preheat your oven to 375°F (190°C). Roll out the thawed puff pastry sheet on a lightly floured surface. Use a sharp knife or pizza cutter to cut the pastry into 24 equal squares.
- Prepare the Brie: Cut the Brie cheese into 24 small cubes, approximately 1/2 inch each. It’s important to guarantee the pieces are small enough to fit comfortably within the puff pastry squares.
- Assemble the Bites: Place each puff pastry square into the well of a mini muffin tin, gently pressing down to form a cup. Place a cube of Brie into each pastry-lined cup.
- Add Cranberry Sauce: Spoon about 1 teaspoon of cranberry sauce over the Brie in each cup. Be careful not to overfill, as the sauce will expand slightly when baked.
- Brush with Egg Wash: Lightly brush the edges of the puff pastry with the beaten egg. This will help give the bites a beautiful golden-brown color when baked.
- Bake the Bites: Place the muffin tin in the preheated oven and bake for 15-20 minutes, or until the pastry is puffed and golden brown. Keep an eye on them to prevent burning.
- Garnish and Serve: Remove the bites from the oven and allow them to cool slightly before removing from the muffin tin. Garnish with fresh thyme leaves, if desired, and serve warm.
Extra Tips:
To save time on the day of your event, you can assemble the Cranberry Brie Bites in advance and freeze them unbaked. When you’re ready to serve, simply pop them in the oven straight from the freezer, adjusting the baking time by a few extra minutes.
Be sure to use high-quality Brie for the best flavor, and feel free to experiment with adding other ingredients like chopped nuts or a drizzle of honey for added complexity.
Spiced Nut Mix
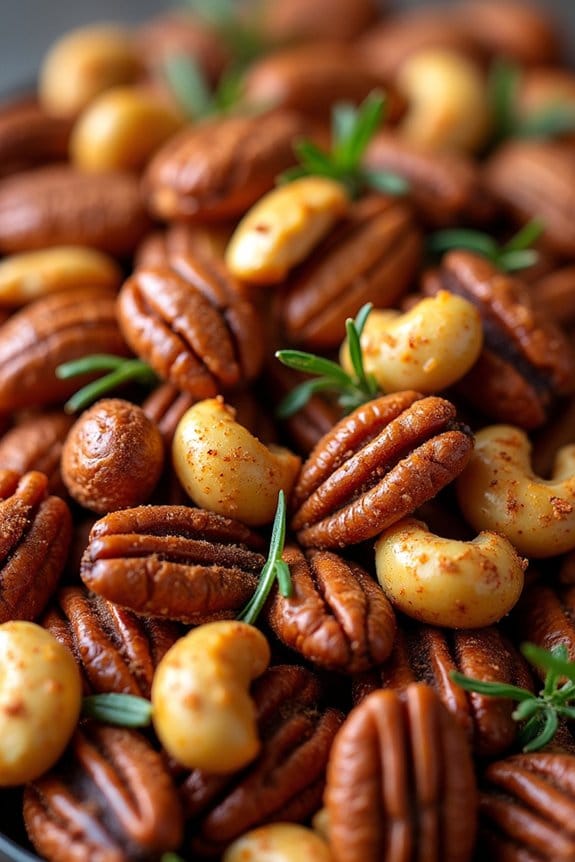
If you’re looking for an easy yet impressive appetizer for your holiday gathering, consider preparing a Spiced Nut Mix. This delightful snack combines a variety of nuts with aromatic spices, creating a treat that’s both savory and slightly sweet. Perfect for mingling guests, this dish can be made ahead of time, allowing you to focus on other aspects of your party.
The warm and inviting flavors of the spiced nuts will complement any festive atmosphere, making it a must-have addition to your Christmas party menu. Not only is this Spiced Nut Mix delicious, but it’s also incredibly simple to prepare. The nuts are roasted to perfection, then coated with a fragrant blend of spices and a touch of sweetness.
This recipe yields a generous serving that’s ideal for 4-6 people, but it can easily be doubled or tripled for larger gatherings. Whether served in decorative bowls around your home or as part of a larger snack spread, these spiced nuts are sure to be a hit with your guests.
Ingredients (Serves 4-6):
- 1 cup raw almonds
- 1 cup raw cashews
- 1 cup raw pecans
- 2 tablespoons olive oil
- 2 tablespoons honey
- 1 teaspoon ground cinnamon
- 1 teaspoon smoked paprika
- 1/2 teaspoon cayenne pepper
- 1 teaspoon sea salt
- 1/2 teaspoon black pepper
- 1 tablespoon fresh rosemary, finely chopped
Cooking Instructions:
1. Preheat the Oven:
Preheat your oven to 350°F (175°C). This guarantees that the nuts roast evenly and develop a nice crunch.
2. Prepare the Nut Mixture:
In a large mixing bowl, combine the almonds, cashews, and pecans. Drizzle the olive oil and honey over the nuts, and stir well to confirm they’re evenly coated.
3. Add the Spices:
Add the ground cinnamon, smoked paprika, cayenne pepper, sea salt, black pepper, and fresh rosemary to the bowl. Mix thoroughly so that each nut is covered in the spice mixture.
4. Roast the Nuts:
Spread the spiced nuts in a single layer on a baking sheet lined with parchment paper. This helps prevent sticking and makes for easier cleanup. Roast in the preheated oven for 15-20 minutes, stirring halfway through, until the nuts are golden brown and fragrant.
5. Cool and Serve:
Remove the nuts from the oven and let them cool completely on the baking sheet. As they cool, they’ll become crispier. Once cooled, transfer the nuts to a serving bowl or store them in an airtight container until ready to serve.
Extra Tips:
To confirm your Spiced Nut Mix achieves the best flavor and texture, make sure to use fresh, raw nuts. This allows the spices to adhere better and the nuts to roast evenly.
You can adjust the spiciness of the mix by modifying the amount of cayenne pepper to suit your taste. Additionally, if you prefer a sweeter mix, increase the honey slightly.
This recipe is versatile, so feel free to experiment with different nuts or spices to tailor it to your liking. Finally, make sure the nuts are completely cool before storing them to maintain their crispiness. Enjoy your festive creation!
Marinated Shrimp Skewers
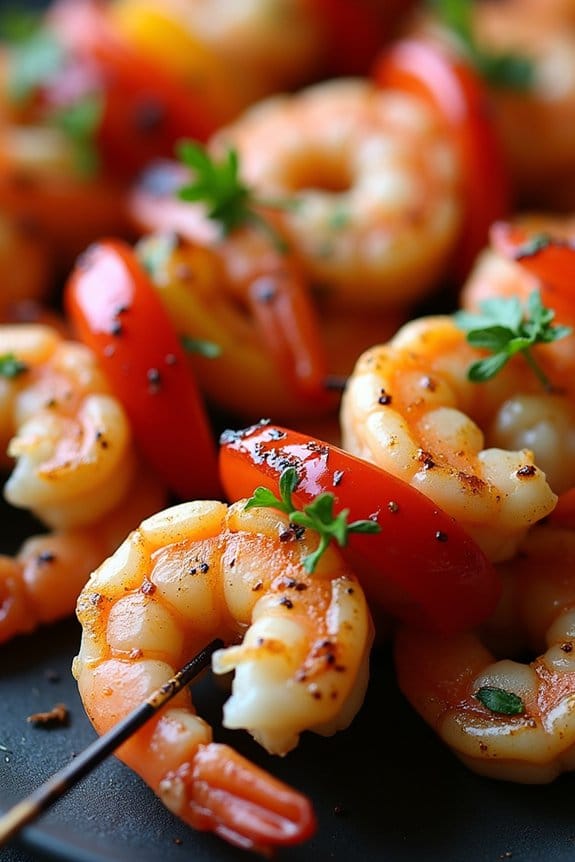
Marinated Shrimp Skewers are a delightful and savory addition to any make-ahead Christmas party menu. These skewers aren’t only visually appealing with their vibrant colors and enticing aroma, but they also offer a burst of flavor that will leave your guests craving more.
Perfect for both indoor and outdoor gatherings, these skewers can be prepared in advance and simply grilled or broiled just before serving, making them an ideal choice for hosts who want to enjoy the festivities without being tied to the kitchen.
The secret to these irresistible shrimp skewers lies in the marinade, which infuses the shrimp with a perfect blend of herbs, spices, and citrus. Allowing the shrimp to marinate for a few hours enhances their flavor and tenderness.
With minimal prep time, these skewers are easy to assemble and cook, guaranteeing that you’re able to spend more time celebrating with friends and family. Serve them as an appetizer or as part of a main course, and watch them disappear from the table in no time.
Ingredients for 4-6 servings:
- 1 1/2 pounds large shrimp, peeled and deveined
- 3 tablespoons olive oil
- 2 tablespoons lemon juice
- 3 cloves garlic, minced
- 1 teaspoon paprika
- 1/2 teaspoon salt
- 1/4 teaspoon black pepper
- 1 tablespoon fresh parsley, chopped
- Wooden or metal skewers
Cooking Instructions:
- Prepare the Marinade: In a mixing bowl, combine the olive oil, lemon juice, minced garlic, paprika, salt, and black pepper. Whisk the ingredients together until well blended.
- Marinate the Shrimp: Add the peeled and deveined shrimp to the bowl with the marinade. Toss the shrimp until they’re well coated. Cover the bowl with plastic wrap and refrigerate for at least 1-2 hours, or up to overnight for best flavor.
- Preheat the Grill: If using a grill, preheat it to medium-high heat. If using an oven, preheat the broiler on high. This will guarantee the shrimp cook quickly and maintain their juiciness.
- Assemble the Skewers: Thread the marinated shrimp onto the skewers, ensuring they’re evenly spaced for even cooking.
- Cook the Skewers: Place the skewers on the grill or under the broiler. Cook for about 2-3 minutes on each side, or until the shrimp turn pink and opaque. Be careful not to overcook them as they can become tough.
- Garnish and Serve: Once cooked, remove the skewers from the heat and sprinkle with fresh parsley. Serve immediately while hot, or set aside and serve at room temperature.
Extra Tips:
To guarantee your skewers are perfect every time, soak wooden skewers in water for at least 30 minutes before threading the shrimp. This will prevent them from burning during cooking.
Consider adding vegetables like bell peppers or cherry tomatoes to the skewers for added flavor and color. If you’re hosting a large gathering, these skewers can be made in large batches and kept warm in a low oven until ready to serve.
Holiday Meatballs
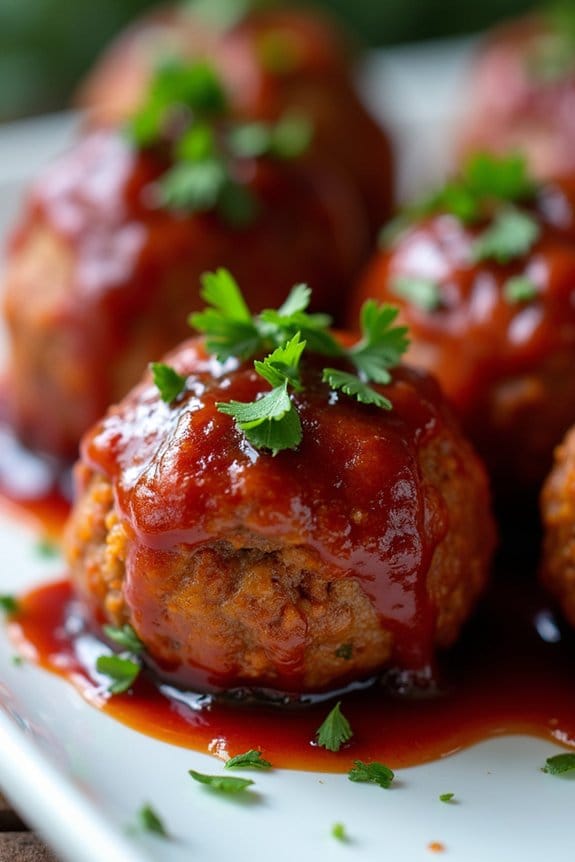
Holiday gatherings are the perfect opportunity to share delicious food with friends and family, and these Holiday Meatballs are sure to be a hit at your next Christmas party.
These flavorful meatballs can be made ahead of time, allowing you to focus on enjoying the festivities rather than being stuck in the kitchen. The combination of savory beef and pork, aromatic herbs, and a sweet and tangy glaze makes these meatballs irresistible and perfect for any holiday spread.
These Holiday Meatballs aren’t only delicious but also incredibly versatile. They can be served as an appetizer, part of a main course, or even as a hearty snack while mingling with guests.
With a make-ahead option, you can prepare them in advance and simply reheat when ready to serve, allowing you to spend more time with your loved ones. Let’s explore the recipe and get your Christmas party started!
Ingredients for 4-6 servings:
- 1 pound ground beef
- 1/2 pound ground pork
- 1/2 cup breadcrumbs
- 1/4 cup grated Parmesan cheese
- 1/4 cup milk
- 2 large eggs
- 3 cloves garlic, minced
- 1 small onion, finely chopped
- 1 tablespoon Worcestershire sauce
- 1 tablespoon fresh parsley, chopped
- 1 teaspoon salt
- 1/2 teaspoon ground black pepper
- 1/2 teaspoon dried oregano
- 1/2 teaspoon dried thyme
- 1 cup barbecue sauce
- 1/2 cup cranberry sauce
- 1 tablespoon brown sugar
Cooking Instructions:
1. Preheat the Oven: Start by preheating your oven to 375°F (190°C). Line a baking sheet with parchment paper or lightly grease it to prevent the meatballs from sticking.
2. Prepare the Meatball Mixture: In a large mixing bowl, combine the ground beef, ground pork, breadcrumbs, Parmesan cheese, milk, eggs, minced garlic, chopped onion, Worcestershire sauce, parsley, salt, pepper, oregano, and thyme.
Use your hands or a wooden spoon to mix everything thoroughly until well combined.
3. Shape the Meatballs: Use a tablespoon or a small ice cream scoop to portion out the mixture and roll it into 1-inch meatballs. Place the meatballs evenly spaced on the prepared baking sheet.
4. Bake the Meatballs: Once all the meatballs are shaped, place the baking sheet in the preheated oven and bake for 20-25 minutes, or until the meatballs are cooked through and have a nice golden-brown color.
5. Prepare the Glaze: While the meatballs are baking, Prepare the Glaze. In a small saucepan over medium heat, combine the barbecue sauce, cranberry sauce, and brown sugar.
Stir well and bring to a simmer, allowing the flavors to meld together for about 5 minutes. Remove from heat.
6. Coat the Meatballs: Once the meatballs are done baking, remove them from the oven and transfer them to a serving dish. Pour the glaze over the meatballs, ensuring they’re well coated.
7. Serve: Serve the Holiday Meatballs warm, garnished with additional chopped parsley if desired. Enjoy them as an appetizer or part of a main course.
Extra Tips:
For best results, consider making the meatballs a day ahead. After baking, allow them to cool completely before storing them in an airtight container in the refrigerator.
When you’re ready to serve, gently reheat them in the oven at 350°F (175°C) for about 10-15 minutes. This will allow the flavors to develop even more and make hosting your Christmas party a breeze.
Additionally, feel free to adjust the sweetness of the glaze to your liking by altering the amount of brown sugar or cranberry sauce.
Classic Deviled Eggs
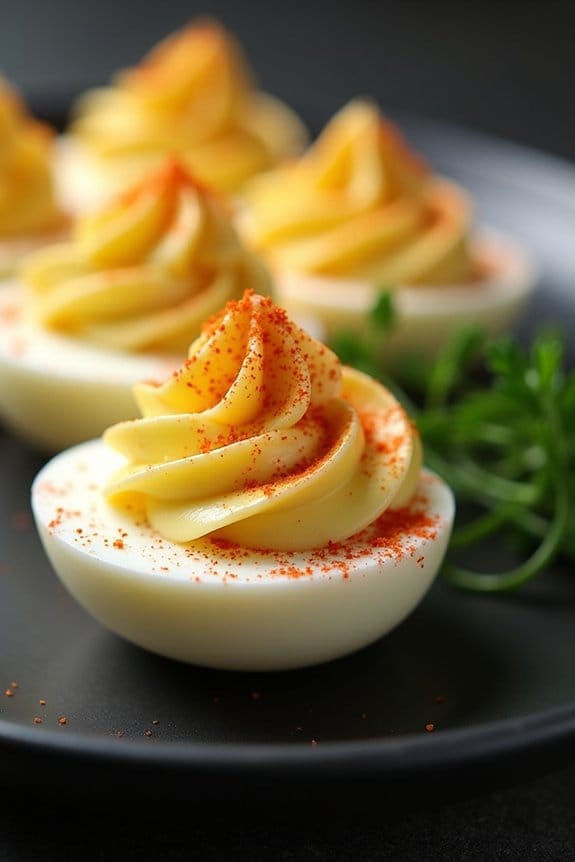
Classic Deviled Eggs are a delightful addition to any Christmas party platter. These little bites of creamy goodness aren’t only easy to prepare but also a crowd favorite. Their versatility allows you to make them ahead of time, ensuring you have one less thing to worry about on the day of your party.
With a smooth and tangy filling, they’re perfect for tantalizing your guests’ taste buds and setting the stage for an enjoyable festive gathering. The beauty of deviled eggs lies in their simplicity and ability to be customized with various toppings and seasonings.
Whether you prefer them with a spicy kick or a more traditional flavor, these eggs can be adjusted to suit any palate. For this recipe, we’ll be focusing on a classic preparation that will surely impress your guests and keep them coming back for more.
Ingredients (serving size: 4-6 people):
- 6 large eggs
- 1/4 cup mayonnaise
- 1 teaspoon Dijon mustard
- 1 teaspoon white vinegar
- Salt and pepper to taste
- Paprika for garnish
- Fresh chives or parsley for garnish (optional)
Instructions:
- Boil the Eggs: Place the eggs in a single layer in a saucepan and cover them with cold water by about an inch. Bring the water to a rolling boil over medium-high heat. Once boiling, remove the saucepan from the heat, cover it with a lid, and let the eggs sit for 10-12 minutes.
- Cool and Peel the Eggs: After the eggs have finished cooking, transfer them to a bowl filled with ice water or run them under cold water to stop the cooking process. Let them sit for about 5 minutes or until cooled. Gently tap each egg on a hard surface to crack the shell, then carefully peel them.
- Prepare the Filling: Slice each egg in half lengthwise and carefully remove the yolks, placing them in a mixing bowl. Set the egg whites aside on a serving platter. Mash the yolks with a fork until they’re crumbly.
- Mix the Filling: Add mayonnaise, Dijon mustard, white vinegar, and a pinch of salt and pepper to the mashed yolks. Stir until the mixture is smooth and creamy. Taste and adjust the seasoning if necessary.
- Fill the Egg Whites: Using a spoon or a piping bag, carefully fill each egg white half with the yolk mixture. If using a spoon, gently mound the filling; if using a piping bag, you can create decorative swirls.
- Garnish and Serve: Lightly sprinkle paprika over the filled eggs for a touch of color. If desired, add a few chopped chives or parsley for a fresh pop of flavor. Serve immediately or cover and refrigerate until ready to serve.
Extra Tips:
When boiling the eggs, adding a teaspoon of baking soda to the water can make peeling the eggs easier by loosening the shell. If you’re making these deviled eggs ahead of time, keep the egg whites and yolk filling separate until just before serving to maintain their freshness and flavor.
You can store the egg whites and filling in airtight containers in the refrigerator for up to two days. For additional flavor, consider adding a dash of hot sauce or a pinch of cayenne pepper to the yolk mixture for a spicy twist.
Chocolate Peppermint Bark

Chocolate Peppermint Bark is a delightful and festive treat that embodies the spirit of the holiday season. This simple yet elegant dessert combines the rich, creamy texture of chocolate with the invigorating crunch of peppermint. Perfect for holiday parties or as a homemade gift, peppermint bark is a crowd-pleaser that will leave your guests clamoring for more. The best part? It can be made ahead of time, allowing you to focus on other festive preparations.
This make-ahead recipe is perfect for serving 4-6 people and can easily be doubled or tripled for larger gatherings. The combination of dark and white chocolate provides a balanced sweetness, while the crushed candy canes add a colorful and flavorful touch. The layers of chocolate and peppermint create a visually appealing dessert that can be broken into pieces and served on a festive platter.
Ingredients (serving size: 4-6 people):
- 8 ounces of high-quality dark chocolate, chopped
- 8 ounces of high-quality white chocolate, chopped
- 1 teaspoon of peppermint extract
- 1/2 cup of crushed candy canes or peppermint candies
Instructions:
- Prepare the Baking Sheet: Line a baking sheet with parchment paper or a silicone baking mat. This will prevent the chocolate from sticking and make it easier to remove once it’s set.
- Melt the Dark Chocolate: In a microwave-safe bowl, melt the dark chocolate in 30-second intervals, stirring in between until completely smooth. Alternatively, use a double boiler to melt the chocolate over simmering water. Once melted, stir in half a teaspoon of peppermint extract.
- Spread and Set: Pour the melted dark chocolate onto the prepared baking sheet and spread it evenly with a spatula to about 1/4 inch thickness. Place the baking sheet in the refrigerator for about 15-20 minutes, or until the chocolate is set.
- Melt the White Chocolate: While the dark chocolate is setting, melt the white chocolate using the same method. Stir in the remaining half teaspoon of peppermint extract once melted.
- Layer the White Chocolate: Remove the baking sheet from the refrigerator and pour the melted white chocolate over the set dark chocolate. Spread it evenly with a spatula.
- Add the Peppermint: Immediately sprinkle the crushed candy canes evenly over the top of the white chocolate layer. Gently press them into the chocolate so they adhere.
- Final Setting: Return the baking sheet to the refrigerator and allow the bark to set completely, about 30-45 minutes.
- Break into Pieces: Once set, remove the chocolate bark from the refrigerator. Use your hands to break it into smaller, irregular pieces.
Extra Tips:
When making Chocolate Peppermint Bark, verify that the chocolate is of high quality for the best flavor and texture. If you prefer a less sweet version, opt for semi-sweet or bittersweet chocolate instead of dark chocolate.
To achieve clean layers, verify the first layer of chocolate is completely set before adding the next. Store the peppermint bark in an airtight container at room temperature for up to two weeks, or refrigerate for longer freshness. This treat also makes a wonderful holiday gift when wrapped in decorative cellophane or placed in a festive tin.
Gingerbread Cookie Dough Logs
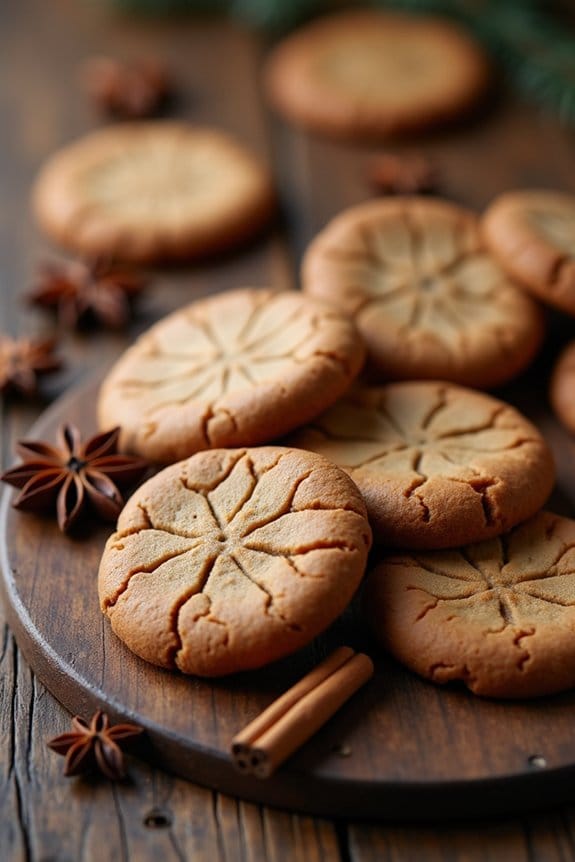
Gingerbread Cookie Dough Logs are a festive addition to any holiday gathering, offering the warm spices and rich flavors synonymous with the Christmas season. These make-ahead treats are perfect for busy hosts who want to prepare in advance and have freshly baked cookies ready at a moment’s notice. By preparing the dough logs ahead of time, you can simply slice and bake the cookies whenever needed, guaranteeing a steady supply of delicious, homemade gingerbread cookies throughout your holiday celebrations.
The key to these delectable cookies lies in the aromatic blend of spices, molasses, and brown sugar, which come together to create a dough that’s both flavorful and easy to work with. Once rolled into logs, the dough can be stored in the refrigerator or freezer until you’re ready to bake. This not only saves time during the busy holiday season but also allows the flavors to meld together, resulting in even more delicious cookies.
Here’s how to prepare Gingerbread Cookie Dough Logs for a serving size of 4-6 people.
Ingredients:
- 3 1/4 cups all-purpose flour
- 3/4 teaspoon baking soda
- 1 tablespoon ground ginger
- 1 tablespoon ground cinnamon
- 1/2 teaspoon ground cloves
- 1/2 teaspoon ground nutmeg
- 1/4 teaspoon ground allspice
- 1/4 teaspoon salt
- 3/4 cup (1 1/2 sticks) unsalted butter, softened
- 1/2 cup packed dark-brown sugar
- 1 large egg
- 1/2 cup unsulfured molasses
- 2 teaspoons pure vanilla extract
Cooking Instructions:
- Prepare the Dry Ingredients: In a large bowl, sift together the flour, baking soda, ginger, cinnamon, cloves, nutmeg, allspice, and salt. Mix well to confirm the spices are evenly distributed throughout the flour.
- Cream Butter and Sugar: In another bowl, use an electric mixer to cream the softened butter and brown sugar together on medium speed until light and fluffy, about 2-3 minutes.
- Combine Wet Ingredients: Add the egg, molasses, and vanilla extract to the butter mixture, and continue to mix until well combined.
- Incorporate Dry Ingredients: Gradually add the dry ingredients to the wet mixture, mixing on low speed until a dough forms. Be careful not to overmix; stop once the dough is homogenous.
- Shape the Dough: Divide the dough into two equal portions. Roll each portion into a log approximately 2 inches in diameter. Wrap each log tightly in plastic wrap and refrigerate for at least 2 hours or up to 3 days. For longer storage, you can freeze the logs for up to 3 months.
- Preheat and Slice: When ready to bake, preheat your oven to 350°F (175°C). Remove the dough logs from the refrigerator (or freezer), and using a sharp knife, slice the logs into 1/4-inch thick rounds.
- Bake the Cookies: Arrange the cookie slices on a lined baking sheet, spacing them about 1 inch apart. Bake in the preheated oven for 8-10 minutes, or until the edges are slightly browned. Allow the cookies to cool on the baking sheet for a few minutes before transferring them to a wire rack to cool completely.
Extra Tips:
For an added touch of holiday cheer, consider decorating your gingerbread cookies with royal icing or sprinkles once they’ve cooled. If you prefer a chewier texture, bake the cookies for a slightly shorter time.
Be sure to store the baked cookies in an airtight container to maintain freshness. Additionally, if the dough becomes too soft while slicing, simply return it to the refrigerator for a few minutes to firm up. This recipe is versatile, so feel free to adjust the spice levels to suit your personal taste preferences.
