

Creating a memorable Christmas lunch on a budget is totally possible and just as enjoyable. With a few thoughtful choices, you can whip up a festive meal without breaking the bank. I’ve found some lovely recipes that offer both flavor and a touch of elegance, like Roast Chicken with Herb Butter or a beautiful Vegetable Wellington. Picture your holiday table with Creamy Potato Gratin and Chocolate Peppermint Bark, each dish bringing warmth and cheer. Ready to explore these delicious options?
Roast Chicken With Herb Butter
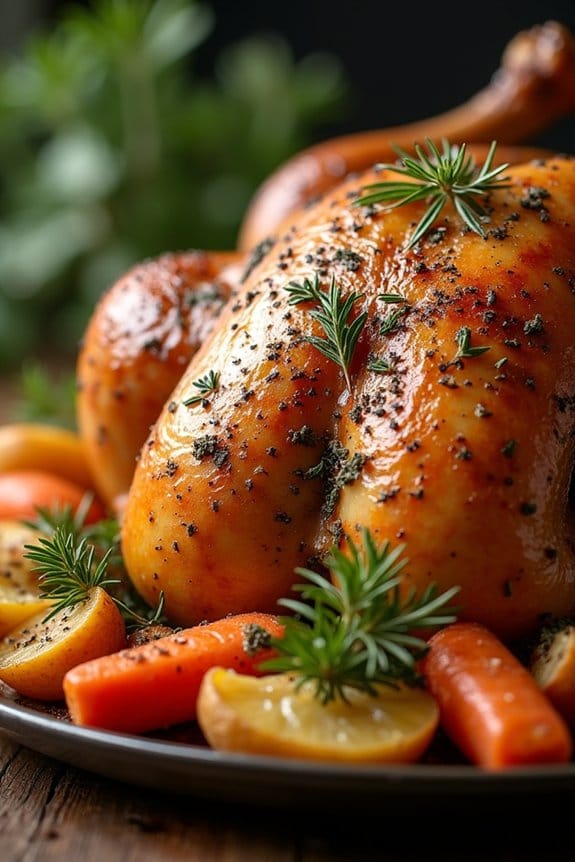
Roast Chicken With Herb Butter is a delightful and budget-friendly option for your Christmas lunch. This simple yet flavorful dish combines the succulence of roast chicken with the aromatic infusion of herb butter, creating a festive meal that’s certain to impress.
The herb butter, made with a blend of fresh herbs, garlic, and butter, adds a rich and flavorful crust to the chicken, keeping it moist and tender while roasting to perfection. Perfect for serving 4-6 people, this recipe isn’t only easy to prepare but also makes for a stunning centerpiece on your holiday table.
Whether you’re hosting a family gathering or a small get-together with friends, Roast Chicken With Herb Butter is a delectable choice that embodies the warmth and joy of the season.
Ingredients:
- 1 whole chicken (about 4-5 pounds)
- 1/2 cup unsalted butter, softened
- 2 tablespoons fresh rosemary, chopped
- 2 tablespoons fresh thyme, chopped
- 1 tablespoon fresh parsley, chopped
- 4 cloves garlic, minced
- Salt and pepper to taste
- 1 lemon, halved
- 1 onion, quartered
- 4 carrots, peeled and cut into chunks
- 4 potatoes, quartered
- Olive oil for drizzling
Instructions:
- Preheat the Oven: Start by preheating your oven to 375°F (190°C). This guarantees the oven is at the right temperature for roasting the chicken.
- Prepare the Herb Butter: In a small bowl, combine the softened butter, chopped rosemary, thyme, parsley, and minced garlic. Mix well until all ingredients are evenly incorporated.
- Season the Chicken: Pat the chicken dry with paper towels. Carefully loosen the skin over the chicken breast by gently sliding your fingers under it. Spread half of the herb butter mixture under the skin, making sure it’s evenly distributed. Rub the remaining herb butter over the outside of the chicken.
- Stuff and Season: Season the inside of the chicken cavity with salt and pepper. Stuff the cavity with lemon halves and onion quarters for added flavor.
- Arrange Vegetables: Place the carrots and potatoes in a roasting pan. Drizzle with olive oil and season with salt and pepper. Toss to coat the vegetables evenly.
- Roast the Chicken: Place the stuffed chicken on top of the vegetables in the roasting pan. Roast in the preheated oven for approximately 1 hour and 30 minutes, or until the chicken reaches an internal temperature of 165°F (75°C) and the juices run clear when the thigh is pierced.
- Rest and Serve: Let the chicken rest for 10-15 minutes before carving. This allows the juices to redistribute, guaranteeing moist meat. Serve the roast chicken with the roasted vegetables on the side.
Extra Tips:
To enhance the flavor of the roast, consider adding a splash of white wine or chicken broth to the roasting pan before cooking. This not only contributes to a more flavorful dish but also helps keep the chicken moist.
Additionally, basting the chicken with pan juices halfway through the cooking process can add extra flavor and guarantee an even, golden-brown finish. If you prefer a spicier kick, consider adding a pinch of cayenne pepper to the herb butter mixture.
Honey-Glazed Ham
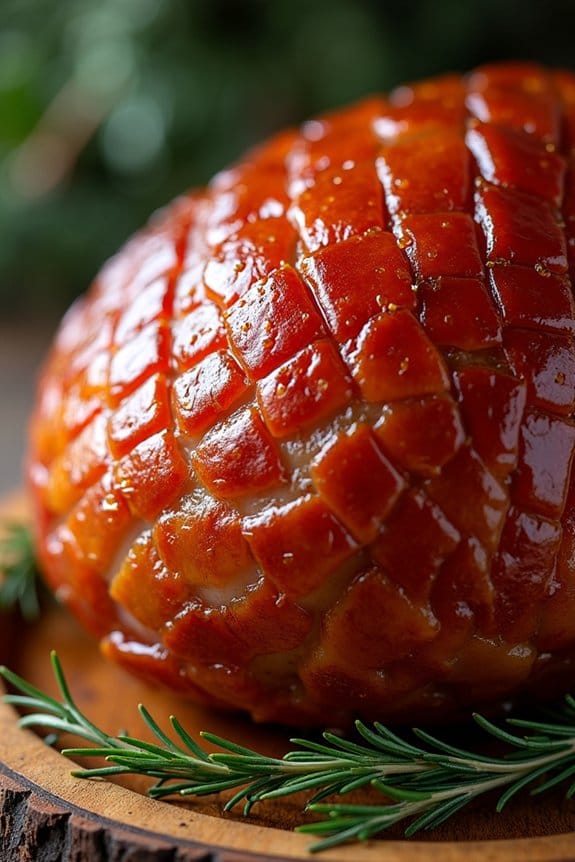
If you’re looking for a show-stopping centerpiece for your Christmas lunch that won’t break the bank, a Honey-Glazed Ham is a perfect choice. This succulent dish combines the savory flavors of a tender ham with the sweet and sticky delight of a honey glaze. Not only is it a delicious treat, but it’s also incredibly easy to prepare, making it perfect for both novice and experienced cooks.
The ham serves as a versatile dish that pairs well with a variety of side dishes, guaranteeing everyone at the table will find something to love.
Our recipe for Honey-Glazed Ham serves 4-6 people, making it ideal for a family gathering or small holiday party. With just a few simple ingredients, you can create a meal that looks and tastes like it came from a gourmet kitchen. The sweet glaze caramelizes beautifully on the ham, creating a glossy, mouth-watering finish that will have your guests reaching for seconds.
Plus, the leftovers (if there are any!) can be used in a variety of ways, from sandwiches to soups.
Ingredients:
- 1.5 kg (approximately 3.3 lbs) bone-in ham
- 1 cup honey
- 1/4 cup Dijon mustard
- 1/4 cup brown sugar
- 2 tablespoons apple cider vinegar
- 1 teaspoon ground cinnamon
- 1/2 teaspoon ground cloves
- 1/4 teaspoon ground ginger
- 1/4 teaspoon salt
- 1/4 teaspoon black pepper
Cooking Instructions:
- Preheat the oven: Begin by preheating your oven to 325°F (160°C). This will make certain that your ham cooks evenly throughout.
- Prepare the ham: Place the ham in a large roasting pan. If it has a thick layer of fat, score it with a sharp knife in a diamond pattern. This helps the glaze penetrate and flavor the meat.
- Make the glaze: In a medium saucepan, combine the honey, Dijon mustard, brown sugar, apple cider vinegar, cinnamon, cloves, ginger, salt, and black pepper. Stir the mixture over medium heat until the sugar dissolves and the glaze is smooth, about 5 minutes.
- Glaze the ham: Pour half of the glaze over the ham, using a brush or spoon to ensure it’s evenly covered. Reserve the rest of the glaze for later.
- Bake the ham: Cover the ham loosely with foil and bake in the preheated oven for about 1.5 hours, basting with the remaining glaze every 30 minutes. Remove the foil for the last 20 minutes of cooking to allow the glaze to caramelize.
- Check for doneness: The ham is ready when an internal thermometer reads 140°F (60°C). Remove it from the oven and let it rest for 10-15 minutes before slicing.
Extra Tips:
For the best results, choose a high-quality ham that isn’t pre-glazed or overly processed. This will allow the homemade glaze to shine through with its delightful flavors.
When basting, be sure to reapply the glaze generously to guarantee a rich coating. If you find the glaze is getting too dark before the ham is fully cooked, cover it loosely with foil to prevent burning.
Finally, remember that resting the ham before slicing allows the juices to redistribute, resulting in a juicier and more flavorful dish.
Vegetable Wellington
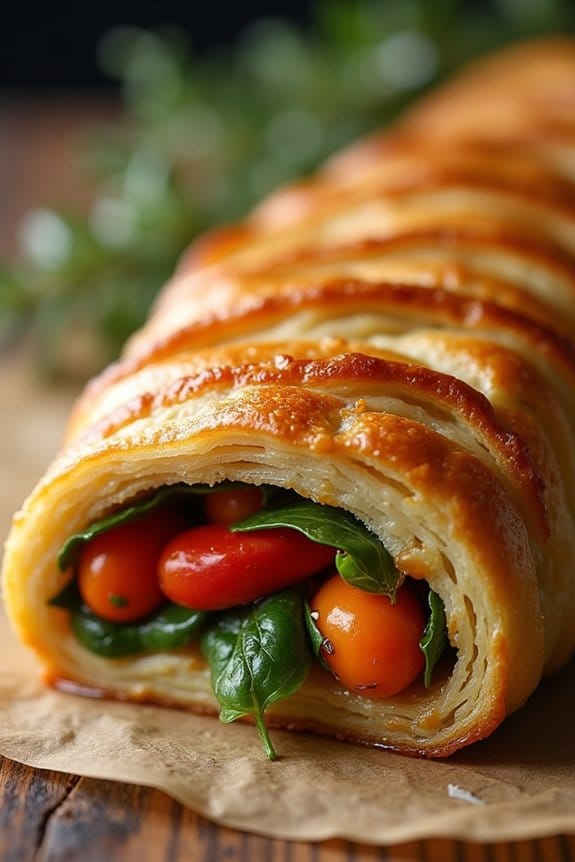
Vegetable Wellington is a delightful and budget-friendly Christmas lunch dish that offers an impressive presentation and satisfies both vegetarians and meat-lovers alike. This dish combines a variety of flavorful vegetables with savory seasonings, all wrapped up in a golden, flaky puff pastry. Not only is it a stunning centerpiece for your holiday table, but it also makes for a hearty and nutritious meal that doesn’t break the bank.
The beauty of Vegetable Wellington is its versatility; you can customize the filling with your favorite seasonal vegetables or whatever you have on hand. The key is to balance the flavors and textures, guaranteeing that each bite is as delightful as the last. This recipe is designed to serve 4-6 people, making it perfect for a small gathering or family meal.
Ingredients (Serves 4-6)
- 1 sheet of puff pastry, thawed
- 1 tablespoon olive oil
- 1 large onion, finely chopped
- 2 garlic cloves, minced
- 1 red bell pepper, finely chopped
- 1 zucchini, diced
- 1 cup mushrooms, chopped
- 1 cup fresh spinach
- 1 teaspoon dried thyme
- 1 teaspoon dried rosemary
- Salt and pepper to taste
- 1 egg, beaten (for egg wash)
Cooking Instructions
- Prepare the Vegetables: Begin by preheating your oven to 400°F (200°C). Heat the olive oil in a large skillet over medium heat. Add the chopped onion and garlic, cooking until the onion becomes translucent, about 5 minutes.
- Cook the Filling: Add the red bell pepper, zucchini, and mushrooms to the skillet. Stir and cook the vegetables for another 10 minutes, or until they’re softened. Stir in the spinach, thyme, rosemary, salt, and pepper. Cook for an additional 2-3 minutes until the spinach wilts. Remove from heat and let it cool slightly.
- Assemble the Wellington: Roll out the puff pastry on a lightly floured surface. Spoon the vegetable mixture onto the center of the pastry, forming a log shape. Fold the pastry over the filling, sealing the edges by pressing them together. Use a fork to crimp the edges for an extra secure seal.
- Bake the Wellington: Transfer the Wellington to a parchment-lined baking sheet. Brush the top with the beaten egg to give it a glossy finish. Use a sharp knife to make a few slits on top of the pastry to allow steam to escape. Bake in the preheated oven for 25-30 minutes, or until the pastry is golden brown and crisp.
- Serve: Once baked, let the Wellington cool for a few minutes before slicing. Serve warm, garnished with a sprig of fresh thyme if desired.
Extra Tips
For the best results, make certain that the vegetables are well-cooked and not too wet before encasing them in the pastry. Excess moisture can cause the puff pastry to become soggy. If you find the mixture too wet, consider draining it or adding breadcrumbs to absorb the excess liquid.
Additionally, feel free to experiment with different herbs and spices to suit your taste preferences or to match the side dishes you plan to serve.
Creamy Potato Gratin
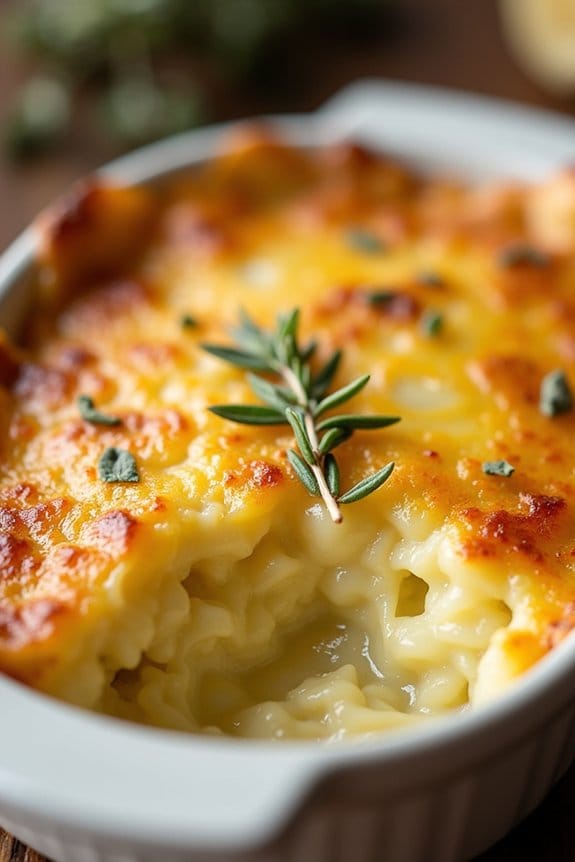
Planning a budget-friendly yet festive Christmas lunch can be a delightful challenge. One dish that perfectly fits the bill is Creamy Potato Gratin. This classic side dish isn’t only economical but also rich in flavor and sophistication. Its creamy texture and golden crust make it a standout addition to any holiday spread.
Whether you’re hosting a large gathering or an intimate meal, this gratin will definitely impress your guests without stretching your budget.
The magic of a potato gratin lies in its simplicity. Thinly sliced potatoes are layered with a luscious cream sauce, infused with garlic and herbs, then topped with a layer of melted cheese. As it bakes, the flavors meld together, creating a comforting dish that pairs beautifully with any main course.
For a serving size of 4-6 people, this recipe is perfect for sharing and spreading holiday cheer around your table.
Ingredients for 4-6 servings:
- 2 pounds of potatoes (Yukon Gold or Russet)
- 2 cups heavy cream
- 1 cup grated Gruyère cheese
- 2 cloves garlic, minced
- 1 teaspoon salt
- 1/2 teaspoon black pepper
- 1/4 teaspoon nutmeg
- 1 tablespoon unsalted butter
- 1 tablespoon chopped fresh thyme (optional)
Cooking Instructions:
1. Preheat the oven: Begin by preheating your oven to 350°F (175°C). This guarantees the gratin will cook evenly and develop a beautiful golden crust.
2. Prepare the baking dish****: Lightly grease a 9×13 inch baking dish with the tablespoon of butter. This will prevent the potatoes from sticking and add a touch of flavor.
3. Slice the potatoes: Peel the potatoes and slice them into thin, even rounds, approximately 1/8 inch thick. Uniform slices ensure even cooking throughout the dish.
4. Make the cream mixture: In a medium saucepan over low heat, combine the heavy cream, minced garlic, salt, pepper, and nutmeg. Stir occasionally until the mixture is warm and the garlic is fragrant, about 5 minutes.
5. Layer the potatoes: Arrange a layer of potato slices in the prepared dish, slightly overlapping each other. Pour a portion of the cream mixture over the potatoes, ensuring they’re well coated.
Repeat the layering process until all potatoes and cream are used.
6. Add the cheese: Sprinkle the grated Gruyère cheese evenly over the top layer of potatoes. This will create a deliciously crispy and golden crust once baked.
7. Bake the gratin: Cover the dish with foil and bake in the preheated oven for 45 minutes. Remove the foil and continue to bake for an additional 30 minutes, or until the potatoes are tender and the top is golden brown.
8. Garnish and serve: Once done, remove the gratin from the oven and let it rest for about 10 minutes. Garnish with chopped fresh thyme if desired, and serve warm.
Extra Tips:
For the best results, use potatoes that have a relatively high starch content, such as Yukon Gold or Russet. This starch helps thicken the creamy sauce as it bakes.
Also, for easier slicing, consider using a mandoline slicer to achieve consistent, thin potato slices. If you prefer a slightly healthier version, you can substitute half of the heavy cream with milk.
Finally, feel free to experiment with different types of cheese, such as cheddar or Parmesan, to customize the flavor to your liking.
Cranberry and Orange Salad
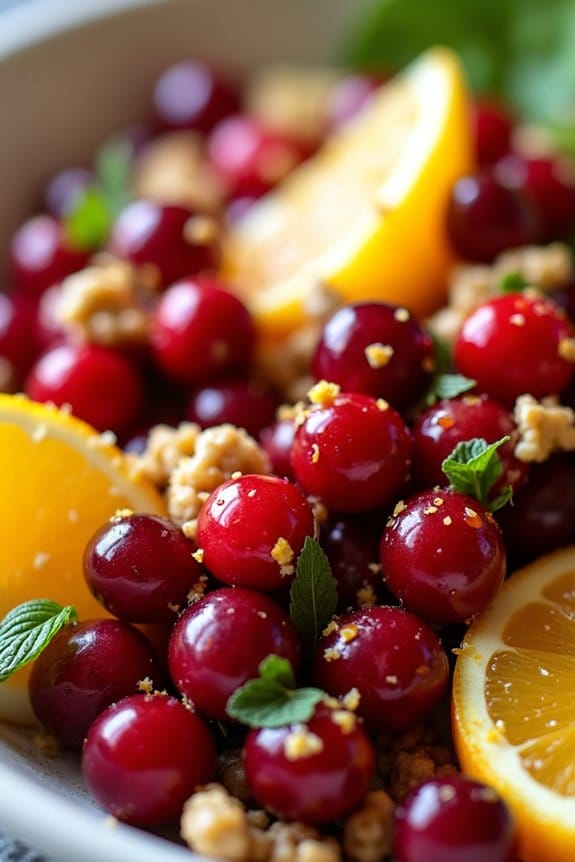
Cranberry and Orange Salad is a delightful and invigorating dish that’s perfect for a festive Christmas lunch. This salad combines the tartness of fresh cranberries with the sweet, citrusy flavor of oranges, creating a vibrant dish that not only looks stunning on your table but also bursts with flavor.
It’s a budget-friendly recipe that makes use of seasonal fruits, guaranteeing you get the best flavors without breaking the bank. This salad can be served as an appetizer or a side dish, adding a fresh note to your holiday meal.
The combination of cranberries and oranges isn’t only delicious but also filled with nutrients, making this salad a healthy addition to your Christmas feast. The crunch from walnuts and a hint of sweetness from honey or maple syrup tie all the flavors together beautifully.
With just a few ingredients and simple steps, you can prepare this salad in no time, allowing you to focus on other holiday preparations. This recipe serves 4-6 people, making it perfect for a small family gathering or as part of a larger spread.
Ingredients:
- 2 cups fresh cranberries
- 2 large oranges
- 1/4 cup honey or maple syrup
- 1/4 cup chopped walnuts
- 1/2 cup diced celery
- 1 tablespoon orange zest
- 1/4 teaspoon salt
- 1/4 teaspoon ground cinnamon
- Fresh mint leaves for garnish (optional)
Instructions:
- Prepare the Cranberries: Rinse the fresh cranberries under cold water and drain them well. Pat them dry with a clean kitchen towel. This guarantees that any dirt or debris is removed.
- Segment the Oranges: Peel the oranges and separate them into segments. Remove any seeds and white pith to prevent bitterness. Cut each segment into bite-sized pieces.
- Combine Ingredients: In a large mixing bowl, combine the cranberries, orange segments, chopped walnuts, and diced celery. This will be the base of your salad.
- Make the Dressing: In a small bowl, whisk together the honey or maple syrup, orange zest, salt, and ground cinnamon until well combined. This dressing will add a sweet and spicy touch to your salad.
- Dress the Salad: Pour the dressing over the cranberry-orange mixture. Gently toss the salad until all ingredients are evenly coated with the dressing.
- Chill and Serve: Cover the bowl with plastic wrap and refrigerate for at least 30 minutes to allow the flavors to meld together. Before serving, give it a gentle toss again and garnish with fresh mint leaves if desired.
Extra Tips:
To elevate the flavors, consider roasting the walnuts for a few minutes before adding them to the salad. This enhances their natural nuttiness and adds an extra layer of crunch.
If fresh cranberries aren’t available, you can use dried cranberries, but be sure to adjust the sweetness accordingly since dried cranberries are often sweetened.
For a more festive touch, you can also add a handful of pomegranate seeds to the salad for extra color and flavor. Remember to taste the salad before serving and adjust the seasoning if necessary, as the sweetness of the oranges and cranberries can vary.
Garlic and Herb Roasted Carrots
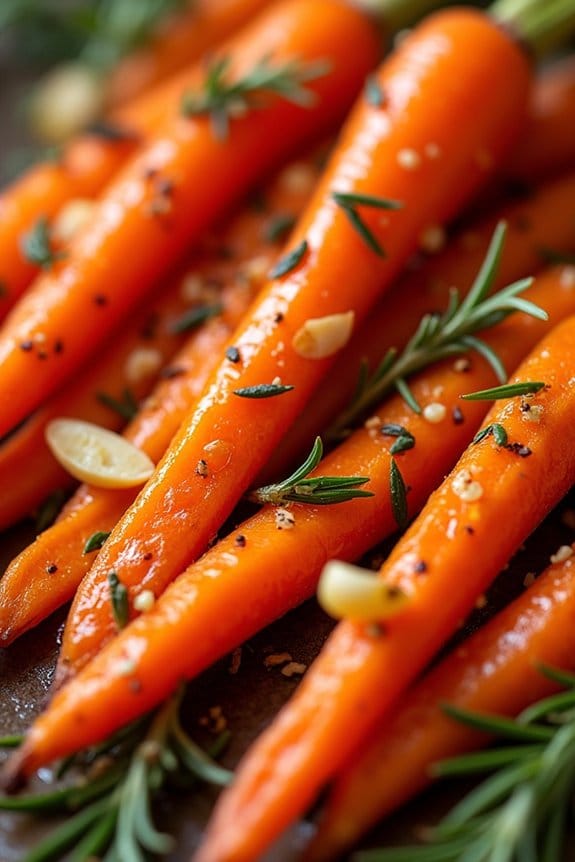
Garlic and Herb Roasted Carrots are a delightful addition to any Christmas lunch, offering a burst of flavor with minimal ingredients and effort. This recipe brings out the natural sweetness of carrots, complemented by the aromatic blend of garlic and fresh herbs. Perfectly roasted to achieve a tender yet slightly crispy texture, this dish isn’t only budget-friendly but also a crowd-pleaser, making it an ideal side dish for your festive meal.
Whether you’re hosting a family gathering or a cozy lunch with friends, these roasted carrots are sure to impress. The combination of garlic, herbs, and a hint of olive oil elevates the humble carrot into a dish that’s both elegant and comforting. Plus, with its vibrant colors, it adds a beautiful touch to your holiday table. The following recipe serves 4-6 people, making it perfect for a small to medium-sized Christmas celebration.
Ingredients for 4-6 people:
- 2 pounds of carrots, peeled and cut into sticks
- 3 tablespoons of olive oil
- 4 cloves of garlic, minced
- 1 tablespoon of fresh thyme leaves
- 1 tablespoon of fresh rosemary, chopped
- Salt and pepper to taste
- Optional: 1 tablespoon of honey or maple syrup
Cooking Instructions:
- Preheat the Oven: Begin by preheating your oven to 400°F (200°C). This temperature is ideal for roasting vegetables, guaranteeing they cook evenly and develop a nice caramelized exterior.
- Prepare the Carrots: Wash and peel the carrots, then cut them into evenly sized sticks. Uniform pieces will guarantee that the carrots cook at the same rate.
- Season the Carrots: In a large mixing bowl, combine the carrot sticks with olive oil, minced garlic, fresh thyme, and rosemary. Add salt and pepper to taste. If you prefer a slightly sweeter flavor, drizzle with honey or maple syrup and mix well to guarantee the carrots are evenly coated.
- Arrange on a Baking Sheet: Spread the seasoned carrots in a single layer on a baking sheet. Avoid overcrowding the pan to allow the carrots to roast properly rather than steam.
- Roast the Carrots: Place the baking sheet in the preheated oven and roast for 25-30 minutes, or until the carrots are tender and golden brown around the edges. Stir the carrots halfway through cooking to promote even roasting.
- Serve and Enjoy: Once the carrots are roasted to your liking, remove them from the oven and transfer to a serving dish. Serve warm as a delicious side dish for your Christmas lunch.
Extra Tips:
To enhance the flavor, consider adding a splash of balsamic vinegar or a sprinkle of parmesan cheese before serving. If you prefer a spicier kick, a pinch of red pepper flakes can also be added.
For a more colorful presentation, mix different types of carrots, such as purple and yellow varieties. Finally, guarantee the baking sheet isn’t overcrowded, as this can prevent the carrots from achieving that perfect roasted texture.
Cheesy Broccoli Casserole
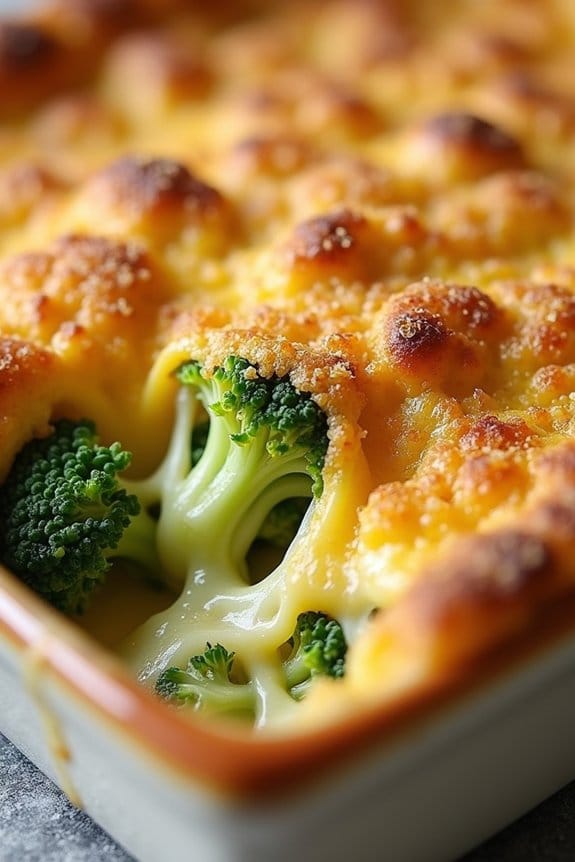
Cheesy Broccoli Casserole is a delightful addition to any Christmas lunch table, providing a creamy, cheesy, and hearty dish that’s sure to please both adults and children alike.
This budget-friendly recipe combines fresh broccoli with a rich cheese sauce, creating a satisfying side dish that pairs perfectly with a variety of holiday entrees. The casserole isn’t only easy to prepare but also allows for some flexibility with ingredients, making it an excellent choice for those looking to keep costs down without sacrificing flavor.
This casserole is perfect for feeding a crowd, making it an ideal choice for gatherings of family and friends during the festive season. The combination of tender broccoli and gooey cheese is a classic pairing that brings comfort and warmth to the table.
With a few simple ingredients and a little time in the oven, you can create a dish that’s both nutritious and indulgent, striking the perfect balance for a holiday meal.
Ingredients (serving size: 4-6 people):
- 4 cups of fresh broccoli florets
- 1 cup shredded cheddar cheese
- 1 can (10.5 oz) condensed cream of mushroom soup
- 1/2 cup sour cream
- 1/4 cup milk
- 1/4 cup bread crumbs
- 1/4 cup grated Parmesan cheese
- 1 tablespoon butter, melted
- Salt and pepper to taste
Cooking Instructions:
- Preheat the Oven: Start by preheating your oven to 350°F (175°C) to make certain it’s ready for baking once your casserole is assembled.
- Prepare the Broccoli: In a large pot of boiling water, blanch the broccoli florets for about 2-3 minutes until bright green and slightly tender. Drain and set aside to cool slightly.
- Mix the Sauce: In a medium mixing bowl, combine the condensed cream of mushroom soup, sour cream, milk, and shredded cheddar cheese. Stir until the mixture is smooth and well combined. Season with salt and pepper to taste.
- Assemble the Casserole: In a 9×13 inch baking dish, arrange the blanched broccoli evenly. Pour the cheese sauce over the broccoli, ensuring all florets are well coated.
- Prepare the Topping: In a small bowl, mix the bread crumbs, grated Parmesan cheese, and melted butter until the crumbs are well coated.
- Top and Bake: Sprinkle the bread crumb mixture evenly over the broccoli and cheese sauce in the baking dish. Place the dish in the preheated oven and bake for 25-30 minutes, or until the top is golden brown and the cheese is bubbly.
- Serve: Remove the casserole from the oven and let it cool slightly before serving. Enjoy your Cheesy Broccoli Casserole warm as a side dish.
Extra Tips:
For those looking to add more flavor or variation, consider mixing in some cooked bacon bits or diced ham for a heartier dish.
If you prefer a spicier kick, add a pinch of red pepper flakes to the cheese sauce. To make certain the broccoli retains its bright color and doesn’t overcook, be careful not to leave it in the boiling water for too long.
Finally, feel free to experiment with different types of cheese, such as mozzarella or gouda, to find the combination that best suits your taste preferences.
Festive Stuffing Balls

Impress your family and friends this Christmas with these delightful and budget-friendly Festive Stuffing Balls. These savory, delicious morsels are packed with flavors of herbs and spices, making them the perfect accompaniment to any Christmas lunch.
Whether you’re serving a traditional roast or a more modern take on the festive meal, these stuffing balls will surely be a highlight at your table. Plus, they’re incredibly easy to prepare, making them a stress-free addition to your holiday menu.
Stuffing balls are versatile and can be customized to suit your taste. You can stick with the classic flavors of sage and onion or experiment with cranberries and nuts for a sweet and nutty twist. This recipe serves 4-6 people, ensuring everyone gets to enjoy these scrumptious bites.
Best of all, the ingredients are affordable and likely to be already in your pantry, making this dish as budget-friendly as it’s tasty.
Ingredients:
- 200g stale bread, crusts removed
- 1 medium onion, finely chopped
- 2 cloves garlic, minced
- 1 tablespoon olive oil
- 2 teaspoons dried sage
- 1 teaspoon dried thyme
- 1/2 teaspoon salt
- 1/4 teaspoon black pepper
- 1 medium egg, beaten
- 50g unsalted butter, melted
- 50g dried cranberries (optional)
- 30g chopped walnuts or pecans (optional)
Instructions:
- Prepare the Bread: Start by tearing the stale bread into small pieces or blitzing it in a food processor until you have coarse breadcrumbs. This forms the base of your stuffing balls.
- Cook the Aromatics: Heat the olive oil in a pan over medium heat. Add the finely chopped onion and minced garlic, and sauté until the onion becomes translucent and soft. This should take about 5 minutes.
- Mix the Dry Ingredients: In a large mixing bowl, combine the breadcrumbs, sautéed onion and garlic, dried sage, dried thyme, salt, and black pepper. If you’re adding cranberries and nuts, mix them in at this stage.
- Bind the Mixture: Pour the beaten egg and melted butter into the breadcrumb mixture. Mix thoroughly until all the ingredients are well combined and the mixture holds together when squeezed.
- Shape the Balls: Preheat your oven to 180°C (350°F). Line a baking tray with parchment paper. Using your hands, shape the mixture into golf ball-sized stuffing balls and place them onto the prepared baking tray.
- Bake: Place the tray in the preheated oven and bake for 20-25 minutes, or until the stuffing balls are golden brown and crisp on the outside.
- Serve: Allow the stuffing balls to cool slightly before serving. They make a perfect side dish for your Christmas lunch.
Extra Tips:
For the best results, use bread that’s a day or two old as it absorbs the flavors better and holds together well. If you don’t have stale bread, you can dry fresh bread slices in a warm oven for a few minutes.
Feel free to experiment with the ingredients by adding chopped fresh herbs or different dried fruits and nuts to match the rest of your Christmas menu. These stuffing balls can be prepared a day in advance and stored in the refrigerator until you’re ready to bake them, saving you time on the big day.
Spiced Apple Crumble
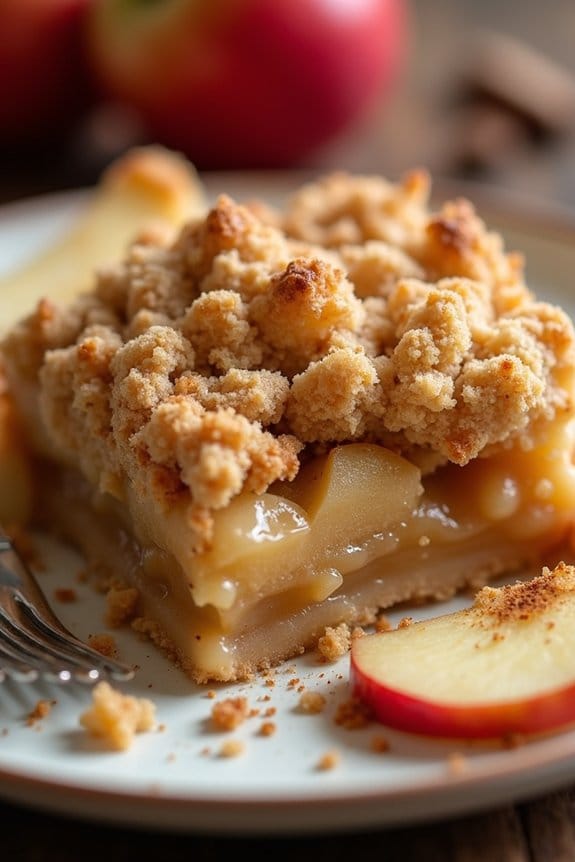
Celebrate the holiday season with a delicious Spiced Apple Crumble that’s both budget-friendly and a delight to the senses. This warm and comforting dessert is perfect for a Christmas lunch, bringing together the sweetness of apples and the earthy warmth of spices like cinnamon and nutmeg.
It’s an easy-to-make dish that doesn’t require expensive ingredients, making it an ideal choice for those looking to enjoy a festive meal without breaking the bank. The Spiced Apple Crumble combines tender, juicy apples with a crunchy, buttery topping, creating a delightful contrast in textures.
The aroma of cinnamon and nutmeg will fill your kitchen, setting a cozy and inviting atmosphere. This recipe serves 4-6 people, making it a great choice for family gatherings or intimate holiday meals. Whether you’re an experienced cook or a novice in the kitchen, this Spiced Apple Crumble is a straightforward recipe that promises to become a holiday favorite.
Ingredients:
- 6 medium-sized apples (such as Granny Smith or Honeycrisp)
- 1 tablespoon lemon juice
- 1/2 cup granulated sugar
- 1 teaspoon ground cinnamon
- 1/2 teaspoon ground nutmeg
- 1/4 teaspoon ground cloves
- 1 cup all-purpose flour
- 1/2 cup brown sugar
- 1/2 cup unsalted butter, chilled and cubed
- 1/2 cup rolled oats
- Pinch of salt
Cooking Instructions:
- Preheat the Oven: Start by preheating your oven to 350°F (175°C). This guarantees the crumble cooks evenly once it’s placed inside.
- Prepare the Apples: Peel, core, and slice the apples into thin wedges. Place the apple slices into a mixing bowl and toss them with lemon juice to prevent browning. Add the granulated sugar, cinnamon, nutmeg, and cloves, then mix well to guarantee even coating.
- Make the Crumble Topping: In a separate bowl, combine the flour, brown sugar, and a pinch of salt. Add the cubed butter and use your fingertips to rub it into the flour mixture until it resembles coarse crumbs. Stir in the oats to complete the crumble topping.
- Assemble the Crumble: Transfer the spiced apple mixture to a baking dish, spreading it out evenly. Sprinkle the crumble topping over the apples, ensuring an even layer that covers the fruit completely.
- Bake: Place the baking dish in the preheated oven and bake for 35-40 minutes. The crumble is ready when the topping is golden brown and the apples are tender and bubbling.
- Cool and Serve: Allow the Spiced Apple Crumble to cool slightly before serving. This dish is delicious on its own or can be complemented with a scoop of vanilla ice cream or a dollop of whipped cream.
Extra Tips:
For the best results, choose apples that are firm and slightly tart, such as Granny Smith, as they hold their shape well during baking. If you prefer a sweeter crumble, consider adding a touch more sugar or using sweeter apple varieties.
Additionally, for a nutty twist, you can incorporate chopped nuts like walnuts or pecans into the crumble topping. Remember, the key to a perfect crumble is balancing the sweetness of the apples with the spiciness of the cinnamon and nutmeg, so feel free to adjust the spices according to your taste preferences.
Enjoy your festive, budget-friendly dessert!
Chocolate Peppermint Bark

Chocolate Peppermint Bark is a classic holiday treat that isn’t only delicious but also incredibly easy to make. This sweet and minty dessert combines the rich flavors of dark and white chocolate with the invigorating taste of peppermint, making it a perfect addition to your Christmas lunch spread.
The best part is that it can be prepared in advance, allowing you more time to enjoy the festivities with family and friends.
Making Chocolate Peppermint Bark is a fun and simple process that doesn’t require any special equipment or baking skills. With just a few ingredients, you can create a beautiful and festive treat that looks as impressive as it tastes. This recipe is designed to serve 4-6 people, making it an ideal choice for a small gathering or as an additional dessert option for larger parties.
Ingredients (Serves 4-6):
- 8 oz dark chocolate, chopped
- 8 oz white chocolate, chopped
- 1/2 teaspoon peppermint extract
- 1/2 cup crushed peppermint candies or candy canes
Cooking Instructions:
- Prepare the Baking Sheet: Line a baking sheet with parchment paper. This will prevent the chocolate from sticking and make it easier to remove once set.
- Melt the Dark Chocolate: In a microwave-safe bowl, melt the dark chocolate in 30-second intervals, stirring in between, until smooth. Alternatively, you can melt it using a double boiler over simmering water.
- Spread the Dark Chocolate: Pour the melted dark chocolate onto the prepared baking sheet and spread it evenly with a spatula to about 1/4 inch thick. Allow it to set slightly in the refrigerator for about 10 minutes.
- Melt the White Chocolate: Using the same method as the dark chocolate, melt the white chocolate until smooth. Stir in the peppermint extract.
- Spread the White Chocolate: Pour the white chocolate over the set dark chocolate layer, spreading evenly. Quickly sprinkle the crushed peppermint candies over the top before the chocolate hardens.
- Set the Bark: Place the baking sheet back in the refrigerator for at least 30 minutes, or until completely set.
- Break into Pieces: Once the bark is fully set, remove it from the refrigerator and break it into pieces using your hands or a sharp knife.
Extra Tips:
To add a bit of flair to your Chocolate Peppermint Bark, consider drizzling some melted milk chocolate over the top layer before it sets for additional texture and flavor.
Be sure to use high-quality chocolate to guarantee a smooth, glossy finish. If you prefer a less minty flavor, adjust the amount of peppermint extract to suit your taste.
When storing the bark, keep it in an airtight container in the refrigerator to maintain its freshness and crisp texture. Enjoy this delightful treat as a standalone dessert or as part of a holiday dessert platter.
