
When the holiday season arrives, there’s something magical about gathering around a festive table with loved ones. A delicious Christmas lunch can become a treasured tradition. Picture the joy of serving an herb-crusted prime rib roast or a honey-glazed ham. These recipes will not only satisfy appetites but also create warm memories. Ready to make this Christmas unforgettable?
Herb-Crusted Prime Rib Roast
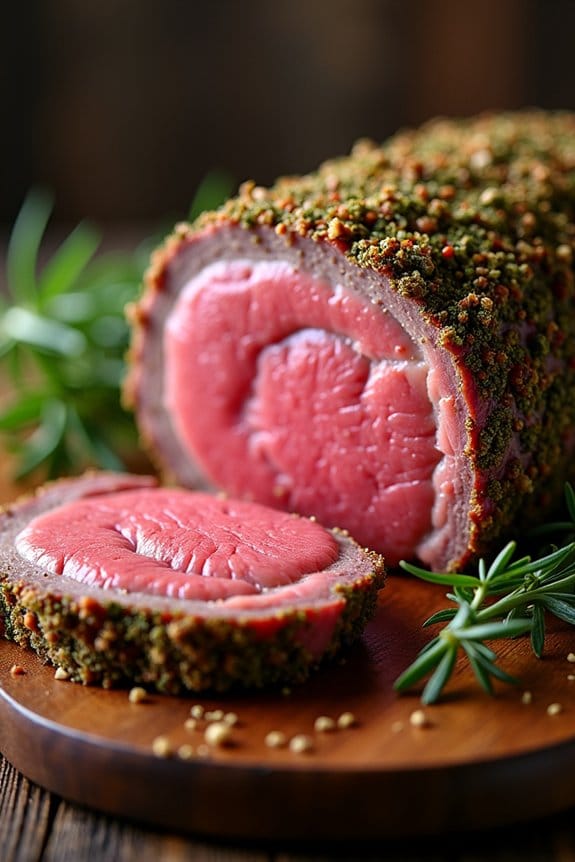
A Herb-Crusted Prime Rib Roast is the perfect centerpiece for your Christmas lunch, offering both elegance and rich flavors to your festive table. This succulent cut of beef, seasoned with a fragrant blend of herbs and spices, is roasted to perfection, resulting in a tender and juicy interior with a savory, crispy crust. The combination of rosemary, thyme, garlic, and other aromatic herbs enhances the natural flavors of the prime rib, making it a truly unforgettable dish that embodies the warmth and joy of the holiday season.
Whether you’re hosting an intimate gathering or a larger festive feast, this recipe will serve 4-6 people, guaranteeing everyone enjoys a generous portion of this exquisite roast. The preparation is simple yet rewarding, allowing you to spend more time with your loved ones while the oven works its magic. Pair this prime rib with your favorite side dishes and a rich red wine to elevate your Christmas meal into an extraordinary culinary experience.
Ingredients (Serves 4-6):
- 1 (4-5 pound) prime rib roast, bone-in
- 4 tablespoons olive oil
- 3 tablespoons fresh rosemary, minced
- 3 tablespoons fresh thyme, minced
- 8 cloves garlic, minced
- 1 tablespoon coarse salt
- 1 tablespoon black pepper
- 2 teaspoons dijon mustard
- 1 tablespoon horseradish
- 1 cup beef broth
Instructions:
- Preparation: Preheat your oven to 450°F (232°C). Allow the prime rib to sit at room temperature for at least 30 minutes before cooking. This guarantees even cooking.
- Herb Mixture: In a small bowl, combine the olive oil, rosemary, thyme, garlic, salt, pepper, dijon mustard, and horseradish. Mix well until a paste forms.
- Season the Roast: Pat the prime rib roast dry with paper towels. Rub the herb mixture all over the meat, ensuring it’s evenly coated on all sides.
- Roasting: Place the seasoned prime rib on a roasting rack set in a large roasting pan. Pour the beef broth into the bottom of the pan to catch drippings and create a base for a potential gravy. Roast in the preheated oven for 20 minutes.
- Adjust Temperature: After 20 minutes, reduce the oven temperature to 325°F (163°C) and continue roasting for approximately 1.5 to 2 hours, or until the internal temperature reaches your desired level of doneness (120°F for rare, 130°F for medium-rare).
- Rest the Meat: Remove the roast from the oven and transfer it to a carving board. Tent with aluminum foil and let it rest for at least 20 minutes before carving. This allows the juices to redistribute throughout the meat.
- Carve and Serve: Slice the prime rib into generous portions and serve with your choice of sides.
Extra Tips:
For the best results, use an instant-read thermometer to accurately gauge the internal temperature of the meat, guaranteeing it’s cooked to your preference.
When selecting your prime rib, opt for a cut with good marbling, as this enhances flavor and tenderness.
Don’t skip the resting period after roasting; this step is essential for achieving a juicy and flavorful prime rib.
Honey-Glazed Ham With Pineapple
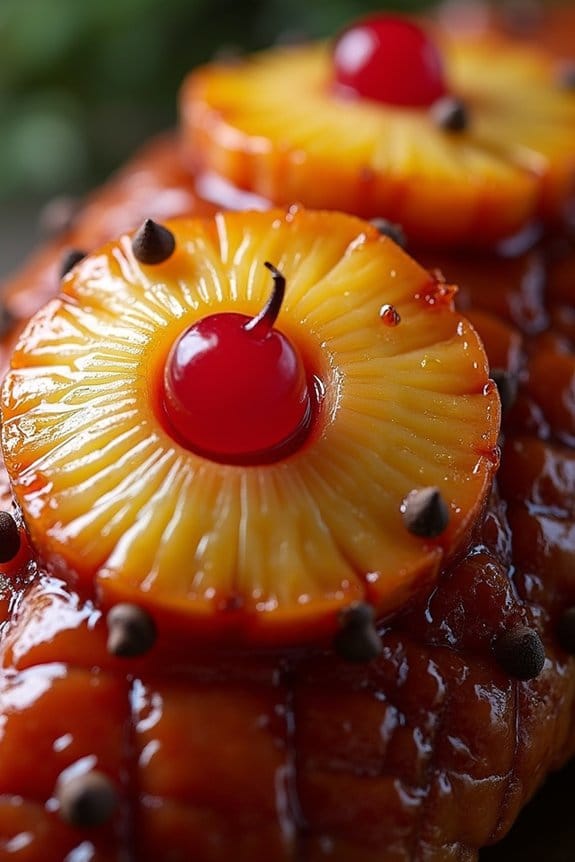
Honey-Glazed Ham with Pineapple is a timeless classic that beautifully balances sweet and savory flavors, making it a perfect centerpiece for your Christmas lunch. This dish features a succulent ham that’s infused with the rich sweetness of honey and the fruity tanginess of pineapple, creating a delightful harmony that will please your guests. The glaze caramelizes during baking, adding a glossy finish and an irresistible aroma that fills your home with holiday cheer.
The combination of tender ham and the vibrant glaze makes this dish not only a feast for the palate but also a visual delight. Preparing this dish is simpler than it appears, allowing you to enjoy more time with family and friends during the festive season. The key is in the preparation of the honey and pineapple glaze, which imbues the ham with flavor and guarantees it remains juicy throughout the cooking process.
This recipe serves 4-6 people, making it an ideal choice for a cozy Christmas gathering. Whether you’re a seasoned cook or a beginner, this Honey-Glazed Ham with Pineapple is sure to impress your loved ones and become a cherished holiday tradition.
Ingredients (Serving Size: 4-6 people):
- 1 boneless ham, approximately 3-4 pounds
- 1 cup honey
- 1/2 cup brown sugar
- 1/2 cup pineapple juice
- 1 tablespoon Dijon mustard
- 1/4 teaspoon ground cloves
- Pineapple rings (canned or fresh)
- Maraschino cherries (optional, for garnish)
- Whole cloves for studding
Cooking Instructions:
- Preheat the Oven: Start by preheating your oven to 325°F (165°C). This guarantees that the ham cooks evenly.
- Prepare the Ham: Place the ham in a roasting pan. Score the surface of the ham with a sharp knife in a diamond pattern. This helps the glaze penetrate the meat, enhancing the flavor.
- Make the Glaze: In a medium saucepan, combine the honey, brown sugar, pineapple juice, Dijon mustard, and ground cloves. Cook over medium heat until the sugar dissolves and the mixture becomes smooth and slightly thickened, about 5-7 minutes.
- Apply the Glaze: Brush the prepared glaze generously over the ham, making sure to get into the scored lines. Reserve some glaze for later basting.
- Stud the Ham: Insert whole cloves into the intersections of the scored lines on the ham for additional flavor and visual appeal.
- Add Pineapple and Cherries: Arrange the pineapple rings over the surface of the ham, securing each with a toothpick. If desired, place a maraschino cherry in the center of each ring for a festive touch.
- Bake the Ham: Cover the ham loosely with foil and place it in the preheated oven. Bake for about 1 1/2 to 2 hours, basting with the reserved glaze every 30 minutes. Remove the foil for the last 20 minutes of baking to allow the glaze to caramelize.
- Check for Doneness: The ham is ready when it reaches an internal temperature of 140°F (60°C). Use a meat thermometer to check for accuracy.
- Rest and Serve: Remove the ham from the oven and let it rest for at least 10 minutes before slicing. This helps the juices redistribute, guaranteeing each slice is moist and flavorful.
Extra Tips:
To enhance the flavor of your Honey-Glazed Ham with Pineapple, consider marinating the ham in pineapple juice overnight before cooking. This will add extra moisture and flavor.
When selecting a ham, choose one with a good fat cap, as the fat will render down during cooking, adding more flavor to the meat. If you prefer a spicier glaze, add a pinch of cayenne pepper to the glaze mixture.
Finally, keep an eye on the ham during the last part of baking to prevent the glaze from burning; if it starts to darken too quickly, tent it with foil again. Enjoy your festive creation!
Roasted Turkey With Sage Butter

Roasted Turkey With Sage Butter is a classic and flavorful centerpiece for your Christmas lunch. This dish combines the succulent taste of turkey with the aromatic essence of sage-infused butter, creating a harmonious blend of flavors that’s both comforting and festive.
The sage butter not only adds depth to the turkey but also helps in keeping the meat moist and tender, guaranteeing that each bite is as delicious as the last. To achieve the perfect roast, the turkey is generously coated with the sage butter, allowing it to penetrate and infuse throughout while roasting.
As the turkey cooks, the butter melts and bastes the meat, imparting a rich and savory taste. The end result is a beautifully golden and crispy turkey skin with juicy and flavorful meat underneath, making it an irresistible dish that will impress your guests and make your Christmas lunch unforgettable.
Ingredients (Serves 4-6 people):
- 1 whole turkey (8-10 lbs)
- 1 cup unsalted butter, softened
- 1/4 cup fresh sage, finely chopped
- 1 tablespoon fresh thyme, chopped
- 1 tablespoon fresh rosemary, chopped
- 1 teaspoon salt
- 1/2 teaspoon black pepper
- 2 lemons, halved
- 1 onion, quartered
- 4 cloves garlic, smashed
- 2 cups chicken broth
Cooking Instructions:
- Prepare the Sage Butter: In a medium bowl, combine the softened butter with chopped sage, thyme, rosemary, salt, and pepper. Mix thoroughly until all herbs are evenly distributed within the butter. This herb-infused butter will be used to coat the turkey.
- Prepare the Turkey: Preheat your oven to 325°F (165°C). Pat the turkey dry with paper towels, both inside and out. Gently separate the skin from the breast meat with your fingers, being careful not to tear it.
- Apply the Sage Butter: Rub the sage butter mixture generously underneath the skin of the turkey breast, as well as over the entire surface of the turkey. Ascertain that the butter covers as much of the turkey as possible for maximum flavor.
- Stuff and Season the Turkey: Place the halved lemons, quartered onion, and smashed garlic cloves inside the turkey cavity. These aromatics will infuse additional flavor into the turkey as it roasts.
- Roasting the Turkey: Place the turkey on a roasting rack in a large roasting pan. Pour 2 cups of chicken broth into the bottom of the pan to keep the meat moist during cooking. Tent the turkey loosely with aluminum foil to prevent over-browning during the initial roasting period.
- Cook the Turkey: Roast the turkey in the preheated oven for approximately 3 to 3.5 hours, or until a meat thermometer inserted into the thickest part of the thigh registers 165°F (74°C). Remove the foil during the last 45 minutes of roasting to allow the skin to crisp up.
- Rest the Turkey: Once cooked, remove the turkey from the oven and let it rest, loosely covered with foil, for about 20-30 minutes before carving. This resting period allows the juices to redistribute throughout the meat, ensuring each slice is tender and juicy.
Extra Tips: For an even more flavorful turkey, prepare the sage butter a day in advance to allow the herbs to fully infuse the butter.
Consider placing the turkey on a wire rack inside the roasting pan to ensure even air circulation and cooking. Don’t forget to baste the turkey with the pan juices every 30 minutes to enhance the flavor and moisture.
If you find the skin browning too quickly, cover the turkey with foil and remove it again during the last part of roasting for that perfect golden finish.
Classic Yorkshire Pudding

Yorkshire pudding is a quintessential British side dish that pairs wonderfully with a variety of roasted meats, particularly beef, making it a perfect addition to any festive Christmas lunch.
Originating in the county of Yorkshire, these delightful puffs are made from a simple batter that, when cooked, becomes golden and crisp on the outside with a light, airy interior. The key to a successful Yorkshire pudding is guaranteeing the batter is well-aerated and that the fat in the baking tin is sizzling hot before pouring the mixture.
This recipe will serve 4-6 people, providing a generous portion of these delicious puddings. The ingredients are straightforward and easy to find, making it possible to whip up a batch with minimal fuss. Whether you’re a seasoned cook or a beginner, this classic Yorkshire pudding recipe will impress your family and friends at your Christmas feast.
Ingredients for 4-6 Servings:
- 1 cup all-purpose flour
- 1 cup whole milk
- 3 large eggs
- 1/2 teaspoon salt
- 1/4 cup beef drippings or vegetable oil
Cooking Instructions:
- Prepare the Batter: In a large mixing bowl, combine the flour and salt. Make a well in the center and crack in the eggs. Gradually whisk in the milk until you achieve a smooth batter. The consistency should be similar to heavy cream. Let the batter rest at room temperature for at least 30 minutes to allow the flour to absorb the liquid.
- Preheat the Oven: Preheat your oven to 425°F (220°C). While the oven is heating, place a 12-cup muffin tin or a specialized Yorkshire pudding tin in the oven to heat up.
- Heat the Fat: Once the oven is hot, carefully remove the tin and add a small amount of beef drippings or vegetable oil to each cup, about 1 teaspoon each. Return the tin to the oven for about 5 minutes, or until the fat is smoking hot.
- Bake the Puddings: Quickly and carefully pour the batter into the hot fat in each cup, filling them about halfway. The batter should sizzle as it hits the hot fat. Place the tin back in the oven and bake for 20-25 minutes, or until the puddings have risen and turned golden brown. Avoid opening the oven door during cooking, as this can cause the puddings to deflate.
- Serve Immediately: Once done, remove the puddings from the oven and serve them immediately as they’re best enjoyed fresh and hot.
Extra Tips:
For the best results, confirm that your ingredients—particularly the eggs and milk—are at room temperature before mixing the batter. This helps the batter rise better in the oven.
Additionally, the resting period is essential for achieving the right texture, so don’t skip it. If you want to add a bit of flair, consider incorporating fresh herbs like rosemary or thyme into the batter for an aromatic twist.
Finally, if you don’t have beef drippings, vegetable oil is a suitable alternative, though the drippings provide a richer flavor that complements the roast.
Garlic and Herb Mashed Potatoes
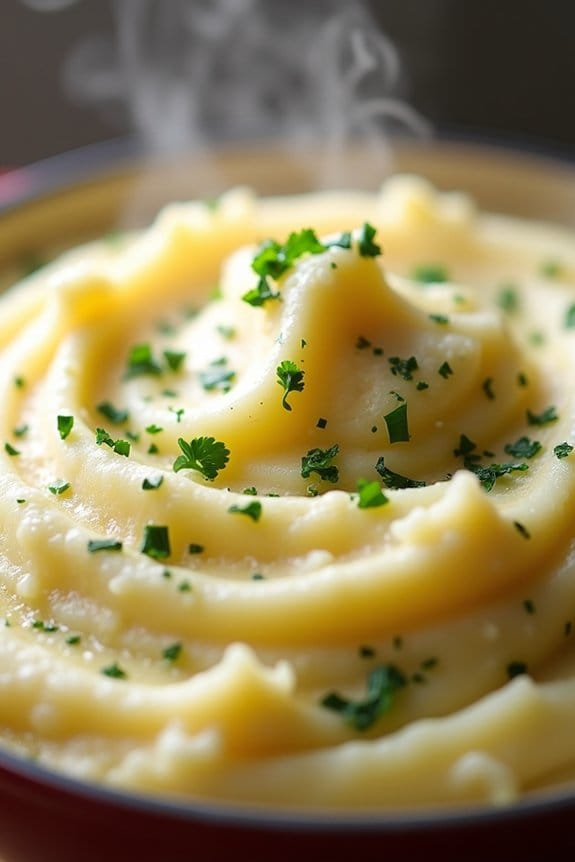
Garlic and Herb Mashed Potatoes are a classic and comforting side dish that can elevate your Christmas lunch to new heights. Creamy, fluffy, and infused with the aromatic flavors of garlic and fresh herbs, these mashed potatoes are bound to be a hit with your family and guests. The secret to achieving the perfect texture is to use the right kind of potatoes and to incorporate just the right amount of dairy and seasoning, resulting in a dish that complements any festive main course.
To make Garlic and Herb Mashed Potatoes, you’ll need to start with high-quality ingredients and a little bit of patience. The process involves boiling potatoes until they’re tender, mashing them to your desired consistency, and then mixing them with garlic-infused butter, cream, and fresh herbs. This recipe serves 4-6 people, making it ideal for a small to medium-sized gathering. Whether served alongside a roasted turkey, glazed ham, or a vegetarian main dish, these mashed potatoes are bound to satisfy.
Ingredients:
- 2 pounds of Yukon Gold potatoes
- 4 cloves of garlic, minced
- 1/2 cup of unsalted butter
- 1 cup of heavy cream
- 1/4 cup of chopped fresh parsley
- 2 tablespoons of chopped fresh chives
- Salt and pepper, to taste
Instructions:
- Prepare the Potatoes: Peel the potatoes and cut them into evenly sized chunks. This guarantees they cook uniformly. Place them in a large pot and cover with cold water.
- Boil the Potatoes: Add a generous pinch of salt to the water and bring it to a boil over medium-high heat. Reduce to a simmer and cook until the potatoes are fork-tender, about 15-20 minutes. Drain thoroughly.
- Infuse the Butter: While the potatoes are cooking, melt the butter in a small saucepan over low heat. Add the minced garlic and cook for 1-2 minutes until fragrant, being careful not to let it brown.
- Mash the Potatoes: Return the drained potatoes to the pot. Use a potato masher or a ricer to mash them to your desired consistency.
- Mix in the Flavors: Gradually add the garlic-infused butter and the heavy cream to the mashed potatoes, stirring continuously until smooth and creamy. Adjust the cream quantity based on your preferred texture.
- Add Herbs and Seasoning: Stir in the chopped parsley and chives. Season with salt and pepper to taste, mixing well to guarantee even distribution of flavors.
- Serve Hot: Transfer the mashed potatoes to a serving dish and garnish with additional herbs if desired. Serve immediately while hot.
Extra Tips:
For the creamiest mashed potatoes, opt for Yukon Gold potatoes as they’ve a buttery texture and flavor that’s ideal for mashing. If you prefer a richer taste, consider adding a splash of sour cream or cream cheese to the mixture.
To avoid lumpy mashed potatoes, make sure to mash them while they’re still hot and avoid overmixing, which can lead to a gluey texture. For an extra touch of flavor, you can also roast the garlic before incorporating it into the butter, adding a sweet and nutty dimension to the dish.
Maple-Balsamic Brussels Sprouts

Maple-Balsamic Brussels Sprouts are a deliciously sweet and tangy side dish perfect for your Christmas lunch. This recipe combines the natural earthiness of Brussels sprouts with the rich sweetness of maple syrup and the deep, tangy flavor of balsamic vinegar. The caramelized outer leaves add a delightful crunch, while the tender insides provide a satisfying bite.
This dish not only complements the traditional holiday main courses but also brings a fresh and vibrant element to your festive table. Whether you’re hosting a large family gathering or enjoying an intimate holiday meal, Maple-Balsamic Brussels Sprouts are certain to please guests of all ages.
The combination of flavors is perfectly balanced and brings a touch of sophistication to your Christmas lunch. Best of all, this dish is simple to prepare, allowing you to focus on spending quality time with loved ones while still serving up a memorable meal.
Ingredients for 4-6 servings:
- 2 pounds Brussels sprouts
- 3 tablespoons olive oil
- 1/2 teaspoon salt
- 1/4 teaspoon black pepper
- 1/4 cup pure maple syrup
- 2 tablespoons balsamic vinegar
- 1/2 teaspoon garlic powder
- Optional: 1/4 cup chopped pecans or walnuts for garnish
Cooking Instructions:
- Prepare the Brussels Sprouts: Start by preheating your oven to 400°F (200°C). Trim the ends of the Brussels sprouts and remove any yellowed outer leaves. Cut each sprout in half lengthwise to guarantee even cooking.
- Season the Sprouts: In a large mixing bowl, combine the halved Brussels sprouts with olive oil, salt, and black pepper. Toss them well to guarantee they’re evenly coated with the oil and seasoning.
- Roast the Brussels Sprouts: Spread the seasoned Brussels sprouts in a single layer on a baking sheet. Roast in the preheated oven for about 20-25 minutes, or until they’re tender and the edges are caramelized, turning them halfway through the cooking time to guarantee even browning.
- Prepare the Maple-Balsamic Glaze: While the Brussels sprouts are roasting, mix together the maple syrup, balsamic vinegar, and garlic powder in a small bowl. Stir well to combine.
- Combine and Finish: Once the Brussels sprouts are roasted, remove them from the oven and transfer them back to the mixing bowl. Pour the maple-balsamic glaze over the hot Brussels sprouts and toss until thoroughly coated. If desired, sprinkle with chopped pecans or walnuts for added crunch and flavor.
- Serve: Transfer the Maple-Balsamic Brussels Sprouts to a serving dish and serve warm as a delicious side dish for your Christmas lunch.
Extra Tips:
For the best results, try to select Brussels sprouts that are similar in size to guarantee even cooking. Avoid overcrowding the baking sheet, as this can cause the sprouts to steam rather than roast, affecting their texture.
If you prefer a bit more heat, consider adding a pinch of red pepper flakes to the glaze. Additionally, you can prepare the glaze in advance to save time on the day of your Christmas lunch. Enjoy this festive and flavorful dish with your loved ones!
Cranberry-Orange Relish
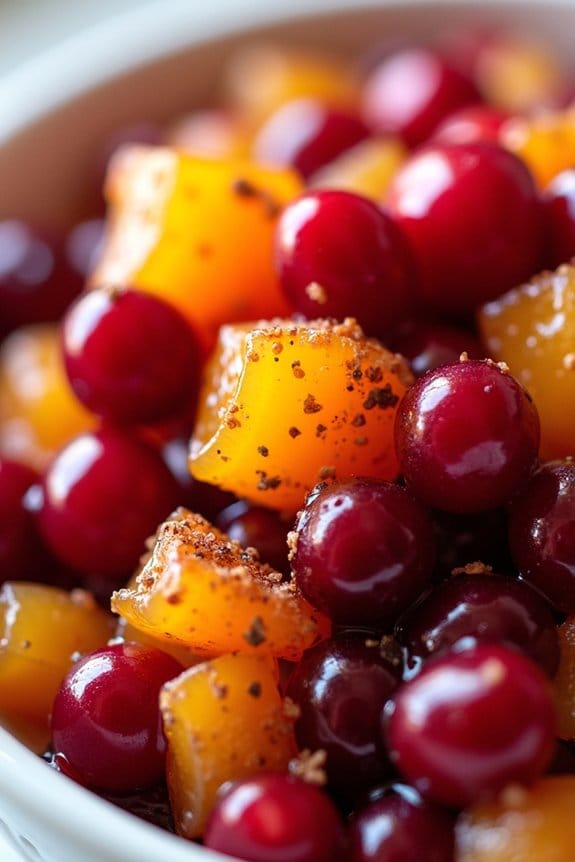
Cranberry-Orange Relish is a vibrant and zesty accompaniment perfect for your Christmas lunch table. The combination of tart cranberries and sweet juicy oranges creates a delightful contrast that enhances the flavors of the entire meal. This relish isn’t only quick and easy to prepare, but it also adds a burst of color and freshness to the festive spread.
Perfect for pairing with turkey, ham, or any roasted meats, this dish is sure to become a holiday favorite. This relish can be made ahead of time, allowing the flavors to meld together, resulting in a more robust taste. The natural sweetness of the oranges complements the cranberries’ tartness, while a touch of sugar balances the overall flavor.
It’s a simple yet delicious recipe that requires minimal ingredients and preparation, making it a stress-free addition to your holiday cooking. Prepare to wow your guests with this irresistible side dish that perfectly captures the essence of the holiday season.
Ingredients for 4-6 servings:
- 2 cups fresh cranberries
- 1 large navel orange, with peel
- 3/4 cup granulated sugar
- 1/4 teaspoon ground cinnamon
- 1/4 teaspoon ground ginger
- 1/4 teaspoon salt
Cooking Instructions:
- Prepare the Cranberries and Orange:
- Rinse the cranberries thoroughly under cold water and drain them well. Verify there are no spoiled berries in the mix.
- Cut the orange into small chunks, leaving the peel on for added flavor, but remove any seeds.
- Blend the Ingredients:
- Place the cranberries and orange chunks into a food processor. Pulse the mixture a few times until the cranberries and orange are finely chopped. Be careful not to over-process the mixture; you want it to have some texture.
- Add Sugar and Spices:
- Transfer the chopped fruit mixture into a medium-sized mixing bowl. Add the granulated sugar, ground cinnamon, ground ginger, and salt. Stir well to combine all the ingredients thoroughly.
- Let it Marinate:
- Cover the bowl with plastic wrap or a lid and let the relish marinate in the refrigerator for at least 2 hours, or overnight if possible. This allows the flavors to meld together beautifully.
- Serve:
- Before serving, give the relish a good stir. Taste and adjust the sugar or spices if needed. Serve chilled or at room temperature alongside your holiday meal.
Extra Tips:
For a more pronounced orange flavor, consider adding a bit of orange zest to the relish. If you prefer a less sweet relish, start with half the sugar and add more to taste. This relish can be stored in an airtight container in the refrigerator for up to one week, which makes it a great make-ahead dish.
Additionally, if you want to add a bit of a kick, a small amount of chopped jalapeño or a pinch of cayenne pepper can bring a subtle heat to the relish. Enjoy experimenting with these variations to find your perfect holiday relish!
Cheesy Broccoli Casserole
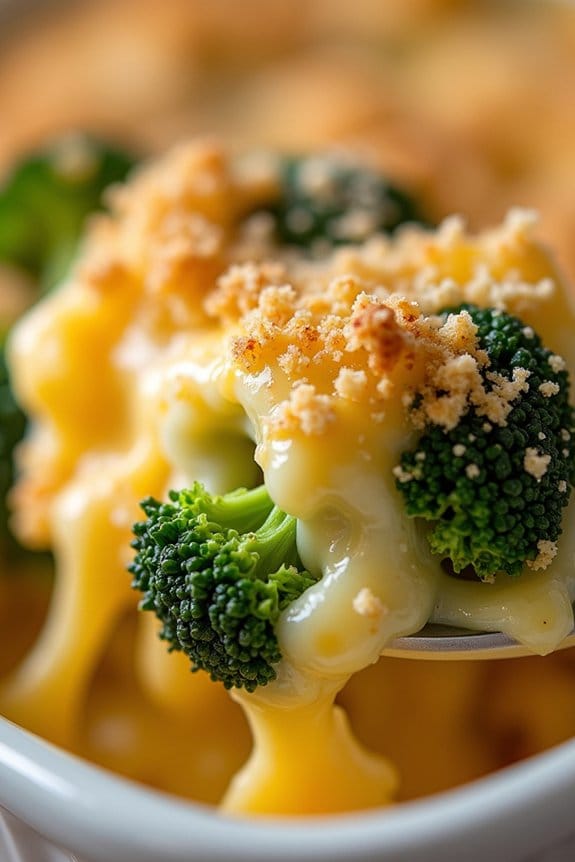
Cheesy Broccoli Casserole is a delightful side dish that combines the rich flavors of cheese with the vibrant goodness of broccoli. Perfect for a Christmas lunch, this casserole brings a comforting twist to your holiday table, complementing the main courses with its creamy texture and savory taste. As the broccoli bakes in a blanket of cheese sauce, it becomes tender and flavorful, making it a dish that even picky eaters might enjoy. This casserole isn’t only delicious but also easy to prepare, allowing you to focus on other holiday preparations.
The beauty of Cheesy Broccoli Casserole lies in its versatility and simplicity. It can be prepared ahead of time, making it a convenient choice for busy holiday schedules. The dish caters to a wide range of palates with its rich cheese sauce that coats each piece of broccoli in mouthwatering goodness. Whether served as a side dish with roasted meats or as part of a vegetarian spread, this casserole is a must-have on your Christmas lunch menu. The following recipe serves 4-6 people, making it an excellent choice for a family gathering or a small holiday party.
Ingredients:
- 1 1/2 pounds of fresh broccoli, cut into florets
- 1 cup of cheddar cheese, shredded
- 1/2 cup of mozzarella cheese, shredded
- 1 cup of milk
- 2 tablespoons of all-purpose flour
- 2 tablespoons of butter
- 1/2 cup of breadcrumbs
- 1/4 cup of grated Parmesan cheese
- 1/4 teaspoon of garlic powder
- Salt and pepper to taste
Cooking Instructions:
- Preheat the Oven: Begin by preheating your oven to 350°F (175°C). This guarantees that your casserole bakes evenly once it goes into the oven.
- Prepare the Broccoli: In a large pot of boiling salted water, blanch the broccoli florets for about 3 minutes. They should be bright green and slightly tender. Drain the broccoli and set it aside.
- Make the Cheese Sauce: In a medium saucepan over medium heat, melt the butter. Add in the flour and stir constantly for about 2 minutes to form a roux. Gradually whisk in the milk, making certain there are no lumps. Continue to cook, stirring occasionally, until the sauce thickens.
- Add the Cheese: Remove the saucepan from heat and stir in the cheddar and mozzarella cheeses until they’re completely melted and the sauce is smooth. Season the sauce with garlic powder, salt, and pepper to taste.
- Assemble the Casserole: In a large baking dish, arrange the blanched broccoli evenly. Pour the cheese sauce over the broccoli, making certain that it’s well-coated.
- Prepare the Topping: In a small bowl, combine the breadcrumbs and grated Parmesan cheese. Sprinkle this mixture evenly over the top of the casserole.
- Bake: Place the baking dish in the preheated oven and bake for about 25-30 minutes, or until the top is golden brown and the cheese is bubbling.
- Serve: Once baked, remove the casserole from the oven and let it sit for a few minutes before serving. This allows the casserole to set and makes it easier to serve.
Extra Tips:
For an added layer of flavor, consider mixing in a pinch of nutmeg or a dash of hot sauce into the cheese sauce. To save time on the day of your Christmas lunch, prepare the cheese sauce and blanch the broccoli a day in advance, storing them separately in the refrigerator. When you’re ready to bake, simply assemble the casserole, top it with breadcrumbs, and pop it in the oven. If you prefer a gluten-free version, substitute the all-purpose flour with a gluten-free alternative and use gluten-free breadcrumbs.
Traditional Christmas Pudding
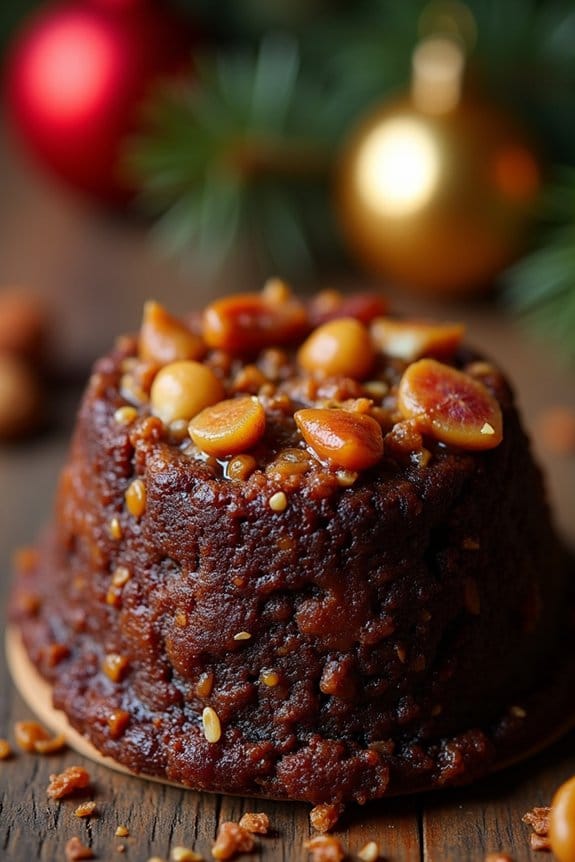
Christmas pudding is a classic holiday dessert that brings warmth and joy to the festive table. This rich and flavorful pudding, often enjoyed on Christmas Day, is deeply rooted in British tradition. Packed with a blend of dried fruits, spices, and a touch of brandy, it’s steamed to perfection, resulting in a moist and scrumptious dessert that embodies the spirit of the season.
The preparation of a traditional Christmas pudding is a labor of love, typically made weeks in advance to allow the flavors to mature. The pudding is usually served flaming – soaked in brandy and set alight for a dramatic presentation. This spectacle is accompanied by a side of brandy butter or custard, enhancing the pudding’s decadent taste.
Whether you’re making it for the first time or it’s part of your yearly holiday tradition, this recipe will guide you through the process of creating a delicious Christmas pudding for a serving size of 4-6 people.
Ingredients:
- 100g suet or unsalted butter
- 100g dark brown sugar
- 100g plain flour
- 100g breadcrumbs
- 100g raisins
- 100g currants
- 100g sultanas
- 50g chopped mixed peel
- 50g chopped almonds
- 1 apple, peeled, cored and grated
- 1 lemon, zest and juice
- 1 orange, zest and juice
- 1 tsp ground cinnamon
- 1 tsp mixed spice
- 1/4 tsp ground nutmeg
- 2 large eggs
- 150ml milk
- 75ml brandy or rum
Cooking Instructions:
- Prepare the Dry Mix: In a large mixing bowl, combine the suet or grated butter, dark brown sugar, plain flour, and breadcrumbs. Mix thoroughly until all the ingredients are well integrated.
- Add the Fruits and Nuts: Stir in the raisins, currants, sultanas, mixed peel, and chopped almonds. Make sure the fruits and nuts are evenly distributed throughout the mixture.
- Incorporate the Fresh Ingredients: Add the grated apple, lemon zest and juice, and orange zest and juice to the bowl. Mix well to guarantee that the fresh ingredients are evenly blended into the mixture.
- Spice It Up: Sprinkle in the ground cinnamon, mixed spice, and nutmeg. Stir the mixture thoroughly to make sure that the spices are evenly distributed, adding depth and flavor to the pudding.
- Bind the Mixture: Beat the eggs in a separate bowl, then add them to the mixture along with the milk and brandy or rum. Mix everything together until you have a thick, wet batter.
- Fill the Pudding Basin: Grease a 1.2-liter pudding basin with butter. Transfer the mixture into the basin, pressing down firmly to compact it, leaving a small gap at the top.
- Cover and Steam: Cover the basin with a layer of parchment paper and a layer of foil, securing it with string around the rim. Place the basin in a large saucepan and pour in enough water to reach halfway up the sides of the basin. Bring the water to a simmer, cover the saucepan, and steam the pudding for 5-6 hours, topping up with water as necessary.
- Cool and Store: Once steamed, remove the pudding from the saucepan and let it cool completely. Store in a cool, dry place until Christmas Day. Re-steam for about 2 hours before serving.
Extra Tips:
For an added depth of flavor, consider soaking the dried fruits in the brandy or rum overnight before adding them to the mixture. This not only enhances the taste but also makes the fruits plump and juicy.
Remember to regularly check the water level in the saucepan during steaming to avoid it running dry, which can affect the steaming process. For a spectacular presentation, warm a few tablespoons of brandy, pour it over the hot pudding, and light it just before serving.
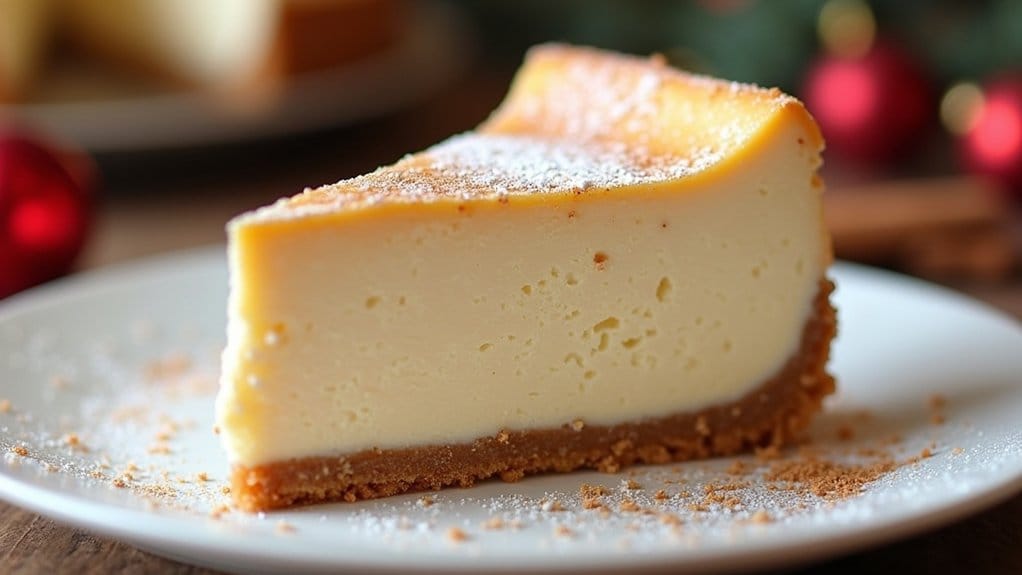
Spiced Eggnog Cheesecake
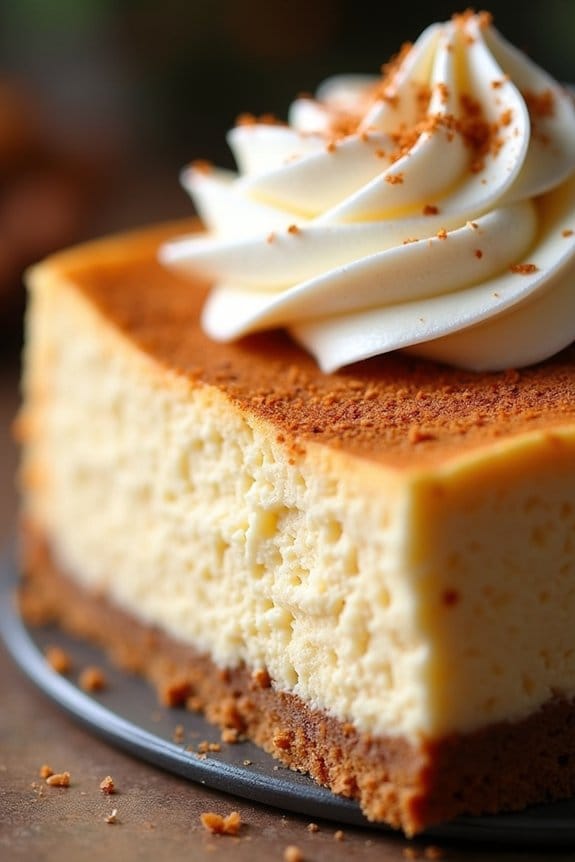
Spiced Eggnog Cheesecake is a delightful twist on the traditional holiday beverage, transforming it into a rich and creamy dessert that’s perfect for your Christmas lunch. This cheesecake combines the warming spices of eggnog with the smooth texture of cream cheese to create a festive treat that will impress your guests.
With a buttery graham cracker crust and a spiced eggnog filling, this cheesecake is certain to become a holiday favorite. The recipe yields a luscious cheesecake that serves 4-6 people, making it an ideal dessert for an intimate Christmas gathering. The spiced notes of cinnamon, nutmeg, and cloves add a comforting warmth, while the subtle tang of cream cheese balances the sweetness of the eggnog.
Whether served plain or adorned with a dollop of whipped cream, this Spiced Eggnog Cheesecake is a scrumptious way to celebrate the season.
Ingredients:
- 1 1/2 cups graham cracker crumbs
- 1/4 cup granulated sugar
- 1/2 cup unsalted butter, melted
- 16 oz cream cheese, softened
- 1 cup granulated sugar
- 3 eggs
- 1 cup eggnog
- 1 teaspoon vanilla extract
- 1/2 teaspoon ground cinnamon
- 1/4 teaspoon ground nutmeg
- 1/4 teaspoon ground cloves
Instructions:
- Prepare the Crust: Preheat your oven to 325°F (163°C). In a medium bowl, combine the graham cracker crumbs and 1/4 cup of sugar. Stir in the melted butter until the mixture resembles wet sand.
- Form the Crust: Press the crumb mixture evenly into the bottom of a 9-inch springform pan to form a compact crust. Use the back of a spoon or the bottom of a glass to press it down firmly. Bake for 10 minutes, then remove from the oven and allow to cool slightly while you prepare the filling.
- Mix the Filling: In a large mixing bowl, beat the softened cream cheese and 1 cup of sugar together until smooth and creamy. Add the eggs one at a time, mixing well after each addition. Pour in the eggnog, vanilla extract, cinnamon, nutmeg, and cloves. Mix until all ingredients are fully incorporated.
- Assemble the Cheesecake: Pour the cream cheese mixture over the prepared crust in the springform pan. Smooth the top with a spatula to guarantee an even surface.
- Bake the Cheesecake: Place the cheesecake in the preheated oven and bake for 50-60 minutes, or until the center is set and the edges are lightly browned. The center should still jiggle slightly when you gently shake the pan.
- Cool and Chill: Remove the cheesecake from the oven and run a knife around the edge of the pan to loosen it. Allow it to cool completely at room temperature, then refrigerate for at least 4 hours or overnight to set fully.
Extra Tips:
For the best results, verify all your ingredients are at room temperature before starting, as this helps achieve a smooth and creamy cheesecake filling.
If you notice any cracks on the surface of your cheesecake, don’t worry; they can be easily covered with a dusting of powdered sugar or a dollop of whipped cream. Additionally, if you prefer a stronger spice flavor, feel free to adjust the quantities of cinnamon, nutmeg, and cloves to suit your taste.
Enjoy your Spiced Eggnog Cheesecake with a warm cup of coffee or tea for a truly festive treat!
