

I’ve gathered 14 delightful Christmas party recipes that won’t break the bank but will wow your guests with their elegance. Think savory stuffed mushrooms and elegant Caprese skewers, paired with crispy Parmesan roasted potatoes. These dishes will add a touch of gourmet flair to your holiday spread. Ready to elevate your festive table without the hefty price tag? Let’s explore these budget-friendly treats together.
Savory Stuffed Mushrooms

Savory Stuffed Mushrooms are a delightful appetizer that can elevate any Christmas party spread without breaking the bank. These bite-sized treats are packed with flavor, featuring a rich and creamy filling that perfectly complements the earthy taste of the mushrooms.
Easy to prepare and budget-friendly, this dish is ideal for entertaining a crowd during the holiday season. The combination of fresh ingredients and simple preparation techniques guarantees that even novice cooks can create a delicious and impressive appetizer.
This recipe serves 4-6 people and focuses on using affordable ingredients that you might already have in your pantry. The mushrooms are stuffed with a mixture of cream cheese, breadcrumbs, and seasonings, creating a perfect balance of textures and flavors.
Whether your guests are vegetarians or meat-lovers, these savory stuffed mushrooms are sure to be a hit at your Christmas party.
Ingredients:
- 16 oz (approximately 25-30) button mushrooms
- 8 oz cream cheese, softened
- 1/2 cup breadcrumbs
- 1/4 cup grated Parmesan cheese
- 2 cloves garlic, minced
- 2 tablespoons fresh parsley, chopped
- 1/2 teaspoon dried thyme
- 1/4 teaspoon ground black pepper
- 1/4 teaspoon salt
- 2 tablespoons olive oil
- 1 tablespoon lemon juice
Cooking Instructions:
- Preheat the Oven: Start by preheating your oven to 375°F (190°C). This will ascertain it’s at the right temperature when you’re ready to bake the mushrooms.
- Prepare the Mushrooms: Gently clean the mushrooms with a damp cloth to remove any dirt. Carefully remove the stems and set them aside, as you’ll be using them in the stuffing mixture.
- Make the Filling: Chop the reserved mushroom stems finely. In a medium-sized bowl, combine the chopped mushroom stems, cream cheese, breadcrumbs, Parmesan cheese, minced garlic, parsley, thyme, pepper, and salt. Mix until all ingredients are well combined and form a creamy, cohesive mixture.
- Stuff the Mushrooms: Using a spoon or a small scoop, fill each mushroom cap with the stuffing mixture, pressing lightly to ascertain the filling adheres to the mushroom.
- Bake the Mushrooms: Arrange the stuffed mushrooms on a baking sheet lined with parchment paper or a lightly greased baking dish. Drizzle the mushrooms with olive oil and a splash of lemon juice for added flavor. Bake in the preheated oven for 20-25 minutes or until the mushrooms are tender and the tops are golden brown.
- Serve: Remove the mushrooms from the oven and let them cool slightly before serving. Arrange them on a platter and garnish with additional chopped parsley if desired.
Extra Tips:
For an added depth of flavor, consider using a variety of mushrooms such as cremini or portobello in addition to button mushrooms. You can also experiment with other herbs like rosemary or basil for a unique twist.
If you prefer a spicier filling, add a pinch of red pepper flakes to the mixture. To make the dish ahead of time, prepare the stuffed mushrooms as instructed and refrigerate them until you’re ready to bake. This makes them a convenient option for stress-free holiday entertaining.
Elegant Caprese Skewers
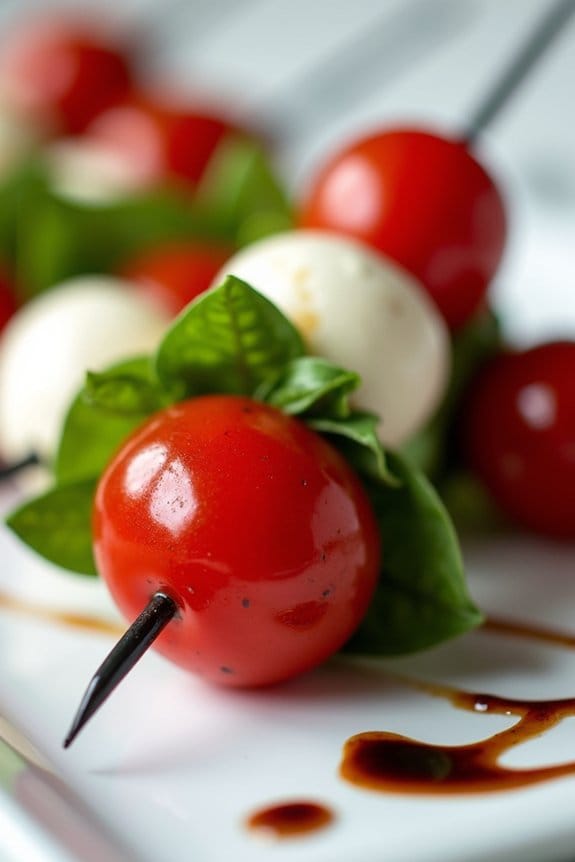
Caprese Skewers are a delightful and elegant appetizer that perfectly balances flavors and textures. This dish is inspired by the classic Italian Caprese salad, which traditionally features fresh mozzarella, tomatoes, and basil. By transforming these ingredients into skewers, you create a visually appealing and convenient party snack that’s easy to serve and enjoy.
These skewers are perfect for a budget-friendly Christmas party, as they offer a touch of sophistication without breaking the bank.
To make these Caprese Skewers, you’ll need fresh and high-quality ingredients to guarantee the best taste. The combination of creamy mozzarella, juicy cherry tomatoes, and fragrant basil leaves, drizzled with a balsamic glaze, creates a burst of flavor in every bite. The skewers are easy to assemble and can be prepared in advance, allowing you to focus on entertaining your guests during the party.
This recipe serves 4-6 people, making it a great addition to any holiday gathering.
Ingredients (for 4-6 servings):
- 20 cherry tomatoes
- 20 small fresh mozzarella balls (bocconcini)
- 20 fresh basil leaves
- 2 tablespoons extra virgin olive oil
- Salt and pepper to taste
- Balsamic glaze (store-bought or homemade)
- 20 wooden skewers or toothpicks
Instructions:
- Prepare the Ingredients: Start by washing the cherry tomatoes and basil leaves thoroughly under cold water. Pat them dry with a paper towel. Drain the mozzarella balls and set them aside in a small bowl.
- Assemble the Skewers: Take a wooden skewer or toothpick and first skewer a cherry tomato. Follow this by folding a basil leaf in half and skewering it. Next, add a mozzarella ball. Repeat this process until you have used up all the ingredients, guaranteeing each skewer has a tomato, basil leaf, and mozzarella ball.
- Season the Skewers: Once all the skewers are assembled, place them on a serving platter. Drizzle the olive oil over the skewers, guaranteeing each one is lightly coated. Sprinkle a small amount of salt and pepper over the top for added flavor.
- Add the Finishing Touch: Just before serving, drizzle the balsamic glaze over the skewers. Be generous but careful not to overpower the fresh flavors of the ingredients.
- Serve and Enjoy: Arrange the skewers neatly on the platter and serve them chilled or at room temperature. They’re best enjoyed fresh.
Extra Tips:
For an added pop of flavor, you can marinate the mozzarella balls in olive oil, minced garlic, and a pinch of dried oregano for 30 minutes before assembling the skewers. This infuses the cheese with additional taste and complements the other ingredients beautifully.
If you prefer making your own balsamic glaze, simply simmer balsamic vinegar on low heat until it reduces by half and becomes syrupy. This homemade glaze can be stored in the refrigerator for up to a month.
When serving, consider arranging the skewers in a circular pattern on a platter to enhance their visual appeal and make for an elegant presentation.
Crispy Parmesan Roasted Potatoes
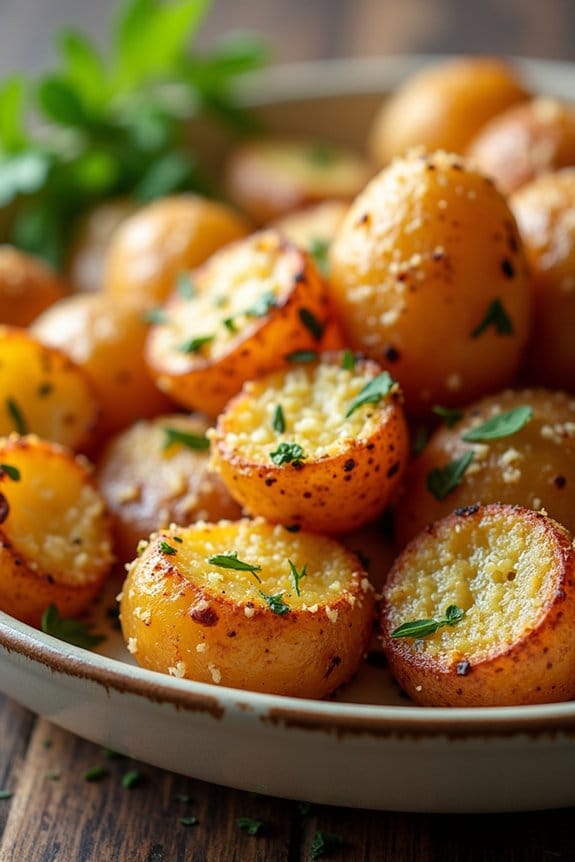
Crispy Parmesan Roasted Potatoes are a perfect addition to any Christmas party menu, offering a delicious and budget-friendly option that will delight your guests.
These savory roasted potatoes are coated with a generous amount of parmesan cheese, enhancing their crispy texture and rich flavor. Not only are they easy to prepare, but they also require minimal ingredients, making them a practical choice for any holiday gathering.
This recipe yields enough to serve 4-6 people, making it ideal for a small to medium-sized Christmas party. The combination of tender potatoes with a crispy, cheesy crust is sure to be a hit, providing a satisfying side dish that complements a variety of main courses.
With just a few steps, you’ll have a dish that’s both impressive and comforting.
Ingredients:
- 2 pounds of baby potatoes
- 1/4 cup olive oil
- 1 teaspoon garlic powder
- 1 teaspoon onion powder
- 1 teaspoon dried thyme
- 1 cup grated parmesan cheese
- Salt and pepper to taste
- Fresh parsley for garnish (optional)
Cooking Instructions:
1. Preheat the Oven:
Preheat your oven to 400°F (200°C) to guarantee it’s hot enough to give the potatoes a crispy finish.
2. Prepare the Potatoes:
Wash the baby potatoes thoroughly and cut them in half. If they’re very small, you can leave them whole. Pat dry with a kitchen towel to remove excess moisture.
3. Season the Potatoes:
In a large mixing bowl, combine the olive oil, garlic powder, onion powder, dried thyme, salt, and pepper. Add the potatoes to the bowl and toss until they’re evenly coated with the seasoning mixture.
4. Add Parmesan:
Add the grated parmesan cheese to the bowl and toss again to guarantee each potato piece is well-coated with cheese.
5. Roast the Potatoes:
Spread the seasoned potatoes in a single layer on a baking sheet lined with parchment paper. Make sure they aren’t overcrowded, as this will help them roast evenly. Place the baking sheet in the preheated oven.
6. Bake:
Roast the potatoes for 25-30 minutes, flipping them halfway through the cooking time, until they’re golden brown and crispy on the outside.
7. Serve:
Once cooked, remove from the oven and let them cool for a few minutes. Garnish with fresh parsley if desired and serve warm.
Extra Tips:
To achieve maximum crispiness, guarantee the potatoes are spread out evenly on the baking sheet without overlapping.
Overcrowding the pan can cause the potatoes to steam rather than roast. You can also experiment with different herbs or add a sprinkle of paprika for an extra kick. If you don’t have baby potatoes, regular potatoes cut into small chunks will also work well.
Prosciutto-Wrapped Asparagus

Prosciutto-Wrapped Asparagus is a delightful and elegant appetizer that’s perfect for any Christmas party. This dish combines the earthy, fresh flavor of asparagus with the salty, savory taste of prosciutto, creating a deliciously balanced bite-sized treat. Not only is it incredibly tasty, but it’s also a visually appealing addition to any holiday spread.
The best part? It’s budget-friendly and simple to make, allowing you to impress your guests without breaking the bank or spending hours in the kitchen. This dish can be prepared in advance, freeing you from last-minute stress during your festive gathering.
The crispy texture of the roasted asparagus complements the delicate, thinly-sliced prosciutto, making every bite a delightful experience. With minimal ingredients and easy preparation, Prosciutto-Wrapped Asparagus is a fantastic choice for a festive appetizer that can serve 4-6 people.
Ingredients:
- 1 pound of fresh asparagus (approximately 20 spears)
- 10 slices of prosciutto
- 2 tablespoons of olive oil
- Salt and pepper to taste
- 1 lemon, zested
- Grated Parmesan cheese (optional)
Cooking Instructions:
- Preheat the Oven: Begin by preheating your oven to 400°F (200°C). Line a baking sheet with parchment paper to prevent sticking and make cleanup easier.
- Prepare the Asparagus: Wash the asparagus spears thoroughly under cold water. Snap off the tough ends of the asparagus by gently bending each spear until it naturally breaks at the right point. Pat the asparagus dry with a clean kitchen towel.
- Season the Asparagus: Place the asparagus in a large bowl. Drizzle the olive oil over the asparagus and sprinkle with salt and pepper. Toss the spears gently until they’re evenly coated with oil and seasoning.
- Wrap with Prosciutto: Cut each slice of prosciutto in half lengthwise, creating long strips. Take one asparagus spear and wrap a strip of prosciutto around it in a spiral manner, starting just below the tip and working your way to the bottom. Repeat with all asparagus spears.
- Bake the Asparagus: Arrange the wrapped asparagus spears in a single layer on the prepared baking sheet. Place in the preheated oven and bake for 10-15 minutes, or until the asparagus is tender and the prosciutto is crispy.
- Garnish and Serve: Remove the baking sheet from the oven. Transfer the prosciutto-wrapped asparagus to a serving platter. Sprinkle with lemon zest and, if desired, a little grated Parmesan cheese before serving.
Extra Tips: When choosing asparagus, opt for spears that are firm and vibrant in color as they’ll be fresher and more flavorful. For an added touch, consider serving these with a simple dipping sauce, such as a lemon aioli or balsamic reduction, which complements the flavors nicely.
Also, be mindful not to overbake the asparagus to keep them tender-crisp, ensuring the best texture in each bite.
Balsamic Glazed Brussels Sprouts
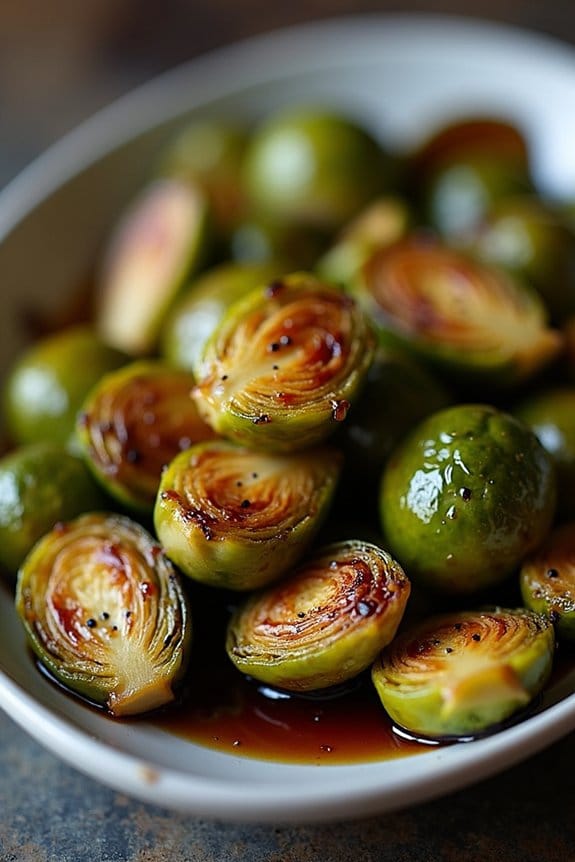
Balsamic Glazed Brussels Sprouts are a delightful side dish that brings a balance of sweet and tangy flavors to your festive table. This dish elevates the often-overlooked Brussels sprouts by infusing them with the rich, syrupy goodness of balsamic vinegar. Perfect for a budget-friendly Christmas party, these sprouts add a touch of elegance without breaking the bank. With their caramelized exterior and tender interior, they’re sure to be a crowd-pleaser.
The key to this dish is in the simplicity of its ingredients and the technique used to bring out the natural sweetness of the Brussels sprouts. By roasting them in the oven, you allow the outer leaves to crisp up, providing a delightful contrast to the tender inner layers. The balsamic glaze is added towards the end of the cooking process, allowing it to coat the sprouts perfectly without burning.
Whether you’re hosting a large gathering or a small family dinner, these Brussels sprouts will make an excellent addition to your menu.
Ingredients (Serves 4-6):
- 1 1/2 pounds Brussels sprouts, trimmed and halved
- 2 tablespoons olive oil
- Salt and pepper to taste
- 1/4 cup balsamic vinegar
- 1 tablespoon honey
- 1 teaspoon Dijon mustard
- 2 cloves garlic, minced
Cooking Instructions:
- Preheat the Oven: Preheat your oven to 400°F (200°C). This temperature guarantees that the Brussels sprouts roast evenly and develop a good caramelized crust.
- Prepare the Brussels Sprouts: Wash the Brussels sprouts thoroughly, trimming off the ends and removing any yellow or damaged outer leaves. Cut each sprout in half to allow for even cooking.
- Season the Sprouts: Place the halved Brussels sprouts in a large bowl. Drizzle with olive oil and season with salt and pepper. Toss the sprouts until they’re evenly coated with oil and seasoning.
- Roast the Sprouts: Spread the Brussels sprouts in a single layer on a baking sheet. Roast in the preheated oven for 20-25 minutes, stirring halfway through, until they’re golden brown and tender.
- Prepare the Balsamic Glaze: While the sprouts are roasting, prepare the glaze by combining balsamic vinegar, honey, Dijon mustard, and minced garlic in a small saucepan. Bring the mixture to a simmer over medium heat, stirring frequently, until it reduces by half and becomes syrupy, about 5-7 minutes.
- Glaze the Sprouts: Once the Brussels sprouts are roasted to perfection, remove them from the oven and transfer them to a serving bowl. Pour the balsamic glaze over the sprouts, tossing gently to coat each piece evenly.
- Serve: Serve the Balsamic Glazed Brussels Sprouts warm, garnished with a sprinkle of freshly cracked black pepper if desired.
Extra Tips:
For the best results, make sure that the Brussels sprouts are spread out in a single layer on the baking sheet; overcrowding can lead to steaming rather than roasting.
If you prefer a sweeter glaze, adjust the amount of honey to your taste. You can also add a sprinkle of toasted nuts, like walnuts or pecans, for added crunch and flavor.
If you have leftovers, they can be stored in an airtight container in the refrigerator for up to three days and reheated in the oven to maintain their crispiness.
Festive Cranberry Brie Bites
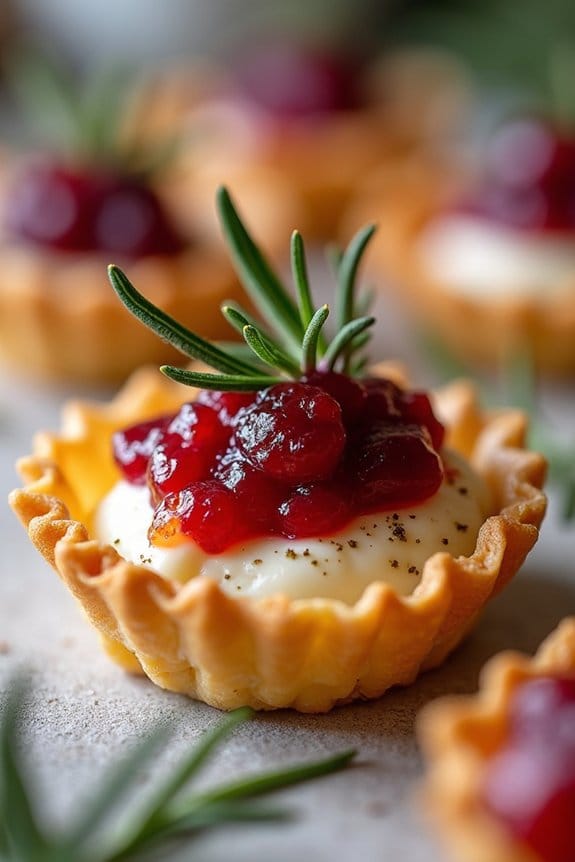
Festive Cranberry Brie Bites are the perfect budget-friendly appetizer to add a touch of elegance and flavor to your Christmas party. These delightful morsels combine the creaminess of Brie cheese with the tart sweetness of cranberry sauce, all nestled in a buttery, flaky phyllo pastry shell. Not only are they visually appealing, but they’re also incredibly easy to make, allowing you to impress your guests without spending hours in the kitchen or breaking the bank.
The combination of ingredients in Festive Cranberry Brie Bites creates a harmonious balance of flavors that will tantalize your taste buds. The Brie cheese melts beautifully, creating a luscious, creamy center, while the cranberry sauce adds an invigorating zing that cuts through the richness. These bites are just the right size for a party, making them an ideal finger food that guests can easily enjoy while mingling. Prepare to be showered with compliments as your friends and family dig into these festive treats.
Ingredients (Serves 4-6):
- 1 sheet of phyllo pastry (or 12 phyllo pastry cups)
- 8 oz Brie cheese
- 1/2 cup cranberry sauce (homemade or store-bought)
- 1 tablespoon chopped fresh rosemary (optional)
- 1 tablespoon melted butter or olive oil
Instructions:
- Preheat the Oven: Start by preheating your oven to 375°F (190°C). This guarantees that the bites bake evenly and the pastry becomes golden and crispy.
- Prepare the Phyllo Pastry: If using a sheet of phyllo pastry, carefully cut it into 4-inch squares and brush each square lightly with melted butter or olive oil. If you’re using pre-made phyllo pastry cups, you can skip this step.
- Assemble the Bites: Place a square of phyllo pastry into each cup of a mini muffin tin, pressing gently to form a cup shape. Cut the Brie into small cubes and place one cube into each phyllo cup. Top each piece of Brie with a teaspoon of cranberry sauce.
- Add Rosemary (Optional): If using rosemary, sprinkle a few chopped rosemary leaves over the cranberry sauce for an added burst of flavor and a festive touch.
- Bake: Place the muffin tin in the preheated oven and bake for 10-12 minutes, or until the phyllo pastry is golden brown and the Brie has melted.
- Cool and Serve: Once baked, remove the muffin tin from the oven and let the bites cool slightly before serving. This allows the cheese to set a little, making them easier to eat.
Extra Tips: For a homemade touch, you can make your own cranberry sauce by simmering fresh cranberries with sugar and a splash of orange juice until thick and jammy. If you’re short on time, store-bought cranberry sauce works just as well.
Additionally, feel free to experiment with different herbs like thyme or sage if rosemary isn’t available. Remember, the key to the perfect Festive Cranberry Brie Bite is to balance the amount of each ingredient so that every bite delivers a taste of creamy Brie, tart cranberry, and crispy pastry. Enjoy!
Spiced Holiday Meatballs
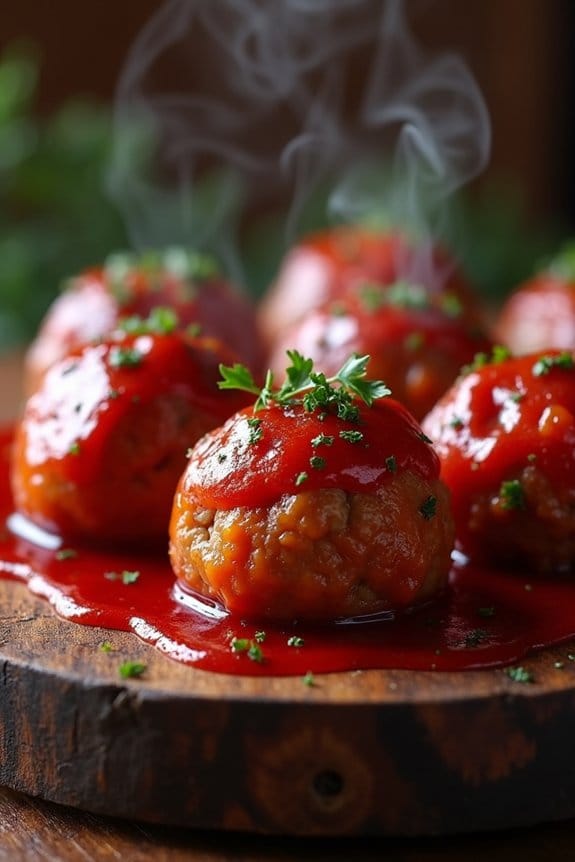
The holiday season is the perfect time to gather with loved ones and enjoy delicious meals together. Spiced Holiday Meatballs are a delightful addition to any Christmas party spread, offering a warm and comforting flavor profile that’s certain to please your guests.
These meatballs are seasoned with a blend of spices that evoke the festive spirit, making them an ideal choice for a budget-friendly yet impressive dish. Whether served as an appetizer or a main course, these meatballs are guaranteed to be a hit.
Made with a combination of ground meat and a medley of spices, these Spiced Holiday Meatballs aren’t only delicious but also easy to prepare. This recipe serves 4-6 people, making it perfect for a small gathering or a cozy family dinner.
With ingredients that are readily available and affordable, you can create a dish that captures the essence of the holiday season without breaking the bank. Follow the instructions below to create these flavorful meatballs that are certain to be a festive favorite.
Ingredients for 4-6 servings:
- 1 pound ground beef or turkey
- 1/2 cup breadcrumbs
- 1/4 cup milk
- 1 egg
- 1 small onion, finely chopped
- 2 cloves garlic, minced
- 1 teaspoon ground cinnamon
- 1 teaspoon ground nutmeg
- 1 teaspoon ground allspice
- 1/2 teaspoon salt
- 1/4 teaspoon black pepper
- 2 tablespoons olive oil
- 1 cup cranberry sauce
- 1/4 cup orange juice
- 2 tablespoons soy sauce
Instructions:
- Prepare the Mixture: In a large mixing bowl, combine the ground meat, breadcrumbs, milk, and egg. Add the chopped onion, minced garlic, cinnamon, nutmeg, allspice, salt, and pepper. Mix well until all ingredients are evenly incorporated.
- Shape the Meatballs: Using your hands, form the mixture into small meatballs, approximately 1 inch in diameter. Place the meatballs on a plate or baking sheet as you work to ensure they’re ready for cooking.
- Cook the Meatballs: In a large skillet, heat the olive oil over medium heat. Add the meatballs to the skillet, cooking them in batches if necessary to avoid overcrowding. Cook each meatball for about 5-7 minutes, turning occasionally, until they’re browned on all sides and cooked through.
- Prepare the Sauce: While the meatballs are cooking, in a separate saucepan, combine the cranberry sauce, orange juice, and soy sauce. Heat the mixture over medium-low heat, stirring occasionally, until it’s smooth and heated through.
- Combine and Serve: Once the meatballs are cooked, transfer them to the saucepan with the sauce. Gently stir to coat the meatballs evenly with the sauce. Allow them to simmer in the sauce for an additional 5 minutes to absorb the flavors. Serve the meatballs hot, garnished with additional spices if desired.
Extra Tips:
For a more intense flavor, consider making the meatball mixture a day in advance and refrigerating it overnight. This allows the spices to meld with the meat, enhancing the overall taste.
If you’re looking to add a bit of heat, a pinch of cayenne pepper can be included in the meatball mixture. Additionally, these meatballs can be kept warm in a slow cooker, making them a convenient option for serving at parties.
Herb-Crusted Salmon Bites

Herb-Crusted Salmon Bites are a delightful and elegant dish perfect for a budget-friendly Christmas party. These morsels of salmon are coated in a flavorful herb mixture, offering a burst of taste in every bite. Not only are they delicious, but they’re also quick to prepare and make a stunning addition to any festive spread.
The combination of fresh herbs and tender salmon will leave your guests impressed and satisfied, proving that you don’t need to break the bank to serve up gourmet treats. This recipe is designed to serve 4-6 people, making it ideal for small gatherings or as part of a larger holiday buffet.
The dish is versatile enough to pair with various sides, from simple salads to more elaborate vegetable platters. Whether you’re a novice cook or a seasoned chef, these Herb-Crusted Salmon Bites are sure to become a staple in your holiday recipe repertoire.
Ingredients:
- 1 pound salmon fillet, skin removed, cut into 1-inch cubes
- 1 cup fresh breadcrumbs
- 1/4 cup fresh parsley, finely chopped
- 2 tablespoons fresh dill, finely chopped
- 1 tablespoon fresh thyme leaves
- 1 teaspoon lemon zest
- Salt and pepper to taste
- 2 tablespoons olive oil
- Lemon wedges for serving
Cooking Instructions:
- Prepare the Herb Mixture:
- In a medium bowl, combine the fresh breadcrumbs, parsley, dill, thyme, lemon zest, salt, and pepper. Mix well to guarantee the herbs are evenly distributed throughout the breadcrumbs.
- Coat the Salmon:
- Pat the salmon cubes dry with a paper towel to remove any excess moisture. This helps the herb coating adhere better.
- Roll each salmon cube in the herb mixture, pressing gently to guarantee an even coating. Set aside on a plate.
- Cook the Salmon Bites:
- Heat the olive oil in a non-stick skillet over medium heat. Once the oil is hot, carefully place the salmon bites in the skillet.
- Cook the salmon bites for about 3-4 minutes on each side, or until they’re golden brown and cooked through. Avoid overcrowding the pan; cook in batches if necessary.
- Serve:
- Arrange the cooked salmon bites on a serving platter and garnish with lemon wedges. Serve warm, allowing guests to squeeze lemon juice over the bites for added flavor.
Extra Tips:
To enhance the flavor of your Herb-Crusted Salmon Bites, consider using a mix of different types of breadcrumbs, such as panko and regular, for added texture.
For a more intense lemon flavor, you can add a tablespoon of lemon juice to the herb mixture. If you prefer a spicier kick, a pinch of cayenne pepper can be mixed into the breadcrumbs.
Finally, confirm your skillet is hot enough before adding the salmon bites to prevent them from sticking and to guarantee a nice, crispy crust.
Creamy Garlic Mashed Cauliflower
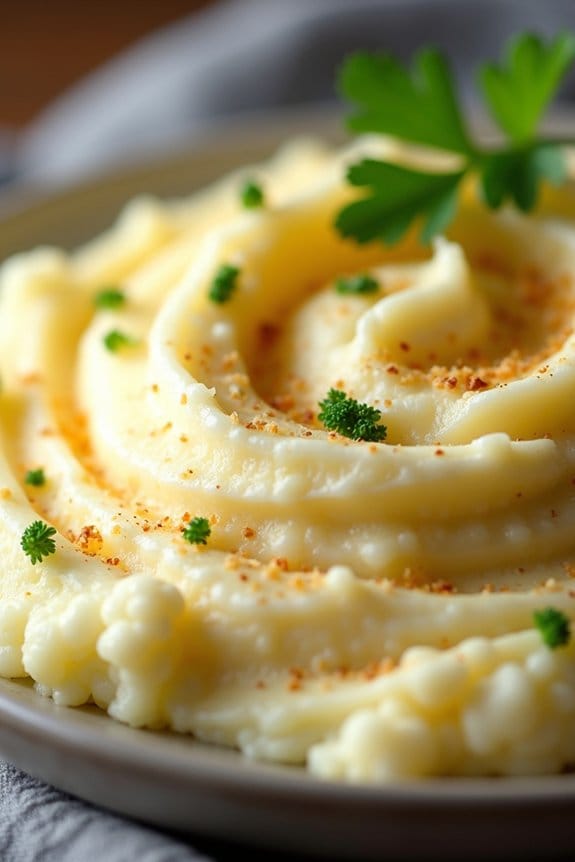
Creamy Garlic Mashed Cauliflower is a delightful and budget-friendly alternative to traditional mashed potatoes, perfect for holiday gatherings or any festive occasion. This dish isn’t only lighter on your wallet but also on your waistline, making it a great choice for those who are looking to indulge without the guilt.
Mashed cauliflower offers a creamy texture and rich flavor, thanks to the addition of garlic and other flavorful ingredients, making it a hit among guests of all dietary preferences. As you prepare for your Christmas party, this recipe for Creamy Garlic Mashed Cauliflower guarantees that you can serve a dish that’s both delicious and healthy.
The combination of cauliflower with garlic, butter, and cream cheese results in a smooth and savory dish that complements any main course. With the right blend of ingredients, this dish provides all the satisfaction of mashed potatoes but with a fraction of the carbohydrates and calories.
Here’s what you’ll need to make this tasty side dish for 4-6 people:
Ingredients:
- 2 large heads of cauliflower
- 4 cloves of garlic, minced
- 4 tablespoons of unsalted butter
- 4 ounces of cream cheese
- 1/4 cup of grated Parmesan cheese
- 1/4 cup of milk or cream
- Salt and pepper to taste
- Fresh parsley for garnish (optional)
Instructions:
- Prepare the Cauliflower: Begin by removing the leaves and core from the cauliflower heads. Cut the cauliflower into florets and rinse them under cold water to clean.
- Cook the Cauliflower: Fill a large pot with water and bring it to a boil. Add a pinch of salt and the cauliflower florets. Boil the cauliflower for about 10-12 minutes, until they’re tender and can be easily pierced with a fork.
- Drain and Dry: Once cooked, drain the cauliflower well and let it sit for a few minutes to allow excess moisture to evaporate. Pat it dry using a clean kitchen towel or paper towels to guarantee there’s no extra water.
- Sauté Garlic: In a small pan, melt 2 tablespoons of butter over medium heat. Add the minced garlic and sauté until fragrant and lightly golden, about 1-2 minutes. Be careful not to burn the garlic.
- Mash the Cauliflower: In a large mixing bowl or food processor, combine the cooked cauliflower, sautéed garlic with butter, remaining butter, cream cheese, and milk or cream. Blend or mash until smooth and creamy. You can adjust the consistency by adding more milk if needed.
- Season and Finish: Stir in the grated Parmesan cheese and season with salt and pepper to taste. Mix well to combine all ingredients evenly.
- Serve: Transfer the creamy garlic mashed cauliflower to a serving dish. Garnish with fresh parsley if desired and serve warm.
Extra Tips:
For an even creamier texture, make sure the cauliflower is fully cooked and adequately drained before mashing. A food processor will give the smoothest consistency, but a hand masher can also be used for a chunkier texture.
You can also experiment with adding other seasonings, such as nutmeg or chives, for a unique twist. If you want to make this dish ahead of time, you can prepare and store it in the refrigerator for up to two days; simply reheat it in the oven or microwave before serving.
Puff Pastry Cheese Straws
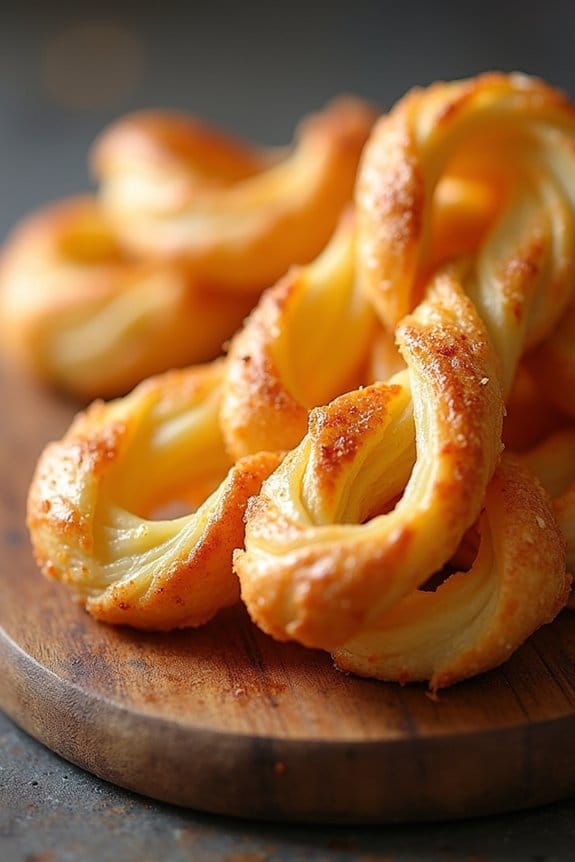
Puff Pastry Cheese Straws are a delightful and savory snack that are perfect for any Christmas party. These elegant and crispy treats aren’t only visually appealing but also incredibly easy to make, making them a great choice for hosts looking to impress guests without spending too much time in the kitchen.
The combination of buttery puff pastry and rich, melted cheese creates a flavorful bite that pairs well with a variety of holiday beverages. This recipe is budget-friendly and utilizes simple ingredients that can often be found in your pantry or at your local grocery store.
Puff Pastry Cheese Straws are versatile, allowing you to customize them with different types of cheese or seasonings based on your preferences. Whether you’re a seasoned chef or a beginner in the kitchen, you’ll find this recipe straightforward and rewarding, delivering impressive results that are sure to be a hit at your holiday gathering.
Ingredients for 4-6 people:
- 1 sheet of puff pastry (thawed if frozen)
- 1 cup of grated cheddar cheese
- 1/4 cup of grated Parmesan cheese
- 1 teaspoon of paprika
- 1/2 teaspoon of garlic powder
- 1 egg, beaten
- Salt and pepper to taste
Cooking Instructions:
- Prepare the Oven and Baking Sheet: Preheat your oven to 400°F (200°C). Line a large baking sheet with parchment paper to prevent sticking and guarantee easy cleanup.
- Roll Out the Puff Pastry: On a lightly floured surface, unfold and roll out the puff pastry sheet to approximately 10×12 inches. This will help guarantee an even thickness throughout, which is essential for uniform baking.
- Add Cheese and Seasonings: Evenly sprinkle the grated cheddar and Parmesan cheeses over the entire surface of the puff pastry. Follow this by sprinkling the paprika and garlic powder. Add salt and pepper according to your taste.
- Press Ingredients into Pastry: Gently press the cheese and seasonings into the puff pastry using a rolling pin or your hands. This will help the toppings stick to the pastry and prevent them from falling off during baking.
- Cut and Twist the Straws: Using a sharp knife or pizza cutter, slice the pastry into strips about 1/2-inch wide. Carefully pick up each strip, twist it several times, and lay it on the prepared baking sheet, leaving space between each twist for expansion.
- Egg Wash: Brush the twisted pastry strips with the beaten egg. This step will give the cheese straws a beautiful golden color and add a slight sheen to the finished product.
- Bake the Cheese Straws: Place the baking sheet in the preheated oven and bake for 12-15 minutes, or until the cheese straws are puffed and golden brown. Keep a close eye on them to avoid over-baking.
- Cool and Serve: Remove the cheese straws from the oven and let them cool on the baking sheet for a few minutes before transferring them to a wire rack. Serve warm or at room temperature.
Extra Tips:
When working with puff pastry, guarantee it remains cold to maintain its structure and flakiness. If it becomes too warm, pop it back in the fridge for a few minutes before proceeding.
You can experiment with different cheeses, such as Gruyere or Emmental, to vary the flavor. For an added touch, consider sprinkling sesame seeds or poppy seeds on top before baking.
These cheese straws can be made a day in advance and stored in an airtight container, making your party preparations even easier.
Honey Dijon Glazed Carrots
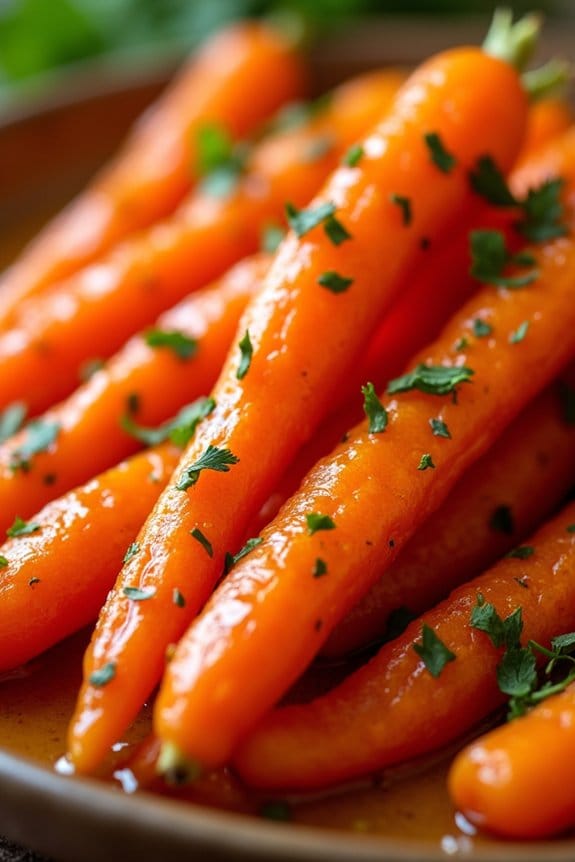
Bring a touch of elegance and a burst of flavor to your Christmas party with Honey Dijon Glazed Carrots. This delightful side dish pairs the natural sweetness of carrots with the tangy and rich flavors of honey and Dijon mustard, creating a harmonious blend that will tantalize your taste buds.
Not only is this dish simple to prepare, but it also utilizes budget-friendly ingredients, making it a perfect choice for a festive gathering. Whether served alongside a traditional Christmas roast or as part of a vegetarian feast, these glazed carrots will add a vibrant and delicious dimension to your holiday table.
The beauty of this recipe lies in its simplicity. With just a few ingredients, you can create a dish that looks and tastes gourmet without breaking the bank. The glaze, made with honey and Dijon mustard, not only enhances the natural sweetness of the carrots but also provides a beautiful glossy finish.
This dish can be made in under 30 minutes, allowing you to spend more time with your guests and less time in the kitchen. With a serving size of 4-6 people, this recipe is perfect for a small gathering or can be easily doubled for larger celebrations.
Ingredients:
- 2 pounds of carrots, peeled and cut into sticks
- 2 tablespoons olive oil
- 3 tablespoons honey
- 1 tablespoon Dijon mustard
- 1 tablespoon unsalted butter
- Salt and pepper to taste
- Fresh parsley, chopped (for garnish)
Instructions:
- Prepare the Carrots: Start by peeling the carrots and cutting them into evenly sized sticks, approximately 3 inches long. This guarantees that they cook evenly.
- Cook the Carrots: In a large skillet, heat the olive oil over medium heat. Add the carrot sticks to the skillet and sauté them for about 8-10 minutes, stirring occasionally, until they begin to soften and develop a slight golden color.
- Make the Glaze: In a small bowl, combine the honey, Dijon mustard, and unsalted butter. Stir until the mixture is well blended and smooth.
- Glaze the Carrots: Pour the honey Dijon mixture over the sautéed carrots in the skillet. Stir to coat the carrots evenly with the glaze. Continue to cook for an additional 5-7 minutes, allowing the glaze to thicken slightly and adhere to the carrots.
- Season and Serve: Season the glazed carrots with salt and pepper to taste. Transfer them to a serving dish, garnish with freshly chopped parsley, and serve warm.
Extra Tips:
To enhance the flavor profile of this dish, consider adding a splash of apple cider vinegar to the glaze for an extra tangy kick. If you prefer a bit of spice, a pinch of cayenne pepper can also be included in the glaze.
For a more uniform texture, make sure that the carrot sticks are cut to similar sizes. This dish can be prepared ahead of time and gently reheated before serving, making it a convenient option for holiday meal planning.
Enjoy your Honey Dijon Glazed Carrots as a complement to any festive main course!
Decadent Chocolate Truffles

Indulge in the luxurious flavors of homemade Decadent Chocolate Truffles, a treat that’s both budget-friendly and perfect for your Christmas party. These truffles are rich, smooth, and easy to make, requiring just a few simple ingredients that you likely already have in your pantry. Not only do they make an elegant dessert choice, but they also serve as a delightful gift when wrapped in festive packaging.
Crafting these chocolate truffles is an enjoyable process that allows for creativity. You can roll them in a variety of coatings such as cocoa powder, chopped nuts, or desiccated coconut to add a personal touch. With this recipe, you’ll create a batch of truffles that are sure to impress your guests while keeping costs in check. This recipe yields enough for 4-6 people, ensuring everyone gets a taste of this decadent dessert.
Ingredients:
- 8 ounces (about 225 grams) of high-quality dark chocolate
- 1/2 cup (120 ml) of heavy cream
- 1 teaspoon of vanilla extract
- A pinch of salt
- Cocoa powder, for coating
- Chopped nuts, for coating (optional)
- Desiccated coconut, for coating (optional)
Instructions:
- Prepare the Chocolate: Begin by chopping the dark chocolate into small, even pieces. This helps it melt more uniformly. Place the chocolate into a heatproof bowl.
- Heat the Cream: In a small saucepan, heat the heavy cream over medium heat until it just begins to simmer. You’ll know it’s ready when small bubbles form around the edge. Be careful not to let it boil.
- Combine Chocolate and Cream: Pour the hot cream over the chopped chocolate. Let it sit for about 2 minutes to allow the chocolate to soften.
- Mix Until Smooth: Add the vanilla extract and a pinch of salt to the mixture. Stir gently with a spatula or whisk until the chocolate has completely melted and the mixture is smooth and glossy.
- Chill the Mixture: Cover the bowl with plastic wrap and refrigerate for about 1-2 hours, or until the mixture is firm enough to scoop.
- Form the Truffles: Once chilled, use a small cookie scoop or a teaspoon to scoop out small amounts of the mixture. Roll each portion into a ball with your hands.
- Coat the Truffles: Roll the truffles in your choice of coatings such as cocoa powder, chopped nuts, or desiccated coconut. Place the coated truffles on a parchment-lined baking sheet.
- Chill Again: Once all truffles are formed and coated, refrigerate them for another 30 minutes to set.
Extra Tips:
For the best results, use high-quality chocolate, as it’s the star ingredient in this recipe. If the truffle mixture is too hard to scoop after chilling, let it sit at room temperature for a few minutes to soften slightly. Conversely, if it’s too soft, pop it back in the fridge for a little longer.
When rolling the truffles, it helps to have slightly damp or cool hands to prevent the chocolate from melting too quickly. Feel free to experiment with different flavors by adding a splash of liqueur or a pinch of spice to the chocolate mixture for a unique twist.
Enjoy your homemade Decadent Chocolate Truffles as a delicious treat that embodies the festive spirit!
Miniature Cheesecake Bites

Miniature Cheesecake Bites are the perfect bite-sized dessert for any Christmas party, offering a delightful blend of creamy richness and subtle sweetness. These little treats aren’t only budget-friendly but also incredibly easy to make, making them an ideal choice for both novice and experienced bakers.
With a buttery graham cracker crust and a smooth, tangy cream cheese filling, these cheesecake bites are sure to be a hit, leaving your guests craving for more.
Preparing these Miniature Cheesecake Bites requires minimal ingredients and effort, yet yields impressive results. This recipe is designed to serve 4-6 people, providing just the right amount for a small gathering.
Whether served plain or topped with your favorite fruit preserves or chocolate sauce, these cheesecake bites are versatile and can be customized to suit any preference. Below is a thorough guide to creating these delightful treats, complete with a list of ingredients and step-by-step instructions.
Ingredients:
- 1 cup graham cracker crumbs
- 3 tablespoons melted butter
- 2 tablespoons granulated sugar
- 8 ounces cream cheese, softened
- 1/4 cup granulated sugar
- 1 teaspoon vanilla extract
- 1 large egg
- 1 tablespoon all-purpose flour
- 1/4 cup sour cream
Instructions:
- Prepare the Crust:
- Preheat your oven to 325°F (165°C).
- In a medium-sized bowl, combine the graham cracker crumbs, melted butter, and 2 tablespoons of granulated sugar. Mix until the crumbs are evenly coated and the mixture resembles wet sand.
- Form the Base:
- Line a mini muffin tin with paper liners. Spoon about a tablespoon of the graham cracker mixture into each liner, pressing down firmly to form a compact crust. Use the back of a spoon or your fingers to make sure it’s well packed.
- Make the Cheesecake Filling:
- In a large mixing bowl, beat the softened cream cheese until smooth and creamy. Add 1/4 cup of granulated sugar and continue mixing until fully incorporated.
- Mix in the vanilla extract and egg, blending until just combined. Avoid overmixing to prevent air bubbles.
- Gently fold in the flour and sour cream until the filling is smooth and well combined.
- Assemble and Bake:
- Spoon the cheesecake mixture over the crusts, filling each liner nearly to the top.
- Bake in the preheated oven for 15-18 minutes, or until the centers are set and the tops are slightly puffed.
- Allow the cheesecake bites to cool completely in the tin before transferring them to the refrigerator to chill for at least an hour.
- Serve:
- Once chilled, remove the cheesecake bites from the liners and garnish with your choice of toppings such as fresh berries, chocolate drizzle, or a dusting of powdered sugar.
Extra Tips:
To achieve a smooth cheesecake filling, make sure the cream cheese is at room temperature before mixing. This prevents lumps and guarantees a creamy texture.
It’s also important to avoid overbaking the cheesecake bites; the centers should still have a slight jiggle when removed from the oven, as they’ll firm up while cooling.
For an extra festive touch, consider adding a drop of food coloring to the filling for a holiday theme, or top with a small dollop of whipped cream and a sprinkle of crushed candy canes.
Sparkling Holiday Punch
The holiday season is the perfect time to gather with friends and family, and no festive gathering is complete without a revitalizing drink to toast with. This Sparkling Holiday Punch isn’t only delicious and visually appealing, but it’s also incredibly easy on the wallet.
Featuring a delightful combination of juices and sparkling elements, this punch will add a festive glow to your party table. Whether you’re hosting a large gathering or a cozy family dinner, this punch is sure to be a hit with guests of all ages.
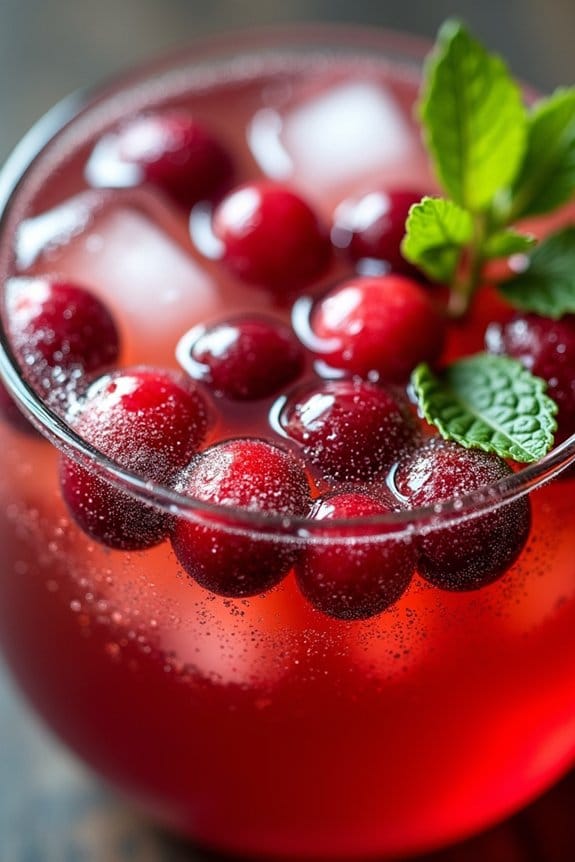
This recipe is designed to serve 4-6 people, making it ideal for a small group. With a blend of tart cranberry juice, sweet pineapple juice, and fizzy ginger ale, this punch strikes the perfect balance of flavors. A touch of fresh lime juice adds a hint of zest, while the sparkling water guarantees a bubbly finish.
Garnished with fresh cranberries and mint leaves, this punch not only tastes vibrant but also looks stunning in a punch bowl or pitcher.
Ingredients (Serves 4-6):
- 2 cups cranberry juice
- 1 cup pineapple juice
- 1 cup ginger ale
- 1 cup sparkling water
- 1/4 cup fresh lime juice
- 1/2 cup fresh cranberries
- Mint leaves for garnish
- Ice cubes
Instructions:
- Prepare the Base: In a large pitcher or punch bowl, combine the cranberry juice, pineapple juice, and fresh lime juice. Stir well to guarantee the juices are thoroughly mixed.
- Add the Fizz: Pour in the ginger ale and sparkling water. Stir gently to combine, being careful not to lose the carbonation. This will give your punch its revitalizing sparkle.
- Chill the Punch: Add a generous amount of ice cubes to the punch to keep it chilled. You can alternatively chill the juices and ginger ale beforehand to reduce dilution from the ice.
- Garnish and Serve: Before serving, add the fresh cranberries and mint leaves to the punch. This not only provides a lovely visual appeal but also infuses subtle flavors into the drink. Serve immediately to enjoy the full effervescence.
Extra Tips:
For an extra festive touch, consider freezing some cranberries inside ice cubes to add to the punch. This not only keeps the drink cold but also adds a decorative element.
If you prefer a less sweet punch, opt for diet ginger ale or reduce the amount of pineapple juice. Additionally, you can prepare the juice mixture ahead of time and add the ginger ale and sparkling water just before serving to maintain the fizz.
Enjoy your Sparkling Holiday Punch as a delightful centerpiece for your holiday celebrations!
