
Hosting a Christmas lunch and looking for the perfect bites to serve? Sandwiches and sliders are the go-to crowd-pleasers and are super easy to whip up. From classic turkey and cranberry sliders to savory ham and Swiss with honey mustard, there’s a flavor for every palate. For those seeking lighter options, try roast vegetable and hummus wraps. Ready to explore more delicious ideas?
Classic Turkey and Cranberry Sliders
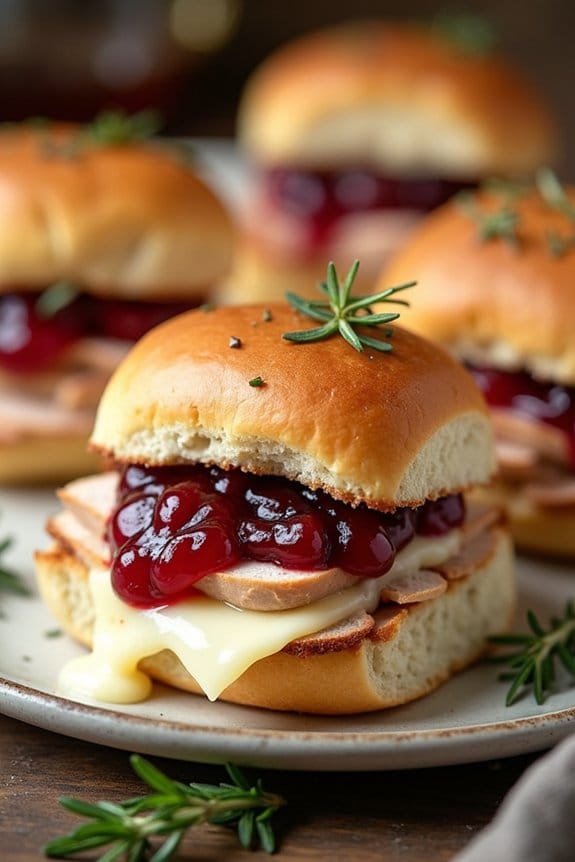
The holiday season brings with it the joy of gathering around the table to enjoy delicious meals with family and friends. One classic dish that perfectly captures the flavors of Christmas is the Classic Turkey and Cranberry Slider.
These sliders are a delightful way to use leftover turkey from your Christmas lunch, paired with the sweet and tangy taste of cranberry sauce. Easy to prepare and perfect for a cozy lunch or a festive gathering, these sliders bring the comforting taste of the holiday season into every bite.
These sliders combine tender slices of turkey with a rich cranberry sauce, all nestled in soft, buttery slider buns. The addition of a creamy cheese, such as Brie or Swiss, adds a layer of indulgence, while a hint of mustard gives a subtle kick. The result is a perfect balance of flavors and textures that make these sliders irresistible. Ideal for serving 4-6 people, these sliders make a wonderful addition to your holiday menu.
Ingredients (Serving Size: 4-6 people):
- 12 slider buns
- 2 cups cooked turkey, sliced
- 1 cup cranberry sauce
- 6 slices of cheese (Brie or Swiss recommended)
- 2 tablespoons Dijon mustard
- 2 tablespoons butter, melted
- 1 tablespoon fresh rosemary, chopped (optional)
Cooking Instructions:
- Preheat the Oven: Start by preheating your oven to 350°F (175°C) to guarantee it’s ready for baking the sliders.
- Prepare the Slider Buns: Slice the slider buns in half horizontally and place the bottom halves on a baking sheet or in a baking dish.
- Assemble the Sliders: Spread a thin layer of Dijon mustard on the bottom halves of the buns. Layer the sliced turkey evenly over the mustard-coated buns.
- Add the Cranberry Sauce: Spread a generous spoonful of cranberry sauce over the turkey on each slider, making sure it covers the turkey evenly.
- Cheese Layer: Place a slice of cheese on top of the cranberry sauce for each slider. If using Brie, you may need to cut each slice to fit the size of the slider bun.
- Complete the Sliders: Place the top halves of the buns over the cheese. Brush the tops with melted butter and sprinkle with chopped rosemary for added flavor, if desired.
- Bake the Sliders: Cover the baking dish with aluminum foil and bake in the preheated oven for 10-12 minutes. Remove the foil and bake for an additional 5 minutes or until the cheese is melted and the tops are golden brown.
- Serve and Enjoy: Once baked, remove the sliders from the oven and let them cool slightly. Serve warm and enjoy the delightful combination of flavors.
Extra Tips:
To make the most out of your Classic Turkey and Cranberry Sliders, consider preparing the ingredients ahead of time, especially if you’re using leftover turkey.
You can also experiment by adding a layer of stuffing or a few slices of avocado for an extra twist. If you prefer a bit more crunch, lightly toast the inside of the slider buns before assembling.
These sliders are highly versatile and can be customized with your favorite festive flavors, making them a perfect addition to your holiday menu.
Roast Beef and Horseradish Sandwiches
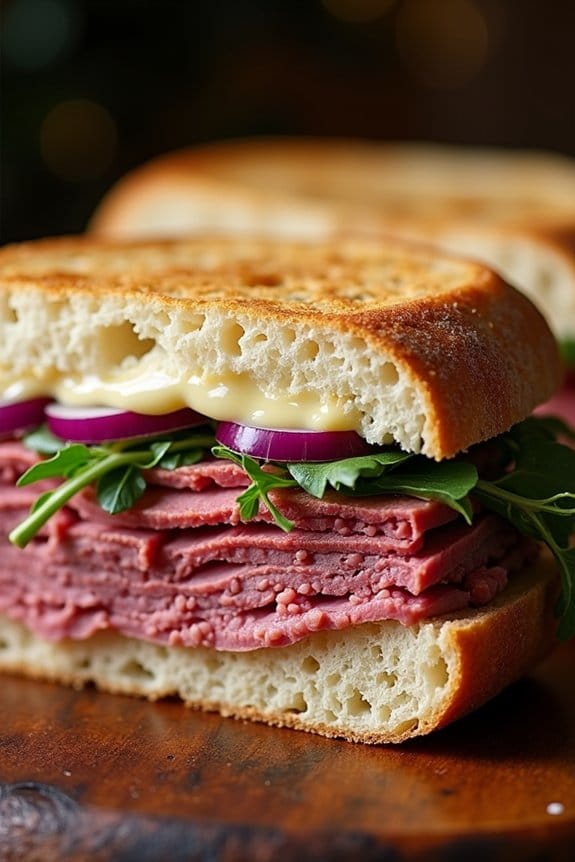
The Roast Beef and Horseradish Sandwich is a classic combination that brings a burst of flavors with every bite. Perfect for a festive Christmas lunch, this sandwich offers a delightful mix of tender roast beef, creamy horseradish sauce, and fresh toppings, all packed between crisp slices of bread.
It’s a simple yet sophisticated meal that will impress your guests and leave them craving more. Ideal for a serving size of 4-6 people, this recipe guarantees that your holiday gathering has a delectable centerpiece. The key is to use high-quality ingredients, as they elevate the overall taste and experience.
You can prepare these sandwiches ahead of time, making them a convenient and delicious option for any festive occasion.
Ingredients (for 4-6 servings):
- 1 pound of roast beef, thinly sliced
- 6 tablespoons of prepared horseradish sauce
- 12 slices of crusty bread (such as sourdough or ciabatta)
- 6 slices of Swiss cheese
- 1 red onion, thinly sliced
- 1 cup of arugula or mixed greens
- 2 tablespoons of olive oil
- Salt and pepper to taste
- Optional: 1 tablespoon of Dijon mustard
Cooking Instructions:
- Prepare the Bread: Preheat your oven to 350°F (175°C). Brush each slice of bread with olive oil on one side. Place the slices, oil-side down, on a baking sheet. Toast the bread in the oven for about 5 minutes, or until they’re lightly golden and crisp.
- Assemble the Sandwiches: Take one slice of toasted bread and spread a generous amount of horseradish sauce on the un-oiled side. If using, spread a thin layer of Dijon mustard for an extra kick.
- Layer the Ingredients: Place a layer of roast beef on top of the horseradish sauce, followed by a slice of Swiss cheese. Add a few slices of red onion and a handful of arugula or mixed greens for freshness.
- Finish the Sandwich: Top with another slice of toasted bread. Press down gently to ensure the sandwich holds together.
- Serve: Cut each sandwich in half and serve immediately. Arrange on a platter for a festive presentation.
Extra Tips:
For the best flavor, try to purchase roast beef that’s freshly sliced from the deli section of your grocery store. This guarantees it’s not overly processed and retains its juicy texture.
If you prefer a stronger horseradish flavor, you can add more horseradish sauce or even mix it into mayonnaise for a creamier spread. Additionally, feel free to customize your sandwiches with other toppings like pickles or roasted peppers to suit your taste preferences.
Enjoy your meal with a side of crispy potato chips or a light salad for a complete and satisfying Christmas lunch.
Ham and Swiss Sliders With Honey Mustard

Ham and Swiss Sliders With Honey Mustard are a delightful addition to any Christmas lunch spread. These tasty sliders combine the savory flavors of ham and Swiss cheese with the sweet and tangy bite of honey mustard, all encased in soft, buttery rolls.
Perfect for parties or family gatherings, these sliders are easy to make and guaranteed to be a hit with both kids and adults alike. The sliders are baked until the cheese is perfectly melted and the rolls are golden brown.
This recipe is designed to serve 4-6 people, making it ideal for intimate holiday gatherings. With minimal preparation time and a quick baking process, you can focus on enjoying the festive season with your loved ones rather than spending hours in the kitchen.
Ingredients (serving size: 4-6 people):
- 12 slider rolls or small dinner rolls
- 1 pound thinly sliced deli ham
- 12 slices Swiss cheese
- 1/4 cup mayonnaise
- 1/4 cup honey mustard
- 1/2 cup unsalted butter, melted
- 1 tablespoon poppy seeds
- 1 tablespoon Dijon mustard
- 1 tablespoon Worcestershire sauce
- 1 teaspoon garlic powder
Instructions:
- Preheat the Oven: Begin by preheating your oven to 350°F (175°C). This guarantees that it’s ready for baking once your sliders are assembled.
- Prepare the Baking Dish: Take a 9×13-inch baking dish and lightly grease it or line it with parchment paper to prevent sticking.
- Assemble the Sliders: Slice the slider rolls in half horizontally without separating them, and place the bottom halves in the prepared baking dish. Spread the mayonnaise evenly over the bottom halves of the rolls.
- Layer the Ingredients: Layer the ham evenly over the mayonnaise-covered rolls, followed by the Swiss cheese. Place the top halves of the rolls over the cheese.
- Make the Sauce: In a small bowl, whisk together the melted butter, honey mustard, Dijon mustard, Worcestershire sauce, poppy seeds, and garlic powder until well combined.
- Pour the Sauce: Carefully pour the sauce over the assembled sliders, ensuring that it seeps down into the rolls and covers the tops completely.
- Bake the Sliders: Cover the baking dish with aluminum foil and bake in the preheated oven for 15 minutes. Remove the foil and bake for an additional 5-10 minutes, or until the cheese is melted and the tops of the rolls are golden brown.
- Serve: Remove the sliders from the oven and let them cool slightly before slicing and serving warm.
Extra Tips: For an added crunch, you can sprinkle some finely chopped onions over the cheese layer before placing the top halves of the rolls.
If you prefer a spicier flavor, add a pinch of cayenne pepper to the butter sauce. These sliders are best served warm, but can be prepared a few hours in advance and kept at room temperature until ready to bake. Simply cover them tightly with plastic wrap to keep them fresh.
Brie and Apple Grilled Cheese
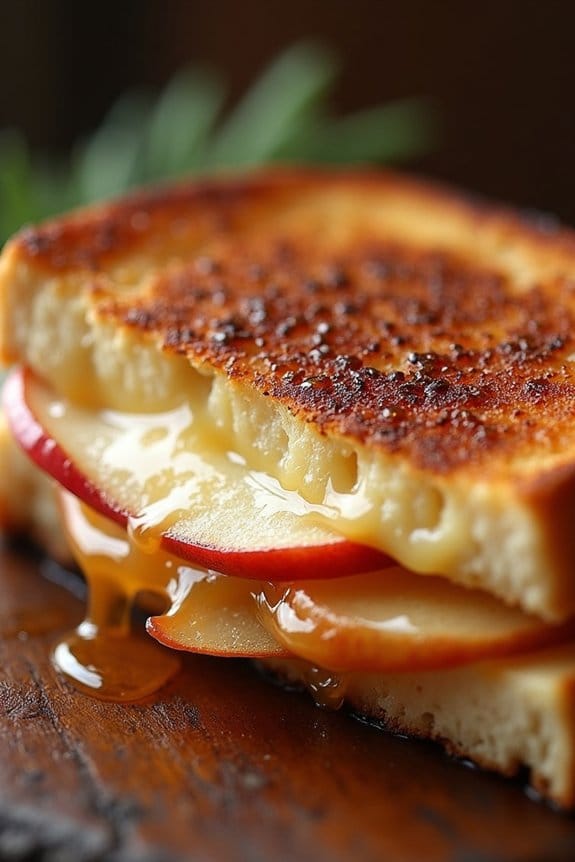
Brie and Apple Grilled Cheese sandwiches are a delightful twist on the classic grilled cheese, offering a perfect balance of creamy, savory, and sweet flavors. This sandwich brings together the silky texture of melted Brie cheese with the crisp and slightly tart freshness of sliced apples. The result is a warm, gooey center encased in crispy, golden-brown bread, making it an ideal comfort food for a festive Christmas lunch.
The addition of apples not only complements the cheese but also adds a revitalizing element to the sandwich, making each bite a unique experience. Whether you’re serving them as a main dish or as sliders for a larger spread, Brie and Apple Grilled Cheese sandwiches are sure to be a hit with family and friends. They’re easy to prepare and can be made in larger quantities, perfect for serving 4-6 people.
Ingredients:
- 8 slices of sourdough bread
- 12 ounces of Brie cheese, sliced
- 2 large apples, thinly sliced
- 4 tablespoons of unsalted butter, softened
- 2 tablespoons of honey
- Salt to taste
Cooking Instructions:
- Preparation: Begin by preparing all your ingredients. Slice the Brie cheese and apples thinly to guarantee they melt and cook evenly. Make sure the butter is softened for easy spreading.
- Assemble the Sandwich: Lay out the slices of sourdough bread. On one side of each slice, spread a thin layer of butter. On the unbuttered side, layer slices of Brie cheese and apple. Drizzle a small amount of honey over the apples, and sprinkle a pinch of salt to enhance the flavors.
- Close the Sandwich: Place another slice of bread on top of each assembled piece, buttered side facing out.
- Grill the Sandwich: Heat a non-stick skillet over medium heat. Place the sandwiches in the skillet, being careful not to overcrowd the pan. Cook each side for about 4-5 minutes, or until the bread is golden brown and crispy, and the cheese has melted.
- Serve: Once cooked, remove the sandwiches from the skillet and let them rest for a minute before slicing. Serve warm for the best taste and texture.
Extra Tips: For a more robust flavor, consider adding a sprinkle of cinnamon or nutmeg to the apples before assembling the sandwich. Additionally, you can substitute the sourdough bread with other types of bread such as multigrain or rustic white bread, depending on your preference. If you prefer a sharper flavor, a touch of Dijon mustard can be spread on the bread before layering the cheese and apple. Finally, make sure not to overfill the sandwiches, as this can make grilling them evenly more difficult.
Festive Pesto Chicken Sandwiches
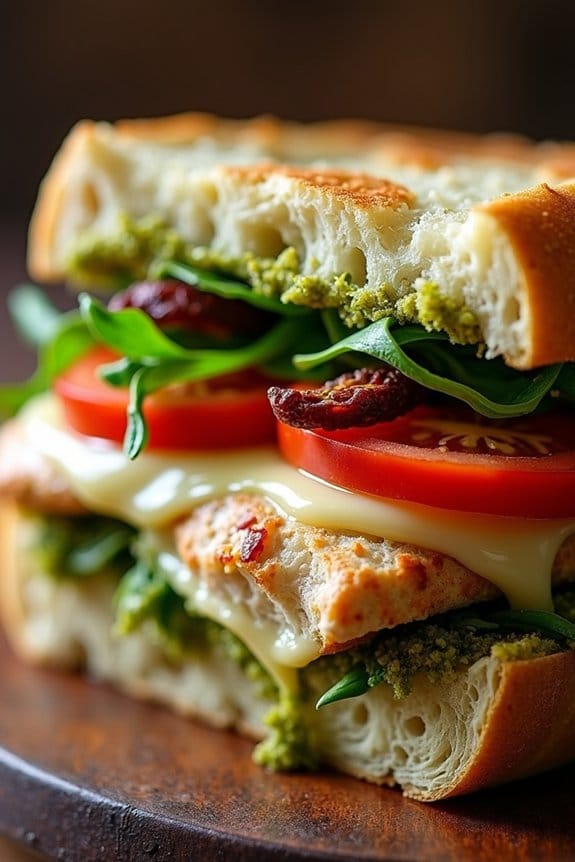
Celebrate the holiday season with a delightful twist on a classic sandwich. These Festive Pesto Chicken Sandwiches are perfect for Christmas lunch, combining the rich flavors of homemade pesto with tender, juicy chicken. The vibrant green of the pesto adds a festive touch, while the combination of fresh ingredients brings a burst of flavor with every bite.
Whether you’re serving them at a family gathering or enjoying a quiet holiday meal, these sandwiches are sure to impress.
These sandwiches aren’t only delicious but also easy to prepare, making them an ideal choice for a holiday meal. The crispy texture of the bread complements the creamy pesto and succulent chicken, creating a balanced and satisfying dish. With just a few simple steps, you can assemble a meal that looks and tastes gourmet.
Let’s explore the ingredients and instructions to make these mouth-watering Festive Pesto Chicken Sandwiches for 4-6 people.
Ingredients:
- 4 boneless, skinless chicken breasts
- 1 cup fresh basil leaves
- 1/4 cup pine nuts
- 1/2 cup grated Parmesan cheese
- 2 cloves garlic
- 1/2 cup olive oil
- Salt and pepper to taste
- 1 loaf of ciabatta bread or 6 sandwich rolls
- 1 cup arugula or fresh spinach
- 1 large tomato, sliced
- 6 slices of mozzarella cheese
- Optional: 1/4 cup sun-dried tomatoes
Instructions:
- Prepare the Pesto: In a food processor, combine the basil leaves, pine nuts, Parmesan cheese, and garlic. Pulse until finely chopped. With the processor running, gradually add the olive oil until the mixture is smooth. Season with salt and pepper to taste.
- Cook the Chicken: Season the chicken breasts with salt and pepper. Heat a grill pan or skillet over medium-high heat. Cook the chicken for about 6-7 minutes on each side, or until the internal temperature reaches 165°F (75°C). Once cooked, let the chicken rest for a few minutes before slicing it thinly.
- Assemble the Sandwiches: Slice the ciabatta bread or sandwich rolls in half. Spread a generous layer of pesto on the bottom half of each roll. Layer slices of cooked chicken, mozzarella cheese, tomato slices, and arugula or spinach over the pesto. Add sun-dried tomatoes for extra flavor if desired.
- Toast and Serve: Preheat your oven to 350°F (175°C). Place the assembled sandwiches on a baking sheet and toast in the oven for 5-7 minutes, or until the cheese is melted and the bread is slightly crisp. Serve immediately.
Extra Tips:
For an even more flavorful sandwich, marinate the chicken breasts in olive oil, lemon juice, and Italian herbs for at least 30 minutes before cooking. This will infuse the chicken with additional flavors that complement the pesto beautifully.
If you’re short on time, you can use store-bought pesto, but homemade pesto will give you the freshest taste. Feel free to customize the sandwiches with your favorite toppings, such as roasted red peppers or caramelized onions, to make them your own.
Smoked Salmon and Dill Cream Cheese Bagels
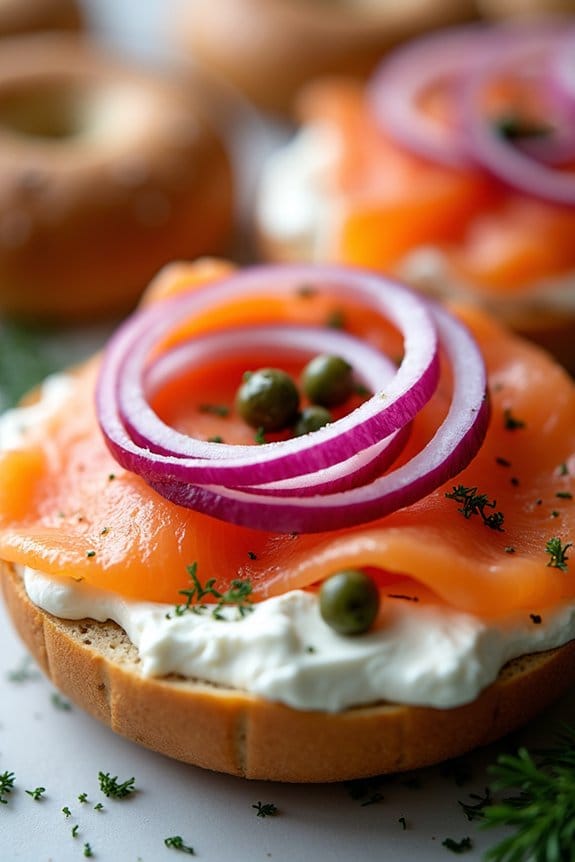
Indulge in the luxurious flavors of smoked salmon and dill cream cheese bagels for a perfect addition to your Christmas lunch spread. This delightful recipe combines the rich, smoky taste of salmon with the fresh, aromatic hints of dill-infused cream cheese, all nestled within a soft, chewy bagel.
It’s a sophisticated yet simple dish that’s sure to impress your guests with its vibrant flavors and elegant presentation. Whether serving it as a main dish or a festive appetizer, these smoked salmon and dill cream cheese bagels are a versatile option for your holiday menu.
The creamy texture of the cheese complements the tender salmon perfectly, while the dill adds a revitalizing note that ties the dish together. Prepare this dish in advance to allow the flavors to meld, making your Christmas lunch even more effortless and enjoyable.
Ingredients for 4-6 people:
- 6 bagels (preferably plain or sesame)
- 8 oz smoked salmon
- 8 oz cream cheese, softened
- 2 tablespoons fresh dill, finely chopped
- 1 tablespoon lemon juice
- 1 teaspoon lemon zest
- 1 small red onion, thinly sliced
- Capers (optional)
- Freshly ground black pepper, to taste
Cooking Instructions:
- Prepare the Dill Cream Cheese: In a mixing bowl, combine the softened cream cheese, chopped fresh dill, lemon juice, and lemon zest. Mix well until all ingredients are evenly incorporated and the cream cheese is smooth.
- Slice the Bagels: Carefully slice each bagel in half horizontally. If desired, lightly toast the bagel halves to add a subtle crunch and warmth.
- Assemble the Bagels: Spread a generous layer of the dill cream cheese mixture onto each bagel half. Make sure the cream cheese covers the entire surface to guarantee every bite is flavorful.
- Add the Smoked Salmon: Evenly distribute the smoked salmon slices onto the cream cheese-covered bagels. Aim for an even layer to balance the flavors and textures.
- Top with Onions and Capers: Place thin slices of red onion over the smoked salmon layer. If you enjoy the briny taste, add a few capers on top of the onions.
- Season and Serve: Finish with a sprinkle of freshly ground black pepper to enhance the flavors. Arrange the bagels on a serving platter and serve immediately for the best taste and texture.
Extra Tips:
For a more personalized touch, consider offering additional toppings such as sliced avocados, cucumber, or tomatoes, allowing your guests to customize their bagels to their liking.
When selecting smoked salmon, opt for high-quality varieties to guarantee a rich, authentic flavor. If preparing in advance, keep the components separate and assemble just before serving to maintain the freshness and prevent the bagels from becoming soggy.
Enjoy this dish as part of a festive brunch or serve as an elegant appetizer, adding a touch of sophistication to your holiday gathering.
Caprese Sandwich With Balsamic Glaze
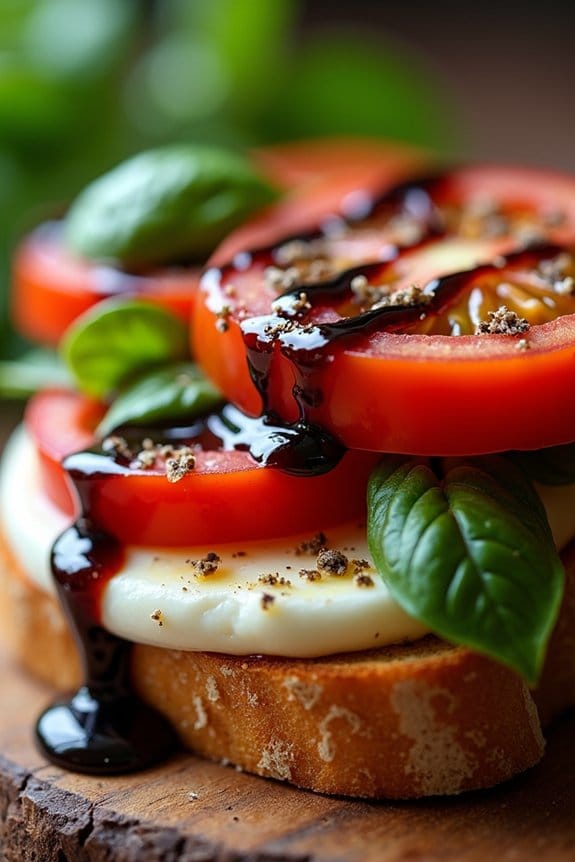
Caprese sandwiches with balsamic glaze are a delightful twist on the classic Italian Caprese salad. These sandwiches aren’t only visually appealing with their vibrant colors but also burst with fresh flavors. The combination of ripe tomatoes, creamy mozzarella, fresh basil, and a drizzle of sweet balsamic glaze makes for a revitalizing and satisfying meal. Perfect for a Christmas lunch, these sandwiches can be served as sliders, making them a great choice for a festive gathering.
The Caprese sandwich is simple yet elegant, relying on high-quality ingredients to shine. The key to a delicious Caprese sandwich is using fresh, ripe tomatoes and good-quality mozzarella cheese. The balsamic glaze adds a sweet and tangy touch that elevates the flavors, making every bite an experience. These sandwiches are quick to assemble, making them ideal for a busy holiday season when you want to spend more time with loved ones and less time in the kitchen.
Ingredients (Serving size: 4-6 people):
- 8-12 slices of ciabatta or French bread
- 4 large ripe tomatoes, sliced
- 16 ounces fresh mozzarella cheese, sliced
- Fresh basil leaves
- 1 cup balsamic vinegar
- 1 tablespoon honey or brown sugar
- Salt and pepper to taste
- Olive oil for drizzling
Cooking Instructions:
- Prepare the Balsamic Glaze: In a small saucepan, combine the balsamic vinegar and honey or brown sugar. Bring the mixture to a gentle boil over medium heat, then reduce the heat to low. Let it simmer, stirring occasionally, until the mixture has thickened and reduced by about half, approximately 10-15 minutes. Remove from heat and let it cool.
- Slice the Ingredients: While the glaze is cooling, slice the tomatoes and mozzarella cheese into even slices. Tear the basil leaves into smaller pieces if they’re large.
- Assemble the Sandwiches: Lay out the slices of bread on a clean surface. On one slice, layer a couple of slices of tomato, followed by slices of mozzarella cheese, and top with fresh basil leaves. Drizzle a small amount of olive oil over the toppings and season with salt and pepper to taste.
- Drizzle the Glaze: Once all the sandwiches are assembled, drizzle the cooled balsamic glaze over the top of the ingredients. Use a spoon or a squeeze bottle for a more controlled pour.
- Finish the Sandwiches: Place the remaining bread slices on top to complete the sandwiches. If desired, you can slice each sandwich in half for easier handling.
- Serve: Arrange the sandwiches on a platter and serve immediately. If making sliders, cut the bread and fillings into smaller portions before assembling.
Extra Tips: For the best flavor, let the balsamic glaze cool completely before drizzling it over the sandwiches, as this will allow the flavors to concentrate and thicken. Additionally, if you prefer a warm sandwich, consider lightly toasting the bread before assembling. Confirm the mozzarella is fresh and moist to achieve the creamy texture that complements the tomatoes and basil. For those who enjoy a bit of garlic, a light rub of a garlic clove on the bread before assembly can add a subtle depth of flavor.
Pulled Pork Sliders With Coleslaw
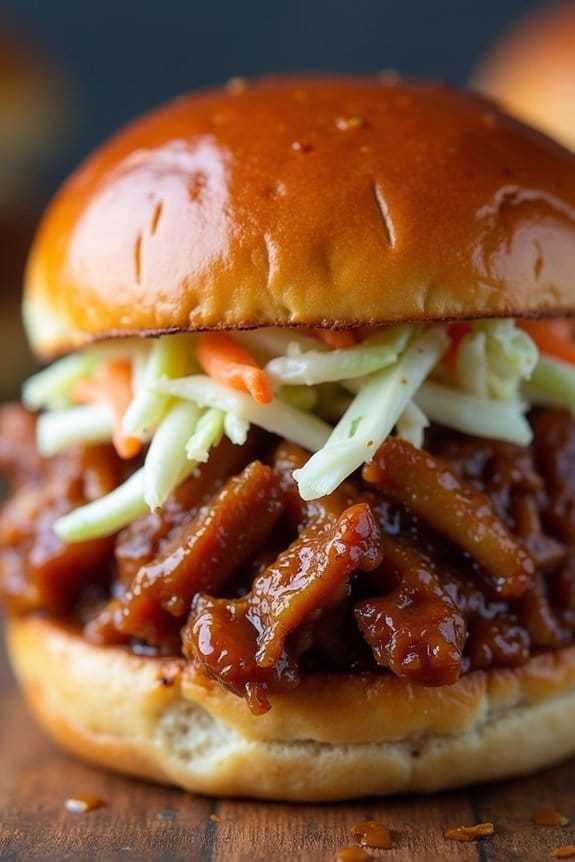
Pulled Pork Sliders With Coleslaw are a delightful way to indulge in the flavors of a classic barbecue dish, all packed into a convenient sandwich form. Perfect for a Christmas lunch or any festive gathering, these sliders offer a harmonious balance of tender, slow-cooked pork and crunchy, tangy coleslaw.
The sliders are easy to prepare and make a great addition to any holiday feast, allowing you to enjoy the spirit of Christmas with every bite. The juicy, flavorful pulled pork is the star of this dish, slow-cooked to perfection to guarantee it’s tender and succulent.
Paired with a creamy coleslaw that provides a revitalizing contrast, these sliders are sure to be a hit with family and friends. Whether served as a main course or as part of a buffet, Pulled Pork Sliders With Coleslaw are versatile and satisfying, making them an ideal choice for your holiday menu.
Ingredients (Serves 4-6):
- 2 pounds pork shoulder or pork butt
- 1 tablespoon olive oil
- 1 tablespoon smoked paprika
- 2 teaspoons garlic powder
- 1 teaspoon onion powder
- 1 teaspoon salt
- 1 teaspoon black pepper
- 1 cup barbecue sauce
- 12 slider buns
- 2 cups coleslaw mix (cabbage and carrots)
- 1/2 cup mayonnaise
- 1 tablespoon apple cider vinegar
- 1 tablespoon sugar
- Salt and pepper to taste
Cooking Instructions:
- Prepare the Pork: Begin by rubbing the pork shoulder with olive oil, smoked paprika, garlic powder, onion powder, salt, and black pepper. Guarantee the pork is evenly coated with the seasoning.
- Cook the Pork: Place the seasoned pork in a slow cooker. Add 1/2 cup of barbecue sauce over the top. Cover and cook on low for 8 hours or until the pork is tender and easily shreds with a fork.
- Make the Coleslaw: While the pork is cooking, prepare the coleslaw. In a large bowl, combine the coleslaw mix with mayonnaise, apple cider vinegar, sugar, salt, and pepper. Mix thoroughly and refrigerate until ready to serve.
- Shred the Pork: Once the pork is cooked, remove it from the slow cooker and shred it using two forks. Mix in the remaining 1/2 cup of barbecue sauce to the shredded pork to enhance the flavor.
- Assemble the Sliders: Slice the slider buns in half. Place a generous portion of pulled pork on the bottom half of each bun. Top with a scoop of coleslaw and cover with the top half of the bun.
- Serve: Arrange the sliders on a serving platter and enjoy them warm.
Extra Tips:
For the best results, choose a well-marbled pork shoulder or pork butt, as the fat content will keep the meat moist and flavorful during the cooking process.
If you’re short on time, you can prepare the pork a day in advance and reheat it before assembling the sliders. Additionally, feel free to customize the coleslaw to suit your taste; adding ingredients like apple slices or a hint of mustard can provide an extra layer of flavor.
Vegetarian Stuffed Bell Pepper Sandwiches

Vegetarian Stuffed Bell Pepper Sandwiches are a delightful and hearty option for a Christmas lunch that caters to both vegetarians and those looking to try something new.
These sandwiches pack a punch of flavor with their vibrant colors and savory stuffing that includes a mix of grains, vegetables, and spices. Perfectly nestled inside halved bell peppers, these sandwiches aren’t only visually appealing but also offer a satisfying and nutritious meal option.
Ideal for serving 4-6 people, this recipe is designed to be both simple and impressive. The combination of ingredients guarantees a balanced taste, while the presentation makes it a festive addition to any holiday spread.
Whether you’re hosting a gathering or simply want to enjoy a special meal, these Vegetarian Stuffed Bell Pepper Sandwiches are sure to be a hit.
Ingredients (serving size 4-6 people):
- 6 medium-sized bell peppers (any color)
- 1 cup quinoa
- 2 cups vegetable broth
- 1 can (15 oz) black beans, drained and rinsed
- 1 cup corn kernels (fresh, frozen, or canned)
- 1 cup cherry tomatoes, halved
- 1/2 cup red onion, finely chopped
- 1 cup shredded cheddar cheese (optional)
- 2 teaspoons olive oil
- 1 teaspoon ground cumin
- 1 teaspoon smoked paprika
- 1/2 teaspoon garlic powder
- Salt and pepper to taste
- Fresh cilantro, for garnish
Cooking Instructions:
- Prepare the Bell Peppers: Preheat your oven to 375°F (190°C). Cut the bell peppers in half lengthwise and remove the seeds and membranes. Lightly brush the outer skin with olive oil and place them cut side up on a baking sheet.
- Cook the Quinoa: In a medium saucepan, combine the quinoa and vegetable broth. Bring to a boil, then reduce the heat to low. Cover and let it simmer for about 15 minutes, or until the liquid is absorbed and the quinoa is fluffy.
- Prepare the Filling: In a large mixing bowl, combine the cooked quinoa, black beans, corn, cherry tomatoes, red onion, olive oil, cumin, smoked paprika, garlic powder, salt, and pepper. Mix well until all ingredients are evenly distributed.
- Stuff the Peppers: Spoon the filling mixture into each bell pepper half, pressing down gently to pack it in. If desired, sprinkle shredded cheddar cheese over the top of each stuffed pepper.
- Bake the Peppers: Place the baking sheet in the preheated oven and bake for 25-30 minutes, or until the peppers are tender and the cheese is melted and bubbly.
- Garnish and Serve: Remove the stuffed peppers from the oven and let them cool slightly. Garnish with fresh cilantro before serving. Enjoy these flavorful and colorful Vegetarian Stuffed Bell Pepper Sandwiches warm.
Extra Tips:
When selecting bell peppers, look for ones that are firm and have a smooth, unblemished skin. They should also be able to sit flat on the baking sheet without tipping over.
For a bit of spice, consider adding diced jalapeños or a sprinkle of chili flakes to the filling. Additionally, these sandwiches are versatile; feel free to substitute or add other vegetables such as zucchini or mushrooms, and use vegan cheese to make the dish entirely plant-based.
Eggnog French Toast Sandwiches

Eggnog French Toast Sandwiches are a delightful twist on the traditional French toast, incorporating the rich flavors of holiday eggnog. Perfect for a festive brunch or a special Christmas lunch, these sandwiches offer a sweet, creamy indulgence that will please both kids and adults alike. By using thick slices of bread and a luscious eggnog batter, you create a dish that isn’t only delicious but also visually appealing with its golden-brown crust and fluffy interior.
These sandwiches can be served as they’re or paired with your favorite holiday toppings like fresh berries, whipped cream, or even a dusting of powdered sugar. By adding fillings like creamy mascarpone or a tangy cranberry sauce, you elevate the flavor profile, creating a memorable holiday treat. Whether you’re gathering with friends or enjoying a cozy family meal, Eggnog French Toast Sandwiches are sure to become a cherished part of your festive traditions.
Ingredients (Serving size: 4-6 people):
- 12 slices of thick-cut bread (brioche or challah recommended)
- 2 cups eggnog
- 4 large eggs
- 1 teaspoon ground cinnamon
- 1 teaspoon vanilla extract
- 1/4 teaspoon salt
- 1/4 cup unsalted butter
- 1 cup mascarpone cheese
- 1/2 cup cranberry sauce
- Maple syrup or powdered sugar (optional, for serving)
Cooking Instructions:
- Prepare the Eggnog Mixture: In a large mixing bowl, whisk together the eggnog, eggs, cinnamon, vanilla extract, and salt until well combined. This will be your soaking mixture, infusing the bread with rich holiday flavors.
- Heat the Skillet: Place a large skillet or griddle over medium heat and add 2 tablespoons of butter. Allow the butter to melt and start to bubble gently before proceeding to the next step.
- Soak the Bread: Dip each slice of bread into the eggnog mixture, ensuring both sides are well coated, but not overly saturated. Let the excess eggnog mixture drip off before placing the bread on the skillet.
- Cook the French Toast: Arrange the slices of soaked bread in the skillet, cooking them in batches if necessary. Cook each side for about 3-4 minutes, or until golden brown and cooked through. Add more butter to the skillet as needed for subsequent batches.
- Assemble the Sandwiches: Spread a generous layer of mascarpone cheese on half of the cooked bread slices. Top with cranberry sauce, and then cover with another slice of French toast to form a sandwich.
- Serve: Cut the sandwiches in half and serve warm. Optionally, drizzle with maple syrup or dust with powdered sugar for added sweetness.
Extra Tips:
When making Eggnog French Toast Sandwiches, it’s important to use a bread that can absorb the eggnog mixture without falling apart. Brioche and challah are ideal choices due to their dense, sturdy texture.
If you prefer a different filling, consider using sweetened cream cheese or a nut spread. For an added crunch, sprinkle some chopped nuts or granola on the filling before closing the sandwich.
Adjust the sweetness to your preference by experimenting with the amount of maple syrup or powdered sugar used for serving. Enjoy your festive creation with a side of fresh fruit or a cup of hot cocoa to enhance the holiday experience.
Roast Vegetable and Hummus Wraps
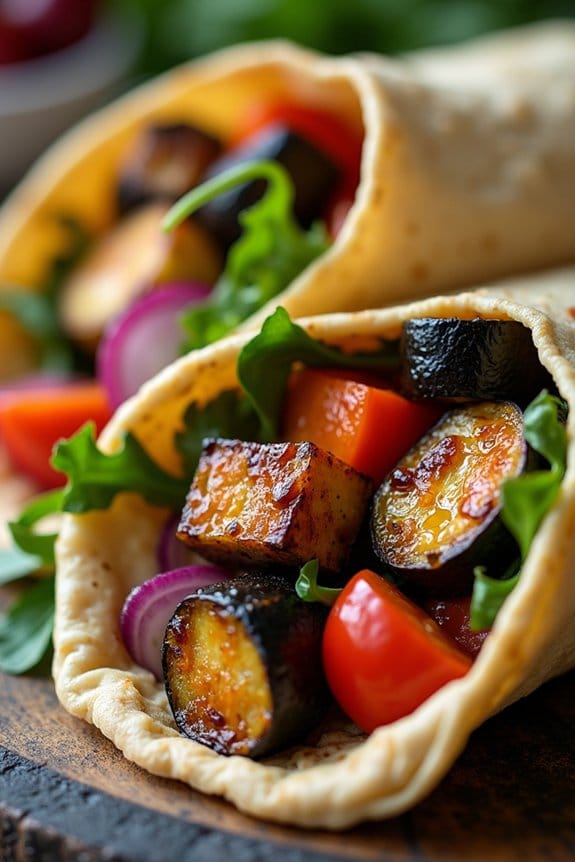
Roast Vegetable and Hummus Wraps are a delightful and nutritious option for a Christmas lunch that caters to both vegetarians and health-conscious eaters. This wrap combines the earthy flavors of roasted vegetables with the creamy, rich taste of hummus, resulting in a satisfying and flavorful meal.
The dish isn’t only vibrant and colorful, adding a festive touch to your Christmas table, but it’s also packed with essential nutrients, making it a guilt-free indulgence.
Perfect for a serving size of 4-6 people, these wraps are easy to prepare and can be made ahead of time, allowing you to enjoy the company of your guests without spending too much time in the kitchen.
The combination of textures, from the soft hummus to the slightly crispy roasted vegetables, provides a delightful eating experience. This versatile dish can be customized with your favorite seasonal vegetables, making it a flexible addition to your holiday menu.
Ingredients (Serves 4-6):
- 2 red bell peppers
- 2 zucchini
- 1 eggplant
- 1 red onion
- 2 tablespoons olive oil
- Salt and black pepper, to taste
- 6 large whole wheat or spinach wraps
- 1 cup hummus
- 1 cup baby spinach or arugula leaves
- 1 tablespoon balsamic glaze (optional)
Cooking Instructions:
- Preheat the Oven: Begin by preheating your oven to 400°F (200°C) to guarantee it’s hot enough to perfectly roast the vegetables.
- Prepare the Vegetables: Wash the red bell peppers, zucchini, and eggplant. Slice the bell peppers into strips, the zucchini into half-moons, and the eggplant into cubes. Peel and slice the red onion into wedges.
- Season the Vegetables: Place all the sliced vegetables on a large baking sheet. Drizzle with olive oil, and season with salt and black pepper. Toss the vegetables to guarantee they’re evenly coated with oil and seasoning.
- Roast the Vegetables: Spread the vegetables out in a single layer on the baking sheet and roast in the preheated oven for 25-30 minutes, or until they’re tender and slightly caramelized, stirring halfway through the cooking time.
- Assemble the Wraps: Once the vegetables are roasted, remove them from the oven and allow them to cool slightly. Lay out each wrap on a clean surface. Spread a generous layer of hummus over each wrap.
- Add the Filling: Divide the roasted vegetables evenly among the wraps, placing them over the hummus. Add a handful of baby spinach or arugula leaves on top of the vegetables for a fresh crunch.
- Roll the Wraps: Carefully roll up each wrap tightly to enclose the filling. If desired, secure the wraps with toothpicks to help them hold their shape.
- Serve: Cut the wraps in half diagonally for easy serving. Drizzle with balsamic glaze if using, and serve them warm or at room temperature.
Extra Tips:
To make these wraps even more flavorful, consider adding a sprinkle of feta cheese or a few slices of avocado before rolling them up.
You can also include a variety of herbs such as thyme or rosemary when roasting the vegetables to enhance their flavor.
For a spicier kick, add a pinch of chili flakes to the seasoning. If you’re preparing these wraps in advance, keep them wrapped in foil or plastic wrap to maintain freshness until serving time.
Holiday Meatball Sliders With Marinara

Holiday Meatball Sliders With Marinara are a delightful twist on the classic slider, perfect for adding a festive touch to your Christmas lunch spread. These mini sandwiches are packed with flavor, featuring juicy meatballs simmered in a rich marinara sauce and served on soft slider buns. The combination of savory meat, tangy sauce, and melted cheese makes these sliders an irresistible addition to your holiday menu.
Crafting these sliders is a simple yet rewarding process. Begin by preparing homemade meatballs using a blend of ground meats seasoned with herbs and spices, guaranteeing each bite is bursting with flavor. Once cooked, these meatballs are bathed in marinara sauce and placed on lightly toasted buns, topped with cheese and fresh basil for a finishing touch.
Whether served as a main course or as a hearty appetizer, these Holiday Meatball Sliders With Marinara are sure to become a family favorite.
Ingredients (Serves 4-6):
- 1 pound ground beef
- 1/2 pound ground pork
- 1/2 cup breadcrumbs
- 1/4 cup grated Parmesan cheese
- 2 cloves garlic, minced
- 1 large egg
- 1 teaspoon salt
- 1/2 teaspoon black pepper
- 1 teaspoon Italian seasoning
- 2 tablespoons olive oil
- 2 cups marinara sauce
- 12 slider buns
- 1 cup shredded mozzarella cheese
- Fresh basil leaves for garnish
Cooking Instructions:
- Prepare the Meatball Mixture: In a large bowl, combine the ground beef, ground pork, breadcrumbs, Parmesan cheese, minced garlic, egg, salt, black pepper, and Italian seasoning. Mix well until all ingredients are evenly incorporated.
- Form the Meatballs: Shape the meat mixture into small meatballs, about 1 inch in diameter. Aim for uniform size to guarantee even cooking.
- Cook the Meatballs: Heat olive oil in a large skillet over medium heat. Add the meatballs and cook, turning occasionally, until browned on all sides and cooked through, about 10-12 minutes. Remove from the skillet and set aside.
- Simmer in Marinara: In the same skillet, pour in the marinara sauce. Return the meatballs to the skillet, guaranteeing they’re coated with the sauce. Let them simmer on low heat for about 10 minutes, allowing the flavors to meld.
- Prepare the Slider Buns: While the meatballs are simmering, preheat your oven to 350°F (175°C). Place the slider buns on a baking sheet and lightly toast them in the oven for about 5 minutes.
- Assemble the Sliders: Place a spoonful of marinara sauce on the bottom half of each toasted slider bun. Add a meatball on top, then sprinkle with shredded mozzarella cheese. Cover with the top half of the bun.
- Melt the Cheese: Return the assembled sliders to the oven for another 5 minutes, or until the cheese is melted and bubbly.
- Garnish and Serve: Remove from the oven and garnish each slider with fresh basil leaves. Serve warm and enjoy!
Extra Tips:
For an extra burst of flavor, consider adding a pinch of red pepper flakes to the marinara sauce for a subtle kick. If you prefer a softer bun, cover the sliders with foil while reheating to maintain their moisture.
These sliders are also easily adaptable; try using turkey or chicken for a lighter version. Prepare the meatballs a day in advance to save time, simply reheat in the sauce before assembling the sliders.
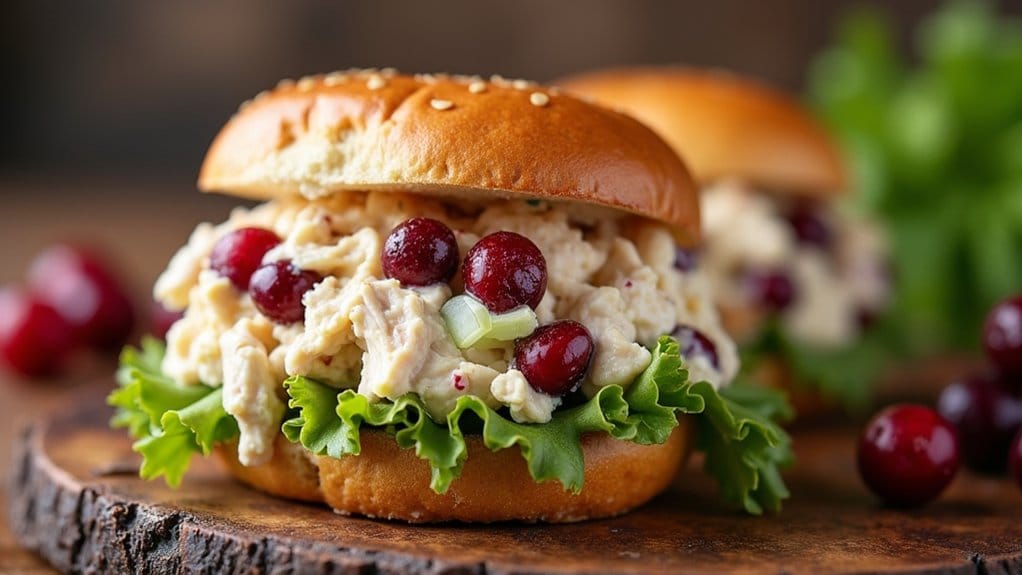
Cranberry Walnut Chicken Salad Sandwiches
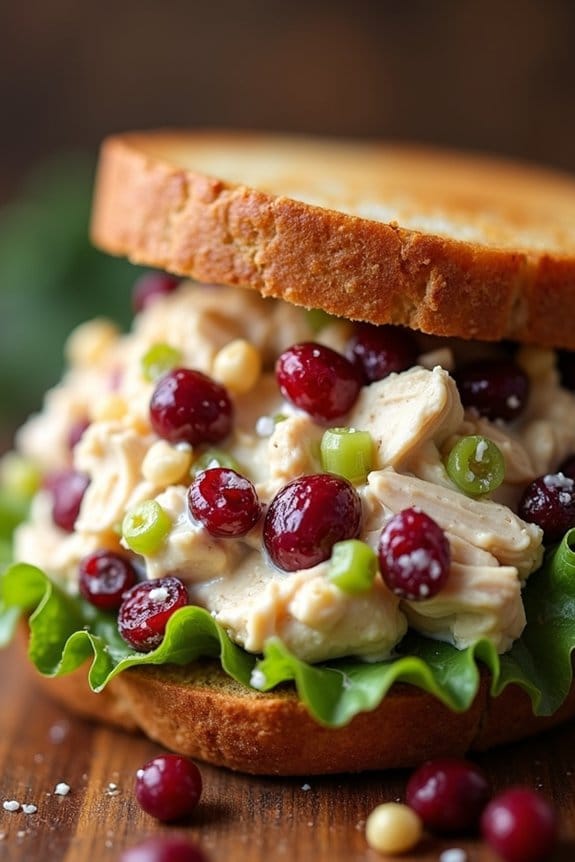
Cranberry Walnut Chicken Salad Sandwiches are a delightful and festive option for a Christmas lunch. These sandwiches combine the savory flavors of rotisserie chicken with the sweet and tart notes of dried cranberries, complemented by the crunch of walnuts. Perfectly nestled between slices of your favorite bread or served on mini slider buns, this dish offers a blend of textures and flavors that are sure to please any holiday crowd.
With a balance of creamy and crunchy elements, these sandwiches aren’t only delicious but also visually appealing, making them a standout addition to your holiday spread. Ideal for feeding a group of 4-6 people, these sandwiches are easy to prepare and can be made ahead of time, allowing you to enjoy more time with your guests.
The combination of ingredients isn’t only delicious but also nutritious, providing a satisfying meal that captures the essence of holiday flavors. Whether served as a main dish or as part of a larger buffet, Cranberry Walnut Chicken Salad Sandwiches are a wonderful way to spread holiday cheer.
Ingredients for 4-6 people:
- 2 cups cooked and shredded rotisserie chicken
- 1/2 cup mayonnaise
- 1/4 cup plain Greek yogurt
- 1/2 cup dried cranberries
- 1/2 cup chopped walnuts
- 2 stalks celery, finely chopped
- 1 tablespoon Dijon mustard
- Salt and pepper to taste
- 8-12 slices of whole grain or sourdough bread, or 8-12 slider buns
- Lettuce leaves (optional)
Instructions:
- Prepare the Chicken: Begin by shredding the rotisserie chicken into bite-sized pieces. Place the shredded chicken in a large mixing bowl.
- Mix the Dressing: In a separate bowl, combine the mayonnaise, Greek yogurt, and Dijon mustard. Stir well until the mixture is smooth and creamy.
- Combine Ingredients: Add the dried cranberries, chopped walnuts, and chopped celery to the shredded chicken. Pour the dressing over the chicken mixture and stir until all the ingredients are well combined. Season with salt and pepper to taste.
- Assemble the Sandwiches: If using sliced bread, lay out 8-12 slices. If using slider buns, slice them in half. Place a generous scoop of the chicken salad mixture onto one slice of bread or the bottom half of each bun. Add a lettuce leaf if desired.
- Finish the Sandwiches: Top with the remaining slices of bread or the top half of each bun. Press gently to secure the filling.
- Serve: Arrange the sandwiches on a platter and serve immediately, or cover and refrigerate until ready to serve.
Extra Tips:
For a lighter option, consider using all Greek yogurt instead of mayonnaise, or opt for a low-fat mayonnaise. You can toast the bread or buns for added texture and flavor. If you want to add more fruitiness, fresh apple slices or grapes can be included in the salad mixture.
For a nuttier taste, consider toasting the walnuts before adding them to the mix. Finally, make sure to prepare the chicken salad at least an hour ahead of time to allow the flavors to meld together for a more cohesive taste.
