
The holiday season is here, and I’m so excited to share a collection of 14 healthy Christmas baking recipes that will impress everyone. Think whole wheat gingerbread cookies and vegan chocolate peppermint bark, all while keeping your health goals in check. These treats combine festive flavors with nutritious ingredients, perfect for sharing with family and friends. Ready to explore some mouthwatering options that balance taste and wellness? Let’s dive into these delightful creations together!
Whole Wheat Gingerbread Cookies

Whole Wheat Gingerbread Cookies are a delightful and healthier twist on the classic holiday treat. Made with whole wheat flour, these cookies retain the warm, spicy flavors of traditional gingerbread while offering a boost of fiber and nutrients. The use of molasses and brown sugar adds depth to the sweetness, making these cookies a festive favorite that can be enjoyed without guilt during the holiday season.
Perfect for a cozy afternoon of baking with family or as a homemade gift for loved ones, Whole Wheat Gingerbread Cookies bring the aroma of Christmas straight into your kitchen. With a serving size of 4-6 people, this recipe yields enough cookies to share the holiday spirit with friends and family, while still leaving plenty for yourself to savor alongside a cup of hot cocoa or tea.
Ingredients (Serving Size: 4-6 people):
- 2 3/4 cups whole wheat flour
- 1 tablespoon ground ginger
- 1 teaspoon ground cinnamon
- 1/2 teaspoon ground cloves
- 1/4 teaspoon ground nutmeg
- 1/4 teaspoon salt
- 1/2 teaspoon baking soda
- 1/2 cup unsalted butter, softened
- 1/2 cup brown sugar
- 1 large egg
- 1/2 cup unsulfured molasses
- 1 teaspoon vanilla extract
Cooking Instructions:
- Prepare the Dry Ingredients: In a medium bowl, whisk together the whole wheat flour, ground ginger, cinnamon, cloves, nutmeg, salt, and baking soda. This guarantees the spices are evenly distributed throughout the flour, which helps create a consistent flavor in the cookies.
- Cream the Butter and Sugar: In a large mixing bowl, beat the softened butter and brown sugar together with an electric mixer on medium speed until the mixture is light and fluffy. This should take about 2-3 minutes. This step is essential for incorporating air into the dough, which helps the cookies to rise properly.
- Add the Wet Ingredients: Mix in the egg, molasses, and vanilla extract to the butter and sugar mixture. Continue beating until well combined. Make certain the molasses is fully incorporated, as it adds moisture and richness to the dough.
- Combine Wet and Dry Ingredients: Gradually add the dry flour mixture to the wet ingredients, mixing on low speed until just combined. Be careful not to overmix, as this can lead to tough cookies.
- Chill the Dough: Wrap the dough in plastic wrap and refrigerate for at least 1 hour. Chilling the dough helps to firm it up, making it easier to roll out and cut into shapes.
- Preheat and Prepare for Baking: Preheat your oven to 350°F (175°C). Line two baking sheets with parchment paper.
- Roll and Cut the Dough: On a lightly floured surface, roll out the dough to about 1/4-inch thickness. Use cookie cutters to cut out desired shapes, then transfer them to the prepared baking sheets, leaving about 1 inch of space between each cookie.
- Bake the Cookies: Bake in the preheated oven for 8-10 minutes, or until the edges are firm but not darkened. The center should still be slightly soft to guarantee a chewy texture once cooled.
- Cool and Decorate: Allow the cookies to cool on the baking sheets for a few minutes before transferring them to a wire rack to cool completely. Once completely cooled, you can decorate them with icing or enjoy them plain.
Extra Tips: For an extra burst of flavor, consider adding a pinch of black pepper to the dry ingredients for a little warmth and complexity. If you prefer a crisper cookie, roll the dough slightly thinner and bake for an additional 1-2 minutes. Additionally, confirm the molasses you use is unsulfured to avoid any bitterness in the cookies. These cookies store well in an airtight container for up to a week, making them perfect for preparing ahead of holiday gatherings.
Almond Flour Sugar Cookies
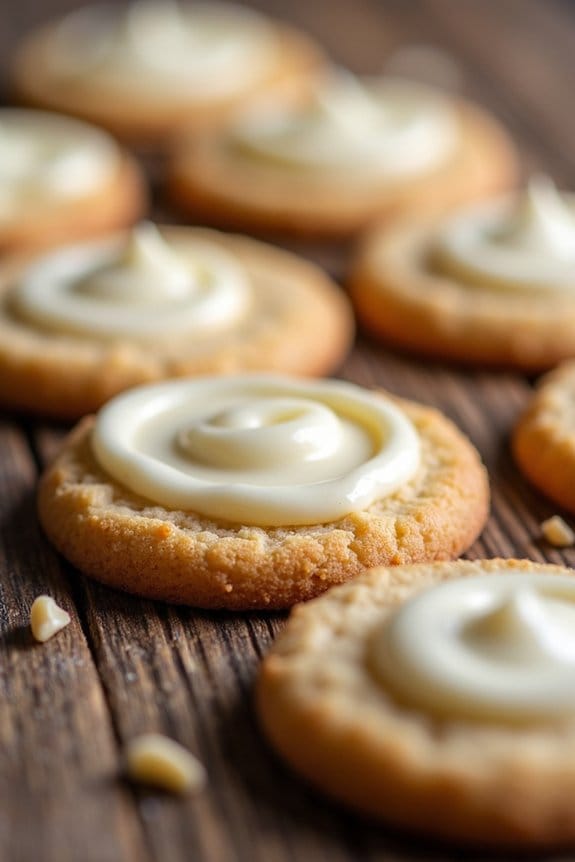
Almond Flour Sugar Cookies are a delightful and healthier twist on traditional sugar cookies, perfect for the festive season. Made with almond flour, these cookies aren’t only gluten-free but also have a nutty flavor that complements the sweetness of the sugar.
They’re crisp on the outside, chewy on the inside, and can be decorated with your favorite icing or kept simple. These cookies are sure to be a hit at your Christmas gatherings or as a homemade gift for loved ones.
Almond flour is an excellent substitute for regular flour, providing a more nutritious option without compromising on taste or texture. These cookies are quick to prepare and require minimal ingredients, making them an easy and enjoyable baking project.
With this recipe, you can indulge in holiday treats while keeping your wellness goals in mind. The following recipe serves 4-6 people, ensuring everyone has a chance to savor these delicious cookies.
Ingredients:
- 2 cups almond flour
- 1/4 cup coconut oil, melted
- 1/4 cup honey or maple syrup
- 1 teaspoon vanilla extract
- 1/2 teaspoon baking soda
- 1/4 teaspoon salt
- Optional: 1 tablespoon almond milk (if dough is too dry)
Instructions:
1. Preheat the Oven:
Preheat your oven to 350°F (175°C) and line a baking sheet with parchment paper to prevent sticking.
2. Mix the Wet Ingredients:
In a medium-sized bowl, combine the melted coconut oil, honey (or maple syrup), and vanilla extract. Whisk them together until well blended.
3. Combine Dry Ingredients:
In another bowl, mix the almond flour, baking soda, and salt. Stir until the dry ingredients are evenly distributed.
4. Form the Dough:
Gradually add the dry ingredients to the wet mixture, stirring continuously until a dough forms. If the dough is too crumbly, add a tablespoon of almond milk to help bind it.
5. Shape the Cookies:
Scoop out tablespoon-sized amounts of dough, roll them into balls, and then gently flatten each ball onto the prepared baking sheet. Leave space between each cookie to allow for spreading.
6. Bake the Cookies:
Place the baking sheet in the preheated oven and bake for 8-10 minutes, or until the edges are golden brown. Keep an eye on them to prevent burning.
7. Cool and Decorate:
Remove the cookies from the oven and let them cool on the baking sheet for a few minutes before transferring them to a wire rack to cool completely. Once cooled, you can decorate them with icing or enjoy them plain.
Extra Tips:
When working with almond flour, it’s important to mix the ingredients just until combined to avoid overworking the dough, which can make the cookies tough.
If you prefer a softer cookie, slightly underbake them by removing them from the oven as soon as the edges start to brown. Additionally, these cookies can be stored in an airtight container for up to a week, making them a great make-ahead option for your holiday celebrations.
Enjoy your Almond Flour Sugar Cookies with a warm cup of tea or hot chocolate for the perfect festive treat!
Vegan Chocolate Peppermint Bark

Vegan Chocolate Peppermint Bark is a festive and healthy treat that will add a touch of holiday magic to your Christmas celebrations. This delightful confection combines the rich, smooth taste of vegan chocolate with a revitalizing hint of peppermint, making it an irresistible dessert for both children and adults. Not only is it delicious, but it’s also easy to prepare and perfect for those who follow a plant-based diet or want to indulge in a guilt-free holiday dessert.
This recipe is ideal for serving 4-6 people and can be a wonderful homemade gift or a simple yet elegant treat to serve at your Christmas gatherings. With minimal ingredients and just a few steps, you can create a beautiful and decadent bark that captures the essence of the season. The combination of dark chocolate and crushed candy canes creates a visually appealing and aromatic experience that will surely impress your family and friends.
Ingredients:
- 300 grams (about 10.5 oz) vegan dark chocolate
- 1 teaspoon peppermint extract
- 1/2 cup crushed vegan candy canes
- 1/4 cup chopped nuts (optional, for extra crunch)
- A pinch of sea salt
Instructions:
- Prepare the Baking Sheet: Start by lining a baking sheet with parchment paper. This will prevent the chocolate from sticking and guarantee easy removal once the bark has set.
- Melt the Chocolate: Break the vegan dark chocolate into small pieces and place it in a heatproof bowl. Set the bowl over a pot of simmering water, ensuring the bottom of the bowl doesn’t touch the water. Stir continuously until the chocolate is fully melted and smooth. Alternatively, you can melt the chocolate in a microwave-safe bowl in 30-second intervals, stirring in between until completely melted.
- Add the Peppermint Extract: Once the chocolate is melted, remove it from the heat and stir in the peppermint extract. Make sure it’s evenly distributed throughout the chocolate to infuse it with a revitalizing peppermint flavor.
- Pour and Spread the Chocolate: Pour the melted chocolate onto the prepared baking sheet. Use a spatula to spread it out evenly to about a 1/4-inch thickness, creating a uniform layer.
- Add Toppings: Sprinkle the crushed vegan candy canes and chopped nuts evenly over the top of the chocolate layer. Lightly press them into the chocolate to ensure they stick. Finish with a pinch of sea salt to enhance the flavors.
- Set the Bark: Allow the chocolate to set at room temperature for a couple of hours, or speed up the process by placing the baking sheet in the refrigerator for about 30 minutes, until the chocolate is firm.
- Break into Pieces: Once the chocolate is completely set, remove the bark from the parchment paper and break it into irregular pieces using your hands.
Extra Tips:
For a more personalized touch, consider adding different toppings such as dried fruits, seeds, or even a drizzle of white vegan chocolate for contrast and flavor variety.
If you’re gifting the bark, package it in decorative bags or boxes lined with festive tissue paper. It can be stored in an airtight container at room temperature for up to two weeks, making it a convenient make-ahead treat.
Low-Sugar Spiced Apple Cake
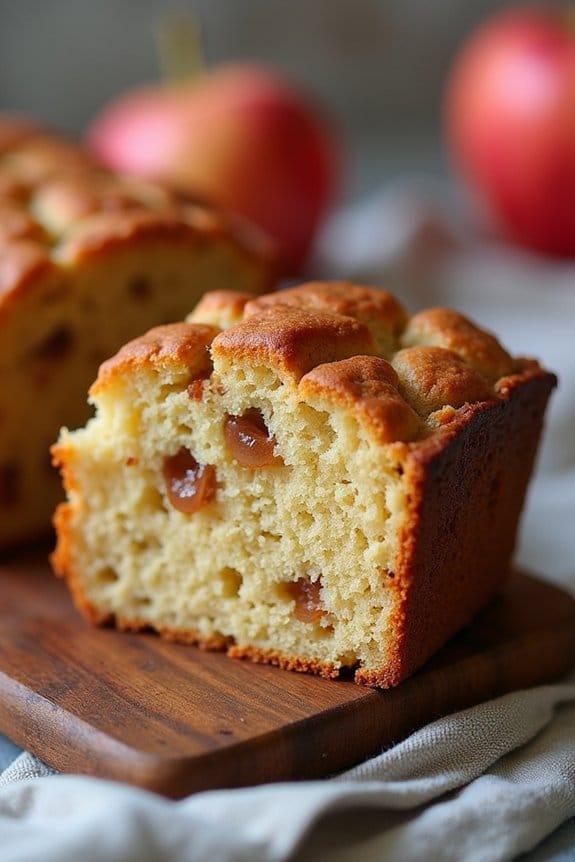
Low-Sugar Spiced Apple Cake is a delightful dessert perfect for the holiday season, offering all the warmth and flavor of a traditional apple cake without the excess sugar. This cake is a healthier alternative, focusing on the natural sweetness of apples and a blend of fragrant spices that evoke the cozy feeling of Christmas.
It’s light, moist, and perfect for serving at family gatherings or festive parties, making it an irresistible treat for everyone to enjoy.
Using whole grain flour and reducing the amount of sugar allows the apple’s natural sweetness and the spices to shine through. The combination of cinnamon, nutmeg, and cloves adds a wonderful depth of flavor, making each bite a taste of holiday cheer.
This recipe serves 4-6 people, making it ideal for small get-togethers or as a sweet ending to a festive meal.
Ingredients:
- 2 cups whole grain flour
- 1 teaspoon baking powder
- 1/2 teaspoon baking soda
- 1/2 teaspoon salt
- 1 teaspoon ground cinnamon
- 1/2 teaspoon ground nutmeg
- 1/4 teaspoon ground cloves
- 1/2 cup unsweetened applesauce
- 1/4 cup honey or maple syrup
- 2 large eggs
- 1 teaspoon vanilla extract
- 2 cups peeled, cored, and diced apples (preferably tart varieties like Granny Smith)
- 1/4 cup chopped walnuts or pecans (optional)
Instructions:
- Preheat the Oven: Start by preheating your oven to 350°F (175°C). Grease and flour a 9-inch round cake pan or line it with parchment paper to prevent the cake from sticking.
- Mix Dry Ingredients: In a medium-sized bowl, combine the whole grain flour, baking powder, baking soda, salt, cinnamon, nutmeg, and cloves. Whisk these dry ingredients together until they’re well blended. This guarantees an even distribution of the spices throughout the cake.
- Combine Wet Ingredients: In a separate large mixing bowl, combine the unsweetened applesauce, honey (or maple syrup), eggs, and vanilla extract. Beat these ingredients together with an electric mixer on medium speed until they’re well incorporated.
- Mix Wet and Dry Ingredients: Gradually add the dry ingredients to the wet ingredients, mixing gently with a spatula or a wooden spoon. Stir just until combined; be careful not to overmix, as this can make the cake dense.
- Fold in Apples and Nuts: Gently fold in the diced apples and the chopped nuts (if using) until they’re evenly distributed throughout the batter.
- Bake the Cake: Pour the batter into the prepared cake pan and spread it evenly. Place the pan in the preheated oven and bake for 30-35 minutes, or until a toothpick inserted into the center of the cake comes out clean.
- Cool and Serve: Once baked, remove the cake from the oven and let it cool in the pan for about 10 minutes. Then, transfer it to a wire rack to cool completely before serving.
Extra Tips:
For best results, select firm, tart apples like Granny Smiths, as they retain their shape and provide a nice contrast to the sweetness of the cake.
You can also experiment with other spices, such as cardamom or ginger, to personalize the flavor profile. If you prefer a nut-free cake, simply omit the walnuts or pecans.
This cake pairs wonderfully with a dollop of Greek yogurt or a scoop of vanilla ice cream for an extra special touch. Enjoy the delightful taste of this Low-Sugar Spiced Apple Cake as a wholesome treat this holiday season!
Gluten-Free Snickerdoodles
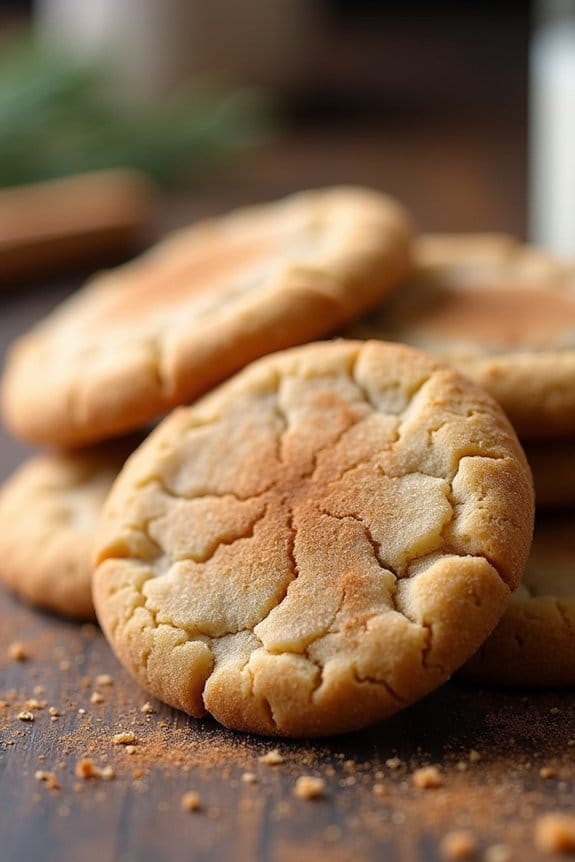
Indulge in the warm, cinnamon-sugar delight of Gluten-Free Snickerdoodles this holiday season. These cookies maintain the classic chewy texture and sweet-spicy flavor of traditional snickerdoodles, but cater to those with gluten sensitivities or those simply seeking a lighter option. Perfect with a cup of tea or coffee, these cookies are sure to be a hit at your Christmas gatherings, spreading cheer and sweetness to all.
Crafting these Gluten-Free Snickerdoodles isn’t only easy but also satisfying, as they come together quickly with ingredients that are simple to find. The result is a batch of cookies that are both comforting and festive, making them an ideal treat for sharing with friends and family. The recipe below serves 4-6 people, ensuring that everyone gets a taste of this delicious holiday classic.
Ingredients:
- 1 1/2 cups gluten-free all-purpose flour
- 1/2 teaspoon baking soda
- 1/2 teaspoon cream of tartar
- 1/4 teaspoon salt
- 1/2 cup unsalted butter, softened
- 1 cup granulated sugar
- 1 large egg
- 1 teaspoon vanilla extract
- 1 tablespoon ground cinnamon
- 2 tablespoons granulated sugar (for rolling)
Instructions:
- Preheat and Prepare: Preheat your oven to 350°F (175°C) and line two baking sheets with parchment paper to prevent sticking.
- Mix Dry Ingredients: In a medium bowl, whisk together the gluten-free all-purpose flour, baking soda, cream of tartar, and salt until well combined.
- Cream Butter and Sugar: In a large mixing bowl, beat the softened butter and 1 cup of granulated sugar together with an electric mixer on medium speed until light and fluffy, about 2-3 minutes.
- Add Egg and Vanilla: Add the egg and vanilla extract to the butter mixture and continue to beat on low speed until fully incorporated.
- Combine Wet and Dry Ingredients: Gradually add the dry ingredients to the wet ingredients, mixing on low speed until a dough forms. The dough should be soft but not sticky.
- Prepare Cinnamon-Sugar Coating: In a small bowl, mix the ground cinnamon and the remaining 2 tablespoons of sugar. This will be used to coat the cookies.
- Shape and Coat Cookies: Using a tablespoon or small cookie scoop, portion out the dough and roll into balls. Roll each ball in the cinnamon-sugar mixture until evenly coated.
- Bake: Place the coated dough balls onto the prepared baking sheets, spacing them about 2 inches apart. Bake in the preheated oven for 10-12 minutes, or until the edges are lightly golden.
- Cool and Serve: Remove the cookies from the oven and let them cool on the baking sheets for about 5 minutes before transferring them to a wire rack to cool completely.
Extra Tips: For best results, make sure your butter is softened, not melted, to achieve the right cookie texture. If your dough feels too sticky, refrigerate it for 15-20 minutes before rolling into balls.
Also, feel free to adjust the amount of cinnamon-sugar coating based on your preference for sweetness and spice. Enjoy these Gluten-Free Snickerdoodles with a glass of milk or your favorite holiday beverage for the ultimate festive treat!
Healthy Banana Bread With Walnuts
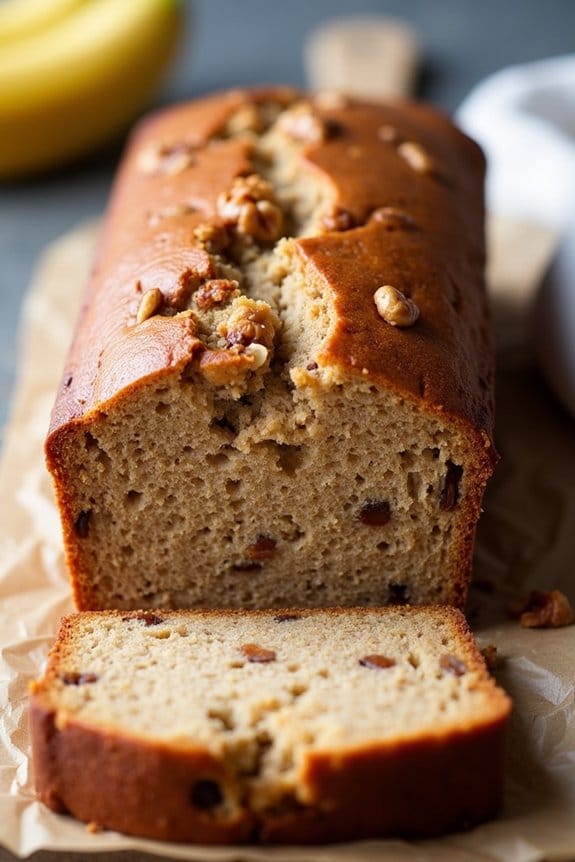
Indulging in holiday treats doesn’t have to mean overindulging in unhealthy ingredients. This Healthy Banana Bread With Walnuts is the perfect way to enjoy a sweet treat without the guilt. Packed with the natural sweetness of ripe bananas, the nutty crunch of walnuts, and the wholesome goodness of whole wheat flour, this recipe is both delicious and nutritious.
Perfect for a cozy Christmas morning or as a festive gift, this banana bread is sure to become a family favorite. This recipe is designed to serve 4-6 people, making it an ideal size for a small gathering or for enjoying over a couple of days. It’s easy to prepare and bakes beautifully, filling your home with the comforting aroma of bananas and spices.
Whether you’re a seasoned baker or a beginner, you’ll find this recipe straightforward and rewarding. Gather your ingredients and get ready to bake a loaf of banana bread that’s as satisfying as it’s healthy.
Ingredients
- 3 ripe bananas, mashed
- 1/3 cup melted coconut oil
- 1/2 cup honey or maple syrup
- 2 eggs
- 1 teaspoon vanilla extract
- 1 teaspoon baking soda
- 1/4 teaspoon salt
- 1 teaspoon ground cinnamon
- 1 3/4 cups whole wheat flour
- 1/2 cup chopped walnuts
Instructions
- Preheat and Prepare: Preheat your oven to 350°F (175°C). Grease a 9×5-inch loaf pan with a bit of coconut oil or line it with parchment paper for easy removal.
- Mix Wet Ingredients: In a large mixing bowl, combine the mashed bananas, melted coconut oil, and honey or maple syrup. Stir until the mixture is smooth. Add in the eggs and vanilla extract; mix well until all the wet ingredients are thoroughly combined.
- Combine Dry Ingredients: In a separate bowl, whisk together the baking soda, salt, cinnamon, and whole wheat flour. Confirm the baking soda is evenly distributed throughout the flour for even rising.
- Mix Wet and Dry Ingredients: Gradually add the dry ingredients to the wet ingredients, stirring gently until just combined. Avoid overmixing to maintain a tender bread.
- Add Walnuts: Fold in the chopped walnuts, distributing them evenly throughout the batter. This adds a delightful crunch to every bite.
- Pour and Bake: Pour the batter into the prepared loaf pan, smoothing the top with a spatula. Bake in the preheated oven for 50-60 minutes, or until a toothpick inserted into the center comes out clean.
- Cool and Serve: Once baked, let the banana bread cool in the pan for about 10 minutes. Then, transfer it to a wire rack to cool completely before slicing and serving.
Extra Tips
For the best results, use very ripe bananas with plenty of brown spots for maximum sweetness and flavor. If your bananas aren’t ripe enough, you can speed up the ripening process by placing them in a brown paper bag for a day or two.
For an extra touch of holiday flavor, consider adding a pinch of nutmeg or a handful of dried cranberries to the batter. To keep the bread moist, store it in an airtight container at room temperature for up to three days, or in the refrigerator for up to a week.
Dark Chocolate Avocado Brownies
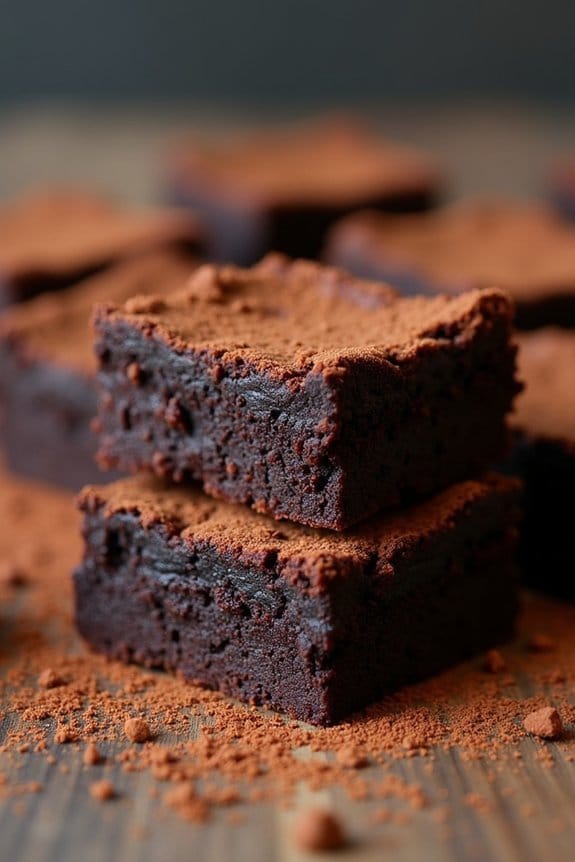
Dark Chocolate Avocado Brownies are a delightful twist on the classic brownie, incorporating the creamy richness of avocados for a healthier treat. This recipe is perfect for those who want to enjoy a decadent dessert without compromising on their health goals. The combination of dark chocolate and avocado creates a fudgy texture that’s both satisfying and nourishing, packed with healthy fats and antioxidants.
These brownies are ideal for a holiday gathering or a cozy night in, offering a guilt-free indulgence that will impress your guests. The natural sweetness of the ingredients allows you to cut down on added sugars, making them a great option for those watching their sugar intake. With just a few simple steps, you can whip up these delicious treats and savor them with your friends and family.
Ingredients for 4-6 servings:
- 2 ripe avocados
- 1/2 cup unsweetened cocoa powder
- 1/2 cup dark chocolate chips
- 1/4 cup coconut oil, melted
- 1/2 cup honey or maple syrup
- 1 teaspoon vanilla extract
- 3 large eggs
- 1/2 cup almond flour
- 1/4 teaspoon salt
- 1/2 teaspoon baking soda
Cooking Instructions:
- Preheat the Oven: Start by preheating your oven to 350°F (175°C). This will guarantee it’s hot and ready for your brownies once the batter is prepared.
- Prepare the Avocados: Cut the avocados in half, remove the pits, and scoop the flesh into a large mixing bowl. Mash the avocados until they’re smooth and creamy, free of any lumps.
- Combine Wet Ingredients: Add the melted coconut oil, honey or maple syrup, and vanilla extract to the mashed avocados. Stir until all the ingredients are well incorporated.
- Melt the Chocolate: In a microwave-safe bowl, melt the dark chocolate chips in 30-second intervals, stirring between each interval until smooth. Be careful not to overheat them.
- Mix Cocoa and Chocolate: Add the melted chocolate and cocoa powder to the avocado mixture. Stir thoroughly to guarantee the cocoa powder is completely dissolved and the mixture is smooth.
- Incorporate Eggs: Crack the eggs into the bowl and mix until the batter is well combined.
- Add Dry Ingredients: Gently fold in the almond flour, salt, and baking soda. Mix until just combined, being careful not to overmix to keep the batter light.
- Prepare the Baking Dish: Line an 8×8 inch baking dish with parchment paper or lightly grease it to prevent the brownies from sticking.
- Pour and Spread Batter: Pour the batter into the prepared baking dish and spread it evenly with a spatula to guarantee even cooking.
- Bake: Place the dish in the preheated oven and bake for 25-30 minutes. The brownies are done when a toothpick inserted into the center comes out mostly clean.
- Cool and Serve: Allow the brownies to cool in the pan for at least 15 minutes before slicing and serving. This will help them set and make cutting easier.
Extra Tips:
For the best results, confirm the avocados are ripe and well-mashed to avoid any lumps in the batter. You can experiment with different sweeteners based on your taste preference, such as agave syrup or stevia for a lower-calorie option.
Additionally, if you desire a nutty crunch, consider adding chopped walnuts or pecans to the batter before baking. Remember to store any leftovers in an airtight container in the refrigerator to maintain their freshness. Enjoy these brownies warm or cold, and feel free to pair them with a scoop of vanilla Greek yogurt for an added protein boost.
Oatmeal Cranberry Bars
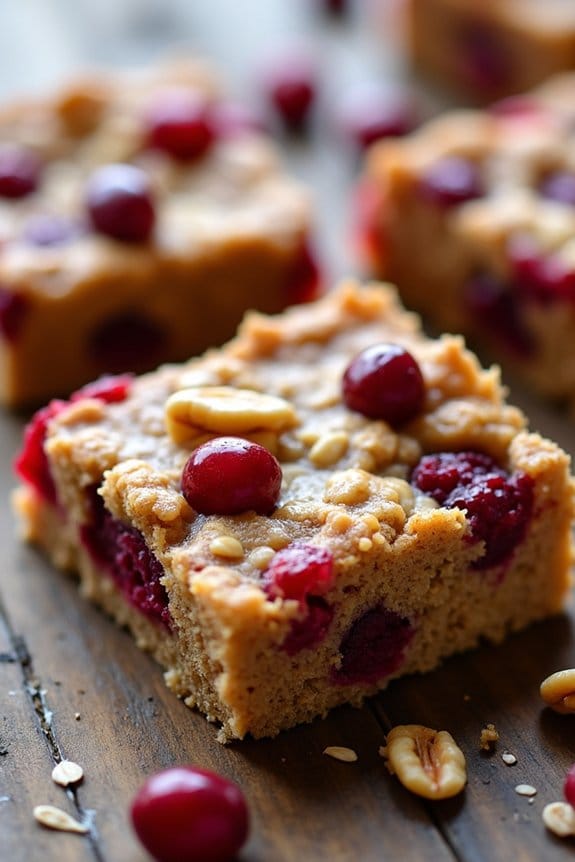
Delight your taste buds this holiday season with these scrumptious Oatmeal Cranberry Bars. Perfect for a cozy Christmas breakfast or a sweet treat post-dinner, these bars combine the heartiness of oats with the sweet-tart flavor of cranberries.
This nutritious recipe not only satisfies your sweet tooth but also provides a healthy twist on traditional holiday desserts. Packed with fiber and antioxidants, these bars are a great way to indulge without the guilt.
These Oatmeal Cranberry Bars are easy to make and require minimal ingredients, making them an excellent choice for those busy holiday weeks. Whether you’re serving them as a dessert at your festive gatherings or enjoying them as a snack with your morning coffee, these bars are sure to become a favorite.
Let the warm aromas of oats and cranberries fill your kitchen as you bake these delightful treats, bringing joy and warmth to your home during this special time of year.
Ingredients for 4-6 Servings:
- 1 cup rolled oats
- 1 cup whole wheat flour
- 1/2 cup brown sugar
- 1/2 teaspoon baking soda
- 1/4 teaspoon salt
- 1/2 cup unsalted butter, melted
- 1 cup fresh or dried cranberries
- 1/2 cup chopped walnuts (optional)
- 1 teaspoon vanilla extract
- 1/4 cup honey
- 1 egg
Instructions:
- Preheat the Oven: Begin by preheating your oven to 350°F (175°C). This guarantees that the bars bake evenly and achieve the right texture.
- Prepare the Baking Dish: Grease a 9×9 inch baking dish with a little butter or line it with parchment paper. This will help prevent the bars from sticking and make it easier to remove them after baking.
- Mix Dry Ingredients: In a large mixing bowl, combine the rolled oats, whole wheat flour, brown sugar, baking soda, and salt. Stir well to guarantee all ingredients are evenly distributed.
- Add Wet Ingredients: In a separate bowl, whisk together the melted butter, vanilla extract, honey, and egg until smooth. Pour this mixture into the bowl of dry ingredients.
- Combine the Mixtures: Stir the wet and dry ingredients together until they form a cohesive dough. Fold in the cranberries and walnuts to evenly distribute them throughout the dough.
- Transfer to Baking Dish: Spread the dough evenly into the prepared baking dish, pressing it down with a spatula or your hands to guarantee it’s compact.
- Bake: Place the dish in the preheated oven and bake for 25-30 minutes, or until the edges are golden brown and a toothpick inserted into the center comes out clean.
- Cool and Cut: Allow the bars to cool in the baking dish for about 10 minutes before transferring them to a wire rack to cool completely. Once cooled, cut them into squares or bars as desired.
Extra Tips:
For an even more festive flavor, consider adding a pinch of cinnamon or nutmeg to the dough.
If using dried cranberries, you might want to soak them in hot water for about 10 minutes before adding them to the dough to plump them up.
Additionally, these bars can be stored in an airtight container at room temperature for up to a week, making them a convenient make-ahead option for holiday gatherings.
Enjoy them as they are, or serve them warm with a scoop of vanilla ice cream for an extra special treat.
Flourless Peanut Butter Blossoms

Flourless Peanut Butter Blossoms are a delightful and healthier twist on the classic holiday cookie. These cookies are perfect for those looking to indulge in festive treats without the guilt, as they omit traditional flour and use wholesome ingredients. Not only are these cookies simple to make, but they also boast a rich peanut butter flavor that pairs perfectly with the chocolate kiss on top.
The absence of flour makes them gluten-free, which means more people can enjoy them during holiday gatherings. This recipe makes a batch perfect for serving 4-6 people, ensuring everyone gets to enjoy a couple of these delicious cookies. Whether you’re baking for a holiday party or simply want to fill your home with the warm, inviting scent of Christmas baking, Flourless Peanut Butter Blossoms are a must-try.
With minimal ingredients and steps, they’re an easy addition to your holiday baking repertoire.
Ingredients:
- 1 cup creamy peanut butter
- 1 cup brown sugar
- 1 large egg
- 1 teaspoon vanilla extract
- 1 teaspoon baking soda
- 1/4 teaspoon salt
- 24 chocolate kisses (unwrapped)
Instructions:
- Preheat the Oven: Start by preheating your oven to 350°F (175°C). Line a baking sheet with parchment paper to prevent sticking.
- Mix Ingredients: In a large mixing bowl, combine the peanut butter, brown sugar, egg, vanilla extract, baking soda, and salt. Mix until all ingredients are well incorporated and the dough is smooth.
- Shape the Cookies: Using a tablespoon or a small cookie scoop, portion out the dough and roll it into balls. Place each ball onto the prepared baking sheet, spacing them about 2 inches apart.
- Bake: Place the baking sheet in the preheated oven and bake for 8-10 minutes, or until the cookies are slightly golden and set around the edges.
- Add Chocolate Kisses: As soon as the cookies come out of the oven, gently press a chocolate kiss into the center of each cookie. The heat from the cookies will slightly melt the chocolate, helping it to adhere.
- Cool: Allow the cookies to cool on the baking sheet for about 5 minutes before transferring them to a wire rack to cool completely.
Extra Tips:
For best results, use a smooth and creamy peanut butter. If you prefer a chunkier texture, you can opt for crunchy peanut butter, but keep in mind that this might slightly alter the texture of the cookies.
Make sure not to overbake the cookies; they should be soft and chewy with a slight crisp around the edges. If the dough seems too sticky to handle, refrigerate it for 15-20 minutes before rolling into balls. Enjoy your Flourless Peanut Butter Blossoms warm or store them in an airtight container for up to a week.
Coconut Macaroons With a Twist
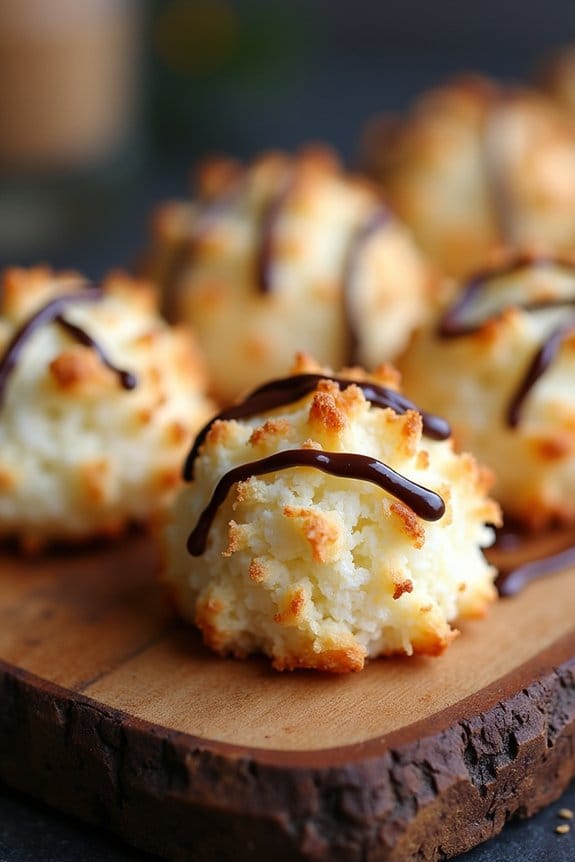
The holiday season is a perfect time to indulge in some delightful homemade treats, and Coconut Macaroons With a Twist is an exciting recipe to add to your Christmas baking list. This recipe adds a unique twist to the traditional coconut macaroons by incorporating a splash of citrus and a hint of almond, creating an irresistible combination of flavors. Not only are these macaroons delicious, but they’re also healthier, as they’re made with natural sweeteners and ingredients that will satisfy your sweet tooth without the guilt.
These Coconut Macaroons With a Twist are perfect for serving at holiday gatherings or gifting to friends and family. Their golden, chewy texture and the blend of coconut, citrus, and almond make them stand out on any dessert table. The recipe serves 4-6 people, making it ideal for small to medium gatherings or as a special treat for your loved ones. Now, let’s explore the ingredients and the simple steps to create these delectable macaroons.
Ingredients for 4-6 servings:
- 3 cups unsweetened shredded coconut
- 2/3 cup almond flour
- 1/2 cup honey or maple syrup
- 1/4 cup unsweetened applesauce
- 1 tablespoon freshly squeezed orange juice
- 1 teaspoon vanilla extract
- 1/2 teaspoon almond extract
- Zest of 1 orange
- 1/4 teaspoon sea salt
- 3 large egg whites
- 1/2 cup dark chocolate chips (optional, for drizzling)
Cooking Instructions:
- Preheat and Prepare: Preheat your oven to 325°F (160°C). Line a baking sheet with parchment paper to prevent sticking and guarantee even baking.
- Mix Dry Ingredients: In a large mixing bowl, combine the shredded coconut, almond flour, and sea salt. Stir them together until well mixed.
- Incorporate Wet Ingredients: In a separate bowl, whisk together the honey (or maple syrup), applesauce, orange juice, vanilla extract, almond extract, and orange zest until smooth. Add this mixture to the dry ingredients, stirring until fully combined.
- Beat Egg Whites: In another clean bowl, beat the egg whites with an electric mixer on high speed until soft peaks form. This will help give the macaroons a light and airy texture.
- Fold in Egg Whites: Gently fold the beaten egg whites into the coconut mixture using a spatula. Be careful not to deflate the egg whites, as this will affect the texture of the macaroons.
- Shape the Macaroons: Using a small cookie scoop or your hands, form the mixture into small mounds and place them on the prepared baking sheet, leaving some space between each macaroon.
- Bake: Place the baking sheet in the preheated oven and bake for 18-20 minutes or until the macaroons are golden brown on the outside and slightly firm to the touch.
- Cool and Drizzle (Optional): Allow the macaroons to cool on the baking sheet for a few minutes before transferring them to a wire rack to cool completely. If desired, melt the dark chocolate chips and drizzle over the cooled macaroons for an extra touch of indulgence.
Extra Tips:
For the best results, make sure to use unsweetened shredded coconut to control the sweetness of your macaroons. If you don’t have almond flour, you can substitute it with finely ground almonds.
When beating the egg whites, confirm that your bowl and beaters are clean and free of any grease to achieve the perfect peaks. If you choose to add the chocolate drizzle, allow the macaroons to cool completely before drizzling to prevent the chocolate from melting too quickly.
These macaroons store well in an airtight container at room temperature for up to five days, making them a convenient and festive treat to prepare in advance.
Paleo-Friendly Pumpkin Pie
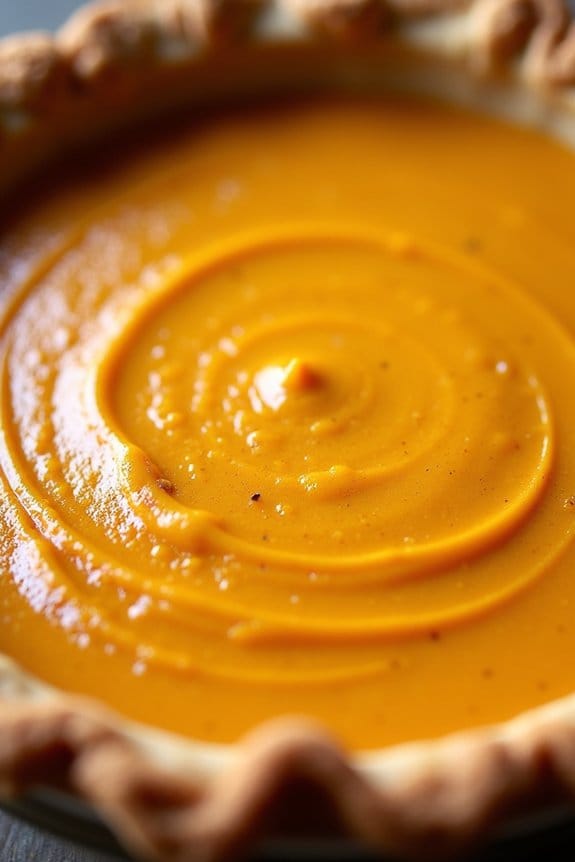
Indulge in the warm, comforting flavors of the holiday season with this Paleo-Friendly Pumpkin Pie, a health-conscious twist on a classic favorite. This delicious dessert combines the rich, creamy texture of pumpkin with a perfectly spiced filling, all nestled in a grain-free crust.
It’s an ideal treat for those adhering to a paleo diet, guaranteeing that everyone can enjoy a slice of pie without straying from their healthy eating habits. This recipe uses wholesome ingredients that align with paleo principles, such as almond flour for the crust and coconut milk for the filling.
The pie is naturally sweetened with maple syrup, providing a delicate sweetness that complements the earthy pumpkin and aromatic spices. Perfect for a holiday gathering, this pie serves 4-6 people, making it a delightful centerpiece for your festive dessert table.
Ingredients for 4-6 servings:
For the Crust:
- 1 1/2 cups almond flour
- 1/4 cup coconut oil, melted
- 1 tablespoon maple syrup
- 1/4 teaspoon sea salt
For the Filling:
- 1 can (15 oz) pumpkin puree
- 3 large eggs
- 1/2 cup coconut milk
- 1/3 cup maple syrup
- 2 teaspoons vanilla extract
- 1 1/2 teaspoons ground cinnamon
- 1/2 teaspoon ground ginger
- 1/4 teaspoon ground nutmeg
- 1/4 teaspoon ground cloves
- 1/4 teaspoon sea salt
Cooking Instructions:
1. Preheat the Oven: Start by preheating your oven to 350°F (175°C). This guarantees that the oven reaches the desired temperature by the time you’re ready to bake the pie.
2. Prepare the Crust: In a mixing bowl, combine the almond flour, melted coconut oil, maple syrup, and sea salt. Mix until a dough forms. Press this mixture evenly into the bottom and sides of a 9-inch pie dish to form the crust.
Use a fork to poke several holes at the bottom of the crust to prevent bubbling. Bake for 10 minutes, then remove from the oven and set aside.
3. Make the Filling: In a large bowl, whisk together the pumpkin puree, eggs, coconut milk, maple syrup, and vanilla extract until smooth. Add in the cinnamon, ginger, nutmeg, cloves, and sea salt, and whisk until fully combined.
4. Assemble the Pie: Pour the pumpkin filling into the pre-baked crust, spreading it out evenly with a spatula.
5. Bake the Pie: Place the pie in the preheated oven and bake for 50-60 minutes, or until the filling is set and a knife inserted in the center comes out clean. If the crust begins to brown too much, cover the edges with foil or a pie shield.
6. Cool and Serve: Remove the pie from the oven and let it cool completely on a wire rack. Once cooled, refrigerate for at least 2 hours to allow the filling to firm up. Serve chilled or at room temperature.
Extra Tips:
For the best results, verify all your ingredients, especially the eggs and coconut milk, are at room temperature before mixing. This will help the filling blend more smoothly.
If you’re looking for a bit of extra sweetness, consider topping your pie with a dollop of coconut whipped cream or a sprinkle of chopped pecans. Remember, the key to a perfect paleo pumpkin pie isn’t rushing the cooling process; allowing the pie to chill thoroughly guarantees a clean slice and stable filling.
Lemon Poppy Seed Muffins
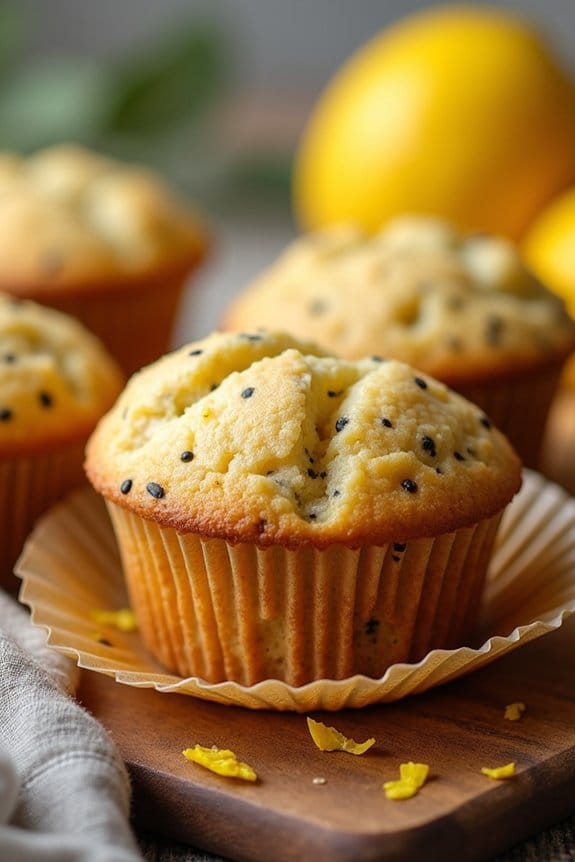
Lemon Poppy Seed Muffins are a delightful and zesty treat that are perfect for the holiday season. These muffins aren’t only delicious but also incorporate healthier ingredients to guarantee that you can indulge without guilt. The combination of tangy lemon and crunchy poppy seeds creates a burst of flavor in every bite, making these muffins a perfect addition to your Christmas morning breakfast or brunch.
Baking these muffins is a great way to bring some festive cheer into your kitchen. By using whole wheat flour, Greek yogurt, and honey, you can make a healthier version of the classic muffin without compromising on taste. This recipe yields about 12 muffins, making it ideal for a serving size of 4-6 people, perfect for a family gathering or sharing with friends.
Ingredients:
- 1 1/2 cups whole wheat flour
- 1/2 cup all-purpose flour
- 1 tablespoon poppy seeds
- 1 teaspoon baking powder
- 1/2 teaspoon baking soda
- 1/4 teaspoon salt
- 1/2 cup honey
- 1/4 cup coconut oil, melted
- 2 large eggs
- 1 cup Greek yogurt
- 1/4 cup fresh lemon juice (about 2 lemons)
- Zest of 2 lemons
- 1 teaspoon vanilla extract
Instructions:
- Preheat the oven: Start by preheating your oven to 350°F (175°C). Line a 12-cup muffin tin with paper liners or lightly grease with cooking spray.
- Mix dry ingredients: In a large mixing bowl, combine the whole wheat flour, all-purpose flour, poppy seeds, baking powder, baking soda, and salt. Mix these dry ingredients well to guarantee even distribution.
- Prepare wet ingredients: In another bowl, whisk together the honey and melted coconut oil until well combined. Add in the eggs, Greek yogurt, lemon juice, lemon zest, and vanilla extract. Mix until smooth and all elements are fully incorporated.
- Combine wet and dry ingredients: Gradually add the wet ingredients to the dry ingredients, stirring gently until just combined. Be careful not to overmix, as this can make the muffins dense.
- Fill muffin cups: Using a spoon or a scoop, fill each muffin cup about two-thirds full with the batter. This will allow room for the muffins to rise while baking.
- Bake: Place the muffin tin in the preheated oven and bake for 18-20 minutes, or until a toothpick inserted into the center of a muffin comes out clean.
- Cool: Once baked, remove the muffins from the oven and let them cool in the pan for about 5 minutes. Then, transfer them to a wire rack to cool completely.
Extra Tips:
To guarantee your Lemon Poppy Seed Muffins have the best texture, avoid overmixing the batter, as this can make them tough. If you prefer a sweeter version, you can add a light glaze made from powdered sugar and lemon juice drizzled over the top once the muffins have cooled.
Additionally, for a richer flavor, you can substitute part of the coconut oil with unsalted butter. Finally, for a more intense lemon flavor, consider adding a bit more lemon zest or a drop of lemon extract to the batter.
Chia Seed Ginger Snap Cookies
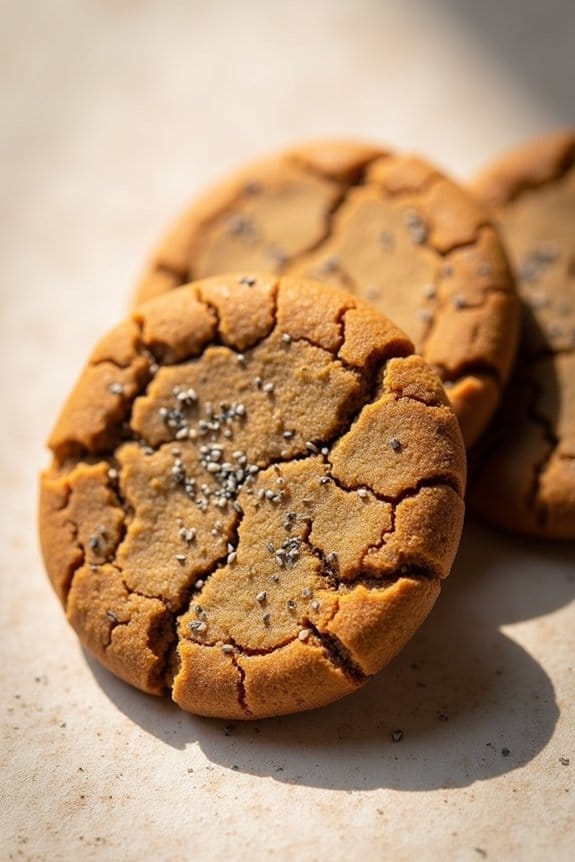
Chia Seed Ginger Snap Cookies are a delightful and healthy twist on a classic holiday treat. These cookies combine the warm, spicy flavors of ginger with the nutritional benefits of chia seeds, offering a guilt-free indulgence perfect for the festive season.
Whether you’re watching your sugar intake or simply looking to try something new, these cookies are sure to satisfy your holiday sweet tooth while keeping your health goals in check.
The addition of chia seeds not only brings a unique texture to the cookies, but also adds a boost of omega-3 fatty acids, fiber, and antioxidants. This recipe is designed for a serving size of 4-6 people, making it ideal for small gatherings or as a delightful homemade gift.
Let’s explore the ingredients and steps needed to create these scrumptious Chia Seed Ginger Snap Cookies.
Ingredients:
- 1 cup almond flour
- 1/2 cup coconut sugar
- 1/4 cup chia seeds
- 1/4 cup molasses
- 1/4 cup coconut oil, melted
- 1 egg
- 1 teaspoon ground ginger
- 1 teaspoon ground cinnamon
- 1/2 teaspoon baking soda
- 1/4 teaspoon salt
- 1/4 teaspoon ground cloves
Instructions:
- Preheat the Oven: Start by preheating your oven to 350°F (175°C). Line a baking sheet with parchment paper to prevent the cookies from sticking and to make cleanup easier.
- Mix Dry Ingredients: In a medium-sized bowl, combine the almond flour, coconut sugar, chia seeds, ground ginger, ground cinnamon, ground cloves, baking soda, and salt. Stir well to verify the spices and baking soda are evenly distributed throughout the flour mixture.
- Combine Wet Ingredients: In a separate bowl, whisk together the melted coconut oil, molasses, and egg until smooth. Make sure the coconut oil isn’t too hot, as it can cook the egg.
- Form the Dough: Gradually add the dry ingredients to the wet ingredients, stirring continuously until a sticky dough forms. The mixture should be well combined, confirming no dry spots remain.
- Shape the Cookies: Scoop tablespoons of the dough onto the prepared baking sheet, leaving about 2 inches between each cookie to allow for spreading. Gently flatten each ball of dough with the back of a spoon or your fingers to form round cookie shapes.
- Bake: Place the baking sheet in the preheated oven and bake for 10-12 minutes, or until the edges of the cookies begin to firm up and the tops are slightly cracked.
- Cool: Remove the cookies from the oven and allow them to cool on the baking sheet for 5 minutes before transferring them to a wire rack to cool completely. This will help them firm up as they cool.
Extra Tips:
To verify the best texture, make sure to use fresh chia seeds as older seeds may not absorb liquid as effectively.
If you prefer a crunchier cookie, leave them in the oven for an additional minute or two, but be careful not to overbake.
These cookies can be stored in an airtight container at room temperature for up to a week, making them a great make-ahead option for your holiday gatherings.
Enjoy these as they are, or pair them with a hot cup of tea or coffee for an extra cozy treat.
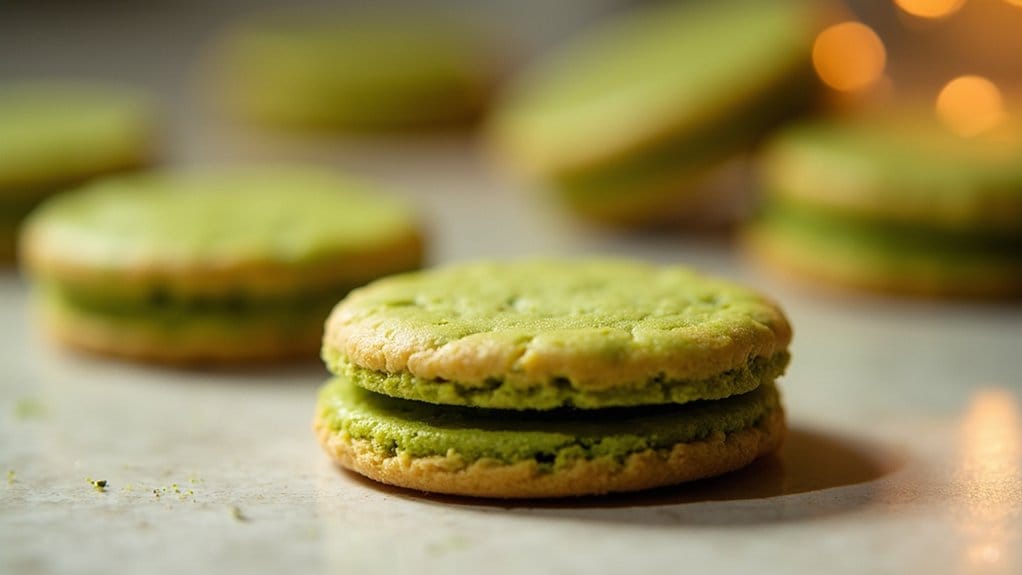
Matcha Green Tea Shortbread
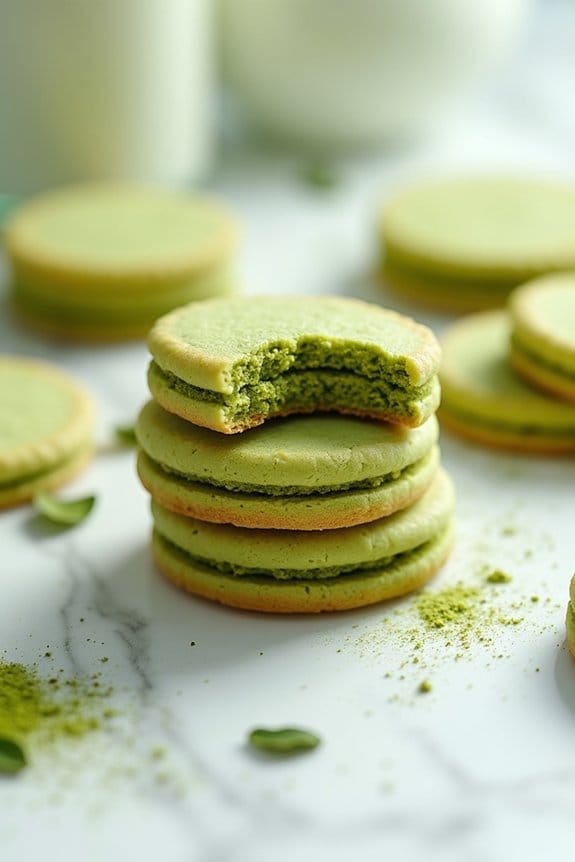
Indulge in the subtle and earthy flavors of Matcha Green Tea Shortbread this holiday season. This delectable treat is a unique twist on traditional shortbread, with the addition of matcha powder providing a beautiful green hue and a distinct taste that pairs perfectly with the buttery cookie.
Not only does this recipe make for an elegant addition to your Christmas cookie tray, but it also incorporates matcha’s known antioxidant properties, offering a healthier option for your festive gatherings.
These delicate cookies are perfect for serving with a hot cup of tea or coffee, making them a versatile choice for afternoon snacks or dessert offerings. The following recipe yields enough shortbread for 4-6 people, guaranteeing that there’s plenty to share with family and friends.
With just a few simple steps, you can create a batch of these delightful cookies that are sure to impress both visually and in flavor.
Ingredients (serving size: 4-6 people):
- 1 cup all-purpose flour
- 1/4 cup granulated sugar
- 2 tablespoons matcha green tea powder
- 1/2 cup unsalted butter, softened
- 1/2 teaspoon vanilla extract
- A pinch of salt
Instructions:
- Prepare the Dough: Begin by sifting the all-purpose flour and matcha green tea powder together in a medium bowl to make certain there are no lumps and the matcha is evenly distributed. Set aside.
- Cream the Butter and Sugar: In a separate large mixing bowl, cream the softened unsalted butter and granulated sugar together using an electric mixer until the mixture is light and fluffy. This should take about 2-3 minutes.
- Combine Ingredients: Add the vanilla extract and a pinch of salt to the butter-sugar mixture. Mix until just combined. Gradually add the flour and matcha mixture to the wet ingredients, mixing on low speed until a dough forms. Be careful not to overmix.
- Shape the Dough: Turn the dough out onto a lightly floured surface. Gently knead it a couple of times to bring it together, then shape it into a log or disc, depending on your preferred shape for the cookies. Wrap the dough in plastic wrap and refrigerate for at least 1 hour, or until firm.
- Preheat and Prepare Baking Sheet: Preheat your oven to 325°F (165°C). Line a baking sheet with parchment paper.
- Slice or Roll the Dough: If you’ve shaped the dough into a log, slice it into 1/4-inch thick rounds. If using a disc, roll out the dough to about 1/4-inch thickness and use cookie cutters to cut out shapes. Place the cookies on the prepared baking sheet, leaving a little space between each one.
- Bake the Cookies: Bake in the preheated oven for 12-15 minutes, or until the edges are just turning golden. Allow the cookies to cool on the baking sheet for a few minutes before transferring them to a wire rack to cool completely.
Extra Tips: For an added festive touch, consider dusting the shortbread cookies with a light layer of powdered sugar before serving. If you find the dough too crumbly, you can add a teaspoon of cold water to help it come together.
Additionally, storing the cookies in an airtight container will keep them fresh for up to a week, allowing you to prepare them in advance of your holiday celebrations. Enjoy these matcha delights as a unique addition to your Christmas baking repertoire!
