
Hosting a Christmas party is a delightful way to gather loved ones together. Yet, the thought of preparing food for everyone can seem daunting. Last year, I found myself searching for easy recipes that wouldn’t leave me stressed in the kitchen. That’s when I stumbled upon these simple yet impressive ideas like Pigs in a Blanket and a Charcuterie Board. These recipes will make your party a hit, all while keeping things effortless.
Classic Pigs in a Blanket
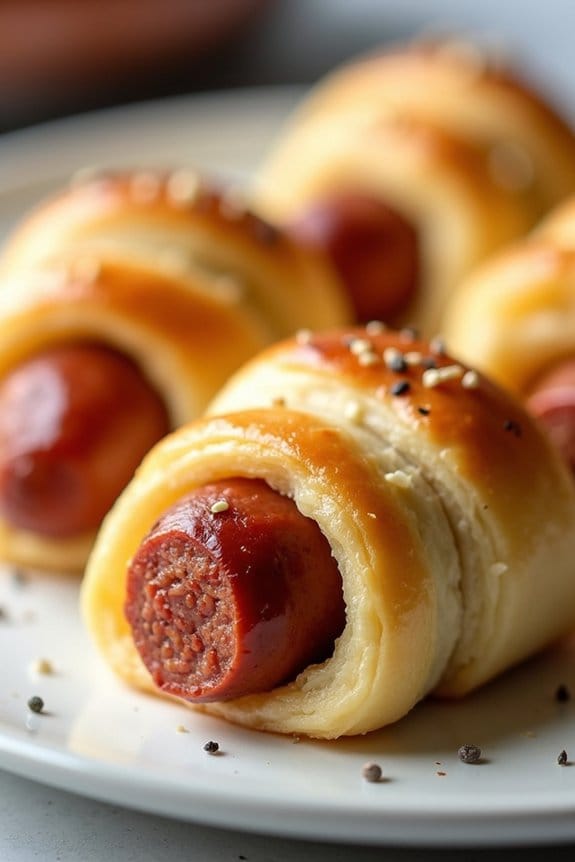
Classic Pigs in a Blanket are a timeless appetizer that never fails to delight guests at any festive gathering, especially during the holiday season.
These delightful little bites consist of juicy cocktail sausages wrapped in flaky, buttery pastry. They aren’t only delicious but also incredibly easy to make, making them a perfect addition to your Christmas party menu.
Whether served as a starter or a snack, Pigs in a Blanket are sure to be a hit with both kids and adults alike.
The beauty of this dish lies in its simplicity and versatility. You can prepare them ahead of time and either bake them fresh when guests arrive or reheat them quickly before serving.
This recipe serves 4-6 people, making it ideal for small gatherings or as part of a larger spread. Pair these savory treats with a variety of dipping sauces, such as mustard or ketchup, to enhance their flavor even further.
Ingredients:
- 1 package of pre-cooked cocktail sausages (approximately 24 sausages)
- 1 sheet of puff pastry (store-bought or homemade)
- 1 egg
- 1 tablespoon water
- Optional: sesame seeds or poppy seeds for garnish
Cooking Instructions:
- Preheat the oven: Begin by preheating your oven to 400°F (200°C) to guarantee it’s hot and ready when it’s time to bake.
- Prepare the puff pastry: Roll out the puff pastry sheet on a lightly floured surface until it’s smooth and slightly thinner. Cut the pastry into strips approximately 1 inch wide and 3 inches long.
- Wrap the sausages: Take one cocktail sausage and place it at the end of a pastry strip. Roll the sausage up in the pastry, making sure it’s fully wrapped. Press down the edge to seal it. Repeat this process for all the sausages.
- Prepare the egg wash: In a small bowl, beat the egg with one tablespoon of water to create an egg wash. Brush each wrapped sausage with the egg wash to give them a golden, shiny finish when baked.
- Add optional toppings: If desired, sprinkle sesame seeds or poppy seeds over the top of each wrapped sausage for added texture and flavor.
- Bake: Arrange the wrapped sausages on a baking sheet lined with parchment paper, leaving a small space between each one. Bake in the preheated oven for 15-20 minutes, or until the pastry is golden brown and puffed.
- Serve: Allow the Pigs in a Blanket to cool slightly before serving them warm with your choice of dipping sauces.
Extra Tips:
For an extra burst of flavor, consider adding a small slice of cheese or a dab of mustard inside each pastry before wrapping the sausages. This adds a delicious twist to the classic recipe.
If you’re making them ahead of time, you can freeze the wrapped sausages before baking. When ready to serve, bake them straight from the freezer, adding a few extra minutes to the baking time.
This makes them an excellent make-ahead appetizer for stress-free party planning.
Festive Cheese and Charcuterie Board

Creating a Festive Cheese and Charcuterie Board is a delightful way to impress your guests at your Christmas party. This board combines a variety of flavors and textures, offering a visually stunning presentation that’s as delicious as it’s beautiful. The key to an outstanding cheese and charcuterie board is balance—balancing flavors, textures, and colors to provide a taste experience that satisfies all palates.
By carefully selecting a range of cheeses, cured meats, and complementary accompaniments, you can create a centerpiece that encourages mingling and conversation. For a serving size of 4-6 people, you can include a diverse selection of cheeses such as soft, semi-soft, and hard varieties, as well as a mix of savory and sweet accompaniments. Incorporating seasonal elements like fresh fruit or nuts can enhance the festive theme.
Remember, the presentation is just as important as the selection, so take time to arrange your items artfully on a large wooden board or platter. With the right combination of ingredients, your Festive Cheese and Charcuterie Board will become a highlight of your holiday gathering.
Ingredients:
- 4 oz Brie cheese
- 4 oz Cheddar cheese
- 4 oz Blue cheese
- 4 oz Gouda cheese
- 4 oz Prosciutto
- 4 oz Salami
- 4 oz Chorizo
- 1 cup mixed olives
- 1 cup grapes
- 1 cup dried apricots
- 1/2 cup almonds
- 1/2 cup walnuts
- 1/2 cup honey
- 1/2 cup fig jam
- 1 baguette, sliced
- Assorted crackers
Instructions:
- Prepare the Cheese: Begin by cutting the cheeses into slices or wedges. This makes it easier for your guests to serve themselves. Arrange the different varieties of cheese in different sections on your board.
- Add Meats: Roll or fold the prosciutto and salami into attractive shapes and place them around the cheese. This not only makes the board look appealing but also makes it easy for guests to pick up the slices.
- Incorporate Fresh and Dried Fruits: Scatter grapes and dried apricots across the board. These elements add a sweet contrast to the salty and creamy elements of the board.
- Include Nuts and Olives: Fill any empty spaces with almonds, walnuts, and mixed olives. These add a crunchy texture and a savory flavor that complements the cheeses and meats.
- Add Condiments: Place small bowls of honey and fig jam on the board. These are perfect for drizzling over cheese or spreading on bread for an added layer of flavor.
- Place Bread and Crackers: Ultimately, arrange slices of baguette and a variety of crackers around the edges of the board. These act as vessels for sampling the various components of the board.
Extra Tips:
To enhance the visual appeal, try to incorporate a variety of colors and textures. Consider adding fresh herbs like rosemary or thyme as a garnish for a pop of color and fragrance.
Make sure to include a variety of knives for different cheeses, and provide small tongs or picks for the meats and other accompaniments. Finally, allow the cheeses to come to room temperature before serving to enhance their flavors and textures. This board can be prepared a few hours in advance and covered with plastic wrap to keep it fresh until guests arrive.
Cranberry Brie Bites
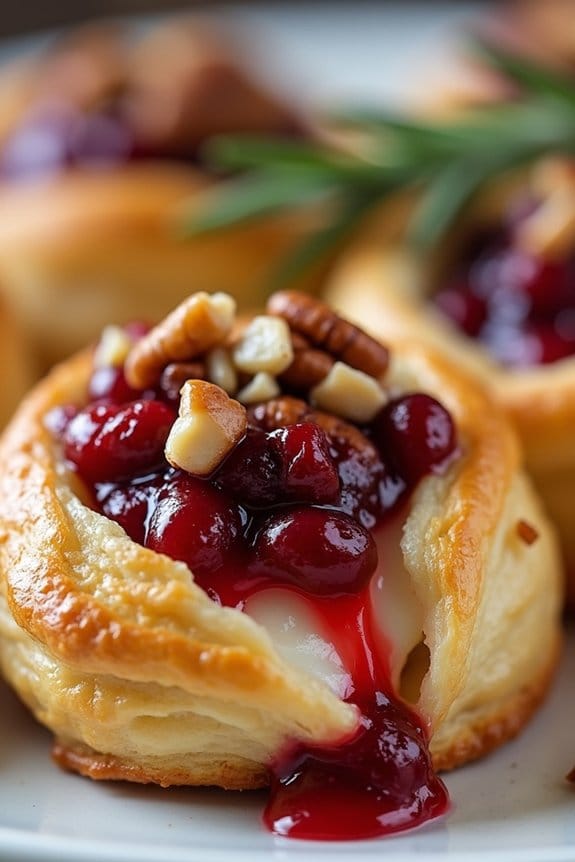
Cranberry Brie Bites are the perfect festive appetizer to serve at your Christmas party. These little bites aren’t only delicious but also incredibly easy to make, combining the rich creaminess of Brie cheese with the sweet tanginess of cranberry sauce. Encased in flaky puff pastry, they’re sure to be a hit among guests with their elegant appearance and mouthwatering taste.
Whether you’re hosting a small gathering or a large festive feast, these Cranberry Brie Bites are a crowd-pleaser that adds a touch of sophistication to your holiday spread.
The beauty of this dish lies in its simplicity. With just a few ingredients, you can create a gourmet appetizer that looks and tastes like you’ve spent hours in the kitchen. The combination of flavors and textures makes every bite a delightful experience. The tart cranberries complement the creamy Brie perfectly, while the buttery pastry encases the filling, creating a satisfying crunch.
Perfect for both novice and seasoned cooks, this recipe is a fantastic way to impress your guests without the stress of complicated preparation.
Ingredients for serving size of 4-6 people:
- 1 sheet of puff pastry, thawed
- 1 small wheel of Brie cheese
- 1/2 cup cranberry sauce
- 1/4 cup chopped pecans (optional)
- 1 egg, beaten (for egg wash)
- Fresh rosemary or thyme sprigs (for garnish)
Cooking Instructions:
- Preheat the Oven: Begin by preheating your oven to 375°F (190°C). This guarantees that your puff pastry cooks evenly and achieves a golden-brown finish.
- Prepare the Puff Pastry: Roll out the puff pastry sheet on a lightly floured surface to smooth out any creases. Cut the pastry into approximately 12 equal squares using a sharp knife or pizza cutter.
- Prepare the Brie and Filling: Cut the Brie into small cubes, roughly the size of your pastry squares. Place a cube of Brie in the center of each pastry square.
- Add the Cranberry Sauce: Spoon about a teaspoon of cranberry sauce on top of each Brie cube. If you like a bit of crunch, sprinkle some chopped pecans over the cranberry sauce.
- Assemble the Bites: Bring the corners of each pastry square up to the center, pinching them together to seal the Brie and cranberry sauce inside. This will create a little pouch.
- Apply the Egg Wash: Brush each pastry bite with the beaten egg. This will give them a beautiful golden sheen once baked.
- Bake: Place the assembled bites on a baking sheet lined with parchment paper. Bake in the preheated oven for 15-20 minutes, or until the pastry is puffed and golden.
- Garnish and Serve: Once out of the oven, allow the bites to cool slightly before serving. Garnish with a sprig of fresh rosemary or thyme for an added touch of elegance.
Extra Tips:
For the best results, make sure your puff pastry is well-chilled before you start working with it, as this helps it puff up nicely during baking. You can prepare the cranberry sauce ahead of time or use store-bought for convenience.
Additionally, feel free to experiment with other toppings such as chopped walnuts or a drizzle of honey for added flavor. If you’re preparing these bites in advance, you can assemble them a day ahead and store them in the refrigerator, then bake them fresh right before serving.
Enjoy the festive spirit with these delightful Cranberry Brie Bites!
Caprese Christmas Wreath
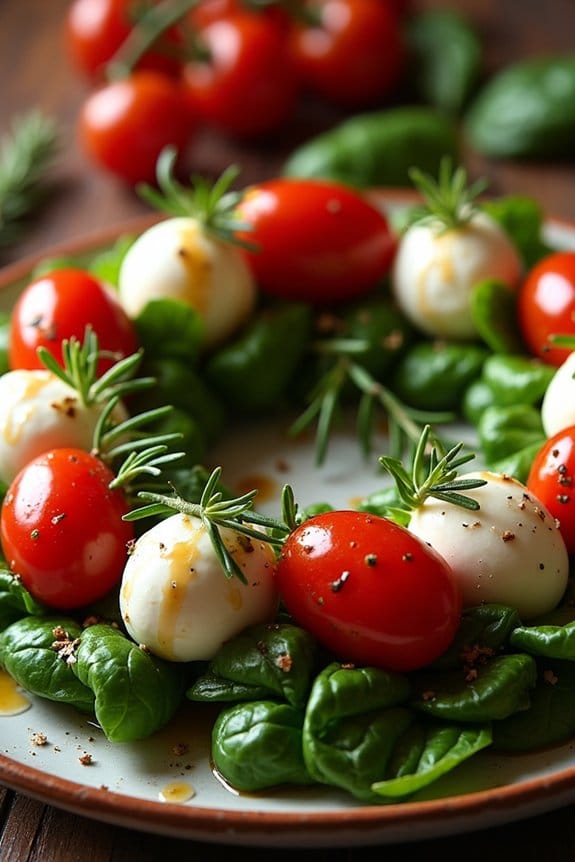
The Caprese Christmas Wreath is an elegant and festive appetizer that brings joy to your holiday table with its vibrant colors and fresh flavors. This dish beautifully combines the classic ingredients of a Caprese salad — fresh mozzarella, ripe tomatoes, and fragrant basil — arranged in a visually stunning wreath shape. Perfect for a Christmas party, this recipe not only tastes delicious but also adds a touch of holiday cheer to your presentation.
This recipe serves 4-6 people and can be prepared in under 30 minutes, making it an ideal choice for those looking to impress their guests without spending too much time in the kitchen. The key to a successful Caprese Christmas Wreath lies in using high-quality, fresh ingredients that highlight the simple yet exquisite flavors of this Italian classic.
Now, let’s explore the ingredients and steps needed to create this beautiful dish.
Ingredients:
- 16 fresh mozzarella balls (bocconcini)
- 16 cherry tomatoes
- 1 bunch fresh basil leaves
- 2 tablespoons extra virgin olive oil
- 1 tablespoon balsamic glaze
- Salt, to taste
- Freshly ground black pepper, to taste
- Fresh rosemary sprigs, for garnish (optional)
Cooking Instructions:
- Prepare the Ingredients: Begin by thoroughly washing the cherry tomatoes and basil leaves. Pat them dry with a paper towel to remove any excess moisture. Drain the mozzarella balls from their liquid and set aside.
- Assemble the Wreath: On a large, round serving platter, start arranging the mozzarella balls and cherry tomatoes alternately in a circle to form the base of the wreath. This should create a lovely pattern and guarantee an even distribution of flavors.
- Add Basil Leaves: Tuck fresh basil leaves between the mozzarella balls and cherry tomatoes. Make sure to place them strategically so that they mimic the appearance of a wreath, adding an extra pop of green color to the arrangement.
- Drizzle with Olive Oil and Balsamic Glaze: Lightly drizzle the assembled wreath with extra virgin olive oil, followed by a drizzle of balsamic glaze. These ingredients will enhance the flavors of the mozzarella and tomatoes while adding a beautiful sheen to the dish.
- Season and Garnish: Sprinkle a pinch of salt and freshly ground black pepper over the entire wreath. For an additional festive touch, garnish the platter with fresh rosemary sprigs, which mimic evergreen branches and add a subtle aroma.
Extra Tips:
For the best flavor, use high-quality extra virgin olive oil and a thick, sweet balsamic glaze. If you can, opt for heirloom cherry tomatoes, as they offer an array of colors and enhance the visual appeal of the wreath.
Remember to prepare the dish just before serving to maintain the freshness of the basil and the juiciness of the tomatoes. If you’re looking for a more robust flavor, consider marinating the mozzarella balls in olive oil, salt, and a splash of balsamic vinegar for about an hour before assembling the wreath.
This simple yet stunning appetizer is sure to be a hit at your Christmas party!
Stuffed Mushrooms With Garlic and Herbs

Stuffed Mushrooms With Garlic and Herbs are a delightful addition to any Christmas party table, offering a burst of flavor with each bite. These savory bites are the perfect blend of earthy mushrooms filled with a delectable mixture of garlic, fresh herbs, and creamy cheese. They aren’t only delicious but also relatively simple to prepare, making them a great choice for holiday entertaining.
The combination of textures and flavors in this dish will surely impress your guests and add a touch of elegance to your party menu. These stuffed mushrooms can be prepared ahead of time, allowing you to spend more time enjoying your party. The recipe yields enough for 4-6 people, making it a perfect appetizer or side dish.
The key to achieving the best flavor is using fresh ingredients, so be sure to select fresh mushrooms and herbs to maximize the taste. With the right ingredients and a bit of preparation, these stuffed mushrooms will be a hit at your Christmas gathering.
Ingredients (Serves 4-6):
- 20 large button or cremini mushrooms
- 3 tablespoons olive oil
- 3 cloves garlic, minced
- 1/4 cup finely chopped fresh parsley
- 1/4 cup finely chopped fresh thyme
- 1/4 cup finely chopped fresh chives
- 1/2 cup breadcrumbs
- 1/2 cup grated Parmesan cheese
- 4 ounces cream cheese, softened
- Salt and pepper to taste
- 1 tablespoon lemon juice
Cooking Instructions:
- Prepare the Mushrooms: Preheat your oven to 375°F (190°C). Gently clean the mushrooms with a damp cloth and remove the stems. Set the mushroom caps aside and finely chop the stems.
- Cook the Filling: Heat 2 tablespoons of olive oil in a skillet over medium heat. Add the chopped mushroom stems and minced garlic, sautéing until the stems are tender and the garlic is fragrant, about 3-4 minutes.
- Mix the Filling: In a bowl, combine the sautéed mushroom stems and garlic with parsley, thyme, chives, breadcrumbs, Parmesan cheese, cream cheese, lemon juice, salt, and pepper. Mix until well combined.
- Stuff the Mushrooms: Place the mushroom caps on a baking sheet lined with parchment paper. Use a spoon to fill each mushroom cap with the prepared stuffing mixture, slightly mounding it on top.
- Bake the Mushrooms: Drizzle the remaining tablespoon of olive oil over the stuffed mushrooms. Bake in the preheated oven for 20-25 minutes, or until the mushrooms are tender and the tops are golden brown.
- Serve: Remove from the oven and allow them to cool slightly before serving. These stuffed mushrooms are best enjoyed warm.
Extra Tips:
For a richer flavor, you can toast the breadcrumbs in a little butter before mixing them with the other ingredients. If you prefer a spicier version, add a pinch of red pepper flakes to the filling mixture.
These mushrooms can be prepared a day in advance; simply assemble them and refrigerate, then bake just before serving. Remember to taste the filling before stuffing the mushrooms to adjust the seasoning with salt and pepper according to your preference.
Holiday Spiced Nuts

The holiday season is the perfect time to indulge in festive treats, and Holiday Spiced Nuts are a delicious addition to your Christmas party spread. These nuts are roasted to perfection with a blend of warm spices and a hint of sweetness, making them a delightful and addictive snack.
Whether you’re hosting a large gathering or a small family dinner, these spiced nuts are certain to be a hit with your guests, offering a flavorful combination of textures and tastes that capture the essence of the season.
Perfect for a serving size of 4-6 people, this recipe is simple to prepare and can be customized to suit your taste preferences. You can use a mix of your favorite nuts such as almonds, pecans, and walnuts, or stick to one type.
The spices used in this recipe include a blend of cinnamon, nutmeg, and cloves, which pair beautifully with the natural sweetness of maple syrup or honey. Serve these Holiday Spiced Nuts as an appetizer, a snack, or even package them up as a thoughtful homemade gift.
Ingredients:
- 1 cup raw almonds
- 1 cup raw pecans
- 1 cup raw walnuts
- 1/4 cup maple syrup or honey
- 2 tablespoons unsalted butter, melted
- 1 teaspoon ground cinnamon
- 1/2 teaspoon ground nutmeg
- 1/2 teaspoon ground cloves
- 1/2 teaspoon salt
- 1/4 teaspoon cayenne pepper (optional, for a bit of heat)
Cooking Instructions:
- Preheat the Oven: Preheat your oven to 350°F (175°C). Line a baking sheet with parchment paper or a silicone baking mat to prevent the nuts from sticking and to make cleanup easier.
- Mix the Coating: In a large mixing bowl, combine the maple syrup or honey, melted butter, cinnamon, nutmeg, cloves, salt, and cayenne pepper (if using). Stir until all ingredients are well combined and the mixture is smooth.
- Coat the Nuts: Add the almonds, pecans, and walnuts to the bowl with the spiced mixture. Toss the nuts until they’re evenly coated with the spiced syrup mixture. Confirm every nut is well coated for maximum flavor.
- Bake the Nuts: Spread the coated nuts evenly on the prepared baking sheet. Arrange them in a single layer to ensure even roasting. Place the baking sheet in the preheated oven and bake for 15-20 minutes, stirring halfway through, until the nuts are golden brown and fragrant.
- Cool and Serve: Once baked, remove the nuts from the oven and let them cool completely on the baking sheet. The coating will harden as they cool, giving the nuts a delightful crunch. Transfer the cooled nuts to a serving bowl or store them in an airtight container if not serving immediately.
Extra Tips:
To guarantee the best results, keep an eye on the nuts while they bake as they can quickly go from perfectly roasted to burnt.
Feel free to adjust the spices to your preference, and experiment with different types of nuts or seeds to customize your mix. If you prefer a sweeter nut mix, you can add an extra tablespoon of maple syrup or honey.
For those who enjoy a savory touch, a sprinkle of sea salt can enhance the flavors beautifully. Remember, these spiced nuts also make excellent gifts when packaged in decorative jars tied with a festive ribbon.
Enjoy the delightful crunch and festive flavors of your Holiday Spiced Nuts this Christmas season!
Mini Beef Wellington Bites
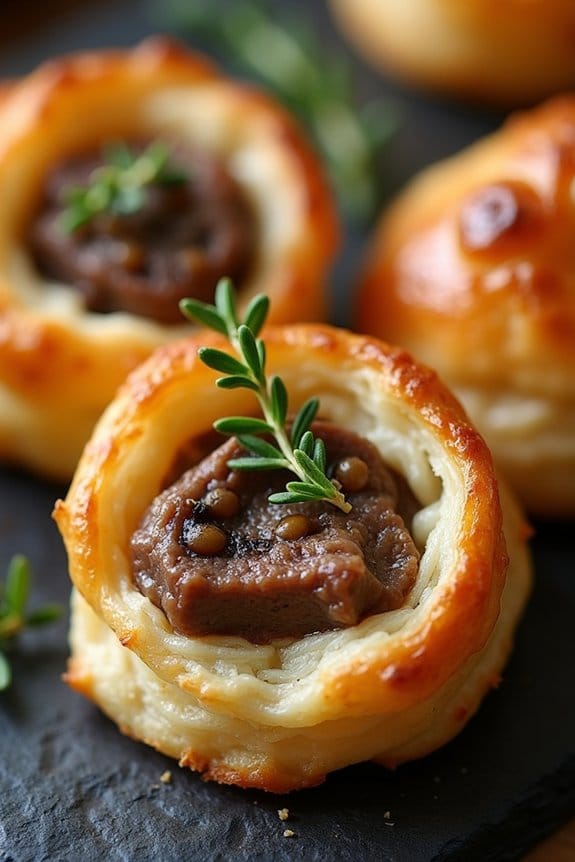
Mini Beef Wellington Bites are a delightful and sophisticated appetizer perfect for any festive Christmas party. These bite-sized treats capture the essence of the classic Beef Wellington but in a smaller, more manageable form. With tender beef tenderloin, savory mushroom duxelles, and crispy puff pastry, these bites are a guaranteed crowd-pleaser that will impress your guests with both flavor and presentation.
These Mini Beef Wellington Bites aren’t only delicious but also convenient to make ahead of time, allowing you to focus on other party preparations. The combination of flavors in each bite is a harmonious blend of rich and savory, making them an irresistible addition to your holiday menu. Serve them as a tantalizing appetizer and watch them disappear quickly from the serving platter.
Ingredients for 4-6 servings:
- 1 pound beef tenderloin, cut into 1-inch cubes
- Salt and pepper, to taste
- 2 tablespoons olive oil
- 2 tablespoons unsalted butter
- 1 small onion, finely chopped
- 8 ounces mushrooms, finely chopped
- 2 cloves garlic, minced
- 1 tablespoon Dijon mustard
- 1 sheet puff pastry, thawed
- 1 egg, beaten (for egg wash)
- Fresh thyme leaves, for garnish (optional)
Cooking Instructions:
- Prepare the Beef: Season the beef tenderloin cubes with salt and pepper. Heat olive oil in a skillet over medium-high heat and sear the beef cubes on all sides until browned, about 2-3 minutes. Remove from the pan and set aside to cool.
- Make the Mushroom Duxelles: In the same skillet, melt the butter over medium heat. Add the chopped onion and cook until translucent, about 3 minutes. Stir in the mushrooms and garlic, cooking until the mixture is dry and golden, about 8-10 minutes. Mix in the Dijon mustard and season with salt and pepper. Allow the mixture to cool.
- Prepare the Puff Pastry: Preheat the oven to 400°F (200°C). Roll out the thawed puff pastry sheet on a lightly floured surface and cut into squares large enough to enclose each beef cube, approximately 3×3 inches.
- Assemble the Bites: Place a teaspoon of the mushroom duxelles in the center of each puff pastry square. Place a beef cube on top of the duxelles. Brush the edges of the pastry with the beaten egg. Fold the corners of the pastry over the beef, sealing the edges tightly to form a neat parcel.
- Bake the Wellington Bites: Arrange the parcels seam-side down on a baking sheet lined with parchment paper. Brush the tops with the remaining egg wash. Bake in the preheated oven for 15-20 minutes, or until the pastry is golden brown and puffed.
- Garnish and Serve: Allow the Mini Beef Wellington Bites to cool slightly before garnishing with fresh thyme leaves if desired. Serve warm and enjoy!
Extra Tips:
For best results, verify the beef is at room temperature before searing to achieve an even browning. When preparing the mushroom duxelles, make sure to cook out all the moisture to avoid soggy pastry.
You can prepare the duxelles and sear the beef a day ahead, storing them separately in the refrigerator. This will save time on the day of your event. Additionally, if you’re hosting a larger gathering, the recipe can be easily doubled or tripled to accommodate more guests.
Gingerbread Cookie Bars
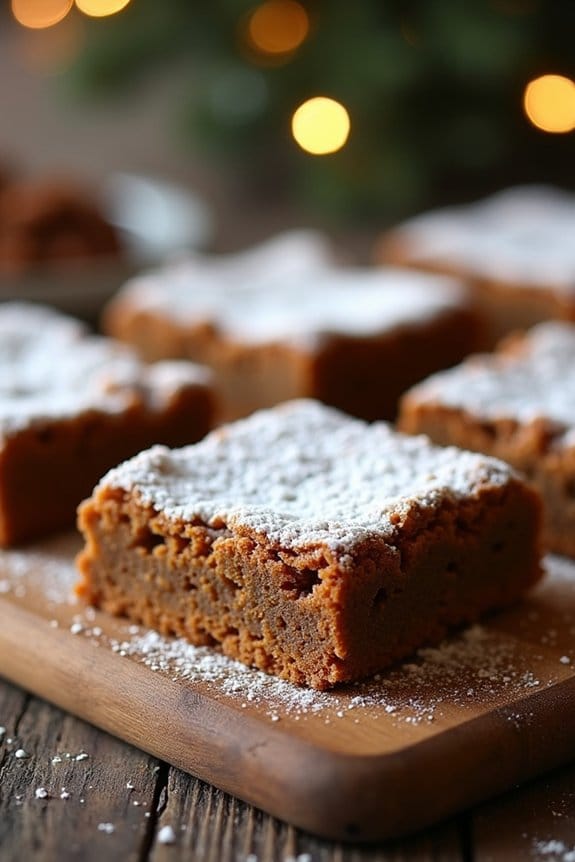
Gingerbread Cookie Bars are a delightful twist on traditional gingerbread cookies, offering the same festive flavors in a convenient bar form.
These bars are perfect for a Christmas party, as they’re easy to prepare and serve, and they maintain the classic taste of ginger, cinnamon, and molasses that everyone loves. The soft, chewy texture of gingerbread cookie bars makes them an irresistible treat, and they can be easily decorated with icing or a dusting of powdered sugar to add an extra touch of holiday cheer.
Ideal for serving 4-6 people, this recipe combines the warm spices of gingerbread with the ease of a bar cookie, making it a great choice for holiday gatherings. The bars can be prepared ahead of time, freeing you up to enjoy the festivities. Whether you’re hosting a party or attending one as a guest, these gingerbread cookie bars are sure to be a hit.
Ingredients:
- 1/2 cup (1 stick) unsalted butter, softened
- 1/2 cup brown sugar, packed
- 1/4 cup molasses
- 1 large egg
- 1 teaspoon vanilla extract
- 1 1/2 cups all-purpose flour
- 1 teaspoon baking soda
- 1/2 teaspoon salt
- 1 teaspoon ground ginger
- 1 teaspoon ground cinnamon
- 1/4 teaspoon ground cloves
Instructions:
- Preheat and Prepare: Begin by preheating your oven to 350°F (175°C). Line an 8×8-inch baking pan with parchment paper, leaving some overhang on the sides to allow for easy removal of the bars.
- Cream the Butter and Sugar: In a large mixing bowl, cream together the softened butter and brown sugar until light and fluffy. This typically takes about 2-3 minutes using an electric mixer on medium speed.
- Add Wet Ingredients: Mix in the molasses, egg, and vanilla extract, beating until the ingredients are well combined and the mixture is smooth.
- Combine Dry Ingredients: In a separate bowl, whisk together the flour, baking soda, salt, ginger, cinnamon, and cloves. Verify the spices are evenly distributed throughout the flour.
- Mix it All Together: Gradually add the dry ingredients to the wet ingredients, mixing on low speed until just combined. Be careful not to overmix, as this can make the bars tough.
- Transfer and Bake: Pour the batter into the prepared baking pan and use a spatula to spread it evenly. Bake in the preheated oven for 20-25 minutes, or until the edges are golden brown and a toothpick inserted into the center comes out clean.
- Cool and Serve: Allow the bars to cool completely in the pan on a wire rack. Once cooled, use the parchment paper overhang to lift the bars from the pan and onto a cutting board. Cut into squares and serve.
Extra Tips:
For an added touch of sweetness and visual appeal, consider drizzling the cooled bars with a simple icing made from powdered sugar and milk, or sprinkle them with powdered sugar just before serving.
If you prefer, you can also add a handful of raisins or chopped nuts to the batter for extra texture and flavor. To guarantee even baking, make sure the batter is spread evenly in the pan before placing it in the oven.
These gingerbread cookie bars can be stored in an airtight container at room temperature for up to three days, making them perfect for preparing ahead of your festive event.
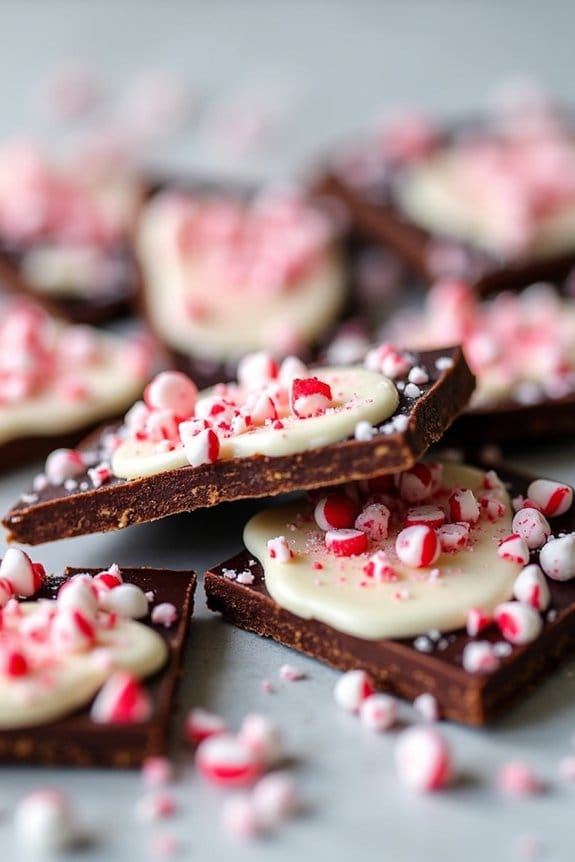
Peppermint Chocolate Bark
Peppermint Chocolate Bark is a delightful treat that combines the rich, smooth flavor of chocolate with the invigorating, cool taste of peppermint. It’s a perfect holiday confection that’s both simple to make and incredibly satisfying. This festive candy is a favorite at Christmas parties, offering a sweet and minty burst that complements the season’s cheer.
Whether you’re hosting a gathering or looking for a homemade gift, this recipe is sure to become a holiday staple.
The beauty of Peppermint Chocolate Bark lies in its simplicity and versatility. Made with just a few ingredients, it requires minimal effort yet yields a visually stunning and delicious result. The bark can be broken into irregular pieces, making it ideal for sharing amongst friends and family.
Plus, the combination of dark and white chocolate, along with crushed peppermint candies, creates a beautiful contrast that’s as pleasing to the eye as it’s to the palate.
Ingredients (serving size: 4-6 people):
- 12 oz (340g) dark chocolate, chopped
- 12 oz (340g) white chocolate, chopped
- 1 tsp peppermint extract
- 1/2 cup crushed peppermint candies or candy canes
Cooking Instructions:
- Prepare the Baking Sheet: Line a baking sheet with parchment paper or a silicone baking mat. This will prevent the chocolate from sticking and make it easy to remove the bark once it’s set.
- Melt the Dark Chocolate: In a microwave-safe bowl, melt the dark chocolate in 30-second intervals, stirring after each interval, until smooth and fully melted. Alternatively, you can melt the chocolate over a double boiler.
- Add Peppermint Extract: Stir in the peppermint extract into the melted dark chocolate until fully combined. This will infuse the chocolate with an invigorating peppermint flavor.
- Spread the Dark Chocolate: Pour the melted dark chocolate onto the prepared baking sheet, spreading it evenly with a spatula to about 1/4-inch thickness.
- Chill the Dark Chocolate: Place the baking sheet in the refrigerator for about 10-15 minutes, until the chocolate is firm but not completely set.
- Melt the White Chocolate: As the dark chocolate sets, melt the white chocolate in a similar manner using the microwave or a double boiler.
- Layer the White Chocolate: Once the dark chocolate is firm, pour the melted white chocolate over it, spreading evenly to cover the dark chocolate layer.
- Add Crushed Peppermint: Immediately sprinkle the crushed peppermint candies over the white chocolate layer. Gently press the candies into the chocolate to make sure they adhere.
- Set the Bark: Allow the bark to set at room temperature or place it back in the refrigerator until fully hardened, about 30 minutes to 1 hour.
- Break into Pieces: Once set, break the chocolate bark into irregular pieces. Serve immediately or store in an airtight container for up to two weeks.
Extra Tips:
When making Peppermint Chocolate Bark, be mindful of the chocolate’s temperature; overheating can cause it to seize. Use high-quality chocolate for the best taste and texture.
If you prefer a smoother finish, you can temper the chocolate, though it’s not necessary. For added flair, consider adding a sprinkle of edible glitter or swapping white chocolate for a colored candy melt to match your holiday theme.
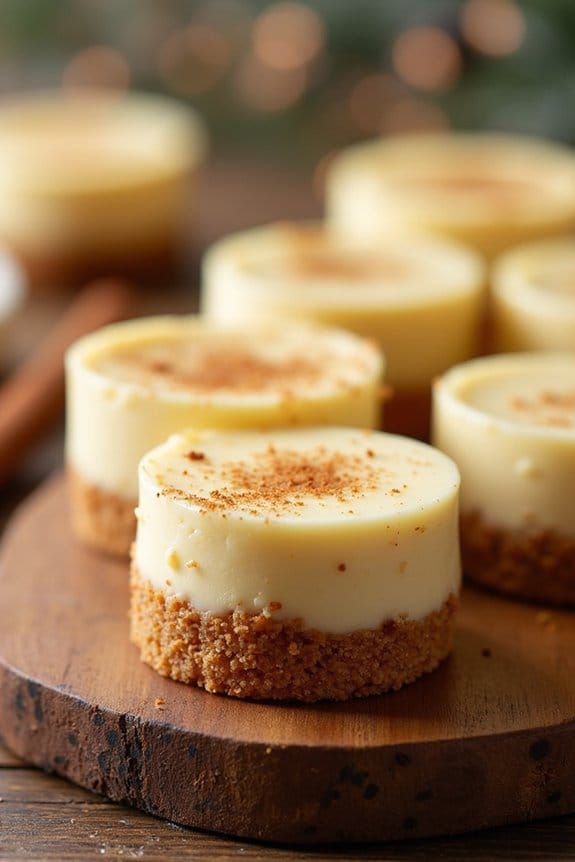
Eggnog Cheesecake Bites
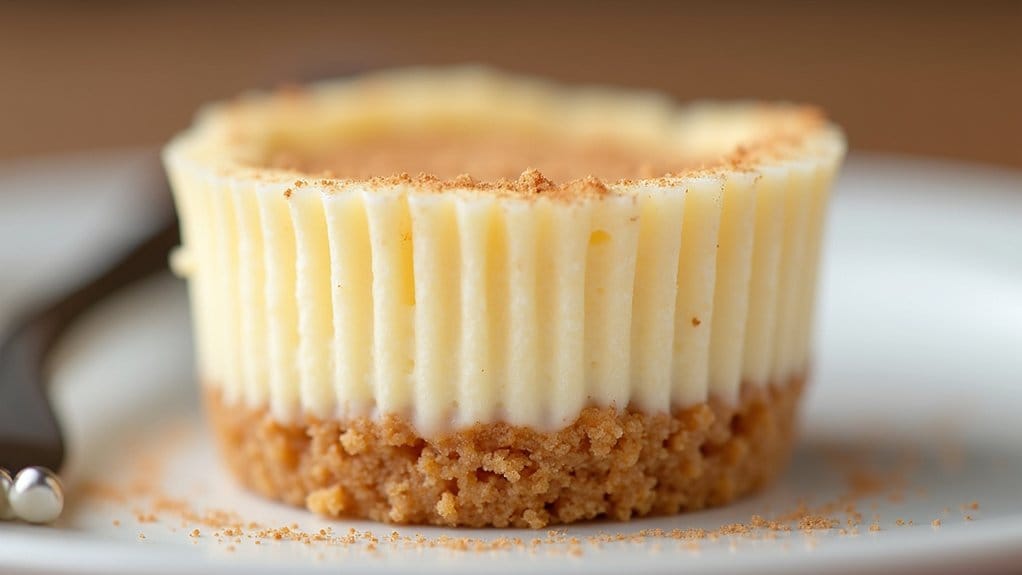
Eggnog Cheesecake Bites are the perfect festive treat to bring a touch of holiday spirit to your Christmas party. Combining the traditional flavors of creamy eggnog and the rich, smooth texture of cheesecake, these bite-sized delights are certain to be a hit with your guests. Not only are they delicious, but their small size makes them a convenient, mess-free dessert option that can be easily served and enjoyed by your guests.
Whether you’re hosting a large gathering or a cozy family get-together, these Eggnog Cheesecake Bites are assured to add a touch of sweetness to your celebration.
Crafting these festive bites involves a delicate balance of flavors and textures. The creamy cheesecake filling, infused with the warm notes of nutmeg, cinnamon, and rum extract, is nestled atop a buttery graham cracker crust. Each bite delivers a burst of holiday flavor that will leave your guests craving more.
The recipe below will guide you through the process of making a batch suitable for serving 4-6 people, perfect for a small gathering or as part of a larger dessert spread.
Ingredients (Serves 4-6):
- 1 cup graham cracker crumbs
- 4 tablespoons unsalted butter, melted
- 2 tablespoons granulated sugar
- 1 1/2 cups cream cheese, softened
- 1/2 cup granulated sugar
- 1/4 cup eggnog
- 1 teaspoon vanilla extract
- 1/2 teaspoon rum extract
- 1/4 teaspoon ground nutmeg
- 1/4 teaspoon ground cinnamon
- 1 large egg
Cooking Instructions:
- Prepare the Crust: Preheat your oven to 325°F (163°C). In a medium bowl, mix together the graham cracker crumbs, melted butter, and 2 tablespoons of sugar until the mixture resembles wet sand.
- Form the Crust Base: Line a mini muffin pan with paper liners. Spoon about a tablespoon of the crumb mixture into each liner and press down firmly to form a crust. Bake in the preheated oven for 5 minutes, then remove and let cool.
- Make the Cheesecake Filling: In a large bowl, beat the softened cream cheese and 1/2 cup of sugar together until smooth. Add the eggnog, vanilla extract, rum extract, nutmeg, cinnamon, and egg. Beat the mixture until well combined and smooth.
- Assemble the Bites: Spoon the cheesecake filling over the cooled crusts, filling each liner nearly to the top. Smooth the tops with a spatula if necessary.
- Bake the Cheesecake Bites: Return the pan to the oven and bake for 15-18 minutes, or until the edges are set and the centers slightly jiggle when moved.
- Cool and Chill: Allow the cheesecakes to cool in the pan for about 10 minutes, then transfer them to a wire rack to cool completely. Once cooled, refrigerate for at least 2 hours, or until firm.
- Serve and Enjoy: Carefully remove the cheesecake bites from the liners and place them on a serving platter. Optionally, garnish with a sprinkle of nutmeg or a dollop of whipped cream before serving.
Extra Tips:
To guarantee the smoothest cheesecake texture, make sure all your ingredients are at room temperature before you begin mixing. This will help the cream cheese blend more easily with the other ingredients.
If you’re short on time, the crust can be prepared and baked a day ahead, allowing you to focus solely on the filling on the day of your event. For an added festive touch, consider topping each bite with a small piece of candied nut or a sprinkle of cinnamon just before serving.
