
When it comes to Christmas lunch, keeping it simple yet delightful is key. I love having make-ahead recipes that let me savor the day with my family. Picture a honey-glazed ham filling your home with its mouthwatering aroma. Meanwhile, a creamy potato gratin is ready in the oven. Want more stress-free ideas that will impress your guests? Let’s explore some possibilities together.
Classic Baked Ziti

Classic Baked Ziti is a comforting and delicious dish that’s perfect for a make-ahead Christmas lunch. This Italian-American favorite combines hearty pasta, rich tomato sauce, creamy cheese, and savory meat, all baked to perfection. Its versatility and ease of preparation make it an ideal choice for holiday gatherings, allowing you to enjoy time with family and friends without spending too much time in the kitchen on the day of your celebration.
This recipe serves 4-6 people and is perfect for preparing the day before your event. The flavors meld beautifully when allowed to sit overnight, resulting in a dish that’s even more flavorful when reheated. Simply follow the instructions to assemble the ziti, refrigerate, and then bake when you’re ready to serve. This guarantees you have a delicious and stress-free meal ready to impress your guests.
Ingredients (serves 4-6):
- 1 pound ziti pasta
- 2 tablespoons olive oil
- 1 onion, chopped
- 3 cloves garlic, minced
- 1 pound ground beef or Italian sausage
- 1 teaspoon dried oregano
- 1 teaspoon dried basil
- Salt and pepper to taste
- 1 jar (24 ounces) marinara sauce
- 1 can (15 ounces) ricotta cheese
- 1 egg
- 2 cups shredded mozzarella cheese
- 1/2 cup grated Parmesan cheese
- Fresh basil leaves for garnish (optional)
Instructions:
- Preheat and Prepare: Preheat your oven to 375°F (190°C). Grease a 9×13-inch baking dish and set aside.
- Cook the Pasta: In a large pot of salted boiling water, cook the ziti pasta until al dente, according to package instructions. Drain and set aside.
- Sauté the Aromatics: In a large skillet, heat the olive oil over medium heat. Add the chopped onion and sauté until translucent, about 5 minutes. Add the minced garlic and cook for another minute until fragrant.
- Cook the Meat: Add the ground beef or Italian sausage to the skillet. Cook, breaking up with a spoon, until browned and cooked through. Drain any excess fat.
- Season and Sauce: Stir in the dried oregano, dried basil, salt, and pepper. Pour in the marinara sauce, and let the mixture simmer for 10 minutes to allow the flavors to meld.
- Mix the Ricotta: In a separate bowl, combine the ricotta cheese with the egg, mixing until smooth. Season with a pinch of salt and pepper.
- Assemble the Ziti: Spread a thin layer of the meat sauce on the bottom of the prepared baking dish. Layer half of the cooked ziti pasta over the sauce, then spread half of the ricotta mixture over the pasta. Sprinkle with half of the mozzarella cheese. Repeat the layering process with the remaining ingredients, finishing with the remaining mozzarella and Parmesan cheese on top.
- Bake: Cover the dish with aluminum foil and bake in the preheated oven for 20 minutes. Remove the foil and bake for an additional 10-15 minutes, or until the cheese is melted and bubbly.
- Garnish and Serve: Let the baked ziti rest for 5-10 minutes before serving. Garnish with fresh basil leaves if desired.
Extra Tips:
- For a vegetarian version, simply omit the meat and add sautéed vegetables such as mushrooms, bell peppers, or spinach.
- If you prefer a spicier dish, add red pepper flakes to the meat sauce.
- The baked ziti can be assembled up to two days in advance and stored in the refrigerator. Just extend the baking time by an additional 10 minutes if baking straight from the fridge.
- For added flavor, consider mixing in some grated Parmesan cheese with the ricotta mixture.
Honey Glazed Ham
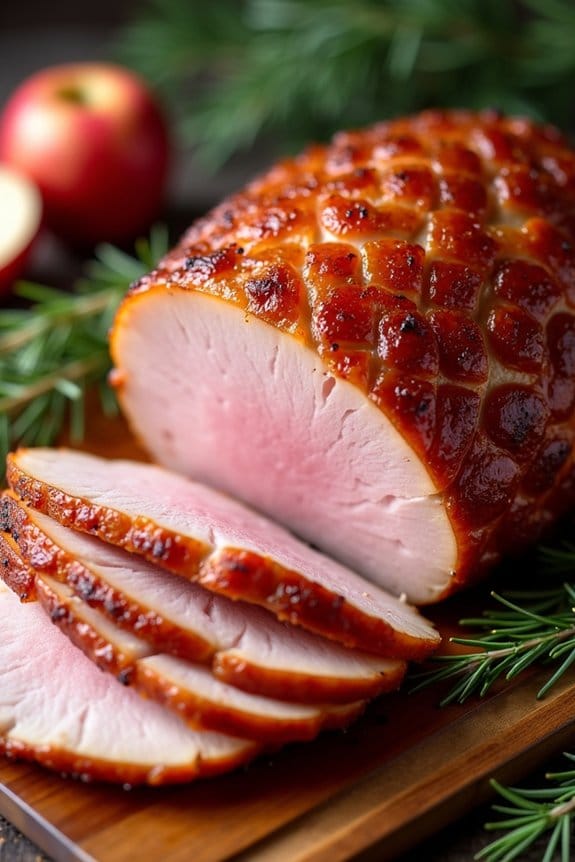
Preparing a Honey Glazed Ham for your make-ahead Christmas lunch can be a delightful way to bring warmth and flavor to your festive table. The sweet and crispy glaze, combined with the tender, juicy ham, is bound to impress your guests. This dish is perfect for serving a group of 4-6 people, allowing you to enjoy a stress-free Christmas day by preparing it in advance.
The honey glaze adds a beautiful, glossy finish to the ham, making it not only delicious but also visually appealing. By preparing this dish ahead of time, you can focus on enjoying the holiday with your loved ones, knowing that the main course is ready to be served. Just reheat it on the day, and your guests will be treated to a flavorful and succulent meal.
Ingredients:
- 1 (5-pound) fully cooked bone-in ham
- 1 cup honey
- 1/2 cup brown sugar
- 1/4 cup Dijon mustard
- 1/4 cup apple cider vinegar
- 1 teaspoon ground cinnamon
- 1/2 teaspoon ground cloves
- 1/2 teaspoon ground allspice
- 1/2 teaspoon ground nutmeg
Instructions:
- Preheat the Oven: Begin by preheating your oven to 325°F (165°C). This will guarantee that your ham cooks evenly.
- Prepare the Ham: Place the ham in a roasting pan, flat side down. Score the surface of the ham in a diamond pattern using a sharp knife, making sure not to cut too deeply.
- Make the Glaze: In a small saucepan over medium heat, combine the honey, brown sugar, Dijon mustard, apple cider vinegar, ground cinnamon, ground cloves, ground allspice, and ground nutmeg. Stir until the sugar dissolves and the mixture is smooth.
- Apply the Glaze: Brush the glaze generously over the surface of the ham. Reserve some glaze for basting during cooking.
- Roast the Ham: Place the ham in the preheated oven. Roast for about 1.5 to 2 hours, basting with the reserved glaze every 20-30 minutes, until the ham is heated through and the glaze is caramelized.
- Rest and Serve: Once the ham is fully cooked, remove it from the oven and let it rest for about 10-15 minutes before slicing. This allows the juices to redistribute, guaranteeing a moist and tender bite.
Extra Tips:
For an even more flavorful ham, consider marinating it in the glaze overnight before cooking. This allows the spices and honey to penetrate the meat more deeply.
Always use a meat thermometer to guarantee the internal temperature reaches 140°F (60°C) for safety. If you prefer a thicker glaze, let it simmer longer on the stove until it reaches your desired consistency.
Spinach and Feta Puff Pastry

Spinach and Feta Puff Pastry is a delightful and easy-to-make dish that can be prepared in advance for your Christmas lunch, guaranteeing you have more time to spend with family and friends. This savory pastry combines the rich, creamy texture of feta cheese with the vibrant, earthy taste of spinach, all encased in a buttery, flaky puff pastry.
It’s a crowd-pleaser that works wonderfully as a main course or a substantial side dish, offering a festive touch to your holiday spread.
What makes this dish particularly appealing is its versatility and the convenience of preparing it ahead of time. You can assemble the pastries the night before or even a few days in advance, and simply store them in the refrigerator until you’re ready to bake. This not only infuses your holiday meal with homemade warmth but also alleviates some of the stress of last-minute preparations.
Here’s how to make Spinach and Feta Puff Pastry for 4-6 people.
Ingredients:
- 1 package of frozen puff pastry (2 sheets), thawed
- 1 tablespoon olive oil
- 1 small onion, finely chopped
- 2 cloves garlic, minced
- 10 ounces fresh spinach, washed and chopped
- 1 cup feta cheese, crumbled
- 1 egg, beaten (for egg wash)
- Salt and pepper to taste
- 1 teaspoon dried oregano
Instructions:
- Prepare the Spinach Filling:
- In a large skillet, heat the olive oil over medium heat. Add the chopped onion and sauté until it becomes translucent, about 3-4 minutes. Stir in the minced garlic and cook for an additional minute until fragrant.
- Add the chopped spinach to the skillet, stirring occasionally, and cook until wilted, which should take about 4-5 minutes. Remove the skillet from heat and let the mixture cool slightly.
- Once cooled, transfer the spinach mixture to a large bowl. Add crumbled feta cheese, salt, pepper, and dried oregano, and mix well to combine.
- Assemble the Puff Pastry:
- Preheat your oven to 400°F (200°C) and line a baking sheet with parchment paper.
- Roll out the thawed puff pastry sheets on a lightly floured surface. Cut each sheet into equal-sized squares or rectangles, depending on your preference.
- Spoon a generous amount of the spinach and feta mixture onto one half of each pastry square, leaving a small border around the edges.
- Fold the other half of the pastry over the filling to form a triangle or rectangle, pressing the edges with a fork to seal. Brush the tops with beaten egg for a golden finish.
- Bake the Puff Pastries:
- Arrange the filled pastries on the prepared baking sheet, guaranteeing they’re spaced apart to allow for expansion during baking.
- Bake in the preheated oven for 20-25 minutes, or until the pastries are puffed and golden brown. Remove from the oven and let them cool slightly before serving.
Extra Tips:
For best results, guarantee the puff pastry is fully thawed but still cold when you work with it, as this helps maintain its flaky texture.
If you’re short on time, you can use pre-washed baby spinach to speed up the preparation process. Feel free to experiment with additional herbs or spices to customize the flavor to your liking.
These pastries can be served warm or at room temperature, making them ideal for a make-ahead dish. If you have leftovers, they can be reheated in the oven at a low temperature to restore their crispiness.
Creamy Potato Gratin
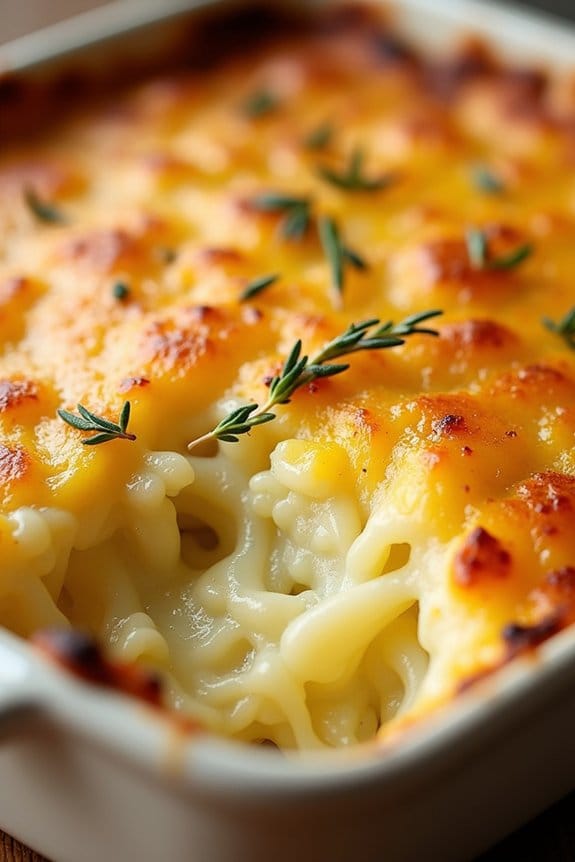
Indulge in the luxurious layers of Creamy Potato Gratin, a classic side dish that’s perfect for a make-ahead Christmas lunch. This dish features thinly sliced potatoes enveloped in a rich, velvety cream sauce, infused with garlic and herbs, then baked to golden perfection. The result is a decadent and comforting accompaniment that pairs beautifully with roasted meats and seasonal vegetables.
Whether you’re hosting a small family gathering or a larger festive feast, this gratin can effortlessly elevate your holiday table. Preparing Creamy Potato Gratin in advance allows you to focus on other aspects of your meal, making your Christmas lunch stress-free and enjoyable. This recipe is designed to serve 4-6 people, making it ideal for intimate family gatherings or as part of a larger spread.
The gratin can be assembled the day before and baked just before serving, ensuring that it tastes fresh while giving you more time to spend with your loved ones.
Ingredients:
- 2 pounds (about 1 kg) potatoes, preferably Yukon Gold
- 2 cups heavy cream
- 1 cup whole milk
- 2 cloves garlic, minced
- 1 teaspoon salt
- 1/2 teaspoon black pepper
- 1/4 teaspoon ground nutmeg
- 1 tablespoon unsalted butter, for greasing
- 1 cup grated Gruyère cheese
- 1/4 cup grated Parmesan cheese
- 1 tablespoon chopped fresh thyme (or 1 teaspoon dried thyme)
Cooking Instructions:
- Preheat and Prepare: Preheat your oven to 350°F (175°C). Grease a 9×13-inch baking dish with the unsalted butter, ensuring it’s evenly coated to prevent the potatoes from sticking.
- Slice the Potatoes: Peel the potatoes and slice them thinly, about 1/8-inch thick. A mandoline slicer can be particularly useful for achieving even slices.
- Make the Cream Mixture: In a medium saucepan, combine the heavy cream, whole milk, minced garlic, salt, black pepper, and nutmeg. Heat over medium-low heat until warm, stirring occasionally. Don’t let the mixture boil.
- Layer the Potatoes: Arrange half of the potato slices in the prepared baking dish, slightly overlapping them. Sprinkle half of the Gruyère cheese over the potatoes, followed by half of the Parmesan cheese and half of the thyme.
- Add Cream and Repeat: Pour half of the warm cream mixture over the layered potatoes. Repeat the layering process with the remaining potatoes, Gruyère, Parmesan, and thyme, and pour the rest of the cream mixture on top.
- Bake the Gratin: Cover the dish with aluminum foil and bake in the preheated oven for 45 minutes. Remove the foil and continue to bake for an additional 25-30 minutes, or until the top is golden brown and the potatoes are tender when pierced with a fork.
- Rest and Serve: Allow the gratin to cool for about 10 minutes before serving. This resting time helps the layers set and makes it easier to serve portions.
Extra Tips:
For an even richer flavor, consider adding a pinch of cayenne pepper or smoked paprika to the cream mixture. If making ahead, assemble the gratin up to the point of baking, cover it tightly with foil, and refrigerate overnight. On the day of serving, bring the dish to room temperature before baking as instructed. If the top browns too quickly during baking, cover it loosely with foil to prevent burning while ensuring the potatoes cook through.
Stuffed Bell Peppers

Stuffed bell peppers are a delightful and colorful addition to any Christmas lunch menu. This dish combines vibrant bell peppers filled with a savory mixture of ground meat, rice, and aromatic herbs, making it both visually appealing and deliciously satisfying.
The best part is that this dish can be prepared ahead of time, allowing you to enjoy your holiday celebrations without any last-minute cooking stress. Serve these stuffed bell peppers alongside a fresh salad or some crusty bread for a complete and hearty meal.
Preparing this dish in advance allows the flavors to meld together, enhancing the taste when reheated. You can stuff and bake the peppers the day before your Christmas lunch, and simply warm them in the oven just before serving. This make-ahead approach not only saves time but also guarantees that you can focus on enjoying the festivities with your loved ones, rather than being tied up in the kitchen.
Ingredients for 4-6 Servings:
- 6 medium-sized bell peppers (any color)
- 1 pound ground beef or turkey
- 1 cup cooked white or brown rice
- 1 medium onion, chopped
- 2 cloves garlic, minced
- 1 can (14.5 oz) diced tomatoes, drained
- 1 teaspoon dried oregano
- 1 teaspoon dried basil
- Salt and pepper to taste
- 1 cup shredded mozzarella cheese
- 2 tablespoons olive oil
Cooking Instructions:
- Prepare the Bell Peppers: Preheat your oven to 375°F (190°C). Cut the tops off the bell peppers and remove the seeds and membranes. Lightly brush the outside of the peppers with olive oil and place them in a baking dish.
- Cook the Filling: In a large skillet over medium heat, add 1 tablespoon of olive oil. Add the chopped onion and minced garlic, sautéing until the onion becomes translucent. Add the ground beef or turkey, cooking until browned and fully cooked. Drain any excess fat.
- Mix the Ingredients: In a large bowl, combine the cooked meat mixture with the rice, diced tomatoes, oregano, basil, salt, and pepper. Mix until all ingredients are well incorporated.
- Stuff the Peppers: Spoon the filling mixture into each bell pepper, packing it tightly. Sprinkle the top of each stuffed pepper with shredded mozzarella cheese.
- Bake the Peppers: Cover the baking dish with aluminum foil and bake in the preheated oven for 25-30 minutes. Remove the foil and bake for an additional 10-15 minutes, or until the peppers are tender and the cheese is bubbly and golden brown.
- Serve: Allow the stuffed peppers to cool for a few minutes before serving. They can be served as is or with a side of your choice.
Extra Tips:
When choosing bell peppers, try to pick ones that are similar in size to promote even cooking. If you prefer a vegetarian version, you can substitute the meat with a mixture of beans or lentils.
To add a bit of spice, consider adding a pinch of crushed red pepper flakes to the filling. Finally, these stuffed bell peppers can be stored in the refrigerator for up to 3 days, and they reheat beautifully in the oven, making them an ideal make-ahead option for your Christmas lunch.
Cranberry Pecan Salad
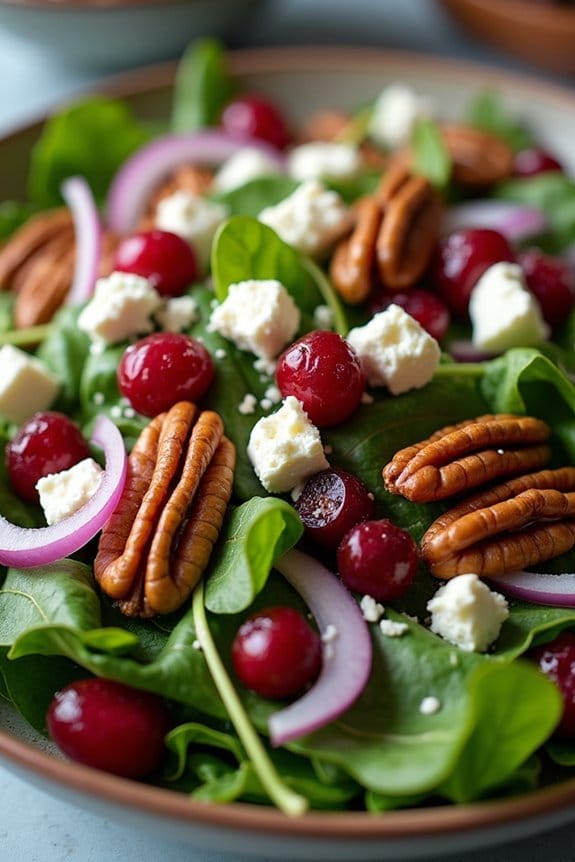
A delightful addition to any make-ahead Christmas lunch, Cranberry Pecan Salad offers a perfect balance of tangy, sweet, and nutty flavors. This vibrant salad not only adds a splash of color to your festive table but also provides a revitalizing contrast to the rich dishes typically served during the holidays.
The combination of dried cranberries, toasted pecans, mixed greens, and a light vinaigrette dressing is sure to impress your guests and become a holiday staple. This salad is incredibly easy to prepare and can be made ahead of time, allowing you more freedom to enjoy the festivities with your loved ones.
The key is to assemble the salad just before serving to maintain the crispness of the greens. With its mix of textures and flavors, Cranberry Pecan Salad is a versatile dish that can complement a variety of main courses, making it an ideal choice for your Christmas lunch menu.
Ingredients for 4-6 servings:
- 6 cups mixed salad greens
- 1 cup dried cranberries
- 1 cup pecans, toasted
- 1/2 cup crumbled feta cheese
- 1/2 small red onion, thinly sliced
- 1/4 cup balsamic vinaigrette dressing
- Salt and pepper to taste
Instructions:
- Toast the Pecans: Preheat your oven to 350°F (175°C). Spread the pecans on a baking sheet in a single layer. Toast them in the oven for about 8-10 minutes, or until they’re fragrant and golden brown. Allow them to cool before adding to the salad.
- Prepare the Salad Base: In a large salad bowl, combine the mixed greens, making sure they’re washed and dried properly. The greens should be fresh and crisp to provide a good base for the salad.
- Add the Toppings: Scatter the dried cranberries, toasted pecans, crumbled feta cheese, and sliced red onion over the greens. Be sure to distribute the toppings evenly for a balanced flavor in every bite.
- Dress the Salad: Just before serving, drizzle the balsamic vinaigrette over the salad. Start with about half of the vinaigrette, then toss the salad gently to guarantee all the ingredients are coated. Add more dressing if needed, but be careful not to overdress the salad.
- Season and Serve: Taste the salad and add salt and pepper as desired. Serve immediately to enjoy the freshness and crunch of the greens.
Extra Tips:
To make certain your Cranberry Pecan Salad is at its best, consider preparing all the components ahead of time and storing them separately. This includes washing and drying the greens, toasting the pecans, and slicing the red onion.
Combine everything and dress the salad just before serving to keep it fresh and crisp. For an extra burst of flavor, you can add a splash of fresh lemon juice to the salad before serving. Additionally, feel free to customize the salad with your favorite ingredients, such as adding sliced apples or substituting goat cheese for feta.
Roasted Vegetable Medley
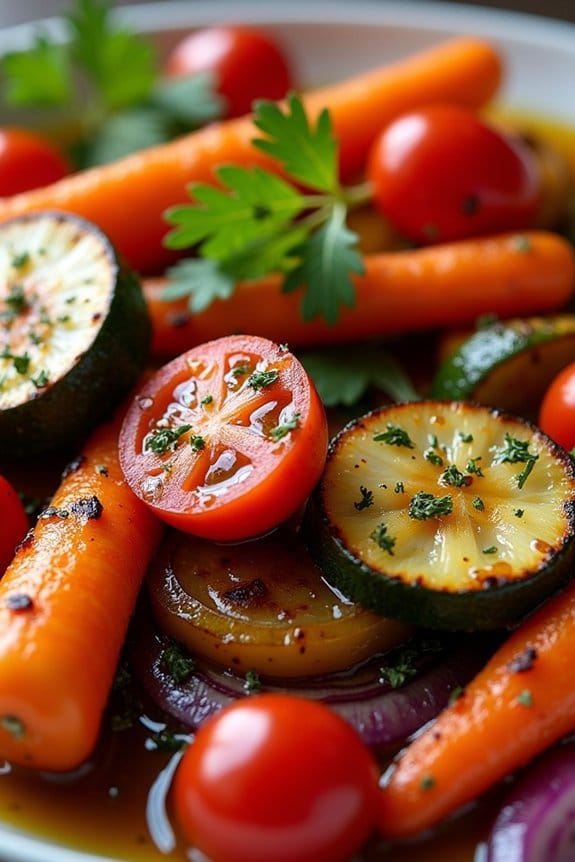
A Roasted Vegetable Medley is a vibrant and nutritious dish that adds a burst of color and flavor to your Christmas lunch table. This dish is perfect for those who want to prepare a meal in advance, as the vegetables can be prepped and seasoned ahead of time, then simply roasted on the day of serving. Loaded with seasonal vegetables like carrots, bell peppers, zucchinis, and more, this medley is a versatile and crowd-pleasing side that complements any main course.
The beauty of a Roasted Vegetable Medley lies in its simplicity and the natural sweetness that roasting brings out in vegetables. By adding a touch of herbs and olive oil, the vegetables become tender on the inside and slightly charred on the outside, offering a delightful contrast in texture.
Whether you’re hosting a large gathering or an intimate family meal, this dish is sure to impress with its rich flavors and appealing presentation.
Ingredients (serves 4-6):
- 2 large carrots
- 1 red bell pepper
- 1 yellow bell pepper
- 1 zucchini
- 1 red onion
- 1 cup cherry tomatoes
- 3 tablespoons olive oil
- 1 teaspoon dried thyme
- 1 teaspoon dried rosemary
- Salt and pepper to taste
- Fresh parsley for garnish (optional)
Cooking Instructions:
- Preheat the oven: Start by preheating your oven to 400°F (200°C) to guarantee it’s hot enough to roast the vegetables evenly.
- Prepare the vegetables: Wash and dry all the vegetables thoroughly. Peel the carrots and cut them into thin slices. Core and slice both the red and yellow bell peppers into strips. Cut the zucchini into half-moons, and slice the red onion into wedges. Halve the cherry tomatoes.
- Season the vegetables: Place all the prepared vegetables in a large mixing bowl. Drizzle with olive oil, then sprinkle with dried thyme, rosemary, salt, and pepper. Toss everything together until the vegetables are well coated with the oil and seasonings.
- Arrange on a baking sheet: Spread the seasoned vegetables in an even layer on a large baking sheet. Make sure they aren’t overcrowded; this will help them roast rather than steam.
- Roast the vegetables: Place the baking sheet in the preheated oven and roast for 25-30 minutes. Stir halfway through to guarantee even cooking. The vegetables are done when they’re tender and starting to caramelize at the edges.
- Serve: Once roasted to perfection, remove the vegetables from the oven. Transfer them to a serving platter and garnish with freshly chopped parsley, if desired, for an extra touch of color and flavor.
Extra Tips:
For a deeper flavor, consider marinating the vegetables with the olive oil and herbs for up to two hours before roasting. This dish can also be customized by adding your favorite vegetables or a sprinkle of Parmesan cheese before serving for added richness.
If you prefer a spicier kick, a pinch of red pepper flakes can be included in the seasoning mix. Remember to cut all vegetables to a uniform size to guarantee even roasting. Enjoy this delightful Roasted Vegetable Medley warm or at room temperature, making it a flexible addition to your holiday meal planning.
Lemon Herb Chicken
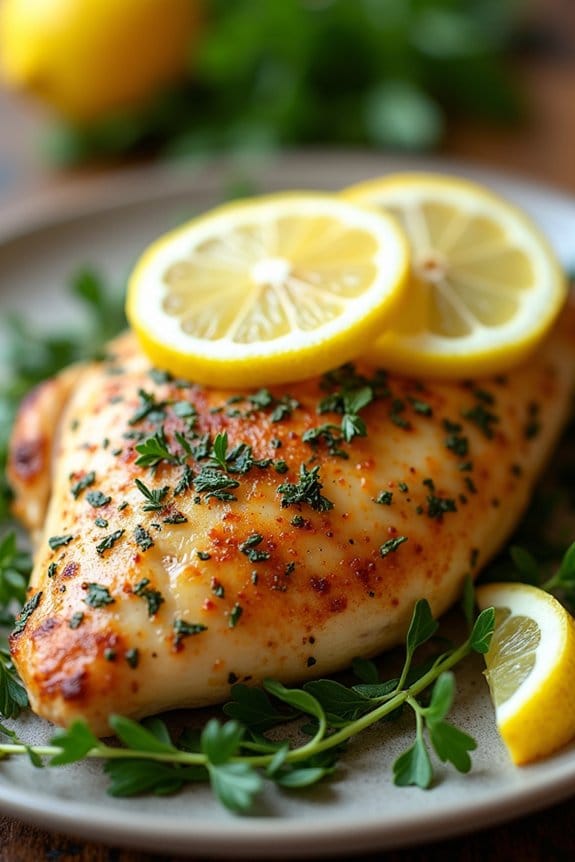
Cooking a delicious and flavorful Lemon Herb Chicken for your Christmas lunch doesn’t have to be stressful. This make-ahead recipe allows you to prepare everything the day before, so you can focus on enjoying time with your loved ones on the big day.
With a perfect blend of zesty lemon and aromatic herbs, this dish is sure to be a hit and add a revitalizing touch to your holiday table. The beauty of this recipe is its simplicity and the way the flavors meld together overnight, enhancing the taste of the chicken.
Suitable for serving 4-6 people, this dish pairs wonderfully with a variety of sides, making it a versatile centerpiece for your festive meal. Whether you’re a seasoned cook or a beginner, the straightforward steps guarantee a stress-free cooking experience.
Ingredients:
- 4-6 boneless, skinless chicken breasts
- 1/4 cup olive oil
- 1/4 cup freshly squeezed lemon juice
- Zest of 2 lemons
- 4 cloves garlic, minced
- 2 tablespoons chopped fresh parsley
- 1 tablespoon chopped fresh thyme
- 1 tablespoon chopped fresh rosemary
- Salt and pepper to taste
- Lemon slices for garnish
- Fresh herb sprigs for garnish
Cooking Instructions:
- Prepare the Marinade: In a medium bowl, whisk together the olive oil, lemon juice, lemon zest, minced garlic, chopped parsley, thyme, and rosemary. Season with salt and pepper to taste.
- Marinate the Chicken: Place the chicken breasts in a large resealable plastic bag or a shallow dish. Pour the marinade over the chicken, making sure each piece is well coated. Seal the bag or cover the dish and refrigerate for at least 2 hours, or overnight for best results.
- Preheat the Oven: When ready to cook, preheat your oven to 375°F (190°C).
- Prepare the Baking Dish: Remove the chicken from the marinade and place it in a baking dish. Discard the remaining marinade. Arrange lemon slices on top of the chicken for extra flavor and visual appeal.
- Bake the Chicken: Bake the chicken in the preheated oven for 25-30 minutes, or until the chicken is cooked through and reaches an internal temperature of 165°F (74°C).
- Rest and Serve: Once cooked, remove the chicken from the oven and let it rest for 5 minutes. This allows the juices to redistribute, keeping the meat tender and juicy. Garnish with fresh herb sprigs and additional lemon slices before serving.
Extra Tips:
For best flavor, allow the chicken to marinate overnight. This not only infuses the meat with the citrusy and herbal notes but also tenderizes it.
If you’re short on time, a quick marinade of at least 2 hours will still yield delicious results. When slicing lemon for garnish, use a sharp knife to achieve thin, even slices that enhance the dish’s presentation.
Additionally, if you prefer a more intense herb flavor, feel free to increase the quantity of fresh herbs in the marinade.
Butternut Squash Soup

There’s nothing quite like a warm bowl of Butternut Squash Soup to bring comfort and joy to your Christmas lunch table. This velvety soup isn’t only delicious but also incredibly easy to prepare ahead of time, allowing you to focus on enjoying the holiday with your loved ones.
The natural sweetness of the butternut squash pairs beautifully with the aromatic spices, creating a rich and satisfying dish that will delight your guests.
Perfect for serving 4-6 people, this Butternut Squash Soup is a wonderful starter that can be made a day or two in advance. Simply reheat it before serving, and your guests will be none the wiser.
The recipe combines simple ingredients with a few key techniques to guarantee a smooth, flavorful soup that’s both healthy and indulgent.
Ingredients:
- 1 large butternut squash, peeled and diced
- 1 medium onion, chopped
- 2 cloves garlic, minced
- 4 cups vegetable broth
- 1 cup coconut milk
- 1 teaspoon ground cinnamon
- 1/2 teaspoon ground nutmeg
- Salt and pepper to taste
- 2 tablespoons olive oil
- Fresh thyme sprigs for garnish (optional)
Cooking Instructions:
- Prepare the Ingredients: Begin by peeling and dicing the butternut squash. Chop the onion and mince the garlic to have all ingredients ready for cooking.
- Sauté Aromatics: Heat the olive oil in a large pot over medium heat. Add the chopped onion and garlic, sautéing until the onion becomes translucent and fragrant, about 5 minutes.
- Cook the Squash: Add the diced butternut squash to the pot and stir to combine with the onion and garlic. Cook for an additional 5 minutes, allowing the squash to begin softening.
- Add Broth and Spices: Pour in the vegetable broth, ensuring that the squash is fully submerged. Stir in the ground cinnamon, nutmeg, salt, and pepper. Bring the mixture to a boil, then reduce the heat to a simmer. Cover the pot and cook for 20-25 minutes, or until the squash is tender and easily pierced with a fork.
- Blend the Soup: Once the squash is tender, remove the pot from the heat. Use an immersion blender to puree the soup until smooth and creamy. Alternatively, you can transfer the soup in batches to a countertop blender, then return it to the pot.
- Add Coconut Milk: Stir in the coconut milk, and return the pot to low heat. Allow the soup to warm through, adjusting the seasoning with additional salt and pepper if needed.
- Serve: Ladle the soup into bowls, garnishing with fresh thyme sprigs if desired. Serve hot and enjoy the comforting flavors.
Extra Tips:
Make sure to taste and adjust the seasoning once the soup is blended. If you prefer a thinner consistency, you can add more vegetable broth or water.
This soup can be made up to two days in advance; simply store it in an airtight container in the refrigerator. When ready to serve, gently reheat on the stove, adding a bit of broth if the soup has thickened.
For an elegant touch, drizzle a bit of extra coconut milk or olive oil on top before serving.
Garlic Parmesan Mashed Potatoes
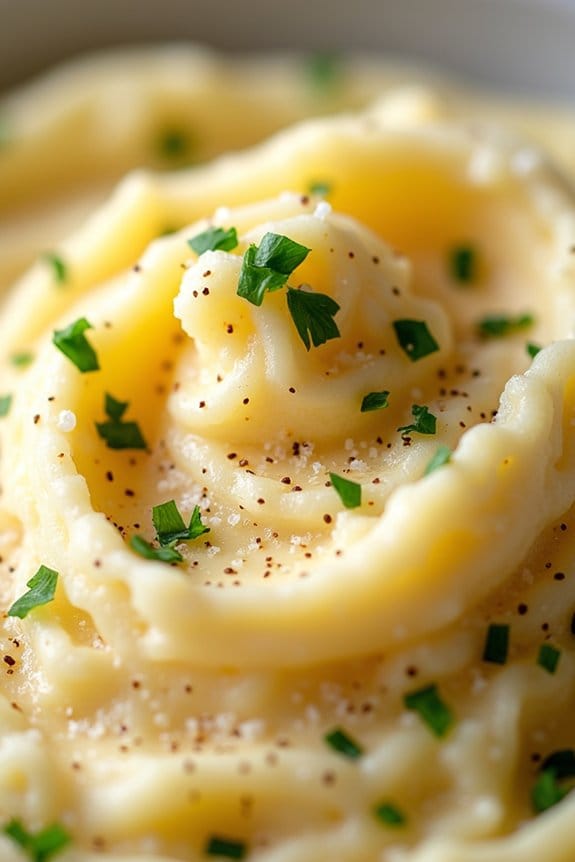
Garlic Parmesan Mashed Potatoes are a delightful twist on the classic mashed potatoes, perfect for a Christmas lunch. This make-ahead dish combines the creamy texture of mashed potatoes with the rich flavors of garlic and parmesan cheese, offering a comforting side that pairs beautifully with any holiday main course.
Preparing this dish in advance will save you time on the day of your Christmas feast, allowing you to focus on enjoying the festivities.
The key to these mashed potatoes is their velvety consistency and robust flavor profile, achieved by using high-quality ingredients and a few essential techniques. By incorporating roasted garlic and freshly grated parmesan cheese, these mashed potatoes are elevated to a gourmet level.
They can be made ahead of time and stored, then reheated on Christmas day without losing their creamy texture or savory taste.
Ingredients for 4-6 servings:
- 3 pounds of Yukon Gold potatoes, peeled and cubed
- 6 cloves of garlic, peeled
- 4 tablespoons of unsalted butter
- 1 cup of freshly grated parmesan cheese
- 1 cup of heavy cream
- Salt to taste
- Freshly ground black pepper to taste
- Chopped fresh parsley for garnish
Instructions:
- Prepare the Potatoes and Garlic: Begin by placing the cubed potatoes and whole garlic cloves in a large pot. Cover with cold water and add a generous pinch of salt. Bring to a boil over medium-high heat, then reduce the heat and simmer until the potatoes are tender when pierced with a fork, about 20-25 minutes.
- Drain and Mash: Once the potatoes are cooked, drain them and the garlic cloves thoroughly. Return the potatoes and garlic to the pot and let them sit for a minute to allow excess moisture to evaporate. Mash the potatoes and garlic together using a potato masher or a ricer until smooth.
- Add Butter and Cheese: With the pot over low heat, add the butter and stir until melted and well combined with the potatoes. Gradually add the grated parmesan cheese, stirring continuously to make certain it melts evenly into the mash.
- Incorporate Cream: Slowly pour in the heavy cream, stirring constantly until the potatoes reach your desired creamy consistency. Season with salt and freshly ground black pepper to taste.
- Final Touches: Transfer the mashed potatoes to a serving dish, garnish with freshly chopped parsley, and serve. If making ahead, allow the potatoes to cool completely before covering and refrigerating.
Extra Tips:
When making Garlic Parmesan Mashed Potatoes ahead of time, verify you reheat them gently to maintain their creamy texture. You can do this by placing them in a covered dish in the oven at a low temperature, or by reheating them in a pot over low heat, stirring occasionally.
If the potatoes seem too thick after reheating, add a splash of milk or cream to loosen them up. For an extra burst of flavor, consider adding a pinch of nutmeg or a drizzle of truffle oil before serving.
Cheesy Broccoli Casserole
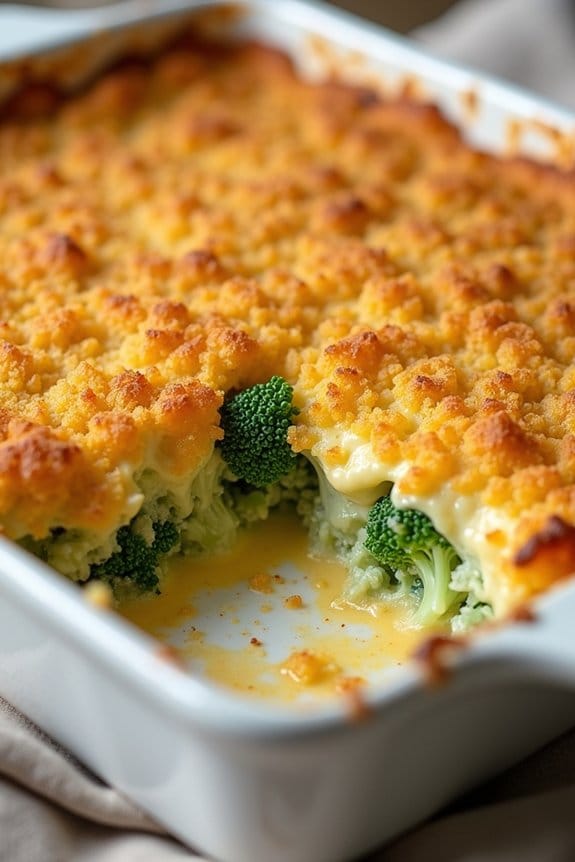
Cheesy Broccoli Casserole is the perfect addition to your make-ahead Christmas lunch menu. This dish combines tender broccoli florets with a creamy, cheesy sauce and a crispy breadcrumb topping, creating a comforting side dish that everyone will love. The best part is that you can prepare it in advance, saving you time on the big day.
Whether you’re serving a small family gathering or a larger holiday feast, this casserole will be a hit on your festive table. The combination of cheddar cheese, cream, and fresh broccoli creates a rich and satisfying flavor profile that pairs well with any main dish.
The casserole can be assembled the day before and baked just before serving, allowing you to spend more time with your loved ones and less time in the kitchen. With its golden, bubbly top and hearty interior, this dish is sure to become a family favorite for holiday gatherings.
Ingredients (Serves 4-6):
- 1 pound fresh broccoli florets
- 2 cups shredded cheddar cheese
- 1 cup sour cream
- 1 can (10.5 oz) cream of mushroom soup
- 1/2 cup milk
- 1 teaspoon garlic powder
- 1/2 teaspoon salt
- 1/4 teaspoon black pepper
- 1 cup breadcrumbs
- 2 tablespoons melted butter
Cooking Instructions:
- Preheat the Oven: Preheat your oven to 350°F (175°C) to guarantee it’s ready when you need to bake the casserole.
- Prepare the Broccoli: In a large pot, bring water to a boil and blanch the broccoli florets for 3-4 minutes until they’re bright green and slightly tender. Drain and set aside.
- Make the Cheese Sauce: In a large mixing bowl, combine the shredded cheddar cheese, sour cream, cream of mushroom soup, milk, garlic powder, salt, and black pepper. Mix until well combined to create a smooth sauce.
- Combine Broccoli and Sauce: Add the blanched broccoli to the cheese sauce mixture. Stir gently until the broccoli is evenly coated with the sauce.
- Assemble the Casserole: Transfer the broccoli and cheese mixture into a greased 9×13 inch baking dish, spreading it out evenly.
- Prepare the Topping: In a small bowl, mix the breadcrumbs with the melted butter until the breadcrumbs are evenly coated. Sprinkle this mixture over the top of the casserole.
- Bake the Casserole: Place the dish in the preheated oven and bake for 25-30 minutes, or until the top is golden brown and the casserole is bubbling around the edges.
- Cool Slightly and Serve: Allow the casserole to cool for a few minutes before serving. This will help the sauce to set slightly, making it easier to serve.
Extra Tips:
For added flavor, consider adding a pinch of nutmeg to the cheese sauce or mixing in a handful of crispy bacon bits for a smoky touch.
If you prefer a more substantial topping, you can mix some grated Parmesan cheese with the breadcrumbs for extra crunch and flavor. When reheating leftovers, cover the casserole with foil to prevent the top from over-browning.
This dish also freezes well, making it an excellent option for preparing in advance and enjoying at your convenience.
Maple Dijon Roast Pork
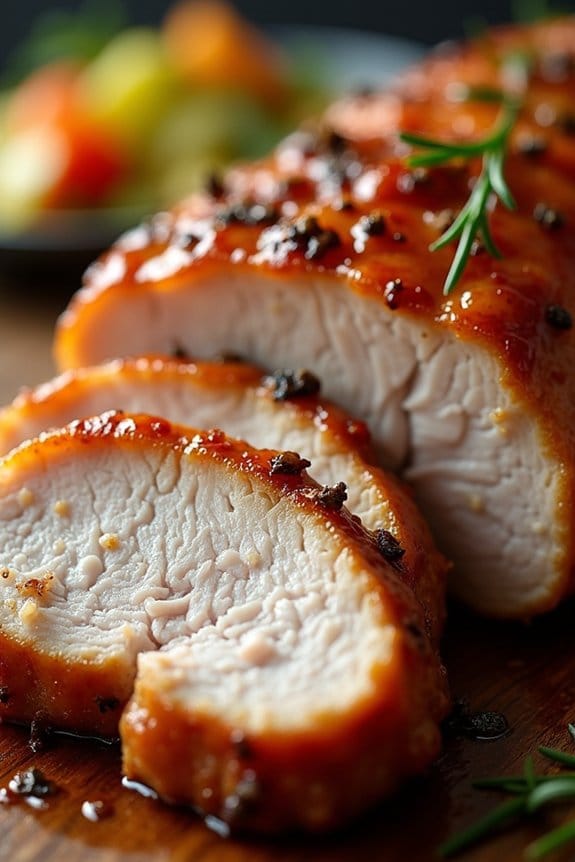
Maple Dijon Roast Pork is a succulent and flavorful dish that combines the sweetness of maple syrup with the tangy sharpness of Dijon mustard. Perfect for a make-ahead Christmas lunch, this dish not only brings a burst of taste to the table but also allows you to spend more time with family and less time in the kitchen.
The roast pork is marinated and cooked to perfection, resulting in a tender and juicy centerpiece that pairs beautifully with seasonal sides. This recipe serves 4-6 people and is a great option for those looking to prepare a stress-free and delicious holiday meal.
By preparing the pork ahead of time, you can guarantee that it absorbs all the flavors of the marinade, enhancing its taste and aroma. Here’s what you need to make this delightful dish:
Ingredients:
- 3 pounds pork loin
- 1/2 cup pure maple syrup
- 1/4 cup Dijon mustard
- 2 tablespoons olive oil
- 2 tablespoons apple cider vinegar
- 4 cloves garlic, minced
- 1 teaspoon dried thyme
- 1 teaspoon salt
- 1/2 teaspoon black pepper
Instructions:
- Prepare the Marinade: In a medium bowl, combine the maple syrup, Dijon mustard, olive oil, apple cider vinegar, minced garlic, dried thyme, salt, and black pepper. Whisk until all ingredients are well blended to create a smooth marinade.
- Marinate the Pork: Place the pork loin in a large resealable plastic bag or a baking dish. Pour the marinade over the pork, guaranteeing it’s completely covered. Seal the bag or cover the dish with plastic wrap, then refrigerate it for at least 2 hours, or overnight for maximum flavor infusion.
- Preheat the Oven: When ready to cook, preheat your oven to 350°F (175°C). Allow the pork to sit at room temperature for about 15 minutes before roasting.
- Roast the Pork: Transfer the marinated pork to a roasting pan, discarding any excess marinade. Place the pork in the oven and roast for 1 to 1 1/2 hours, or until the internal temperature reaches 145°F (63°C). Baste the pork occasionally with the pan juices to keep it moist and flavorful.
- Rest and Serve: Once cooked, remove the pork from the oven and let it rest for 10-15 minutes before slicing. This allows the juices to redistribute throughout the meat, guaranteeing each slice is tender and juicy. Slice and serve with your favorite holiday sides.
Extra Tips:
For an even more flavorful dish, consider adding fresh herbs such as rosemary or sage to the marinade. If you prefer a crispier crust on the pork, increase the oven temperature to 400°F (200°C) for the last 10 minutes of cooking.
Additionally, if you want to prepare this dish ahead of time, the pork can be marinated and stored in the refrigerator up to 24 hours in advance, giving you one less thing to worry about on the day of your Christmas lunch.
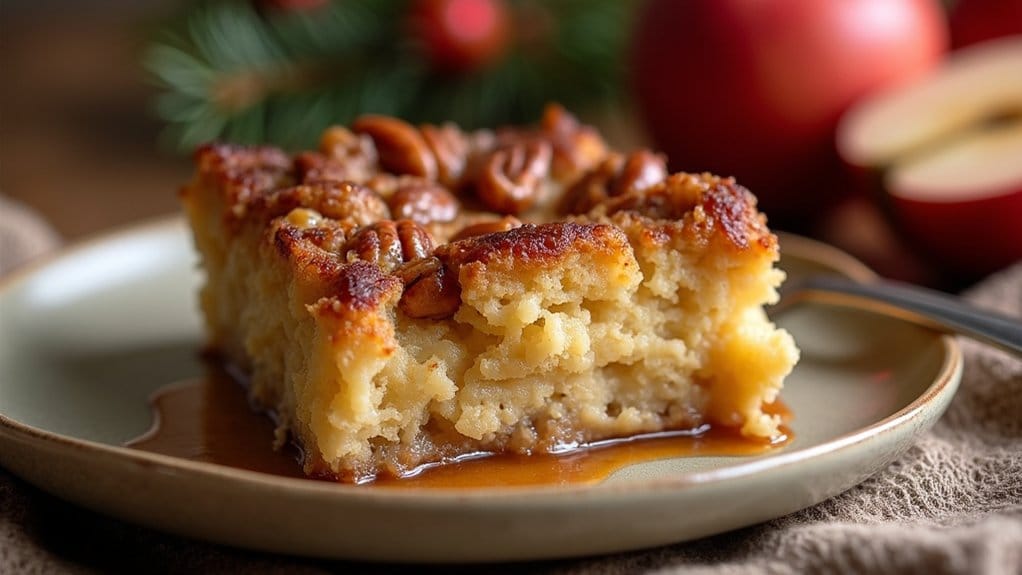
Apple Pecan Bread Pudding
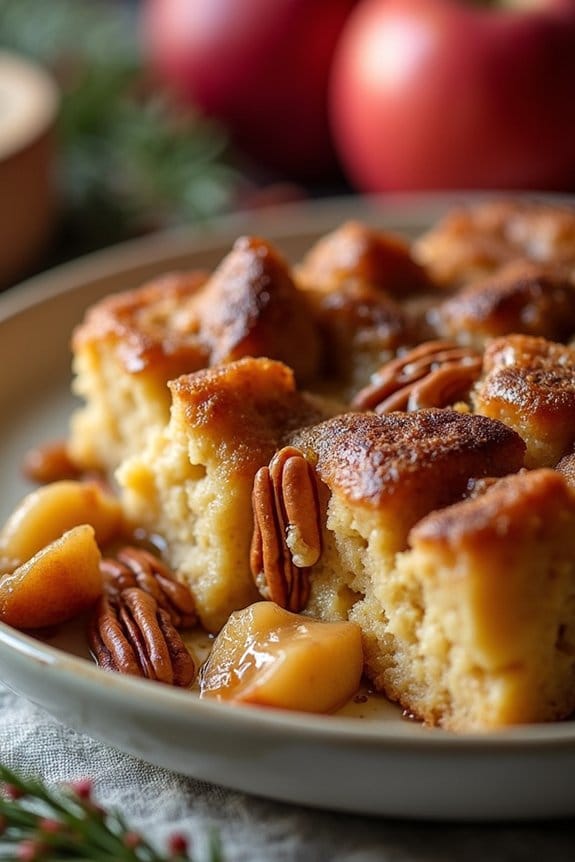
Apple Pecan Bread Pudding is a delightful and comforting dessert that perfectly encapsulates the flavors of the holiday season. This make-ahead recipe is ideal for a Christmas lunch, allowing you to enjoy the festivities with family and friends without the stress of last-minute preparations.
Combining the tartness of fresh apples with the rich, nutty flavor of pecans, this bread pudding is sure to be a crowd-pleaser, offering a warm and satisfying end to your festive meal.
To prepare this delicious dish for 4-6 people, you’ll need a few simple pantry staples along with some seasonal ingredients. The bread pudding can be assembled the day before and refrigerated, allowing the flavors to meld together beautifully. When you’re ready to serve, simply bake it in the oven for a cozy dessert that’s sure to impress.
Follow the steps below for a foolproof holiday treat.
Ingredients:
- 6 cups stale bread, cubed
- 2 cups milk
- 1 cup heavy cream
- 4 large eggs
- 1 cup granulated sugar
- 1 teaspoon vanilla extract
- 1 teaspoon ground cinnamon
- 1/2 teaspoon ground nutmeg
- 2 large apples, peeled, cored, and diced
- 1 cup pecans, chopped
- 2 tablespoons unsalted butter, melted
Cooking Instructions:
- Prepare the Bread and Apples: Preheat your oven to 350°F (175°C). Lightly grease a 9×13 inch baking dish. Spread the cubed stale bread evenly in the dish. In a large bowl, combine the diced apples and chopped pecans, then sprinkle them over the bread cubes.
- Make the Custard: In a separate bowl, whisk together the milk, heavy cream, eggs, sugar, vanilla extract, ground cinnamon, and ground nutmeg until well combined. This mixture will serve as the custard base for the bread pudding.
- Assemble the Pudding: Pour the custard mixture over the bread, apples, and pecans, ensuring all the bread pieces are soaked. Gently press down on the mixture with a spatula to help the bread absorb the custard.
- Chill or Bake: Cover the dish with plastic wrap and refrigerate for at least 1 hour, or overnight if preparing ahead. When ready to bake, remove from the refrigerator and allow it to come to room temperature.
- Bake the Pudding: Drizzle the melted butter over the top of the bread pudding. Place the dish in the preheated oven and bake for 45-50 minutes, or until the top is golden brown and the custard is set. A knife inserted into the center should come out clean.
- Serve: Allow the bread pudding to cool slightly before serving. Enjoy it warm, perhaps with a scoop of vanilla ice cream or a dollop of whipped cream for extra indulgence.
Extra Tips:
For the best flavor, use a hearty bread like brioche or challah, which will absorb the custard well while maintaining a soft texture. If your bread isn’t stale, you can cube it and leave it out overnight or toast it lightly in the oven before using.
Feel free to experiment with different types of apples, such as Granny Smith for a tart touch or Honeycrisp for sweetness. Additionally, to enhance the flavor, consider adding a splash of bourbon or rum to the custard mixture.
