

The holiday season is all about gathering with loved ones and enjoying delicious food. Hosting doesn’t have to be stressful, especially with these 13 easy Christmas recipes perfect for serving a crowd. From a juicy herb-roasted turkey breast to a delightful gingerbread trifle, these recipes offer a mix of tradition and simplicity. Picture the delightful aroma of baked ham with a honey glaze filling your home. Get ready to explore flavors that will make your celebration truly memorable!
Classic Baked Ham With Honey Glaze
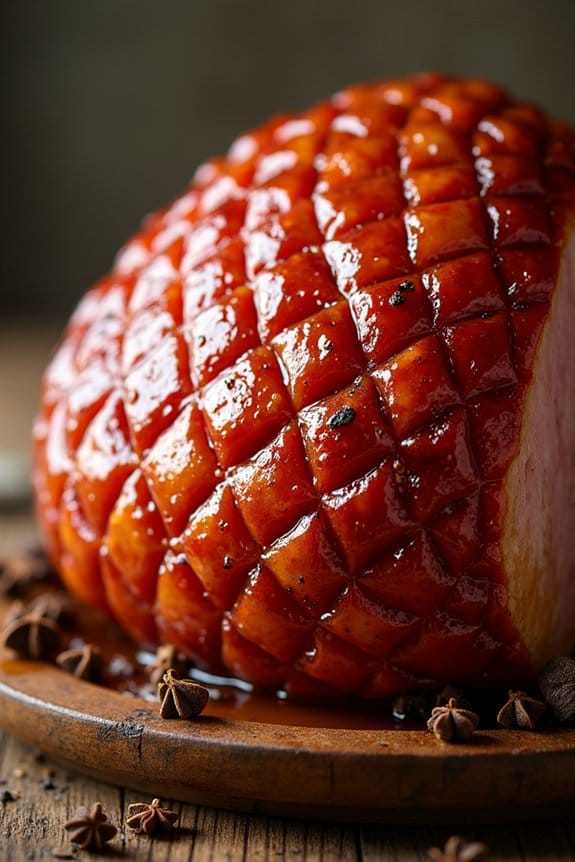
Classic Baked Ham With Honey Glaze is a timeless holiday favorite that’s perfect for feeding a crowd. This succulent dish combines the savory flavors of a perfectly baked ham with the sweetness of a homemade honey glaze, creating a mouthwatering centerpiece for any Christmas table. The honey glaze not only adds a delightful flavor but also gives the ham a beautiful, caramelized finish that’s certain to impress your guests.
Whether you’re hosting a small family gathering or a larger party, this dish is bound to be a hit with everyone.
To prepare the Classic Baked Ham With Honey Glaze, you’ll need to choose a quality ham, as it serves as the foundation of this dish. The glaze is made with a mixture of honey, brown sugar, and a touch of mustard to add depth and a hint of spice. This combination of ingredients creates a rich, sticky glaze that pairs perfectly with the tender, juicy ham.
Best of all, this recipe is simple to prepare, making it an ideal choice for those who want to focus on spending time with loved ones rather than spending all day in the kitchen.
Ingredients for 4-6 servings:
- 1 (5-6 pound) bone-in fully cooked ham
- 1 cup honey
- 1/2 cup brown sugar
- 1 tablespoon Dijon mustard
- 1 teaspoon ground cloves
- 1/4 cup apple cider vinegar
- 1/4 cup water
Cooking Instructions:
- Preheat the Oven: Preheat your oven to 325°F (165°C). This temperature will guarantee that the ham is cooked evenly throughout.
- Prepare the Ham: Remove the ham from its packaging and place it in a large roasting pan. Score the surface of the ham in a diamond pattern, about 1/4 inch deep. This step allows the glaze to penetrate the ham and enhances its flavor.
- Make the Glaze: In a medium saucepan over medium heat, combine the honey, brown sugar, Dijon mustard, ground cloves, apple cider vinegar, and water. Stir the mixture until the sugar has dissolved and the glaze is smooth. Bring the glaze to a simmer, then reduce the heat and let it cook for an additional 5 minutes, allowing it to thicken slightly.
- Glaze the Ham: Brush the ham generously with about half of the glaze, making sure that it covers the scored surface well. This first coating will begin to caramelize as the ham cooks.
- Bake the Ham: Place the roasting pan in the preheated oven and bake the ham for 1 1/2 to 2 hours, or until the internal temperature reaches 140°F (60°C). Baste the ham every 30 minutes with the remaining glaze to build up a rich, sticky coating.
- Rest and Serve: Once cooked, remove the ham from the oven and let it rest for 10-15 minutes before carving. This resting period allows the juices to redistribute, guaranteeing a moist and tender ham.
Extra Tips:
When selecting a ham, opt for a bone-in variety, as it typically yields more flavor and moisture. If you prefer a less sweet glaze, you can reduce the amount of honey and brown sugar to suit your taste.
For a more pronounced flavor, consider adding a splash of orange juice or a pinch of cinnamon to the glaze. When basting, be sure not to open the oven door too often, as this can cause the oven temperature to drop and extend the cooking time.
Finally, if you have leftovers, the ham can be stored in the refrigerator for up to a week or frozen for longer storage.
Savory Herb-Roasted Turkey Breast
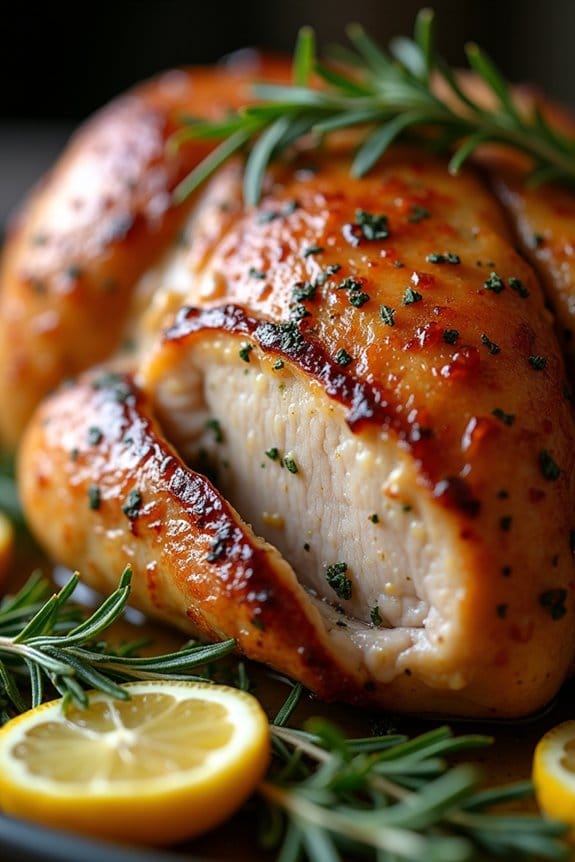
Savory Herb-Roasted Turkey Breast is a delicious and easy-to-make dish that’s perfect for a crowd, especially during the festive Christmas season. This recipe focuses on enhancing the natural flavors of the turkey breast with a blend of aromatic herbs and a touch of citrus, creating a succulent and flavorful centerpiece for your holiday table.
Whether you’re hosting a large family gathering or a smaller, intimate affair, this dish is designed to satisfy and impress your guests with minimal effort.
The key to a perfect Savory Herb-Roasted Turkey Breast lies in the seasoning and roasting technique. By using a combination of fresh herbs, garlic, and lemon, the turkey breast is infused with a fragrant and zesty flavor profile. The roasting process guarantees the meat remains juicy and tender, while the skin becomes beautifully crisp.
This recipe serves 4-6 people, making it an ideal choice for gatherings where you want to make sure everyone leaves the table happy and full.
Ingredients
- 1 (4-5 pounds) turkey breast, bone-in and skin-on
- 4 tablespoons olive oil
- 2 tablespoons unsalted butter, softened
- 1 tablespoon fresh rosemary, chopped
- 1 tablespoon fresh thyme, chopped
- 1 tablespoon fresh sage, chopped
- 4 cloves garlic, minced
- Zest of 1 lemon
- Juice of 1 lemon
- Salt and freshly ground black pepper
- 1 cup chicken broth
- 1 lemon, sliced
- Fresh rosemary sprigs (for garnish, optional)
Cooking Instructions
- Preheat the Oven: Begin by preheating your oven to 350°F (175°C). This makes certain that the oven reaches the right temperature by the time you’re ready to roast the turkey breast.
- Prepare the Turkey Breast: Rinse the turkey breast under cold water and pat it dry with paper towels. Place it on a roasting rack set inside a roasting pan.
- Make the Herb Mixture: In a small bowl, combine the olive oil, softened butter, chopped rosemary, thyme, sage, minced garlic, lemon zest, lemon juice, salt, and pepper. Mix well until you have a smooth paste.
- Season the Turkey: Using your hands, gently loosen the skin from the turkey breast, being careful not to tear it. Rub half of the herb mixture directly onto the meat under the skin. Spread the remaining mixture over the skin to ensure even flavor distribution.
- Add Broth and Lemon Slices: Pour the chicken broth into the roasting pan around the turkey breast. Arrange lemon slices around the breast for added flavor and aroma during roasting.
- Roast the Turkey: Place the turkey in the preheated oven. Roast for about 1.5 to 2 hours, or until the internal temperature reaches 165°F (75°C) when measured with a meat thermometer inserted into the thickest part of the breast.
- Rest and Serve: Once roasted, remove the turkey from the oven and let it rest for at least 15 minutes before carving. This allows the juices to redistribute, making sure moist, tender slices. Garnish with fresh rosemary sprigs if desired.
Extra Tips
For an even more flavorful turkey, consider marinating the breast in the herb mixture overnight in the refrigerator. This allows the flavors to penetrate deeply into the meat.
If you’re looking to save time on the day of your event, prepare the herb mixture a day in advance. Additionally, if you prefer a golden-brown skin, broil the turkey for the last few minutes of cooking, keeping a close eye to prevent burning.
Remember to use a meat thermometer for accuracy in cooking time, as oven temperatures may vary.
One-Pan Garlic Butter Salmon
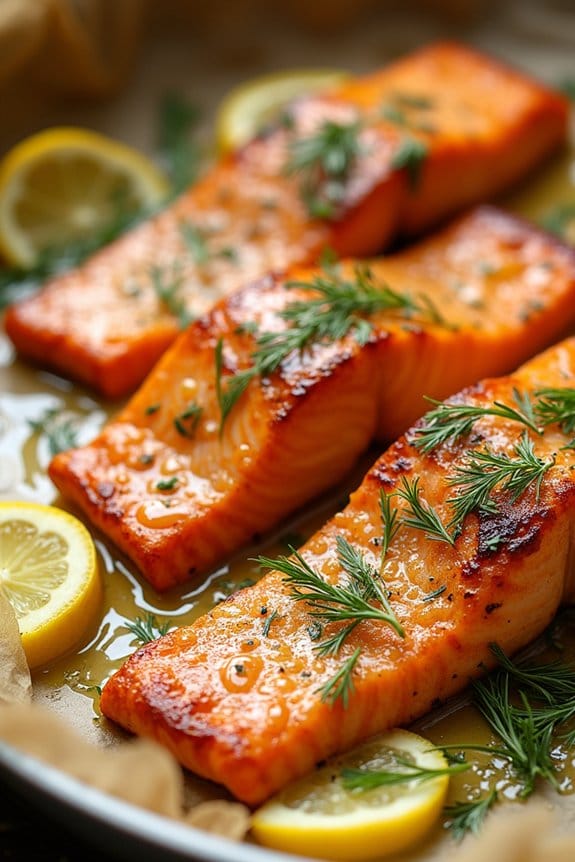
One-pan meals are a lifesaver when it comes to feeding a crowd during the busy holiday season. This One-Pan Garlic Butter Salmon isn’t only easy to prepare, but it also delivers a sophisticated and delicious experience that will impress your guests.
The rich, buttery flavor of the garlic-infused butter complements the salmon perfectly, while the one-pan method guarantees minimal cleanup, leaving you more time to enjoy the festivities with your loved ones.
This recipe serves 4-6 people and is perfect for those who love seafood and are looking to add a healthy yet indulgent dish to their holiday spread. With just a few simple ingredients, you can create a meal that’s both flavorful and visually appealing.
The salmon is cooked to perfection, with a crispy skin and a tender, flaky interior, assuring that each bite is a delight.
Ingredients:
- 2 lbs (about 4-6 fillets) of salmon, skin on
- 4 tablespoons unsalted butter
- 5 cloves garlic, minced
- 2 tablespoons fresh lemon juice
- 1 tablespoon olive oil
- Salt, to taste
- Black pepper, to taste
- 1 tablespoon fresh dill, chopped (or 1 teaspoon dried dill)
- 1 lemon, sliced into rounds
- Fresh parsley, chopped, for garnish
Cooking Instructions:
- Preheat the Oven: Start by preheating your oven to 375°F (190°C). This will guarantee that the salmon cooks evenly and achieves a beautiful golden color.
- Prepare the Baking Sheet: Line a large baking sheet with parchment paper or lightly grease it with olive oil. This will prevent the salmon from sticking and make cleanup easier.
- Make the Garlic Butter: In a small saucepan over low heat, melt the butter. Add the minced garlic and cook for about 1 minute until fragrant, being careful not to burn the garlic. Remove from heat and stir in the lemon juice.
- Season the Salmon: Place the salmon fillets, skin side down, on the prepared baking sheet. Brush the tops generously with the garlic butter mixture. Season with salt, black pepper, and sprinkle with dill.
- Add Lemon Slices: Arrange the lemon slices over the salmon fillets. The lemon will infuse the fish with a fresh, zesty flavor as it cooks.
- Bake the Salmon: Place the baking sheet in the preheated oven and bake for 15-20 minutes, or until the salmon is opaque and flakes easily with a fork. The cooking time may vary slightly depending on the thickness of your salmon fillets.
- Garnish and Serve: Once cooked, remove the salmon from the oven and let it rest for a few minutes. Garnish with freshly chopped parsley before serving. Enjoy!
Extra Tips:
To guarantee the salmon cooks evenly, try to use fillets that are similar in size and thickness. If your fillets are particularly thick, you might need to increase the cooking time slightly.
For an extra touch of flavor, consider adding a splash of white wine to the baking sheet before cooking. This dish pairs beautifully with roasted vegetables or a fresh green salad, making it a versatile addition to any holiday menu.
Slow Cooker Beef Pot Roast
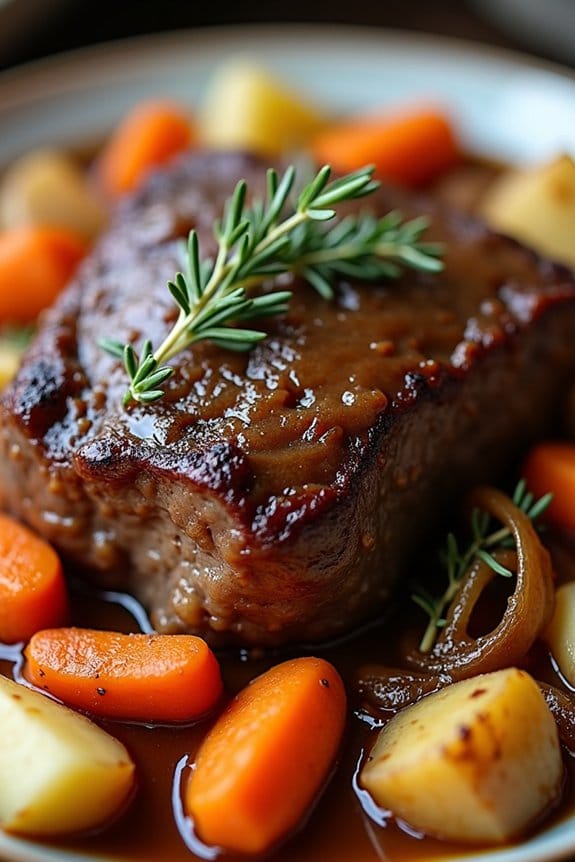
The Slow Cooker Beef Pot Roast is the perfect dish to serve at your Christmas gathering. This hearty and flavorful meal is simple to prepare, allowing you to focus on enjoying the festivities with your loved ones. The slow cooker does all the heavy lifting, transforming a humble cut of beef into a tender, succulent masterpiece.
The combination of beef, vegetables, and aromatic herbs creates a rich and savory dish that will leave your guests satisfied and impressed. Ideal for feeding a crowd, this recipe serves 4-6 people, making it an excellent choice for your holiday menu.
The beef pot roast can be prepped in the morning and left to cook throughout the day, filling your home with the delightful aromas of a home-cooked feast. Serve it alongside your favorite holiday sides for a complete and comforting meal that’s sure to become a new Christmas tradition.
Ingredients (serves 4-6):
- 3-4 pounds beef chuck roast
- 1 tablespoon olive oil
- Salt and black pepper to taste
- 4 cups beef broth
- 2 tablespoons tomato paste
- 1 tablespoon Worcestershire sauce
- 2 teaspoons dried thyme
- 1 teaspoon garlic powder
- 1 bay leaf
- 4 large carrots, peeled and cut into chunks
- 4 potatoes, peeled and quartered
- 2 onions, peeled and quartered
- 3 cloves garlic, minced
- 2 tablespoons cornstarch (optional, for thickening)
- 2 tablespoons water (optional, for thickening)
Instructions:
- Prepare the Beef: Season the beef chuck roast generously with salt and black pepper on all sides.
- Sear the Beef: In a large skillet over medium-high heat, add olive oil. Once hot, sear the beef on all sides until browned, about 4-5 minutes per side. This step adds depth of flavor to the roast.
- Assemble in Slow Cooker: Place the seared beef into the slow cooker. Pour in the beef broth, tomato paste, and Worcestershire sauce. Stir to combine.
- Add Seasonings: Sprinkle the thyme, garlic powder, and add the bay leaf on top.
- Add Vegetables: Arrange the carrots, potatoes, onions, and minced garlic around the beef in the slow cooker.
- Cook: Cover the slow cooker and set it to low heat. Cook for 8-10 hours or until the beef is tender and falls apart easily with a fork.
- Thicken the Sauce (Optional): If you prefer a thicker gravy, remove 1 cup of cooking liquid from the slow cooker. In a small bowl, mix the cornstarch and water to form a slurry, then stir it into the reserved cooking liquid. Pour this mixture back into the slow cooker and stir well.
- Serve: Once the pot roast is cooked, remove the bay leaf and serve the beef with vegetables and gravy on the side.
Extra Tips:
For best results, try to use a well-marbled beef chuck roast, as the fat content contributes to the moistness and flavor of the roast.
If you have the time, letting the beef sit at room temperature for about 30 minutes before searing can help it cook more evenly. Additionally, if you find the sauce too oily, skim off excess fat before serving.
Pair this dish with crusty bread or a fresh salad to balance the richness of the pot roast.
Vegetarian Stuffed Bell Peppers
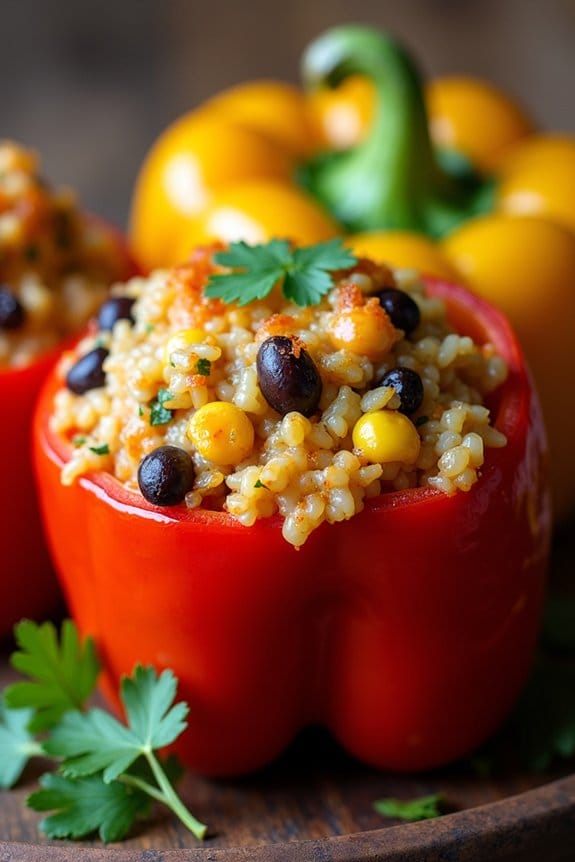
Hosting a Christmas gathering and looking for a delightful, meat-free option to serve your guests? Vegetarian Stuffed Bell Peppers are a perfect choice! These colorful and flavorful bell peppers are stuffed with a hearty mixture of rice, beans, vegetables, and spices, making them not only delicious but also visually appealing.
This recipe serves 4-6 people and caters to both vegetarians and those looking to include more plant-based meals in their diet. It’s a wholesome dish that’s sure to be a hit at your festive dinner table.
The recipe is straightforward and doesn’t require any complex techniques, making it ideal for cooks of all levels. Plus, the filling can be customized to suit your preferences or dietary restrictions. Whether you’re serving these stuffed peppers as a main course or a side dish, they’re sure to impress your guests with their rich flavors and satisfying texture.
Follow the steps below for a stress-free cooking experience and a dish that’s bound to bring holiday cheer to your table.
Ingredients for 4-6 servings:
- 6 large bell peppers (any color)
- 2 tablespoons olive oil
- 1 medium onion, diced
- 2 cloves garlic, minced
- 1 cup cooked rice (white or brown)
- 1 can (15 oz) black beans, drained and rinsed
- 1 cup corn kernels (fresh, frozen, or canned)
- 1 can (14.5 oz) diced tomatoes, drained
- 1 teaspoon ground cumin
- 1 teaspoon chili powder
- Salt and pepper to taste
- 1 ½ cups shredded cheese (cheddar or mozzarella)
- ¼ cup chopped fresh cilantro (optional)
- Lime wedges for serving (optional)
Cooking Instructions:
1. Prepare the Bell Peppers: Preheat your oven to 375°F (190°C). Cut the tops off the bell peppers and remove the seeds and membranes. Lightly brush the outside of the peppers with olive oil and place them upright in a baking dish.
2. Make the Filling: In a large skillet, heat 2 tablespoons of olive oil over medium heat. Add the diced onion and minced garlic, sautéing until the onion is translucent, about 5 minutes.
Stir in the cooked rice, black beans, corn, and diced tomatoes. Season the mixture with cumin, chili powder, salt, and pepper. Cook for an additional 5 minutes, stirring occasionally, until everything is heated through and well combined.
3. Stuff the Peppers: Spoon the filling mixture into each prepared bell pepper, packing it in firmly. Place the stuffed peppers in the baking dish. Cover the dish with aluminum foil and bake in the preheated oven for 30 minutes.
4. Add the Cheese: Remove the foil and sprinkle the shredded cheese evenly over the top of each stuffed pepper. Return the dish to the oven, uncovered, and bake for an additional 10-15 minutes, or until the cheese is melted and bubbly.
5. Garnish and Serve: Once done, remove the peppers from the oven and let them cool slightly. Garnish with fresh cilantro if using, and serve with lime wedges on the side for an extra zesty flavor.
Extra Tips:
When preparing Vegetarian Stuffed Bell Peppers, it’s essential to choose peppers that are similar in size so they cook evenly.
If you prefer a bit more heat, consider adding a finely chopped jalapeño to the filling. To make the dish vegan, simply omit the cheese or use a plant-based alternative.
The filling can be prepared a day in advance and stored in the refrigerator, making it easy to assemble and bake just before your guests arrive. Enjoy the festive colors and flavors of this delightful dish!
Cheesy Potato Casserole

There’s nothing quite like the comforting warmth of a cheesy potato casserole to bring people together during the holiday season. This dish is the perfect blend of creamy, cheesy goodness with a hint of crunch on top, making it an instant favorite at any Christmas gathering. With its rich flavors and satisfying texture, this casserole not only serves as a hearty side dish but can also be the star of your festive spread.
Designed with simplicity in mind, this recipe is ideal for feeding a crowd, guaranteeing that everyone leaves the table with a smile and a full belly. This cheesy potato casserole is both easy to prepare and a joy to eat, making it a must-have for your Christmas menu.
Whether you’re hosting a large family gathering or a small get-together with friends, this dish is sure to impress. The combination of tender potatoes, creamy sauce, and melted cheese creates a mouthwatering experience with every bite. With just a few ingredients and minimal prep time, you can whip up this delightful casserole and focus on enjoying the holiday spirit with your loved ones.
Ingredients (serving size: 4-6 people):
- 6 medium-sized potatoes, peeled and sliced
- 1 cup sour cream
- 1 can (10.5 oz) condensed cream of chicken soup
- 2 cups shredded cheddar cheese
- 1/2 cup melted butter
- 1 teaspoon garlic powder
- 1 teaspoon onion powder
- 1 teaspoon salt
- 1/2 teaspoon black pepper
- 1 cup crushed cornflakes
- 1/4 cup chopped green onions (optional)
Instructions:
- Prepare the Potatoes: Preheat your oven to 350°F (175°C). Peel and slice the potatoes into thin, even slices. This guarantees they cook evenly and absorb the flavors well.
- Mix the Creamy Base: In a large bowl, combine the sour cream, condensed cream of chicken soup, 1 1/2 cups of the shredded cheddar cheese, melted butter, garlic powder, onion powder, salt, and pepper. Stir until all ingredients are well incorporated.
- Assemble the Casserole: Lightly grease a 9×13 inch baking dish. Layer half of the sliced potatoes evenly in the dish. Pour half of the creamy mixture over the potatoes, spreading it to cover them completely. Add the remaining potatoes on top and cover with the rest of the creamy mixture.
- Top with Crunch: In a separate small bowl, mix the crushed cornflakes with the remaining 1/2 cup of shredded cheddar cheese. Sprinkle this mixture evenly over the top of the casserole to create a crispy, cheesy crust.
- Bake: Cover the dish with aluminum foil and bake in the preheated oven for 45 minutes. Remove the foil and bake for an additional 15-20 minutes, or until the potatoes are tender and the top is golden brown.
- Finish and Serve: Once baked, remove the casserole from the oven and let it sit for about 10 minutes before serving. This allows the flavors to meld and makes it easier to serve. Garnish with chopped green onions if desired.
Extra Tips: For an added depth of flavor, consider adding a pinch of smoked paprika to the creamy mixture. This will give the casserole a subtle smoky taste that complements the cheese beautifully.
If you prefer a vegetarian version, simply substitute the cream of chicken soup with cream of mushroom soup. Finally, to save time on the day of your gathering, you can prepare the casserole in advance and keep it refrigerated. Just remember to add a few extra minutes to the baking time if you’re cooking it straight from the fridge.
Creamy Mushroom Risotto

Creamy Mushroom Risotto is a wonderful and comforting dish that’s perfect for a Christmas gathering. The creamy texture and rich flavors make it a crowd-pleaser, offering a delightful combination of Arborio rice, earthy mushrooms, and savory Parmesan cheese. This risotto isn’t only satisfying but also adds a touch of elegance to your holiday table, making it a fantastic choice for impressing your guests.
When preparing this dish for a crowd, the key is to take your time and allow the flavors to meld together beautifully. Risotto requires patience and attention, but the end result is well worth the effort. By using fresh ingredients and a little love, you can create a dish that will have everyone coming back for seconds. Here’s how you can make Creamy Mushroom Risotto for a serving size of 4-6 people.
Ingredients:
- 2 cups Arborio rice
- 1 pound mushrooms (such as cremini or button), sliced
- 1 onion, finely chopped
- 4 cloves garlic, minced
- 1 cup dry white wine
- 6 cups chicken or vegetable broth
- 1 cup Parmesan cheese, grated
- 4 tablespoons unsalted butter
- 2 tablespoons olive oil
- Salt and freshly ground black pepper, to taste
- 2 tablespoons fresh parsley, chopped
Instructions:
- Prepare the Ingredients: Begin by slicing the mushrooms and finely chopping the onion and garlic. Grate the Parmesan cheese and set it aside for later use.
- Sauté the Mushrooms: In a large pan, heat 2 tablespoons of olive oil over medium-high heat. Add the sliced mushrooms and sauté until they’re golden brown and tender, about 5-7 minutes. Remove the mushrooms from the pan and set aside.
- Cook the Aromatics: In the same pan, add 2 tablespoons of butter and the chopped onion. Sauté until the onion becomes translucent, about 3-4 minutes. Add the minced garlic and cook for an additional minute until fragrant.
- Toast the Rice: Add the Arborio rice to the pan with the onions and garlic. Stir continuously for about 2 minutes until the rice is lightly toasted and coated with the butter and oil.
- Deglaze with Wine: Pour in the white wine and stir until it’s mostly absorbed by the rice. This will add a rich flavor to the risotto.
- Add the Broth Gradually: Begin adding the chicken or vegetable broth, one ladle at a time. Stir frequently and allow each addition of broth to be almost fully absorbed before adding the next. Continue this process until the rice is creamy and cooked to al dente, about 18-20 minutes.
- Incorporate the Mushrooms: Once the rice is cooked, stir the sautéed mushrooms back into the pan. Add the remaining 2 tablespoons of butter and the grated Parmesan cheese. Stir until the cheese is melted and the risotto is creamy.
- Season and Garnish: Season the risotto with salt and freshly ground black pepper to taste. Garnish with chopped fresh parsley before serving.
Extra Tips:
For the perfect Creamy Mushroom Risotto, make sure to keep the broth warm on a separate burner, as adding cold broth can slow down the cooking process. Stirring frequently helps release the rice’s starches, creating a creamy consistency.
If you prefer a vegetarian version, simply use vegetable broth instead of chicken broth. Finally, feel free to experiment with different types of mushrooms or add a touch of truffle oil for an extra layer of flavor.
Cranberry Walnut Salad
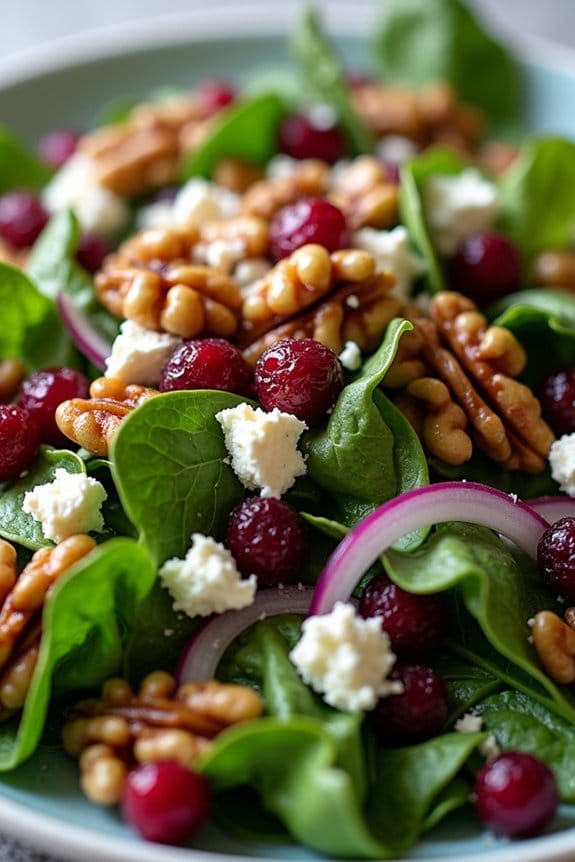
Cranberry Walnut Salad is a perfect festive dish that effortlessly combines vibrant colors and rich flavors, making it an excellent choice for any Christmas gathering. The tartness of dried cranberries and the crunchiness of toasted walnuts blend seamlessly with fresh greens, offering a revitalizing contrast to the typically heavier holiday dishes.
This salad not only adds a splash of color to your Christmas table but also provides a burst of flavor that delights the palate. Ideal for serving 4-6 people, this salad is both quick to prepare and easy to scale up if you’re hosting a larger crowd.
The combination of tangy vinaigrette with sweet and savory ingredients guarantees that this dish will be a hit at any holiday event. Whether you’re preparing a full Christmas dinner or simply looking for a flavorful side, this Cranberry Walnut Salad is sure to impress your guests.
Ingredients for 4-6 people:
- 6 cups mixed baby greens (such as arugula, spinach, and romaine)
- 1 cup dried cranberries
- 1 cup walnut halves, toasted
- 1/2 cup crumbled feta cheese
- 1 small red onion, thinly sliced
- 1/4 cup balsamic vinaigrette
- Salt and pepper to taste
Cooking Instructions:
- Prepare the Greens: Rinse the mixed baby greens thoroughly under cold water. Use a salad spinner to dry them or pat them gently with a clean kitchen towel to remove excess moisture. Place the greens in a large salad bowl.
- Toast the Walnuts: Preheat a skillet over medium heat. Add the walnut halves and toast them for about 5 minutes, stirring frequently, until they’re golden brown and fragrant. Be careful not to burn them. Remove from heat and let them cool.
- Assemble the Salad: Add the dried cranberries, toasted walnuts, crumbled feta cheese, and thinly sliced red onion to the bowl with the mixed greens.
- Dress the Salad: Drizzle the balsamic vinaigrette over the salad. Toss gently to guarantee all ingredients are well coated.
- Season and Serve: Season the salad with salt and pepper to taste. Serve immediately to enjoy the fresh flavors and textures.
Extra Tips:
For an added touch of sweetness, you can include slices of fresh apple or pear in the salad. If you prefer a dairy-free version, simply omit the feta cheese.
Additionally, you can prepare the salad components ahead of time and assemble them just before serving to keep the greens crisp and the walnuts crunchy. Adjust the amount of vinaigrette based on your taste preference, starting with a smaller amount and adding more as needed.
Festive Deviled Eggs

Deviled eggs are a classic appetizer that add a touch of elegance and festivity to any gathering, making them perfect for a Christmas feast. This recipe for Festive Deviled Eggs combines the rich, creamy filling with a hint of tanginess and a sprinkle of colorful garnishes to create a dish that’s both visually appealing and delicious.
Ideal for serving a crowd, these deviled eggs aren’t only easy to prepare but also allow for creativity with toppings, guaranteeing they’ll be a hit at your holiday celebration. This recipe is designed to serve 4-6 people, making it suitable for an intimate gathering or as part of a larger spread of appetizers.
By balancing classic flavors with a festive twist, these deviled eggs will surely stand out as a memorable treat. Whether you’re hosting a party or bringing a dish to a potluck, these deviled eggs are sure to be a crowd-pleaser.
Ingredients:
- 6 large eggs
- 3 tablespoons mayonnaise
- 1 teaspoon Dijon mustard
- 1 teaspoon apple cider vinegar
- Salt and pepper to taste
- Paprika, for garnish
- Chopped chives, for garnish
- Pomegranate seeds, for garnish
Instructions:
- Boil the Eggs: Place the eggs in a saucepan and cover them with cold water by about an inch. Bring the water to a rolling boil over medium-high heat. Once boiling, cover the saucepan with a lid and remove it from heat. Let the eggs sit in the hot water for 10-12 minutes.
- Cool the Eggs: After the eggs have cooked, transfer them to a bowl of ice water to cool for at least 5 minutes. This will make peeling easier and stop the cooking process.
- Peel and Halve: Once the eggs have cooled, gently tap them on the counter to crack the shell and peel them carefully. Slice each egg in half lengthwise and remove the yolks, placing them in a small bowl.
- Prepare the Filling: Mash the egg yolks with a fork until crumbly. Add mayonnaise, Dijon mustard, apple cider vinegar, salt, and pepper. Mix until smooth and creamy. Adjust seasoning if necessary.
- Fill the Egg Whites: Spoon or pipe the yolk mixture back into the hollowed egg whites. A piping bag or a resealable plastic bag with a corner snipped off can make the filling look more decorative.
- Garnish: Dust the filled eggs with a light sprinkle of paprika. Add a few chopped chives and pomegranate seeds on top for a festive touch.
- Serve: Arrange the deviled eggs on a platter and serve immediately, or chill them in the refrigerator until ready to serve.
Extra Tips:
For perfect hard-boiled eggs, confirm the eggs aren’t too fresh, as older eggs peel more easily. You can also experiment with different garnishes like crumbled bacon, smoked salmon, or pickled onions to cater to different tastes and add variety.
If you’re preparing these ahead of time, keep the filling separate from the egg whites until just before serving to maintain freshness and avoid any sogginess.
Pull-Apart Garlic Bread

Pull-Apart Garlic Bread is a delightful and easy-to-make dish that’s perfect for Christmas gatherings or any festive occasion where you’re feeding a crowd. This recipe transforms a simple loaf of bread into a flavorful and aromatic centerpiece that guests will love. The combination of melted butter, garlic, herbs, and cheese creates a savory treat that pairs beautifully with a variety of holiday dishes, from hearty stews to roasted meats.
Plus, the pull-apart design makes it fun and interactive, encouraging guests to gather around and help themselves. Ideal for serving 4-6 people, this Pull-Apart Garlic Bread recipe is both simple and satisfying. The preparation involves making a delicious garlic butter mixture, cutting the bread in a way that allows each piece to be easily pulled apart, and baking it to crispy, golden perfection.
Whether you’re a seasoned cook or a novice in the kitchen, this recipe is straightforward enough to guarantee success every time.
Ingredients:
- 1 large round loaf of crusty bread (such as sourdough or ciabatta)
- 1/2 cup unsalted butter, melted
- 4 cloves garlic, minced
- 1 tablespoon fresh parsley, chopped
- 1 teaspoon dried oregano
- 1/2 teaspoon salt
- 1/4 teaspoon black pepper
- 1 cup shredded mozzarella cheese
- 1/2 cup grated Parmesan cheese
Instructions:
- Preheat the Oven: Begin by preheating your oven to 350°F (175°C). This will guarantee that the bread bakes evenly and achieves a nice golden crust.
- Prepare the Garlic Butter: In a small bowl, combine the melted butter, minced garlic, chopped parsley, dried oregano, salt, and black pepper. Stir until all the ingredients are well combined. This flavorful mixture will infuse the bread with its signature garlic taste.
- Prepare the Bread: Place the loaf of bread on a cutting board. Using a sharp serrated knife, make diagonal cuts about 1 inch apart across the top of the bread, cutting about three-quarters of the way through to create a grid pattern. Be careful not to cut all the way through the loaf.
- Fill the Bread: Gently pull apart the bread sections and use a spoon or a brush to distribute the garlic butter mixture evenly between the cuts. Make sure to coat each section thoroughly for maximum flavor.
- Add Cheese: Stuff the shredded mozzarella and grated Parmesan cheese into the cuts, ensuring that each section is filled. The cheese will melt and create a deliciously gooey texture.
- Wrap and Bake: Wrap the entire loaf in aluminum foil, ensuring it’s sealed tightly, and place it on a baking sheet. Bake in the preheated oven for 15 minutes to allow the flavors to meld and the cheese to begin melting.
- Final Bake: After 15 minutes, remove the foil and return the bread to the oven for an additional 10 minutes. This will help the top become golden brown and crispy.
- Serve: Once done, remove the bread from the oven and let it cool slightly before serving. Place it on a platter and let guests pull apart the sections to enjoy.
Extra Tips:
For an extra burst of flavor, consider adding a pinch of crushed red pepper flakes to the garlic butter mixture for a hint of heat. You can also experiment with different types of cheese, such as cheddar or Gruyère, to suit your taste preferences.
If you want to prepare the bread ahead of time, you can assemble it and keep it wrapped in the refrigerator for a few hours before baking. Just be sure to add a few extra minutes to the baking time if it’s coming straight from the fridge.
Gingerbread Trifle

Gingerbread Trifle is the perfect festive dessert to impress a crowd during the holiday season. This delightful treat combines the classic flavors of gingerbread with rich layers of creamy custard and whipped cream, creating a visually stunning and deliciously indulgent dessert. The combination of spiced gingerbread, smooth custard, and fluffy whipped cream, all topped with a sprinkle of crushed ginger snaps, makes this trifle a true highlight of any holiday gathering.
Not only is it a showstopper on the dessert table, but it also has the added benefit of being easy to prepare, making it a stress-free choice for busy hosts.
The beauty of the Gingerbread Trifle lies in its versatility and ease of assembly. By preparing some components ahead of time, such as the gingerbread and custard, you can quickly assemble the trifle just before serving. This guarantees that the layers remain distinct and the textures are at their best.
Whether you’re hosting a small get-together or a larger gathering, this recipe is designed to serve 4-6 people, making it an ideal choice for a cozy holiday celebration with family and friends.
Ingredients for Gingerbread Trifle (Serves 4-6):
- 1 loaf of gingerbread cake
- 2 cups of vanilla custard
- 1 cup of heavy whipping cream
- 2 tablespoons of powdered sugar
- 1 teaspoon of vanilla extract
- 1/2 cup of crushed ginger snaps
- Optional: fresh berries or mint leaves for garnish
Cooking Instructions:
- Prepare the Gingerbread Cake: If using store-bought gingerbread, cut the loaf into small cubes. If baking from scratch, allow it to cool completely before cutting into cubes. The gingerbread should be moist and flavorful to enhance the trifle layers.
- Make the Custard: If using store-bought custard, confirm it’s chilled before use. To make a homemade custard, whisk together egg yolks, sugar, and milk over a bain-marie until thickened. Let it cool in the refrigerator until ready to assemble the trifle.
- Whip the Cream: In a mixing bowl, combine the heavy whipping cream, powdered sugar, and vanilla extract. Beat with an electric mixer on medium-high speed until soft peaks form. Be careful not to over-whip, as this will turn the cream grainy.
- Assemble the Trifle: In a trifle bowl or individual serving glasses, start by adding a layer of gingerbread cubes at the bottom. Follow with a layer of vanilla custard, then a layer of whipped cream. Repeat the layers until you reach the top of the bowl or glass, finishing with a generous layer of whipped cream.
- Add the Finishing Touches: Sprinkle the top layer with crushed ginger snaps for a delightful crunch. For an extra festive touch, add fresh berries or mint leaves as a garnish.
- Chill Before Serving: Allow the trifle to chill in the refrigerator for at least 1 hour before serving. This will help the flavors meld together and make the dessert easier to serve.
Extra Tips:
For an added depth of flavor, consider adding a splash of rum or brandy to the custard, which pairs wonderfully with the spicy notes of the gingerbread.
If you prefer a lighter dessert, you can substitute the vanilla custard with a vanilla yogurt. Additionally, the trifle can be made in advance and stored in the refrigerator for up to two days, making it a convenient option for busy holiday schedules. Just be sure to add the ginger snap topping right before serving to maintain its crispness.
Peppermint Bark Brownies

Peppermint Bark Brownies are a delightful and festive treat that perfectly combine the rich flavors of chocolate and the invigorating taste of peppermint. These brownies are an excellent choice for holiday gatherings, offering a unique twist on traditional brownie recipes. The layers of chocolatey goodness, topped with crunchy peppermint bark, make them a crowd-pleaser at any Christmas celebration.
Whether you’re hosting a party or attending one, these brownies will surely make an impression with their decadent taste and holiday spirit.
These brownies aren’t only delicious but also surprisingly easy to make, ensuring that you won’t be spending all day in the kitchen. The recipe is designed to serve 4-6 people, making it ideal for small gatherings or as a part of a larger dessert assortment.
With just a few simple ingredients and some basic kitchen equipment, you can whip up a batch of these Peppermint Bark Brownies in no time, adding a touch of homemade charm to your holiday festivities.
Ingredients (serving size: 4-6 people):
- 1 cup unsalted butter
- 1 cup granulated sugar
- 1 cup brown sugar
- 4 large eggs
- 1 teaspoon vanilla extract
- 1 cup all-purpose flour
- 1 cup unsweetened cocoa powder
- 1/2 teaspoon salt
- 1/2 teaspoon baking powder
- 1/2 cup semi-sweet chocolate chips
- 1/2 cup crushed peppermint candies
- 1 cup white chocolate chips
- 1 teaspoon peppermint extract
Instructions:
- Preheat and Prepare Pan: Preheat your oven to 350°F (175°C). Grease a 9×13 inch baking pan with butter or non-stick spray, and line it with parchment paper, leaving some overhang on the sides for easy removal of the brownies after baking.
- Melt Butter and Mix Sugars: In a medium saucepan over low heat, melt the unsalted butter. Once melted, remove from heat and stir in the granulated sugar and brown sugar until the mixture is smooth and combined.
- Combine Wet Ingredients: Add the eggs, one at a time, into the butter and sugar mixture, stirring well after each addition. Stir in the vanilla extract until everything is well incorporated.
- Prepare Dry Ingredients: In a separate bowl, whisk together the all-purpose flour, unsweetened cocoa powder, salt, and baking powder. Gradually add this dry mixture to the wet ingredients, stirring until just combined.
- Add Chocolate Chips: Fold in the semi-sweet chocolate chips, ensuring they’re evenly distributed throughout the batter.
- Pour and Bake: Pour the brownie batter into the prepared baking pan, spreading it out evenly with a spatula. Bake in the preheated oven for 25-30 minutes, or until a toothpick inserted in the center comes out mostly clean with a few moist crumbs.
- Prepare Peppermint Topping: While the brownies are baking, melt the white chocolate chips in a microwave-safe bowl in 30-second intervals, stirring in between, until smooth. Stir in the peppermint extract and crushed peppermint candies.
- Top and Cool: Once the brownies are out of the oven, immediately drizzle the melted white chocolate mixture over the top. Use a spatula to spread it evenly and allow the brownies to cool completely in the pan on a wire rack.
- Slice and Serve: Once cooled, lift the brownies out of the pan using the parchment paper overhang. Slice them into squares and serve.
Extra Tips:
For an extra festive touch, consider adding a few drops of red or green food coloring to the white chocolate mixture before drizzling it over the brownies. This will give the brownies an additional pop of holiday color.
Additionally, using a serrated knife can help achieve cleaner cuts when slicing the brownies, especially with the crunchy peppermint topping. If you’re preparing these brownies in advance, store them in an airtight container to maintain their freshness and texture.
Eggnog Cheesecake Bites

Eggnog Cheesecake Bites are the perfect holiday treat, combining the rich, creamy flavors of traditional cheesecake with the festive notes of eggnog.
These bite-sized delights aren’t only easy to make but also serve as a delightful addition to any holiday gathering. With their smooth texture and subtle hint of nutmeg, they capture the essence of Christmas in every bite. Perfect for serving a crowd, these cheesecake bites can be prepared ahead of time, allowing you to enjoy the festivities without the stress of last-minute cooking.
Designed to please a group of 4-6 people, these Eggnog Cheesecake Bites are a crowd favorite. The recipe is straightforward, using simple ingredients that most people have on hand during the holiday season.
The combination of a buttery graham cracker crust and creamy eggnog-infused filling creates an irresistible dessert that will have your guests coming back for more. Whether you’re hosting a Christmas party or attending a potluck, these cheesecake bites are sure to be a hit.
Ingredients (serving size: 4-6 people):
- 1 cup graham cracker crumbs
- 3 tablespoons unsalted butter, melted
- 16 ounces cream cheese, softened
- 1/2 cup granulated sugar
- 1/2 cup eggnog
- 1 tablespoon all-purpose flour
- 1 teaspoon vanilla extract
- 1/2 teaspoon ground nutmeg
- 2 large eggs
- Whipped cream (for topping, optional)
- Ground cinnamon (for garnish, optional)
Cooking Instructions:
- Prepare the crust: Preheat your oven to 325°F (163°C). In a medium bowl, combine the graham cracker crumbs and melted butter. Mix until the crumbs are evenly moistened. Press the mixture firmly into the bottom of a greased mini muffin tin or a baking pan to form the base of the cheesecake bites.
- Make the filling: In a large mixing bowl, beat the softened cream cheese and granulated sugar with an electric mixer until smooth and creamy. Add the eggnog, flour, vanilla extract, and ground nutmeg, and continue mixing until well combined. Make sure there are no lumps in the mixture.
- Add the eggs: Beat in the eggs one at a time, mixing on low speed until just combined. Be careful not to overmix, as this can incorporate too much air and cause the bites to crack during baking.
- Fill the crust: Pour the cream cheese mixture over the prepared crust in the muffin tin or baking pan, filling each cavity evenly.
- Bake the cheesecake bites: Place the tin in the preheated oven and bake for 18-20 minutes, or until the edges are set but the centers still have a slight jiggle. Remove from the oven and allow to cool to room temperature.
- Chill and serve: Once cooled, refrigerate the cheesecake bites for at least 2 hours or until thoroughly chilled. Before serving, top each bite with a dollop of whipped cream and a sprinkle of ground cinnamon, if desired.
Extra Tips:
To guarantee the best texture, make sure your cream cheese is at room temperature before mixing. This will prevent lumps and create a smoother filling.
If you don’t have mini muffin tins, you can use a regular baking pan and cut the cheesecake into squares once set. Remember, these bites are best when chilled, so try to make them the day before serving to allow flavors to meld.
Finally, feel free to adjust the nutmeg to your taste preference, as some may prefer a more pronounced spice flavor.
