
With the holiday season just around the corner, it’s time to start thinking about those beloved side dishes that make Christmas dinners so special. Picture your table adorned with roasted Brussels sprouts, garlic mashed potatoes, and a golden cheesy scalloped potatoes dish baking to perfection. These essential recipes are not only a feast for the senses but also the heart of treasured traditions. Ready to make this year’s celebration one to remember? Let’s explore these must-have recipes together.
Classic Roasted Brussels Sprouts
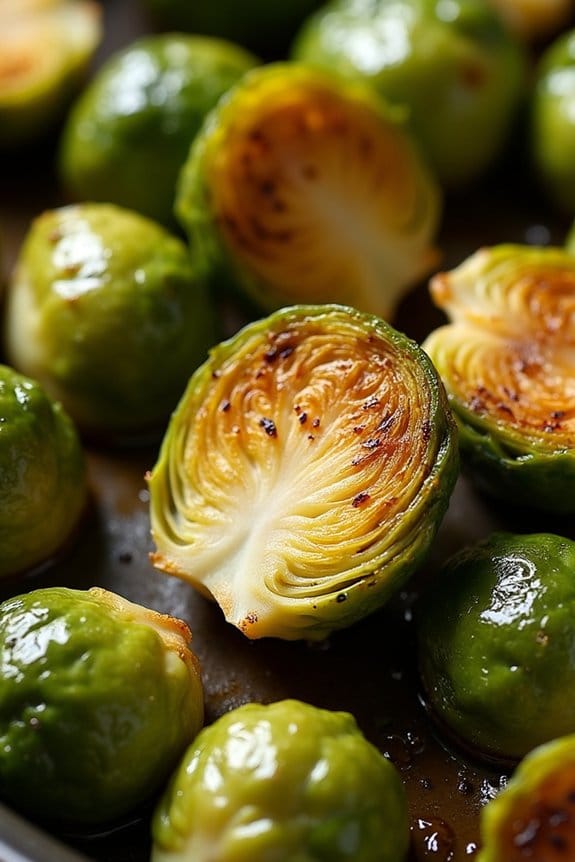
Classic Roasted Brussels Sprouts are a timeless side dish that perfectly complements any holiday meal, especially during the festive Christmas season. This recipe brings out the natural sweetness and nutty flavor of Brussels sprouts by roasting them to perfection. The outer leaves become crispy, while the inside remains tender, creating a delightful contrast in textures.
With minimal ingredients and simple preparation, these roasted Brussels sprouts are certain to become a staple on your holiday table. Whether you’re hosting a large family gathering or a small dinner, this dish can easily be scaled to meet your needs. The following recipe serves 4-6 people, making it ideal for an intimate Christmas celebration.
By using fresh Brussels sprouts and a few pantry staples, you can create a side dish that not only tastes delicious but also adds a vibrant pop of green to your festive spread.
Ingredients (Serves 4-6):
- 1 1/2 pounds of fresh Brussels sprouts
- 3 tablespoons of olive oil
- 1 teaspoon of salt
- 1/2 teaspoon of freshly ground black pepper
- 1 tablespoon of balsamic vinegar (optional)
Cooking Instructions:
- Preheat the Oven: Preheat your oven to 400°F (200°C). This temperature is ideal for roasting Brussels sprouts, allowing them to cook evenly and develop a beautiful golden-brown color.
- Prepare the Brussels Sprouts: Rinse the Brussels sprouts under cold water and pat them dry with a kitchen towel. Trim the stem ends and remove any yellow or damaged outer leaves. Cut the larger sprouts in half to guarantee even cooking.
- Season the Brussels Sprouts: In a large mixing bowl, combine the Brussels sprouts with olive oil, salt, and black pepper. Toss them well to make sure that each sprout is evenly coated with the seasoning.
- Roast the Brussels Sprouts: Spread the seasoned Brussels sprouts in a single layer on a baking sheet. Roast them in the preheated oven for 20-25 minutes, stirring halfway through. They should be tender on the inside and crispy on the outside.
- Add Balsamic Vinegar (Optional): If desired, drizzle the roasted Brussels sprouts with balsamic vinegar immediately after removing them from the oven. Toss them gently to coat, and let them rest for a couple of minutes before serving.
Extra Tips: For even crispier Brussels sprouts, make sure they’re spaced out on the baking sheet, as overcrowding can cause them to steam rather than roast.
Additionally, you can enhance the flavor by adding minced garlic or a sprinkle of parmesan cheese during the last few minutes of roasting. If you prefer a touch of sweetness, try tossing the sprouts with a bit of maple syrup along with the balsamic vinegar. Enjoy the versatility of this dish by experimenting with different seasonings to suit your taste.
Garlic Mashed Potatoes
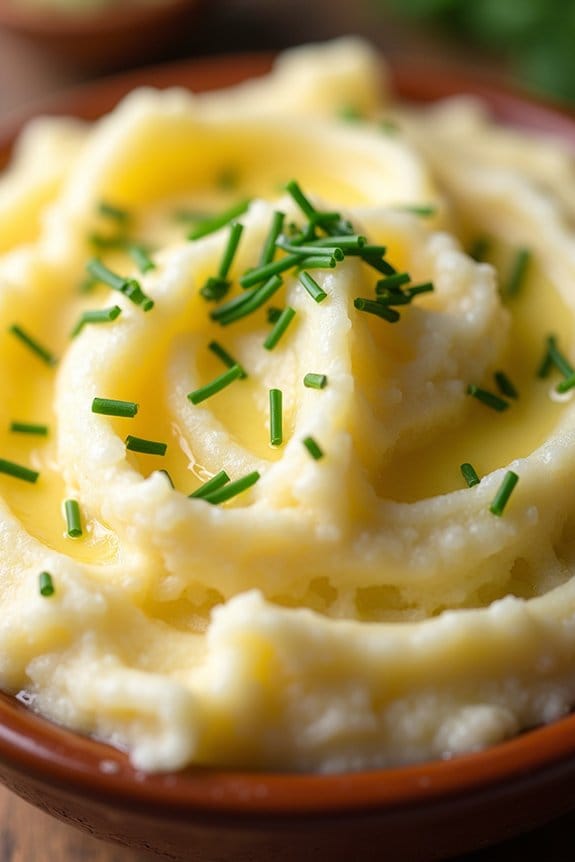
Garlic mashed potatoes are a classic comfort food that make a delightful addition to any Christmas dinner table. The creamy texture combined with the savory flavor of garlic creates a dish that’s both simple and satisfying. Perfect as a side to roast meats or vegetables, these potatoes are certain to be a crowd-pleaser during the festive season.
Whether you’re hosting a large family gathering or enjoying an intimate holiday meal, garlic mashed potatoes are a versatile and delicious choice. This recipe is designed to serve 4-6 people, making it ideal for a small to medium-sized gathering. Using simple ingredients, this dish can be prepared with ease, giving you more time to focus on spending quality time with loved ones.
With the right technique, you’ll achieve the perfect balance of flavors and textures, creating garlic mashed potatoes that are creamy, fluffy, and full of rich, garlicky goodness.
Ingredients (Serves 4-6):
- 2 pounds of Yukon Gold potatoes
- 4 cloves of garlic
- 1/2 cup of unsalted butter
- 1 cup of heavy cream
- Salt, to taste
- Ground black pepper, to taste
- Fresh chives (optional for garnish)
Cooking Instructions:
- Prepare the Potatoes: Peel the Yukon Gold potatoes and cut them into evenly sized chunks. This guarantees they cook at the same rate. Place the potato chunks in a large pot and cover them with cold water.
- Cook the Potatoes: Add a generous pinch of salt to the pot and bring the water to a boil over high heat. Once boiling, reduce the heat to medium and let the potatoes simmer for about 15-20 minutes, or until they’re tender when pierced with a fork.
- Prepare the Garlic and Cream: While the potatoes are cooking, peel and mince the garlic cloves. In a small saucepan, combine the minced garlic, butter, and heavy cream. Heat the mixture over low heat until the butter is melted and the garlic is fragrant, about 5 minutes. Be careful not to let the garlic brown.
- Mash the Potatoes: Once the potatoes are cooked, drain them well and return them to the pot. Using a potato masher or ricer, mash the potatoes until they reach your desired consistency.
- Combine Ingredients: Pour the warm garlic-butter-cream mixture over the mashed potatoes. Stir well to combine, making certain the potatoes are creamy and smooth. Season with salt and ground black pepper to taste.
- Serve: Transfer the garlic mashed potatoes to a serving dish. If desired, garnish with freshly chopped chives for a touch of color and flavor. Serve warm alongside your holiday meal.
Extra Tips:
For the best texture, use a potato masher or ricer instead of an electric mixer to avoid over-mixing, which can make the potatoes gluey. If you prefer a stronger garlic flavor, consider roasting the garlic before adding it to the cream mixture.
Simply wrap whole garlic cloves in foil and bake in a preheated oven at 400°F (200°C) for about 30 minutes, then squeeze the softened garlic into the butter and cream. This method will give the mashed potatoes a sweet, mellow garlic taste.
Enjoy your garlic mashed potatoes as a comforting and flavorful addition to your Christmas feast!
Honey-Glazed Carrots
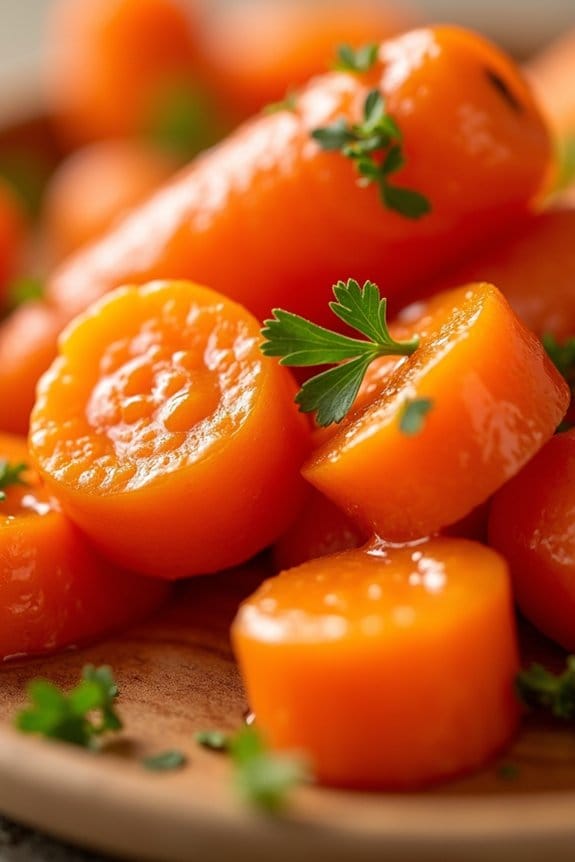
Honey-Glazed Carrots are a delightful Christmas side dish that combines the natural sweetness of carrots with the rich, golden flavor of honey. This dish is perfect for adding a pop of color and a touch of sweetness to your holiday table.
The carrots are cooked until tender and then coated in a luscious honey glaze, making them a favorite among both kids and adults. Whether you’re hosting a festive dinner or simply looking for a new way to enjoy your vegetables, these Honey-Glazed Carrots are guaranteed to impress.
This recipe serves 4-6 people, making it ideal for a small gathering or as part of a larger holiday feast. The preparation is straightforward, requiring just a handful of ingredients and minimal cooking time. The result is a dish that’s both elegant and comforting, perfect for the Christmas season.
Whether you’re a seasoned cook or a beginner in the kitchen, you’ll find this recipe easy to follow and the results truly satisfying.
Ingredients:
- 1 ½ pounds carrots, peeled and cut into 1/4-inch rounds
- 3 tablespoons unsalted butter
- 3 tablespoons honey
- 1 tablespoon brown sugar
- ½ teaspoon salt
- ¼ teaspoon black pepper
- 1 tablespoon chopped fresh parsley (optional)
Cooking Instructions:
- Prepare the Carrots: Begin by washing and peeling the carrots. Slice them into 1/4-inch thick rounds to guarantee even cooking.
- Cook the Carrots: Place the carrot slices in a large pot and add enough water to cover them. Bring the water to a boil over medium-high heat. Once boiling, reduce the heat to medium and simmer the carrots for about 5-7 minutes, or until they’re just tender. Be careful not to overcook them, as you want them to hold their shape.
- Drain and Set Aside: Once the carrots are cooked, drain them using a colander and set them aside to cool slightly.
- Create the Glaze: In the same pot, melt the butter over medium heat. Add the honey and brown sugar, stirring continuously until the sugar is fully dissolved and the mixture is smooth.
- Combine Carrots and Glaze: Return the drained carrots to the pot, stirring to coat them evenly with the honey glaze. Season with salt and black pepper to taste.
- Simmer and Thicken: Allow the carrots to simmer in the glaze for an additional 3-4 minutes, stirring occasionally, until the glaze thickens and clings to the carrots.
- Garnish and Serve: Transfer the honey-glazed carrots to a serving dish and, if desired, sprinkle with freshly chopped parsley for a touch of color and flavor. Serve warm.
Extra Tips:
For an additional layer of flavor, consider adding a teaspoon of lemon juice or a pinch of cinnamon to the glaze. This can enhance the sweetness and add a subtle tartness or warm spice, respectively.
If you’re preparing this dish ahead of time, store the cooked carrots and glaze separately. Reheat them together just before serving to guarantee the glaze remains glossy and the carrots are perfectly tender.
Adjust the seasoning to your preference, and remember, fresh parsley adds not only a visual appeal but also a fresh taste to the dish.
Cheesy Scalloped Potatoes
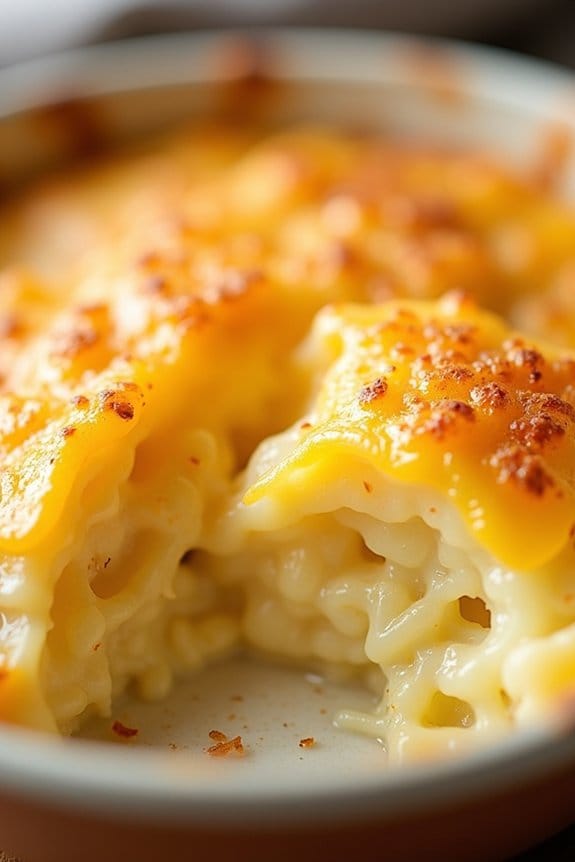
Cheesy Scalloped Potatoes are a classic comfort food side dish that’s perfect for a festive Christmas dinner. These creamy, cheesy layers of thinly sliced potatoes are baked to perfection, offering a warm and hearty addition to your holiday meal. The combination of melted cheese, creamy sauce, and tender potatoes creates a dish that’s both indulgent and satisfying, making it a favorite among family and friends.
The key to this dish’s success lies in the quality of the cheese and the evenness of the potato slices. Using a sharp cheddar cheese adds a depth of flavor, while the addition of a hint of garlic and onion enhances the overall taste. This side dish isn’t only delicious but also visually appealing, with its golden, bubbling top. It’s a dish that can be prepared ahead of time, allowing you to focus on other aspects of your holiday feast.
Here’s how to make Cheesy Scalloped Potatoes for a serving size of 4-6 people:
Ingredients:
- 2 pounds of russet or Yukon Gold potatoes, thinly sliced
- 2 tablespoons butter
- 1 small onion, finely chopped
- 2 cloves garlic, minced
- 1/4 cup all-purpose flour
- 2 1/2 cups whole milk
- 1 teaspoon salt
- 1/2 teaspoon black pepper
- 1/4 teaspoon nutmeg
- 2 cups shredded sharp cheddar cheese
- 1/2 cup grated Parmesan cheese
Cooking Instructions:
- Preheat the Oven: Start by preheating your oven to 375°F (190°C). This will guarantee it’s at the right temperature by the time your dish is ready to bake.
- Prepare the Potatoes: Peel and thinly slice the potatoes using a mandoline or a sharp knife to achieve uniform thickness, which helps them cook evenly.
- Make the Sauce: In a medium saucepan, melt the butter over medium heat. Add the chopped onion and minced garlic, and sauté until the onion becomes translucent. Stir in the flour and cook for about 1 minute, forming a roux.
- Add Milk and Seasonings: Gradually whisk in the milk, guaranteeing there are no lumps. Continue stirring until the mixture thickens. Season with salt, pepper, and nutmeg. Remove from heat and stir in 1 1/2 cups of cheddar cheese until melted.
- Layer the Potatoes: In a greased 9×13 inch baking dish, arrange half of the potato slices in an even layer. Pour half of the cheese sauce over the potatoes, spreading it evenly. Repeat with the remaining potatoes and sauce.
- Top with Cheese: Sprinkle the remaining cheddar cheese and Parmesan cheese over the top layer.
- Bake the Dish: Cover the dish with aluminum foil and bake in the preheated oven for 45 minutes. Remove the foil and bake for an additional 25-30 minutes, or until the potatoes are tender and the top is golden and bubbly.
- Let it Rest: Allow the dish to rest for about 10 minutes before serving. This will help the sauce thicken slightly and make it easier to serve.
Extra Tips:
To guarantee your Cheesy Scalloped Potatoes are perfectly creamy, be sure to slice the potatoes uniformly thin. If you prefer a more robust flavor, consider adding a hint of paprika or thyme to the sauce. For an even creamier texture, you can substitute half of the milk with heavy cream.
To save time, you can prepare the dish a day in advance; simply cover and refrigerate, then bake it just before serving. Enjoy this delicious side dish as part of your Christmas feast, and it’s sure to be a hit!
Maple Roasted Butternut Squash
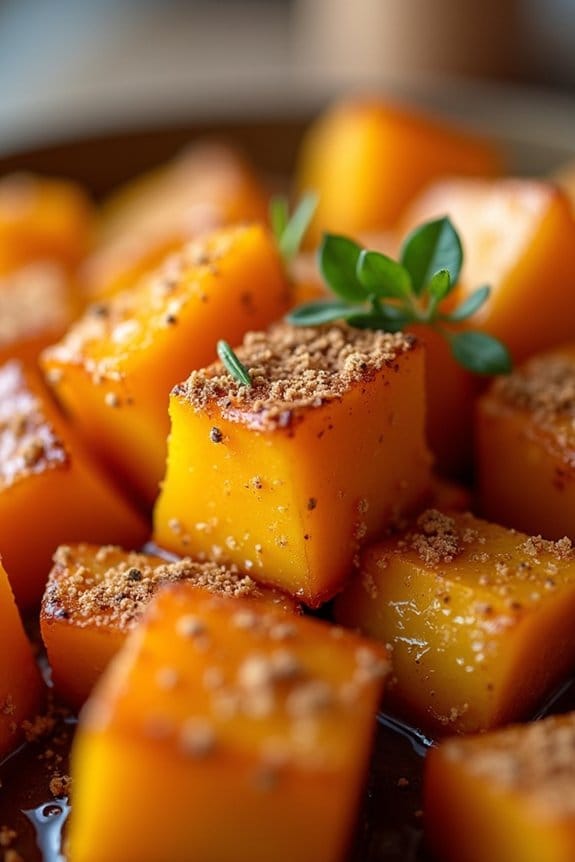
Maple Roasted Butternut Squash is a delectable side dish that perfectly complements any Christmas feast. The natural sweetness of the butternut squash is enhanced by the rich, caramel-like flavor of maple syrup, creating a dish that’s both comforting and festive.
This recipe is simple to prepare, allowing you to focus on spending time with family and friends during the holiday season. Not only does it add a vibrant splash of color to your table, but its aroma will fill your kitchen with the warm scents of the holidays.
The process of roasting the butternut squash brings out its natural sugars, creating a tender and flavorful dish that’s lightly crisped on the outside. The addition of maple syrup, along with a touch of cinnamon and nutmeg, elevates the dish to new heights, making it an irresistible option for your Christmas menu.
Whether you’re serving it alongside a roast or incorporating it into a vegetarian spread, this Maple Roasted Butternut Squash is sure to be a hit with guests of all ages. The following recipe serves 4-6 people.
Ingredients:
- 1 large butternut squash (about 3-4 pounds)
- 1/4 cup pure maple syrup
- 2 tablespoons olive oil
- 1 teaspoon ground cinnamon
- 1/2 teaspoon ground nutmeg
- Salt and pepper to taste
- Fresh thyme leaves for garnish (optional)
Cooking Instructions:
- Preheat the Oven: Start by preheating your oven to 400°F (200°C). This guarantees that it’s at the right temperature when you’re ready to roast the squash.
- Prepare the Squash: Carefully peel the butternut squash using a vegetable peeler. Cut it in half lengthwise, scoop out the seeds with a spoon, and then cut the squash into 1-inch cubes.
- Season the Squash: In a large mixing bowl, combine the butternut squash cubes, olive oil, maple syrup, cinnamon, nutmeg, salt, and pepper. Toss everything together until the squash is well coated with the mixture.
- Arrange on Baking Sheet: Spread the seasoned squash in a single layer on a large baking sheet. Make sure the pieces aren’t overcrowded to guarantee even roasting.
- Roast the Squash: Place the baking sheet in the preheated oven and roast for 25-30 minutes, turning the squash halfway through. You’ll know it’s done when the edges are caramelized and the squash is tender when pierced with a fork.
- Serve: Once cooked, remove the squash from the oven and transfer it to a serving dish. Garnish with fresh thyme leaves if desired, and serve warm.
Extra Tips:
To save time, you can peel and cut the butternut squash a day ahead and store it in the refrigerator until you’re ready to use it.
For a more savory twist, consider adding a sprinkle of cayenne pepper for a hint of heat. If you don’t have maple syrup on hand, honey is a suitable alternative, although it will impart a slightly different flavor.
Keep an eye on the squash as it roasts to prevent burning, especially if your oven runs hot. Enjoy this delightful side dish as part of your holiday celebration!
Green Bean Almondine
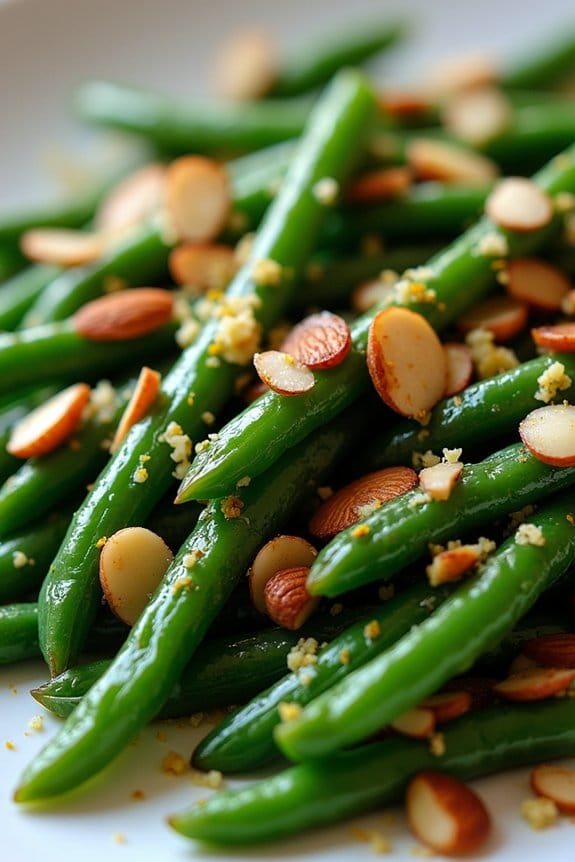
Green Bean Almondine is a classic and elegant side dish that adds a touch of sophistication to any Christmas meal. This dish combines the fresh, crunchy texture of green beans with the rich, nutty flavor of almonds, creating a harmonious balance that delights the palate. It’s a perfect accompaniment to the more robust flavors of holiday roasts and is sure to impress your guests with its simplicity and taste.
The origins of Green Bean Almondine can be traced back to French cuisine, where ‘amandine’ refers to a dish garnished with almonds. This recipe elevates the humble green bean by sautéing it with butter and garlic, then tossing it with lightly toasted almonds and a hint of lemon juice for brightness. It’s a quick and easy recipe that can be prepared ahead of time, allowing you to enjoy the festivities without spending too much time in the kitchen.
Ingredients for 4-6 servings:
- 1 1/2 pounds fresh green beans, trimmed
- 1/2 cup slivered almonds
- 3 tablespoons unsalted butter
- 2 cloves garlic, minced
- 1 tablespoon fresh lemon juice
- Salt and freshly ground black pepper, to taste
- Zest of 1 lemon (optional)
Cooking Instructions:
- Prepare the Green Beans: Begin by trimming the ends off the green beans and rinsing them under cold water. Bring a large pot of salted water to a boil and add the green beans. Blanch them for about 4-5 minutes until they’re bright green and tender-crisp. Immediately transfer the beans to a bowl of ice water to stop the cooking process. Once cooled, drain and set aside.
- Toast the Almonds: In a large skillet over medium heat, add the slivered almonds. Stir frequently until they become golden brown and fragrant, about 3-4 minutes. Be careful not to burn them. Once toasted, remove the almonds from the skillet and set aside.
- Sauté the Garlic: In the same skillet, melt the butter over medium heat. Add the minced garlic and sauté for about 1 minute until it becomes fragrant but not browned.
- Combine Ingredients: Add the blanched green beans to the skillet with the garlic butter. Toss them to coat evenly and cook for an additional 2-3 minutes until they’re heated through.
- Finish the Dish: Remove the skillet from the heat. Add the toasted almonds, lemon juice, salt, and pepper to the green beans. Toss everything together gently to combine. If desired, sprinkle lemon zest over the top for extra flavor.
- Serve: Transfer the Green Bean Almondine to a serving platter and serve immediately as a delightful Christmas side dish.
Extra Tips: To guarantee your Green Bean Almondine is perfectly cooked, don’t skip the blanching step, as it helps maintain the vibrant green color and crisp texture of the beans. You can prepare the green beans and toast the almonds a day in advance, storing them separately to save time on the day of your meal. Additionally, feel free to adjust the amount of lemon juice and seasoning to suit your taste preferences. For a variation, try adding a pinch of red pepper flakes for a subtle kick of heat.
Cranberry Walnut Stuffing
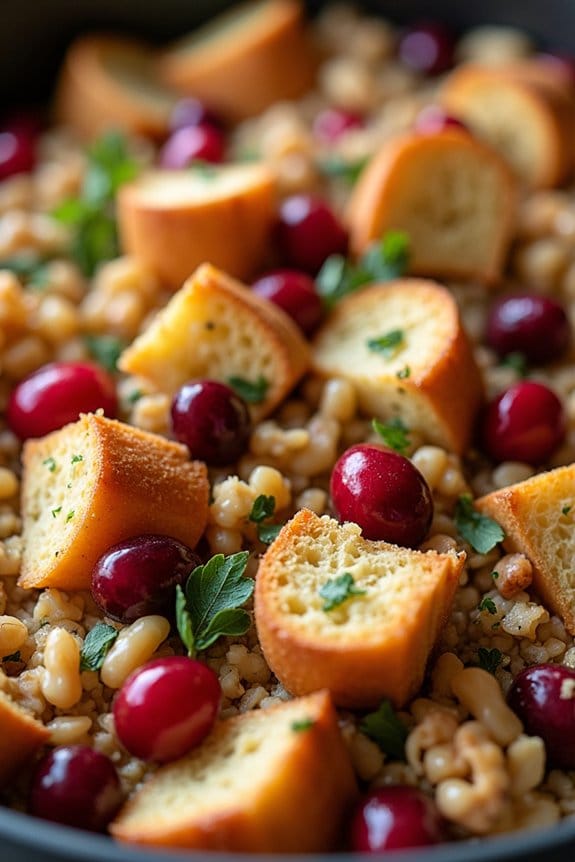
Cranberry Walnut Stuffing is a delightful and flavorful dish that perfectly complements the holiday season, adding a festive touch to any Christmas table. The combination of tangy cranberries and the rich, nutty flavor of walnuts creates a warm, inviting side that pairs beautifully with turkey or ham. This stuffing isn’t only delicious but also adds a splash of color and texture to your holiday spread.
Whether you’re hosting a big family gathering or a cozy dinner with friends, this stuffing will surely be a crowd-pleaser.
Preparing Cranberry Walnut Stuffing involves a few simple steps that bring out the best of its ingredients. The process begins with the toasting of walnuts to enhance their natural flavor, followed by the sautéing of aromatics which form the base of the stuffing. The addition of cranberries provides a burst of tartness that balances the savory elements of the dish.
The combination of fresh herbs, bread, and broth guarantees a moist and fluffy stuffing that’s packed with flavor. This recipe serves 4-6 people, making it ideal for small to medium gatherings.
Ingredients:
- 8 cups of cubed bread (preferably day-old)
- 1 cup of dried cranberries
- 1 cup of chopped walnuts
- 1 cup of diced onion
- 1 cup of diced celery
- 2 cups of chicken or vegetable broth
- 1/2 cup of unsalted butter
- 2 tablespoons of fresh parsley, chopped
- 1 tablespoon of fresh sage, chopped
- 1 tablespoon of fresh thyme, chopped
- 1 teaspoon of salt
- 1/2 teaspoon of black pepper
Cooking Instructions:
- Toast the Bread and Walnuts: Preheat your oven to 350°F (175°C). Spread the cubed bread on a baking sheet and toast in the oven for 10-15 minutes until lightly golden and crisp. At the same time, spread the walnuts on a separate baking sheet and toast for about 5-7 minutes until fragrant. Remove both from the oven and set aside.
- Prepare the Aromatics: In a large skillet, melt the butter over medium heat. Add the diced onion and celery, sautéing for about 5 minutes until they’re soft and translucent.
- Combine Ingredients: In a large mixing bowl, combine the toasted bread cubes, sautéed onion and celery, toasted walnuts, dried cranberries, chopped parsley, sage, thyme, salt, and pepper. Toss everything together to guarantee even distribution of ingredients.
- Moisten the Mixture: Gradually add the chicken or vegetable broth to the bread mixture, stirring gently to moisten. The bread should be damp but not soggy.
- Bake the Stuffing: Transfer the mixture into a greased baking dish and cover with foil. Bake in the preheated oven for 30 minutes. Remove the foil and bake for an additional 15 minutes until the top is golden brown and crisp.
Extra Tips:
For maximum flavor, use a mix of different types of bread such as sourdough, whole wheat, or white bread. This adds complexity to the stuffing.
If you prefer a sweeter stuffing, consider adding a tablespoon of brown sugar or a drizzle of maple syrup to the cranberry mixture.
To save time on the day of, you can prepare the stuffing mixture a day in advance and store it in the refrigerator, then bake it just before serving.
For a vegetarian version, simply use vegetable broth instead of chicken broth.
Parmesan Roasted Cauliflower

Parmesan Roasted Cauliflower is a delightful and flavorful side dish that pairs perfectly with any Christmas main course. This dish combines the nutty taste of roasted cauliflower with the rich, savory notes of Parmesan cheese. The roasting process brings out the natural sweetness of the cauliflower, making it an irresistible addition to your holiday table.
Whether you’re hosting a large gathering or a cozy family dinner, this recipe is certain to impress your guests with its simplicity and taste. This dish isn’t only delicious but also easy to prepare, making it a great choice for busy holiday cooking schedules. The ingredients are straightforward and likely already in your pantry.
With just a few simple steps, you can transform regular cauliflower into a festive and elegant side dish that everyone will love. Plus, it’s a healthy option that doesn’t compromise on flavor, making it suitable for various dietary preferences.
Ingredients (serving size: 4-6 people):
- 1 large head of cauliflower
- 3 tablespoons olive oil
- 1 teaspoon salt
- 1/2 teaspoon black pepper
- 1 teaspoon garlic powder
- 1 teaspoon onion powder
- 1/2 cup grated Parmesan cheese
- 2 tablespoons chopped fresh parsley (optional)
Cooking Instructions:
- Preheat the Oven: Preheat your oven to 425°F (220°C). This high temperature will help achieve a nice roast on the cauliflower.
- Prepare the Cauliflower: Remove the leaves and core from the cauliflower. Cut the cauliflower into bite-sized florets. Try to make them uniform in size to guarantee even cooking.
- Season the Cauliflower: In a large mixing bowl, combine the cauliflower florets with olive oil, salt, black pepper, garlic powder, and onion powder. Toss everything together until the cauliflower is evenly coated with the seasonings.
- Roast the Cauliflower: Spread the seasoned cauliflower florets in a single layer on a baking sheet lined with parchment paper. Roast in the preheated oven for 25-30 minutes, turning the florets halfway through, until they’re golden brown and tender.
- Add Parmesan Cheese: Remove the cauliflower from the oven and sprinkle the grated Parmesan cheese evenly over the top. Return to the oven for an additional 5 minutes, or until the cheese is melted and slightly crisp.
- Garnish and Serve: Once done, remove the cauliflower from the oven and transfer to a serving dish. Garnish with freshly chopped parsley if desired. Serve immediately while hot.
Extra Tips:
To guarantee the cauliflower roasts evenly, avoid overcrowding the baking sheet. If necessary, use two baking sheets to provide ample space between the florets.
For an extra burst of flavor, try adding a squeeze of fresh lemon juice over the roasted cauliflower just before serving. Additionally, you can experiment with different herbs or spices, such as thyme or paprika, to customize the dish to your liking.
Enjoy this Parmesan Roasted Cauliflower as a versatile and delicious side dish that complements a wide variety of holiday meals.
Bacon-Wrapped Asparagus

Bacon-wrapped asparagus is a delicious and elegant side dish that’s perfect for Christmas or any special occasion. The combination of tender asparagus and crispy bacon creates a delightful contrast in textures and flavors. This dish isn’t only visually appealing but also easy to prepare, making it a great choice for both novice and experienced cooks.
The smoky, savory flavor of the bacon complements the fresh, slightly sweet taste of the asparagus, resulting in a dish that’s certain to impress your guests. This recipe serves 4-6 people, making it an ideal side dish for a family gathering or holiday feast. With just a few simple ingredients, you’ll be able to create a dish that’s both impressive and packed with flavor.
Whether served alongside a traditional Christmas ham or a roasted turkey, bacon-wrapped asparagus is sure to be a hit at your holiday table.
Ingredients:
- 1 pound fresh asparagus, trimmed
- 12 slices of bacon
- 2 tablespoons olive oil
- Salt and pepper to taste
- 1 teaspoon garlic powder
- 1 tablespoon balsamic glaze (optional)
Cooking Instructions:
- Preheat the Oven: Preheat your oven to 400°F (200°C). This temperature will guarantee that the bacon becomes crispy while the asparagus cooks to perfection.
- Prepare the Asparagus: Wash the asparagus thoroughly and trim the woody ends. Pat them dry with a paper towel to remove excess moisture, as this will help the bacon adhere better.
- Wrap with Bacon: Take a slice of bacon and wrap it around 3-4 asparagus spears, starting from the bottom and spiraling upwards. Confirm that the bacon is tightly wrapped so it stays in place during cooking. Repeat this process with the remaining asparagus and bacon slices.
- Season and Arrange: Place the bacon-wrapped asparagus bundles on a baking sheet lined with parchment paper. Drizzle olive oil over the top and sprinkle with salt, pepper, and garlic powder to add extra flavor.
- Bake: Place the baking sheet in the preheated oven and bake for 20-25 minutes. You’ll know they’re done when the bacon is crispy and the asparagus is tender.
- Optional Glaze: If using, drizzle balsamic glaze over the cooked bundles right before serving to add a touch of sweetness and acidity.
Extra Tips:
For an extra crispiness, consider using thin-cut bacon, as it will cook more quickly and evenly. If you prefer your asparagus with a bit more bite, reduce the baking time slightly.
To keep the bacon from unraveling, you can secure it with toothpicks during baking, just remember to remove them before serving. If you’re preparing this dish in advance, you can wrap the asparagus in bacon a few hours ahead of time and store them in the refrigerator until you’re ready to cook. This will help streamline your cooking process during busy holiday preparations.
Creamy Corn Casserole
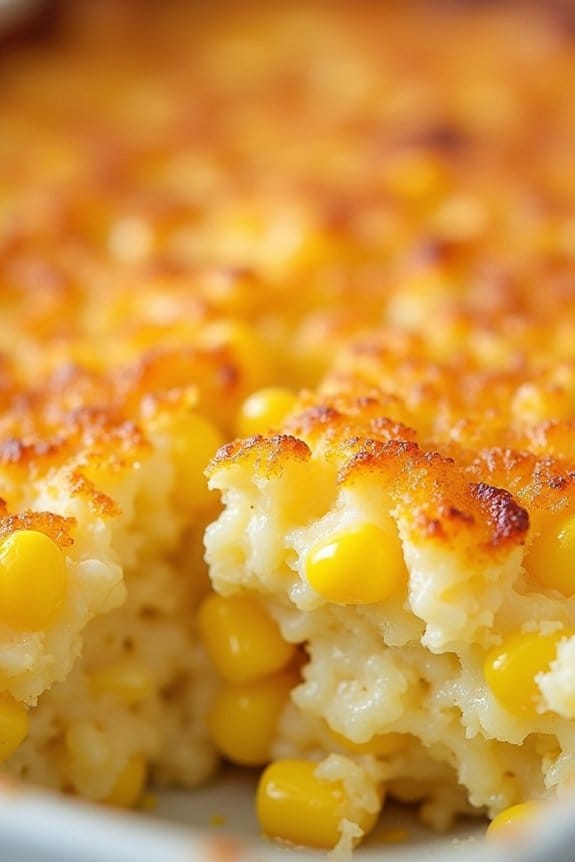
Creamy Corn Casserole is a classic holiday side dish that brings comfort and flavor to any Christmas feast. This dish combines the sweetness of corn with a rich, creamy base, creating a delightful contrast that’s certain to please everyone’s palate.
Whether you’re a fan of traditional holiday foods or you’re looking to try something new, this casserole is a perfect addition to your table. It’s easy to prepare and can be made ahead of time, allowing you to focus on other aspects of your holiday cooking.
The Creamy Corn Casserole is a versatile dish that pairs well with a variety of main courses, from roasted turkey to glazed ham. Its creamy texture and sweet corn flavor make it a comforting addition to any meal, while the golden-brown crust provides a satisfying contrast.
This recipe is designed to serve 4-6 people, making it ideal for family gatherings or intimate holiday dinners. With simple ingredients and straightforward instructions, you’ll find that making this dish is as enjoyable as eating it.
Ingredients for Creamy Corn Casserole (Serves 4-6):
- 1 cup of cornmeal
- 2 cans of whole kernel corn, drained
- 1 can of creamed corn
- 1 cup of sour cream
- 1/2 cup of melted butter
- 1 cup of shredded cheddar cheese
- 2 large eggs, beaten
- 1 tablespoon of sugar
- 1 teaspoon of salt
- 1/2 teaspoon of black pepper
- 1 teaspoon of baking powder
Cooking Instructions:
- Preheat the Oven: Begin by preheating your oven to 350°F (175°C). This guarantees that your casserole cooks evenly and develops a nice golden-brown crust.
- Mix the Ingredients: In a large mixing bowl, combine the cornmeal, drained whole kernel corn, creamed corn, sour cream, melted butter, beaten eggs, sugar, salt, black pepper, and baking powder. Stir until all the ingredients are well combined.
- Add Cheese: Fold in the shredded cheddar cheese into the mixture. Make sure the cheese is evenly distributed throughout the batter for consistent flavor.
- Prepare the Baking Dish: Lightly grease a 9×13 inch baking dish with butter or non-stick spray. This helps prevent the casserole from sticking to the dish as it bakes.
- Pour and Spread: Pour the corn mixture into the prepared baking dish. Use a spatula to spread it out evenly, ensuring it reaches all corners of the dish.
- Bake: Place the baking dish in the preheated oven and bake for 45-50 minutes, or until the top is golden brown and a toothpick inserted in the center comes out clean.
- Cool Slightly: Once baked, remove the casserole from the oven and let it cool for about 10 minutes before serving. This allows the casserole to set and makes it easier to slice.
Extra Tips:
For added flavor, consider mixing in diced green chilies or a sprinkle of paprika to the batter before baking. If you prefer a spicier version, a pinch of cayenne pepper can add a nice kick.
Using fresh corn kernels instead of canned can enhance the dish’s texture and sweetness if they’re available. Finally, if you’re short on time, this casserole can be prepared a day in advance and simply baked before serving, making it a convenient option for busy holiday schedules.
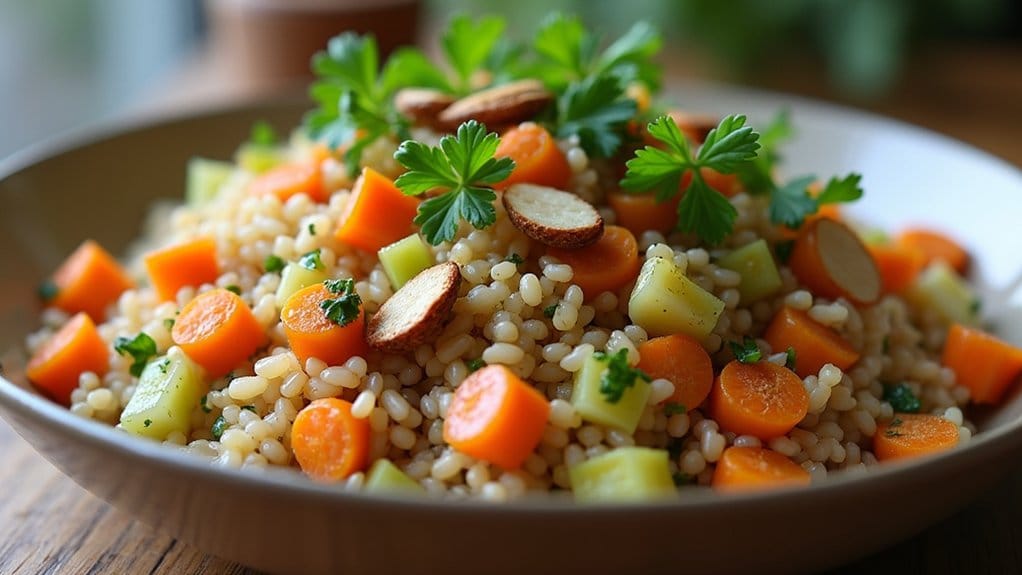
Herbed Wild Rice Pilaf
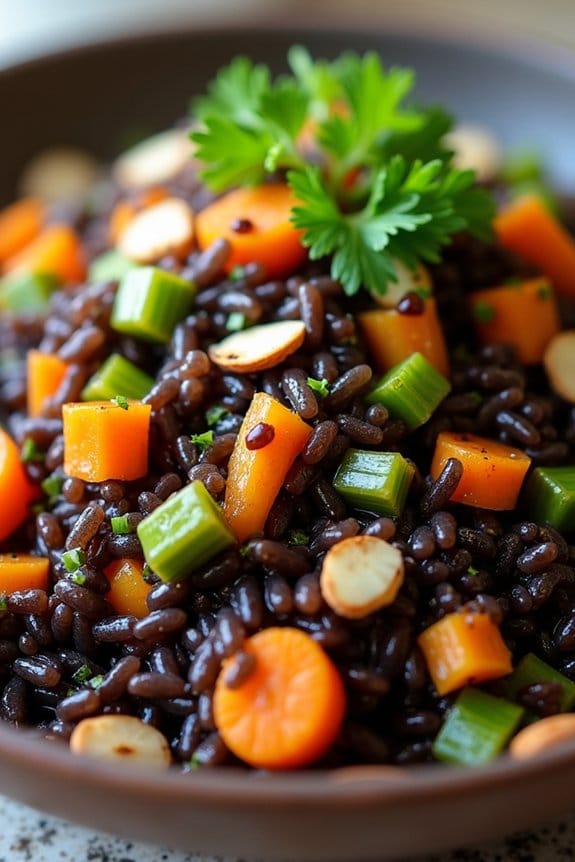
Herbed Wild Rice Pilaf is a delightful and flavorful side dish perfect for Christmas or any festive occasion. This dish combines the nutty taste of wild rice with aromatic herbs and spices, creating a symphony of flavors that will complement any main course. The addition of sautéed vegetables enhances the texture and adds a pop of color, making it not only delicious but visually appealing as well.
Wild rice is a nutrient-rich whole grain, packed with protein and fiber. It provides a hearty base for the pilaf, while the herbs and vegetables add layers of flavor and nutrition. This dish is relatively simple to prepare, yet it brings a touch of elegance to your holiday table. Whether you’re serving turkey, ham, or roast beef, Herbed Wild Rice Pilaf will surely be a crowd-pleaser.
Ingredients for 4-6 servings:
- 1 cup wild rice
- 2 cups vegetable or chicken broth
- 1 tablespoon olive oil
- 1 small onion, finely chopped
- 2 cloves garlic, minced
- 1 carrot, diced
- 1 celery stalk, diced
- 1/2 teaspoon dried thyme
- 1/2 teaspoon dried rosemary
- Salt and pepper to taste
- 1/4 cup chopped fresh parsley
- 1/4 cup toasted almonds (optional)
Cooking Instructions:
- Rinse the Wild Rice: Begin by rinsing the wild rice under cold water using a fine-mesh sieve to remove any debris or excess starch.
- Cook the Rice: In a medium saucepan, combine the wild rice and vegetable or chicken broth. Bring it to a boil, then reduce the heat to low, cover, and let it simmer for about 45-50 minutes or until the rice is tender and the grains have burst open.
- Sauté the Vegetables: While the rice is cooking, heat olive oil in a large skillet over medium heat. Add the chopped onion and sauté for about 3-4 minutes until translucent. Then add the minced garlic, diced carrot, and celery, and cook for another 5 minutes until the vegetables are softened.
- Add Herbs and Seasoning: Stir in the dried thyme, rosemary, salt, and pepper, allowing the flavors to meld with the vegetables for about 2 minutes.
- Combine and Serve: Once the wild rice is cooked, drain any excess liquid if necessary, and add it to the skillet with the sautéed vegetables. Stir well to combine. Remove from heat and mix in the chopped fresh parsley and toasted almonds if using. Serve warm.
Extra Tips:
To add an extra layer of flavor, consider using mushroom broth instead of vegetable or chicken broth. For a nutty crunch, make certain that the almonds are thoroughly toasted before adding them to the pilaf.
You can also customize this dish by incorporating other herbs like sage or adding dried cranberries for a sweet contrast. Be sure to taste and adjust the seasoning before serving to suit your preference.
