

As the holidays draw near, I find myself searching for gluten-free Christmas party food ideas that are as delicious as they are inclusive. Hosting or attending, these 12 recipes promise to impress every guest without anyone feeling left out. From savory gluten-free stuffed mushrooms to indulgent flourless chocolate cake, there’s something to please every palate. Ready to explore some festive gluten-free delights that will wow your guests? Let’s get cooking!
Gluten-Free Stuffed Mushrooms
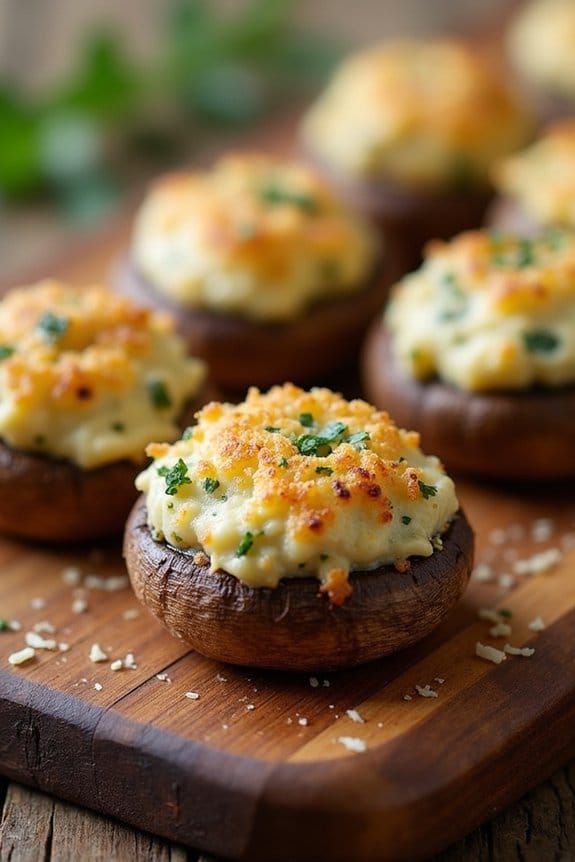
Hosting a Christmas party and guaranteeing everyone has something delicious to eat can be a bit challenging, especially when considering dietary restrictions. Gluten-free stuffed mushrooms are the perfect appetizer to serve at your holiday gatherings. Not only are they flavorful and savory, but they also cater to guests who are avoiding gluten, making your party menu inclusive and considerate.
These delightful morsels are filled with a rich combination of cream cheese, herbs, and a touch of garlic, bringing warmth and comfort to your festive table. The beauty of this dish lies in its simplicity and the ability to prepare it ahead of time.
These gluten-free stuffed mushrooms can be assembled and refrigerated until you’re ready to bake them, allowing you to enjoy the party without spending the whole evening in the kitchen. With a crisp top and creamy center, these bite-sized treats are bound to be a hit, leaving your guests asking for the recipe.
Here’s how you can make a serving size for 4-6 people:
Ingredients:
- 20 large button mushrooms
- 1 tablespoon olive oil
- 1 small onion, finely chopped
- 3 cloves of garlic, minced
- 1/2 cup gluten-free breadcrumbs
- 8 ounces cream cheese, softened
- 1/4 cup grated Parmesan cheese
- 2 tablespoons fresh parsley, chopped
- 1/2 teaspoon dried thyme
- Salt and pepper to taste
Cooking Instructions:
- Prepare the Mushrooms: Preheat your oven to 375°F (190°C). Gently clean the mushrooms with a damp cloth and remove the stems. Hollow out the center of the caps slightly to make more room for the filling.
- Cook the Aromatics: Heat the olive oil in a skillet over medium heat. Add the chopped onion and cook until soft and translucent, about 5 minutes. Stir in the minced garlic and cook for another minute until fragrant.
- Make the Filling: In a large mixing bowl, combine the cooked onion and garlic with the gluten-free breadcrumbs, cream cheese, Parmesan cheese, parsley, thyme, salt, and pepper. Mix well until all ingredients are thoroughly combined.
- Stuff the Mushrooms: Using a small spoon, fill each mushroom cap generously with the cream cheese mixture. Place the stuffed mushrooms on a baking sheet lined with parchment paper.
- Bake the Mushrooms: Bake the stuffed mushrooms in the preheated oven for 20-25 minutes, or until the tops are golden brown and the mushrooms are tender.
- Serve: Allow the mushrooms to cool for a few minutes before serving. Arrange them on a platter and garnish with additional parsley if desired.
Extra Tips:
When preparing gluten-free stuffed mushrooms, it’s important to confirm that all your ingredients, particularly the breadcrumbs, are certified gluten-free to avoid cross-contamination.
For a more intense flavor, consider adding chopped sun-dried tomatoes or crumbled bacon to the filling. If you want to make them ahead of time, prepare the mushrooms and filling separately, and then stuff and bake them just before serving to maintain their fresh, crisp texture.
Enjoy these gluten-free delights with a chilled glass of sparkling wine for the perfect holiday pairing.
Cheese and Herb Polenta Bites
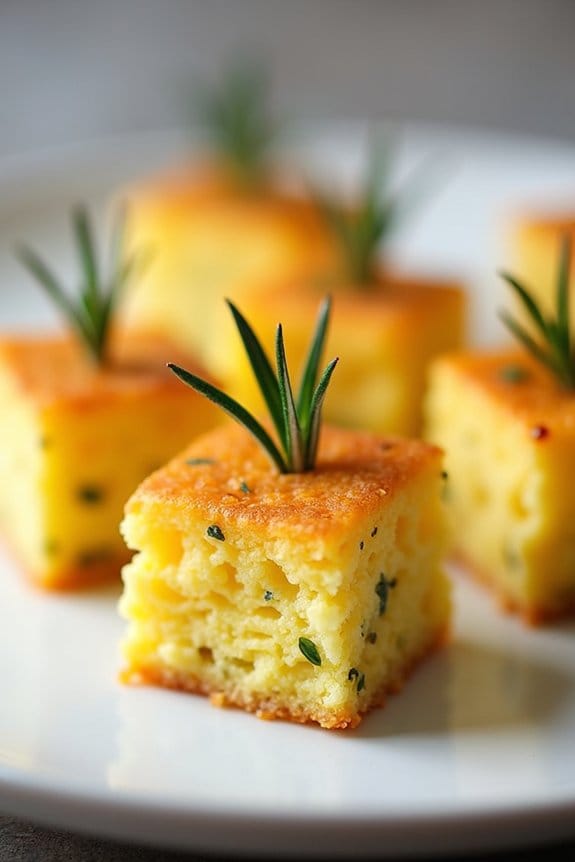
Cheese and Herb Polenta Bites are a delightful and versatile addition to any gluten-free Christmas party spread. These little bites aren’t only rich in flavor but also elegant in presentation, making them ideal for impressing guests. The creamy polenta infused with aromatic herbs and tangy cheese creates a deliciously savory base that pairs well with various toppings or can be enjoyed on its own. Perfect as an appetizer, these bites are easy to prepare and can be made ahead of time, allowing you to focus on entertaining rather than cooking during your holiday gathering.
The key to these Cheese and Herb Polenta Bites lies in the quality of the ingredients. Using freshly grated Parmesan cheese and finely chopped fresh herbs such as rosemary and thyme will enhance the flavor profile and create a more vibrant dish. The polenta itself is cooked to creamy perfection before being set, cut into bite-sized pieces, and lightly pan-fried to achieve a golden crust.
Whether you choose to serve them plain or topped with a festive garnish, these bites are sure to be a hit at your Christmas party.
Ingredients for 4-6 servings:
- 1 cup polenta (cornmeal)
- 4 cups vegetable broth or water
- 1 cup grated Parmesan cheese
- 1 tablespoon unsalted butter
- 1 tablespoon olive oil
- 1 teaspoon finely chopped fresh rosemary
- 1 teaspoon finely chopped fresh thyme
- Salt and pepper to taste
- Additional olive oil for frying
Instructions:
- Prepare the Polenta Base: In a large saucepan, bring the vegetable broth or water to a boil. Gradually whisk in the polenta, making certain there are no lumps. Reduce the heat to low and continue to stir frequently for about 20-25 minutes, or until the polenta is thick and creamy.
- Incorporate Cheese and Herbs: Remove the saucepan from the heat and stir in the grated Parmesan cheese, unsalted butter, chopped rosemary, chopped thyme, salt, and pepper. Mix until the cheese and butter have melted, and the herbs are evenly distributed.
- Set the Polenta: Line a baking dish with parchment paper. Pour the polenta mixture into the dish, spreading it evenly. Allow it to cool at room temperature for about 30 minutes, then transfer to the refrigerator for at least 2 hours to set.
- Cut the Polenta: Once the polenta is firm, remove it from the refrigerator and cut it into bite-sized squares or rounds, depending on your preference.
- Fry the Polenta Bites: Heat olive oil in a non-stick frying pan over medium heat. Working in batches, add the polenta pieces and fry for 3-4 minutes on each side until they’re golden and crispy. Drain on paper towels.
- Serve: Arrange the Cheese and Herb Polenta Bites on a platter and serve warm. You can top them with additional herbs, cheese, or your choice of garnishes for extra flair.
Extra Tips: For best results, make certain the polenta is cooked thoroughly to avoid a gritty texture. If you’re short on time, the polenta can be made a day in advance and stored in the refrigerator until ready to fry. When cutting the polenta, a sharp knife or a cookie cutter can help achieve clean, uniform shapes. Additionally, experimenting with different herbs or cheeses can tailor the flavors to your liking.
Spiced Sweet Potato Rounds
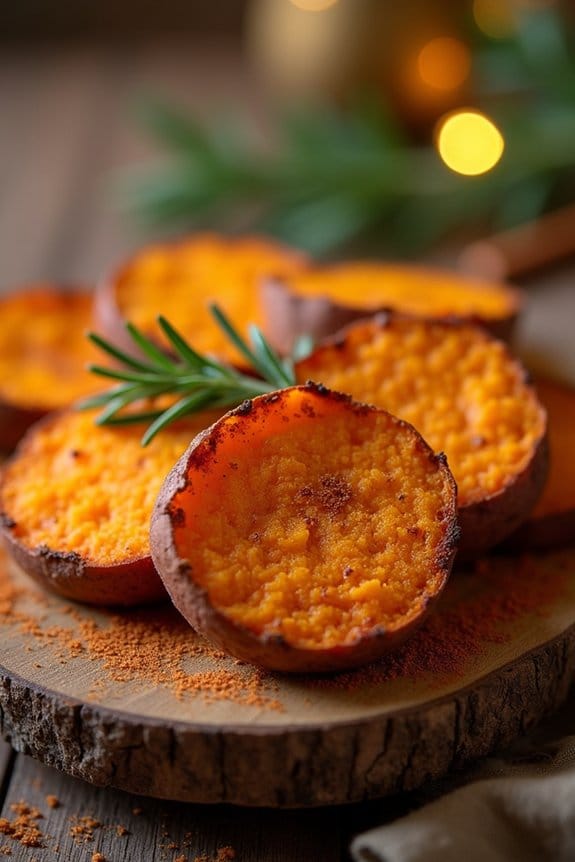
Spiced Sweet Potato Rounds are a delightful gluten-free option perfect for your Christmas party spread. These rounds boast a tantalizing combination of sweet and savory flavors, making them a hit with both kids and adults alike. The natural sweetness of the sweet potatoes is enhanced by a warm spice blend, which gives this dish a comforting holiday feel.
Whether you’re hosting a large gathering or a cozy family dinner, these rounds are sure to impress your guests with their vibrant color and appealing taste. Not only are these sweet potato rounds visually appealing, but they’re also incredibly easy to prepare. With minimal ingredients and simple steps, you’ll have a festive appetizer ready in no time.
Their crispy exterior and soft, fluffy interior make them an irresistible addition to your holiday menu. Pair them with a creamy dip or enjoy them on their own; either way, these Spiced Sweet Potato Rounds are bound to be a crowd-pleaser.
Ingredients (Serving Size: 4-6 people):
- 3 large sweet potatoes
- 2 tablespoons olive oil
- 1 teaspoon ground cinnamon
- 1 teaspoon smoked paprika
- 1/2 teaspoon ground cumin
- 1/2 teaspoon salt
- 1/4 teaspoon black pepper
- Optional: fresh rosemary or parsley for garnish
Cooking Instructions:
- Preheat the Oven: Preheat your oven to 425°F (220°C). This temperature will guarantee that the sweet potatoes become crispy on the outside while remaining tender inside.
- Prepare the Sweet Potatoes: Wash and peel the sweet potatoes. Slice them into 1/4-inch thick rounds. Aim for uniform slices to guarantee even cooking.
- Season the Rounds: In a large bowl, combine olive oil, cinnamon, smoked paprika, ground cumin, salt, and black pepper. Add the sweet potato rounds to the bowl and toss them until they’re evenly coated with the spice mixture.
- Arrange on Baking Sheet: Line a large baking sheet with parchment paper or lightly grease it with oil. Arrange the spiced sweet potato rounds in a single layer on the sheet, ensuring they don’t overlap.
- Bake the Rounds: Place the baking sheet in the preheated oven and bake for 25-30 minutes, flipping the rounds halfway through the cooking time. They should be golden brown and slightly crispy when done.
- Garnish and Serve: Remove the sweet potato rounds from the oven and let them cool slightly. If desired, garnish with fresh rosemary or parsley for an added touch of color and flavor. Serve warm as a delicious appetizer or side dish.
Extra Tips:
For an extra touch of flavor, consider drizzling a bit of maple syrup or honey over the sweet potato rounds before serving. If you prefer a spicier kick, add a pinch of cayenne pepper to the spice mix.
To make sure the rounds cook evenly and achieve a perfect texture, be sure not to overcrowd the baking sheet. If necessary, use two sheets or bake in batches. Finally, for those who enjoy a cheesy twist, sprinkle some grated Parmesan cheese over the rounds during the concluding minutes of baking.
Prosciutto-Wrapped Asparagus

Prosciutto-Wrapped Asparagus is a delightful and elegant appetizer perfect for your gluten-free Christmas party. This dish combines the tender, earthy flavor of asparagus with the savory, slightly salty taste of prosciutto, creating a harmonious blend that’s both visually appealing and delicious.
It’s easy to prepare, requiring minimal ingredients and time, yet it delivers maximum flavor and sophistication to your holiday spread. Whether you’re hosting a large gathering or an intimate dinner, Prosciutto-Wrapped Asparagus is sure to be a hit among your guests.
The dish is naturally gluten-free, making it an ideal option for those with dietary restrictions, without compromising on taste. Serve these as a starter, or add them to a charcuterie board for a touch of elegance. The preparation is straightforward, and the results are sure to impress your family and friends.
Ingredients for 4-6 servings:
- 1 pound of fresh asparagus
- 12 slices of prosciutto
- 2 tablespoons of olive oil
- 1 teaspoon of freshly ground black pepper
- 1 teaspoon of garlic powder
- 1/2 teaspoon of lemon zest
- Optional: grated Parmesan cheese for garnish
Cooking Instructions:
- Preheat the Oven: Start by preheating your oven to 400°F (200°C). This guarantees your oven is ready to cook the asparagus evenly.
- Prepare the Asparagus: Wash the asparagus thoroughly and trim the woody ends. It’s important to cut off about 1-2 inches from the bottom of each stalk to guarantee they’re tender after cooking.
- Season the Asparagus: In a large bowl, toss the asparagus with olive oil, black pepper, garlic powder, and lemon zest. Make certain that each stalk is evenly coated with the seasoning.
- Wrap with Prosciutto: Lay a slice of prosciutto flat on a clean surface. Place an asparagus stalk on one end and roll it up tightly, allowing the prosciutto to overlap slightly as you wrap. Repeat with the remaining asparagus and prosciutto.
- Bake the Asparagus: Arrange the wrapped asparagus on a baking sheet lined with parchment paper. Make sure the seam of the prosciutto is facing down to prevent it from unrolling. Bake in the preheated oven for 12-15 minutes or until the prosciutto is crispy and the asparagus is tender.
- Serve: Once cooked, remove the asparagus from the oven and let them cool for a few minutes. If desired, sprinkle with grated Parmesan cheese for additional flavor before serving.
Extra Tips:
For best results, choose asparagus stalks that are of medium thickness. Thin stalks may cook too quickly and become mushy, while very thick stalks may not cook through completely.
If you prefer a slightly crispier texture, consider broiling the wrapped asparagus for an additional 1-2 minutes at the end of the baking time. Always monitor closely to avoid burning.
Finally, feel free to experiment with different seasonings or add a drizzle of balsamic glaze for a sweet and tangy finish.
Cranberry and Brie Bites
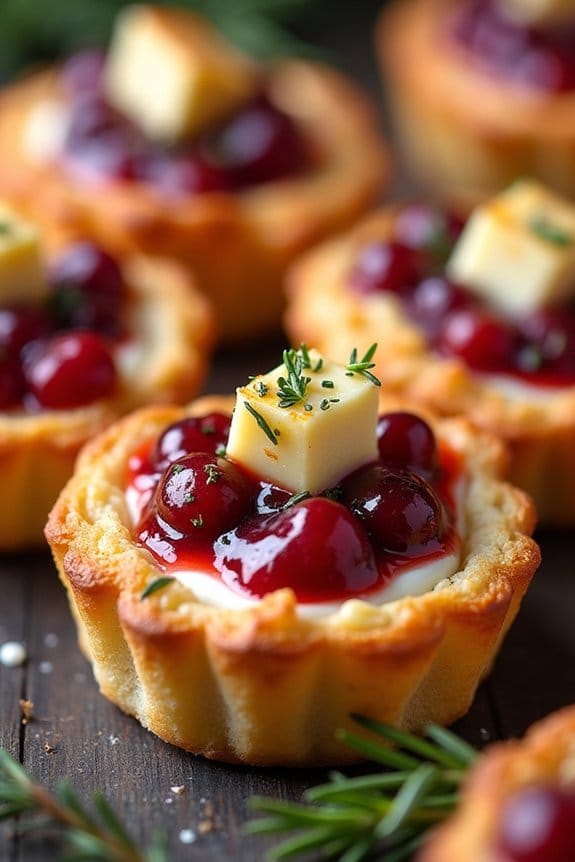
Cranberry and Brie Bites are a delicious and elegant appetizer that will enhance your gluten-free Christmas party menu. These delightful bites combine the creamy richness of Brie cheese with the tart sweetness of cranberries, all encased in a crispy gluten-free pastry shell.
Perfectly portioned for a crowd, they make for a sophisticated yet simple starter that will impress your guests with minimal effort. The combination of flavors in these bites is a classic, with the Brie providing a smooth, buttery base that complements the sharp tang of the cranberry sauce.
The gluten-free pastry guarantees that everyone at your gathering can enjoy them without worry. Serve these warm from the oven for the best experience, as the gooey melted cheese and crisp pastry create a wonderful texture contrast that’s hard to resist.
Ingredients (Serves 4-6):
- 1 sheet of gluten-free puff pastry
- 1 cup fresh cranberries
- 1/4 cup granulated sugar
- 1/4 cup water
- 8 oz Brie cheese, cut into small cubes
- 1 tablespoon fresh rosemary, chopped
- 1 egg, beaten (for egg wash)
Cooking Instructions:
- Preheat the Oven: Start by preheating your oven to 375°F (190°C) so it’s ready for baking once you’ve assembled the bites.
- Prepare the Cranberry Sauce: In a small saucepan, combine the fresh cranberries, sugar, and water. Cook over medium heat, stirring occasionally, until the cranberries have burst and the mixture has thickened, about 10 minutes. Set aside to cool.
- Prepare the Puff Pastry: Roll out the gluten-free puff pastry sheet on a lightly floured surface to avoid it sticking. Cut the pastry into 12 equal squares using a sharp knife or pastry cutter.
- Assemble the Bites: Place each pastry square into the cups of a mini muffin tin. Gently press down to form a small cup. Add a cube of Brie cheese into each pastry cup, followed by a teaspoon of the cooled cranberry sauce.
- Sprinkle a pinch of chopped rosemary over the top for added flavor.
- Egg Wash: Brush the exposed pastry edges with the beaten egg to achieve a golden finish once baked.
- Bake: Place the muffin tin in the preheated oven and bake for 15-20 minutes, or until the pastry is puffed and golden brown and the cheese is bubbly.
- Serve: Allow the bites to cool slightly before removing them from the tin. Serve warm to enjoy the full flavor and texture.
Extra Tips:
For an extra touch of flavor, consider adding a small piece of walnut or a sprinkle of cracked black pepper on top of each bite before baking.
If you’re making these in advance, you can prepare the cranberry sauce and cut the Brie beforehand. Assemble the bites just before baking to ensure the pastry remains crisp. If you don’t have fresh cranberries, canned whole cranberry sauce can be used as a substitute, but reduce the added sugar as needed.
Zucchini Fritters
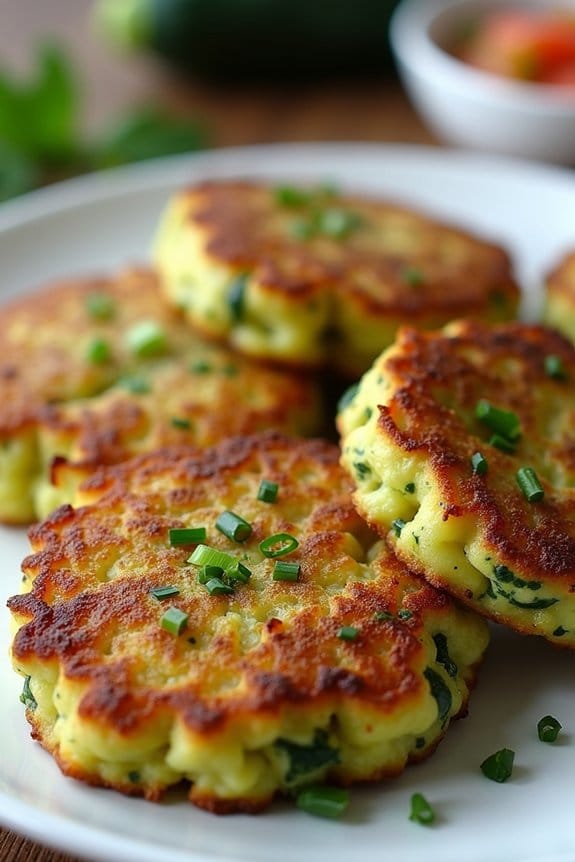
Zucchini Fritters are a versatile and delightful addition to your Christmas party menu. They offer a light, crispy texture with a flavorful punch, making them a perfect appetizer or side dish for your gluten-free guests. Easy to prepare and cook, these fritters are a crowd-pleaser that can be enjoyed by everyone, whether they follow a gluten-free diet or not.
The combination of fresh zucchini, aromatic herbs, and a hint of cheese creates a harmonious blend of flavors that will have your guests coming back for more.
These gluten-free zucchini fritters aren’t only delicious but also healthy and easy to make. The use of rice flour or gluten-free all-purpose flour keeps them light and crisp, while the addition of cheese adds a richness that complements the zucchini perfectly.
They’re best served hot and can be paired with a variety of dips, such as a tangy yogurt sauce or a spicy salsa, to enhance their flavor even further. This recipe serves 4-6 people, making it ideal for a small gathering or as part of a larger spread of holiday goodies.
Ingredients (Serving Size: 4-6 people):
- 2 medium zucchinis, grated
- 2 large eggs
- 1 cup gluten-free all-purpose flour or rice flour
- 1/2 cup grated Parmesan cheese
- 2 green onions, finely chopped
- 2 cloves garlic, minced
- 1/4 cup fresh parsley or dill, chopped
- Salt and pepper to taste
- Olive oil for frying
Cooking Instructions:
- Prepare the Zucchini: Start by grating the zucchinis using a box grater. Place the grated zucchini in a clean kitchen towel and squeeze out as much moisture as possible. Removing excess liquid is essential to guarantee that the fritters are crispy.
- Mix the Ingredients: In a large mixing bowl, combine the squeezed zucchini, eggs, gluten-free flour, Parmesan cheese, green onions, garlic, parsley, salt, and pepper. Mix well until all ingredients are evenly incorporated. The mixture should be thick enough to hold its shape when formed into patties.
- Shape the Fritters: Using your hands or a spoon, form the mixture into small patties, about 2-3 inches in diameter. Make sure they’re compact and uniform in size for even cooking.
- Heat the Oil: In a large non-stick skillet, heat a generous amount of olive oil over medium heat. You want enough oil to cover the bottom of the pan to achieve a crispy exterior.
- Cook the Fritters: Carefully place the patties in the hot oil, ensuring they aren’t overcrowded. Cook for about 3-4 minutes on each side, or until golden brown and crisp. Adjust the heat as necessary to prevent burning.
- Drain and Serve: Once cooked, transfer the fritters to a paper towel-lined plate to drain any excess oil. Serve immediately with your choice of dip.
Extra Tips:
For the best results, make sure that the zucchini is thoroughly drained; excess water can make the fritters soggy.
Feel free to experiment with different herbs or cheeses to suit your taste preferences. If you want to prepare ahead, you can make the mixture a day in advance and refrigerate it until you’re ready to cook.
Additionally, to keep the fritters warm before serving, place them in a low oven on a wire rack to maintain their crispiness.
Almond Flour Crackers With Dip
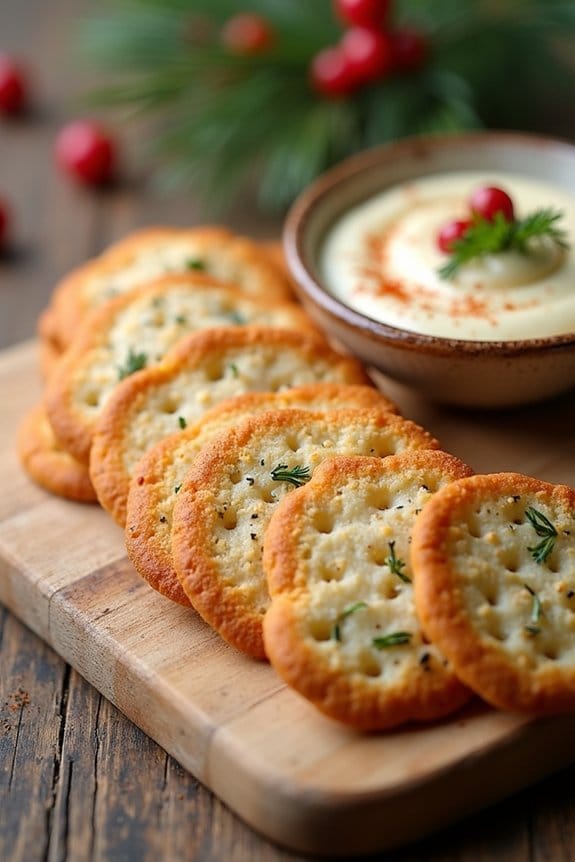
Almond Flour Crackers With Dip are a delightful gluten-free option for your Christmas party spread. These crackers aren’t only simple to make, but they also pair beautifully with a variety of dips, making them a versatile addition to any holiday gathering. The nutty flavor of almond flour provides a rich base for the crackers, while the accompanying dip can be tailored to suit different taste preferences, guaranteeing there’s something for everyone to enjoy.
Whether you’re catering to a gluten-free crowd or simply looking to diversify your party offerings, these crackers are sure to be a hit. The preparation of Almond Flour Crackers With Dip is straightforward, allowing you to focus on enjoying the festivities rather than spending too much time in the kitchen. Almond flour acts as the primary ingredient for the crackers, producing a crispy texture that complements the creaminess of the dip.
The recipe can be customized with various herbs and spices to add an extra layer of flavor. This makes it a perfect opportunity to get creative with your seasoning choices. The accompanying dip can be anything from a classic hummus to a vibrant roasted red pepper spread, offering a palate-pleasing experience that your guests will love.
Ingredients (Serves 4-6)
For the Almond Flour Crackers:
- 2 cups almond flour
- 1 tablespoon ground flaxseed
- 1/2 teaspoon baking soda
- 1/2 teaspoon salt
- 1/4 teaspoon garlic powder
- 1/4 teaspoon onion powder
- 1/4 cup water
- 2 tablespoons olive oil
For the Dip:
- 1 cup Greek yogurt or hummus
- 2 tablespoons lemon juice
- 1 tablespoon olive oil
- 1 teaspoon paprika
- Salt and pepper to taste
- Fresh herbs (such as dill or parsley) for garnish
Cooking Instructions
- Preheat the Oven: Begin by preheating your oven to 350°F (175°C). Line a baking sheet with parchment paper to prevent the crackers from sticking and facilitate an even bake.
- Prepare the Cracker Dough: In a mixing bowl, combine the almond flour, ground flaxseed, baking soda, salt, garlic powder, and onion powder. Stir in the water and olive oil, mixing until a dough forms. The mixture should be cohesive but not too sticky.
- Roll Out the Dough: Place the dough between two sheets of parchment paper. Use a rolling pin to roll the dough out to about 1/8 inch thickness. This guarantees the crackers will be crispy after baking.
- Cut and Bake the Crackers: Remove the top sheet of parchment paper and, using a knife or pizza cutter, cut the dough into squares or your preferred shape. Transfer the parchment paper with the dough onto the baking sheet. Bake for 12-15 minutes or until the edges are golden brown. Allow them to cool completely on a wire rack.
- Prepare the Dip: While the crackers are baking, prepare the dip by combining the Greek yogurt or hummus with lemon juice, olive oil, paprika, salt, and pepper in a bowl. Mix until well combined. Adjust seasoning to taste.
- Serve: Once the crackers are cooled, arrange them on a serving platter alongside the dip. Garnish the dip with fresh herbs for a pop of color and extra flavor.
Extra Tips
For the best results, make sure your almond flour is fresh and finely ground, as this will give the crackers a smoother texture. If you prefer a different flavor profile, consider adding herbs like rosemary or thyme to the cracker dough. Additionally, you can experiment with different types of dips such as spinach-artichoke or avocado lime for variety.
Store any leftover crackers in an airtight container to maintain their crispiness for up to a week. Enjoy your gluten-free Almond Flour Crackers With Dip as a delicious and healthy party snack!
Chicken Skewers With Ginger Glaze
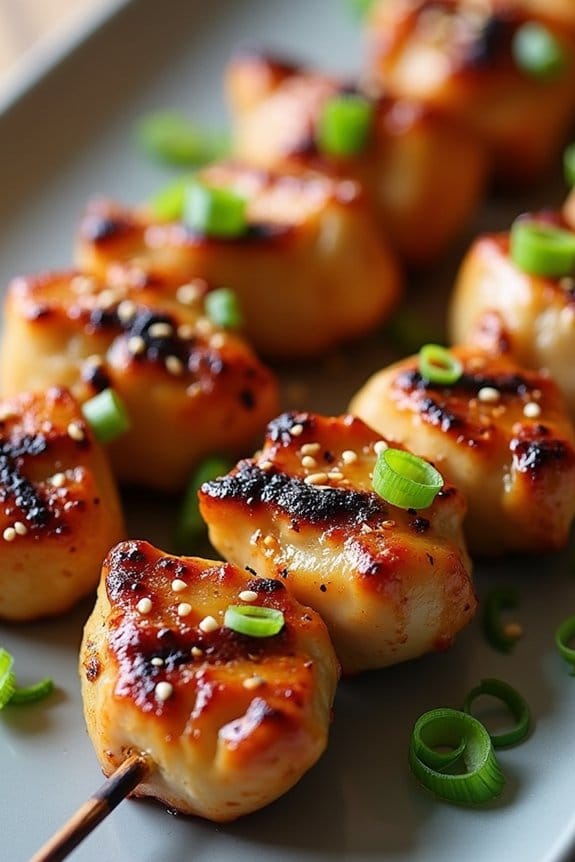
As the holiday season approaches, hosting a gluten-free Christmas party can be both exciting and challenging. You want to make certain that your guests enjoy delicious food without worrying about gluten content. One dish that’s sure to please is Chicken Skewers With Ginger Glaze. This delightful recipe combines juicy pieces of chicken with a sweet and savory ginger glaze, creating a flavorful dish that isn’t only gluten-free but also a crowd-pleaser.
Chicken Skewers With Ginger Glaze are perfect for serving at parties because they’re easy to prepare, serve, and eat. The skewers can be prepped ahead of time, allowing you to spend more time with your guests. The ginger glaze adds a festive and exotic twist to the dish, making it a standout on your holiday menu. Whether served as an appetizer or a main course, these skewers are sure to be a hit with both gluten-free and non-gluten-free guests.
Ingredients for 4-6 servings:
- 1 ½ pounds boneless, skinless chicken breast, cut into 1-inch cubes
- 2 tablespoons olive oil
- Salt and pepper to taste
- 12 wooden skewers (soaked in water for at least 30 minutes)
- 1/3 cup gluten-free soy sauce
- 1/4 cup honey
- 2 tablespoons fresh ginger, grated
- 2 cloves garlic, minced
- 1 tablespoon rice vinegar
- 1 teaspoon sesame oil
- 1 tablespoon cornstarch
- 1 tablespoon water
- Sesame seeds and chopped green onions for garnish
Cooking Instructions:
- Prepare the Skewers: Begin by soaking the wooden skewers in water for at least 30 minutes to prevent them from burning during cooking. Meanwhile, cut the chicken breast into 1-inch cubes and season with olive oil, salt, and pepper.
- Make the Ginger Glaze: In a small saucepan over medium heat, combine the gluten-free soy sauce, honey, grated ginger, minced garlic, rice vinegar, and sesame oil. Stir the mixture and bring it to a simmer.
- Thicken the Glaze: In a separate small bowl, mix the cornstarch and water to create a slurry. Slowly add the slurry to the simmering glaze while continuously stirring. Allow the glaze to thicken for about 2-3 minutes, then remove from heat and let it cool slightly.
- Skewer the Chicken: Thread the seasoned chicken cubes onto the soaked skewers, leaving a little space between each piece to make certain of even cooking.
- Grill the Skewers: Preheat a grill or grill pan over medium-high heat. Place the skewers on the grill and cook for 5-7 minutes on each side, or until the chicken is cooked through and has grill marks.
- Glaze the Chicken: Brush the ginger glaze generously over the chicken skewers during the final few minutes of grilling. Allow the glaze to caramelize slightly on the chicken.
- Serve and Garnish: Once the chicken is cooked and well-glazed, transfer the skewers to a serving platter. Garnish with sesame seeds and chopped green onions before serving.
Extra Tips:
For the best flavor, try marinating the chicken in half of the ginger glaze for at least 30 minutes before skewering. This will allow the flavors to penetrate the meat, resulting in even more tender and flavorful chicken.
Additionally, make certain that the grill is well-preheated before placing the skewers on it; this helps prevent sticking and allows for beautiful grill marks. Finally, if you prefer a spicier kick, consider adding a pinch of red pepper flakes to the glaze for an extra layer of heat.
Quinoa and Cranberry Salad
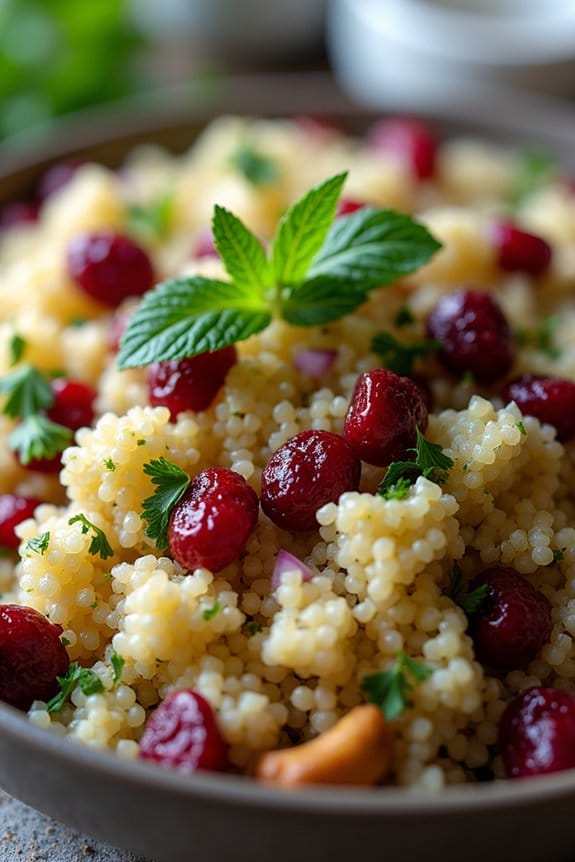
Quinoa and Cranberry Salad is a delightful gluten-free dish perfect for a Christmas party. This vibrant salad combines the nutty flavor of quinoa with the tartness of cranberries, creating a dish that isn’t only visually appealing but also packed with nutrition.
The addition of toasted nuts and fresh herbs adds texture and freshness, making it a standout on any festive table. Whether you’re catering to dietary restrictions or just want to offer a healthy alternative, this salad is sure to please your guests with its bold flavors and beautiful colors.
Aside from being gluten-free, this salad is also vegetarian and can be easily adapted for vegan preferences. It’s a great make-ahead dish, as the flavors meld beautifully when left to sit for a few hours. Serve it as a side dish, or make it the star of your holiday spread. The recipe below serves 4-6 people, making it perfect for a small gathering or as part of a larger buffet.
Ingredients:
- 1 cup quinoa
- 2 cups water
- 1/2 cup dried cranberries
- 1/2 cup chopped nuts (such as almonds or walnuts), toasted
- 1/4 cup fresh parsley, chopped
- 1/4 cup fresh mint, chopped
- 1/4 cup finely chopped red onion
- 1/4 cup olive oil
- 2 tablespoons lemon juice
- Salt and pepper to taste
Instructions:
- Prepare the Quinoa: Rinse the quinoa under cold water in a fine mesh sieve to remove any bitterness. In a medium saucepan, bring 2 cups of water to a boil. Add the rinsed quinoa, reduce the heat to low, cover, and let simmer for 15 minutes or until the quinoa is tender and water is absorbed. Fluff with a fork and let it cool.
- Toast the Nuts: In a small skillet over medium heat, toast the chopped nuts until they’re golden brown and fragrant, stirring frequently to prevent burning. Remove from heat and set aside to cool.
- Make the Dressing: In a small bowl, whisk together the olive oil, lemon juice, salt, and pepper until well combined.
- Combine Ingredients: In a large mixing bowl, combine the cooked quinoa, dried cranberries, toasted nuts, chopped parsley, mint, and red onion.
- Dress the Salad: Pour the dressing over the quinoa mixture. Toss everything together until the ingredients are evenly coated with the dressing.
- Chill and Serve: Cover the salad and refrigerate for at least 30 minutes to allow the flavors to meld. Before serving, taste and adjust the seasoning if necessary. Serve chilled or at room temperature.
Extra Tips: For a more robust flavor, consider using vegetable broth instead of water to cook the quinoa. You can also add a sprinkle of feta cheese or goat cheese for a creamy contrast if dairy isn’t an issue.
If fresh herbs aren’t available, dried herbs can be used in smaller quantities, though fresh will always provide the best flavor. Finally, this salad can be made a day in advance, which makes it a convenient option for holiday meal prep.
Flourless Chocolate Cake
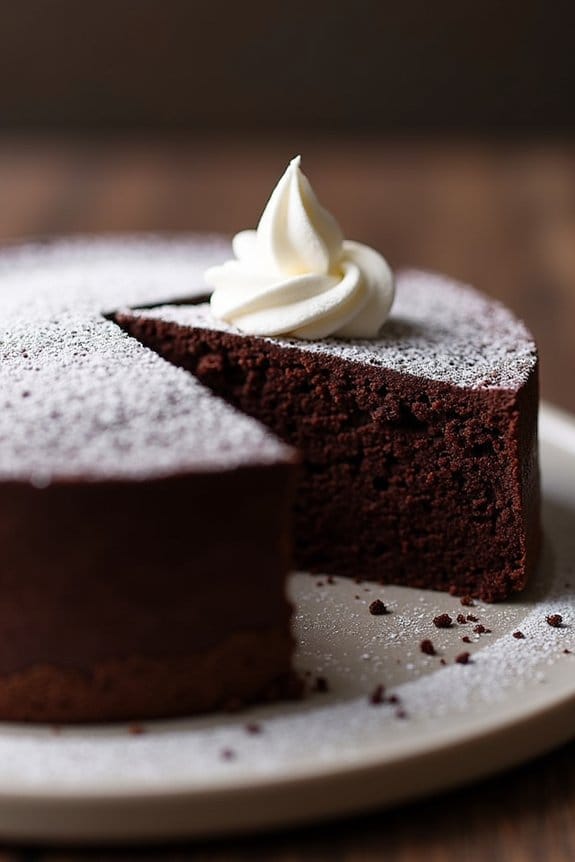
Indulge in a rich and decadent dessert this Christmas with a Flourless Chocolate Cake that isn’t only delicious but also perfect for those following a gluten-free diet. This cake is dense, moist, and packed with intense chocolate flavor, making it a delightful end to any holiday meal.
The absence of flour allows the chocolate to truly shine, offering a melt-in-your-mouth experience that will satisfy any chocolate lover’s cravings. Whether you’re hosting a festive gathering or simply enjoying a cozy night in, this cake is bound to be a crowd-pleaser.
Ideal for serving 4-6 people, this Flourless Chocolate Cake is surprisingly simple to make and requires just a handful of ingredients. The recipe uses high-quality chocolate and cocoa powder to guarantee a luxurious taste and texture.
With its smooth and silky consistency, this cake pairs wonderfully with a dollop of whipped cream or a sprinkle of powdered sugar for added elegance. Gather your ingredients, preheat your oven, and prepare to impress your guests with this delightful gluten-free treat.
Ingredients:
- 8 ounces (225g) high-quality dark chocolate, chopped
- 1/2 cup (113g) unsalted butter
- 3/4 cup (150g) granulated sugar
- 1/4 teaspoon salt
- 1 teaspoon vanilla extract
- 4 large eggs
- 1/2 cup (50g) unsweetened cocoa powder
- Powdered sugar or whipped cream for serving (optional)
Instructions:
- Preheat the Oven: Begin by preheating your oven to 375°F (190°C). Grease an 8-inch round cake pan and line the bottom with parchment paper for easy removal.
- Melt Chocolate and Butter: In a medium-sized microwave-safe bowl, combine the chopped dark chocolate and butter. Heat in the microwave in 30-second intervals, stirring after each, until both are fully melted and the mixture is smooth.
- Mix Sugar and Vanilla: Stir in the granulated sugar, salt, and vanilla extract into the melted chocolate and butter mixture until well combined.
- Add Eggs: Add the eggs one at a time, mixing well after each addition. The batter should become smooth and glossy.
- Incorporate Cocoa Powder: Sift the unsweetened cocoa powder over the chocolate mixture, then gently fold it in until fully incorporated. Be careful not to overmix.
- Bake the Cake: Pour the batter into the prepared cake pan and smooth the top with a spatula. Bake in the preheated oven for 20-25 minutes, or until the cake has just set in the middle. A toothpick inserted into the center should come out with moist crumbs.
- Cool and Serve: Allow the cake to cool in the pan for 10 minutes, then gently run a knife around the edges and invert it onto a wire rack to cool completely. Serve dusted with powdered sugar or with a dollop of whipped cream if desired.
Extra Tips:
For the best results, use high-quality dark chocolate with at least 70% cocoa content to guarantee a rich flavor. Allow the cake to cool completely before serving to achieve the perfect texture.
If you prefer a sweeter cake, consider adjusting the amount of sugar to taste. This cake also stores well and can be made a day in advance, making it a convenient option for holiday preparations.
Reheat individual slices gently in the microwave if you prefer it warm, and enjoy the velvety chocolate goodness with your loved ones.
Coconut Macaroons
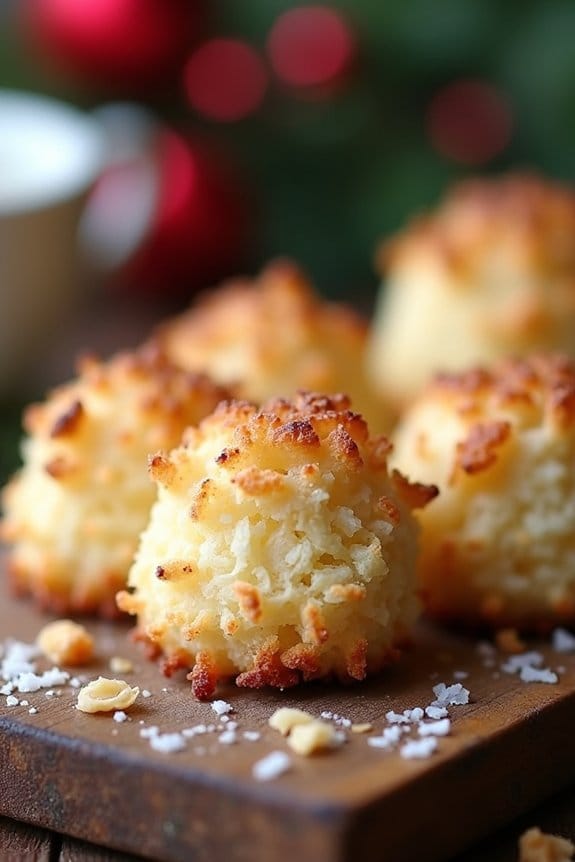
Coconut macaroons are a delightful treat that makes an excellent addition to any gluten-free Christmas party. These sweet, chewy cookies are a perfect choice for those who want to indulge in a festive dessert without worrying about gluten. Not only are they simple to make, but they also require minimal ingredients, making them a favorite for busy holiday gatherings.
Whether you’re serving them to guests or gifting them as a homemade holiday treat, coconut macaroons are sure to be a hit.
The beauty of coconut macaroons lies in their simplicity. With a crispy exterior and a soft, chewy interior, they offer a satisfying texture that’s hard to resist. The natural sweetness of coconut pairs wonderfully with a hint of vanilla, creating a flavor profile that’s both rich and comforting.
Plus, since they can be made ahead of time and stored easily, these macaroons are a practical choice for party planners who want to prepare their food in advance.
Ingredients (Serves 4-6):
- 3 cups sweetened shredded coconut
- 4 large egg whites
- 1 cup granulated sugar
- 1 teaspoon pure vanilla extract
- 1/4 teaspoon salt
Cooking Instructions:
- Preheat the Oven: Start by preheating your oven to 325°F (163°C). This guarantees that the macaroons will bake evenly and achieve that perfect golden-brown color.
- Prepare the Baking Sheet: Line a baking sheet with parchment paper or a non-stick baking mat. This will prevent the macaroons from sticking to the pan and make cleanup much easier.
- Mix the Ingredients: In a large mixing bowl, combine the sweetened shredded coconut, egg whites, granulated sugar, vanilla extract, and salt. Stir the mixture until all the ingredients are well combined and the coconut is evenly coated.
- Shape the Macaroons: Using a tablespoon or a small ice cream scoop, scoop the mixture onto the prepared baking sheet, spacing each mound about 1 inch apart. Gently press the mounds down to make sure they hold together while baking.
- Bake: Place the baking sheet in the preheated oven and bake for 20-25 minutes, or until the edges and tops of the macaroons are golden brown. Keep an eye on them to avoid over-baking.
- Cool: Once baked, remove the macaroons from the oven and allow them to cool on the baking sheet for about 5 minutes. Then, transfer them to a wire rack to cool completely.
Extra Tips:
For a more indulgent version, consider drizzling or dipping the cooled macaroons in melted chocolate. If you want to add a bit more flavor, you can also incorporate a teaspoon of almond extract into the mixture.
To make sure the macaroons hold their shape, make sure to pack the coconut mixture tightly when forming each mound. Finally, store any leftovers in an airtight container at room temperature for up to a week to maintain their freshness.
Gluten-Free Gingerbread Cookies

Celebrate the holiday season with delicious Gluten-Free Gingerbread Cookies that everyone can enjoy, regardless of dietary restrictions. These cookies capture the classic flavors of gingerbread—rich with spices like cinnamon, ginger, and cloves—but are made with gluten-free flour, guaranteeing they’re safe for those with gluten sensitivities. Perfect for a festive Christmas party, these cookies aren’t only aromatic and tasty but also maintain the traditional chewy texture that gingerbread cookies are loved for.
Crafting these Gluten-Free Gingerbread Cookies is a fun and rewarding baking experience, especially suitable for involving family or friends in the kitchen. The dough is easy to work with, allowing you to cut out various festive shapes—from stars and trees to gingerbread men—before baking them to perfection. Once baked, these cookies can be decorated with icing, making them both a treat for the taste buds and a decorative addition to your holiday table. This recipe makes enough cookies to serve 4-6 people.
Ingredients (Serves 4-6 people):
- 2 1/4 cups gluten-free all-purpose flour
- 1 teaspoon xanthan gum (if your flour blend doesn’t contain it)
- 1/2 teaspoon baking soda
- 1/2 teaspoon salt
- 1 teaspoon ground ginger
- 1 teaspoon ground cinnamon
- 1/2 teaspoon ground cloves
- 1/4 teaspoon ground nutmeg
- 1/2 cup unsalted butter, softened
- 1/2 cup packed brown sugar
- 1/4 cup molasses
- 1 large egg
- 1 teaspoon vanilla extract
Instructions:
- Preheat and Prepare: Begin by preheating your oven to 350°F (175°C) and line two baking sheets with parchment paper. This will prevent the cookies from sticking and guarantee even baking.
- Mix Dry Ingredients: In a medium-sized bowl, whisk together the gluten-free flour, xanthan gum, baking soda, salt, ginger, cinnamon, cloves, and nutmeg. Set this aside as it will be added to the wet ingredients later.
- Cream Butter and Sugar: In a large bowl, using an electric mixer, cream together the softened butter and brown sugar until light and fluffy, about 2-3 minutes. This will help incorporate air into the mixture, giving the cookies a nice texture.
- Add Wet Ingredients: Beat in the molasses, egg, and vanilla extract until well combined. The mixture should be smooth and a bit sticky.
- Combine Mixtures: Gradually add the dry ingredients to the wet ingredients, mixing on low speed until just combined. The dough should come together nicely and be firm enough to roll out. If it’s too sticky, add a little more flour, a tablespoon at a time.
- Chill the Dough: Divide the dough in half, wrap each piece in plastic wrap, and refrigerate for at least 30 minutes. Chilling the dough makes it easier to handle and helps the cookies keep their shape during baking.
- Roll and Cut: On a lightly floured surface, roll out one portion of the dough to about 1/4-inch thickness. Use cookie cutters to cut out shapes and place them on the prepared baking sheets, leaving some space between each cookie.
- Bake: Bake the cookies in the preheated oven for 8-10 minutes, or until the edges are firm. Keep an eye on them to prevent overbaking, which can make the cookies too crunchy.
- Cool and Decorate: Allow the cookies to cool on the baking sheet for a few minutes before transferring them to a wire rack to cool completely. Once cooled, decorate with icing if desired.
Extra Tips:
When baking gluten-free, the type of flour blend used can greatly affect the texture and flavor of the cookies. Make sure to use a high-quality gluten-free all-purpose flour that’s suitable for baking.
If you don’t have molasses on hand, you can substitute it with dark corn syrup or a mixture of honey and maple syrup, although this will slightly alter the flavor.
Finally, if you’re planning to decorate the cookies, consider making a simple icing with powdered sugar, milk, and a dash of vanilla extract for added sweetness and flair.
