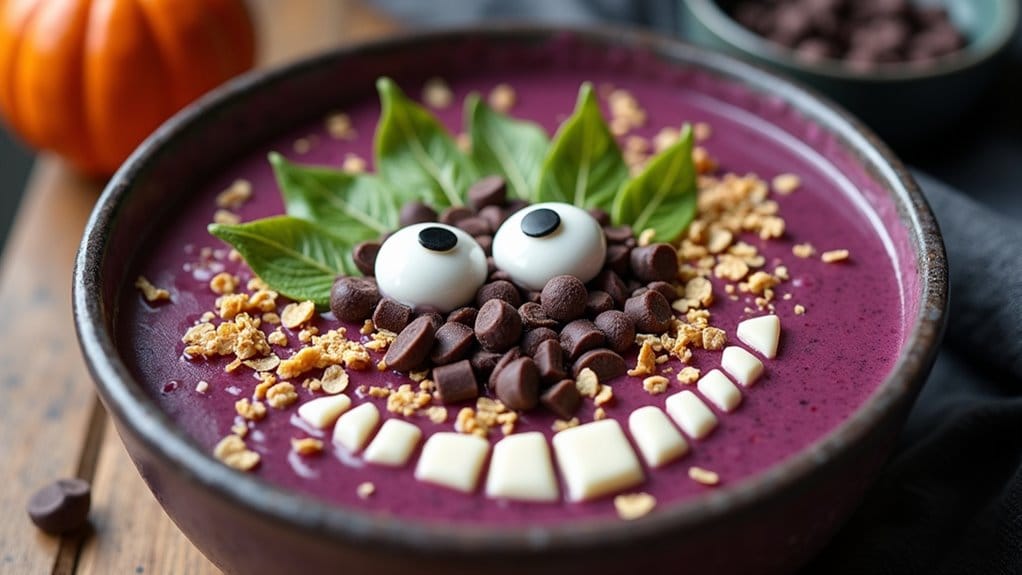
As Halloween sneaks up, it’s time to sprinkle some magic into your kitchen with treats that kids will adore and parents can smile about. Picture Monster Veggie Cups bursting with vibrant hues or Ghostly Yogurt Parfaits that are as fun to make as they are to eat. And let’s not forget the irresistibly cute Vampire Teeth Apple Slices. These creative snacks turn healthy eating into a delightful adventure. Ready to make your Halloween a memorable feast?
Monster Veggie Cups
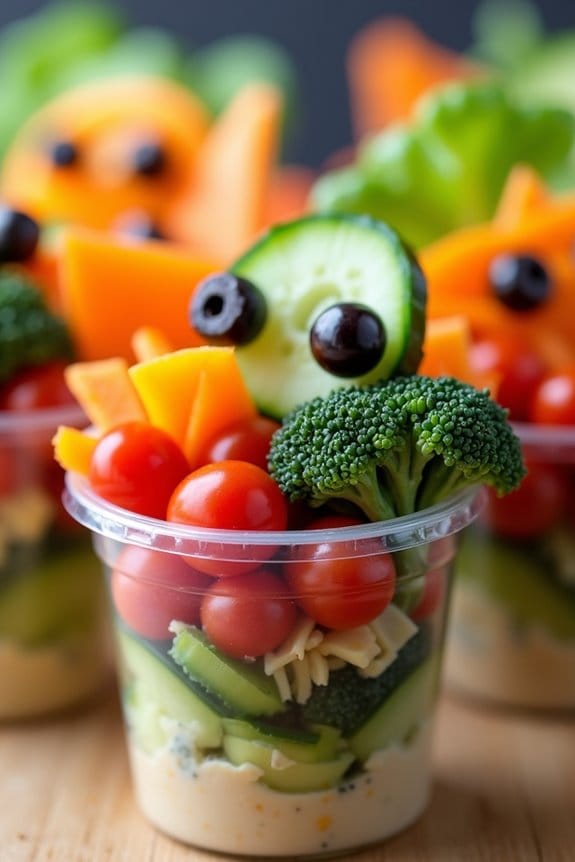
Monster Veggie Cups are a fun and healthy Halloween treat that’s sure to delight kids and adults alike. These whimsical cups are filled with fresh, crunchy vegetables, creatively arranged to resemble adorable, friendly monsters. Ideal for a Halloween party or a festive snack, Monster Veggie Cups not only add a touch of spookiness to your spread but also guarantee that your children get their dose of nutrients amidst the candy rush.
Whimsical and healthy, Monster Veggie Cups bring spookiness and nutrients to your Halloween spread.
The key to these veggie cups is the presentation, turning simple veggies into a delightful and interactive experience for the little ones.
To prepare Monster Veggie Cups for 4-6 people, you’ll need a variety of vegetables that are colorful and easy to shape. The cups themselves can be made using clear plastic cups or small jars to give a peek at the vibrant colors inside. The dip can be a simple ranch or hummus base, providing a tasty foundation for the vegetables. You can use olives and cheese to create eyes and other facial features, turning ordinary veggies into cute monster faces that will have everyone reaching for a cup.
Ingredients:
- 6 clear plastic cups or small jars
- 1 cup of cherry tomatoes
- 1 large cucumber
- 2 bell peppers (preferably different colors)
- 1 cup of baby carrots
- 1 cup of broccoli florets
- 1 cup of hummus or ranch dressing
- 12 small olives (for eyes)
- 1 slice of cheese (for eyes and teeth)
Cooking Instructions:
- Prepare the Veggies:
- Wash all the vegetables thoroughly. Slice the cucumber into thin rounds, and cut the bell peppers into strips. Halve the cherry tomatoes, and cut the cheese slice into small pieces for eyes and teeth.
- Assemble the Cups:
- Start by placing 2-3 tablespoons of hummus or ranch dressing at the bottom of each plastic cup. This will serve as the “base” for the veggies and a tasty dip.
- Create the Monster Faces:
- Arrange the cucumber rounds vertically against the inner wall of the cup, covering about a third of the circumference. Use a toothpick to secure two olive halves onto each cucumber slice as eyes. Use small cheese pieces to add teeth or other facial features, pressing them into the dip to hold them in place.
- Add the Veggies:
- Fill each cup with a variety of veggie sticks, adding the bell pepper strips, baby carrots, and broccoli florets. Make sure the different colors are visible from the outside to enhance the monster effect.
- Finishing Touches:
- Adjust the veggies to make sure each cup has a balanced mix and the monster faces are visible.
- Serve:
- Place the cups on a serving tray and enjoy the compliments as guests admire the creative and healthy Halloween treat.
Extra Tips:
When making Monster Veggie Cups, verify the vegetables are fresh and crisp for the best texture and flavor. You can get creative with the designs, adding additional features like red pepper tongues or carrot horns to your monsters.
If you have any dietary restrictions, feel free to substitute the dip with a dairy-free or vegan option. Keep the veggie cups cool until serving to maintain freshness and prevent the dip from becoming too runny. Enjoy the festive fun with these healthy Halloween snacks!
Ghostly Yogurt Parfaits
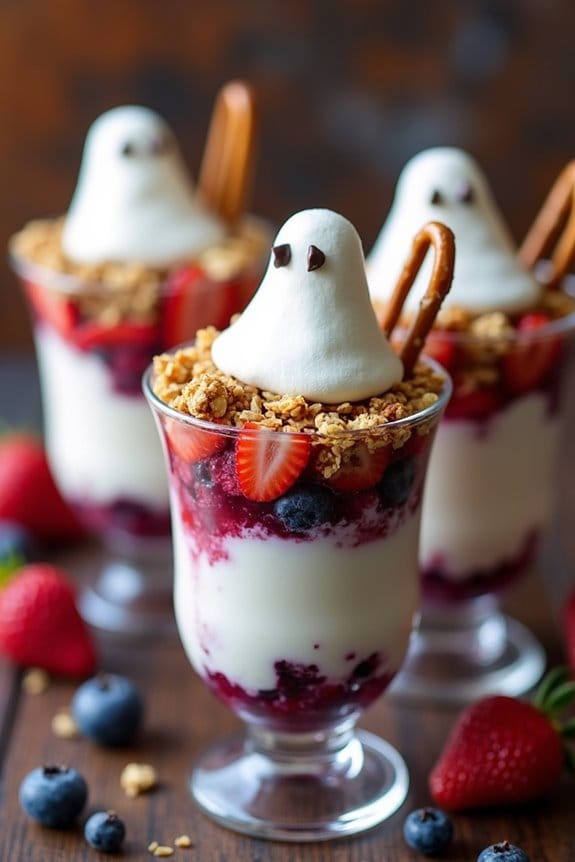
Are you looking for a fun and spooky treat to serve at your Halloween party this year? Ghostly Yogurt Parfaits are the perfect choice for a kid-friendly snack that’s both delicious and nutritious.
These parfaits are a delightful combination of creamy yogurt, crunchy granola, and sweet berries, all topped with ghostly marshmallow figures to fit the Halloween theme. Not only are they simple to make, but they also provide a healthy alternative to the typical sugary treats often associated with Halloween.
Creating these parfaits is a great way to get the kids involved in the kitchen. They can help layer the ingredients and have fun decorating their ghostly creations. With just a few ingredients and a little bit of creativity, you can whip up these fun parfaits in no time. Perfect for a classroom party or a family gathering, these Ghostly Yogurt Parfaits will surely be a hit among the little ghouls and goblins.
Ingredients (Serves 4-6):
- 4 cups vanilla yogurt
- 2 cups granola
- 2 cups mixed berries (strawberries, blueberries, raspberries)
- 12 large marshmallows
- Chocolate chips
- Small pretzel sticks
Cooking Instructions:
- Prepare the Berries: Start by washing your mixed berries thoroughly under cold water. Pat them dry with a paper towel to remove excess moisture, which will keep your parfaits from getting soggy.
- Layer the Parfaits: Take six clear cups or small jars and begin layering. Start by adding a generous spoonful of granola to the bottom of each cup. This will give a crunchy base to your parfaits.
- Add the Yogurt: Spoon a layer of vanilla yogurt over the granola in each cup. The yogurt acts as a creamy layer that complements the crunchy granola and sweet berries.
- Add Berries: Evenly distribute the mixed berries over the yogurt layer in each cup. Try to get an even mix of strawberries, blueberries, and raspberries for a burst of flavor and color.
- Repeat Layers: Repeat the layering process by adding another layer of granola, followed by yogurt, and then berries. Fill the cups until you reach the top, ending with a yogurt layer.
- Create Ghosts: To make the ghost decorations, use a toothpick to poke two small holes in each marshmallow and insert chocolate chips to create the eyes. Break a pretzel stick in half and insert it into the bottom of each marshmallow to act as a handle.
- Decorate Parfaits: Place the marshmallow ghosts on top of each parfait. The marshmallow should sit nicely on the yogurt, adding a whimsical and spooky touch to your dessert.
Extra Tips:
When preparing these Ghostly Yogurt Parfaits, you can use any type of berries you have on hand. If you want to make this dish even healthier, consider using Greek yogurt for added protein and a thicker texture.
Additionally, you can switch out the granola for crushed graham crackers if you prefer. These parfaits can also be made ahead of time and stored in the refrigerator, but be sure to add the marshmallow ghosts just before serving to keep them looking their best.
Enjoy making these adorable and delicious Halloween treats with your little ones!
Witch’s Broomstick Pretzels

Witch’s Broomstick Pretzels are a spooky and delightful treat perfect for Halloween gatherings, especially for kids. These whimsical snacks aren’t only fun to look at, but they’re also incredibly easy to make and delicious to eat. With their creative presentation, they’ll be a hit at any Halloween party, bringing a touch of magical fun to the snack table.
The combination of salty pretzels and cheese makes them a savory option that balances out the sweet treats typically found at such gatherings. Creating these broomsticks is a fantastic activity to involve children in the kitchen. It allows them to have a hands-on experience in crafting their own party snacks, which adds to the excitement of the holiday.
The preparation requires minimal ingredients and effort, making it an ideal recipe for a busy Halloween day. The result is a batch of adorable broomsticks that will enchant your little witches and wizards.
Ingredients (Serving Size: 4-6 people):
- 12 pretzel sticks (about 4 inches long each)
- 6 string cheese sticks
- Fresh chives or thin green onion tops for tying
Cooking Instructions:
- Prepare the String Cheese: Unwrap the string cheese sticks and cut each into halves, giving you a total of 12 pieces. These will form the bristles of the broom.
- Form the Broom Bristles: Take each half of the string cheese and gently peel it into thin strips about 2/3 of the way up, leaving the top intact. This will make it look like the bristles of a broom.
- Assemble the Broomsticks: Insert one end of a pretzel stick into the unpeeled end of the string cheese. Push gently to verify it stays in place but be careful not to break the pretzel.
- Secure with Chives: Take a chive or a green onion top, wrap it around the cheese where it meets the pretzel, and tie a small knot to secure it. This will help keep the cheese attached to the pretzel and make it look more like a broom.
- Repeat the Process: Continue assembling the remaining pretzel sticks and string cheese pieces until all broomsticks are complete.
- Presentation: Arrange the Witch’s Broomstick Pretzels on a serving platter for a charming display.
Extra Tips:
For a more colorful presentation, consider using colored string cheese varieties, if available, to add a pop of color to your broomstick bristles. Additionally, if fresh chives aren’t available, thin strips of fruit leather or licorice can be used as an alternative for tying.
To keep the cheese from drying out, you can prepare the broomsticks a few hours in advance and store them in an airtight container in the refrigerator until ready to serve. Encourage kids to help with the peeling and tying steps, as these are simple tasks that add to the fun of making this Halloween treat.
Mummy Apple Bites
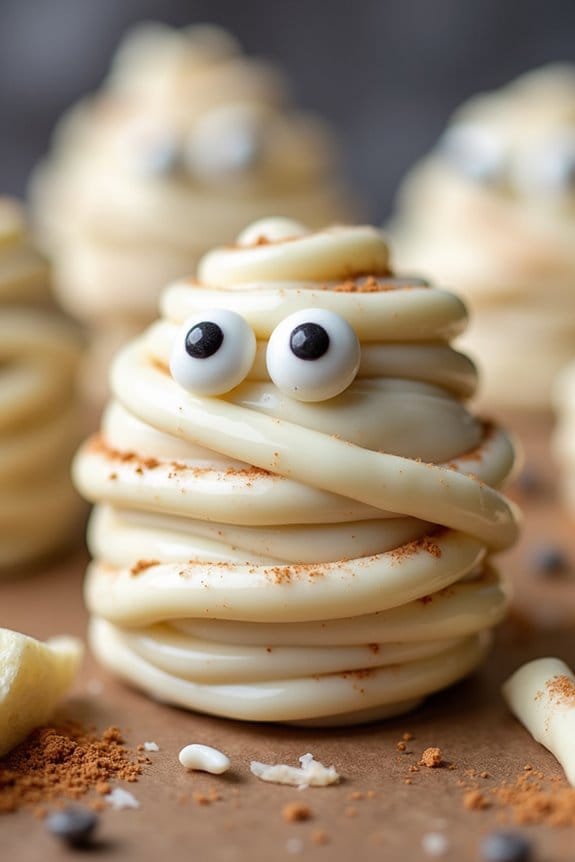
Mummy Apple Bites are a fun and festive treat perfect for the Halloween season. These adorable and spooky snacks are easy to make and a delightful way to get kids involved in Halloween preparations. With their charming mummy appearance and sweet, crunchy taste, Mummy Apple Bites are sure to be a hit at any Halloween gathering or as a fun after-school snack.
A spooky, sweet Halloween treat kids will love crafting and snacking on.
These apple bites are wrapped in a deliciously sweet coating that mimics the look of a mummy’s bandages. The combination of fresh apples, luscious white chocolate, and a touch of cinnamon makes for a pleasantly surprising treat that balances healthy and indulgent flavors. With just a few simple ingredients, you can create a batch of Mummy Apple Bites that will have everyone, both young and old, coming back for more.
Ingredients for 4-6 servings:
- 2 large apples (any variety)
- 1 cup white chocolate chips
- 1 teaspoon coconut oil
- 1/2 teaspoon ground cinnamon
- Candy eyes (24 pieces)
- 1 tablespoon lemon juice
Cooking Instructions:
- Prepare the Apples: Begin by washing and drying the apples thoroughly. Cut each apple into quarters and remove the core and seeds. Then, slice each quarter into three or four bite-sized pieces. To prevent the apples from browning, brush each piece lightly with lemon juice.
- Melt the Chocolate: In a microwave-safe bowl, combine the white chocolate chips and coconut oil. Microwave in 20-second intervals, stirring in between, until the chocolate is completely melted and smooth. Be cautious not to overheat the chocolate as it can become grainy.
- Coat the Apples: Dip each apple piece into the melted white chocolate, ensuring that it’s well-coated. Gently shake off any excess chocolate and place the apple bites on a baking sheet lined with parchment paper.
- Create the Mummy Bandages: Allow the chocolate on the apple bites to set slightly, then drizzle additional white chocolate over the top using a fork or a piping bag to create a mummy bandage effect.
- Add the Eyes: Before the chocolate sets completely, place two candy eyes on each apple bite. This step will bring the mummy to life and add to the spooky charm of the treat.
- Sprinkle with Cinnamon: Lightly dust the apple bites with ground cinnamon for added flavor and a touch of color.
- Let Set: Allow the Mummy Apple Bites to set at room temperature for about 15-20 minutes, or until the chocolate is firm.
Extra Tips:
For best results, choose apples that are firm and crisp, such as Granny Smith or Honeycrisp, which will provide a nice contrast to the sweet white chocolate. If you don’t have coconut oil, you can substitute it with vegetable oil to help the chocolate melt smoothly.
Additionally, make sure to have fun with the process—let the kids help with drizzling the chocolate and placing the eyes for a truly memorable Halloween activity. These treats are best served fresh, but they can be stored in the refrigerator for a day if needed. Enjoy your spooky and delicious Mummy Apple Bites!
Jack-o’-Lantern Stuffed Peppers

Create a spooktacular treat for your Halloween festivities with Jack-o’-Lantern Stuffed Peppers! This festive dish isn’t only fun to make but also nutritious and delicious. By carving faces into bright orange bell peppers, you can transform a simple dinner into a Halloween masterpiece.
These peppers are filled with a savory mixture of ground meat, rice, and vegetables, making them a hearty meal that kids will love. Perfect for a family gathering or a Halloween party, Jack-o’-Lantern Stuffed Peppers serve 4-6 people and are bound to be a hit with both kids and adults.
The beauty of this dish lies in its versatility; you can customize the stuffing to suit your preferences or dietary needs. Whether you opt for beef, turkey, or a vegetarian version, these stuffed peppers will become a staple in your Halloween menu for years to come.
Ingredients:
- 6 medium orange bell peppers
- 1 pound ground beef or turkey
- 1 cup cooked rice
- 1 medium onion, diced
- 2 cloves garlic, minced
- 1 can (15 oz) tomato sauce
- 1 cup shredded cheddar cheese
- 1 tablespoon olive oil
- 1 teaspoon salt
- 1/2 teaspoon black pepper
- 1 teaspoon Italian seasoning
- Optional: 1/2 cup corn or black beans
Cooking Instructions:
- Preheat and Prepare: Preheat your oven to 375°F (190°C). While the oven is heating, wash the bell peppers and carefully cut the tops off. Remove the seeds and membranes from the inside. Use a small paring knife to carve jack-o’-lantern faces into each pepper for a festive look.
- Cook the Filling: In a large skillet, heat the olive oil over medium heat. Add the diced onion and minced garlic, sautéing until the onion becomes translucent. Add the ground beef or turkey, cooking until it’s browned and fully cooked. Drain any excess fat from the skillet.
- Mix the Stuffing: Add the cooked rice, tomato sauce, salt, black pepper, Italian seasoning, and optional corn or black beans to the skillet. Stir well to combine all ingredients and simmer for 5 minutes to allow flavors to meld.
- Stuff the Peppers: Carefully spoon the meat and rice mixture into each carved pepper, filling them to the top. Place the stuffed peppers upright in a baking dish.
- Bake: Cover the baking dish with aluminum foil and bake in the preheated oven for 30 minutes. After 30 minutes, remove the foil, sprinkle shredded cheddar cheese on top of each pepper, and bake for an additional 10 minutes or until the cheese is melted and bubbly.
- Serve: Allow the stuffed peppers to cool slightly before serving. Enjoy your spooky Jack-o’-Lantern Stuffed Peppers warm.
Extra Tips:
When carving faces into the peppers, make certain the cuts aren’t too close together to maintain the structural integrity of the pepper.
If you’re hosting a party, consider offering a variety of fillings to cater to different dietary preferences, such as a vegetarian version with quinoa and vegetables.
Leftovers can be stored in an airtight container in the refrigerator for up to 3 days, making them a great option for a quick meal later in the week. For an extra touch, serve with a side of sour cream or guacamole to add creaminess to each bite.
Spider Web Hummus Dip
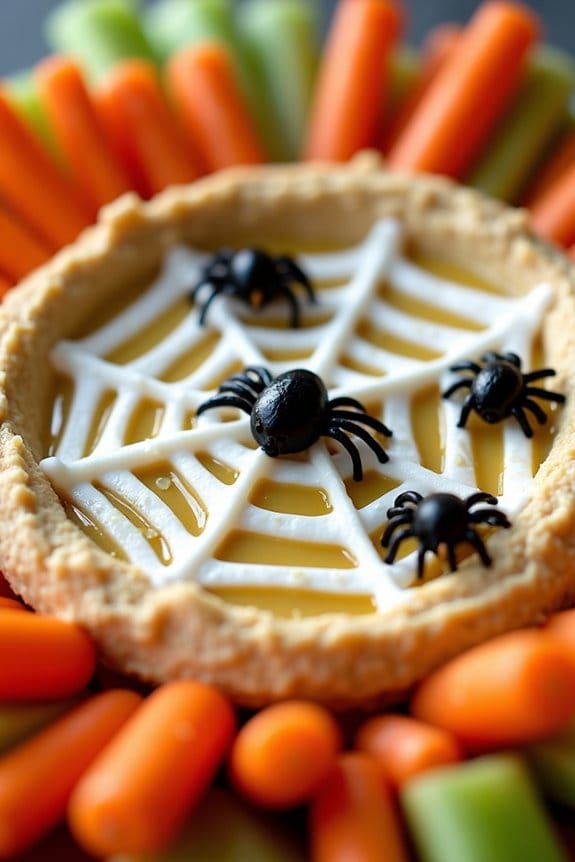
Halloween is the perfect time to get creative in the kitchen, especially when preparing snacks and appetizers for kids. One delightful and spooky dish that’s sure to be a hit at your Halloween party is the Spider Web Hummus Dip. This fun and easy recipe combines the classic flavors of creamy hummus with a playful design that resembles a spider web, making it both delicious and visually appealing. Kids will love the fun presentation, and parents will appreciate the healthy ingredients that make this dish a nutritious option amidst the Halloween candy overload.
The Spider Web Hummus Dip isn’t only a treat for the eyes, but it also offers a satisfying taste experience. The dish is made using traditional hummus ingredients, which means it’s packed with protein-rich chickpeas, tahini, and a burst of lemony freshness. To create the spider web effect, you’ll need sour cream or Greek yogurt—both of which add a tangy contrast to the smooth hummus. This recipe is designed to serve 4-6 people, making it a great choice for a small gathering or as part of a larger Halloween spread.
Ingredients (serves 4-6):
- 2 cups canned chickpeas, drained and rinsed
- 1/3 cup tahini
- 1/4 cup fresh lemon juice
- 2 cloves garlic, minced
- 1/4 cup olive oil
- 1 teaspoon ground cumin
- Salt to taste
- 3-4 tablespoons water (as needed)
- 1/4 cup sour cream or Greek yogurt
- Black olives, for decoration
- Tortilla chips, carrots, celery sticks, or other dippers
Instructions:
- Prepare the Chickpeas: Begin by draining and rinsing your canned chickpeas. This helps remove any excess sodium and guarantees a smooth texture for your hummus.
- Blend the Hummus: In a food processor, combine the chickpeas, tahini, lemon juice, garlic, olive oil, cumin, and salt. Blend until the mixture is smooth. If the hummus is too thick, gradually add water one tablespoon at a time until you achieve your desired consistency.
- Transfer to a Serving Dish: Once the hummus is smooth, transfer it to a shallow serving dish. Use a spatula to spread it evenly across the dish, creating a flat surface.
- Create the Spider Web: Spoon the sour cream or Greek yogurt into a small plastic sandwich bag. Snip a small corner off the bag to create a piping tool. Carefully pipe concentric circles over the surface of the hummus. Use a toothpick to drag lines from the center to the edges, creating a spider web appearance.
- Decorate with Olives: Slice black olives to create small “spiders” and place them strategically on the web. You can use a whole olive for the body and sliced pieces for the legs.
- Serve with Dippers: Arrange tortilla chips, carrot sticks, celery sticks, or your preferred dippers around the hummus, and serve immediately.
Extra Tips:
For an even smoother hummus, you can peel the chickpeas before blending. This can be done by gently rubbing them between your fingers after rinsing, allowing the skins to slip off easily.
Additionally, if you’re hosting a larger party, consider doubling the recipe to accommodate more guests. Feel free to get creative with the presentation by adding additional Halloween-themed decorations, such as small plastic spiders or themed serving bowls.
This dish can be made a few hours ahead of time and stored in the refrigerator—just add the spider web design right before serving to keep it fresh and vibrant.
Vampire Teeth Apple Slices

Vampire Teeth Apple Slices are a spooky and fun snack perfect for Halloween festivities. This simple treat combines the natural sweetness of apples with the creamy texture of peanut butter, and the spooky addition of marshmallows and almonds to create a ghoulish vampire grin.
It’s a delightful way to get kids excited about healthy snacks while embracing the Halloween spirit. The contrast of colors and textures makes these apple slices not only tasty but also visually appealing, perfect for a Halloween party or a fun after-school snack.
This recipe is also a fantastic way to involve kids in the kitchen. They can help with assembling the ingredients and using their creativity to make funny and spooky faces. Plus, it’s a great opportunity to introduce them to some basic kitchen skills like spreading peanut butter and safely cutting fruit.
With minimal preparation and cooking required, Vampire Teeth Apple Slices can be whipped up in no time, making it a convenient choice for busy parents. Enjoy these eerie yet delicious apple slices with your little goblins and ghouls this Halloween season.
Ingredients (Serving Size: 4-6 people):
- 4 medium red apples
- 1/2 cup creamy peanut butter
- 1/2 cup mini marshmallows
- 1/4 cup slivered almonds
- Lemon juice (optional)
Cooking Instructions:
- Prepare the Apples: Wash and dry the apples thoroughly. This guarantees any wax or residue is removed. Slice each apple into quarters, and then cut each quarter in half again to create thin wedges.
- Prevent Browning: If you prefer, sprinkle a little lemon juice on the apple slices to prevent them from browning. This is optional but can help maintain the appearance of the apples for a longer period if they’ll be sitting out.
- Apply the Peanut Butter: Use a spoon or a butter knife to spread a generous amount of creamy peanut butter on one side of each apple wedge. This will act as the “gums” of the vampire teeth and also help hold the marshmallows in place.
- Create the Teeth: On one apple slice, arrange mini marshmallows along the peanut butter side, pressing them gently into the peanut butter to make them stick. These will serve as the vampire’s teeth.
- Add the Fangs: Carefully insert two slivered almonds into the row of marshmallows on each apple slice to represent the vampire’s fangs. Make sure they’re placed symmetrically and protruding slightly to enhance the spooky effect.
- Assemble the Vampire Mouths: Take another apple slice with peanut butter and place it on top of the marshmallows, peanut butter side down, creating a sandwich with the marshmallows and almonds in the middle. Press gently to secure the layers together.
- Serve and Enjoy: Arrange the Vampire Teeth Apple Slices on a platter for a fun and spooky presentation. Serve immediately or within a few hours to guarantee freshness and crispness.
Extra Tips:
To make the Vampire Teeth Apple Slices even more fun, consider using a variety of apple types for different colors and flavors. Granny Smith apples can add a tart contrast to the sweetness of the marshmallows and peanut butter.
Make sure the almonds are inserted carefully to avoid breaking the apple slices. If your child has a nut allergy, sunflower seed butter can be used as a substitute for peanut butter. Finally, these treats are best enjoyed fresh, but if you need to make them in advance, store them in an airtight container in the refrigerator to keep them crisp.
Pumpkin Patch Cheese Balls
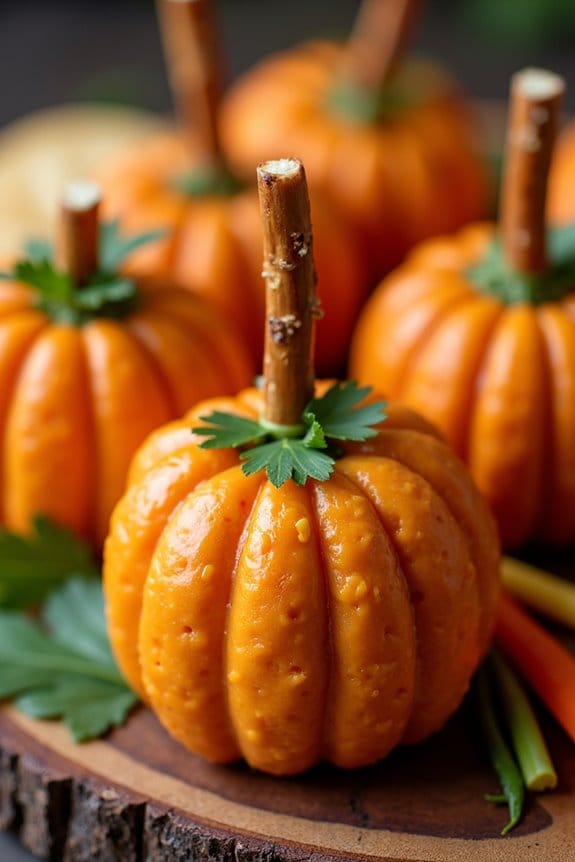
Pumpkin Patch Cheese Balls are a fun and festive treat perfect for a Halloween party. These cheesy delights not only look adorable but are also deliciously creamy, making them a hit with kids and adults alike. They resemble mini pumpkins, bringing a touch of the pumpkin patch to your Halloween spread.
Fun and festive, these cheesy delights are perfect for Halloween, delighting both kids and adults alike.
Perfect as an appetizer or a snack, these cheese balls are quick to prepare and can be customized with your favorite flavors and garnishes. Creating Pumpkin Patch Cheese Balls is a great way to get kids involved in the kitchen, as they can help shape and decorate them.
The vibrant orange color comes from a combination of cheeses and spices, while pretzel sticks and fresh herbs serve as the stems and leaves, respectively, giving them an authentic pumpkin appearance. With a serving size of 4-6 people, this recipe is ideal for small gatherings or family nights.
Ingredients (Serves 4-6)
- 8 oz cream cheese, softened
- 1 cup shredded cheddar cheese
- 1 teaspoon garlic powder
- 1 teaspoon paprika
- 1/2 teaspoon salt
- 1/4 teaspoon black pepper
- Pretzel sticks
- Fresh parsley or cilantro leaves
- Crackers or vegetable sticks, for serving
Instructions
- Mix the Cheeses: In a large mixing bowl, combine the softened cream cheese and shredded cheddar cheese. Use a spatula or hand mixer to blend them until smooth and well combined.
- Add Seasonings: Sprinkle in the garlic powder, paprika, salt, and black pepper. Mix thoroughly to guarantee the spices are evenly distributed throughout the cheese mixture.
- Form the Balls: Using a tablespoon, scoop out portions of the cheese mixture and roll them into small balls with your hands. Each ball should be about the size of a large marble.
- Shape into Pumpkins: Gently press each cheese ball to flatten it slightly, and then use a toothpick to create vertical lines down the sides, mimicking the ridges of a pumpkin.
- Add the Stems and Leaves: Insert a pretzel stick into the center of each cheese ball to serve as the stem. Then, garnish with a small parsley or cilantro leaf next to the pretzel stick to resemble a pumpkin leaf.
- Chill: Place the completed cheese balls on a plate and refrigerate for at least 30 minutes to allow them to firm up and the flavors to meld.
- Serve: Arrange the chilled Pumpkin Patch Cheese Balls on a platter with crackers or vegetable sticks for dipping and enjoy!
Extra Tips
When making Pumpkin Patch Cheese Balls, verify that the cream cheese is adequately softened; this will make mixing and shaping much easier.
If you’re planning to prepare this dish ahead of time, the cheese balls can be made and refrigerated up to 24 hours in advance, which allows the flavors to develop even more.
For an added twist, consider rolling the cheese balls in finely chopped nuts or crumbled bacon before adding the pretzel stems and parsley leaves, providing extra crunch and flavor.
Frankenstein Avocado Toast
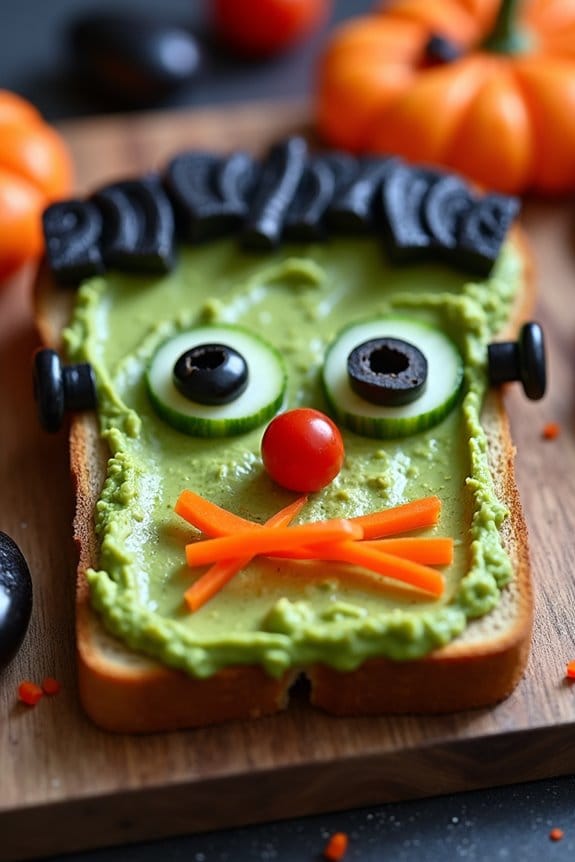
Halloween is the perfect time to get creative in the kitchen, especially with dishes that delight children. Frankenstein Avocado Toast is a fun, spooky, and nutritious snack that combines the creaminess of avocados with the crunchiness of toast, topped with a variety of veggies to create a monster’s face. This dish isn’t only visually entertaining but also packed with healthy ingredients, making it an ideal choice for kids’ Halloween parties or as a delightful after-school snack.
Creating Frankenstein Avocado Toast is a great way to involve kids in the kitchen, allowing them to use their creativity while learning about healthy eating. The vibrant green of the avocado mimics Frankenstein’s skin, while olives, cherry tomatoes, and bell peppers add character to his face. This recipe is simple enough for young chefs to help with, and the end result is sure to be a hit at any Halloween gathering.
Ingredients for 4-6 servings:
- 6 slices of whole grain bread
- 3 ripe avocados
- 1 tablespoon lemon juice
- 1/2 teaspoon salt
- 1/4 teaspoon black pepper
- 12 black olives (sliced)
- 6 cherry tomatoes (halved)
- 1 small red bell pepper (cut into strips)
- 1 small cucumber (sliced)
- 1 small carrot (peeled and cut into thin sticks)
Cooking Instructions:
- Prepare the Avocado Mixture: Start by halving and pitting the avocados. Scoop the flesh into a bowl and mash it with a fork. Add lemon juice, salt, and black pepper to the mashed avocado and mix well until smooth.
- Toast the Bread: Toast the slices of whole grain bread until they’re golden brown and crispy. This will provide a sturdy base for your avocado spread.
- Spread the Avocado: Evenly spread the avocado mixture over each slice of toasted bread. This green layer will serve as Frankenstein’s face.
- Create Frankenstein’s Hair and Bolts: Arrange sliced black olives on the top edge of the toast to create Frankenstein’s hair. Place two olive slices on each side of the toast to represent bolts.
- Add the Eyes and Nose: Place two cherry tomato halves on the toast for eyes. Use a small piece of cucumber to form the nose, positioning it below the eyes.
- Make the Mouth and Scars: Use the red bell pepper strips to create a mouth by arranging them in a zigzag pattern. For scars, place thin carrot sticks on the face in a crisscross design.
Extra Tips:
For a more vibrant presentation, consider using different colored bell peppers for the mouth and scars to add more color contrast. If you want to make the toast extra spooky, you can cut the bread into different shapes using Halloween-themed cookie cutters before toasting.
Remember to involve the kids in decorating their Frankenstein faces; it’s a wonderful opportunity for them to express their creativity and enjoy the fruits of their labor. The ripe avocados should be soft but not too mushy to guarantee they spread smoothly.
Enjoy this Halloween treat with a side of spooky-themed punch or apple cider!
Witch Hat Cupcakes

Witch Hat Cupcakes are a delightful and whimsical treat perfect for Halloween celebrations, especially for kids. These cupcakes not only taste delicious but also serve as a fun activity for children to help with in the kitchen. The combination of a moist, flavorful cupcake and a colorful, creative witch hat on top is sure to bring smiles to everyone’s faces.
A whimsical Halloween treat that delights kids and inspires creativity in the kitchen.
Whether you’re planning a Halloween party or just want to surprise your little ones with a themed dessert, these Witch Hat Cupcakes are a fantastic choice. The base of the Witch Hat Cupcakes is a classic chocolate cupcake, which pairs beautifully with a vibrant buttercream frosting. Topped with a crispy chocolate cone to mimic a witch’s hat, these cupcakes are finished off with decorative icing and sprinkles to add a touch of magic.
The recipe is simple enough for beginners but offers enough room for creativity to keep even seasoned bakers entertained. With a serving size of 4-6 people, this recipe is perfect for a small gathering or family treat.
Ingredients (Serving Size: 4-6 people)
- 1 cup all-purpose flour
- 1/2 cup unsweetened cocoa powder
- 1 teaspoon baking powder
- 1/2 teaspoon baking soda
- 1/4 teaspoon salt
- 1/2 cup unsalted butter, softened
- 3/4 cup granulated sugar
- 2 large eggs
- 1 teaspoon vanilla extract
- 1/2 cup whole milk
- 1 cup buttercream frosting (store-bought or homemade)
- 6 chocolate ice cream cones
- 1/2 cup melted chocolate
- Assorted sprinkles and edible decorations
- Food coloring (optional)
Cooking Instructions
- Preheat and Prepare Pans: Preheat your oven to 350°F (175°C). Line a muffin tin with paper cupcake liners to prevent sticking.
- Mix Dry Ingredients: In a medium bowl, whisk together the flour, cocoa powder, baking powder, baking soda, and salt until well combined. Set aside.
- Cream Butter and Sugar: In a large mixing bowl, beat the softened butter and sugar together with an electric mixer until light and fluffy, about 2-3 minutes.
- Add Eggs and Vanilla: Add the eggs one at a time, beating well after each addition. Stir in the vanilla extract.
- Combine Wet and Dry Ingredients: Gradually add the dry ingredients to the wet mixture, alternating with the milk. Mix until just combined. Be careful not to overmix.
- Fill and Bake: Divide the batter evenly among the cupcake liners, filling each about two-thirds full. Bake in the preheated oven for 18-20 minutes or until a toothpick inserted into the center of a cupcake comes out clean. Allow them to cool completely on a wire rack.
- Prepare Witch Hats: Dip the open end of each ice cream cone into melted chocolate, making certain it’s fully coated. Allow excess chocolate to drip off, then place the cones on a parchment-lined tray to set.
- Decorate Cupcakes: Once the cupcakes are cool, frost them with the buttercream. You can tint the frosting with food coloring if desired.
- Assemble Witch Hats: Once the chocolate on the cones has set, place a cone onto each frosted cupcake to form the witch hat. Decorate with sprinkles and edible decorations as desired to add a magical touch.
Extra Tips
When making Witch Hat Cupcakes, verify that the cupcakes are completely cool before frosting; otherwise, the icing may melt. If you’re planning to involve kids in the decorating process, prepare a variety of sprinkles and edible decorations so they can personalize their witch hats.
For additional flavor, consider adding a pinch of cinnamon or nutmeg to the cupcake batter for a warm, autumnal spice. If you’re short on time, you can use store-bought cupcakes and focus on decorating the witch hats, making this a quick and enjoyable Halloween activity.
Batty Energy Bites
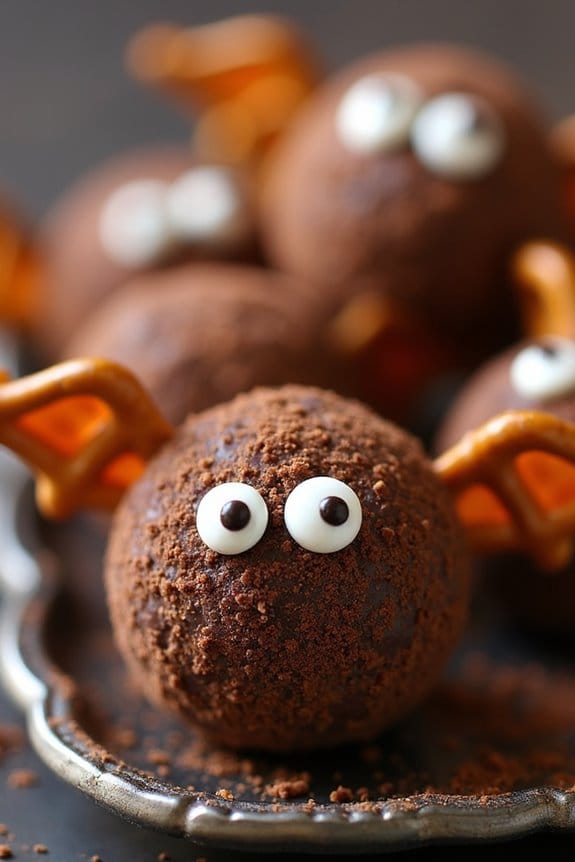
Halloween is a time for spooky fun and delicious treats, and Batty Energy Bites are the perfect way to combine both. These delightful snacks aren’t only adorable but also packed with energy-boosting ingredients that will keep your little monsters fueled for a night of trick-or-treating.
Made with wholesome ingredients like oats, peanut butter, and honey, these bites are both nutritious and satisfying, making them a great alternative to traditional Halloween candies.
Creating these batty bites is an enjoyable kitchen activity that kids can participate in, allowing them to express their creativity by decorating each bite with bat wings and eyes. The combination of flavors and textures in these bites is sure to be a hit with both kids and adults alike.
Plus, they’re quick and easy to prepare, making them an ideal choice for busy parents looking to whip up a festive snack in no time.
Ingredients (Serving Size: 4-6 people):
- 1 cup rolled oats
- 1/2 cup peanut butter
- 1/4 cup honey
- 1/4 cup mini chocolate chips
- 1 teaspoon vanilla extract
- 1/4 cup chopped almonds
- 1/4 cup cocoa powder (for dusting)
- 1/2 cup pretzel sticks (for bat wings)
- 1/2 cup candy eyes
Cooking Instructions:
- Mix the Base Ingredients: In a large mixing bowl, combine the rolled oats, peanut butter, honey, mini chocolate chips, vanilla extract, and chopped almonds. Use a spatula or your hands to mix everything together until well combined and a sticky dough forms.
- Shape the Bites: Using a tablespoon, scoop out portions of the mixture and roll them into small balls, about 1 inch in diameter. Place each ball on a baking sheet lined with parchment paper.
- Add the Bat Features: Once all the bites are shaped, take two pretzel sticks and gently insert them into each side of the balls to create bat wings. Press candy eyes onto the front of each ball to give your bats a face.
- Dust with Cocoa Powder: Lightly dust each energy bite with cocoa powder to give them a spooky, bat-like appearance. You can do this by sifting the cocoa powder over the bites or rolling them gently in the powder.
- Chill the Bites: Place the baking sheet in the refrigerator and allow the bites to chill for at least 30 minutes. This will help them firm up and hold their shape.
- Serve and Enjoy: Once the bites are set, they’re ready to be served. Arrange them on a platter for a festive Halloween treat that’s sure to impress.
Extra Tips:
For a nut-free version, substitute sunflower seed butter for peanut butter and omit the almonds.
You can also get creative with the decorations; consider using sliced almonds for bat ears or different colored candies for eyes.
To make rolling the bites easier, lightly dampen your hands to prevent the mixture from sticking.
These energy bites can be stored in an airtight container in the refrigerator for up to a week, making them a great make-ahead option for Halloween parties or school treats.
Haunted Banana Pops

Halloween is the perfect time to get creative with food, especially when it comes to making treats for kids. Haunted Banana Pops are a spooky and delicious snack that kids will love to both make and eat. These treats aren’t only fun to look at, but they also provide a healthier option to balance out the sugary candies typically associated with Halloween.
Made from bananas, chocolate, and a few decorations, these pops are simple to prepare and are sure to be a hit at any Halloween party or gathering. The key to making these Haunted Banana Pops is to let your imagination run wild with the decorations. Using melted chocolate to coat the bananas, you can create ghostly figures by adding small chocolate chips for eyes and mouth, or you can use white chocolate for a classic ghostly appearance.
This treat is ideal for engaging kids in the kitchen, allowing them to design their own spooky characters. Plus, it’s a great way to introduce them to fruit-based snacks in a fun and festive way.
Ingredients (serving size: 4-6 people):
- 3 large bananas
- 12 oz white chocolate chips
- 12 oz milk or dark chocolate chips
- Mini chocolate chips (for eyes and mouth)
- Lollipop sticks or popsicle sticks
- Wax paper
Cooking Instructions:
1. Prepare the Bananas:
Start by peeling the bananas and cutting them in half crosswise. Insert a lollipop stick or popsicle stick into the flat end of each banana half. This will serve as your Haunted Banana Pop handle.
2. Melt the Chocolate:
In two separate microwave-safe bowls, melt the white chocolate chips and the milk or dark chocolate chips. Heat each bowl in the microwave in 30-second intervals, stirring in between, until completely smooth and melted.
3. Coat the Bananas:
Dip each banana half into the melted white chocolate, ensuring it’s fully covered. Let any excess chocolate drip off before placing the banana on a sheet of wax paper.
4. Decorate the Pops:
While the chocolate is still melted, press mini chocolate chips into the coated bananas to create eyes and a mouth. Be creative with the expressions to give each banana pop a unique personality.
5. Chill the Pops:
Place the decorated banana pops onto a tray lined with wax paper and put them in the freezer for at least 30 minutes. This will allow the chocolate to set and harden.
6. Serve and Enjoy:
Once the chocolate has hardened, remove the banana pops from the freezer and serve immediately for a spooky and delightful Halloween treat.
Extra Tips:
For an extra twist, try using different colored chocolate coatings to give your Haunted Banana Pops a more vibrant and varied appearance. You can also add sprinkles or edible glitter for additional flair.
If you have leftover chocolate, consider drizzling it over the pops for an extra layer of decoration. Keep in mind that these treats are best enjoyed soon after being removed from the freezer to maintain their firm texture and avoid melting.
Goblin Guacamole Cups
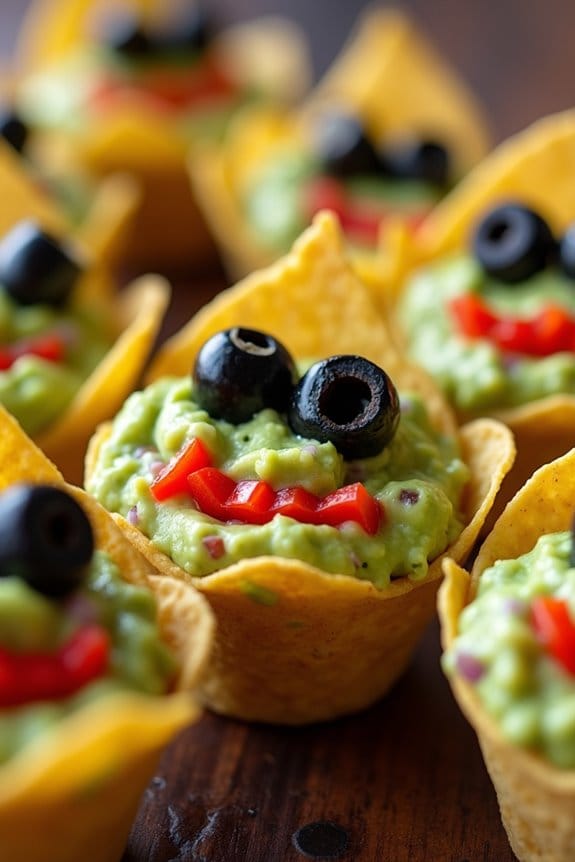
Goblin Guacamole Cups are a spooky, fun, and delicious way to celebrate Halloween with kids. Not only do these cups look festive with their green, ghoulish appearance, but they’re also packed with healthy ingredients that parents can feel good about serving.
Perfect for parties or a fun family snack, these cups are sure to be a hit with kids of all ages.
The base of each Goblin Guacamole Cup is a crunchy tortilla chip cup, filled with creamy, flavorful guacamole. The guacamole is jazzed up with Halloween-themed decorations like olive slices for eyes and red pepper strips for a ghoulish grin. This recipe serves 4-6 people, making it ideal for a small gathering or family dinner. Here’s how to make these delightfully eerie treats:
Ingredients:
- 6 ripe avocados
- 1 lime, juiced
- 1 teaspoon salt
- 1/2 teaspoon ground cumin
- 1/2 teaspoon cayenne pepper
- 1/2 medium red onion, diced
- 1 large tomato, diced
- 3 tablespoons chopped cilantro
- 2 cloves garlic, minced
- 24 tortilla chip cups
- Sliced black olives (for eyes)
- Red bell pepper strips (for mouths)
Cooking Instructions:
- Prepare the Avocados: Cut the avocados in half, remove the pits, and scoop the flesh into a large mixing bowl. Use a fork to mash the avocados to your desired consistency. Some like it smooth, others prefer it chunky.
- Season the Guacamole: Add the lime juice, salt, cumin, and cayenne pepper to the mashed avocados. Mix well to guarantee that the seasoning is evenly distributed throughout the guacamole.
- Add Vegetables and Herbs: Stir in the diced red onion, tomato, cilantro, and minced garlic. Mix until all ingredients are thoroughly combined. Taste and adjust seasoning if needed.
- Assemble the Cups: Spoon the guacamole into each tortilla chip cup, filling them generously. Place two slices of black olive on each cup to create the “eyes.”
- Decorate the Faces: Cut the red bell pepper into small strips to form “mouths,” and place one on each cup to complete the goblin face.
- Serve Immediately: Arrange the Goblin Guacamole Cups on a large platter and serve immediately to guarantee the tortilla cups stay crispy.
Extra Tips:
For the best results, confirm the avocados are perfectly ripe; they should yield slightly to gentle pressure.
If preparing in advance, store the guacamole with a piece of plastic wrap pressed directly onto the surface to prevent browning, and only fill the tortilla cups just before serving.
Feel free to customize the goblin faces by adding other edible decorations like shredded cheese for hair or corn for teeth. Enjoy the creativity and have fun with the kids while assembling these ghoulish goodies!
Skeleton Veggie Platter
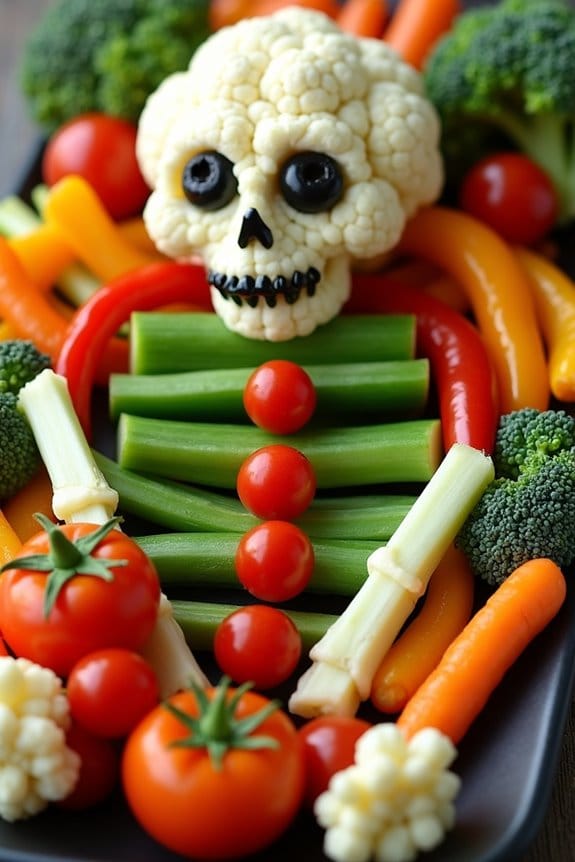
Skeleton Veggie Platter is a fun and healthy treat that’s perfect for kids during Halloween. This creative and spooky platter takes the form of a skeleton, made entirely out of fresh vegetables. Not only is it visually appealing, but it also promotes children to enjoy their veggies in a playful and engaging way.
Whether you’re hosting a Halloween party or just looking to add some festive flair to your mealtime, this Skeleton Veggie Platter is sure to be a hit.
The beauty of this dish lies in its simplicity and versatility. You can use a variety of colorful vegetables to create the skeleton, allowing you to customize it to your children’s preferences and dietary needs. The platter can include crunchy bell peppers, crisp celery sticks, and juicy cherry tomatoes, arranged artfully to resemble a skeleton figure.
Pair it with a delicious dip, such as ranch or hummus, to add an extra layer of flavor. This dish not only provides essential nutrients but also serves as an exciting centerpiece for your Halloween celebration.
Ingredients (Serves 4-6):
- 1 large head of cauliflower
- 1 cucumber
- 2-3 bell peppers (red, yellow, or orange)
- 1 bunch of celery
- 1 pint of cherry tomatoes
- 1 small bunch of broccoli
- 1 cup of baby carrots
- 1/2 cup of black olives
- 1 cup of your favorite dip (ranch or hummus)
Instructions:
- Prepare the Cauliflower Head: Start by removing the leaves and stem from the cauliflower. Break it into bite-sized florets. These will form the “skull” of your skeleton.
- Slice the Vegetables: Slice the cucumber into rounds, and cut the bell peppers into strips. For the celery, chop it into sticks about 4 inches long. These will serve as the “bones” of your skeleton.
- Assemble the Skeleton: On a large platter, begin by placing the cauliflower florets at the top to form the “head.” Use cucumber slices to make the “spine,” and arrange the celery and bell pepper strips as “arms” and “legs.” Position the cherry tomatoes as “joints” at the ends of limbs.
- Add Details with Broccoli and Carrots: Use broccoli florets for “feet” and “hands” and baby carrots to fill in any gaps along the limbs, adding texture and color.
- Create the Face: Use the black olives to design the skeleton’s face on the cauliflower “head.” You can use whole olives for eyes and sliced olives for a mouth.
- Serve with Dip: Place a bowl of your chosen dip (ranch or hummus) near the skeleton for easy access, encouraging kids to dip their vegetables as they enjoy the platter.
Extra Tips:
For added creativity, consider using different vegetables to match your child’s preferences or dietary restrictions. If serving to a larger group, double the ingredients to guarantee everyone gets a taste.
You can also prepare the vegetables in advance and store them in airtight containers in the refrigerator to save time on the day of your event. To make the face even more expressive, use small pieces of carrot or red pepper to create eyebrows or a nose.
Enjoy making this playful and nutritious dish with your kids, and watch their faces light up as they dig into this spooky and tasty treat!
Spooky Smoothie Bowls
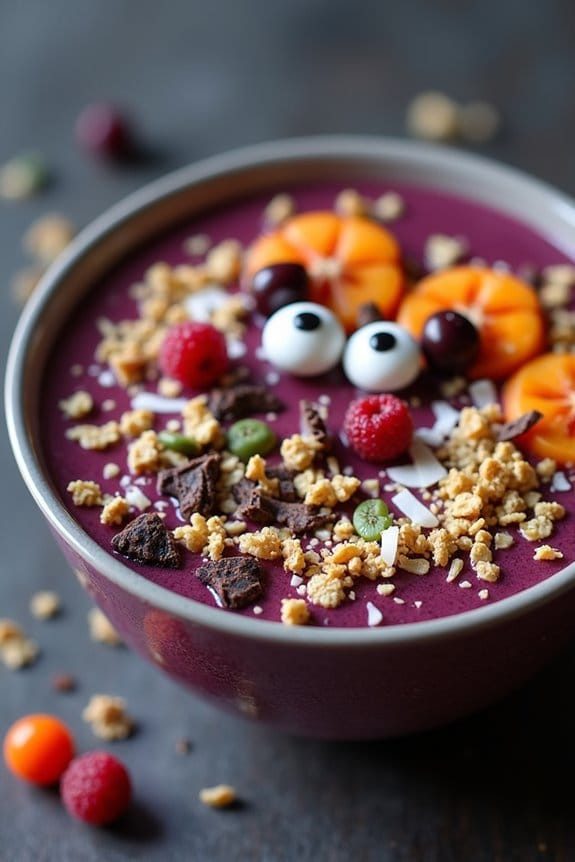
Looking to delight your little ones with a nutritious yet exciting Halloween treat? Spooky Smoothie Bowls are the perfect answer! Not only are they packed with vitamins and minerals, but they also bring the Halloween spirit to your breakfast or snack time.
These smoothie bowls are easily customizable with your favorite fruits and toppings, and they can be made into a fun activity for kids to assemble their own spooky creations. With a little creativity, you can transform these bowls into ghoulish faces, monster scenes, or eerie landscapes that are sure to captivate young minds and taste buds alike.
To create the ultimate Spooky Smoothie Bowls for a group of 4-6 people, you’ll need a blend of vibrant fruits like bananas, berries, and spinach. The base is creamy and smooth, while the toppings offer a delightful crunch and visual appeal. Feel free to adjust the ingredients according to your child’s preferences or dietary requirements.
By incorporating natural food coloring and playful designs, you can guarantee these smoothie bowls aren’t only healthy but also irresistibly fun. Now, let’s plunge into the list of ingredients and get started on these hauntingly delicious bowls!
Ingredients (serving size: 4-6 people):
- 4 ripe bananas
- 2 cups frozen mixed berries
- 2 cups fresh spinach
- 2 cups almond milk (or any milk of choice)
- 2 tablespoons honey or maple syrup
- 1 cup granola
- 1/2 cup pumpkin seeds
- 1/2 cup shredded coconut
- 1/2 cup dark chocolate chips or cacao nibs
- Edible eyes candy or yogurt-covered raisins
- Natural food coloring (optional)
Cooking Instructions:
- Prepare the Smoothie Base: In a blender, combine the ripe bananas, frozen mixed berries, fresh spinach, and almond milk. Blend on high speed until the mixture is smooth and creamy. If you prefer a sweeter base, add in the honey or maple syrup, and blend again briefly.
- Color the Base (Optional): If you’d like to add a spooky color to your smoothie base, now is the time to incorporate a few drops of natural food coloring. Blend until the color is evenly distributed throughout the mixture.
- Pour and Shape: Divide the smoothie mixture evenly among 4-6 bowls. Use the back of a spoon to smooth the top of each bowl, creating a flat surface for decorating.
- Decorate with Toppings: Let the kids help with this part! Arrange the granola, pumpkin seeds, shredded coconut, and dark chocolate chips or cacao nibs on top of the smoothie base to create spooky faces, monsters, or Halloween-themed designs. Use the edible eyes candy or yogurt-covered raisins to complete the look.
- Serve Immediately: These Spooky Smoothie Bowls are best enjoyed fresh. The creamy texture of the smoothie against the crunchy toppings is a deliciously fun contrast.
Extra Tips:
To make your smoothie bowls even more exciting, consider using cookie cutters to shape fruits like kiwi or mango into Halloween-themed figures like bats or pumpkins.
If you’re serving these bowls at a party, provide a variety of toppings so kids can mix and match to create their own unique spooky designs. Remember to keep the smoothie bowls refrigerated if you’re not serving them right away, as they can start to melt at room temperature.
Enjoy the creative process, and have a happy, healthy Halloween!

