
When Christmas lunch comes around, there’s something magical about the side dishes that have everyone coming back for seconds. Think of creamy garlic mashed potatoes that are perfectly fluffy or a cheesy broccoli casserole with a satisfying crunch. These dishes are not only the perfect partners to the main course but also bring back warm holiday memories. Want to know which side dishes everyone loves the most? Let’s uncover the irresistible sides that are always the first to disappear.
Creamy Garlic Mashed Potatoes

Creamy Garlic Mashed Potatoes are the perfect side dish to complement your Christmas lunch spread. This classic recipe pairs the smooth texture of mashed potatoes with the rich flavors of garlic and cream, making it a comforting and satisfying addition to your holiday meal.
Whether served alongside a roast, turkey, or ham, these mashed potatoes are sure to be a hit with family and friends, offering a rich and velvety experience that everyone will enjoy.
To achieve the perfect creamy consistency, it’s crucial to select the right type of potatoes. Yukon Gold potatoes are an excellent choice due to their buttery texture and flavor, which blend beautifully with the garlic and cream. This recipe is designed to serve 4-6 people, allowing everyone at your table to indulge in this delectable side dish.
With just a few simple ingredients and easy-to-follow steps, you can whip up a batch of these heavenly mashed potatoes for a memorable Christmas meal.
Ingredients for 4-6 servings:
- 3 pounds Yukon Gold potatoes
- 6 cloves garlic, peeled
- 1 cup heavy cream
- 1/2 cup unsalted butter
- Salt, to taste
- Freshly ground black pepper, to taste
- Chopped fresh parsley, for garnish (optional)
Cooking Instructions:
- Prepare the Potatoes: Start by peeling the potatoes and cutting them into evenly-sized chunks. This allows them to cook at the same rate. Rinse them under cold water to remove excess starch.
- Cook the Potatoes and Garlic: Place the potato chunks and whole garlic cloves in a large pot. Fill the pot with enough cold water to cover the potatoes by about an inch. Add a generous pinch of salt to the water. Bring the pot to a boil over medium-high heat, then reduce the heat to a simmer. Cook until the potatoes are fork-tender, about 15-20 minutes.
- Heat the Cream and Butter: While the potatoes are cooking, combine the heavy cream and butter in a small saucepan. Heat over low heat until the butter is melted and the mixture is warm. Don’t bring it to a boil.
- Mash the Potatoes: Once the potatoes and garlic are cooked, drain them well and return them to the pot. Use a potato masher or a potato ricer to mash the potatoes and garlic until smooth. Be careful not to over-mash, as this can make the potatoes gluey.
- Mix in Cream and Season: Gradually add the warm cream and butter mixture to the mashed potatoes, stirring gently until fully incorporated. Season with salt and freshly ground black pepper to taste. Adjust the seasoning as necessary.
- Serve: Transfer the creamy garlic mashed potatoes to a serving dish. Garnish with chopped fresh parsley if desired. Serve immediately while hot.
Extra Tips:
To enhance the flavor of your mashed potatoes, consider roasting the garlic before adding it to the pot. Roasted garlic adds a sweet, mellow flavor that complements the richness of the dish.
Additionally, if you prefer a tangy twist, stir in a dollop of sour cream or cream cheese along with the cream and butter mixture. Finally, for a bit of texture, sprinkle in some crispy bacon bits or grated Parmesan cheese before serving.
Enjoy your perfectly creamy and flavorful mashed potatoes this Christmas!
Honey Glazed Carrots With Thyme
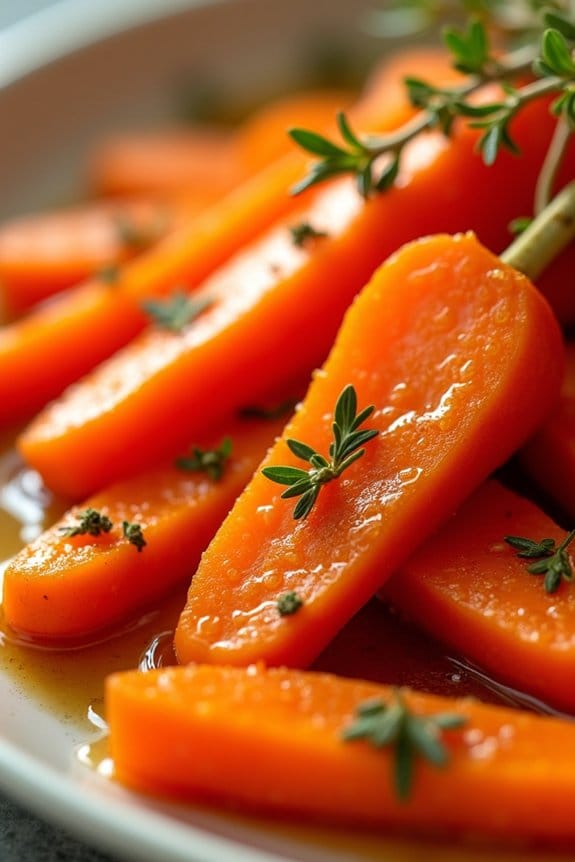
Honey Glazed Carrots With Thyme is a classic side dish that adds a touch of elegance to any Christmas lunch. The natural sweetness of the carrots is enhanced by the rich, golden honey glaze, while the fresh thyme adds a savory note that balances the flavors perfectly.
This dish isn’t only visually appealing with its vibrant orange hue, but it also brings a delightful mix of textures and tastes that complements a variety of main courses during the festive season.
This recipe is perfect for serving 4-6 people, making it an ideal addition to your holiday spread. The preparation is straightforward and requires minimal ingredients, allowing you to focus on other aspects of your Christmas meal.
The key to this dish is in the gentle cooking process, which guarantees the carrots remain tender yet firm, and the glaze perfectly coats each piece without being overpowering. Follow the steps below to create this delicious and festive side dish.
Ingredients:
- 1 1/2 pounds of carrots, peeled and cut into 1/4-inch slices
- 3 tablespoons of unsalted butter
- 2 tablespoons of honey
- 1 tablespoon of fresh thyme leaves, chopped
- Salt and pepper to taste
- 1/4 cup of water
Cooking Instructions:
- Prepare the Carrots: Begin by peeling and slicing the carrots into 1/4-inch thick rounds. This uniform size guarantees even cooking.
- Melt the Butter: In a large skillet over medium heat, melt the butter. Be careful not to let it brown; you want the butter just melted and ready to coat the carrots.
- Add the Carrots and Water: Once the butter is melted, add the carrot slices to the skillet, followed by the 1/4 cup of water. Stir to coat the carrots in the butter.
- Simmer the Carrots: Cover the skillet with a lid and let the carrots simmer for about 5-7 minutes. This step softens the carrots while allowing them to absorb the butter flavor.
- Add Honey and Seasonings: Remove the lid and stir in the honey and chopped thyme leaves. Season with salt and pepper to taste. Continue cooking for another 5 minutes, stirring occasionally, until the carrots are tender and glazed.
- Reduce the Glaze: Increase the heat slightly and cook for an additional 2-3 minutes, stirring constantly, until the glaze has reduced and thickened, coating the carrots evenly.
- Serve: Transfer the honey glazed carrots with thyme to a serving dish and garnish with extra thyme leaves if desired. Serve warm and enjoy!
Extra Tips:
When preparing Honey Glazed Carrots With Thyme, make sure not to overcook the carrots as they should retain a slight crunch for the best texture.
If you prefer your carrots softer, you can extend the simmering time by a couple of minutes. For a twist, consider adding a pinch of cinnamon or nutmeg for additional warmth and holiday spice.
This dish can also be made a day in advance; simply reheat before serving, adding a splash of water if needed to refresh the glaze.
Cheesy Broccoli Casserole
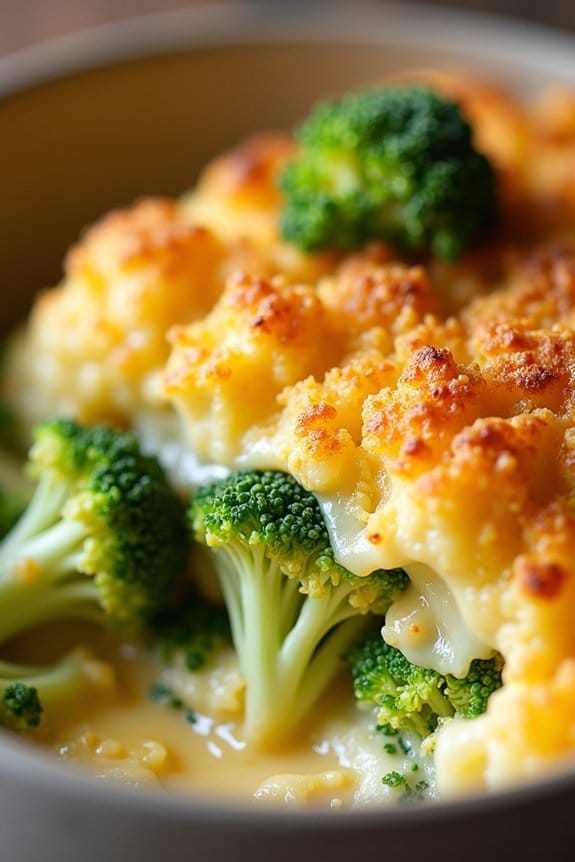
Cheesy Broccoli Casserole is a delightful and hearty side dish that makes a perfect addition to any Christmas lunch. Its creamy texture, combined with the crispy topping, offers a contrast in flavors and textures that everyone at the table will love. This dish not only satisfies the palate but also adds a splash of green to your festive spread, making it both a visually and gastronomically pleasing experience.
Ideal for feeding a small gathering, this casserole serves 4-6 people, guaranteeing that everyone gets a generous helping.
One of the wonderful things about the Cheesy Broccoli Casserole is its versatility. It’s a great way to incorporate vegetables into your holiday meal without sacrificing taste. The broccoli is bathed in a rich, cheesy sauce, then topped with a crispy breadcrumb layer that adds a satisfying crunch. The result is a comforting, warm dish that complements roasted meats and other holiday staples beautifully.
Plus, this dish can be prepared ahead of time, which is always a bonus during the busy holiday season.
Ingredients (Serves 4-6):
- 4 cups broccoli florets
- 2 tablespoons butter
- 1 small onion, finely chopped
- 2 cloves garlic, minced
- 3 tablespoons all-purpose flour
- 1 ½ cups milk
- 1 cup shredded cheddar cheese
- ¼ cup grated Parmesan cheese
- ½ teaspoon salt
- ¼ teaspoon black pepper
- ½ teaspoon paprika
- 1 cup breadcrumbs
- 2 tablespoons melted butter
Cooking Instructions:
- Prepare the Broccoli: Preheat your oven to 350°F (175°C). Steam or boil the broccoli florets for about 3-4 minutes until they’re tender-crisp. Drain and set aside.
- Make the Sauce: In a large saucepan, melt the butter over medium heat. Add the chopped onion and sauté for 3-4 minutes until translucent. Stir in the minced garlic and cook for an additional minute.
- Thicken the Sauce: Sprinkle the flour over the onion and garlic mixture, stirring constantly to prevent lumps. Cook for 2 minutes, then gradually whisk in the milk. Continue to stir until the sauce thickens, about 5-7 minutes.
- Add the Cheese: Remove the saucepan from heat. Stir in the cheddar cheese and Parmesan cheese until melted and smooth. Season the sauce with salt, pepper, and paprika.
- Assemble the Casserole: In a large mixing bowl, combine the cooked broccoli with the cheese sauce, making sure the broccoli is evenly coated. Transfer the mixture into a greased 9×13-inch baking dish.
- Prepare the Topping: In a small bowl, combine the breadcrumbs with the melted butter. Sprinkle this mixture evenly over the broccoli and cheese.
- Bake the Casserole: Place the dish in the preheated oven and bake for 25-30 minutes, or until the top is golden brown and the casserole is bubbling around the edges.
- Serve: Allow the casserole to cool for a few minutes before serving. Enjoy the cheesy, crunchy delight as a perfect accompaniment to your main course.
Extra Tips: To enhance the flavor, consider adding a pinch of nutmeg to the cheese sauce. If you prefer a spicier kick, a dash of cayenne pepper can be added as well. For a gluten-free version, substitute the all-purpose flour with cornstarch and use gluten-free breadcrumbs.
Preparing the casserole a day in advance and refrigerating it can help intensify the flavors. Just make sure to bring it to room temperature before baking.
Cranberry Pecan Wild Rice Pilaf
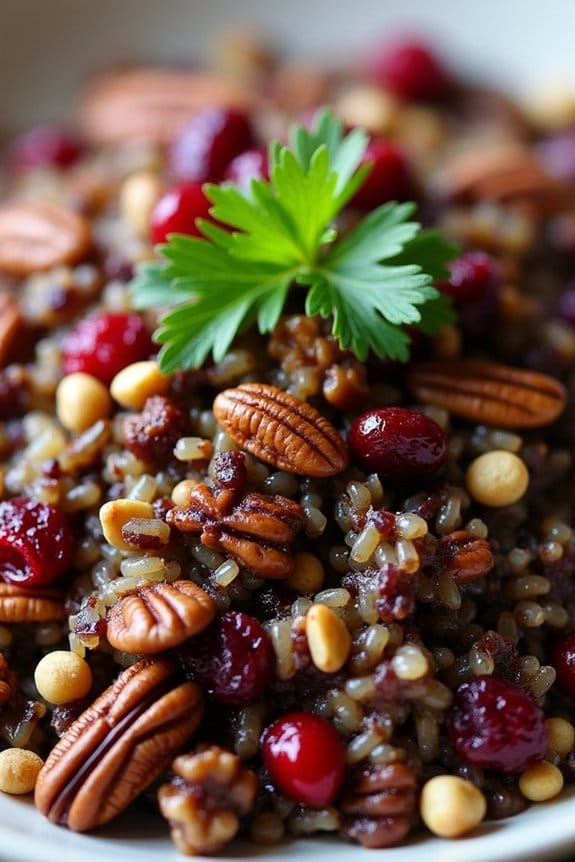
Cranberry Pecan Wild Rice Pilaf is a delightful and festive side dish that perfectly complements any Christmas lunch. This dish combines the nutty flavor of wild rice with the sweet and tart taste of cranberries and the crunchy texture of pecans. The aromatic herbs and spices further enhance the flavor, making it a wonderful addition to your holiday table.
Not only is it visually appealing with its rich colors, but it also offers a healthy and hearty option that pairs well with a variety of main courses. This dish is perfect for those who want to add a touch of elegance to their Christmas meal without spending hours in the kitchen.
The wild rice is cooked to perfection, while the cranberries and pecans add a seasonal flair that will impress your guests. Whether you’re hosting a large gathering or an intimate family meal, Cranberry Pecan Wild Rice Pilaf serves as an ideal side dish that everyone will love. Below is the recipe, complete with a list of ingredients and detailed cooking instructions for serving 4-6 people.
Ingredients:
- 1 cup wild rice
- 2 cups vegetable broth
- 1/2 cup dried cranberries
- 1/2 cup chopped pecans
- 1 small onion, finely chopped
- 2 cloves garlic, minced
- 2 tablespoons olive oil
- 1 teaspoon salt
- 1/2 teaspoon black pepper
- 1/4 teaspoon cinnamon
- 1/4 teaspoon nutmeg
- 2 tablespoons chopped fresh parsley
Instructions:
- Rinse the Wild Rice: Begin by rinsing the wild rice under cold water. This helps remove any excess starch and debris, ensuring a cleaner grain.
- Cook the Wild Rice: In a medium saucepan, combine the rinsed wild rice and vegetable broth. Bring to a boil over medium-high heat, then reduce the heat to low, cover, and let simmer for 45-50 minutes or until the rice is tender and the liquid is absorbed. Fluff with a fork and set aside.
- Sauté Onion and Garlic: In a large skillet, heat the olive oil over medium heat. Add the finely chopped onion and sauté until translucent, about 3-4 minutes. Stir in the minced garlic and cook for an additional minute.
- Combine Ingredients: Add the cooked wild rice to the skillet with the sautéed onion and garlic. Stir in the dried cranberries, chopped pecans, salt, black pepper, cinnamon, and nutmeg. Mix well to combine all the flavors.
- Heat Through: Cook the pilaf for another 5 minutes over medium heat, stirring occasionally, until everything is heated through and the cranberries have softened slightly.
- Garnish and Serve: Remove from heat and stir in the chopped fresh parsley. Serve warm as a delightful side dish to your Christmas lunch.
Extra Tips:
For a more robust flavor, you can toast the pecans in a dry skillet over medium heat for a few minutes before adding them to the pilaf. Be sure to watch them closely to prevent burning.
Additionally, consider experimenting with different dried fruits such as apricots or cherries for a unique twist. If you prefer a more savory taste, you can replace the cinnamon and nutmeg with a pinch of thyme or rosemary.
Finally, if you have leftovers, this pilaf can be refrigerated and reheated, maintaining its delicious flavor and texture.
Maple Roasted Brussels Sprouts
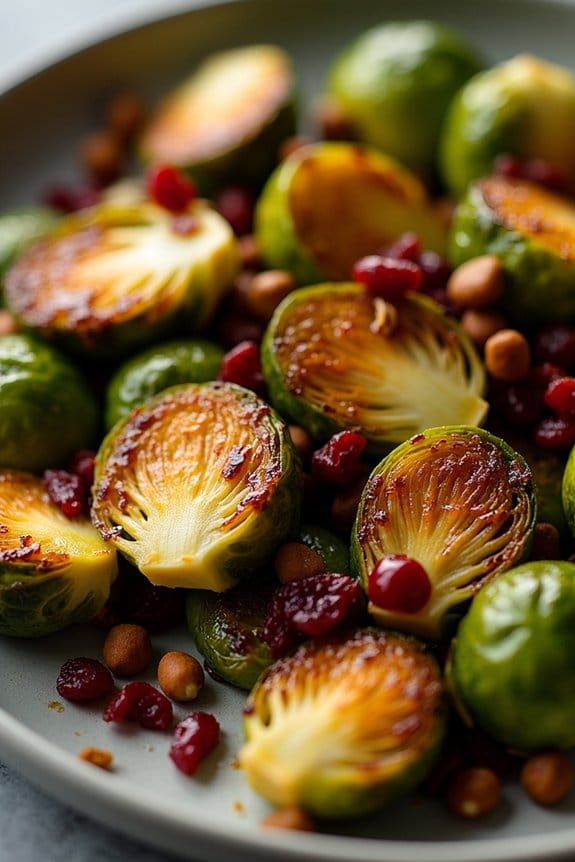
Maple Roasted Brussels Sprouts are a delightful and nutritious side dish perfect for any Christmas lunch. This dish combines the natural bitterness of Brussels sprouts with the sweet, caramelized flavor of maple syrup, making it a crowd-pleaser that even those wary of Brussels sprouts will enjoy.
The roasting process enhances the sprouts’ natural flavors, resulting in a dish that’s both crispy and tender. In addition to their delicious taste, Brussels sprouts are packed with vitamins and nutrients, making this side dish as healthy as it’s flavorful.
The combination of maple syrup, olive oil, and a hint of salt and pepper guarantees that each bite is bursting with taste. This recipe is simple to prepare and requires minimal ingredients, allowing you to spend more time enjoying the company of your loved ones and less time in the kitchen.
Ingredients for 4-6 servings:
- 2 pounds Brussels sprouts, trimmed and halved
- 3 tablespoons olive oil
- 1/4 cup pure maple syrup
- Salt and freshly ground black pepper, to taste
- 1/2 cup chopped pecans (optional)
- 1/4 cup dried cranberries (optional)
Instructions:
- Preheat the Oven: Begin by preheating your oven to 400°F (200°C) to verify it’s hot enough to roast the Brussels sprouts to perfection.
- Prepare the Brussels Sprouts: Trim the ends of the Brussels sprouts and remove any yellow or damaged outer leaves. Cut each sprout in half to guarantee even cooking.
- Mix Ingredients: In a large mixing bowl, combine the halved Brussels sprouts, olive oil, maple syrup, salt, and pepper. Toss the ingredients together until the sprouts are evenly coated.
- Spread on Baking Sheet: Arrange the Brussels sprouts in a single layer on a large baking sheet. This will help them cook evenly and allow them to roast rather than steam.
- Roast in the Oven: Place the baking sheet in the preheated oven and roast for 25-30 minutes, flipping the sprouts halfway through cooking. They should be tender yet crispy on the edges.
- Add Pecans and Cranberries (Optional): If using, add the chopped pecans and dried cranberries to the baking sheet during the final 5 minutes of roasting. This will gently toast the pecans and slightly soften the cranberries.
- Serve: Once the Brussels sprouts are done roasting, remove them from the oven and serve immediately for the best flavor and texture.
Extra Tips:
When selecting Brussels sprouts, look for ones that are firm and bright green for the freshest flavor. Be sure not to overcrowd the baking sheet, as this can cause the sprouts to steam rather than roast, preventing them from getting that desirable crispy texture.
If you prefer a spicier kick, consider adding a pinch of red pepper flakes to the mix. Finally, feel free to experiment with different nuts or dried fruits to customize the dish to your taste preferences.
Classic Green Bean Almondine
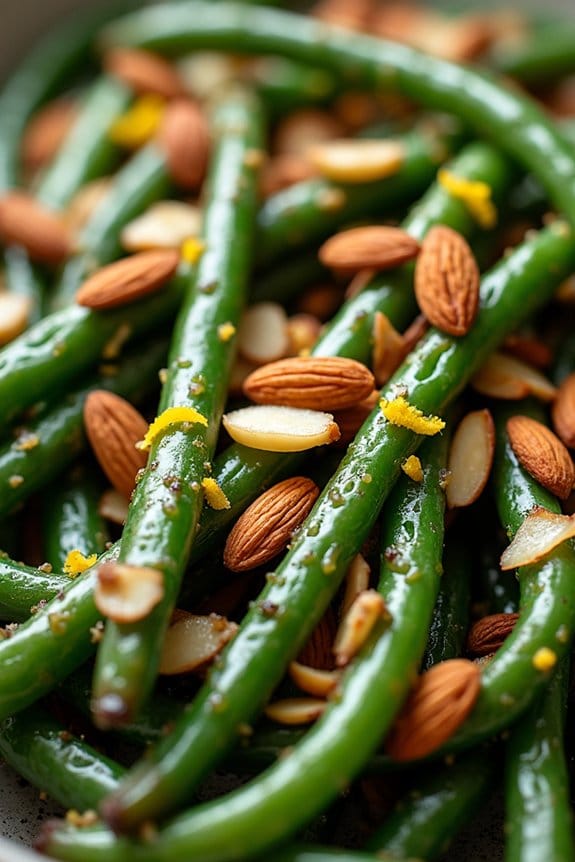
Green Bean Almondine is a timeless and elegant side dish perfect for your Christmas lunch. This classic French recipe features tender green beans tossed with toasted almonds and a hint of lemon, bringing a delightful crunch and new, zesty flavor to your holiday table.
It’s a simple yet sophisticated dish that pairs beautifully with a variety of main courses, making it a versatile addition to your festive spread.
The beauty of Green Bean Almondine lies in its simplicity and the use of fresh ingredients that highlight the natural flavors of the green beans. The almonds add a nutty richness, while the lemon juice brightens the dish, making it an invigorating complement to heavier holiday fare.
This recipe serves 4-6 people, making it ideal for a family gathering or an intimate holiday meal.
Ingredients:
- 1 pound fresh green beans, trimmed
- 1/2 cup slivered almonds
- 3 tablespoons unsalted butter
- 2 cloves garlic, minced
- 1 lemon, juiced and zested
- Salt and pepper to taste
- Optional: 1 tablespoon olive oil
Cooking Instructions:
1. Prepare the Green Beans: Begin by trimming the ends of the green beans. Rinse them thoroughly under cold water to remove any dirt or debris.
2. Blanch the Green Beans: Fill a large pot with water and bring it to a boil. Add a pinch of salt. Once boiling, add the green beans and cook for 3-4 minutes until they’re bright green and tender-crisp.
Immediately transfer the beans to a bowl of ice water to stop the cooking process. Drain and set aside.
3. Toast the Almonds: In a large skillet, melt the butter over medium heat. Add the slivered almonds and toast them for about 3-5 minutes until they’re golden brown and fragrant.
Stir occasionally to prevent burning. Once toasted, remove the almonds from the skillet and set aside.
4. Sauté the Garlic: In the same skillet, add the minced garlic to the remaining butter. Sauté for about 1 minute until the garlic is fragrant but not browned.
5. Combine Ingredients: Add the blanched green beans to the skillet with the garlic. Toss to coat the beans in the garlic butter.
Add the toasted almonds, lemon juice, and lemon zest. Season with salt and pepper to taste. Optional: drizzle with olive oil for added richness.
6. Serve: Heat everything together for another 2-3 minutes until the green beans are warmed through. Transfer to a serving dish and serve immediately.
Extra Tips:
To make sure your Green Bean Almondine is a hit at your Christmas lunch, make sure not to overcook the green beans during the blanching process. They should remain tender-crisp for the best texture.
You can also prepare the almonds and blanch the beans a day in advance to save time on the day of your meal. Additionally, feel free to experiment with flavors by adding a sprinkle of freshly grated Parmesan cheese or a dash of crushed red pepper flakes for a bit of heat.
Adjust the lemon juice according to your taste preference, and remember, fresh lemon juice always offers the best flavor.
Sweet Potato and Marshmallow Bake

Sweet Potato and Marshmallow Bake is a classic and comforting side dish that has found its way into the hearts and homes of many during the holiday season. This delightful dish combines the natural sweetness of sweet potatoes with the gooey, caramelized topping of marshmallows, creating a symphony of flavors and textures that are certain to please any crowd.
Perfect for a festive Christmas lunch, this recipe brings warmth and nostalgia to the table, making it an ideal choice to accompany your main course.
Preparing this Sweet Potato and Marshmallow Bake is both simple and satisfying. The process involves roasting sweet potatoes to enhance their natural sugars, then mashing them with butter, brown sugar, and a few aromatic spices to create a rich and flavorful base. Topped with a generous layer of marshmallows, the bake is finished in the oven until the marshmallows are golden and bubbly, providing a beautiful contrast to the creamy sweet potatoes beneath.
This dish serves 4-6 people, making it perfect for a small family gathering or a festive potluck.
Ingredients:
- 4 large sweet potatoes
- 1/2 cup unsalted butter, melted
- 1/3 cup brown sugar
- 1/2 teaspoon ground cinnamon
- 1/4 teaspoon ground nutmeg
- 1 teaspoon vanilla extract
- 1/2 teaspoon salt
- 2 cups mini marshmallows
Cooking Instructions:
- Preheat the oven: Start by preheating your oven to 375°F (190°C) to get it ready for baking.
- Prepare the sweet potatoes: Wash and peel the sweet potatoes, and then cut them into large chunks. This will guarantee they cook evenly.
- Cook the sweet potatoes: Place the sweet potato chunks in a large pot and cover them with water. Bring the water to a boil over high heat, then reduce the heat to medium and let them simmer for about 20-25 minutes, or until the sweet potatoes are tender when pierced with a fork.
- Mash the sweet potatoes: Drain the sweet potatoes and transfer them to a large mixing bowl. Add the melted butter, brown sugar, cinnamon, nutmeg, vanilla extract, and salt. Mash the mixture with a potato masher or an electric mixer until smooth and creamy.
- Assemble the bake: Spoon the mashed sweet potatoes into a greased 9×13 inch baking dish, spreading them out evenly. Sprinkle the mini marshmallows evenly over the top of the sweet potatoes.
- Bake the dish: Place the baking dish in the preheated oven and bake for 15-20 minutes, or until the marshmallows are golden brown and puffy.
- Serve: Remove the bake from the oven and let it sit for a few minutes before serving, allowing the marshmallows to set slightly.
Extra Tips:
For an added layer of flavor, consider sprinkling chopped pecans or walnuts over the marshmallows before baking. This will add a delightful crunch to each bite.
Additionally, if you prefer a less sweet version, you can reduce the amount of brown sugar or opt for unsweetened marshmallows. Be sure to keep a close eye on the marshmallows while baking, as they can quickly go from golden to burnt.
Finally, if you’re serving a larger crowd, this recipe can easily be doubled and prepared in a larger baking dish.
Zesty Orange and Pomegranate Salad
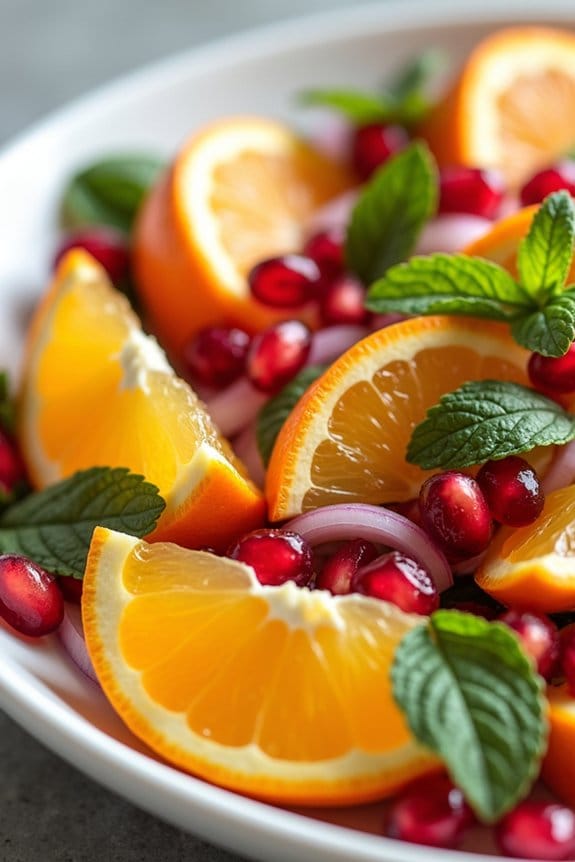
Zesty Orange and Pomegranate Salad is a revitalizing and vibrant dish that will bring a pop of color and flavor to your Christmas lunch table. Combining the sweetness of fresh oranges with the tartness of pomegranates, this salad offers a delightful balance of citrusy and tangy flavors. The addition of fresh mint leaves and a light dressing enhances the taste, making it a perfect side dish to complement your festive feast.
Aside from its delicious taste, this salad is packed with nutrients. Oranges are rich in vitamin C, which boosts the immune system, while pomegranates are loaded with antioxidants that can help reduce inflammation. This simple yet elegant salad isn’t only a treat for your taste buds but also provides numerous health benefits, making it a perfect addition to your holiday menu.
Serve this Zesty Orange and Pomegranate Salad for 4-6 people to enjoy a revitalizing and healthy side dish during your Christmas celebration.
Ingredients:
- 4 large oranges
- 1 cup pomegranate seeds
- 1 small red onion, thinly sliced
- 1/4 cup fresh mint leaves, chopped
- 2 tablespoons olive oil
- 1 tablespoon honey
- 1 tablespoon lime juice
- Salt and pepper to taste
Instructions:
- Prepare the Oranges: Begin by peeling the oranges. Use a sharp knife to remove the skin and pith completely. Slice the oranges crosswise into thin rounds, and then cut each round into quarters. This makes it easier to eat and mix with other salad ingredients.
- Extract Pomegranate Seeds: Cut the pomegranate in half and gently tap the back with a wooden spoon over a bowl to release the seeds. Make sure to remove any white pith that falls out.
- Mix the Salad: In a large salad bowl, combine the orange pieces, pomegranate seeds, and thinly sliced red onion. Toss gently to mix the ingredients without bruising the fruit.
- Prepare the Dressing: In a small bowl, whisk together the olive oil, honey, and lime juice until well combined. Season with salt and pepper to taste. Adjust the seasoning according to your preference.
- Dress the Salad: Pour the dressing over the salad mixture. Add the chopped mint leaves and toss everything together gently to revitalize the dressing coats all the ingredients evenly.
- Chill and Serve: Allow the salad to chill in the refrigerator for at least 30 minutes before serving. This helps the flavors to meld together. Serve cold and enjoy the revitalizing taste.
Extra Tips:
For best results, choose ripe and juicy oranges to promote maximum flavor. If you want a more robust flavor, consider adding a few thin slices of jalapeño for a spicy kick.
You can also substitute lime juice with lemon juice if you prefer. When extracting pomegranate seeds, do it over a bowl of water to prevent staining your clothes and to easily separate the seeds from the pith.
This salad is best served fresh; however, you can prepare the ingredients ahead of time and combine them just before serving to save time on the day of your event.
Savory Herb Stuffing
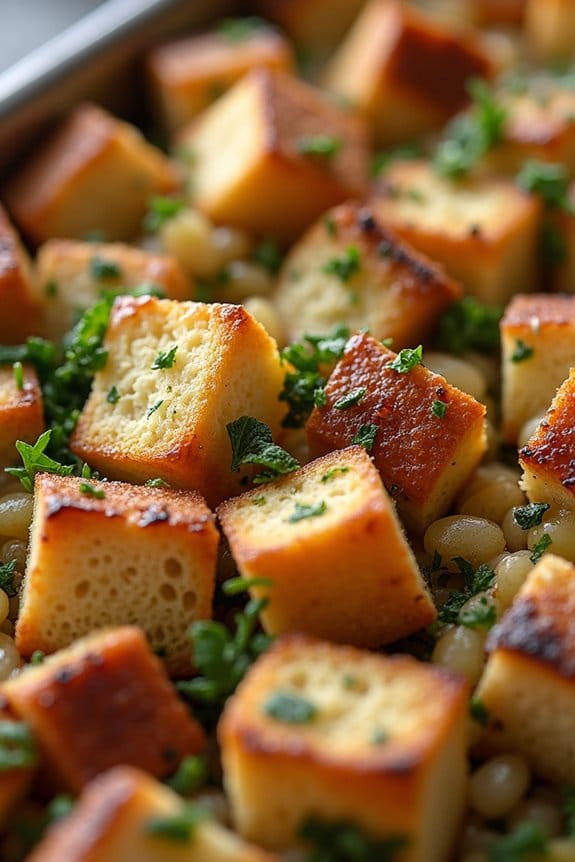
Savory Herb Stuffing is a quintessential side dish for any Christmas lunch, bringing together a harmonious blend of herbs and spices with deliciously toasted bread cubes. This classic dish pairs well with turkey, ham, or any other holiday centerpiece, and its rich, aromatic flavors are sure to be a hit with family and friends.
The recipe is simple to follow and can be made in advance, giving you more time to focus on the main course and other festivities. This stuffing recipe serves 4-6 people, making it perfect for a family gathering or a small holiday party.
The combination of fresh herbs, butter, and broth guarantees a moist and flavorful stuffing that’s both comforting and delicious. Whether it’s served alongside a traditional roast or as a vegetarian option, this stuffing is a must-have on your Christmas lunch menu.
Ingredients:
- 1 loaf of crusty bread (about 1 pound), cut into 1-inch cubes
- 1/2 cup (1 stick) unsalted butter
- 1 large onion, finely chopped
- 3 celery stalks, finely chopped
- 3 cloves garlic, minced
- 1/4 cup fresh parsley, chopped
- 2 tablespoons fresh sage, chopped
- 1 tablespoon fresh thyme, chopped
- 1 teaspoon salt
- 1/2 teaspoon black pepper
- 2 cups chicken or vegetable broth
- 2 large eggs, beaten
Cooking Instructions:
1. Preheat the Oven: Preheat your oven to 350°F (175°C). Spread the bread cubes evenly on a baking sheet and toast them in the oven for about 10-15 minutes, or until they’re golden brown and crisp. Remove from the oven and set aside to cool.
2. Cook Vegetables: In a large skillet, melt the butter over medium heat. Add the chopped onion, celery, and garlic. Sauté until the vegetables are tender, approximately 10 minutes.
Stir in the parsley, sage, thyme, salt, and pepper, and cook for an additional 2 minutes to allow the herbs to release their flavors.
3. Combine Ingredients: In a large mixing bowl, combine the toasted bread cubes with the sautéed vegetable mixture. Pour in the broth gradually, stirring to ascertain that the bread cubes are evenly moistened, but not soggy.
Add the beaten eggs and mix well to incorporate all ingredients.
4. Bake the Stuffing: Transfer the stuffing mixture to a greased 9×13-inch baking dish. Cover with foil and bake for 30 minutes.
Remove the foil and bake for an additional 15-20 minutes, or until the top is golden brown and crisp.
5. Serve: Once baked, remove the stuffing from the oven and let it rest for a few minutes before serving. This allows the flavors to meld together and makes it easier to serve.
Extra Tips:
For a deeper flavor, consider using a mix of different types of bread, such as sourdough, whole wheat, or rye. You can also add extras like chopped nuts, dried cranberries, or sautéed mushrooms to enhance the dish.
If you prefer a slightly more moist stuffing, increase the amount of broth slightly. Finally, preparing the stuffing a day in advance and refrigerating it overnight can help the flavors to develop even further, making it a time-saving option on the day of your Christmas lunch.
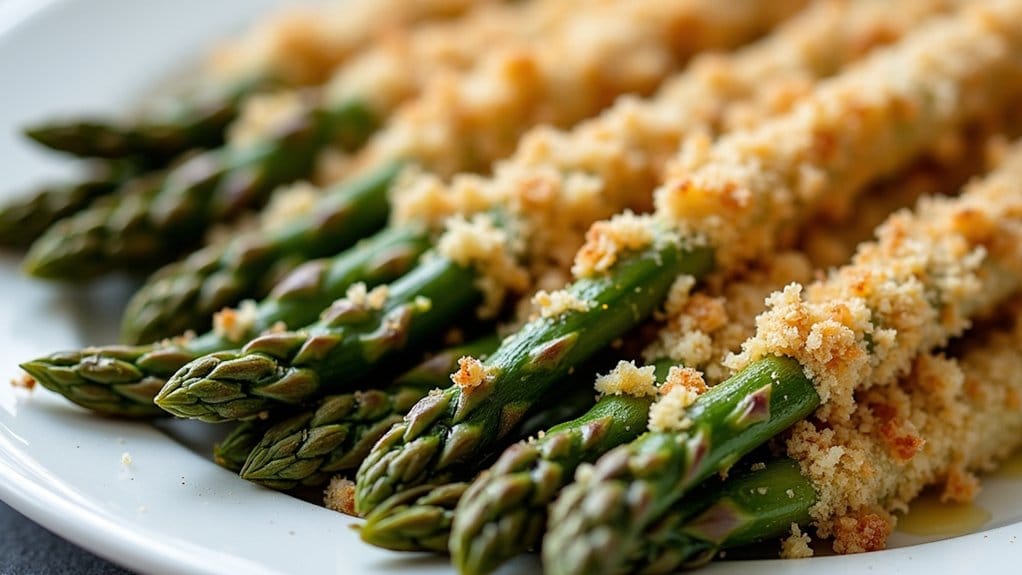
Parmesan Crusted Asparagus
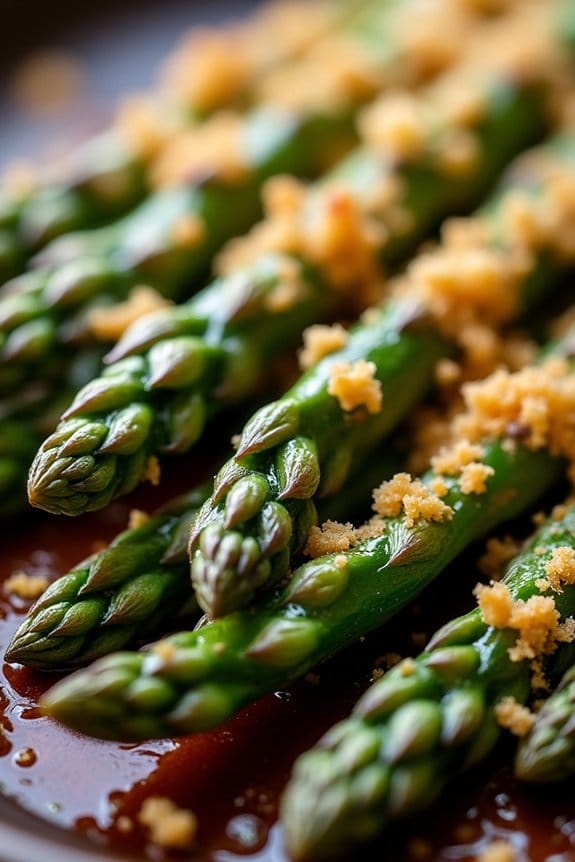
Parmesan Crusted Asparagus is a delightful side dish that combines the fresh, earthy flavors of asparagus with the rich, savory taste of Parmesan cheese. Perfect for a Christmas lunch, this dish isn’t only delicious but also adds a touch of elegance to your table.
The asparagus spears are coated with a crispy, cheesy crust that enhances their natural flavor and provides a satisfying crunch. This recipe is simple to prepare and is sure to captivate your family and friends with its gourmet appearance and taste.
This dish is ideal for those looking to add a healthy yet indulgent side to their holiday meal. The Parmesan Crusted Asparagus pairs well with a variety of main courses, from roasted meats to vegetarian options.
Its versatility and appealing presentation make it a great choice for any festive occasion. With this recipe, you can enjoy a side dish that’s both nutritious and packed with flavor, making it a perfect addition to your Christmas lunch menu.
Ingredients (Serves 4-6):
- 1 pound fresh asparagus, ends trimmed
- 1 cup grated Parmesan cheese
- 1 cup panko breadcrumbs
- 1 teaspoon garlic powder
- 1 teaspoon salt
- 1/2 teaspoon black pepper
- 2 large eggs
- 2 tablespoons olive oil
Cooking Instructions:
- Preheat the Oven: Preheat your oven to 400°F (200°C). Line a baking sheet with parchment paper to prevent sticking and guarantee easy cleanup.
- Prepare the Coating: In a shallow dish, combine the grated Parmesan cheese, panko breadcrumbs, garlic powder, salt, and black pepper. Mix well to guarantee even distribution of the spices.
- Prepare the Asparagus: Wash the asparagus thoroughly and trim the tough ends. Pat them dry with a paper towel to guarantee the coating adheres properly.
- Coat the Asparagus: In a separate shallow dish, beat the eggs and add a tablespoon of olive oil. Dip each asparagus spear into the egg mixture, guaranteeing it’s well coated, then roll it in the Parmesan mixture. Use your hands to press the coating onto the asparagus to guarantee it sticks well.
- Arrange on Baking Sheet: Place the coated asparagus spears in a single layer on the prepared baking sheet. Drizzle with the remaining tablespoon of olive oil for added crispness.
- Bake: Bake in the preheated oven for 15-20 minutes, or until the asparagus is tender and the coating is golden brown and crispy. Keep an eye on them to prevent burning.
- Serve: Remove from the oven and let cool slightly before serving. They can be enjoyed warm and make a perfect addition to your Christmas lunch table.
Extra Tips:
To guarantee the best results, choose fresh, firm asparagus spears; thinner spears tend to crisp up better than thicker ones. If you prefer a spicier kick, consider adding a pinch of cayenne pepper to the Parmesan mixture.
For an even crispier texture, use a convection setting on your oven if available. This dish can be prepared a few hours in advance and stored in the fridge; simply bake just before serving for maximum freshness.
