

As the holiday season draws near, I’ve been searching for festive recipes that keep things light and joyous. I’ve curated a list of ten vibrant, healthy dishes that promise to make our celebrations both delicious and nourishing. Think Roasted Vegetable Antipasto Platter and Quinoa Stuffed Bell Peppers bursting with flavor. And we can’t overlook the sweet touch of a Dark Chocolate Avocado Mousse. Ready to see how these dishes can transform your holiday table?
Roasted Vegetable Antipasto Platter

The Roasted Vegetable Antipasto Platter is a delightful and healthy addition to your Christmas menu. This vibrant dish showcases a colorful array of seasonal vegetables, roasted to perfection, bringing out their natural sweetness and flavors. Perfect as a starter or a side dish, this platter isn’t only visually appealing but also packed with nutrients.
The roasted vegetables are complemented by a selection of marinated olives, artichokes, and sun-dried tomatoes that add a savory and tangy contrast, making it a crowd-pleaser for both vegetarians and non-vegetarians alike.
Ideal for serving 4-6 people, this antipasto platter can be customized to include your favorite vegetables and accompaniments. It’s a versatile dish that allows for flexibility based on your personal preferences and what’s available in season.
Whether you’re hosting a large gathering or an intimate family dinner, this platter can be easily scaled up or down. It’s also a convenient option as most of the preparation can be done in advance, allowing you to enjoy the festivities with your loved ones without spending too much time in the kitchen.
Ingredients:
- 2 medium zucchinis, sliced
- 1 large red bell pepper, sliced
- 1 large yellow bell pepper, sliced
- 1 medium eggplant, sliced
- 1 cup cherry tomatoes
- 1 red onion, sliced
- 3 tbsp olive oil
- 2 tsp dried Italian herbs
- Salt and pepper to taste
- 1 cup marinated olives
- 1 cup marinated artichoke hearts
- 1/2 cup sun-dried tomatoes, drained
- Fresh basil leaves for garnish
Cooking Instructions:
- Preheat the Oven: Start by preheating your oven to 400°F (200°C). This guarantees that the vegetables roast evenly and develop a beautiful caramelization.
- Prepare the Vegetables: Wash all the vegetables thoroughly. Slice the zucchinis, bell peppers, eggplant, and onion into even pieces. Halve the cherry tomatoes. This guarantees even cooking.
- Seasoning: In a large mixing bowl, combine the sliced vegetables with olive oil, Italian herbs, salt, and pepper. Toss them well to confirm each piece is coated with the seasoning.
- Roasting: Spread the seasoned vegetables in a single layer on a baking sheet lined with parchment paper. Avoid overcrowding the pan to confirm even roasting. Place in the preheated oven and roast for 25-30 minutes or until the vegetables are tender and slightly charred.
- Assembling the Platter: Allow the roasted vegetables to cool slightly. On a large serving platter, arrange the roasted vegetables along with marinated olives, artichoke hearts, and sun-dried tomatoes.
- Garnishing: Finish by garnishing the platter with fresh basil leaves to add a burst of color and freshness.
Extra Tips:
For the best flavor, try roasting the vegetables the day before and storing them in an airtight container in the refrigerator. This allows the flavors to meld together beautifully.
When ready to serve, simply bring them to room temperature or give them a quick reheat in the oven. Additionally, consider using a variety of colored bell peppers for added visual appeal.
If you have any dietary restrictions or preferences, feel free to swap out vegetables or add in favorites such as mushrooms or asparagus. Finally, a drizzle of balsamic glaze over the finished platter can add a touch of sweetness that complements the savory elements perfectly.
Quinoa Stuffed Bell Peppers
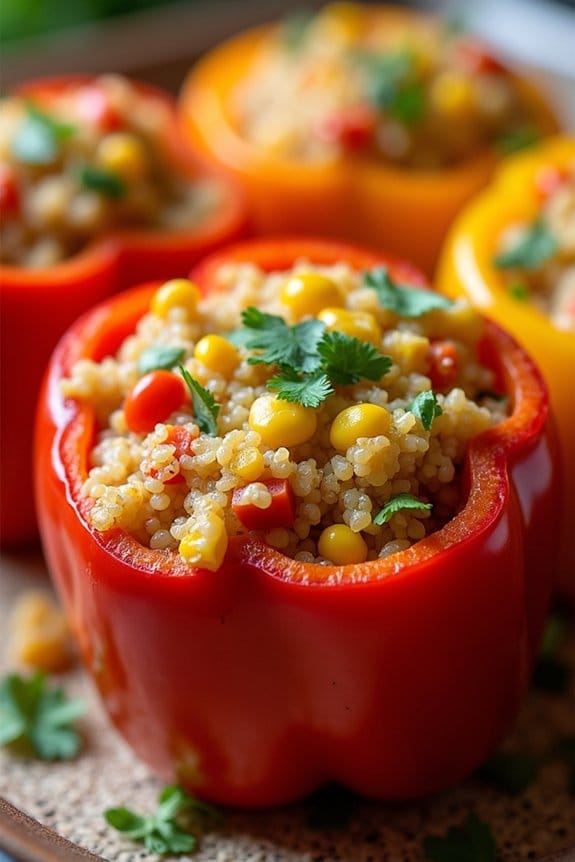
Quinoa Stuffed Bell Peppers are a delightful and nutritious option for a festive holiday meal. This vibrant dish combines the earthy flavors of quinoa with a medley of vegetables, herbs, and spices, all nestled in sweet bell peppers. Perfect for a Christmas gathering, these stuffed peppers not only look festive with their bright colors but also provide a healthy alternative to traditional holiday fare. Packed with protein and fiber, they satisfy both vegetarians and meat-lovers alike, making them a versatile addition to your Christmas menu.
Preparing Quinoa Stuffed Bell Peppers is a straightforward process that involves cooking quinoa to fluffy perfection and mixing it with a variety of vegetables and seasonings before stuffing the mixture into halved bell peppers. The dish is then baked until the peppers are tender and the flavors meld beautifully. Whether served as a main course or a side dish, these stuffed peppers are sure to be a hit at your holiday table. This recipe serves 4-6 people, making it ideal for family gatherings or intimate holiday dinners.
Ingredients:
- 6 large bell peppers (any color)
- 1 cup quinoa
- 2 cups vegetable broth or water
- 1 tablespoon olive oil
- 1 small onion, diced
- 2 cloves garlic, minced
- 1 zucchini, diced
- 1 can (14.5 oz) diced tomatoes, drained
- 1 can (15 oz) black beans, rinsed and drained
- 1 teaspoon ground cumin
- 1 teaspoon chili powder
- ½ teaspoon smoked paprika
- Salt and pepper to taste
- 1 cup corn kernels (fresh, frozen, or canned)
- ½ cup chopped fresh cilantro
- 1 cup shredded cheese (cheddar, Monterey Jack, or vegan cheese)
- Lime wedges for serving
Instructions:
- Preheat the Oven and Prepare the Peppers: Preheat your oven to 375°F (190°C). Slice the tops off the bell peppers and remove the seeds and membranes. Arrange the peppers in a baking dish, cut side up.
- Cook the Quinoa: Rinse the quinoa under cold water. In a medium saucepan, combine the quinoa and vegetable broth or water. Bring to a boil, then reduce the heat to low. Cover and simmer for about 15 minutes, or until the quinoa is cooked and the liquid is absorbed. Fluff with a fork and set aside.
- Sauté the Vegetables: In a large skillet, heat olive oil over medium heat. Add the diced onion and sauté until translucent, about 5 minutes. Stir in the minced garlic and cook for another minute. Add the zucchini and cook until tender, about 3 minutes.
- Combine the Filling: In the skillet with the cooked vegetables, add the drained diced tomatoes, black beans, cumin, chili powder, smoked paprika, salt, and pepper. Stir to combine and cook for 5 minutes. Add the cooked quinoa, corn, and cilantro, mixing all the ingredients thoroughly.
- Stuff the Peppers: Spoon the quinoa mixture into each bell pepper, packing it tightly. Place any leftover filling around the peppers in the baking dish.
- Bake the Peppers: Cover the dish with aluminum foil and bake in the preheated oven for 30 minutes. Remove the foil, sprinkle the tops of the peppers with cheese, and return to the oven. Bake uncovered for an additional 10-15 minutes, or until the cheese is melted and bubbly.
- Serve: Remove from the oven and let the peppers cool slightly before serving. Garnish with lime wedges and additional cilantro if desired.
Extra Tips:
For added flavor, you can roast the bell peppers in the oven for 10 minutes before stuffing them. This enhances their sweetness and adds a slightly smoky taste.
If you prefer a spicier version, consider adding a pinch of cayenne pepper or chopped jalapeños to the filling. Additionally, these stuffed peppers can be prepared ahead of time; simply assemble them, cover, and refrigerate for up to 24 hours before baking. This makes them an excellent choice for hassle-free holiday entertaining.
Herb-Crusted Salmon With Lemon
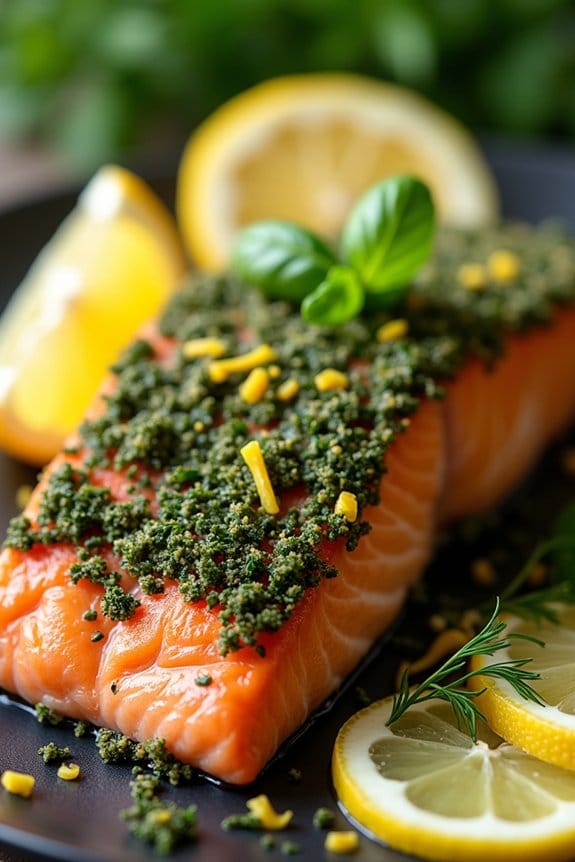
Herb-Crusted Salmon With Lemon is a delightful and healthy dish perfect for a festive Christmas meal. This recipe combines the rich, buttery flavor of salmon with a fragrant herb crust that’s complemented by the bright citrus notes of lemon. Not only is it simple to prepare, but it also makes for a stunning centerpiece on your holiday table.
The combination of fresh herbs and lemon zest creates a light yet flavorful crust that enhances the natural taste of the salmon, making it an ideal choice for those looking to enjoy a nutritious and delicious meal during the holiday season.
This dish isn’t only flavorful but also packed with nutrients. Salmon is rich in omega-3 fatty acids, which are beneficial for heart health, and the herbs provide additional antioxidants and vitamins. The lemon adds a revitalizing twist, making this dish a balanced and healthy option for Christmas dinner.
Whether you’re hosting a large gathering or a small family dinner, Herb-Crusted Salmon With Lemon is sure to impress your guests with its vibrant flavors and elegant presentation.
Ingredients:
- 4-6 salmon fillets (about 6 ounces each)
- 1 cup fresh parsley, finely chopped
- 1/2 cup fresh dill, finely chopped
- 1/2 cup fresh basil, finely chopped
- Zest of 2 lemons
- 2 cloves garlic, minced
- 1/4 cup olive oil
- Salt and pepper to taste
- Lemon wedges, for serving
Cooking Instructions:
- Preheat the Oven: Begin by preheating your oven to 400°F (200°C). This guarantees that the salmon will cook evenly and develop a nice crust.
- Prepare the Herb Mixture: In a medium-sized bowl, combine the chopped parsley, dill, basil, lemon zest, and minced garlic. Stir in the olive oil, mixing well until all the herbs are coated. Season the mixture with salt and pepper to taste.
- Prepare the Salmon: Place the salmon fillets on a baking sheet lined with parchment paper. Pat the fillets dry with a paper towel to remove excess moisture, which helps the herb crust adhere better.
- Apply the Herb Crust: Generously spread the herb mixture over the top of each salmon fillet, pressing down lightly to confirm it sticks. Make sure the crust covers the entire top surface of the fillets.
- Bake the Salmon: Place the baking sheet in the preheated oven and bake for 12-15 minutes, or until the salmon is cooked through and flakes easily with a fork. The herb crust should be lightly browned and fragrant.
- Serve: Remove the salmon from the oven and allow it to rest for a few minutes. Serve with lemon wedges on the side for an extra burst of citrus flavor.
Extra Tips:
For the best results, use fresh herbs and lemons as they provide a more intense flavor compared to dried herbs and bottled lemon juice. If you prefer a spicier kick, you can add a pinch of red pepper flakes to the herb mixture.
When selecting salmon, opt for wild-caught varieties for a more sustainable and flavorful option. Finally, keeping an eye on the baking time is essential, as overcooking can dry out the salmon; it should remain moist and tender.
Warm Spiced Lentil and Vegetable Soup
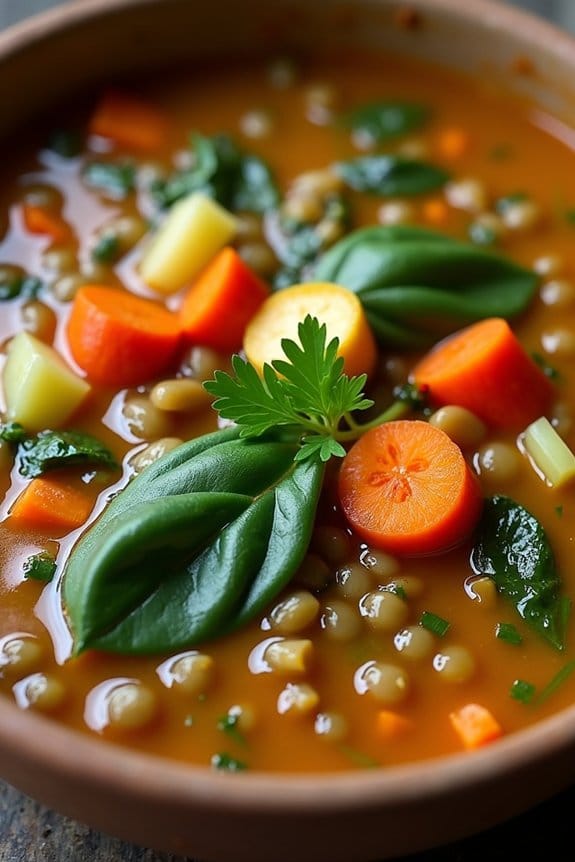
Warm Spiced Lentil and Vegetable Soup is a perfect addition to your healthy Christmas menu. This hearty soup is packed with nutritious ingredients that will warm you up on a chilly winter evening. The combination of lentils and vegetables, spiced with aromatic herbs, creates a flavorful and satisfying dish that’s both comforting and nourishing.
Not only does it delight the taste buds, but it also provides a good source of protein and fiber, making it an ideal choice for a wholesome holiday meal. This recipe is designed to serve 4-6 people, making it perfect for a small family gathering or as a complement to a larger festive feast.
The warmth of cinnamon, cumin, and coriander infuses the lentils and vegetables with a rich depth of flavor, while the addition of fresh herbs adds a vibrant touch. Whether you’re looking for a light starter or a substantial main course, this Warm Spiced Lentil and Vegetable Soup will surely become a Christmas favorite.
Ingredients:
- 1 cup dried green or brown lentils
- 2 tablespoons olive oil
- 1 large onion, diced
- 2 cloves garlic, minced
- 2 carrots, diced
- 2 celery stalks, diced
- 1 red bell pepper, diced
- 1 zucchini, diced
- 1 teaspoon ground cumin
- 1 teaspoon ground coriander
- 1/2 teaspoon ground cinnamon
- 6 cups vegetable broth
- 1 can (14.5 oz) diced tomatoes
- Salt and black pepper to taste
- 1 bay leaf
- 2 cups fresh spinach leaves
- Fresh parsley, chopped, for garnish
Cooking Instructions:
- Prepare the Lentils: Rinse the lentils thoroughly under cold water and set aside. This helps to remove any debris or dust from the lentils.
- Sauté the Aromatics: In a large pot, heat the olive oil over medium heat. Add the diced onion and garlic, and sauté for about 3 minutes until the onion becomes translucent and the garlic is fragrant.
- Add Vegetables: Stir in the diced carrots, celery, red bell pepper, and zucchini. Cook the vegetables for about 5 minutes, stirring occasionally until they begin to soften.
- Incorporate Spices: Sprinkle in the ground cumin, ground coriander, and ground cinnamon. Stir well to coat the vegetables with the spices, cooking for an additional 2 minutes to release the flavors.
- Combine Lentils and Liquids: Add the rinsed lentils to the pot, followed by the vegetable broth, diced tomatoes, bay leaf, salt, and black pepper. Stir everything together until well combined.
- Simmer the Soup: Bring the mixture to a boil over high heat. Once boiling, reduce the heat to low, cover the pot, and let the soup simmer for about 25-30 minutes, or until the lentils are tender.
- Finish with Spinach: Stir in the fresh spinach leaves and cook for another 5 minutes until the spinach is wilted and bright green.
- Serve and Garnish: Remove the bay leaf before serving. Ladle the soup into bowls, garnish with fresh chopped parsley, and enjoy warm.
Extra Tips: For an extra depth of flavor, you can toast the cumin, coriander, and cinnamon in a dry skillet for a minute before adding them to the pot. This will intensify their aroma and flavor.
If you prefer a thicker consistency, you can blend a portion of the soup before adding the spinach, then return it to the pot to achieve your desired texture. Ultimately, feel free to customize the vegetables based on what’s in season or your personal preference.
Pomegranate and Walnut Salad
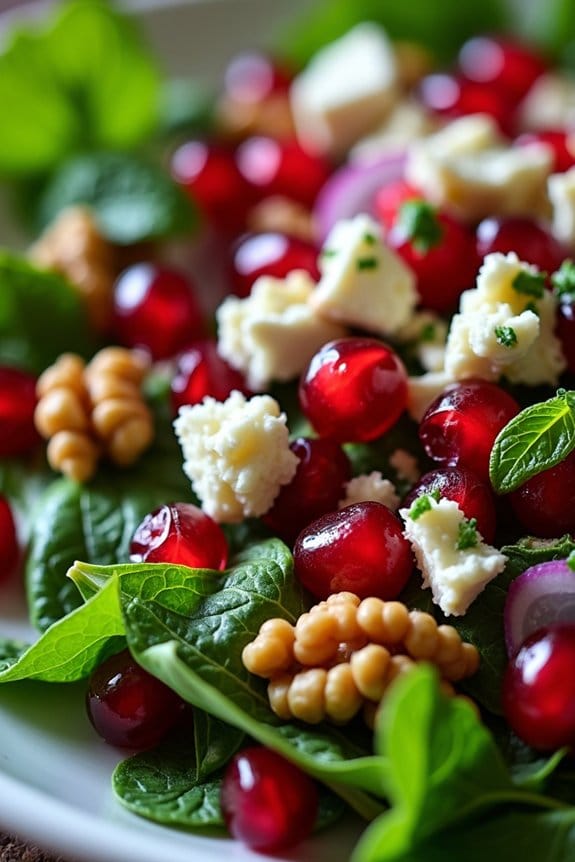
A Pomegranate and Walnut Salad is a delightful addition to any Christmas feast, combining the vibrant colors and flavors of the holiday season. This salad isn’t only visually appealing with its ruby red pomegranate arils and earthy walnuts but also packed with nutrients that make it a healthy choice for your festive table.
The combination of fresh greens, tangy pomegranate, crunchy walnuts, and a zesty dressing creates a perfect harmony of flavors and textures that will please your guests. This salad is quick and easy to prepare, making it an ideal choice for a busy holiday gathering.
The ingredients are simple yet full of flavor, and the preparation requires minimal effort. With its invigorating taste and festive appearance, this Pomegranate and Walnut Salad is sure to become a favorite in your holiday recipe collection.
Ingredients (serving size: 4-6 people):
- 6 cups mixed salad greens (such as arugula, spinach, or romaine)
- 1 cup pomegranate arils
- 1 cup walnut halves
- 1/2 cup crumbled feta cheese
- 1/4 cup thinly sliced red onion
- 1/4 cup fresh mint leaves, chopped
- 1/4 cup extra-virgin olive oil
- 2 tablespoons balsamic vinegar
- 1 tablespoon honey
- Salt and pepper to taste
Cooking Instructions:
- Prepare the Greens: Begin by washing and drying the salad greens thoroughly. Once dry, place them in a large salad bowl. This will be the base of your salad, so make sure the greens are fresh and crisp.
- Toast the Walnuts: In a dry skillet over medium heat, toast the walnut halves for about 5 minutes, stirring occasionally, until they’re golden brown and fragrant. Be careful not to burn them. Once toasted, remove from heat and let them cool.
- Assemble the Salad: Add the pomegranate arils, crumbled feta cheese, sliced red onion, and cooled walnuts to the bowl with the salad greens. Gently toss the ingredients together to guarantee an even distribution.
- Prepare the Dressing: In a small bowl, whisk together the olive oil, balsamic vinegar, and honey until well combined. Season with salt and pepper to taste. Adjust the seasoning according to your preference.
- Dress the Salad: Drizzle the dressing over the salad and gently toss to coat all ingredients with the dressing. Be careful not to overdress the salad to keep it light and fresh.
- Garnish and Serve: Sprinkle the chopped mint leaves over the top of the salad as a garnish. Serve immediately to enjoy the salad at its freshest.
Extra Tips:
To further enhance the flavor of your Pomegranate and Walnut Salad, consider adding a sprinkle of lemon zest for an extra citrusy note. If you prefer a vegan version, simply omit the feta cheese or substitute it with a vegan cheese alternative.
For added convenience, you can prepare the dressing ahead of time and store it in the refrigerator for up to a week. When toasting the walnuts, keep a close eye on them as they can burn quickly.
Finally, always use fresh pomegranate arils for the best flavor and texture, and if you’re short on time, you can purchase pre-packaged arils from the store.
Zucchini Noodles With Pesto
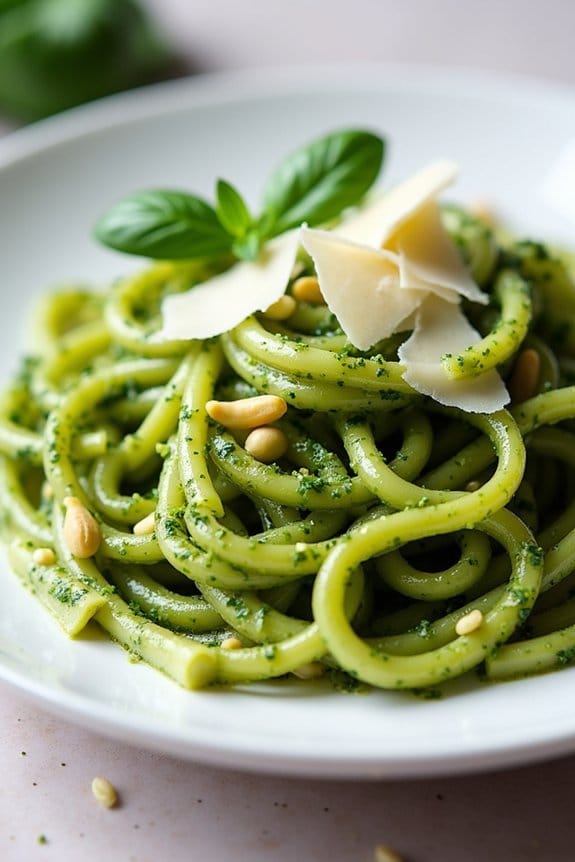
Indulge in a delightful and healthy twist on a classic Italian dish with Zucchini Noodles With Pesto. This recipe replaces traditional pasta with fresh zucchini noodles, offering a low-carb and nutrient-rich alternative that’s perfect for a light and satisfying meal.
The homemade basil pesto, teeming with vibrant flavors, perfectly complements the zucchini, creating an invigorating and aromatic dish that will be a hit at any Christmas gathering.
This recipe serves 4-6 people and isn’t only simple to prepare but also a feast for the senses. The crispness of the zucchini noodles pairs beautifully with the creamy, nutty, and herby notes of the pesto sauce. Whether you’re serving it as a main course or a side dish, these zucchini noodles are sure to be a crowd-pleaser, providing a healthy option that doesn’t skimp on taste.
Ingredients:
- 4 medium zucchinis
- 2 cups fresh basil leaves
- 1/2 cup extra-virgin olive oil
- 1/3 cup pine nuts
- 2 cloves garlic
- 1/2 cup grated Parmesan cheese
- Salt and pepper to taste
- 1 tablespoon lemon juice
Cooking Instructions:
- Prepare the Zucchini Noodles: Wash the zucchinis thoroughly. Using a spiralizer, create zucchini noodles. If you don’t have a spiralizer, you can use a julienne peeler or a regular vegetable peeler to make long, thin strips.
- Make the Pesto: In a food processor, combine the basil leaves, pine nuts, and garlic. Pulse until coarsely chopped. Gradually add the olive oil while continuing to process until the mixture is smooth. Add the grated Parmesan cheese and lemon juice, and process again to combine. Season with salt and pepper to taste.
- Cook the Zucchini Noodles: Heat a large skillet over medium heat. Add the zucchini noodles and sauté for 3-5 minutes, stirring occasionally until they’re tender but still crisp. Be careful not to overcook, as they can become mushy.
- Combine and Serve: Remove the skillet from heat and add the pesto to the zucchini noodles. Toss gently to coat the noodles evenly with the pesto. Serve immediately, garnished with additional Parmesan cheese and fresh basil leaves if desired.
Extra Tips: When preparing zucchini noodles, it’s important to avoid overcooking them to maintain their texture. If you prefer a thicker pesto, reduce the amount of olive oil.
Additionally, to keep the noodles from becoming watery, you can lightly salt them after spiralizing and let them drain in a colander for a few minutes before cooking. This dish is versatile and can be enhanced with additional ingredients like cherry tomatoes or grilled chicken for added flavor and protein.
Balsamic Glazed Brussels Sprouts
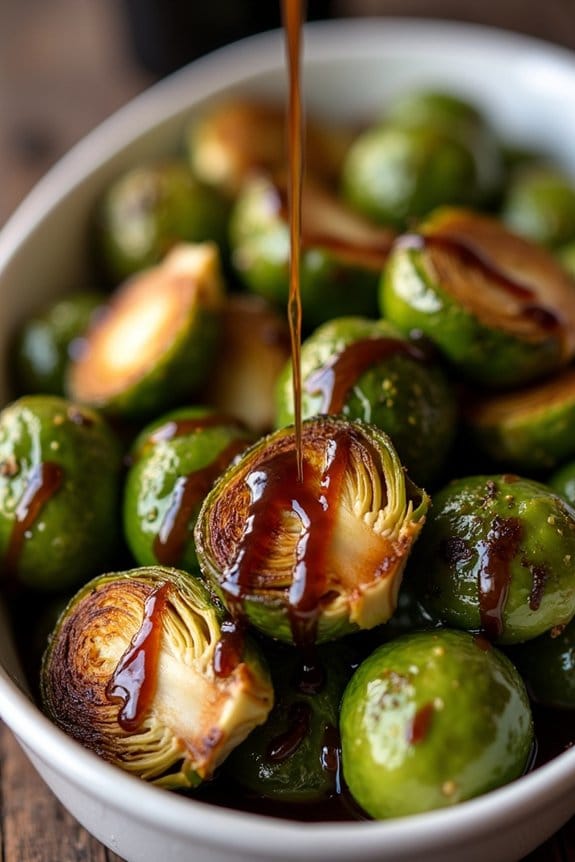
Brussels sprouts often get a bad rap, but when cooked correctly, they can be a delicious and nutritious addition to your Christmas feast. The natural bitterness of the sprouts is beautifully balanced by the sweet and tangy balsamic glaze, making this dish a crowd-pleaser even for those who claim not to like Brussels sprouts.
This recipe isn’t only healthy but also relatively simple to prepare, making it an ideal side dish for your festive table. The key to perfect Brussels sprouts is roasting them until they’re tender and caramelized, creating a delightful contrast with the balsamic glaze.
This dish serves 4-6 people, making it perfect for family gatherings or holiday dinners. With just a few ingredients, you can transform Brussels sprouts into a dish that everyone will love. Let’s explore the ingredients and the step-by-step process to create this mouthwatering dish.
Ingredients:
- 1 ½ pounds Brussels sprouts
- 3 tablespoons olive oil
- Salt, to taste
- Pepper, to taste
- ½ cup balsamic vinegar
- 2 tablespoons honey
- 1 teaspoon garlic powder
Instructions:
- Preheat the Oven: Start by preheating your oven to 400°F (200°C). This temperature is ideal for roasting Brussels sprouts to achieve a crispy exterior and tender interior.
- Prepare the Brussels Sprouts: Trim the ends of the Brussels sprouts and remove any yellow or damaged outer leaves. Cut each sprout in half for even cooking.
- Season the Sprouts: Place the halved Brussels sprouts in a large mixing bowl. Drizzle with olive oil and season with salt and pepper to taste. Toss them well to guarantee they’re thoroughly coated.
- Roast the Sprouts: Spread the Brussels sprouts in a single layer on a baking sheet. Roast them in the preheated oven for about 25-30 minutes, or until they’re golden brown and tender, stirring halfway through for even cooking.
- Prepare the Balsamic Glaze: While the sprouts are roasting, combine the balsamic vinegar, honey, and garlic powder in a small saucepan over medium heat. Bring the mixture to a boil, then reduce the heat and simmer for about 5-7 minutes, or until the glaze has thickened slightly.
- Combine and Serve: Once the Brussels sprouts are done roasting, remove them from the oven and transfer them to a serving dish. Drizzle the balsamic glaze over the roasted sprouts, tossing gently to coat them evenly. Serve immediately while warm.
Extra Tips:
When preparing this dish, it’s important to not overcrowd the baking sheet, as this can cause the Brussels sprouts to steam rather than roast, resulting in a less crispy texture.
You can also experiment by adding some toasted nuts, such as almonds or pecans, for an extra crunch. If you prefer a spicier kick, consider adding a sprinkle of red pepper flakes to the balsamic glaze.
This recipe is versatile and allows for adjustments based on your personal taste preferences. Enjoy your healthy and festive side dish!
Cauliflower Mashed Potatoes

Cauliflower Mashed Potatoes are a delightful and healthy twist on the traditional mashed potatoes, perfect for a Christmas feast. This dish offers a creamy texture and a subtle, nutty flavor, providing a lower-carb alternative without sacrificing taste. By swapping out potatoes for cauliflower, you get a lighter dish that pairs beautifully with any holiday roast or main course.
The addition of garlic and parmesan enhances the flavor, making it a hit even with those who are skeptical of vegetables. Not only is Cauliflower Mashed Potatoes easy to prepare, but it also requires minimal ingredients, many of which you may already have in your kitchen. It’s a dish that can be made in advance, which is a lifesaver during the busy holiday season.
Whether you’re serving guests who are on a low-carb diet or simply want to add more vegetables to your Christmas menu, this recipe is sure to please.
Ingredients (serves 4-6):
- 2 large heads of cauliflower
- 4 cloves of garlic, minced
- 1/4 cup unsalted butter
- 1/2 cup grated parmesan cheese
- 1/4 cup sour cream
- Salt, to taste
- Freshly ground black pepper, to taste
- Optional: Chopped chives for garnish
Cooking Instructions:
- Prepare the Cauliflower: Start by removing the leaves and the core from the cauliflower heads. Cut the cauliflower into florets. Rinse them thoroughly under cold water to remove any dirt and drain well.
- Cook the Cauliflower: In a large pot, bring about an inch of water to a boil and add a pinch of salt. Place the cauliflower florets in a steamer basket and set it in the pot. Cover and steam the florets for about 10-12 minutes, or until they’re fork-tender.
- Sauté the Garlic: While the cauliflower is steaming, melt the butter in a small pan over medium heat. Add the minced garlic and sauté for about 1-2 minutes until fragrant but not browned. Remove from heat and set aside.
- Mash the Cauliflower: Once the cauliflower is cooked, transfer it to a large mixing bowl. Use a potato masher or an immersion blender to mash the cauliflower to your desired consistency.
- Combine Ingredients: Add the sautéed garlic and butter, parmesan cheese, and sour cream to the mashed cauliflower. Mix everything together until well combined. Season with salt and freshly ground black pepper to taste.
- Final Touch: If desired, garnish with chopped chives for a pop of color and added flavor.
Extra Tips: For a smoother texture, consider using a food processor to blend the cauliflower after steaming. Be careful not to over-process, as this can make the mash too watery. If you find the mash is a bit too wet, you can return it to the pot over low heat, stirring occasionally to allow some of the moisture to evaporate.
Feel free to experiment with seasonings such as nutmeg or thyme for additional flavor variations.
Spiced Pear and Almond Tart

Spiced Pear and Almond Tart is a delightful and healthy treat perfect for adding a festive touch to your holiday gatherings. This dessert combines the natural sweetness of ripe pears with the nutty richness of almonds, all nestled in a crispy tart crust. The spices used in this recipe, such as cinnamon and nutmeg, enhance the flavors of the fruit and add a warm, comforting aroma to your kitchen.
This tart isn’t only delicious but also healthier compared to traditional holiday desserts, as it incorporates whole ingredients and reduces refined sugars. The result is a light yet satisfying dessert that will leave your guests feeling indulged without overindulging. Designed to serve 4-6 people, this recipe offers a perfect balance of flavors and textures, making it a must-try for your holiday menu.
Ingredients (Serves 4-6)
- 1 sheet of store-bought puff pastry or homemade tart dough
- 3 ripe pears, peeled, cored, and thinly sliced
- 1/2 cup almond flour
- 1/4 cup granulated sugar or a sugar substitute
- 1/4 cup unsalted butter, softened
- 1 large egg
- 1 teaspoon vanilla extract
- 1/2 teaspoon ground cinnamon
- 1/4 teaspoon ground nutmeg
- 1/4 cup sliced almonds
- Powdered sugar for dusting (optional)
Cooking Instructions
1. Prepare the Tart Base
Preheat your oven to 375°F (190°C). Roll out the puff pastry or tart dough on a lightly floured surface to fit a 9-inch tart pan. Carefully transfer the dough into the pan, pressing it into the edges and trimming any excess. Prick the base with a fork to prevent it from puffing up during baking.
2. Make the Almond Filling
In a medium bowl, cream together the almond flour, granulated sugar, and softened butter until smooth. Add the egg and vanilla extract, and mix until fully incorporated. Spread the almond mixture evenly over the prepared tart base.
3. Arrange the Pears
Neatly arrange the pear slices over the almond filling in a circular pattern, starting from the outer edge and working your way to the center. Sprinkle the ground cinnamon and nutmeg evenly over the pears for added flavor.
4. Bake the Tart
Place the tart in the preheated oven and bake for 35-40 minutes or until the pears are tender and the crust is golden brown. The almond filling should be set and slightly puffed.
5. Add the Finishing Touches****
Remove the tart from the oven and let it cool slightly. Sprinkle the sliced almonds over the top and add a light dusting of powdered sugar for a festive touch, if desired.
Extra Tips
For the best results, choose pears that are ripe yet firm to the touch, as they’ll hold their shape better during baking. If using a homemade tart dough, verify that it’s chilled before rolling out to prevent it from becoming too soft.
To enhance the almond flavor, consider toasting the almond flour lightly before using it in the filling. This tart is best served slightly warm or at room temperature, allowing the flavors to meld beautifully. Enjoy your Spiced Pear and Almond Tart as a delightful end to your holiday meal!
Dark Chocolate Avocado Mousse

Creating a healthy yet indulgent dessert for the holiday season can be a delightful challenge. Dark Chocolate Avocado Mousse is a perfect choice for those looking to enjoy a sweet treat without the guilt. This rich and creamy mousse combines the natural creaminess of avocados with the deep flavor of dark chocolate, resulting in a dessert that’s both satisfying and nutritious. The avocado provides healthy fats, while the dark chocolate offers antioxidants, making it a dessert that you can feel good about serving.
This mousse isn’t only delicious but also incredibly simple to prepare, making it an excellent option for a holiday gathering or a cozy night in. The smooth texture and decadent taste will leave your guests impressed, and they won’t believe that it’s made from avocados. With just a few ingredients and minimal effort, you can create a delightful dessert that caters to both chocolate lovers and health-conscious individuals alike.
Ingredients for 4-6 servings:
- 3 ripe avocados
- 150 grams of dark chocolate (70% cocoa or higher)
- 1/4 cup unsweetened cocoa powder
- 1/4 cup almond milk (or any milk of choice)
- 1/4 cup honey or maple syrup
- 1 teaspoon vanilla extract
- A pinch of salt
Cooking Instructions:
- Prepare the Chocolate: Start by melting the dark chocolate. Break the chocolate into small pieces and place them in a heatproof bowl. Set the bowl over a pot of simmering water, making sure the bowl doesn’t touch the water. Stir occasionally until the chocolate is fully melted and smooth. Remove from heat and let it cool slightly.
- Blend the Avocados: Cut the avocados in half, remove the pits, and scoop the flesh into a food processor or blender. Process the avocados until smooth and creamy, making sure there are no lumps.
- Combine Ingredients: Add the melted dark chocolate, unsweetened cocoa powder, almond milk, honey or maple syrup, vanilla extract, and a pinch of salt to the food processor with the avocado. Blend all the ingredients together until the mixture is smooth and homogeneous. Stop occasionally to scrape down the sides of the bowl to guarantee even mixing.
- Adjust Sweetness and Consistency: Taste the mousse and adjust the sweetness if necessary by adding more honey or maple syrup. If the mixture is too thick, add a little more almond milk, one tablespoon at a time, until you reach your desired consistency.
- Chill the Mousse: Once the mousse is smooth and well-combined, transfer it to serving bowls or glasses. Cover with plastic wrap and refrigerate for at least 30 minutes to allow the mousse to set and the flavors to meld.
- Serve: Before serving, you can garnish with toppings such as fresh berries, chopped nuts, or a dollop of whipped cream for an added touch of festivity.
Extra Tips:
When selecting avocados for this recipe, make sure they’re ripe but not overripe, as this will affect the texture and flavor of the mousse. If you prefer a sweeter mousse, feel free to adjust the amount of honey or maple syrup to suit your taste.
For a more intense chocolate flavor, you can increase the amount of cocoa powder slightly. This recipe can be made a day in advance and stored in the refrigerator, making it a convenient option for holiday preparations. Enjoy your healthy, decadent treat!
