
Looking for fresh and healthy Christmas appetizer ideas that will leave your guests impressed and guilt-free? I’ve got some delightful options that blend flavor and nutrition so well. Think creamy roasted red pepper hummus or vibrant Caprese salad skewers as stunning additions to your table. Each bite is a delightful surprise, perfect for your festive gathering. Ready to explore more tasty options that cater to every palate?
Roasted Red Pepper Hummus With Veggie Sticks
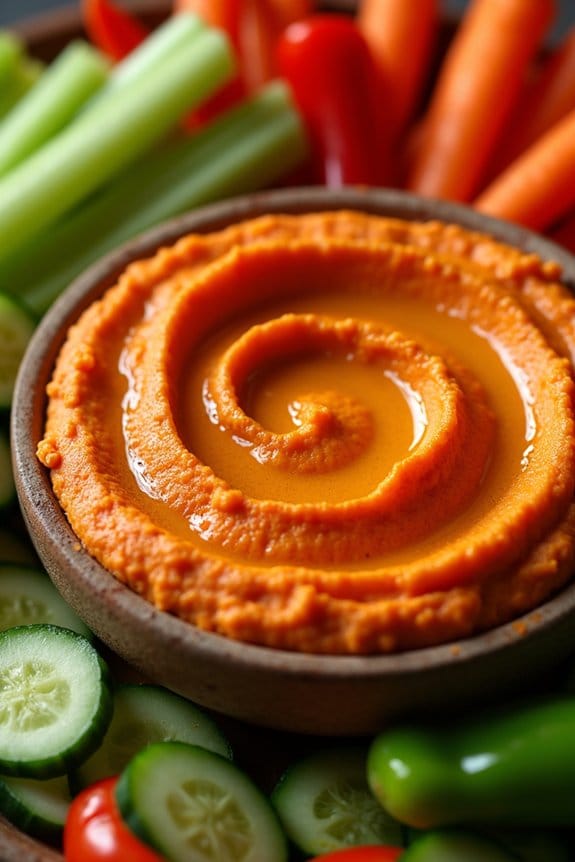
Roasted Red Pepper Hummus With Veggie Sticks is a delightful and healthy appetizer perfect for Christmas gatherings. This vibrant dish combines the smoky sweetness of roasted red peppers with the creamy texture of chickpeas to create a hummus that’s as delicious as it’s nutritious.
Paired with an assortment of fresh veggie sticks, it’s a crowd-pleaser that satisfies both the taste buds and the desire for a healthy snack. Ideal for serving 4-6 people, this recipe isn’t only easy to prepare but also makes for a visually appealing addition to your holiday spread.
The vibrant colors of the roasted red pepper hummus, coupled with the crisp, colorful veggie sticks, create an inviting display that encourages guests to dig in. Whether you’re hosting a festive party or attending a potluck, this dish is sure to impress.
Ingredients:
- 2 large red bell peppers
- 2 cups canned chickpeas, drained and rinsed
- 1/4 cup tahini
- 3 tablespoons lemon juice
- 2 garlic cloves, minced
- 2 tablespoons olive oil
- 1 teaspoon ground cumin
- Salt to taste
- Freshly ground black pepper to taste
- 1/3 cup water (or as needed for consistency)
- Assorted veggie sticks (such as carrots, cucumbers, celery, and bell peppers)
Cooking Instructions:
- Roast the Red Peppers: Preheat your oven to 450°F (230°C). Place the red peppers on a baking sheet and roast in the oven for about 20-25 minutes, turning occasionally until the skin is blistered and charred.
- Remove from the oven and place them in a bowl, covering with plastic wrap to steam for about 15 minutes. This will make the skins easier to peel off.
- Prepare the Hummus Base: While the peppers are steaming, combine the chickpeas, tahini, lemon juice, minced garlic, olive oil, ground cumin, salt, and black pepper in a food processor. Process until the mixture is smooth.
- Peel and Add the Peppers: Once the peppers are cool enough to handle, peel off the skins, remove the seeds, and add the flesh to the food processor. Blend until the mixture is smooth and creamy.
- If the hummus is too thick, add water, a tablespoon at a time, until the desired consistency is reached.
- Adjust Seasoning: Taste the hummus and adjust the seasoning if necessary, adding more salt, lemon juice, or cumin to suit your taste preferences.
- Serve: Transfer the hummus to a serving bowl and drizzle with a little olive oil if desired. Arrange the assorted veggie sticks around the bowl or on a separate platter for easy dipping.
Extra Tips: To add a bit more depth to your hummus, consider adding a pinch of smoked paprika or cayenne pepper for a subtle kick.
If you’re short on time, jarred roasted red peppers can be a quick alternative to roasting fresh ones. When choosing veggies for dipping, try to incorporate a variety of colors and textures to enhance the visual appeal and nutritional value of the dish.
Finally, for a more authentic Middle Eastern taste, you can add a tablespoon of za’atar spice blend to the hummus before serving.
Cucumber and Smoked Salmon Bites
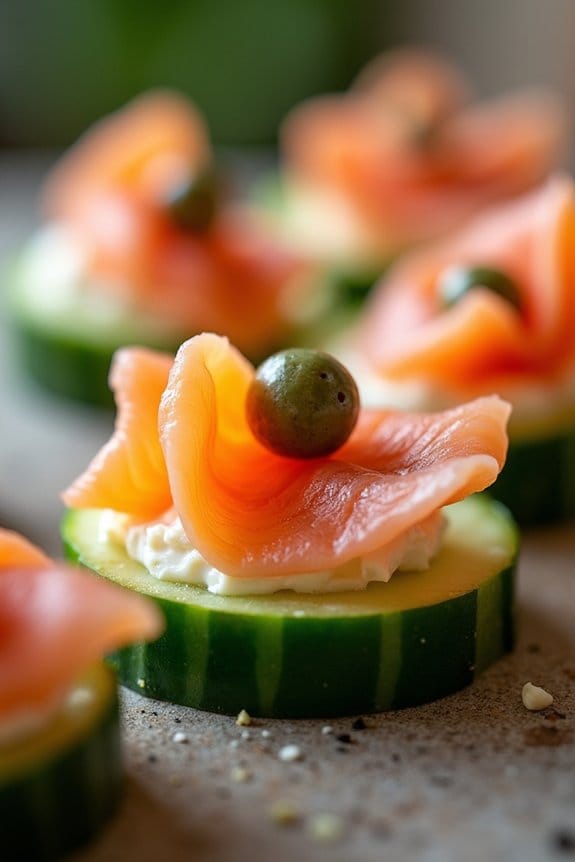
Cucumber and Smoked Salmon Bites are an elegant and healthy appetizer perfect for your Christmas celebrations. These delightful bites combine the invigorating crunch of cucumber with the rich, savory taste of smoked salmon, creating a harmonious balance of flavors and textures.
Not only are they visually appealing, but they’re also incredibly easy to prepare, making them an ideal choice for busy holiday gatherings. Whether you’re hosting a party or simply looking for a festive snack, these cucumber and smoked salmon bites will surely impress your guests.
This recipe is designed to serve 4-6 people, making it a great option for a small gathering or as part of a larger spread of appetizers. The preparation time is minimal, allowing you to focus on enjoying the holiday season with your loved ones.
With just a few ingredients and simple steps, you’ll have a sophisticated appetizer that highlights the freshness of cucumber and the indulgent flavor of smoked salmon. Let’s plunge into the ingredients and instructions to bring these delightful bites to your holiday table.
Ingredients:
- 1 large cucumber
- 8 ounces smoked salmon
- 4 ounces cream cheese, softened
- 1 tablespoon fresh dill, chopped
- 1 tablespoon lemon juice
- Salt and pepper to taste
- Optional: capers for garnish
Instructions:
- Prepare the Cucumber: Begin by washing the cucumber thoroughly. Using a vegetable peeler, partially peel the cucumber, leaving strips of the skin for a decorative effect. Slice the cucumber into rounds about 1/4 inch thick.
- Make the Cream Cheese Mixture: In a small bowl, combine the softened cream cheese, chopped dill, and lemon juice. Mix well until smooth and creamy. Season with a pinch of salt and pepper to taste.
- Assemble the Bites: Lay out the cucumber slices on a serving platter. Using a small spoon or a piping bag, place a dollop of the cream cheese mixture on each cucumber slice.
- Add the Smoked Salmon: Tear or cut the smoked salmon into bite-sized pieces. Place a piece of smoked salmon on top of the cream cheese on each cucumber slice.
- Garnish and Serve: For an extra touch of flavor, optionally top each bite with a caper. Arrange the cucumber and smoked salmon bites neatly on the platter, and serve immediately.
Extra Tips: When selecting cucumbers, choose firm ones without soft spots for a crisp texture. If you prefer a milder flavor, you can use seedless cucumbers.
For an added pop of color and taste, consider garnishing with finely chopped chives or a sprinkle of paprika. These bites are best served fresh to maintain their crunchy texture, so try to assemble them just before serving to your guests.
Caprese Salad Skewers
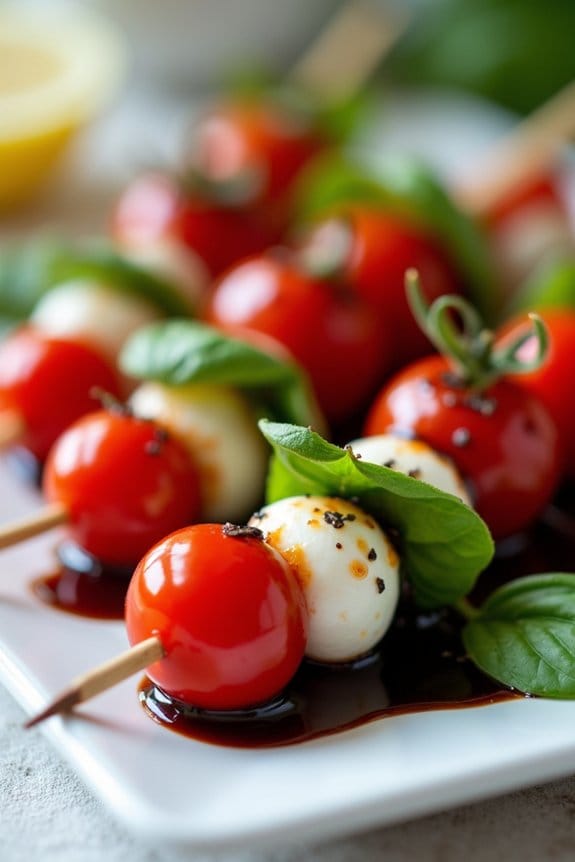
Caprese Salad Skewers are a delightful and healthy appetizer that bring a touch of Italian flair to your Christmas festivities. These skewers aren’t only visually appealing with their vibrant colors but also burst with fresh flavors, making them a perfect addition to your holiday spread. The combination of juicy cherry tomatoes, creamy mozzarella, and aromatic fresh basil leaves, all drizzled with a balsamic glaze, creates an irresistible bite-sized treat that will impress your guests.
Caprese Salad Skewers are incredibly easy to assemble, requiring minimal preparation time, which is a blessing during the busy holiday season. This appetizer embodies the essence of simplicity and elegance, allowing the fresh ingredients to shine.
Whether you’re hosting a large gathering or an intimate dinner, these skewers can be prepared ahead of time and refrigerated until you’re ready to serve, making them a stress-free option for any Christmas celebration.
Ingredients (Serves 4-6):
- 20 cherry tomatoes
- 20 mini mozzarella balls (bocconcini)
- 20 fresh basil leaves
- 1/4 cup balsamic glaze
- 20 wooden skewers or toothpicks
- Salt and pepper to taste
Cooking Instructions:
- Prepare the ingredients: Begin by washing the cherry tomatoes and fresh basil leaves thoroughly under cold water. Pat them dry with a clean paper towel to remove any excess moisture.
- Assemble the skewers: Take a wooden skewer and slide a cherry tomato onto it, followed by a mini mozzarella ball, and then a fresh basil leaf. Repeat this sequence once more on the same skewer, or until you reach the desired number of layers. Continue the process until all ingredients are used up, or you have prepared enough skewers for your guests.
- Season the skewers: Once assembled, arrange the skewers on a serving platter. Lightly sprinkle them with salt and pepper to enhance the flavors of the fresh ingredients.
- Drizzle with balsamic glaze: Just before serving, drizzle the balsamic glaze over the skewers. This adds a sweet and tangy finish that complements the creamy mozzarella and fresh basil.
- Serve immediately: Present the skewers as a delightful appetizer to your guests. For the best experience, they should be enjoyed fresh and at room temperature.
Extra Tips:
To make your Caprese Salad Skewers even more appealing, consider using a variety of cherry tomatoes, such as yellow or heirloom, to add a splash of color to the presentation.
If you prefer a more intense balsamic flavor, you can reduce balsamic vinegar over low heat until it thickens into a glaze. Additionally, for a touch of gourmet flair, you can sprinkle a few flakes of sea salt over the skewers just before serving.
Stuffed Mini Bell Peppers
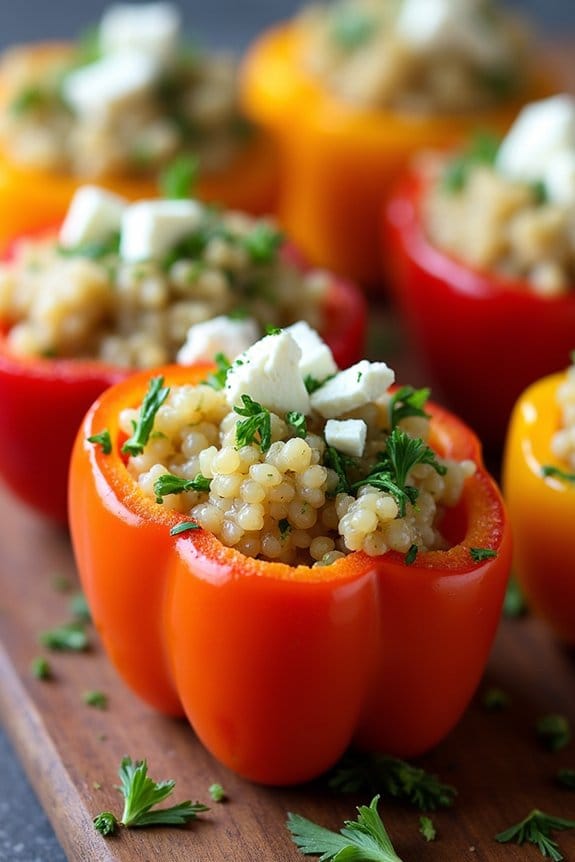
Add a festive and healthy touch to your Christmas appetizer spread with these delightful Stuffed Mini Bell Peppers. With their vibrant colors and rich flavors, these bite-sized treats aren’t only visually appealing but also packed with wholesome ingredients.
Perfect for entertaining, they’re a crowd-pleaser that caters to both health-conscious guests and those simply looking for a delicious snack.
The stuffing for these mini bell peppers is a flavorful blend of quinoa, feta cheese, and fresh herbs, providing a satisfying texture and taste. The sweetness of the bell peppers complements the savory stuffing, making each bite a burst of flavor.
This dish is simple to prepare and ideal for serving 4-6 people, guaranteeing everyone gets a taste of holiday cheer without the guilt.
Ingredients for 4-6 people:
- 12-15 mini bell peppers
- 1 cup cooked quinoa
- 1/2 cup crumbled feta cheese
- 1/4 cup chopped fresh parsley
- 1/4 cup chopped fresh dill
- 2 tablespoons olive oil
- 1 tablespoon lemon juice
- 1 clove garlic, minced
- Salt and pepper to taste
Cooking Instructions:
- Preheat the oven: Start by preheating your oven to 375°F (190°C) to confirm it’s ready for baking the stuffed mini bell peppers.
- Prepare the bell peppers: Wash the mini bell peppers thoroughly. Slice each one in half lengthwise and remove the seeds and membranes, creating a hollow space for the stuffing.
- Make the stuffing: In a mixing bowl, combine the cooked quinoa, crumbled feta cheese, chopped parsley, chopped dill, olive oil, lemon juice, and minced garlic. Mix well until all ingredients are evenly distributed.
- Season with salt and pepper to taste.
- Stuff the peppers: Using a small spoon, fill each bell pepper half with the quinoa mixture. Press down gently to confirm the stuffing stays in place.
- Bake the peppers: Place the stuffed peppers on a baking sheet lined with parchment paper. Bake in the preheated oven for 15-20 minutes, or until the peppers are tender and slightly charred at the edges.
- Serve: Once baked, remove the peppers from the oven and let them cool for a few minutes before transferring to a serving platter. Enjoy them warm or at room temperature.
Extra Tips:
For an added burst of flavor, consider incorporating sun-dried tomatoes or olives into the quinoa stuffing. These ingredients pair well with the feta and herbs, enhancing the Mediterranean-inspired taste.
Additionally, if you’re preparing this dish ahead of time, you can stuff the peppers and store them in the refrigerator until you’re ready to bake. This makes them a convenient option for holiday gatherings, allowing you to focus on other preparations.
Spinach and Feta Phyllo Cups

Spinach and Feta Phyllo Cups are a delightful appetizer that perfectly combines the savory flavors of spinach and creamy feta cheese, all encased in a crisp phyllo pastry shell. These bite-sized treats are an excellent choice for a healthy Christmas appetizer, offering a burst of flavor and a satisfying crunch.
Not only are they delicious, but their elegant presentation also makes them a beautiful addition to any holiday spread.
Phyllo pastry, known for its delicate and flaky texture, pairs wonderfully with the rich, cheesy filling. The spinach adds a fresh, earthy taste, while the feta provides a tangy and creamy contrast. This recipe is designed to serve 4-6 people, making it perfect for a small gathering. With easy-to-follow instructions, you’ll have these appetizing cups ready in no time, leaving you free to enjoy the festive season.
Ingredients (Serves 4-6):
- 1 package of phyllo dough (thawed)
- 2 tablespoons olive oil
- 1 cup fresh spinach, chopped
- 1/2 cup feta cheese, crumbled
- 1/4 cup ricotta cheese
- 1 egg, lightly beaten
- 2 cloves garlic, minced
- 1/4 teaspoon salt
- 1/4 teaspoon black pepper
- 1/4 teaspoon nutmeg
- 1 tablespoon fresh dill, chopped (optional)
Cooking Instructions:
- Prepare the Phyllo Dough: Preheat your oven to 375°F (190°C). Carefully unroll the phyllo dough and cover it with a damp cloth to prevent drying out.
- Cut the Dough: On a clean work surface, lay out one sheet of phyllo. Brush lightly with olive oil. Lay another sheet on top and brush again. Repeat this process until you have a stack of 4 sheets. Cut the phyllo stack into 12 equal squares.
- Form the Cups: Gently press each square into the cups of a mini muffin tin. Press down lightly to form a cup shape, ensuring the corners of the dough stick out.
- Prepare the Filling: In a large bowl, combine the chopped spinach, crumbled feta, ricotta cheese, beaten egg, minced garlic, salt, black pepper, and nutmeg. Mix well until all ingredients are thoroughly incorporated. Stir in the fresh dill if using.
- Fill the Cups: Spoon the spinach and feta mixture into each phyllo cup. Fill them generously, but avoid overstuffing.
- Bake the Phyllo Cups: Place the muffin tin in the preheated oven and bake for 15-18 minutes, or until the phyllo is golden brown and the filling is set.
- Serve: Allow the phyllo cups to cool slightly before removing them from the tin. Serve warm or at room temperature.
Extra Tips:
When working with phyllo dough, it’s important to keep it covered with a damp cloth, as it dries out quickly. If you find the phyllo becoming brittle, use a slightly damp paper towel to re-moisten it.
The filling can be prepared a day in advance and stored in the refrigerator, making it convenient for busy holiday schedules. Feel free to add extra herbs or spices according to your taste preferences, and experiment with different cheeses for variation.
Zucchini and Parmesan Crisps
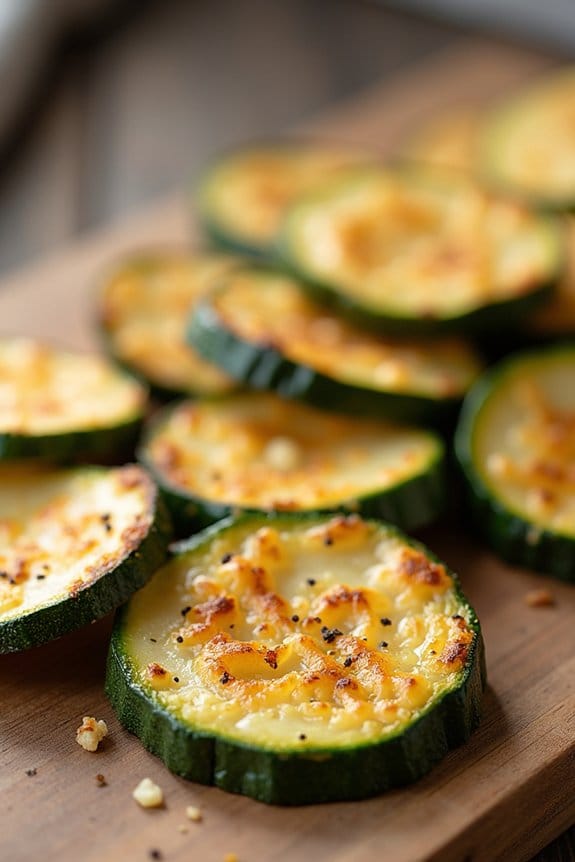
Zucchini and Parmesan Crisps are a delightful and healthy appetizer that will add a touch of elegance to your Christmas spread. These crispy, cheesy bites are a perfect way to start your holiday meal, offering a satisfying crunch and rich flavor profile that will impress your guests.
Made with fresh zucchini slices, seasoned with just the right amount of herbs and spices, and topped with savory Parmesan cheese, these crisps aren’t only delicious but also easy to prepare.
The simplicity of this dish allows the natural flavors of the zucchini to shine through, complemented by the umami-rich Parmesan. This appetizer is perfect for those who are looking for a lighter option that doesn’t compromise on taste.
Whether you’re hosting a large gathering or a small family dinner, Zucchini and Parmesan Crisps are sure to be a hit. Plus, they provide a great way to sneak some vegetables into your holiday menu without anyone noticing!
Ingredients (serving size: 4-6 people):
- 2 medium zucchinis
- 1 cup grated Parmesan cheese
- 1 teaspoon garlic powder
- 1 teaspoon Italian seasoning
- ½ teaspoon salt
- ¼ teaspoon black pepper
- 2 tablespoons olive oil
Cooking Instructions:
1. Preheat the Oven:
Preheat your oven to 400°F (200°C) and line a large baking sheet with parchment paper. This guarantees that your crisps won’t stick and will bake evenly.
2. Prepare the Zucchini:
Wash the zucchinis thoroughly and pat them dry with a paper towel. Slice them into thin rounds, about 1/8-inch thick, guaranteeing uniform thickness for even cooking.
3. Season the Zucchini:
In a large mixing bowl, combine the zucchini slices with olive oil, garlic powder, Italian seasoning, salt, and pepper. Toss well to make sure each slice is evenly coated with the seasoning.
4. Add Parmesan:
Arrange the zucchini slices in a single layer on the prepared baking sheet. Sprinkle the grated Parmesan cheese generously over each slice, making sure they’re well-covered.
5. Bake:
Place the baking sheet in the preheated oven and bake for 15-20 minutes, or until the zucchini is tender and the cheese is golden and crispy.
6. Cool and Serve:
Remove from the oven and allow the crisps to cool slightly on the baking sheet. This will help them set and become crispier. Serve warm as a delicious appetizer.
Extra Tips:
When selecting zucchinis, look for ones that are firm and free of blemishes for the best texture. If you prefer extra crispy edges, use a mandoline slicer for even thinner slices.
Additionally, feel free to experiment with different seasonings to match your taste preferences, such as adding a pinch of red pepper flakes for some heat. Remember to serve these crisps shortly after baking for maximum crunchiness, as they tend to soften if left out for too long.
Turkey and Cranberry Lettuce Wraps
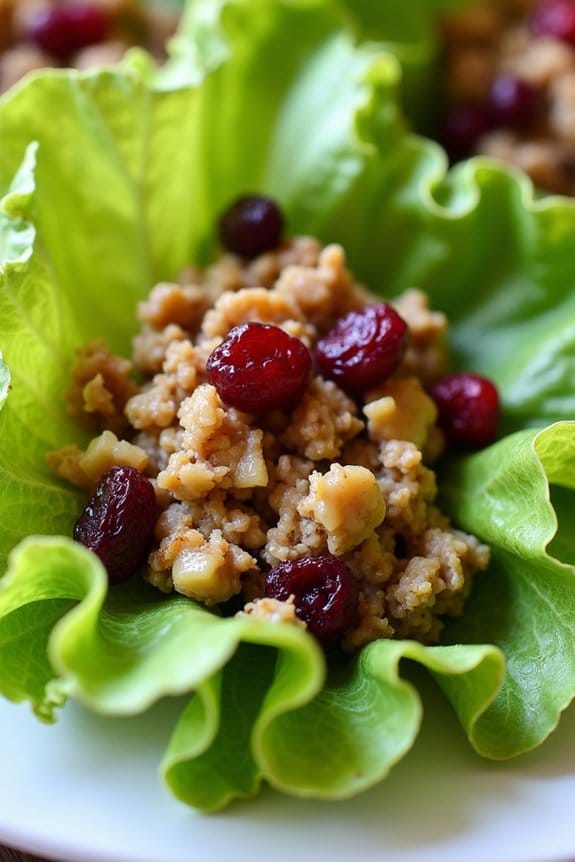
Looking for a healthy and festive appetizer to serve at your Christmas gathering? Turkey and Cranberry Lettuce Wraps offer a deliciously light yet satisfying option that captures the essence of the holiday season. These wraps combine the lean protein of turkey with the sweet-tart flavors of cranberries, all encased in crisp lettuce leaves. They make for a perfect starter that’s not only easy to prepare but also full of flavor, guaranteeing your guests have something to rave about.
The best part about these wraps is their versatility and ease of preparation. They’re ideal for those who want to keep their holiday meals on the lighter side without sacrificing taste. The use of turkey provides essential nutrients while keeping the dish healthy, and the cranberries add a festive touch. The wraps can be assembled quickly, making them a great choice for both planned dinners and impromptu gatherings. Serve them as an appetizer, or double the portion for a light main course.
Ingredients (Serves 4-6):
- 1 pound ground turkey
- 1 tablespoon olive oil
- 1/2 cup diced onion
- 1 clove garlic, minced
- 1/2 teaspoon salt
- 1/4 teaspoon black pepper
- 1/2 cup dried cranberries
- 1/4 cup chopped walnuts
- 1/4 cup low-sodium chicken broth
- 2 tablespoons honey
- 1 tablespoon balsamic vinegar
- 1 head of butter or iceberg lettuce
- Optional: fresh parsley for garnish
Cooking Instructions:
- Prepare the Turkey Mixture: In a large skillet, heat the olive oil over medium heat. Add the diced onion and minced garlic, sautéing until the onion becomes translucent, about 3-4 minutes.
- Cook the Turkey: Add the ground turkey to the skillet, breaking it up with a spoon. Season with salt and pepper. Cook the turkey until it’s browned and fully cooked, which should take about 6-8 minutes.
- Add Cranberries and Walnuts: Stir in the dried cranberries and chopped walnuts. Cook for an additional 2 minutes to allow the flavors to meld together.
- Simmer with Broth and Honey: Pour in the chicken broth, honey, and balsamic vinegar. Stir well to combine. Lower the heat and let the mixture simmer for 5 minutes, allowing the flavors to blend and the cranberries to soften slightly.
- Prepare Lettuce Leaves: While the turkey mixture is simmering, wash and dry the lettuce leaves. Carefully separate them, keeping each leaf intact, to use as wraps.
- Assemble the Wraps: Spoon the turkey mixture into the center of each lettuce leaf. If desired, garnish with fresh parsley for a touch of color and flavor.
- Serve Immediately: Arrange the assembled wraps on a platter and serve immediately while warm.
Extra Tips:
For added flavor, consider incorporating additional herbs such as thyme or rosemary into the turkey mixture. If you prefer a bit of heat, add a pinch of red pepper flakes.
Make certain that the lettuce leaves are thoroughly dried to prevent them from becoming soggy. If you have leftover turkey mixture, it can be stored in the refrigerator for up to two days and reheated gently before serving.
This dish is also adaptable for different dietary needs; for a gluten-free option, make sure all ingredients are labeled gluten-free. Enjoy your healthy and festive appetizer!
Sweet Potato and Avocado Bites
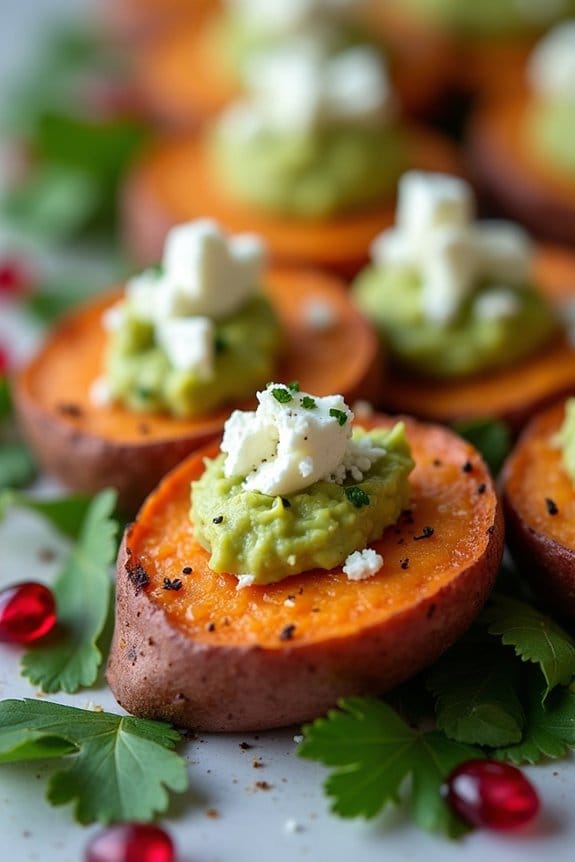
Sweet Potato and Avocado Bites are a delicious and nutritious appetizer perfect for a festive Christmas gathering. These bites combine the natural sweetness of roasted sweet potatoes with the creamy texture of avocado, making them both satisfying and healthy.
The vibrant colors and delightful flavors make them an attractive addition to any holiday spread, guaranteeing both visual and gustatory appeal. Not only are they packed with nutrients, but they’re also easy to prepare and can be made ahead of time, allowing you more time to enjoy the festivities with your loved ones.
This recipe is ideal for a serving size of 4-6 people, making it a great choice for small gatherings or as part of a larger appetizer buffet. The combination of roasted sweet potatoes and avocados, topped with feta cheese and a sprinkle of pomegranate seeds, offers a balance of flavors and textures that your guests will love.
This dish is a wonderful way to incorporate healthy ingredients into your holiday menu without compromising on taste.
Ingredients:
- 2 large sweet potatoes
- 2 ripe avocados
- 1 tablespoon olive oil
- 1 tablespoon lime juice
- Salt and pepper to taste
- 1/4 cup crumbled feta cheese
- 1/4 cup pomegranate seeds
- Fresh cilantro leaves for garnish
Cooking Instructions:
- Preheat the Oven: Start by preheating your oven to 400°F (200°C). This will guarantee that your sweet potatoes roast evenly and develop a nice, caramelized exterior.
- Prepare the Sweet Potatoes: Wash and peel the sweet potatoes, then slice them into 1/4-inch thick rounds. Try to keep the slices uniform in thickness to guarantee even cooking.
- Roast the Sweet Potatoes: Place the sweet potato slices on a baking sheet lined with parchment paper. Drizzle them with olive oil and season with salt and pepper. Toss to coat well. Roast in the preheated oven for 20-25 minutes, flipping halfway through, until they’re tender and lightly browned.
- Prepare the Avocado Mixture: While the sweet potatoes are roasting, scoop the avocados into a bowl and mash them with lime juice, salt, and pepper until smooth. Adjust seasoning to taste.
- Assemble the Bites: Once the sweet potatoes are done roasting, remove them from the oven and let them cool slightly. Top each sweet potato slice with a dollop of the mashed avocado mixture.
- Add Toppings: Sprinkle crumbled feta cheese and pomegranate seeds over the avocado-topped sweet potatoes. These toppings add a burst of flavor and color, making each bite irresistible.
- Garnish and Serve: Finish with a few fresh cilantro leaves for garnish, adding an extra layer of freshness to the bites. Serve immediately, or prepare ahead and refrigerate, bringing them to room temperature before serving.
Extra tips: For best results, choose ripe but firm avocados to guarantee the mashed mixture holds its shape. You can also prepare the sweet potatoes in advance and store them in the refrigerator; however, it’s best to add the avocado mixture and toppings just before serving to maintain their freshness and color.
If you want to add a bit of spice, consider sprinkling a pinch of chili powder over the sweet potatoes before roasting. Enjoy these Sweet Potato and Avocado Bites as a healthy yet indulgent appetizer that’s sure to impress your guests this holiday season!
Quinoa and Black Bean Mini Tacos
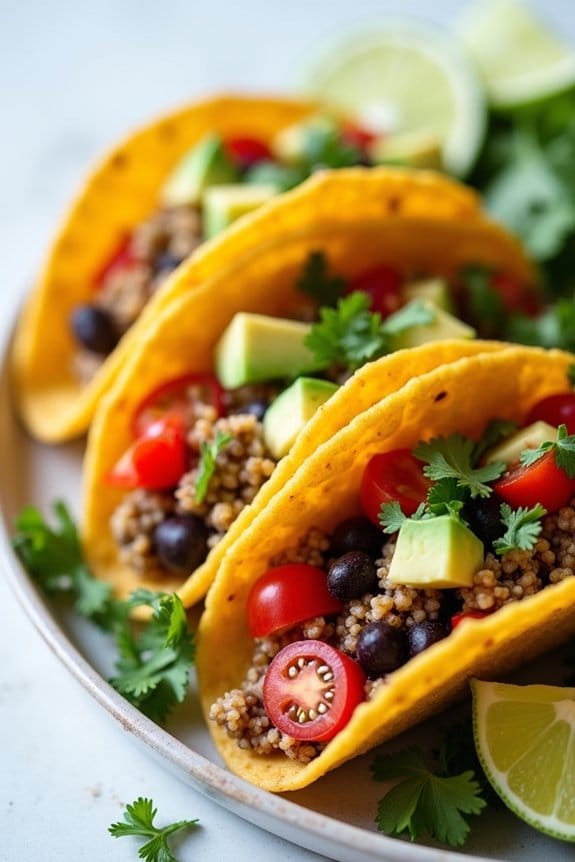
If you’re searching for a delicious and healthy appetizer to serve at your Christmas gathering, seek no further than Quinoa and Black Bean Mini Tacos. These flavorful bites are packed with protein and fiber, making them both satisfying and nourishing. The combination of quinoa, black beans, and spices creates a savory filling that pairs perfectly with the crispness of mini taco shells. Not only are these mini tacos a delightful treat for the taste buds, but they’re also visually appealing and sure to be a hit with your guests.
These mini tacos are versatile and can be adapted to suit different dietary preferences. Whether you’re serving vegetarians, vegans, or those with gluten sensitivities, this recipe is sure to accommodate all. The use of fresh ingredients like avocado, lime, and cilantro adds a burst of freshness, while a touch of spice provides the perfect kick. Prepare these Quinoa and Black Bean Mini Tacos in advance to enjoy a stress-free holiday gathering.
Ingredients (Serves 4-6):
- 1 cup quinoa, rinsed
- 2 cups vegetable broth or water
- 1 can (15 oz) black beans, drained and rinsed
- 1 tablespoon olive oil
- 1 small onion, diced
- 2 cloves garlic, minced
- 1 teaspoon ground cumin
- 1 teaspoon chili powder
- Salt and pepper to taste
- 12 mini taco shells
- 1 cup cherry tomatoes, quartered
- 1 avocado, diced
- 1/4 cup fresh cilantro, chopped
- 1 lime, cut into wedges
- Optional toppings: shredded cheese, sour cream, hot sauce
Cooking Instructions:
- Cook the Quinoa: In a medium saucepan, combine the quinoa and vegetable broth (or water). Bring to a boil over medium-high heat. Once boiling, reduce the heat to low, cover, and let it simmer for about 15 minutes, or until the quinoa is cooked and the liquid is absorbed. Fluff with a fork and set aside.
- Prepare the Filling: In a large skillet, heat the olive oil over medium heat. Add the diced onion and sauté for about 3-4 minutes until translucent. Add the minced garlic and cook for another minute.
- Add Spices and Beans: Stir in the ground cumin and chili powder, cooking for 1 minute until fragrant. Add the black beans to the skillet and cook for about 5 minutes, stirring occasionally, until heated through.
- Combine Quinoa and Beans: Add the cooked quinoa to the skillet with the black bean mixture. Stir well to combine. Season with salt and pepper to taste. Allow the mixture to cook for an additional 2-3 minutes, allowing the flavors to meld together.
- Assemble the Tacos: Preheat the oven to 350°F (175°C). Arrange the mini taco shells on a baking sheet and fill each with a generous spoonful of the quinoa and black bean mixture. Transfer to the oven and bake for about 5 minutes, just until the shells are warm and slightly crisp.
- Garnish and Serve: Remove the tacos from the oven. Top with cherry tomatoes, avocado, and fresh cilantro. Serve with lime wedges on the side for an added zest. Offer optional toppings like shredded cheese, sour cream, or hot sauce for those who desire.
Extra Tips:
For an even more flavorful filling, consider adding a pinch of smoked paprika or a dash of cayenne pepper for extra heat. If you’re serving gluten-free guests, verify that the mini taco shells are certified gluten-free.
To save time, the quinoa and black bean filling can be prepared a day in advance and stored in the refrigerator; just reheat before assembling the tacos. If you prefer a vegan option, omit the cheese and sour cream, or use plant-based alternatives.
Greek Yogurt and Herb Dip With Whole Grain Crackers
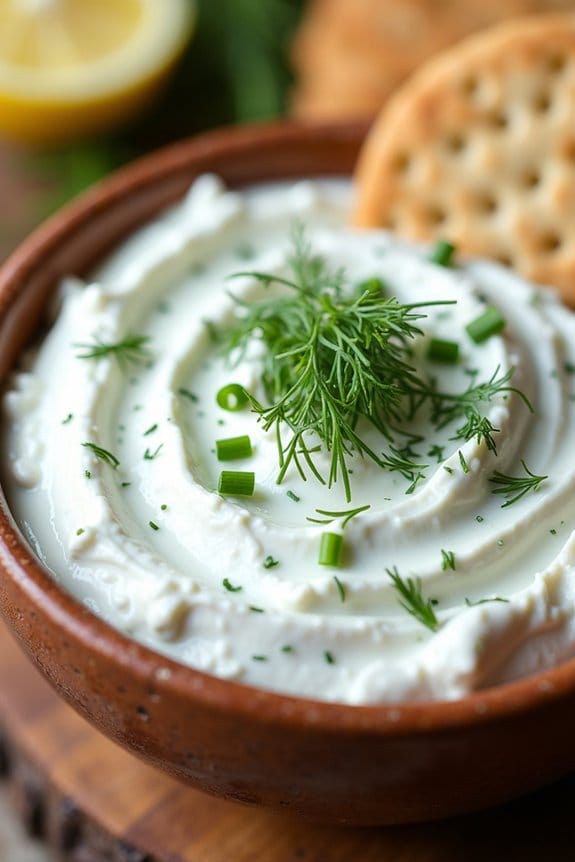
Greek Yogurt and Herb Dip With Whole Grain Crackers is a delightful and healthy appetizer perfect for your Christmas gatherings. This dish combines the creaminess of Greek yogurt with the fresh flavors of herbs, resulting in a delicious dip that pairs wonderfully with crunchy whole grain crackers. Not only is it a crowd-pleaser, but it’s also simple to prepare and packed with nutrients, making it a guilt-free addition to your festive spread.
This appetizer isn’t only tasty but also nutritious, providing a good source of protein and fiber. Greek yogurt is known for its high protein content and probiotics, which are beneficial for gut health. The addition of fresh herbs like dill and parsley not only enhances the flavor but also adds a dose of vitamins and antioxidants. Serve this dip with whole grain crackers to guarantee a balanced intake of carbohydrates and fiber, and you have a snack that will satisfy your guests without derailing their healthy eating habits.
Ingredients for 4-6 people:
- 2 cups Greek yogurt
- 2 tablespoons fresh dill, chopped
- 2 tablespoons fresh parsley, chopped
- 1 tablespoon fresh chives, chopped
- 1 clove garlic, minced
- 1 tablespoon lemon juice
- 1 teaspoon lemon zest
- Salt and pepper to taste
- Whole grain crackers for serving
Cooking Instructions:
- Prepare the Herbs: Begin by washing the fresh dill, parsley, and chives thoroughly. Pat them dry with a paper towel before chopping them finely. This makes sure that all excess water is removed and doesn’t dilute the dip.
- Mix the Base: In a medium-sized mixing bowl, combine the Greek yogurt with the chopped herbs. Use a spoon or spatula to stir the mixture until the herbs are evenly distributed throughout the yogurt.
- Add Flavor: Add the minced garlic, lemon juice, and lemon zest to the yogurt mixture. These ingredients add a zesty and aromatic flavor to the dip. Mix well to make certain that the garlic and lemon are evenly incorporated.
- Season: Taste the dip and add salt and pepper according to your preference. Start with a small amount and adjust as needed to make sure the seasoning is to your liking.
- Chill the Dip: Once the dip is well-mixed and seasoned, cover the bowl with plastic wrap and refrigerate for at least 30 minutes. Chilling the dip allows the flavors to meld together, enhancing the taste.
- Serve: Before serving, give the dip a final stir. Arrange the whole grain crackers on a platter and place the dip in a serving bowl alongside them. Garnish with additional fresh herbs if desired.
Extra Tips:
For the best flavor, prepare the dip a few hours in advance and let it chill in the refrigerator. This allows the flavors to develop more fully.
If you prefer a thicker dip, strain the Greek yogurt using a cheesecloth to remove excess whey before mixing.
Additionally, feel free to experiment with other herbs such as basil or cilantro for a different flavor profile.
Always taste and adjust the seasoning before serving, as the flavors can change slightly after chilling. Enjoy this healthy and revitalizing appetizer with your holiday guests!
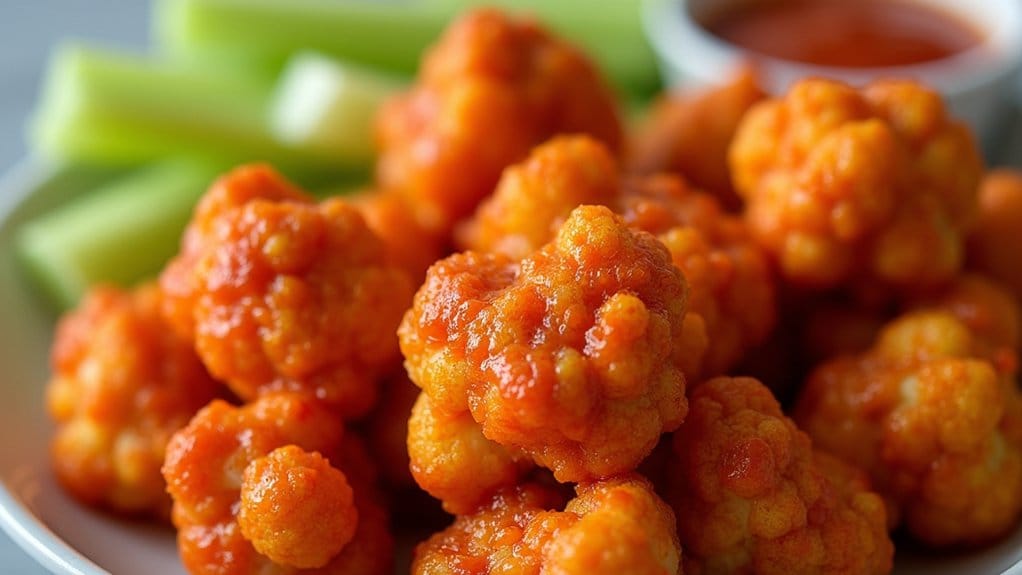
Baked Cauliflower Buffalo Wings

Baked Cauliflower Buffalo Wings are a delicious and healthy alternative to traditional chicken wings, perfect for a Christmas appetizer. This dish combines the hearty texture of baked cauliflower with the spicy kick of buffalo sauce to create a mouthwatering treat that’s certain to be a hit at any holiday gathering.
Whether you’re catering to vegetarians or simply looking to add more plant-based options to your festive menu, these cauliflower wings are an excellent choice. The crispy coating and tangy sauce make them irresistible, and they can be easily adapted to suit different spice preferences.
Packed with flavor and nutrients, Baked Cauliflower Buffalo Wings aren’t only a crowd-pleaser but also a guilt-free option to indulge in during the holiday season. The baking process guarantees they’re lower in fat compared to fried alternatives, while the cauliflower provides a good dose of vitamins and fiber.
This recipe makes enough for 4-6 people, making it ideal for intimate gatherings or as part of a larger spread. With simple ingredients and straightforward preparation, you can whip up these tasty bites in no time.
Ingredients for 4-6 servings:
- 1 large head of cauliflower, cut into florets
- 1 cup all-purpose flour
- 1 cup water
- 1 teaspoon garlic powder
- 1 teaspoon onion powder
- 1 teaspoon paprika
- 1/2 teaspoon salt
- 1/4 teaspoon black pepper
- 1 cup hot sauce (such as Frank’s RedHot)
- 2 tablespoons unsalted butter, melted
- Cooking spray or oil for greasing
- Optional: celery sticks and ranch or blue cheese dressing for serving
Cooking Instructions:
- Preheat the Oven: Start by preheating your oven to 450°F (230°C) and line a baking sheet with parchment paper or lightly grease it with cooking spray or oil.
- Prepare the Batter: In a large mixing bowl, whisk together the flour, water, garlic powder, onion powder, paprika, salt, and black pepper until you have a smooth batter.
- Coat the Cauliflower: Dip each cauliflower floret into the batter, making sure it’s evenly coated. Allow any excess batter to drip off before placing the florets onto the prepared baking sheet in a single layer.
- Bake the Cauliflower: Place the baking sheet in the preheated oven and bake for 20 minutes. After 20 minutes, remove the sheet from the oven and flip each floret over. Return to the oven and bake for an additional 10 minutes until the cauliflower is golden and crispy.
- Prepare the Buffalo Sauce: While the cauliflower is baking, combine the hot sauce and melted butter in a small saucepan over low heat. Stir until well combined, then remove from heat.
- Coat with Buffalo Sauce: Once the cauliflower is baked, remove it from the oven and carefully toss the florets in the buffalo sauce until they’re well coated. Return the coated florets to the baking sheet.
- Final Bake: Place the coated cauliflower back in the oven and bake for another 10 minutes, allowing the sauce to adhere and caramelize slightly.
- Serve: Remove from the oven and let cool slightly before serving. Arrange on a platter and serve with celery sticks and your choice of ranch or blue cheese dressing for dipping.
Extra Tips:
For a gluten-free version, substitute the all-purpose flour with a gluten-free flour blend. If you prefer your buffalo wings to be extra spicy, add a pinch of cayenne pepper to the buffalo sauce.
To guarantee even baking and crispiness, try not to overcrowd the baking sheet with cauliflower florets. You can also experiment with different sauces and spices for added variety, making this recipe versatile for any occasion.
