
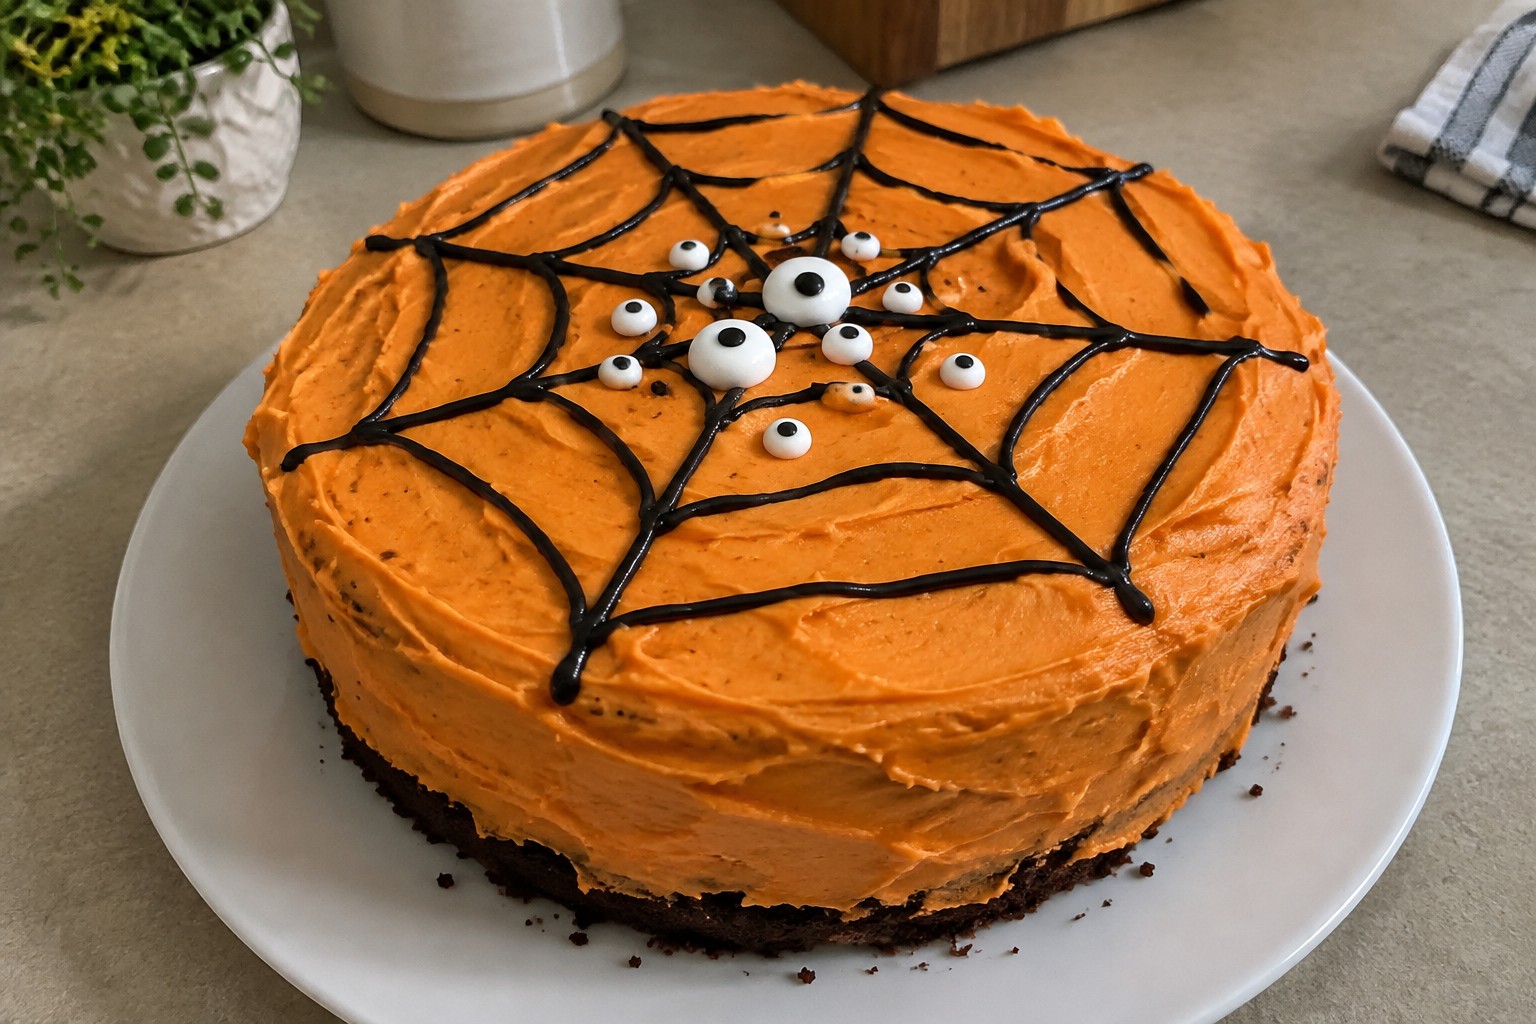
Halloween parties need desserts that look good and taste even better. These recipes use ingredients you can find at most stores. They focus on treats that come together without complicated steps. You will see options for different party sizes and skill levels. The list includes 13 ideas to help you choose what fits your plans.
Helpful Tips Before You Start
A few practical steps make these party desserts easier to pull off.
Make Bases Ahead
Bake cookies, brownies, or cake layers one or two days early. Store them wrapped so you only need to add toppings the day of the party.
Keep Decorations Simple
Use one color theme or a single shape cutter across multiple desserts. This creates a polished look without extra time or tools.
Check Fridge Space First
Many of these treats need chilling. Clear space or use a cooler so finished items do not crowd each other.
Scale for the Crowd
Double a recipe only if you have tested it once. Start with the original amounts if you are serving a smaller group.
Black Cocoa Spiderweb Tart with Raspberry Filling
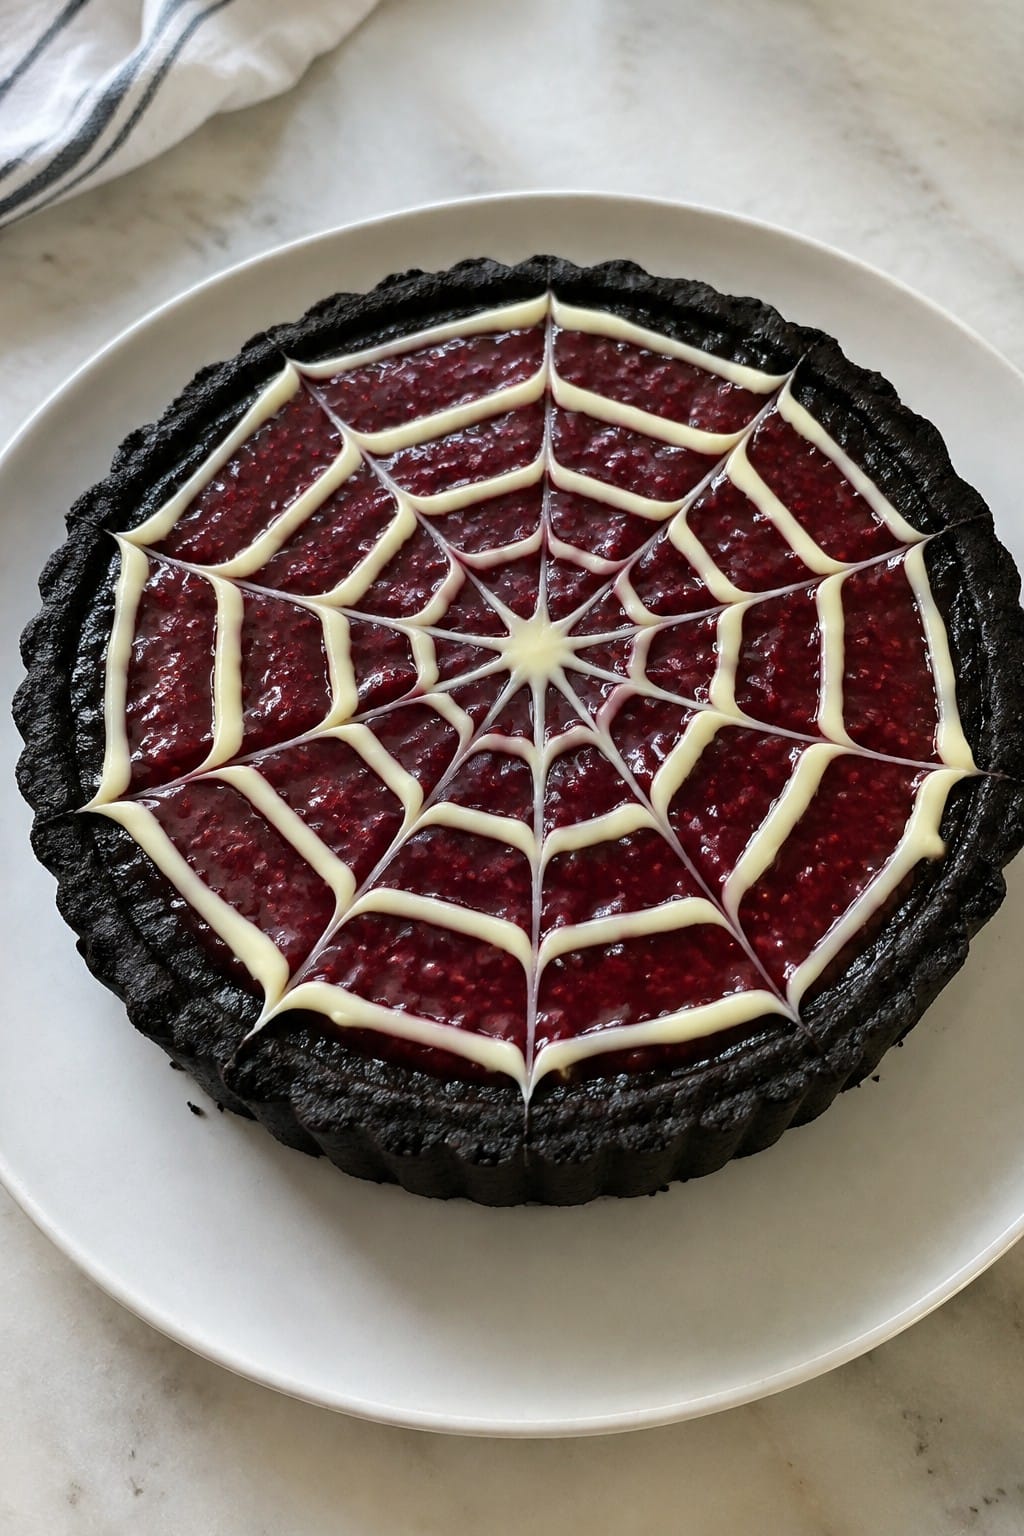
This tart brings a dark, dramatic look to any Halloween spread. The black cocoa crust gives it a striking color that stands out on a dessert table, while the raspberry filling adds bright contrast. It works well for parties because it can be made ahead and still looks polished when served.
The flavor combines deep cocoa notes with sweet-tart raspberry. The crust stays crisp, and the filling sets just enough to slice cleanly. A simple white chocolate spiderweb on top completes the theme without extra fuss.
Serves 4 people.
Ingredients
- 1 1/4 cups all-purpose flour
- 1/4 cup black cocoa powder
- 1/4 cup granulated sugar
- 1/2 cup cold unsalted butter, cubed
- 1 large egg yolk
- 1/4 teaspoon salt
- 2 cups fresh raspberries
- 1/3 cup granulated sugar
- 1 tablespoon lemon juice
- 2 teaspoons cornstarch
- 3 tablespoons white chocolate chips
Instructions
- Mix the flour, black cocoa powder, 1/4 cup sugar, and salt in a bowl. Add the cold butter cubes and work them in with your fingers until the mixture looks like coarse crumbs. Stir in the egg yolk until a dough forms. Press the dough into a 7-inch tart pan and chill for 20 minutes.
- Preheat the oven to 350 degrees. Bake the crust for 15 minutes, then let it cool completely.
- Combine the raspberries, 1/3 cup sugar, and lemon juice in a saucepan over medium heat. Cook until the berries break down and release their juices. Stir the cornstarch with a tablespoon of water, then add it to the pan. Simmer for 2 minutes until the mixture thickens. Remove from heat and let the filling cool slightly.
- Spread the raspberry filling evenly inside the cooled crust. Melt the white chocolate chips in a small bowl. Spoon the melted chocolate into a zip-top bag, snip a tiny corner, and pipe concentric circles over the filling. Drag a toothpick from the center outward in several spots to create the spiderweb pattern.
Extra Tips
Pipe the white chocolate while the filling is still slightly warm so the lines set neatly on top. If you want a stronger cocoa taste, swap in an extra tablespoon of black cocoa for part of the flour in the crust. Store leftovers covered in the fridge for up to two days. The spiderweb stays intact if you avoid stacking slices.Course: Dessert Cuisine: American Equipment: Tart pan, Mixing bowl, Saucepan, Zip-top bag
Spiced Pumpkin Cheesecake with Candied Pecan Topping
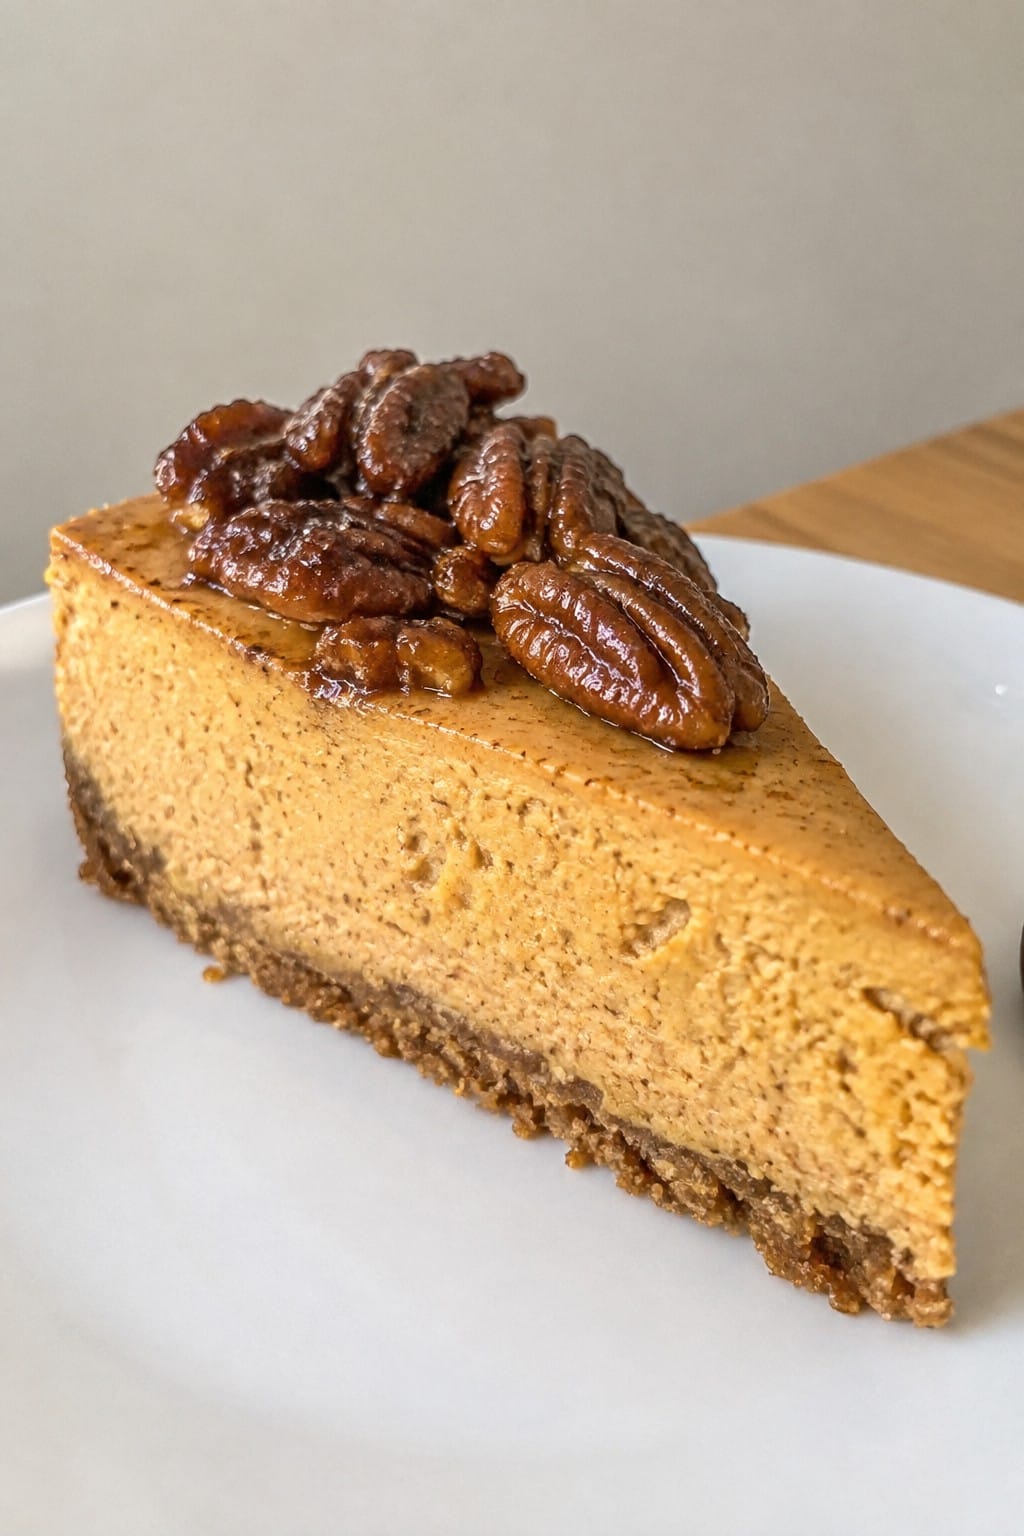
This cheesecake brings warm spices and creamy pumpkin together in a dessert that feels right at home at a Halloween party. The candied pecan topping adds crunch and sweetness that balances the smooth filling. It looks festive without needing fancy decorations.
It works well as a make-ahead option for gatherings since it chills nicely and slices cleanly. The flavor profile leans toward classic fall spices with a nutty finish that guests notice right away.
Serves 4 people.
Ingredients
- 3/4 cup graham cracker crumbs
- 2 tablespoons melted butter
- 8 ounces cream cheese, softened
- 1/2 cup pumpkin puree
- 1/4 cup granulated sugar
- 1 large egg
- 1 teaspoon vanilla extract
- 1 teaspoon ground cinnamon
- 1/4 teaspoon ground nutmeg
- 1/4 teaspoon ground ginger
- 1/2 cup pecan halves
- 2 tablespoons brown sugar
- 1 tablespoon butter
Instructions
- Preheat the oven to 325 degrees. Mix the graham cracker crumbs with the melted butter until the crumbs are evenly coated. Press the mixture firmly into the bottom of a small 6-inch springform pan.
- In a mixing bowl, beat the cream cheese until smooth. Add the pumpkin puree, granulated sugar, egg, vanilla extract, cinnamon, nutmeg, and ginger. Beat until the filling is fully combined and no streaks remain.
- Pour the filling over the crust and smooth the top. Bake for 35 to 40 minutes until the center is just set. Turn off the oven and leave the cheesecake inside with the door cracked for 10 minutes.
- Remove the cheesecake and let it cool to room temperature before refrigerating for at least 2 hours.
- While the cheesecake chills, make the topping. Melt the tablespoon of butter in a small skillet over medium heat. Add the pecan halves and brown sugar. Stir for 3 to 4 minutes until the pecans are coated and the sugar has caramelized. Spread them on parchment paper to cool.
- Once the cheesecake is chilled, remove it from the pan and scatter the cooled candied pecans over the top before slicing.
Extra Tips
Chill the cheesecake overnight if you can. The flavors deepen and the texture firms up for cleaner slices. If the pecans cool into a clump, break them apart gently with your fingers before adding them to the top. Store leftovers covered in the fridge for up to three days. Reheat individual slices for 10 seconds in the microwave if you prefer a softer texture.Course: Dessert Cuisine: American Equipment: Mixing bowls, 6-inch springform pan, Small skillet, Oven
Ghost Meringue Pavlova with Blood Orange Curd
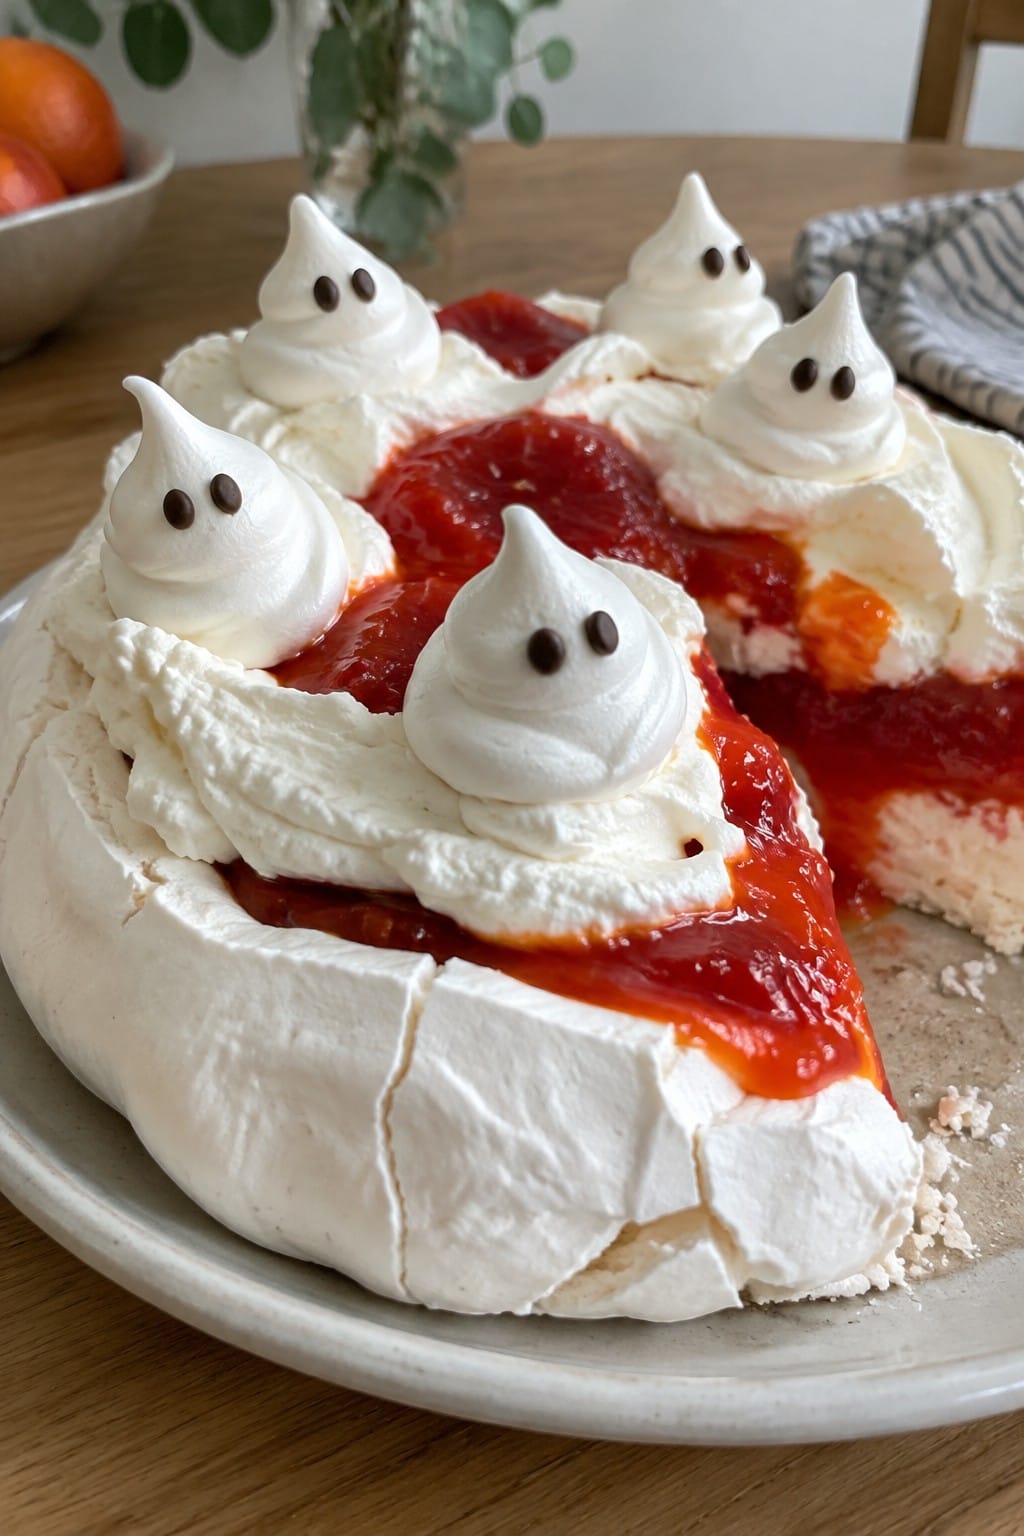
This pavlova brings a spooky touch to any Halloween spread. The crisp meringue shell holds a bright, tangy curd made from blood oranges, while small ghost-shaped meringues add a playful finish on top. It looks impressive but stays light enough to serve after a big meal.
The texture combines a crunchy exterior with a soft, marshmallow-like center. The curd cuts through the sweetness with its sharp citrus notes, making each bite balanced and refreshing for a party setting.
Serves 4 people.
Ingredients
- 4 large egg whites
- 1 1/4 cups granulated sugar, divided
- 1 teaspoon cornstarch
- 1 teaspoon white vinegar
- 4 blood oranges
- 4 large egg yolks
- 1/2 cup unsalted butter, cubed
- 1 cup heavy cream
- 2 tablespoons dark chocolate chips
Instructions
- Preheat the oven to 250°F and line a baking sheet with parchment paper. Draw a 7-inch circle on the paper as a guide.
- In a clean bowl, beat the egg whites until soft peaks form. Gradually add 1 cup of the sugar while beating until stiff, glossy peaks develop. Fold in the cornstarch and vinegar.
- Spoon most of the meringue onto the circle to form the pavlova base. Use the remaining meringue to pipe 4 small ghost shapes around the edge.
- Bake for 1 hour and 15 minutes, then turn off the oven and let the meringue cool inside with the door closed.
- While the meringue bakes, zest and juice the blood oranges. Place the yolks, remaining 1/4 cup sugar, and 1/2 cup blood orange juice in a saucepan. Cook over medium heat, stirring constantly, until the mixture thickens.
- Remove the curd from heat and stir in the butter until smooth. Let it cool completely.
- Whip the heavy cream to soft peaks. Spread the cooled curd over the pavlova base, then top with the whipped cream.
- Place the ghost meringues on top. Melt the chocolate chips and use a toothpick to draw faces on the ghosts.
Extra Tips
Whip the cream just before serving so it stays light and does not weep on the curd. If the blood oranges are very tart, taste the curd before removing it from the heat and add a pinch more sugar if needed. Store leftover pavlova in an airtight container at room temperature for up to one day, but assemble with curd and cream only at the last minute.Course: Dessert Cuisine: Australian Equipment: Mixing Bowl, Baking Sheet, Saucepan, Electric Mixer
Caramel-Stuffed Apple Hand Pies with Cinnamon Sugar
These hand pies bring a cozy fall feel to any Halloween spread. The flaky crust holds tender apples and a gooey caramel center, finished with a crisp cinnamon sugar coating. They travel well and need no plates, which makes them handy for parties.
The contrast of warm spiced filling and crunchy topping gives each bite a satisfying mix of textures. They work best when served fresh from the oven while the caramel is still soft.
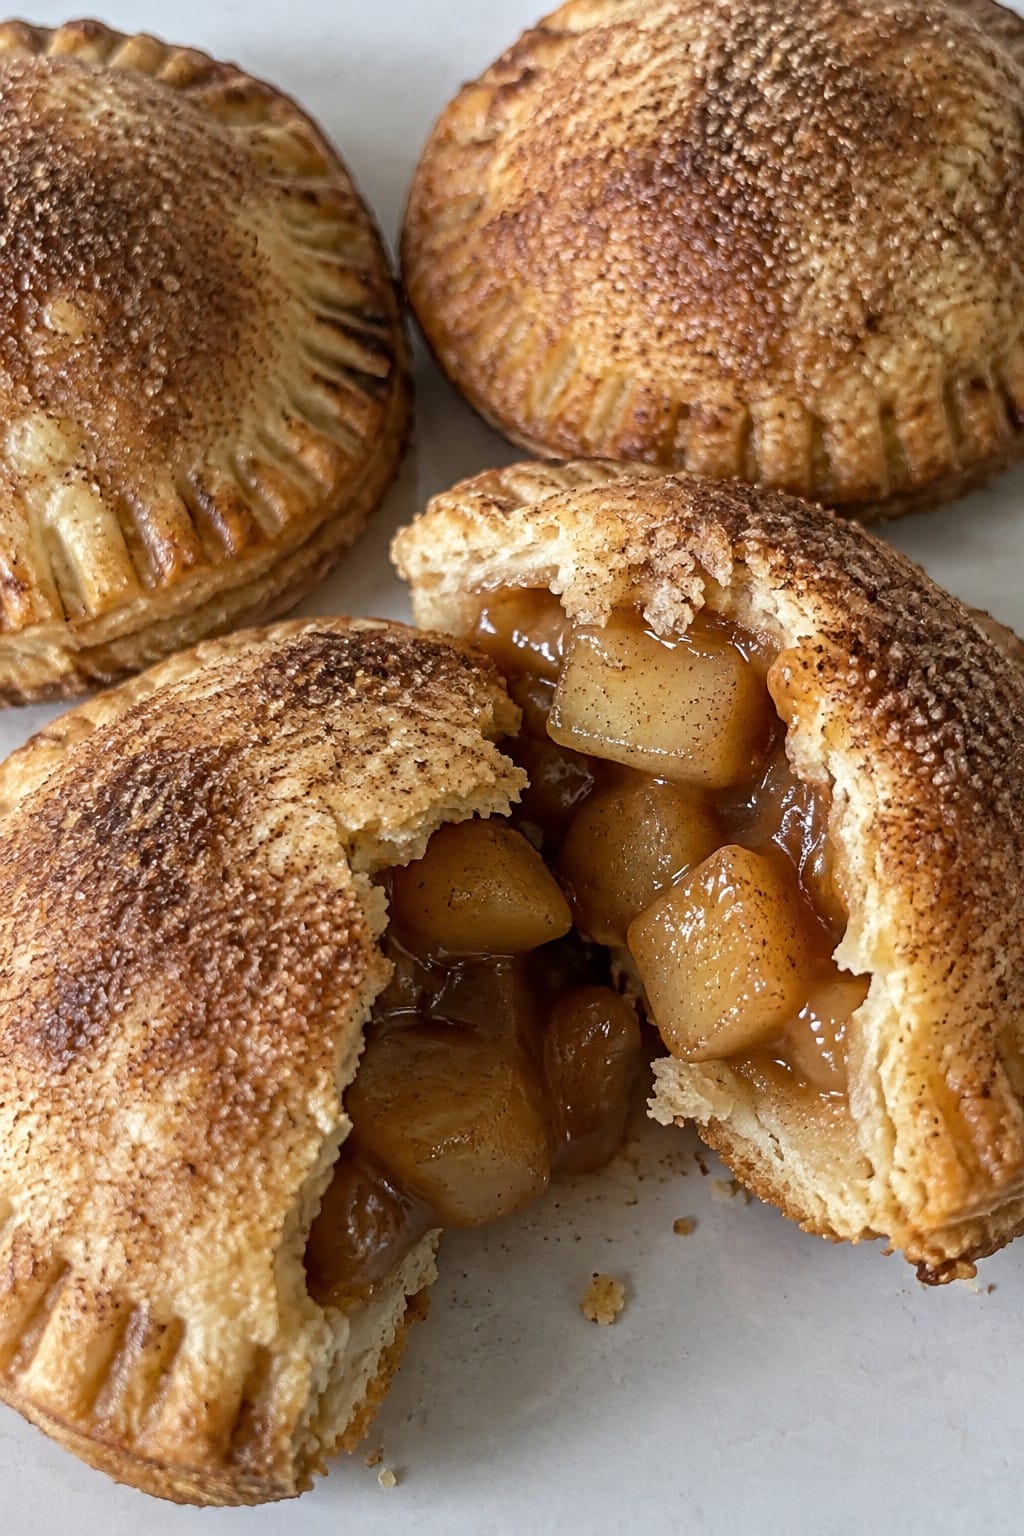
Serves 4 people.
Ingredients
- 2 refrigerated pie crusts
- 2 medium apples, peeled and diced
- 1/2 cup caramel sauce
- 1/4 cup granulated sugar
- 1 teaspoon ground cinnamon
- 1 egg, beaten
- 1 tablespoon all-purpose flour
Instructions
- Preheat the oven to 375 degrees and line a baking sheet with parchment paper. Lightly dust the work surface with the flour.
- Unroll both pie crusts and cut each into two equal rounds for a total of four circles.
- Toss the diced apples with half of the cinnamon sugar mixture made from 2 tablespoons of the sugar and 1/2 teaspoon of the cinnamon.
- Spoon the apple mixture onto one half of each dough circle, then drizzle 2 tablespoons of caramel sauce over the apples on each pie.
- Fold the dough over the filling to form a half-moon shape. Press the edges together with a fork to seal.
- Place the pies on the baking sheet. Brush the tops with the beaten egg and sprinkle with the remaining cinnamon sugar mixture.
- Cut a small slit in the top of each pie. Bake for 20 to 25 minutes until the crust is golden and the filling bubbles slightly.
Extra Tips
Let the pies cool for five minutes before serving so the caramel thickens and does not run out when bitten. If the caramel is very thin, chill the assembled pies for ten minutes before baking to help keep the filling inside. Leftovers can be stored in an airtight container at room temperature for one day and reheated briefly in a 300 degree oven to restore crispness.Course: Dessert Cuisine: American Equipment: Baking Sheet, Mixing Bowl, Pastry Brush
Dark Chocolate Cauldron Brownies with Marshmallow Skulls
These brownies bring a fun Halloween touch to any party spread. Each one bakes up fudgy and rich with dark chocolate, then gets topped with a marshmallow skull for a spooky finish. They work well for small gatherings where you want something that looks thought out without much fuss.
The texture stays dense and chewy inside with slightly crisp edges, while the marshmallow adds a soft, sweet contrast. Serve them warm or at room temperature so the chocolate flavor stands out.
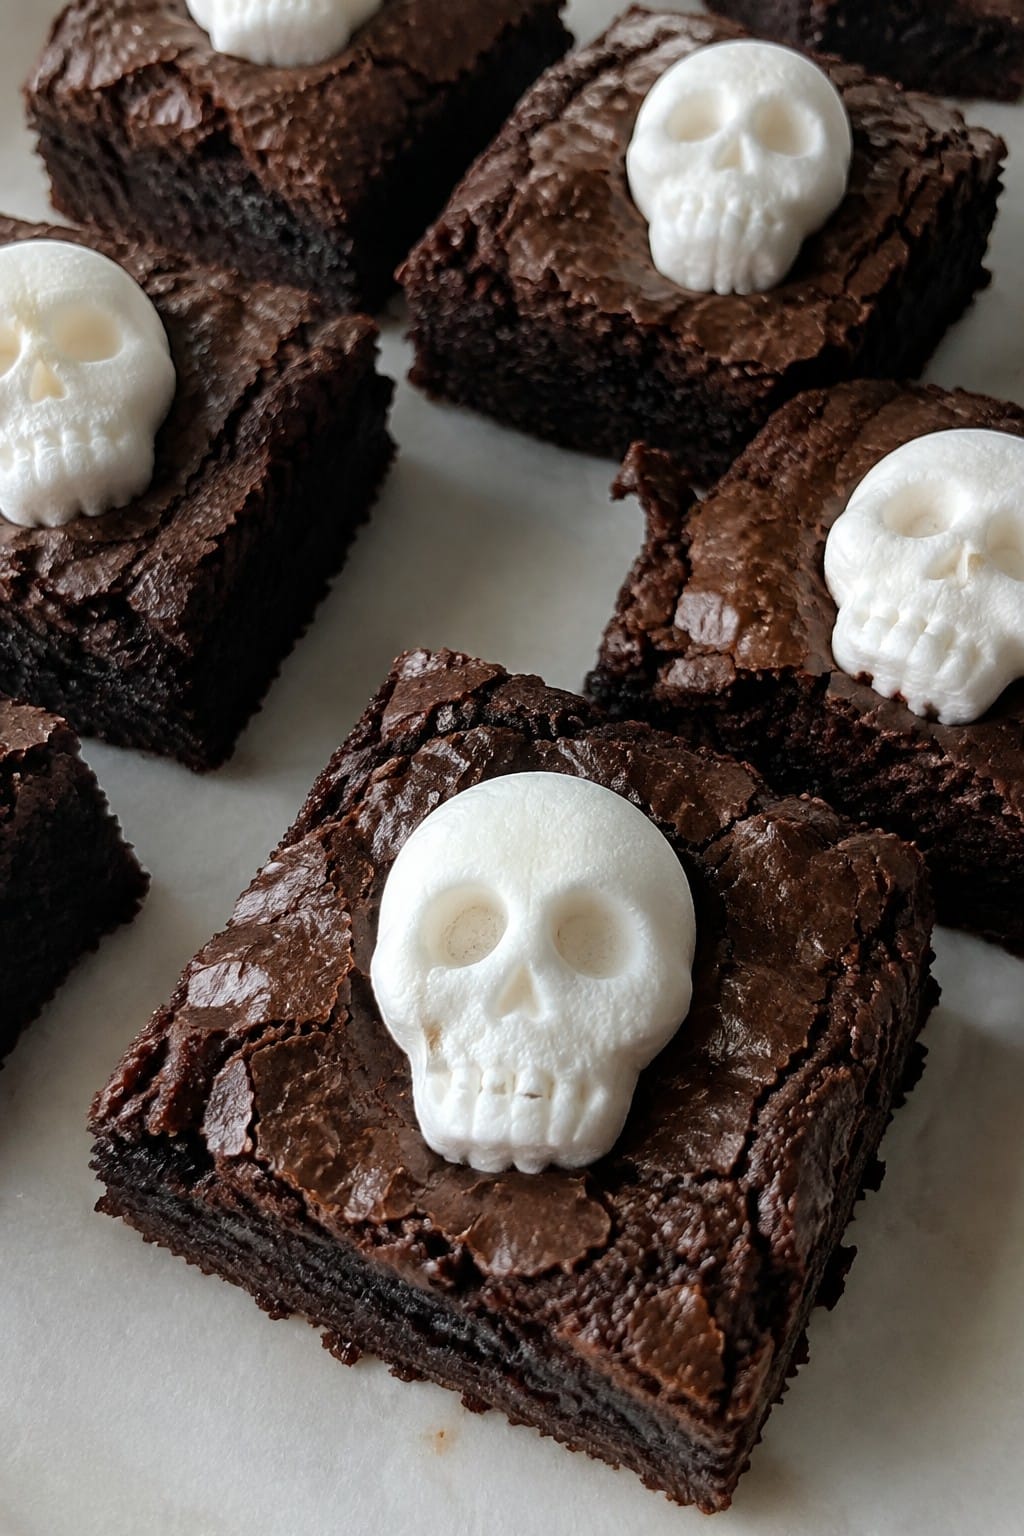
Serves 4 people.
Ingredients
- 1/2 cup unsalted butter
- 4 ounces dark chocolate, chopped
- 3/4 cup granulated sugar
- 2 large eggs
- 1/2 teaspoon vanilla extract
- 1/2 cup all-purpose flour
- 2 tablespoons unsweetened cocoa powder
- 1/4 teaspoon salt
- 4 large marshmallows
Instructions
- Preheat the oven to 350 degrees F and line four muffin cups with paper liners.
- Melt the butter and dark chocolate together in a microwave-safe bowl in 30-second bursts, stirring until smooth.
- Stir the sugar into the chocolate mixture until fully combined, then add the eggs one at a time and mix in the vanilla extract.
- Whisk together the flour, cocoa powder, and salt in a separate bowl, then fold the dry ingredients into the wet mixture until no streaks remain.
- Divide the batter evenly among the four prepared muffin cups and bake for 18 to 20 minutes until the centers are just set.
- Remove the brownies from the oven and immediately press one marshmallow onto the center of each brownie. Let them cool in the pan for 10 minutes before transferring to a wire rack.
Extra Tips
Press the marshmallow down gently right after baking so it softens slightly from the heat and sticks without sliding. If you want the skulls to hold shape better, chill the cooled brownies for 15 minutes before adding the marshmallows. These brownies store well in an airtight container at room temperature for two days.Course: Dessert Cuisine: American Equipment: Muffin tin, Mixing bowls, Microwave-safe bowl, Whisk
Orange Velvet Layer Cake with Black Cocoa Buttercream
This cake brings a bold Halloween look to the table with bright orange layers and deep black frosting. The orange flavor stays fresh and tangy while the black cocoa adds a dark chocolate note that balances the sweetness. It works well for small parties or as a centerpiece dessert that stands out without much fuss.
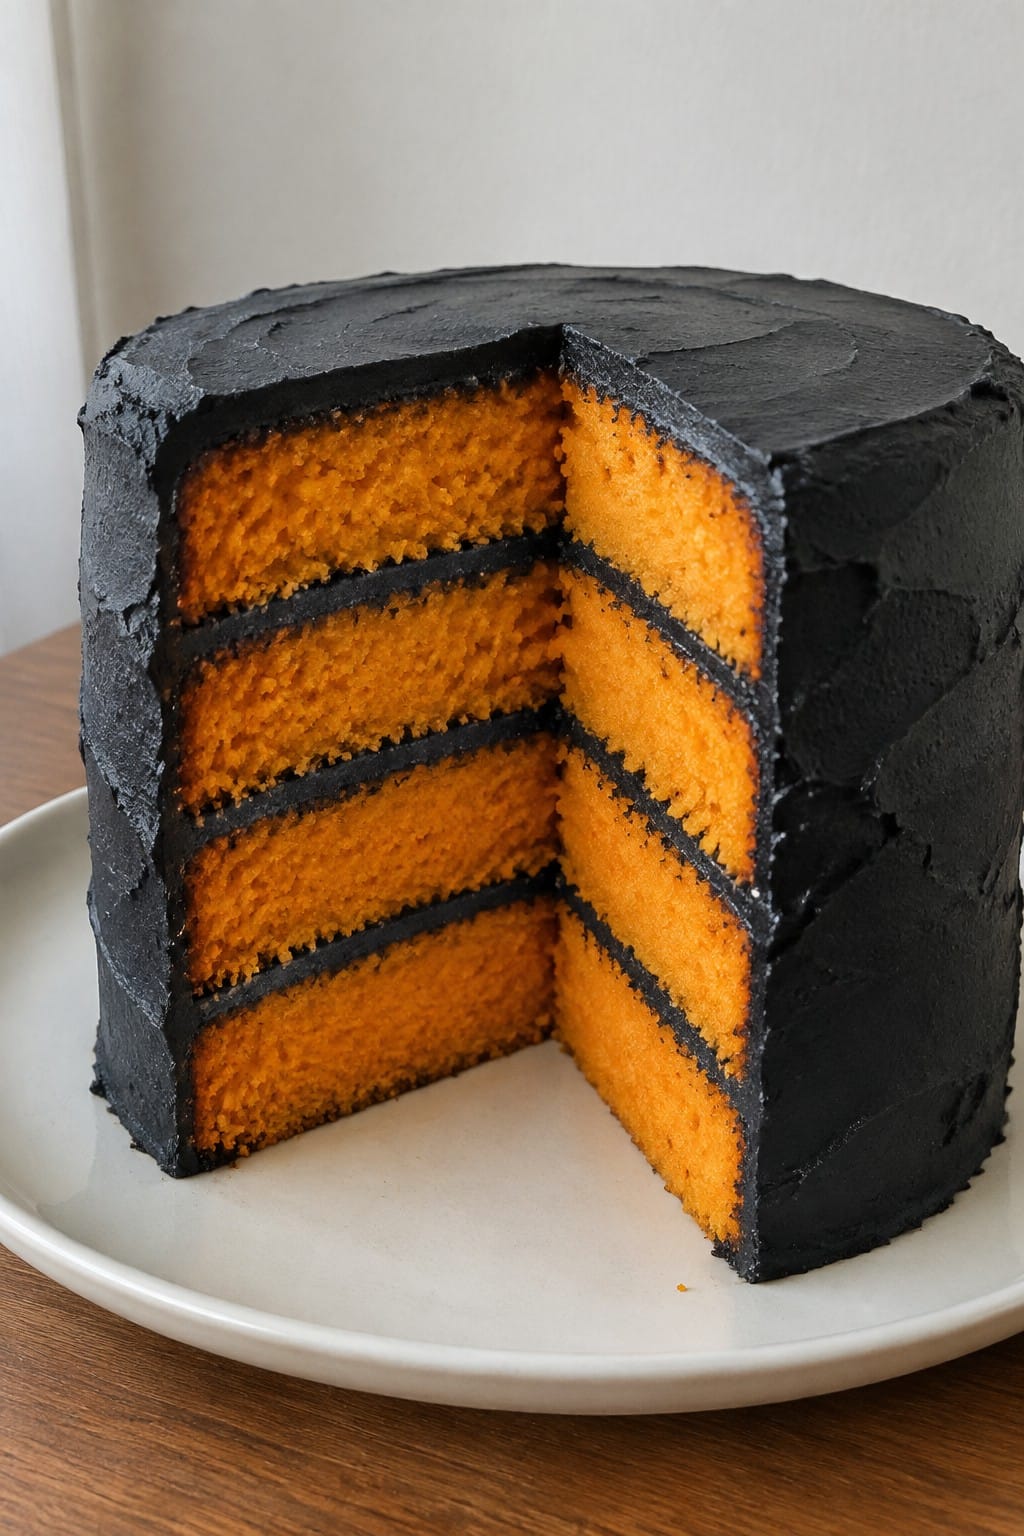
Serves 4 people.
Ingredients
- 1 1/4 cups all-purpose flour
- 3/4 cup granulated sugar
- 1/2 teaspoon baking soda
- 1/4 teaspoon salt
- 1/2 cup buttermilk
- 1/4 cup vegetable oil
- 1 large egg
- 1 tablespoon orange zest
- 2 tablespoons fresh orange juice
- 1 teaspoon white vinegar
- 1 teaspoon vanilla extract
- Orange gel food coloring
- 1/2 cup unsalted butter, softened
- 1 1/2 cups powdered sugar
- 1/4 cup black cocoa powder
- 2 tablespoons heavy cream
Instructions
- Preheat the oven to 350 degrees and grease two 6-inch round cake pans. Line the bottoms with parchment rounds.
- In a medium bowl, whisk together the flour, granulated sugar, baking soda, and salt.
- In a separate bowl, mix the buttermilk, vegetable oil, egg, orange zest, orange juice, white vinegar, and vanilla extract until smooth. Stir in orange gel food coloring until the batter reaches a vibrant shade.
- Pour the wet mixture into the dry ingredients and stir just until combined. Divide the batter evenly between the prepared pans.
- Bake for 22 to 25 minutes until a toothpick inserted in the center comes out clean. Cool the cakes in the pans for 10 minutes, then turn them out onto a rack to cool completely.
- Beat the softened butter until creamy. Add the powdered sugar, black cocoa powder, and heavy cream. Mix on low speed until incorporated, then beat on medium until the frosting is light and spreadable.
- Place one cooled cake layer on a plate. Spread a thin layer of frosting on top. Add the second layer and cover the top and sides with the remaining frosting.
Extra Tips
For the cleanest black color, sift the black cocoa before mixing it into the buttercream. If the frosting feels stiff, add a teaspoon more cream at a time until it spreads easily. The cake tastes best the day it is made but can be wrapped and stored at room temperature for one day.Course: Dessert Cuisine: American Equipment: Mixing Bowls, Electric Mixer, Cake Pans, Offset Spatula
Witch Hat Chocolate Cookies with Ganache Brims
These cookies stand out at Halloween parties because the shape is simple to create yet looks festive on a dessert table. They work well when you need a make-ahead treat that travels easily and holds up during a gathering. The flavor combines rich chocolate in the cookie with a smooth, slightly bitter ganache that adds creaminess without overwhelming sweetness.
The texture stays crisp on the edges and soft in the center, which pairs nicely with the glossy ganache layer on top.
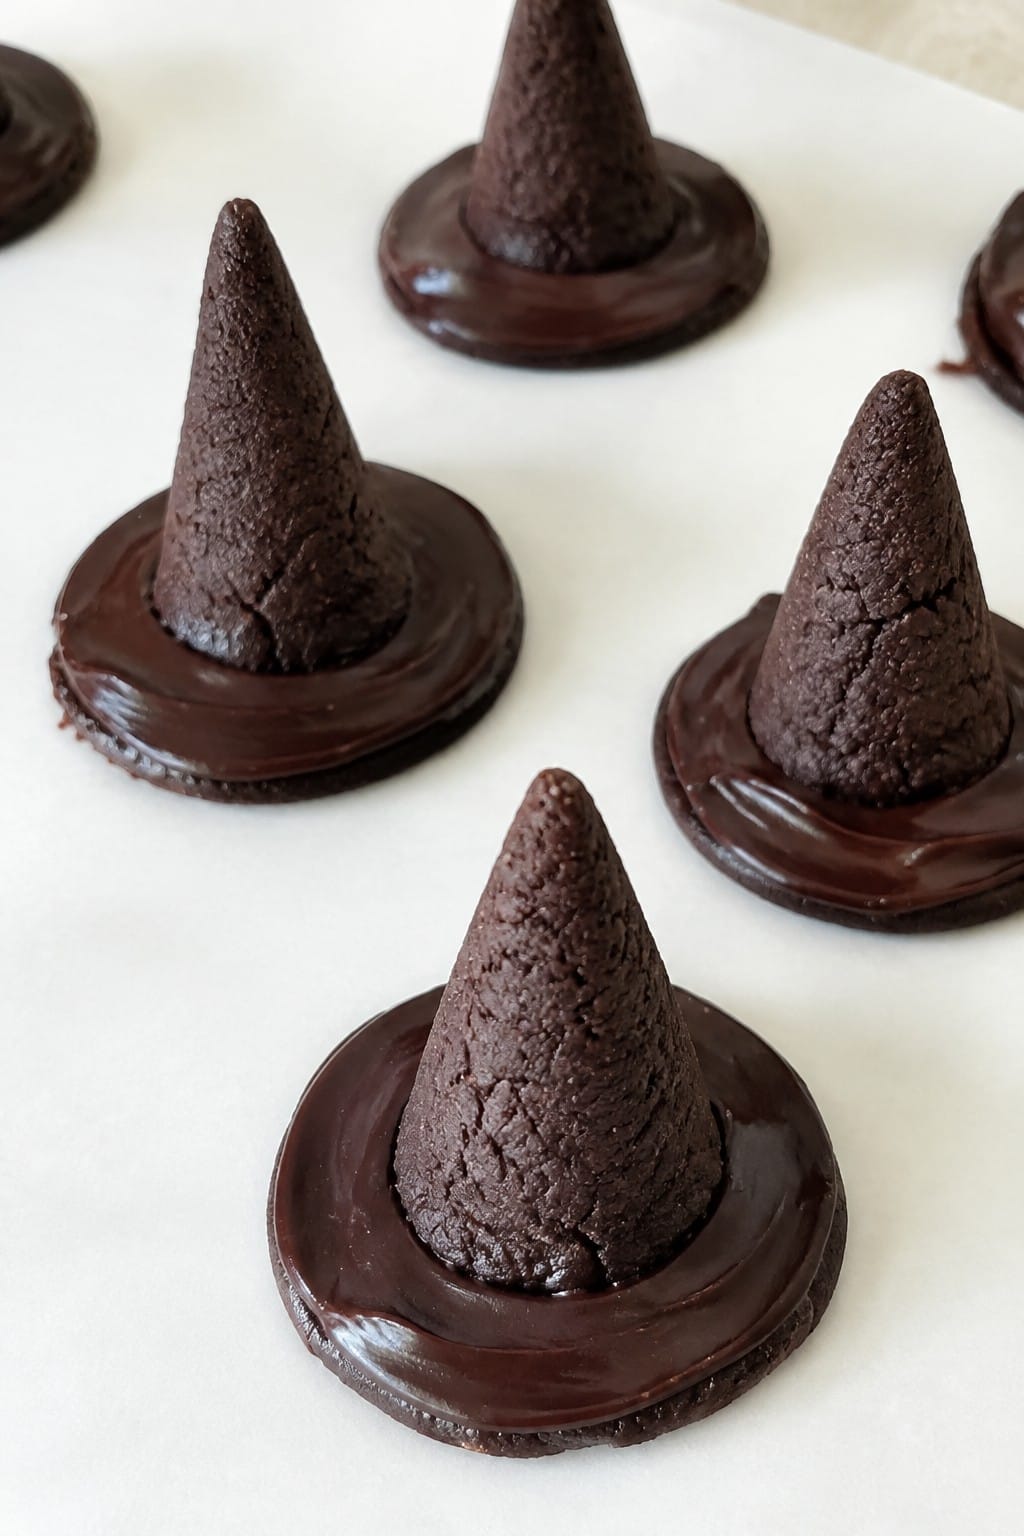
Serves 4 people.
Ingredients
- 1 cup all-purpose flour
- ½ cup unsweetened cocoa powder
- ½ cup granulated sugar
- ¼ cup unsalted butter, softened
- 1 large egg
- 1 teaspoon vanilla extract
- ½ teaspoon baking soda
- ¼ teaspoon salt
- ½ cup heavy cream
- 4 ounces semisweet chocolate, chopped
Instructions
- Heat the oven to 350 degrees and line a baking sheet with parchment paper.
- In a medium bowl, whisk together the flour, cocoa powder, baking soda, and salt.
- In a separate bowl, beat the butter and sugar until light. Add the egg and vanilla and mix until combined.
- Stir the dry ingredients into the wet mixture until a dough forms. Roll the dough into eight small balls, then shape each ball into a cone with a flat base to resemble a witch hat.
- Place the shaped cookies on the baking sheet and bake for 10 to 12 minutes. Let them cool completely on the sheet.
- While the cookies cool, heat the heavy cream in a small saucepan until it just begins to steam. Remove from heat, add the chopped chocolate, and stir until the mixture is smooth and glossy.
- Once the cookies are cool, spoon or pipe the ganache around the base of each cookie to form the brim. Allow the ganache to set before serving.
Extra Tips
Shape the dough cones a little taller than you think you need because they spread slightly during baking. If the ganache thickens too much while you work, warm it gently over low heat and stir until it loosens again. Store any leftovers in an airtight container at room temperature for up to two days to keep the cookies crisp.Course: Dessert Cuisine: American Equipment: Mixing Bowl, Baking Sheet, Saucepan
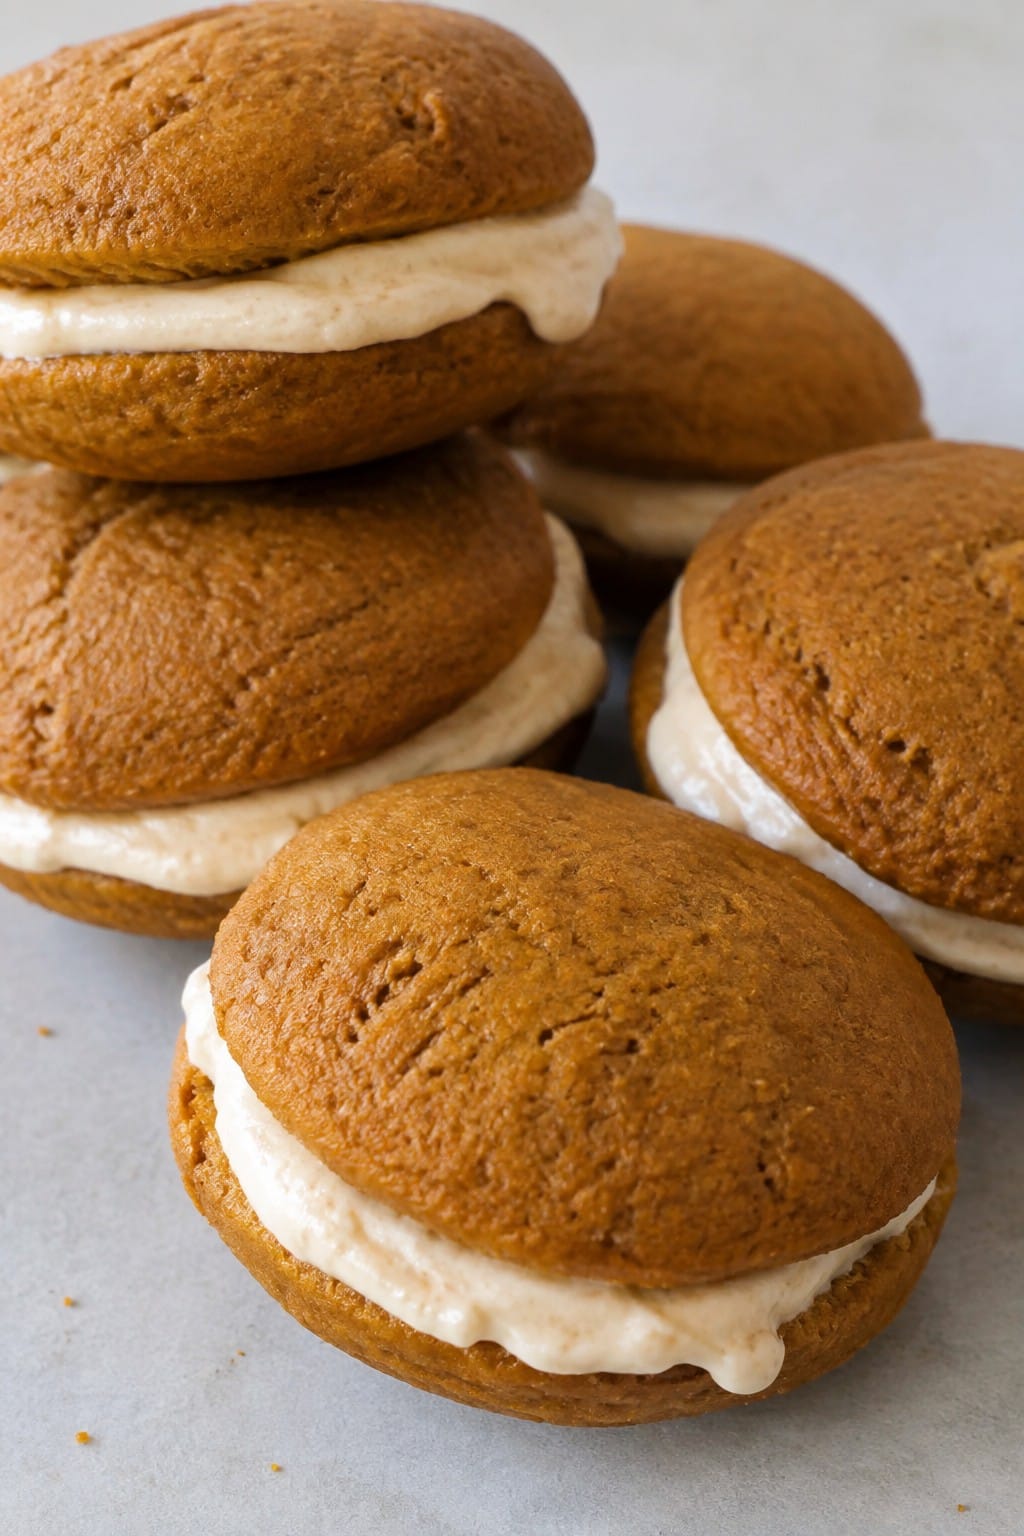
Pumpkin Spice Whoopie Pies with Maple Cream Filling
These whoopie pies bring warm pumpkin spice flavors into soft cake rounds that sandwich a sweet maple cream filling. They work well for Halloween parties because they feel festive without needing much decoration. The texture stays tender on the outside with a creamy center that balances the spices.
They suit a dessert table or grab-and-go treats at gatherings. The maple adds a cozy note that pairs nicely with the pumpkin.
Serves 4 people.
Ingredients
- 1 cup all-purpose flour
- 1/2 teaspoon baking powder
- 1/2 teaspoon baking soda
- 1/4 teaspoon salt
- 1 teaspoon pumpkin pie spice
- 1/2 cup pumpkin puree
- 1/4 cup brown sugar
- 1/4 cup granulated sugar
- 1/4 cup vegetable oil
- 1 large egg
- 1/2 teaspoon vanilla extract
- 4 ounces cream cheese, softened
- 2 tablespoons unsalted butter, softened
- 1/2 cup powdered sugar
- 2 tablespoons maple syrup
Instructions
- Preheat the oven to 350 degrees and line a baking sheet with parchment paper.
- In a medium bowl, whisk together the flour, baking powder, baking soda, salt, and pumpkin pie spice.
- In a separate bowl, mix the pumpkin puree, brown sugar, granulated sugar, vegetable oil, egg, and vanilla extract until smooth.
- Stir the dry ingredients into the wet ingredients until just combined.
- Drop rounded tablespoons of batter onto the baking sheet, spacing them a few inches apart, to make 8 rounds.
- Bake for 10 to 12 minutes until the edges look set. Let them cool completely on the sheet.
- In a clean bowl, beat the cream cheese and butter until creamy. Add the powdered sugar and maple syrup and mix until smooth.
- Spread the filling on the flat side of four cooled rounds and top each with a second round to form sandwiches.
Extra Tips
Make the cakes a day ahead and store them in an airtight container at room temperature, then fill them right before serving so the cakes stay soft. If the filling feels too loose, add a little more powdered sugar to thicken it without changing the maple taste.Course: Dessert Cuisine: American Equipment: Mixing bowls, baking sheet, parchment paper, whisk, electric mixer
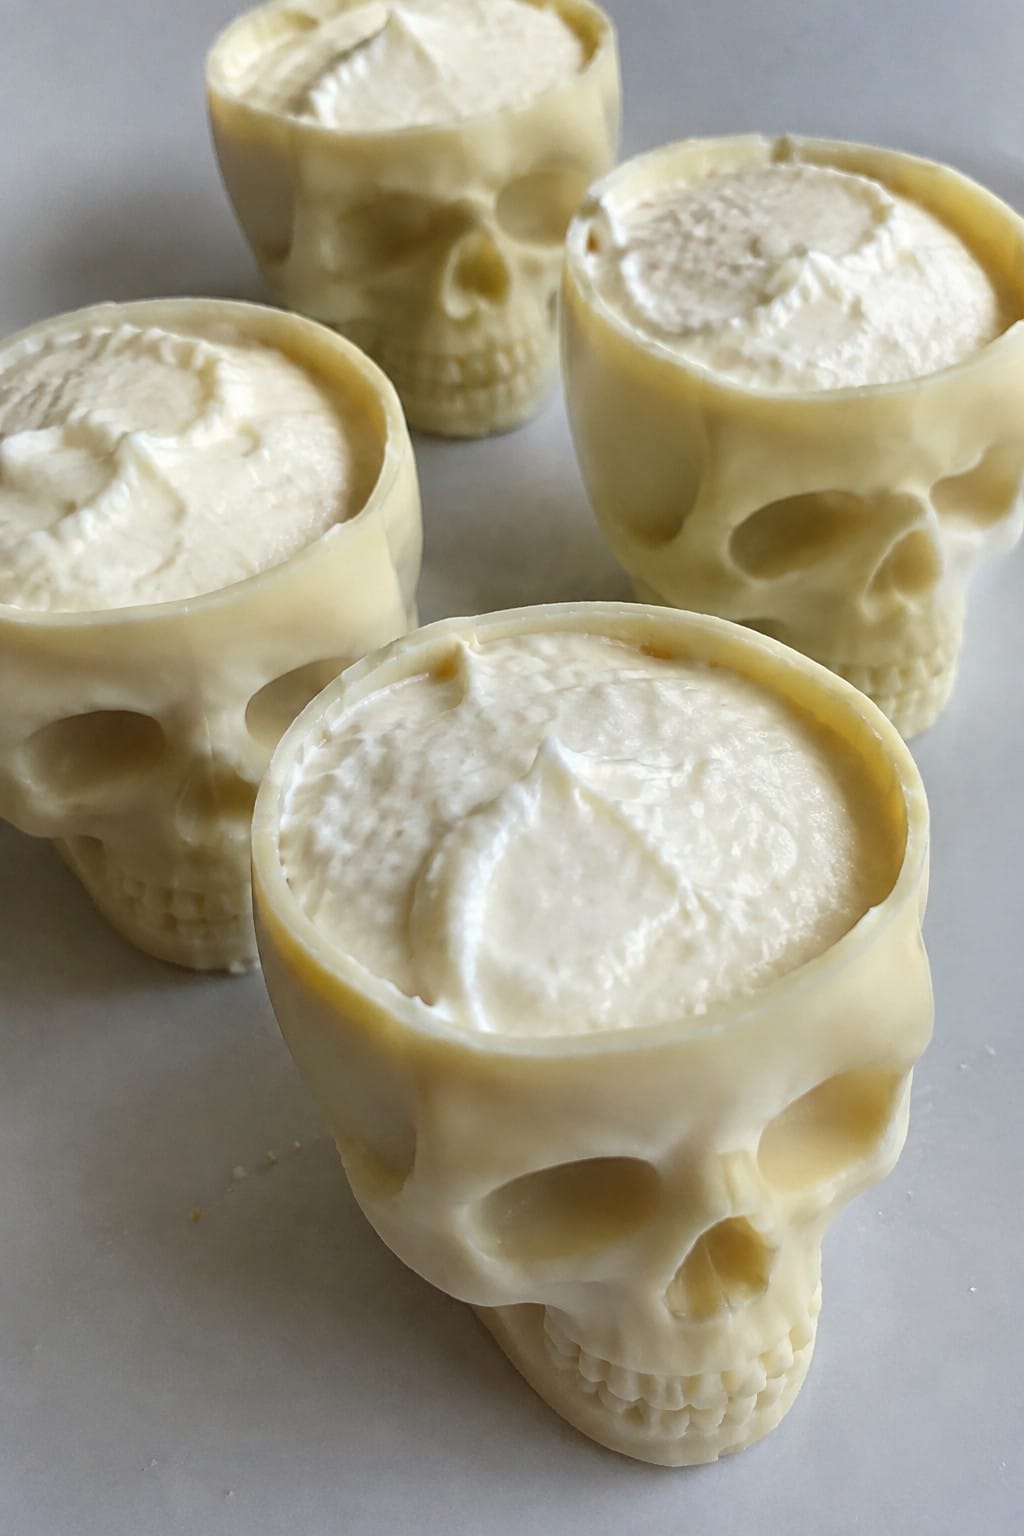
Skull-Shaped White Chocolate Mousse Cups
These skull-shaped cups turn a classic white chocolate mousse into a striking party dessert. The shells hold a light, creamy filling that contrasts nicely with the sweet chocolate. They work well for Halloween gatherings where you want something that looks impressive but stays simple to prepare.
The flavor stays rich and sweet with a smooth texture from the whipped cream base. Each cup serves as its own portion, so guests can grab one easily during a buffet or sit-down event.
Serves 4 people.
Ingredients
- 12 ounces white chocolate, divided
- 2 cups heavy whipping cream, divided
- 1 teaspoon vanilla extract
- 2 tablespoons powdered sugar
Instructions
- Melt 8 ounces of the white chocolate with 1/2 cup of the heavy cream in a heatproof bowl set over simmering water. Stir until smooth, then remove from heat and let cool slightly.
- Divide the melted chocolate mixture among four skull-shaped silicone molds. Use a spoon or brush to coat the inside evenly, creating a thin shell. Place the molds in the refrigerator for 20 minutes to set.
- In a separate bowl, whip the remaining 1 1/2 cups heavy cream with the powdered sugar and vanilla extract until soft peaks form. Melt the remaining 4 ounces of white chocolate and let it cool to room temperature. Fold the cooled white chocolate into the whipped cream until fully combined.
- Remove the chocolate shells from the molds. Spoon or pipe the mousse into each shell until filled. Return the filled cups to the refrigerator for at least 1 hour to firm up before serving.
Extra Tips
Chill the mousse filling longer if you want a firmer texture for warmer party settings. You can prepare the shells a day ahead and store them in the refrigerator, then fill them right before guests arrive to keep the mousse fresh. Skip any extra decorations since the skull shape already stands out on its own.Course: Dessert Cuisine: American Equipment: Mixing bowls, Whisk, Silicone skull molds, Spoon or piping bag, Refrigerator
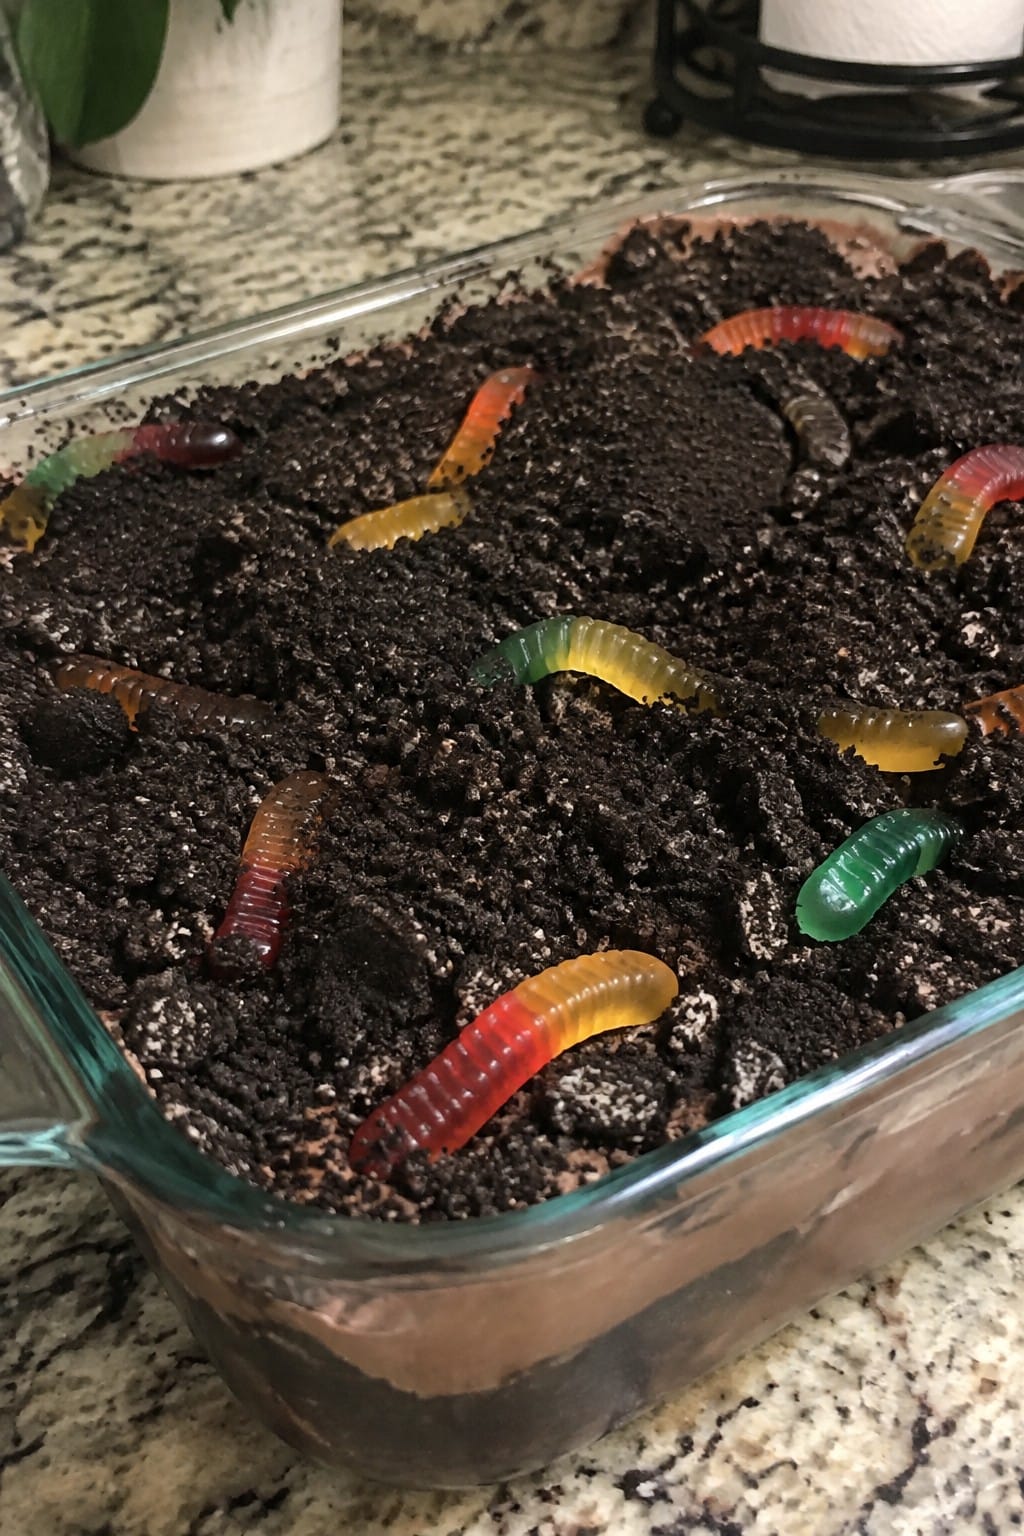
Graveyard Dirt Cake with Oreo Crumbs and Gummy Worms
This graveyard dirt cake makes a fun addition to any Halloween party spread. The creamy chocolate layers and crushed cookie topping give it a rich texture that feels festive without much effort.
It works well for small gatherings or potlucks where you want something that looks themed but stays simple to prepare. The taste is deeply chocolate with a light, fluffy finish and occasional chewy bites from the worms.
Serves 4 people.
Ingredients
- 1 package (3.9 oz) instant chocolate pudding mix
- 2 cups cold milk
- 8 ounces cream cheese, softened
- 1 cup powdered sugar
- 8 ounces frozen whipped topping, thawed
- 20 Oreo cookies, crushed
- 12 gummy worms
Instructions
- Whisk the instant chocolate pudding mix with the cold milk in a medium bowl until it thickens, about two minutes. Set it aside to firm up further.
- Beat the softened cream cheese and powdered sugar together in a separate bowl until smooth. Fold in the thawed whipped topping until evenly combined.
- Gently stir the prepared pudding into the cream cheese mixture until fully blended.
- Spoon a layer of the chocolate mixture into individual serving cups or a small dish. Add a layer of crushed Oreo cookies on top.
- Repeat the layers once more, ending with a final layer of crushed Oreo cookies to create the dirt effect.
- Press the gummy worms into the top cookie layer so they appear to be emerging from the surface. Chill the dessert until ready to serve.
Extra Tips
Crush the Oreos into fine crumbs for the best dirt-like appearance. Add the gummy worms right before serving so they stay firm and visible. If you need to prepare ahead, assemble the layers without the worms and cover the dish in the refrigerator for up to one day.Course: Dessert Cuisine: American Equipment: Mixing Bowl, Electric Mixer, Serving Cups
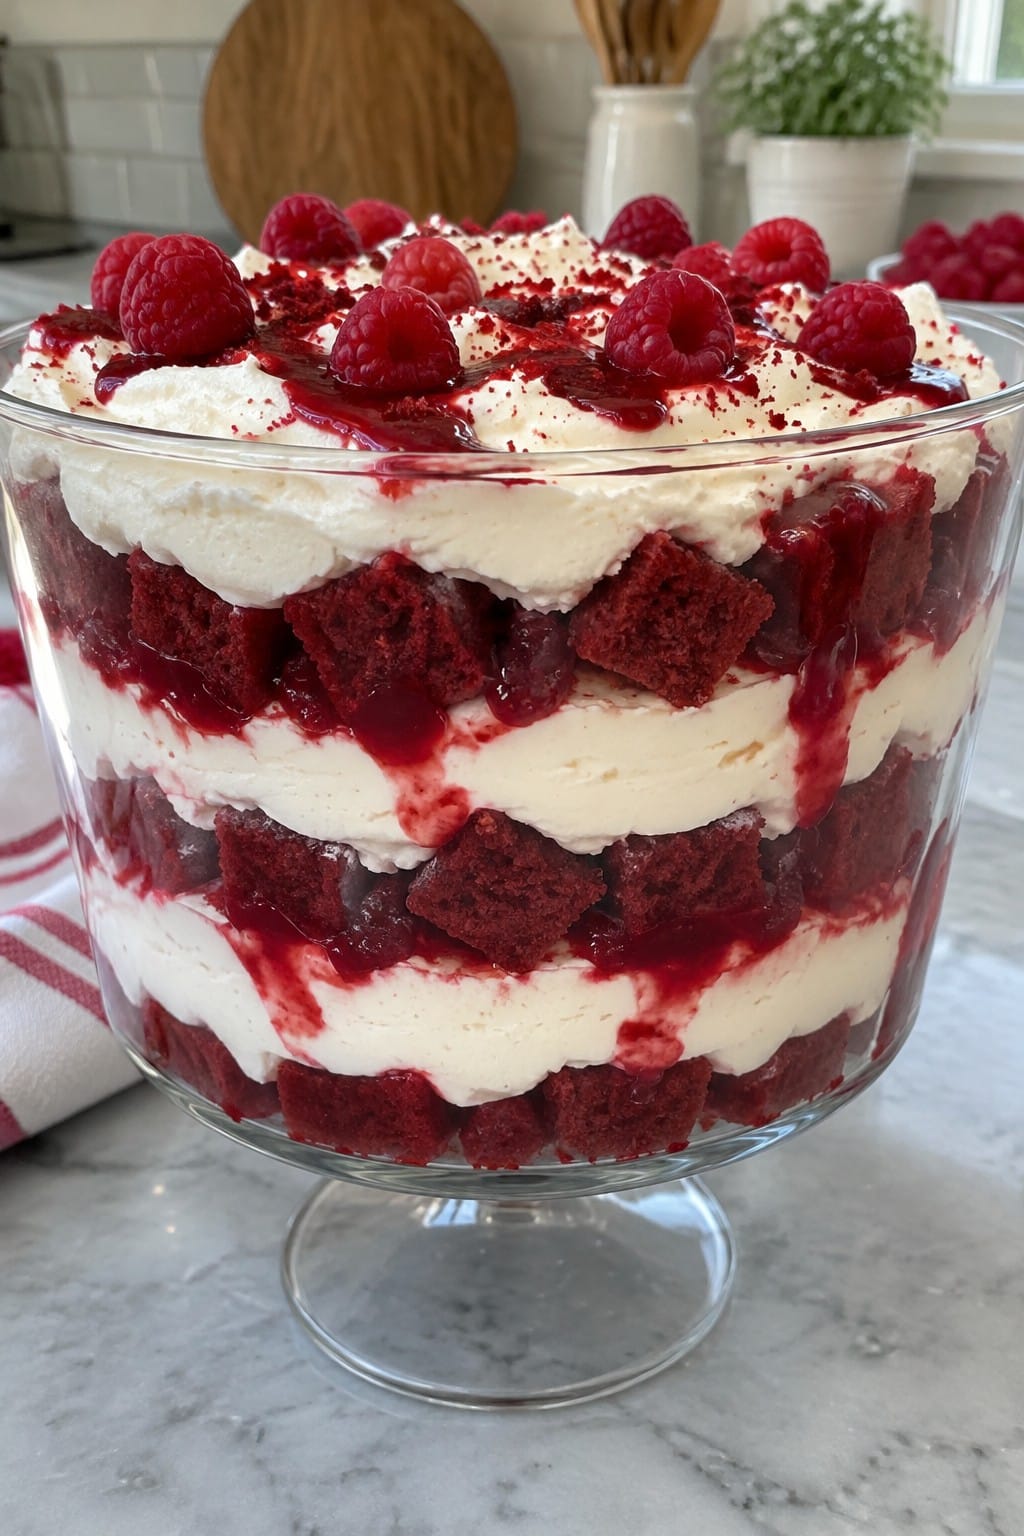
Bloody Red Velvet Trifle with Mascarpone Layers
This trifle brings bold color and creamy texture together in one dish. It works well for Halloween parties because the red layers stand out in a clear bowl and the mascarpone adds a light contrast to the rich cake. The result tastes like a dressed-up red velvet cake with a hint of berry tang.
It suits small gatherings where you want something that looks assembled rather than fussy. Each spoonful gives soft cake, smooth cheese filling, and a touch of fruit sauce that keeps the sweetness balanced.
Serves 4 people.
Ingredients
- 4 cups red velvet cake cubes
- 8 ounces mascarpone cheese, softened
- 1 cup heavy whipping cream
- 1/4 cup granulated sugar
- 1 teaspoon vanilla extract
- 1/2 cup raspberry sauce
- Fresh raspberries for garnish
Instructions
- Place the mascarpone cheese in a mixing bowl. Add the granulated sugar and vanilla extract, then beat until smooth.
- In a separate bowl, whip the heavy whipping cream until stiff peaks form. Fold the whipped cream into the mascarpone mixture until fully combined.
- Set out four small trifle glasses or one medium glass bowl. Add a layer of red velvet cake cubes to the bottom of each.
- Spoon a layer of the mascarpone mixture over the cake. Drizzle a small amount of raspberry sauce on top.
- Repeat the layers once more, ending with mascarpone mixture. Finish with a final drizzle of raspberry sauce and a few fresh raspberries on each serving.
Extra Tips
Make the red velvet cake a day ahead so the cubes stay firm during assembly. If the raspberry sauce is too thick, thin it with a teaspoon of water before drizzling so it flows like a thin red streak. Store leftovers covered in the refrigerator for up to two days.Course: Dessert Cuisine: American Equipment: Mixing Bowl, Electric Mixer, Trifle Glasses
Halloween Candy Bark with Toffee and Pretzel Pieces
This bark brings together smooth chocolate with salty pretzel crunch and buttery toffee bits. It makes a simple addition to a Halloween dessert table and travels well to parties.
The finished bark offers a balance of sweet and salty notes with a satisfying snap. It works as a make-ahead option that guests can grab by hand.
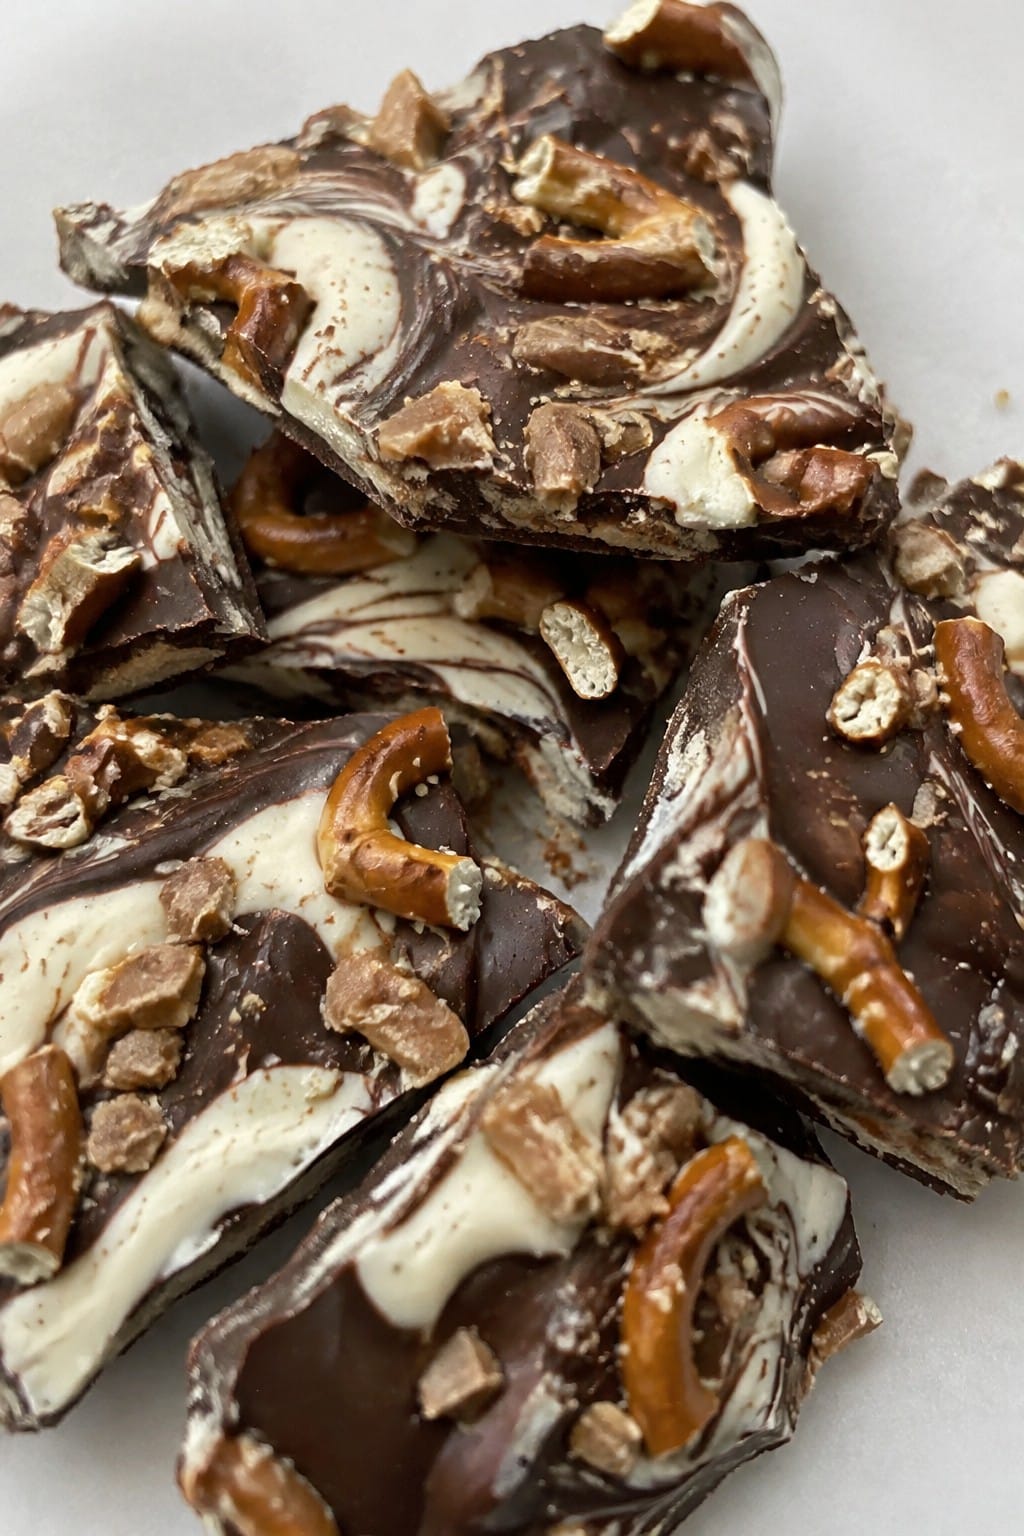
Serves 4 people.
Ingredients
- 8 ounces semisweet chocolate chips
- 4 ounces white chocolate chips
- 1/2 cup toffee bits
- 3/4 cup pretzel pieces
Instructions
- Line a baking sheet with parchment paper and set it aside.
- Place the semisweet chocolate chips in a microwave-safe bowl. Heat in 30-second intervals, stirring after each, until fully melted and smooth.
- Pour the melted semisweet chocolate onto the prepared baking sheet. Use a spatula to spread it into a thin, even layer about 1/4 inch thick.
- Place the white chocolate chips in a separate microwave-safe bowl. Heat in 30-second intervals, stirring after each, until melted and smooth.
- Drizzle the melted white chocolate over the semisweet layer in a random pattern. Use a toothpick or knife tip to swirl the two chocolates together lightly.
- Sprinkle the toffee bits evenly across the surface, followed by the pretzel pieces. Press them gently into the chocolate so they stick.
- Transfer the baking sheet to the refrigerator and chill for at least 1 hour, or until the bark is completely firm.
- Remove the bark from the refrigerator and break it into irregular pieces by hand.
Extra Tips
Break the bark right before serving so the pretzel pieces stay crisp. If you need to make it ahead, store the pieces in an airtight container at room temperature for up to three days. For a different texture, swap the white chocolate drizzle for a thin layer of melted peanut butter chips before adding the toppings.Course: Dessert Cuisine: American Equipment: Baking sheet, Parchment paper, Microwave-safe bowls, Spatula
Caramel Apple Cheesecake Dip with Cinnamon Pita Chips
This dip brings together creamy cheesecake flavors with sweet caramel and fresh apple pieces. It works well for Halloween parties because guests can scoop it with warm, spiced chips instead of using utensils. The texture stays smooth in the center with a bit of crunch from the baked pita on the side.
The flavor profile leans sweet and cozy, with cinnamon tying the dip and chips together. It feels festive without extra decorations and comes together quickly for a crowd.
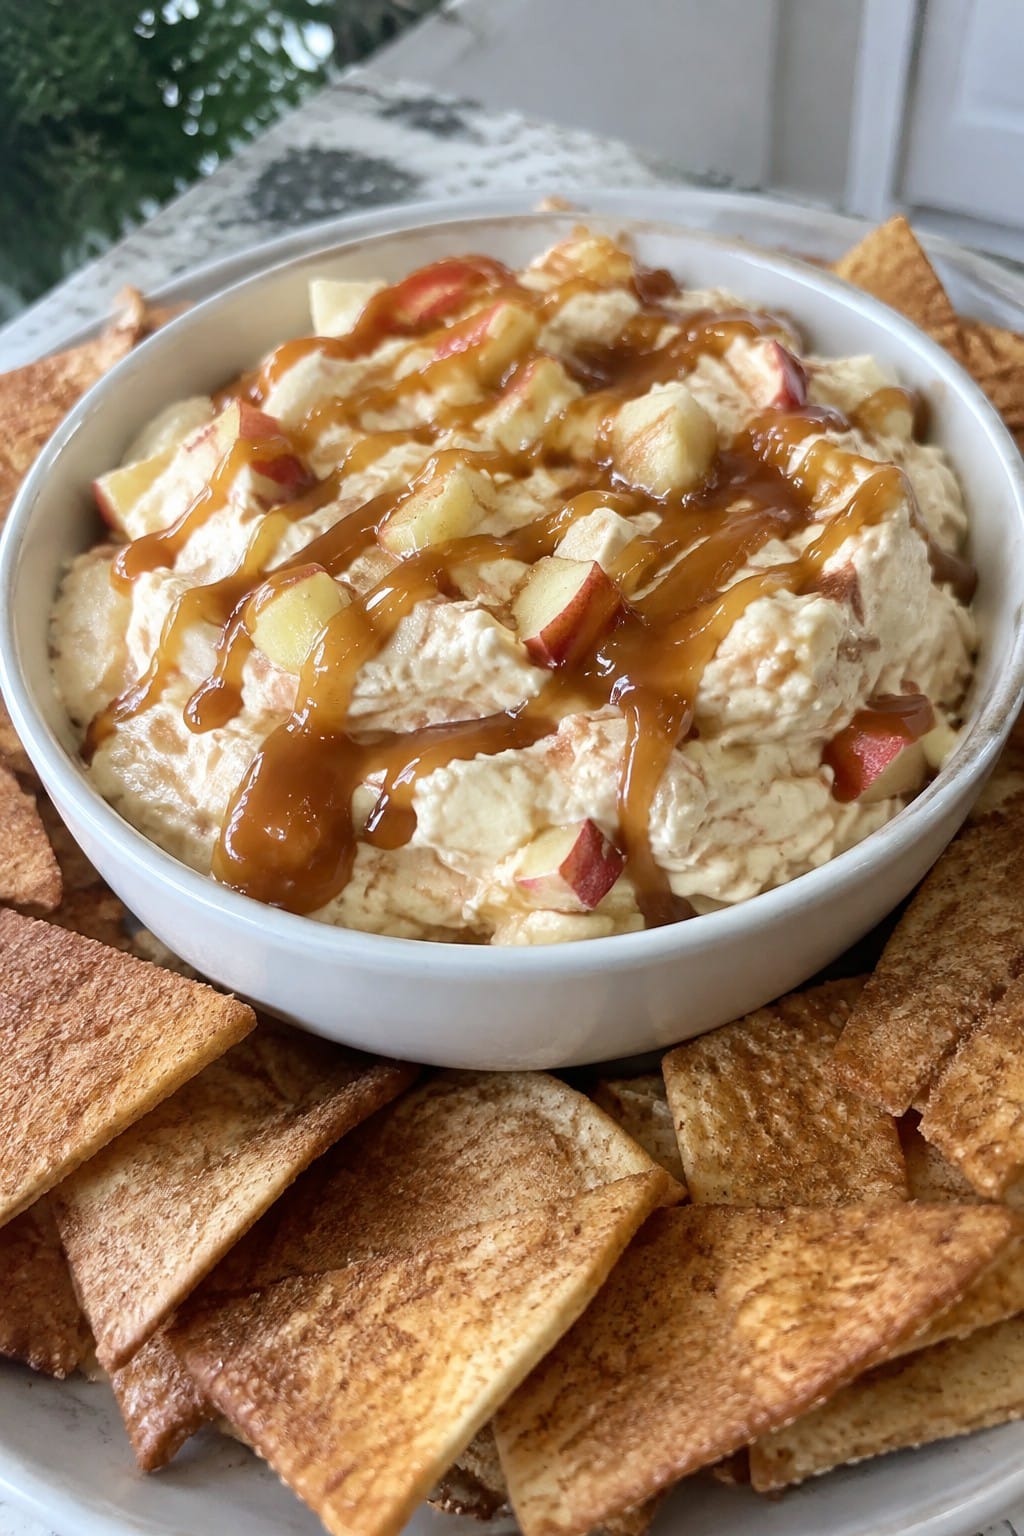
Serves 4 people.
Ingredients
- 8 oz cream cheese, softened
- 1/4 cup caramel sauce, plus 2 tablespoons for drizzling
- 1/4 cup brown sugar
- 1 tsp vanilla extract
- 1/2 tsp ground cinnamon
- 1 large apple, diced
- 2 pita breads, cut into triangles
- 2 tbsp unsalted butter, melted
- 2 tbsp granulated sugar
- 1 tsp ground cinnamon
Instructions
- Preheat the oven to 375 degrees and line a baking sheet with parchment paper.
- In a mixing bowl, beat the softened cream cheese until smooth. Add the 1/4 cup caramel sauce, brown sugar, vanilla extract, and 1/2 tsp cinnamon. Mix until fully combined.
- Fold the diced apple into the cream cheese mixture. Spread the dip into a serving bowl and drizzle the extra 2 tablespoons of caramel sauce over the top.
- Place the pita triangles on the prepared baking sheet. Brush each piece with melted butter.
- Stir together the granulated sugar and 1 tsp cinnamon. Sprinkle the mixture evenly over the pita triangles.
- Bake the chips for 8 to 10 minutes until they turn golden and crisp. Remove from the oven and let them cool slightly before serving alongside the dip.
Extra Tips
Mix the dip a few hours ahead and keep it covered in the fridge so the flavors blend. If the caramel firms up after chilling, let the bowl sit at room temperature for 20 minutes before serving. Use a firm apple like Granny Smith to keep the pieces from turning mushy in the dip.Course: Dessert Cuisine: American Equipment: Mixing Bowl, Baking Sheet, Oven
