

As Halloween draws near, it’s time to whip up some festive treats that are perfect for an adult gathering. Picture a table sprinkled with Ghostly Deviled Eggs and Mummified Jalapeño Poppers—each one a delicious blend of spooky and scrumptious. These culinary creations are sure to bring both chills and chuckles to your celebration. Get ready for a Halloween feast that’s as delightful to look at as it is to taste. Let’s make this holiday a memorable one with treats that are as stylish as they are tasty!
Witch’s Brew Sangria
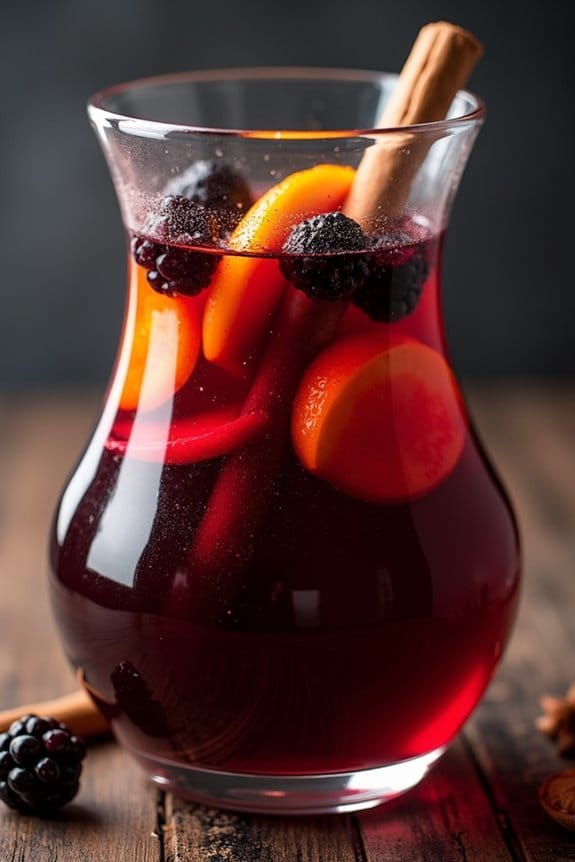
Crafting this potion is as simple as it’s satisfying. The deep red wine serves as the base, giving it a rich, velvety texture, while the incorporation of seasonal fruits and a hint of spice provides layers of flavor that are both invigorating and complex.
With a few simple steps, you can create a bewitching brew that not only looks the part but also tantalizes the taste buds of your guests.
Ingredients for 4-6 servings:
- 1 bottle of dry red wine (750ml)
- 1 cup of pomegranate juice
- 1/2 cup of brandy
- 1/4 cup of triple sec
- 1/4 cup of simple syrup
- 1 orange, thinly sliced
- 1 apple, cored and thinly sliced
- 1/2 cup of blackberries
- 1/2 cup of raspberries
- 1 cinnamon stick
- 2-3 star anise
- 1 cup of club soda
- Ice cubes
Cooking Instructions:
1. Prepare the Fruit Base: Begin by washing and slicing the orange and apple. Make sure the slices are thin to allow them to soak in the flavors of the sangria.
Rinse the blackberries and raspberries under cold water and set all the fruit aside.
2. Mix the Liquid Ingredients**: In a large pitcher, combine the bottle of dry red wine, pomegranate juice**, brandy, and triple sec.
Stir well to guarantee the liquids are thoroughly mixed.
3. Add the Sweetness and Spice: Pour in the simple syrup and add the cinnamon stick and star anise.
Stir everything together, allowing the spices to infuse the liquid with their aromatic flavors.
4. Combine the Fruit: Add the sliced orange, apple, blackberries, and raspberries into the pitcher.
Stir gently to combine and guarantee the fruit is submerged in the liquid.
5. Chill and Marinate: Place the pitcher in the refrigerator and allow the sangria to chill and the flavors to meld for at least 2-4 hours.
For the best results, let it sit overnight.
6. Add the Finishing Touches**: Before serving, add the club soda** to the pitcher.
Stir gently to incorporate the fizz without losing it.
7. Serve: Fill glasses with ice cubes and pour the sangria over the ice.
Make sure to include pieces of fruit in each glass for a festive presentation.
Extra Tips:
To make your Witch’s Brew Sangria even more visually striking, consider freezing some pomegranate seeds in ice cube trays filled with water or juice for an added eerie touch.
Additionally, if you prefer a sweeter sangria, adjust the amount of simple syrup to your taste.
For a non-alcoholic version, substitute the wine with grape juice and omit the brandy and triple sec, guaranteeing everyone can enjoy a glass of this magical brew.
Ghostly Deviled Eggs
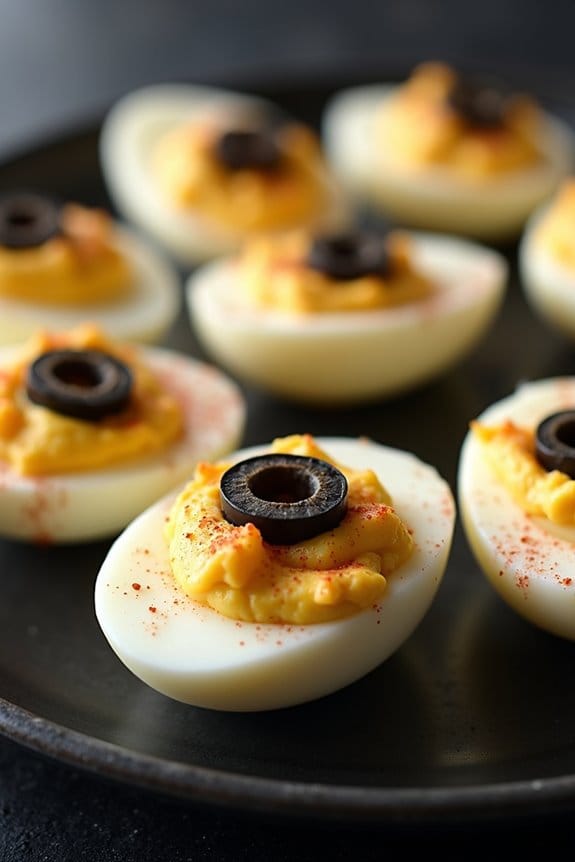
Halloween isn’t just for kids, and a spooky twist on classic dishes can set the perfect tone for an adult Halloween gathering. Ghostly Deviled Eggs are a delightful and eerie addition to your Halloween spread. These deviled eggs are deliciously creamy and are transformed into a spooky treat with the help of strategically placed black olive slices that mimic ghostly eyes. With their haunting appearance and savory flavor, these eggs are sure to be a hit at your next adult Halloween party.
The creation of Ghostly Deviled Eggs is simple yet effective, making it an ideal choice for any host looking to add a little spookiness to their menu without a lot of fuss. The creamy yolk filling, with a hint of tang from mustard and a dash of paprika, provides a satisfying richness that pairs perfectly with the smooth egg whites. Crafting these ghostly delights is as fun as it’s easy, and with just a few steps, you’ll have a platter ready to impress and thrill your guests.
Ingredients (Serves 4-6 people):
- 12 large eggs
- 1/2 cup mayonnaise
- 1 tablespoon Dijon mustard
- 1 teaspoon white vinegar
- Salt and black pepper to taste
- Paprika, for garnish
- Black olives, sliced into small rounds for eyes
Cooking Instructions:
- Boil the Eggs: Place the eggs in a single layer in a large saucepan and cover them with water. Bring to a boil over medium-high heat. Once boiling, cover the saucepan, remove it from heat, and let the eggs sit in hot water for 10-12 minutes.
- Cool and Peel the Eggs: After the eggs have cooked, drain the hot water and transfer the eggs to a bowl of ice water. Let them cool for about 5 minutes. Once cooled, gently tap each egg on the counter and peel off the shell.
- Prepare the Eggs: Slice each egg in half lengthwise. Carefully remove the yolks and place them in a medium-sized bowl. Set the egg whites aside on a serving platter.
- Make the Filling: Mash the egg yolks with a fork until they’re crumbly. Add the mayonnaise, Dijon mustard, and white vinegar to the bowl. Mix until smooth and creamy. Season with salt and black pepper to taste.
- Fill the Egg Whites: Spoon or pipe the yolk mixture back into the egg white halves. Fill each egg white generously with the yolk mixture.
- Decorate: Sprinkle a light dusting of paprika over each filled egg for a touch of color. Place two small olive slices on each egg to create ghostly eyes.
- Chill and Serve: Refrigerate the eggs for at least 30 minutes before serving to allow the flavors to meld. Serve chilled on a spooky-themed platter.
Extra Tips:
For an extra spooky effect, consider using a piping bag with a star tip to fill the egg whites with the yolk mixture, giving them a more textured and ghostly appearance. If you don’t have a piping bag, simply snip the corner off a ziplock bag to create a makeshift one.
Confirm that the eggs are thoroughly chilled before serving, as this enhances both flavor and texture. If you’re preparing this dish in advance, keep the decorated eggs covered to prevent them from drying out. Enjoy getting creative with your Ghostly Deviled Eggs and watch them disappear as quickly as they materialized!
Spooky Stuffed Peppers

Halloween is the perfect time to get creative in the kitchen, and Spooky Stuffed Peppers are a fantastic way to bring some festive fun to your adult Halloween gathering. This dish combines flavorful ingredients with a touch of eerie charm, making it a crowd-pleaser that’s both tasty and visually appealing.
Spooky Stuffed Peppers add festive fun with flavorful ingredients and eerie charm for your Halloween gathering.
The bell peppers, carved to resemble jack-o’-lanterns, add a playful twist to the classic stuffed pepper recipe. Filled with a savory mixture of ground beef, rice, and spices, these peppers are bound to be a hit at your Halloween party.
Whether you’re hosting a dinner party or simply want to enjoy a themed meal at home, these Spooky Stuffed Peppers make for a delicious and satisfying dish. The rich flavors of the filling complement the sweetness of the baked peppers, creating a delightful contrast. Plus, they’re easy to make and can be prepared in advance, allowing you to spend more time enjoying the festivities.
With this recipe, you can serve 4-6 people.
Ingredients:
- 6 large bell peppers (preferably orange or red)
- 1 pound ground beef
- 1 cup cooked rice
- 1 onion, finely chopped
- 2 cloves garlic, minced
- 1 can (14.5 ounces) diced tomatoes
- 1 teaspoon salt
- 1/2 teaspoon black pepper
- 1 teaspoon paprika
- 1 teaspoon dried oregano
- 1 cup shredded mozzarella cheese
- Olive oil for drizzling
Cooking Instructions:
1. Preheat the Oven: Start by preheating your oven to 375°F (190°C) to guarantee it’s hot enough to bake the peppers evenly.
2. Prepare the Peppers: Slice the tops off each bell pepper and remove the seeds and membranes. Carve spooky faces into one side of each pepper, mimicking jack-o’-lanterns. This can be done with a small paring knife.
3. Cook the Filling: In a large skillet over medium heat, add a drizzle of olive oil. Add the chopped onion and minced garlic, sautéing until the onion is translucent. Add the ground beef, cooking until it’s browned and fully cooked.
Stir in the diced tomatoes, cooked rice, salt, black pepper, paprika, and oregano. Let the mixture simmer for about 5 minutes to blend the flavors.
4. Stuff the Peppers: Fill each carved pepper with the beef and rice mixture, pressing it down to pack tightly. Place the filled peppers upright in a baking dish.
5. Bake: Cover the dish with aluminum foil and bake in the preheated oven for 25 minutes. Remove the foil and sprinkle shredded mozzarella cheese on top of each pepper. Return to the oven and bake for an additional 10-15 minutes, or until the cheese is melted and bubbly.
6. Serve: Once done, allow the peppers to cool slightly before serving. Arrange them on a platter to showcase their spooky faces.
Extra Tips:
For an added touch of spookiness, consider using a mix of different colored bell peppers such as red, orange, and yellow to create a more vibrant presentation.
If you prefer a vegetarian option, substitute the ground beef with black beans or a meat substitute. When carving the faces, remember to keep the designs simple to avoid breaking the peppers.
Finally, these peppers can be made a day ahead and reheated before serving, making them a convenient option for entertaining.
Mummified Jalapeño Poppers

Mummified Jalapeño Poppers make for an exciting and spooky addition to any Halloween party spread. These tasty treats combine the heat of jalapeños with creamy, cheesy filling, all wrapped up in a crispy, golden crescent roll ‘mummy’ disguise. Not only are they delicious, but their fun presentation will surely impress guests and add a festive touch to your Halloween gathering.
Perfect for adults who enjoy a little spice, these poppers can be made ahead of time and baked just before serving for maximum freshness and flavor. The dish is relatively simple to prepare, requiring just a handful of ingredients and some creativity with your wrapping technique.
The key is to achieve the right balance between the spicy jalapeño, the rich filling, and the buttery crescent roll exterior. This recipe serves 4-6 people, making it ideal for a small get-together. Whether you’re hosting a Halloween party or just looking for a fun way to enjoy an evening with friends, Mummified Jalapeño Poppers are sure to be a hit.
Ingredients:
- 12 large jalapeños
- 8 oz cream cheese, softened
- 1 cup shredded cheddar cheese
- 1 tsp garlic powder
- 1 tsp onion powder
- ½ tsp smoked paprika
- 1 package crescent roll dough
- 24 candy eyeballs (optional, for decoration)
Cooking Instructions:
- Prepare the Jalapeños: Preheat your oven to 375°F (190°C). Slice the jalapeños in half lengthwise and remove the seeds and membranes to reduce the heat. Be sure to wear gloves to protect your hands from the spicy oils.
- Make the Filling: In a medium bowl, mix together the softened cream cheese, shredded cheddar cheese, garlic powder, onion powder, and smoked paprika until well combined.
- Stuff the Jalapeños: Spoon the cheese mixture into each jalapeño half, packing it tightly so that it fills the cavity completely.
- Wrap with Crescent Roll Dough: Unroll the crescent roll dough and cut it into thin strips. Take each stuffed jalapeño and wrap it with the dough strips to resemble a mummy, leaving a small gap to place the candy eyeballs later.
- Bake the Poppers: Place the wrapped jalapeños on a baking sheet lined with parchment paper. Bake in the preheated oven for 12-15 minutes, or until the crescent roll dough is golden brown and cooked through.
- Add the Eyes: Once baked, let the poppers cool slightly. Then, gently press two candy eyeballs onto each popper where you left gaps in the dough, creating the appearance of mummies.
Extra Tips:
When handling jalapeños, wearing gloves is essential as the oils can irritate your skin and eyes. If you prefer less heat, make sure to thoroughly remove all seeds and membranes from the jalapeños.
You can also adjust the spice level by choosing milder peppers or adding more cheddar cheese to the filling. To save time, prepare the filling a day in advance and store it in the refrigerator. Just verify the filling is at room temperature before stuffing the jalapeños so it spreads easily.
If you want to avoid using candy decorations, you can use small pieces of black olives as eyes for a more savory finish.
Creepy Caprese Salad

Creepy Caprese Salad is a delightful twist on the classic Italian dish, perfect for adding a spooky touch to your Halloween festivities. This dish combines the fresh flavors of tomatoes, mozzarella, and basil with a ghoulish presentation that’s certain to impress your guests.
The key to this dish lies in its eerie appearance, achieved by cleverly arranging the ingredients to resemble a creepy, yet delicious, Halloween treat. This salad isn’t only visually intriguing but also bursting with flavor. The creamy mozzarella pairs beautifully with the juicy tomatoes and aromatic basil.
Drizzled with a tangy balsamic glaze, this Creepy Caprese Salad offers a perfect balance of taste and texture. Ideal as an appetizer or a side dish, it serves 4-6 people, making it perfect for a small gathering or a Halloween dinner party.
Ingredients (Serving Size: 4-6 people)
- 4 large ripe tomatoes
- 16 oz fresh mozzarella balls (bocconcini)
- 1 bunch fresh basil leaves
- 1 cup balsamic glaze
- Salt and freshly ground black pepper to taste
- 1/4 cup extra virgin olive oil
- 1/2 cup black olives (pitted and sliced)
Instructions
- Prepare the Tomatoes: Wash the tomatoes thoroughly and slice them into 1/4-inch thick rounds. Arrange the slices on a large serving platter, leaving some space between each slice for the mozzarella and basil.
- Add the Mozzarella: Drain the bocconcini and slice each ball in half. Place a piece of mozzarella on top of each tomato slice. Ascertain that the mozzarella is slightly off-center to create a visually interesting and spooky presentation.
- Arrange the Basil: Pluck fresh basil leaves from the stem and tuck a few leaves around each mozzarella-topped tomato slice. The basil should peek out, adding a pop of green and enhancing the creepy appearance.
- Add the Eyes: Slice the black olives into rings and place them on top of each mozzarella piece, creating an “eye” effect. The black olives give the salad its creepy, Halloween-inspired look.
- Drizzle the Dressing: In a small bowl, combine the extra virgin olive oil, salt, and freshly ground black pepper. Drizzle this mixture over the salad. Follow with a generous drizzling of balsamic glaze, adding a darker, drippy effect to enhance the spooky presentation.
- Serve and Enjoy: Allow the salad to sit for a few minutes to let the flavors meld together, then serve it as an appetizer or side dish for your Halloween party.
Extra Tips
To elevate the spooky factor of your Creepy Caprese Salad, consider using heirloom tomatoes in various colors such as yellow or purple, which add an additional eerie touch.
You can also use small cookie cutters to carve out mini pumpkin or ghost shapes from the mozzarella for a truly festive look. If you want to save time on the day of your event, prepare the ingredients ahead of time and assemble the salad just before serving.
Vampire Bat Wings

Vampire Bat Wings are a spooky and delicious addition to any adult Halloween party spread. This dish takes the classic buffalo wings to a whole new level with a dark, sinister twist. The “bat wings” are chicken wings coated with a deep, rich marinade that gives them their eerie appearance. Not only do they look the part, but the combination of spices and flavors creates a tantalizing taste that’s sure to be a hit among your guests.
The preparation of Vampire Bat Wings is straightforward, and the result is a flavorful dish that balances spiciness with a hint of sweetness. By using ingredients like soy sauce, balsamic vinegar, and black food coloring, you achieve the perfect dark hue resembling bat wings. The marinade infuses the wings with a savory umami flavor that’s enhanced by a touch of garlic and ginger. When baked to perfection, these wings are crispy on the outside and juicy on the inside, making them a crowd-pleasing addition to your Halloween festivities.
Ingredients for Vampire Bat Wings (serving size: 4-6 people):
- 2 lbs chicken wings
- 1/2 cup soy sauce
- 1/4 cup balsamic vinegar
- 2 tablespoons honey
- 1 tablespoon olive oil
- 3 cloves garlic, minced
- 1 tablespoon fresh ginger, grated
- 1 teaspoon smoked paprika
- 1/2 teaspoon black pepper
- 1/4 teaspoon salt
- 1 teaspoon black food coloring
Cooking Instructions:
- Prepare the Marinade: In a large mixing bowl, combine the soy sauce, balsamic vinegar, honey, olive oil, minced garlic, grated ginger, smoked paprika, black pepper, and salt. Stir until the honey is fully dissolved and the mixture is uniform.
- Add Food Coloring: Gradually add the black food coloring to the marinade and mix well until the desired dark color is achieved. You may adjust the amount of food coloring to get the perfect shade of black for your bat wings.
- Marinate the Wings: Add the chicken wings to the marinade, ensuring they’re well-coated. Cover the bowl with plastic wrap or transfer the wings and marinade to a large resealable plastic bag. Let them marinate in the refrigerator for at least 2 hours, or preferably overnight for a more intense flavor.
- Preheat the Oven: Preheat your oven to 400°F (200°C) and prepare a baking sheet by lining it with aluminum foil. Place a wire rack on top of the foil to allow for even cooking.
- Arrange the Wings: Remove the wings from the marinade, allowing excess marinade to drip off. Arrange them in a single layer on the wire rack. Discard the remaining marinade.
- Bake the Wings: Place the baking sheet in the preheated oven and bake the wings for 30-35 minutes, turning halfway through, until they’re fully cooked and crispy on the outside.
- Serve: Once cooked, remove the wings from the oven and let them cool slightly before serving. Arrange them on a platter and enjoy your spooky Vampire Bat Wings!
Extra Tips:
For an added touch, consider serving your Vampire Bat Wings with a side of blood-red dipping sauce, such as a spicy sriracha ketchup or a tangy cranberry sauce.
Additionally, using a wire rack is essential for ensuring the wings cook evenly and become crispy, as it allows heat to circulate around the wings. If you prefer a smokier flavor, you can add a few drops of liquid smoke to the marinade.
Remember to wear gloves when handling black food coloring to avoid staining your hands.
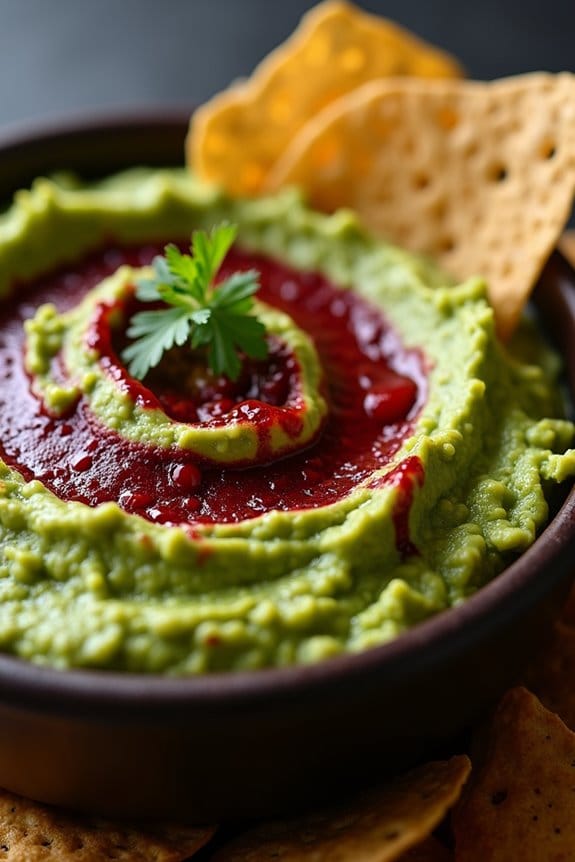
Pumpkin Patch Hummus
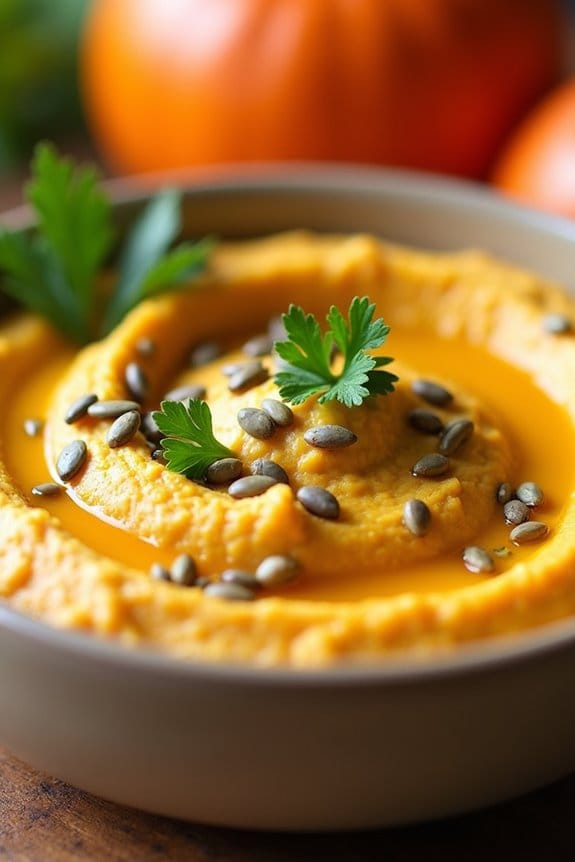
Pumpkin Patch Hummus is a vibrant, festive twist on traditional hummus, perfect for celebrating Halloween with a group of adults. This delicious dip combines the rich, earthy flavors of pumpkin with the creamy texture of chickpeas, creating a savory and slightly sweet appetizer that will delight your guests.
The addition of spices gives it a warm, autumnal flavor, making it the ideal centerpiece for a spooky snack table. Serve it with an assortment of colorful vegetables, pita chips, or even crusty bread to add a thematic element to your Halloween party spread.
This recipe is designed to serve 4-6 people, making it a great choice for an intimate gathering or a small party. The preparation involves using canned pumpkin puree, which provides a smooth consistency and deep pumpkin flavor, eliminating the need for cooking or baking fresh pumpkins.
This easy-to-make dish requires minimal effort but delivers maximum flavor, guaranteeing your Halloween celebration is both effortless and memorable.
Ingredients:
- 1 can (15 ounces) chickpeas, drained and rinsed
- 1 cup canned pumpkin puree
- 1/4 cup tahini
- 1/4 cup olive oil
- 2 tablespoons lemon juice
- 2 cloves garlic, minced
- 1 teaspoon ground cumin
- 1/2 teaspoon smoked paprika
- 1/2 teaspoon salt
- 1/4 teaspoon black pepper
- 1/4 teaspoon ground cinnamon
- Pumpkin seeds (pepitas) for garnish
- Fresh parsley for garnish
Instructions:
- Prepare the Chickpeas: Drain and rinse the chickpeas thoroughly under cold water. This step helps remove excess sodium and enhances the hummus’s flavor and texture.
- Blend Ingredients: In a food processor, combine the chickpeas, pumpkin puree, tahini, olive oil, lemon juice, and minced garlic. Blend until the mixture is smooth and creamy. You may need to stop occasionally to scrape down the sides of the bowl.
- Season the Hummus: Add ground cumin, smoked paprika, salt, black pepper, and ground cinnamon to the blended mixture. Blend again to guarantee the spices are evenly distributed throughout the hummus.
- Check Consistency: If the hummus is too thick, add a tablespoon of water or olive oil at a time until the desired consistency is reached. It should be smooth and easily spreadable.
- Serve and Garnish: Transfer the hummus to a serving bowl. Drizzle a little olive oil on top and garnish with pumpkin seeds and freshly chopped parsley for a festive look.
- Chill Before Serving: For best results, let the hummus chill in the refrigerator for at least an hour before serving. This allows the flavors to meld together.
Extra Tips: For a richer flavor, consider roasting the garlic before adding it to the hummus. This will give the dip a deeper, slightly sweet taste. If you prefer a spicier version, add a pinch of cayenne pepper.
Additionally, you can prepare the hummus a day in advance to save time on the day of your party, as the flavors tend to improve overnight. Finally, adjust the salt and lemon juice to taste, depending on your preference for tanginess and seasoning.
Spidery Spinach Dip
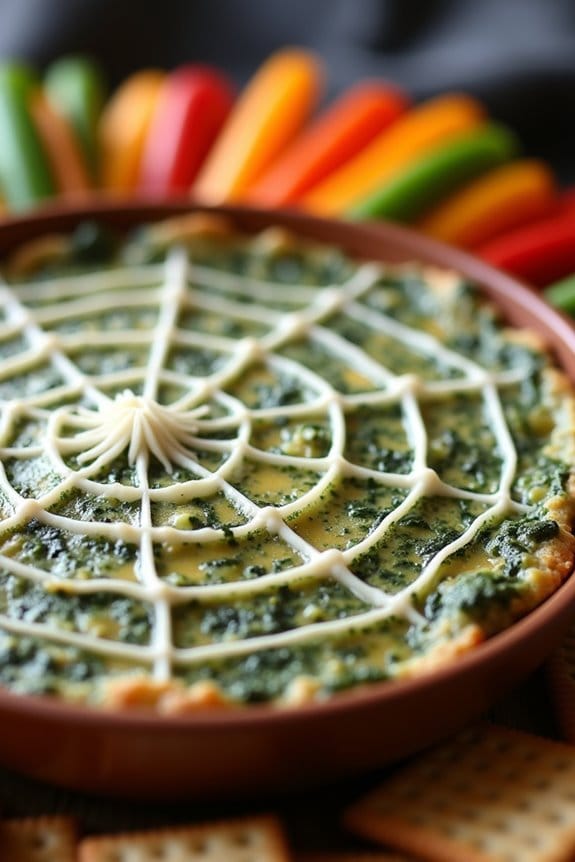
Elevate your Halloween party with this Spidery Spinach Dip, a spooky and delicious appetizer perfect for adults. This dish combines the classic creamy texture of spinach dip with a playful spider web design that’s sure to impress your guests.
It’s a fun and festive way to add a touch of Halloween spirit to your gathering while satisfying your guests’ taste buds with a blend of spinach, cheeses, and spices. This dip isn’t only visually appealing but also rich in flavor, making it a surefire hit at any Halloween event.
The creamy consistency is achieved by blending cream cheese, sour cream, and mozzarella, while fresh spinach adds an earthy depth. A sprinkle of spices gives it a little kick, and the final touch is the intricate spider web design crafted from sour cream. Serve this dip with an assortment of crackers or sliced vegetables for a complete and delightful appetizer experience.
Ingredients (serving size: 4-6 people):
- 1 cup fresh spinach, chopped
- 8 oz cream cheese, softened
- 1 cup sour cream, divided
- 1 cup mozzarella cheese, shredded
- 1/4 cup Parmesan cheese, grated
- 2 cloves garlic, minced
- 1/2 teaspoon onion powder
- 1/2 teaspoon salt
- 1/4 teaspoon black pepper
- 1 tablespoon olive oil
- Crackers or sliced vegetables for serving
Cooking Instructions:
- Prepare the spinach: In a large skillet over medium heat, add the olive oil. Once hot, add the chopped spinach and sauté until wilted, about 3-4 minutes. Remove from heat and set aside.
- Mix the base: In a medium bowl, combine the softened cream cheese, 1/2 cup of sour cream, mozzarella cheese, and Parmesan cheese. Mix until smooth.
- Add seasonings: Stir in the minced garlic, onion powder, salt, and black pepper to the cheese mixture. Mix until all ingredients are well incorporated.
- Incorporate spinach: Fold the sautéed spinach into the cheese mixture, ensuring it’s evenly distributed throughout.
- Transfer to baking dish: Spoon the mixture into a shallow baking dish, spreading it evenly across the surface.
- Create the spider web: Place the remaining 1/2 cup of sour cream in a small ziplock bag. Snip a small corner off the bag to create a piping bag. Pipe concentric circles over the top of the spinach dip.
- Draw the web lines: Using a toothpick or skewer, draw lines from the center of the dip outwards to the edges to create a spider web effect.
- Bake the dip: Preheat your oven to 350°F (175°C) and bake the dip for 20-25 minutes, or until the cheese is bubbly and the top is lightly golden.
- Serve: Allow the dip to cool for a few minutes before serving with crackers or sliced vegetables.
Extra Tips:
For an added touch of Halloween flair, consider placing a plastic spider on the dip just before serving, but be sure to remove it before eating.
If you want a bit more spice, you can add a pinch of cayenne pepper to the cheese mixture. This dip can be prepared a day in advance; just cover and refrigerate until you’re ready to bake it.
Remember to let the dip sit at room temperature for about 10 minutes before baking if it has been refrigerated. Enjoy your spooktacular creation!
Bloody Mary Shrimp Cocktail

Looking to add a spooky twist to your Halloween party menu? The Bloody Mary Shrimp Cocktail is a perfect choice to impress your guests with its eerie appearance and delicious flavor. This dish combines the classic shrimp cocktail with the bold, spicy flavors of a Bloody Mary, creating a unique and festive appetizer that’s bound to be a hit.
Add a spooky twist to your Halloween menu with a Bloody Mary Shrimp Cocktail!
The vibrant red cocktail sauce paired with plump, succulent shrimp offers a thrilling culinary experience, ideal for adults who want to enjoy Halloween with a sophisticated touch.
The Bloody Mary Shrimp Cocktail can be prepared in advance, allowing you to enjoy your party without being stuck in the kitchen. This recipe serves 4-6 people and can easily be doubled if you’re hosting a larger gathering. The combination of horseradish, Worcestershire sauce, and hot sauce in the cocktail sauce adds a fiery kick, while the celery salt and lemon juice bring balance to the dish.
Served in a chilled glass rimmed with spicy salt, this appetizer not only tastes delightful but also adds a visually striking element to your Halloween spread.
Ingredients (Serves 4-6)
- 1 1/2 pounds large shrimp, peeled and deveined
- 1 cup tomato juice
- 1/2 cup vodka
- 1/4 cup prepared horseradish
- 2 tablespoons Worcestershire sauce
- 1 tablespoon hot sauce (adjust to taste)
- Juice of 1 lemon
- 1 teaspoon celery salt
- Salt and freshly ground black pepper to taste
- 1 cup ketchup
- Ice cubes (for chilling shrimp)
- 1 tablespoon spicy salt (for glass rimming)
- Lemon wedges and celery sticks for garnish
Cooking Instructions
1. Prepare the Shrimp: Fill a large pot with water and bring it to a boil. Add a generous pinch of salt to the boiling water. Add the shrimp and cook for 2-3 minutes until they turn pink and opaque.
Immediately transfer the shrimp to a bowl of ice water to stop the cooking process and to keep them firm and juicy. Once cooled, drain and pat them dry with paper towels.
2. Make the Cocktail Sauce: In a medium-sized mixing bowl, combine the tomato juice, vodka, horseradish, Worcestershire sauce, hot sauce, lemon juice, celery salt, ketchup, and a pinch of salt and pepper.
Stir well until all ingredients are thoroughly mixed. Taste and adjust seasoning if necessary.
3. Rim the Glasses: Moisten the rims of your serving glasses with a lemon wedge. Dip the rims into a shallow plate filled with spicy salt to coat evenly.
4. Assemble the Cocktail: Divide the cocktail sauce evenly among the prepared glasses. Arrange the cooked shrimp around the rim of the glasses, tails facing outward for an appealing presentation.
5. Garnish and Serve: Garnish each glass with a lemon wedge and a celery stick. Serve immediately or store in the refrigerator until ready to serve.
Extra Tips
For the best flavor, prepare the cocktail sauce a few hours in advance to allow the flavors to meld together. You can adjust the spiciness of the cocktail sauce by adding more or less hot sauce to suit your taste.
If you don’t prefer vodka, you can omit it and still have a delicious non-alcoholic version. When rimming the glasses, verify the spicy salt adheres well by pressing gently.
This dish pairs wonderfully with a variety of beverages, making it a versatile addition to your Halloween festivities.
Gory Guacamole
Halloween isn’t just for the kids; adults can enjoy the spooky festivities too, especially when it comes to themed food and beverages. Among the more creative and appetizing options is Gory Guacamole. This dish puts a creepy twist on the classic Mexican dip, making it perfect for Halloween parties. Its gruesome appearance is matched only by its delicious taste, making it a fun addition to any adult gathering.
Gory Guacamole isn’t only easy to prepare, but it also allows for plenty of creative flair. The rich, creamy texture of the avocados is combined with a medley of fresh ingredients, and garnished in such a way that it resembles something straight out of a horror movie. With a splash of lime and a hint of heat, this dish is sure to be a crowd-pleaser at your Halloween bash.
Ingredients for 4-6 servings:
- 4 ripe avocados
- 1 medium-sized red onion
- 2 medium tomatoes
- 1 jalapeño pepper
- 2 cloves of garlic
- 1 lime
- Salt to taste
- Black food coloring
- Red food coloring
- Tortilla chips (for serving)
Cooking Instructions:
- Prepare the Avocados: Begin by cutting the avocados in half and removing the pits. Scoop the flesh into a large mixing bowl and mash it with a fork until you get your desired consistency. For a smoother texture, you can use a potato masher.
- Chop the Vegetables: Dice the red onion, tomatoes, and jalapeño pepper into small pieces. Mince the garlic cloves finely. Add all of these to the mashed avocado, stirring them in well to guarantee even distribution.
- Add Lime and Season: Cut the lime in half and squeeze the juice over the guacamole mixture. Add salt to taste and mix everything together thoroughly. The lime juice not only adds flavor but also helps prevent the avocados from browning too quickly.
- Create the Gory Look: To give the guacamole its ‘gory’ appearance, divide a small portion of the guacamole into a separate bowl. Add a few drops of black food coloring and mix until you achieve a dark hue. Swirl this back into the main bowl of guacamole to create a marbled effect.
- Final Touches: Use red food coloring to add ‘blood’ streaks across the top of the guacamole. Drizzle it sparingly to maintain the spooky aesthetic. Serve the Gory Guacamole with tortilla chips arranged around the bowl for dipping.
Extra Tips:
When selecting avocados, confirm they’re ripe yet firm to the touch for the best texture. If you prefer a less spicy version, you can remove the seeds from the jalapeño or omit it entirely.
To enhance the Halloween theme, consider serving the guacamole in a hollowed-out pumpkin or alongside other Halloween-themed dishes. Remember, the key to a successful Gory Guacamole is in the presentation, so don’t be afraid to get creative with your garnishing!
Graveyard Chocolate Mousse

Graveyard Chocolate Mousse is a perfect Halloween treat for adults, combining delicious flavors with a spooky presentation. This rich, velvety dessert is both indulgent and festive, offering a sophisticated twist to the traditional Halloween fare. By incorporating dark chocolate and a hint of coffee, the mousse provides a deeply satisfying taste experience, while its graveyard theme adds a fun and eerie touch to any Halloween gathering.
The preparation of Graveyard Chocolate Mousse is straightforward yet rewarding, making it an ideal choice for those looking to impress their guests without spending hours in the kitchen. The mousse is topped with chocolate cookie “dirt” and decorated with tombstone-shaped cookies, creating a chilling yet delightful presentation. This recipe serves 4-6 people, guaranteeing that everyone at your Halloween party can enjoy a taste of this ghoulishly good dessert.
Ingredients (serves 4-6 people):
- 200g dark chocolate, chopped
- 3 tablespoons strong brewed coffee
- 4 large eggs, separated
- 50g granulated sugar
- 1 teaspoon vanilla extract
- 1 cup heavy cream
- 12 chocolate sandwich cookies, crushed (for “dirt”)
- Tombstone-shaped cookies or biscuits (for decoration)
- Optional: whipped cream and edible decorations like gummy worms or candy bones
Instructions:
- Melt the Chocolate: In a heatproof bowl, combine the chopped dark chocolate and brewed coffee. Set the bowl over a saucepan of simmering water, making sure the bottom of the bowl doesn’t touch the water. Stir until the chocolate is melted and smooth, then remove from heat and let it cool slightly.
- Prepare the Egg Mixture: In a separate bowl, whisk the egg yolks with the granulated sugar and vanilla extract until the mixture becomes pale and creamy. Gradually add the melted chocolate to the egg yolk mixture, stirring continuously to combine thoroughly.
- Whip the Egg Whites: In another bowl, use a hand mixer to beat the egg whites until they form stiff peaks. Gently fold the egg whites into the chocolate mixture in three additions, making sure each addition is incorporated fully before adding the next.
- Whip the Cream: In a clean bowl, whip the heavy cream until soft peaks form. Carefully fold the whipped cream into the chocolate mixture until no white streaks remain, creating a smooth and airy mousse.
- Assemble the Mousse: Divide the chocolate mousse evenly among serving glasses or bowls. Cover and refrigerate for at least 4 hours or overnight to allow the mousse to set properly.
- Decorate: Before serving, sprinkle the crushed chocolate cookies over the top of each mousse to create a “dirt” layer. Insert the tombstone-shaped cookies into the mousse, and add any other edible decorations as desired.
Extra Tips: When selecting dark chocolate for this recipe, opt for a high-quality variety with at least 70% cocoa content to guarantee a rich and intense chocolate flavor. If you prefer a more bittersweet mousse, you can reduce the sugar slightly.
Additionally, be sure to handle the egg whites gently for the best mousse texture, as over-mixing can deflate the airiness. For an extra touch, personalize the tombstone cookies with icing to add names or spooky messages, enhancing the Halloween ambiance of your dessert.
Bewitched Brownie Bites

Bewitched Brownie Bites are a delightful and spooktacular treat perfect for a Halloween gathering for adults. These bite-sized delights aren’t only rich and indulgent but also come with an enchanting twist that will leave your guests spellbound. With a dark chocolate base and a touch of espresso, these brownies deliver a deep, complex flavor that’s sure to satisfy any chocolate lover’s cravings.
The bewitching aspect comes in the form of a ghostly white chocolate drizzle and a sprinkle of edible glitter, making these brownies both visually stunning and deliciously tempting.
What makes Bewitched Brownie Bites an ideal choice for adults is their sophisticated flavor profile, which balances the sweetness of chocolate with a hint of bitterness from the espresso. They’re easy to prepare and make for a perfect party platter that will have your guests coming back for more.
Whether you’re hosting a Halloween dinner party or simply want to bring a festive dish to a gathering, these brownie bites are sure to impress. The following recipe serves 4-6 people, making it perfect for a small to medium-sized group.
Ingredients:
- 1 cup unsalted butter
- 1 1/2 cups granulated sugar
- 1 cup light brown sugar
- 4 large eggs
- 2 teaspoons vanilla extract
- 1 cup all-purpose flour
- 1 cup unsweetened cocoa powder
- 1 teaspoon baking powder
- 1/2 teaspoon salt
- 1 tablespoon instant espresso powder
- 1 cup semisweet chocolate chips
- 1/2 cup white chocolate chips
- Edible glitter
Instructions:
- Preheat the Oven: Preheat your oven to 350°F (175°C). Line a 9×13-inch baking pan with parchment paper, allowing some overhang on the sides for easy removal of brownies later.
- Mix Wet Ingredients: In a large saucepan, melt the butter over medium heat. Once melted, remove from heat and add the granulated sugar and brown sugar, stirring until smooth and combined. Allow the mixture to cool slightly, then whisk in the eggs, one at a time, followed by the vanilla extract.
- Combine Dry Ingredients: In a separate bowl, sift together the flour, cocoa powder, baking powder, salt, and instant espresso powder. Gradually fold this dry mixture into the wet ingredients, mixing until just combined to avoid overworking the batter.
- Add Chocolate Chips: Stir in the semisweet chocolate chips until they’re evenly distributed throughout the batter.
- Bake: Pour the brownie batter into the prepared baking pan, spreading it evenly. Bake in the preheated oven for 25-30 minutes, or until a toothpick inserted into the center comes out with a few moist crumbs.
- Cool and Cut: Allow the brownies to cool completely in the pan on a wire rack. Once cool, use the parchment overhang to lift the brownies out of the pan. Cut into bite-sized squares for serving.
- Decorate: Melt the white chocolate chips in a microwave-safe bowl in 15-second intervals, stirring between each, until smooth. Drizzle the melted white chocolate over the brownie bites using a spoon or a piping bag. Sprinkle with edible glitter for a magical finish.
Extra Tips:
To guarantee your Bewitched Brownie Bites maintain their moist, fudgy texture, be cautious not to overbake them. Checking them a few minutes before the recommended baking time can prevent them from drying out.
Additionally, for a more intense coffee flavor, you can increase the espresso powder to 1 1/2 tablespoons. When cutting the brownie bites, use a sharp knife and clean it between cuts for neat, evenly shaped pieces.
If you’re preparing these brownies ahead of time, store them in an airtight container at room temperature for up to three days or freeze them for longer storage.
Toxic Waste Macarons
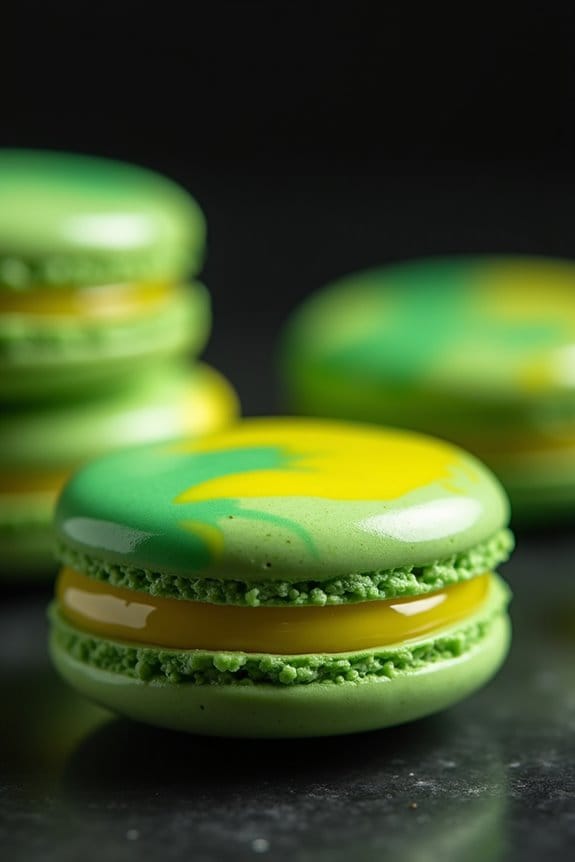
For a Halloween gathering that’s sure to impress adults with both its creativity and taste, consider making Toxic Waste Macarons. These eerie treats are a perfect balance of sweet and sour, with a ghastly appearance reminiscent of bubbling toxic waste. The macaron shells are dyed in vibrant greens and yellows, and the filling is a tangy lemon-lime curd that will make your taste buds tingle. Not only do they look fantastically festive, but they also provide a sophisticated taste that elevates the usual Halloween spread.
Creating these macarons requires some attention to detail, as macarons can be notoriously tricky to master. However, with the right ingredients and careful preparation, you can produce a batch of macarons that aren’t only visually stunning but also deliciously addictive. These pastries are ideal for an adult Halloween party, offering a unique twist on the standard candy and dessert options. Below is a detailed recipe for making 4-6 servings of Toxic Waste Macarons.
Ingredients:
- 200g almond flour
- 200g powdered sugar
- 150g egg whites (about 5 large eggs), divided into two 75g portions
- 200g granulated sugar
- 60ml water
- Green and yellow gel food coloring
- 1 teaspoon vanilla extract
- 150g butter, softened
- 150g granulated sugar (for the filling)
- 4 large egg yolks
- 120ml freshly squeezed lemon juice
- 1 tablespoon lime zest
Cooking Instructions:
- Prepare the Macaron Shells: Sift together the almond flour and powdered sugar in a large mixing bowl. In another bowl, whisk 75g of egg whites to soft peaks and add a few drops of green and yellow gel food coloring to achieve a toxic waste hue. Combine this mixture with the almond flour and powdered sugar until a thick paste forms.
- Make the Sugar Syrup: In a small saucepan, combine 200g granulated sugar with 60ml of water. Heat over medium heat until it reaches 240°F (115°C) on a candy thermometer.
- Whip the Egg Whites: While the sugar syrup is heating, begin to whisk the remaining 75g of egg whites in a stand mixer until soft peaks form. Slowly pour the hot sugar syrup into the egg whites while continuing to whisk on medium speed. Increase the speed to high and whip until you achieve a glossy meringue with stiff peaks.
- Combine Components: Gently fold the meringue into the almond paste mixture in three additions. Be cautious not to overmix; stop just after the batter flows like lava.
- Pipe the Macarons: Transfer the batter to a piping bag fitted with a round tip. Pipe small circles onto a baking tray lined with parchment paper, about 1 inch apart. Tap the tray on the counter to remove air bubbles and let it rest for 30 minutes to form a skin.
- Bake the Macarons: Preheat the oven to 300°F (150°C). Bake the macarons for 15-17 minutes. They should rise to form their characteristic “feet” and shouldn’t stick to the parchment paper when gently lifted.
- Prepare the Lemon-Lime Filling: In a saucepan, whisk together 150g of granulated sugar, egg yolks, lemon juice, and lime zest. Cook over medium heat, stirring constantly until thickened. Remove from heat and whisk in softened butter until smooth. Allow to cool completely.
- Assemble the Macarons: Once the macaron shells and filling are cooled, pair shells of similar size. Pipe the lemon-lime curd onto one shell and gently sandwich with the other. Repeat until all macarons are assembled.
Extra Tips:
Macarons are best served after they’ve matured for at least 24 hours in the refrigerator, allowing the flavors to meld and the shells to soften slightly. When making the meringue, verify that your mixing bowl and whisk are completely clean and free of any grease to achieve the best volume.
If you’re having trouble with the consistency of the macaron batter, remember that it should flow slowly and smoothly, like lava, allowing you to form perfect circles when piping.
