
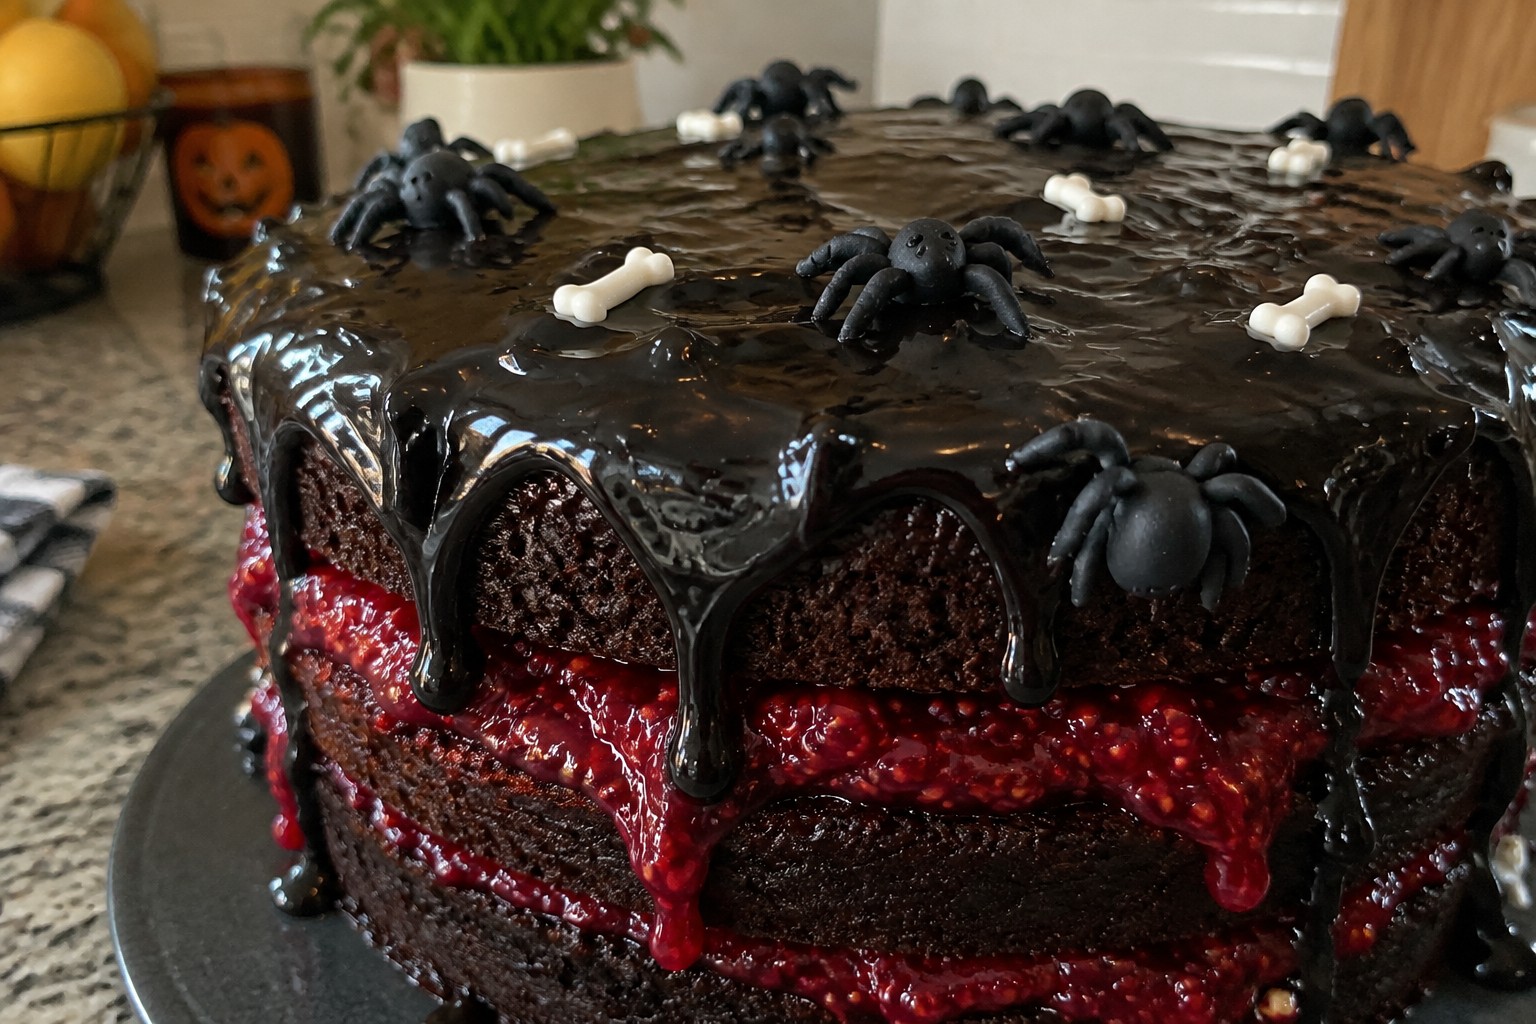
Halloween is coming up and it can be nice to have some cake ideas ready for the table. I collected 15 different cake recipes that look a bit spooky without needing fancy tools. Each one comes with simple steps and ingredients that are easy to find. You can pick a few that fit your time and skill level for the day. They should help you put together something that works for a small gathering or a bigger party.
Helpful Tips Before You Start
These tips will help you get clean results with the spooky designs ahead.
Use Gel Food Coloring
Gel colors create deep shades like black and blood red without watering down cake batter or frosting.
Cool Cakes Fully Before Decorating
Warm layers soften icing and make it hard to add details like faces or webs.
Pipe Details on Parchment First
Test skulls, eyes, or drips on paper to check flow and color before applying them to the cake.
Pick a Firm Frosting Base
A stiff buttercream holds shape better for raised elements like tombstones or claws.
Work in Small Batches
Mix just enough icing for each color to keep textures consistent across multiple cakes.
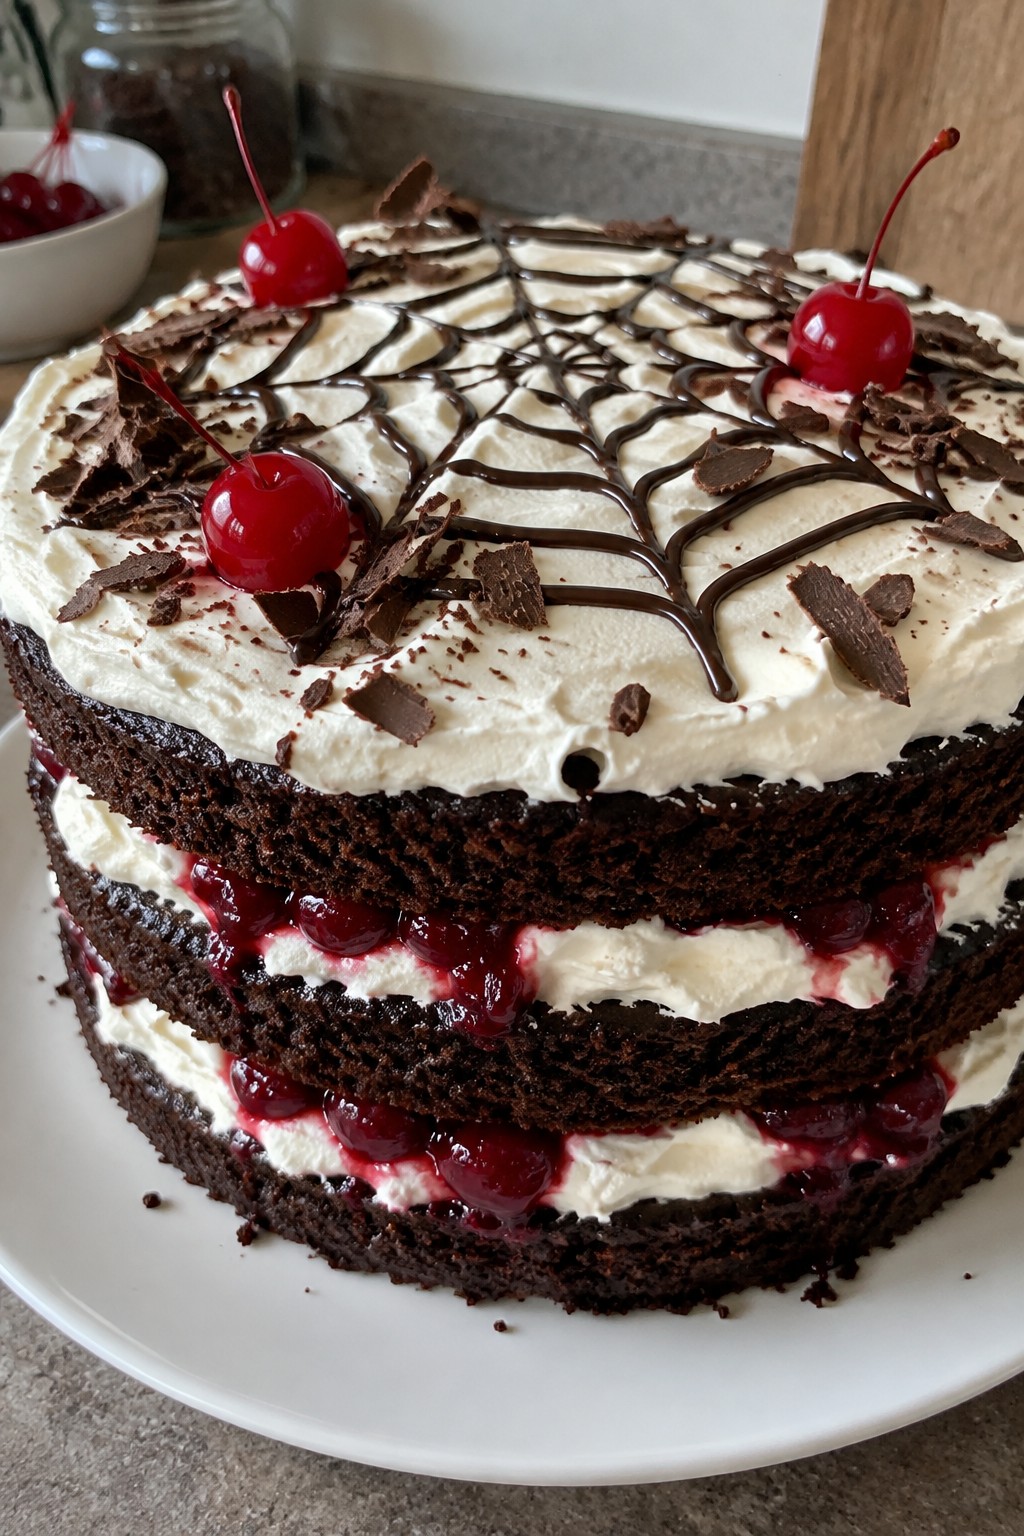
Spiderweb Black Forest Layer Cake
This spiderweb black forest layer cake puts a Halloween spin on the classic chocolate and cherry combination. Moist cocoa layers hold tart cherry filling and billowy whipped cream, while a simple chocolate web on top gives it a creepy finish that fits right in at any October table.
The flavors stay balanced with rich chocolate against bright fruit and light cream. It suits small gatherings or dessert spreads where you want something themed but still easy to slice and serve.
Serves 4 people.
Ingredients
- 1 cup all-purpose flour
- 1/2 cup unsweetened cocoa powder
- 3/4 cup granulated sugar
- 1/2 cup unsalted butter, softened
- 2 large eggs
- 1/2 cup buttermilk
- 1 teaspoon baking soda
- 1 teaspoon vanilla extract
- 1 1/2 cups fresh cherries, pitted
- 2 tablespoons granulated sugar
- 1 tablespoon cornstarch
- 1 cup heavy whipping cream
- 2 tablespoons powdered sugar
- 1/4 cup semisweet chocolate chips
- Maraschino cherries for garnish
- Chocolate shavings for garnish
Instructions
- Preheat the oven to 350°F and grease two 6-inch round cake pans. Whisk the flour, cocoa powder, and baking soda in a bowl and set aside.
- Beat the butter and granulated sugar until light. Add the eggs one at a time, then mix in the vanilla. Alternate adding the dry ingredients and buttermilk until the batter is smooth.
- Divide the batter between the pans and bake for 22-25 minutes until a toothpick comes out clean. Cool the layers completely on a wire rack.
- Cook the cherries with 2 tablespoons granulated sugar and cornstarch over medium heat until the mixture thickens. Let it cool.
- Whip the heavy cream with powdered sugar until stiff peaks form. Melt the chocolate chips and place in a piping bag or zip-top bag with a small corner cut.
- Place one cake layer on a plate. Spread half the cherry filling over it, then add a layer of whipped cream. Top with the second cake layer and repeat with the remaining filling and cream.
- Pipe a chocolate spiderweb across the top whipped cream. Add maraschino cherries and chocolate shavings around the edge.
Extra Tips
Bake the cake layers a day ahead and store them wrapped at room temperature so assembly stays quick. Pipe the chocolate web while the whipped cream is still soft so the lines set cleanly without cracking. Use fresh cherries for the filling to keep the flavor bright instead of overly sweet.Course: Dessert Cuisine: German Equipment: Mixing Bowls, Cake Pans, Electric Mixer, Piping Bag
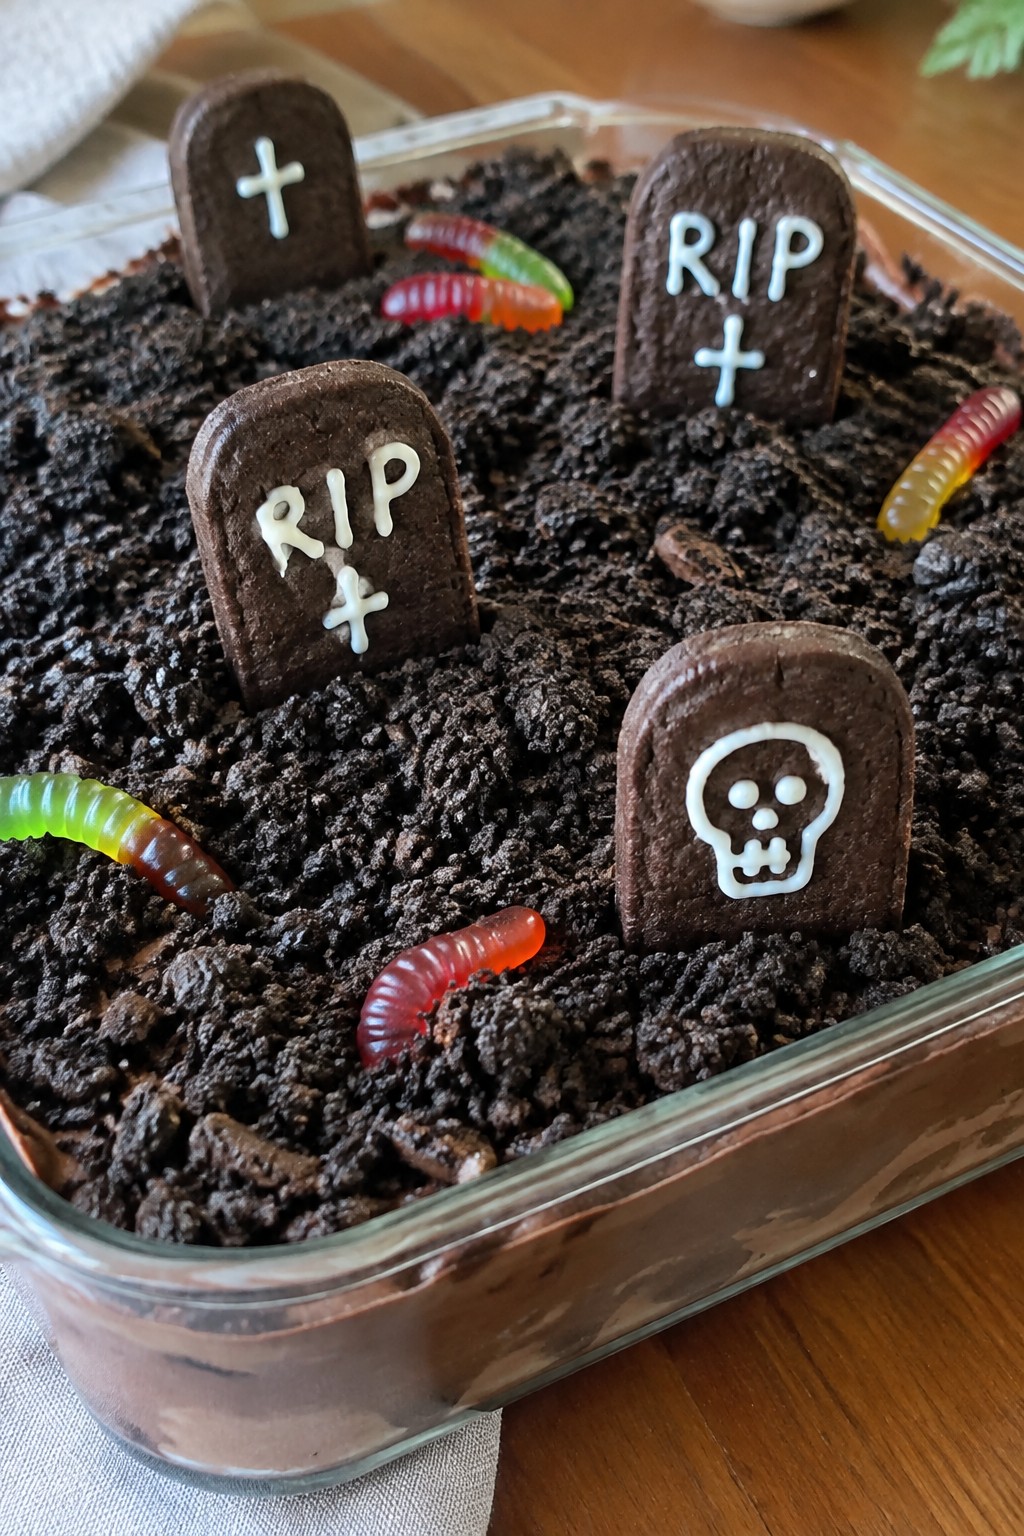
Graveyard Chocolate Dirt Cake with Cookie Tombstones
This graveyard cake turns a classic chocolate dirt cake into a spooky centerpiece. Layers of creamy pudding and crushed cookies create a realistic dirt effect while upright cookies serve as edible tombstones. It works well for small Halloween gatherings or as a make-ahead dessert that kids can help decorate.
The finished dish offers rich chocolate flavor with a smooth, creamy base and crunchy cookie texture throughout. The tombstones add a crisp contrast and a touch of sweetness from the frosting.
Serves 4 people.
Ingredients
- 1 (3.9 ounce) package instant chocolate pudding mix
- 2 cups cold milk
- 8 ounces cream cheese, softened
- 1 cup powdered sugar
- 1 (8 ounce) container frozen whipped topping, thawed
- 20 chocolate sandwich cookies
- 4 rectangular chocolate cookies
- 2 tablespoons white frosting
- 8 gummy worms
Instructions
- Whisk the pudding mix and cold milk in a large bowl until smooth and thickened, about two minutes. Set aside.
- Beat the softened cream cheese and powdered sugar in a separate bowl until creamy. Fold in the whipped topping until fully combined.
- Gently fold the pudding into the cream cheese mixture until uniform.
- Place the chocolate sandwich cookies in a zip-top bag and crush them with a rolling pin until they resemble fine dirt. Reserve two tablespoons of the crumbs for topping.
- Spread half the pudding mixture into an 8×8 inch dish. Sprinkle most of the crushed cookies over the layer. Repeat with the remaining pudding mixture and crushed cookies.
- Press the four rectangular chocolate cookies upright into the top to form tombstones. Pipe the white frosting onto each cookie to write "RIP".
- Scatter the gummy worms across the surface and sprinkle the reserved cookie crumbs around the base of the tombstones.
Extra Tips
Chill the assembled cake for at least two hours before serving so the layers set firmly. If you need to make it ahead, prepare the pudding mixture the day before and add the cookie tombstones and gummy worms right before guests arrive to keep the cookies crisp. Use any extra crushed cookies to refresh the dirt look if the surface softens in the fridge.Course: Dessert Cuisine: American Equipment: Mixing Bowl, Electric Mixer, 8×8 Inch Baking Dish
Bloody Red Velvet Cake with Dripping Ganache
This cake gives a classic red velvet a bold Halloween twist with its deep red layers and thick ganache that runs down the sides. It suits a small gathering or a themed dessert table where you want something striking but still simple to make. The crumb stays moist with a light cocoa flavor, while the ganache adds a rich, glossy finish.
It works especially well when you need a single dessert that looks dramatic without extra decorations. The buttermilk keeps the texture tender and the red color vivid against the dark chocolate drip.

Serves 4 people.
Ingredients
- ¾ cup all-purpose flour
- ½ cup granulated sugar
- 1 tablespoon unsweetened cocoa powder
- ½ teaspoon baking soda
- ¼ teaspoon salt
- ½ cup buttermilk
- ¼ cup vegetable oil
- 1 large egg
- 2 tablespoons red food coloring
- ½ teaspoon vanilla extract
- ½ teaspoon white vinegar
- ½ cup heavy cream
- 4 ounces white chocolate chips
Instructions
- Heat the oven to 350°F and line a 6-inch round cake pan with parchment paper.
- In a medium bowl, whisk together the flour, sugar, cocoa powder, baking soda, and salt.
- In a separate bowl, mix the buttermilk, oil, egg, red food coloring, vanilla extract, and white vinegar until smooth.
- Pour the wet mixture into the dry ingredients and stir until just combined.
- Transfer the batter to the prepared pan and bake for 28 to 32 minutes, or until a toothpick inserted in the center comes out clean.
- Let the cake cool in the pan for 10 minutes, then turn it out onto a wire rack to cool completely.
- In a small saucepan, heat the heavy cream until it just begins to simmer. Remove from heat, add the white chocolate chips, and stir until melted and smooth. Stir in 1 teaspoon of the red food coloring for a deeper red.
- Place the cooled cake on a serving plate and slowly pour the warm ganache over the top so it drips down the sides.
Extra Tips
Use room-temperature buttermilk and egg so the batter mixes evenly and the red color stays bright. If the ganache thickens too much before pouring, warm it gently for a few seconds while stirring. Leftovers keep well in the refrigerator for two days; bring slices to room temperature before serving so the ganache softens again.Course: Dessert Cuisine: American Equipment: Mixing Bowls, 6-inch Cake Pan, Small Saucepan, Whisk
Monster Mash Fudge Cake with Candy Eyeballs
This fudge cake brings a rich chocolate base that stays moist and dense, making it a good choice for a small Halloween gathering. The candy eyeballs add a playful monster touch without extra steps, and the whole dessert comes together with basic pantry items.
It works well for an after-dinner treat at a kids’ party or as part of a larger spooky spread. The flavor stays straightforward with deep cocoa notes and a slight chew from the melted chocolate chips.

Serves 4 people.
Ingredients
- 1 cup all-purpose flour
- 3/4 cup granulated sugar
- 1/2 cup unsweetened cocoa powder
- 1/2 teaspoon baking soda
- 1/4 teaspoon salt
- 1/2 cup unsalted butter, melted
- 2 large eggs
- 1 teaspoon vanilla extract
- 1/2 cup chocolate chips
- Candy eyeballs, for topping
Instructions
- Preheat the oven to 350 degrees and line an 8-inch square pan with parchment paper.
- In a mixing bowl, stir together the flour, sugar, cocoa powder, baking soda, and salt until evenly combined.
- Add the melted butter, eggs, and vanilla extract to the dry mixture. Stir until a thick batter forms and no dry streaks remain.
- Fold in the chocolate chips until they are distributed through the batter.
- Pour the batter into the prepared pan and smooth the top. Bake for 25 to 28 minutes, until a toothpick inserted in the center comes out with a few moist crumbs.
- Remove the cake from the oven and let it cool in the pan for 15 minutes. Press candy eyeballs gently into the top while the cake is still slightly warm.
Extra Tips
Let the cake cool fully before slicing so the fudge-like texture sets. If the chocolate chips sink during baking, stir them into the batter just before pouring it into the pan next time. Store leftovers in an airtight container at room temperature for up to two days.Course: Dessert Cuisine: American Equipment: Mixing Bowl, 8-inch Cake Pan, Oven
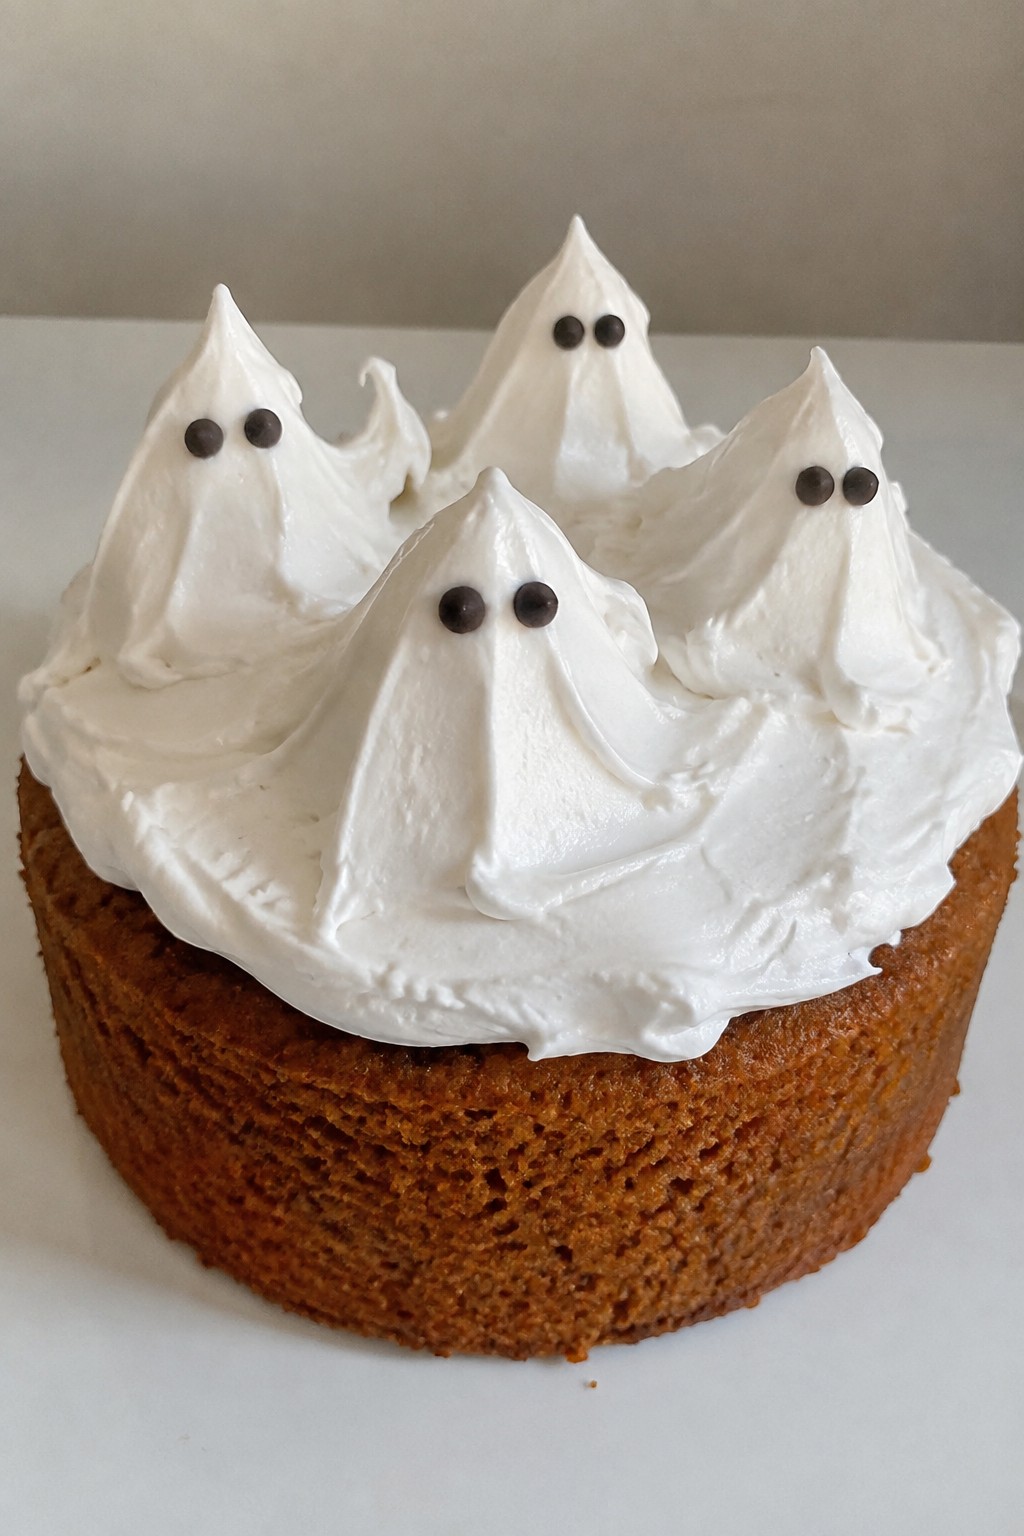
Pumpkin Spice Ghost Cake with Marshmallow Frosting
This pumpkin spice cake brings cozy fall flavors to a Halloween spread. The moist crumb holds up well under a layer of fluffy marshmallow frosting that you can shape into simple ghosts. It suits a small party or an intimate dessert table where guests want something sweet without too much fuss.
The cake tastes warmly spiced with notes of pumpkin, while the frosting adds a light, sticky sweetness that sets quickly for decorating.
Serves 4 people.
Ingredients
- 1 cup all-purpose flour
- 3/4 cup pumpkin puree
- 1/2 cup granulated sugar
- 1 large egg
- 1/4 cup vegetable oil
- 1 teaspoon pumpkin pie spice
- 1 teaspoon baking powder
- 1/4 teaspoon salt
- 1 cup mini marshmallows
- 2 tablespoons unsalted butter
- 1 cup powdered sugar
- 1 teaspoon vanilla extract
- 8 candy eyes
Instructions
- Preheat the oven to 350 degrees and grease a 6-inch round cake pan.
- In a mixing bowl, whisk together the flour, pumpkin pie spice, baking powder, and salt.
- In a second bowl, stir the pumpkin puree, granulated sugar, egg, and vegetable oil until smooth.
- Pour the wet mixture into the dry ingredients and stir until just combined, then spread the batter into the prepared pan.
- Bake for 25 to 30 minutes until a toothpick inserted in the center comes out clean, then cool the cake completely in the pan.
- Melt the mini marshmallows and unsalted butter together in a small saucepan over low heat, stirring until smooth.
- Remove from heat and stir in the powdered sugar and vanilla extract until the frosting thickens and becomes spreadable.
- Spread the frosting over the cooled cake, then use a small spoon or piping bag to form ghost shapes on top and press two candy eyes into each ghost.
Extra Tips
Melt the marshmallows slowly so the frosting stays white and smooth for shaping. If the frosting firms up too quickly, warm it gently for a few seconds before piping the ghosts. Store any leftovers in an airtight container at room temperature for up to two days.Course: Dessert Cuisine: American Equipment: Mixing Bowls, 6-inch Cake Pan, Whisk, Spatula, Saucepan
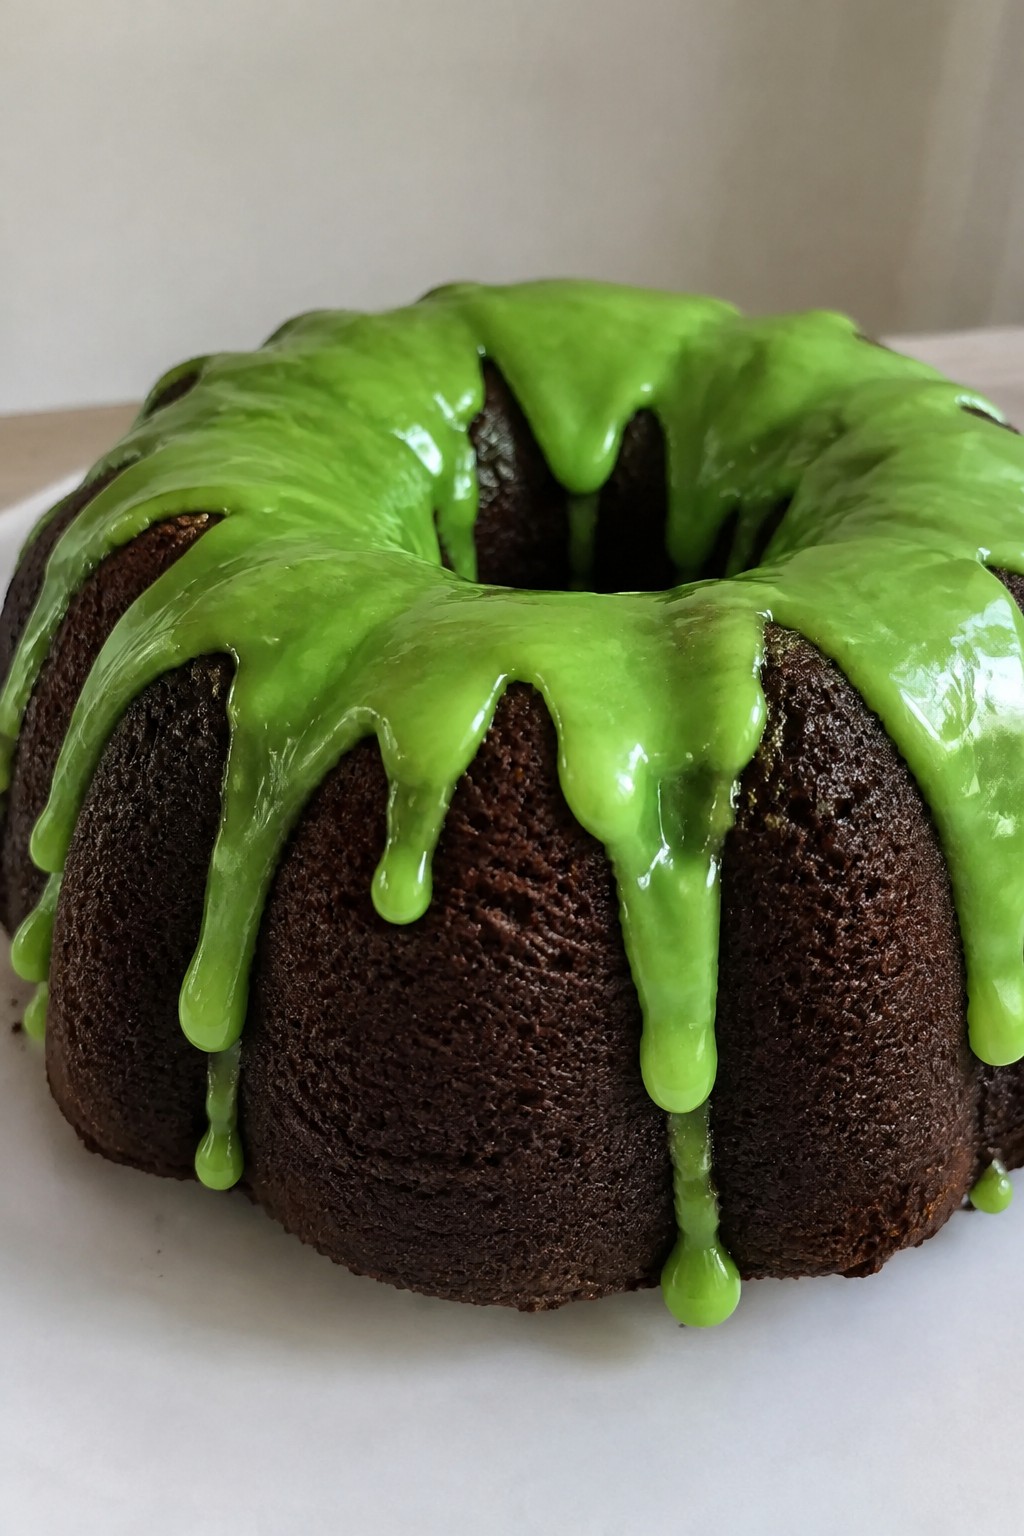
Witch’s Cauldron Bundt Cake with Bubbling Glaze
This bundt cake turns a dark chocolate base into a simple centerpiece for Halloween. The round shape mimics a cauldron, and the bright green glaze drips down the sides to look like a potion. It serves well at small gatherings or as a dessert after a themed meal, with a moist crumb and a sweet, slightly tangy finish from the glaze.
The cake bakes in one pan and comes together with basic pantry items. Once cooled, the glaze sets with a glossy surface that holds its color without bleeding into the cake.
Serves 4 people.
Ingredients
- 1 1/2 cups all-purpose flour
- 1 cup granulated sugar
- 1/2 cup unsweetened cocoa powder
- 1 teaspoon baking soda
- 1/2 teaspoon salt
- 1 cup buttermilk
- 1/2 cup vegetable oil
- 2 large eggs
- 1 teaspoon vanilla extract
- 2 cups powdered sugar
- 3 tablespoons milk
- 1/2 teaspoon green food coloring
Instructions
- Heat the oven to 350°F and grease a small bundt pan.
- In a large bowl, whisk together the flour, granulated sugar, cocoa powder, baking soda, and salt.
- Add the buttermilk, vegetable oil, eggs, and vanilla extract. Stir until the batter is smooth and no dry streaks remain.
- Pour the batter into the prepared pan and bake for 30 to 35 minutes, until a toothpick inserted in the center comes out clean.
- Let the cake cool in the pan for 10 minutes, then turn it out onto a wire rack to cool completely.
- In a medium bowl, stir the powdered sugar, milk, and green food coloring until the glaze is thick but pourable.
- Place the cooled cake on a serving plate and slowly pour the glaze over the top so it drips down the sides like a bubbling potion.
Extra Tips
If the glaze thickens while sitting, add a few drops of milk to loosen it before pouring. The cake keeps at room temperature in an airtight container for two days. For a darker cauldron look, use black cocoa powder in place of regular cocoa without changing any other step.Course: Dessert Cuisine: American Equipment: Bundt pan, Mixing bowls, Whisk, Oven, Wire rack
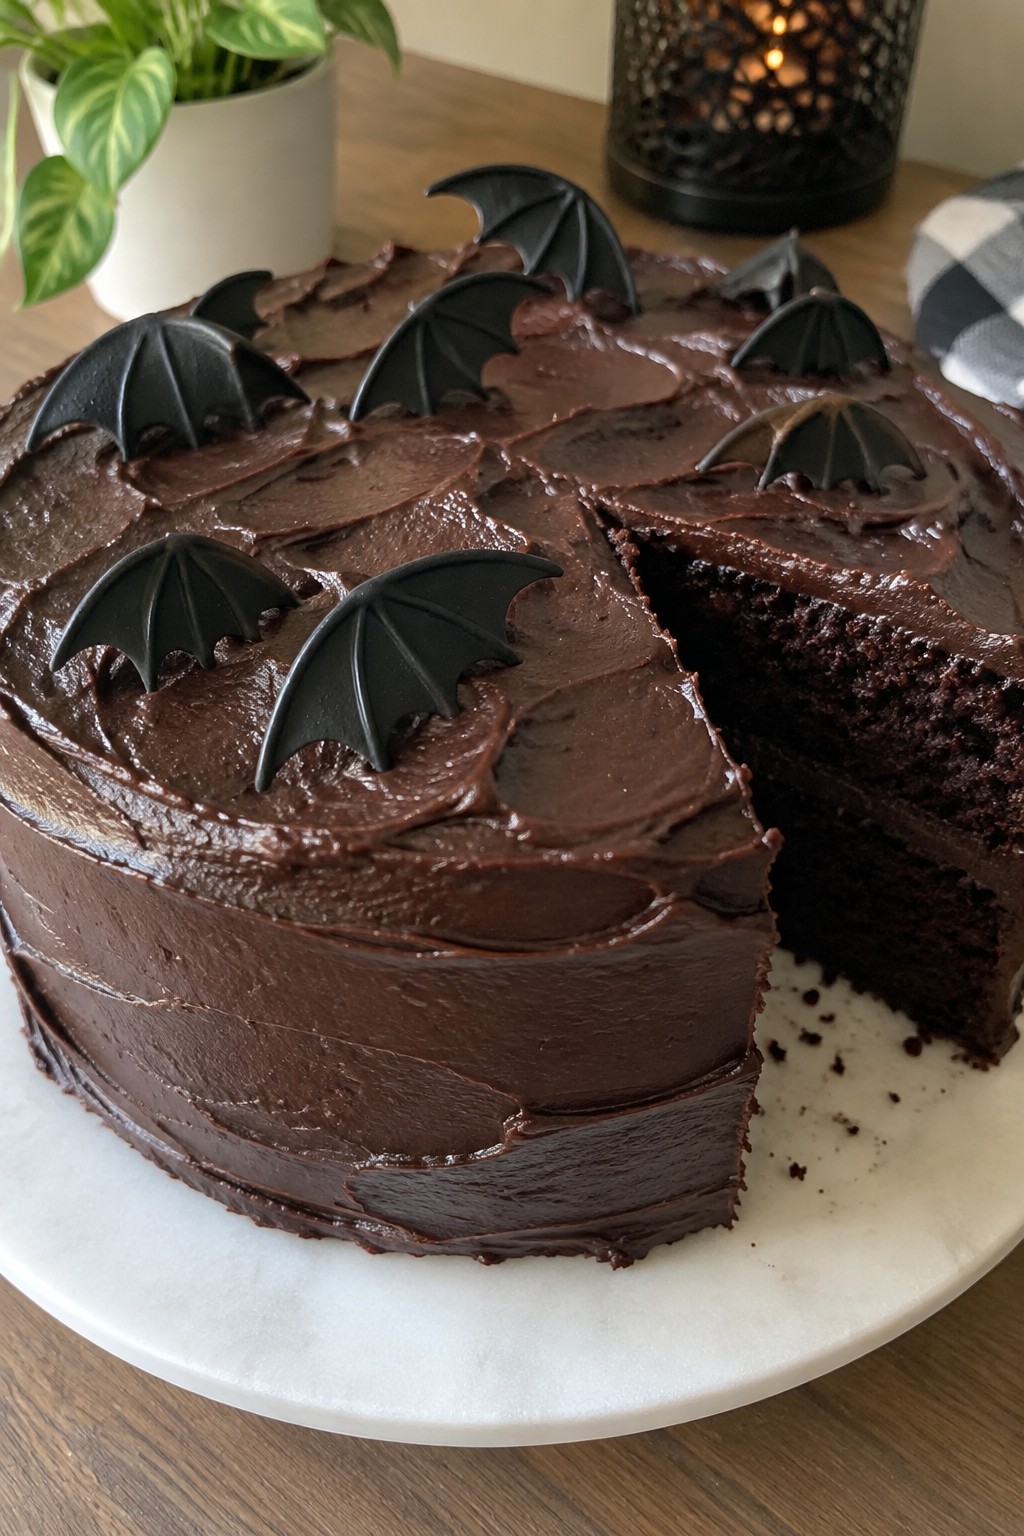
Bat Wing Devil’s Food Cake with Dark Cocoa Frosting
This cake brings a rich chocolate base with a deep cocoa flavor that feels fitting for a Halloween spread. The dark frosting adds intensity while the bat wing decorations on top give it a playful yet spooky look that works well for small gatherings.
It bakes up moist with a tender crumb and holds up nicely when sliced. Serve it after a casual dinner or at a themed dessert table where the bat wings can be the main visual element.
Serves 4 people.
Ingredients
- 1 cup all-purpose flour
- 3/4 cup granulated sugar
- 1/2 cup dark cocoa powder
- 1 teaspoon baking soda
- 1/2 teaspoon salt
- 1/2 cup buttermilk
- 1/4 cup vegetable oil
- 1 large egg
- 1/2 teaspoon vanilla extract
- 1/2 cup hot water
- 4 ounces dark chocolate
- 1/2 cup unsalted butter, softened
- 1 1/2 cups powdered sugar
- 2 tablespoons milk
Instructions
- Preheat the oven to 350 degrees F and grease a 6-inch round cake pan.
- In a mixing bowl, whisk together the flour, granulated sugar, 1/4 cup of the dark cocoa powder, baking soda, and salt.
- Add the buttermilk, vegetable oil, egg, and vanilla extract to the dry ingredients and stir until smooth.
- Pour in the hot water and mix until the batter is thin but fully combined.
- Transfer the batter to the prepared pan and bake for 30 minutes or until a toothpick inserted in the center comes out clean.
- Let the cake cool in the pan for 10 minutes, then turn it out onto a wire rack to cool completely.
- While the cake cools, melt the dark chocolate and spread it thinly on parchment paper. Use a knife or cutter to form small bat wing shapes and let them set until firm.
- In a separate bowl, beat the softened butter with the remaining 1/4 cup dark cocoa powder until creamy.
- Gradually add the powdered sugar and milk, beating until the frosting reaches a spreadable consistency.
- Frost the cooled cake evenly with the dark cocoa frosting and press the set chocolate bat wings into the top.
Extra Tips
Melt the dark chocolate just until smooth to avoid streaks when shaping the wings. If the frosting feels too thick, add milk one teaspoon at a time. Store leftovers in an airtight container at room temperature for up to two days.Course: Dessert Cuisine: American Equipment: Mixing Bowl, Cake Pan, Whisk, Oven, Wire Rack
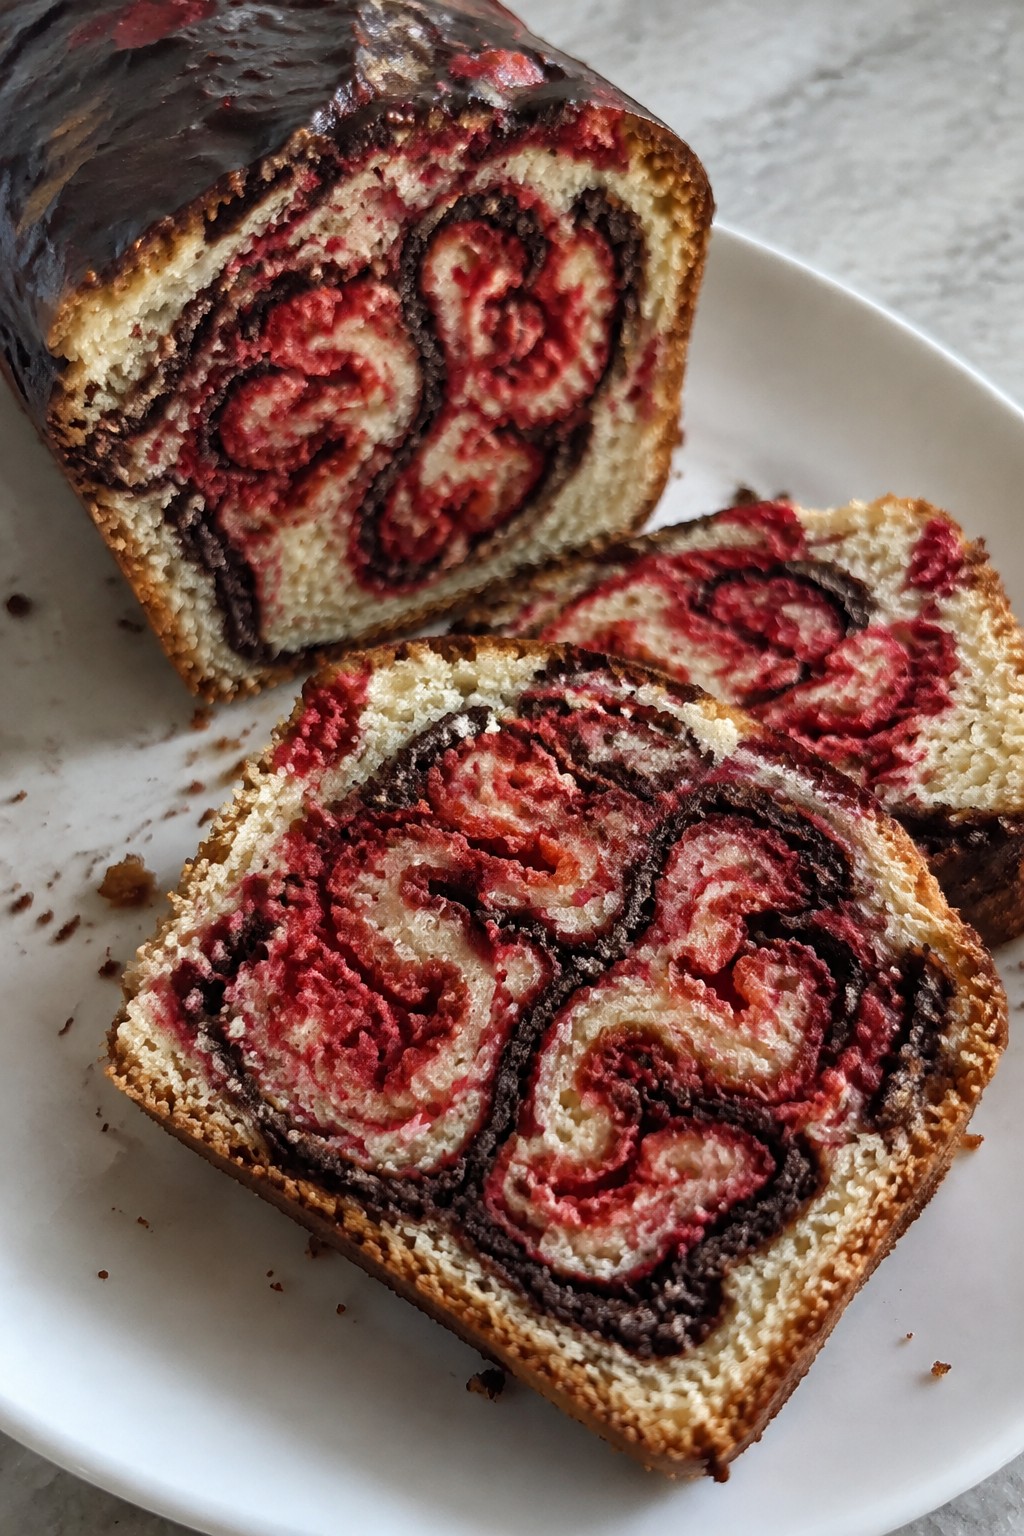
Zombie Brain Swirl Marble Cake
This marble cake stands out with its red and chocolate swirls that form a brain-like pattern across each slice. The vanilla base stays moist while the cocoa adds a mild chocolate note without overpowering the cake.
It fits well on a small Halloween dessert table or as a simple treat for a few guests. The straightforward mixing method keeps the focus on the visual effect once the cake is sliced.
Serves 4 people.
Ingredients
- 1 cup all-purpose flour
- 1/2 cup sugar
- 1/4 cup unsalted butter, softened
- 1 large egg
- 1/2 cup milk
- 1 1/2 teaspoons baking powder
- 1 teaspoon vanilla extract
- 2 tablespoons unsweetened cocoa powder
- Red food coloring
Instructions
- Preheat the oven to 350°F and grease a small loaf pan.
- In a mixing bowl, cream the softened butter with the sugar until light. Beat in the egg and vanilla extract until smooth.
- In a separate bowl, whisk together the flour and baking powder. Add half the dry mixture to the wet ingredients, then pour in half the milk. Stir gently. Repeat with the remaining dry mixture and milk until just combined.
- Divide the batter into three portions. Leave one plain, stir the cocoa powder into the second, and add several drops of red food coloring to the third until it reaches a bright shade.
- Drop spoonfuls of each colored batter into the prepared pan in an alternating pattern. Run a knife through the batter a few times to create swirls.
- Bake for 30 to 35 minutes, or until a toothpick inserted in the center comes out clean. Cool in the pan for 10 minutes before turning out onto a wire rack.
Extra Tips
For the clearest brain pattern, avoid over-swirling the batter so the red sections stay distinct from the chocolate. A small loaf pan helps the cake bake evenly and gives neat slices that show the swirl. Store leftovers in an airtight container at room temperature for up to two days.Course: Dessert Cuisine: American Equipment: Mixing Bowls, Loaf Pan, Oven
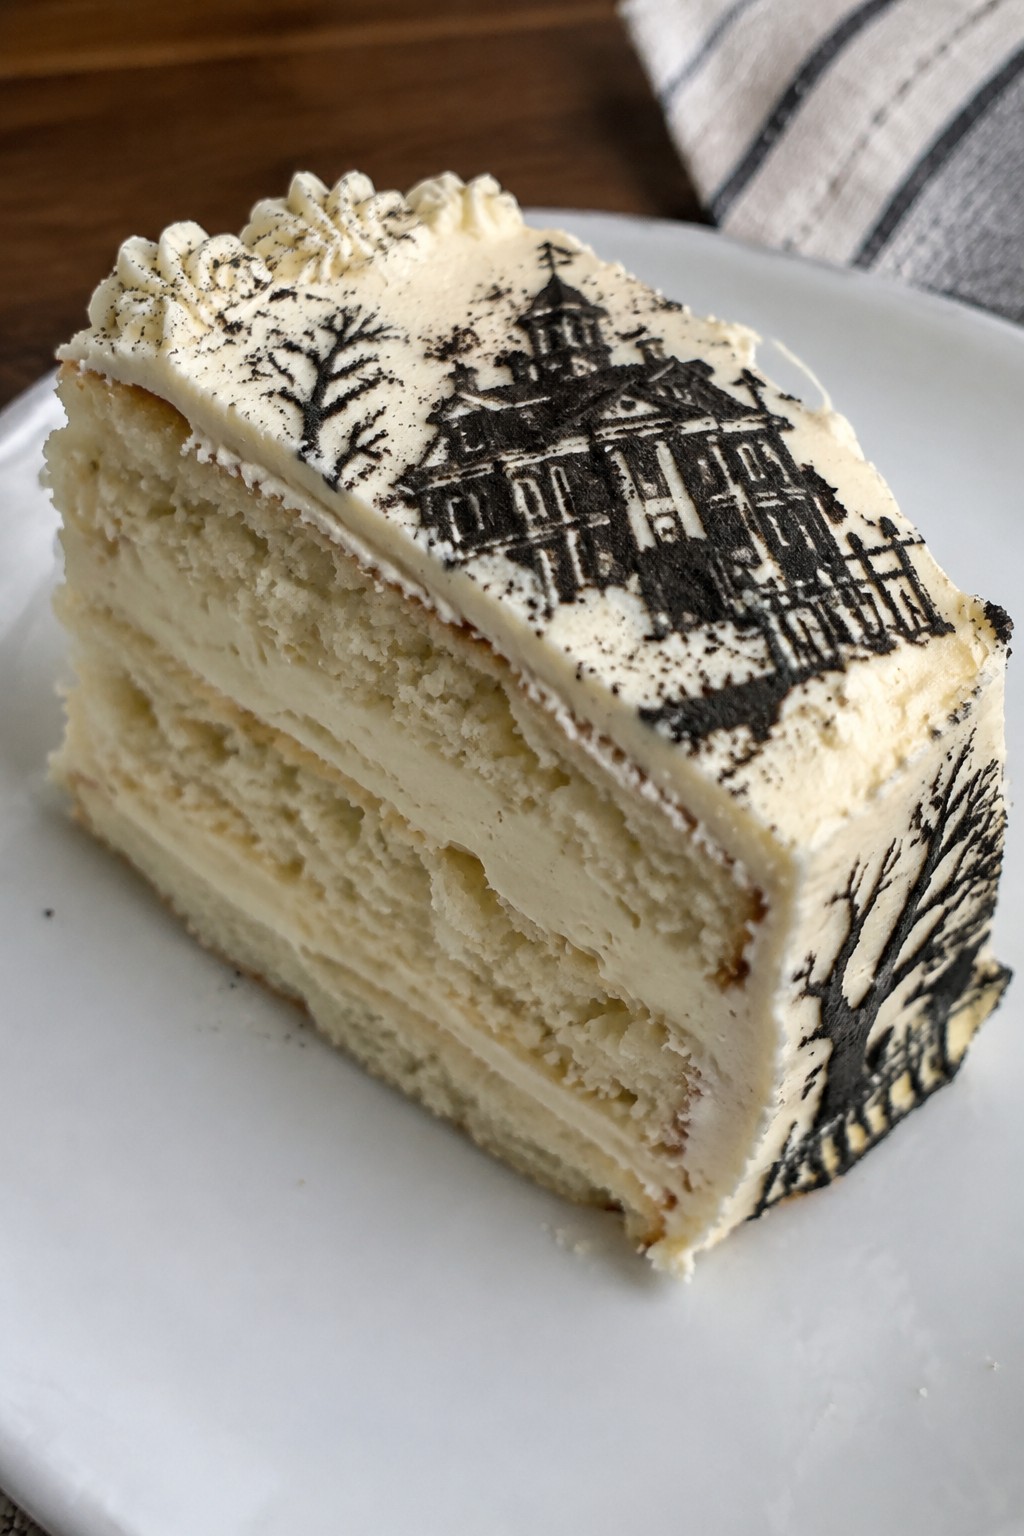
Haunted Mansion White Chocolate Layer Cake
This white chocolate layer cake brings a spooky touch to any Halloween spread with its pale layers and dark accents that suggest a miniature haunted mansion. It works well for small gatherings or as a striking centerpiece on a dessert table. The cake has a tender crumb and a rich, creamy white chocolate flavor that balances sweetness without feeling heavy.
Serves 4 people.
Ingredients
- 1 cup all-purpose flour
- 2/3 cup granulated sugar
- 1/4 cup unsalted butter, softened
- 3 ounces white chocolate, melted and cooled
- 1 large egg
- 1 teaspoon baking powder
- 1/3 cup whole milk
- 1 teaspoon vanilla extract
- 6 ounces white chocolate
- 1/4 cup heavy cream
- 1 tablespoon black cocoa powder
Instructions
- Preheat the oven to 350 degrees F and grease two 6-inch round cake pans. Line the bottoms with parchment paper.
- In a mixing bowl, cream the butter and sugar until light. Add the egg and vanilla extract, then stir in the melted white chocolate until smooth.
- In a separate bowl, whisk the flour and baking powder. Add half the dry mixture to the wet ingredients, followed by the milk. Mix in the remaining dry ingredients until just combined.
- Divide the batter between the prepared pans. Bake for 22 to 25 minutes, until a toothpick inserted in the center comes out clean. Cool the cakes in the pans for 10 minutes, then turn them out onto a wire rack.
- While the cakes cool, make the ganache. Chop the remaining white chocolate and place it in a heatproof bowl. Heat the heavy cream until steaming, pour it over the chocolate, and stir until melted and glossy. Let it thicken slightly.
- Place one cake layer on a plate and spread a thin layer of ganache over the top. Add the second layer and pour the rest of the ganache over the whole cake, letting it drip down the sides. Dust the top lightly with black cocoa powder to create the haunted mansion silhouette effect.
Extra Tips
Let the ganache set at room temperature for 20 minutes before slicing so the layers stay neat. If the white chocolate seizes during melting, add a teaspoon of warm milk to loosen it. The black cocoa dusting gives a subtle contrast without altering the main flavor, but you can skip it if you prefer an all-white finish. Store leftovers in the refrigerator and bring slices to room temperature before serving to restore the creamy texture.Course: Dessert Cuisine: American Equipment: Mixing bowls, Electric mixer, Cake pans, Wire rack
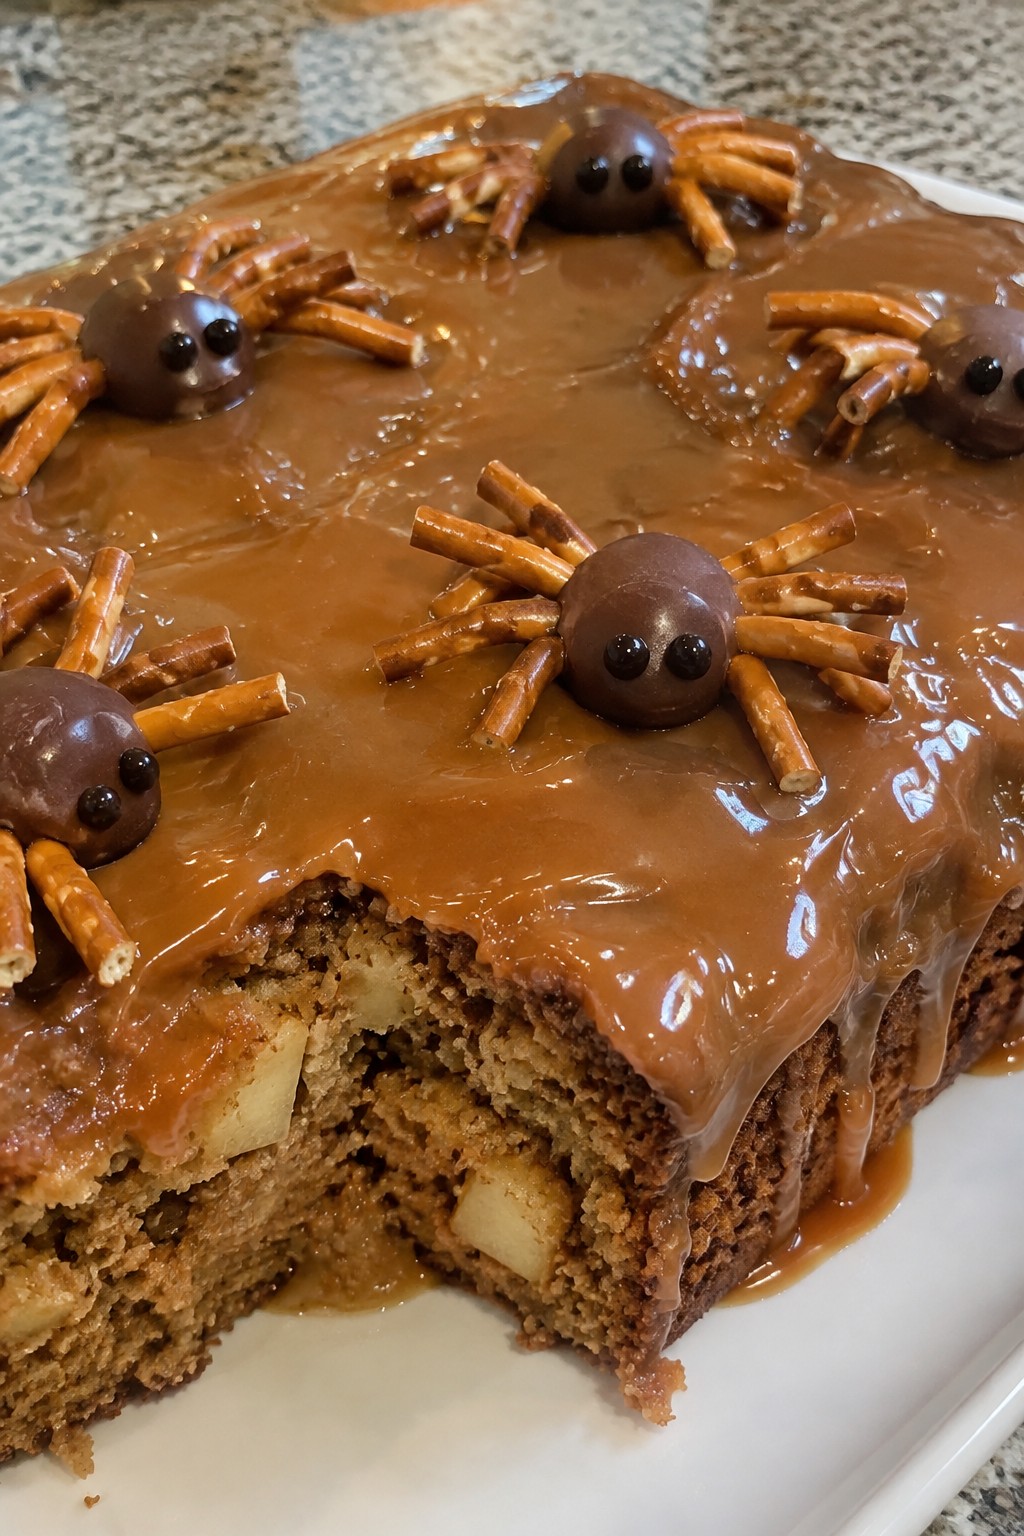
Creepy Crawly Caramel Apple Spice Cake
This cake brings together the cozy flavors of apple and warm spices with a rich caramel drizzle. It works well for a Halloween gathering when you want a dessert that feels seasonal without being overly complicated. The crumb stays moist thanks to the fresh apples, while the caramel adds a chewy finish on top.
The creepy crawly detail comes from simple chocolate spiders made with pretzel legs. They sit on the caramel surface for an easy visual effect that suits the holiday table.
Serves 4 people.
Ingredients
- 1 1/2 cups all-purpose flour
- 3/4 cup granulated sugar
- 1 teaspoon baking soda
- 1 teaspoon ground cinnamon
- 1/2 teaspoon ground nutmeg
- 2 medium apples, diced
- 2 large eggs
- 1/2 cup unsalted butter, melted
- 1/2 cup milk
- 3/4 cup caramel sauce
- 1/4 cup semi-sweet chocolate chips
- 12 pretzel sticks
Instructions
- Preheat the oven to 350 degrees F and grease a small loaf pan or 8-inch round cake pan.
- In a mixing bowl, whisk together the flour, sugar, baking soda, cinnamon, and nutmeg.
- Add the diced apples, eggs, melted butter, and milk to the dry ingredients. Stir until just combined and no dry streaks remain.
- Pour the batter into the prepared pan and bake for 35 to 40 minutes, or until a toothpick inserted in the center comes out clean.
- Let the cake cool in the pan for 10 minutes, then turn it out onto a plate.
- Drizzle the caramel sauce evenly over the top of the cooled cake.
- Melt the chocolate chips in a small bowl. Use a spoon to drop small circles of chocolate onto the caramel surface for spider bodies. Press pretzel sticks into each circle to form legs.
Extra Tips
Melt the chocolate in short bursts in the microwave to keep it smooth for shaping the spiders. If the caramel is too thick to drizzle, warm it slightly in a saucepan over low heat. Store leftovers covered at room temperature for up to two days.Course: Dessert Cuisine: American Equipment: Mixing Bowl, Cake Pan, Whisk, Oven
Witch’s Brew Green Velvet Cake with Potion Swirls
This green velvet cake offers a moist crumb with a mild chocolate note and a bright color that stands out on a Halloween table. The potion swirls come from tinted frosting layered on top, giving each slice a simple but striking pattern that fits the theme without extra fuss.
It works well for small gatherings or as one dessert among several spooky treats. The cake stays tender thanks to buttermilk and oil, while the cream cheese frosting adds a light tang that balances the sweetness.

Serves 4 people.
Ingredients
- 1 cup all-purpose flour
- 3/4 cup granulated sugar
- 2 tablespoons unsweetened cocoa powder
- 1 teaspoon baking soda
- 1/4 teaspoon salt
- 1/2 cup buttermilk
- 1/4 cup vegetable oil
- 1 large egg
- 2 teaspoons vanilla extract
- 2 tablespoons green food coloring
- 1 cup cream cheese frosting
- 1 teaspoon purple food coloring
Instructions
- Preheat the oven to 350°F and grease a 6-inch round cake pan. Line the bottom with parchment paper.
- In a medium bowl, whisk together the flour, sugar, cocoa powder, baking soda, and salt until evenly combined.
- In a separate bowl, mix the buttermilk, vegetable oil, egg, vanilla extract, and green food coloring until the color is uniform.
- Pour the wet mixture into the dry ingredients and stir gently until no streaks of flour remain. Avoid overmixing to keep the cake tender.
- Transfer the batter to the prepared pan and smooth the top. Bake for 28 to 32 minutes, or until a toothpick inserted in the center comes out clean.
- Cool the cake in the pan for 10 minutes, then turn it out onto a wire rack to cool completely.
- Divide the cream cheese frosting into two small bowls. Stir the purple food coloring into one bowl until the shade is even.
- Spread the plain frosting over the cooled cake. Add small dollops of the purple frosting on top and gently swirl with a knife or offset spatula to create the potion effect.
Extra Tips
For cleaner swirls, chill the cake for 15 minutes after applying the base frosting so the purple color stays distinct. If the cream cheese frosting feels too soft, add a tablespoon of powdered sugar to firm it up before tinting. Store leftovers in an airtight container in the refrigerator for up to three days and bring slices to room temperature before serving to restore the soft texture.Course: Dessert Cuisine: American Equipment: Mixing bowls, Whisk, 6-inch cake pan, Oven, Wire rack
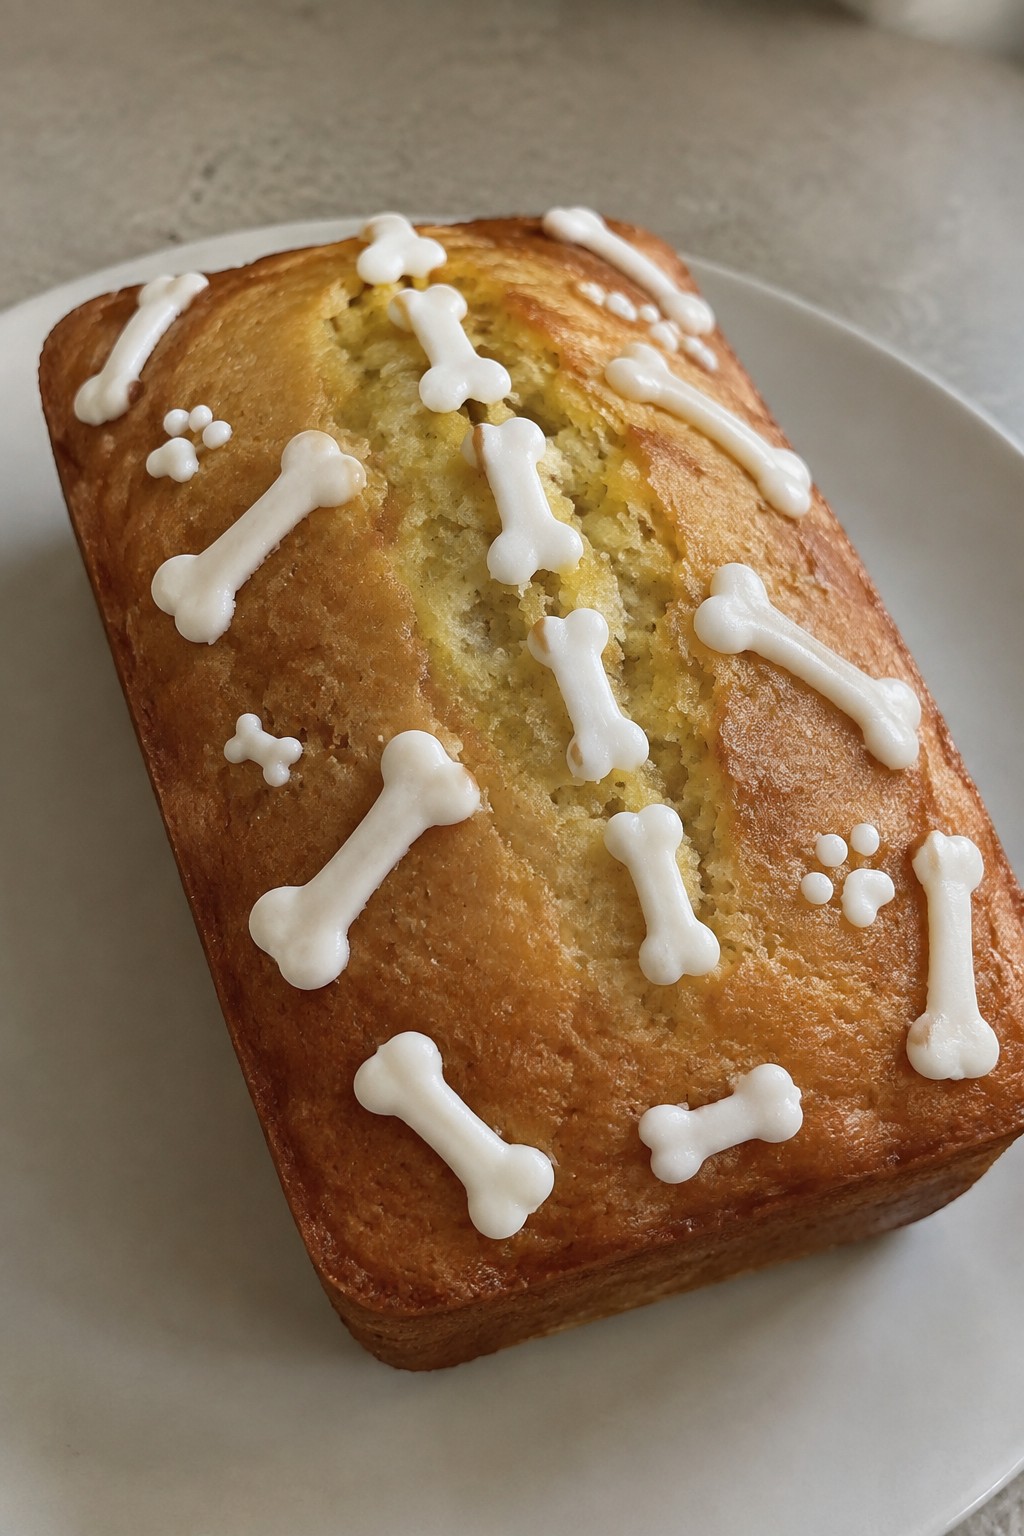
Skeleton Bone Vanilla Pound Cake with Bone-Shaped Icing
This vanilla pound cake gives you a sturdy base that holds its shape well for Halloween decorating. The dense texture pairs with sweet icing to create a simple but striking skeleton bone look that works for a party table or small gathering.
The recipe keeps the flavor classic with plenty of vanilla in both the cake and the icing. It serves four, so you can make one small loaf and pipe bone shapes right on top without extra fuss.
Serves 4 people.
Ingredients
- 1/2 cup unsalted butter, softened
- 3/4 cup granulated sugar
- 2 large eggs
- 2 teaspoons vanilla extract
- 1 1/4 cups all-purpose flour
- 1/2 teaspoon baking powder
- 1/4 cup milk
- 1 cup powdered sugar
- 2 tablespoons milk
Instructions
- Preheat the oven to 350°F and grease a small loaf pan.
- Cream the butter and granulated sugar in a mixing bowl until light and fluffy.
- Beat in the eggs one at a time, then stir in 1 teaspoon of the vanilla extract.
- Whisk together the flour and baking powder in a separate bowl.
- Add the dry ingredients to the butter mixture in two parts, alternating with the 1/4 cup milk, and mix until just combined.
- Pour the batter into the prepared pan and bake for 35 to 40 minutes until a toothpick comes out clean.
- Cool the cake completely in the pan before removing it.
- Stir the powdered sugar, remaining 2 tablespoons milk, and remaining 1 teaspoon vanilla extract together until smooth.
- Spoon the icing into a piping bag fitted with a small round tip and pipe bone shapes across the top of the cooled cake.
Extra Tips
Pipe the icing slowly and let each bone shape set for a minute before adding the next one so the lines stay clean. If the icing feels too thick, add a drop more milk. The cake stays moist for two days when wrapped tightly at room temperature.Course: Dessert Cuisine: American Equipment: Mixing Bowl, Loaf Pan, Piping Bag, Oven
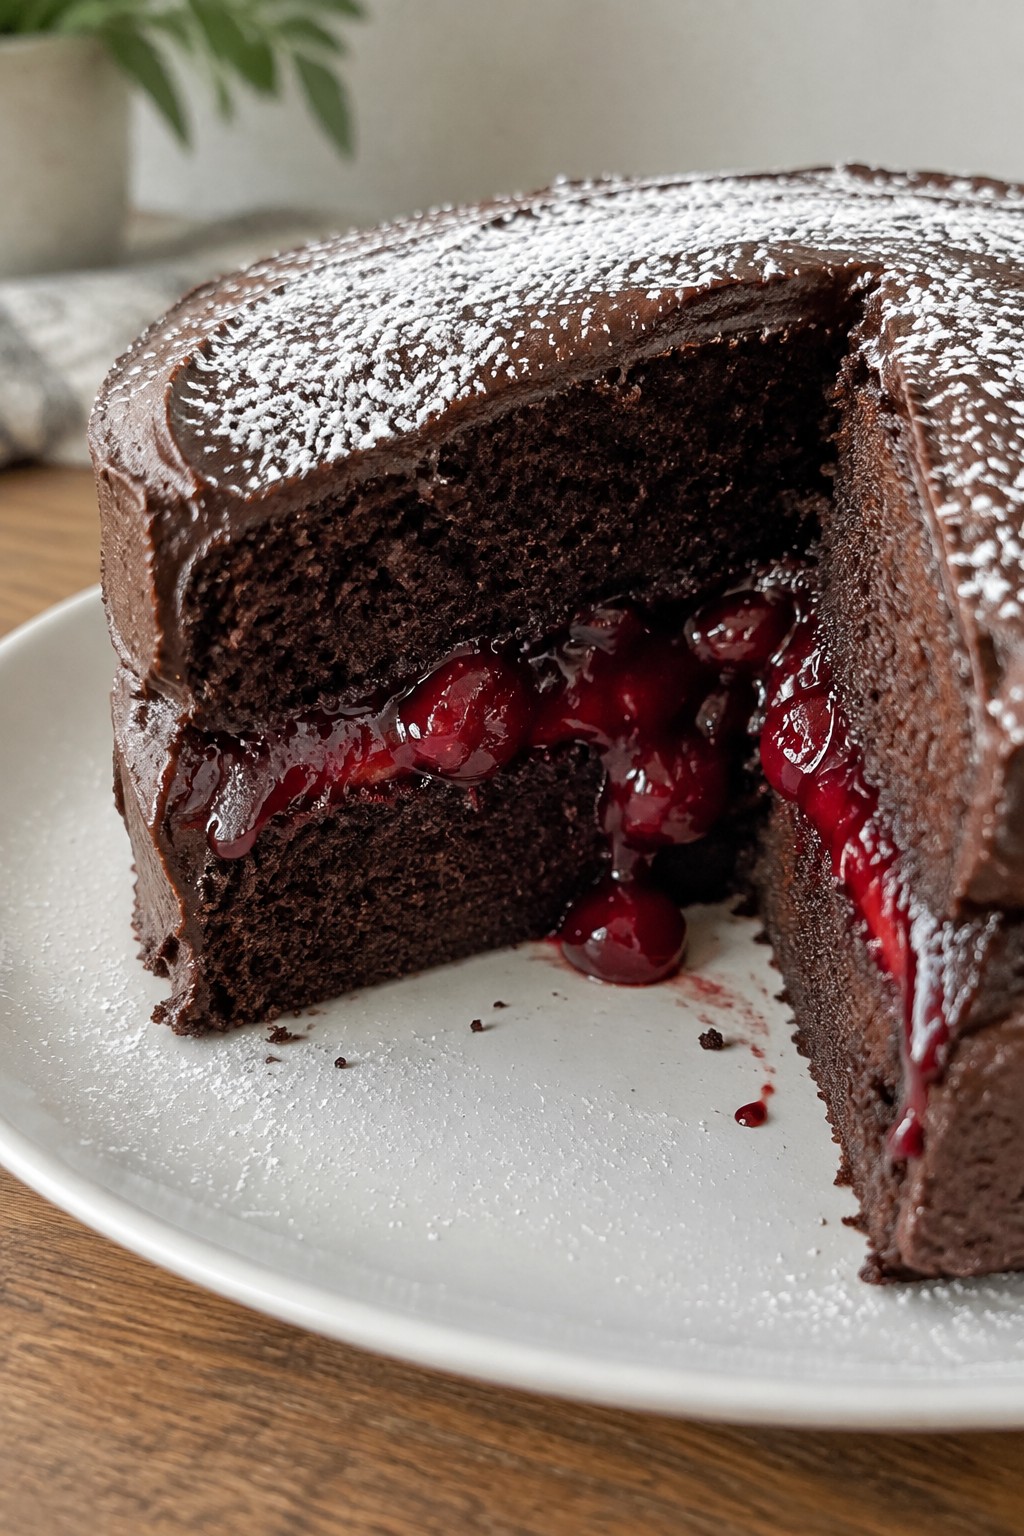
Vampire Bite Cherry Chocolate Cake with Blood-Red Filling
This cake brings a spooky touch to any Halloween table with its dark chocolate layers and a cherry filling that looks like fresh blood when sliced. The moist crumb pairs well with the tart-sweet center, making it a good choice for a small gathering or a themed dessert spread.
It works especially well for intimate parties where you want something festive but not overly complicated. The balance of rich cocoa and bright cherry keeps each bite interesting without feeling heavy.
Serves 4 people.
Ingredients
- 1 cup all-purpose flour
- ¾ cup granulated sugar
- ½ cup unsweetened cocoa powder
- 1 teaspoon baking powder
- 2 large eggs
- ½ cup unsalted butter, melted
- ½ cup milk
- 1 cup cherry pie filling
- ½ cup dark chocolate chips
- ¼ cup powdered sugar
Instructions
- Preheat the oven to 350°F and line an 8-inch round cake pan with parchment paper.
- In a mixing bowl, whisk together the flour, granulated sugar, cocoa powder, and baking powder.
- Add the eggs, melted butter, and milk to the dry mixture and stir until a smooth batter forms.
- Pour the batter into the prepared pan and bake for 25 minutes, or until a toothpick inserted in the center comes out clean.
- Let the cake cool for 10 minutes, then slice it horizontally into two layers.
- Spread the cherry pie filling evenly over the bottom layer, replace the top layer, and press gently.
- Melt the dark chocolate chips in a small bowl and drizzle over the top of the cake.
- Dust with powdered sugar before serving.
Extra Tips
Warm the cherry pie filling slightly before assembly so it flows more freely when the cake is cut. If you need a make-ahead option, bake the cake layers the day before and store them wrapped at room temperature, then add the filling and chocolate just before serving. The powdered sugar helps hide any uneven drips from the chocolate.Course: Dessert Cuisine: American Equipment: Mixing Bowl, 8-inch Cake Pan, Oven
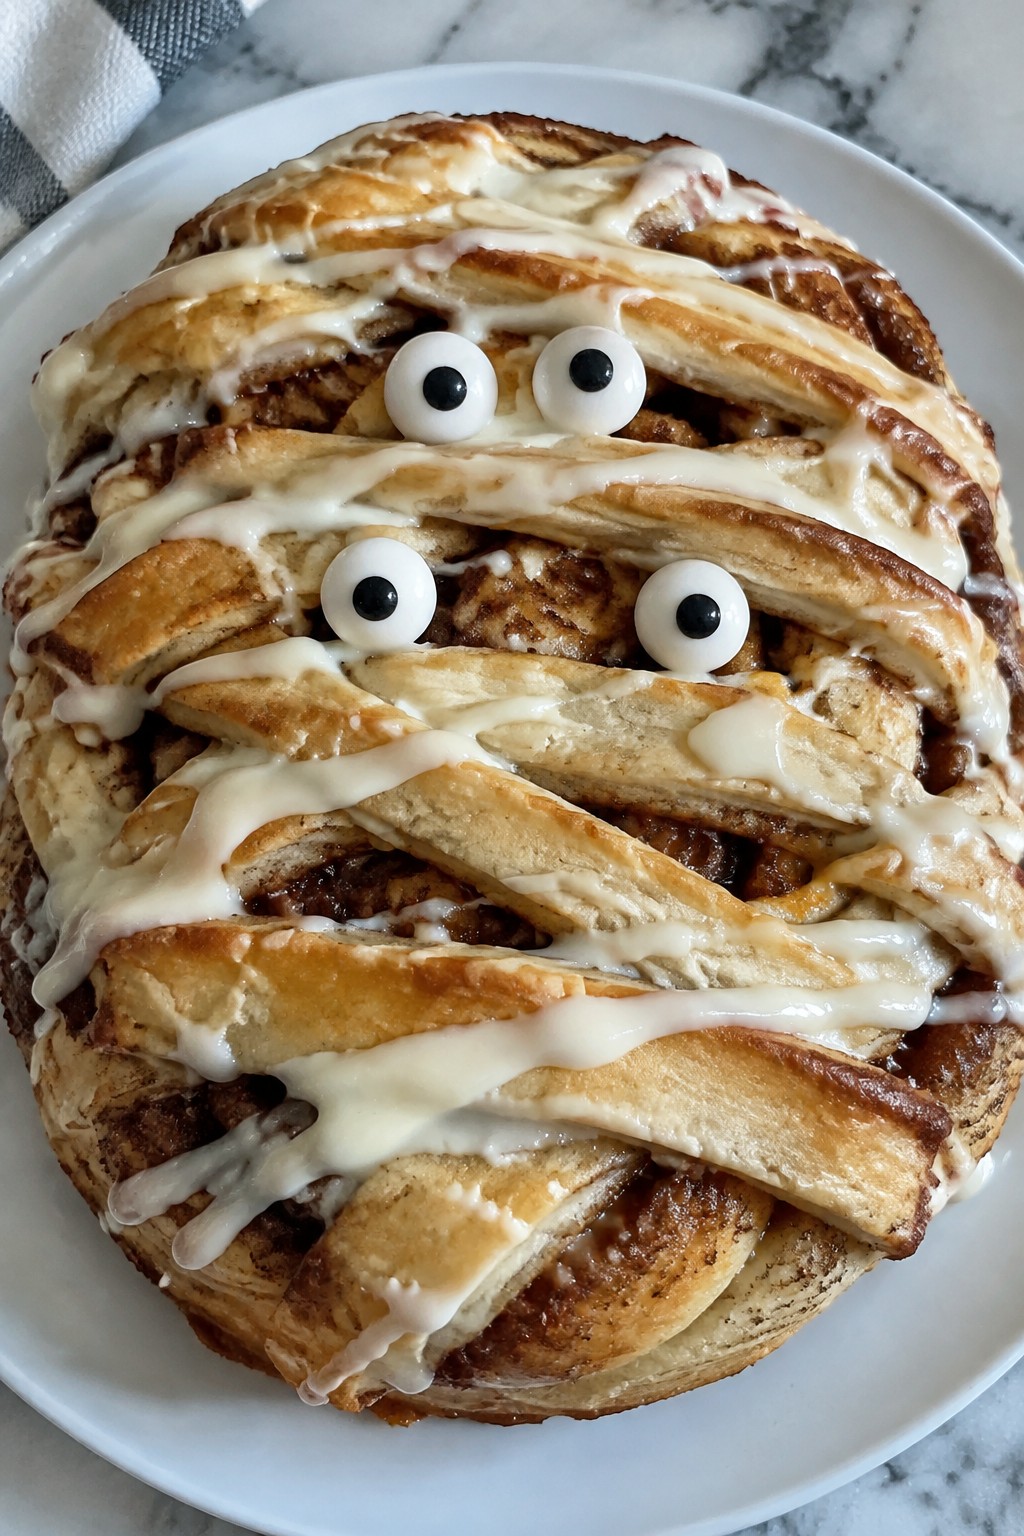
Mummy Wrapped Cinnamon Roll Cake
This cinnamon roll cake turns a classic sweet treat into a Halloween showpiece. The dough forms both the soft cake base and the thin strips that bake into mummy bandages. It delivers warm cinnamon flavor with a gooey center and lightly crisp edges.
It works well for small gatherings or as a centerpiece dessert on a spooky table. Kids and adults enjoy pulling apart the bandage strips to reveal the sweet filling inside.
Serves 4 people.
Ingredients
- 12 ounces refrigerated cinnamon roll dough
- 3 tablespoons granulated sugar
- 1 tablespoon ground cinnamon
- 2 tablespoons butter, melted
- 1/2 cup cream cheese frosting
- 4 candy eyeballs
Instructions
- Preheat the oven to 350 degrees and line a small baking pan with parchment paper.
- Separate the cinnamon roll dough into individual rolls. Press half the rolls together in the center of the pan to form a round cake base.
- Mix the sugar and cinnamon in a small bowl. Brush the base with half the melted butter and sprinkle half the cinnamon sugar over it.
- Cut the remaining dough into thin strips. Lay the strips across the base in a crisscross pattern to create mummy bandages. Brush the strips with the rest of the melted butter and sprinkle with the remaining cinnamon sugar.
- Bake for 20 to 25 minutes until the dough is golden and cooked through. Let the cake cool for 10 minutes.
- Spread the cream cheese frosting over the top in uneven patches so some of the dough shows through. Press the candy eyeballs into the frosting.
Extra Tips
Serve the cake warm so the bandages stay soft enough to pull apart easily. If the frosting sets too firm, warm it briefly in the microwave before spreading. Leftovers keep covered at room temperature for one day and reheat well in a low oven.Course: Dessert Cuisine: American Equipment: Baking pan, Mixing bowl, Oven, Pastry brush
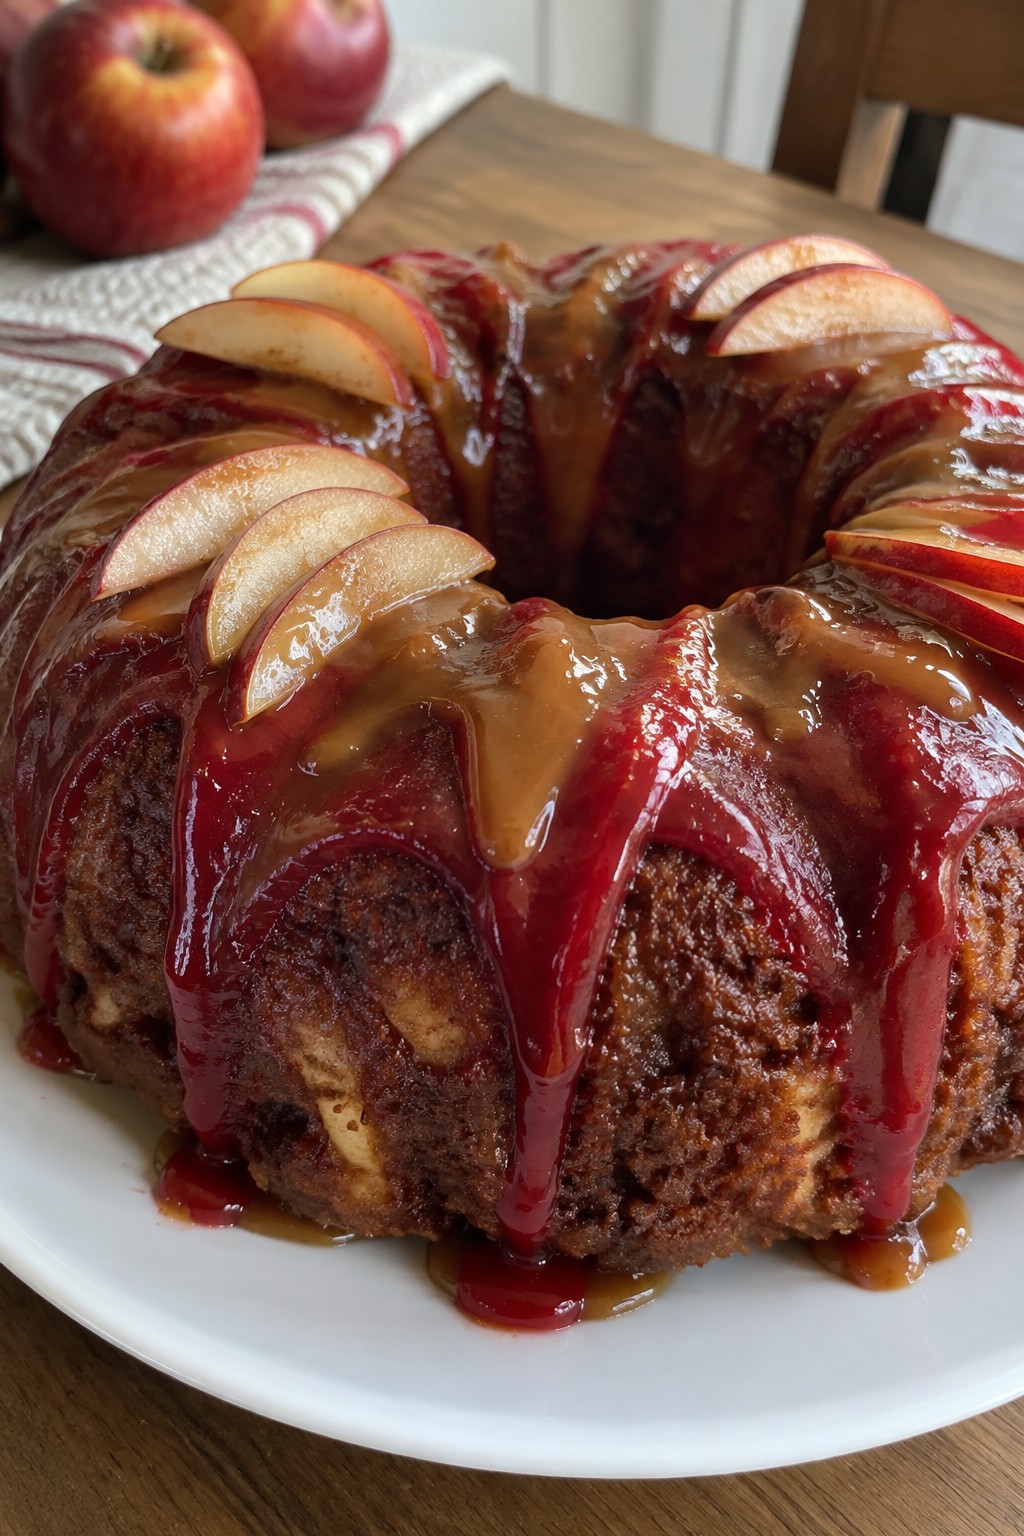
Poison Apple Red Caramel Bundt Cake
This Poison Apple Red Caramel Bundt Cake adds a simple spooky touch to Halloween gatherings. The apple cinnamon base stays moist while a red-tinted caramel glaze creates the poisoned apple look on top.
It suits small parties or family dessert tables where you want something themed but easy to slice and serve. The cake tastes sweet with warm spice and finishes with a sticky caramel layer.
Serves 4 people.
Ingredients
- 1 1/2 cups all-purpose flour
- 3/4 cup granulated sugar
- 1/2 cup unsalted butter, softened
- 2 large eggs
- 1/2 cup applesauce
- 1 teaspoon baking powder
- 1/2 teaspoon ground cinnamon
- 1/4 teaspoon salt
- 1/2 teaspoon red food coloring
- 1/2 cup caramel sauce
- 1 red apple, thinly sliced
Instructions
- Preheat the oven to 350°F and grease a small bundt pan.
- In a bowl, whisk together the flour, baking powder, cinnamon, and salt.
- In a separate bowl, cream the butter and sugar until light. Add the eggs one at a time, then stir in the applesauce.
- Gradually mix the dry ingredients into the wet mixture until just combined.
- Pour the batter into the prepared bundt pan and smooth the top.
- Bake for 30 to 35 minutes until a toothpick comes out clean. Let the cake cool in the pan for 10 minutes, then turn it out onto a plate.
- Stir the red food coloring into the caramel sauce until the color is even. Drizzle the red caramel over the cooled cake.
- Arrange the red apple slices around the base of the cake before serving.
Extra Tips
Warm the caramel sauce slightly before adding the food coloring so it spreads evenly without tearing the cake surface. Store any leftovers in an airtight container at room temperature for up to two days. If the caramel firms up, set the cake near a warm oven for a few minutes to loosen the glaze again.Course: Dessert Cuisine: American Equipment: Bundt pan, Mixing bowls, Whisk, Oven
