

Halloween potlucks with kids often call for simple dishes that travel well and get eaten. These ideas focus on recipes that use basic ingredients and appeal to younger tastes. You will see both sweet treats and savory bites that can be prepared ahead. Each one aims to fit into a shared table without much fuss. The list includes options that work for different age groups and party sizes.
Helpful Tips Before You Start
These steps will help you create Halloween potluck recipes that kids can enjoy safely and easily.
Ask About Allergies First
Check with parents about common restrictions like nuts, dairy, or gluten before you cook. This avoids last-minute changes and keeps the spread welcoming for everyone.
Pick Make-Ahead Recipes
Choose items that hold up well in the fridge or at room temperature. Potluck tables often sit out for hours, so sturdy treats reduce stress during transport.
Use Simple Shapes and Colors
Cut sandwiches or cookies into pumpkins, bats, or ghosts with basic cutters. Bright colors from fruit or sprinkles draw kids in without extra work.
Keep Portions Small
Make bite-sized versions so children can try several options without waste. Finger foods also move faster on a shared table.
Mummy Hot Dogs in Crescent Rolls
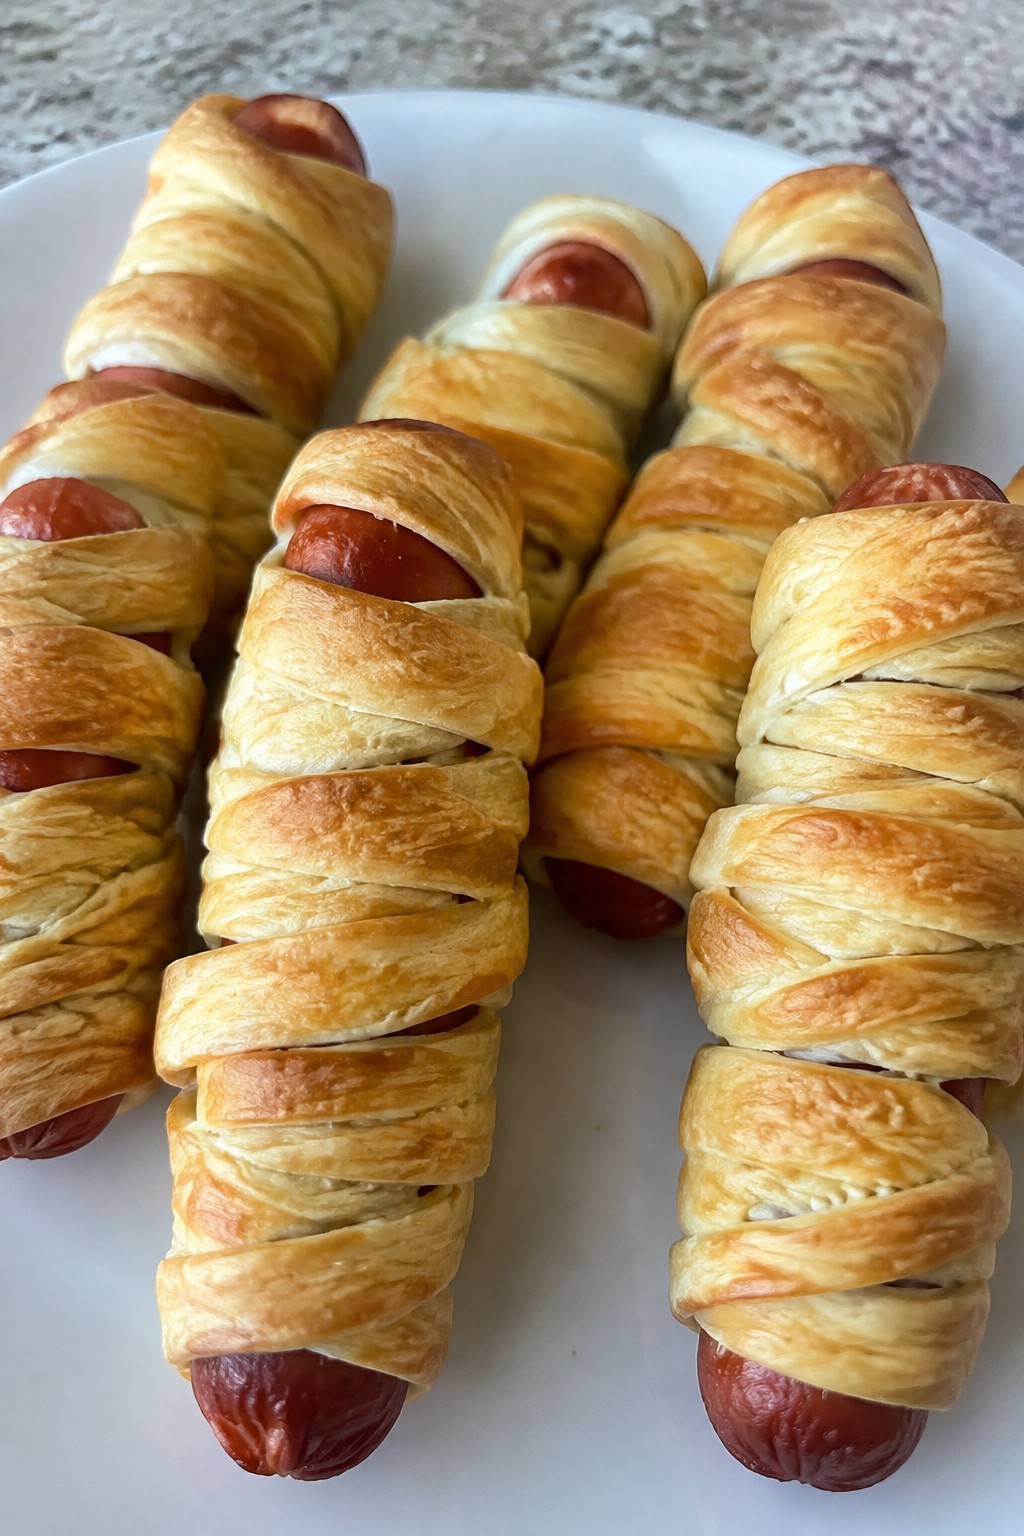
These mummy hot dogs wrapped in crescent rolls add a simple Halloween touch to a kids’ potluck spread. The dish keeps things familiar with everyday hot dogs while the dough creates a fun wrapped look that appeals to younger guests.
They travel well to gatherings and hold up after baking without much fuss. Each bite gives a mix of savory sausage and light, flaky pastry.
Serves 4 people.
Ingredients
- 4 hot dogs
- 1 can (8 ounces) refrigerated crescent roll dough
- 1 tablespoon yellow mustard
Instructions
- Heat the oven to 375 degrees and line a baking sheet with parchment paper.
- Unroll the crescent dough on a cutting board and press the seams together to form a single sheet.
- Cut the dough into thin strips about half an inch wide.
- Wrap the strips around each hot dog in a crisscross pattern, leaving a small open space near one end for the face.
- Place the wrapped hot dogs on the prepared baking sheet.
- Bake for 12 to 15 minutes until the dough turns golden brown.
- Remove from the oven and let cool for a few minutes.
- Use a small amount of yellow mustard to dot two eyes on each hot dog in the open space.
Extra Tips
Wrap the dough strips loosely so they stay visible after baking. Serve the hot dogs warm with extra mustard in a small bowl for dipping. If making ahead, bake them fully, cool completely, and reheat at 350 degrees for five minutes before serving.Course: Appetizer Cuisine: American Equipment: Baking Sheet, Knife
Spiderweb Seven-Layer Dip with Tortilla Chips
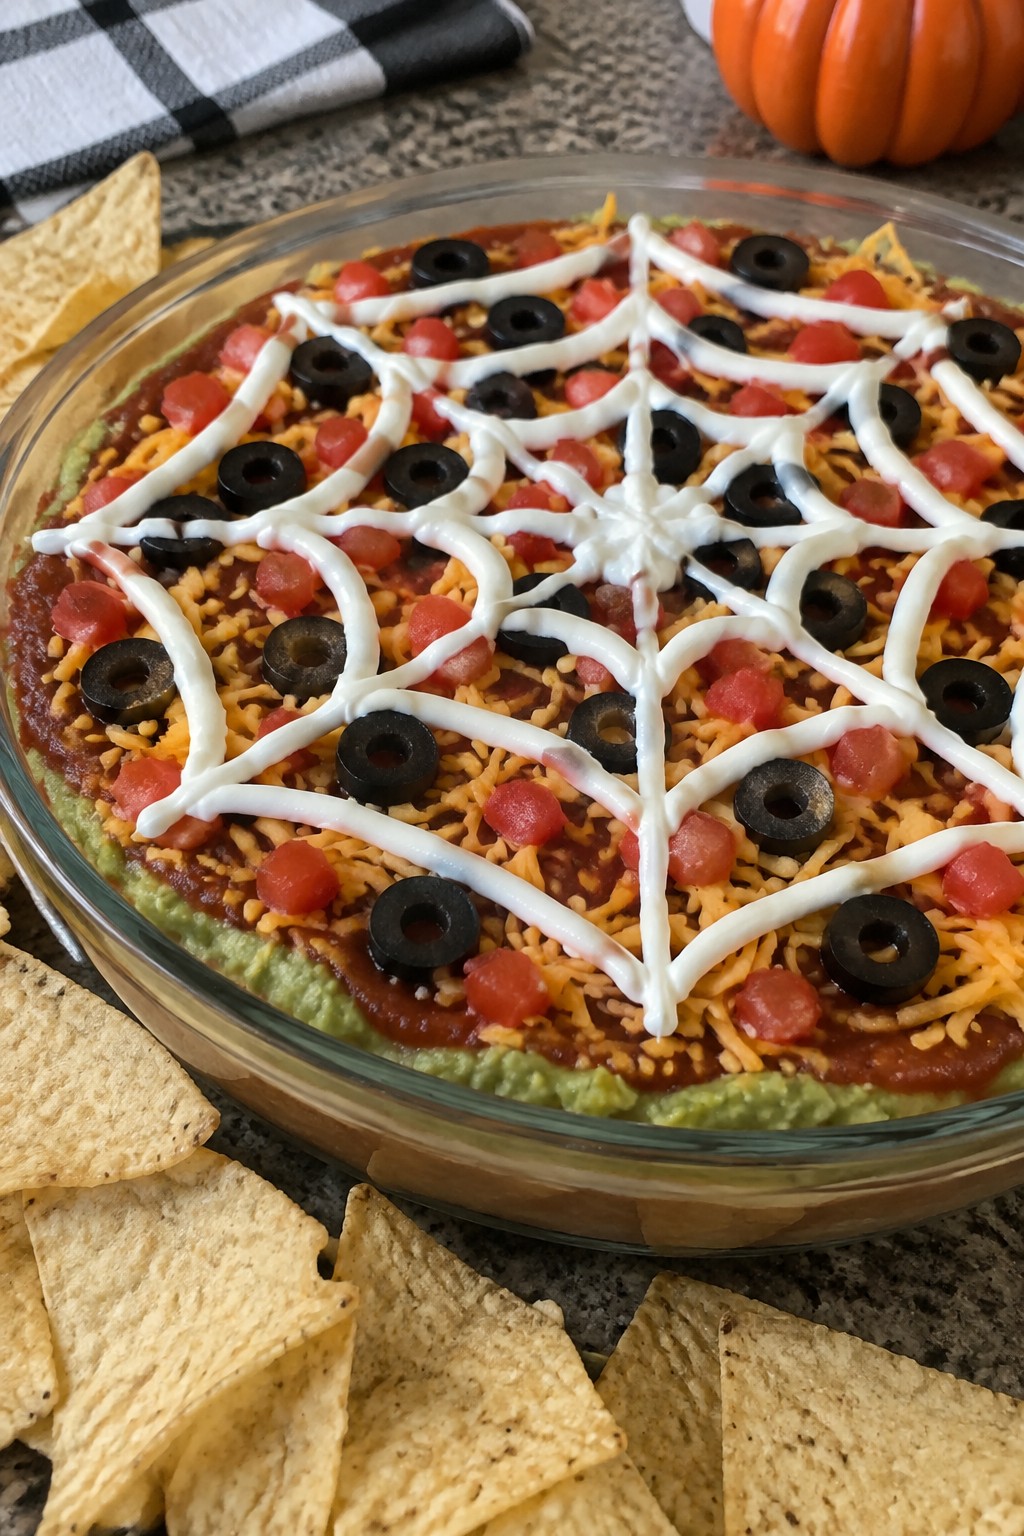
This spiderweb seven-layer dip turns a familiar party dish into a simple Halloween option. The stacked layers stay mild and creamy, which makes it easy for kids to enjoy at a potluck. It travels well in a covered dish and pairs naturally with tortilla chips for scooping.
The design uses sour cream to form a web on top, giving the dip a seasonal look without extra work. Textures range from smooth beans and guacamole to crisp toppings, all kept in balanced portions for four servings.
Serves 4 people.
Ingredients
- 1 can (16 oz) refried beans
- 2 ripe avocados, mashed
- 1 cup mild salsa
- 1 cup sour cream
- 1 cup shredded cheddar cheese
- 1/2 cup diced tomatoes
- 1/4 cup sliced black olives
- Tortilla chips for serving
Instructions
- Spread the refried beans evenly across the bottom of a shallow serving dish to form the first layer.
- Spoon the mashed avocados over the beans and smooth them into an even second layer.
- Pour the mild salsa over the avocado layer and spread it gently to cover.
- Reserve 2 tablespoons of sour cream in a small bowl, then spread the remaining sour cream over the salsa as the next layer.
- Sprinkle the shredded cheddar cheese evenly over the sour cream.
- Scatter the diced tomatoes across the cheese layer.
- Add the sliced black olives on top as the final layer.
- Spoon the reserved sour cream into a small plastic bag, snip off one corner, and pipe a spiderweb pattern across the surface of the dip.
- Serve with tortilla chips on the side for dipping.
Extra Tips
Pipe the web right before serving so the lines stay sharp. If the dip sits for a while, the sour cream may soften, so keep the reserved portion chilled until you need it. Use sturdy tortilla chips to hold up under the thick layers.Course: Appetizer Cuisine: Mexican Equipment: Mixing bowl, shallow serving dish, plastic bag
Pumpkin Patch Mac and Cheese Cups
These Pumpkin Patch Mac and Cheese Cups add a seasonal touch to a classic kid favorite. The orange hue from pumpkin puree fits right into a Halloween spread, and the individual portions make them simple to serve at a potluck.
The cups bake up creamy inside with a lightly crisp top. Each one gets a pretzel stem for a quick pumpkin look that appeals to children without extra fuss.

Serves 4 people.
Ingredients
- 2 cups elbow macaroni
- 1 cup canned pumpkin puree
- 2 cups shredded cheddar cheese
- 1 cup milk
- 2 tablespoons butter
- 2 tablespoons all-purpose flour
- 1/2 teaspoon salt
- 1/4 teaspoon black pepper
- 1/4 teaspoon paprika
- 8 small pretzel sticks
Instructions
- Preheat the oven to 375°F and lightly grease 8 cups of a standard muffin tin.
- Bring a large pot of salted water to a boil and cook the elbow macaroni until just tender. Drain and set aside.
- In a medium saucepan over medium heat, melt the butter. Whisk in the flour and cook for one minute until bubbly.
- Slowly whisk in the milk and continue stirring until the mixture thickens, about two minutes.
- Remove the pan from heat and stir in the pumpkin puree, 1 1/2 cups of the cheddar cheese, salt, black pepper, and paprika until the cheese melts.
- Fold the cooked macaroni into the sauce until evenly coated.
- Spoon the mixture into the prepared muffin cups, pressing down gently to fill each one. Sprinkle the remaining 1/2 cup cheese over the tops.
- Bake for 15 to 18 minutes until the cheese on top is melted and the edges are lightly golden. Let the cups cool in the tin for five minutes.
- Carefully remove the cups and insert one pretzel stick into the top of each to form a stem.
Extra Tips
Let the cups rest a few extra minutes after baking so they hold their shape when lifted from the tin. If you prepare them ahead, reheat in a 350°F oven for five minutes to restore the crisp top without drying the centers. Use sharp cheddar for stronger flavor or mild cheddar if serving very young kids.Course: Appetizer Cuisine: American Equipment: Muffin Tin, Large Pot, Medium Saucepan, Mixing Bowl
Ghostly Banana Pudding Parfaits
These Ghostly Banana Pudding Parfaits bring a simple spooky element to a Halloween potluck. Clear cups show off the layers while the whipped topping tops create a fun ghost shape that kids notice right away.
The creamy pudding pairs with soft banana slices for a mild, sweet flavor that most children enjoy. The texture stays light and smooth, which makes the parfaits easy to serve at a group event.

Serves 4 people.
Ingredients
- 2 cups cold milk
- 1 (3.4-ounce) package instant vanilla pudding mix
- 2 ripe bananas, sliced
- 1 cup frozen whipped topping, thawed
- 12 vanilla wafers
- 8 mini chocolate chips
Instructions
- Pour the cold milk into a mixing bowl and add the instant vanilla pudding mix. Whisk for two minutes until the mixture thickens.
- Place one vanilla wafer at the bottom of each of four clear cups. Add a few banana slices on top of the wafer.
- Spoon a layer of pudding over the bananas. Repeat with another wafer, more banana slices, and another layer of pudding until the cups are nearly full.
- Dollop the whipped topping on each parfait to form a rounded ghost shape. Press two mini chocolate chips into the topping on each cup to make eyes.
Extra Tips
Assemble the parfaits no more than two hours before serving so the wafers stay slightly crisp. Use firm but ripe bananas to avoid mushy layers. If you need to make them further ahead, keep the whipped topping and chocolate chips separate and add them right before the potluck.Course: Dessert Cuisine: American Equipment: Mixing bowl, Whisk, 4 clear cups
Monster Eyeball Meatball Sliders
These sliders turn simple meatballs into a fun Halloween touch with cheese and olive eyes on top. They work well for kids at a potluck because the portions are small and easy to hold. The flavor is savory with a mild tomato sauce and soft bun texture that most children enjoy.

Serves 4 people.
Ingredients
- 1 pound ground beef
- 1/4 cup breadcrumbs
- 1 large egg
- 1 teaspoon garlic powder
- 1/2 teaspoon salt
- 1/2 teaspoon black pepper
- 8 slider buns
- 1 cup marinara sauce
- 8 small fresh mozzarella balls
- 8 black olives, halved
Instructions
- Preheat the oven to 400 degrees. In a mixing bowl, combine the ground beef, breadcrumbs, egg, garlic powder, salt, and black pepper. Mix until evenly blended.
- Divide the mixture into 8 equal portions and roll each into a meatball. Place the meatballs on a baking sheet.
- Bake the meatballs for 18 to 20 minutes until cooked through and lightly browned.
- While the meatballs bake, warm the marinara sauce in a small skillet over low heat.
- Split the slider buns and place one meatball on each bottom half. Spoon a little marinara sauce over each meatball.
- Set one mozzarella ball on top of each meatball, then press one olive half into the center of the cheese to form an eyeball.
- Place the top bun on each slider and serve.
Extra Tips
Form the meatballs a day ahead and keep them covered in the fridge so they are ready to bake before the potluck. Use small mozzarella balls that sit flat on the meatballs to keep the eyeballs from rolling. If the cheese starts to melt too much in a warm car, pack the sliders without the tops and add them just before serving.Course: Appetizer Cuisine: American Equipment: Mixing bowl, Baking sheet, Small skillet
Witch Hat Taco Salad Cups
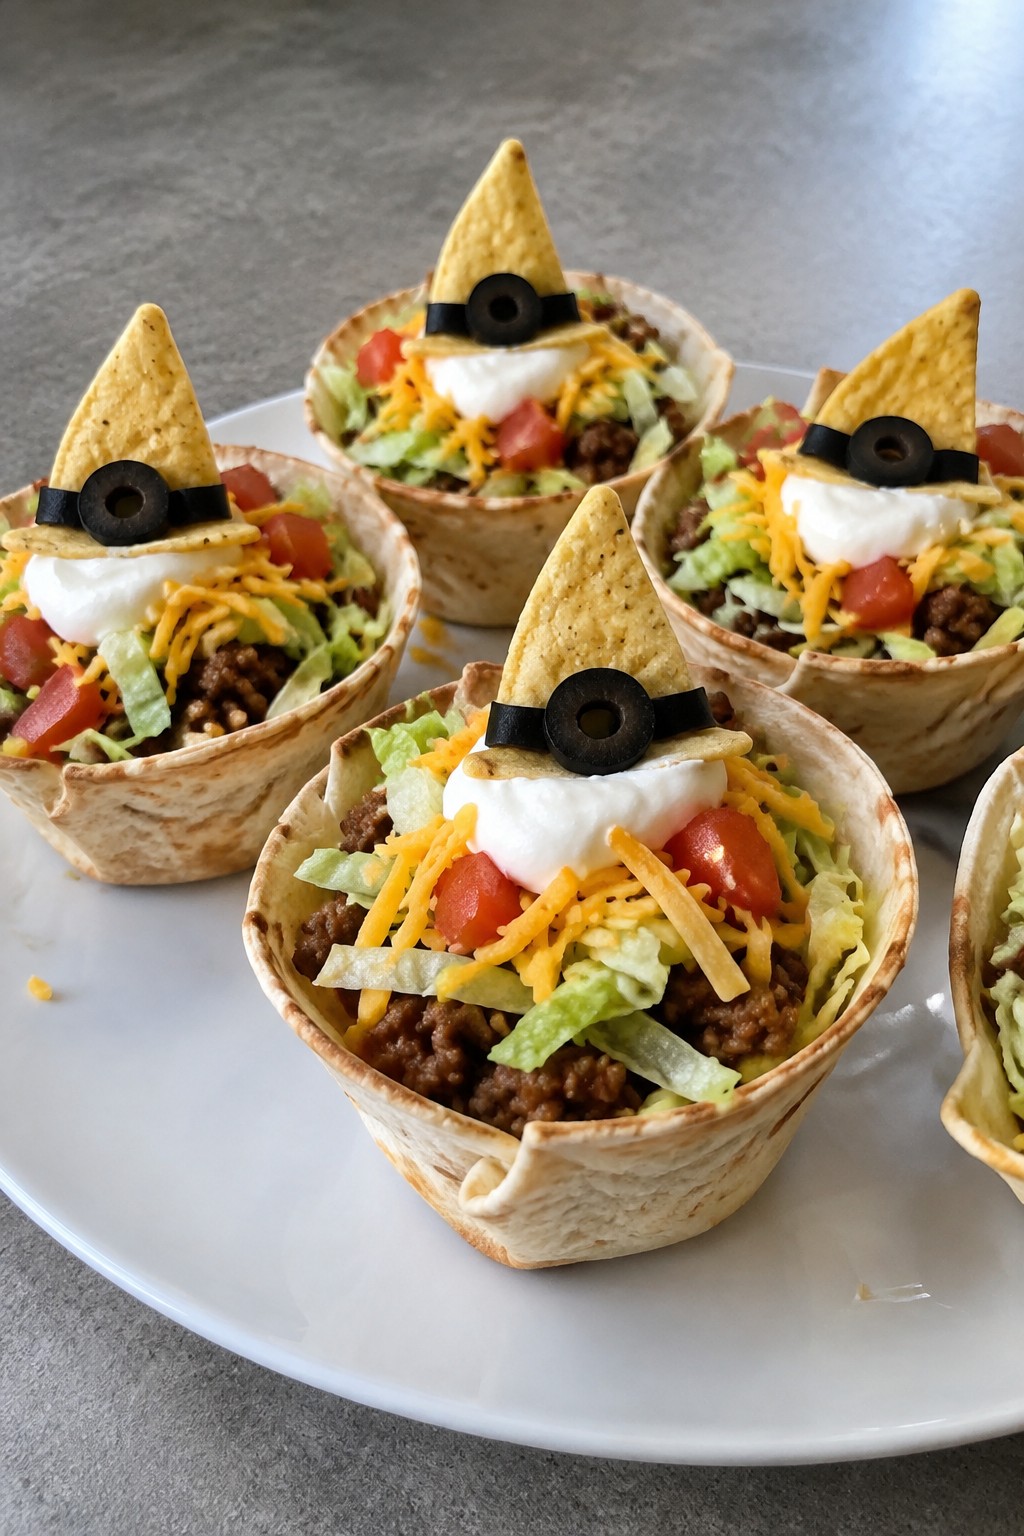
These Witch Hat Taco Salad Cups turn a simple taco filling into a playful Halloween bite. Small tortilla cups hold seasoned beef and fresh toppings, then get finished with a chip and olive detail that kids recognize as a witch hat right away.
They travel well to potlucks and let children assemble or decorate their own if you set out the components. The result is crunchy, savory, and creamy without any heat that might bother younger guests.
Serves 4 people.
Ingredients
- 1 lb ground beef
- 2 tablespoons taco seasoning
- 4 small flour tortillas
- 2 cups shredded lettuce
- 1 cup diced tomatoes
- 1 1/2 cups shredded cheddar cheese
- 1/2 cup sour cream
- 12 round tortilla chips
- 1/4 cup sliced black olives
Instructions
- Cook the ground beef in a large skillet over medium heat until browned. Drain any excess fat, then stir in the taco seasoning and 1/4 cup water. Simmer for 3 minutes until the mixture thickens.
- Lightly press each flour tortilla into a muffin tin cup to form a small bowl shape. Bake at 375°F for 8 to 10 minutes until the edges turn golden and crisp. Remove and let cool in the tin for 2 minutes before lifting out.
- Spoon the seasoned beef evenly into the four tortilla cups. Layer the shredded lettuce and diced tomatoes on top of the beef.
- Sprinkle shredded cheddar cheese over each cup. Add a spoonful of sour cream in the center.
- Place one round tortilla chip flat on the sour cream to form the hat brim. Set two or three black olive slices in the middle of the chip to create the pointed crown.
Extra Tips
Prepare the tortilla cups a day ahead and store them in an airtight container so they stay crisp. If the sour cream is too thick to spread, stir in a teaspoon of milk to loosen it for easier dolloping. Skip the olives if any kids dislike them and use a small piece of cheese cut into a triangle instead.Course: Appetizer Cuisine: Mexican Equipment: Large skillet, Muffin tin, Baking sheet
Bat Wing Chicken Tenders with Honey Mustard
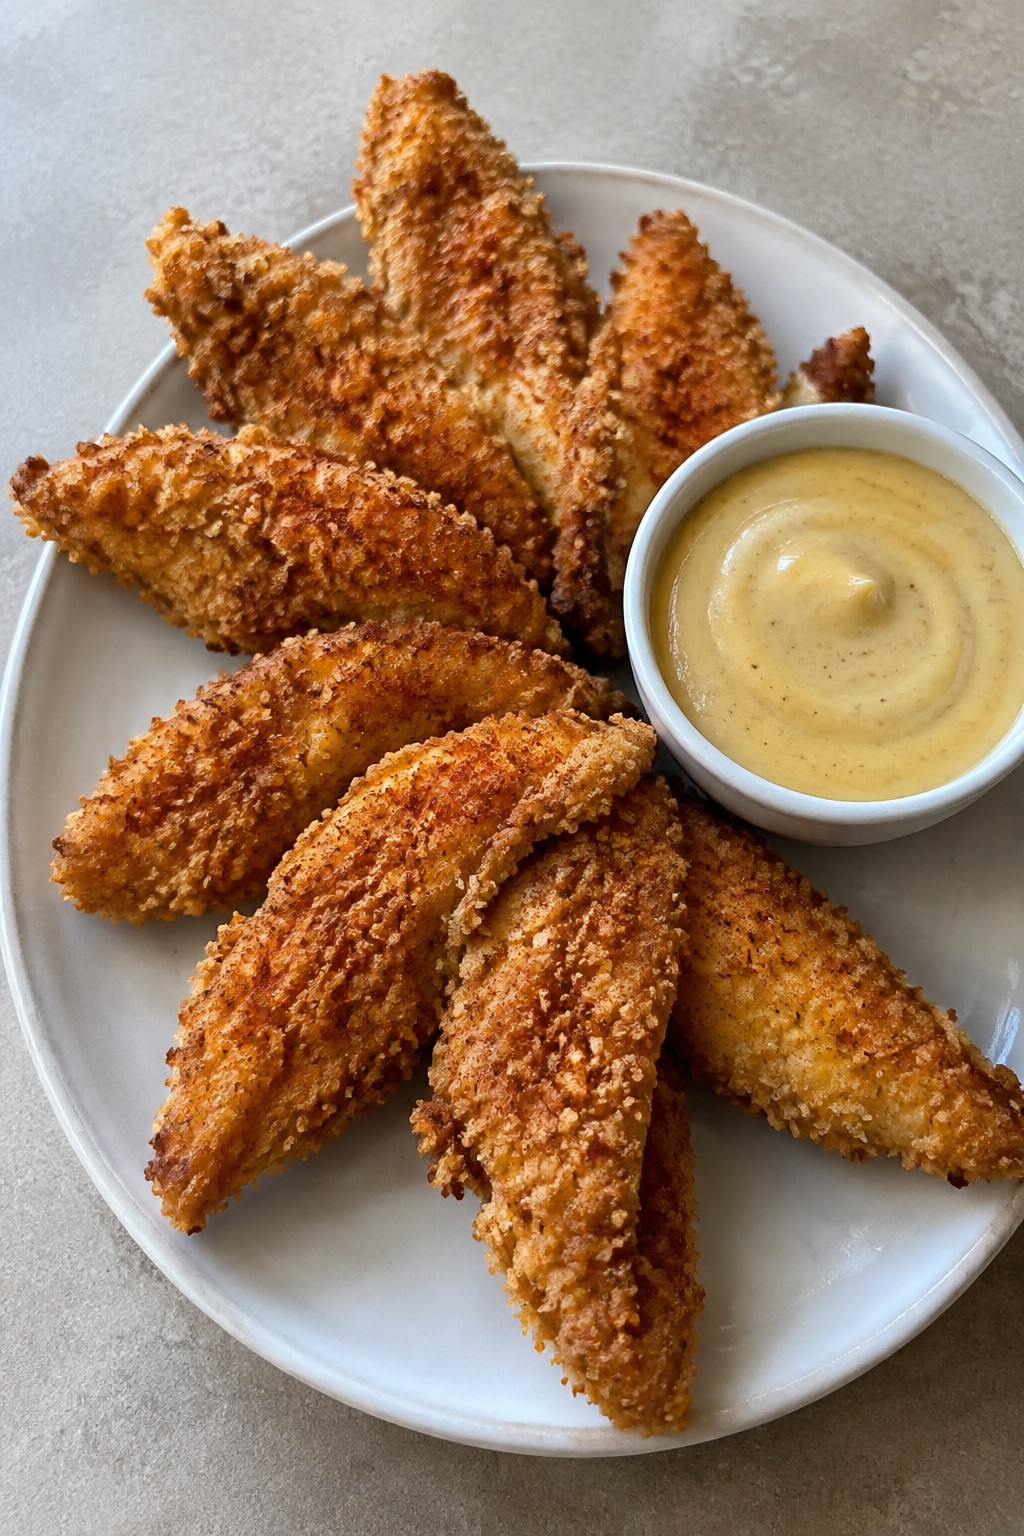
These chicken tenders get their name from the way they are arranged on the platter to look like bat wings. Kids enjoy the crispy coating and the sweet honey mustard dip that comes with them. The recipe travels well to potluck events and holds up on a buffet table.
The tenders stay crunchy even after sitting for a while, and the dipping sauce balances the savory breading with a mild tang. It is a simple dish that feels festive without extra steps.
Serves 4 people.
Ingredients
- 1 pound chicken tenders
- 1 cup all-purpose flour
- 2 large eggs
- 1 cup panko breadcrumbs
- 1 teaspoon paprika
- 1/2 teaspoon salt
- 1/4 teaspoon black pepper
- 1/4 cup mayonnaise
- 2 tablespoons Dijon mustard
- 2 tablespoons honey
- Vegetable oil for frying
Instructions
- Set up three shallow bowls. Place the flour in the first, beat the eggs in the second, and mix the panko breadcrumbs with paprika, salt, and black pepper in the third.
- Pat the chicken tenders dry. Dredge each one in flour, dip in egg, then coat with the seasoned breadcrumbs. Set the breaded tenders on a plate.
- Heat 1/2 inch of vegetable oil in a large skillet over medium heat. Fry the tenders in batches until golden and cooked through, about 3 to 4 minutes per side. Drain on paper towels.
- Stir the mayonnaise, Dijon mustard, and honey together in a small bowl until smooth.
- Arrange the hot tenders on a platter in two curved rows to form bat wings. Serve the honey mustard in a bowl on the side for dipping.
Extra Tips
Fry the tenders just before leaving for the potluck and pack them in a single layer so they stay crisp. If you need to make them ahead, reheat on a baking sheet at 375 degrees for five minutes right before serving. The honey mustard can be mixed the night before and kept in the fridge.Course: Appetizer Cuisine: American Equipment: Large skillet, Three mixing bowls, Whisk
Skeleton Bone Breadsticks with Marinara
These breadsticks give kids a fun way to join in at a Halloween potluck. They come together quickly with store-bought dough and turn into a shareable snack that travels well in a covered tray. The finished sticks bake up golden with a light garlic flavor and a crisp edge that stays tender inside.
The marinara on the side adds a simple dip that balances the savory bread. Kids often enjoy helping twist the dough into bone shapes before baking.
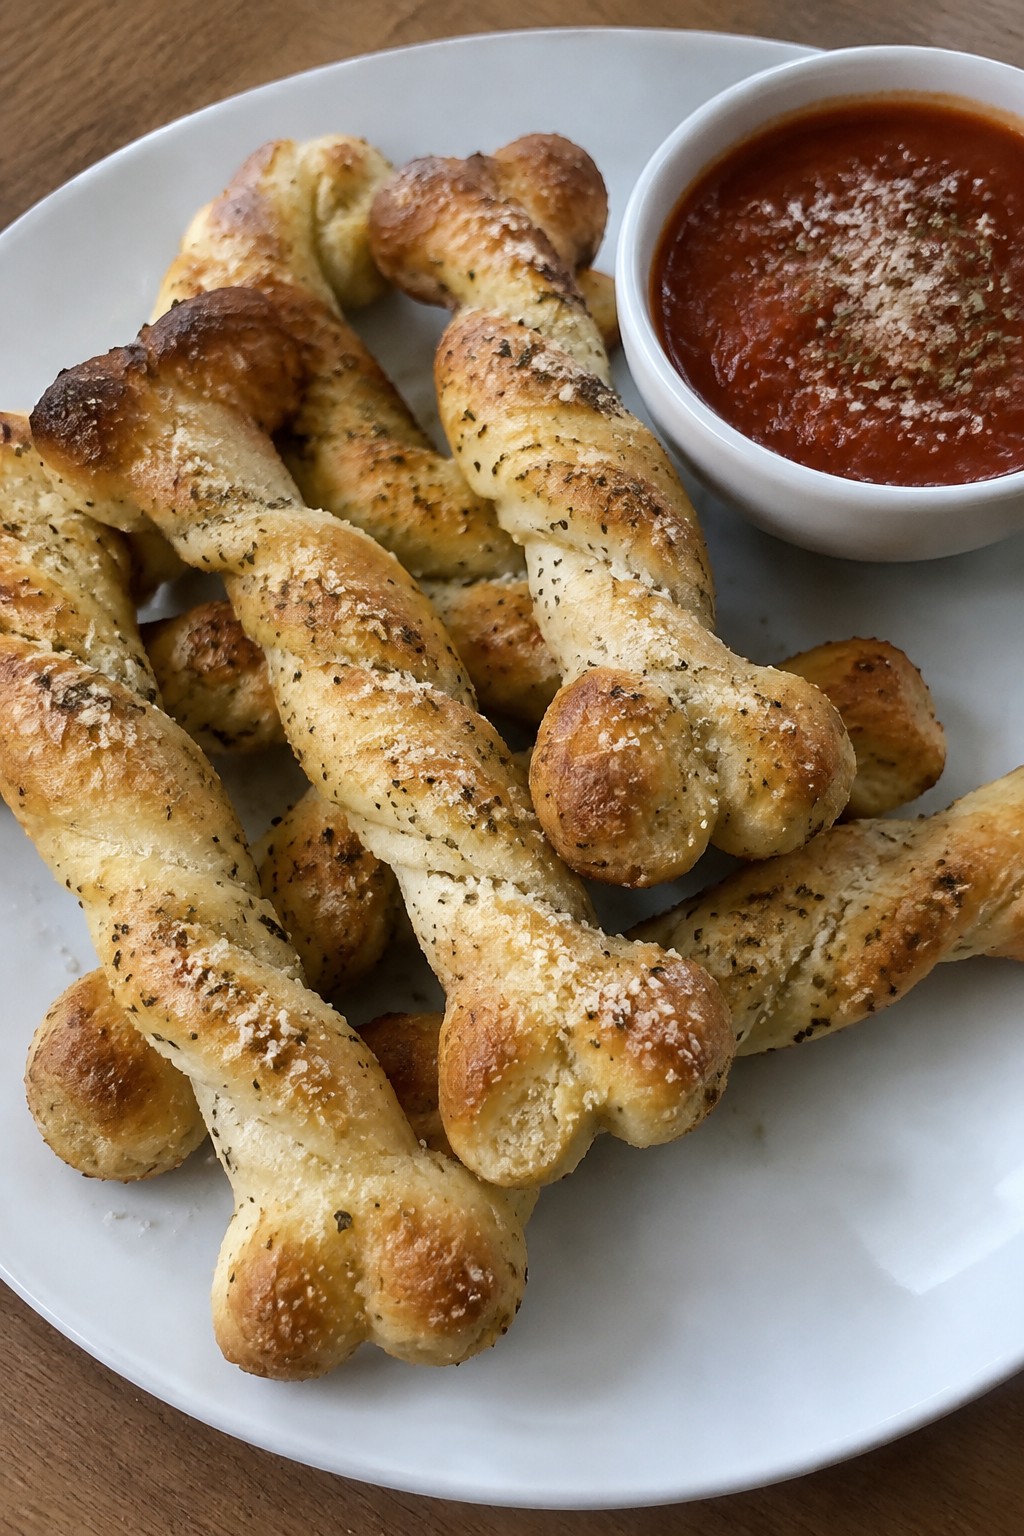
Serves 4 people.
Ingredients
- 1 (13.8-ounce) tube refrigerated pizza dough
- 2 tablespoons olive oil
- 1 teaspoon garlic powder
- 1/4 cup grated Parmesan cheese
- 1 cup marinara sauce
Instructions
- Heat the oven to 400 degrees and line a baking sheet with parchment paper.
- Unroll the pizza dough on a lightly floured surface and press it into a rectangle about 10 by 12 inches.
- Cut the dough into 8 long strips. Roll each strip into a rope roughly 8 inches long.
- Tie a loose knot at both ends of each rope to create the bone shape, then place the shaped pieces on the baking sheet.
- Brush the tops with olive oil and sprinkle evenly with garlic powder and Parmesan cheese.
- Bake for 12 to 15 minutes until the breadsticks are golden brown.
- Warm the marinara sauce and serve it alongside the breadsticks for dipping.
Extra Tips
Shape the knots gently so the dough does not tear. For a make-ahead option, form the bones, cover the tray, and refrigerate up to four hours before baking. Leftovers keep in an airtight container at room temperature for one day and reheat well in a 300-degree oven for five minutes.Course: Appetizer Cuisine: Italian Equipment: Baking sheet, Rolling pin, Pastry brush
Candy Corn Fruit and Yogurt Parfaits
These parfaits copy the bright stripes of candy corn with layers of fruit and yogurt. They make an easy addition to a kids’ Halloween potluck because they need no baking and travel well in individual cups. The mix of sweet pineapple, juicy oranges, and creamy yogurt gives a light texture that feels like a treat without being heavy.
The colors stay distinct when you build the layers in clear glasses, so the candy corn look stays visible on the table. Kids can grab one and eat it with a spoon, and the portion size works for small hands.
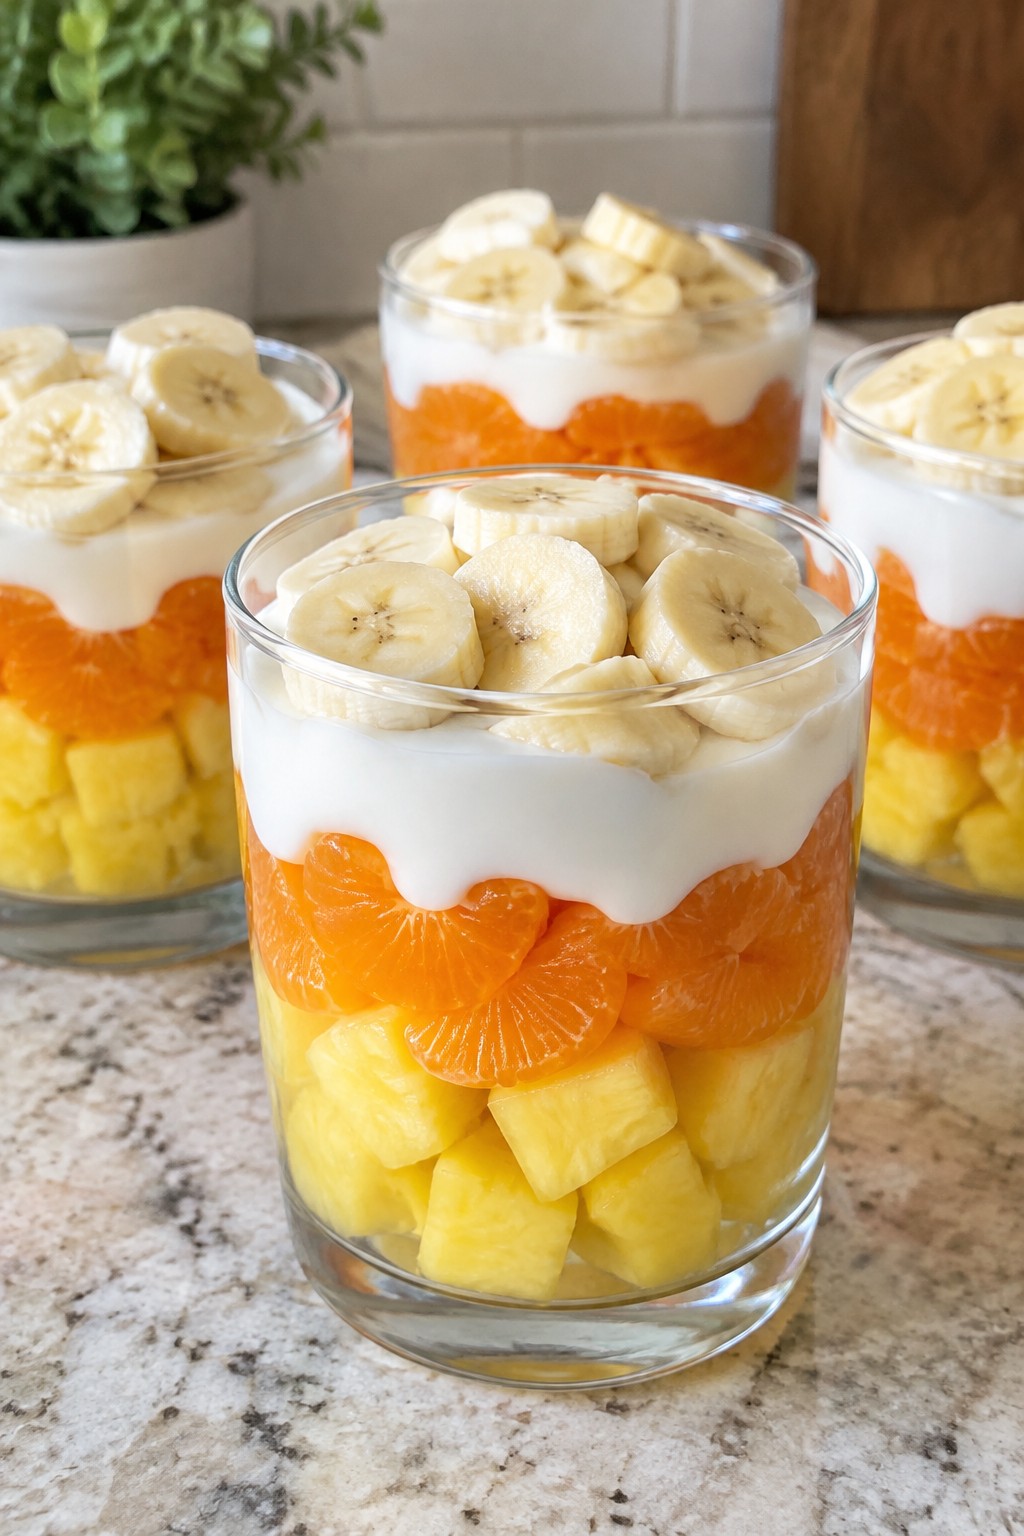
Serves 4 people.
Ingredients
- 2 cups vanilla yogurt
- 1 cup pineapple chunks
- 1 cup mandarin orange segments
- 1 banana, sliced
Instructions
- Place 1/4 cup pineapple chunks in the bottom of each of four clear glasses to form the yellow base layer.
- Spoon 1/4 cup vanilla yogurt over the pineapple in each glass and spread it gently to cover the fruit.
- Add 1/4 cup mandarin orange segments on top of the yogurt in each glass to create the orange middle layer.
- Add another 1/4 cup vanilla yogurt to each glass, smoothing the surface.
- Finish each parfait with a few banana slices arranged on the top yogurt layer.
Extra Tips
Use clear plastic cups for potluck so the layers show through and stay neat during transport. If the yogurt seems too thick, stir in a teaspoon of milk per cup before layering. Assemble the parfaits no more than two hours ahead to keep the banana slices from browning.Course: Dessert Cuisine: American Equipment: Clear Glasses, Measuring Cups, Spoon
Frankenstein Avocado Toast Bites
These Frankenstein Avocado Toast Bites turn simple avocado toast into a fun Halloween snack that fits right in at a kids’ potluck. The green mash gives each piece a monster look, and the faces come together with a few easy toppings that children recognize right away.
The result is a mix of creamy avocado and crunchy toast that travels well and holds up on a shared table. Kids can grab one or two without needing utensils, and the mild flavors keep everyone happy.
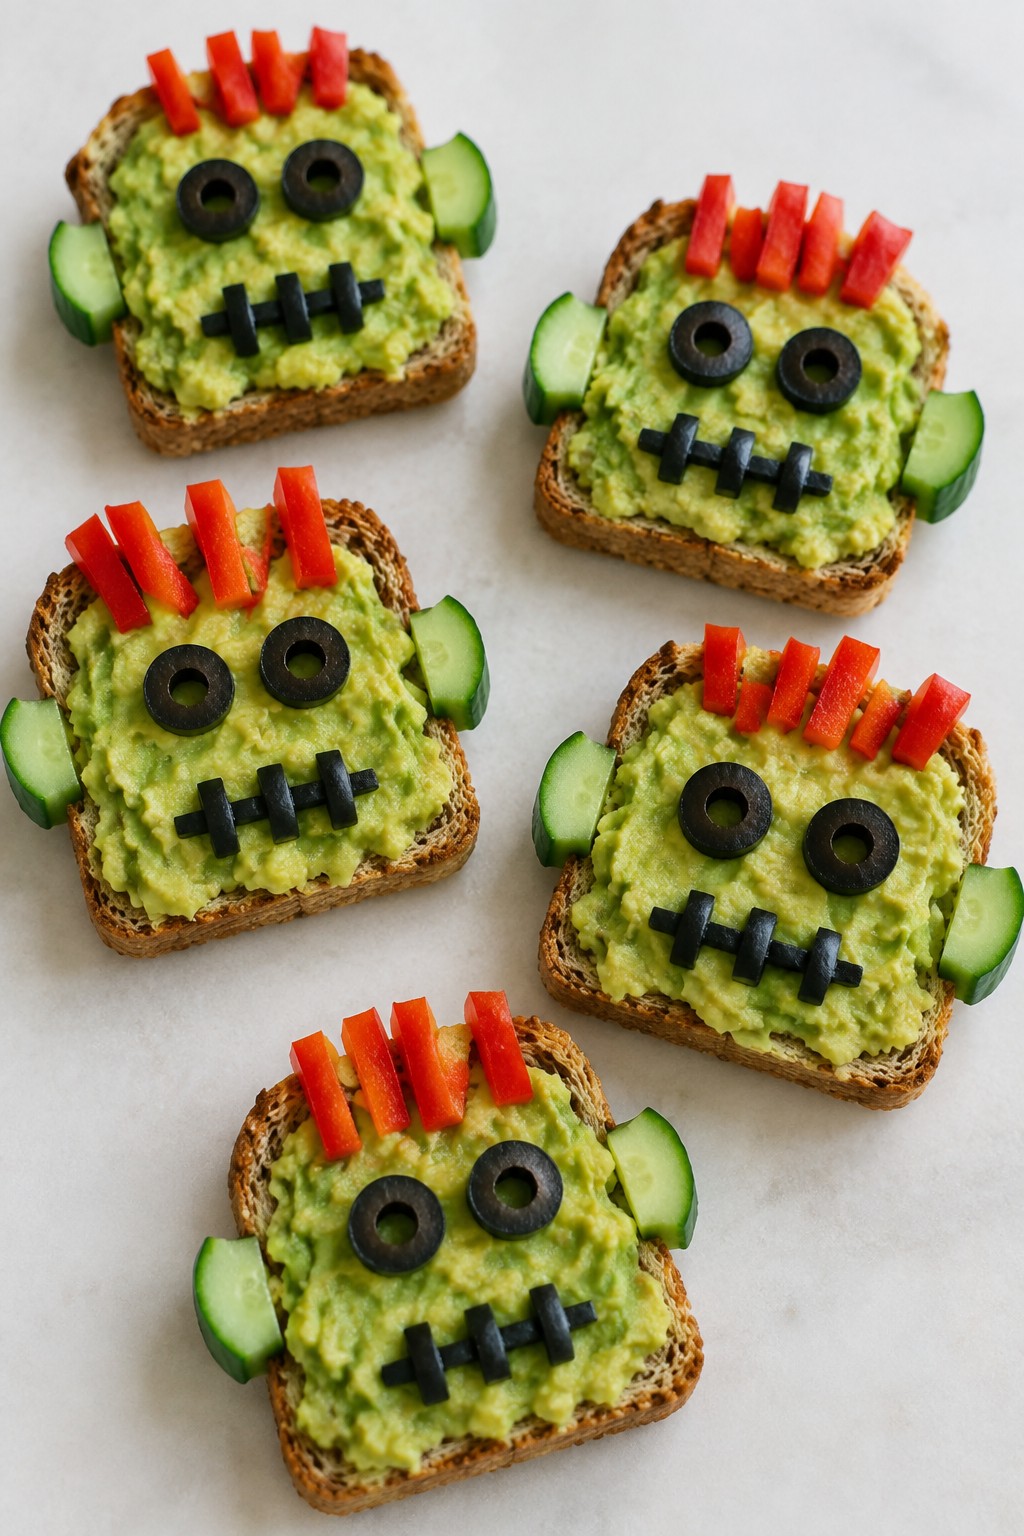
Serves 4 people.
Ingredients
- 4 slices whole wheat bread
- 2 ripe avocados
- 1 tablespoon lemon juice
- 1/4 teaspoon salt
- 8 black olives, pitted
- 4 thin cucumber slices
- 1 red bell pepper, cut into thin strips
Instructions
- Toast the 4 slices of bread until golden and crisp.
- Place the avocados in a mixing bowl and mash them with the lemon juice and salt until mostly smooth.
- Spread the mashed avocado evenly across each slice of toast.
- Cut each toast slice in half to make 8 rectangular bites.
- Press two black olive halves onto each bite to form eyes.
- Add one cucumber slice to the side of each bite to create the neck bolts.
- Lay one thin red pepper strip across the top of each bite for the scar.
Extra Tips
Mash the avocado right before spreading so it stays bright green. Toast the bread ahead of time and keep it separate until serving to avoid sogginess. If the red pepper feels too strong for some kids, leave the strips off and rely on the olives and cucumber for the face details.
Course: Appetizer Cuisine: American Equipment: Toaster, Mixing Bowl, KnifeBlack Cat Chocolate Rice Krispie Treats
These treats bring a fun Halloween twist to a classic no-bake snack. Kids enjoy the chocolate flavor and the chance to spot the cat faces at a potluck table. The result is a chewy, crispy bite with a rich chocolate taste that holds up well when served at room temperature.
The black color comes from cocoa and food coloring mixed into the marshmallow base. Each treat is shaped by hand and finished with simple candy features so they look like small black cats without much extra work.

Serves 4 people.
Ingredients
- 3 tablespoons unsalted butter
- 4 cups mini marshmallows
- 1/2 cup semi-sweet chocolate chips
- 1/2 teaspoon black gel food coloring
- 4 cups Rice Krispies cereal
- 8 candy eyes
- 4 thin black licorice strings, cut into 12 short pieces
Instructions
- Melt the butter in a large pot over low heat. Add the mini marshmallows and stir until fully melted and smooth.
- Stir in the chocolate chips until they melt completely into the marshmallow mixture. Add the black gel food coloring and mix until the color is even.
- Remove the pot from heat. Pour in the Rice Krispies cereal and stir quickly until every piece is coated.
- Let the mixture cool for two minutes until it is safe to handle but still pliable. Divide into four equal portions and shape each into a rounded cat head on a sheet of parchment paper.
- Press two candy eyes onto each cat head while the treats are still soft. Insert three licorice pieces on each side to form whiskers.
Extra Tips
Press the candy eyes and licorice in right after shaping so they stick without extra icing. If the mixture firms up too quickly, warm your hands slightly under water to make shaping easier. Store any leftovers in a single layer in an airtight container at room temperature for up to two days.Course: Dessert Cuisine: American Equipment: Large pot, Wooden spoon, Parchment paper
Haunted Haystack Chex Mix with Candy Corn
This snack mix brings a sweet and crunchy option to a kids Halloween potluck. The combination of cereal and pretzels creates light clusters that resemble haystacks, while candy corn adds a festive touch everyone recognizes.
It works well as a make ahead item that travels easily in a large bowl or individual bags. The flavor stays balanced between salty cereal and sweet coating without becoming too heavy.
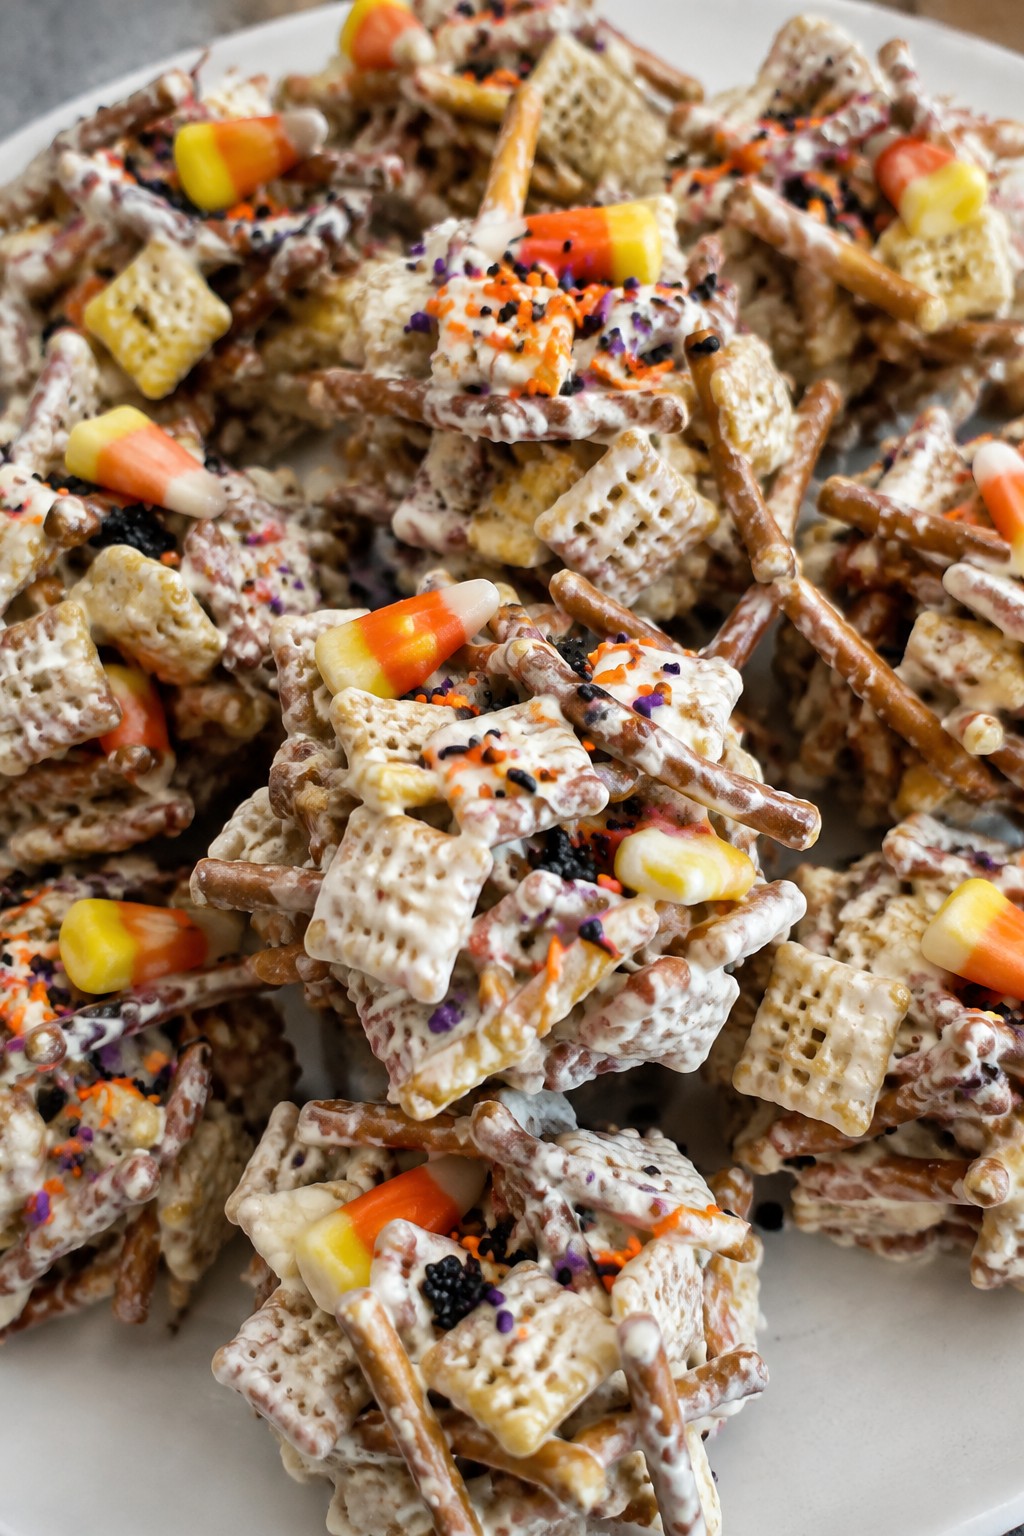
Serves 4 people.
Ingredients
- 4 cups Corn Chex cereal
- 2 cups pretzel sticks
- 1 cup candy corn
- 1 cup white chocolate melts
- 1/4 cup Halloween sprinkles
Instructions
- Place the white chocolate melts in a large microwave safe bowl and heat in 30 second bursts, stirring after each, until fully melted and smooth.
- Add the Corn Chex cereal and pretzel sticks to the bowl. Stir gently until the pieces are evenly coated.
- Spread the coated mixture onto a parchment lined baking sheet in a single layer. Let it sit at room temperature for 20 minutes until the chocolate sets.
- Break the mixture into small clusters. Stir in the candy corn and Halloween sprinkles until evenly distributed.
Extra Tips
Store the mix in an airtight container at room temperature for up to three days to keep the candy corn from softening. If the clusters seem too sticky after setting, add a few extra pretzel sticks before serving to restore crunch. For a nut free version, replace the pretzels with additional cereal.Course: Snack Cuisine: American Equipment: Microwave safe bowl, Baking sheet, Parchment paper
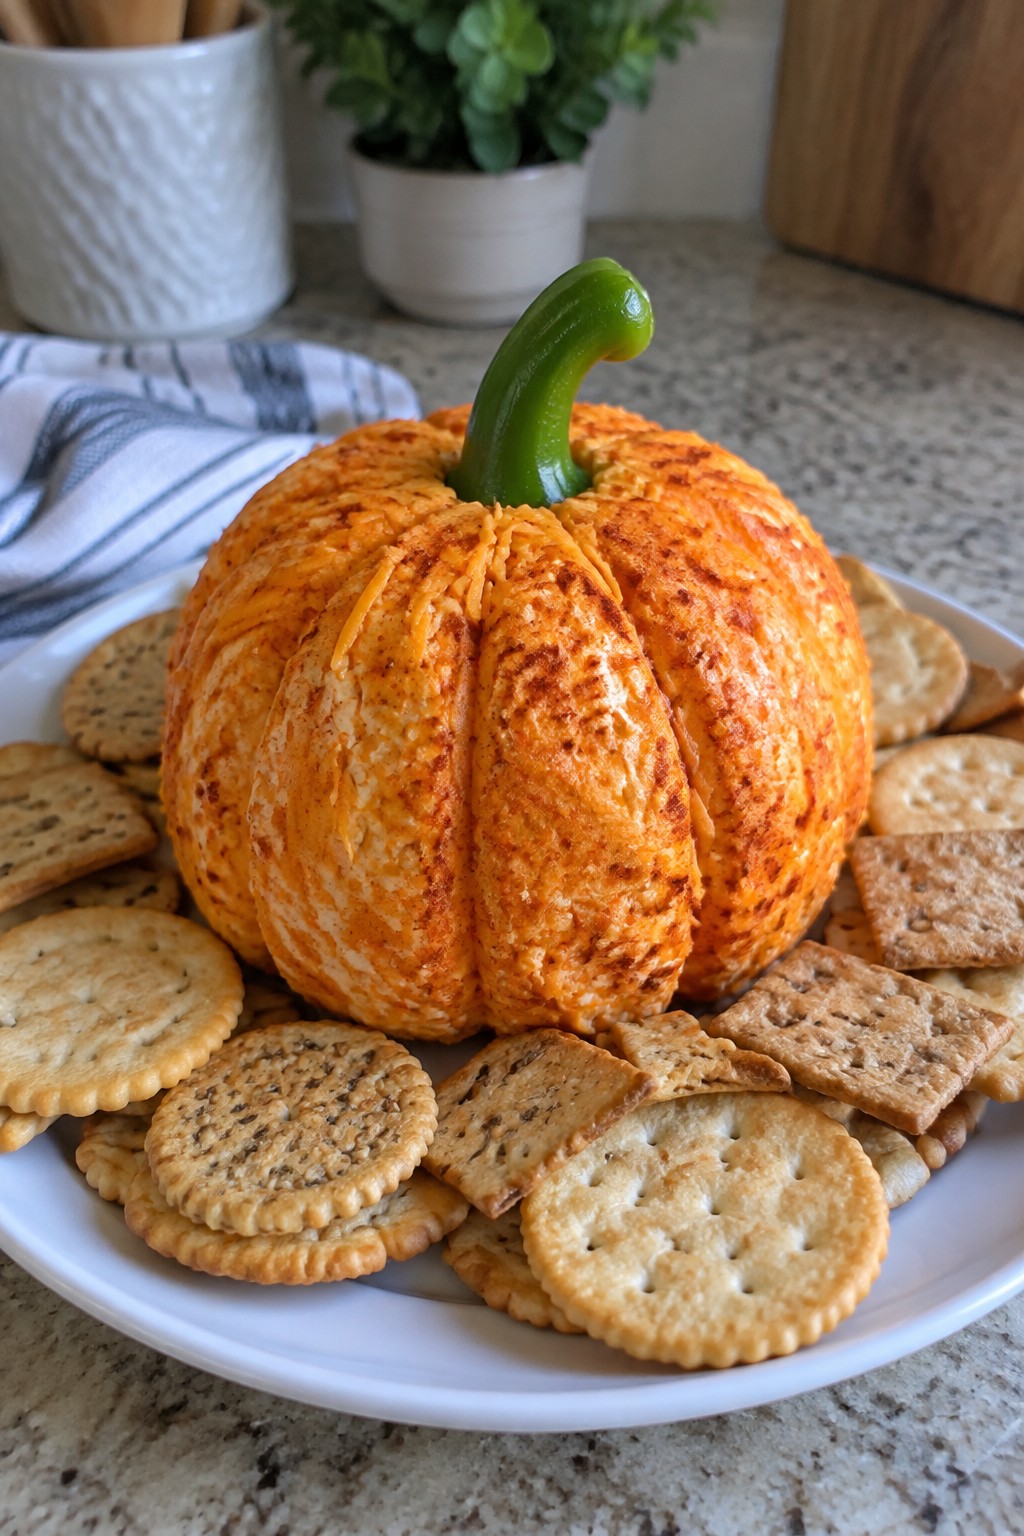
Orange Pumpkin Cheese Ball with Crackers
This cheese ball brings a simple orange pumpkin shape to the table without any complicated steps. Kids enjoy the mild cheesy taste and the way it pairs with crunchy crackers at a potluck. It works well for an afternoon gathering where children can help shape it or pick their own crackers.
The texture stays smooth and spreadable while the paprika adds a light color and gentle flavor. It holds up at room temperature for a couple of hours, making it practical for shared events.
Serves 4 people.
Ingredients
- 8 ounces cream cheese, softened
- 1 1/2 cups shredded cheddar cheese
- 1 teaspoon paprika
- 1/2 teaspoon garlic powder
- 1/4 teaspoon salt
- 1 green bell pepper stem
- 20 to 24 assorted crackers
Instructions
- Place the softened cream cheese in a mixing bowl and beat it until smooth.
- Add the shredded cheddar cheese, paprika, garlic powder, and salt to the bowl. Stir until the mixture is evenly combined and the color turns a consistent orange.
- Scoop the mixture onto a sheet of plastic wrap and shape it into a round ball. Use your hands to form ridges around the sides so it resembles a pumpkin.
- Press the green bell pepper stem into the top center to create the pumpkin stem.
- Wrap the cheese ball and chill it for at least one hour to firm up.
- Arrange the cheese ball on a serving plate and place the crackers around it for easy dipping.
Extra Tips
Chill the cheese ball longer if the kitchen is warm so it keeps its shape during the event. Use a firmer cheddar for easier mixing and a slightly sharper taste. Swap the bell pepper stem for a cucumber slice if you need a milder green accent.Course: Appetizer Cuisine: American Equipment: Mixing bowl, Plastic wrap, Serving plate
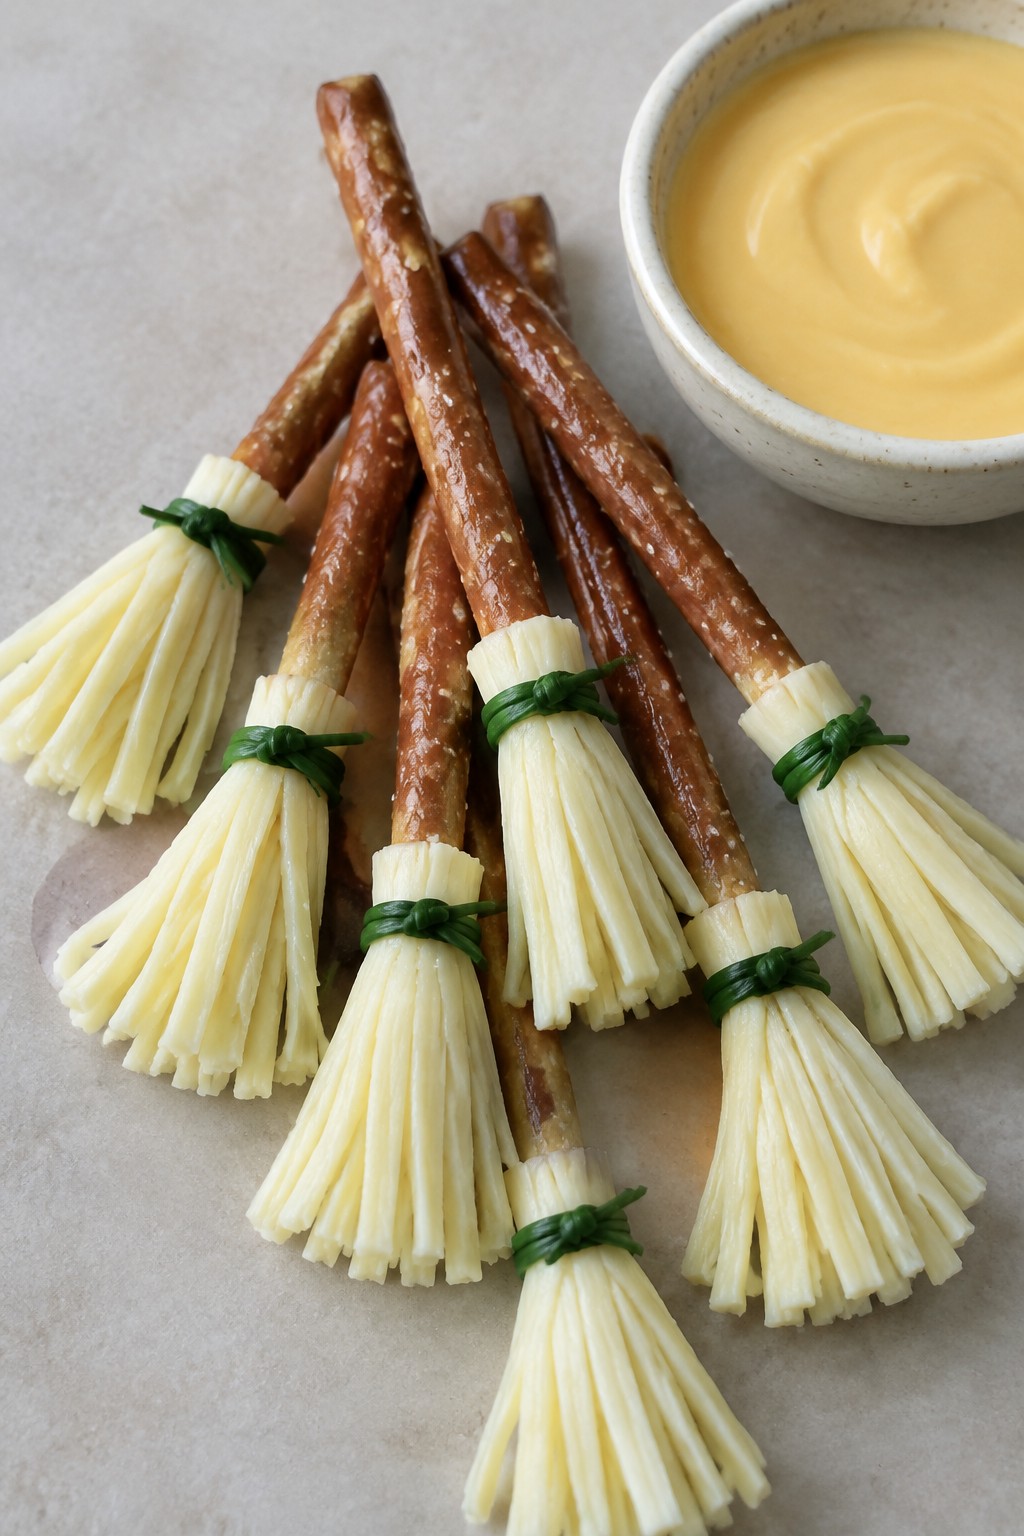
Witch’s Broomstick Pretzel Rods with Cheese Dip
These broomstick pretzels bring a simple, playful touch to a kids’ Halloween potluck. The shape is easy to put together and pairs well with a mild cheese dip that children tend to enjoy. Crunchy pretzels and smooth dip give a nice contrast in each bite.
The recipe works best when prepared a few hours ahead so the broomsticks can set before serving. It travels well in a covered container and needs only a quick warm-up for the dip at the event.
Serves 4 people.
Ingredients
- 12 pretzel rods
- 4 string cheese sticks
- 8 fresh chives
- 2 cups shredded cheddar cheese
- 1 cup milk
- 2 tablespoons butter
- 1 tablespoon all-purpose flour
- 1/2 teaspoon garlic powder
- 1/4 teaspoon salt
Instructions
- Cut each string cheese stick into thin lengthwise strips at one end, leaving the other end intact to form the broom head.
- Press the intact end of each prepared string cheese onto the top of a pretzel rod.
- Wrap one chive around the cheese and pretzel to secure the broom head, then tie gently.
- Place the finished broomsticks on a plate and set aside while you make the dip.
- Melt the butter in a small saucepan over medium heat.
- Whisk in the flour and cook for one minute.
- Slowly pour in the milk while whisking to avoid lumps.
- Add the shredded cheddar cheese, garlic powder, and salt.
- Stir until the cheese melts and the dip thickens, then remove from heat.
- Serve the warm cheese dip alongside the pretzel broomsticks.
Extra Tips
Make the broomsticks first so the chives stay flexible. If the dip thickens too much while sitting, stir in a splash of milk to loosen it before serving. Skip the garlic powder if serving very young children who prefer plain cheese flavor.Course: Appetizer Cuisine: American Equipment: Saucepan, Whisk, Knife
