
Halloween potlucks at work often mean finding recipes that travel well and look a bit special.
These 15 ideas focus on dishes that are straightforward to make ahead of time.
You will see a range of sweet and savory options that use common ingredients.
Each recipe includes simple steps so you can prepare it without much stress.
They are meant to help you bring something that gets noticed at the table.
Helpful Tips Before You Start
A few smart choices help your dish travel well and fit easily into a busy office setting.
Make It Ahead
Pick recipes that improve after sitting overnight. This cuts down on morning stress and lets you focus on transport.
Pack for Travel
Use sturdy containers with tight lids. Bring a cooler bag or ice packs if your dish needs to stay cold on the way.
Add Clear Labels
Include a small card with the name and main ingredients. Note any common allergens so coworkers can choose safely.
Bring Your Own Serving Tools
Pack a serving spoon or tongs along with paper plates or napkins. This keeps the shared table organized and avoids last minute searches.
Spiced Pumpkin Cheesecake Bars with Gingersnap Crust
These bars bring a creamy pumpkin filling over a crisp gingersnap base that travels well to the office. They fit right into a Halloween potluck spread because they look festive without needing any last-minute assembly.
The texture combines a firm spiced crust with a smooth, lightly sweet filling that holds its shape when cut into squares. Spices like cinnamon and ginger give it that warm fall flavor people expect around this time of year.

Serves 4 people.
Ingredients
- 1 cup crushed gingersnap cookies
- 3 tablespoons unsalted butter, melted
- 8 ounces cream cheese, softened
- 1/2 cup pumpkin puree
- 1/4 cup granulated sugar
- 1 large egg
- 1 teaspoon vanilla extract
- 1 teaspoon ground cinnamon
- 1/2 teaspoon ground nutmeg
- 1/4 teaspoon ground ginger
- 1/8 teaspoon ground cloves
Instructions
- Preheat the oven to 350 degrees and line an 8-inch square pan with parchment paper.
- Stir the crushed gingersnap cookies with the melted butter until the crumbs hold together. Press the mixture evenly into the bottom of the prepared pan.
- Beat the cream cheese until smooth. Add the pumpkin puree, sugar, egg, vanilla extract, cinnamon, nutmeg, ground ginger, and cloves. Mix until fully combined and no streaks remain.
- Pour the filling over the crust and spread it into an even layer.
- Bake for 25 to 28 minutes until the center looks set but still has a slight jiggle.
- Cool the pan on a wire rack, then refrigerate for at least two hours before slicing into bars.
Extra Tips
Chill the bars thoroughly before transporting so they stay firm in a shared fridge at work. If you want a stronger ginger note, swap half the gingersnaps for extra-spicy varieties. Leftovers keep in an airtight container in the refrigerator for up to three days.Course: Dessert Cuisine: American Equipment: Mixing Bowl, Electric Mixer, 8-Inch Square Pan, Food Processor
Mummy-Wrapped Italian Sausage Skewers with Roasted Red Pepper Dip
This recipe turns simple Italian sausages into a playful Halloween snack that travels well to the office. The dough strips create a mummy look while adding a flaky layer around the meat. It fits a work potluck because the skewers hold up without much fuss and pair easily with the creamy dip.
The finished dish gives you savory sausage with a crisp outside and a sweet smoky sauce on the side. The contrast between the warm wrapped meat and the cool dip keeps people coming back for another skewer.

Serves 4 people.
Ingredients
- 4 mild Italian sausages
- 1 can refrigerated crescent roll dough
- 8 small wooden skewers
- 2 jarred roasted red peppers, drained
- 1/4 cup mayonnaise
- 1 garlic clove
- 1/4 teaspoon salt
- 1/4 teaspoon black pepper
- 1 tablespoon olive oil
Instructions
- Preheat the oven to 375 degrees. Cook the sausages in a skillet over medium heat until browned and cooked through, about 10 minutes. Let them cool slightly then cut each sausage in half crosswise.
- Unroll the crescent dough and cut it into thin strips. Thread two sausage halves onto each skewer. Wrap the dough strips around the sausages in a crisscross pattern to resemble mummy bandages, leaving small gaps for the face.
- Place the skewers on a baking sheet and brush lightly with olive oil. Bake for 12 to 15 minutes until the dough turns golden.
- While the skewers bake, combine the roasted red peppers, mayonnaise, garlic clove, salt, and black pepper in a blender or food processor. Blend until smooth. Transfer the dip to a small bowl.
- Serve the warm skewers with the roasted red pepper dip on the side.
Extra Tips
Make the dip a day ahead and store it in the fridge so the flavors have time to settle. If the crescent dough feels too sticky to handle, chill it for a few minutes before cutting the strips. For a milder dip, add an extra spoonful of mayonnaise. Leftovers reheat well in a 350 degree oven for five minutes to keep the dough crisp.Course: Appetizer Cuisine: Italian Equipment: Skillet, Baking sheet, Blender or food processor, Wooden skewers
Black Cocoa Brownies with Marshmallow Ghost Toppers
These brownies bring a dark, striking look to any work potluck table while keeping the prep straightforward. The black cocoa gives them a bold color that reads as Halloween without extra dyes or fuss.
The brownies bake up fudgy with a deep chocolate taste. Marshmallow ghosts on top add a soft bite and a playful finish that travels well in a container.

Serves 4 people.
Ingredients
- ½ cup unsalted butter, melted
- ¾ cup granulated sugar
- 2 large eggs
- 1 teaspoon vanilla extract
- ⅓ cup black cocoa powder
- ½ cup all-purpose flour
- ¼ teaspoon salt
- 4 large marshmallows
- 1 tablespoon semisweet chocolate chips
Instructions
- Preheat the oven to 350°F and line a small 8×8 baking pan with parchment paper.
- In a mixing bowl, stir together the melted butter and sugar until smooth.
- Add the eggs and vanilla extract, then mix until fully combined.
- Sift in the black cocoa powder, flour, and salt. Stir until no dry streaks remain and the batter looks glossy.
- Pour the batter into the prepared pan and spread it evenly.
- Bake for 18 to 20 minutes until the center is just set.
- Remove the pan from the oven and immediately press one marshmallow into the center of each planned portion while the brownies are still warm.
- Melt the chocolate chips in a small bowl in the microwave in 15-second bursts, stirring between each.
- Use a toothpick or piping bag to draw simple eyes and a mouth on each marshmallow.
Extra Tips
Place the marshmallows right after baking so they soften and stick without sliding. If the chocolate for faces sets too quickly, rewarm it briefly. Store leftovers in an airtight container at room temperature for up to two days to keep the marshmallows from drying out.Course: Dessert Cuisine: American Equipment: Mixing Bowl, Baking Pan, Oven
Spinach Artichoke Dip Served in a Sourdough Cauldron Bowl
This recipe turns a classic creamy dip into a fun potluck centerpiece. The sourdough loaf acts as both the serving bowl and an edible vessel that soaks up the warm filling. It travels well to the office and holds up during a long lunch spread.
The dip itself is rich and cheesy with tender spinach and artichoke pieces throughout. Baking it inside the bread creates a crisp crust on the outside while the inside stays soft and flavorful.

Serves 4 people.
Ingredients
- 1 large round sourdough bread boule
- 8 ounces cream cheese, softened
- 1/2 cup sour cream
- 1/2 cup mayonnaise
- 1 cup shredded mozzarella cheese
- 1/2 cup grated Parmesan cheese
- 10 ounces frozen chopped spinach, thawed and squeezed dry
- 1 (14-ounce) can artichoke hearts, drained and chopped
- 2 cloves garlic, minced
- 1/2 teaspoon salt
- 1/4 teaspoon black pepper
Instructions
- Preheat the oven to 375 degrees. Slice the top off the sourdough boule and hollow out the center, leaving a 1-inch border around the sides and bottom to create a sturdy bowl. Set the bread pieces aside for dipping later.
- In a mixing bowl, combine the softened cream cheese, sour cream, and mayonnaise until smooth. Stir in the mozzarella, Parmesan, spinach, artichoke hearts, garlic, salt, and pepper until everything is evenly mixed.
- Spoon the dip mixture into the hollowed sourdough bowl, filling it to the top. Place the filled bread on a baking sheet.
- Bake for 25 to 30 minutes until the dip is hot and bubbly and the cheese on top begins to brown slightly. Remove from the oven and let it cool for 5 minutes before serving.
Extra Tips
Keep the bread lid nearby during baking so you can replace it if the top browns too quickly. The dip firms up as it cools, so serve it while still warm for the best texture. Leftovers reheat well in a 350-degree oven for 10 minutes. You can prepare the filling the night before and store it in the fridge, then assemble and bake just before heading to work.Course: Appetizer Cuisine: American Equipment: Mixing bowl, Baking sheet, Knife
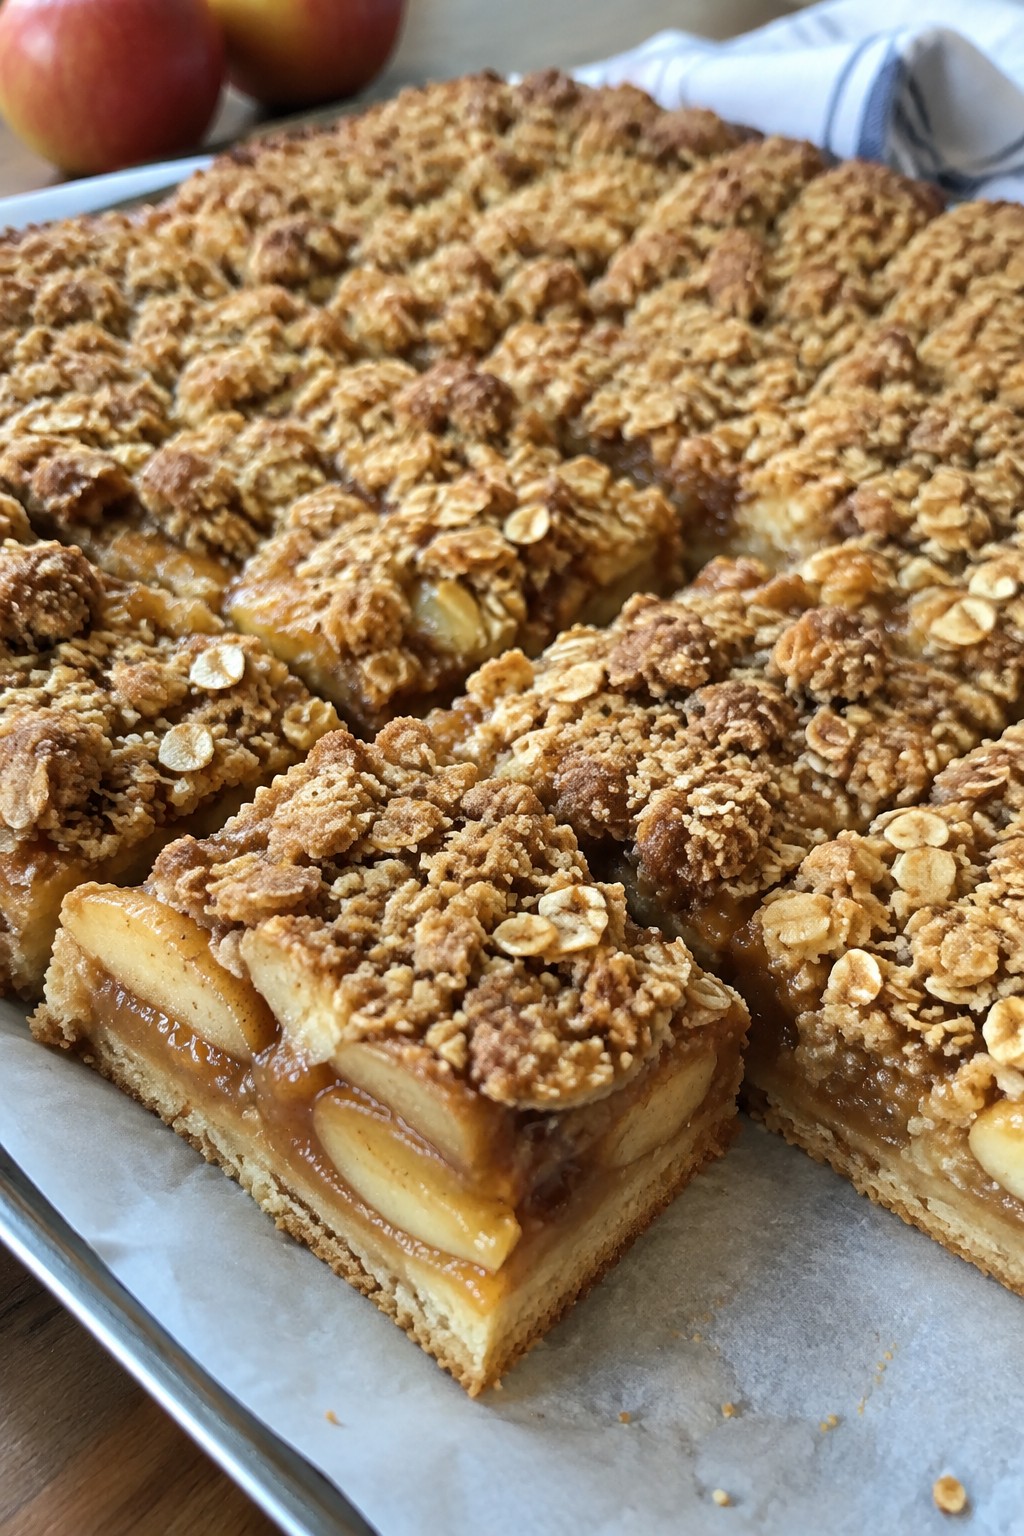
Caramel Apple Crumble Slab Pie with Oat Streusel
This slab pie combines soft cinnamon-spiced apples with gooey caramel and a crisp oat topping over a buttery crust. It travels well to the office and cuts into neat squares for easy sharing at a potluck.
The result offers a balance of tart fruit, sweet caramel, and crunchy streusel that feels festive without extra decoration. It works as a reliable dessert option that holds up at room temperature for several hours.
Serves 4 people.
Ingredients
- 1 refrigerated pie crust
- 4 medium apples, peeled, cored, and sliced
- 1/2 cup caramel sauce, divided
- 3/4 cup rolled oats
- 1/2 cup all-purpose flour
- 1/4 cup brown sugar
- 1/4 cup unsalted butter, melted
- 1 teaspoon ground cinnamon
- 1/4 teaspoon salt
Instructions
- Preheat the oven to 375°F. Unroll the pie crust and press it into an 8×8-inch baking pan, trimming any overhang.
- In a large bowl, toss the sliced apples with 1/4 cup caramel sauce and the cinnamon until evenly coated.
- Spread the apple mixture over the crust in an even layer.
- In a medium bowl, stir together the oats, flour, brown sugar, melted butter, and salt until the mixture forms clumps.
- Sprinkle the oat streusel evenly over the apples.
- Bake for 35 to 40 minutes until the topping is golden and the apples are tender when pierced with a knife.
- Remove from the oven and drizzle the remaining 1/4 cup caramel sauce over the top while still warm. Let cool at least 20 minutes before slicing.
Extra Tips
Use a mix of tart and sweet apples to keep the filling from becoming too one-note. The pie can be baked the night before and left at room temperature, covered loosely with foil. Warm individual slices briefly in the microwave if you want to restore a bit of gooey texture to the caramel before serving.Course: Dessert Cuisine: American Equipment: 8×8-inch baking pan, Mixing bowls, Oven
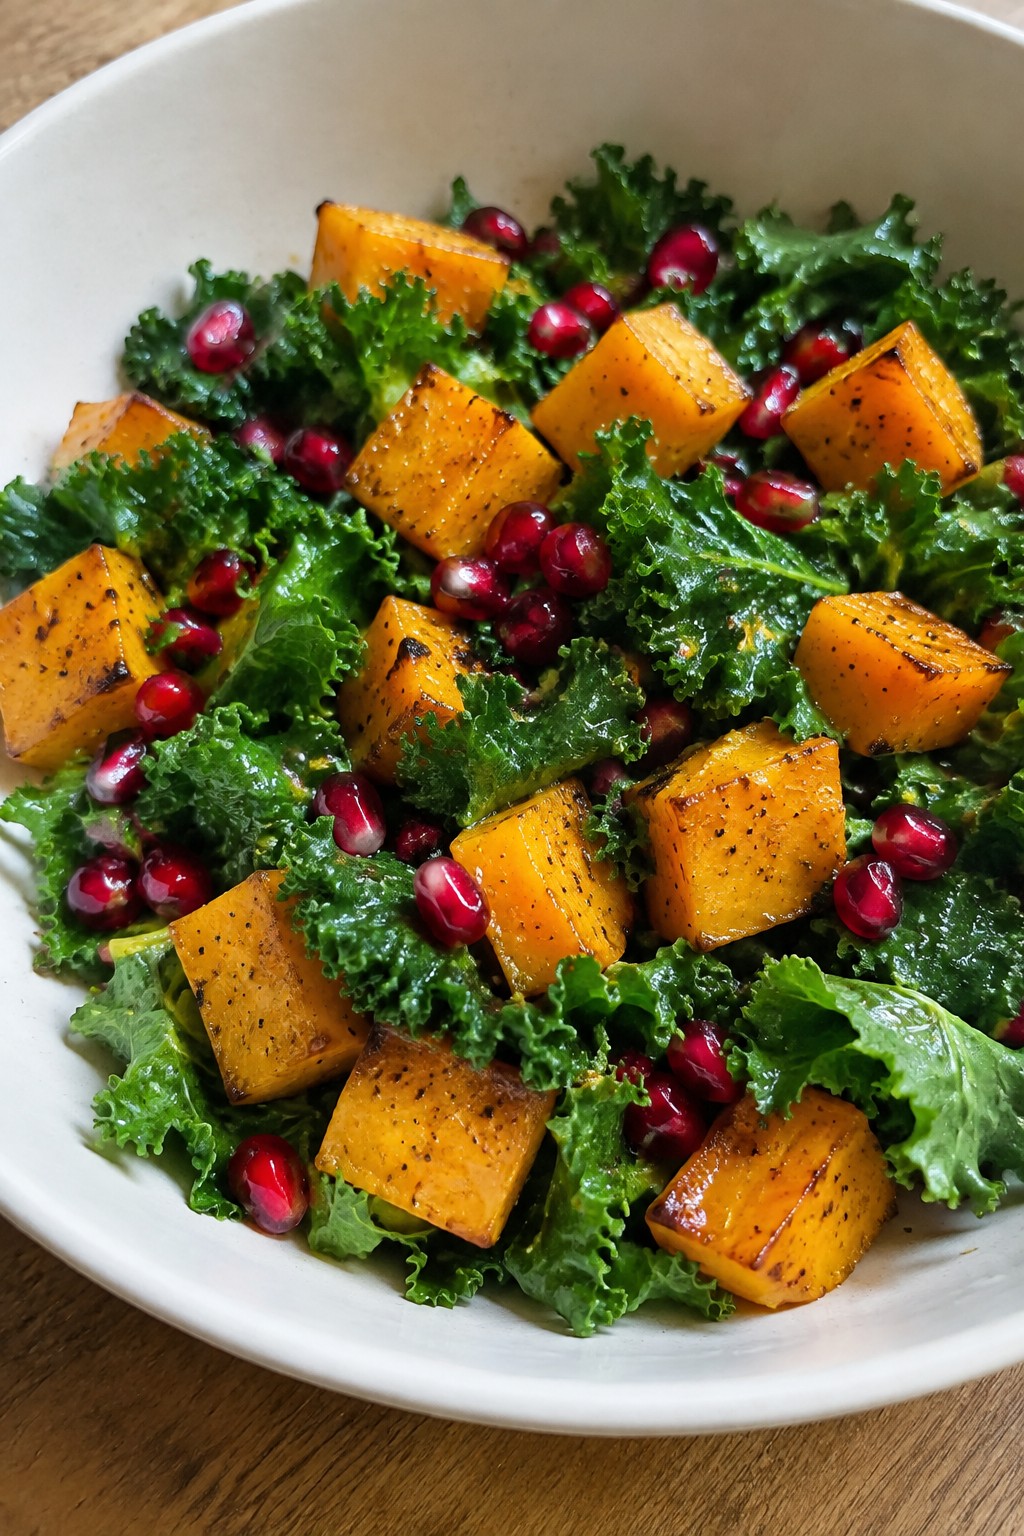
Roasted Butternut Squash and Kale Salad with Pomegranate Seeds
This salad brings bright color and hearty texture to a work potluck. The roasted squash turns sweet and tender while the kale stays fresh with a light dressing. Pomegranate seeds add a pop of tartness that feels festive without any extra effort.
It works well for office gatherings because it holds up at room temperature and travels easily in one container. The mix of sweet, earthy, and tangy flavors appeals to most people and stands out next to heavier dishes.
Serves 4 people.
Ingredients
- 1 medium butternut squash, peeled, seeded, and cut into 1-inch cubes
- 3 tablespoons olive oil, divided
- 1/2 teaspoon salt, divided
- 1/4 teaspoon black pepper
- 1 large bunch kale, stems removed and leaves torn into bite-size pieces
- 1 cup pomegranate seeds
- 1 tablespoon lemon juice
Instructions
- Preheat the oven to 400 degrees. Toss the cubed butternut squash with 2 tablespoons olive oil, 1/4 teaspoon salt, and the black pepper on a baking sheet.
- Spread the squash in a single layer and roast for 25 to 30 minutes until the edges turn golden and the pieces soften.
- While the squash roasts, place the kale in a large bowl. Add the remaining 1 tablespoon olive oil and the remaining 1/4 teaspoon salt. Massage the leaves with your hands for 1 to 2 minutes until they darken and soften slightly.
- Add the roasted squash and pomegranate seeds to the kale. Drizzle with lemon juice and toss gently to combine.
Extra Tips
Roast the squash the night before and store it in the fridge so assembly takes just a few minutes the next morning. If the kale feels too firm, give it an extra minute of massaging before adding the other ingredients. Skip the lemon juice if you prefer a milder flavor, or add it right before serving to keep the greens bright.Course: Salad Cuisine: American Equipment: Baking sheet, Large mixing bowl, Knife
White Chocolate Covered Strawberry Ghosts on a Stick
These strawberry ghosts bring a light and playful touch to any work potluck spread. They travel well in a single layer and need no reheating, so they stay neat on a shared table. The white chocolate shell sets firm around juicy berries, giving a sweet snap that pairs with the fresh fruit inside.

Serves 4 people.
Ingredients
- 8 large strawberries
- 8 popsicle sticks
- 12 ounces white chocolate chips
- 1 tablespoon coconut oil
- 1 ounce dark chocolate chips
Instructions
- Rinse the strawberries and pat them dry completely. Insert one popsicle stick into the top of each strawberry where the stem was.
- Place the white chocolate chips and coconut oil in a microwave-safe bowl. Heat in 30-second bursts, stirring between each, until the mixture is smooth.
- Dip each strawberry into the melted white chocolate, turning to coat evenly and letting excess drip off. Set the coated strawberries on a parchment-lined tray.
- Melt the dark chocolate chips in a small bowl using the same short-burst method. Spoon the melted dark chocolate into a zip-top bag, snip a tiny corner, and pipe simple eyes and a mouth on each white-coated strawberry.
- Chill the tray for 20 minutes until the chocolate is fully set. Transfer the ghosts to a serving plate or container for transport.
Extra Tips
Keep the strawberries at room temperature before dipping so condensation does not form under the chocolate. If the white chocolate thickens while you work, warm it for 10 seconds and stir in a drop more coconut oil. Store finished ghosts in a single layer in the fridge and bring them out 15 minutes before serving so the coating softens slightly.
Course: Dessert Cuisine: American Equipment: Microwave-safe bowls, Parchment-lined baking sheet, Popsicle sticksMini Pumpkin and Ricotta Tartlets with Sage Brown Butter
These mini tartlets bring together creamy pumpkin and ricotta in a crisp shell, finished with a drizzle of nutty sage brown butter. They travel well for office potlucks and look polished without requiring advanced skills. The filling stays smooth while the brown butter adds a savory, autumn note that feels seasonal but not overly sweet.
They work best when served at room temperature, so coworkers can grab one easily during a shared lunch or meeting. The contrast of flaky pastry, soft filling, and fragrant butter makes each bite balanced and satisfying.

Serves 4 people.
Ingredients
- 12 store-bought mini tart shells
- 1 cup canned pumpkin puree
- ¾ cup ricotta cheese
- ½ teaspoon ground nutmeg
- ½ teaspoon salt
- ¼ teaspoon black pepper
- 4 tablespoons unsalted butter
- 8 fresh sage leaves, thinly sliced
Instructions
- Preheat the oven to 350°F. Place the mini tart shells on a baking sheet and bake for 8 minutes until lightly golden. Let them cool on the sheet.
- In a mixing bowl, combine the pumpkin puree, ricotta cheese, nutmeg, salt, and black pepper. Stir until the mixture is smooth and uniform.
- Spoon the filling into the cooled tart shells, filling each one nearly to the top. Smooth the surface with the back of a spoon.
- Melt the butter in a small skillet over medium heat. Add the sliced sage leaves and cook, stirring often, until the butter turns golden brown and the sage becomes crisp, about 3 to 4 minutes. Remove from heat right away.
- Spoon or drizzle the sage brown butter over the filled tartlets just before serving.
Extra Tips
Make the filling and brown butter the night before, then assemble the tartlets at work or right before the potluck so the shells stay crisp. If the brown butter cools too much, warm it gently over low heat for a few seconds before drizzling. Skip extra salt if your ricotta is already salty.Course: Appetizer Cuisine: American Equipment: Baking sheet, Mixing bowl, Small skillet
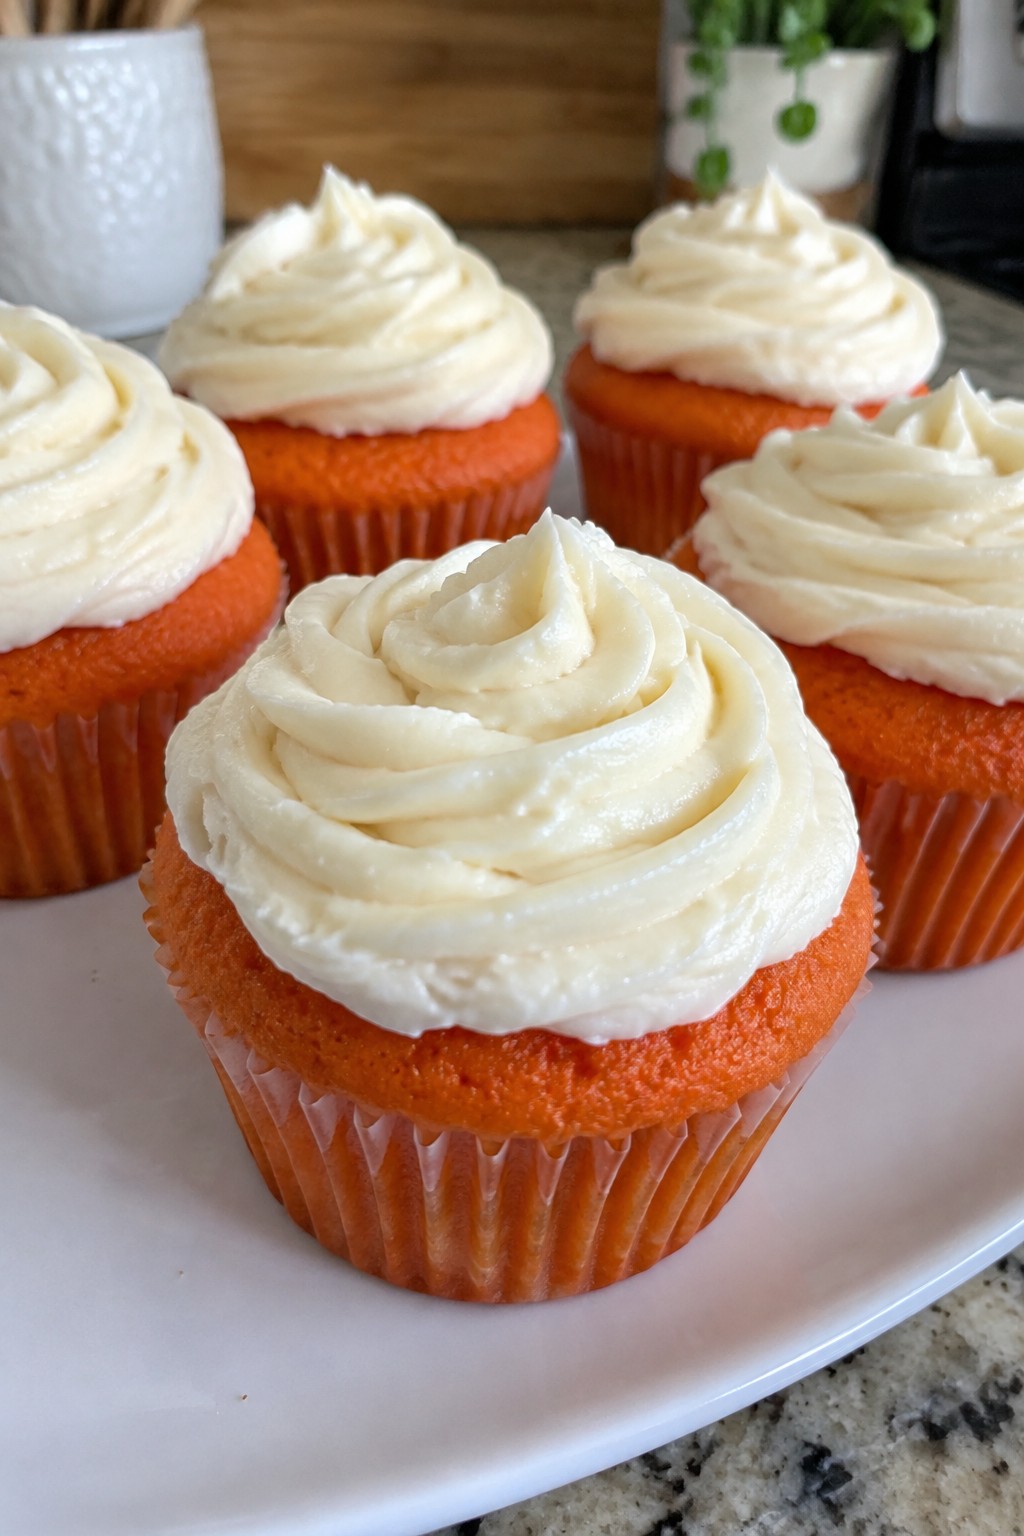
Orange Velvet Cupcakes with Cream Cheese Frosting
These orange velvet cupcakes bring a bright citrus twist to the classic velvet texture. They work well for office potlucks because they travel easily and look festive without much extra effort. The crumb stays soft while the cream cheese frosting adds a tangy finish that balances the orange flavor.
The cupcakes use a small amount of cocoa for depth and orange zest plus extract for clear citrus notes. The frosting stays thick enough to pipe or spread neatly on top.
Serves 4 people.
Ingredients
- ½ cup all-purpose flour
- ¼ cup granulated sugar
- 1 tablespoon unsweetened cocoa powder
- ¼ teaspoon baking soda
- Pinch of salt
- ¼ cup buttermilk
- 1 large egg
- 2 tablespoons vegetable oil
- 1 teaspoon orange zest
- ½ teaspoon orange extract
- 4 drops orange food coloring
- 4 ounces cream cheese, softened
- 2 tablespoons unsalted butter, softened
- ½ cup powdered sugar
- ½ teaspoon vanilla extract
Instructions
- Preheat the oven to 350°F and line a cupcake pan with 4 paper liners.
- In a medium bowl, whisk together the flour, sugar, cocoa powder, baking soda, and salt.
- In a separate bowl, mix the buttermilk, egg, vegetable oil, orange zest, orange extract, and orange food coloring until smooth.
- Pour the wet mixture into the dry ingredients and stir until just combined with no large streaks of flour.
- Divide the batter evenly among the 4 liners and bake for 18 minutes or until a toothpick comes out clean.
- Let the cupcakes cool completely in the pan before removing.
- In a clean bowl, beat the cream cheese and butter together until creamy.
- Add the powdered sugar and vanilla extract, then beat until the frosting is smooth and spreadable.
- Spread or pipe the frosting onto the cooled cupcakes.
Extra Tips
Use room-temperature cream cheese so the frosting stays lump-free. If the orange flavor tastes mild after baking, add an extra pinch of zest to the frosting instead of more extract. Store leftovers in a single layer in an airtight container in the fridge for up to two days.Course: Dessert Cuisine: American Equipment: Mixing bowls, Cupcake pan, Whisk, Electric mixer, Oven
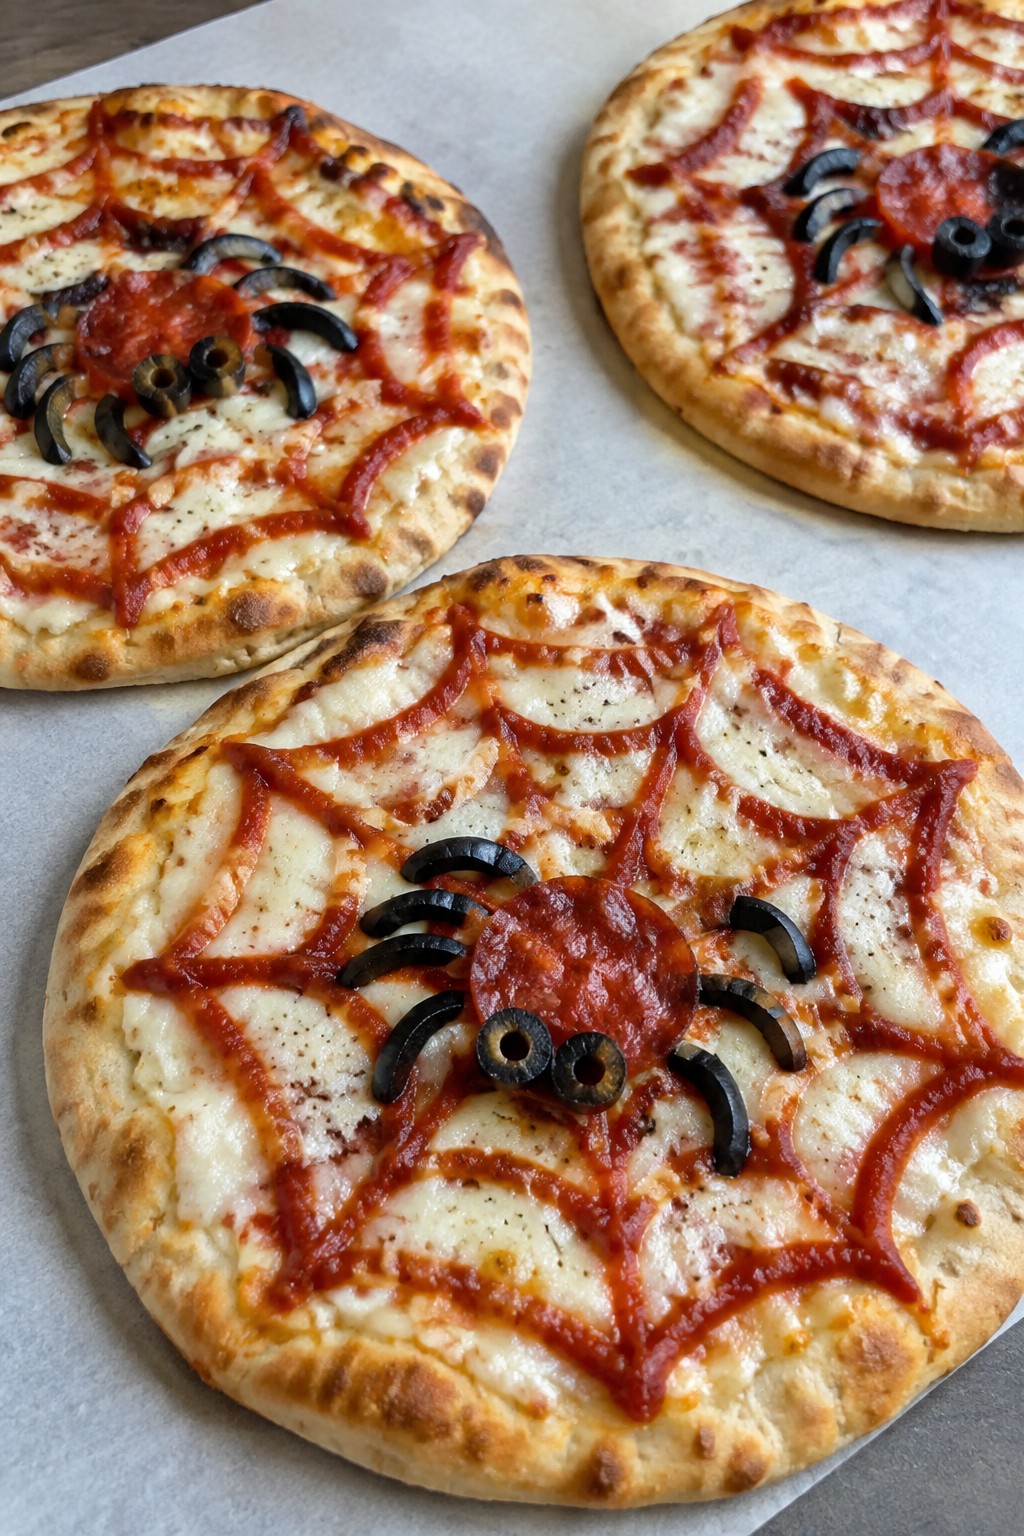
Spiderweb Flatbread Pizzas with Olive and Pepperoni Spiders
These flatbread pizzas bring a simple Halloween touch to a work potluck. They travel well in a covered container and require only a quick reheat or room temperature serving. The base stays crisp while the cheese melts into a gooey layer, and the pepperoni and olive spiders add a playful detail without extra work.
The flavor stays classic with tomato sauce, mild cheese, and salty pepperoni. Black olives provide a sharp contrast that fits the spider theme. The web pattern comes from the sauce itself, so no extra piping tools are needed.
Serves 4 people.
Ingredients
- 4 flatbreads
- ¾ cup marinara sauce
- 2 cups shredded mozzarella cheese
- 16 slices pepperoni
- ½ cup sliced black olives
Instructions
- Preheat the oven to 400°F and line a baking sheet with parchment paper. Place the four flatbreads on the sheet.
- Spread 3 tablespoons of marinara sauce on each flatbread. Use the back of a spoon to draw three concentric circles, then drag a toothpick from the center outward in eight lines to create the web pattern.
- Sprinkle ½ cup of mozzarella cheese evenly over each sauced flatbread, keeping the web lines visible.
- Bake for 8 to 10 minutes until the cheese melts and the edges turn golden.
- While the flatbreads bake, prepare the spiders. Use one pepperoni slice as the body and arrange four olive slices on each side as legs. Make four spiders per flatbread.
- Remove the flatbreads from the oven and let them cool for two minutes. Place the olive and pepperoni spiders on top of the cheese before serving.
Extra Tips
Cut the flatbreads into quarters after baking if you need more portions for a shared table. The spiders hold their shape best when added after the cheese has set for a minute, so they do not sink. Store leftovers in an airtight container in the fridge and reheat in a 350°F oven for five minutes to restore crispness. Skip extra herbs or vegetables, as they would cover the web design.Course: Appetizer Cuisine: American Equipment: Baking sheet, Oven, Toothpick
Savory Sausage and Apple Stuffed Mushroom Caps
These stuffed mushrooms offer a hearty bite that travels well to office potlucks. The savory sausage pairs with sweet apple for a balanced flavor that feels seasonal without being overly sweet. They stay warm in a covered dish and require little more than a quick reheat at work.
The texture mixes tender mushroom with a lightly crisp top from the breadcrumb filling. This makes them easy to eat with a napkin while mingling at a shared table.

Serves 4 people.
Ingredients
- 12 large white mushrooms
- 8 oz ground Italian sausage
- 1 medium apple, peeled and diced
- 1/4 cup diced onion
- 2 garlic cloves, minced
- 1/3 cup breadcrumbs
- 1/4 cup grated Parmesan cheese
- 2 tablespoons olive oil
- 1 tablespoon chopped fresh parsley
- Salt and black pepper to taste
Instructions
- Preheat the oven to 375 degrees and line a baking sheet with parchment paper.
- Wipe the mushrooms clean, remove the stems, and place the caps on the baking sheet. Brush lightly with 1 tablespoon of olive oil and season with salt and pepper.
- Heat the remaining tablespoon of olive oil in a skillet over medium heat. Add the sausage and cook until browned, breaking it into small pieces.
- Add the onion, garlic, and apple to the skillet. Cook for 4 to 5 minutes until the onion softens and the apple begins to soften.
- Remove the skillet from heat. Stir in the breadcrumbs and Parmesan cheese until the mixture holds together. Season with salt and pepper as needed.
- Spoon the filling evenly into each mushroom cap. Bake for 18 to 20 minutes until the mushrooms are tender and the tops are golden.
- Sprinkle with chopped parsley before serving.
Extra Tips
Cook the filling a day ahead and store it in the fridge, then stuff and bake the mushrooms right before leaving for work. Use a firm apple like Granny Smith so it keeps some texture after cooking. If the mixture feels dry, add a teaspoon of olive oil before stuffing.Course: Appetizer Cuisine: American Equipment: Baking Sheet, Skillet, Mixing Bowl
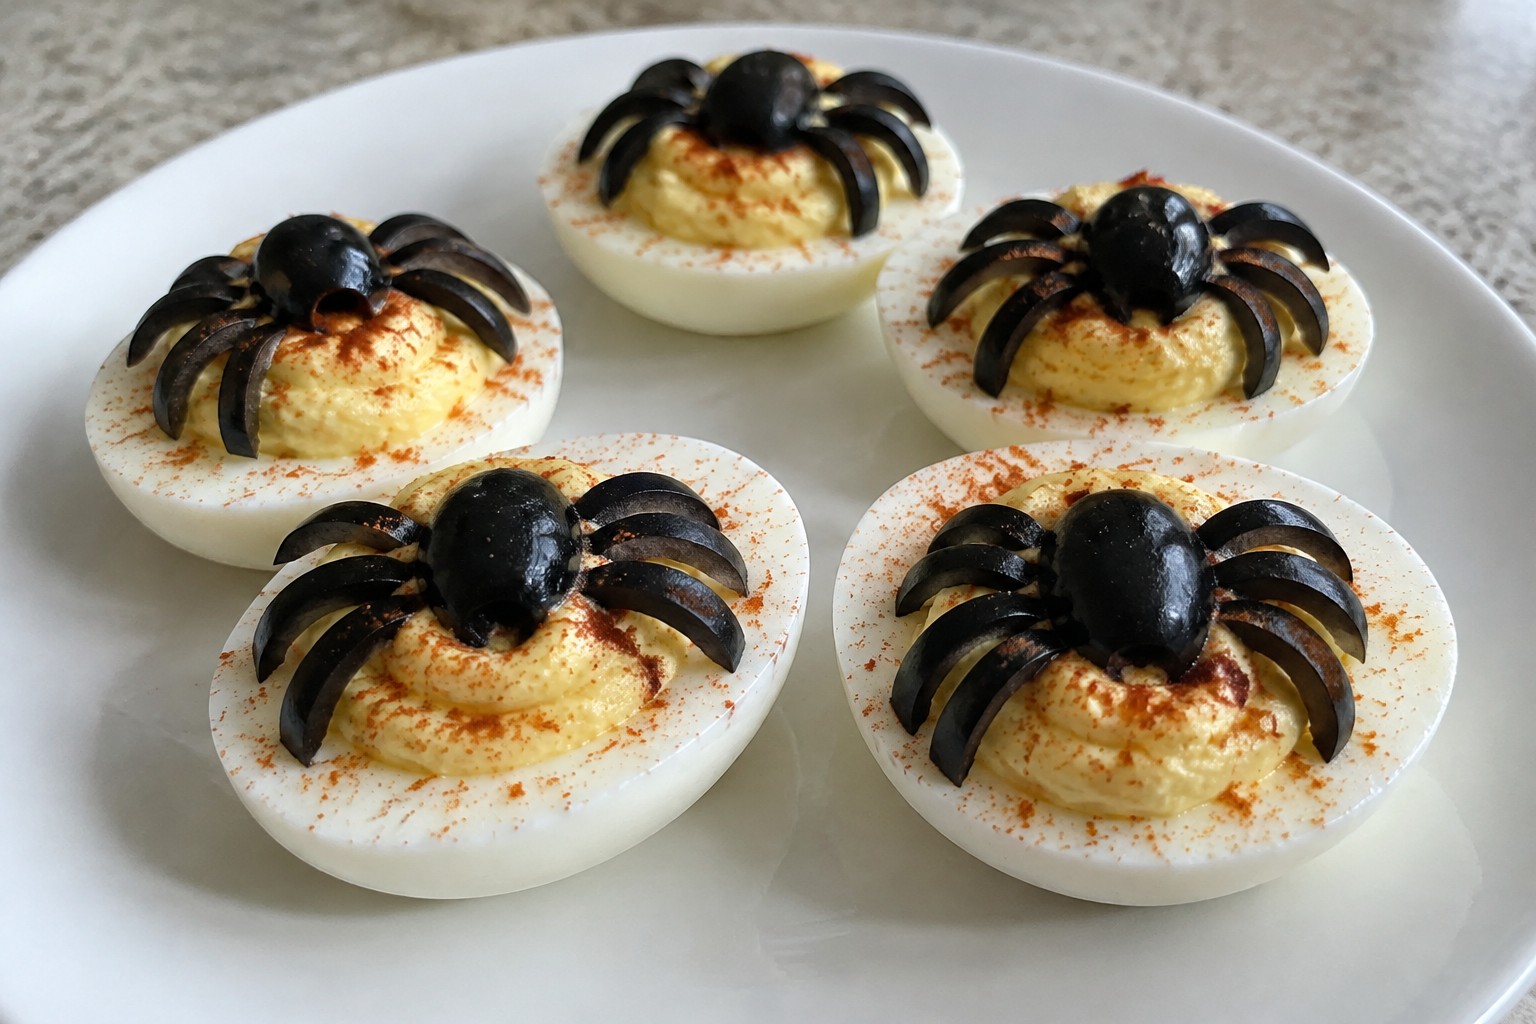
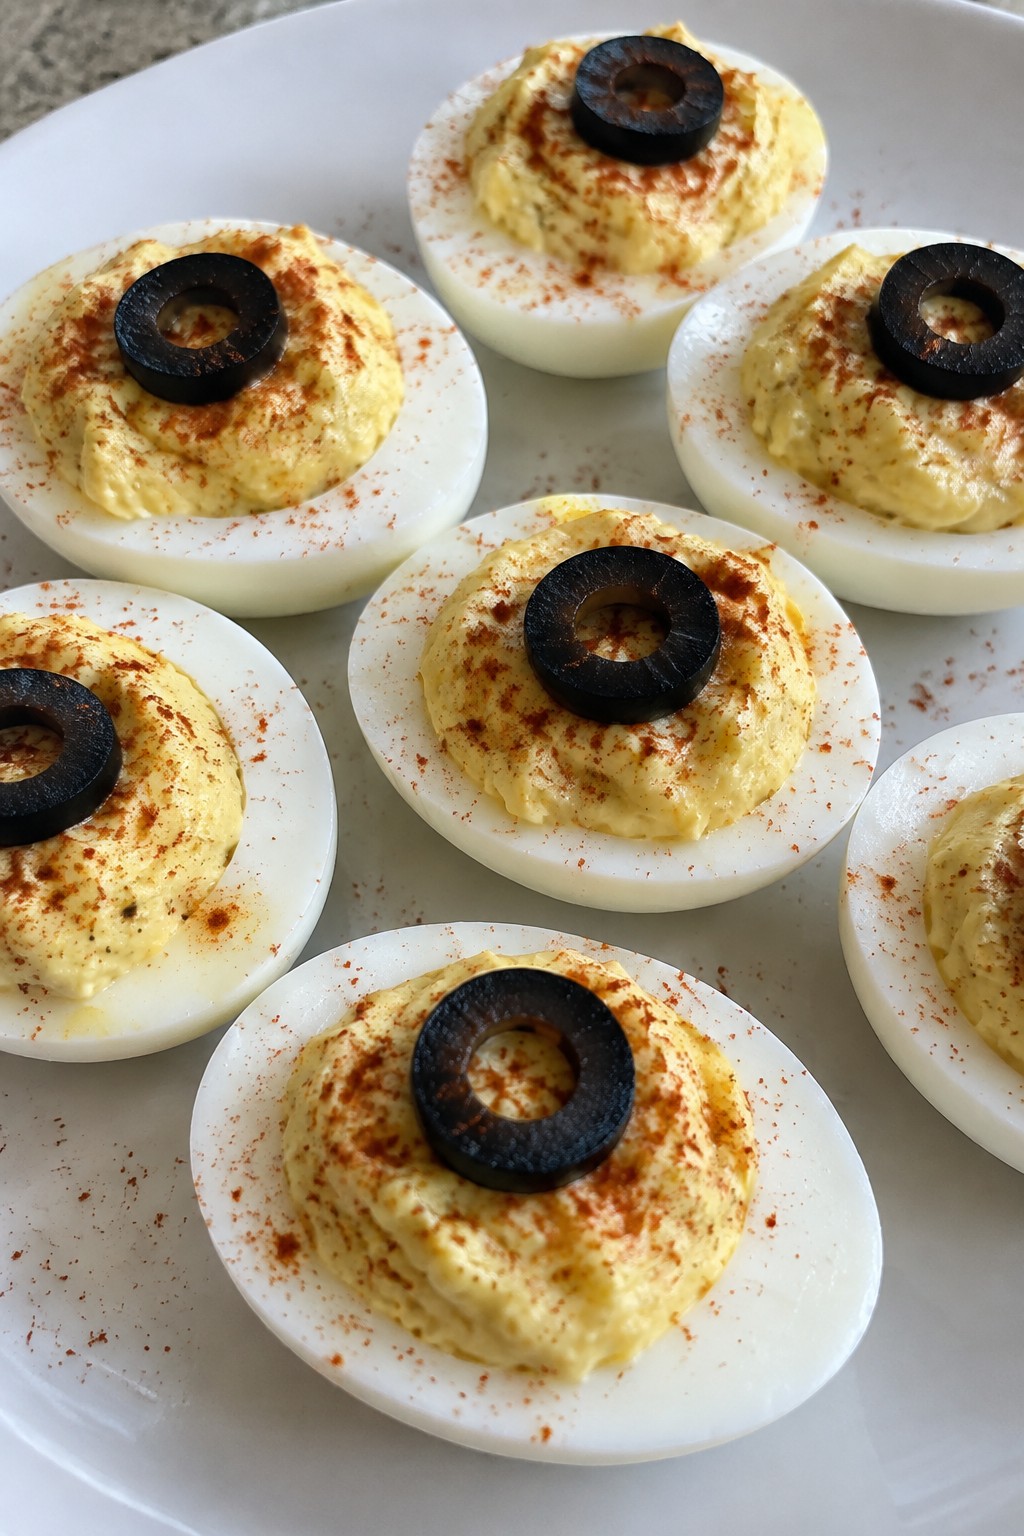
Monster Eye Deviled Eggs with Black Olive and Paprika Garnish
These deviled eggs work well for office potlucks because they hold up in the fridge and travel easily in a covered container. The black olive slices create a simple eye effect while paprika adds color and a light smoky note.
The filling stays creamy with a touch of tang from mustard and vinegar. It pairs nicely with the briny olives without overpowering the classic egg flavor.
Serves 4 people.
Ingredients
- 6 large eggs
- 1/4 cup mayonnaise
- 1 teaspoon yellow mustard
- 1/2 teaspoon white vinegar
- 1/4 teaspoon salt
- 1/8 teaspoon black pepper
- 6 black olives
- 1 teaspoon paprika
Instructions
- Place the eggs in a large pot and cover with water. Bring to a boil, then remove from heat and let sit covered for 12 minutes.
- Drain the eggs and run them under cold water until cool enough to handle. Peel off the shells.
- Slice each egg in half lengthwise and scoop the yolks into a mixing bowl. Arrange the whites on a serving plate.
- Add the mayonnaise, yellow mustard, white vinegar, salt, and black pepper to the yolks. Mash and stir until smooth.
- Spoon or pipe the yolk mixture back into the egg white halves.
- Slice each black olive into 4 rounds and place one round in the center of each filled egg half.
- Sprinkle paprika lightly over the tops before serving.
Extra Tips
Slice the olives right before garnishing so the rounds stay neat and do not dry out. If the filling seems too thick after mixing, add a small drop of vinegar to loosen it. Store leftovers in an airtight container in the fridge for up to two days. These eggs taste best served cold, so keep them chilled until the potluck table is ready.Course: Appetizer Cuisine: American Equipment: Large Pot, Mixing Bowl, Knife
Layered Candy Corn Parfaits with Vanilla Pudding and Orange Gelatin
These parfaits bring a fun candy corn look to any work potluck with their bright orange and creamy layers. They travel well in small cups and hold up fine at room temperature for a short time. The texture combines soft jiggle from the gelatin with smooth pudding and a light topping.
This recipe serves 4 people. – 1 (3 oz) package orange gelatin – 1 cup boiling water – 1 cup cold water – 1 (3.4 oz) package instant vanilla pudding mix – 2 cups cold milk – 1 cup whipped topping – 12 candy corn pieces
### Instructions 1. Pour the orange gelatin into a medium bowl and add the boiling water. Stir until fully dissolved. 2. Stir in the cold water, then divide the mixture evenly among four small parfait glasses or cups. Place the glasses in the refrigerator for 2 hours until the gelatin is firm. 3. In a separate bowl, whisk the instant vanilla pudding mix with the cold milk for 2 minutes until it begins to thicken. 4. Spoon the pudding evenly over the set gelatin layer in each glass. Return the glasses to the refrigerator for 10 minutes. 5. Top each parfait with a dollop of whipped topping and finish with three candy corn pieces per glass.
### Extra Tips Prepare the parfaits the night before and keep them covered in the fridge so the layers stay distinct for transport. Use clear cups to show off the orange and pale layers. If the whipped topping softens during travel, add it just before serving.
Course: Dessert Cuisine: American Equipment: Mixing bowls, Whisk, Parfait glasses, Refrigerator

Serves 4 people.
Instructions
- Pour the orange gelatin into a medium bowl and add the boiling water. Stir until fully dissolved.
- Stir in the cold water, then divide the mixture evenly among four small parfait glasses or cups. Place the glasses in the refrigerator for 2 hours until the gelatin is firm.
- In a separate bowl, whisk the instant vanilla pudding mix with the cold milk for 2 minutes until it begins to thicken.
- Spoon the pudding evenly over the set gelatin layer in each glass. Return the glasses to the refrigerator for 10 minutes.
- Top each parfait with a dollop of whipped topping and finish with three candy corn pieces per glass.
Extra Tips
Prepare the parfaits the night before and keep them covered in the fridge so the layers stay distinct for transport. Use clear cups to show off the orange and pale layers. If the whipped topping softens during travel, add it just before serving.Course: Dessert Cuisine: American Equipment: Mixing bowls, Whisk, Parfait glasses, Refrigerator
Baked Brie en Croûte with Fig Jam and Spooky Cracker Assortment
This baked brie brings a creamy, crowd-pleasing bite to office potlucks. The buttery pastry shell keeps the cheese contained while the fig jam adds a sweet contrast that balances the richness. It travels well and needs only a quick reheat or room-temperature service.
The spooky cracker assortment gives the dish a light Halloween touch without extra work. Guests can scoop the warm cheese onto themed shapes for an easy, shareable appetizer.

Serves 4 people.
Ingredients
- 1 (8-ounce) wheel brie cheese
- 1 sheet puff pastry, thawed
- 1/4 cup fig jam
- 1 large egg
- 8 ounces assorted spooky crackers
Instructions
- Preheat the oven to 400°F and line a baking sheet with parchment paper.
- Unroll the puff pastry on the prepared sheet and center the brie wheel on top.
- Spread the fig jam evenly over the top of the brie.
- Fold the pastry edges up and over the brie to fully enclose it, pressing seams to seal.
- Beat the egg in a small bowl and brush it over the entire pastry surface.
- Bake for 20 to 25 minutes until the pastry is golden brown and puffed.
- Remove from the oven and let rest for 5 minutes before transferring to a serving plate.
- Arrange the spooky crackers around the baked brie for guests to use.
Extra Tips
Assemble the wrapped brie earlier in the day and keep it chilled until baking so it stays cold and bakes evenly. If the pastry cracks during folding, press extra pieces over the gaps before brushing with egg. Serve the brie slightly warm so the cheese stays soft but not runny when scooped onto the crackers.Course: Appetizer Cuisine: French Equipment: Baking sheet, Oven, Pastry brush
Chocolate Ganache Tart with Orange Curd Swirls and Candy Eyeballs
This chocolate ganache tart stands out at office potlucks thanks to the playful candy eyeballs on top. The rich chocolate base gets brightened by swirls of tangy orange curd, giving each slice a balance of sweet and citrus notes along with a smooth, creamy texture.
It travels well to work events and slices cleanly once chilled. The Halloween touch makes it feel festive without extra effort.

Serves 4 people.
Ingredients
- 1 pre-baked 8-inch tart crust
- 6 ounces semisweet chocolate, chopped
- 1/2 cup heavy cream
- 2 large oranges
- 2 egg yolks
- 1/4 cup granulated sugar
- 3 tablespoons unsalted butter
- 12 candy eyeballs
Instructions
- Zest and juice both oranges into a small saucepan. Add the egg yolks, sugar, and 2 tablespoons of butter. Cook over medium heat while whisking until the mixture thickens enough to coat a spoon, then remove from heat and set the curd aside to cool slightly.
- Place the chopped chocolate in a heatproof bowl. Heat the heavy cream in a separate saucepan until it just begins to simmer, then pour it over the chocolate. Let it sit for one minute before stirring until smooth to form the ganache.
- Pour the ganache into the pre-baked tart crust and spread it evenly with a spatula.
- Drop small spoonfuls of the orange curd across the ganache surface. Use a toothpick or skewer to gently swirl the curd into the chocolate for a marbled look.
- Press the candy eyeballs into the top of the tart while the filling is still soft. Chill the tart in the refrigerator for at least two hours before slicing.
Extra Tips
Chill the tart fully before packing it for transport so the swirls stay defined. If the orange curd thickens too much while cooling, stir in a teaspoon of orange juice to loosen it before swirling. Leftovers keep covered in the fridge for two days.Course: Dessert Cuisine: American Equipment: Tart pan, Saucepan, Mixing bowl, Whisk
