
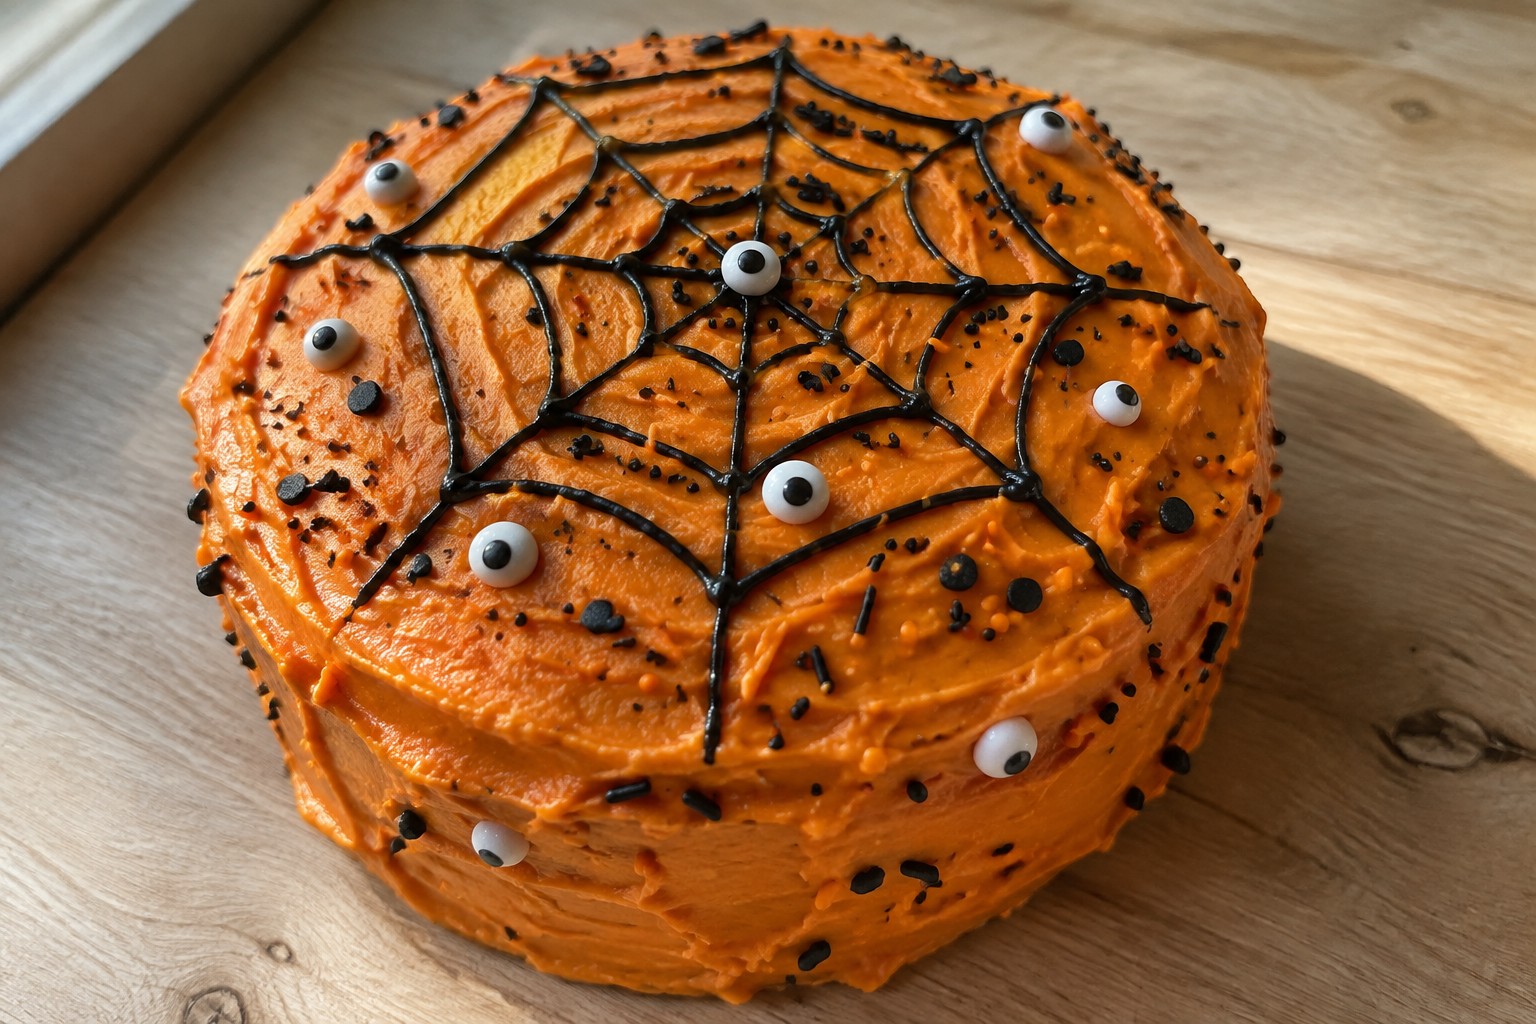
Halloween is coming up and it is a good time to try some new cake recipes. These ideas focus on simple steps and common ingredients so you can bake them without extra stress. Each one works for different schedules and skill levels. You will find cakes that look nice but do not require special tools or long prep times. They are easy to adapt for kids or parties at home.
Helpful Tips Before You Start
These tips will keep your Halloween cakes simple and stress free.
Start with Box Mix
Box mixes save time and deliver reliable results. They work well for beginners who want to focus on decorating.
Chill Before Frosting
Let the cake layers cool in the fridge for 30 minutes. Cold cake holds crumbs in place and makes icing smoother.
Use Gel Colors
Gel food coloring gives bright Halloween shades without watering down frosting. Add a little at a time until you reach the color you want.
Gather Decorations First
Set out candies, sprinkles, and any toppers before you begin. This keeps the decorating step quick and organized.
Pumpkin Spice Sheet Cake with Cream Cheese Frosting
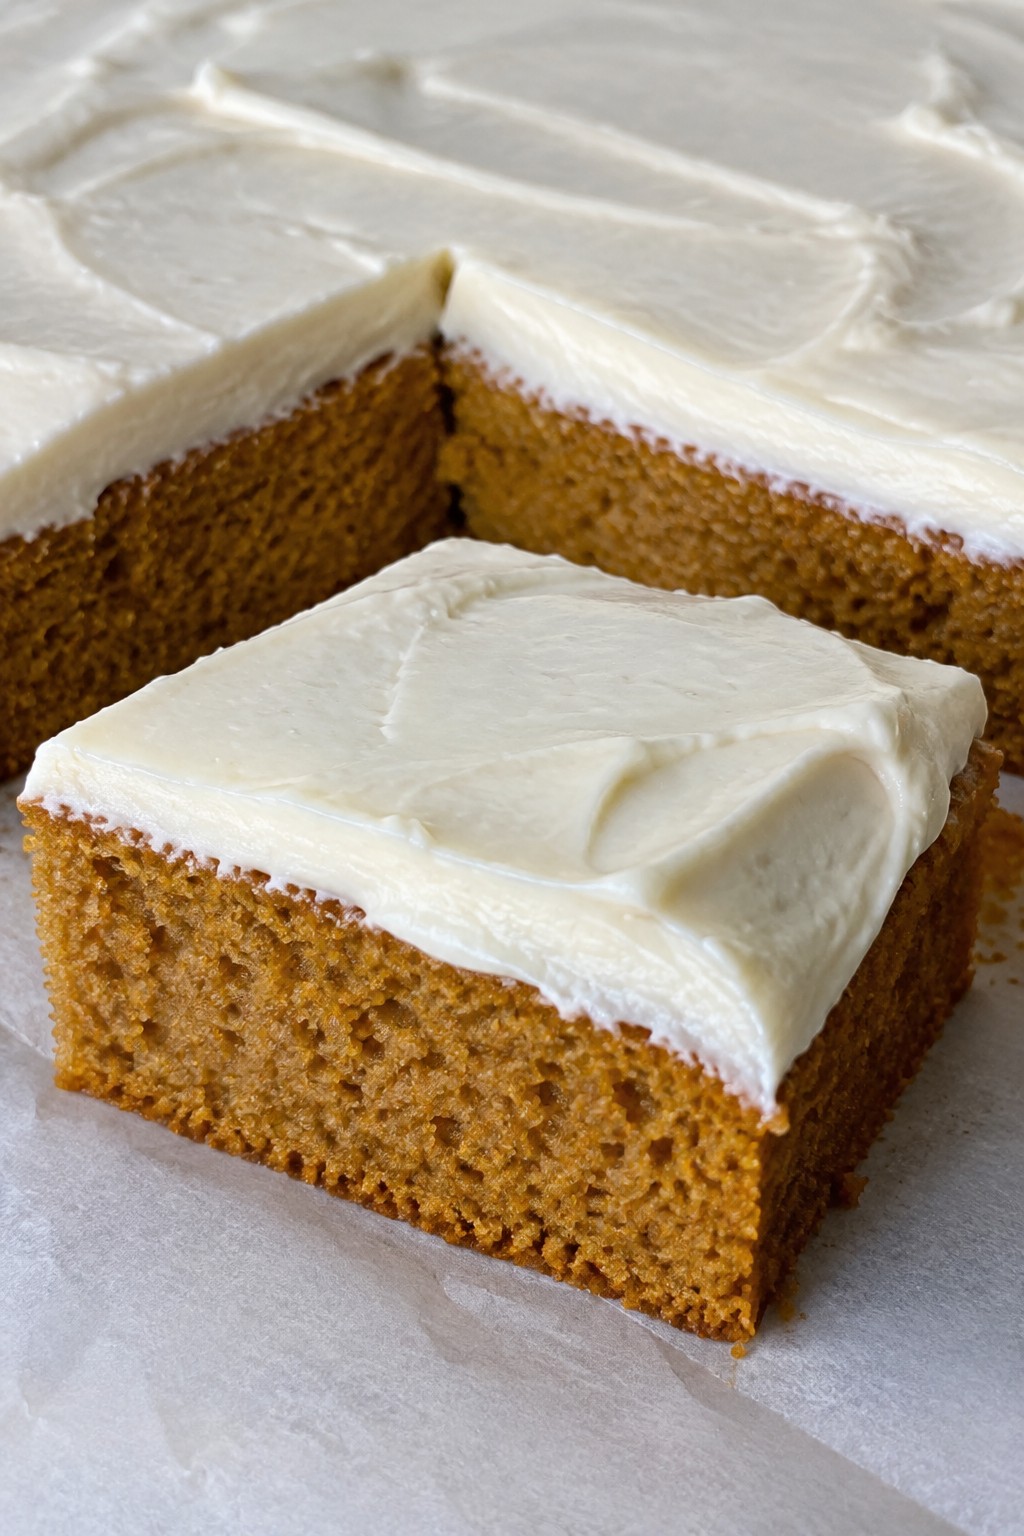
This cake brings warm pumpkin spice flavor to any fall gathering without much fuss. It bakes in one pan and finishes with a simple cream cheese frosting that pairs well with the moist crumb. The result works for Halloween parties, weeknight desserts, or casual get-togethers with friends.
The texture stays soft and tender thanks to the pumpkin, while the frosting adds a light tangy finish. It travels easily if you need to bring something to an event and holds up well at room temperature for a few hours.
Serves 4 people.
Ingredients
- 1 cup all-purpose flour
- 1/2 cup granulated sugar
- 1/2 cup pumpkin puree
- 1 large egg
- 1/4 cup vegetable oil
- 1 teaspoon pumpkin pie spice
- 1/2 teaspoon baking soda
- 1/4 teaspoon salt
- 1/2 teaspoon vanilla extract
- 4 ounces cream cheese, softened
- 2 tablespoons unsalted butter, softened
- 1 cup powdered sugar
Instructions
- Preheat the oven to 350 degrees F and line an 8×8 inch pan with parchment paper.
- In a medium bowl, whisk together the flour, granulated sugar, pumpkin pie spice, baking soda, and salt.
- In a separate bowl, mix the pumpkin puree, egg, vegetable oil, and vanilla extract until smooth.
- Pour the wet mixture into the dry ingredients and stir until just combined.
- Spread the batter evenly into the prepared pan.
- Bake for 25 to 28 minutes, or until a toothpick inserted in the center comes out clean. Let the cake cool completely in the pan.
- In a mixing bowl, beat the cream cheese and butter until creamy. Add the powdered sugar and beat until smooth.
- Spread the frosting over the cooled cake before slicing.
Extra Tips
For the best texture, make sure the cake cools fully before frosting so the cream cheese layer stays firm. If the frosting feels too thick, add a teaspoon of milk at a time until it spreads easily. Store leftovers in the refrigerator for up to three days and bring slices to room temperature before serving.Course: Dessert Cuisine: American Equipment: Mixing bowls, 8×8 inch pan, whisk, electric mixer
Chocolate Spiderweb Layer Cake
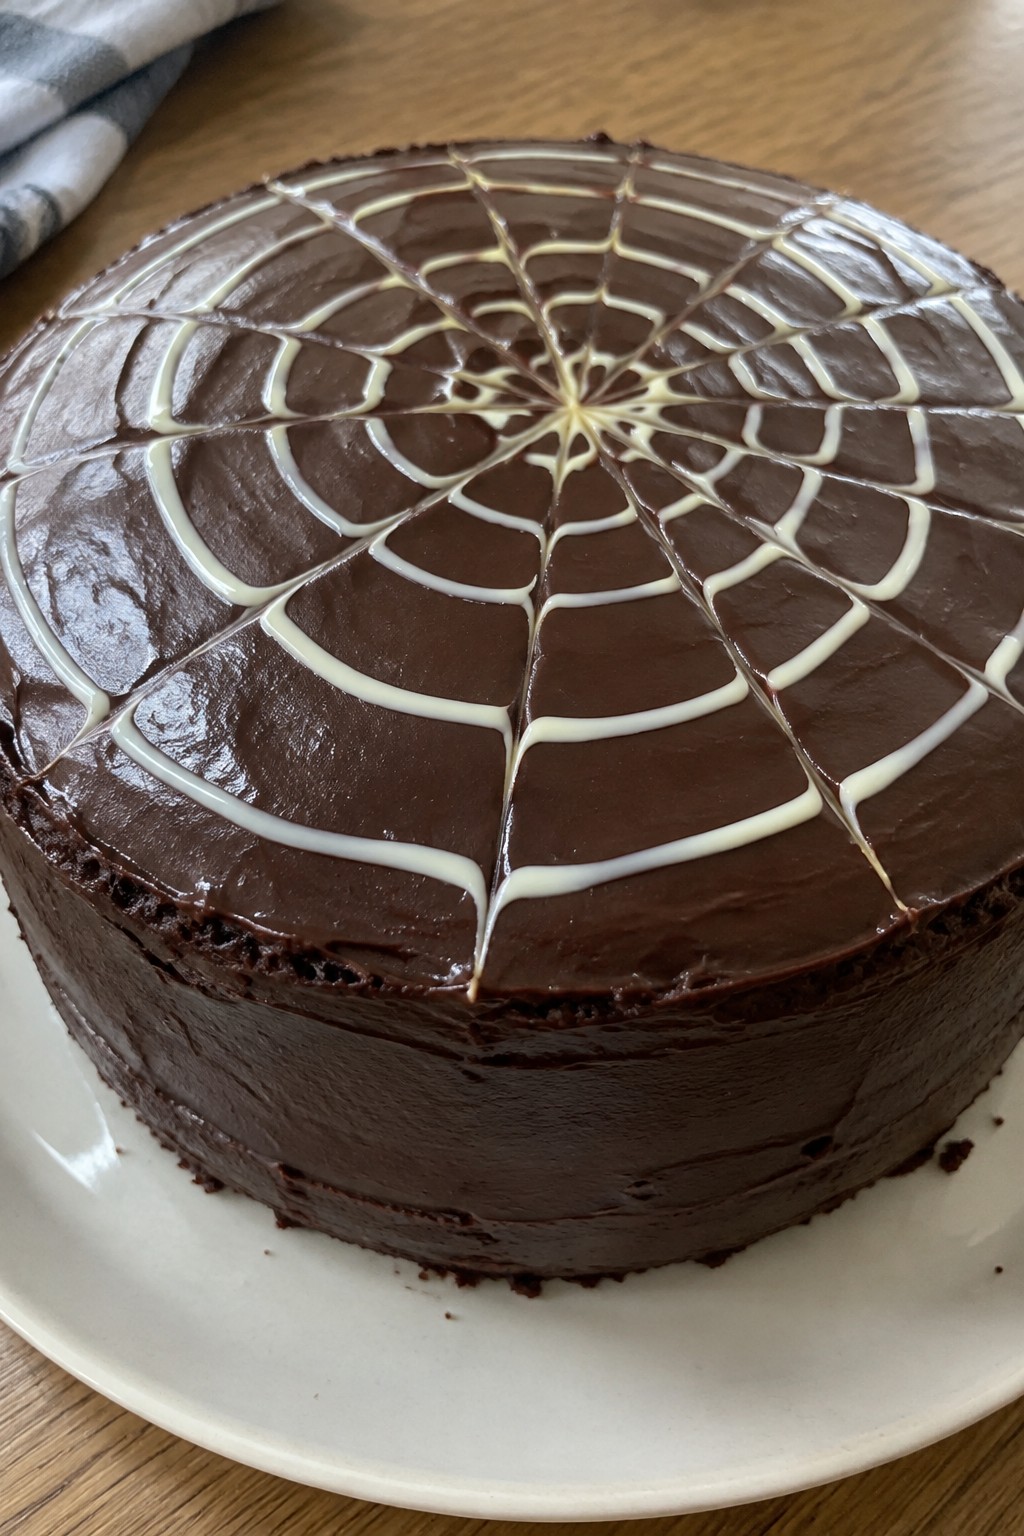
This chocolate layer cake brings a fun Halloween touch with its spiderweb design on top. It works well for small gatherings or as a festive dessert to share with a few friends. The cake stays moist with a deep cocoa flavor, while the smooth chocolate frosting adds richness and the web detail keeps things playful without extra fuss.
Serves 4 people.
Ingredients
- 1 cup all-purpose flour
- ¾ cup granulated sugar
- ⅓ cup unsweetened cocoa powder
- ½ teaspoon baking soda
- ¼ teaspoon salt
- ½ cup milk
- ¼ cup vegetable oil
- 1 large egg
- 1 teaspoon vanilla extract
- ½ cup hot water
- ½ cup unsalted butter, softened
- 1 ½ cups powdered sugar
- ¼ cup white chocolate chips, melted
Instructions
- Preheat the oven to 350°F and grease two 6-inch round cake pans.
- In a large bowl, whisk together the flour, granulated sugar, cocoa powder, baking soda, and salt.
- Add the milk, vegetable oil, egg, and vanilla extract to the dry ingredients and stir until smooth.
- Pour in the hot water and mix until the batter is thin but fully combined.
- Divide the batter evenly between the prepared pans and bake for 22 to 25 minutes, or until a toothpick comes out clean.
- Let the layers cool in the pans for 10 minutes, then remove them to a wire rack to cool completely.
- In a medium bowl, beat the softened butter with the powdered sugar until creamy, then spread the frosting over the top of one cooled layer.
- Place the second layer on top and frost the sides and top of the assembled cake.
- Drizzle the melted white chocolate in circles over the frosted top, then drag a toothpick through the lines to form a spiderweb pattern.
Extra Tips
Melt the white chocolate in short microwave bursts and let it cool slightly before piping so it holds clean lines on the frosting. If the cake layers seem too tall for your group, slice each one in half horizontally for thinner layers and the same spiderweb finish. Store leftovers in an airtight container at room temperature for up to two days.Course: Dessert Cuisine: American Equipment: Mixing Bowls, Cake Pans, Whisk, Spatula, Oven
Ghostly Vanilla Bundt Cake with Marshmallow Topping
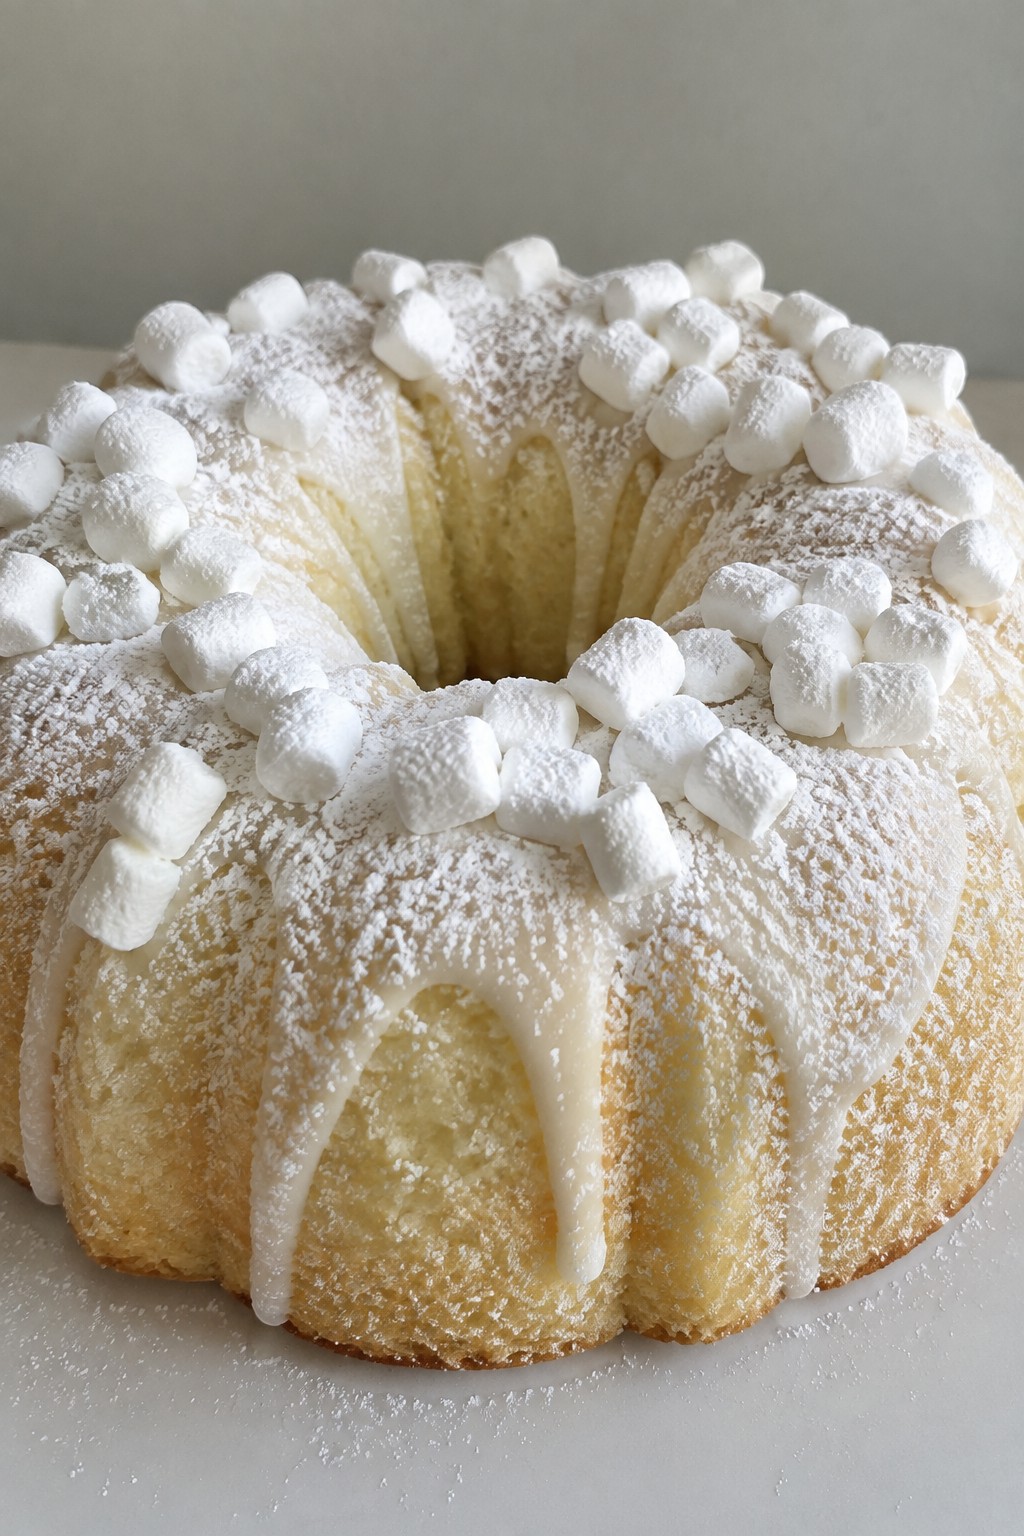
This vanilla bundt cake offers a simple way to add a Halloween touch to dessert. The white cake base and marshmallow topping create a light, playful look that fits right into a spooky spread. It works well for small gatherings or last-minute baking.
The flavor stays mild and sweet with a soft crumb. The marshmallow topping adds chew and a bit of extra sweetness on each slice.
Serves 4 people.
Ingredients
- 1 1/2 cups all-purpose flour
- 3/4 cup granulated sugar
- 1/2 cup unsalted butter, softened
- 2 large eggs
- 3 teaspoons vanilla extract
- 2 teaspoons baking powder
- 1/2 cup whole milk
- 1 cup powdered sugar
- 2 cups mini marshmallows
Instructions
- Preheat the oven to 350 degrees and grease a small bundt pan.
- In a mixing bowl, cream the butter and granulated sugar until light. Add the eggs and 2 teaspoons vanilla extract, then mix until combined.
- In a second bowl, stir together the flour and baking powder. Add half the dry mixture to the wet ingredients, followed by half the milk. Repeat with the remaining flour and milk until the batter is smooth.
- Pour the batter into the prepared pan and bake for 30 to 35 minutes, or until a toothpick comes out clean. Let the cake cool in the pan for 10 minutes, then turn it out onto a plate to cool completely.
- Whisk the powdered sugar with the remaining teaspoon of vanilla extract and enough water to make a thin glaze. Drizzle the glaze over the cooled cake.
- Arrange the mini marshmallows on top of the glaze while it is still slightly tacky so they stick in place.
Extra Tips
Arrange the marshmallows in small clusters to create ghost shapes and add a few chocolate chips for eyes if you have them on hand. Store leftovers in an airtight container at room temperature for up to two days. The cake tastes best the day it is made, before the marshmallows start to firm up.Course: Dessert Cuisine: American Equipment: Bundt Pan, Mixing Bowls, Whisk, Oven
Red Velvet Graveyard Cake
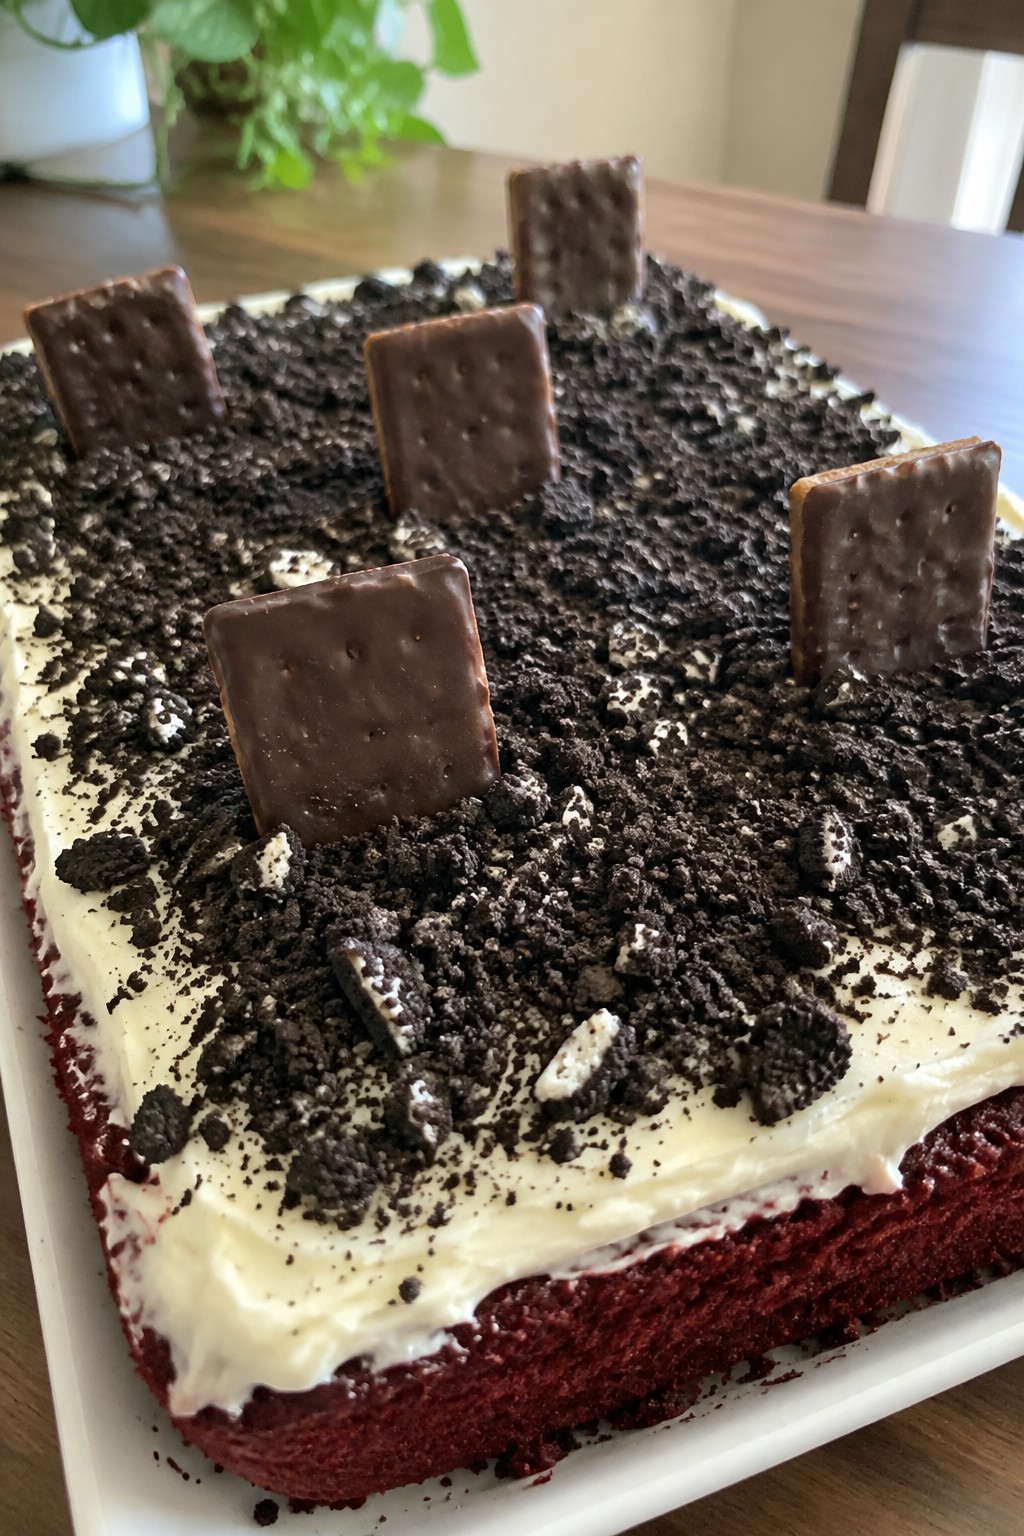
This red velvet graveyard cake adds a simple spooky element to Halloween without extra fuss. The moist cocoa layers get topped with cream cheese frosting and crushed cookies that look like fresh dirt. It comes together quickly and suits small gatherings or after-dinner treats.
The flavor stays classic with a light chocolate note and tangy frosting, while the cookie topping gives a pleasant crunch against the soft cake. Rectangular cookies stand upright as tombstones for an easy visual effect.
Serves 4 people.
Ingredients
- 1 box red velvet cake mix
- 1 cup water
- 1/2 cup vegetable oil
- 3 large eggs
- 8 ounces cream cheese, softened
- 1/4 cup butter, softened
- 2 cups powdered sugar
- 1 teaspoon vanilla extract
- 12 chocolate sandwich cookies, crushed
- 4 chocolate-covered graham crackers
Instructions
- Preheat the oven to 350 degrees and grease an 8-inch square pan. In a large bowl, combine the red velvet cake mix, water, vegetable oil, and eggs. Beat until smooth.
- Pour the batter into the prepared pan and bake for 25 to 30 minutes, or until a toothpick inserted in the center comes out clean. Let the cake cool completely in the pan.
- In a medium bowl, beat the softened cream cheese and butter until creamy. Add the powdered sugar and vanilla extract, then continue beating until the frosting is smooth and spreadable.
- Spread the cream cheese frosting evenly over the cooled cake. Sprinkle the crushed chocolate sandwich cookies across the top to create the graveyard dirt layer.
- Gently press the chocolate-covered graham crackers upright into the cookie layer to form tombstones. Slice and serve.
Extra Tips
Crush the cookies finely so they sit flat like soil rather than in large chunks. If the frosting feels too thick after mixing, add a teaspoon of milk to loosen it. The graham cracker tombstones hold best when pressed in right after the cookies are added, before the frosting sets.Course: Dessert Cuisine: American Equipment: Mixing Bowl, 8-inch Square Pan, Electric Mixer
Orange Creamsicle Halloween Cake
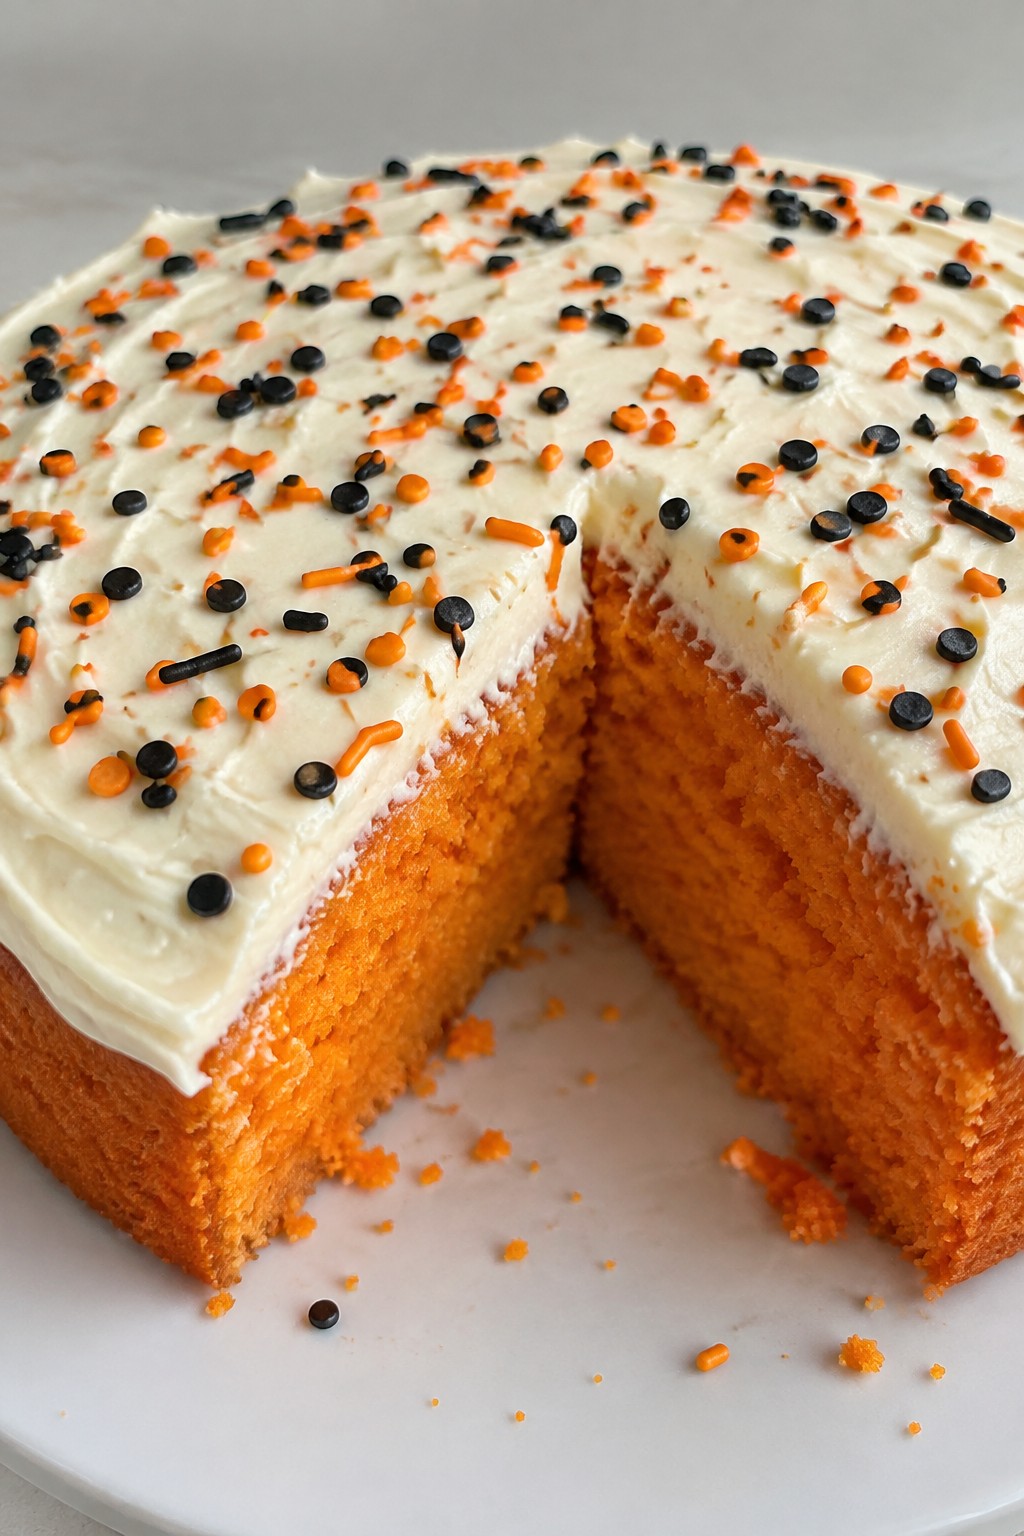
This cake brings the bright citrus flavor of an orange creamsicle into a simple dessert that fits right into Halloween gatherings. The moist orange cake pairs with a light vanilla cream cheese frosting for a sweet and tangy finish that feels festive without extra fuss.
It works well for small parties or family nights when you want something easy yet themed. The soft crumb and creamy topping give it a nostalgic popsicle taste with a fun orange color that matches the season.
Serves 4 people.
Ingredients
- 1 1/2 cups all-purpose flour
- 3/4 cup granulated sugar
- 1/2 cup unsalted butter, softened
- 2 large eggs
- 1/2 cup fresh orange juice
- 2 tablespoons orange zest
- 2 teaspoons vanilla extract
- 1 1/2 teaspoons baking powder
- 1/4 teaspoon salt
- 8 ounces cream cheese, softened
- 1/2 cup powdered sugar
- 1/4 cup heavy cream
- Orange and black sprinkles
Instructions
- Preheat the oven to 350 degrees and grease a 6-inch round cake pan.
- In a mixing bowl, beat the softened butter and granulated sugar until light and fluffy.
- Add the eggs one at a time, mixing well after each addition.
- Stir in the orange juice, orange zest, and 1 teaspoon of the vanilla extract.
- In a separate bowl, whisk together the flour, baking powder, and salt.
- Gradually add the dry ingredients to the wet mixture and stir until just combined.
- Pour the batter into the prepared pan and bake for 30 to 35 minutes, or until a toothpick comes out clean.
- Let the cake cool completely in the pan before removing it.
- In a clean bowl, beat the cream cheese with the powdered sugar, heavy cream, and remaining teaspoon of vanilla extract until smooth.
- Spread the frosting evenly over the cooled cake and finish with a sprinkle of the orange and black sprinkles.
Extra Tips
For the best texture, make sure the cake cools fully before frosting so the cream cheese layer stays firm. If you want a stronger orange note, add an extra teaspoon of zest to the frosting. Leftovers keep well in the fridge for two days in an airtight container.Course: Dessert Cuisine: American Equipment: Mixing Bowls, Electric Mixer, Cake Pan, Oven
Caramel Apple Crumb Cake
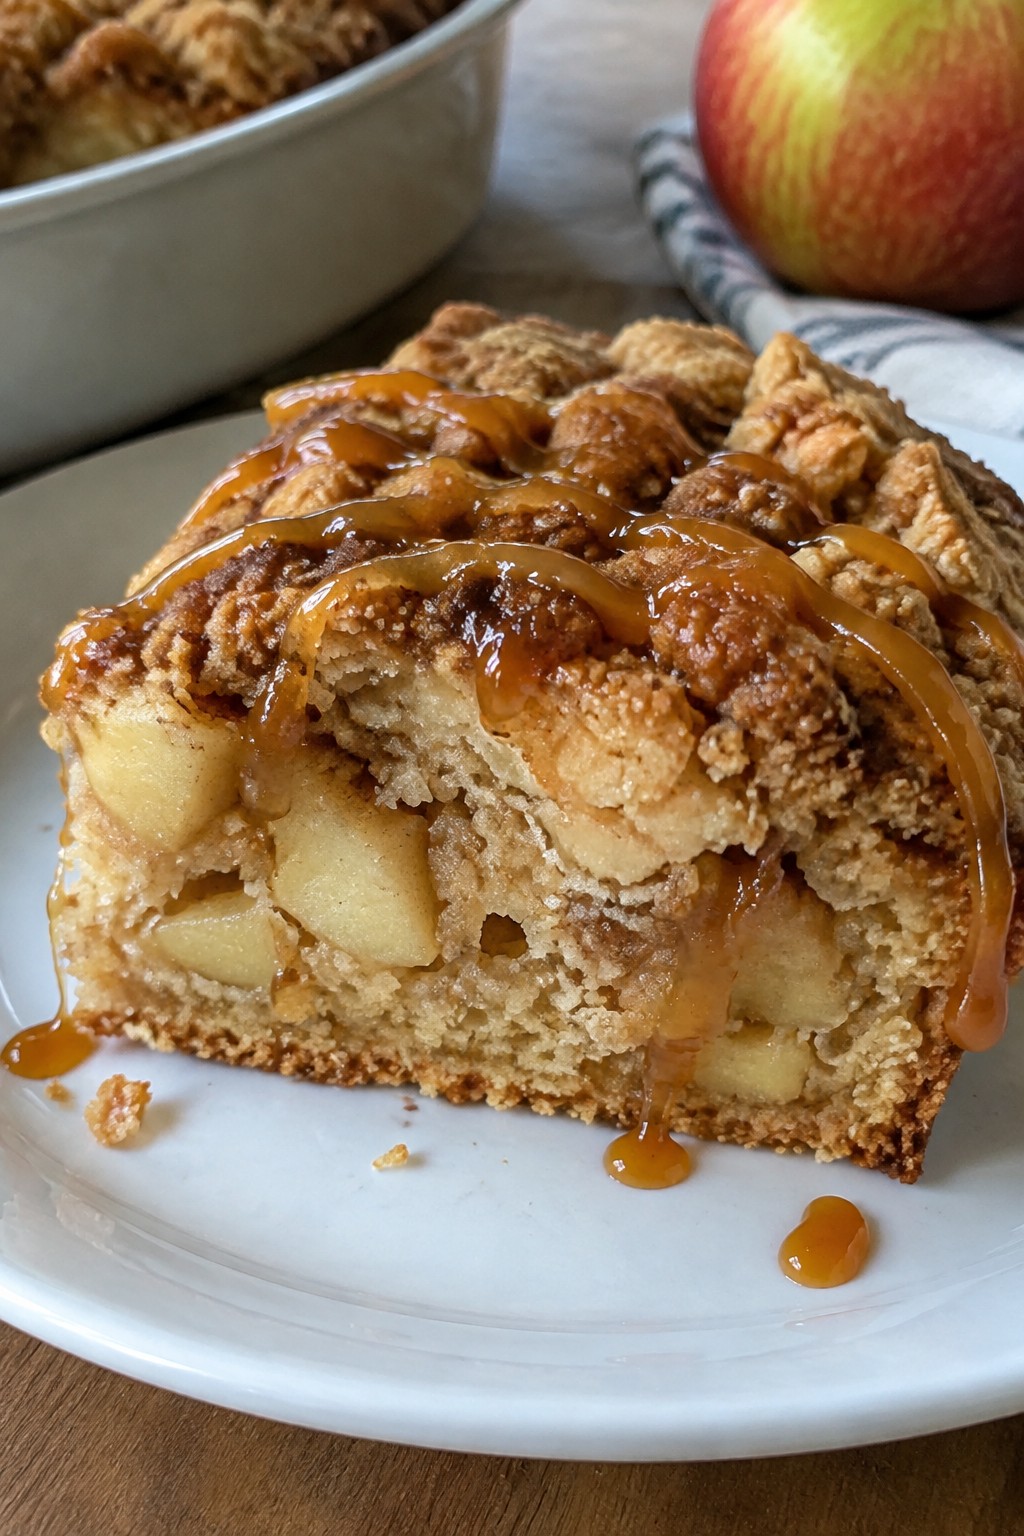
This caramel apple crumb cake combines tender chunks of apple with a buttery crumb topping and a simple caramel drizzle. It makes a cozy choice for Halloween parties or fall get-togethers when you want something sweet but not fussy.
The finished cake has moist layers from the fruit, a crunchy streusel surface, and rich caramel notes that balance the tart apples. It bakes in one pan and slices cleanly for serving.
Serves 4 people.
Ingredients
- 2 medium apples, peeled and chopped
- 1 cup all-purpose flour
- 1/2 cup granulated sugar
- 1/4 cup brown sugar
- 6 tablespoons unsalted butter, softened
- 1 large egg
- 1 teaspoon baking powder
- 1/2 teaspoon ground cinnamon
- 1/4 teaspoon salt
- 1/3 cup caramel sauce
Instructions
- Preheat the oven to 350°F and line an 8×8-inch pan with parchment paper.
- In a mixing bowl, cream 4 tablespoons of the butter with the granulated sugar until light. Add the egg and stir until combined.
- Whisk together 1 cup flour, baking powder, cinnamon, and salt. Add this dry mixture to the wet ingredients and mix just until a batter forms.
- Fold the chopped apples into the batter, then spread the batter evenly in the prepared pan.
- Make the crumb topping by mixing the remaining 2 tablespoons butter with the brown sugar and 2 tablespoons flour until crumbly. Sprinkle this evenly over the batter.
- Bake for 30 to 35 minutes until the topping is golden and a toothpick inserted in the center comes out clean.
- Let the cake cool slightly, then drizzle the caramel sauce over the top before slicing.
Extra Tips
Use firm apples like Granny Smith so they stay tender but do not turn mushy during baking. If the caramel sauce is thick, warm it for a few seconds so it pours easily without soaking into the crumb layer. Leftovers keep well covered at room temperature for one day or in the fridge for three days.Course: Dessert Cuisine: American Equipment: Mixing Bowl, 8×8 Baking Pan, Oven
Black Cocoa Witch Cauldron Cake
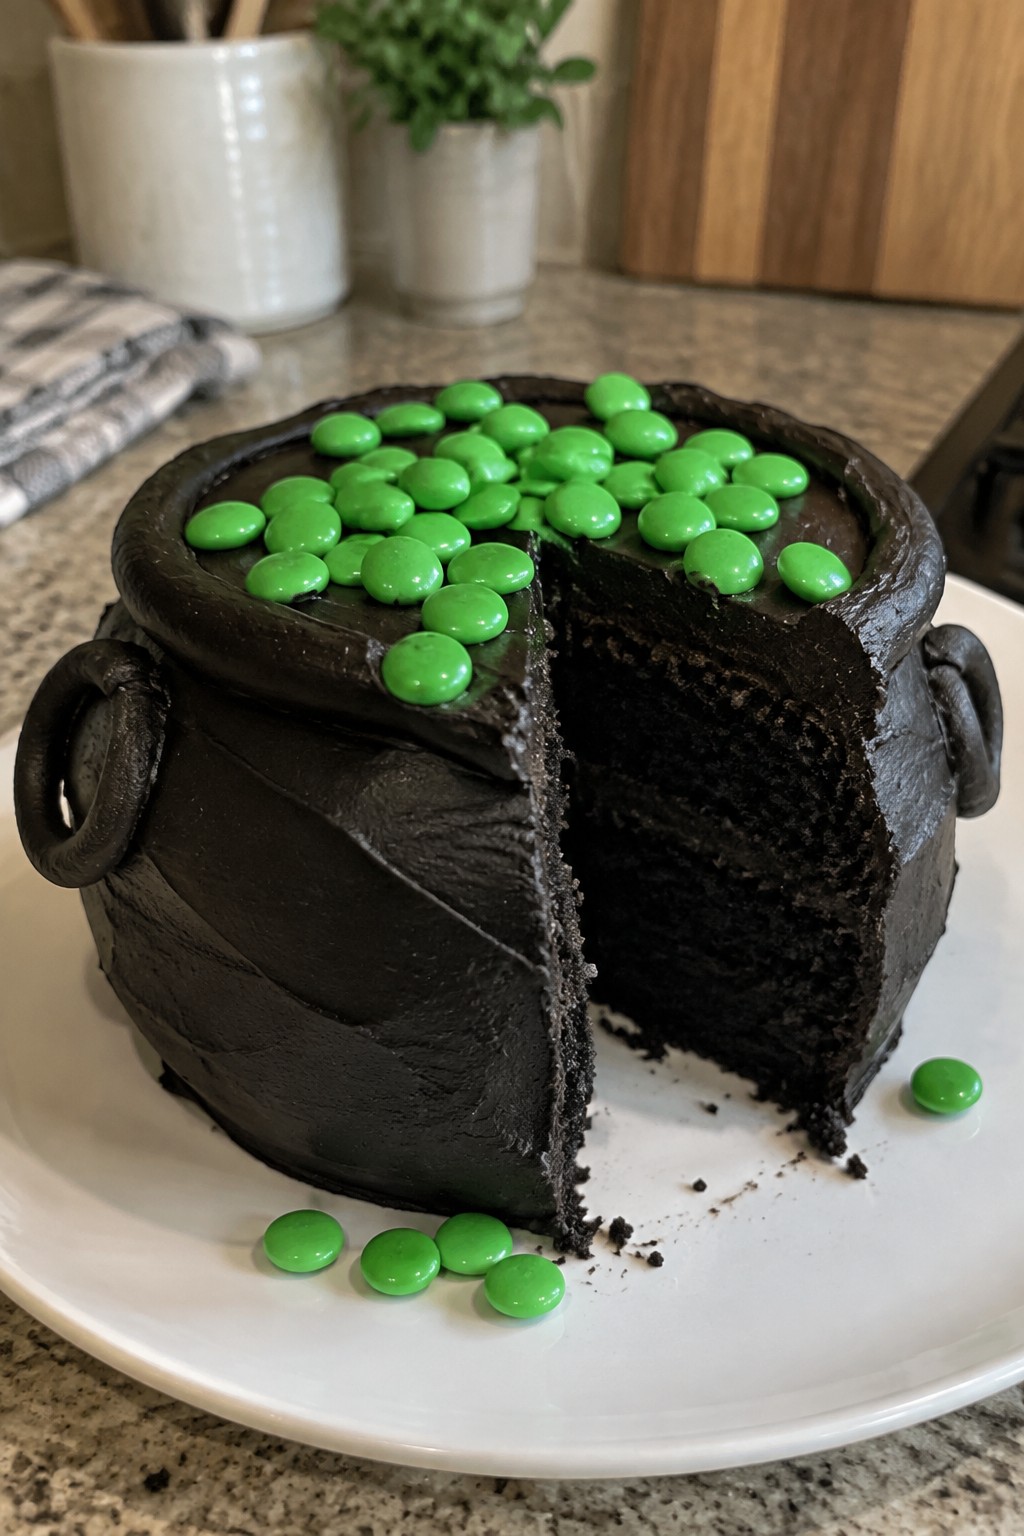
This cake uses black cocoa to create a deep, dark color that stands out on a Halloween table. The flavor stays rich and chocolatey with a soft, moist crumb that holds up well after baking.
It works well for small gatherings since the recipe makes enough for four servings. The round shape and simple topping give it a cauldron look without extra tools or skills.
Serves 4 people.
Ingredients
- 1 cup all-purpose flour
- ½ cup black cocoa powder
- ¾ cup granulated sugar
- 1 teaspoon baking soda
- ½ teaspoon salt
- ½ cup milk
- ¼ cup vegetable oil
- 1 large egg
- 1 teaspoon vanilla extract
- 8 ounces black chocolate frosting
- ½ cup green candy melts
Instructions
- Preheat the oven to 350°F and grease a 6-inch round cake pan.
- In a mixing bowl, whisk together the flour, black cocoa powder, sugar, baking soda, and salt.
- Add the milk, oil, egg, and vanilla extract to the dry ingredients and stir until the batter is smooth.
- Pour the batter into the prepared pan and bake for 30 minutes, or until a toothpick inserted in the center comes out clean.
- Let the cake cool completely in the pan, then remove it and spread the black chocolate frosting over the sides and top to create the cauldron look.
- Melt the green candy melts and drizzle them over the center of the cake so they pool and set like bubbling potion.
Extra Tips
Black cocoa gives the cake a bolder taste than regular cocoa, so skip extra sugar in the frosting. Melt the candy melts in short bursts in the microwave to avoid seizing. Store leftovers in the fridge and bring slices to room temperature before serving so the frosting softens.Course: Dessert Cuisine: American Equipment: Mixing Bowl, 6-inch Round Cake Pan, Oven
Candy Corn Swirl Bundt Cake
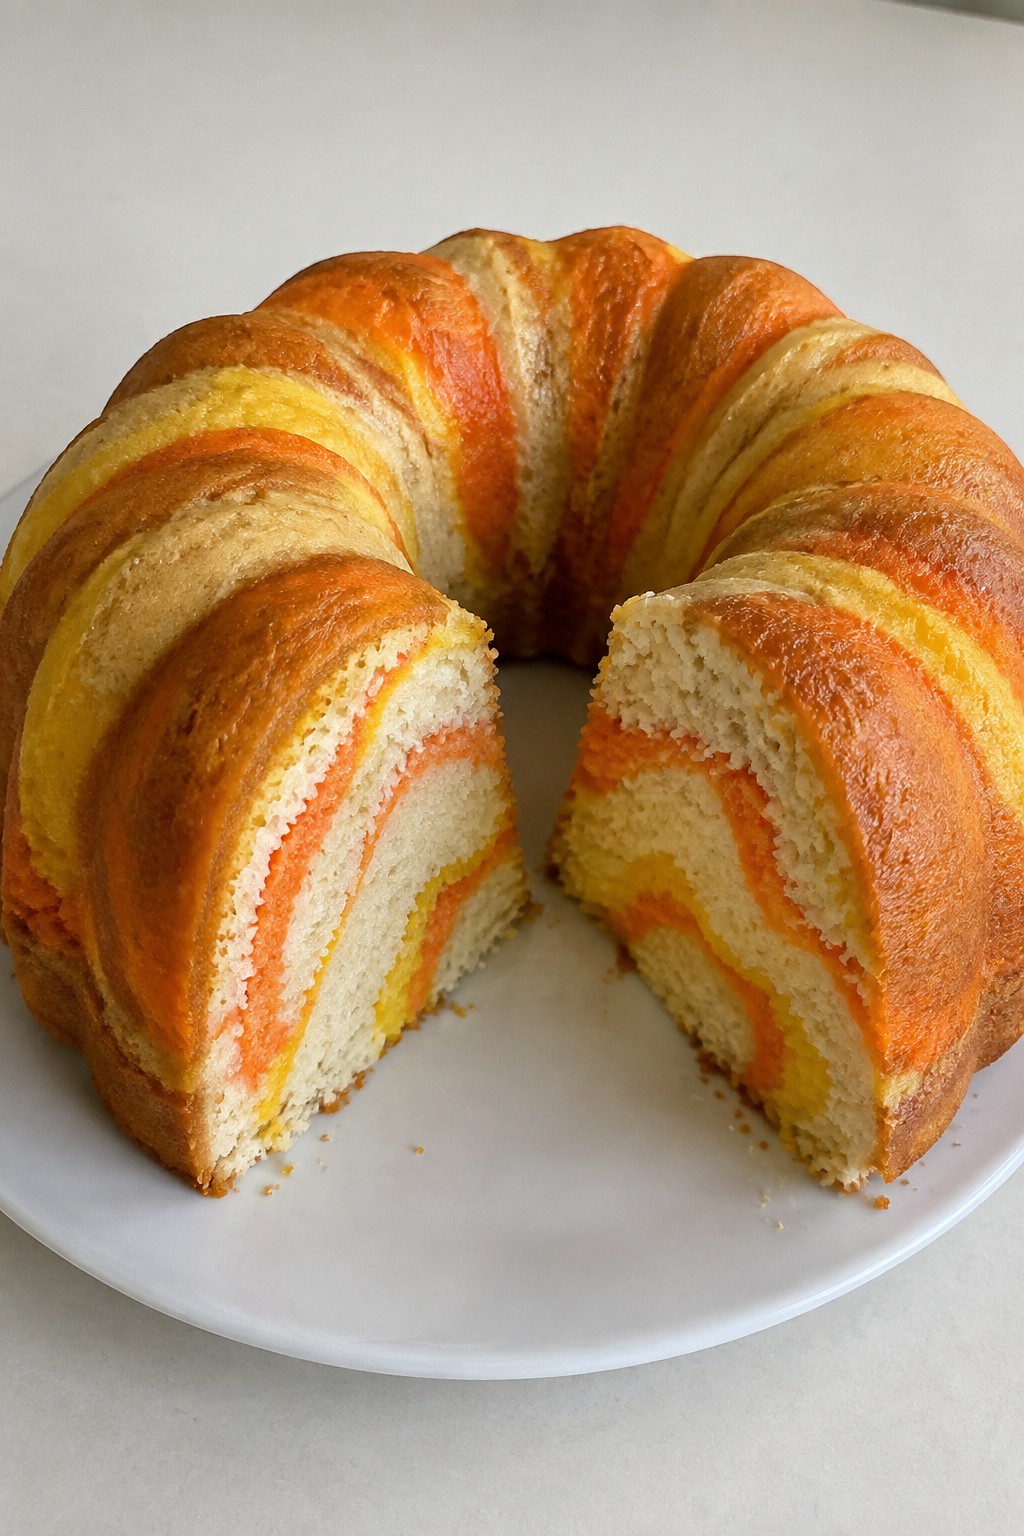
This bundt cake brings a simple Halloween touch with colored swirls that echo the look of candy corn. It works well for family gatherings or school events where you want something festive without much fuss. The cake stays moist with a light vanilla flavor and a soft crumb.
It turns out best when the colors stay distinct rather than blending fully. Kids often enjoy helping with the swirling step.
Serves 4 people.
Ingredients
- 1 1/2 cups all-purpose flour
- 3/4 cup granulated sugar
- 1/2 cup unsalted butter, softened
- 2 large eggs
- 1/2 cup whole milk
- 1 1/2 teaspoons baking powder
- 1 teaspoon vanilla extract
- Yellow food coloring
- Orange food coloring
- 1/4 cup candy corn pieces
Instructions
- Preheat the oven to 350 degrees and grease a small bundt pan.
- In a mixing bowl, cream the butter and sugar until light and fluffy.
- Add the eggs one at a time, then stir in the vanilla extract and milk.
- In a second bowl, whisk the flour and baking powder together.
- Combine the wet and dry mixtures until just smooth.
- Divide the batter into three equal parts. Leave one part plain, tint one part yellow, and tint the last part orange.
- Spoon the three colors into the bundt pan in alternating layers, then run a knife through the batter a few times to create swirls.
- Bake for 30 to 35 minutes until a toothpick comes out clean.
- Cool the cake in the pan for 10 minutes, then turn it out onto a rack to finish cooling.
- Scatter the candy corn pieces over the top before serving.
Extra Tips
Use gel food coloring for stronger shades without thinning the batter. If the swirls look too blended after baking, next time add the colors in thicker, separate dollops. Store leftovers in an airtight container at room temperature for up to two days.Course: Dessert Cuisine: American Equipment: Bundt pan, Mixing bowls, Whisk, Oven
Monster Green Velvet Layer Cake
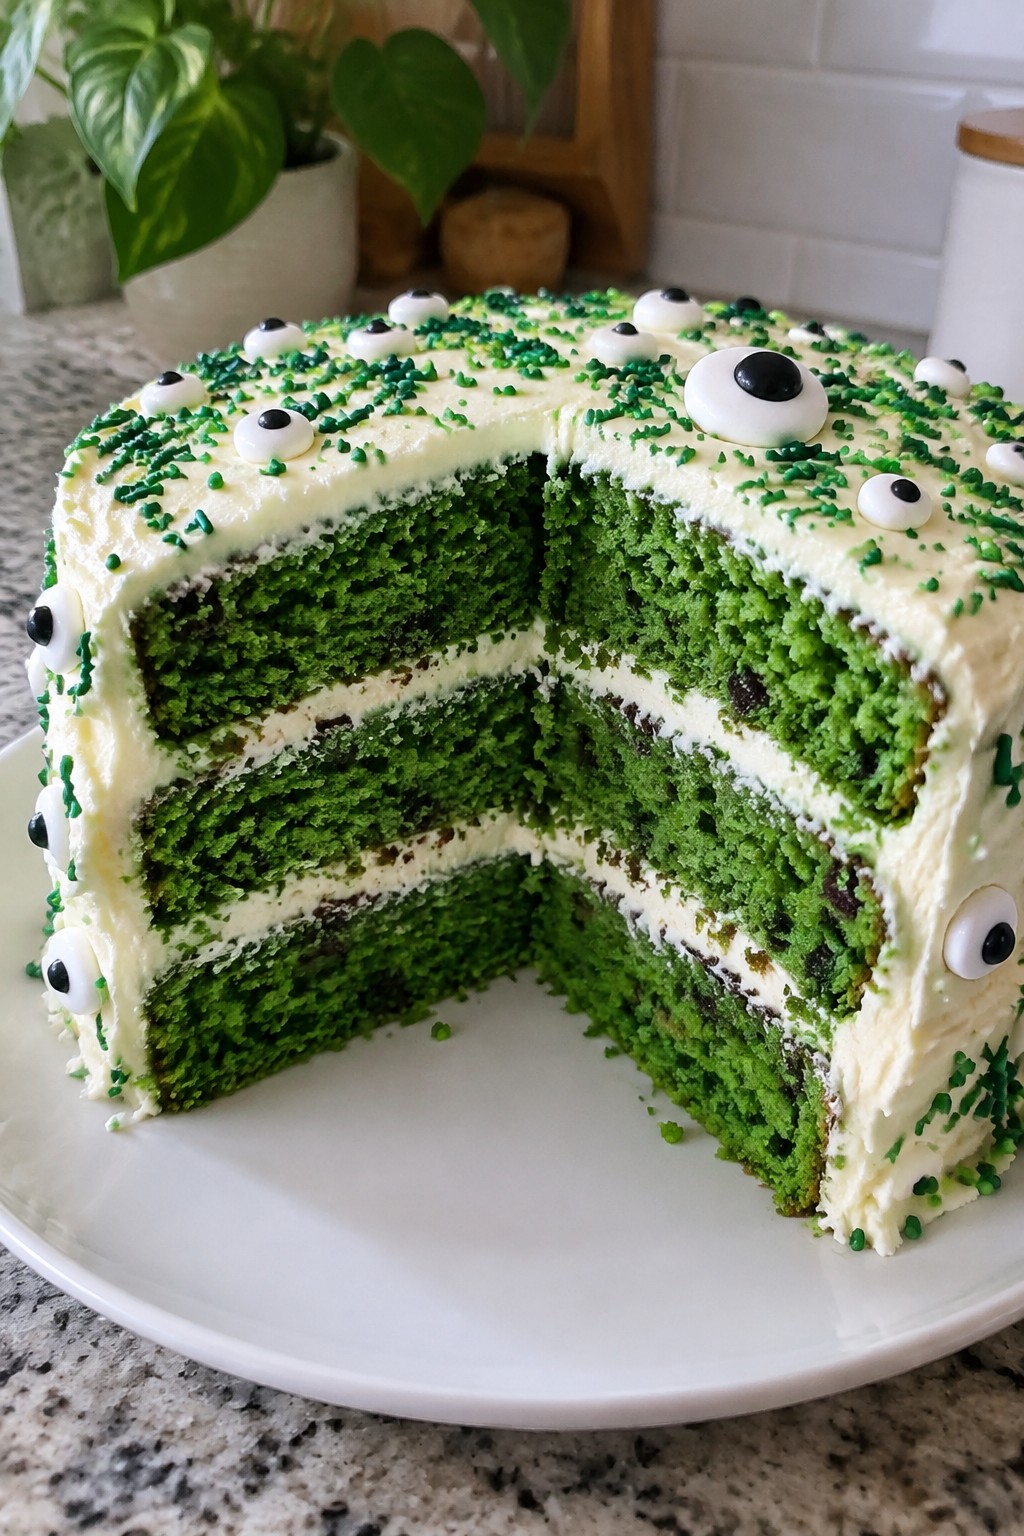
This green velvet cake gives a playful Halloween spin to the classic red velvet recipe. The bright green layers and simple monster decorations make it a hit at parties or family gatherings. It bakes up moist with a light chocolate taste that balances well with the creamy frosting.
Serves 4 people.
Ingredients
- 1 1/4 cups all-purpose flour
- 3/4 cup granulated sugar
- 1 tablespoon unsweetened cocoa powder
- 1/2 teaspoon baking soda
- 1/4 teaspoon salt
- 1/2 cup buttermilk
- 1/4 cup vegetable oil
- 1 large egg
- 1 teaspoon vanilla extract
- 1 tablespoon green food coloring
- 1 teaspoon white vinegar
- 4 ounces cream cheese, softened
- 2 tablespoons unsalted butter, softened
- 1 1/2 cups powdered sugar
- 12 candy eyes
- Green sprinkles for garnish
Instructions
- Preheat the oven to 350°F and grease two 6-inch round cake pans. Line the bottoms with parchment paper.
- In a medium bowl, whisk together the flour, granulated sugar, cocoa powder, baking soda, and salt.
- In another bowl, mix the buttermilk, vegetable oil, egg, vanilla extract, green food coloring, and white vinegar until smooth.
- Pour the wet mixture into the dry ingredients and stir just until combined. Divide the batter evenly between the prepared pans.
- Bake for 22 to 25 minutes, or until a toothpick inserted in the center comes out clean. Cool the layers in the pans for 10 minutes, then turn them out onto a wire rack to cool completely.
- Beat the cream cheese and butter together until smooth. Gradually add the powdered sugar and mix until the frosting reaches a spreadable consistency.
- Place one cooled cake layer on a plate and spread a layer of frosting on top. Add the second layer and frost the top and sides. Press candy eyes onto the sides and scatter green sprinkles over the top.
Extra Tips
Use gel food coloring for a deeper green without thinning the batter. If the frosting feels too thick, add a teaspoon of milk to loosen it. Store leftovers in the refrigerator for up to three days and let slices sit at room temperature for 15 minutes before serving to soften the frosting.Course: Dessert Cuisine: American Equipment: Mixing Bowls, Cake Pans, Electric Mixer, Oven
Bat-Shaped Chocolate Fudge Cake
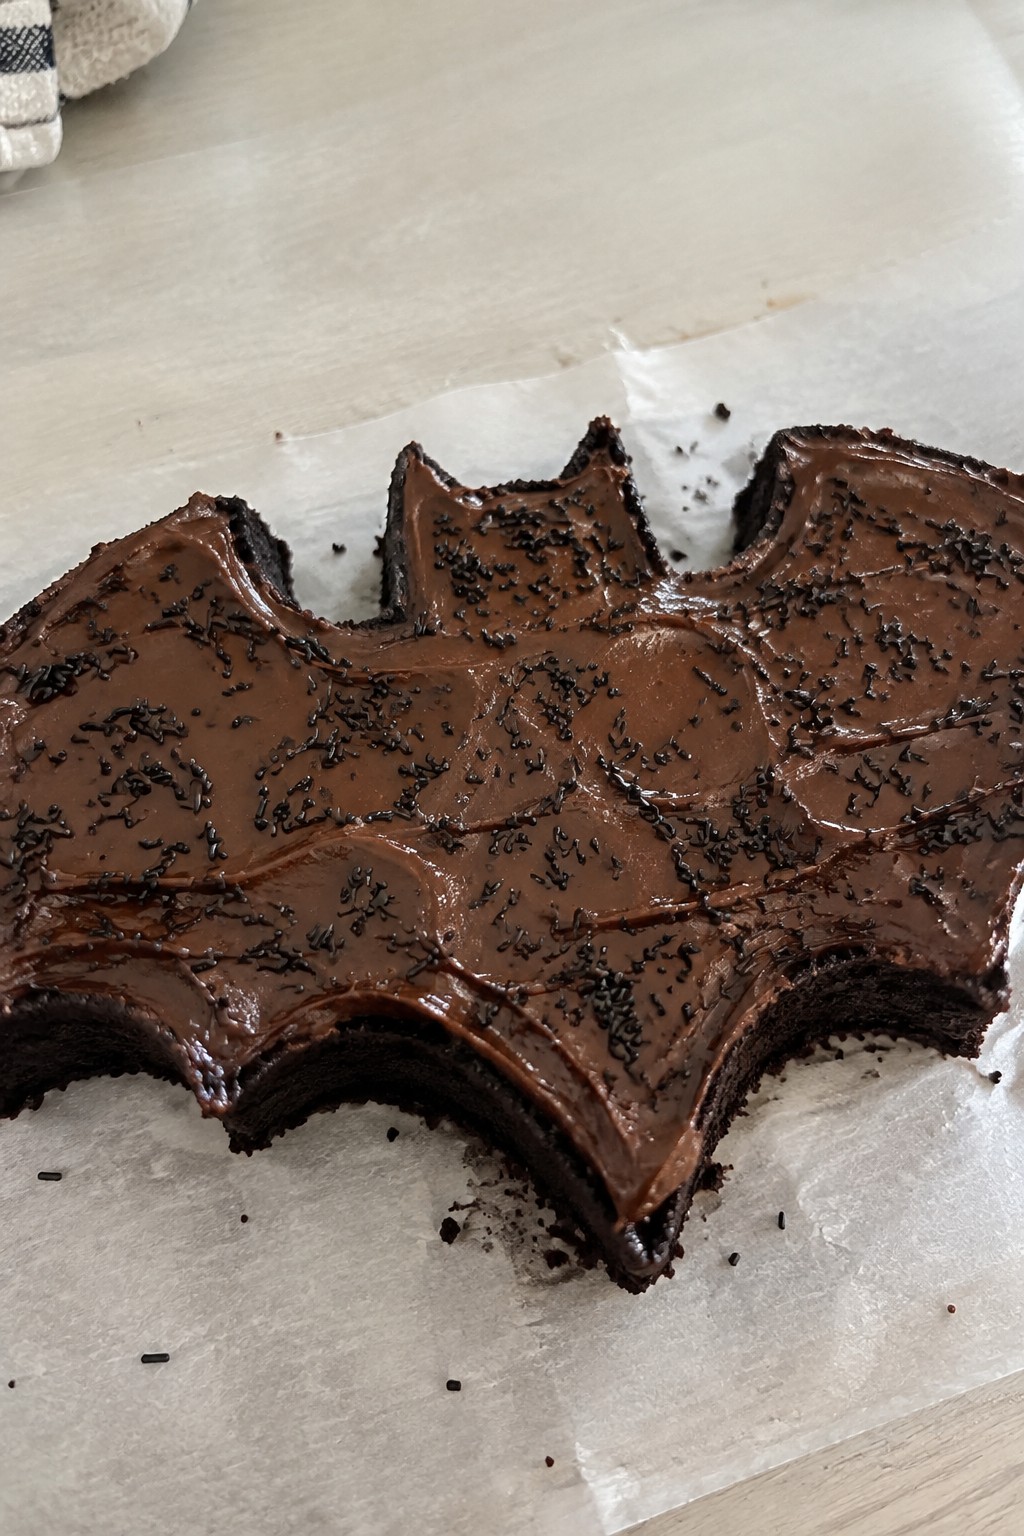
This chocolate fudge cake brings a fun Halloween twist with its bat shape and deep cocoa flavor. The moist, rich texture comes from a simple one-bowl batter that bakes up dense like fudge without extra steps. It works well for small gatherings or as a centerpiece for kids parties when you need something quick and festive.
Serves 4 people.
Ingredients
- 1 cup all-purpose flour
- ¾ cup granulated sugar
- ½ cup unsweetened cocoa powder
- 1 teaspoon baking soda
- ½ teaspoon salt
- 1 large egg
- ½ cup buttermilk
- ¼ cup vegetable oil
- 1 teaspoon vanilla extract
- ½ cup hot water
- 1 cup chocolate frosting
- Black sprinkles
Instructions
- Preheat the oven to 350 degrees and line an 8×8 inch baking pan with parchment paper.
- In a mixing bowl, whisk together the flour, sugar, cocoa powder, baking soda, and salt until evenly combined.
- Add the egg, buttermilk, vegetable oil, and vanilla extract to the dry ingredients and stir until a thick batter forms.
- Pour in the hot water and mix until the batter becomes smooth and glossy.
- Pour the batter into the prepared pan and bake for 25 to 30 minutes until a toothpick inserted in the center comes out clean.
- Let the cake cool completely in the pan before lifting it out.
- Use a sharp knife to cut the cooled cake into a bat shape, trimming away excess edges to form wings and a body.
- Spread the chocolate frosting evenly over the bat-shaped cake.
- Scatter black sprinkles over the frosting to finish the decoration.
Extra Tips
Cut the cake while it is fully cooled to keep the bat shape clean and prevent crumbling. If you want a stronger chocolate taste, swap the hot water for hot coffee in the batter. Store leftovers in an airtight container at room temperature for up to two days to maintain the fudge-like texture.Course: Dessert Cuisine: American Equipment: Mixing Bowl, 8×8 Inch Baking Pan, Oven, Knife
Skeleton Bone White Chocolate Cake
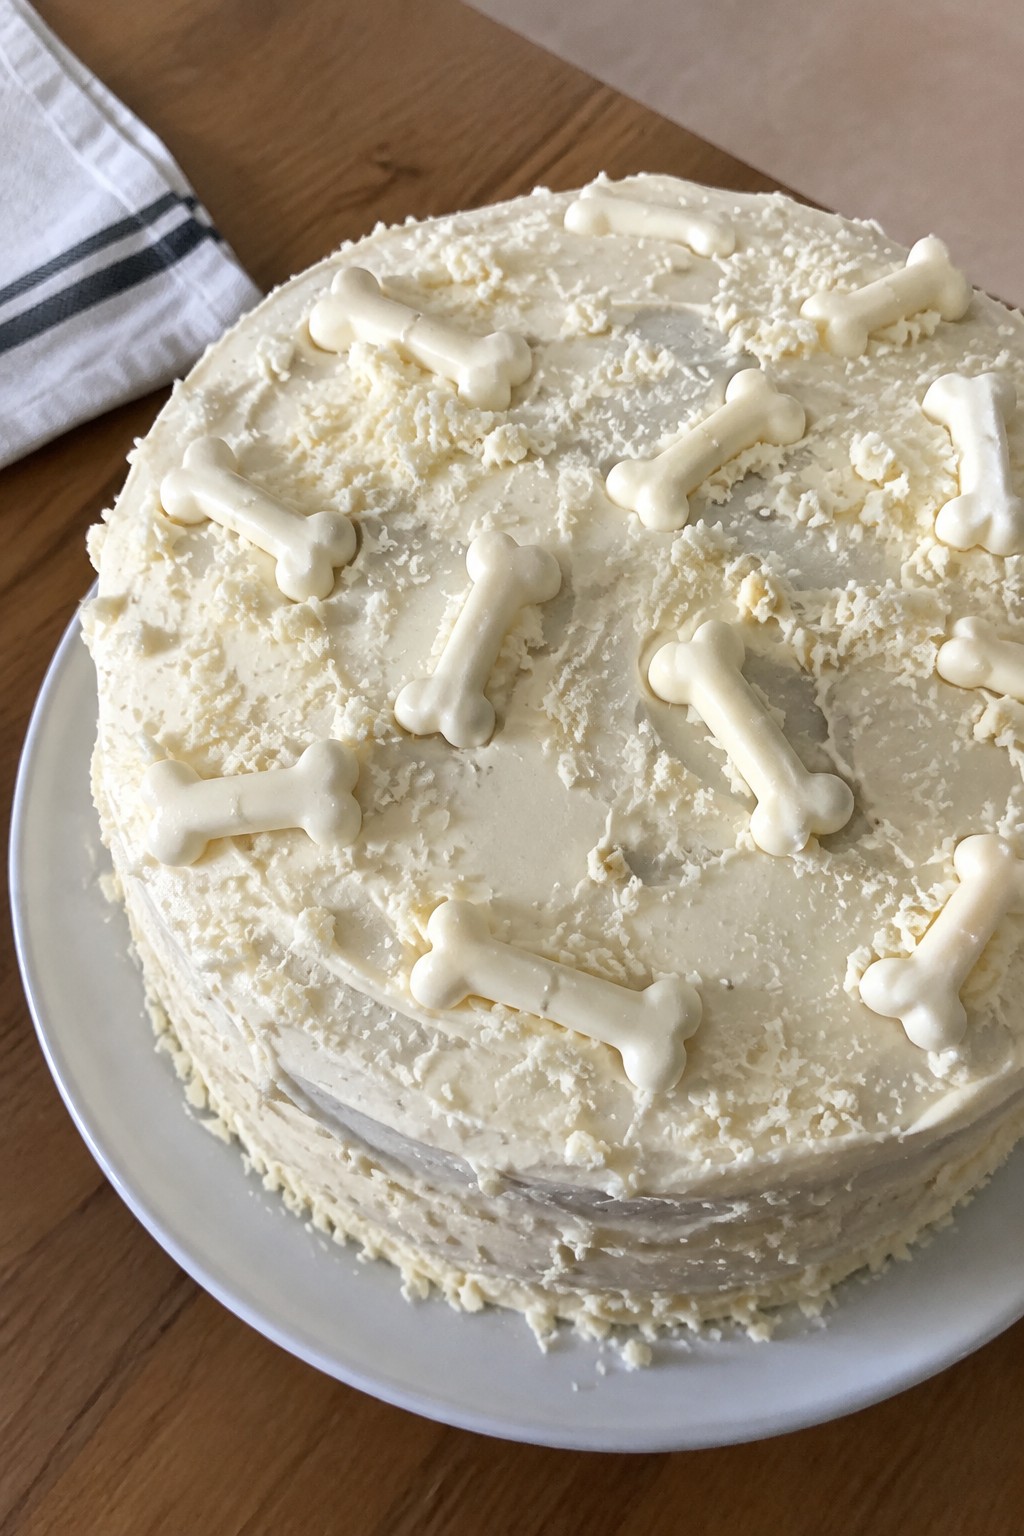
This white chocolate cake offers a simple way to add a Halloween touch without complicated steps. The mild sweetness of white chocolate pairs with a light crumb, and bone-shaped decorations give it a festive look that suits parties or casual gatherings with family.
The recipe keeps the process straightforward so anyone can assemble it at home. Melted white chocolate goes into both the batter and the topping, creating consistent flavor throughout.
Serves 4 people.
Ingredients
- 1 cup all-purpose flour
- 3/4 cup granulated sugar
- 1/2 cup unsalted butter, softened
- 2 large eggs
- 4 ounces white chocolate, melted and divided
- 1 teaspoon vanilla extract
- 1 teaspoon baking powder
- 1/2 cup milk
- 1/2 cup heavy cream
Instructions
- Preheat the oven to 350 degrees F and grease a small 8-inch round cake pan.
- In a mixing bowl, cream the softened butter and sugar until light and fluffy.
- Add the eggs one at a time, mixing well after each addition.
- Stir in 2 ounces of the melted white chocolate and the vanilla extract.
- In a separate bowl, whisk together the flour and baking powder.
- Alternate adding the dry ingredients and the milk to the butter mixture, mixing until just combined.
- Pour the batter into the prepared pan and bake for 25 to 30 minutes, or until a toothpick comes out clean.
- Let the cake cool completely in the pan before removing it.
- Heat the heavy cream until steaming, then pour it over the remaining 2 ounces of white chocolate and stir until smooth to make the topping.
- Spread the white chocolate topping over the cooled cake.
- Use the extra melted white chocolate to pipe small bone shapes on parchment paper, let them set, and arrange them on top of the cake.
Extra Tips
Melt the white chocolate slowly over low heat or in short microwave bursts to avoid scorching. If the topping thickens too much while spreading, warm it gently for a few seconds. The bone decorations can be made ahead and stored in the refrigerator until needed. Leftovers keep well in an airtight container at room temperature for two days.Course: Dessert Cuisine: American Equipment: Mixing Bowl, Cake Pan, Whisk, Piping Bag
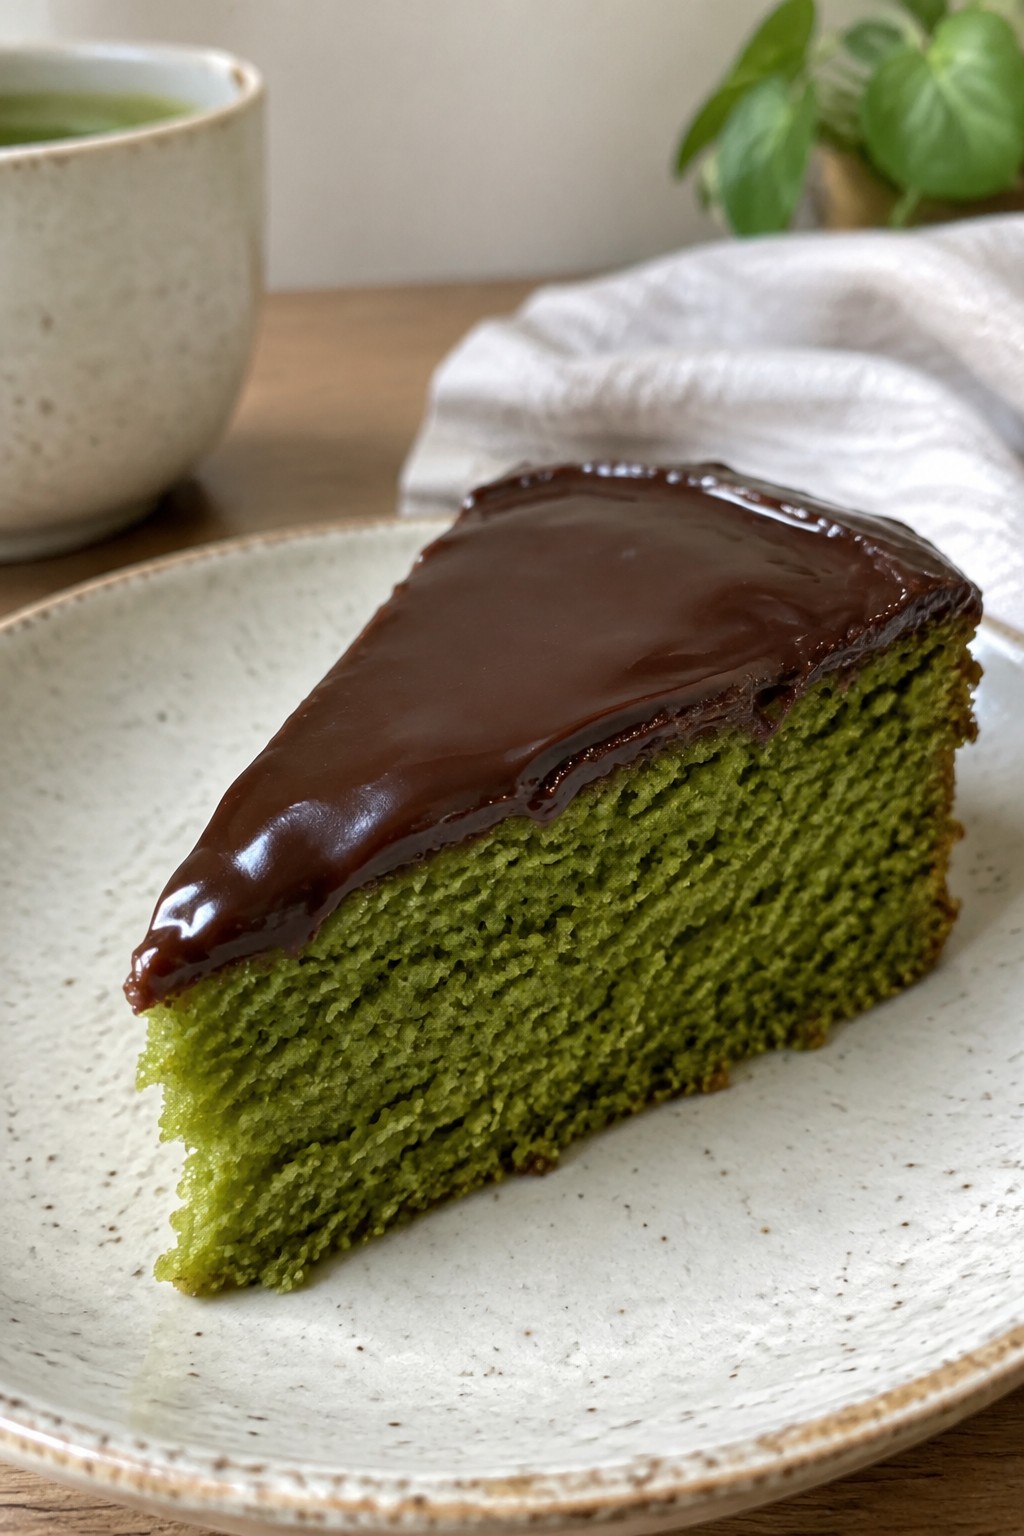
Haunted Forest Matcha Cake
This matcha cake offers a gentle earthy taste and a natural green color that suits Halloween without extra dyes. It works well for small parties or as a simple dessert when you want something a bit different from standard chocolate or vanilla cakes.
The crumb stays moist and tender while the dark chocolate ganache gives a rich contrast. Together they create a balanced bite that feels festive yet easy to prepare.
Serves 4 people.
Ingredients
- ¾ cup all-purpose flour
- ½ cup granulated sugar
- 2 tablespoons matcha powder
- 1 teaspoon baking powder
- ¼ teaspoon salt
- ⅓ cup milk
- ¼ cup vegetable oil
- 1 large egg
- ½ teaspoon vanilla extract
- ½ cup heavy cream
- 4 ounces dark chocolate, chopped
Instructions
- Preheat the oven to 350°F and grease a 6-inch round cake pan.
- In a mixing bowl, stir together the flour, sugar, matcha powder, baking powder, and salt.
- In a second bowl, whisk the milk, vegetable oil, egg, and vanilla extract until smooth.
- Pour the wet mixture into the dry ingredients and stir until just combined.
- Transfer the batter to the prepared pan and bake for 25 to 28 minutes, or until a toothpick comes out clean.
- Let the cake cool in the pan for 10 minutes, then turn it out onto a wire rack to cool completely.
- Place the chopped dark chocolate in a heatproof bowl. Heat the heavy cream in a small saucepan until it just begins to simmer, then pour it over the chocolate.
- Stir the cream and chocolate until the ganache is smooth and glossy. Spread or pour it over the cooled cake.
Extra Tips
Bake the cake a day ahead and store it wrapped at room temperature so the ganache sets cleanly when added. If the matcha tastes too bitter, a light dusting of powdered sugar on top can soften the edge without changing the forest look. Leftovers keep in the fridge for two days and taste best when brought back to room temperature before serving.Course: Dessert Cuisine: Japanese-inspired Equipment: Mixing bowls, Whisk, 6-inch cake pan, Saucepan, Wire rack
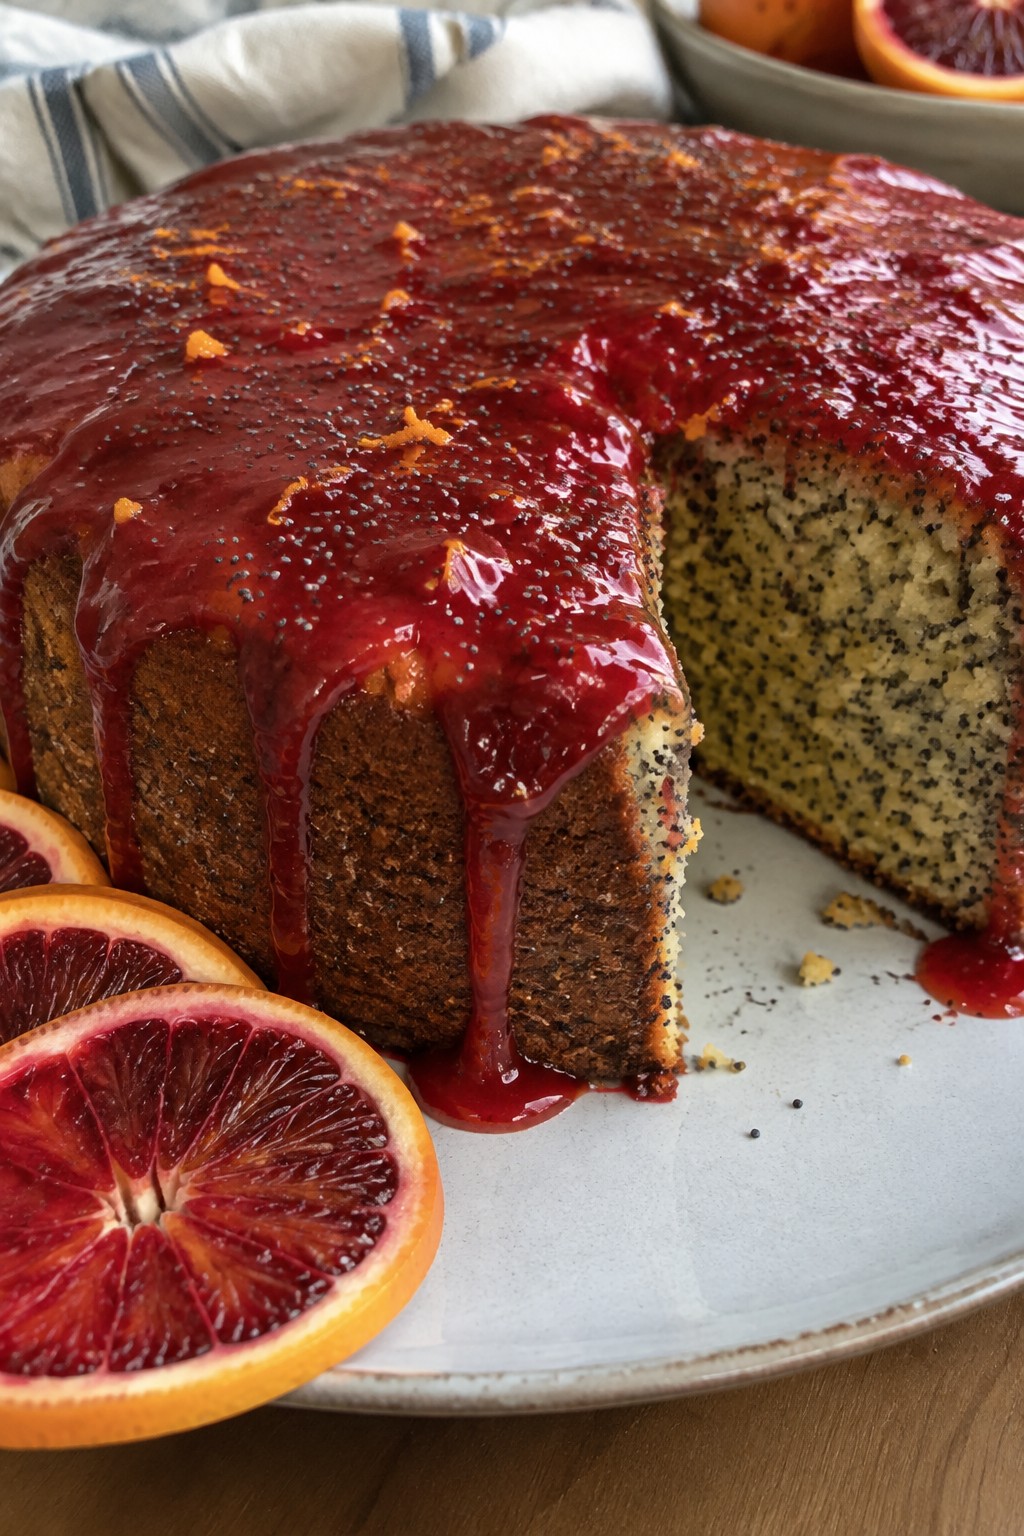
Bloody Orange Poppy Seed Cake
This cake turns a simple poppy seed batter into a Halloween showpiece with blood oranges. The fruit gives the glaze a deep red color that drips down the sides like fresh blood, making it an easy centerpiece for a party table.
The crumb stays moist and speckled with poppy seeds for gentle crunch. Bright citrus balances the sweetness so the cake tastes fresh rather than heavy.
Serves 4 people.
Ingredients
- 1 cup all-purpose flour
- ½ cup granulated sugar
- 1 teaspoon baking powder
- ¼ teaspoon salt
- 2 tablespoons poppy seeds
- ¼ cup unsalted butter, melted
- 1 large egg
- ½ cup milk
- Zest of 2 blood oranges
- ¼ cup blood orange juice
- ½ cup powdered sugar
- Extra blood orange slices for serving
Instructions
- Heat the oven to 350°F and grease a small loaf pan.
- Stir together the flour, sugar, baking powder, salt, and poppy seeds in a mixing bowl.
- In a second bowl, whisk the melted butter, egg, milk, blood orange zest, and 2 tablespoons of the juice until smooth.
- Pour the wet mixture into the dry ingredients and stir just until no flour streaks remain.
- Scrape the batter into the prepared pan and bake for 30 to 35 minutes, until a toothpick comes out clean.
- Let the cake cool in the pan for 10 minutes, then turn it out onto a rack to finish cooling.
- Mix the powdered sugar with the remaining blood orange juice until the glaze is thick but pourable.
- Drizzle the glaze over the cooled cake and let it set for a few minutes before slicing. Serve with the extra blood orange slices.
Extra Tips
Use the full amount of blood orange juice in the glaze for the richest color. If the glaze looks too thick, add a teaspoon more juice at a time until it flows slowly off the spoon. Store leftovers wrapped at room temperature for up to two days.Course: Dessert Cuisine: American Equipment: Mixing Bowls, Small Loaf Pan, Whisk
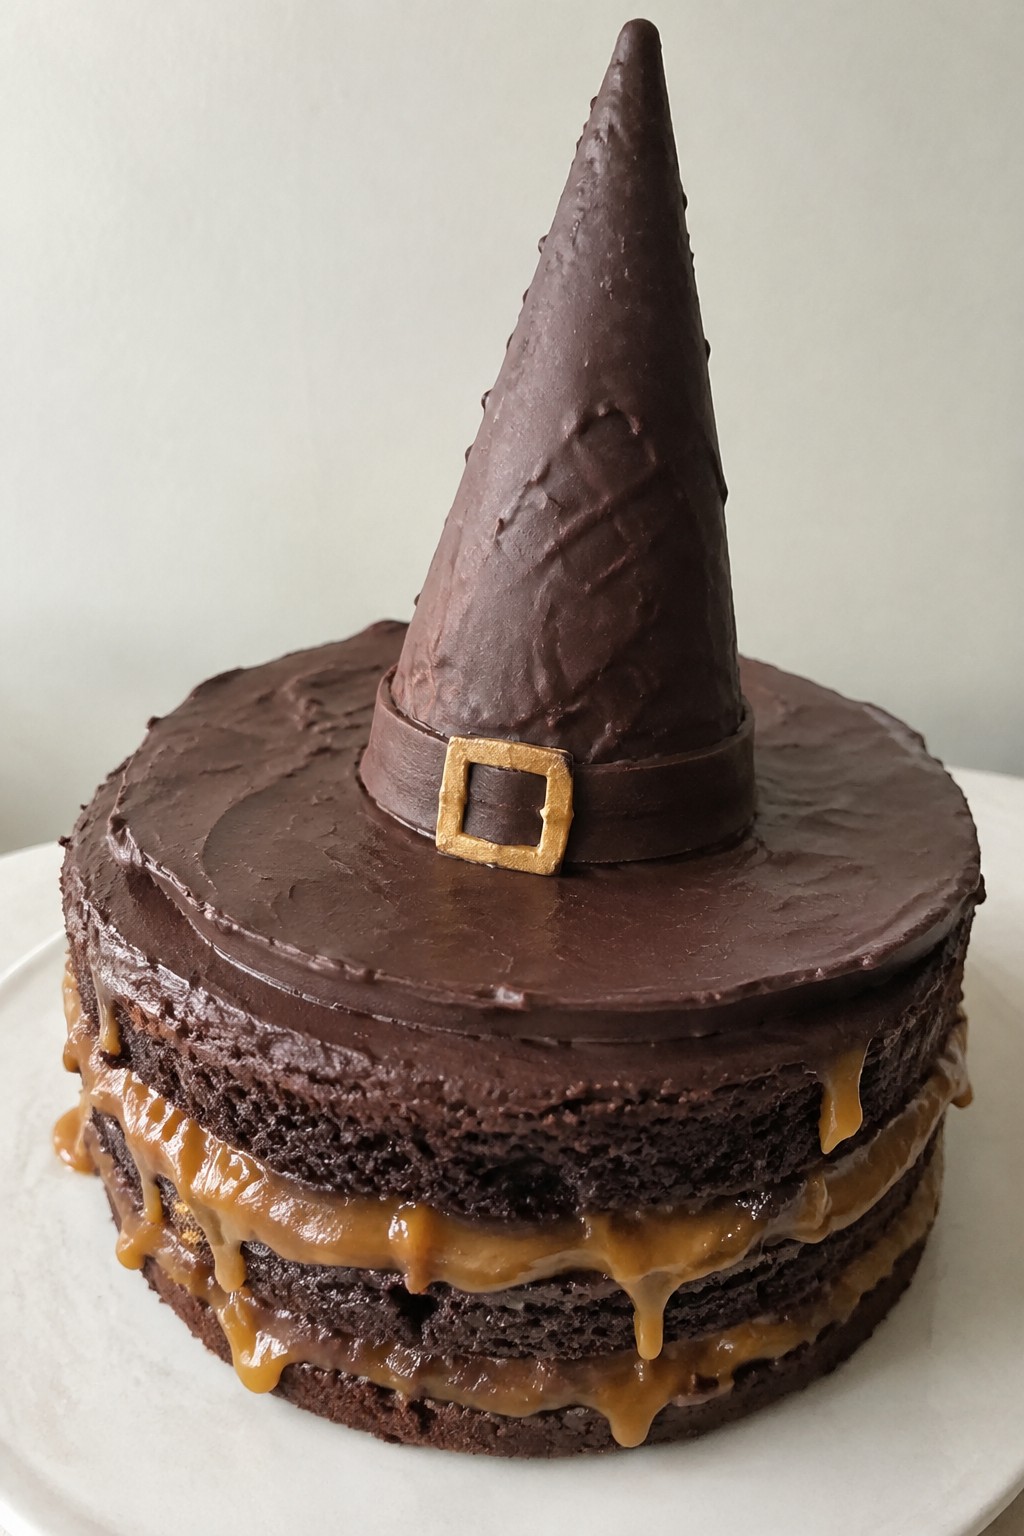
Witch Hat Chocolate Caramel Cake
This witch hat cake brings together moist chocolate layers and sticky caramel in a shape that fits right into Halloween plans. It works well for small gatherings or after-school treats because the steps stay straightforward and the result looks festive without extra tools.
The finished cake tastes rich and sweet with a slight crunch from the chocolate-coated cone on top. Each serving gives you soft cake, smooth caramel, and a playful hat form that kids and adults both enjoy.
Serves 4 people.
Ingredients
- 1 box chocolate cake mix
- 3 large eggs
- ½ cup vegetable oil
- 1 cup water
- 1 cup store-bought caramel sauce
- 8 ounces chocolate melting wafers
- 4 sugar ice cream cones
Instructions
- Preheat the oven to 350°F and line a muffin tin with four paper liners. In a mixing bowl, combine the cake mix, eggs, oil, and water until smooth.
- Divide the batter evenly among the four liners and bake for 18 to 20 minutes, or until a toothpick comes out clean. Let the cakes cool completely in the tin.
- Place the chocolate melting wafers in a microwave-safe bowl and heat in 30-second bursts, stirring between each, until fully melted and smooth.
- Dip each sugar cone into the melted chocolate, turning to coat the outside completely. Set the coated cones on a sheet of parchment paper to harden.
- Once the cakes are cool, drizzle 2 tablespoons of caramel sauce over each one. Press a chocolate-coated cone onto the center of each cake to form the hat shape.
- Warm the remaining caramel slightly if needed and drizzle a little more over the top of each cone for a finished look.
Extra Tips
Warm the caramel just enough to pour easily so it does not soak into the cake too fast. If the chocolate on the cones starts to set before you place them, give the base a quick re-melt so it sticks firmly to the cake.Course: Dessert Cuisine: American Equipment: Mixing Bowl, Muffin Tin, Microwave-safe Bowl, Baking Sheet
