
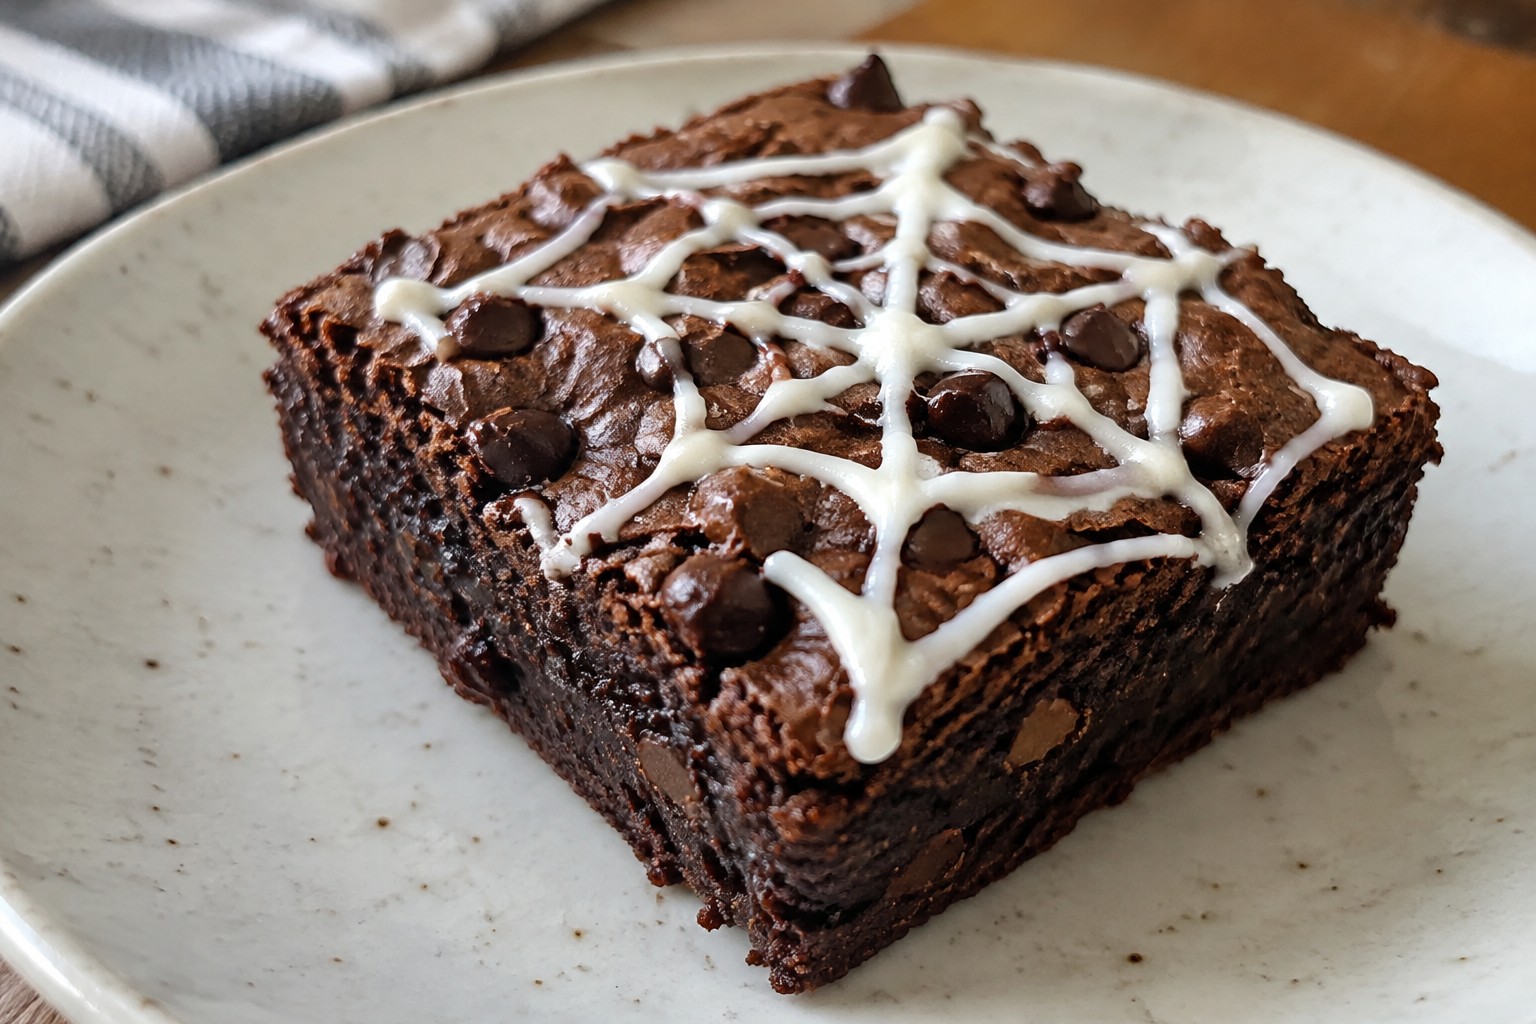
Potluck season around Halloween means finding dishes that are both tasty and on theme.
These ideas focus on simple recipes that travel well and feed a crowd.
You can make most of them with basic ingredients from the store.
Some take just a few steps while others allow for a bit more prep if you have time.
Scroll down to see options that range from savory bites to sweet treats.
Helpful Tips Before You Start
These tips will help your Halloween dishes travel well and work smoothly at a potluck.
Choose Sturdy Recipes
Select items that hold up at room temperature for a few hours. Avoid anything with delicate frostings or ingredients that melt quickly.
Prep Components Separately
Make sauces, fillings, and bases at home. Assemble the final spooky details once you arrive to keep everything fresh.
Bring Serving Basics
Pack extra plates, utensils, and small labels. This makes it easy for guests to serve themselves and note any allergens.
Focus on Finger Foods
Bite sized options like skewers or small wraps let people try several dishes without extra plates or cleanup.
Spooky Spiderweb Seven-Layer Dip
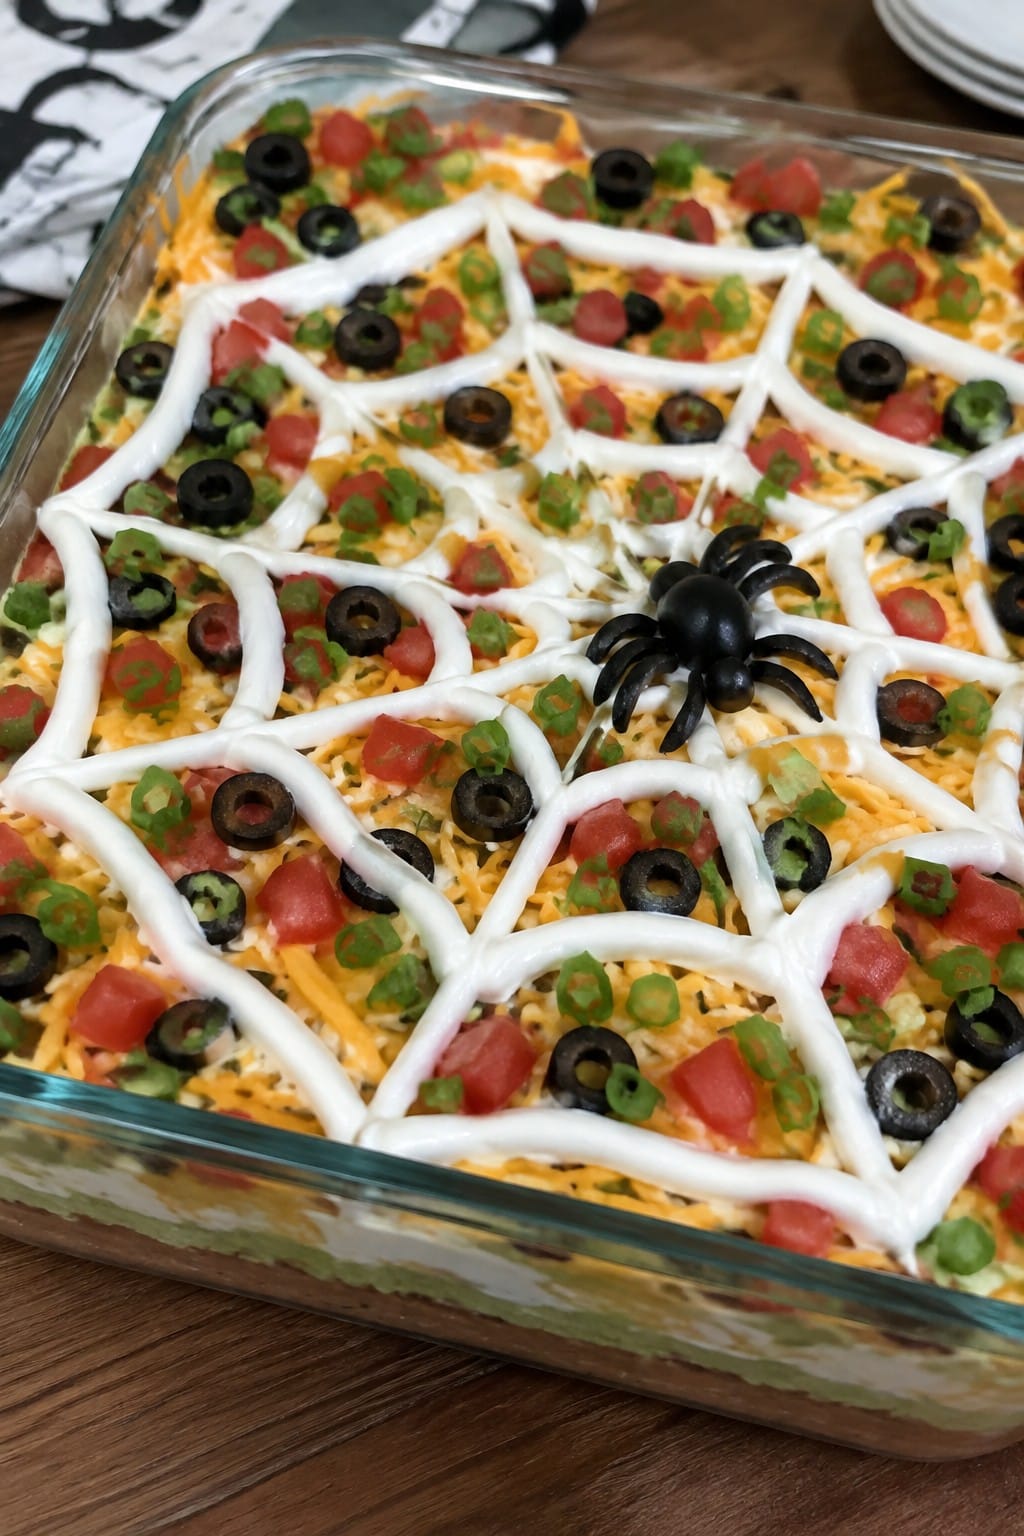
This seven-layer dip gets a simple Halloween update with a sour cream spiderweb on top. It travels well to potlucks and gives guests an easy dish to scoop from a shared platter.
The layers combine creamy beans, guacamole, and fresh toppings for a mix of textures and mild savory flavor. The olive spider adds a quick visual touch without extra steps.
Serves 4 people.
Ingredients
- 1 (15-ounce) can refried beans
- 1 cup guacamole
- 1 1/4 cups sour cream, divided
- 1 cup shredded cheddar cheese
- 2 roma tomatoes, diced
- 1/4 cup sliced black olives
- 1/4 cup chopped green onions
- 3 whole black olives, for garnish
Instructions
- Spread the refried beans evenly across the bottom of a shallow serving dish to form the first layer.
- Spoon the guacamole over the beans and smooth it into an even layer.
- Spread 1 cup of the sour cream over the guacamole.
- Sprinkle the shredded cheddar cheese evenly on top of the sour cream.
- Scatter the diced tomatoes over the cheese.
- Add the sliced black olives as the next layer.
- Finish with the chopped green onions.
- Place the remaining 1/4 cup sour cream in a small zip-top bag, snip off one corner, and pipe concentric circles on top. Drag a toothpick from the center outward to create the web pattern.
- Use the whole black olives to form a spider on the web, slicing one olive into strips for legs if desired.
Extra Tips
Pipe the sour cream web right before serving so it stays bright white. If making ahead, assemble the layers up to the green onions, cover, and add the web and spider just before the potluck. A clear glass dish shows off the layers best.Course: Appetizer Cuisine: American Equipment: Shallow serving dish, Mixing bowl, Zip-top bag
Mummy-Wrapped Sausage Rolls with Mustard
These sausage rolls stand out at a Halloween potluck with their simple mummy look. Strips of dough wrap around the sausages like bandages, giving them a playful appearance that fits the season without extra effort. The result is a warm bite with crisp pastry and savory filling.
Mustard provides a sharp contrast to the rich sausage. The rolls hold up well when transported and stay appealing even after some time on the table.

Serves 4 people.
Ingredients
- 8 cocktail sausages
- 1 (8-ounce) can refrigerated crescent roll dough
- 1/4 cup yellow mustard
Instructions
- Preheat the oven to 375 degrees F and line a baking sheet with parchment paper.
- Unroll the crescent roll dough on a cutting board and slice it into thin strips about 1/2 inch wide.
- Wrap each strip around a sausage, overlapping the dough slightly to create a mummy-bandage effect and leaving a small gap near one end for the face.
- Place the wrapped sausages on the prepared baking sheet.
- Bake for 12 to 15 minutes until the dough turns golden brown.
- Arrange the rolls on a platter and serve with the mustard for dipping.
Extra Tips
Leave a small uncovered space on each sausage so the mustard can be dotted on to form simple eyes after baking. If the dough feels too soft while wrapping, chill it for five minutes to make the strips easier to handle. Leftovers reheat best in a 350-degree oven for five minutes to restore crispness.Course: Appetizer Cuisine: American Equipment: Baking sheet, Knife
Graveyard Taco Salad with Tortilla Tombstones
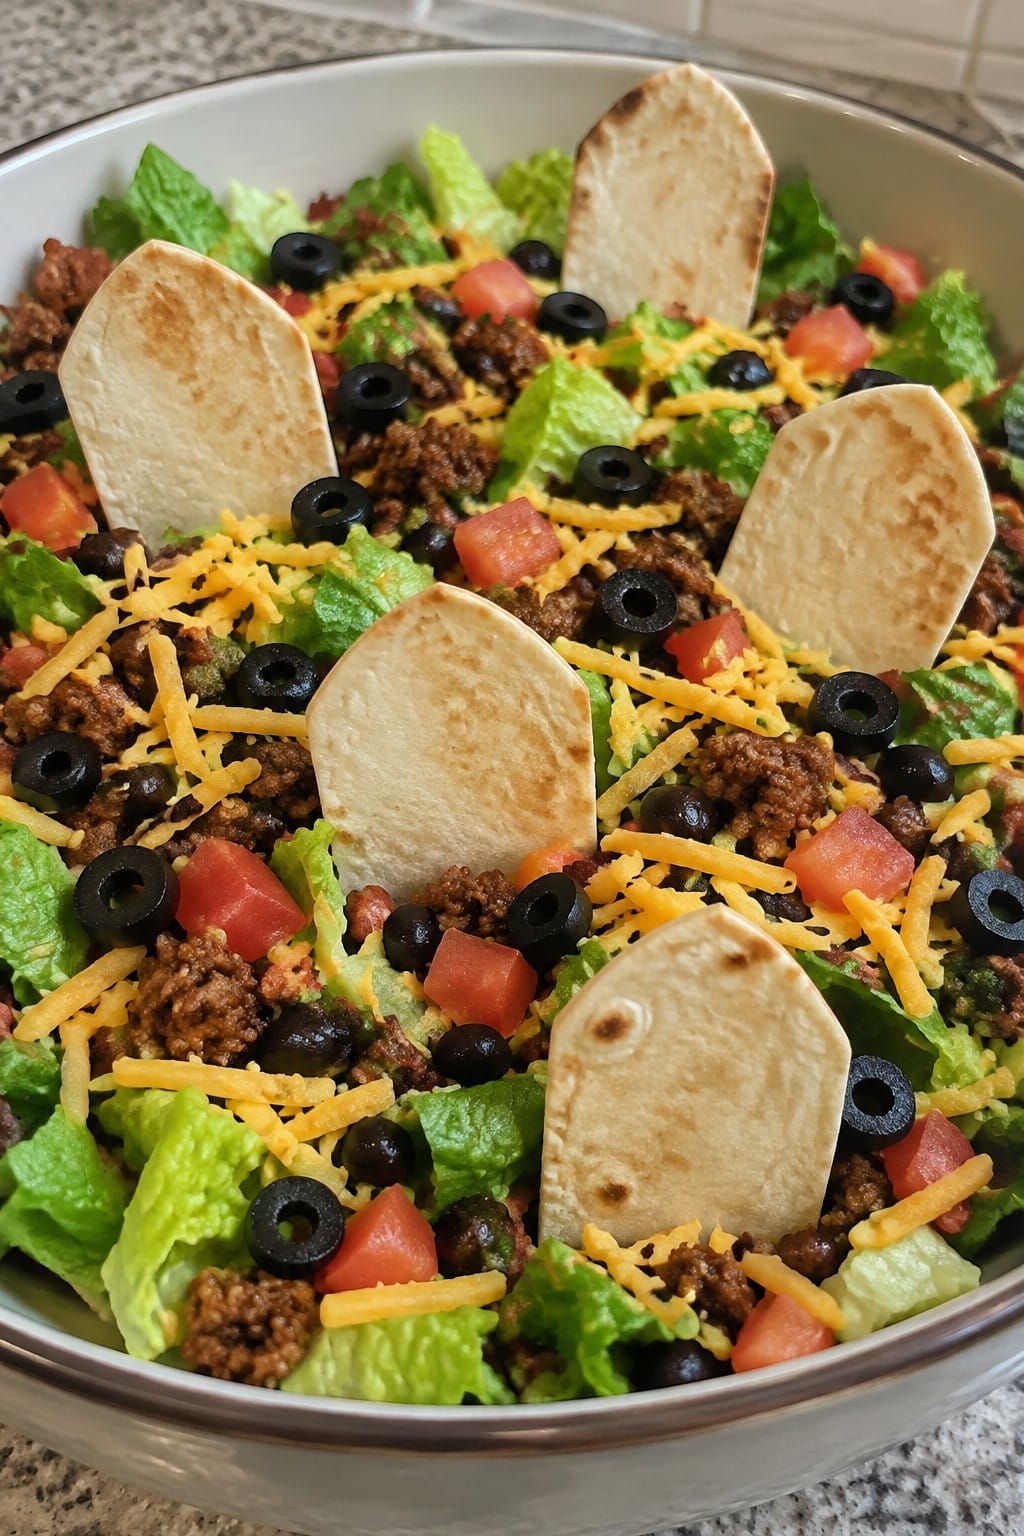
This graveyard taco salad turns a simple taco bar into a potluck centerpiece. The seasoned beef and fresh toppings stay hearty enough to travel, while the tortilla tombstones give it a clear Halloween look without extra work.
Crunchy lettuce and beans contrast with warm taco meat, and the baked tortilla pieces stay crisp on top of the salad. It travels well in a large bowl and needs only a quick assembly once you reach the event.
Serves 4 people.
Ingredients
- 1 lb ground beef
- 2 tbsp taco seasoning
- 6 cups chopped romaine lettuce
- 2 large tomatoes, diced
- 1 cup shredded cheddar cheese
- 1 (15 oz) can black beans, drained and rinsed
- 4 large flour tortillas
- 1 tbsp olive oil
- 1/4 cup sliced black olives
Instructions
- Heat a large skillet over medium heat and cook the ground beef until browned, breaking it up with a spoon as it cooks. Drain any excess fat.
- Stir the taco seasoning into the beef along with 1/4 cup water. Simmer for 3 minutes until the mixture thickens, then remove from heat.
- Preheat the oven to 375°F. Cut each flour tortilla into a tombstone shape. Place the shapes on a baking sheet, brush lightly with olive oil, and bake for 8 minutes until golden and crisp.
- In a large bowl, layer the romaine lettuce, black beans, and diced tomatoes. Spoon the seasoned beef over the vegetables.
- Sprinkle the shredded cheddar cheese and black olives on top. Stand the baked tortilla tombstones upright in the salad just before serving.
Extra Tips
Bake the tortillas right before you leave so they stay crisp during transport. If you need to make the salad ahead, keep the tombstones in a separate container and add them at the potluck to avoid softening. Swap the ground beef for ground turkey if you prefer a lighter option.Course: Salad Cuisine: Mexican Equipment: Large skillet, Baking sheet, Large bowl
Pumpkin-Shaped Cheese Ball Platter
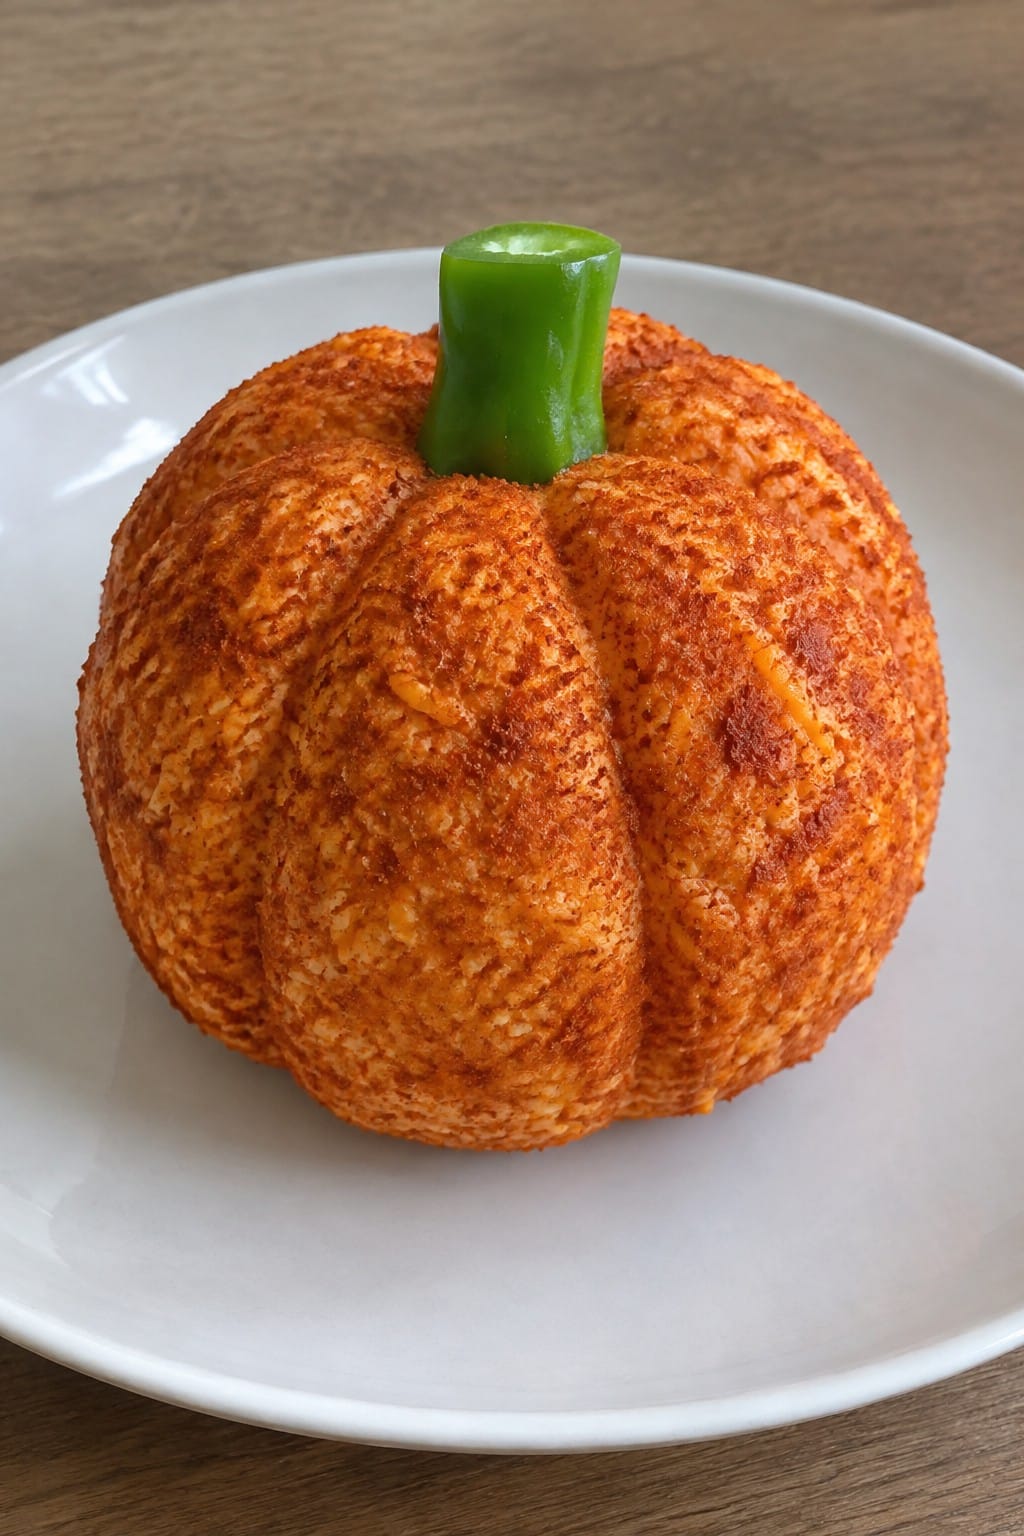
This cheese ball turns a simple spread into a fun Halloween display that stands out on a potluck table. Guests can scoop it onto crackers or veggies, and the pumpkin shape makes it easy to spot among other dishes.
The mix stays creamy inside with a light smoky coating on the outside. It holds its shape well after chilling, so it travels without losing form.
Serves 4 people.
Ingredients
- 8 oz cream cheese, softened
- 1 1/2 cups shredded cheddar cheese
- 1 tsp garlic powder
- 1 tsp paprika, plus 2 tbsp for coating
- 1/4 tsp salt
- 1 small piece green bell pepper
- Assorted crackers and vegetable sticks for serving
Instructions
- Place the softened cream cheese, shredded cheddar, garlic powder, 1 tsp paprika, and salt in a mixing bowl. Stir until the mixture is smooth and evenly combined.
- Lay a sheet of plastic wrap on the counter. Scrape the cheese mixture onto the wrap and shape it into a round ball. Wrap tightly and chill for at least one hour.
- Unwrap the chilled ball. Sprinkle the remaining 2 tbsp paprika on a plate and roll the ball in the paprika until fully coated.
- Use the back of a spoon or a knife to press gentle vertical ridges around the sides to resemble a pumpkin. Press the green bell pepper piece into the top as a stem.
- Set the finished cheese ball in the center of a serving platter. Arrange crackers and vegetable sticks around the edges.
Extra Tips
Chill the cheese ball a few hours ahead so the ridges hold their shape during transport. If the paprika coating looks patchy after travel, roll it lightly in more paprika right before serving. Use sturdy crackers that can hold a thick spread without breaking.Course: Appetizer Cuisine: American Equipment: Mixing Bowl, Plastic Wrap, Serving Platter
Cauldron Beef Chili with Cornbread Dippers
This chili works well for Halloween potlucks because it travels easily and stays warm in a slow cooker or insulated carrier. The name evokes a cauldron while the dish stays simple to prepare and serve family style.
The beef chili turns out thick and spiced with a touch of smokiness from the cumin. Sweet cornbread dippers add a soft, crumbly contrast that holds up when dipped into the hot chili.
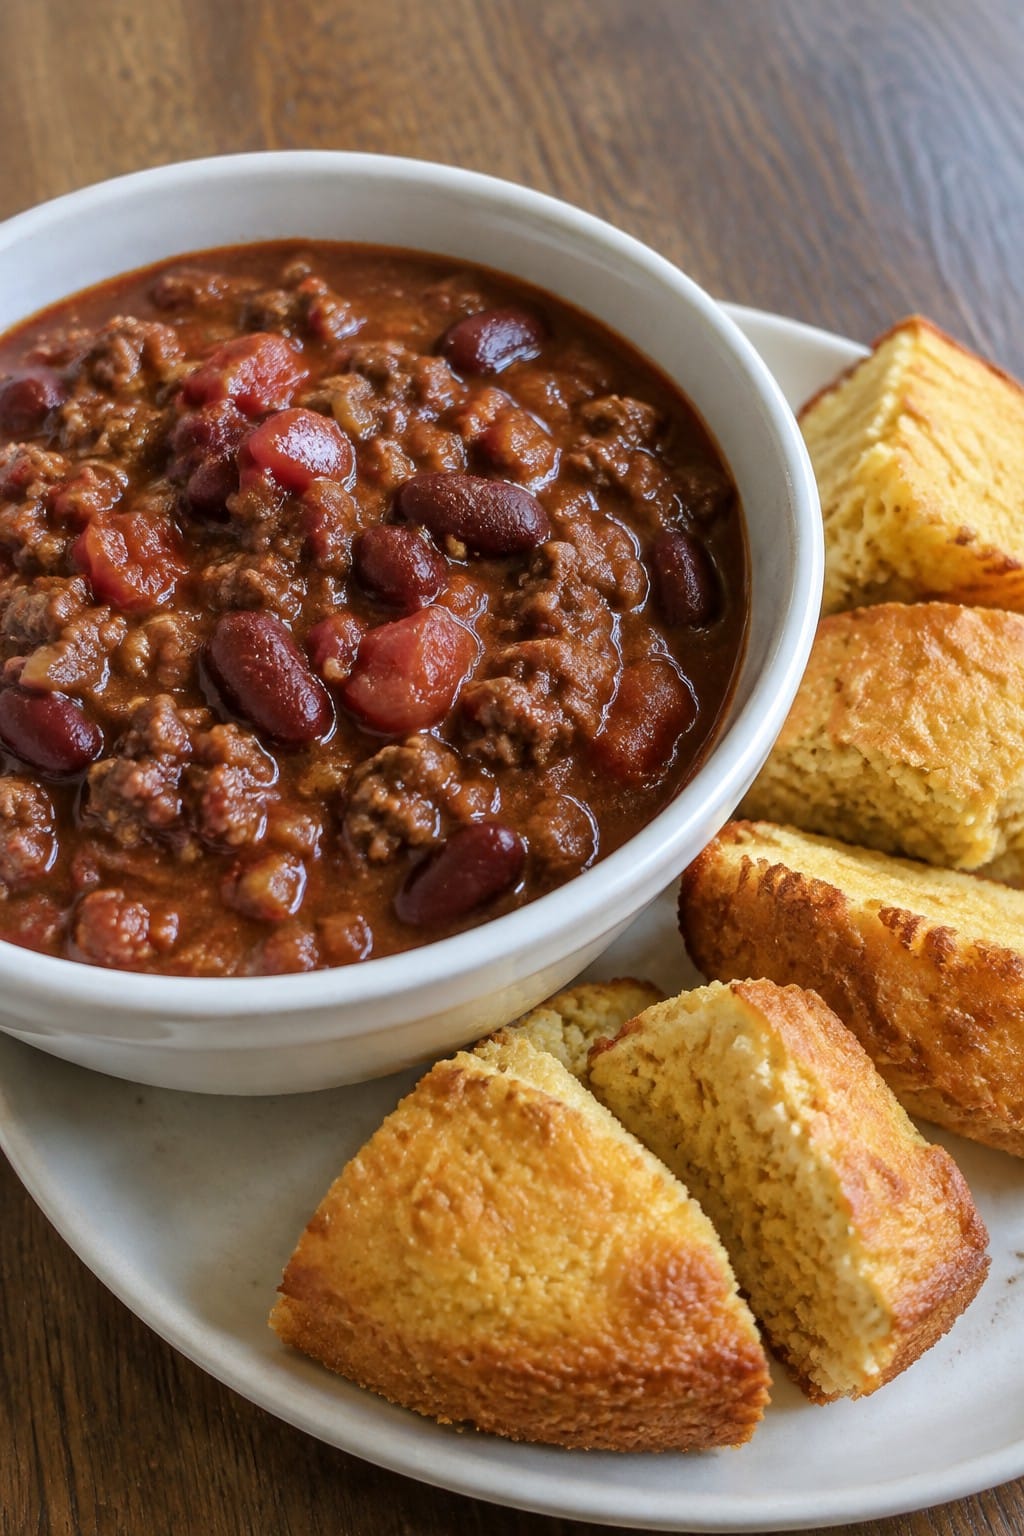
Serves 4 people.
Ingredients
- 1 pound ground beef
- 1 medium onion, diced
- 2 cloves garlic, minced
- 1 can (15 oz) kidney beans, drained and rinsed
- 1 can (14.5 oz) diced tomatoes
- 2 tablespoons chili powder
- 1 teaspoon ground cumin
- Salt and pepper to taste
- 1 cup cornmeal
- 1 cup all-purpose flour
- 1 tablespoon baking powder
- 1 cup milk
- 1 large egg
- 2 tablespoons melted butter
Instructions
- Heat a large pot over medium heat and add the ground beef. Cook until browned, breaking it up with a spoon as it cooks.
- Add the diced onion and minced garlic to the pot. Cook for 3 minutes until the onion softens.
- Stir in the chili powder, cumin, salt, and pepper. Cook for 1 minute to toast the spices.
- Pour in the diced tomatoes and kidney beans. Bring the mixture to a simmer, then reduce heat and cook for 15 minutes, stirring occasionally.
- While the chili simmers, preheat the oven to 400°F. In a mixing bowl, combine the cornmeal, flour, baking powder, and a pinch of salt.
- Whisk the milk, egg, and melted butter together in a separate bowl, then pour into the dry ingredients. Stir until just combined.
- Spread the batter into a greased 8×8-inch baking pan. Bake for 15 minutes until the top is lightly golden.
- Remove the cornbread from the oven, let it cool for 5 minutes, then cut into strips for dipping.
Extra Tips
Keep the chili warm in the pot on low heat or transfer it to a slow cooker set on warm for the potluck table. Cut the cornbread into wider strips if you prefer sturdier dippers that hold their shape better in the thick chili. Leftovers reheat well on the stove with a splash of water to loosen the texture.Course: Main Course Cuisine: American Equipment: Large pot, Mixing bowl, Baking pan
Ghostly White Chicken Lasagna
This white chicken lasagna stands out at a potluck with its pale, creamy layers that give off a simple ghostly look for Halloween. It travels easily in a baking dish and stays satisfying without needing last-minute work.
The dish combines shredded chicken with a smooth white sauce and three cheeses for a rich but not heavy texture. It holds up well when served alongside other dishes at a shared table.
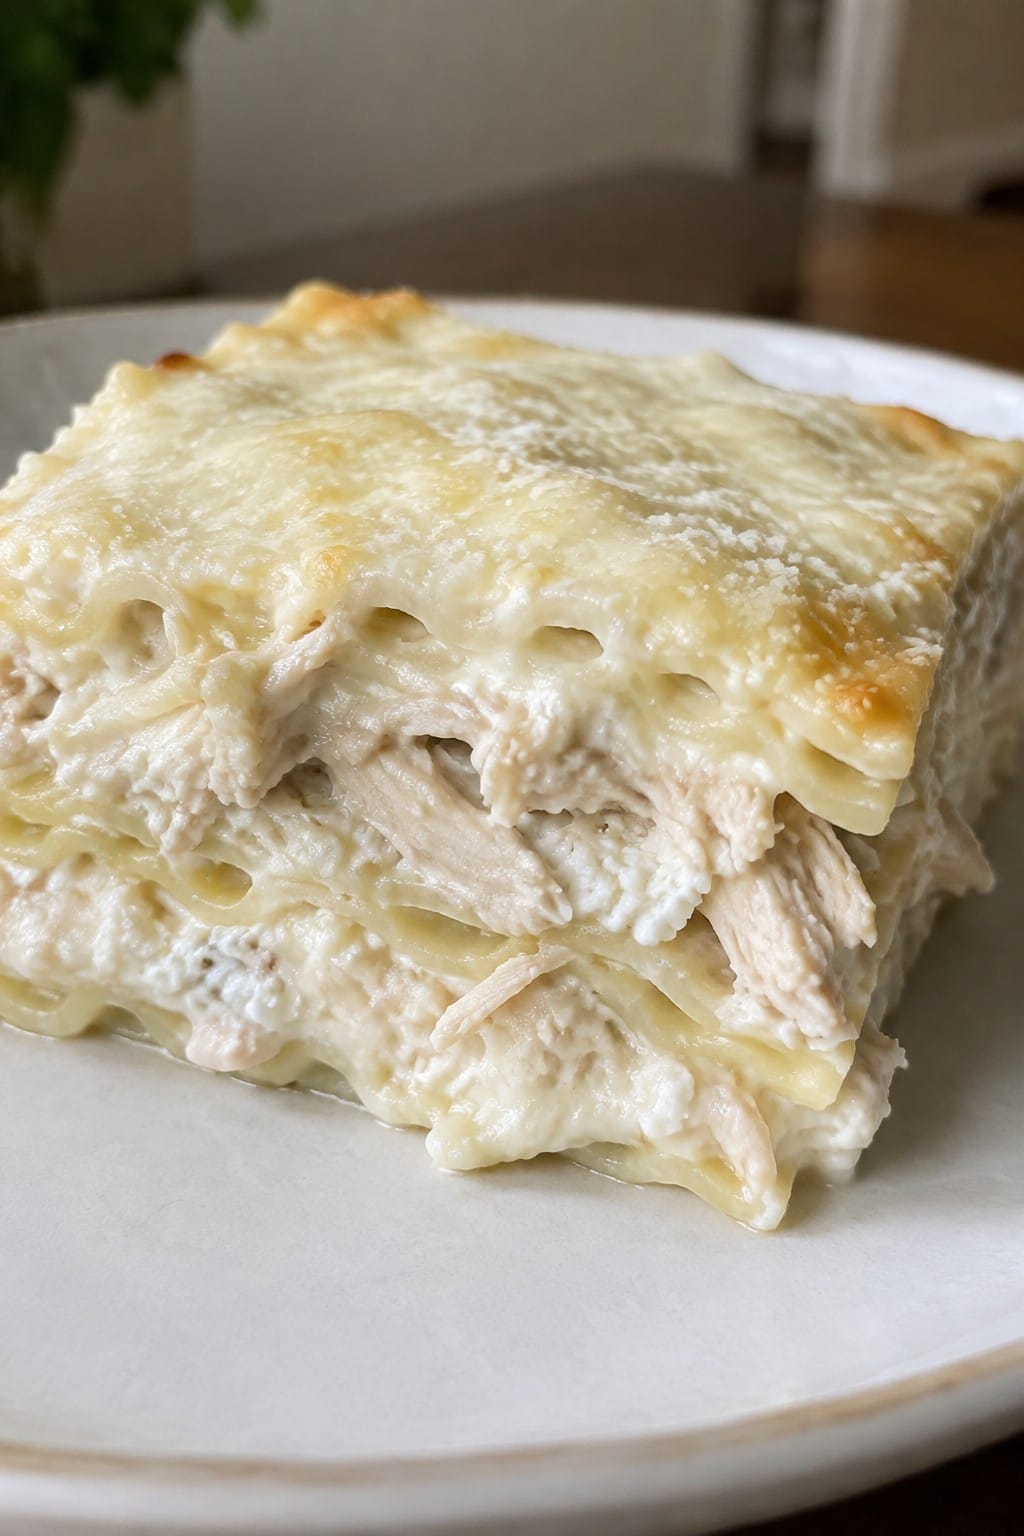
Serves 4 people.
Ingredients
- 8 lasagna noodles
- 2 cups cooked chicken, shredded
- 3 tablespoons butter
- 3 tablespoons all-purpose flour
- 2 cups milk
- 2 cloves garlic, minced
- 1 teaspoon Italian seasoning
- 1 cup ricotta cheese
- 1 1/2 cups shredded mozzarella cheese
- 1/2 cup grated Parmesan cheese
- Salt and pepper to taste
Instructions
- Preheat the oven to 375°F. Cook the lasagna noodles in a large pot of salted water until al dente, then drain and set aside.
- In a saucepan over medium heat, melt the butter. Add the minced garlic and cook for 30 seconds. Stir in the flour and cook for 1 minute. Gradually whisk in the milk until the sauce thickens. Season with Italian seasoning, salt, and pepper. Remove from heat and stir in half the Parmesan.
- Spread a thin layer of white sauce in the bottom of an 8×8 baking dish. Place 2 noodles on top. Add half the shredded chicken, half the ricotta, and one-third of the mozzarella. Spoon on more sauce. Repeat the layers once more, then finish with the remaining noodles, sauce, mozzarella, and Parmesan.
- Cover the dish with foil and bake for 20 minutes. Remove the foil and bake for another 10 minutes until the top is lightly browned and bubbly.
- Let the lasagna rest for 5 minutes before slicing and serving.
Extra Tips
Assemble the lasagna the night before and refrigerate it, then bake on the day of the potluck. If the white sauce thickens too much after chilling, add a splash of milk before layering. Leftovers reheat well in the microwave with a damp paper towel over the top to keep the cheese from drying out.Course: Main Course Cuisine: Italian Equipment: Large pot, Saucepan, 8×8 baking dish, Whisk
Witch Finger Green Bean Bundles
These bundles turn simple green beans into a fun Halloween snack that travels well to any potluck. Each bundle looks like a witch finger thanks to the prosciutto wrap and almond sliver at the tip. The result is a savory bite with crisp-tender beans and salty, slightly crisp prosciutto.
The flavor stays mild and crowd-friendly. Olive oil and a light seasoning let the main ingredients shine without extra sauces that could make transport messy.
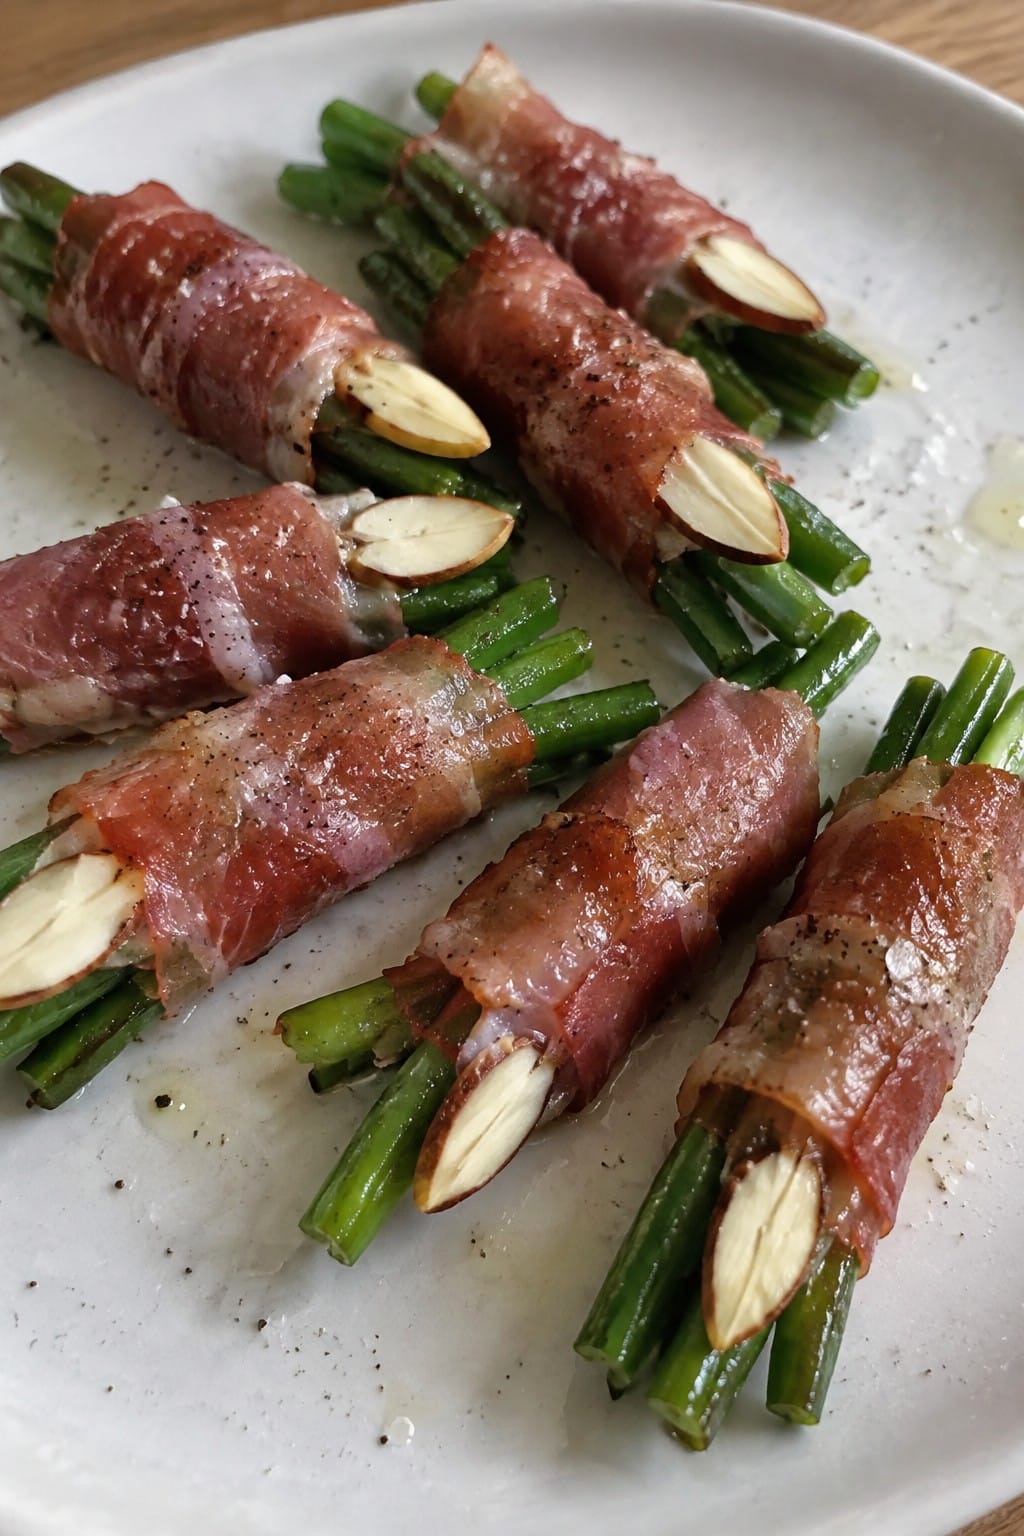
Serves 4 people.
Ingredients
- 1 pound fresh green beans, trimmed
- 8 slices prosciutto
- 1/4 cup almond slivers
- 2 tablespoons olive oil
- 1/2 teaspoon salt
- 1/4 teaspoon black pepper
Instructions
- Bring a large pot of water to a boil and add the green beans. Cook for 3 minutes, then drain and rinse under cold water to stop the cooking.
- Pat the green beans dry with a clean towel. Divide them into 16 small bundles of about 5 to 6 beans each.
- Cut each slice of prosciutto in half lengthwise. Wrap one half around each bundle, leaving one end of the beans exposed to look like a fingertip.
- Place an almond sliver on the exposed tip of each bundle and press lightly so it stays in place.
- Arrange the bundles on a baking sheet. Brush lightly with olive oil and sprinkle with salt and pepper.
- Bake at 400 degrees for 10 to 12 minutes until the prosciutto is crisp at the edges. Serve warm or at room temperature.
Extra Tips
If the almond slivers slip during baking, secure them with a tiny dab of olive oil before the tray goes into the oven. These bundles hold up well on a platter for a couple of hours, so they work for make-ahead potluck prep. Leftovers reheat best in a 350-degree oven for 5 minutes to restore the prosciutto crispness.Course: Appetizer Cuisine: American Equipment: Large pot, Baking sheet, Colander
Bloody Eyeball Caprese Skewers
These skewers turn a classic Caprese into a simple Halloween bite that travels well to any potluck. The mozzarella pieces act as the base for the eyeball effect, while the dark olive slices give them a clear center. They stay light and fresh with tomato, basil, and a touch of balsamic.
The assembly takes just minutes, and the flavors stay balanced without needing any heat. They hold up on a platter for hours, making them easy to set out alongside other shared dishes.
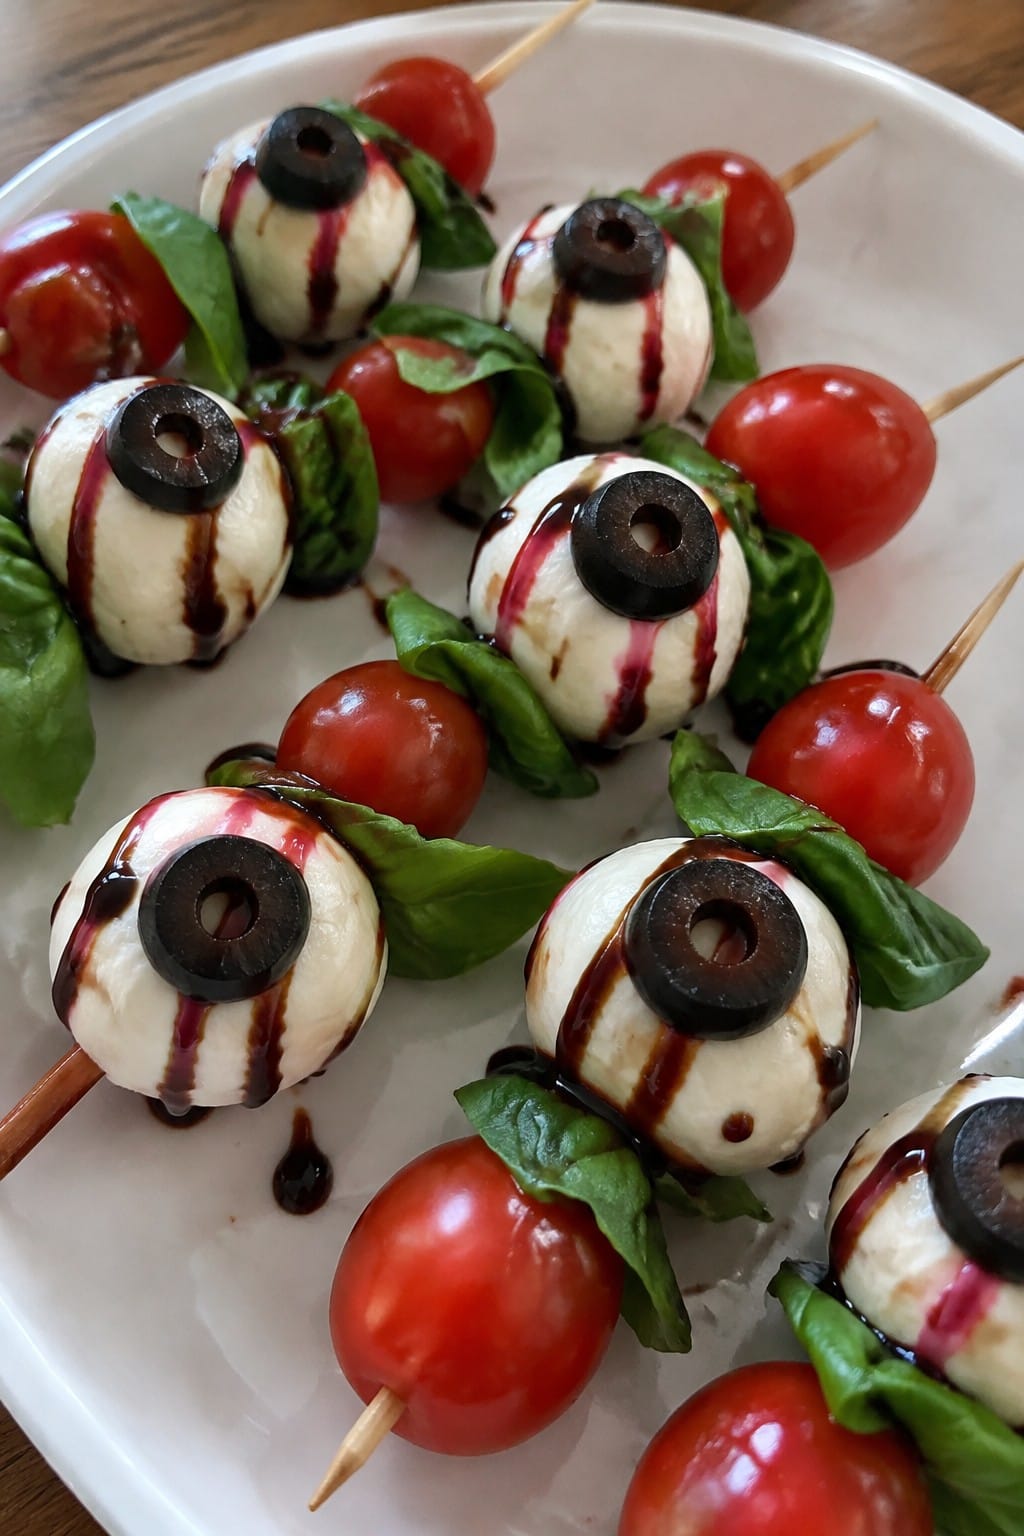
Serves 4 people.
Ingredients
- 8 ounces bocconcini mozzarella balls
- 12 cherry tomatoes
- 12 fresh basil leaves
- 12 black olives
- 2 tablespoons balsamic glaze
- 12 wooden skewers
- Salt and pepper to taste
Instructions
- Drain the mozzarella balls and pat them dry with a paper towel. Slice each black olive into thin rounds to create the pupil pieces.
- Thread one mozzarella ball onto each skewer. Place one olive slice on top of the mozzarella so it sits flat like an eyeball. Add one cherry tomato next to the mozzarella on the skewer. Tuck one basil leaf between the tomato and mozzarella.
- Arrange the finished skewers on a platter. Drizzle the balsamic glaze lightly over the tops. Sprinkle with a pinch of salt and pepper before serving.
Extra Tips
Make these up to two hours ahead and keep them covered in the fridge so the basil stays bright. If balsamic glaze is too thick to drizzle, thin it slightly with a drop of water. Skip the salt if your olives are very salty.Course: Appetizer Cuisine: Italian Equipment: Knife, Serving Platter
Monster Mashed Potato Casserole
This Monster Mashed Potato Casserole adds a fun green twist to classic mashed potatoes for a Halloween potluck. Blending in spinach gives the dish its monster color while keeping the flavor mild and creamy. The cheesy top and olive eyes make it stand out on a shared table without extra effort.
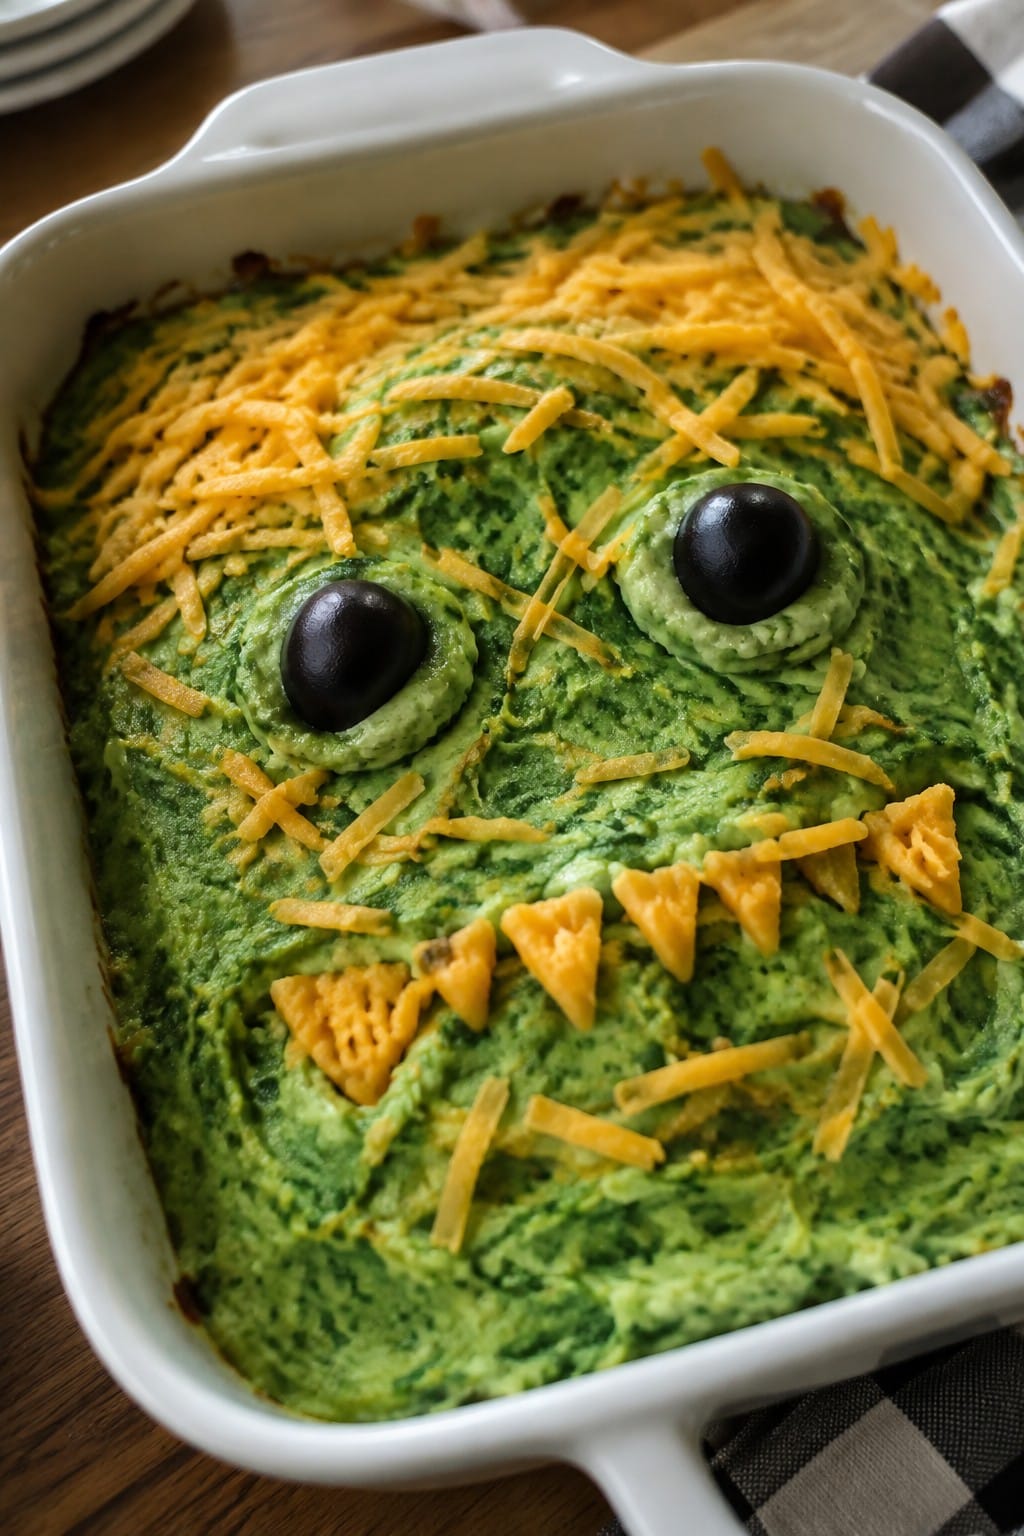
Serves 4 people.
Ingredients
- 4 medium russet potatoes, peeled and cut into chunks
- 2 cups fresh spinach
- 1/2 cup milk
- 3 tablespoons butter
- 1 teaspoon garlic powder
- 1/2 teaspoon salt
- 1 cup shredded cheddar cheese
- 6 black olives, halved
Instructions
- Place the potato chunks in a large pot and cover with water. Bring to a boil and cook for 15 minutes until the potatoes are tender.
- Add the spinach to the pot in the final 2 minutes of cooking so it wilts quickly.
- Drain the potatoes and spinach, then return them to the pot. Add the milk, butter, garlic powder, and salt.
- Mash everything together until smooth and evenly green.
- Spread the mixture into a baking dish and sprinkle the cheddar cheese evenly over the top.
- Arrange the halved olives across the surface to create monster eyes.
- Bake at 375 degrees for 15 minutes until the cheese is melted and lightly browned.
Extra Tips
Make this casserole a day ahead and refrigerate it unbaked, then add the cheese and olives right before baking so the top stays fresh. If the mashed potatoes seem too thick after mashing, stir in an extra splash of milk to loosen the texture. Leftovers reheat well in the microwave with a damp paper towel over the dish to keep the potatoes from drying out.Course: Side Dish Cuisine: American Equipment: Large pot, Potato masher, Baking dish, Oven
Skeleton Veggie Crudité Board with Hummus
This skeleton veggie crudité board brings a light and fresh option to any Halloween potluck. Crisp vegetables arranged in a simple skeleton shape sit alongside creamy hummus for dipping. The mix of crunchy textures and savory flavors keeps guests coming back for more without feeling heavy.
It works well as a make-ahead appetizer that travels easily and holds up during a shared table. The board feels festive yet practical for feeding a small group.
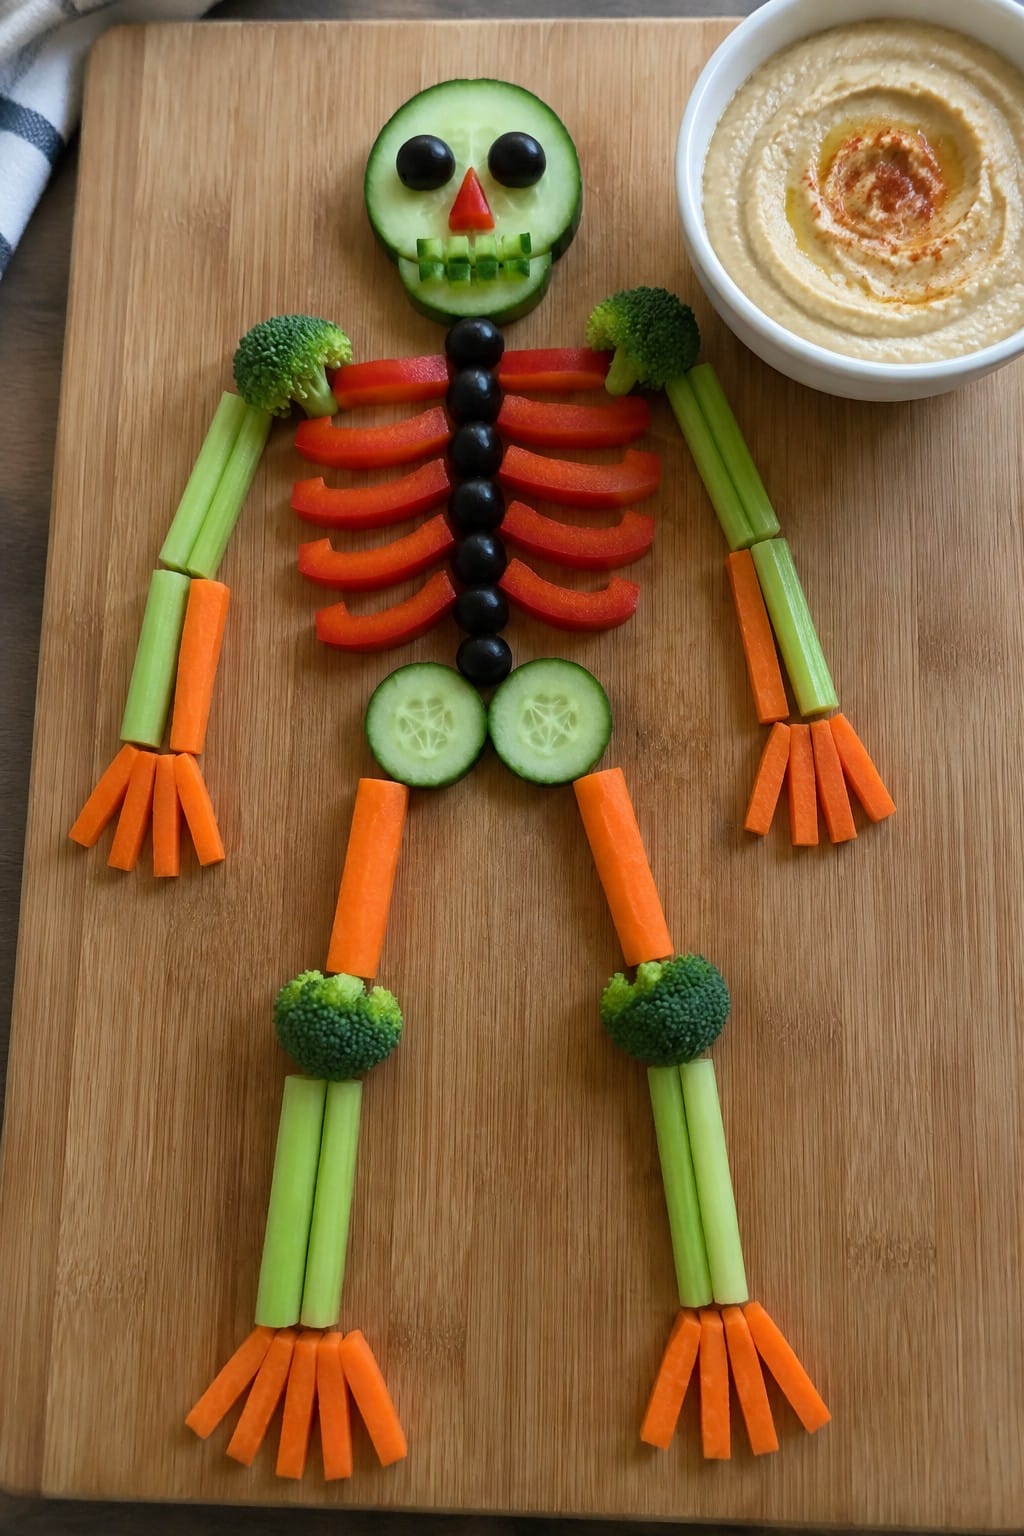
Serves 4 people.
Ingredients
- 2 cups hummus
- 4 carrots, peeled and cut into sticks
- 2 cucumbers, sliced into rounds
- 1 red bell pepper, cut into strips
- 4 celery stalks, cut into sticks
- 1 cup broccoli florets
- 8 black olives
Instructions
- Place the hummus in a small bowl and set it at the top of a large serving board to form the skeleton head.
- Arrange two celery stalks below the hummus bowl as the spine, leaving space between them for the rib cage.
- Lay carrot sticks horizontally across the spine to create the rib bones.
- Position the red bell pepper strips on either side of the spine to form the arm bones.
- Place the remaining celery stalks and carrot sticks below the rib cage to create the leg bones.
- Scatter the cucumber rounds and broccoli florets around the outer edges of the board for extra crunch and color.
- Set the black olives near the hummus to serve as eyes on the skeleton head.
Extra Tips
Prep the vegetables the night before and store them in water-filled containers to keep them crisp. Swap the red bell pepper for yellow if you want brighter color contrast on the board. Keep the hummus covered until serving to prevent it from drying out.Course: Appetizer Cuisine: Mediterranean Equipment: Large serving board, Sharp knife, Cutting board
Dirt Graveyard Pudding Cups
These individual pudding cups bring a fun graveyard scene to any potluck table. They travel well in a carrier and give guests a ready-to-eat treat that feels festive without extra work at the event. The layers combine creamy chocolate pudding with crunchy cookie crumbs and a few chewy gummy worms for a mix of textures.
This recipe serves 4 people. – 1 (3.9-ounce) package instant chocolate pudding mix – 2 cups cold milk – 16 Oreo cookies, crushed – 1 cup whipped topping – 4 rectangular shortbread cookies – 2 tablespoons chocolate frosting – 8 gummy worms
### Instructions 1. Pour the instant chocolate pudding mix and cold milk into a mixing bowl. Whisk for two minutes until the pudding thickens. 2. Let the pudding sit for five minutes so it sets fully. 3. Spoon a layer of crushed Oreo cookies into the bottom of each of four small cups. 4. Add a layer of pudding over the cookie crumbs in each cup. 5. Repeat with another layer of crushed Oreo cookies and another layer of pudding. 6. Spread a thin layer of whipped topping on top of each cup. 7. Press one rectangular shortbread cookie upright into the whipped topping of each cup to act as a tombstone. Use the chocolate frosting to pipe simple letters or a cross on each cookie. 8. Tuck two gummy worms into the cookie crumb layer of each cup so they appear to be coming out of the "dirt."
### Extra Tips Crush the Oreos right before assembling so they stay crisp. If you need to make the cups ahead, add the whipped topping, tombstones, and gummy worms just before serving to keep the cookie layer from softening. Swap the shortbread cookies for graham cracker rectangles if that is what you have on hand.
Course: Dessert Cuisine: American Equipment: Mixing Bowl, Whisk, Serving Cups
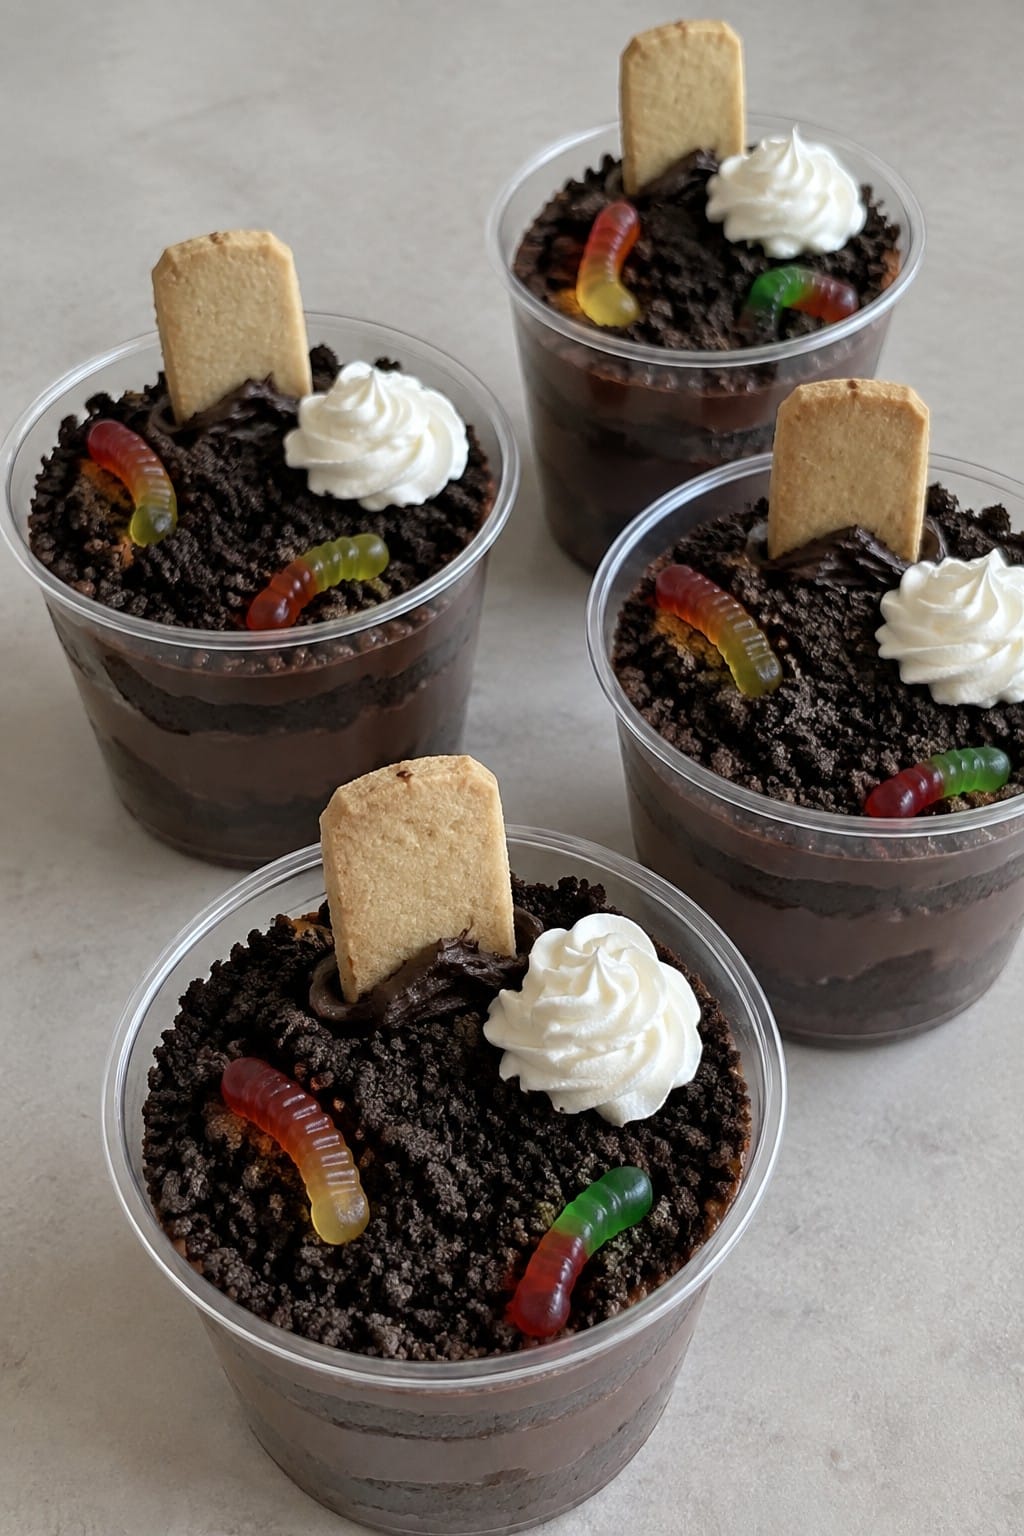
Serves 4 people.
Instructions
- Pour the instant chocolate pudding mix and cold milk into a mixing bowl. Whisk for two minutes until the pudding thickens.
- Let the pudding sit for five minutes so it sets fully.
- Spoon a layer of crushed Oreo cookies into the bottom of each of four small cups.
- Add a layer of pudding over the cookie crumbs in each cup.
- Repeat with another layer of crushed Oreo cookies and another layer of pudding.
- Spread a thin layer of whipped topping on top of each cup.
- Press one rectangular shortbread cookie upright into the whipped topping of each cup to act as a tombstone. Use the chocolate frosting to pipe simple letters or a cross on each cookie.
- Tuck two gummy worms into the cookie crumb layer of each cup so they appear to be coming out of the "dirt."
Extra Tips
Crush the Oreos right before assembling so they stay crisp. If you need to make the cups ahead, add the whipped topping, tombstones, and gummy worms just before serving to keep the cookie layer from softening. Swap the shortbread cookies for graham cracker rectangles if that is what you have on hand.Course: Dessert Cuisine: American Equipment: Mixing Bowl, Whisk, Serving Cups
Bat Wing Sticky Chicken Drumettes
These drumettes turn simple chicken into a fun potluck item with a dark, glossy glaze that resembles bat wings. They hold up well on a buffet table and give guests something savory to grab without needing utensils.
The finished pieces come out tender inside with a sticky, caramelized coating that balances sweet and salty notes. They pair easily with other Halloween snacks and travel without losing texture.
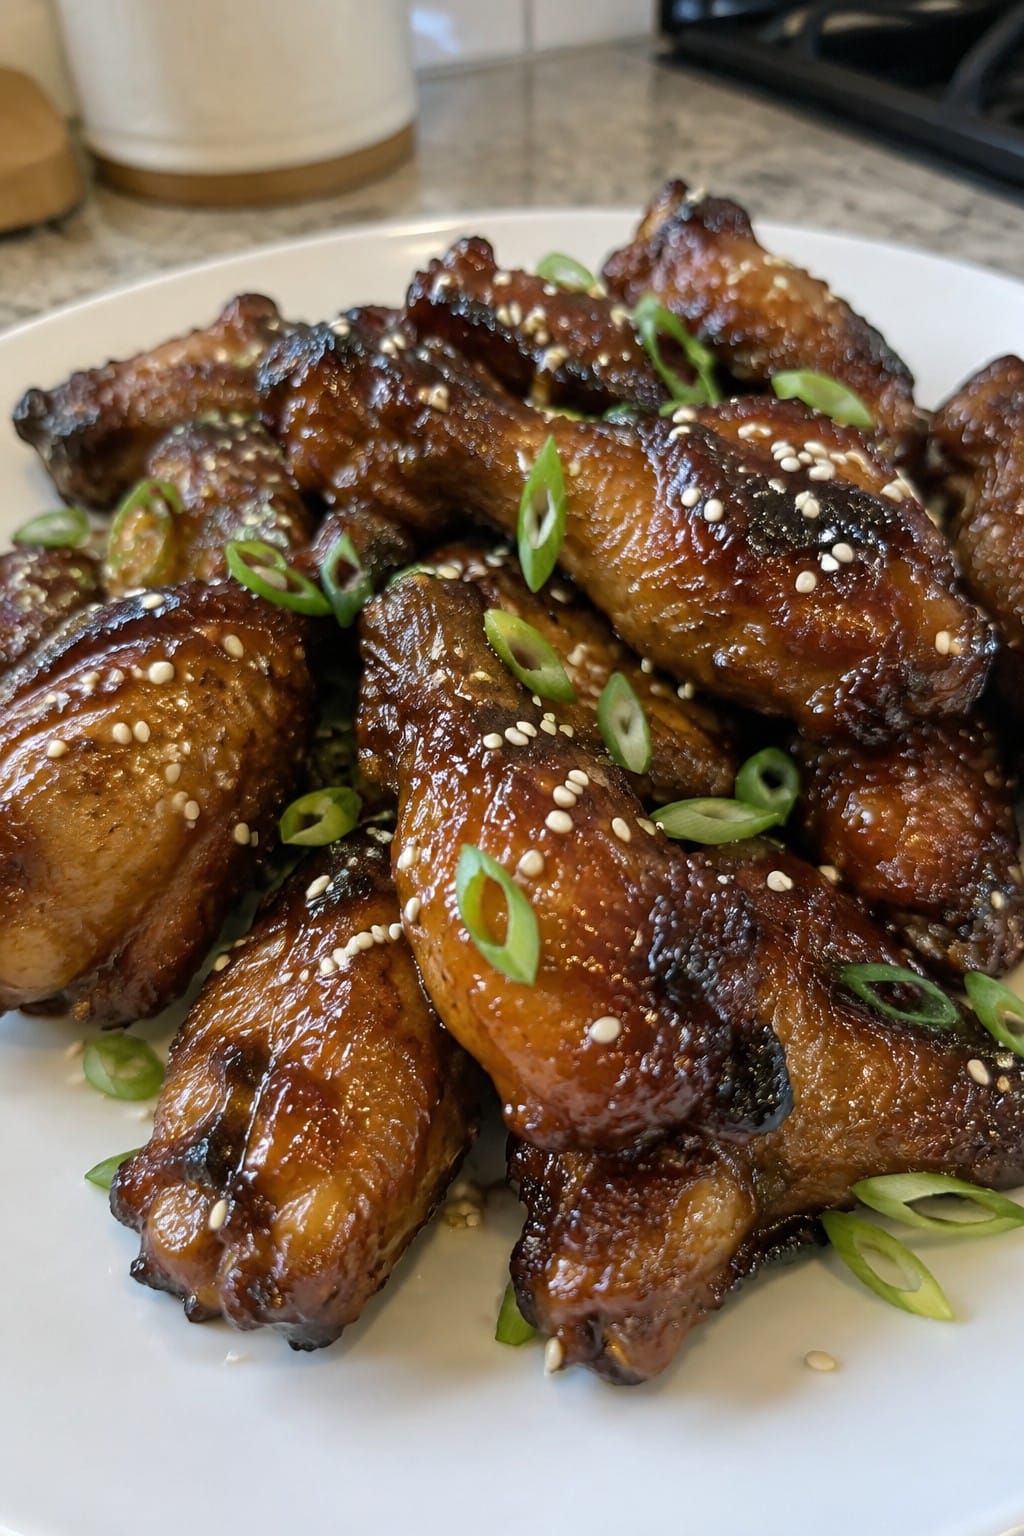
Serves 4 people.
Ingredients
- 12 chicken drumettes
- 1/4 cup soy sauce
- 3 tablespoons honey
- 2 tablespoons brown sugar
- 3 garlic cloves, minced
- 1 tablespoon grated fresh ginger
- 1 teaspoon sesame oil
- 1 tablespoon sesame seeds
- 2 green onions, sliced
Instructions
- Preheat the oven to 400 degrees F and line a baking sheet with parchment paper or foil.
- In a mixing bowl, stir together the soy sauce, honey, brown sugar, minced garlic, grated ginger, and sesame oil until the sugar dissolves.
- Add the chicken drumettes to the bowl and toss until each piece is evenly coated.
- Arrange the drumettes in a single layer on the prepared baking sheet.
- Bake for 35 to 40 minutes, turning the pieces once halfway through, until the glaze thickens and the chicken reaches 165 degrees F.
- Remove from the oven and sprinkle with sesame seeds and sliced green onions before serving.
Extra Tips
For a deeper color that enhances the bat wing look, use dark soy sauce if you have it on hand. If the glaze starts to darken too quickly in the oven, loosely cover the tray with foil for the last 10 minutes. Leftovers reheat well in a 350 degree F oven for 10 minutes to restore the sticky texture.Course: Appetizer Cuisine: American Equipment: Baking sheet, Mixing bowl, Oven
