
Halloween is coming up and it is nice to have some easy food ideas ready. These recipes use basic ingredients and simple steps that work for any skill level. You can make them without special tools or a lot of time. Each one gives clear directions so you know exactly what to do. They are meant to be practical options you can try at home.
Helpful Tips Before You Start
These tips will help you keep the process simple and fun while making the treats.
Start with store bought bases
Many recipes work best when you begin with cookies, cupcakes, or pretzels from the store. This cuts prep time and still leaves room for Halloween details.
Set up a decoration station
Lay out candy eyes, sprinkles, and melted chocolate in small bowls before you begin. Everyone can reach what they need without stopping.
Use cookie cutters for shapes
Press cutters into sandwiches, cheese slices, or brownies to create bats, pumpkins, or ghosts. The shapes make the food look themed with little extra effort.
Work in small batches
Make one or two treats at a time rather than all thirteen at once. This keeps ingredients fresh and prevents mistakes from rushing.
Mummy Hot Dogs Wrapped in Crescent Dough
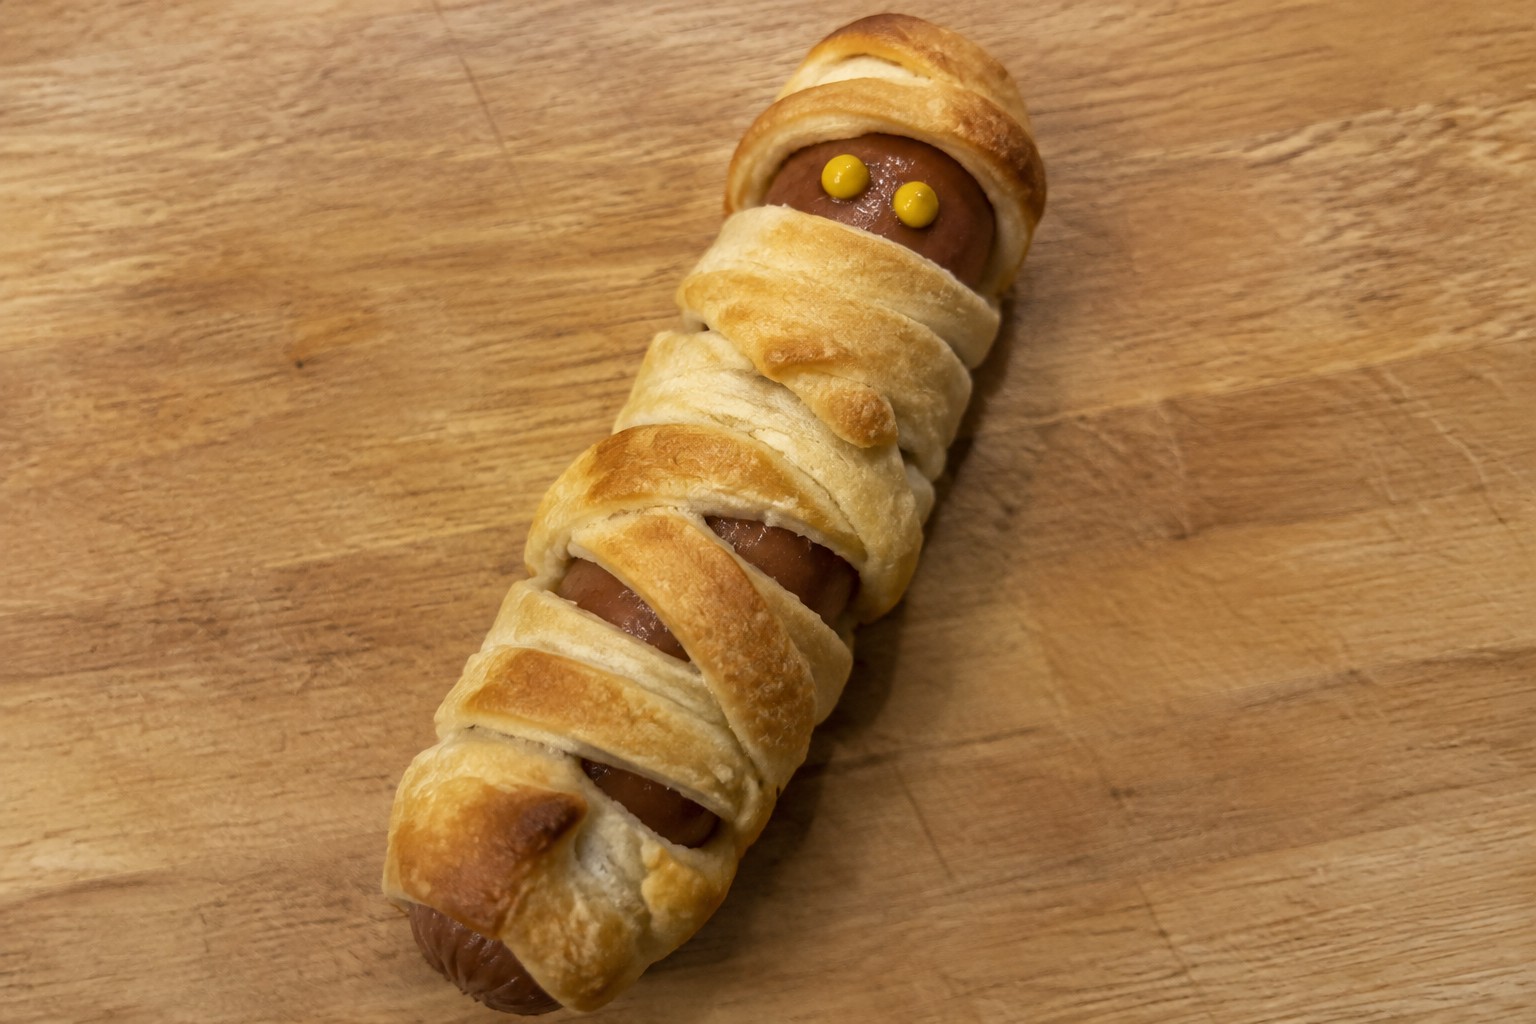
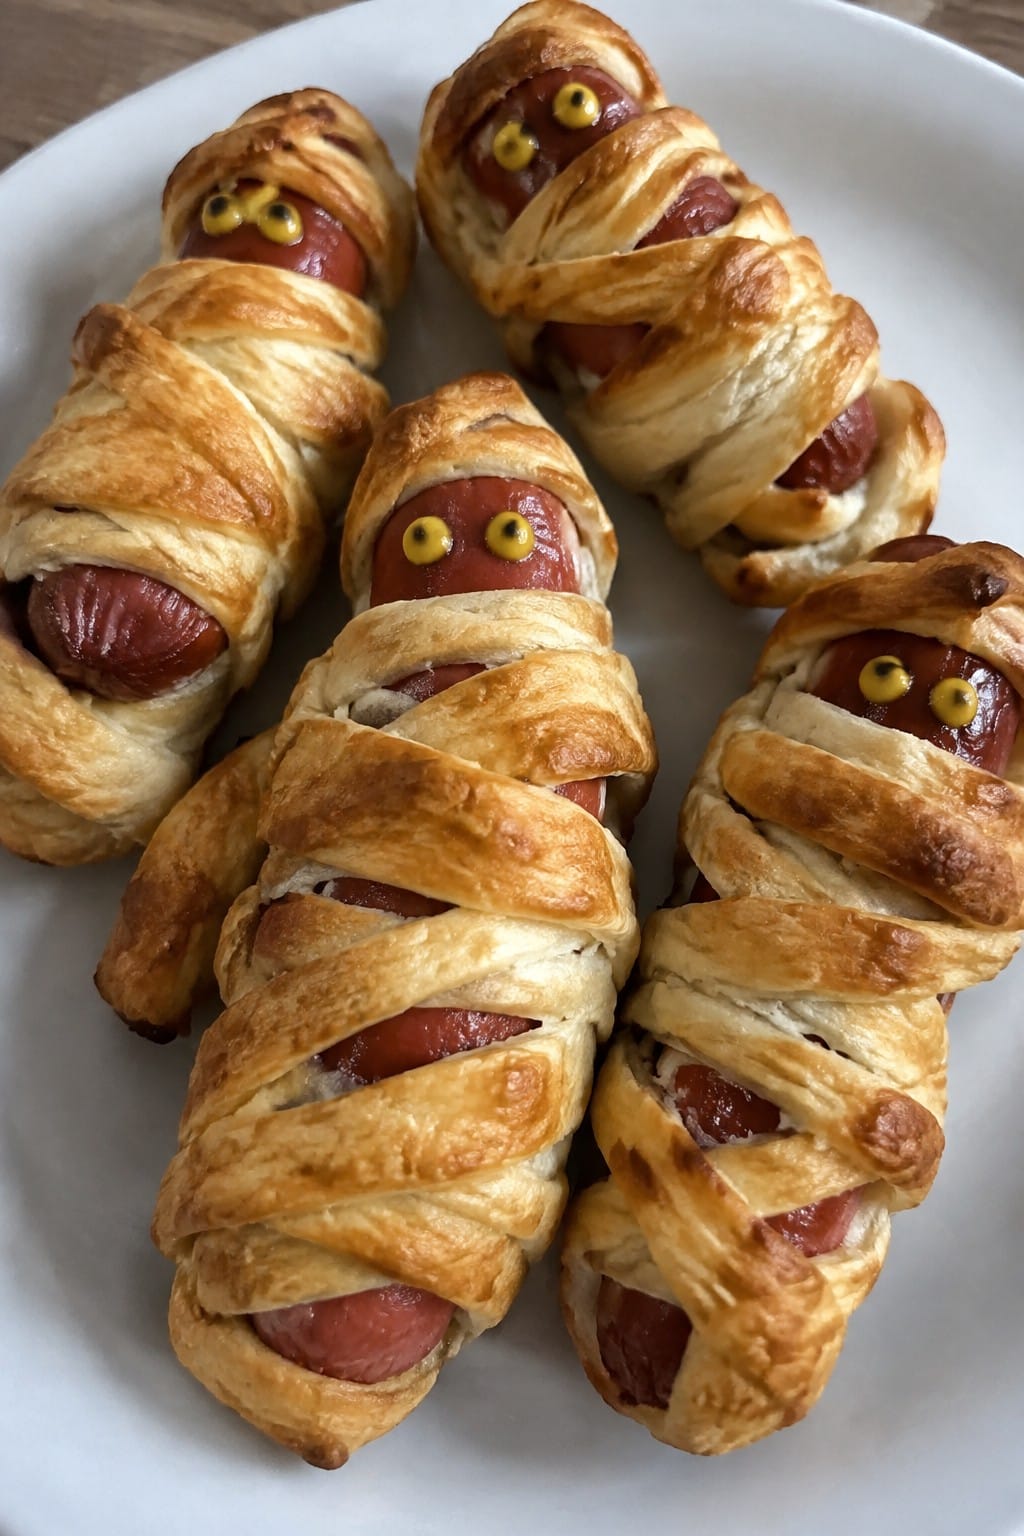
These mummy hot dogs turn a simple package of crescent dough into a playful Halloween snack. The dough wraps around the hot dogs in uneven strips that brown nicely in the oven, giving each one a wrapped look. They taste like buttery pastry with a juicy, savory center.
They fit well at a kids party or as an easy dinner before trick-or-treating. The finished hot dogs stay crisp on the outside and stay warm for a while after baking.
Serves 4 people.
Ingredients
- 8 hot dogs
- 1 can (8 oz) refrigerated crescent roll dough
- 2 tablespoons yellow mustard
Instructions
- Heat the oven to 375 degrees F and line a baking sheet with parchment paper.
- Unroll the crescent dough on a cutting board and slice it into thin strips with a knife.
- Wrap the strips around each hot dog, overlapping slightly but leaving small open spaces near the top for the face.
- Set the wrapped hot dogs on the baking sheet and bake for 12 to 15 minutes until the dough turns golden brown.
- Remove from the oven and let them cool for two minutes. Use a small spoon or the tip of a knife to dot mustard eyes on each hot dog in the open spaces.
Extra Tips
Cut the dough strips with a pizza cutter for cleaner edges that wrap more evenly. Serve the hot dogs right away while the pastry stays crisp, or pair them with a small bowl of extra mustard for dipping. Leftovers reheat best in a 350 degree oven for five minutes to bring back the flaky texture.Course: Appetizer Cuisine: American Equipment: Baking sheet, Oven, Knife
Jack-o’-Lantern Stuffed Bell Peppers
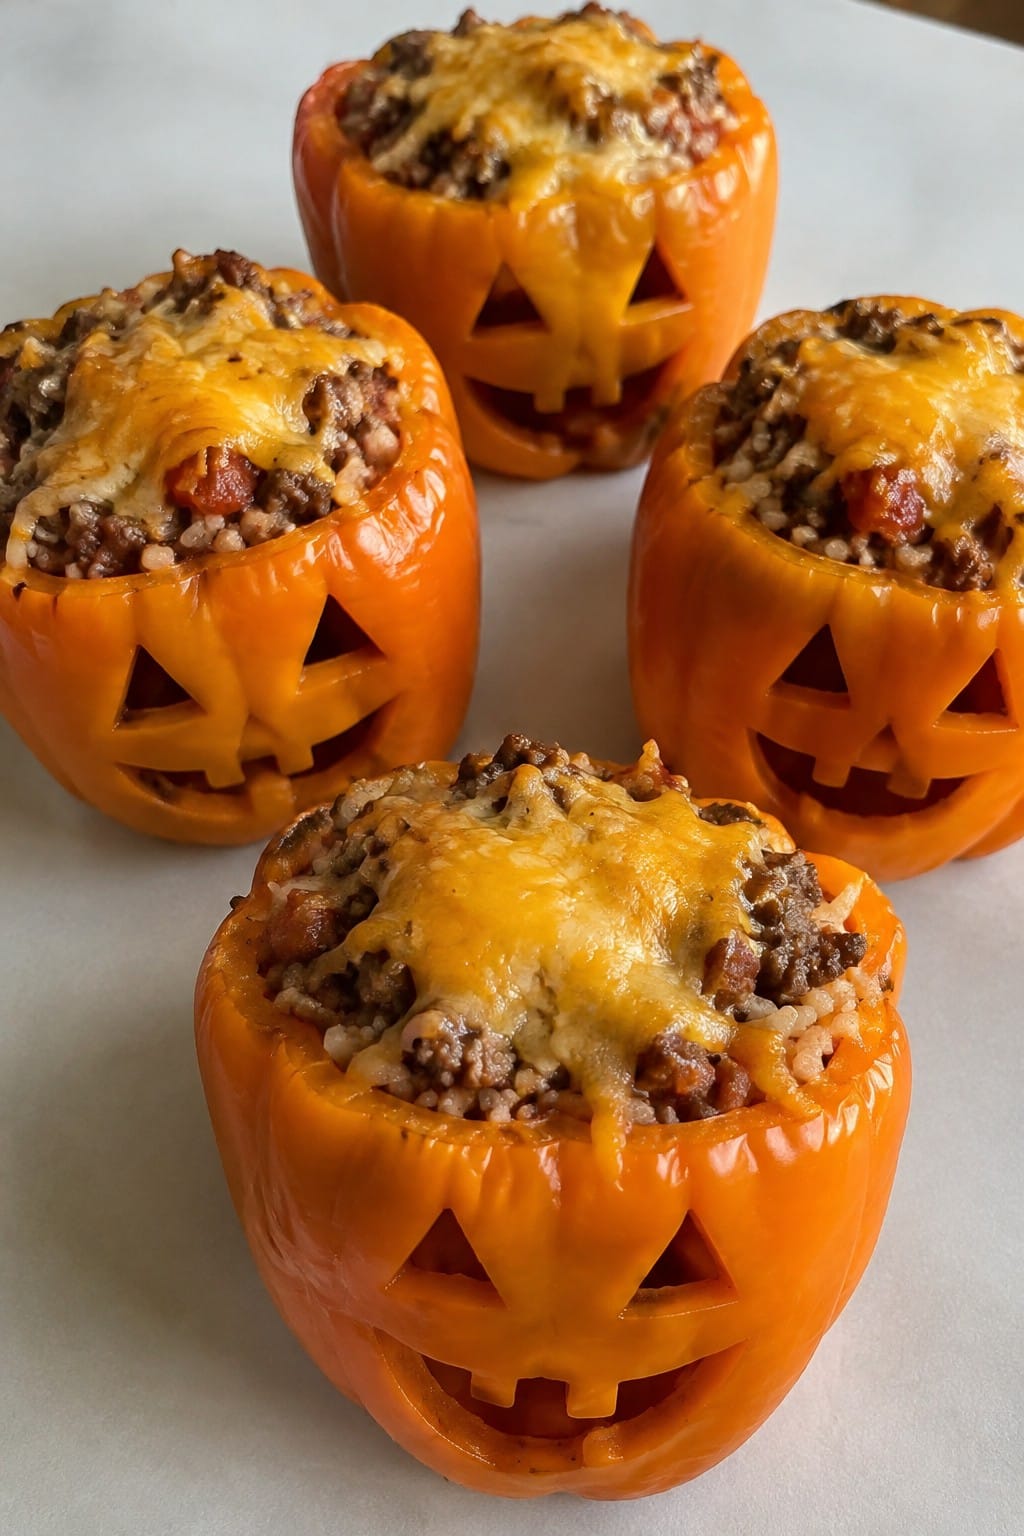
These stuffed peppers bring a fun Halloween twist to a classic dish. Orange bell peppers are carved with simple faces before filling, which makes them stand out on a table without extra effort. The filling combines savory meat, rice, and tomatoes for a hearty meal that still feels light enough for a party spread.
This recipe works well for weeknight dinners in October or as part of a larger Halloween menu. The peppers soften just enough during baking while the cheese on top turns golden.
Serves 4 people.
Ingredients
- 4 large orange bell peppers
- 1 pound ground beef
- 1 small onion, diced
- 2 cloves garlic, minced
- 1 cup cooked rice
- 1 can (14 oz) diced tomatoes, drained
- 1 teaspoon Italian seasoning
- 1/2 teaspoon salt
- 1/4 teaspoon black pepper
- 1 cup shredded cheddar cheese
Instructions
- Preheat the oven to 375 degrees F and lightly grease a baking dish.
- Slice the tops off each bell pepper and set the tops aside. Use a small knife to carve simple jack-o’-lantern faces into the sides of the peppers.
- In a skillet over medium heat, cook the ground beef until browned. Add the diced onion and minced garlic, then cook for 3 more minutes.
- Stir in the cooked rice, drained tomatoes, Italian seasoning, salt, and black pepper. Cook for 2 minutes to combine.
- Spoon the filling evenly into the carved peppers. Place the peppers in the baking dish and sprinkle the shredded cheddar cheese on top.
- Bake for 25 minutes until the peppers are tender and the cheese is melted. Serve with the reserved pepper tops if desired.
Extra Tips
Carve the faces before cooking so the peppers hold their shape better. If the filling seems dry after mixing, add a spoonful of the drained tomato liquid. Leftovers reheat well in the microwave, though the carved faces soften slightly after storage.Course: Main Course Cuisine: American Equipment: Baking dish, Skillet, Knife
Spiderweb Black Bean Nachos
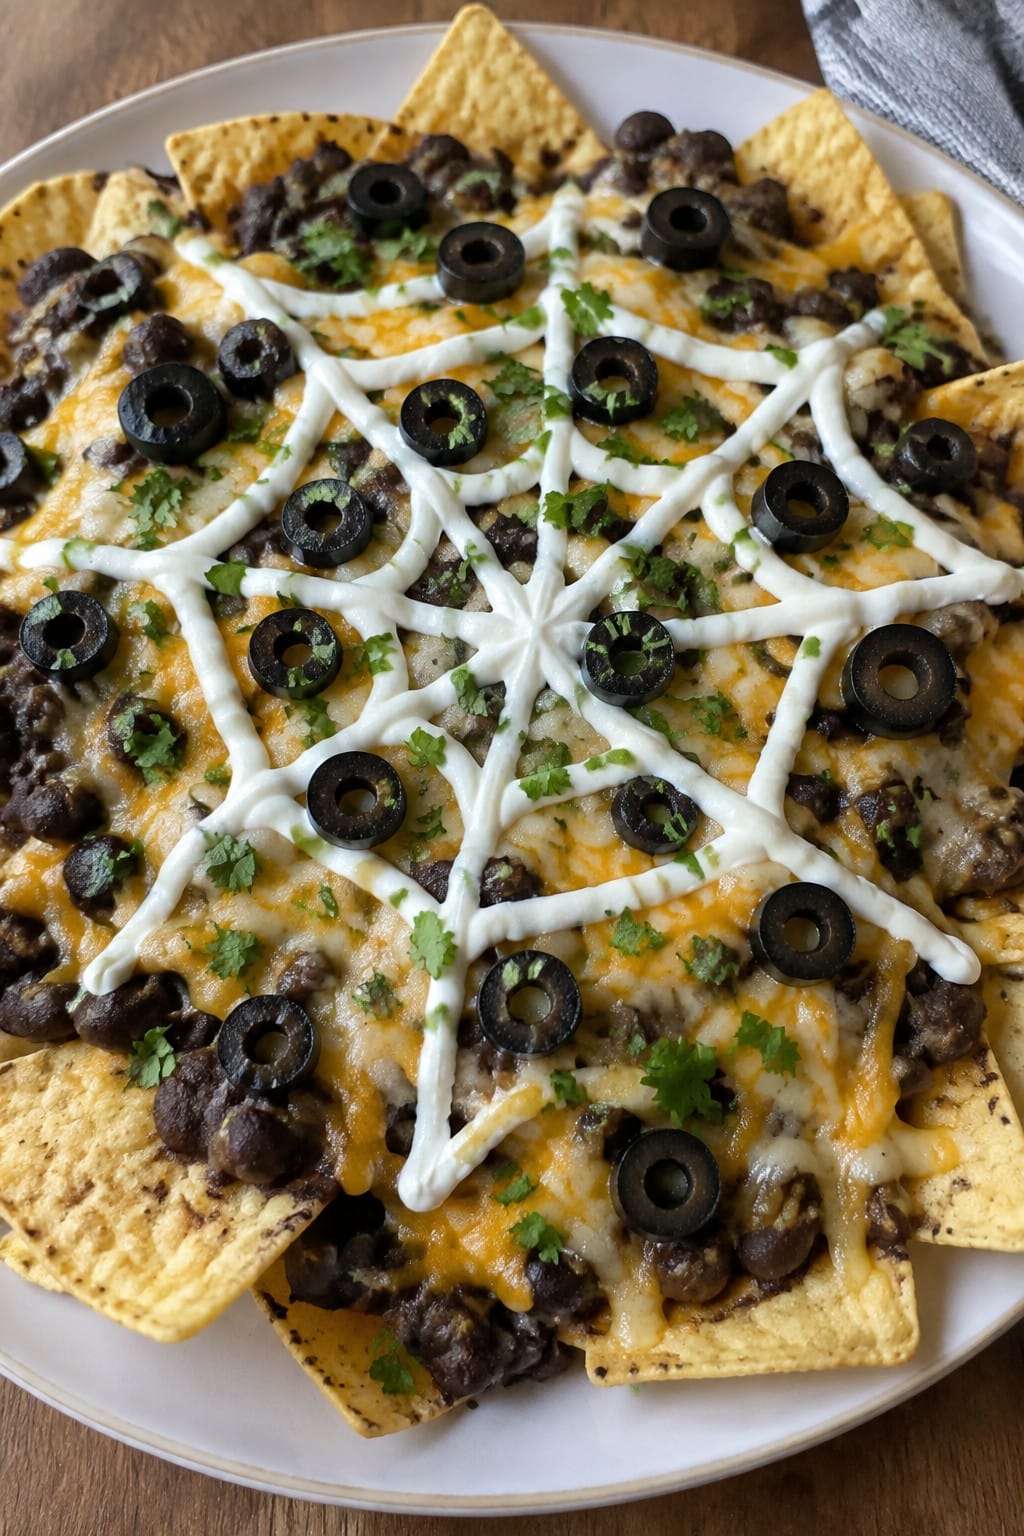
These nachos turn a simple snack into a fun Halloween centerpiece. Black beans create a dark base that makes the sour cream spiderweb stand out, while melted cheese holds everything together. They work well for parties or a casual movie night when you want something quick but themed.
The flavor is savory with mild spices, creamy cheese, and a cool sour cream finish. The black olives add a salty bite that pairs nicely with the beans and chips.
Serves 4 people.
Ingredients
- 12 ounces tortilla chips
- 2 (15-ounce) cans black beans, drained and rinsed
- 1 tablespoon olive oil
- 1 teaspoon chili powder
- 1/2 teaspoon ground cumin
- 2 cups shredded Mexican cheese blend
- 1/2 cup sour cream
- 1/4 cup sliced black olives
- 2 tablespoons chopped fresh cilantro
Instructions
- Preheat the oven to 375 degrees and line a large baking sheet with parchment paper.
- Heat the olive oil in a skillet over medium heat. Add the black beans, chili powder, and cumin. Stir and cook for 3 to 4 minutes until the beans are warmed through and coated with spices.
- Spread half the tortilla chips on the baking sheet. Top with half the black bean mixture and half the cheese. Add the remaining chips, beans, and cheese in another layer.
- Bake for 8 to 10 minutes until the cheese is fully melted.
- Place the sour cream in a small resealable plastic bag and snip off one corner. Pipe circles of sour cream over the nachos, then drag a toothpick from the center outward to form a spiderweb pattern.
- Scatter the black olives and cilantro over the top before serving.
Extra Tips
Pipe the sour cream while the nachos are still hot so the web sets in place without soaking into the chips. If you want a thicker web, let the sour cream sit at room temperature for 10 minutes first. Leftovers reheat best in a 350-degree oven for a few minutes to restore crispness.Course: Appetizer Cuisine: Mexican Equipment: Baking sheet, Large skillet, Resealable plastic bag
Ghost-Shaped Mashed Potato Bowls
These ghost-shaped mashed potato bowls turn a basic side into a quick Halloween treat. They fit well for weeknight dinners or casual gatherings when you want something light and playful without extra effort. The result is creamy potatoes with a soft texture and simple savory taste.
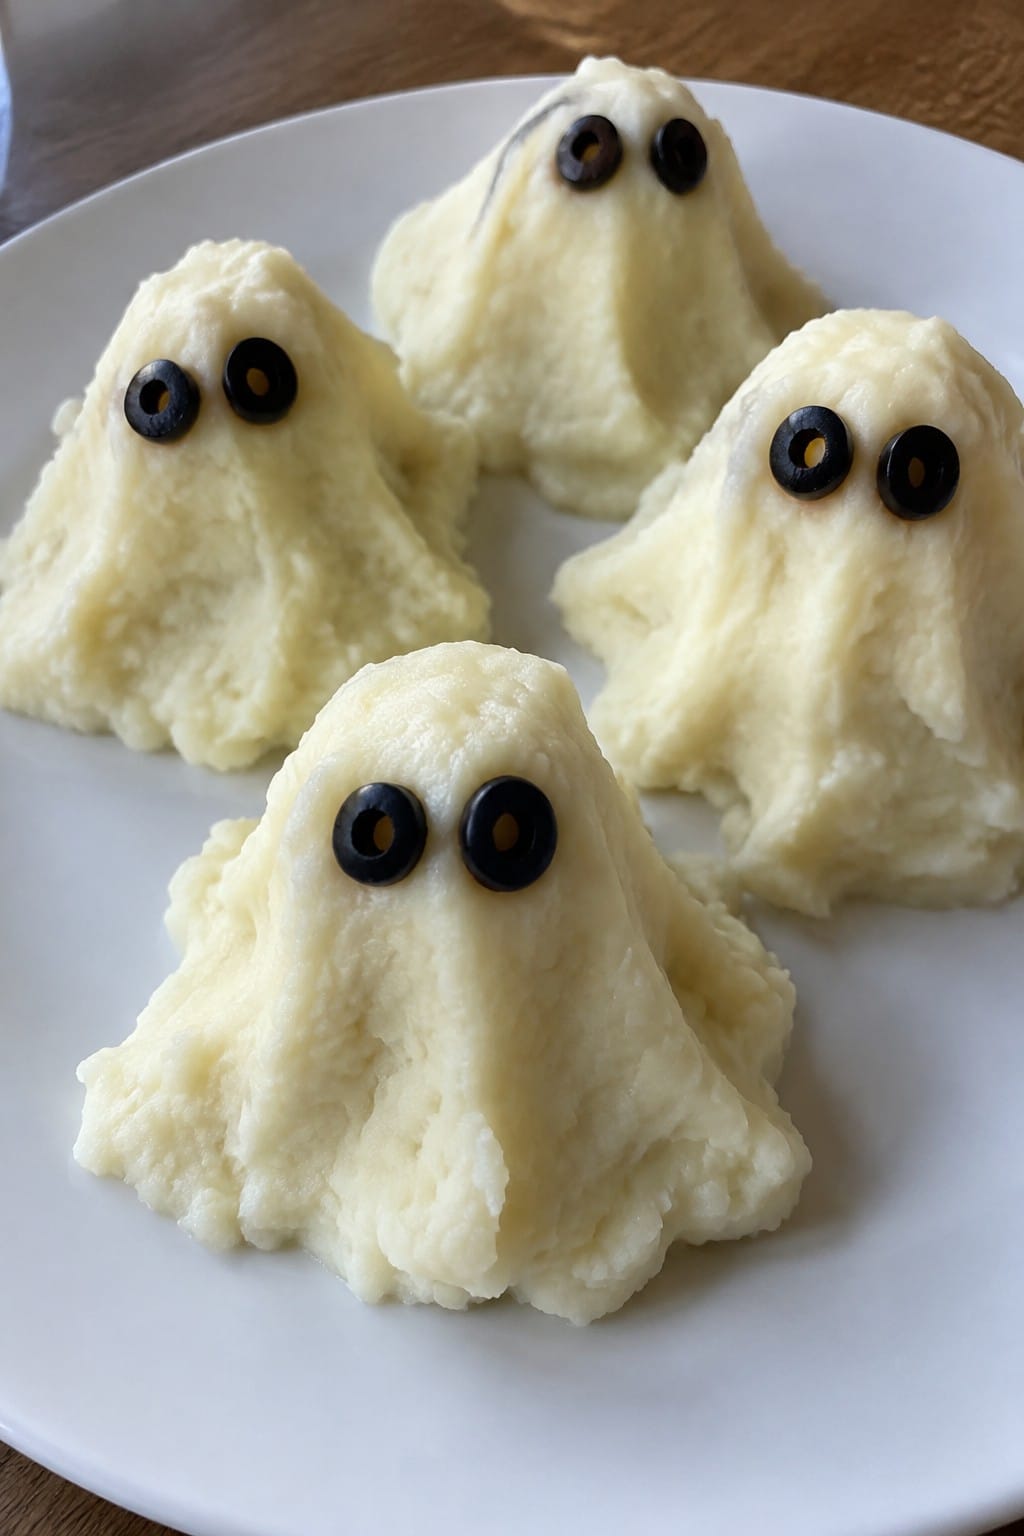
Serves 4 people.
Ingredients
- 2 pounds russet potatoes, peeled and cut into chunks
- 1/2 cup milk
- 4 tablespoons unsalted butter
- 1 teaspoon salt
- 1/4 teaspoon garlic powder
- 8 black olives, pitted and sliced
Instructions
- Place the potato chunks in a large pot and cover with water. Bring to a boil over medium-high heat and cook until the potatoes are fork-tender, about 15 minutes.
- Drain the potatoes and return them to the pot. Add the milk, butter, salt, and garlic powder.
- Mash everything together until smooth and creamy. Let the mixture cool for a few minutes so it holds its shape when handled.
- Spoon the mashed potatoes onto four individual serving plates or into bowls. Use the back of a spoon or a piping bag to form each portion into a simple ghost shape with a rounded top and tapered bottom.
- Press two olive slices into each ghost to create eyes. Add one more slice below for a mouth if desired.
Extra Tips
Shape the ghosts while the potatoes are still warm but not hot to keep the forms neat. If the mixture feels too loose, let it sit a bit longer before shaping. Leftovers can be stored in an airtight container in the fridge for up to two days and reheated gently with a splash of milk to restore creaminess.Course: Side Dish Cuisine: American Equipment: Large Pot, Potato Masher, Serving Bowls
Witch Finger Pretzel Rods with Almond Nails
These witch finger pretzels bring a playful Halloween touch to any gathering. The green coating and almond nails turn simple rods into finger shapes that look spooky without much effort. They work well for parties or school events where you need something quick and eye-catching.
The finished rods give a salty crunch from the pretzel base, balanced by sweet coating and a nutty almond bite at the tip. The red gel adds a small detail that completes the look.
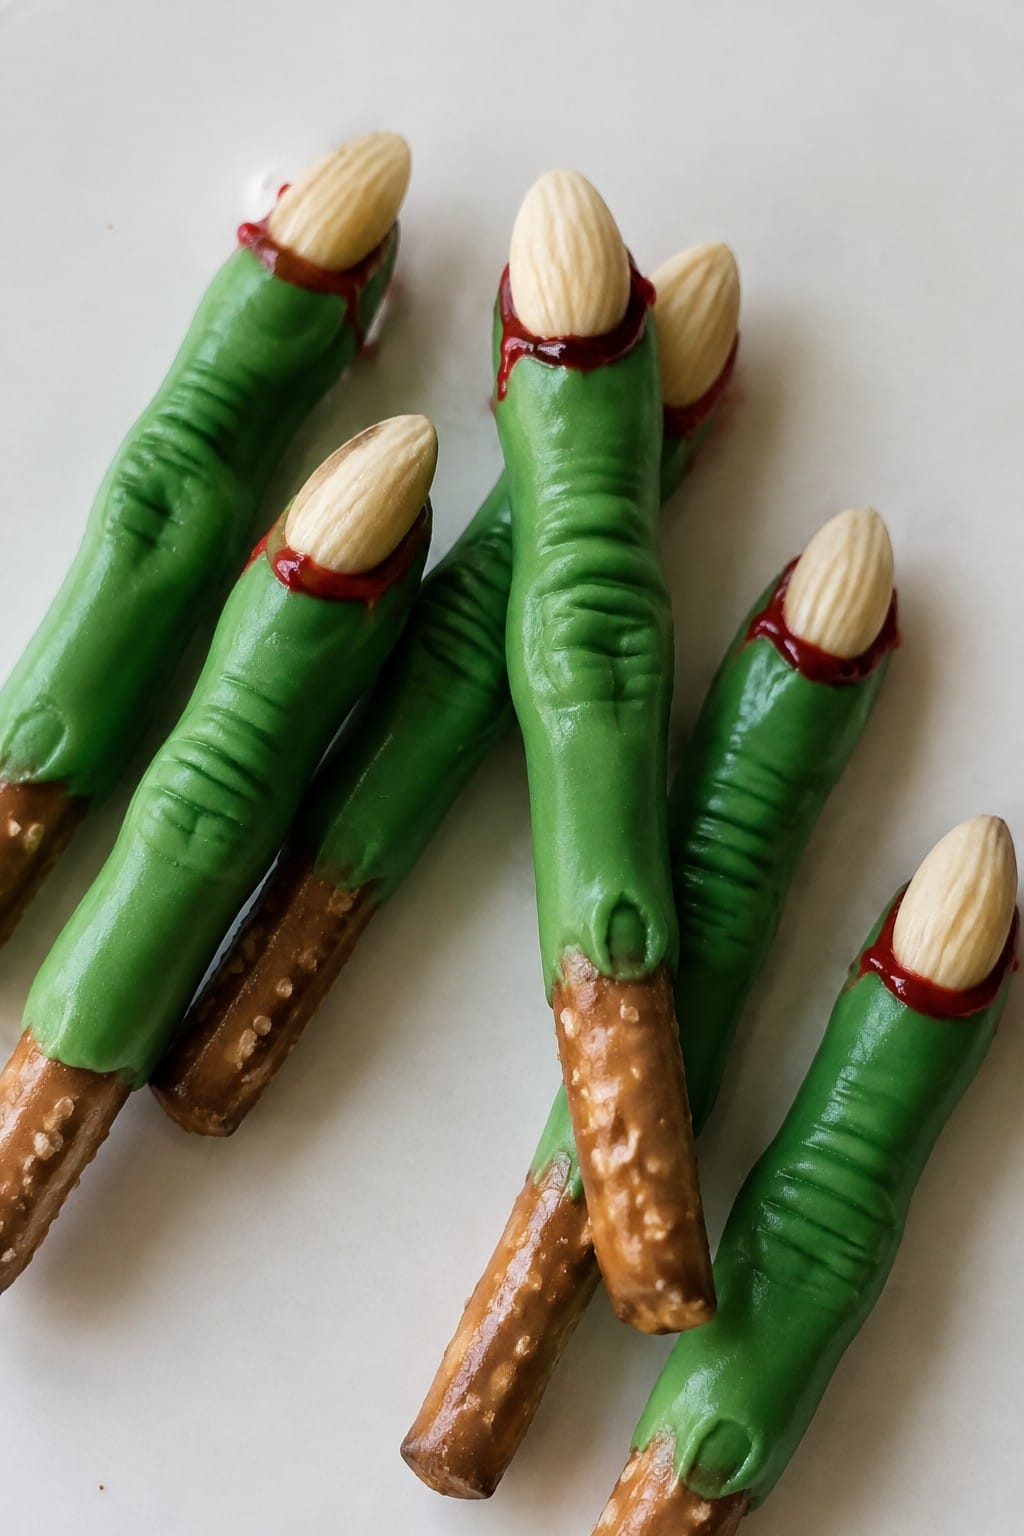
Serves 4 people.
Ingredients
- 12 pretzel rods
- 1 cup green candy melts
- 12 whole blanched almonds
- 2 tablespoons red decorating gel
Instructions
- Line a baking sheet with parchment paper and set it aside.
- Place the green candy melts in a microwave-safe bowl and heat in 30-second intervals, stirring after each, until fully melted and smooth.
- Dip each pretzel rod halfway into the melted candy melts, letting excess drip off.
- Lay the coated pretzel rods on the prepared baking sheet.
- While the coating is still soft, press one almond onto the tip of each rod to form a nail.
- Use a small amount of red decorating gel at the base of each almond to create a cuticle line.
- Let the rods set at room temperature until the coating hardens.
Extra Tips
Work with a few rods at a time so the coating stays soft enough to attach the almonds. Store leftovers in an airtight container at room temperature for up to three days. If the candy melts thicken while dipping, warm them briefly in the microwave for a few seconds.Course: Snack Cuisine: American Equipment: Microwave-safe bowl, Baking sheet, Parchment paper
Monster Green Deviled Eggs
These Monster Green Deviled Eggs add a bright, playful touch to any Halloween spread. The green hue stands out against typical party foods while keeping the classic creamy filling that most people enjoy. They fit well at potlucks, kids’ parties, or casual gatherings where you want something simple yet themed.
The eggs stay tender with a smooth, tangy center that balances the mayo and mustard. Olive slices on top give them a fun monster look without extra steps.
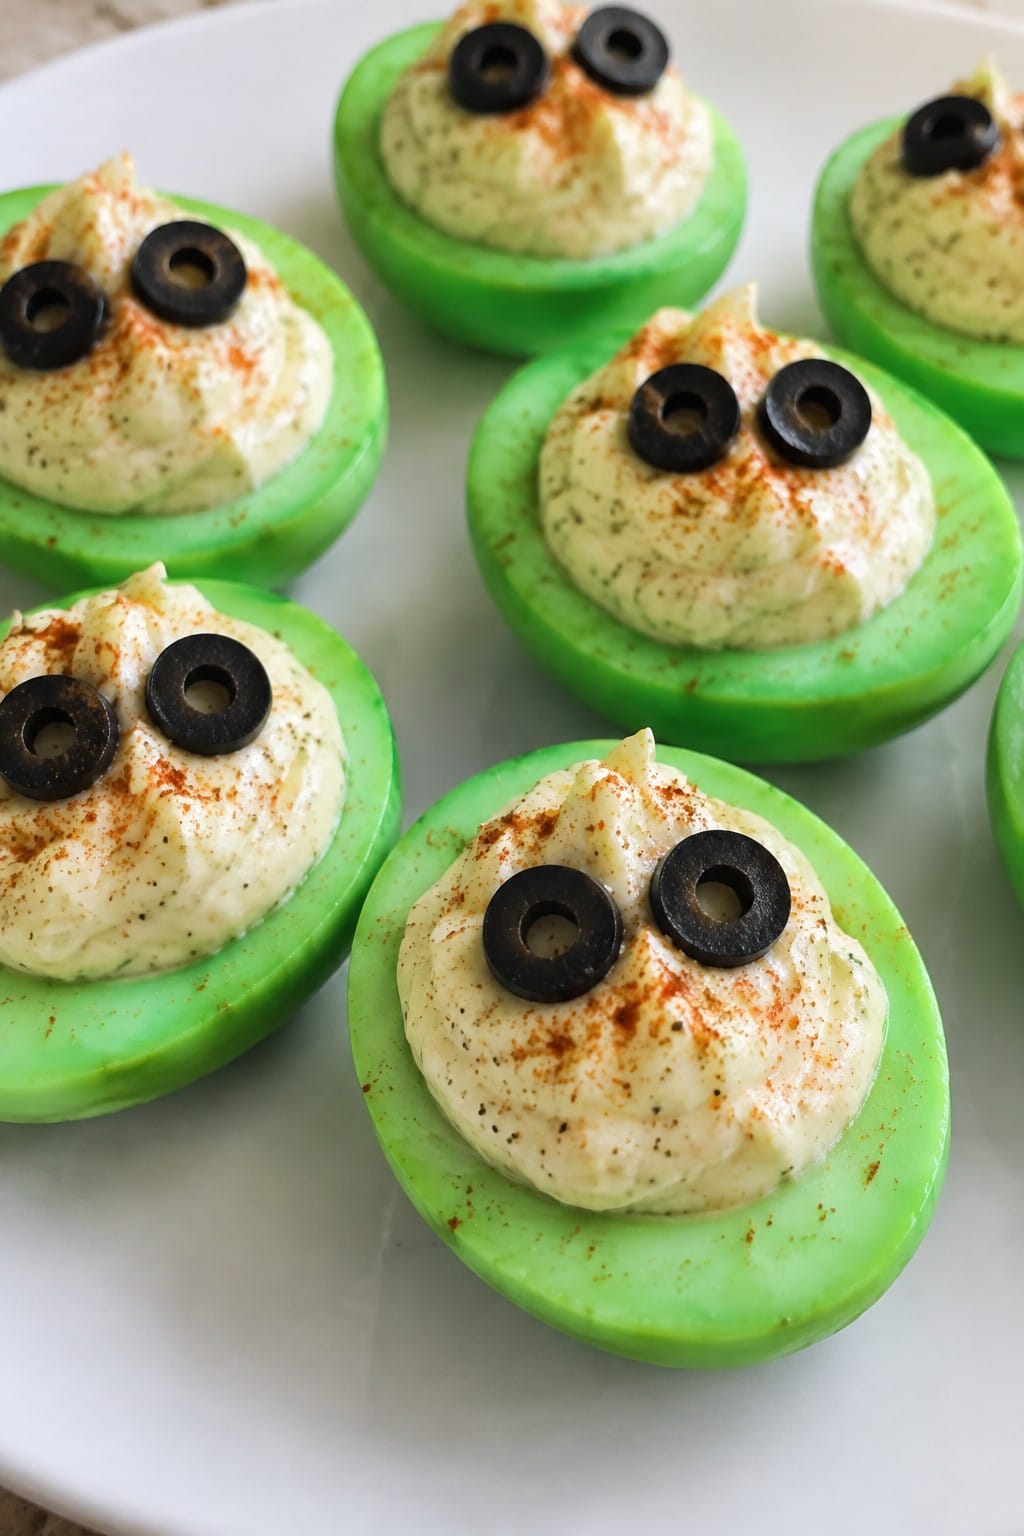
Serves 4 people.
Ingredients
- 6 large eggs
- 1/4 cup mayonnaise
- 1 tablespoon Dijon mustard
- 1 teaspoon white vinegar
- 5 drops green food coloring
- 1/4 teaspoon salt
- 1/8 teaspoon black pepper
- Paprika, for garnish
- Black olive slices, for garnish
Instructions
- Place the eggs in a saucepan and cover them with cold water by one inch. Bring the water to a boil over medium-high heat, then reduce to a simmer and cook for 10 minutes.
- Drain the eggs and transfer them to a bowl of ice water. Let them cool for 5 minutes, then peel off the shells.
- Slice each egg in half lengthwise and scoop the yolks into a mixing bowl. Arrange the whites on a serving plate.
- Mash the yolks with a fork until smooth. Stir in the mayonnaise, Dijon mustard, white vinegar, green food coloring, salt, and black pepper until the mixture is evenly colored and creamy.
- Spoon or pipe the yolk mixture back into the egg white halves.
- Lightly dust the tops with paprika. Add two black olive slices to each egg half to create eyes.
Extra Tips
Adjust the food coloring one drop at a time if you want a deeper shade of green. The olive slices add a mild salty note that pairs well with the tangy filling, so add them just before serving to keep them firm. Leftovers store well in an airtight container in the fridge for up to two days.Course: Appetizer Cuisine: American Equipment: Saucepan, Mixing Bowl, Knife
Pumpkin Patch Cheese Ball Platter
This cheese ball turns a classic appetizer into a simple Halloween centerpiece. The pumpkin adds a mild sweetness and bright color that stands out on any snack table. It works well for small gatherings or last-minute party prep since it needs no baking.
The inside stays creamy and spreadable while the outer coating gives a light crunch. Serve it surrounded by crackers and fresh vegetables to create an easy pumpkin patch look.
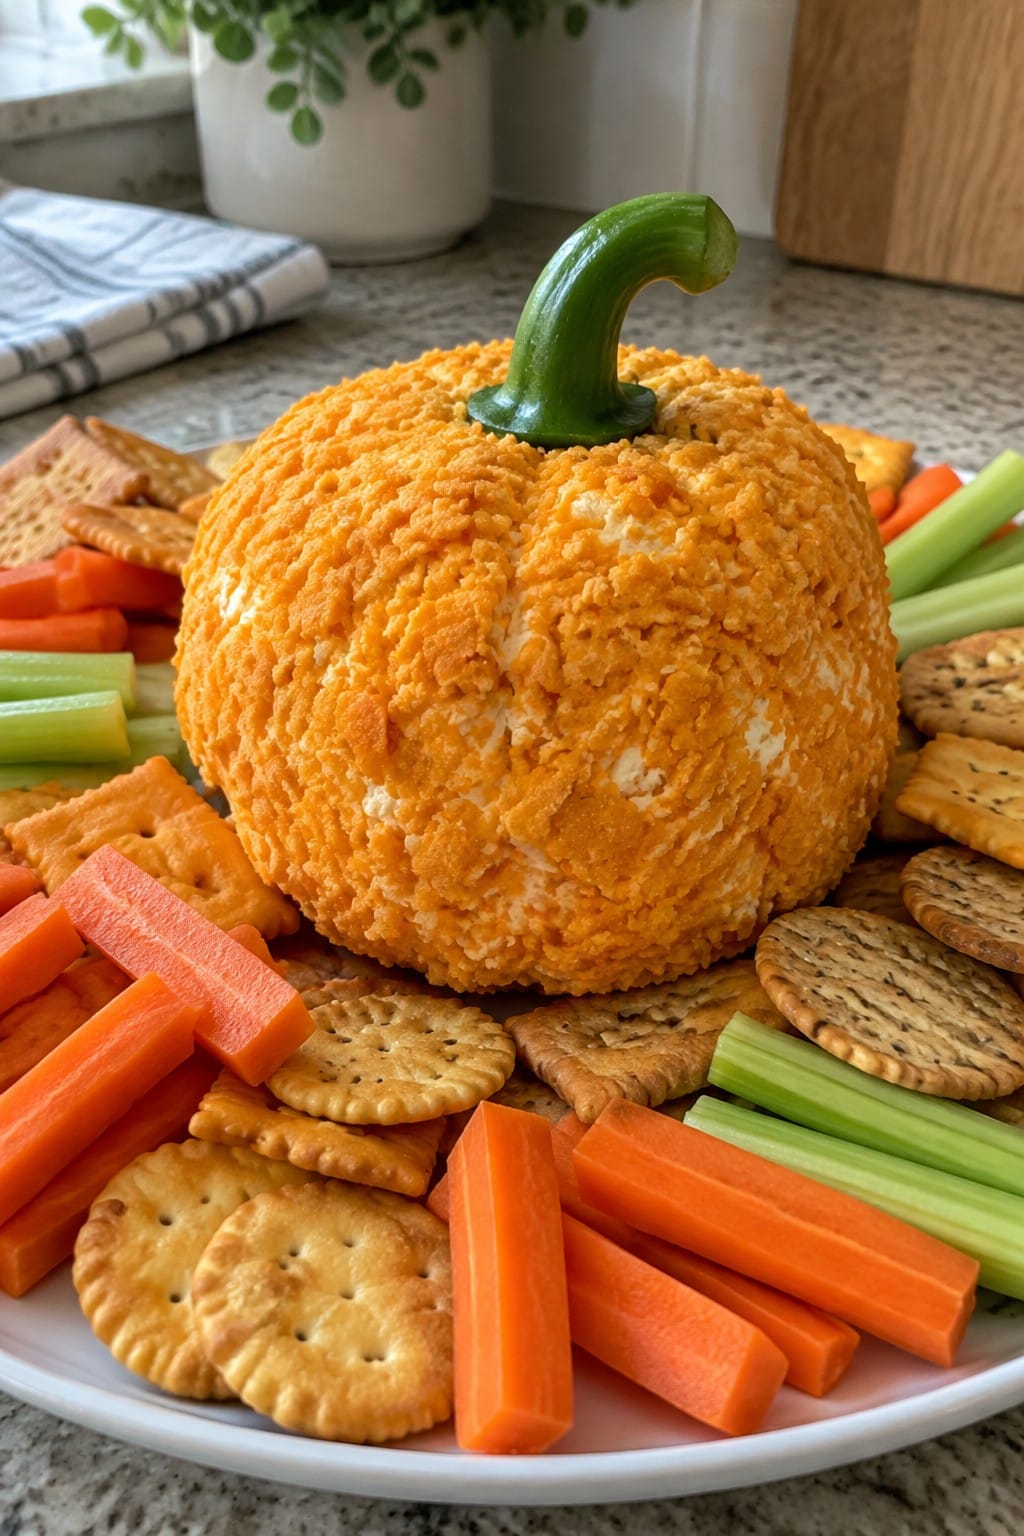
Serves 4 people.
Ingredients
- 8 oz cream cheese, softened
- 1 cup shredded cheddar cheese
- 1/2 cup canned pumpkin puree
- 1 tsp garlic powder
- 1/2 tsp paprika
- 1/4 tsp salt
- 3/4 cup crushed cheese crackers
- 1 green bell pepper stem
- 20 assorted crackers for serving
- 1 cup carrot sticks for serving
- 1 cup celery sticks for serving
Instructions
- Place the cream cheese, cheddar cheese, pumpkin puree, garlic powder, paprika, and salt in a mixing bowl. Stir until the mixture is smooth and evenly combined.
- Scoop the mixture onto a sheet of plastic wrap and shape it into one large ball. Wrap tightly and chill in the refrigerator for 20 minutes to firm up.
- Spread the crushed cheese crackers on a plate. Unwrap the chilled cheese ball and roll it in the crumbs until fully coated on all sides.
- Press the green bell pepper stem gently into the top center of the cheese ball to form the pumpkin stem.
- Arrange the cheese ball in the middle of a serving platter. Place the assorted crackers, carrot sticks, and celery sticks around the edges to complete the platter.
Extra Tips
Chill the cheese ball at least 20 minutes before coating so the crumbs stick better and the shape holds. If the mixture feels too soft after mixing, add one more tablespoon of shredded cheddar. The platter looks best when the vegetables and crackers are placed right before guests arrive so they stay crisp.Course: Appetizer Cuisine: American Equipment: Mixing Bowl, Serving Platter
Graveyard Dirt Pudding Cups
These pudding cups bring a playful graveyard scene to the table with layers of chocolate pudding and crushed cookie dirt. They work well for Halloween parties or as a simple make-ahead treat for kids. The result is creamy chocolate with a crunchy cookie topping and chewy gummy accents.
The texture stays light because the pudding sets quickly in the fridge, while the cookies add a familiar crunch that mimics soil.
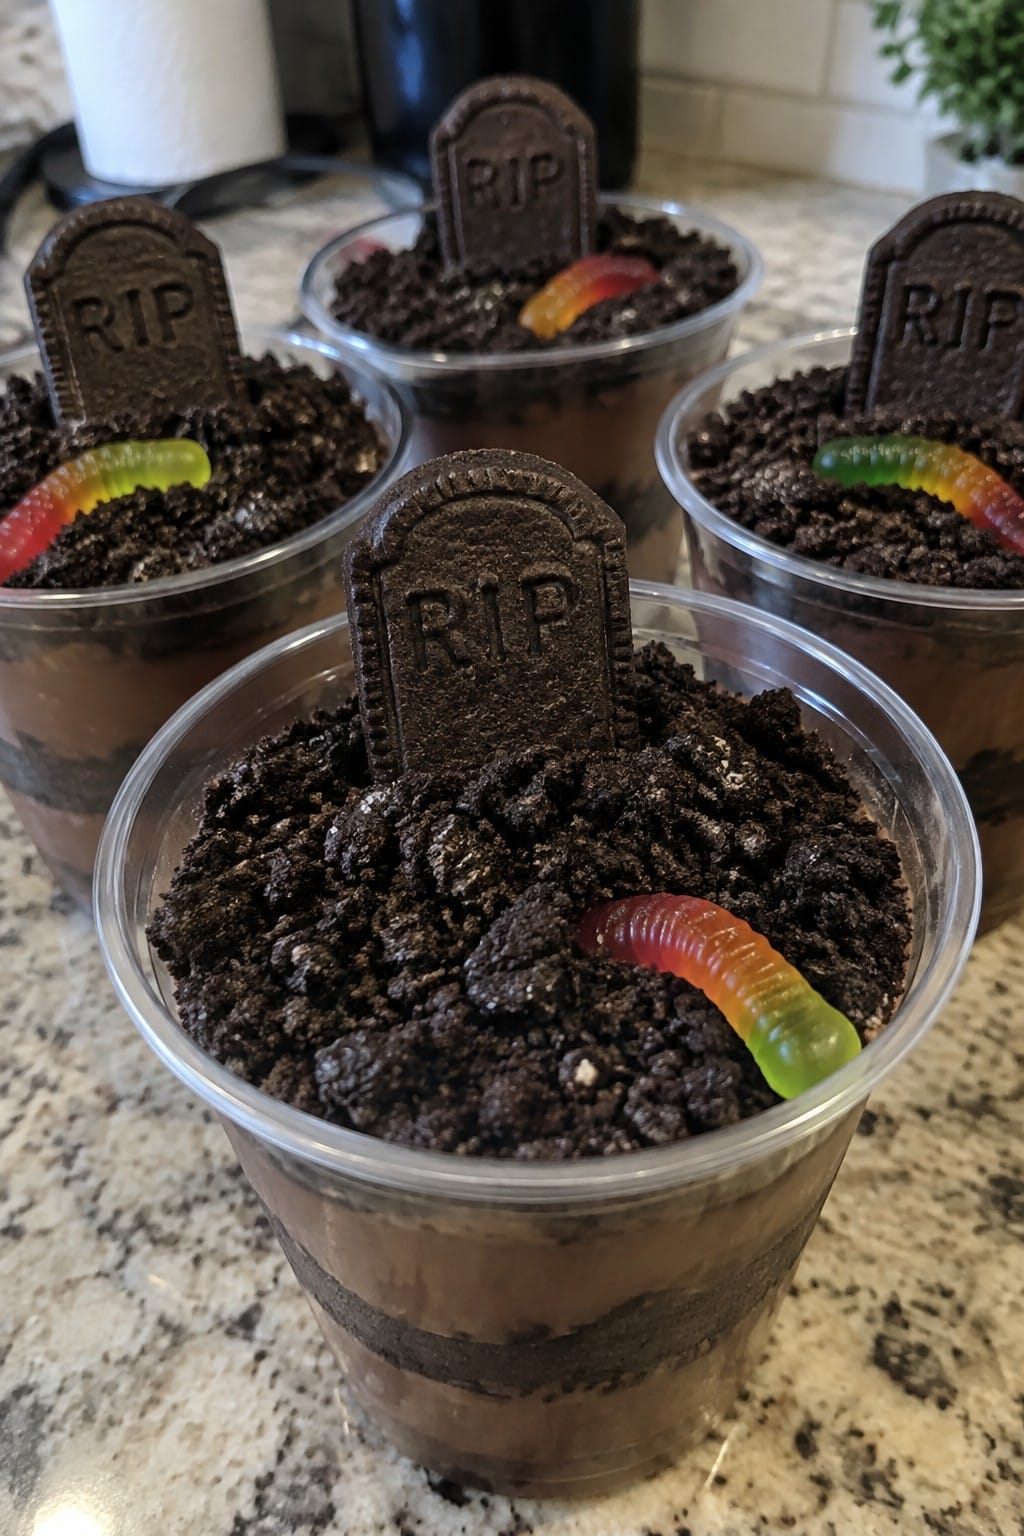
Serves 4 people.
Ingredients
- 1 (3.9 oz) package instant chocolate pudding mix
- 2 cups cold milk
- 16 Oreo cookies
- 4 rectangular chocolate cookies
- Black gel icing
- 8 gummy worms
Instructions
- Pour the cold milk into a mixing bowl and add the instant chocolate pudding mix. Whisk for two minutes until the mixture thickens.
- Place 12 Oreo cookies in a zip-top bag and crush them with a rolling pin until they form fine crumbs.
- Spoon the pudding into four clear cups, filling each about halfway. Add a layer of crushed Oreo crumbs on top.
- Repeat the pudding and crumb layers until the cups are full, finishing with a final layer of crumbs.
- Write "RIP" on each rectangular chocolate cookie with black gel icing and press one cookie upright into the crumbs of each cup.
- Tuck two gummy worms into the crumbs on top of each cup so they appear to emerge from the dirt.
Extra Tips
Crush the Oreos right before assembly so the crumbs stay dry and textured instead of softening too soon. Clear cups help show the layers, and the rectangular cookies stand best when pressed in at a slight angle.Course: Dessert Cuisine: American Equipment: Mixing Bowl, Whisk, Zip-top Bag, Serving Cups
Bat-Wing Barbecue Chicken Wings
These bat-wing barbecue chicken wings add a simple spooky shape to a familiar favorite. They work well for Halloween parties or family dinners when you want something easy but themed.
The wings stay juicy with a thick, smoky barbecue coating that clings nicely to the skin. The dark sauce and spread-out wing shape give them their bat look without extra steps.
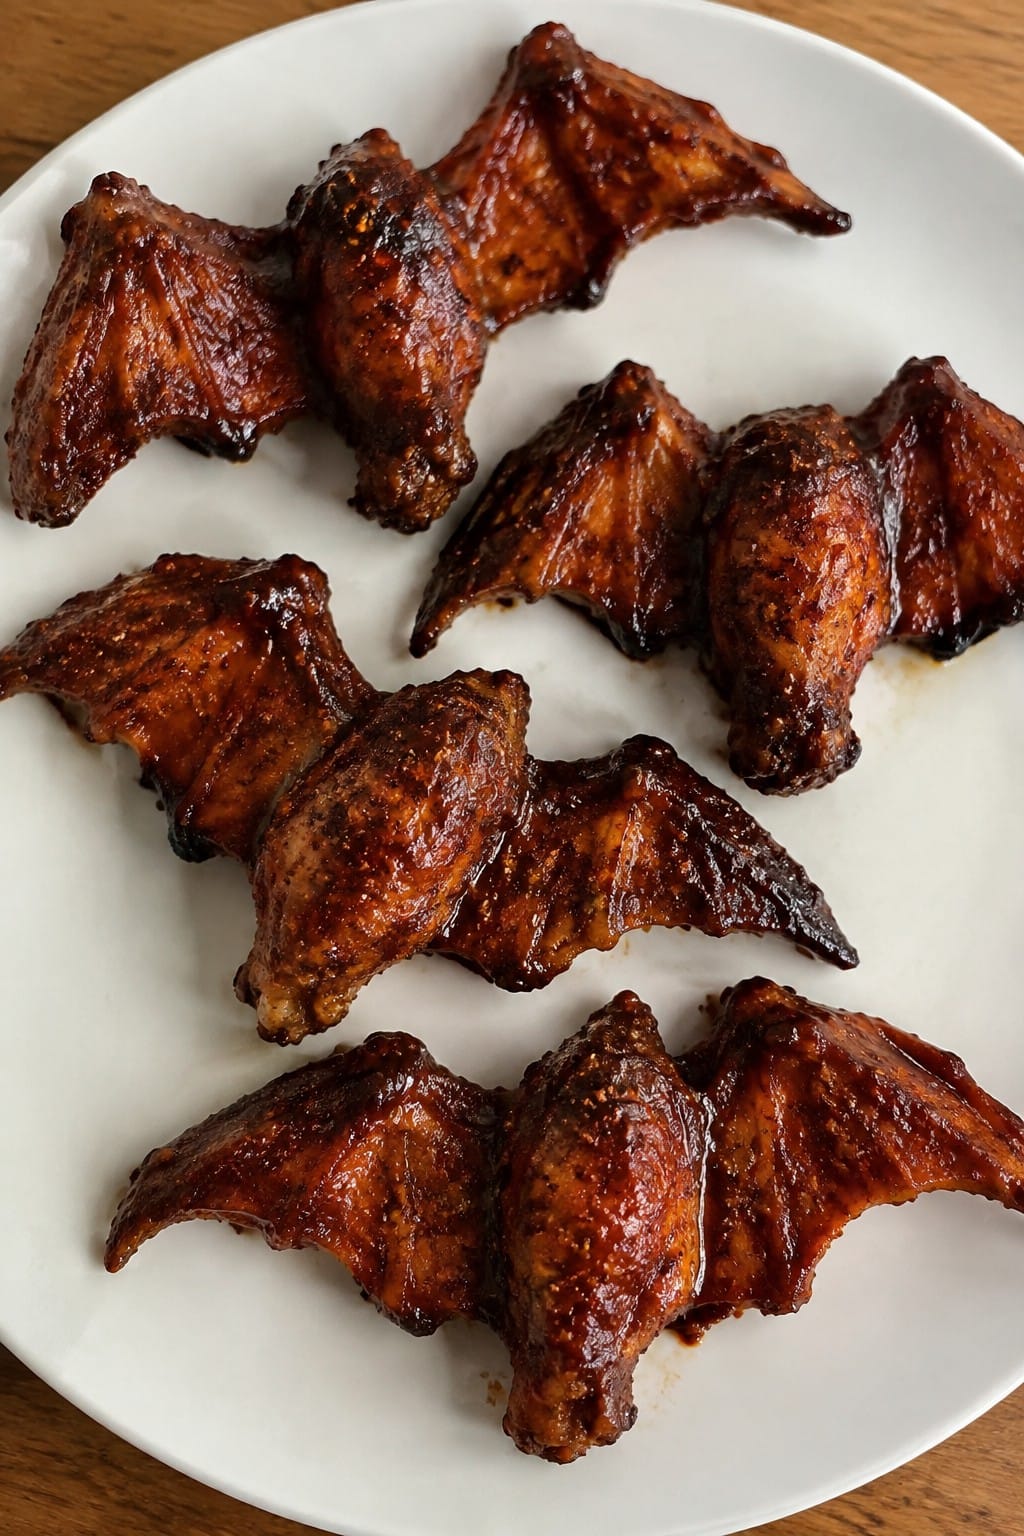
Serves 4 people.
Ingredients
- 2 pounds chicken wings
- 1 cup barbecue sauce
- 2 tablespoons olive oil
- 1 teaspoon garlic powder
- 1 teaspoon smoked paprika
- 1/2 teaspoon salt
- 1/4 teaspoon black pepper
Instructions
- Preheat the oven to 400 degrees and line a baking sheet with parchment paper.
- Place the chicken wings in a large bowl and drizzle with olive oil. Add the garlic powder, smoked paprika, salt, and black pepper. Toss until the wings are evenly coated.
- Spread the wings in a single layer on the prepared baking sheet. Bake for 35 minutes, turning once halfway through.
- Remove the wings from the oven and transfer them to a clean bowl. Pour the barbecue sauce over the wings and toss until fully coated.
- Return the wings to the baking sheet and bake for 10 more minutes until the sauce thickens and looks sticky.
- Arrange the wings on a platter with the tips pointing outward to form the bat-wing shape.
Extra Tips
Use a thick barbecue sauce so it clings without running off the wings. If the sauce seems thin, simmer it briefly on the stove first to reduce it. For the best bat look, place the wings close together in the center of the platter and fan the ends out on both sides.
Course: Appetizer Cuisine: American Equipment: Baking sheet, Large bowl, Parchment paperSkeleton Veggie Crudité Board with Hummus
This skeleton veggie crudité board turns everyday vegetables into a playful Halloween display. It works well for parties or family nights when you want a fresh option that still fits the theme. The crisp vegetables stay light and crunchy against the smooth hummus.
The board looks striking once arranged, yet it takes almost no cooking. Everyone can grab a few pieces and dip them straight into the hummus.
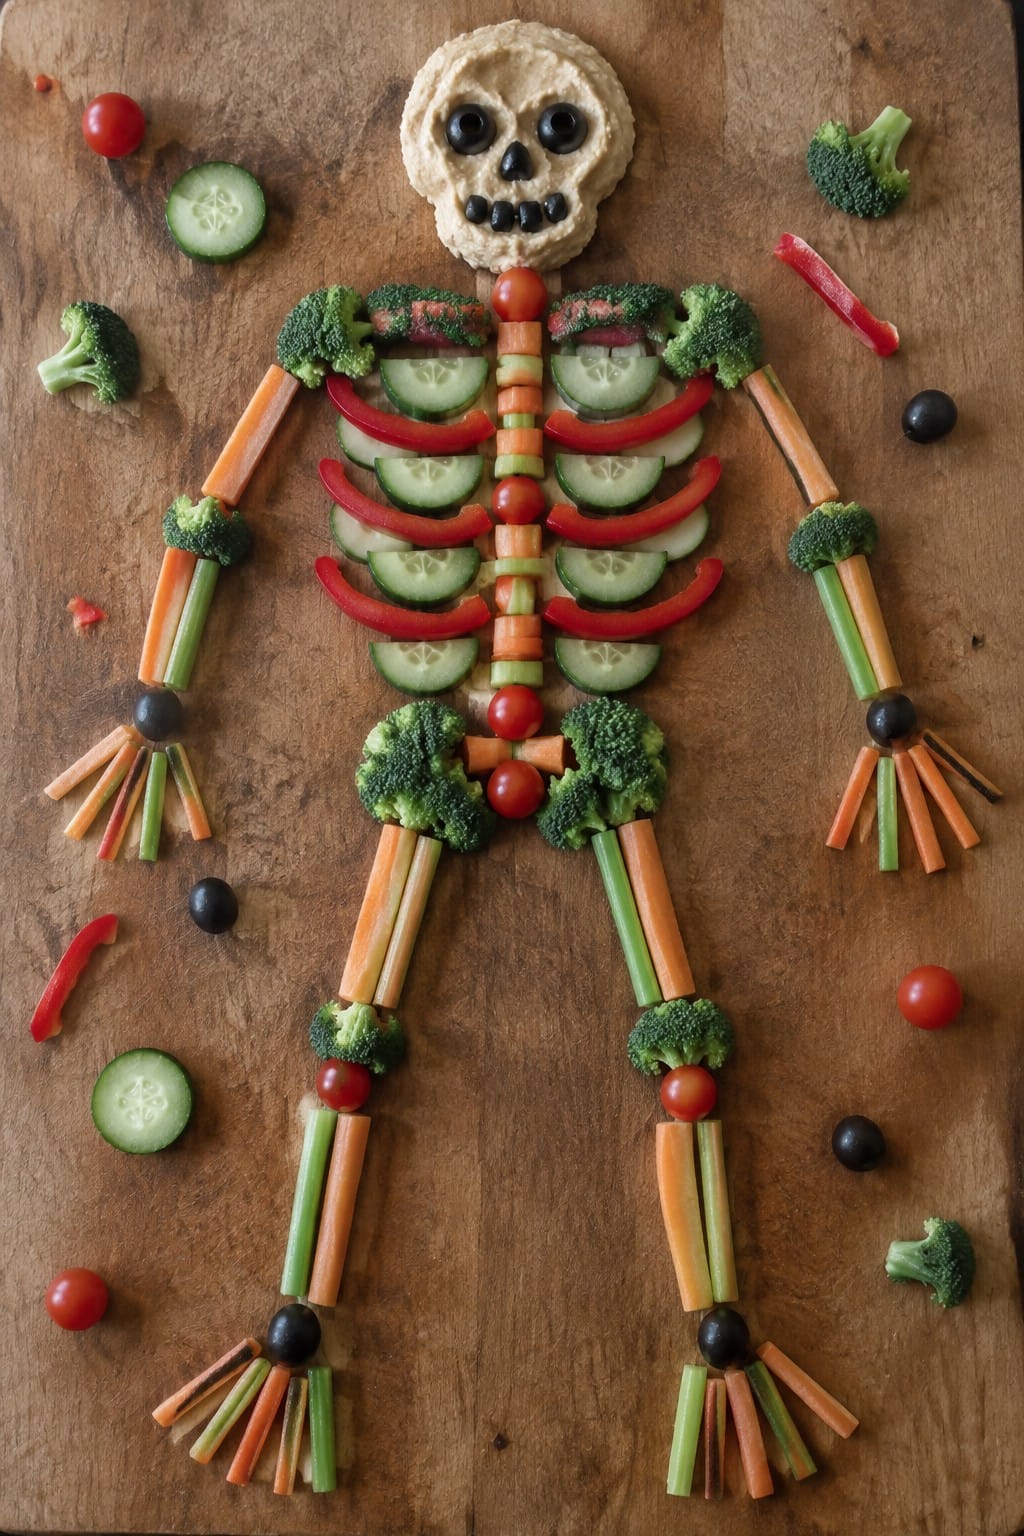
Serves 4 people.
Ingredients
- 1 1/2 cups hummus
- 2 large carrots, cut into thin sticks
- 3 celery stalks, cut into sticks
- 1 cucumber, cut into sticks and rounds
- 1 red bell pepper, cut into strips
- 1 cup broccoli florets
- 10 cherry tomatoes
- 8 black olives
Instructions
- Wash all vegetables and cut them into the sizes listed in the ingredients.
- Place the hummus on a large board and spread it into a rough skull shape at the top.
- Lay carrot and celery sticks below the hummus to form a straight spine and shorter rib bones on each side.
- Position cucumber sticks on either side of the spine to create arm and leg bones.
- Add broccoli florets near the joints and scatter cherry tomatoes along the board for color.
- Set black olives on the hummus skull to mark the eyes and nose.
Extra Tips
Arrange the board right before guests arrive so the cut vegetables stay crisp. If you need to prepare it earlier, cover the board tightly with plastic wrap and store it in the fridge for up to two hours. Swap the red bell pepper for yellow if you want brighter bones, and keep extra hummus on the side for refills.Course: Appetizer Cuisine: American Equipment: Cutting board, Sharp knife, Large serving board
Candy Corn Parfait Cups
These layered cups capture the bright stripes of candy corn in a simple, no-bake dessert. They work well for last-minute Halloween parties or after-school snacks because they need almost no prep and look cheerful in clear cups.
The result is a light, creamy treat with mild fruit flavors and a sweet crunch from the candy corn on top. Kids can help assemble them, and the portions stay small enough to feel like a fun bite rather than a heavy dessert.
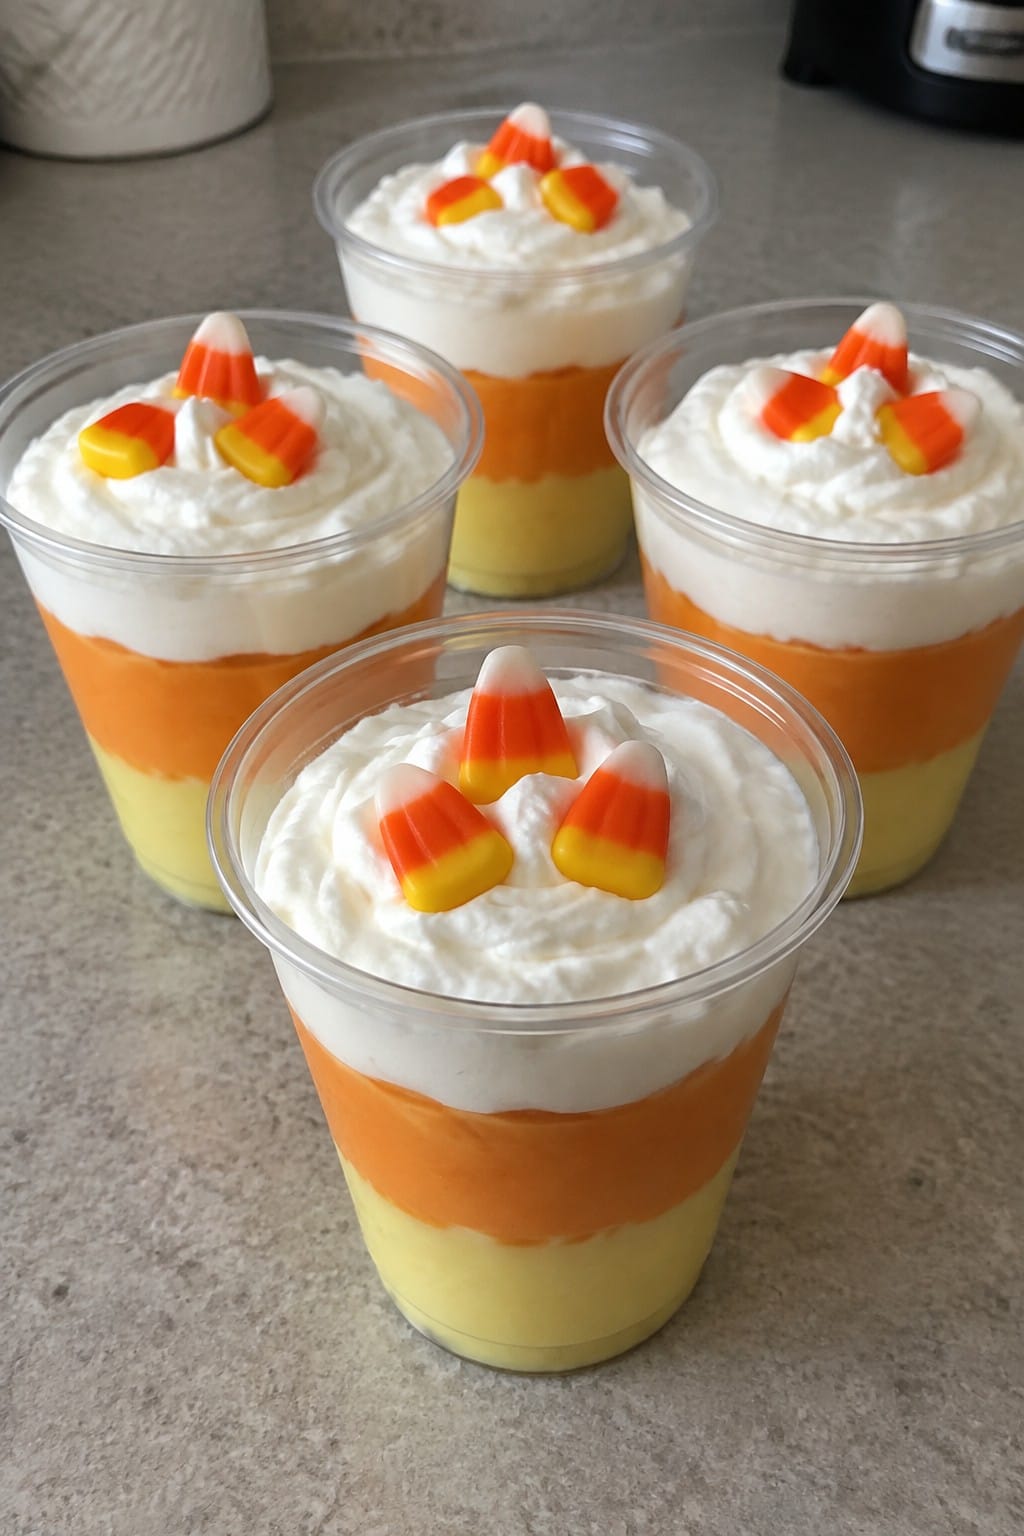
Serves 4 people.
Ingredients
- 1 cup lemon yogurt
- 1 cup orange yogurt
- 1 cup vanilla yogurt
- 1/2 cup whipped topping
- 12 candy corn pieces
- 4 clear plastic cups
Instructions
- Divide the lemon yogurt evenly among the four clear plastic cups to form the bottom yellow layer.
- Spoon the orange yogurt over the lemon layer in each cup to create the middle orange stripe.
- Add the vanilla yogurt on top of the orange layer to finish the white section.
- Place a dollop of whipped topping on each parfait.
- Set three candy corn pieces on the whipped topping of every cup just before serving.
Extra Tips
Chill the filled cups for at least 30 minutes if you want firmer layers. Greek yogurt versions give a thicker texture without changing the flavors. Keep any leftovers covered in the refrigerator for up to one day.Course: Dessert Cuisine: American Equipment: Clear plastic cups, Spoon
Frankenstein Brownie Bites
These Frankenstein Brownie Bites turn a basic brownie into a quick Halloween treat. They work well for parties or after-school snacks because they come together with little effort. The fudgy chocolate base gets a layer of green coating and simple face details that kids and adults both enjoy.
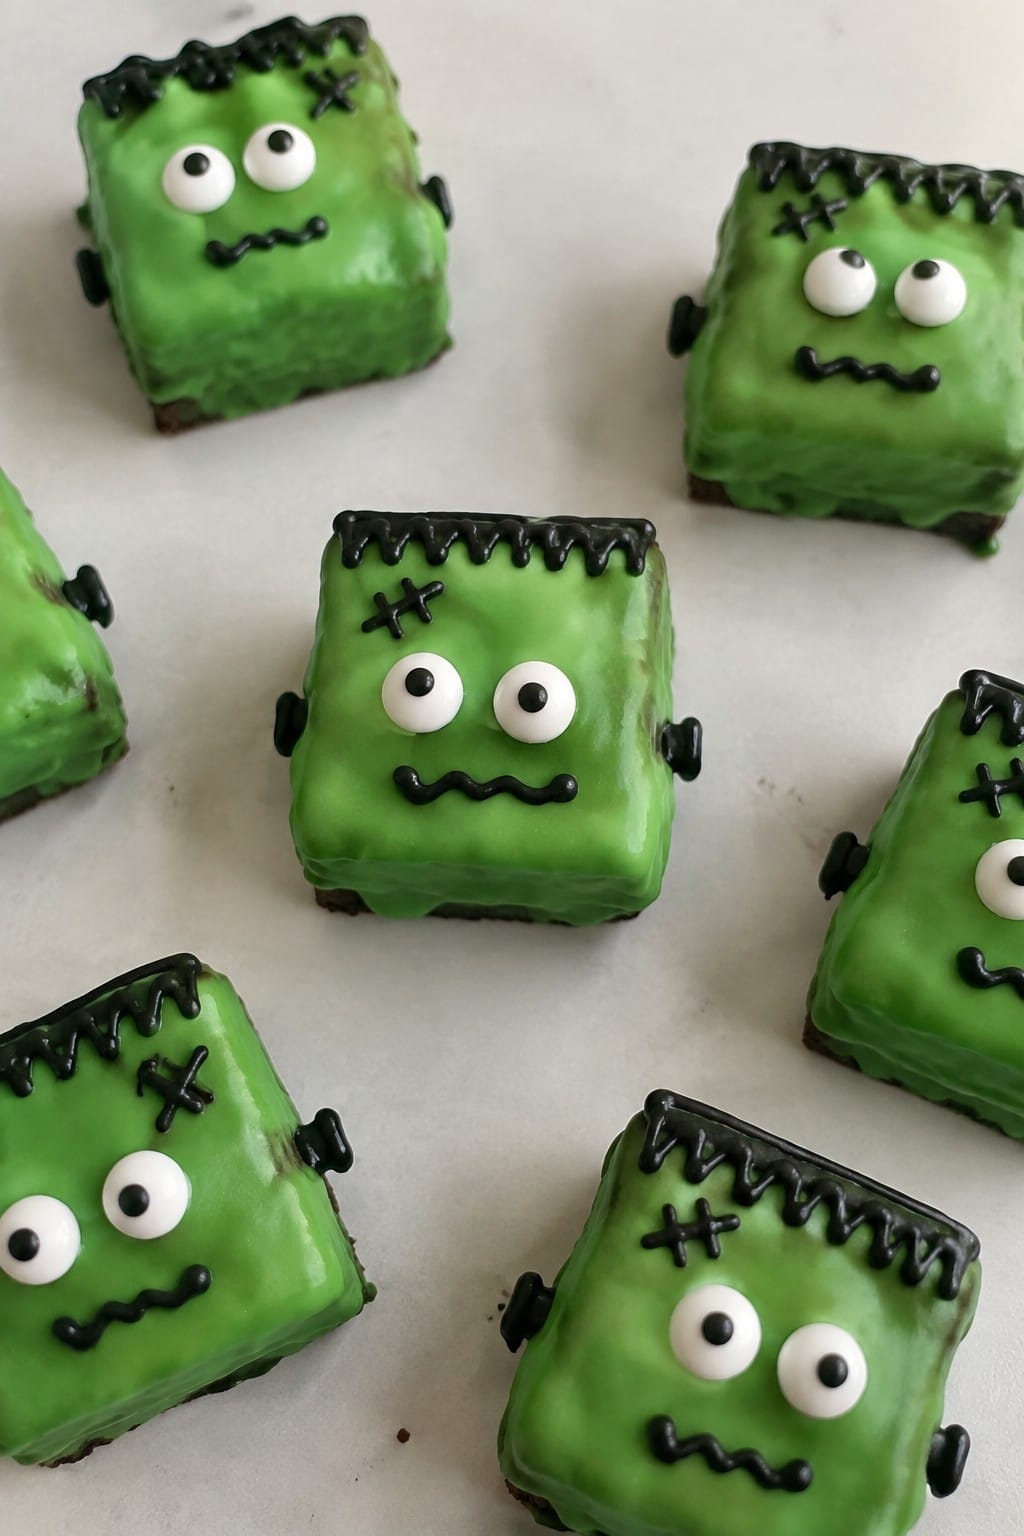
Serves 4 people.
Ingredients
- 1 (18.3 oz) box brownie mix
- ½ cup vegetable oil
- ¼ cup water
- 2 large eggs
- 1 cup green candy melts
- 12 candy eyeballs
- Black decorating gel
Instructions
- Preheat the oven to 350°F and line an 8×8 baking pan with parchment paper.
- In a mixing bowl, combine the brownie mix, vegetable oil, water, and eggs until smooth.
- Pour the batter into the prepared pan and bake for 25 minutes, or until a toothpick comes out with a few moist crumbs.
- Let the brownies cool completely in the pan, then cut them into 12 small squares.
- Place the green candy melts in a microwave-safe bowl and heat in 30-second bursts, stirring between each, until fully melted.
- Dip the top of each brownie square into the melted green candy melts and set on a wire rack.
- While the coating is still soft, press two candy eyeballs onto each brownie.
- Use the black decorating gel to draw a jagged mouth and hairline on each piece.
Extra Tips
Let the brownies cool fully before cutting so the edges stay neat. If the green coating sets too fast, warm it again for a few seconds. Store leftovers in an airtight container at room temperature for up to two days.Course: Dessert Cuisine: American Equipment: Mixing Bowl, Baking Pan, Microwave-Safe Bowl
Caramel Apple Nacho Plate
This caramel apple nacho plate turns classic fall flavors into a shareable treat. Apple slices stand in for chips while caramel and chocolate create the layers. It works well for Halloween parties or quick after-school snacks because it comes together fast with no oven required.
The result gives a mix of crisp apple, sticky caramel, and crunchy toppings. Tart apples balance the sweetness so the plate stays light enough for multiple servings.
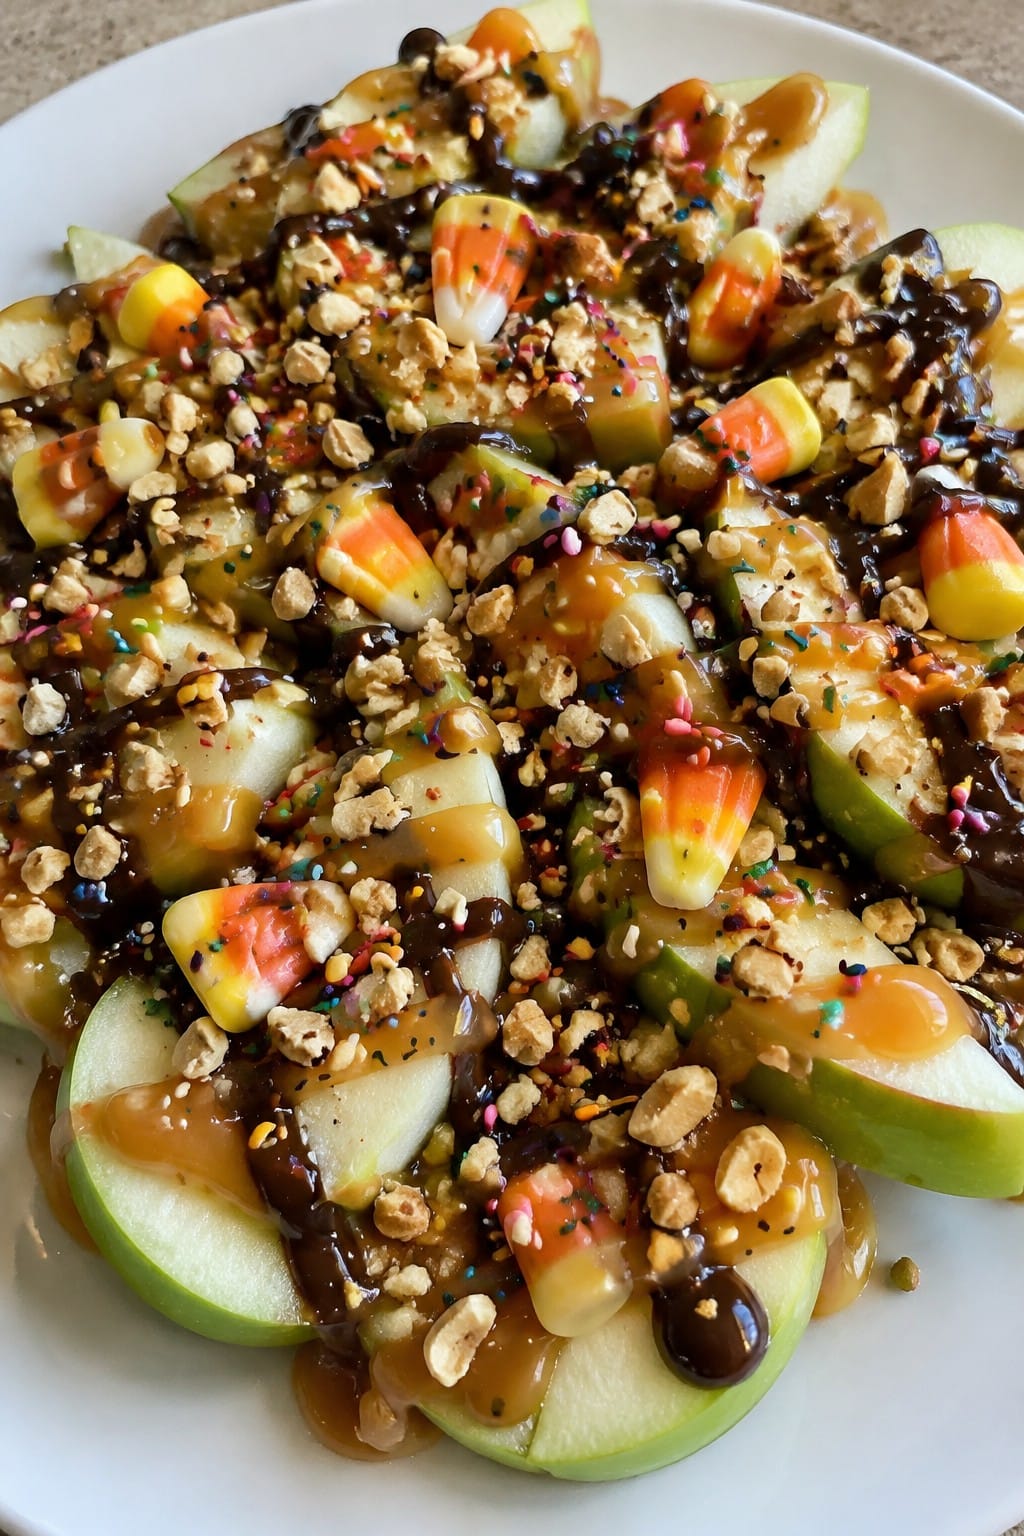
Serves 4 people.
Ingredients
- 4 large Granny Smith apples
- 1 cup caramel sauce
- 1/2 cup semi-sweet chocolate chips
- 1/4 cup chopped peanuts
- 1/4 cup candy corn
- 2 tablespoons rainbow sprinkles
Instructions
- Core the apples and cut them into thin wedges. Arrange the slices in a single overlapping layer on a large serving plate.
- Place the caramel sauce in a microwave-safe bowl and heat it for 20 seconds until it loosens. Drizzle half the warm caramel evenly over the apple slices.
- Put the chocolate chips in a separate microwave-safe bowl and heat them in 15-second bursts, stirring between each, until fully melted. Drizzle the melted chocolate over the caramel layer.
- Scatter the chopped peanuts, candy corn pieces, and rainbow sprinkles across the top. Finish with the remaining caramel sauce.
Extra Tips
Serve the plate right away so the apples stay crisp and do not brown. Tart Granny Smith apples give the best contrast to the sweet toppings. If you need to prepare ahead, slice the apples and store them in lemon water, then pat dry before assembling.Course: Dessert Cuisine: American Equipment: Microwave, Serving plate, Knife
