
Halloween parties always need a few snacks that come together fast. These recipes use basic ingredients and simple steps that fit into a busy day. They have all been tested at gatherings where the food went quickly. You will see a mix of sweet and savory options that work for different ages. The list below gives you 15 ideas to choose from for your next event.
Helpful Tips Before You Start
These tips will help your Halloween snacks come together fast and keep guests coming back for more.
Prep Components Ahead
Chop fruits, mix dips, and portion snacks the day before. This keeps assembly quick on the day of the party.
Make Everything Bite Sized
Cut sandwiches, cookies, and veggies into small pieces. Guests grab more when portions feel easy to eat.
Use Simple Decorations
Add candy eyes or food coloring to basic recipes for a spooky look. These touches take little time but make snacks stand out.
Set Out Backups Early
Keep one extra tray ready in the kitchen. Refilling the table quickly helps popular snacks disappear at a steady pace.
Mummy Hot Dog Roll-Ups with Mustard Eyes
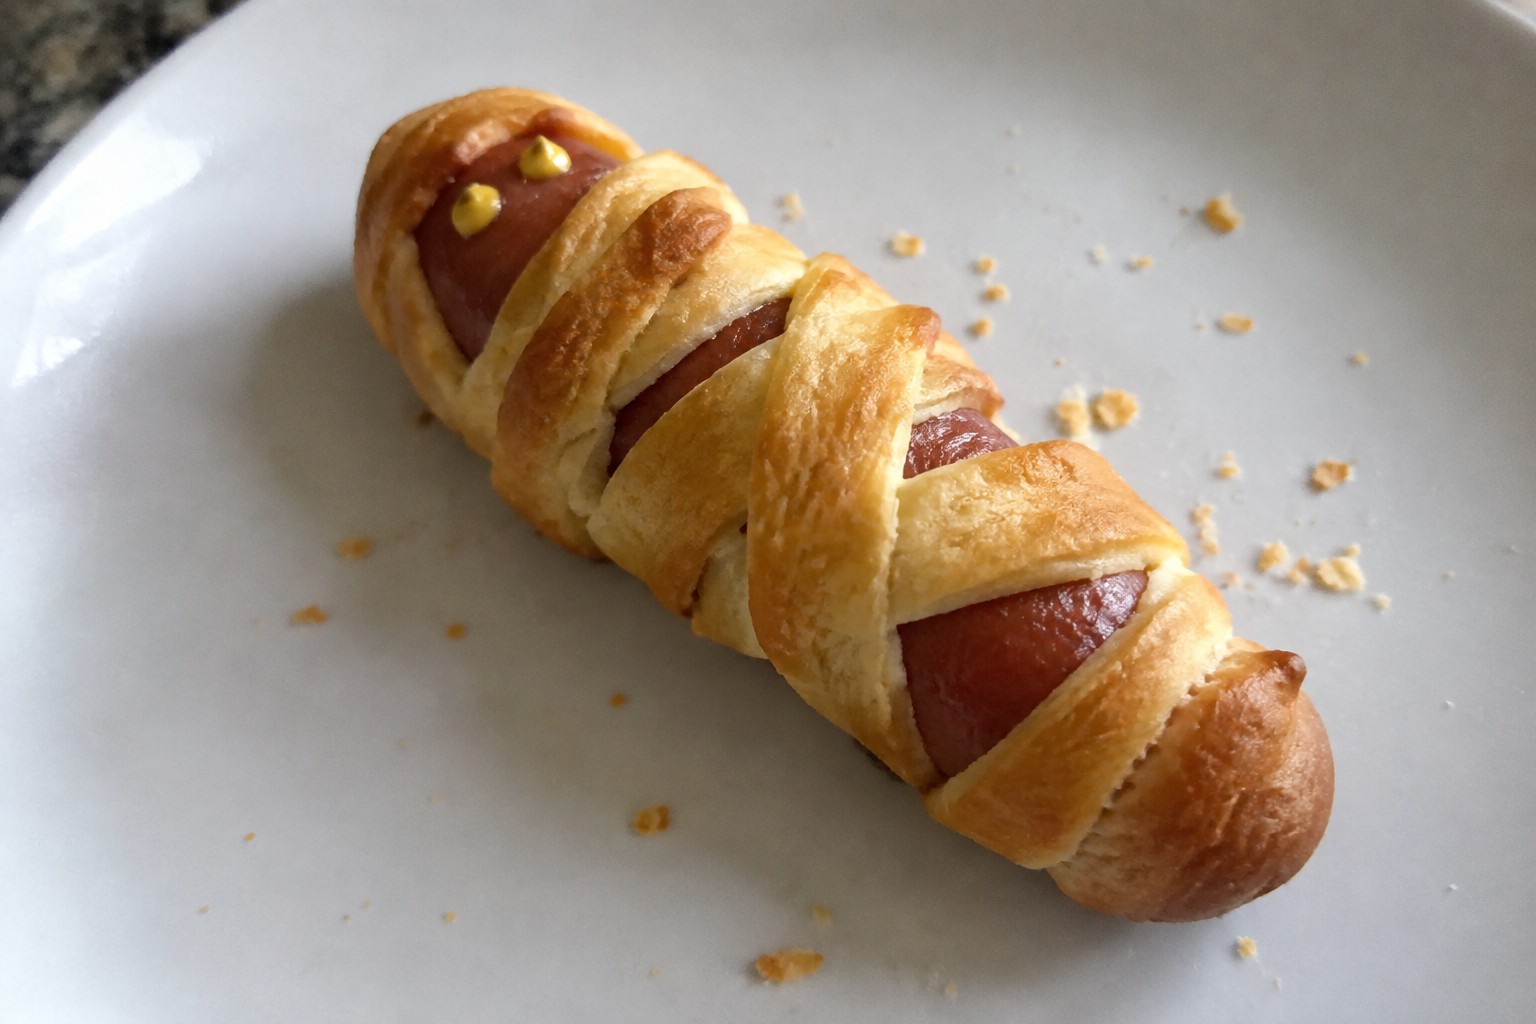
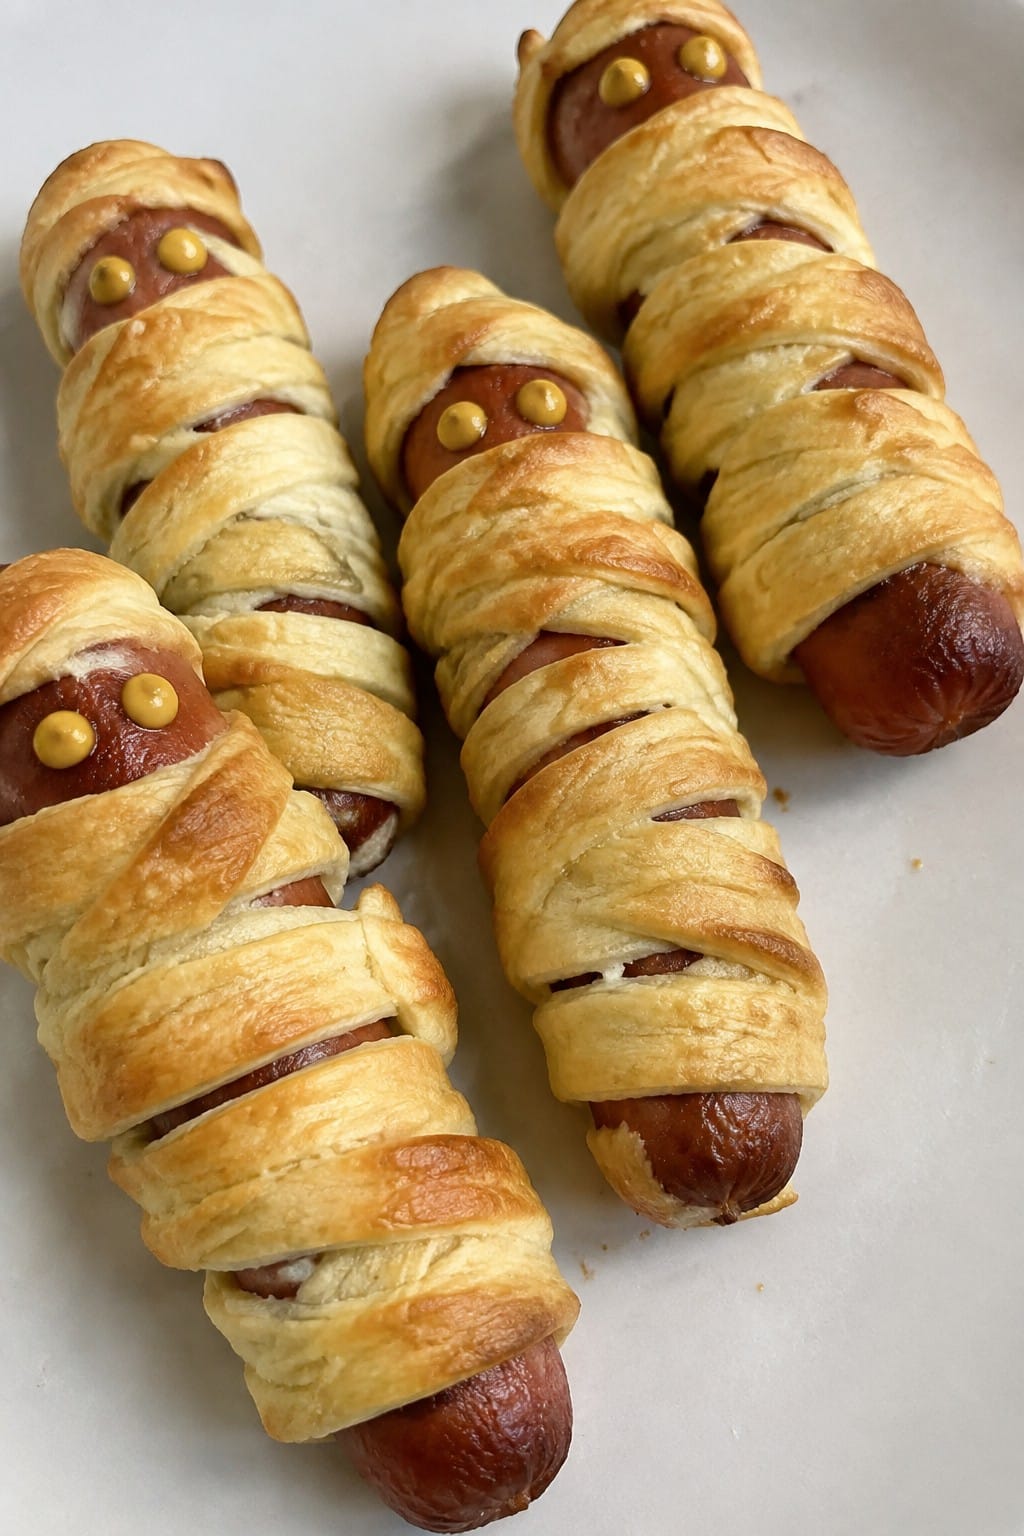
These mummy hot dog roll-ups turn a simple package of hot dogs into a party snack that fits right into a Halloween spread. The dough bakes into flaky layers around the meat, and the whole thing comes out of the oven in under 20 minutes.
The mustard eyes give each roll-up a clear Halloween look while keeping the flavor straightforward and savory. They work well on a buffet table or passed around while guests mingle.
Serves 4 people.
Ingredients
- 8 all-beef hot dogs
- 1 can (8 ounces) refrigerated crescent roll dough
- 2 tablespoons yellow mustard
Instructions
- Heat the oven to 375°F and line a baking sheet with parchment paper.
- Unroll the crescent roll dough on a cutting board and slice it into thin strips about 1/4 inch wide.
- Wrap the dough strips around each hot dog, leaving small gaps near the top for the eyes and overlapping the strips slightly to create a mummy effect.
- Place the wrapped hot dogs on the prepared baking sheet.
- Bake for 12 to 15 minutes until the dough turns golden brown.
- Remove from the oven and let the roll-ups cool for 2 minutes.
- Use a small spoon or squeeze bottle to dot two small circles of mustard on each hot dog for eyes.
Extra Tips
Wrap the dough strips snugly but not too tight so the hot dogs stay juicy inside the crust. Serve them warm on a platter with extra mustard on the side for dipping. If you need to make them ahead, wrap and bake the hot dogs earlier in the day, then add the mustard eyes right before serving so they stay bright.Course: Appetizer Cuisine: American Equipment: Baking sheet, Knife
Spiderweb Seven-Layer Taco Dip with Tortilla Chips
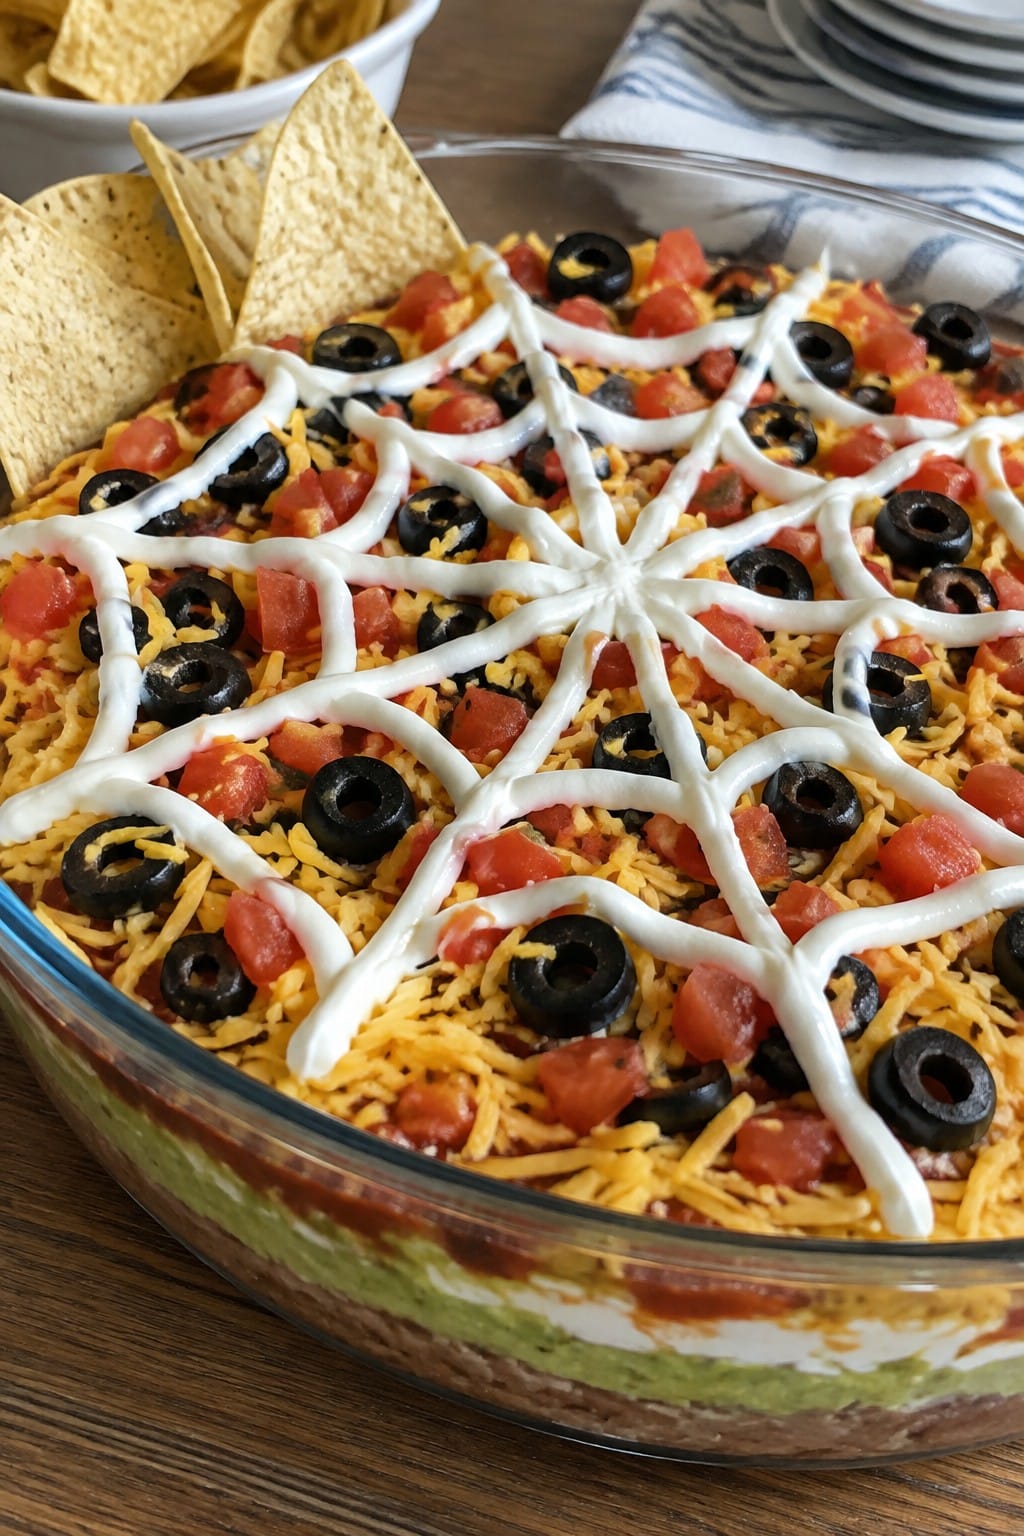
This seven-layer taco dip gets a simple Halloween upgrade with a sour cream spiderweb on top. The layers bring familiar taco flavors that work well for parties or casual get-togethers when you need something quick to set out with chips.
The dip stays creamy from the beans and guacamole while the salsa and cheese add freshness and a bit of bite. It travels easily to a potluck and holds up during the first round of snacking.
Serves 4 people.
Ingredients
- 1 can (16 oz) refried beans
- 1 tablespoon taco seasoning
- 1 cup sour cream, divided
- 1 cup guacamole
- 1 cup salsa
- 1 cup shredded cheddar cheese
- 1/2 cup diced tomatoes
- 1/4 cup sliced black olives
- Tortilla chips, for serving
Instructions
- Stir the refried beans with the taco seasoning in a bowl until evenly mixed.
- Spread the seasoned beans in an even layer in a shallow serving dish.
- Mix 3/4 cup of the sour cream with the remaining taco seasoning if desired, then spread it over the beans.
- Spoon the guacamole over the sour cream layer and smooth it gently.
- Add the salsa as the next layer, followed by the shredded cheddar cheese.
- Scatter the diced tomatoes and black olives over the cheese.
- Place the remaining 1/4 cup sour cream in a small zip-top bag, snip a tiny corner, and pipe four or five concentric circles on top. Drag a toothpick from the center outward to form the spiderweb design.
- Serve right away with tortilla chips.
Extra Tips
Pipe the sour cream web just before serving so the lines stay sharp. If you need to make it ahead, prepare the layers up to the cheese, cover, and add the tomatoes, olives, and web right before guests arrive. A clear glass pie dish shows off the layers best.Course: Appetizer Cuisine: Mexican Equipment: Mixing bowl, Shallow serving dish, Spoon, Zip-top bag, Toothpick
Pumpkin Spice Snack Mix with Candy Corn
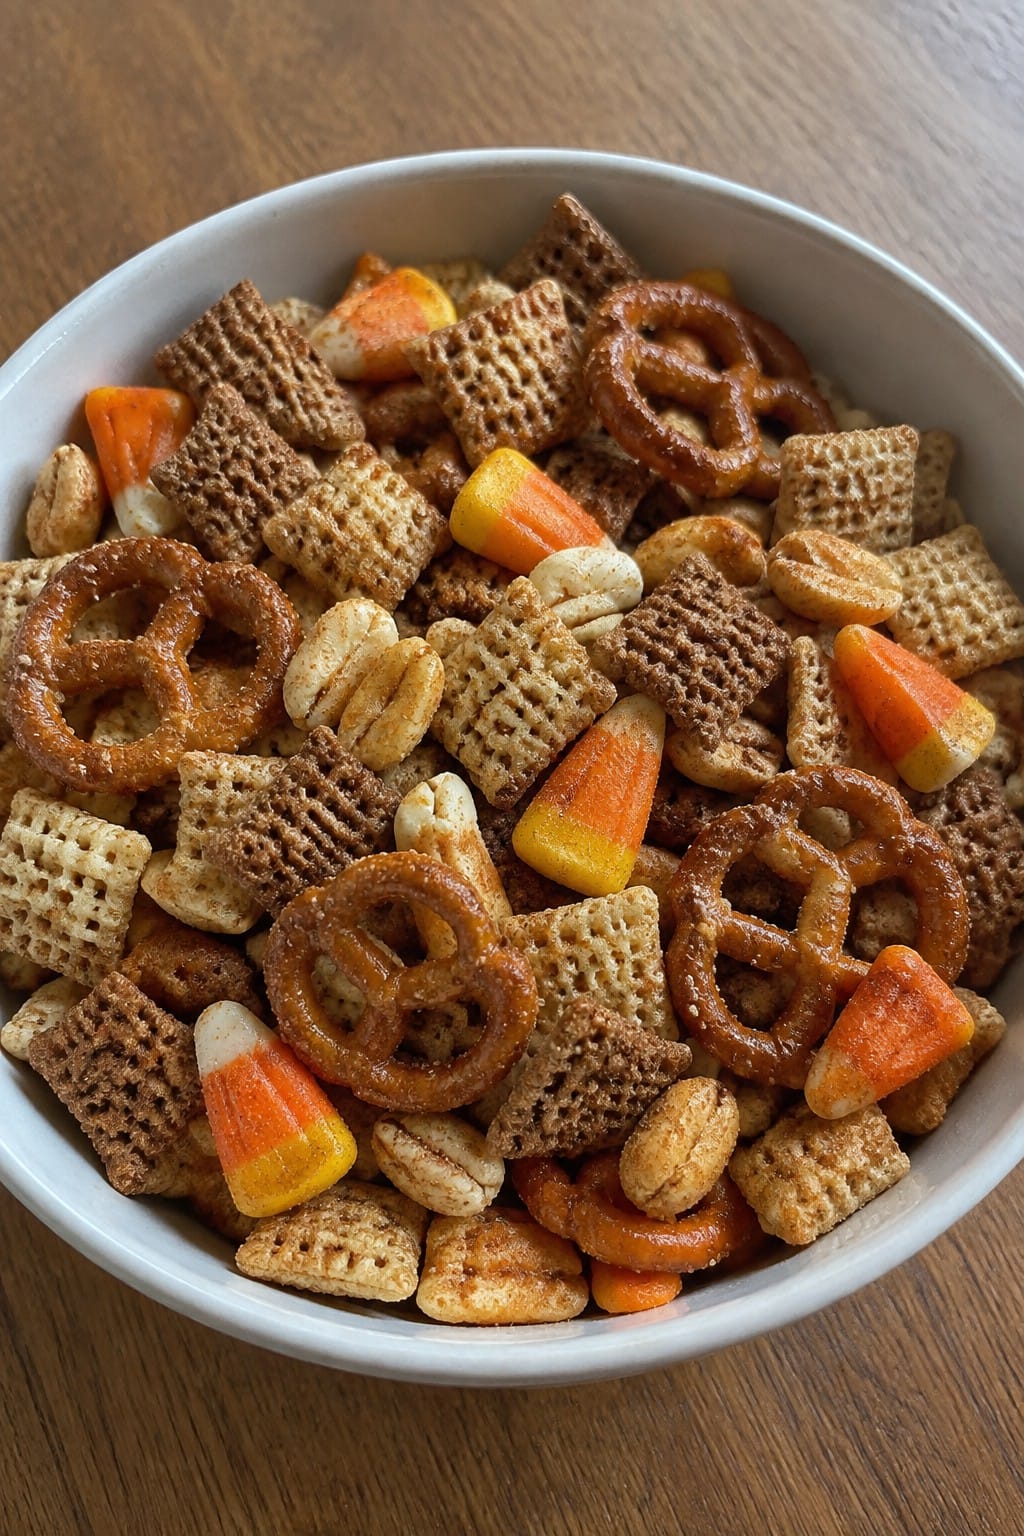
This snack mix brings together warm pumpkin spice and sweet candy corn in one easy bowl. It works well for Halloween parties because it is quick to make and easy to grab by the handful. The mix stays crunchy with a light spiced coating that balances the chewy candy pieces.
It fits right into a table of finger foods and travels well if you need to take it to a gathering. Guests tend to finish it fast since the flavors feel festive without being overly heavy.
Serves 4 people.
Ingredients
- 4 cups Chex cereal
- 2 cups mini pretzels
- 1/2 cup roasted peanuts
- 1/4 cup butter
- 2 tablespoons pumpkin pie spice
- 1 cup candy corn
Instructions
- Place the butter in a microwave-safe bowl and heat it in 20-second bursts until fully melted.
- Stir the pumpkin pie spice into the melted butter until the mixture is smooth.
- Add the Chex cereal, mini pretzels, and roasted peanuts to a large mixing bowl.
- Pour the spiced butter over the dry ingredients and toss gently until everything is evenly coated.
- Spread the coated mix onto a sheet of parchment paper and let it sit for 10 minutes to set.
- Once cooled, add the candy corn and toss lightly to combine.
Extra Tips
Let the mix cool completely before adding the candy corn so the pieces stay whole and do not melt. If you want a stronger spice flavor, add an extra teaspoon of pumpkin pie spice to the butter before coating. Store any leftovers in an airtight container at room temperature for up to two days to keep the cereal crisp.Course: Snack Cuisine: American Equipment: Large Mixing Bowl, Microwave-Safe Bowl
Ghostly Cheese-Stuffed Celery Boats
These celery boats get filled with a simple cream cheese mixture and topped with olive slices to create a ghostly face. They come together quickly and make a light, crunchy option that fits right in at Halloween parties.
The fresh celery gives a crisp bite while the filling stays smooth and savory. Kids and adults both reach for them because they feel fun without being heavy.
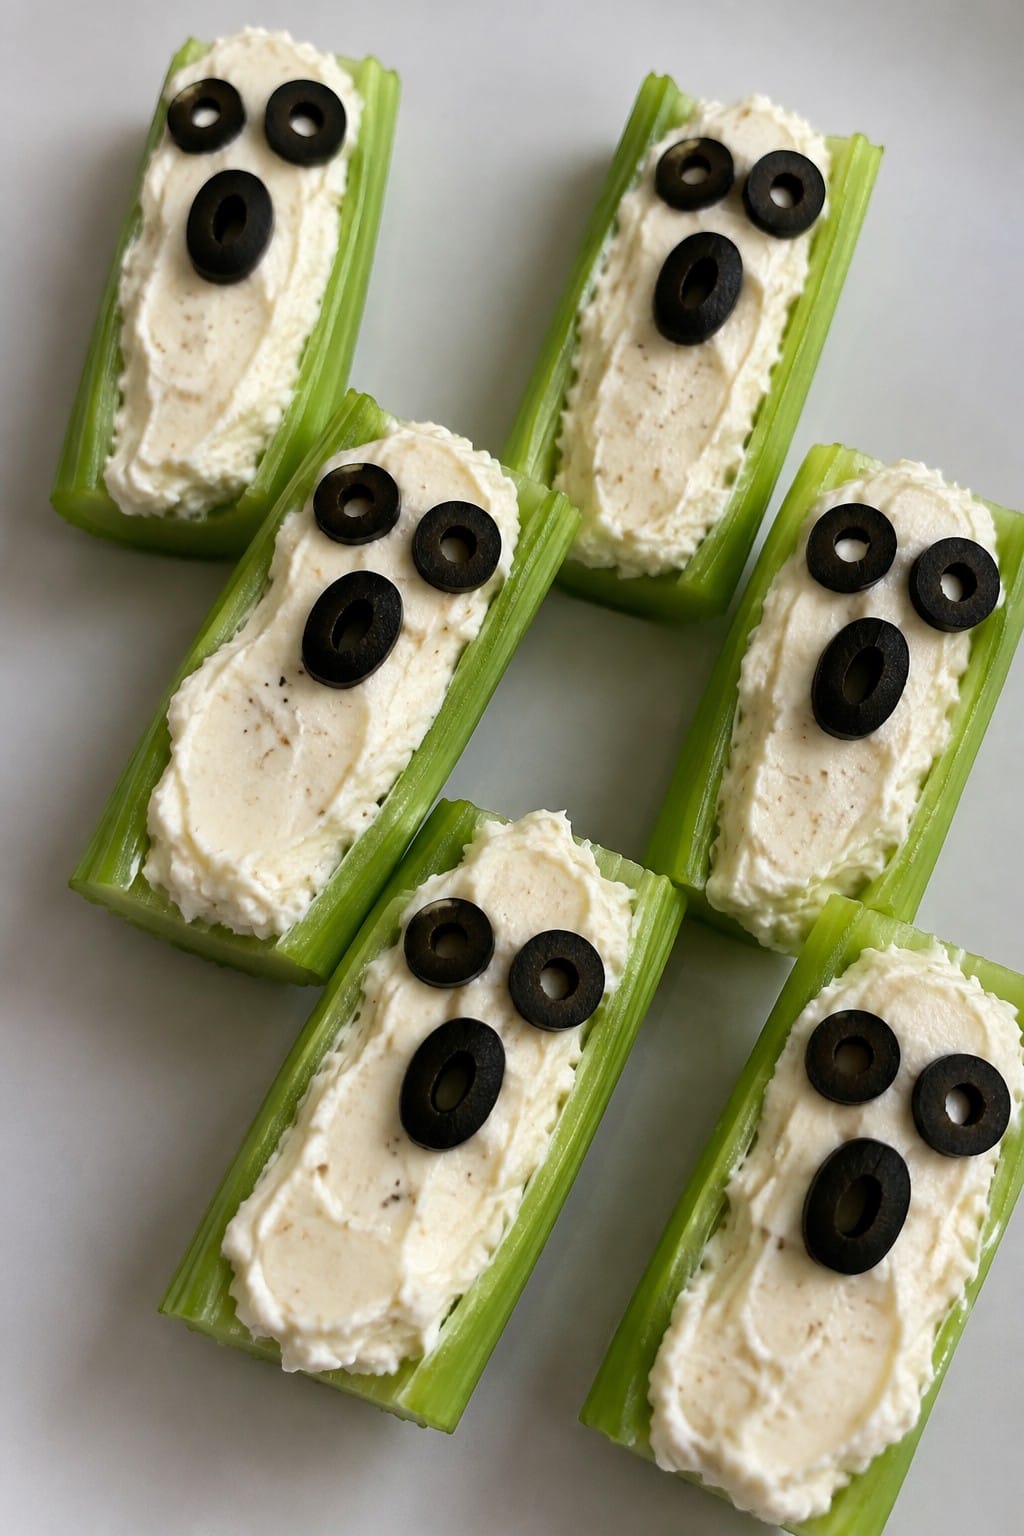
Serves 4 people.
Ingredients
- 8 celery stalks
- 8 ounces cream cheese, softened
- 1/4 cup shredded mozzarella cheese
- 1/2 teaspoon garlic powder
- Pinch of salt
- 12 black olives, sliced into rounds
Instructions
- Wash the celery stalks and pat them dry. Trim off the leafy tops and cut each stalk into two shorter pieces if needed to make boat shapes.
- Place the softened cream cheese in a bowl and stir in the shredded mozzarella, garlic powder, and salt until the mixture is smooth and evenly combined.
- Spoon or pipe the cheese mixture into the center groove of each celery piece, filling it generously but keeping the surface level.
- Press two olive slices into the cheese near one end of each piece to form eyes. Add a third slice lower down if you want a mouth shape.
- Arrange the finished boats on a serving plate and chill until ready to eat.
Extra Tips
Slice the olives thin so they sit flat on the cheese and stay in place. If the cream cheese feels too stiff to mix, let it sit at room temperature for ten minutes before starting. These boats taste best the day they are made, but you can prep the cheese filling a few hours ahead and stuff them right before guests arrive.Course: Snack Cuisine: American Equipment: Mixing Bowl, Knife
Bloody Vampire Caprese Skewers
These skewers give the classic Caprese a quick Halloween update with a dark balsamic drizzle that looks like blood. They come together fast and work well for parties since they need no cooking and can sit out for a bit. The flavors stay bright and fresh with juicy tomatoes, creamy cheese, and herbs.
They make a light option among heavier snacks and hold up on a platter without much fuss. Guests can grab one or two without plates or utensils.
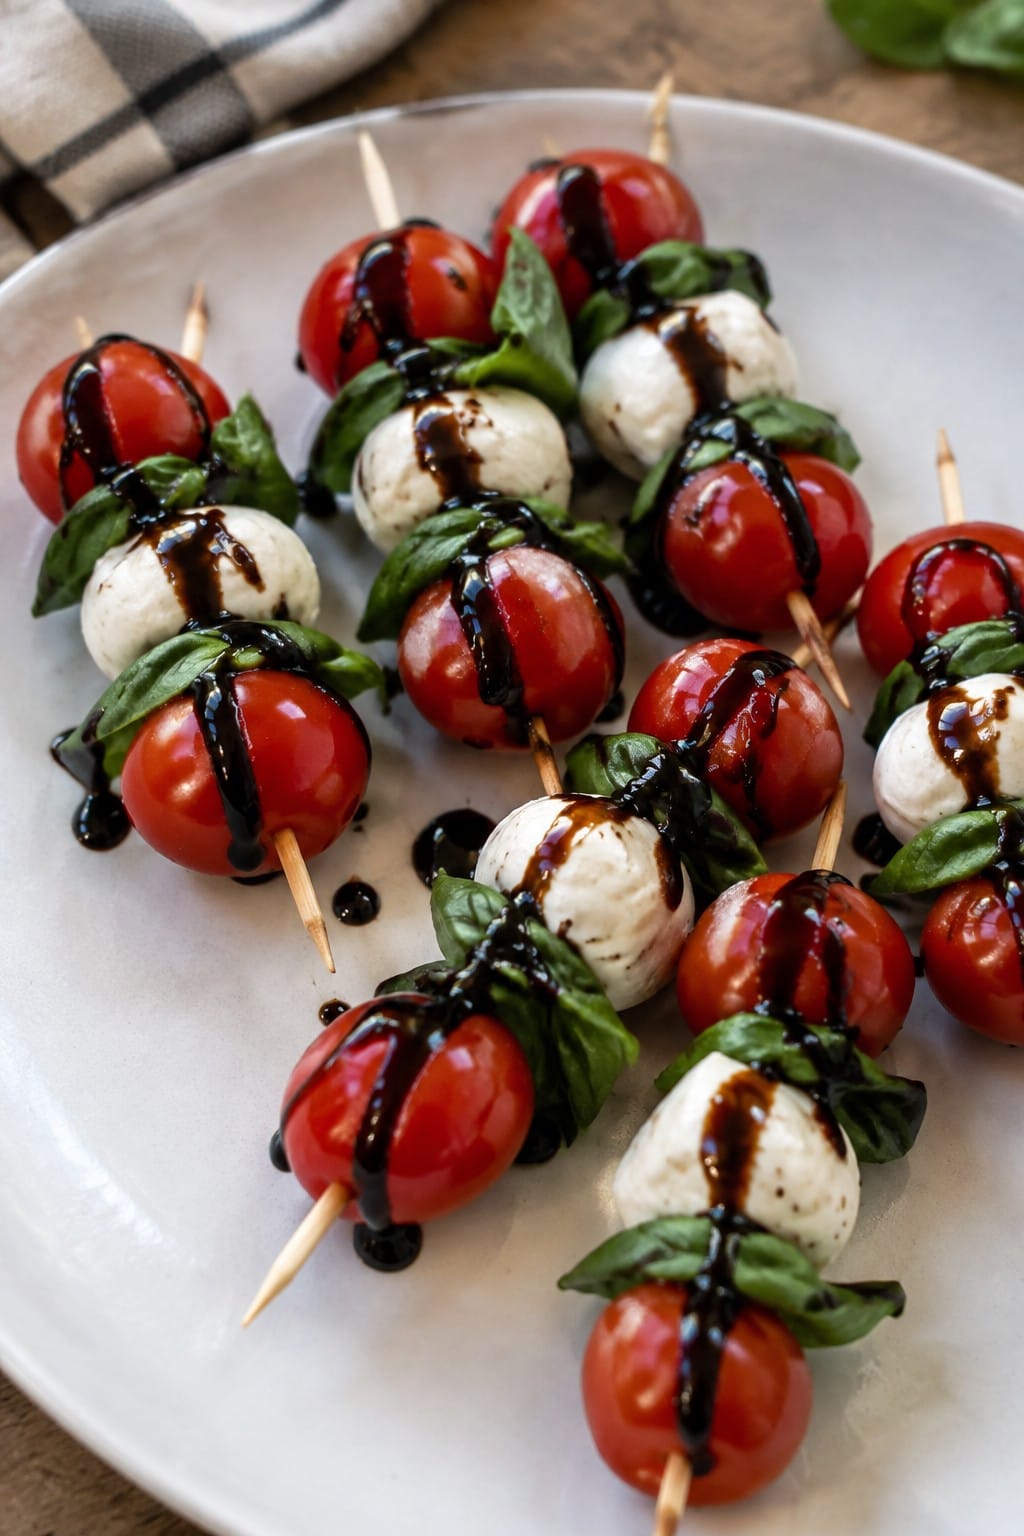
Serves 4 people.
Ingredients
- 12 cherry tomatoes
- 12 small mozzarella balls
- 12 fresh basil leaves
- 1/4 cup balsamic glaze
- 12 wooden skewers
- 1/2 teaspoon salt
- 1/4 teaspoon black pepper
Instructions
- Thread one cherry tomato onto each wooden skewer, followed by one mozzarella ball and one basil leaf.
- Repeat the pattern once more on each skewer so it holds two of each item.
- Arrange the finished skewers on a serving platter.
- Drizzle the balsamic glaze evenly over the skewers.
- Sprinkle the salt and black pepper across the top before serving.
Extra Tips
Assemble the skewers a few hours ahead and keep them covered in the fridge, then add the balsamic glaze right before guests arrive so it stays glossy. If you want less tang, use a thicker aged balsamic that clings better to the cheese. Skip the pepper if serving to kids who prefer milder bites.Course: Appetizer Cuisine: Italian Equipment: Wooden skewers, Serving platter
Witch Finger Pretzel Rods with Almond Nails
These witch finger pretzels bring a playful touch to any Halloween spread. The salty crunch of the pretzel rod contrasts nicely with the smooth sweet coating, creating a snack that feels festive without much effort. They fit well at parties where guests want something quick to grab and eat.
The recipe works best when you need a last-minute option that still looks themed. The green coating and almond detail give each piece a simple finger shape that stands out on a snack table.
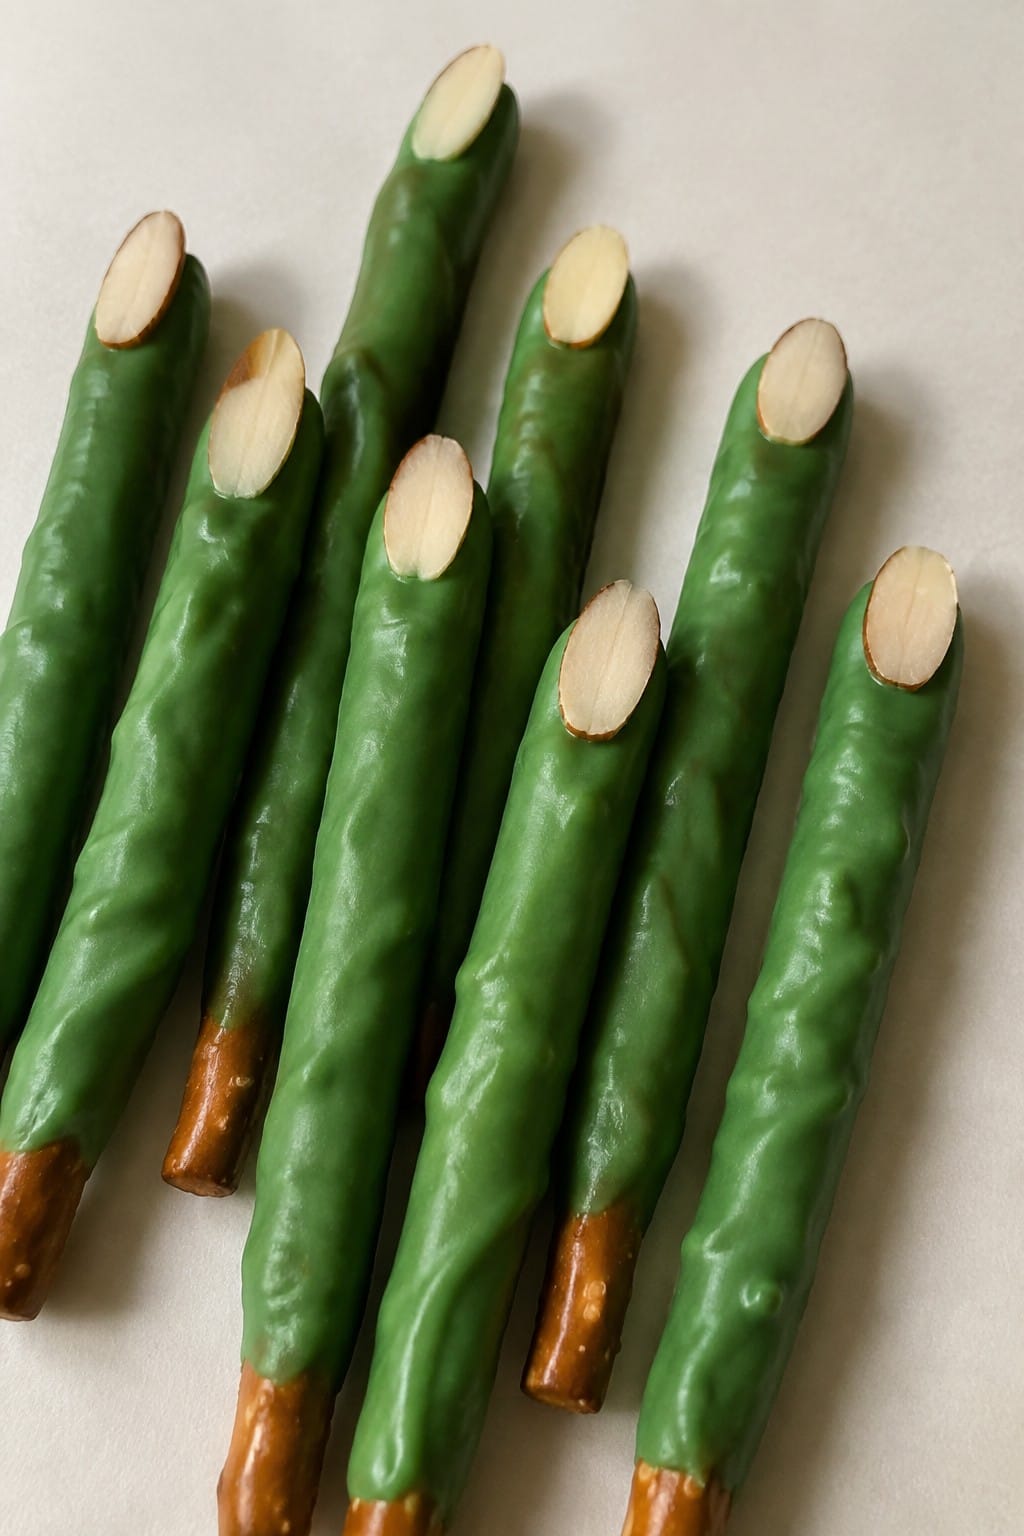
Serves 4 people.
Ingredients
- 12 pretzel rods
- 1 cup green candy melts
- 12 sliced almonds
Instructions
- Line a baking sheet with parchment paper and set it aside.
- Place the green candy melts in a microwave-safe bowl. Heat in 30-second intervals, stirring between each, until fully melted and smooth.
- Dip each pretzel rod into the melted candy, coating about two-thirds of the length while leaving one end bare.
- Lay the coated pretzel on the prepared baking sheet. Press one sliced almond onto the coated tip to act as the nail.
- Repeat with the remaining pretzels and almonds. Allow the candy coating to set at room temperature until firm.
Extra Tips
Work in small batches when dipping so the candy stays at the right consistency for the almonds to stick. If the coating begins to thicken, warm it briefly in the microwave for a few seconds. Store finished rods in a single layer in an airtight container to keep the coating from cracking.Course: Snack Cuisine: American Equipment: Microwave-safe bowl, Baking sheet, Parchment paper
Monster Mash Popcorn Balls
These Monster Mash Popcorn Balls turn basic popcorn into a quick Halloween snack that fits right into any party spread. The bright green color and mix of crunchy popcorn with chewy candy pieces make them stand out on a table without much extra work.
They come together fast on the stovetop and hold their shape once cooled, so you can prep a batch ahead of time. The flavor stays sweet and buttery with a bit of crunch from the added mix-ins.
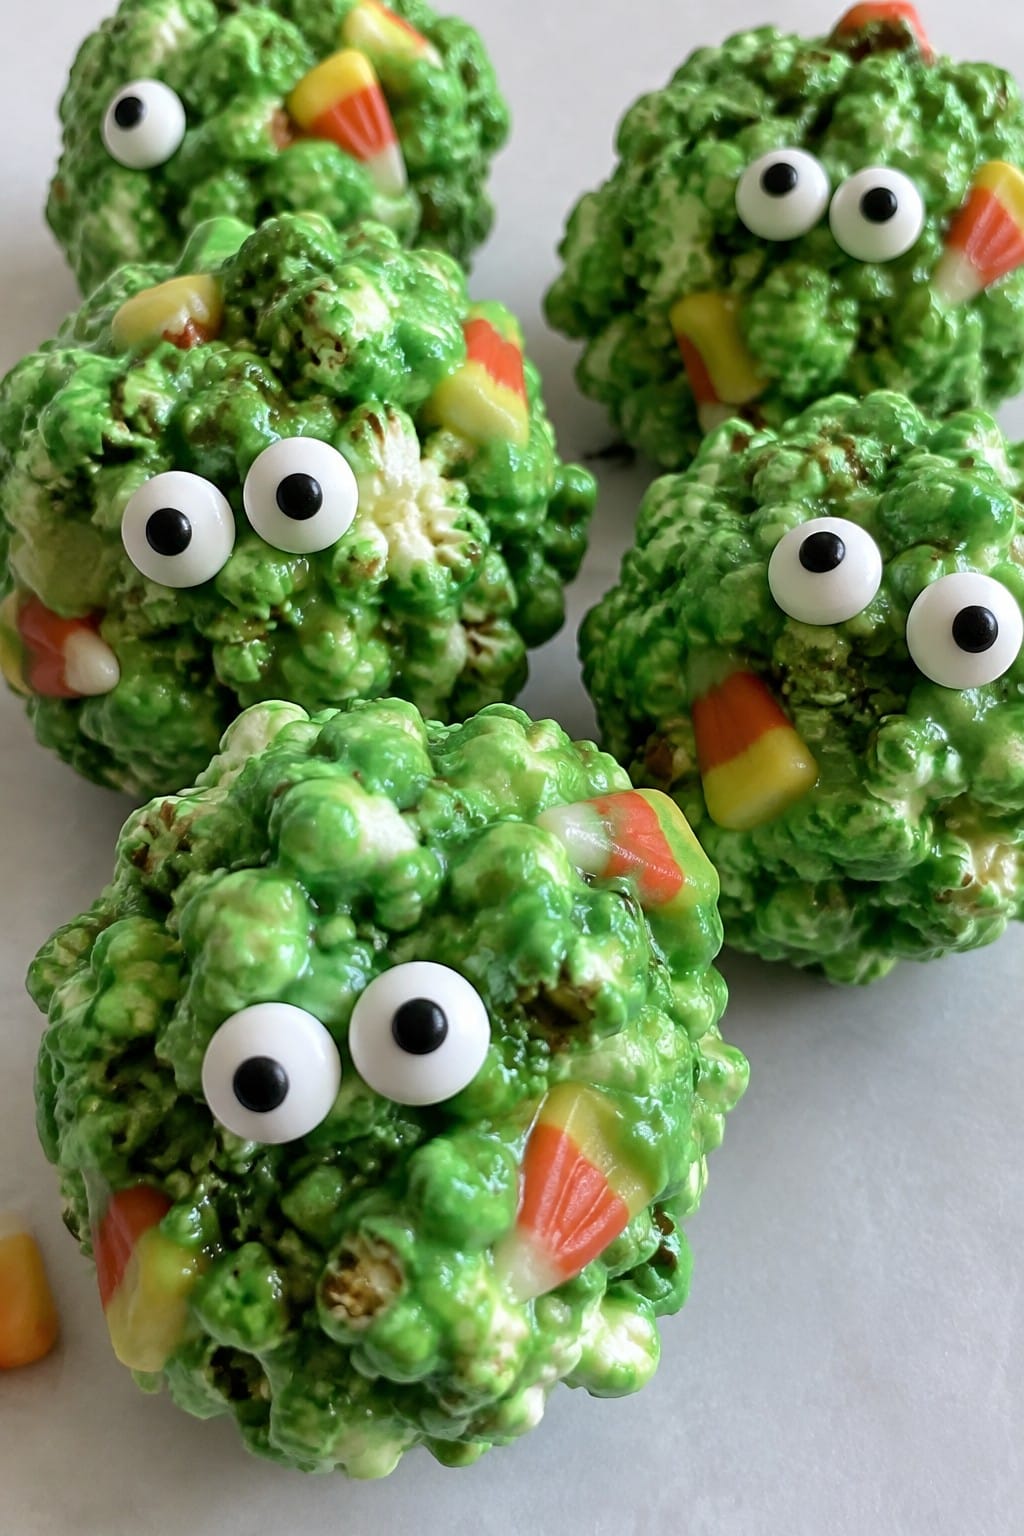
Serves 4 people.
Ingredients
- 8 cups popped popcorn
- 4 cups mini marshmallows
- 3 tablespoons unsalted butter
- 1 teaspoon green food coloring
- 1/2 cup candy corn
- Candy eyes, for decorating
Instructions
- Place the popped popcorn and candy corn in a large bowl and set it aside.
- Melt the butter in a saucepan over medium heat.
- Add the mini marshmallows to the saucepan and stir until fully melted and smooth.
- Remove the saucepan from heat and stir in the green food coloring until the mixture turns an even color.
- Pour the marshmallow mixture over the popcorn and candy corn, then stir quickly until everything is coated.
- Let the mixture cool for a minute until it is safe to handle, then scoop portions and press them into balls with lightly greased hands.
- Press candy eyes onto each ball while they are still warm so they stick.
Extra Tips
Work quickly when shaping the balls because the mixture sets fast once the marshmallows cool. If the mixture feels too sticky, lightly grease your hands with butter or cooking spray between each ball. Store any leftovers in an airtight container at room temperature for up to two days to keep the popcorn from softening.Course: Snack Cuisine: American Equipment: Large bowl, Saucepan, Baking sheet
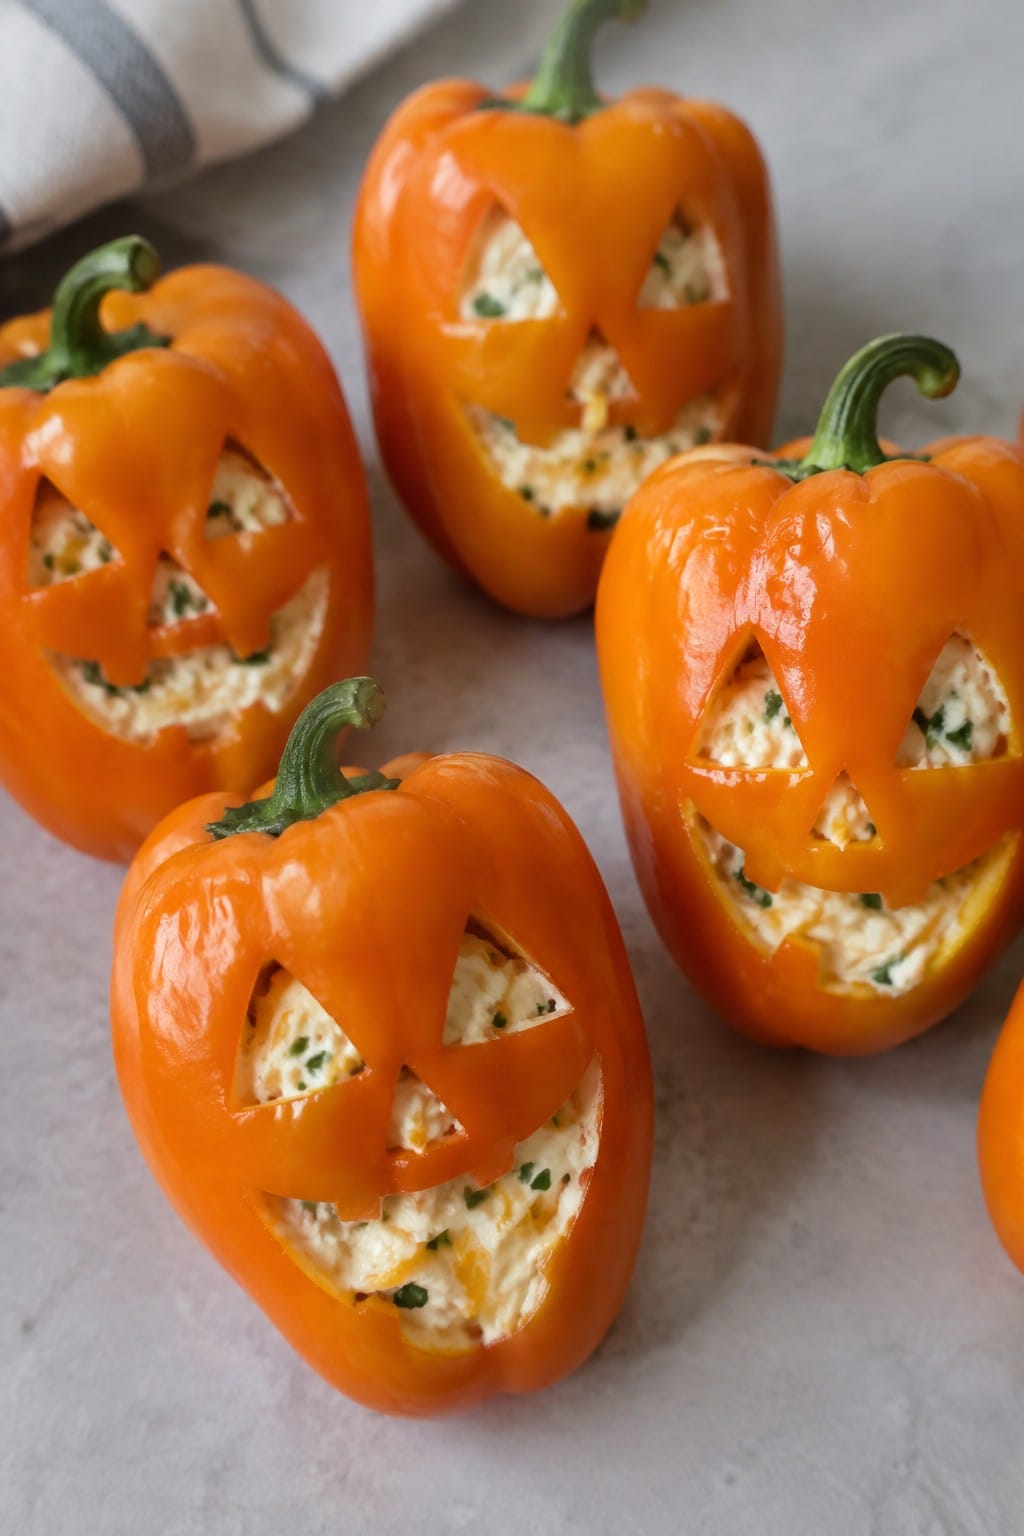
Jack-o’-Lantern Stuffed Mini Peppers
These stuffed peppers stand out at any Halloween party because the carved faces turn a simple bite into something festive. They work well for gatherings since they come together quickly and hold up on a platter without much fuss. The crisp pepper shell gives way to a creamy, cheesy center with a light savory bite.
Serves 4 people.
Ingredients
- 12 mini orange bell peppers
- 8 ounces cream cheese, softened
- 1 cup shredded cheddar cheese
- 1 teaspoon garlic powder
- 1/2 teaspoon onion powder
- 1/4 teaspoon salt
- 1/4 teaspoon black pepper
- 2 tablespoons chopped fresh chives
Instructions
- Slice the tops off each mini pepper and set them aside. Use a small knife to carve simple jack-o’-lantern faces on one side of each pepper, then scoop out the seeds and membranes with a spoon.
- Place the cream cheese in a mixing bowl and stir in the shredded cheddar cheese, garlic powder, onion powder, salt, and black pepper until the mixture is smooth and evenly combined.
- Spoon the cheese filling into each carved pepper until it reaches the top edge. Press gently so the filling stays in place.
- Sprinkle the chopped chives over the filled peppers before serving.
Extra Tips
Carve the faces a few hours ahead and store the empty peppers in the fridge so they stay crisp. If the cream cheese feels too firm to mix, let it sit at room temperature a bit longer before adding the other ingredients. These taste best the same day they are made.Course: Appetizer Cuisine: American Equipment: Mixing bowl, sharp knife, spoon
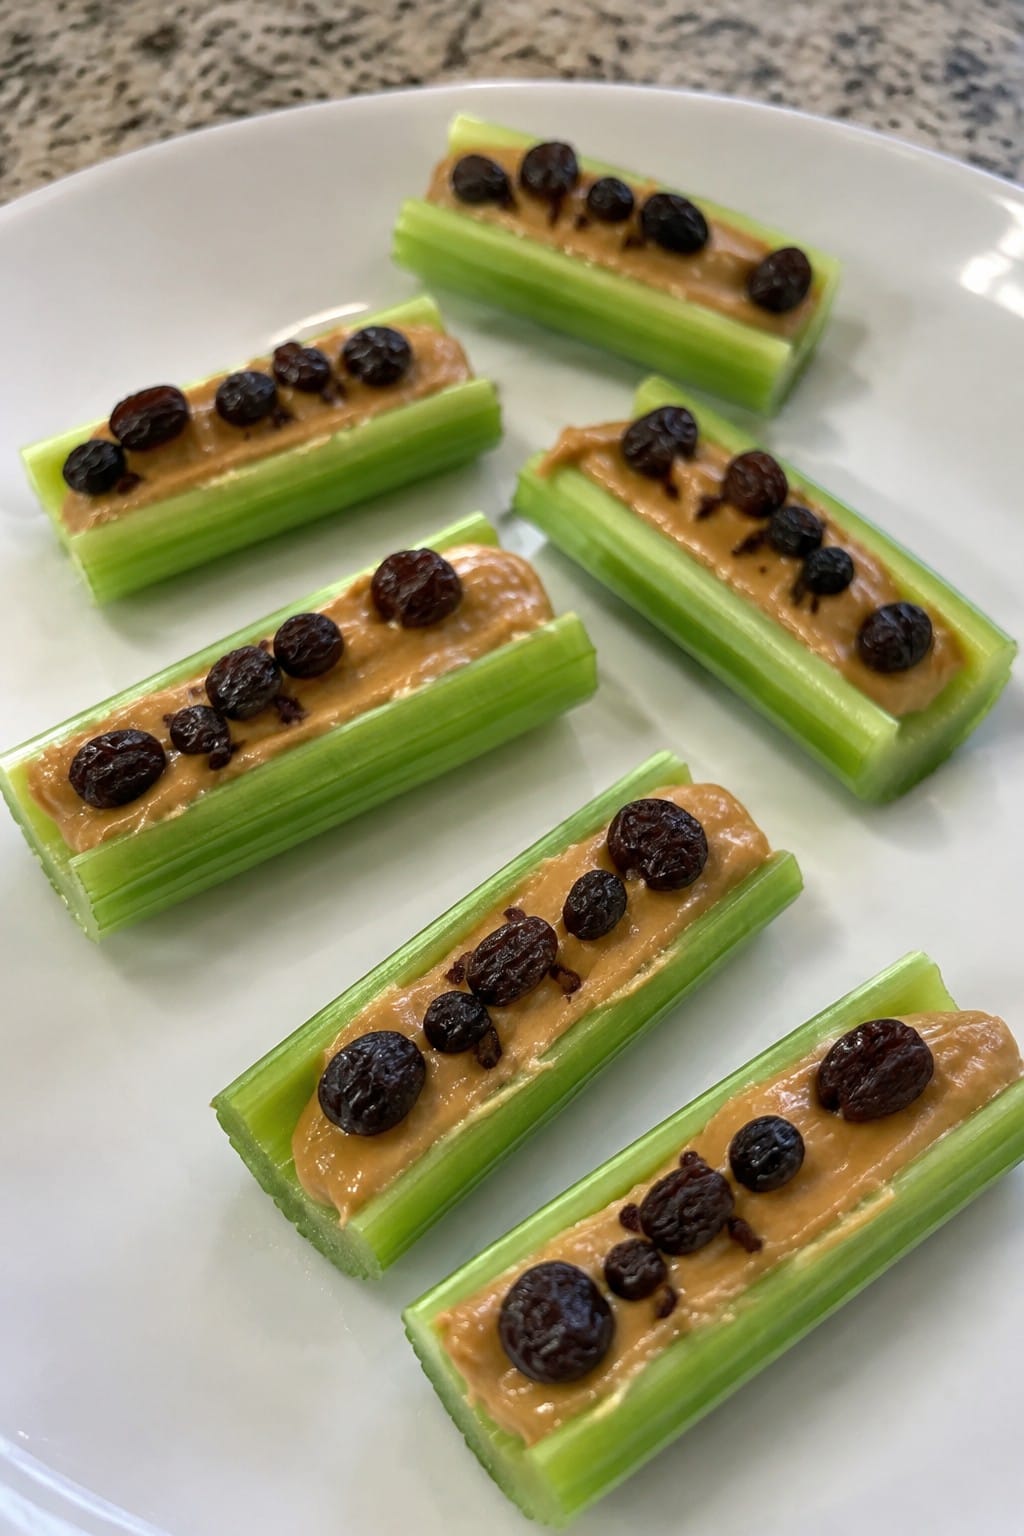
Creepy Crawly Ants-on-a-Log Platter
This platter gives the classic ants-on-a-log snack a Halloween twist that fits right into any party spread. Crisp celery sticks hold a creamy filling and are dotted with raisins that look like tiny crawling bugs. The result is a crunchy, sweet-and-savory bite that guests reach for again and again.
It works well for last-minute party prep because there is no cooking involved. The simple flavors appeal to both kids and adults, and the platter looks festive without extra decorations.
Serves 4 people.
Ingredients
- 8 celery ribs
- 1/2 cup creamy peanut butter
- 1/2 cup raisins
Instructions
- Rinse the celery ribs under cold water and pat them dry. Trim off the ends and cut each rib into 4-inch lengths.
- Use a small knife or spoon to fill the groove of each celery piece with peanut butter, spreading it evenly.
- Press raisins gently into the peanut butter, spacing them out to resemble ants crawling along the log.
- Arrange the finished pieces on a large serving platter in a single layer so they are easy to grab.
Extra Tips
Cut the celery ahead of time and store the pieces in a bowl of ice water to keep them extra crisp until you are ready to fill them. If you want a milder flavor, swap the peanut butter for cream cheese. Leftovers can be wrapped tightly and kept in the fridge for one day, though the celery softens slightly.Course: Snack Cuisine: American Equipment: Knife, Cutting board, Serving platter
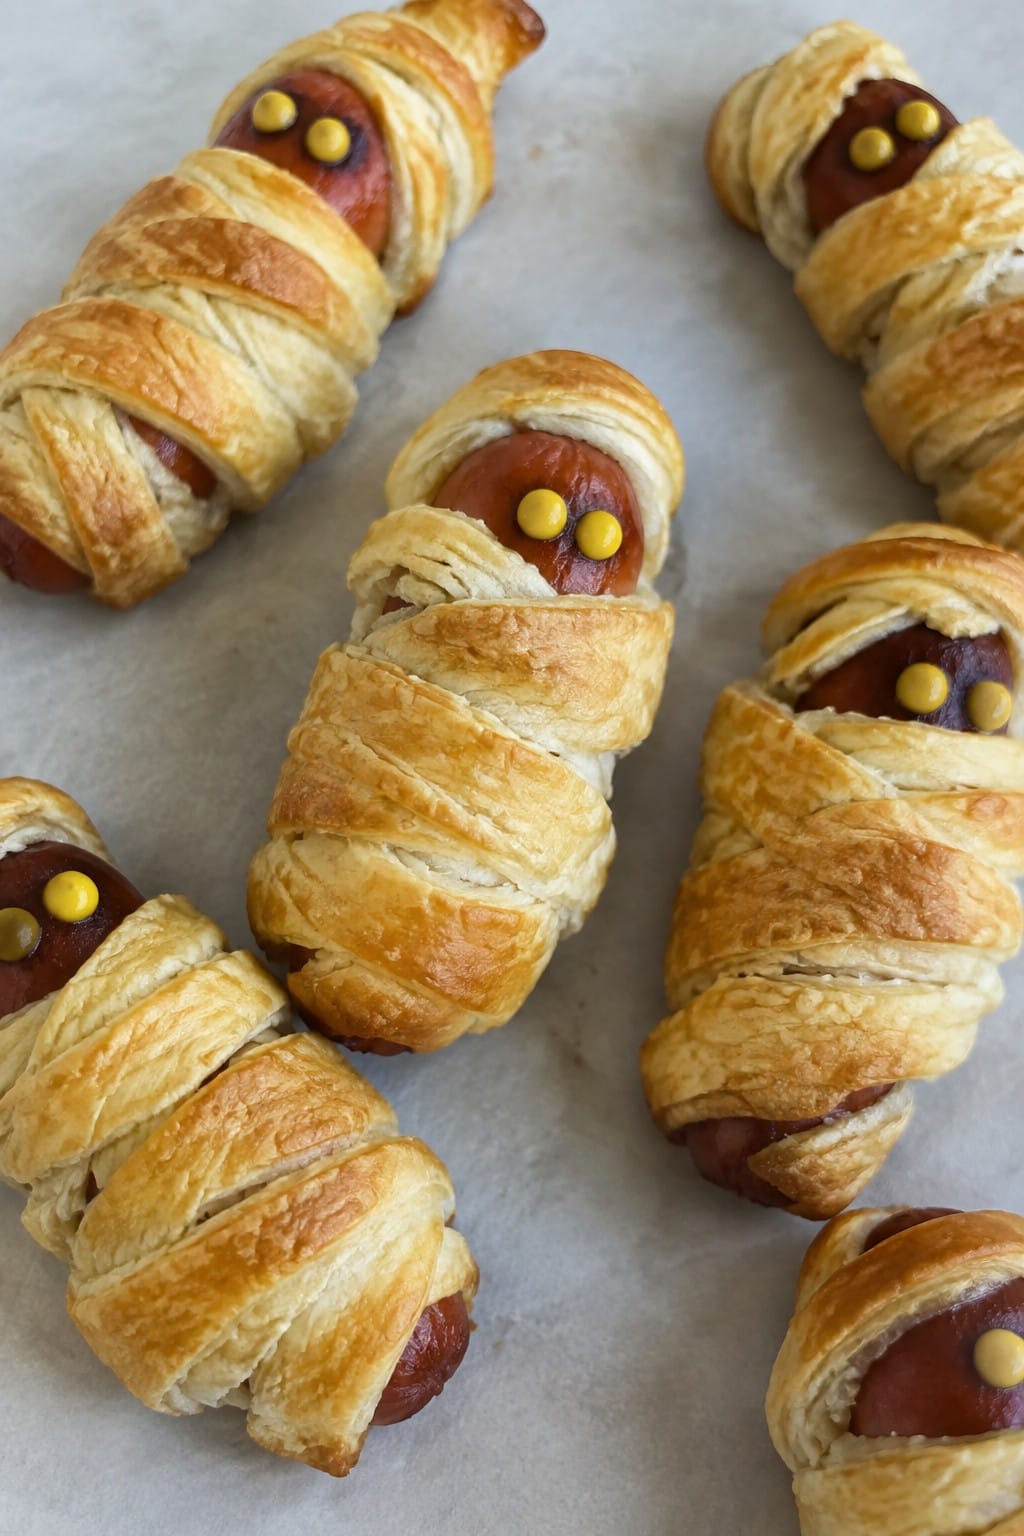
Spooky Sausage Mummy Pastries
These Spooky Sausage Mummy Pastries bring a playful touch to any Halloween spread. The simple wrapping technique turns basic ingredients into eye-catching snacks that guests grab right away. They work well for casual parties because they require little hands-on time and bake in one batch.
The finished pastries have a crisp, golden crust around juicy sausages. A light egg wash helps the dough brown evenly, and small mustard dots give each one a mummy face without extra effort.
Serves 4 people.
Ingredients
- 8 cocktail sausages
- 1 can (8 oz) refrigerated crescent roll dough
- 1 large egg
- 2 tablespoons yellow mustard
Instructions
- Preheat the oven to 375°F and line a baking sheet with parchment paper.
- Unroll the crescent dough on a lightly floured surface and press the seams together to form one sheet. Cut the dough into 16 thin strips.
- Wrap two strips of dough around each sausage, leaving small gaps so the sausage shows through like mummy bandages. Place the wrapped sausages on the prepared baking sheet.
- Beat the egg in a small bowl and brush it lightly over the dough on each pastry.
- Bake for 12 to 15 minutes until the dough is golden brown and the sausages are heated through.
- Let the pastries cool for 2 minutes, then use a toothpick to add two small dots of mustard on each one for eyes.
Extra Tips
Cool the pastries for a few minutes before adding the mustard eyes so the dots stay in place. If you want a milder flavor, swap the mustard for a dab of cream cheese. Leftovers reheat well in a 350°F oven for 5 minutes to restore crispness.Course: Appetizer Cuisine: American Equipment: Baking sheet, Oven, Pastry brush
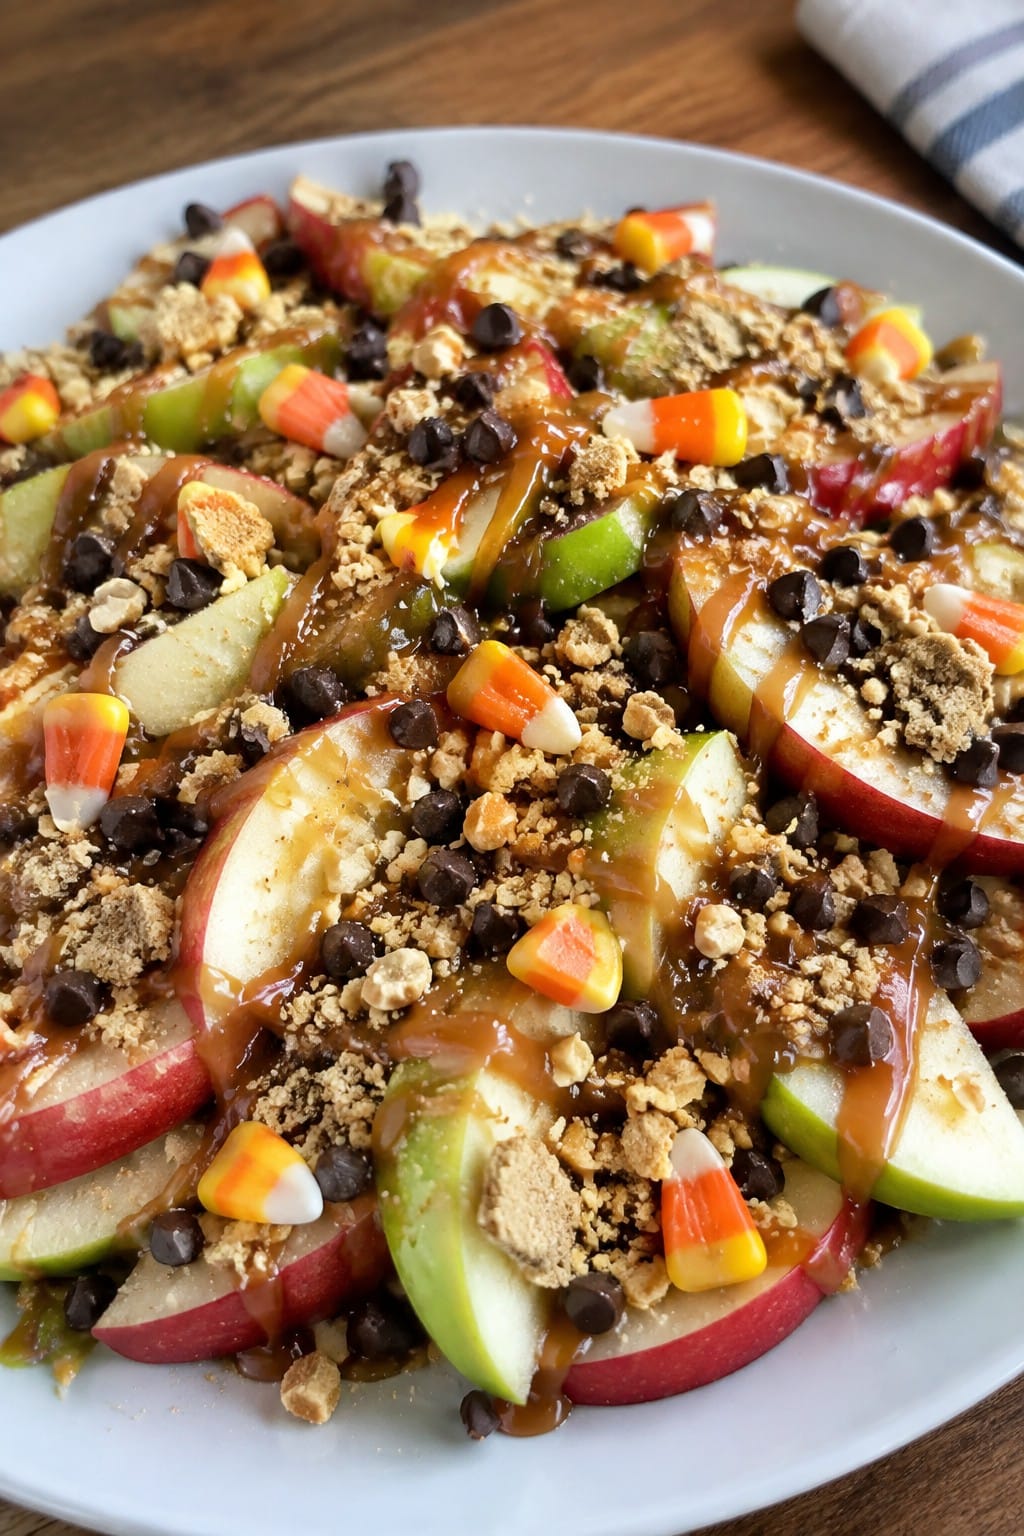
Caramel Apple Nacho Bar
This caramel apple nacho bar turns classic fall flavors into a fun, shareable snack. Guests build their own bites with crisp apple slices topped with warm caramel and sweet mix-ins. It works well at Halloween parties because it comes together fast and gives everyone a taste of caramel apples without the mess of whole fruit on a stick.
The result has a good balance of tart crunch from the apples, sticky sweetness from the caramel, and varied textures from the toppings. It feels festive without needing much cooking.
Serves 4 people.
Ingredients
- 4 large apples, cored and sliced
- 1 cup caramel sauce
- 1/2 cup mini chocolate chips
- 1/4 cup chopped peanuts
- 1/4 cup crushed graham crackers
- 1/4 cup candy corn pieces
Instructions
- Core and slice the apples into thin wedges. Place them in a single layer on a large serving platter so they resemble nacho chips.
- Warm the caramel sauce in a microwave-safe bowl for 20 seconds until it is pourable but not too hot.
- Drizzle the caramel sauce evenly over the apple slices.
- Sprinkle the mini chocolate chips, chopped peanuts, crushed graham crackers, and candy corn pieces across the top.
Extra Tips
Arrange the toppings in small bowls next to the platter so guests can add more as they like. Use a mix of sweet and tart apples to keep the flavor bright. If you prepare the apples ahead, toss the slices with a little lemon juice to slow browning before arranging them.Course: Snack Cuisine: American Equipment: Microwave, Serving platter, Knife
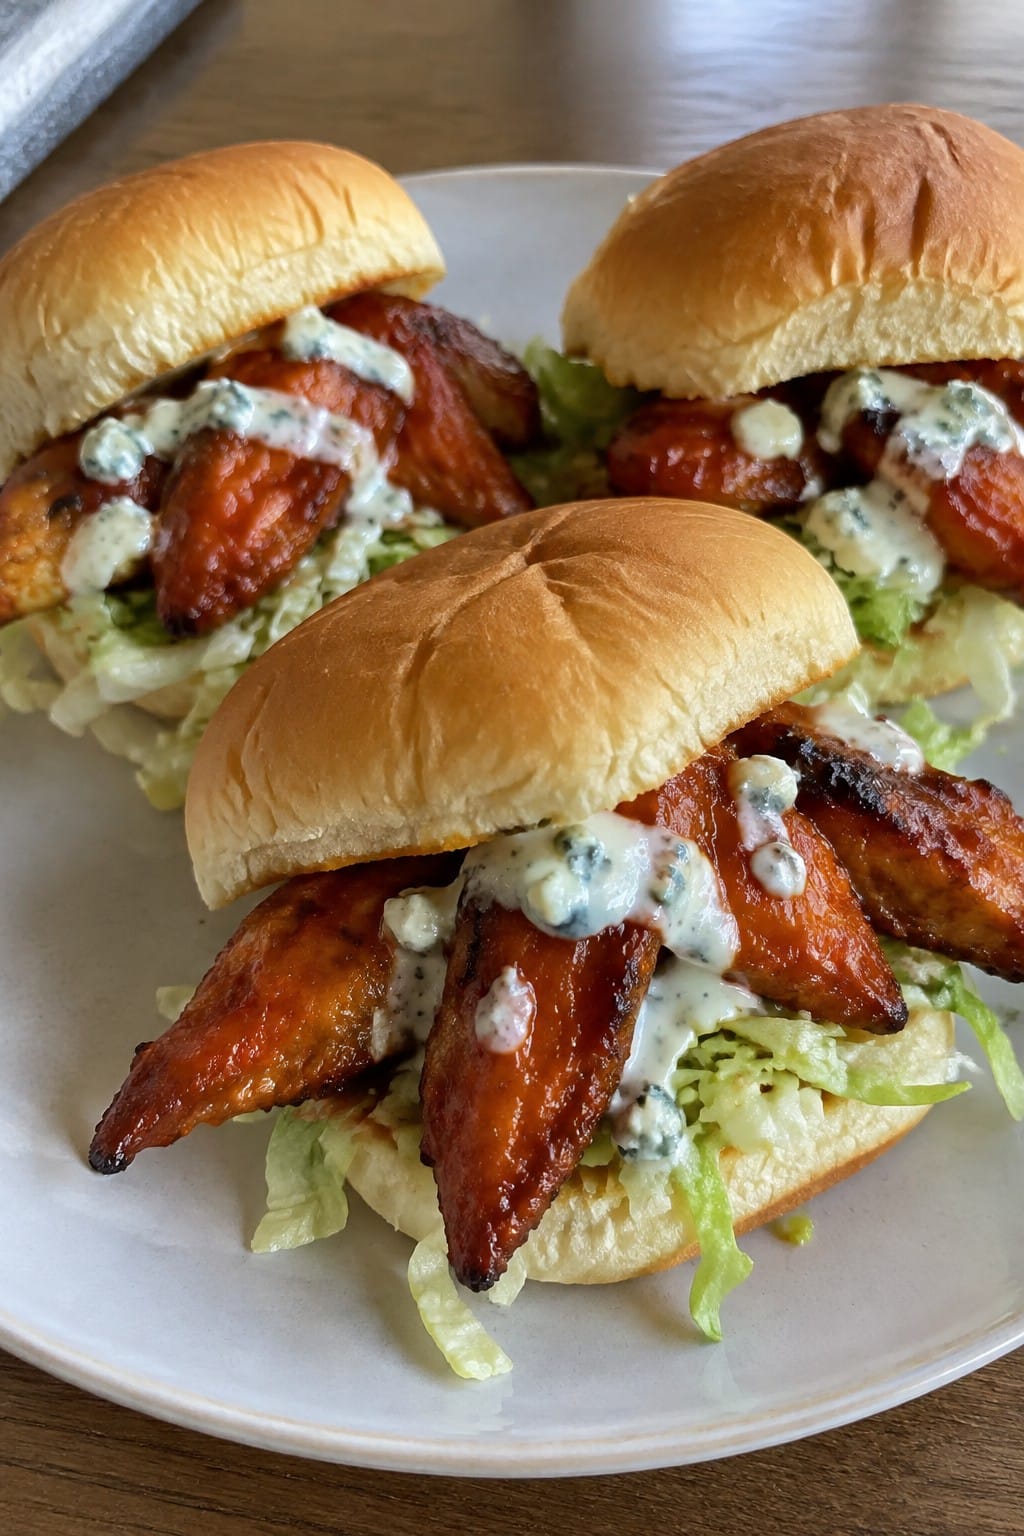
Bat Wing Chicken Sliders
These sliders turn ordinary chicken sandwiches into a quick Halloween snack by shaping the meat like bat wings. The dark buffalo sauce gives them a bold look and a little heat that pairs well with cool ranch. They work well for parties because you can prep the chicken ahead and assemble right before guests arrive.
The finished sliders have tender chicken with a crisp edge from pan cooking, soft buns, and fresh crunch from lettuce. They feel hearty enough to satisfy but small enough for people to grab a couple without committing to a full meal.
Serves 4 people.
Ingredients
- 1 lb boneless skinless chicken breasts
- 8 slider buns
- 1/2 cup buffalo wing sauce
- 1 cup shredded lettuce
- 1/2 cup blue cheese dressing
- 1 tbsp olive oil
- 1 tsp garlic powder
- 1/2 tsp salt
- 1/4 tsp black pepper
Instructions
- Cut each chicken breast into four thin, wing-shaped pieces by making two angled cuts per breast. Season the pieces with garlic powder, salt, and black pepper.
- Heat the olive oil in a large skillet over medium heat. Add the chicken pieces and cook for 4 to 5 minutes per side until browned and cooked through.
- Pour the buffalo wing sauce into the skillet and toss the chicken to coat evenly. Remove from heat.
- Split the slider buns and place two chicken pieces on each bottom bun. Add a small handful of shredded lettuce to each slider. Drizzle blue cheese dressing over the lettuce before adding the top bun.
Extra Tips
Cut the chicken while it is still slightly firm from the fridge so the wing shapes hold better during cooking. If you want less heat, swap half the buffalo sauce for barbecue sauce before tossing. These sliders taste best right after assembly, but you can keep cooked chicken warm in a low oven and build them as needed.Course: Appetizer Cuisine: American Equipment: Large skillet, Cutting board, Sharp knife
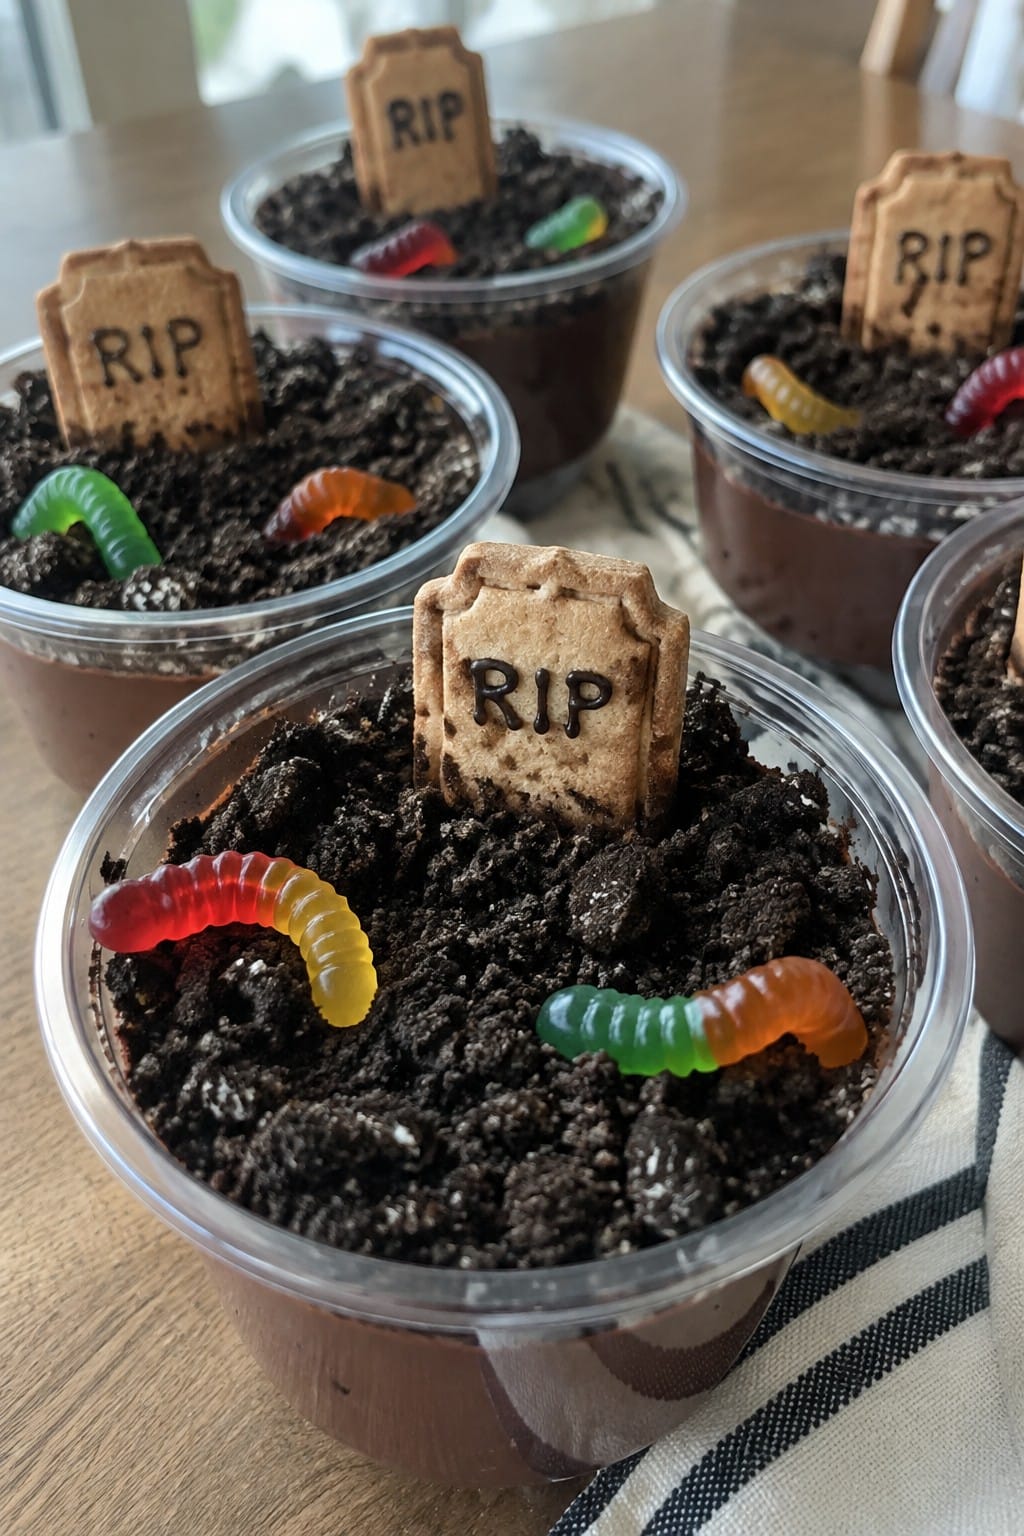
Graveyard Dirt Pudding Cups
These graveyard dirt pudding cups turn simple chocolate pudding into a playful Halloween snack. They work well at parties since each serving stays neat in its own cup and requires no plates or forks.
The creamy pudding sits under a layer of crushed cookies that look like fresh dirt. Gummy worms add a fun touch while the cookie gravestones give each cup a clear Halloween look.
Serves 4 people.
Ingredients
- 1 box (3.9 oz) instant chocolate pudding mix
- 2 cups cold milk
- 20 Oreo cookies
- 4 rectangular cookies
- 12 gummy worms
Instructions
- Pour the cold milk into a mixing bowl and add the instant chocolate pudding mix. Whisk for two minutes until the mixture thickens.
- Place the Oreo cookies in a zip-top bag and crush them with a rolling pin until they form fine crumbs.
- Spoon a layer of pudding into the bottom of each of four small cups. Add a layer of cookie crumbs on top. Repeat with another layer of pudding and finish with more cookie crumbs.
- Press three gummy worms into the top of each cup so they look like they are coming out of the dirt. Stand one rectangular cookie upright in the back of each cup to act as a gravestone.
Extra Tips
Make the cups a few hours ahead so the cookie crumbs soften slightly and the flavors blend. If the rectangular cookies tip over, press them deeper into the crumbs right before serving.Course: Dessert Cuisine: American Equipment: Mixing Bowl, Whisk, Rolling Pin, 4 Small Cups
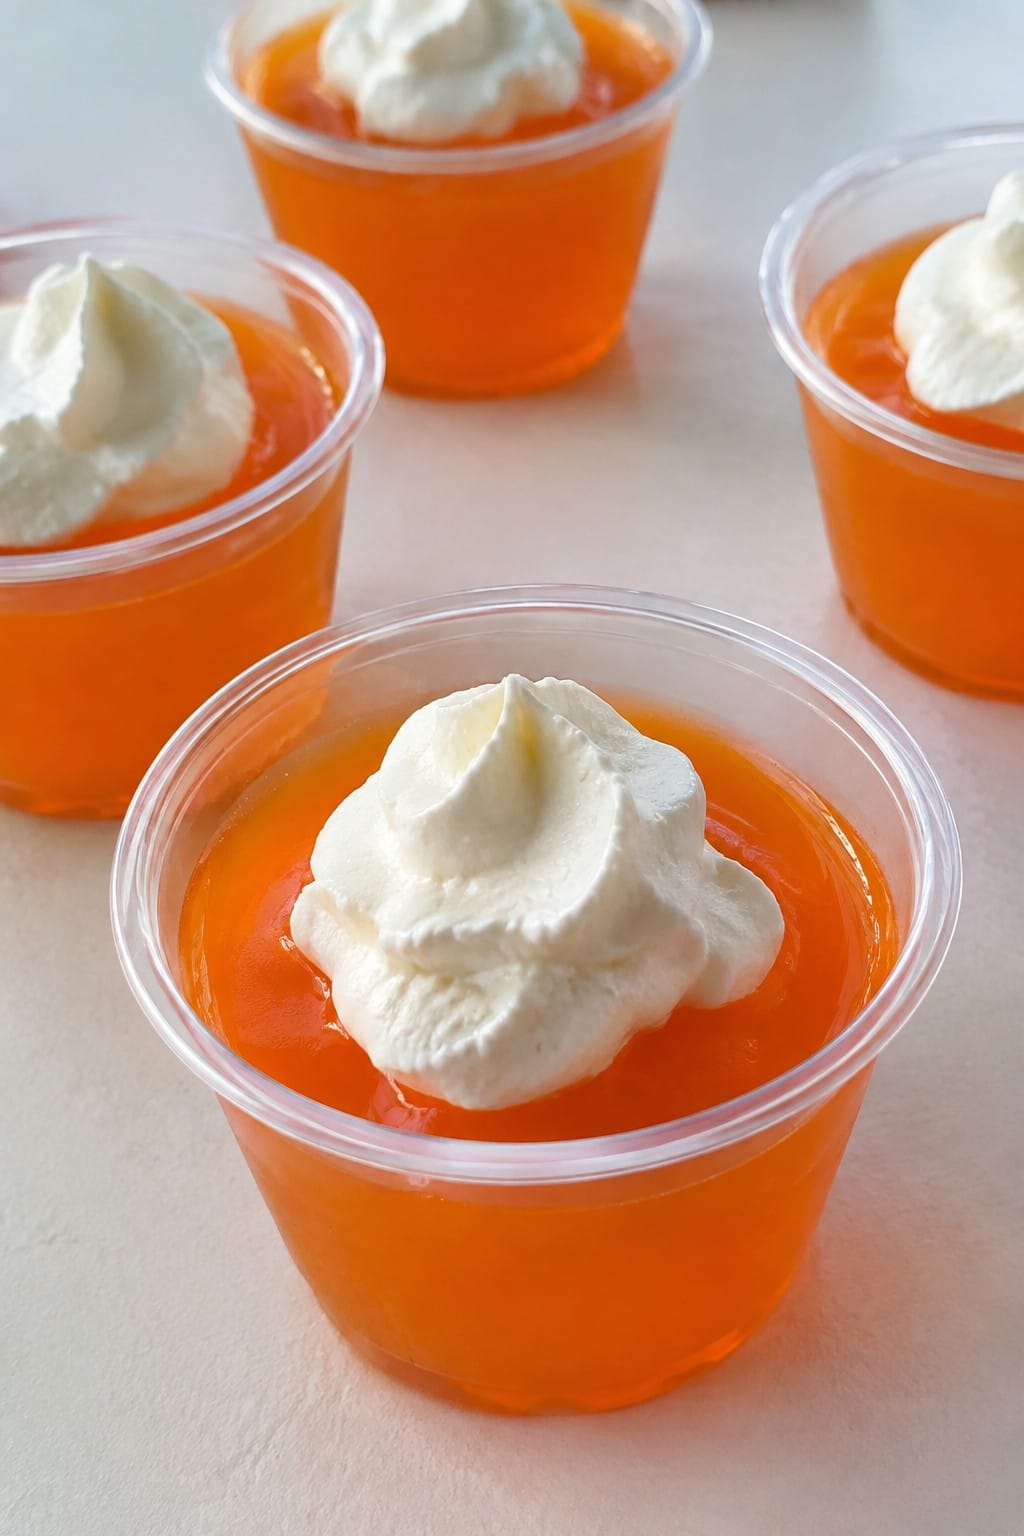
Orange Creamsicle Jell-O Cups
These orange creamsicle Jell-O cups offer a bright, sweet treat that fits right into a Halloween party table. The vivid orange color stands out among other snacks, and the creamy finish gives them a nostalgic ice cream vibe without any extra work. They chill in the fridge while you handle other prep, making them a low-stress option that guests grab quickly.
The texture stays light and jiggly with a smooth vanilla note that balances the citrus flavor. Serve them in small clear cups so the color shows through, and they tend to vanish fast once the party starts.
Serves 4 people.
Ingredients
- 1 (3 oz) package orange Jell-O
- 1 cup boiling water
- 1 cup cold water
- 1/2 cup heavy cream
- 1 teaspoon vanilla extract
- Whipped cream for topping
Instructions
- Pour the orange Jell-O powder into a mixing bowl and add the boiling water. Stir until the powder fully dissolves.
- Add the cold water to the bowl and stir to combine.
- Pour in the heavy cream and vanilla extract. Stir gently until the mixture looks smooth and uniform.
- Divide the mixture evenly among four small cups or glasses.
- Place the cups in the refrigerator and chill for at least two hours, or until the Jell-O is fully set.
- Top each cup with a dollop of whipped cream right before serving.
Extra Tips
Chill the cups on a tray so they stay neat when you move them to the party table. If you want a slightly firmer set, reduce the cold water by two tablespoons. Leftovers keep covered in the fridge for up to two days, though the whipped cream topping is best added fresh.Course: Snack Cuisine: American Equipment: Mixing Bowl, Measuring Cups, Serving Cups
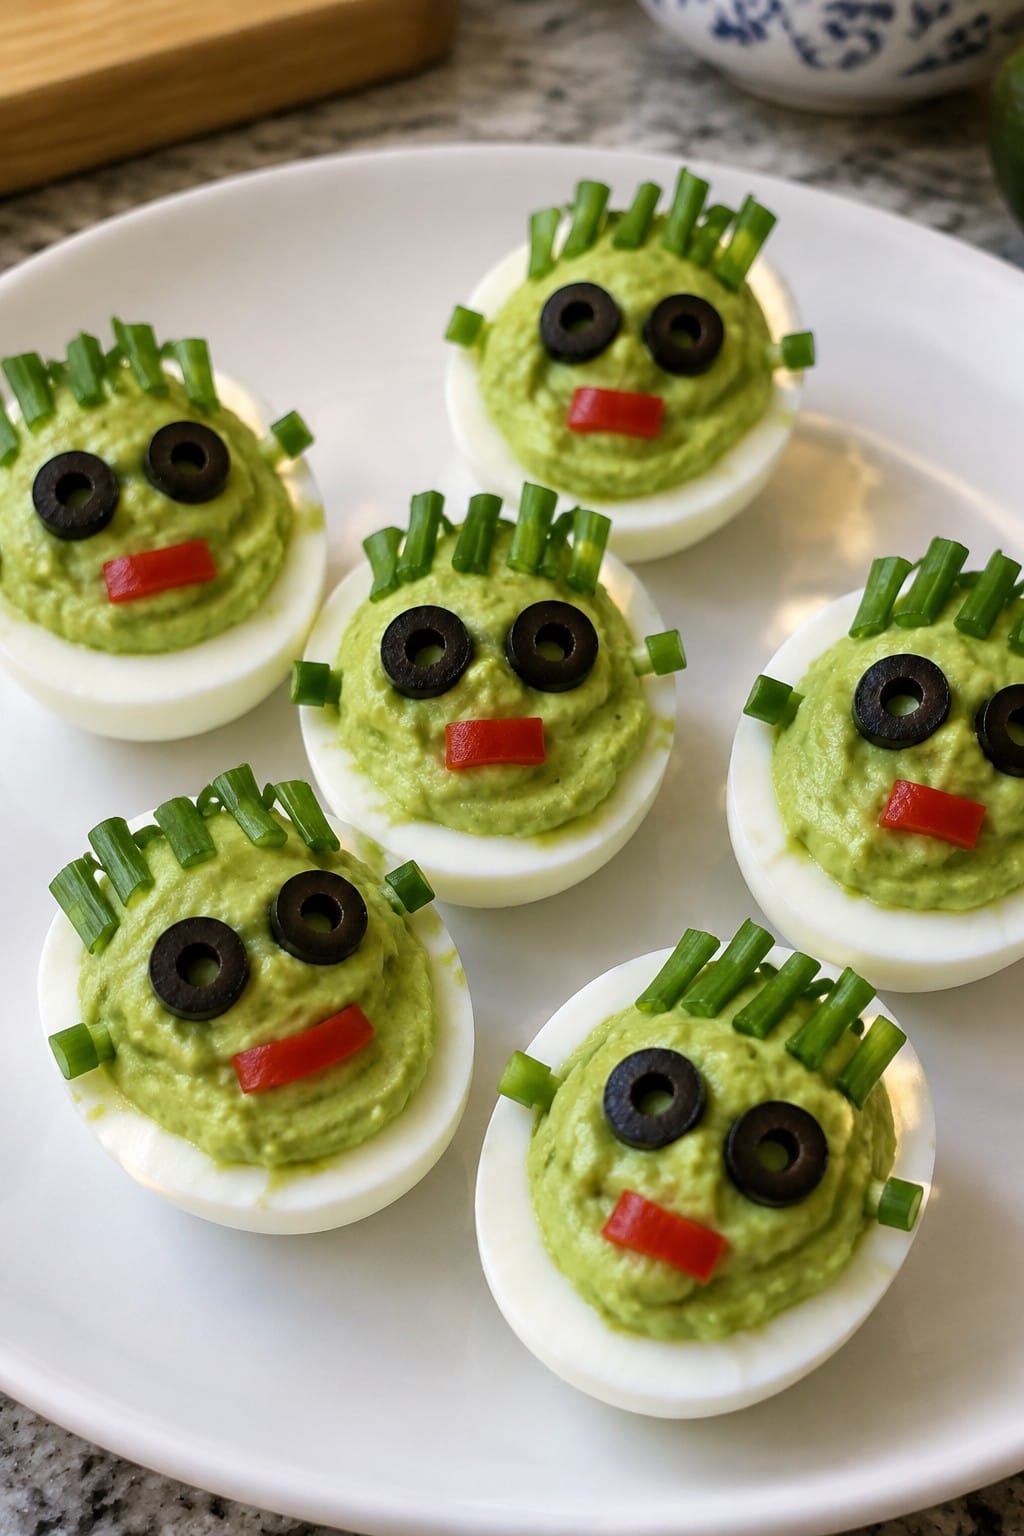
Frankenstein Avocado Deviled Eggs
These deviled eggs get a Halloween makeover with a creamy avocado filling that turns bright green. They work well for parties because they look fun without much extra effort. The taste stays light and fresh with a mild tang that balances the rich yolks.
The green color comes naturally from the avocado, so the Frankenstein faces stand out on the plate. Guests tend to reach for them quickly since they feel like a twist on a familiar snack.
Serves 4 people.
Ingredients
- 6 large eggs
- 1 ripe avocado
- 1 tablespoon lime juice
- 1/2 teaspoon salt
- 1/4 teaspoon garlic powder
- 6 black olives
- 1 small red bell pepper
- 2 green onions
Instructions
- Place the eggs in a pot and cover with water. Bring to a boil, then remove from heat and let sit covered for 10 minutes.
- Drain the eggs and cool them under cold water. Peel the shells and slice each egg in half lengthwise.
- Scoop the yolks into a mixing bowl. Add the avocado, lime juice, salt, and garlic powder. Mash until smooth.
- Spoon or pipe the filling back into the egg white halves.
- Slice the olives to create small rounds for eyes and bolts. Cut thin strips from the red bell pepper for a mouth and stitch lines. Trim the green onions into short pieces for hair.
- Arrange the olive pieces, red pepper strips, and green onion pieces on each filled egg to form simple faces.
Extra Tips
Use a ripe avocado so the filling stays creamy and pipes easily. Assemble the faces right before serving to keep the green onions crisp. If you need to prep ahead, make the filling and store it covered in the fridge, then fill and decorate the eggs just before guests arrive.Course: Appetizer Cuisine: American Equipment: Large pot, Mixing bowl, Knife
