
Halloween parties often come with lots of treats that leave you feeling heavy. These snack ideas use simple ingredients to keep things lighter while still tasting good. Most recipes take under 20 minutes to prepare and use items you can find at any grocery store. You will find options that work for both kids and adults at your event. The list below gives you 12 practical recipes to try this season.
Helpful Tips Before You Start
These tips will help you create healthy Halloween snacks that guests can enjoy without much fuss.
Choose Make Ahead Recipes
Pick snacks like apple slices with nut butter or veggie ghosts that hold up in the fridge. Prep them the night before to free up time on party day.
Focus on Whole Ingredients
Use fruits, vegetables, and whole grains as your base instead of processed items. This keeps the snacks nutritious while still fitting the theme.
Make Portions Small
Cut everything into bite sized pieces so guests can sample several options. This works well for a party setting where people graze.
Label Any Allergens
Mark snacks that contain nuts, dairy, or gluten right on the platter. Partygoers appreciate knowing what they can safely eat.
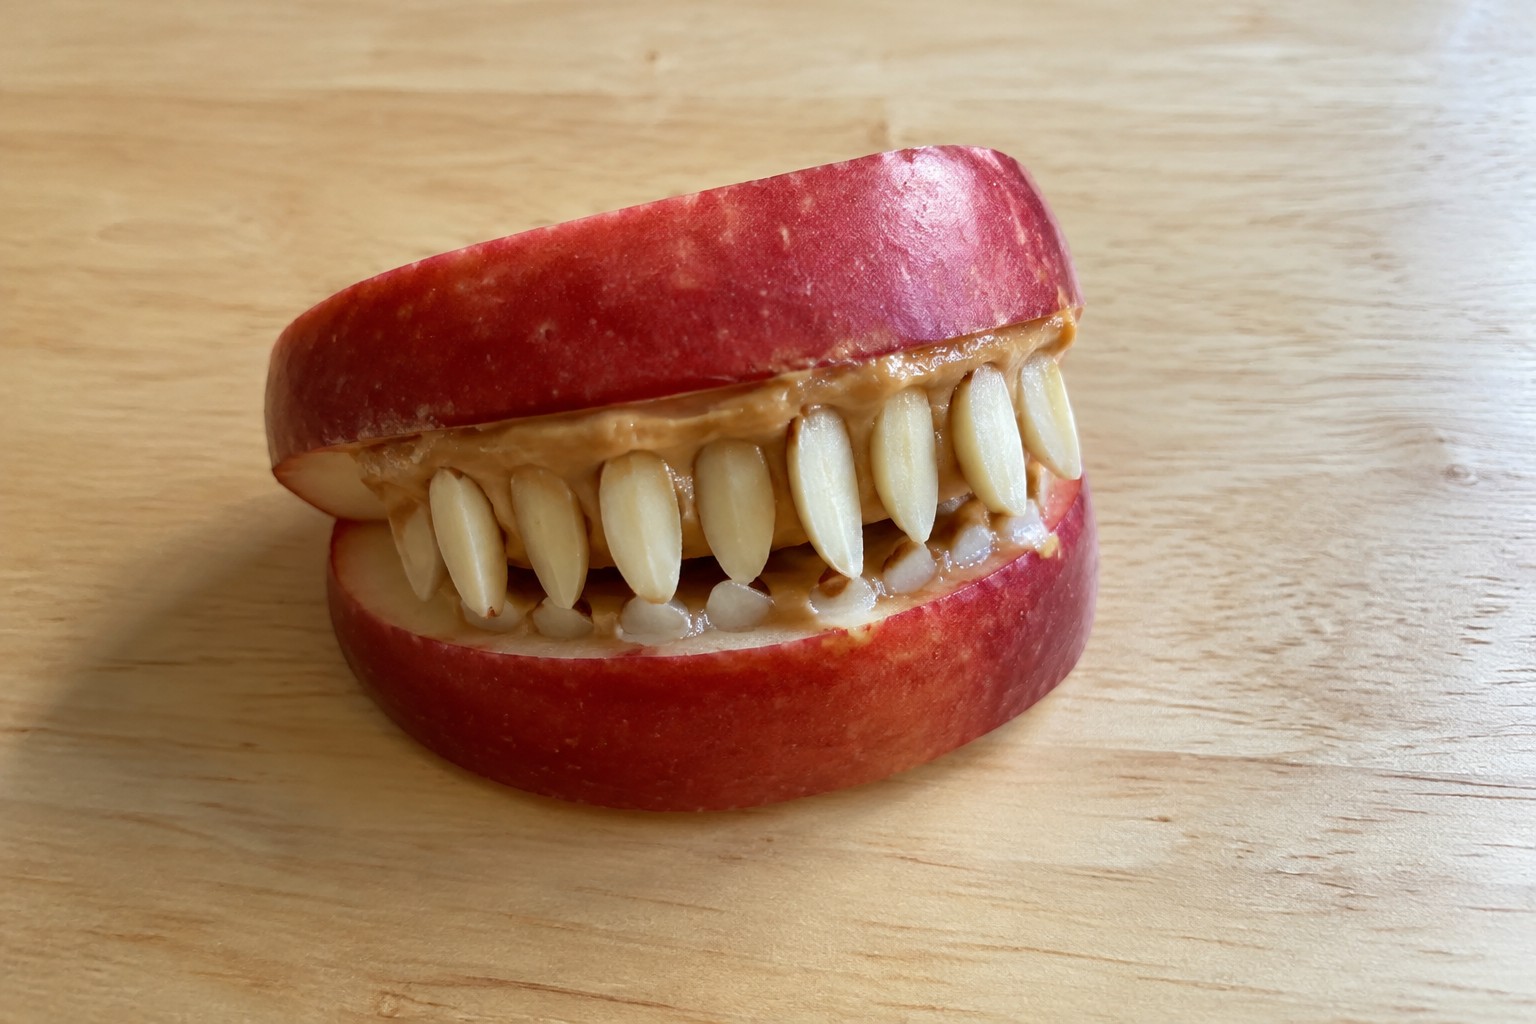
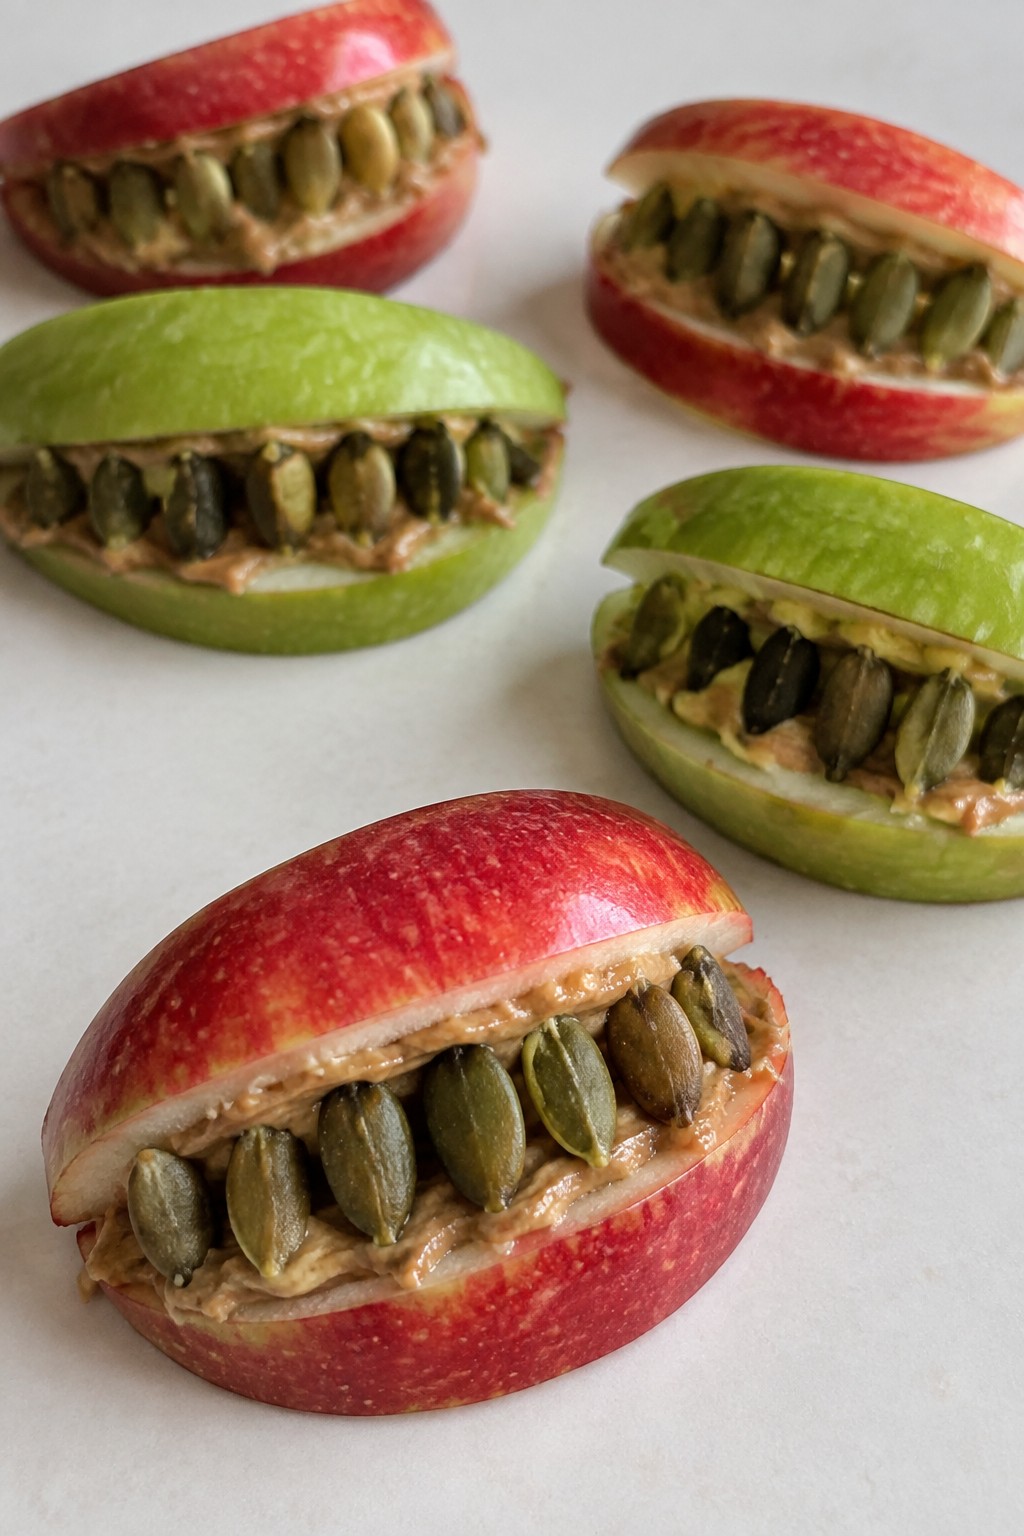
Spooky Apple Monster Mouths with Almond Butter and Seeds
These apple slices turn into fun monster mouths with a simple spread of almond butter and a row of seeds for teeth. They make a quick, no-bake option that fits right into a healthy Halloween spread and gives guests something fresh to grab.
The result is a crisp apple base with creamy almond butter and a light crunch from the seeds. It keeps things naturally sweet while still feeling playful for the occasion.
Serves 4 people.
Ingredients
- 4 medium apples
- ½ cup almond butter
- ¼ cup roasted pumpkin seeds
Instructions
- Wash the apples well under cool water and pat them dry.
- Core each apple and cut it into 8 wedges, aiming for pieces about ½ inch thick.
- Spread a thin layer of almond butter on one side of 16 wedges.
- Press 4 to 6 pumpkin seeds into the almond butter on each of those wedges to form a row of teeth.
- Top each prepared wedge with a plain apple wedge to close the mouth.
Extra Tips
Choose firm, crisp apples so the wedges hold their shape once the almond butter is added. If the almond butter feels stiff, let it sit at room temperature for a few minutes before spreading. Leftovers keep best in an airtight container in the fridge for up to one day.Course: Snack Cuisine: American Equipment: Cutting board, Knife, Spoon
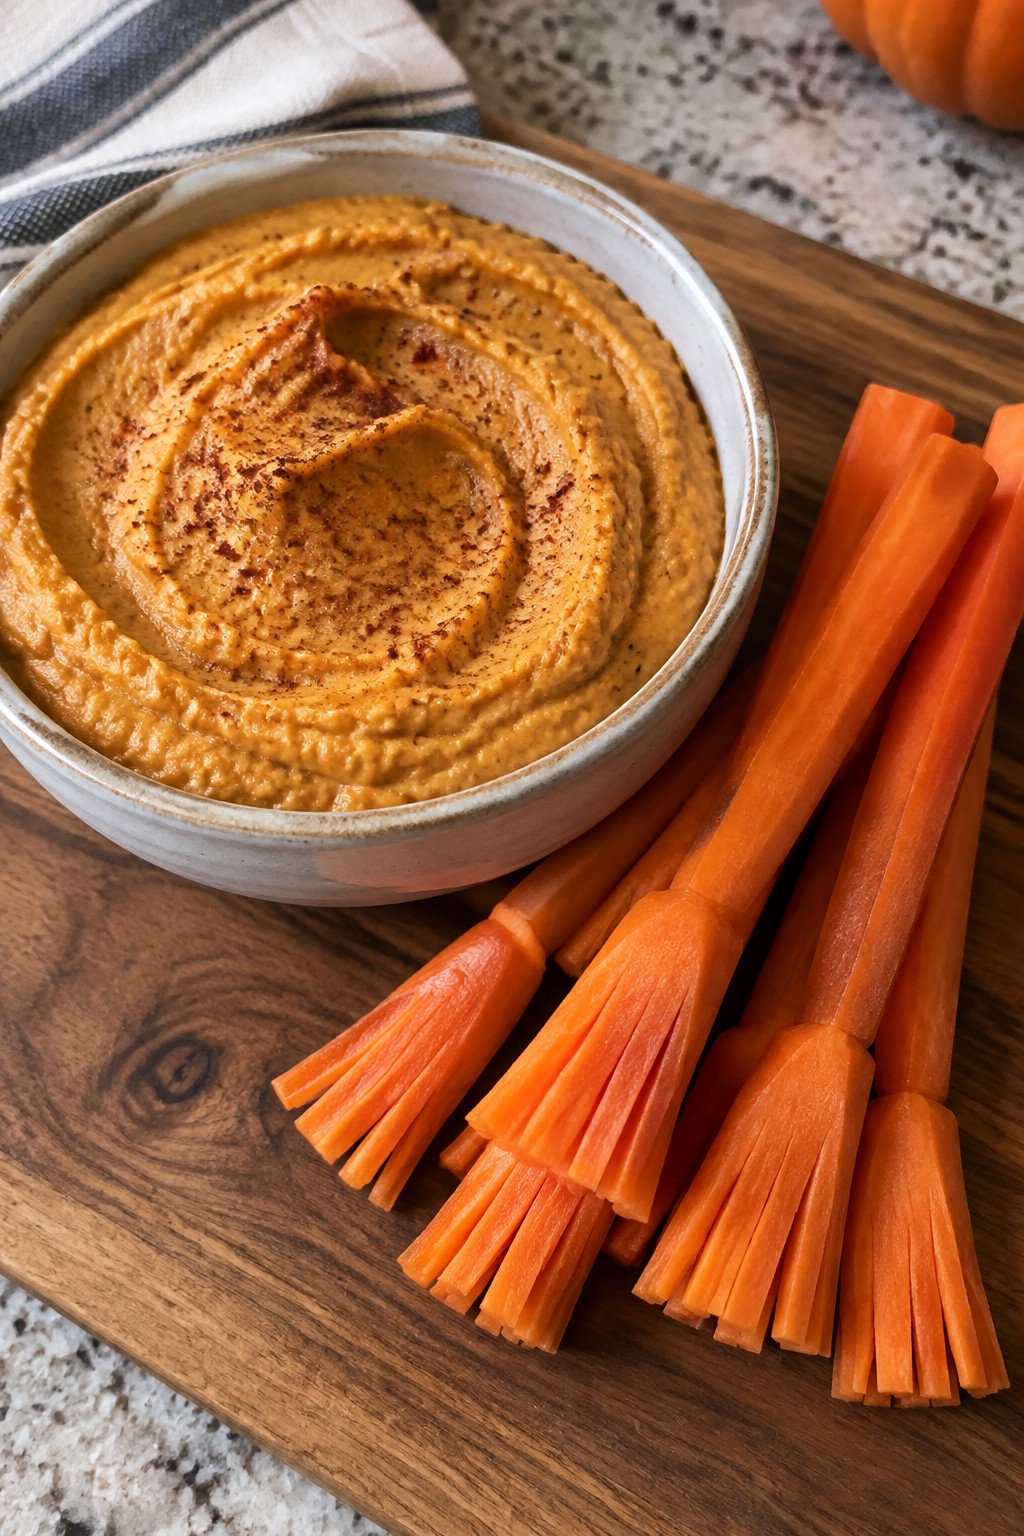
Pumpkin Hummus with Carrot Broomstick Dippers
This pumpkin hummus brings a savory autumn twist to a classic dip. It pairs well at Halloween parties where guests want something lighter than sweets. The texture is smooth and creamy with a hint of earthiness from the pumpkin and warm spices. Carrot sticks cut to look like broomsticks add a playful touch while keeping the snack simple and vegetable focused.
Serves 4 people.
Ingredients
- 1 (15-ounce) can chickpeas, drained and rinsed
- ¾ cup pumpkin puree
- 2 tablespoons tahini
- 1 garlic clove, minced
- Juice of 1 lemon
- 2 tablespoons olive oil
- ½ teaspoon ground cumin
- ½ teaspoon smoked paprika
- ¼ teaspoon salt
- 4 large carrots
Instructions
- Add the chickpeas, pumpkin puree, tahini, minced garlic, lemon juice, olive oil, cumin, smoked paprika, and salt to a food processor.
- Blend the mixture until it reaches a smooth consistency. Scrape down the sides once or twice if needed to ensure everything combines evenly.
- Taste the hummus and adjust salt if desired, then transfer it to a serving bowl.
- Peel the carrots and trim off the ends. Slice each carrot lengthwise into thin sticks, leaving one end slightly wider to suggest a broom shape.
- Arrange the carrot sticks around the bowl of hummus for dipping.
Extra Tips
Make the hummus a day ahead and store it covered in the fridge to let the flavors settle. If the dip seems thick after chilling, stir in a teaspoon of olive oil to loosen it. For clearer broomstick shapes, cut the wider end of each carrot stick into thin fringes with a sharp knife before serving.Course: Appetizer Cuisine: American Equipment: Food processor, Knife, Cutting board
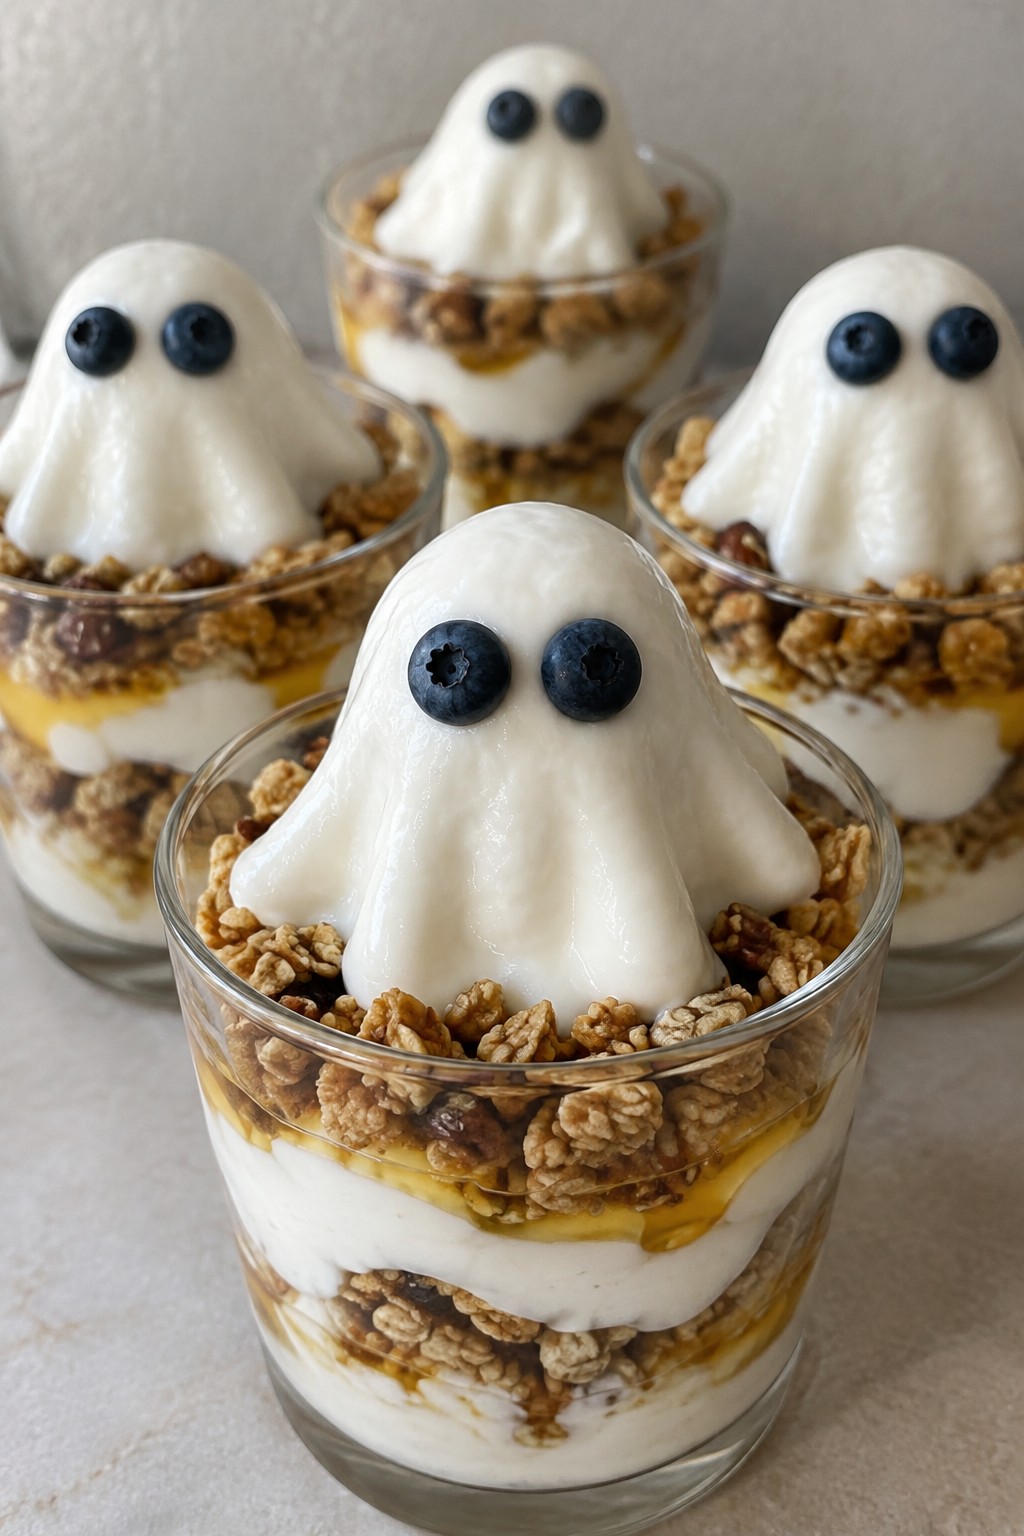
Ghostly Greek Yogurt Parfaits with Berry Eyes
These parfaits offer a light and creamy option that fits right into a healthy Halloween spread. They work well as a make-ahead snack that guests can grab between heavier party foods. The tangy yogurt balances the natural sweetness of the berries, while a bit of crunch adds texture without weighing the dish down.
The finished parfaits look festive once the blueberries are placed as eyes on top. They stay simple to assemble and keep the focus on fresh ingredients.
Serves 4 people.
Ingredients
- 2 cups plain Greek yogurt
- 1 tablespoon honey
- 1 cup granola
- 1 cup fresh blueberries
Instructions
- Stir the Greek yogurt and honey together in a mixing bowl until the honey is fully blended.
- Spoon 1/4 cup of the yogurt mixture into the bottom of each of four clear glasses.
- Add 2 tablespoons of granola on top of the yogurt in each glass.
- Repeat the layers once more with the remaining yogurt and granola.
- Finish each parfait with a final spoonful of yogurt.
- Place two blueberries side by side on the top yogurt layer of each parfait to form the eyes.
Extra Tips
Make these the night before and cover them tightly so the granola stays crisp until serving. If you prefer a sweeter base, stir in an extra half teaspoon of honey per glass right before layering. Skip the granola if you need a nut-free version and replace it with crushed freeze-dried berries for crunch.Course: Snack Cuisine: American Equipment: Mixing bowl, spoon, 4 clear glasses
Baked Cinnamon Sweet Potato Jack-o’-Lantern Chips
These chips turn sweet potatoes into a festive Halloween snack with simple cinnamon seasoning and playful faces cut into each slice. They work well for parties because they stay light and crisp without frying, giving guests a healthy option that still feels fun.
The flavor balances the natural sweetness of the potatoes with warm cinnamon, while the baked texture comes out thin and crunchy. Kids and adults both enjoy picking out the jack-o’-lantern shapes from the bowl.

Serves 4 people.
Ingredients
- 2 large sweet potatoes
- 1 tablespoon olive oil
- 1 teaspoon ground cinnamon
- Pinch of sea salt
Instructions
- Preheat the oven to 375 degrees and line a baking sheet with parchment paper.
- Scrub the sweet potatoes clean and slice them into thin rounds about 1/8 inch thick using a sharp knife or mandoline.
- Place the slices in a bowl and toss them with the olive oil until lightly coated.
- Sprinkle the cinnamon and sea salt over the slices and toss again to distribute the seasoning evenly.
- Use a small paring knife to cut simple jack-o’-lantern faces into each round, removing small pieces for eyes and a mouth.
- Arrange the shaped slices in a single layer on the prepared baking sheet without overlapping.
- Bake for 20 to 25 minutes, flipping the slices halfway through, until the edges turn golden and crisp.
- Remove from the oven and let the chips cool on the sheet for a few minutes before serving.
Extra Tips
Arrange the slices with space between them on the baking sheet so air can circulate and keep the chips crisp rather than soft. If you want a touch more warmth, add an extra pinch of cinnamon before baking, but avoid extra oil which can make them soggy. Store any leftovers in a paper bag at room temperature to help maintain crunch for the next day.Course: Snack Cuisine: American Equipment: Baking sheet, Parchment paper, Mixing bowl, Sharp knife or mandoline
Avocado Deviled Egg Eyeballs on Cucumber Rounds
These avocado deviled egg eyeballs turn a classic snack into a fun Halloween bite. They sit on crisp cucumber rounds for a fresh base that keeps the whole thing light and easy to eat at a party. The creamy filling comes from avocado instead of mayo, giving a mild flavor with a smooth texture that pairs well with the cool cucumber.
The olive slices on top create a simple eyeball effect without extra steps. This version works best when you want something that feels festive but still fits into a healthy spread.
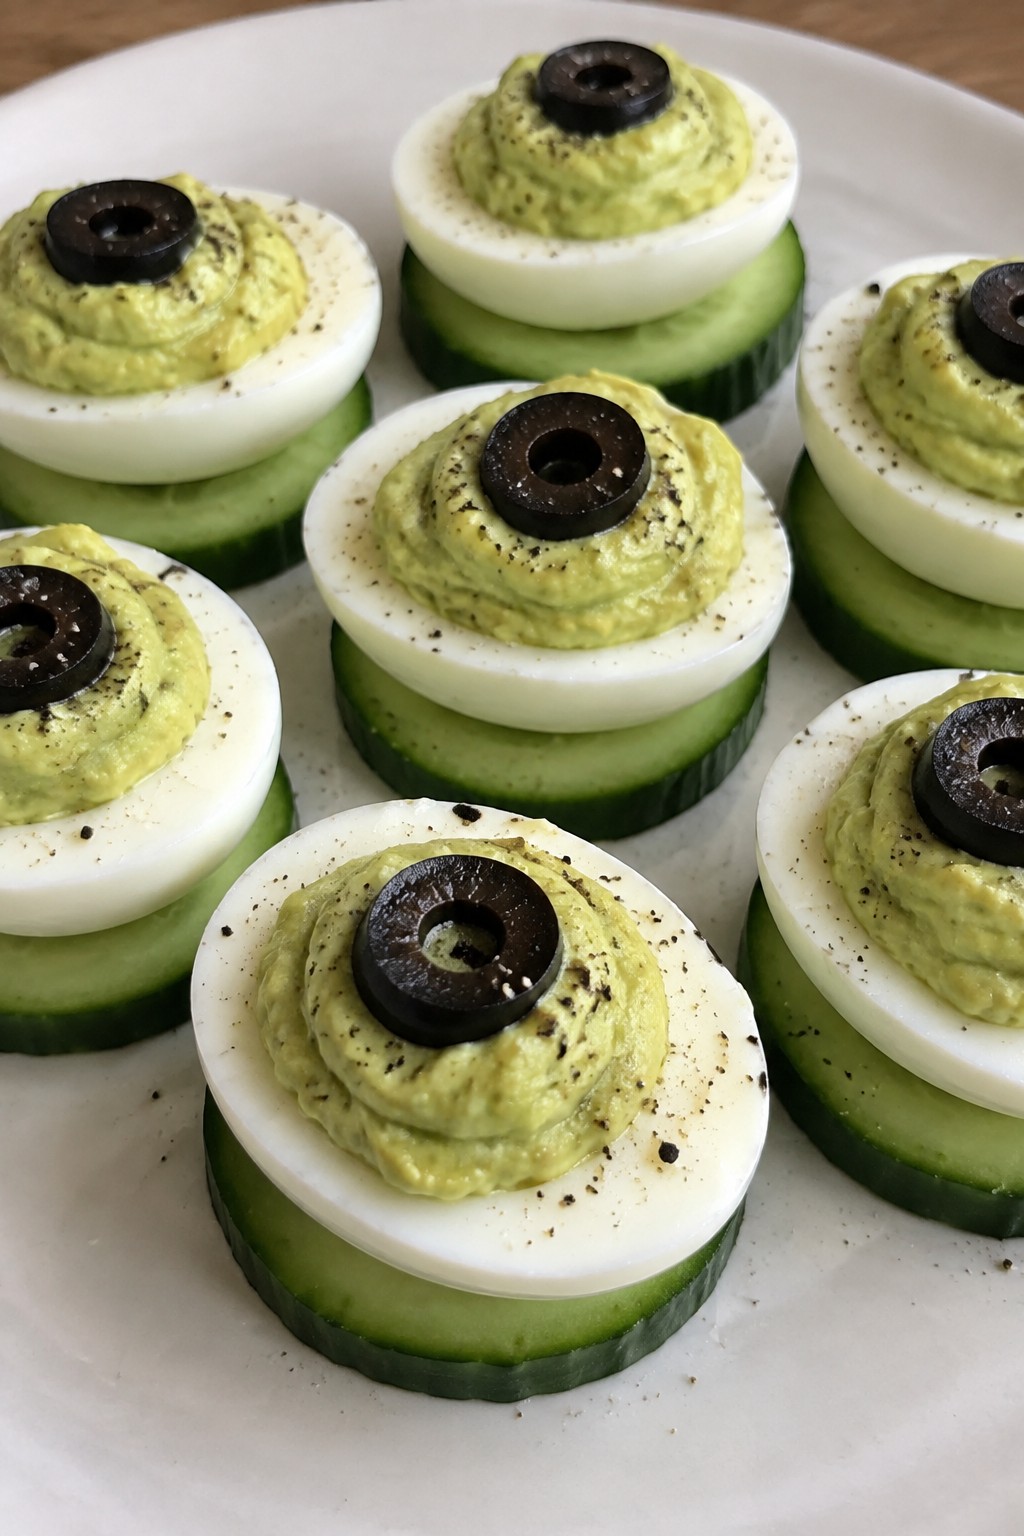
Serves 4 people.
Ingredients
- 4 large eggs
- 1 ripe avocado
- 1 medium cucumber
- 4 black olives
- 1 teaspoon lemon juice
- 1/4 teaspoon salt
- 1/4 teaspoon black pepper
Instructions
- Place the eggs in a pot and cover with water. Bring to a boil, then turn off the heat and let the eggs sit for 10 minutes. Drain and cool under cold water before peeling.
- Slice the cucumber into 8 rounds, each about 1/2 inch thick. Set the rounds on a serving plate.
- Cut each peeled egg in half lengthwise. Scoop the yolks into a bowl and add the avocado, lemon juice, salt, and pepper.
- Mash the mixture with a fork until smooth. Spoon or pipe the filling back into the egg white halves.
- Slice each black olive in half crosswise. Place one olive half on top of each filled egg to form the pupil.
- Set one finished egg half on each cucumber round and serve right away.
Extra Tips
Use a ripe but firm avocado so the filling holds its shape when piped. If the mixture feels too thick, add a small splash of lemon juice rather than extra liquid. These are best assembled just before serving so the cucumber stays crisp.Course: Appetizer Cuisine: American Equipment: Pot, Mixing Bowl, Knife, Spoon
Veggie Skeleton Platter with Herbed Yogurt Dip
This veggie skeleton platter brings a fun Halloween element to any party table. Crisp vegetables form the shape while the herbed yogurt dip provides a cool and tangy contrast that balances the fresh crunch.
It suits gatherings where guests want something light yet festive. The simple arrangement keeps prep straightforward and encourages everyone to snack on vegetables.

Serves 4 people.
Ingredients
- 4 large carrots, cut into sticks and rounds
- 3 celery stalks, cut into sticks
- 1 cucumber, sliced into rounds
- 1 red bell pepper, cut into strips
- 1 cup broccoli florets
- 1 cup cherry tomatoes
- 1 cup plain Greek yogurt
- 2 tablespoons chopped fresh dill
- 1 tablespoon chopped fresh parsley
- 1 garlic clove, minced
- 1 tablespoon lemon juice
- 1/4 teaspoon salt
- 1/8 teaspoon black pepper
Instructions
- Cut the carrots, celery, cucumber, and bell pepper into the required shapes and sizes. Set the broccoli florets and cherry tomatoes aside for later use.
- In a mixing bowl, combine the Greek yogurt, dill, parsley, garlic, lemon juice, salt, and black pepper. Stir until the mixture is smooth and evenly blended.
- On a large platter, arrange the carrot sticks vertically to form a spine and ribs. Place celery sticks on either side to extend the arms and legs.
- Use cucumber rounds and carrot rounds to create the skull at the top. Position broccoli florets around the head area and add cherry tomatoes as accents near the hands and feet.
- Transfer the yogurt dip to a small bowl and place it beside the arranged vegetables for easy serving.
Extra Tips
Prepare the dip a few hours ahead so the garlic and herbs can infuse the yogurt more fully. If the carrot sticks feel too thick for fine skeleton lines, slice them thinner before arranging. Keep the platter covered in the fridge until guests arrive to maintain the crisp texture of the vegetables.Course: Appetizer Cuisine: American Equipment: Cutting board, Sharp knife, Mixing bowl, Serving platter
Frozen Banana Ghosts Rolled in Shredded Coconut
These frozen banana ghosts offer a simple way to add a playful touch to any Halloween spread. The bananas stay creamy once frozen while the shredded coconut gives them a light, chewy coating that feels festive without extra sugar. They work well as a make-ahead option for parties because they hold up in the freezer until guests arrive.
The flavor stays mild and naturally sweet, with just enough coconut to balance the banana. Kids and adults both reach for them because they feel like a treat but stay light enough to enjoy alongside heavier snacks.
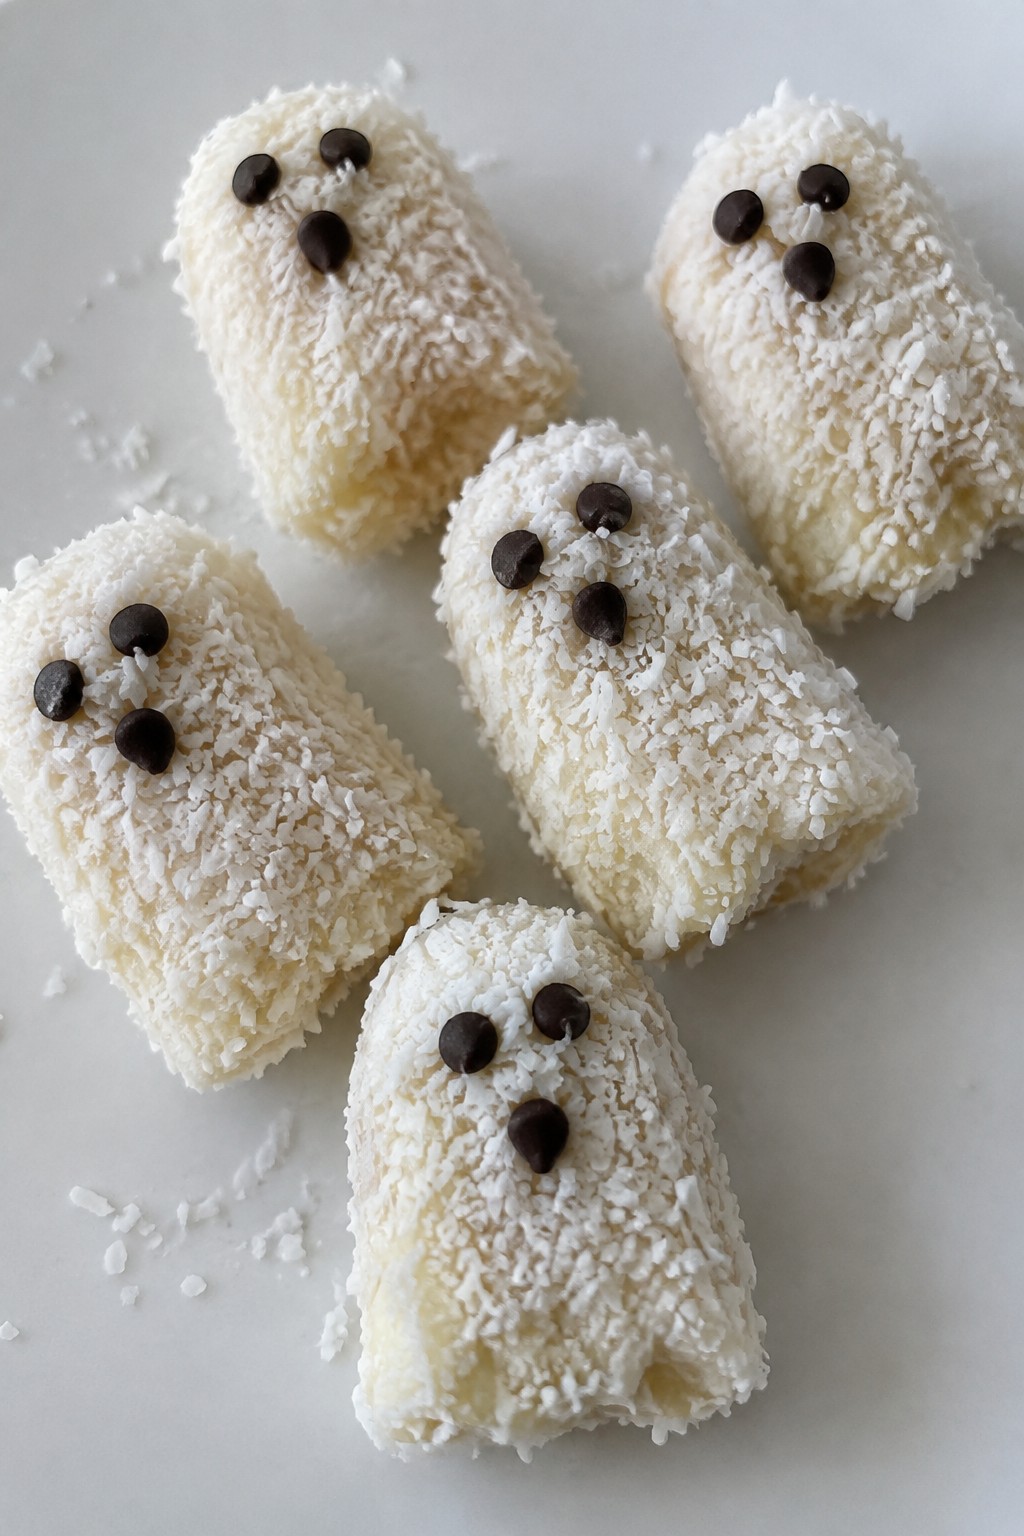
Serves 4 people.
Ingredients
- 4 ripe bananas
- 1 cup unsweetened shredded coconut
- 2 tablespoons mini chocolate chips
Instructions
- Peel the bananas and cut each one in half crosswise to create eight smaller pieces.
- Place the shredded coconut in a shallow bowl. Roll each banana half in the coconut until it is evenly coated on all sides.
- Set the coated bananas on a parchment-lined tray. Press two mini chocolate chips into the top of each piece to form eyes and add one or two more below for a mouth.
- Transfer the tray to the freezer and leave the bananas until they are firm, about two hours.
Extra Tips
Serve the ghosts straight from the freezer on a chilled plate so the coconut stays in place. If the bananas brown slightly during freezing, the coconut coating hides it. For a nut-free version, skip the chocolate chips and use small pieces of dried fruit for the faces instead. Store any leftovers in a single layer in an airtight container for up to one week.Course: Snack Cuisine: American Equipment: Baking sheet, Parchment paper, Shallow bowl
Mini Bell Pepper Jack-o’-Lanterns Stuffed with Quinoa
These stuffed peppers bring a fun Halloween twist to a simple grain bowl. The mini orange peppers get carved into jack-o’-lantern faces, then filled with a bright quinoa mix that feels light but satisfying. They work well as finger food at parties because they hold up without getting soggy and give guests a healthy option alongside sweeter treats.
The flavor stays fresh and mildly spiced, with earthy quinoa, beans, and a squeeze of lime. The peppers add a crisp bite that contrasts the soft filling.

Serves 4 people.
Ingredients
- 8 mini orange bell peppers
- 1 cup uncooked quinoa
- 2 cups water
- 1 cup canned black beans, rinsed and drained
- 1/2 cup corn kernels
- 1 small tomato, diced
- 1 teaspoon ground cumin
- 1/2 teaspoon chili powder
- 1/4 teaspoon salt
- 1/4 teaspoon black pepper
- Juice of 1 lime
- 2 tablespoons fresh cilantro, chopped
Instructions
- Rinse the quinoa under cold water, then place it in a saucepan with the water. Bring to a boil, reduce heat to low, cover, and simmer for 15 minutes until the water is absorbed. Fluff the quinoa with a fork and let it cool slightly.
- While the quinoa cooks, slice the tops off the mini bell peppers and remove the seeds and membranes. Use a small knife to carve simple jack-o’-lantern faces into the sides of each pepper.
- In a mixing bowl, combine the cooked quinoa, black beans, corn, tomato, cumin, chili powder, salt, and black pepper. Stir in the lime juice and chopped cilantro until everything is evenly mixed.
- Spoon the quinoa filling into each carved pepper until full. Replace the tops if desired and arrange the peppers on a platter for serving.
Extra Tips
Carve the pepper faces after removing the seeds so the shells stay sturdy. The filling can be made a day ahead and stored in the fridge, then stuffed just before the party to keep the peppers crisp.Course: Snack Cuisine: American Equipment: Saucepan, Mixing Bowl, Knife
Spider Web Apple Nachos with Yogurt Drizzle
These apple nachos bring a fun Halloween twist to a simple snack. Fresh apple slices get topped with a creamy yogurt base, then finished with a cocoa yogurt drizzle that forms a spider web pattern. The result is crisp fruit with a lightly sweet and tangy coating that feels festive without extra sugar.
This works well for parties because it comes together quickly and requires no baking. The texture stays fresh and crunchy, while the yogurt adds a smooth contrast that appeals to both kids and adults.
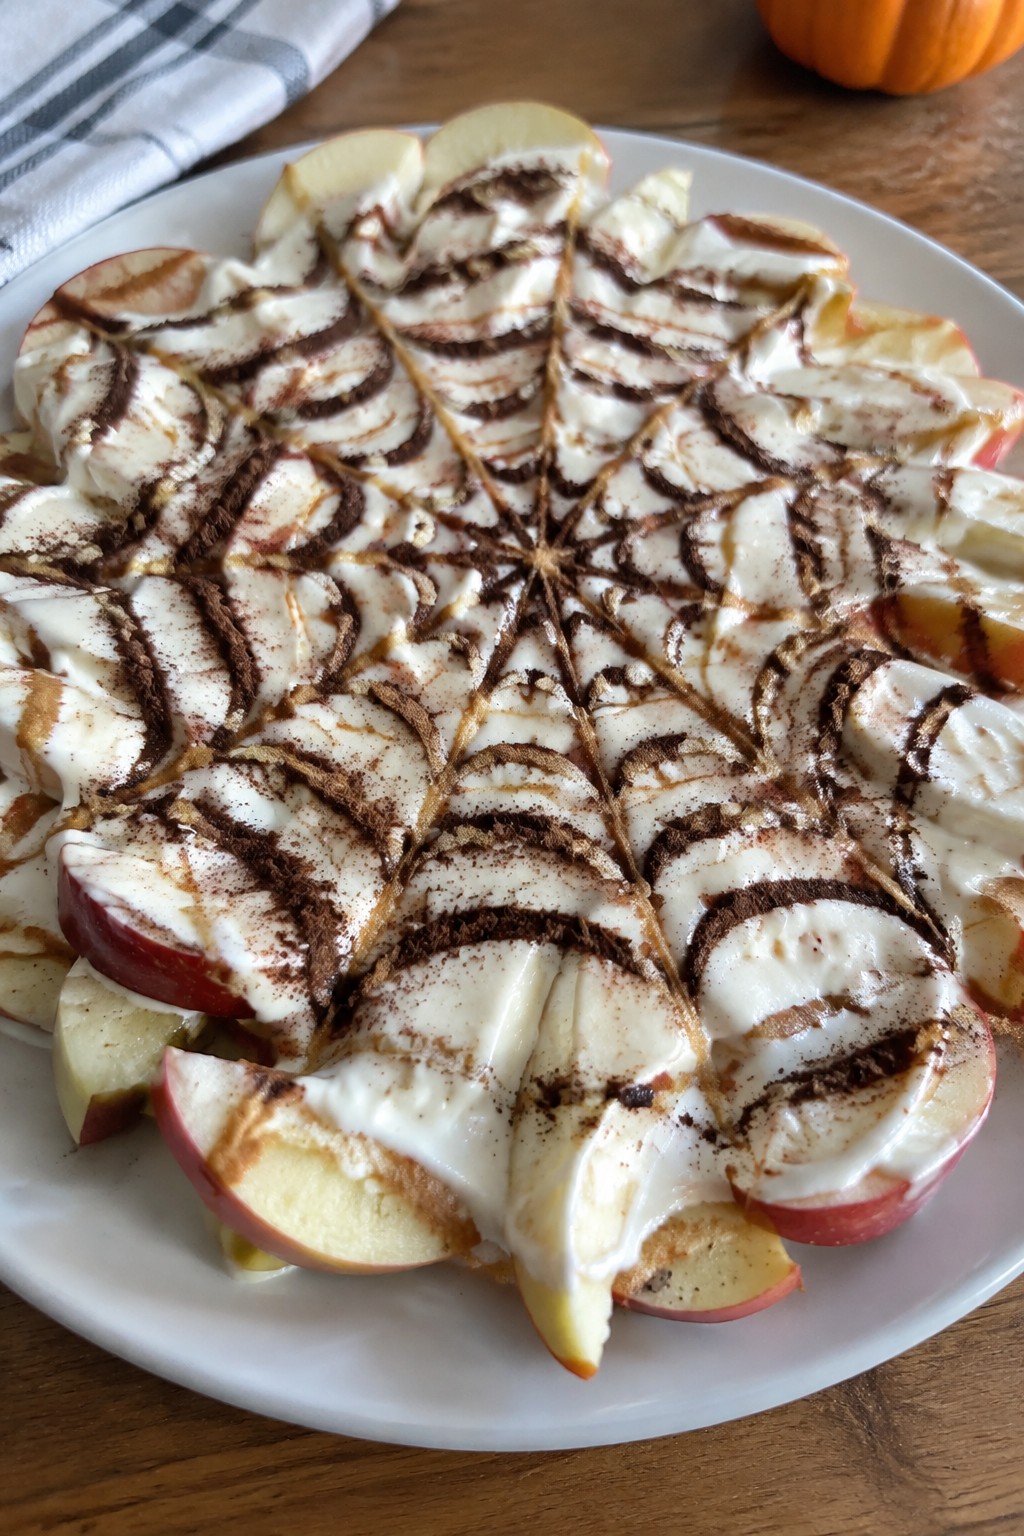
Serves 4 people.
Ingredients
- 4 large apples, cored and sliced into wedges
- 1 cup plain Greek yogurt
- 2 tablespoons honey
- 1 teaspoon vanilla extract
- 2 tablespoons unsweetened cocoa powder
- 1/4 teaspoon ground cinnamon
Instructions
- Arrange the apple wedges in a single overlapping layer on a large serving plate.
- Stir together the Greek yogurt, honey, and vanilla extract in a small bowl until smooth.
- Spoon most of the yogurt mixture over the apple slices, spreading it lightly with the back of a spoon.
- Mix the remaining yogurt mixture with the cocoa powder in a separate small bowl until fully combined and dark in color.
- Transfer the cocoa yogurt to a small zip-top bag, snip off one corner, and pipe thin concentric circles over the apples.
- Use a toothpick to drag lines from the center outward, creating a web pattern.
- Sprinkle the cinnamon evenly over the top before serving.
Extra Tips
Pipe the cocoa mixture slowly so the circles stay thin and distinct. If the yogurt feels too thick for drizzling, add a teaspoon of milk to loosen it. Leftovers keep best when stored in an airtight container in the fridge for up to one day, though the apples soften slightly.Course: Snack Cuisine: American Equipment: Mixing bowls, Zip-top bag, Serving plate
Roasted Chickpea Popcorn with Pumpkin Spice
This roasted chickpea snack turns a simple pantry staple into a crunchy, spiced treat that suits Halloween parties. It gives guests a better-for-you option that still captures the cozy pumpkin flavor of the season.
The chickpeas roast until crisp and take on warm notes from the spice blend. The result is a light, handheld bite that works well for mingling or movie watching.
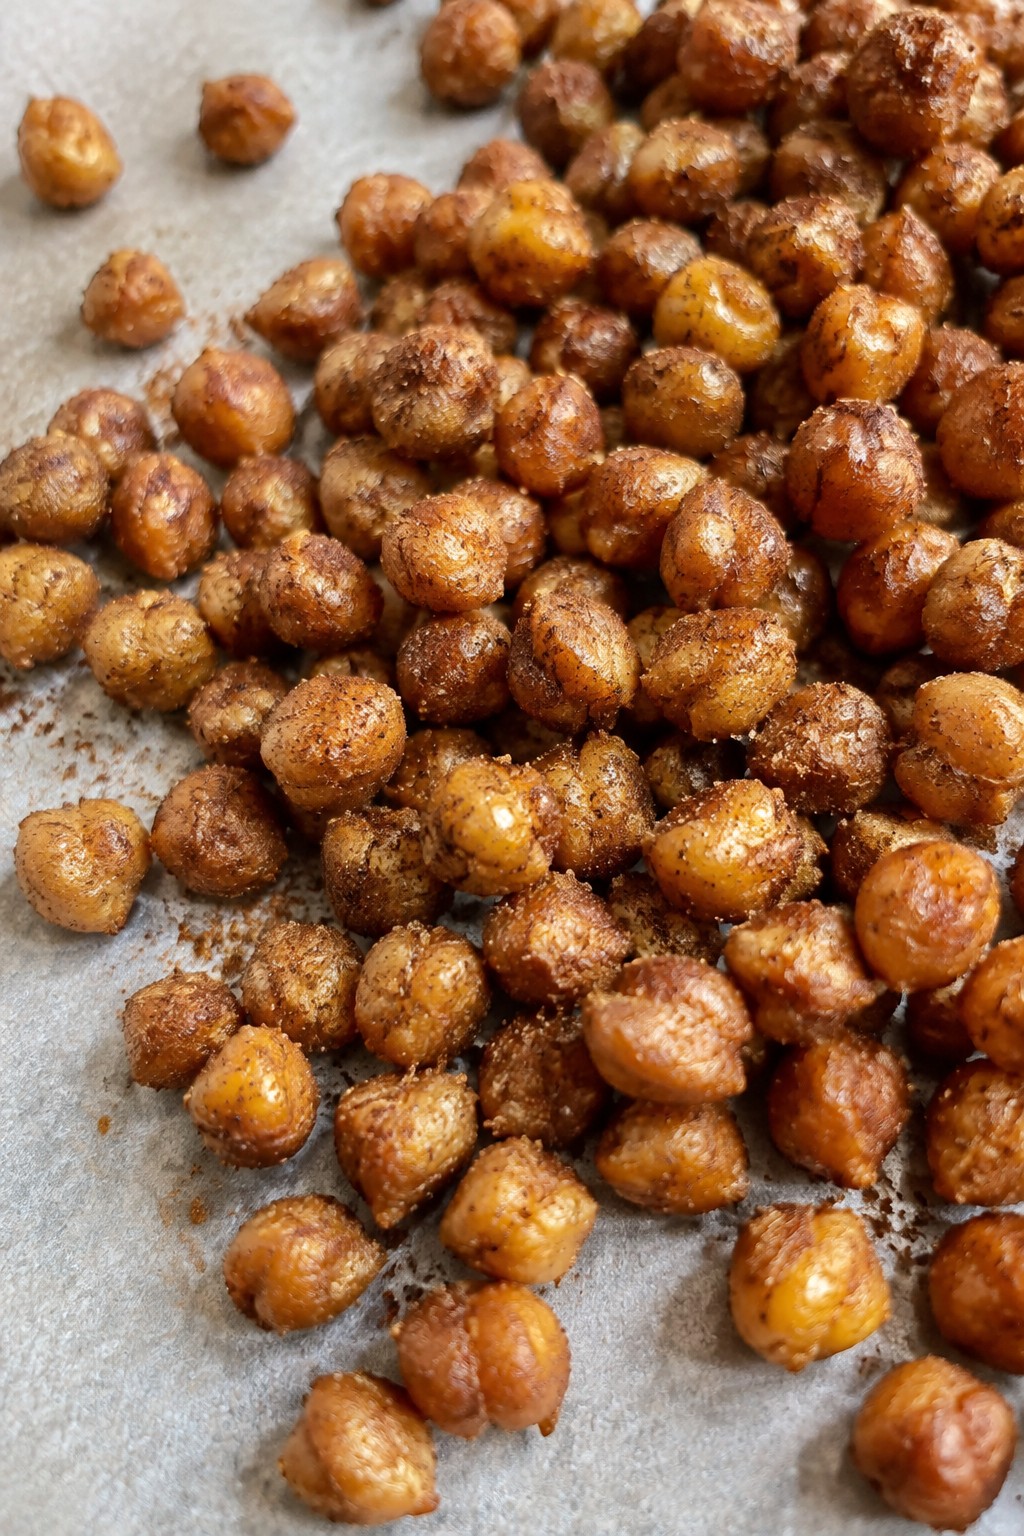
Serves 4 people.
Ingredients
- 2 (15-ounce) cans chickpeas, drained and rinsed
- 2 tablespoons olive oil
- 2 teaspoons pumpkin pie spice
- ½ teaspoon salt
Instructions
- Heat the oven to 400°F and line a baking sheet with parchment paper.
- Drain the chickpeas, rinse them well, and pat them very dry with a clean towel to remove excess moisture.
- Place the chickpeas in a bowl, add the olive oil, pumpkin pie spice, and salt, then stir until the chickpeas are evenly coated.
- Spread the chickpeas in a single layer on the prepared baking sheet.
- Roast for 30 to 35 minutes, shaking the pan halfway through, until the chickpeas are golden and crisp.
- Remove from the oven and let them cool on the sheet for a few minutes before serving.
Extra Tips
Pat the chickpeas thoroughly before seasoning so they roast crisp instead of steaming. Store leftovers in an open container at room temperature to help them stay crunchy; if they soften, a quick 5-minute reheat in a 350°F oven revives the texture.Course: Snack Cuisine: American Equipment: Baking Sheet, Mixing Bowl
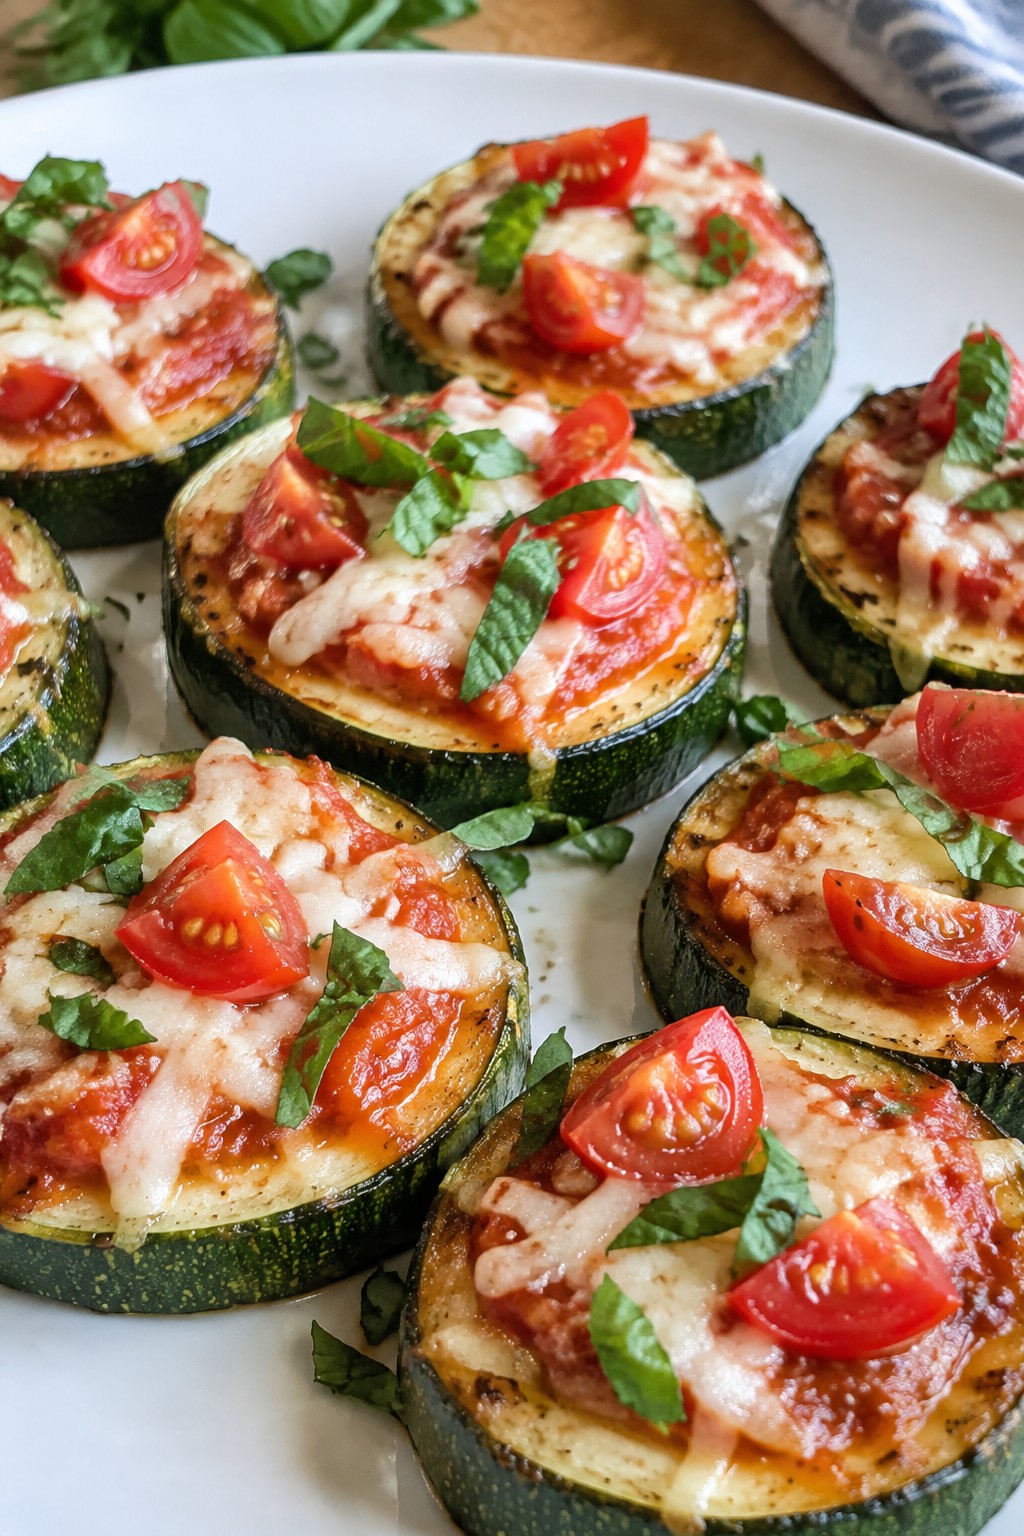
Zucchini Pizza Bites Topped with Tomato and Basil
These zucchini pizza bites give you the familiar flavors of pizza in a lighter form that suits a healthy party table. They come together fast and let guests enjoy a few bites without feeling weighed down.
The roasted zucchini stays tender with a slight crisp edge, while the tomato and basil add bright, fresh notes. They work well as handheld snacks during gatherings or movie nights when you want something simple and vegetable-focused.
Serves 4 people.
Ingredients
- 2 large zucchinis, cut into 1/2-inch thick rounds
- 1 cup tomato sauce
- 1 cup cherry tomatoes, quartered
- 3/4 cup shredded part-skim mozzarella cheese
- 1 tablespoon olive oil
- 1 teaspoon Italian seasoning
- Salt and black pepper to taste
- 1/2 cup fresh basil leaves, chopped
Instructions
- Preheat the oven to 400 degrees F and line a baking sheet with parchment paper.
- Place the zucchini rounds in a mixing bowl and toss them with the olive oil, Italian seasoning, salt, and black pepper until evenly coated.
- Arrange the zucchini slices in a single layer on the prepared baking sheet.
- Spread about one teaspoon of tomato sauce on each zucchini round, then add a few pieces of quartered cherry tomato and a sprinkle of mozzarella cheese.
- Bake for 10 to 12 minutes, until the cheese has melted and the zucchini has softened but still holds its shape.
- Remove the baking sheet from the oven and sprinkle the chopped basil over the hot bites right before serving.
Extra Tips
Slice the zucchinis to an even thickness so they cook at the same pace and avoid becoming mushy. Pat the rounds dry with a paper towel after slicing if they seem very wet. These bites taste best served warm from the oven, but you can prepare the zucchini slices ahead and assemble just before baking.Course: Snack Cuisine: Italian Equipment: Baking Sheet, Oven, Mixing Bowl
Trail Mix Monster Munch with Dried Cranberries and Nuts
This trail mix combines crunchy nuts with chewy dried cranberries for a simple snack that travels well to parties. It works especially well for Halloween gatherings because guests can grab a handful while mingling and it holds up without refrigeration. The flavor stays balanced between earthy nuts and bright tart fruit, with a satisfying mix of textures in every bite.

Serves 4 people.
Ingredients
- 1 cup raw almonds
- 1 cup walnuts
- ½ cup pumpkin seeds
- ½ cup dried cranberries
- ¼ cup sunflower seeds
Instructions
- Place the almonds, walnuts, and pumpkin seeds in a large mixing bowl.
- Add the sunflower seeds to the same bowl.
- Pour the dried cranberries over the nut and seed mixture.
- Stir everything together with a large spoon until the cranberries and seeds are evenly scattered throughout the nuts.
- Divide the finished mix into four small bowls or paper bags for serving.
Extra Tips
If you want a touch more sweetness without changing the healthy profile, stir in a small handful of unsweetened coconut flakes right before serving. Store any leftovers in a sealed jar at room temperature for up to a week so the nuts stay crisp. For a nut-free version at a school party, swap the almonds and walnuts for extra pumpkin and sunflower seeds.Course: Snack Cuisine: American Equipment: Mixing Bowl
