
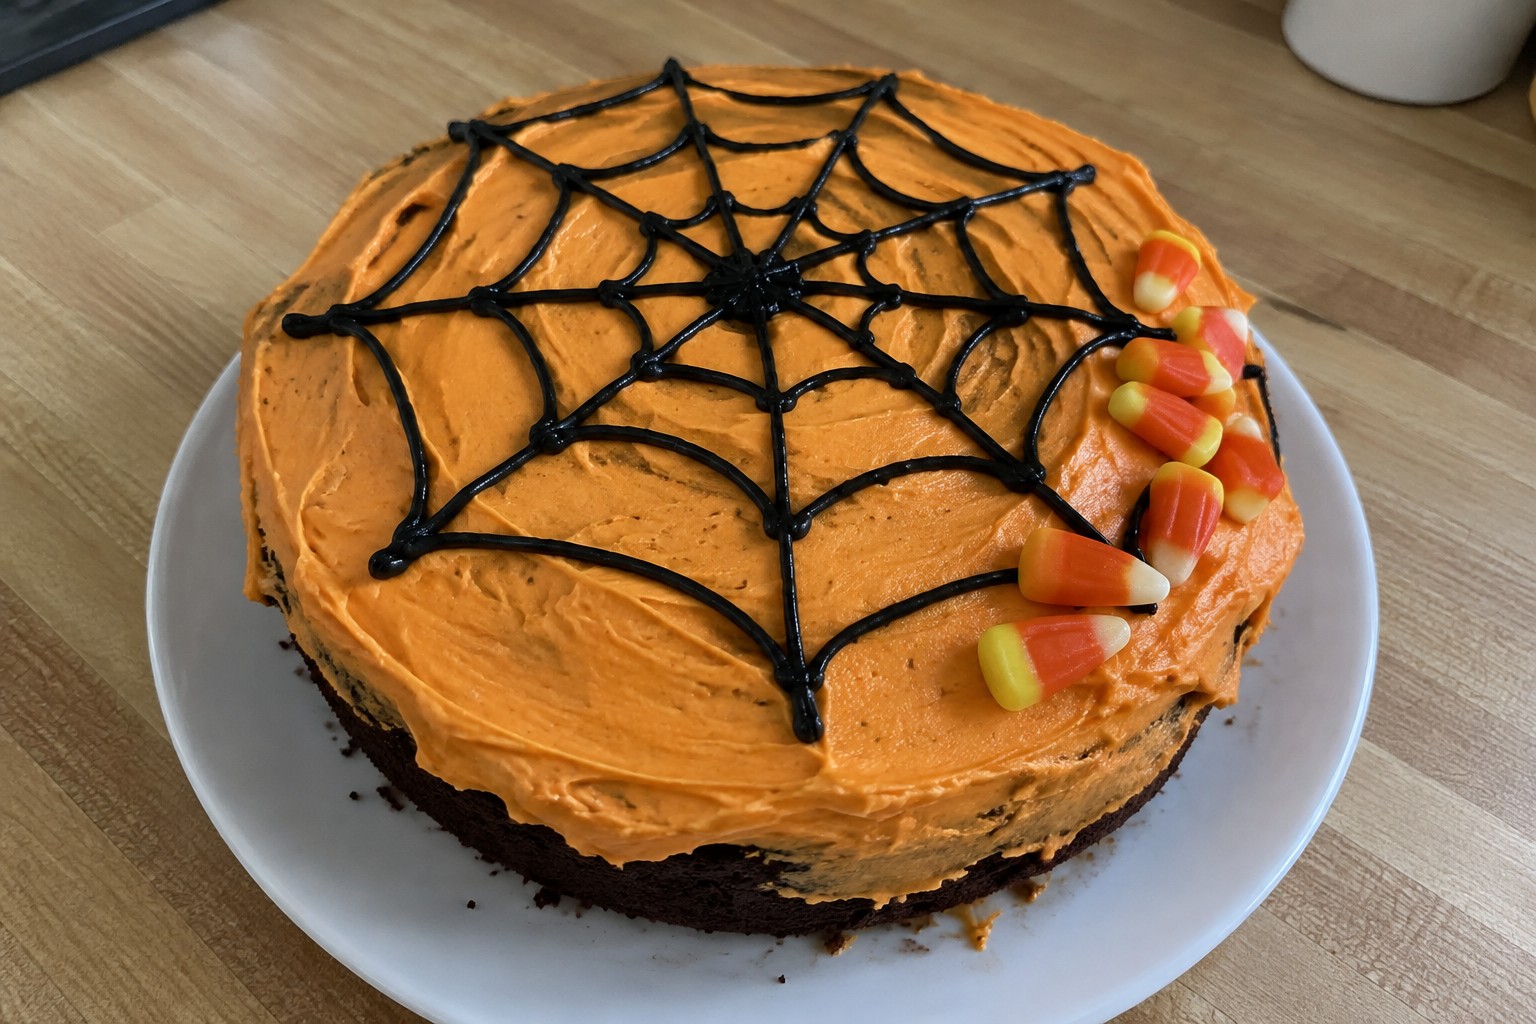
Halloween is a good time to make a cake that stands out at a party or family gathering. I collected these ideas because they focus on recipes that actually work in a home kitchen. Some use basic mixes with easy add ins while others are made from scratch. You will see different flavors and decoration styles to match what you have on hand. Each one includes clear steps so you can choose based on your time and skill level.
Helpful Tips Before You Start
A little prep work helps these Halloween cakes turn out clean and stress free.
Test Food Coloring Ahead
Black and deep orange shades often need extra time to develop. Mix your frosting colors the day before so you can adjust without rushing.
Freeze the Cake Layers
Bake and cool the cakes, then wrap and freeze them overnight. Frozen layers crumb less and hold their shape better during decorating.
Make Decorations Early
Shape fondant ghosts, cut cookie tombstones, or pipe royal icing details a few days ahead. Store them in a dry container until you assemble the cake.
Use a Sturdy Frosting
Swiss meringue buttercream or American buttercream holds up to tall decorations and warm rooms better than whipped cream. It also pipes sharp edges for clean lines.
Pumpkin Spice Ghost Layer Cake
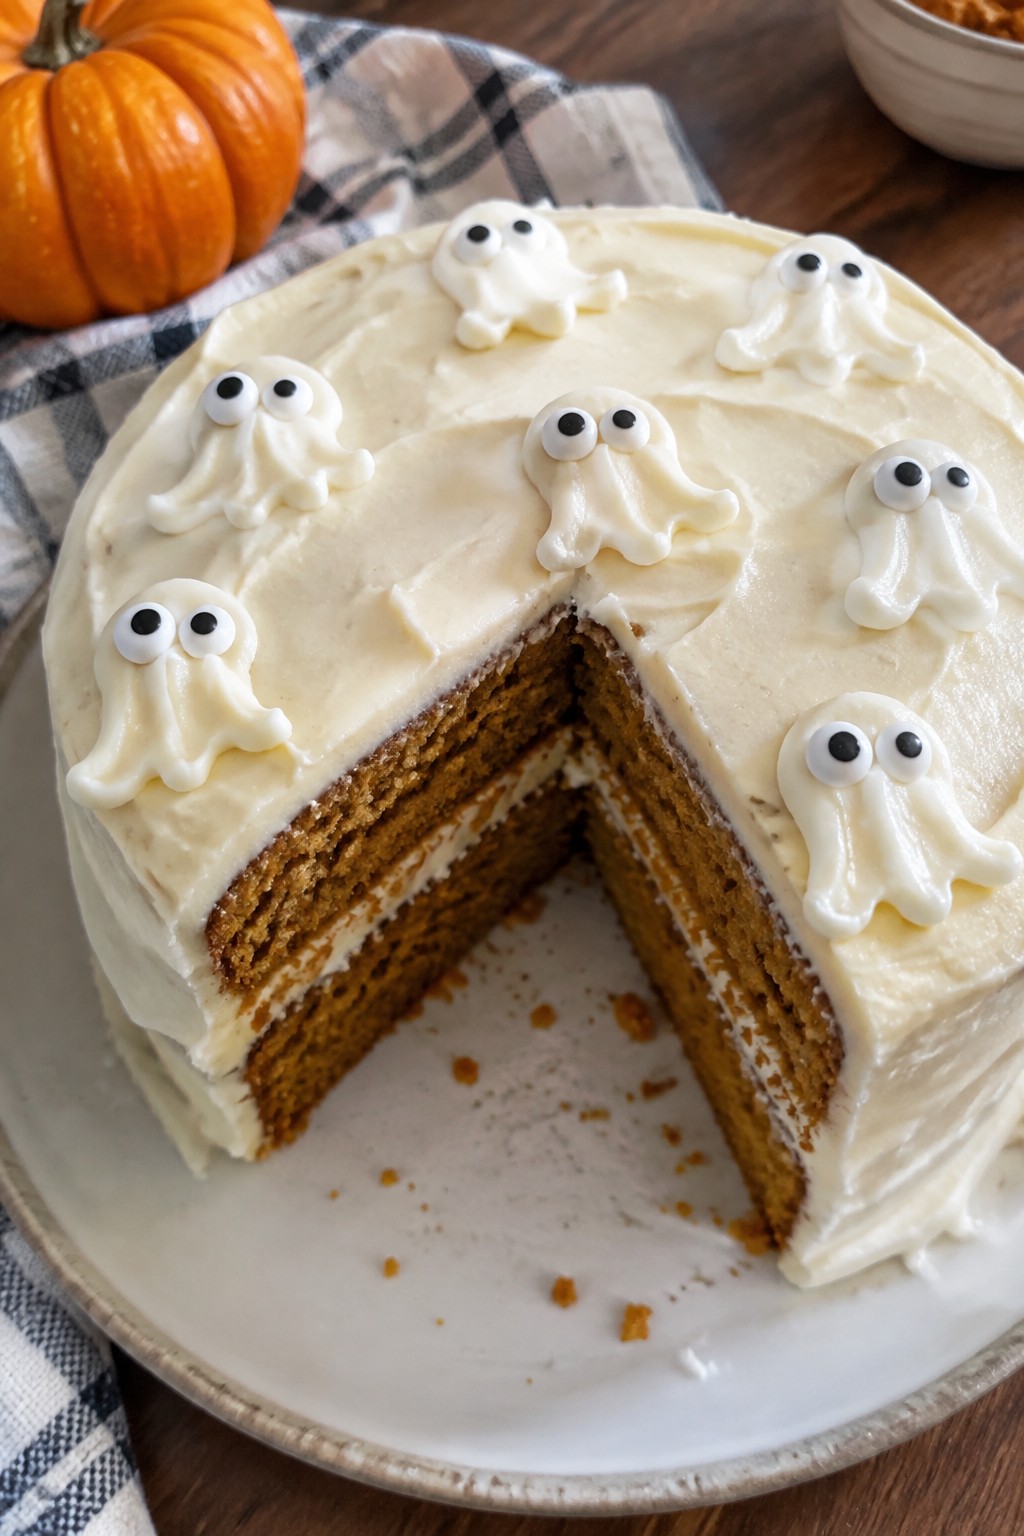
This cake brings warm pumpkin spice flavor to a small layer cake that feels festive without much fuss. The soft, moist crumb pairs with tangy cream cheese frosting, and simple ghost decorations on top make it a natural fit for Halloween gatherings or cozy fall nights with a few guests.
It works well when you want a compact dessert that still looks like a showpiece. The spices give it a familiar autumn taste while the frosting adds a light, creamy finish that balances the cake layers.
Serves 4 people.
Ingredients
- 1 cup all-purpose flour
- 1/2 cup granulated sugar
- 1/2 cup pumpkin puree
- 1 teaspoon pumpkin pie spice
- 1/2 teaspoon baking soda
- 1/4 teaspoon salt
- 1/4 cup vegetable oil
- 1 large egg
- 1/4 cup milk
- 4 ounces cream cheese, softened
- 2 tablespoons unsalted butter, softened
- 1 cup powdered sugar
- 1/2 teaspoon vanilla extract
- 8 candy eyes
Instructions
- Preheat the oven to 350 degrees F. Grease two 6-inch round cake pans and line the bottoms with parchment paper.
- In a medium bowl, whisk together the flour, granulated sugar, pumpkin pie spice, baking soda, and salt.
- In a separate bowl, mix the pumpkin puree, vegetable oil, egg, and milk until smooth. Pour the wet mixture into the dry ingredients and stir until just combined.
- Divide the batter evenly between the prepared pans. Bake for 18 to 20 minutes, or until a toothpick inserted in the center comes out clean. Cool the cakes in the pans for 10 minutes, then turn them out onto a wire rack to cool completely.
- While the cakes cool, beat the cream cheese and butter together until smooth. Add the powdered sugar and vanilla extract, then beat until the frosting is creamy and spreadable.
- Place one cooled cake layer on a plate. Spread a thin layer of frosting over the top. Add the second cake layer and cover the top and sides with the remaining frosting.
- Pipe or spoon small ghost shapes onto the top using extra frosting if needed. Press two candy eyes onto each ghost.
Extra Tips
Chill the cake for 20 minutes after frosting to help the ghosts hold their shape. If the frosting feels too thick, add a teaspoon of milk at a time until it reaches a pipeable consistency. Leftovers keep covered in the refrigerator for up to three days.Course: Dessert Cuisine: American Equipment: Mixing bowls, Electric mixer, 6-inch cake pans, Wire rack
Black Velvet Spiderweb Cake
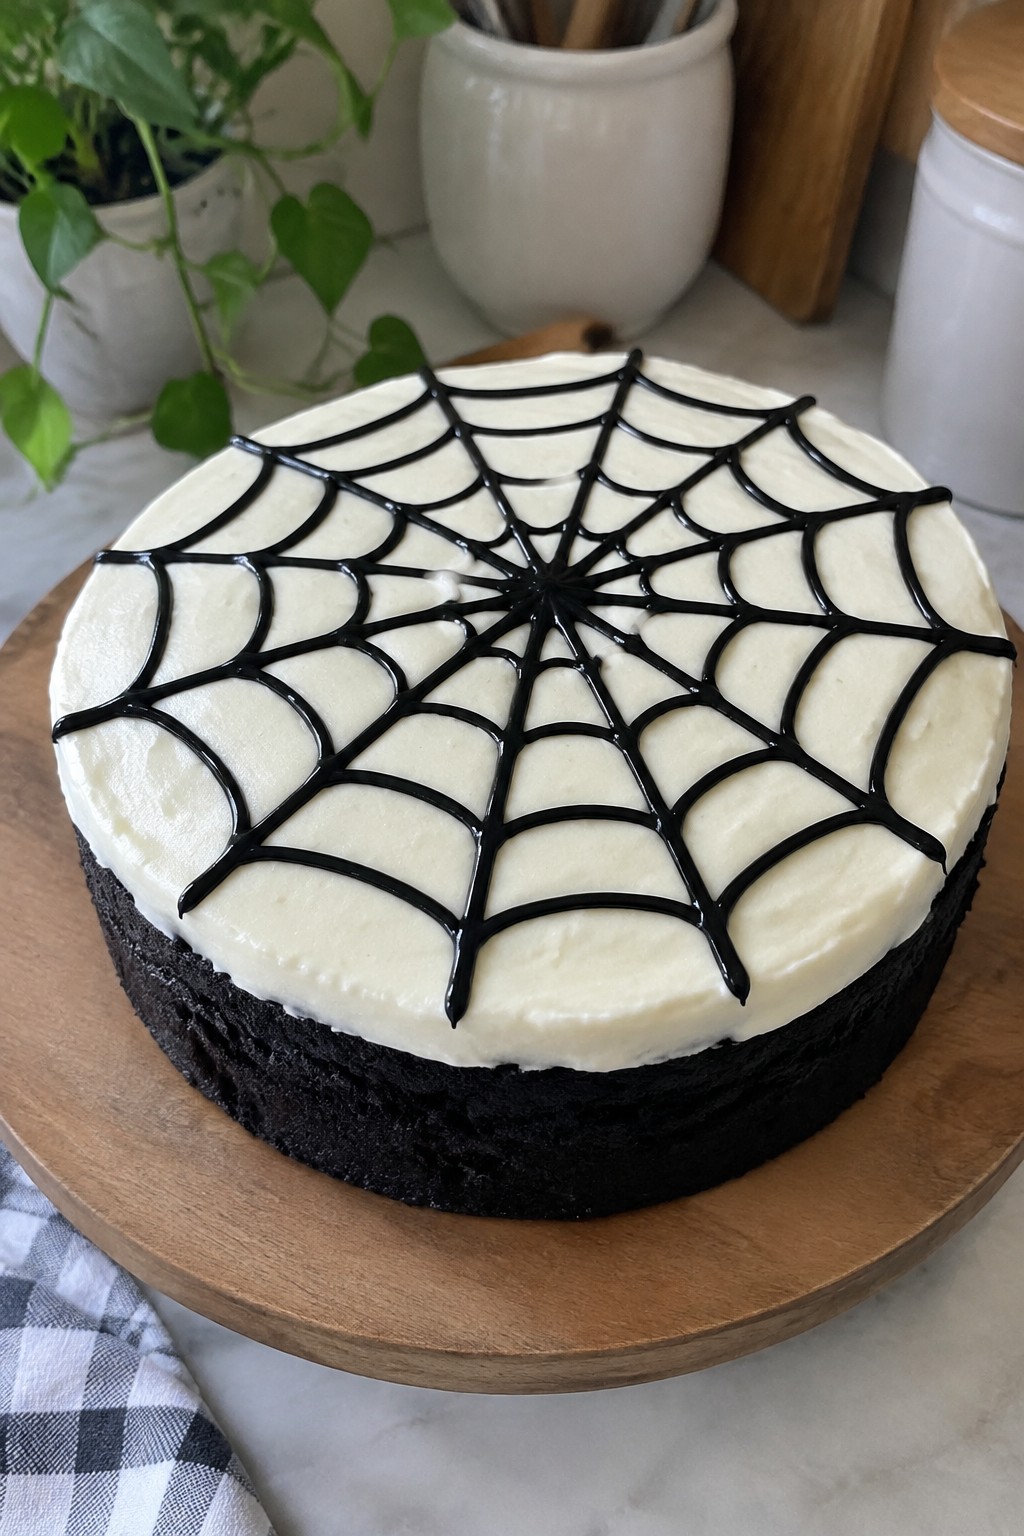
This black velvet spiderweb cake gives your Halloween spread a striking dark look with a moist, tender crumb. The rich cocoa base and smooth cream cheese frosting create a balanced sweet bite that feels festive without being overly sweet.
It suits small parties or family gatherings where you want a simple yet eye-catching dessert. The spiderweb pattern on top comes together quickly once the cake is frosted.
Serves 4 people.
Ingredients
- 1 1/4 cups all-purpose flour
- 3/4 cup granulated sugar
- 1/4 cup black cocoa powder
- 1 teaspoon baking soda
- 1/4 teaspoon salt
- 3/4 cup buttermilk
- 1/4 cup vegetable oil
- 1 large egg
- 2 teaspoons vanilla extract, divided
- 4 ounces cream cheese, softened
- 2 tablespoons unsalted butter, softened
- 1 1/2 cups powdered sugar
Instructions
- Preheat the oven to 350 degrees F and grease a 6-inch round cake pan. Line the bottom with parchment paper.
- In a medium bowl, whisk together the flour, granulated sugar, black cocoa powder, baking soda, and salt.
- In a separate bowl, whisk the buttermilk, vegetable oil, egg, and 1 teaspoon vanilla extract until smooth.
- Pour the wet mixture into the dry ingredients and stir until just combined. Do not overmix.
- Pour the batter into the prepared pan and bake for 30 to 35 minutes, until a toothpick inserted in the center comes out clean.
- Let the cake cool in the pan for 10 minutes, then transfer it to a wire rack to cool completely.
- In a mixing bowl, beat the cream cheese and butter until creamy. Add the powdered sugar and remaining teaspoon of vanilla extract, then beat until smooth.
- Spread the frosting evenly over the cooled cake. Place a small amount of frosting in a piping bag or zip-top bag with the corner snipped off.
- Pipe thin concentric circles on top of the frosting. Drag a toothpick from the center outward through the circles to form the spiderweb design.
Extra Tips
Use black cocoa powder for the deepest color in the cake layers. If the frosting feels too thick for piping the web, add a teaspoon of milk to loosen it slightly before decorating. Store leftovers in an airtight container in the refrigerator for up to three days and bring slices to room temperature before serving.Course: Dessert Cuisine: American Equipment: Mixing Bowls, 6-Inch Cake Pan, Electric Mixer, Piping Bag
Chocolate Graveyard Dirt Cake
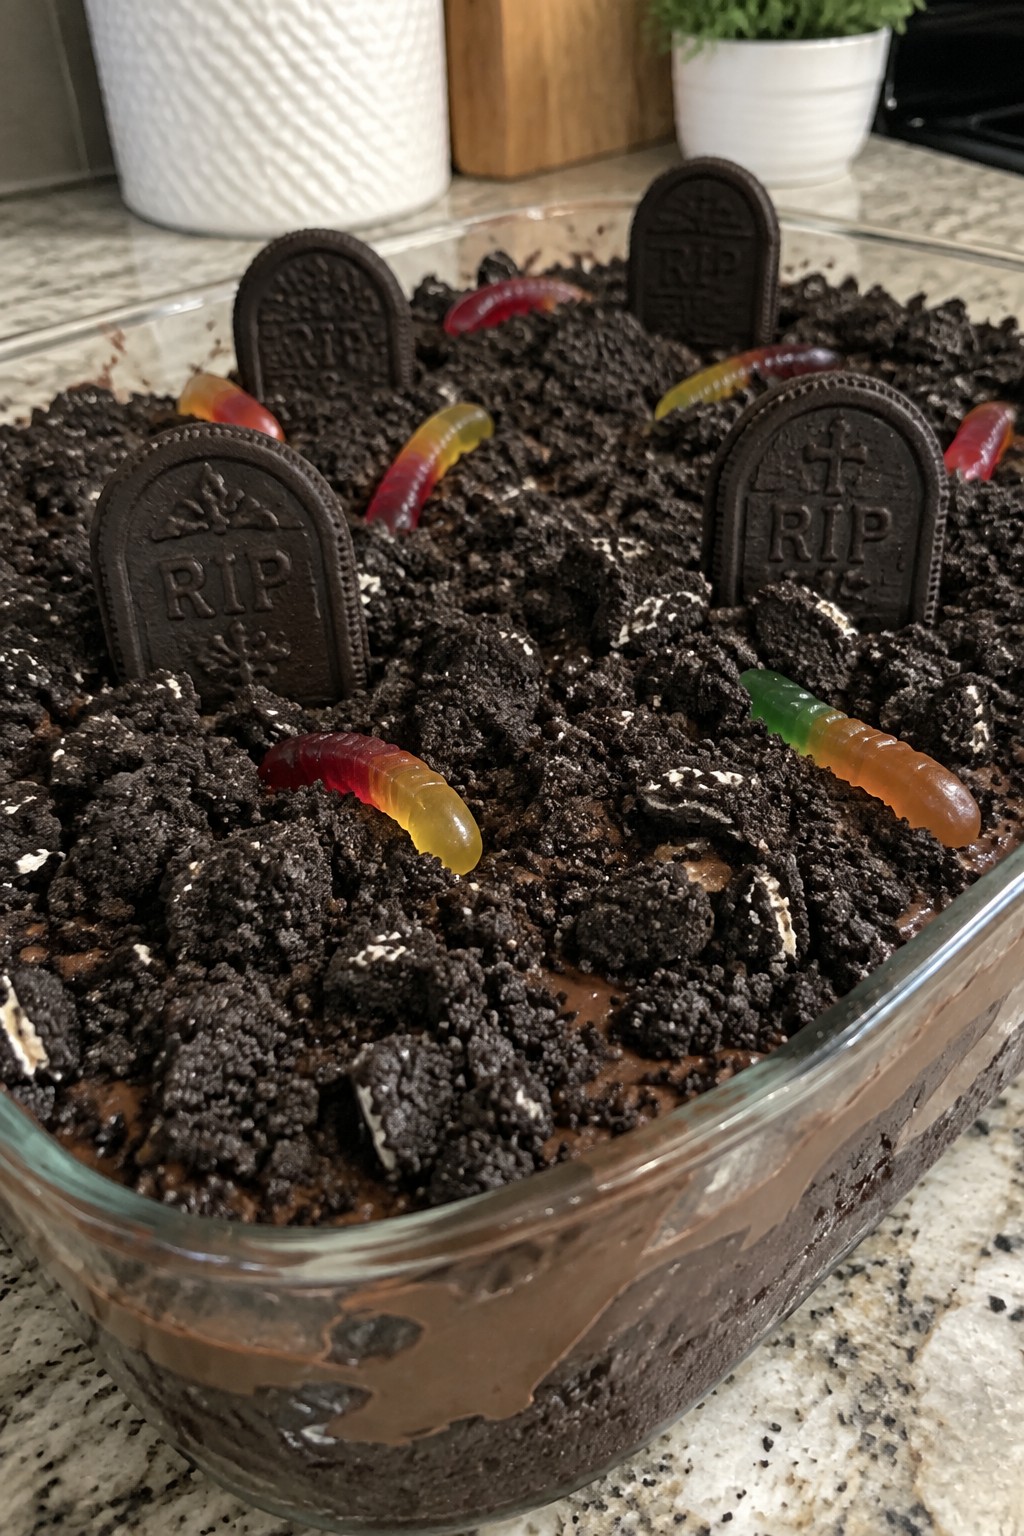
This chocolate graveyard dirt cake turns a simple chocolate base into a fun Halloween centerpiece. The moist cake sits under layers of chocolate pudding and crushed cookies that mimic dirt, with gummy worms and cookie tombstones adding the graveyard detail. It works well for small Halloween parties or family nights when you want a themed dessert without much fuss.
The flavor stays rich and chocolatey while the crushed cookies give a pleasant crunch against the soft pudding and cake. It serves neatly from one dish and holds up well once chilled.
Serves 4 people.
Ingredients
- 1 box (15.25 oz) chocolate cake mix
- 1 cup water
- 1/2 cup vegetable oil
- 3 large eggs
- 2 cups milk
- 1 package instant chocolate pudding mix
- 20 Oreo cookies, crushed
- 8 oz whipped topping
- 12 gummy worms
- 4 chocolate sandwich cookies
Instructions
- Preheat the oven to 350°F. In a mixing bowl, combine the chocolate cake mix, water, vegetable oil, and eggs. Beat until smooth.
- Pour the batter into an 8×8 inch baking dish and bake for 30 minutes, or until a toothpick comes out clean. Let the cake cool completely in the dish.
- In a separate bowl, whisk the instant chocolate pudding mix with the milk until it thickens. Spread the pudding evenly over the cooled cake.
- Spoon the whipped topping over the pudding layer and smooth it out.
- Sprinkle the crushed Oreo cookies across the top to create the dirt effect.
- Press the gummy worms into the cookie layer so they appear to be coming out of the ground. Stand the chocolate sandwich cookies upright at one end of the dish to form tombstones.
Extra Tips
Chill the assembled cake for at least one hour before serving so the pudding firms up and the cookie layer stays crisp. If you make it ahead, add the gummy worms and tombstones just before guests arrive to keep them from softening. Swap the whipped topping for extra pudding if you prefer a denser top layer.Course: Dessert Cuisine: American Equipment: Mixing Bowl, Baking Dish, Whisk
Red Velvet Blood Drip Cake
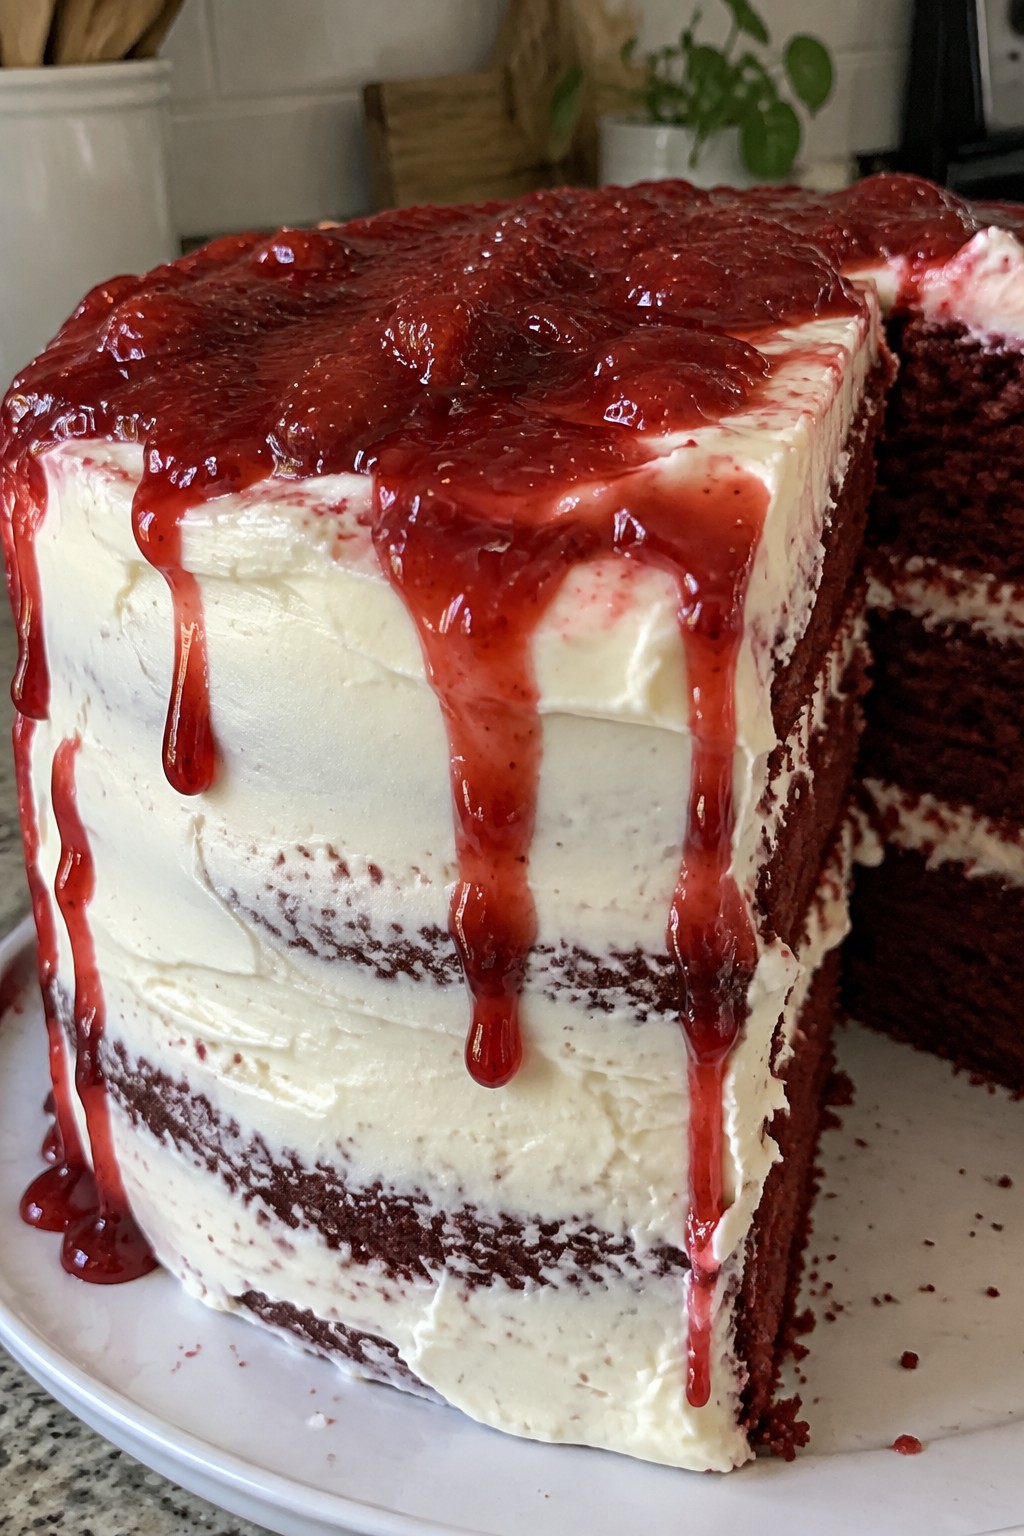
This red velvet cake brings a spooky touch to any Halloween table with its deep red layers and dripping red topping. It works well for small gatherings or as a centerpiece dessert when you want something festive but easy to put together. The cake stays moist with a light cocoa flavor, while the cream cheese frosting adds a tangy contrast and the blood drip gives a sweet fruit note.
Serves 4 people.
Ingredients
- 1 1/4 cups all-purpose flour
- 1 tablespoon unsweetened cocoa powder
- 3/4 cup granulated sugar
- 1/2 teaspoon baking soda
- 1/4 teaspoon salt
- 1/2 cup vegetable oil
- 1/2 cup buttermilk
- 1 large egg
- 1 tablespoon red food coloring
- 1 teaspoon vanilla extract
- 1 teaspoon white vinegar
- 8 ounces cream cheese, softened
- 1/4 cup unsalted butter, softened
- 2 cups powdered sugar
- 1/2 cup strawberry preserves
Instructions
- Preheat the oven to 350 degrees F. Grease a 6-inch round cake pan and line the bottom with parchment paper.
- In a large bowl, whisk together the flour, cocoa powder, sugar, baking soda, and salt.
- In a separate bowl, mix the oil, buttermilk, egg, red food coloring, vanilla extract, and white vinegar until smooth.
- Pour the wet ingredients into the dry ingredients and stir until just combined. Avoid overmixing.
- Pour the batter into the prepared pan and bake for 30 to 35 minutes, or until a toothpick inserted in the center comes out clean.
- Let the cake cool in the pan for 10 minutes, then turn it out onto a wire rack to cool completely.
- Beat the cream cheese and butter together until creamy. Gradually add the powdered sugar and beat until smooth and fluffy.
- Spread the cream cheese frosting over the top and sides of the cooled cake.
- Warm the strawberry preserves in a small saucepan over low heat until it thins slightly. Spoon it over the top of the cake so it drips down the sides.
Extra Tips
Warm the preserves just enough to loosen them without making them too runny, so the drip stays visible. If the frosting feels stiff, add a teaspoon of milk to loosen it before spreading. Store any leftovers in the refrigerator and bring slices to room temperature before serving for the best texture.Course: Dessert Cuisine: American Equipment: Mixing Bowls, 6-inch Cake Pan, Electric Mixer, Wire Rack, Small Saucepan
Caramel Apple Crumb Cake
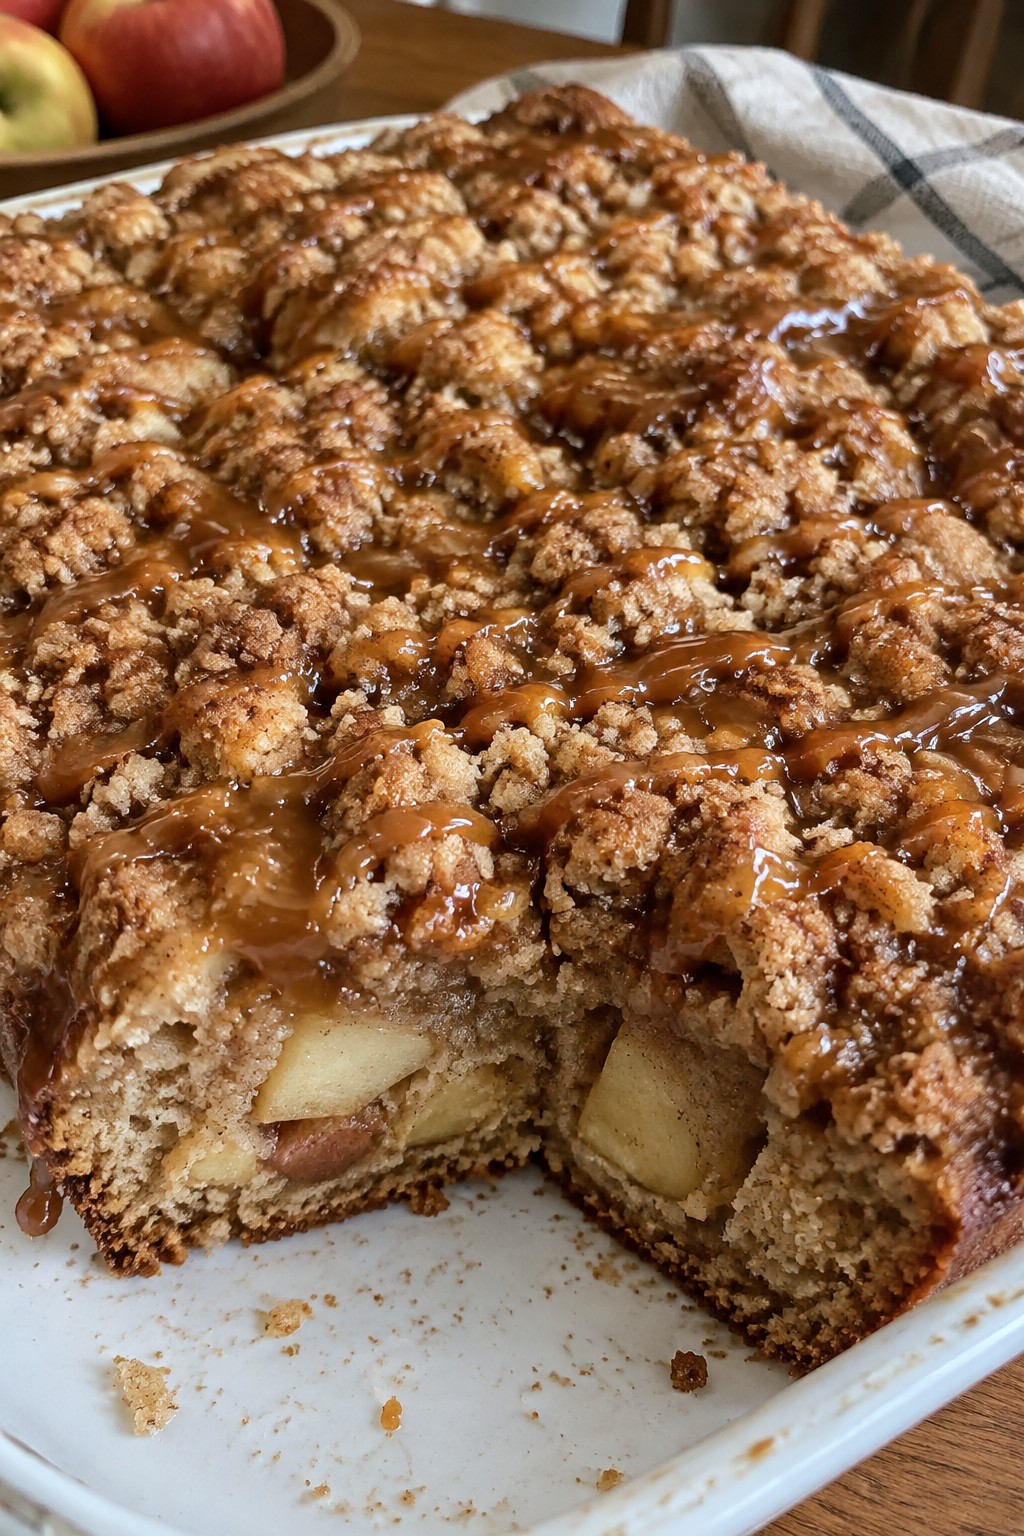
This caramel apple crumb cake combines a lightly spiced base with chunks of fresh apple and a buttery crumb topping. A drizzle of caramel adds sweetness that pairs well with the tender cake and crisp topping. It works nicely for Halloween gatherings or as a simple dessert when you want something seasonal without much fuss.
The flavors lean toward classic fall tastes with warm cinnamon and caramel notes. The texture stays moist from the apples while the crumb layer gives a satisfying crunch.
Serves 4 people.
Ingredients
- 1 cup all-purpose flour
- 1/2 teaspoon baking powder
- 1/2 teaspoon ground cinnamon
- 1/4 cup unsalted butter, softened
- 1/2 cup granulated sugar
- 1 large egg
- 1/4 cup milk
- 2 medium apples, peeled and chopped
- 1/2 cup caramel sauce
- 1/2 cup all-purpose flour (for crumb topping)
- 1/4 cup brown sugar
- 1/4 cup unsalted butter, cold (for crumb topping)
- 1/2 teaspoon ground cinnamon (for crumb topping)
Instructions
- Preheat the oven to 350°F and grease a small 8×8 baking pan.
- In a bowl, whisk together 1 cup flour, baking powder, and 1/2 teaspoon cinnamon.
- In a separate bowl, cream the softened butter with granulated sugar until light. Add the egg and mix well.
- Alternate adding the dry mixture and milk to the butter mixture, stirring until just combined.
- Fold in the chopped apples, then spread the batter evenly in the prepared pan.
- Drizzle half of the caramel sauce over the batter.
- In a small bowl, combine the remaining 1/2 cup flour, brown sugar, and 1/2 teaspoon cinnamon. Cut in the cold butter until the mixture forms coarse crumbs.
- Sprinkle the crumb mixture evenly over the cake.
- Bake for 35 to 40 minutes until a toothpick inserted in the center comes out clean.
- Cool slightly, then drizzle the remaining caramel sauce over the top before slicing.
Extra Tips
Use cold butter for the crumb topping so it stays distinct and crunchy after baking. If the caramel is too thick to drizzle, warm it briefly in the microwave for a few seconds. Leftovers keep well covered at room temperature for one day or in the fridge for up to three days.Course: Dessert Cuisine: American Equipment: Mixing Bowls, Whisk, 8×8 Baking Pan
Monster Green Ombre Layer Cake
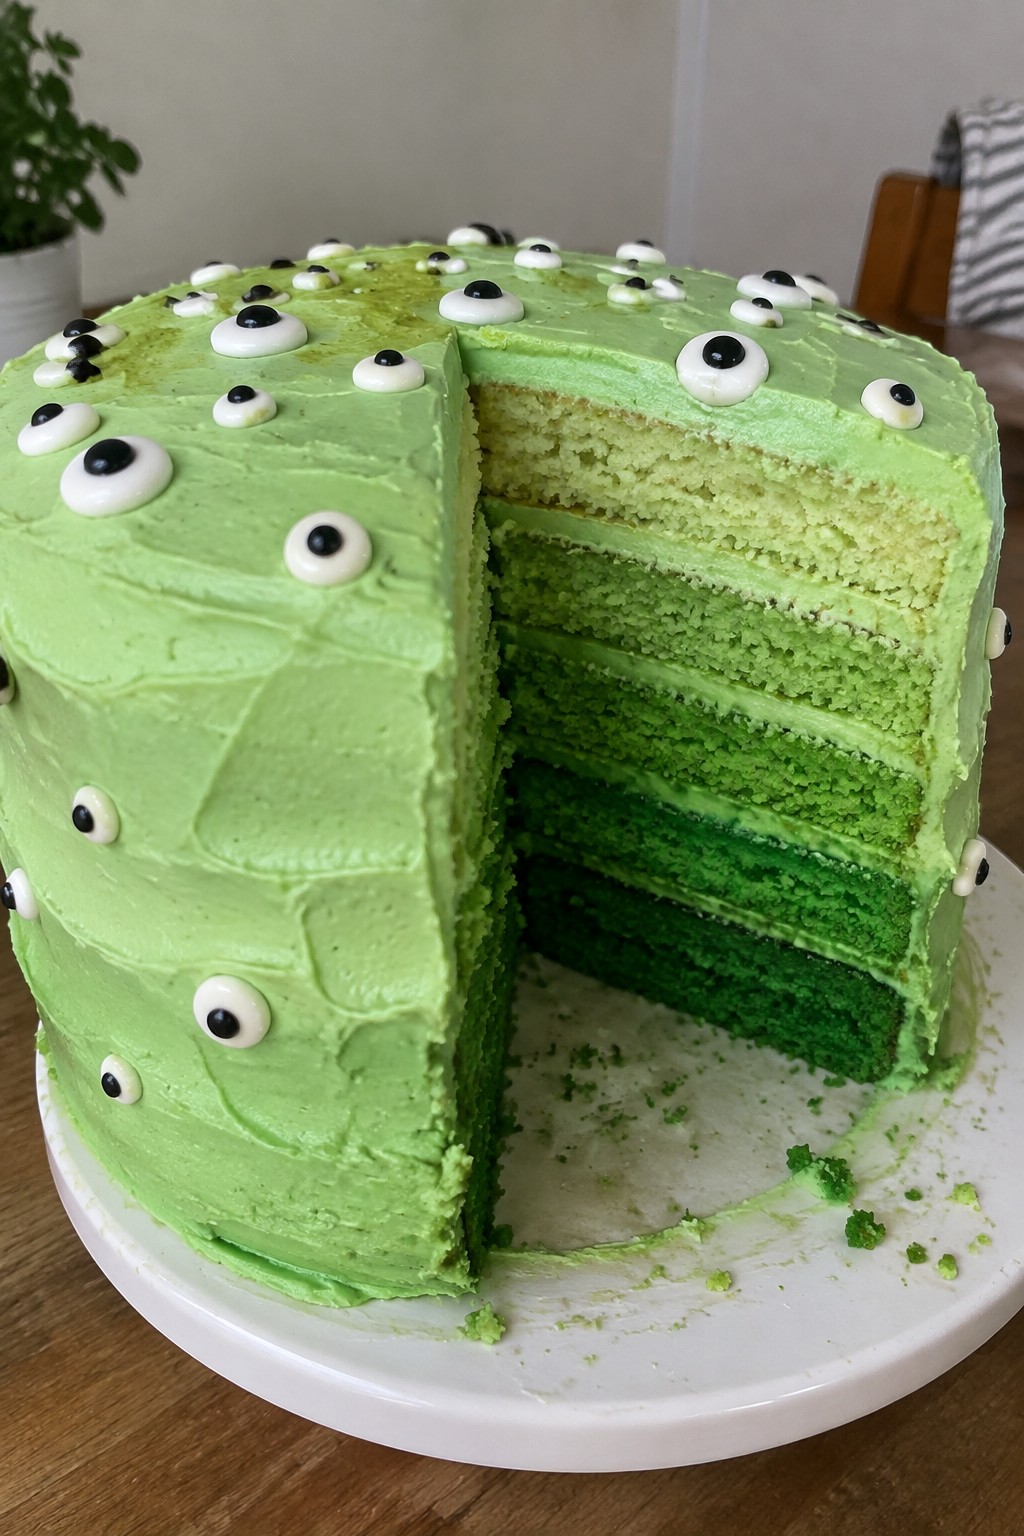
This cake brings a fun Halloween twist with its stacked layers that shift from light green to deep monster green. It works well for small gatherings or kids parties where you want a showy dessert without too much fuss. The vanilla cake stays moist and tender under a simple buttercream that matches the green tones.
Serves 4 people.
Ingredients
- 1 1/2 cups all-purpose flour
- 3/4 cup granulated sugar
- 1/2 cup unsalted butter, softened
- 2 large eggs
- 1/2 cup milk
- 1 1/2 teaspoons baking powder
- 1 teaspoon vanilla extract
- Green gel food coloring
- 1/2 cup unsalted butter, softened
- 2 cups powdered sugar
- 2 tablespoons milk
- Candy eyes
Instructions
- Preheat the oven to 350 degrees F and grease two 6-inch round cake pans. Line the bottoms with parchment paper.
- In a mixing bowl, cream the 1/2 cup softened butter with the granulated sugar until light and fluffy. Beat in the eggs one at a time, then stir in the vanilla extract.
- In a separate bowl, whisk together the flour and baking powder. Add the dry mixture to the wet ingredients in two parts, alternating with the 1/2 cup milk, and mix until just combined.
- Divide the batter evenly into three bowls. Leave one bowl plain, add a small amount of green gel food coloring to the second bowl for a light shade, and add more coloring to the third bowl for a deeper green.
- Pour the three colored batters into the prepared pans in thin layers so the colors create an ombre effect when sliced. Bake for 22 to 25 minutes until a toothpick comes out clean. Cool the layers completely on a wire rack.
- For the frosting, beat the remaining 1/2 cup softened butter with the powdered sugar and 2 tablespoons milk until smooth and spreadable.
- Place one cooled cake layer on a plate and spread a thin layer of frosting on top. Add the second layer and repeat. Frost the outside of the cake and press candy eyes onto the sides for a monster look.
Extra Tips
Divide the batter carefully before coloring so the shades stay distinct and do not blend during baking. Use gel food coloring instead of liquid to keep the texture thick. Store leftovers in an airtight container at room temperature for up to two days.Course: Dessert Cuisine: American Equipment: Mixing bowls, 6-inch cake pans, electric mixer, oven
Witch Hat Chocolate Bundt Cake
This chocolate bundt cake brings a simple Halloween touch to any gathering. The moist crumb and deep cocoa flavor pair well with the playful witch hat decorations on top. It works nicely for small parties or family dessert nights when you want something festive without too much fuss.
The cake bakes in a standard bundt pan and gets finished with a chocolate glaze. Each of the four servings gets its own sugar cone hat coated in melted chocolate and finished with a sprinkle of orange accents.

Serves 4 people.
Ingredients
- 1 cup all-purpose flour
- 3/4 cup granulated sugar
- 1/2 cup unsweetened cocoa powder
- 1 teaspoon baking soda
- 1/2 teaspoon salt
- 1 large egg
- 1/2 cup milk
- 1/4 cup vegetable oil
- 1 teaspoon vanilla extract
- 1/2 cup boiling water
- 8 ounces chocolate chips
- 4 sugar cones
- 2 tablespoons orange sprinkles
Instructions
- Preheat the oven to 350°F and grease a small bundt pan. In a large bowl, whisk together the flour, sugar, cocoa powder, baking soda, and salt.
- Add the egg, milk, oil, and vanilla extract to the dry ingredients. Stir until the batter is smooth and thick.
- Slowly pour in the boiling water while stirring. The batter will thin out but stay consistent.
- Pour the batter into the prepared bundt pan and bake for 30 to 35 minutes, or until a toothpick inserted in the center comes out clean. Let the cake cool in the pan for 10 minutes, then turn it out onto a wire rack to cool completely.
- Melt 6 ounces of the chocolate chips in a microwave-safe bowl, stirring every 30 seconds until smooth. Brush or dip the sugar cones in the melted chocolate to coat them, then set them on parchment paper to harden. Reserve the remaining melted chocolate for the glaze.
- Once the cake has cooled, drizzle or spread the remaining melted chocolate over the top as a glaze. Place one chocolate-coated sugar cone on each of the four cake sections and scatter the orange sprinkles around the base of each cone.
Extra Tips
Melt the chocolate slowly to avoid seizing, and let the coated cones set fully before placing them on the cake so they stand upright. If the glaze thickens too much while you work, warm it for a few seconds in the microwave. Leftovers keep well in an airtight container at room temperature for two days.Course: Dessert Cuisine: American Equipment: Bundt Pan, Mixing Bowls, Whisk, Microwave-Safe Bowl, Wire Rack
Candy Corn Swirl Pound Cake
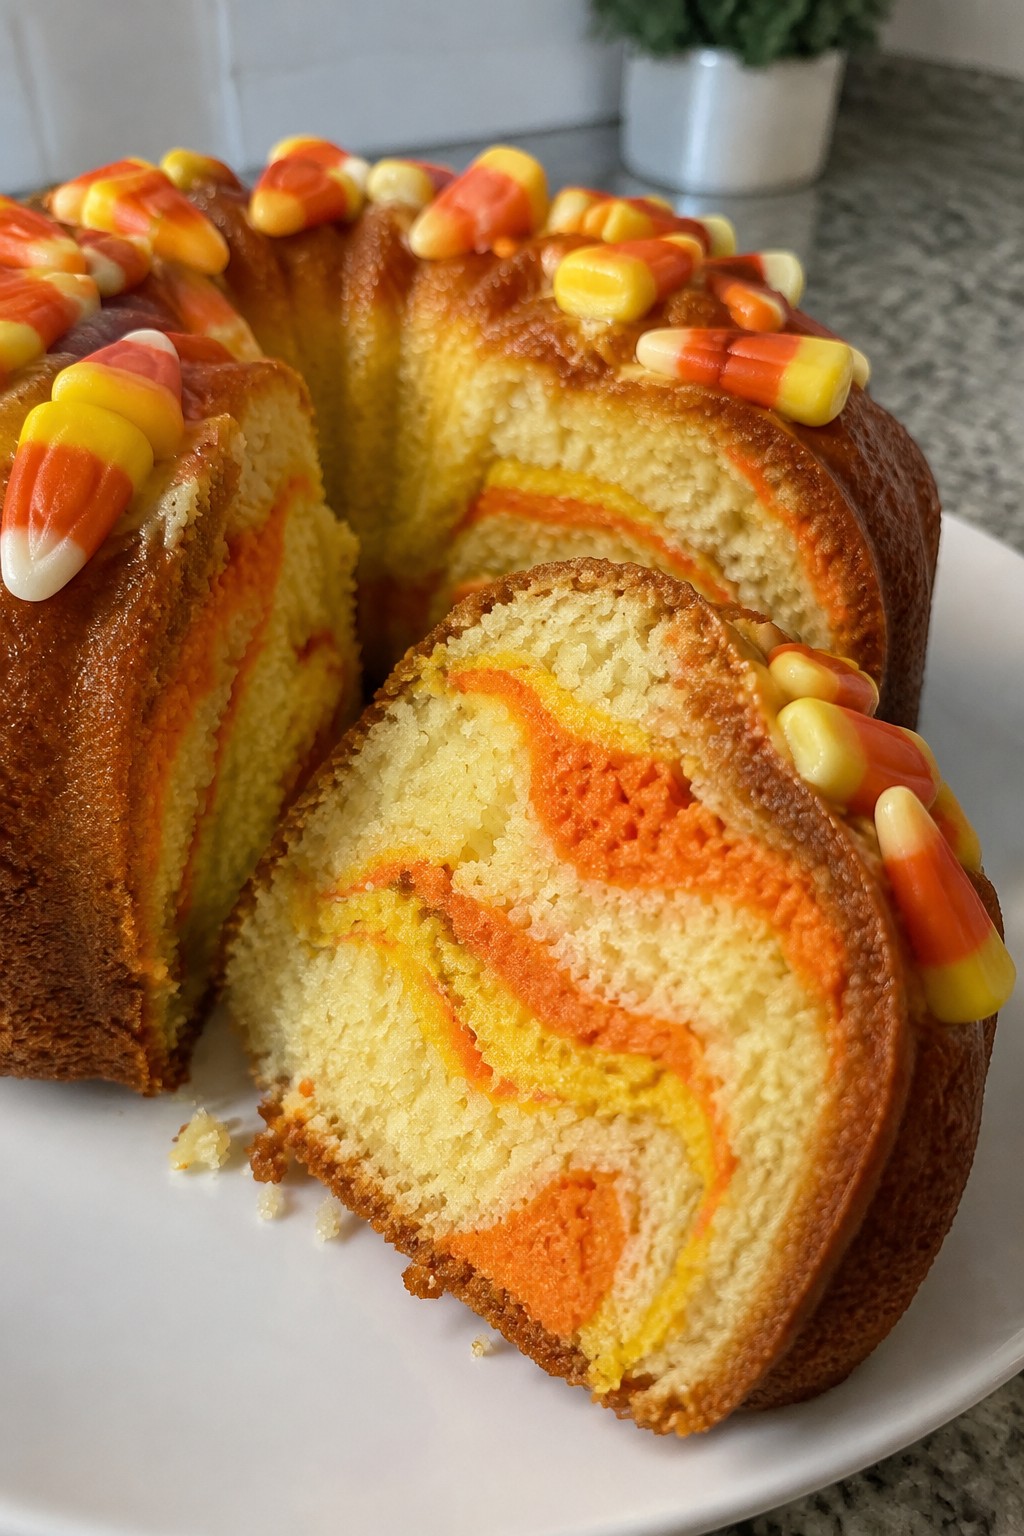
This pound cake brings a playful Halloween touch with its colorful swirls that echo the layers of candy corn. The buttery base stays moist and dense, making it a reliable choice for fall gatherings or a simple weekend bake that looks festive without extra fuss.
It works well as a centerpiece for small parties or as a treat to share with family. The vanilla flavor keeps things familiar while the visual effect stands out on any dessert table.
Serves 4 people.
Ingredients
- 1 cup all-purpose flour
- 1/2 cup unsalted butter, softened
- 3/4 cup granulated sugar
- 2 large eggs
- 1 teaspoon vanilla extract
- 1/2 teaspoon baking powder
- 1/4 teaspoon salt
- Yellow food coloring
- Orange food coloring
- Candy corn pieces for topping
Instructions
- Preheat the oven to 350 degrees and grease a small loaf pan.
- Cream the butter and sugar in a mixing bowl until light and fluffy.
- Beat in the eggs one at a time, then stir in the vanilla extract.
- Whisk together the flour, baking powder, and salt in a separate bowl.
- Fold the dry ingredients into the wet mixture until just combined.
- Divide the batter evenly into three smaller bowls.
- Leave one bowl plain, tint the second with yellow food coloring, and tint the third with orange food coloring.
- Spoon the batters into the loaf pan in alternating layers to create a swirl effect.
- Bake for 45 to 50 minutes until a toothpick inserted in the center comes out clean.
- Cool the cake in the pan for 10 minutes, then remove and top with candy corn pieces before slicing.
Extra Tips
Divide the batter carefully before adding color so the plain section stays bright white. Press the candy corn pieces on while the cake is still slightly warm so they stick without melting. Store leftovers in an airtight container at room temperature for up to three days.Course: Dessert Cuisine: American Equipment: Mixing Bowls, Loaf Pan, Oven
Haunted Forest Matcha Cake
This matcha cake offers an earthy green base that sets a woodland scene for Halloween. Dark chocolate details add contrast and a sense of depth without overpowering the flavor. The result is a moist slice with balanced sweetness that works well for a small gathering or as a centerpiece dessert.
The cake pairs the grassy notes of matcha with a simple chocolate garnish that mimics bare trees. Crushed cookies create a dark ground layer that ties the look together.

Serves 4 people.
Ingredients
- 1 cup all-purpose flour
- 2 tablespoons matcha powder
- ¾ cup granulated sugar
- ½ cup unsalted butter, softened
- 2 large eggs
- ½ cup milk
- 1 teaspoon baking powder
- ½ teaspoon vanilla extract
- ¼ teaspoon salt
- 4 ounces dark chocolate, chopped
- ¼ cup heavy cream
- ½ cup crushed chocolate wafer cookies
Instructions
- Preheat the oven to 350°F and grease a 6-inch round cake pan. Line the bottom with parchment paper.
- In a mixing bowl, whisk together the flour, matcha powder, baking powder, and salt until evenly combined.
- In a separate bowl, beat the softened butter and sugar until light and fluffy. Add the eggs one at a time, then stir in the vanilla extract.
- Alternate adding the dry ingredients and milk to the butter mixture, starting and ending with the dry ingredients. Mix until just smooth.
- Pour the batter into the prepared pan and bake for 25 to 30 minutes, or until a toothpick inserted in the center comes out clean. Cool the cake in the pan for 10 minutes, then turn it out onto a wire rack.
- While the cake cools, place the chopped dark chocolate in a heatproof bowl. Heat the heavy cream in a small saucepan until it just begins to simmer, then pour it over the chocolate. Let it sit for one minute and stir until smooth.
- Once the cake is fully cool, spread the crushed chocolate wafer cookies over the top to form a base layer. Drizzle or pipe the chocolate ganache into thin tree shapes across the surface.
Extra Tips
Pipe the ganache while it is still slightly warm so the lines stay thin and defined without cracking. If the matcha flavor tastes too strong after baking, a light dusting of powdered sugar can soften it. Store leftovers in an airtight container at room temperature for up to two days.Course: Dessert Cuisine: Japanese Fusion Equipment: Mixing Bowl, Cake Pan, Whisk, Saucepan, Wire Rack
Jack-o’-Lantern Orange Creamsicle Cake
This cake brings together moist orange layers and a light vanilla cream frosting for a simple Halloween dessert. The bright citrus pairs with sweet cream to create a creamsicle taste that feels festive without extra fuss. It suits small gatherings and works as a colorful table centerpiece.
The jack-o’-lantern face on top adds a playful touch while keeping the focus on the orange and vanilla flavors.

Serves 4 people.
Ingredients
- 1 1/2 cups all-purpose flour
- 1 cup granulated sugar
- 1/2 cup unsalted butter, softened
- 2 large eggs
- 1/2 cup fresh orange juice
- 1 tablespoon orange zest
- 1 teaspoon vanilla extract
- 1 1/2 teaspoons baking powder
- 1/4 teaspoon salt
- 1 cup heavy cream
- 1/2 cup powdered sugar
- Orange food coloring
- Black icing
Instructions
- Heat the oven to 350 degrees and grease a 6-inch round cake pan.
- In a mixing bowl, beat the softened butter and granulated sugar until light. Add the eggs one at a time, mixing well after each.
- Stir in the orange juice, orange zest, and vanilla extract until combined.
- In a separate bowl, whisk the flour, baking powder, and salt. Slowly add the dry mix to the wet ingredients and stir until smooth.
- Pour the batter into the prepared pan and bake for 30 to 35 minutes, until a toothpick comes out clean. Let the cake cool completely.
- In a clean bowl, whip the heavy cream with the powdered sugar until soft peaks form. Add a few drops of orange food coloring and whip until the color is even.
- Slice the cooled cake in half horizontally to make two layers. Spread half the orange cream between the layers, then cover the top and sides with the remaining cream.
- Use the black icing to pipe eyes, nose, and a mouth on top to create the jack-o’-lantern face.
Extra Tips
Whip the cream just until it holds shape so the frosting stays light and does not turn grainy. If the orange juice tastes too tart, add a pinch more sugar to the batter before baking. Store leftovers in the fridge and bring slices to room temperature for 10 minutes before serving to soften the cream.Course: Dessert Cuisine: American Equipment: Mixing Bowl, 6-inch Cake Pan, Electric Mixer
Skeleton Bone White Chocolate Cake
This white chocolate cake stands out with its clean flavor and striking bone-shaped decorations made from the same chocolate. It works well for a small Halloween gathering or as a themed dessert that still tastes like a regular cake. The crumb stays moist with a mild sweetness that pairs nicely with the smooth white chocolate accents.

Serves 4 people.
Ingredients
- 8 ounces white chocolate, chopped and divided
- 1/2 cup unsalted butter
- 3/4 cup granulated sugar
- 2 large eggs
- 1 teaspoon vanilla extract
- 1 1/2 cups all-purpose flour
- 1 teaspoon baking powder
- 1/2 teaspoon salt
- 1/2 cup milk
Instructions
- Preheat the oven to 350 degrees and line an 8-inch round cake pan with parchment paper.
- Place 4 ounces of the white chocolate and the butter in a microwave-safe bowl. Heat in 20-second bursts until melted, then stir until smooth.
- In a mixing bowl, whisk the melted chocolate mixture with the sugar until combined. Add the eggs one at a time, followed by the vanilla extract.
- In a separate bowl, whisk together the flour, baking powder, and salt. Add half the dry ingredients to the wet mixture, then pour in the milk and stir. Add the remaining dry ingredients and mix until no streaks remain.
- Pour the batter into the prepared pan and bake for 28 to 32 minutes, until a toothpick inserted in the center comes out clean. Let the cake cool in the pan for 10 minutes before turning it out onto a wire rack.
- While the cake cools, melt the remaining 4 ounces of white chocolate. Spoon it into a piping bag or zip-top bag with a small corner cut off. Pipe bone shapes onto a sheet of parchment paper and chill until set.
- Once the cake is fully cool, arrange the white chocolate bones on top.
Extra Tips
Pipe the bone shapes a little thicker than you think they need to be so they hold their form after chilling. If the white chocolate thickens while piping, warm the bag briefly between your hands. Store leftovers in an airtight container at room temperature for up to two days.Course: Dessert Cuisine: American Equipment: Mixing bowls, 8-inch cake pan, Microwave-safe bowl, Piping bag, Parchment paper
Bat Wing Devil’s Food Cake
This rich chocolate cake brings a fun Halloween twist with dark chocolate bat wings perched on top. It works well for small gatherings or as a standout dessert at a party. The cake stays moist with a deep cocoa flavor and a smooth ganache finish.
The bat wings add a playful touch without extra fuss. Dark chocolate gives them a glossy look that stands out against the cake.

Serves 4 people.
Ingredients
- 1 cup all-purpose flour
- 3/4 cup granulated sugar
- 1/2 cup unsweetened cocoa powder
- 1/2 cup buttermilk
- 1/4 cup unsalted butter, melted
- 2 large eggs
- 1 teaspoon baking soda
- 1/2 teaspoon vanilla extract
- 1/4 teaspoon salt
- 6 ounces dark chocolate, divided
- 1/4 cup heavy cream
Instructions
- Preheat the oven to 350°F. Grease an 8-inch round cake pan and line the bottom with parchment paper.
- In a large bowl, whisk together the flour, sugar, cocoa powder, baking soda, and salt.
- In another bowl, beat the eggs, then stir in the buttermilk, melted butter, and vanilla extract.
- Pour the wet ingredients into the dry ingredients and mix until just combined. The batter will be thick.
- Spread the batter evenly in the prepared pan. Bake for 25 to 30 minutes, or until a toothpick inserted in the center comes out clean.
- Let the cake cool in the pan for 10 minutes, then transfer it to a wire rack to cool completely.
- While the cake cools, make the ganache. Chop 4 ounces of the dark chocolate and place it in a heatproof bowl. Heat the heavy cream until it just starts to simmer, then pour it over the chocolate. Let it sit for 2 minutes, then stir until smooth.
- Spread the ganache over the cooled cake. Melt the remaining 2 ounces of dark chocolate. Spoon or pipe it into 8 small bat wing shapes on a sheet of parchment paper. Let them set at room temperature.
- Once the wings are firm, gently press them into the top of the cake to stand upright.
Extra Tips
Use a piping bag or zip-top bag with the corner snipped for cleaner bat wing shapes. If the ganache thickens too much while spreading, warm it gently over low heat. Store leftovers in an airtight container at room temperature for up to two days.Course: Dessert Cuisine: American Equipment: Mixing bowls, 8-inch cake pan, parchment paper, wire rack
Zombie Brain Marble Cake
This marble cake brings chocolate and vanilla swirls together in a single loaf that looks striking on a Halloween table. The raspberry swirl running through the center gives it a gory touch without extra work, so it fits both spooky displays and everyday dessert needs.
The cake stays moist from the butter and milk, while the cocoa adds depth against the mild vanilla. Slice it to show the marbled pattern inside and the red ribbon that resembles brain folds.

Serves 4 people.
Ingredients
- 1 1/2 cups all-purpose flour
- 3/4 cup granulated sugar
- 1/2 cup unsalted butter, softened
- 2 large eggs
- 1/2 cup milk
- 2 teaspoons vanilla extract
- 1/4 cup unsweetened cocoa powder
- 1/4 cup raspberry preserves
Instructions
- Heat the oven to 350 degrees and grease a small loaf pan.
- In a mixing bowl, beat the softened butter and sugar until light and fluffy.
- Add the eggs one at a time, mixing well after each addition, then stir in the vanilla.
- Alternate adding the flour and milk to the butter mixture, stirring until the batter is smooth.
- Scoop half the batter into a second bowl and stir the cocoa powder into it.
- Spoon the plain batter and the chocolate batter into the loaf pan in alternating layers.
- Drop small spoonfuls of raspberry preserves over the batter and swirl gently with a knife.
- Bake for 45 to 50 minutes until a toothpick comes out clean.
- Cool the cake in the pan for 10 minutes, then turn it out onto a wire rack to finish cooling.
Extra Tips
Warm the raspberry preserves slightly before swirling so it spreads more evenly through the batter. If you want a stronger red line, stir a drop of food coloring into the preserves first. Store leftovers wrapped at room temperature for up to two days.Course: Dessert Cuisine: American Equipment: Mixing Bowls, Loaf Pan, Whisk, Oven
