
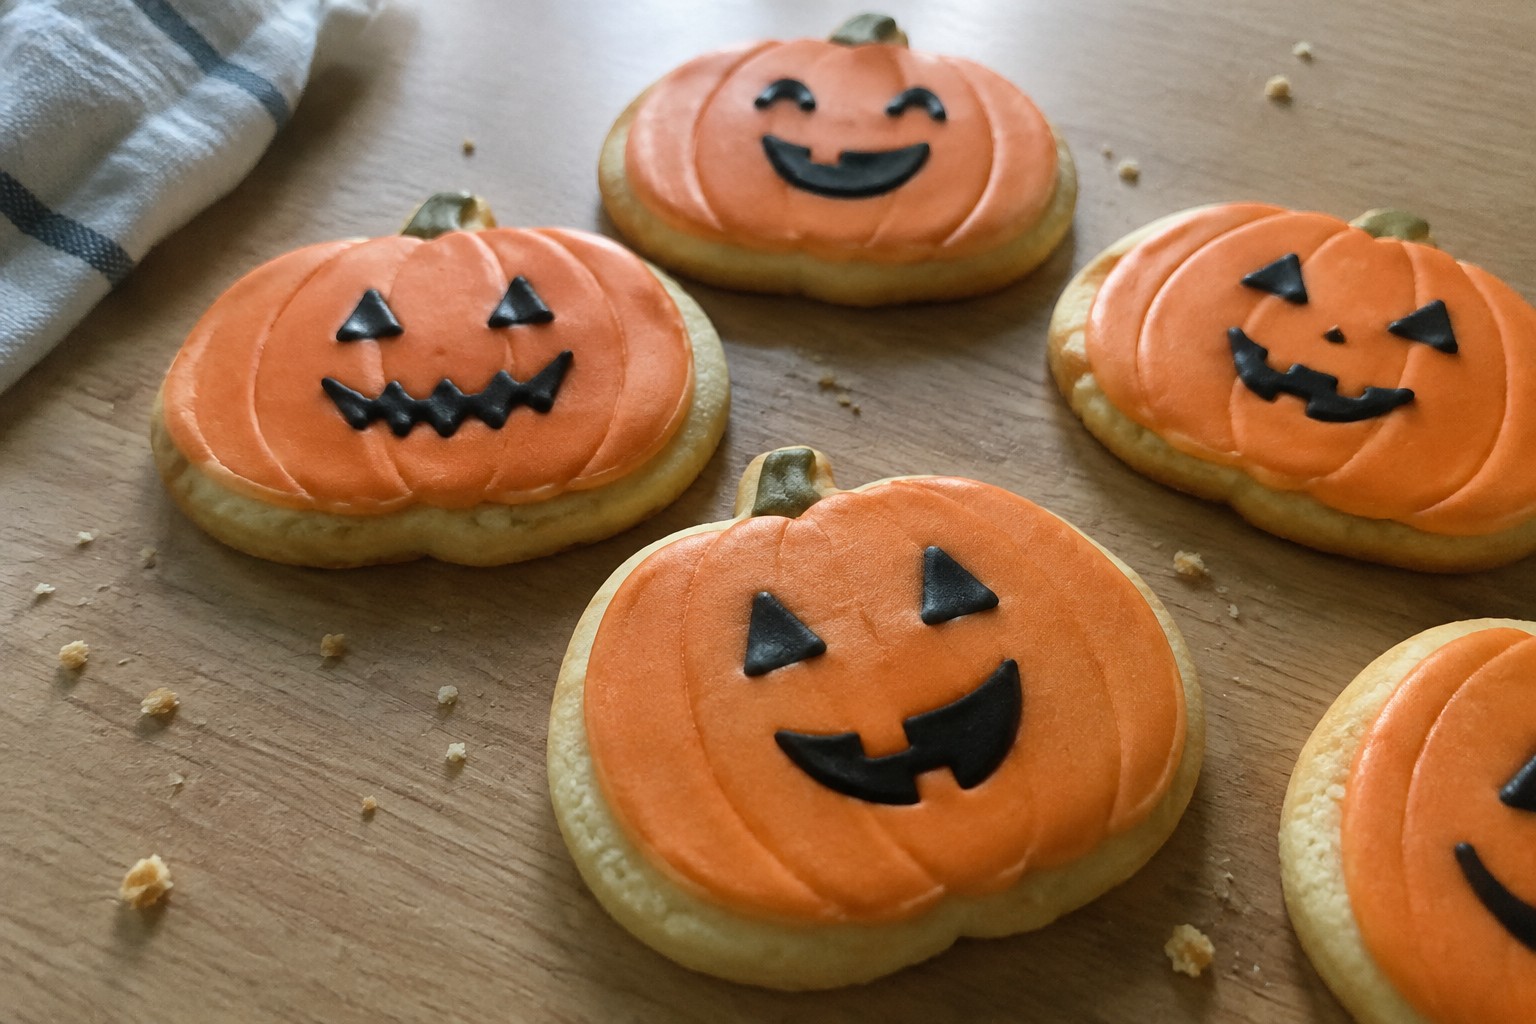
Halloween baking does not need to be complicated. This list has recipes that fit different skill levels so you can choose what works for you. Most of the ideas use pantry staples and simple steps. You can make them ahead or on the day depending on your schedule. Look through and pick the ones that match the time and tools you have.
Helpful Tips Before You Start
These tips will help your Halloween baking go smoothly from start to finish.
Measure Everything First
Set out all ingredients in bowls before you start mixing. This prevents mistakes when following recipes at any skill level.
Match Recipes to Your Experience
Choose easier no-bake or drop cookie options if you are new to baking. Save multi-step decorated cakes for when you have more time and practice.
Prep Decorations Ahead
Sort sprinkles, candies, and icing colors the day before. Having them ready keeps the final steps quick and less messy.
Cool Items Fully Before Decorating
Let cookies and cakes reach room temperature on a rack. Warm surfaces cause icing to slide or colors to bleed.
Pumpkin Chocolate Chunk Cookies
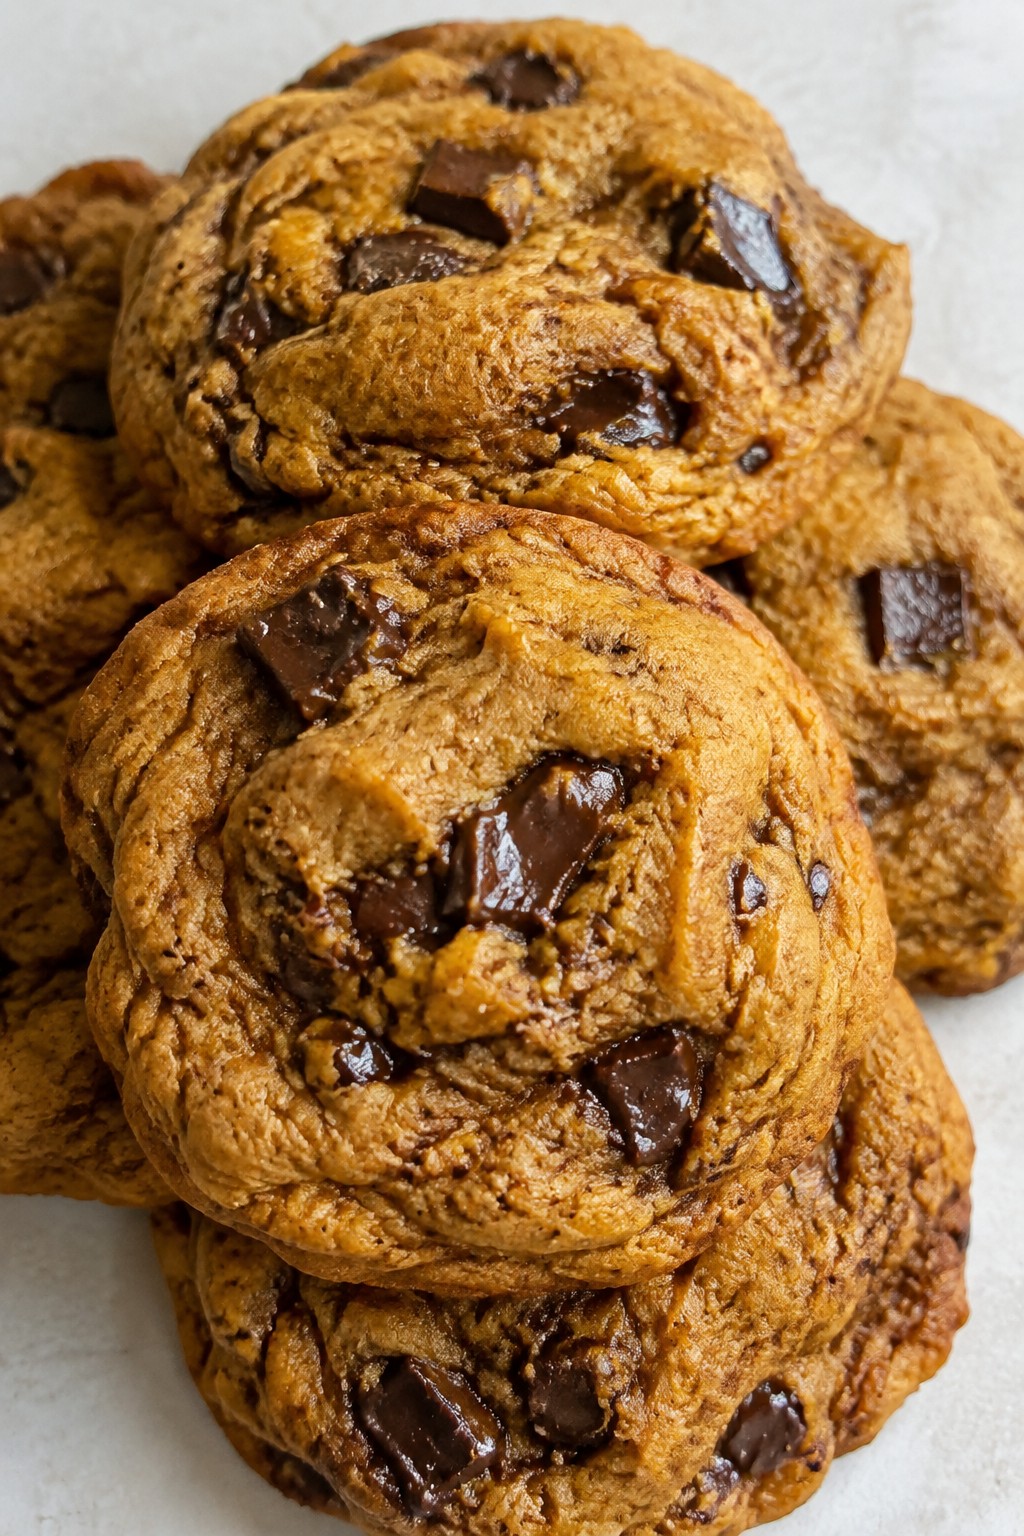
These cookies combine pumpkin with warm spices and plenty of chocolate chunks. They make a simple Halloween treat that feels seasonal and works for everything from school snacks to casual get-togethers.
The result is a soft, slightly cake-like cookie with chewy edges and pockets of melted chocolate. The pumpkin keeps them moist, so they stay fresh longer than standard cookies.
Serves 4 people.
Ingredients
- ½ cup pumpkin puree
- 1½ cups all-purpose flour
- ½ cup unsalted butter, softened
- ½ cup brown sugar
- ¼ cup granulated sugar
- 1 large egg
- 1 teaspoon vanilla extract
- 1 teaspoon ground cinnamon
- ½ teaspoon baking soda
- ¼ teaspoon salt
- 1 cup chocolate chunks
Instructions
- Preheat the oven to 350°F and line a baking sheet with parchment paper.
- In a mixing bowl, whisk together the flour, cinnamon, baking soda, and salt.
- In a second bowl, beat the softened butter with the brown sugar and granulated sugar until light and creamy.
- Add the pumpkin puree, egg, and vanilla extract to the butter mixture and stir until smooth.
- Gradually mix the dry ingredients into the wet ingredients until just combined.
- Fold in the chocolate chunks.
- Scoop rounded tablespoons of dough onto the prepared baking sheet, spacing them a few inches apart.
- Bake for 12 to 14 minutes, until the edges are lightly golden.
- Let the cookies cool on the baking sheet for 5 minutes before moving them to a wire rack.
Extra Tips
Pumpkin makes the dough softer than typical cookie dough, so avoid overmixing once the flour is added or the cookies can turn dense. If the dough feels too sticky to scoop, chill it for 20 minutes. Store cooled cookies in an airtight container at room temperature for up to three days to keep the chocolate from blooming.Course: Dessert Cuisine: American Equipment: Mixing Bowl, Baking Sheet, Oven
Ghost Meringue Kisses
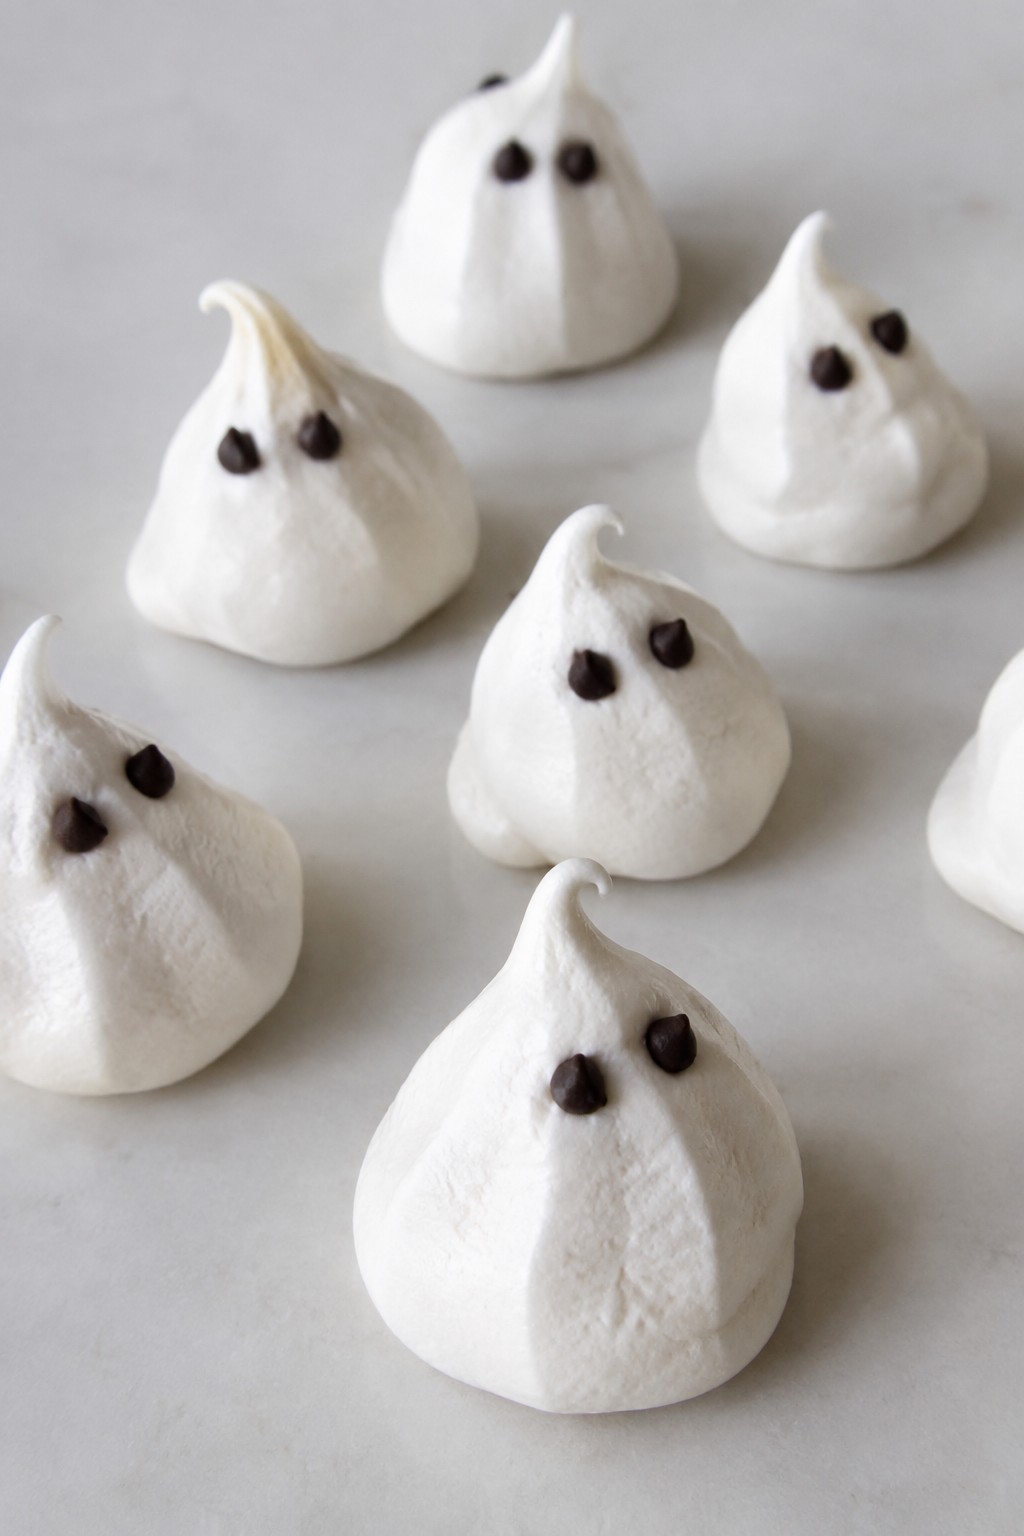
These ghost meringue kisses offer a light and airy treat that fits right into Halloween baking. They come together with basic pantry items and create a crisp outside with a soft center. The vanilla flavor keeps them simple yet appealing for both kids and adults at any gathering.
They work well as a last minute addition to a dessert table or as an activity to do ahead of a party. Pipe them into small ghost shapes and they add a playful element without needing advanced decorating skills.
Serves 4 people.
Ingredients
- 2 large egg whites
- 1/2 cup granulated sugar
- 1/4 teaspoon cream of tartar
- 1/2 teaspoon vanilla extract
- 24 mini chocolate chips
Instructions
- Preheat the oven to 200 degrees F and line a baking sheet with parchment paper.
- Place the egg whites and cream of tartar in a mixing bowl. Beat on medium speed until the mixture turns foamy.
- Increase the speed and add the sugar a tablespoon at a time. Continue beating until stiff peaks form and the mixture looks glossy.
- Beat in the vanilla extract until it is fully combined.
- Spoon the meringue into a piping bag fitted with a round tip. Pipe small ghost shapes onto the prepared baking sheet.
- Bake for 90 minutes until the ghosts feel dry to the touch. Turn off the oven and leave them inside to cool completely.
- Once cooled, press two mini chocolate chips into each ghost to form eyes.
Extra Tips
Pipe the ghosts with a slightly wider base so they stand upright after baking. If the meringue feels too soft to hold shape, beat it a bit longer before piping. Store the finished kisses in an airtight container at room temperature to keep them crisp for up to three days.Course: Dessert Cuisine: American Equipment: Mixing Bowl, Electric Mixer, Piping Bag, Baking Sheet
Spiderweb Sugar Cookies
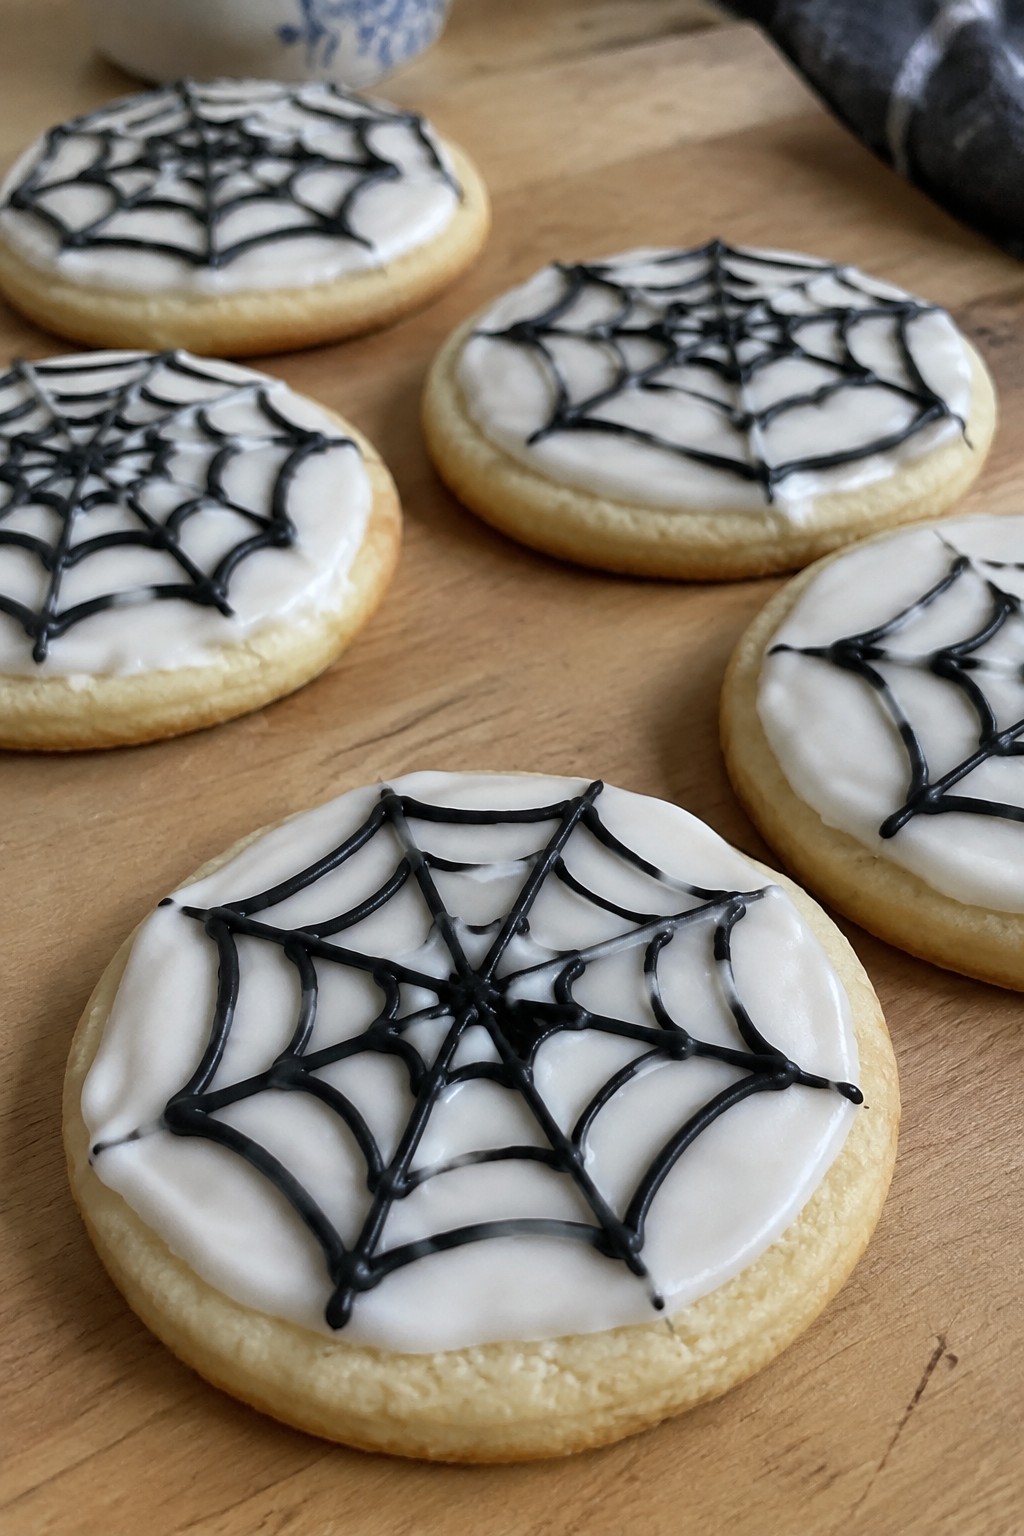
These spiderweb sugar cookies add a festive Halloween touch without much fuss. The classic buttery base pairs with a simple two-tone icing that creates the web effect right on top.
The cookies bake up soft with lightly crisp edges. They suit casual gatherings or a low-pressure baking session with family.
Serves 4 people.
Ingredients
- 1 1/4 cups all-purpose flour
- 1/2 teaspoon baking powder
- 1/4 teaspoon salt
- 1/2 cup unsalted butter, softened
- 1/2 cup granulated sugar
- 1 large egg
- 1 teaspoon vanilla extract
- 1 1/2 cups powdered sugar
- 3 tablespoons milk
- Black food coloring
Instructions
- Whisk the flour, baking powder, and salt in a bowl and set it aside.
- Beat the butter and granulated sugar until light and fluffy, then mix in the egg and vanilla extract.
- Stir the dry ingredients into the wet mixture until a dough forms.
- Roll the dough into a disk, wrap it, and chill for 30 minutes.
- Heat the oven to 350 degrees and line a baking sheet with parchment.
- Roll the dough to 1/4-inch thickness, cut into rounds, and place them on the sheet.
- Bake for 10 to 12 minutes until the edges turn lightly golden, then cool completely.
- Stir the powdered sugar and milk into a smooth white icing.
- Divide the icing in half and tint one portion black with food coloring.
- Spread a thin layer of white icing on each cookie.
- Pipe thin black circles onto the white icing, then drag a toothpick from the center outward to form the web pattern.
Extra Tips
Pipe the black icing while the white layer is still slightly tacky so the lines hold their shape without bleeding. Store the finished cookies in a single layer inside an airtight container at room temperature for up to three days.Course: Dessert Cuisine: American Equipment: Mixing Bowls, Baking Sheet, Piping Bag, Toothpick
Pumpkin Cheesecake Swirl Bars
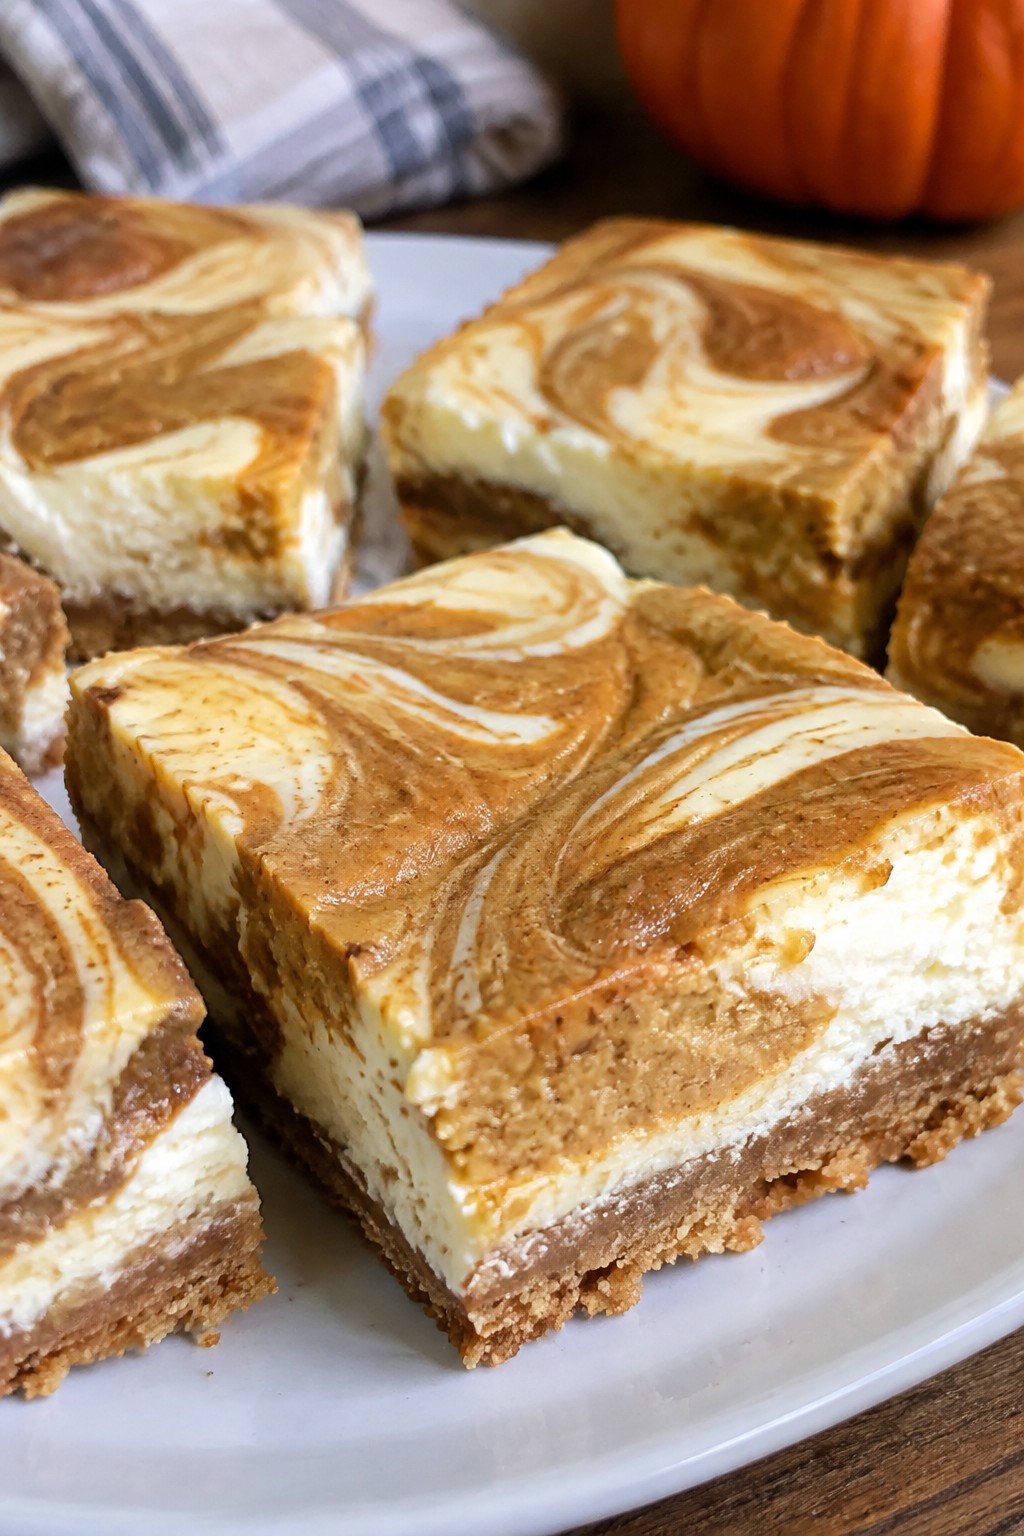
These Pumpkin Cheesecake Swirl Bars combine a buttery graham crust with layers of spiced pumpkin and plain cheesecake. The simple swirl pattern gives them a festive look that fits right into Halloween without extra decoration.
They work well for small gatherings or as a make-ahead dessert for the week. The finished bars have a creamy texture with warm pumpkin spice notes and a crisp base.
Serves 4 people.
Ingredients
- 3/4 cup graham cracker crumbs
- 3 tablespoons unsalted butter, melted
- 8 ounces cream cheese, softened
- 1/3 cup granulated sugar
- 1 large egg
- 1/2 cup pumpkin puree
- 1 teaspoon pumpkin pie spice
- 1/2 teaspoon vanilla extract
Instructions
- Preheat the oven to 350°F and line a small square baking pan with parchment paper.
- Stir the graham cracker crumbs and melted butter together until evenly moistened. Press the mixture firmly into the bottom of the prepared pan.
- In a mixing bowl, beat the cream cheese and sugar until smooth. Add the egg and vanilla extract and mix until fully combined.
- Scoop out half of the cream cheese mixture and set it aside. Stir the pumpkin puree and pumpkin pie spice into the remaining mixture until uniform.
- Drop spoonfuls of the plain and pumpkin mixtures over the crust. Use a knife to gently swirl the two together.
- Bake for 25 to 28 minutes until the center is just set. Cool completely at room temperature, then refrigerate before slicing.
Extra Tips
For the cleanest swirls, use a light hand with the knife and avoid overmixing the layers. Store any leftovers covered in the refrigerator for up to three days. The bars taste best chilled, which helps the cheesecake layer stay firm.Course: Dessert Cuisine: American Equipment: Mixing Bowl, Baking Pan, Electric Mixer
Black Cocoa Cupcakes with Orange Buttercream
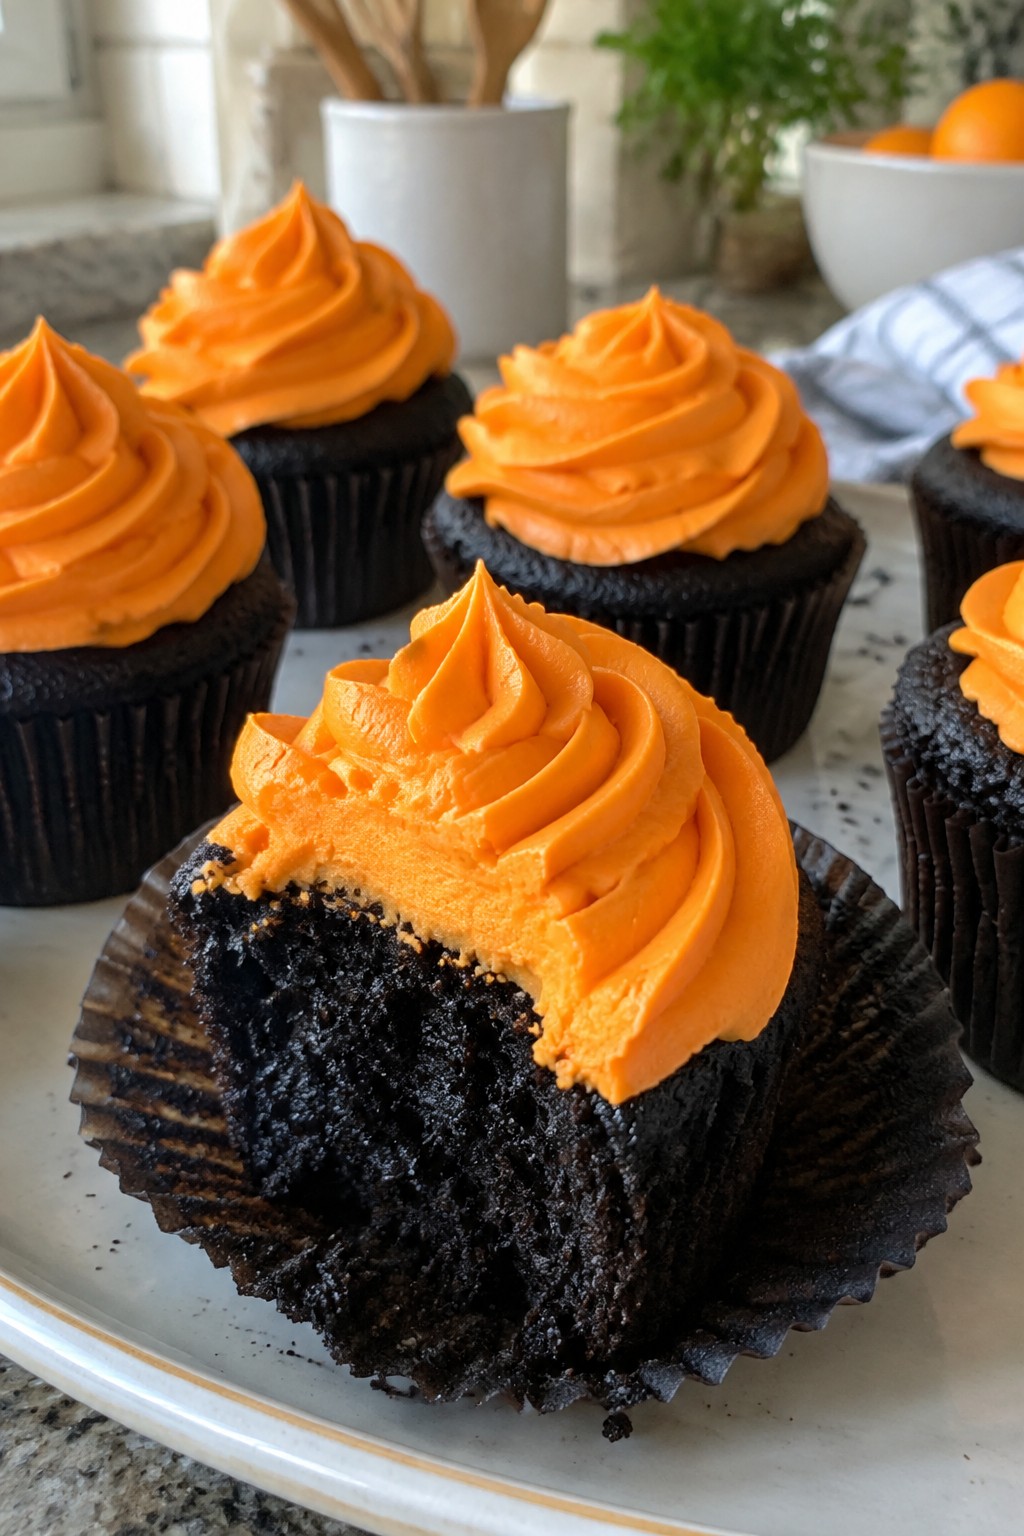
These cupcakes bring a striking dark color and rich chocolate taste that stands out at any fall gathering. The orange buttercream adds a bright citrus note that balances the deep cocoa flavor. They work well for a small Halloween party or as a weekend baking project when you want something festive without too much fuss.
The texture stays moist thanks to oil in the batter, while the frosting pipes smoothly for a clean finish. Black cocoa gives the cakes an almost black hue that pairs nicely with the vivid orange topping.
Serves 4 people.
Ingredients
- 1/2 cup all-purpose flour
- 1/4 cup black cocoa powder
- 1/2 cup granulated sugar
- 1/2 teaspoon baking soda
- 1/4 teaspoon salt
- 1 large egg
- 1/4 cup milk
- 2 tablespoons vegetable oil
- 1 teaspoon vanilla extract
- 1/4 cup hot water
- 1/2 cup unsalted butter, softened
- 1 1/2 cups powdered sugar
- Zest of 1 orange
- 2 tablespoons fresh orange juice
- Pinch of salt
Instructions
- Preheat the oven to 350°F and line a cupcake pan with 4 paper liners.
- In a medium bowl, whisk together the flour, black cocoa powder, granulated sugar, baking soda, and salt.
- Add the egg, milk, vegetable oil, and vanilla extract to the dry ingredients. Stir until the batter is mostly smooth.
- Pour in the hot water and mix until the batter becomes thin and uniform.
- Divide the batter evenly among the 4 liners, filling each about two-thirds full.
- Bake for 18 to 20 minutes, or until a toothpick inserted in the center comes out clean. Let the cupcakes cool completely in the pan.
- While the cupcakes cool, beat the softened butter in a medium bowl until creamy. Gradually add the powdered sugar, orange zest, orange juice, and pinch of salt. Beat until the buttercream is light and fluffy.
- Pipe or spread the orange buttercream onto the cooled cupcakes.
Extra Tips
Let the cupcakes cool fully before frosting so the buttercream does not melt. If the buttercream feels too stiff, add a teaspoon more orange juice. These cupcakes keep well in an airtight container at room temperature for two days, or you can refrigerate them and bring them back to room temperature before serving.Course: Dessert Cuisine: American Equipment: Mixing bowls, Whisk, Cupcake pan, Electric mixer
Caramel Apple Hand Pies
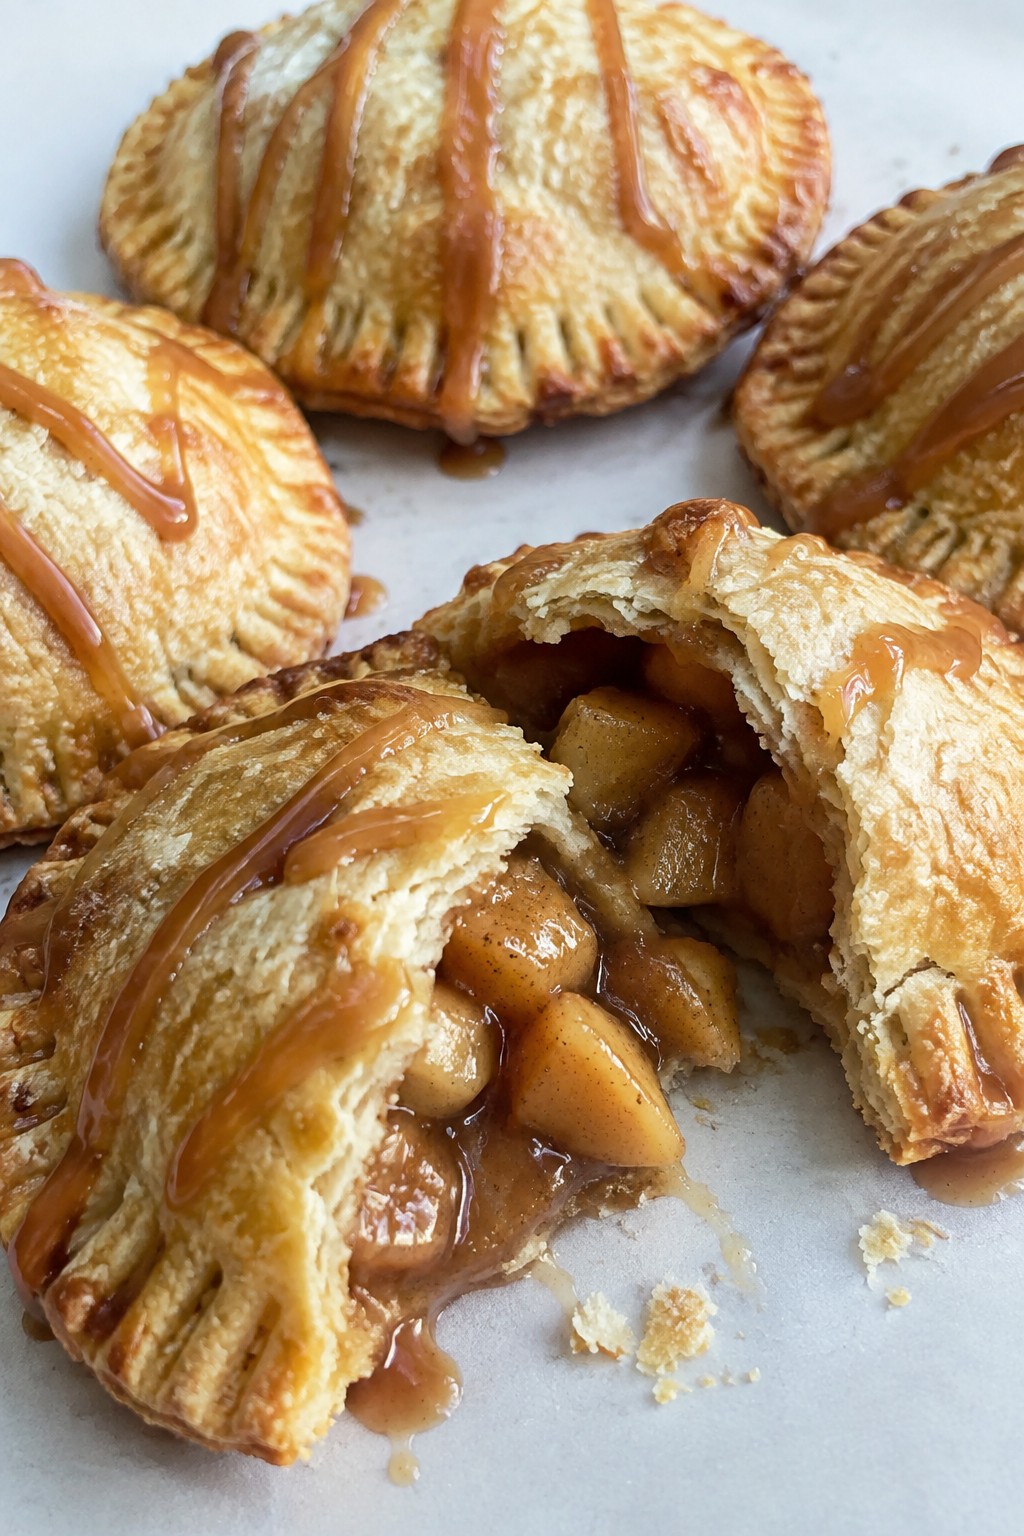
These caramel apple hand pies wrap tender spiced apples and gooey caramel inside a flaky crust. They make a handy treat for Halloween parties or after-school snacks when you want something sweet but not too fussy.
The contrast of crisp pastry and warm filling gives them a satisfying texture that holds up well in lunchboxes or on dessert tables. Kids and adults both reach for seconds.
Serves 4 people.
Ingredients
- 2 refrigerated pie crusts
- 2 medium apples, peeled and diced
- 1/4 cup caramel sauce, plus extra for drizzling
- 1 teaspoon ground cinnamon
- 3 tablespoons sugar
- 1 egg, beaten
Instructions
- Preheat the oven to 400 degrees F and line a baking sheet with parchment paper.
- In a mixing bowl, stir the diced apples with the cinnamon and 2 tablespoons of the sugar until evenly coated.
- Unroll the pie crusts on a lightly floured surface and cut each into two 6-inch circles or squares.
- Spoon the apple mixture onto one half of each dough piece, then drizzle about 1 tablespoon of caramel sauce over the apples.
- Fold the empty half of dough over the filling and press the edges together with a fork to seal.
- Place the pies on the baking sheet, brush the tops with the beaten egg, and sprinkle with the remaining tablespoon of sugar.
- Bake for 18 to 22 minutes until the crust is golden brown. Let cool for a few minutes before drizzling with extra caramel sauce.
Extra Tips
Seal the edges firmly to keep the caramel from leaking during baking. These pies taste best served slightly warm the same day they are made. Leftovers can be stored in an airtight container at room temperature for one day and reheated briefly in a 300-degree oven to restore crispness.Course: Dessert Cuisine: American Equipment: Baking Sheet, Mixing Bowl, Rolling Pin, Fork
Witch Finger Breadsticks
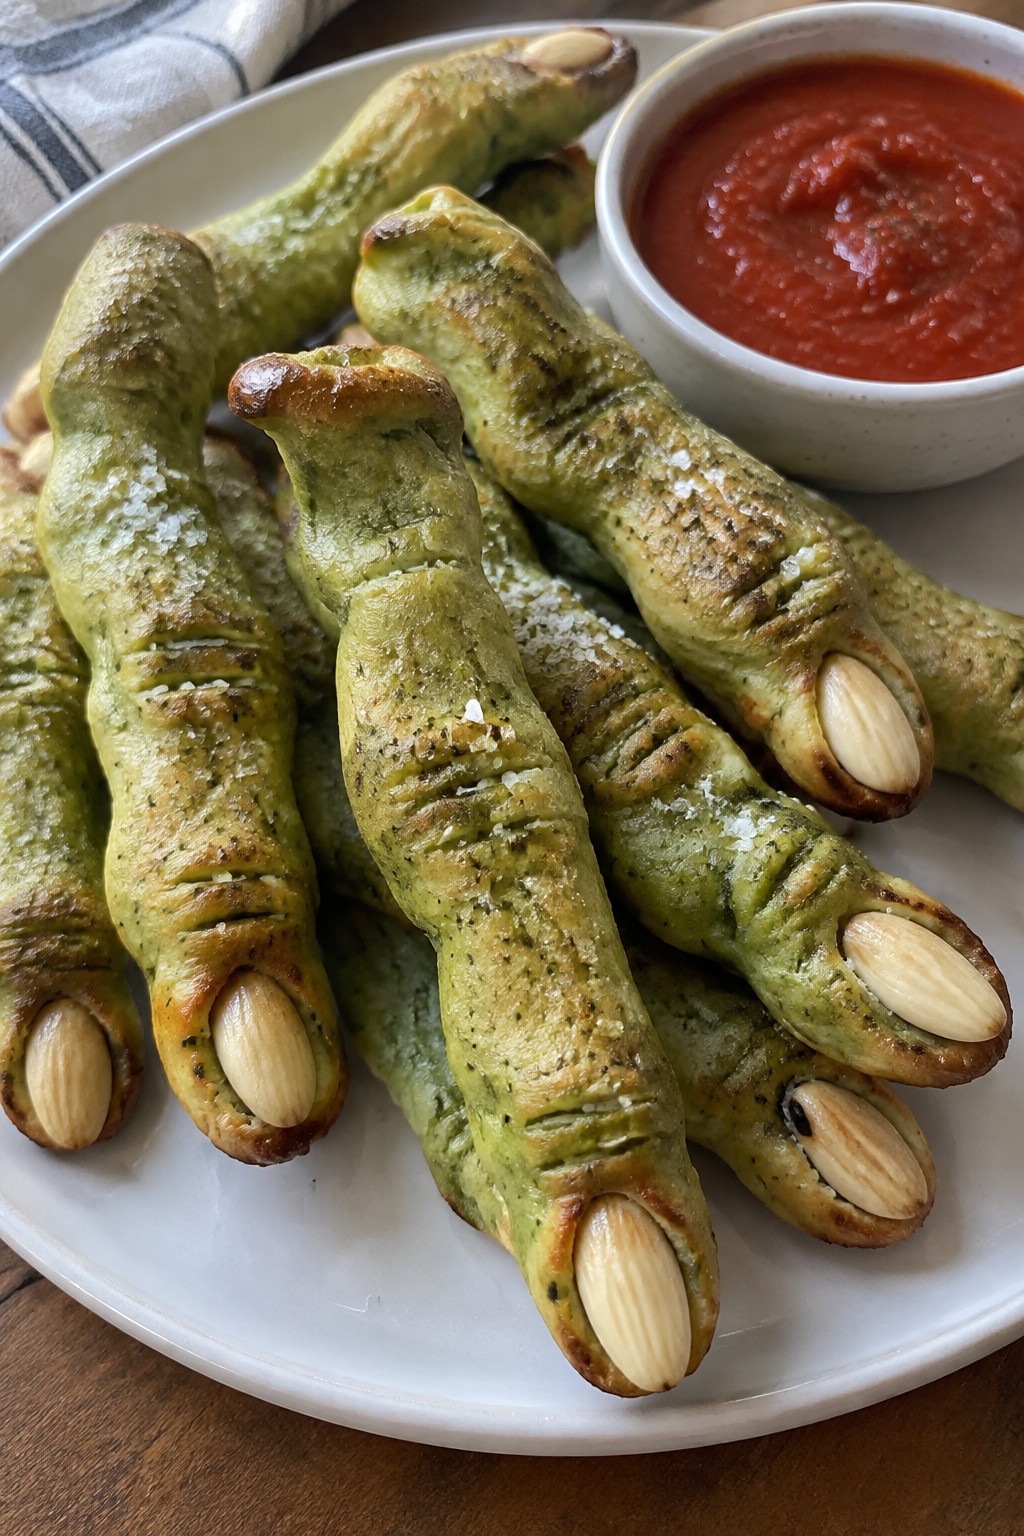
These witch finger breadsticks turn basic dough into a playful Halloween snack. They work well for parties or a simple family dinner on October 31. The finished breadsticks have a soft chew inside with a crisp, lightly salted edge.
They pair nicely with marinara for dipping and look striking on a platter without much extra effort.
Serves 4 people.
Ingredients
- 1 pound pizza dough
- 1 teaspoon green food coloring
- 20 blanched almonds
- 1 large egg
- 1 tablespoon water
- 1 teaspoon flaky sea salt
- 1/2 cup marinara sauce
Instructions
- Place the pizza dough in a mixing bowl and knead in the green food coloring until the color is even throughout.
- Divide the dough into 10 equal pieces and roll each piece into a thin log about 5 inches long.
- Use a knife to make small cuts across each log to create knuckle lines.
- Press one almond into the tip of each log to form a fingernail.
- Whisk the egg with the water to make an egg wash and brush it over each breadstick.
- Sprinkle the flaky sea salt evenly over the tops.
- Arrange the breadsticks on a baking sheet and bake at 400 degrees F for 12 to 15 minutes until golden.
- Warm the marinara sauce and serve it alongside the breadsticks for dipping.
Extra Tips
Press the almonds in firmly before the egg wash so they stay in place during baking. If the dough feels sticky after adding the food coloring, dust your hands lightly with flour. Leftovers keep in an airtight container for one day and reheat well in a 350 degree F oven for five minutes.Course: Appetizer Cuisine: American Equipment: Mixing Bowl, Baking Sheet, Pastry Brush
Pumpkin Pie Biscotti
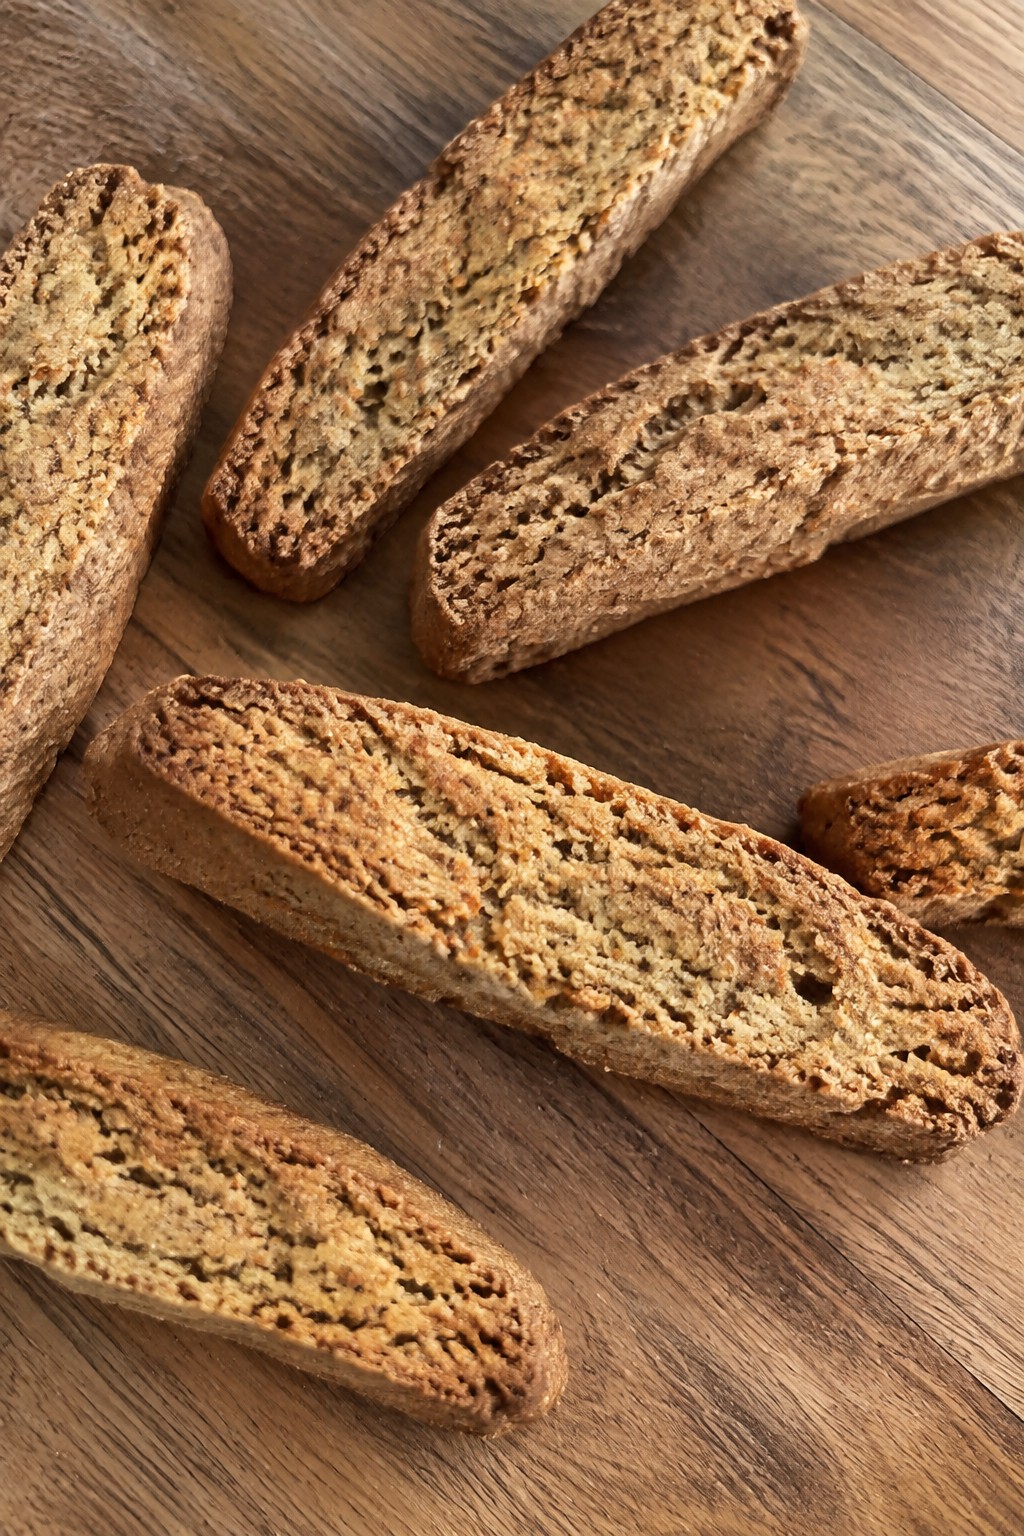
These biscotti bring the cozy flavors of pumpkin pie into a crisp cookie that fits right into Halloween baking. They are easy to make ahead and store well, so you can have a spiced treat ready for gatherings or quiet evenings.
The result is a lightly sweet, crunchy cookie with warm notes of pumpkin and spice. They pair nicely with coffee or tea and add a seasonal touch without much fuss.
Serves 4 people.
Ingredients
- 1 cup all-purpose flour
- 1/2 cup granulated sugar
- 1/4 cup pumpkin puree
- 1 large egg
- 2 tablespoons unsalted butter, melted
- 1 teaspoon pumpkin pie spice
- 1/2 teaspoon baking powder
- 1/2 teaspoon vanilla extract
- 1/4 teaspoon salt
Instructions
- Preheat the oven to 350 degrees F and line a baking sheet with parchment paper.
- In a medium bowl, whisk together the flour, sugar, pumpkin pie spice, baking powder, and salt.
- In a separate bowl, stir the pumpkin puree, egg, melted butter, and vanilla extract until smooth.
- Pour the wet mixture into the dry ingredients and mix until a soft dough forms.
- Shape the dough into a log about 8 inches long and 2 inches wide on the prepared baking sheet.
- Bake for 25 minutes, then remove from the oven and let cool for 10 minutes.
- Slice the log into 1/2-inch thick pieces with a serrated knife.
- Return the slices to the baking sheet, cut side down, and bake for another 10 minutes on each side until crisp.
Extra Tips
Let the biscotti cool completely before storing so they stay crunchy. Keep them in an airtight container at room temperature for up to a week. For a softer texture, reduce the second bake by a few minutes. These work well dipped in coffee or served alongside other fall snacks.Course: Dessert Cuisine: American Equipment: Mixing Bowl, Baking Sheet, Whisk
Red Velvet Cake Pops
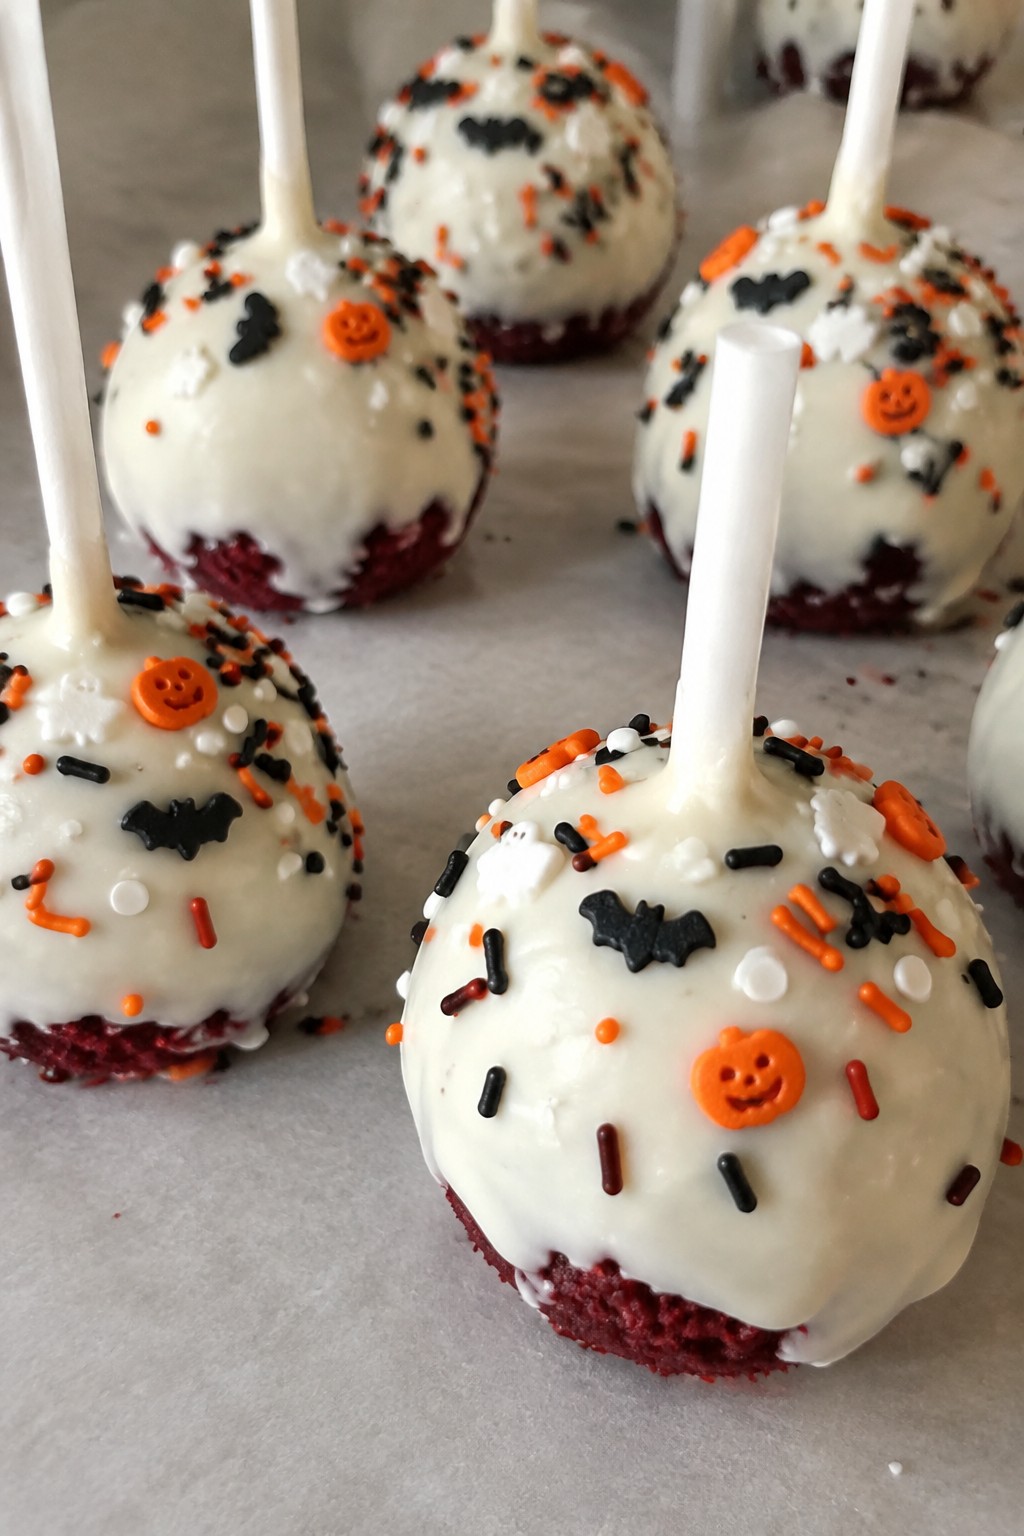
These cake pops turn red velvet into a fun finger food that fits right into a Halloween spread. The deep red color stands out on a dessert table, while the soft cake and creamy frosting stay balanced under a thin candy shell.
They work well for parties or as a make-ahead treat that travels easily. Each bite gives a mild cocoa taste with just enough sweetness from the coating.
Serves 4 people.
Ingredients
- 1 cup all-purpose flour
- 1/2 cup granulated sugar
- 1 tablespoon unsweetened cocoa powder
- 1/2 teaspoon baking soda
- 1/4 teaspoon salt
- 1/4 cup buttermilk
- 1 large egg
- 2 tablespoons vegetable oil
- 1 tablespoon red food coloring
- 2 ounces cream cheese, softened
- 2 tablespoons unsalted butter, softened
- 1 cup white candy melts
- 8 popsicle sticks
- 2 tablespoons Halloween sprinkles
Instructions
- Preheat the oven to 350 degrees F and line a small baking pan with parchment.
- In a mixing bowl, whisk the flour, sugar, cocoa powder, baking soda, and salt. Add the buttermilk, egg, oil, and red food coloring. Stir until the batter is smooth and evenly colored.
- Pour the batter into the prepared pan and bake for 18 to 20 minutes until a toothpick comes out clean. Let the cake cool completely.
- Crumble the cooled cake into a bowl. Beat the cream cheese and butter together until smooth, then mix this frosting into the cake crumbs until the mixture holds together when pressed.
- Roll the mixture into 8 balls and place them on a lined baking sheet. Insert a popsicle stick into each ball and freeze for 20 minutes.
- Melt the candy melts according to package directions. Dip each cake pop into the coating, letting excess drip off, then sprinkle with Halloween sprinkles before the coating sets.
Extra Tips
Freeze the cake balls a little longer if the coating feels too thin when you dip them. Store finished pops in an airtight container in the fridge for up to three days. If the candy melts thicken while you work, warm them gently for a few seconds to keep the shell smooth.Course: Dessert Cuisine: American Equipment: Mixing Bowl, Baking Sheet, Oven
Cinnamon Roll Monsters
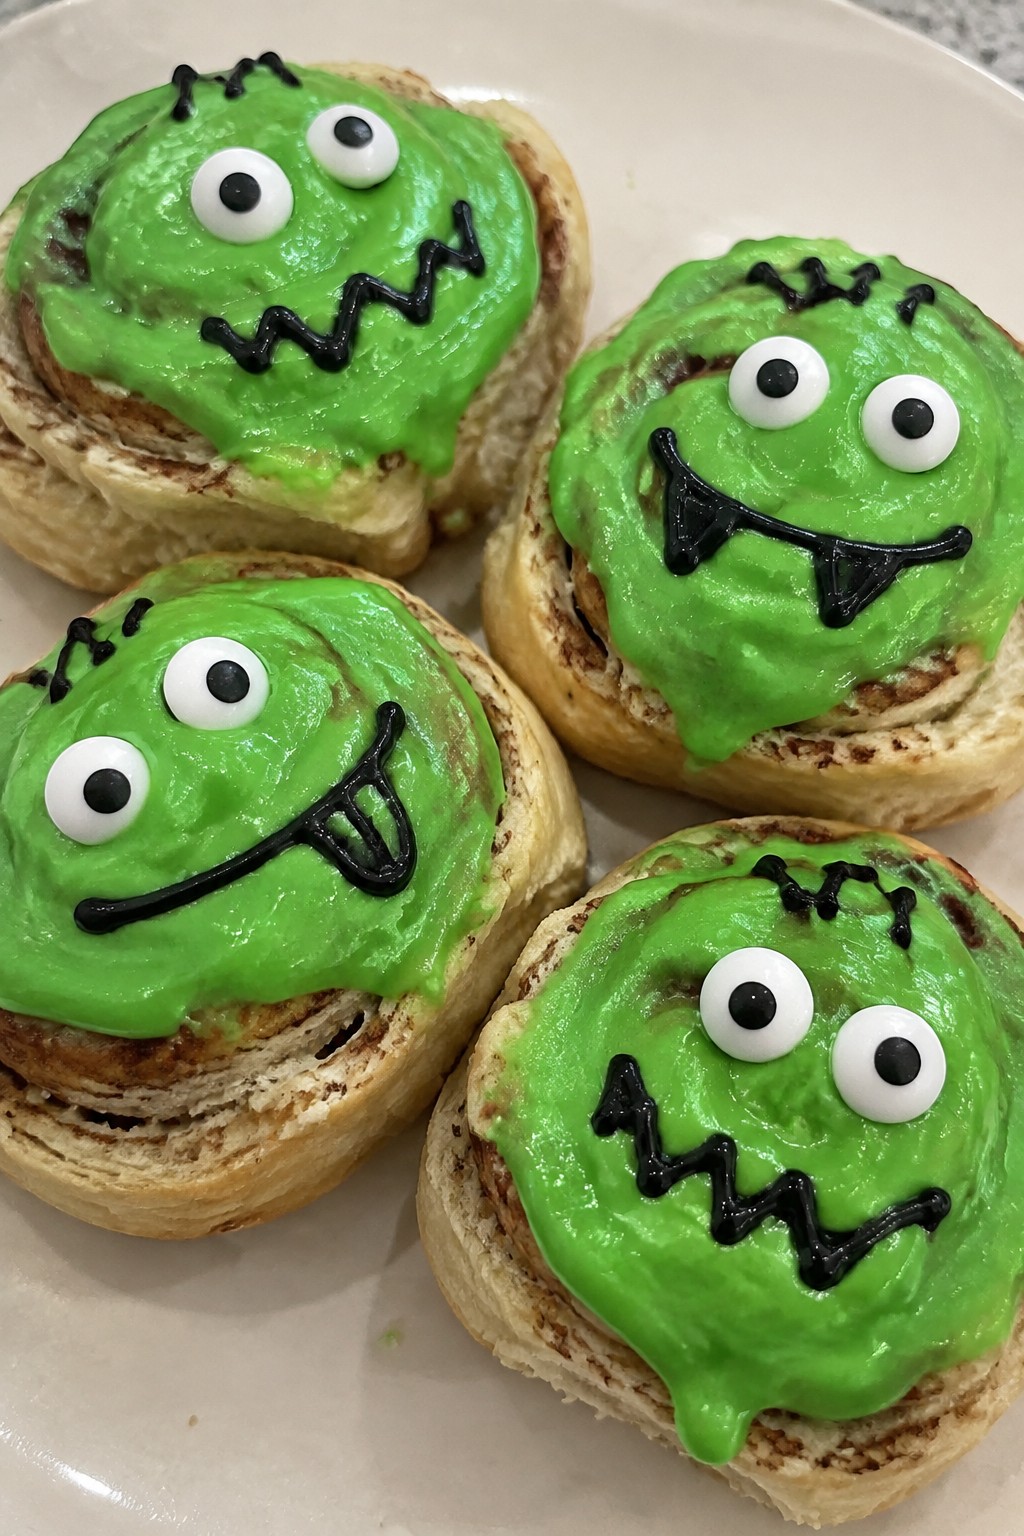
These cinnamon roll monsters turn a simple bake into a Halloween activity that kids and adults can enjoy together. They work well for a party table or an afternoon project when you want something sweet without much fuss. The rolls stay soft and fluffy inside with a light cinnamon swirl, while the bright frosting and candy details give them a playful look.
The finished treats taste like classic cinnamon rolls but with a creamy topping that holds the monster features in place. They come together quickly once the rolls are baked and cooled.
Serves 4 people.
Ingredients
- 4 large refrigerated cinnamon rolls with icing
- 4 drops green food coloring
- 8 candy eyeballs
- 1 tablespoon black decorating gel
Instructions
- Preheat the oven to the temperature listed on the cinnamon roll package. Place the four rolls on a baking sheet and bake until golden and cooked through.
- Let the rolls cool for five minutes on the baking sheet so the frosting does not melt when applied.
- Transfer the included icing to a small bowl and stir in the green food coloring until the color is even.
- Spread the green icing over the top of each cooled roll.
- Press two candy eyeballs into the icing on each roll while it is still soft.
- Use the black decorating gel to draw a simple mouth below the eyes on each roll.
Extra Tips
Apply the green icing while the rolls are still slightly warm so it spreads smoothly without tearing the surface. If the candy eyeballs slide, wait one minute for the icing to set before placing them. Store any leftovers in an airtight container at room temperature for up to two days and refresh them with a quick 10-second microwave warm-up before serving.Course: Dessert Cuisine: American Equipment: Baking sheet, Mixing bowl, Oven
Ginger Molasses Cookies with Royal Icing
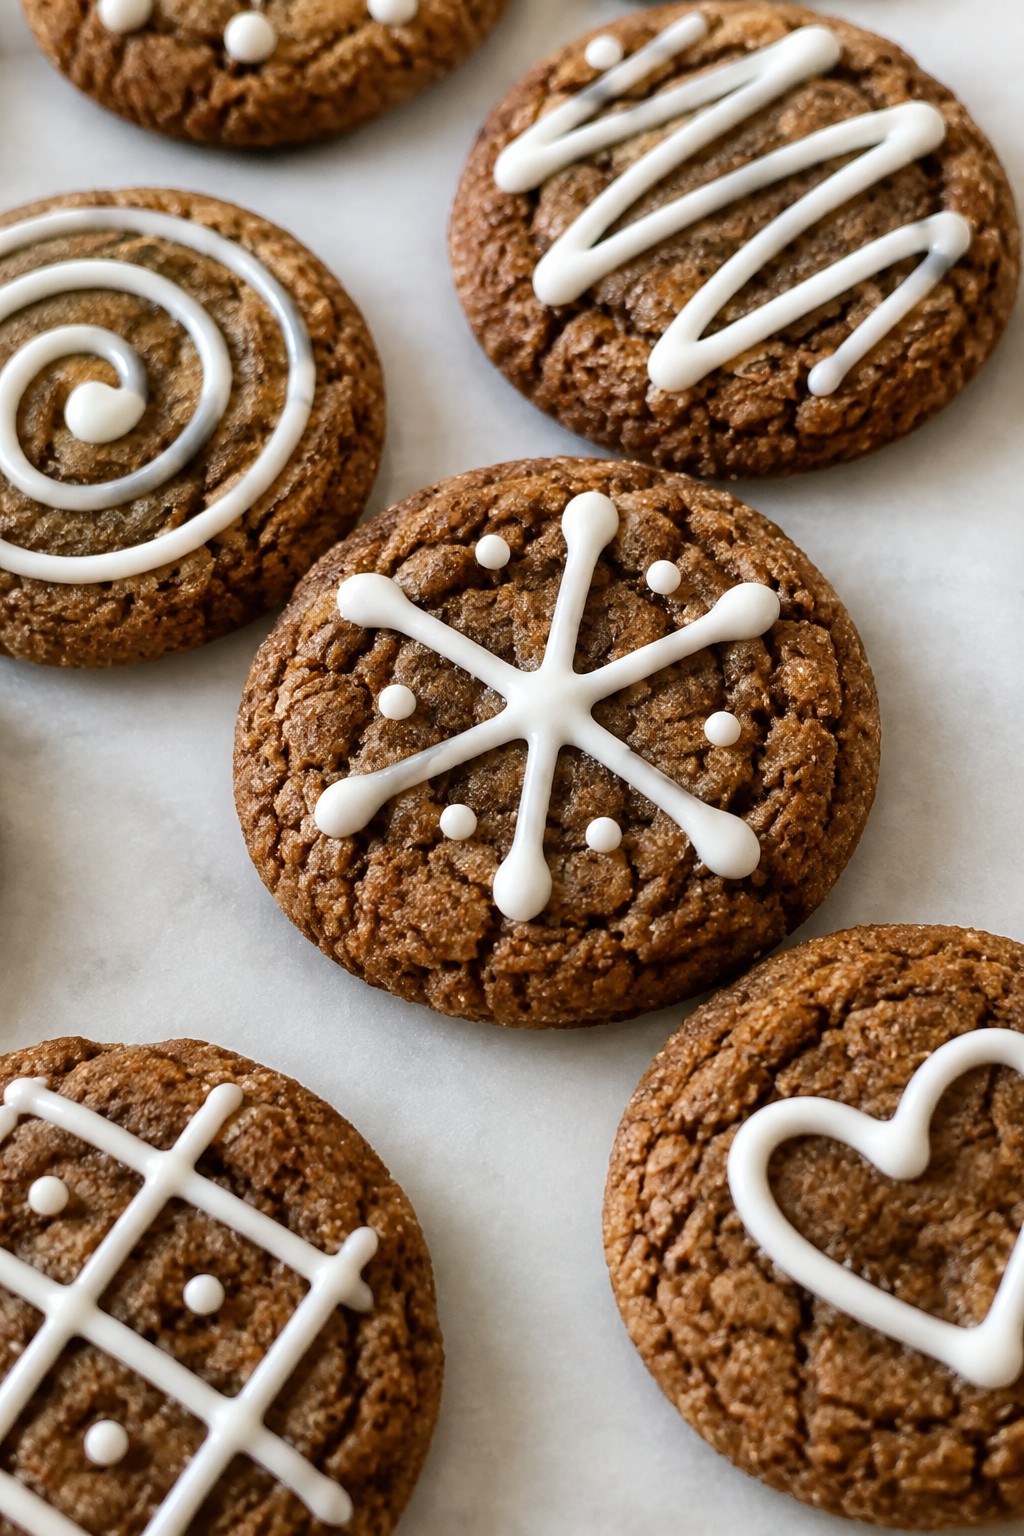
These spiced cookies bring the cozy flavors of ginger and molasses into a simple treat that works well for Halloween parties or casual baking days. The dough bakes into cookies with crisp edges and soft centers that hold royal icing without softening too fast.
They suit bakers who want a reliable base for decorating without needing advanced skills. The warm spice balances the sweet icing for a balanced bite that feels festive without extra effort.
Serves 4 people.
Ingredients
- 1 1/2 cups all-purpose flour
- 1 teaspoon ground ginger
- 1/2 teaspoon ground cinnamon
- 1/4 teaspoon baking soda
- 1/4 teaspoon salt
- 1/4 cup unsalted butter, softened
- 1/4 cup brown sugar
- 1/4 cup molasses
- 1 large egg yolk
- 1 cup powdered sugar
- 1 large egg white
- 1/2 teaspoon vanilla extract
Instructions
- Preheat the oven to 350 degrees and line a baking sheet with parchment paper.
- Whisk the flour, ginger, cinnamon, baking soda, and salt in a medium bowl.
- In a separate bowl, beat the butter and brown sugar until light. Add the molasses and egg yolk, then mix until smooth.
- Stir the dry ingredients into the wet mixture until a dough forms. Shape into a disk, wrap, and chill for 30 minutes.
- Roll the dough to 1/4-inch thickness on a lightly floured surface. Cut into shapes and place on the baking sheet.
- Bake for 8 to 10 minutes until the edges set. Cool the cookies completely on a wire rack.
- Whisk the powdered sugar, egg white, and vanilla until the icing reaches piping consistency.
- Pipe designs onto the cooled cookies and let the icing set for at least 1 hour.
Extra Tips
Chill the dough fully to keep the cookies from spreading during baking. Pipe thin lines first for outlines, then fill in sections to avoid bleeding colors. Store finished cookies in a single layer in an airtight container at room temperature for up to three days.Course: Dessert Cuisine: American Equipment: Mixing bowls, baking sheet, electric mixer, piping bag
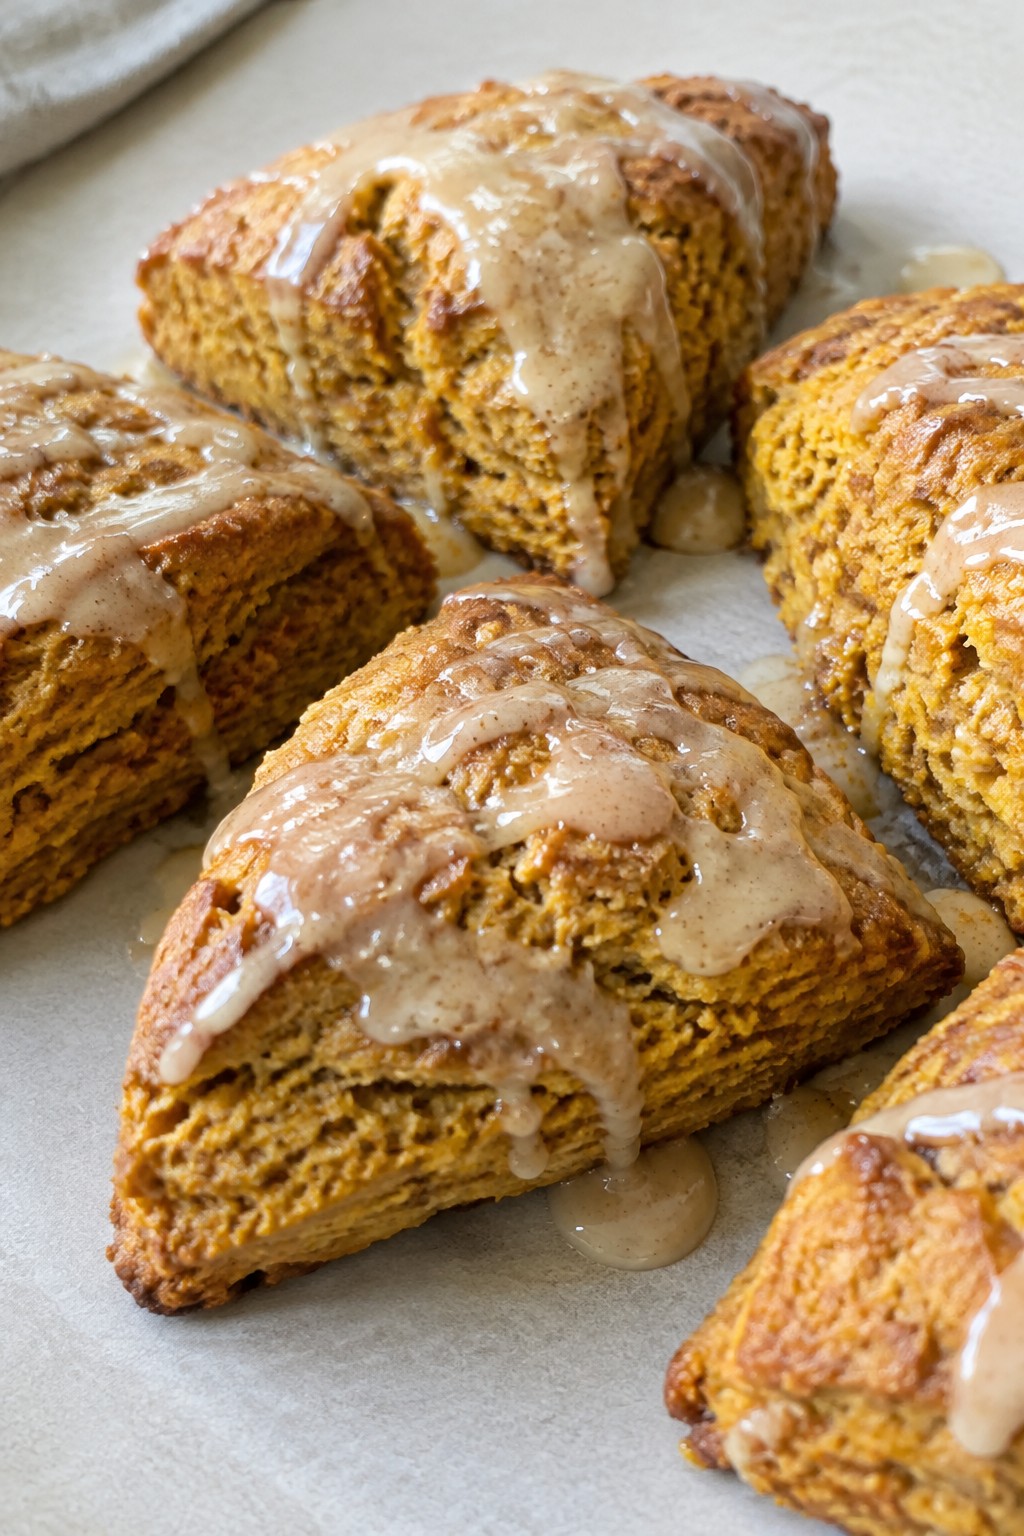
Maple Glazed Pumpkin Scones
These scones combine pumpkin with warm spices and a maple glaze for a simple fall bake. They work well for Halloween morning treats or as part of a dessert spread at gatherings.
The texture stays tender inside with slightly crisp edges. The glaze brings a sweet, woody maple note that pairs with the pumpkin base.
Serves 4 people.
Ingredients
- 2 cups all-purpose flour
- 1/4 cup brown sugar
- 2 teaspoons baking powder
- 1 teaspoon pumpkin pie spice
- 1/2 teaspoon salt
- 1/2 cup cold unsalted butter, cubed
- 3/4 cup pumpkin puree
- 1/4 cup milk
- 1 cup powdered sugar
- 3 tablespoons maple syrup
- 2 tablespoons milk
Instructions
- Preheat the oven to 400 degrees F and line a baking sheet with parchment paper.
- In a large bowl, whisk together the flour, brown sugar, baking powder, pumpkin pie spice, and salt.
- Add the cubed butter to the dry mixture. Use a pastry cutter or your fingers to work it in until the mixture looks like coarse crumbs.
- Stir in the pumpkin puree and 1/4 cup milk until a dough forms. Do not overmix.
- Turn the dough onto a lightly floured surface and pat it into a 1-inch thick circle.
- Cut the circle into 8 wedges and place them on the prepared baking sheet.
- Bake for 15 to 18 minutes until the edges turn golden. Let the scones cool on the sheet for 5 minutes.
- In a small bowl, whisk the powdered sugar, maple syrup, and 2 tablespoons milk until smooth.
- Drizzle the glaze over the cooled scones and let it set before serving.
Extra Tips
Use cold butter straight from the fridge to keep the scones from spreading too much. Real maple syrup gives the glaze a stronger flavor than pancake syrup. Store leftovers in an airtight container at room temperature for up to two days and warm them briefly before adding fresh glaze if needed.Course: Breakfast Cuisine: American Equipment: Mixing Bowl, Baking Sheet, Pastry Cutter
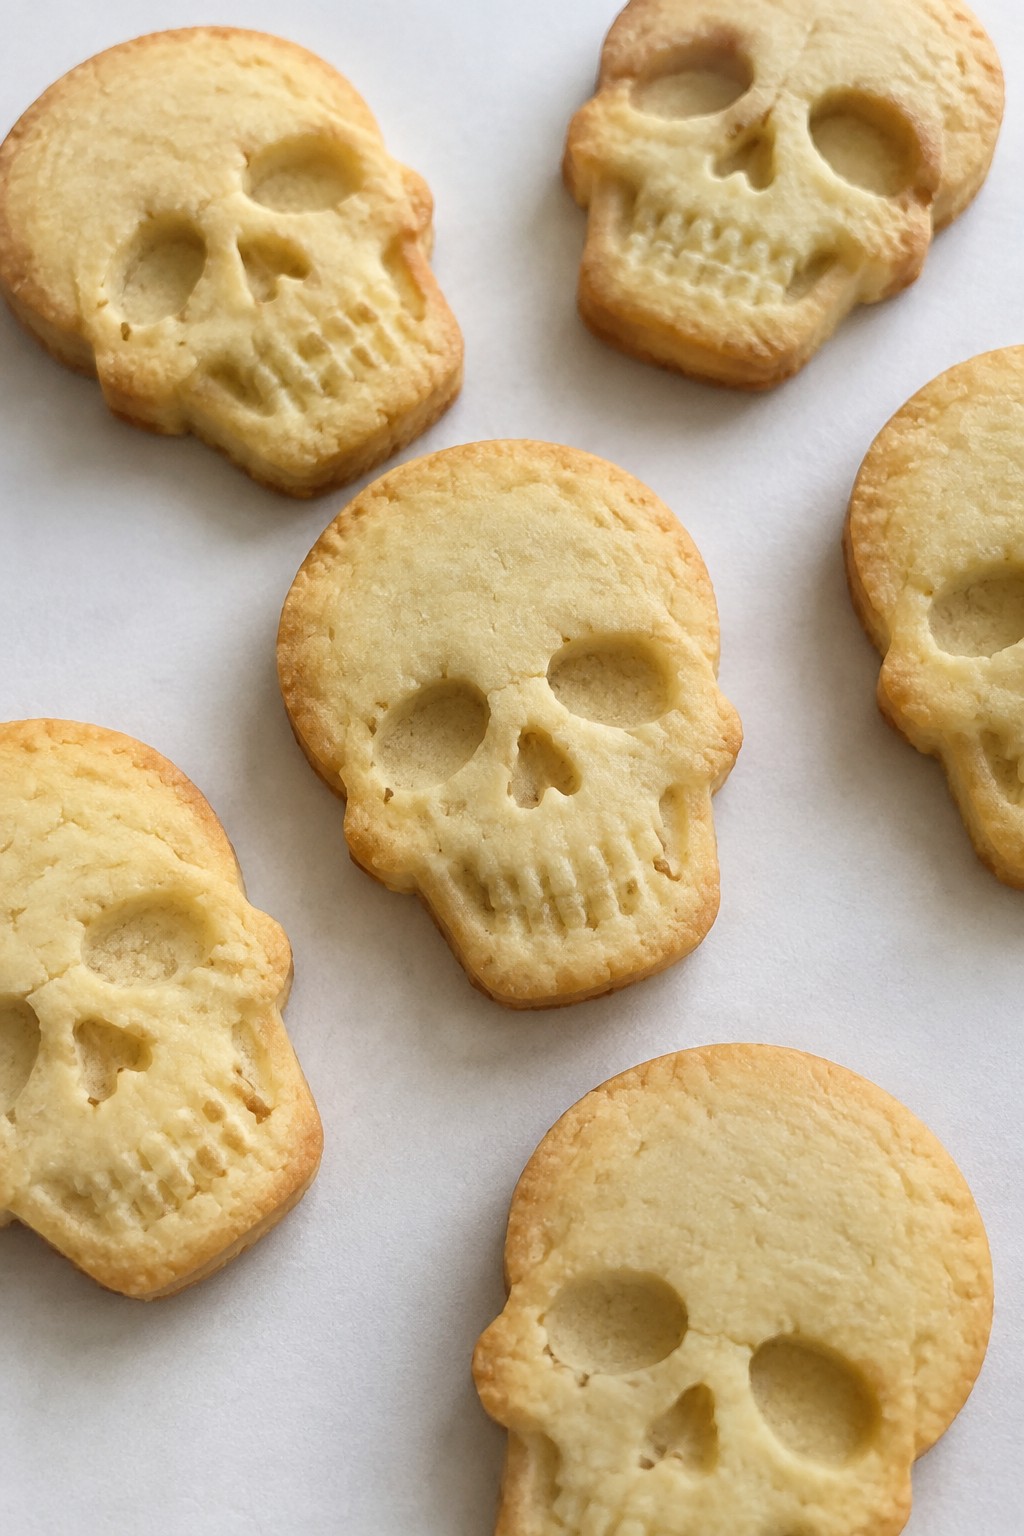
Skull Shortbread Cookies
Skull Shortbread Cookies add a simple Halloween touch to any dessert table. They bake up crisp on the edges with a tender, buttery center that pairs well with coffee or milk. The plain dough keeps the focus on the shapes, so they suit both casual weeknight baking and themed parties.
These cookies come together with basic pantry items and work for bakers who want a low-stress project. The dough holds its form well after a quick chill, which helps the skulls keep their details during baking.
Serves 4 people.
Ingredients
- 1 cup all-purpose flour
- 1/2 cup unsalted butter, softened
- 1/4 cup granulated sugar
- 1 teaspoon vanilla extract
- 1/4 teaspoon salt
Instructions
- Preheat the oven to 350°F and line a baking sheet with parchment paper.
- In a mixing bowl, beat the softened butter and sugar together until the mixture looks pale and fluffy.
- Stir in the vanilla extract and salt until evenly combined.
- Add the flour in two parts, mixing just until a soft dough forms and no dry streaks remain.
- Place the dough between two sheets of parchment and roll it to about 1/4-inch thickness.
- Cut out skull shapes with a cookie cutter, then transfer the cutouts to the prepared baking sheet.
- Bake for 12 to 14 minutes until the edges turn lightly golden.
- Let the cookies cool on the sheet for 5 minutes before moving them to a wire rack to finish cooling.
Extra Tips
Chill the rolled dough for 15 minutes if it feels too soft to hold clean skull edges. The cookies stay crisp stored in an airtight container at room temperature for up to five days. Skip any icing so the simple shortbread flavor stays front and center.Course: Dessert Cuisine: American Equipment: Mixing Bowl, Baking Sheet, Rolling Pin, Skull Cookie Cutter
