
There’s just something magical about Christmas lunch that warms the heart. Gathering with loved ones around a table filled with comforting dishes is truly special. From a traditional roast turkey with herb stuffing to a sweet apple and cranberry crumble, each recipe feels like it belongs in a treasured family cookbook. Let’s explore these cozy Christmas lunch recipes that capture the spirit of the season.
Classic Roast Turkey With Herb Stuffing
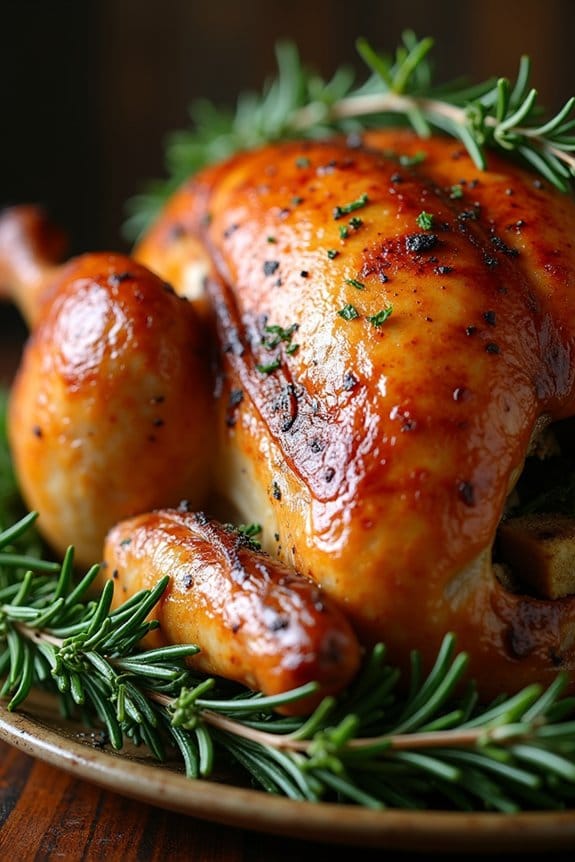
Classic Roast Turkey With Herb Stuffing is a quintessential holiday dish that embodies the warmth and comfort of a Christmas lunch. The centerpiece of many festive tables, this dish features a beautifully roasted turkey with a flavorful herb stuffing that captures the essence of traditional holiday flavors. The combination of juicy, tender turkey and savory stuffing creates a harmonious blend of tastes and aromas that’s sure to delight your family and guests.
Preparing this dish involves roasting a whole turkey to golden perfection while simultaneously creating a delicious stuffing that complements the meat‘s natural flavors. The stuffing is made with a mixture of fresh herbs, vegetables, and bread, resulting in a hearty and aromatic filling. Together, the turkey and stuffing provide a satisfying and memorable dining experience that’s perfect for celebrating the holiday season.
Ingredients (serves 4-6):
- 1 whole turkey (10-12 pounds)
- Salt and pepper to taste
- 1/4 cup olive oil or melted butter
- 1 onion, chopped
- 2 stalks celery, chopped
- 3 cups cubed bread (preferably stale)
- 1/4 cup chopped fresh parsley
- 1 tablespoon chopped fresh sage
- 1 tablespoon chopped fresh thyme
- 1 tablespoon chopped fresh rosemary
- 1/2 cup chicken broth
- 1/4 cup unsalted butter, melted
Cooking Instructions:
- Preparation: Preheat your oven to 325°F (165°C). Remove the turkey from the refrigerator and let it sit at room temperature for about 30 minutes. This helps guarantee even cooking.
- Season the Turkey: Pat the turkey dry with paper towels. Season the cavity and the outside of the turkey generously with salt and pepper. Rub olive oil or melted butter all over the skin to help it brown and crisp up during roasting.
- Make the Stuffing: In a large skillet over medium heat, sauté the chopped onion and celery in a little olive oil until softened, about 5 minutes. Transfer the cooked vegetables to a large mixing bowl. Add the cubed bread, parsley, sage, thyme, rosemary, and chicken broth. Mix until the bread absorbs the broth and the stuffing is well combined.
- Stuff the Turkey: Carefully fill the cavity of the turkey with the prepared stuffing. Don’t overstuff, as the stuffing will expand during cooking. If you have extra stuffing, place it in a buttered baking dish to cook separately.
- Roast the Turkey: Place the stuffed turkey on a rack in a roasting pan. Tie the legs together with kitchen twine, and tuck the wings under the body. Brush the turkey with melted butter. Roast in the preheated oven, basting occasionally with pan juices, until the internal temperature of the turkey reaches 165°F (74°C) in the thickest part of the thigh. This typically takes about 3 to 4 hours.
- Rest and Serve: Once cooked, remove the turkey from the oven and let it rest for at least 20 minutes before carving. This allows the juices to redistribute throughout the meat, keeping it moist.
Extra Tips:
When preparing the Classic Roast Turkey With Herb Stuffing, verify the turkey is completely thawed if previously frozen, as this will promote even cooking.
For added flavor, consider placing a few sprigs of fresh herbs and lemon slices inside the cavity along with the stuffing.
If you find that the turkey skin is browning too quickly, cover it loosely with aluminum foil during roasting.
Finally, remember to allow ample time for the turkey to rest after roasting, as this step is vital for maintaining its juiciness. Enjoy your delicious holiday feast!
Honey-Glazed Ham With Pineapple
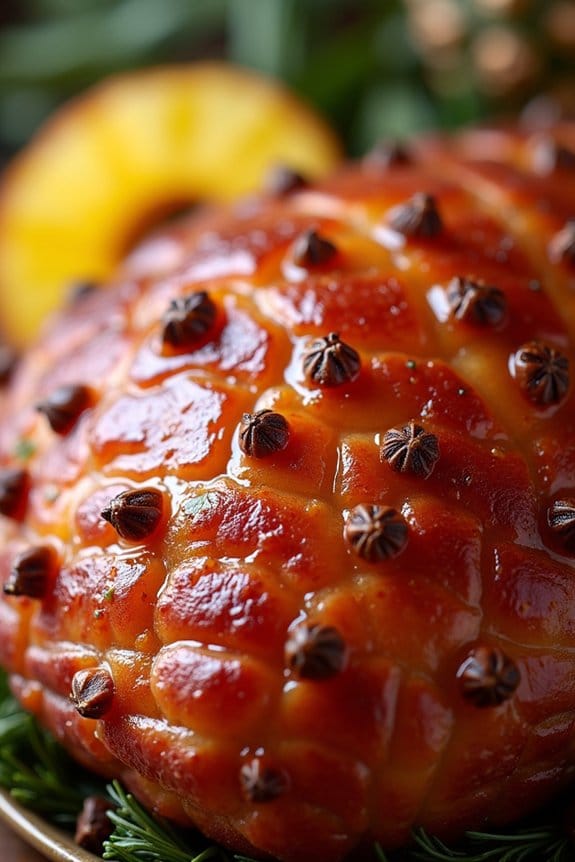
When it comes to celebrating Christmas with family and friends, nothing beats the aroma of a perfectly cooked ham wafting through the house. This Honey-Glazed Ham with Pineapple is a classic dish that combines the juicy, savory flavors of ham with the sweet, tangy taste of pineapple.
This dish not only looks impressive on the table but also fills your home with a warm, festive scent that embodies the spirit of the holiday season. Whether you’re hosting an intimate gathering or a larger feast, this recipe serves 4-6 people, making it ideal for cozy Christmas lunches.
The secret to this dish is the luscious honey glaze, which is enriched by the addition of pineapple juice, mustard, and just a hint of cloves. The glaze caramelizes in the oven, creating a beautiful golden-brown crust that locks in the ham’s moisture.
This dish is simple enough for novice cooks yet sophisticated enough to impress your guests. Serve it with your favorite holiday sides, such as roasted potatoes, green beans, or a fresh salad, and enjoy a memorable meal with loved ones.
Ingredients (Serves 4-6):
- 1 fully cooked bone-in ham (about 4-5 pounds)
- 1 cup pineapple juice
- 1/2 cup honey
- 1/4 cup brown sugar
- 2 tablespoons Dijon mustard
- 1/4 teaspoon ground cloves
- 1 can (20 ounces) pineapple slices
- Whole cloves (for studding, optional)
Cooking Instructions:
- Preheat the Oven: Preheat your oven to 325°F (165°C). This will guarantee that your ham cooks evenly throughout.
- Prepare the Ham: Place the ham in a roasting pan. If your ham has a rind, score the surface in a diamond pattern using a sharp knife. This will allow the glaze to penetrate the ham and enhance the flavor. If desired, stud the ham with whole cloves by inserting them into the intersections of the scoring.
- Make the Glaze: In a medium saucepan, combine the pineapple juice, honey, brown sugar, Dijon mustard, and ground cloves. Bring the mixture to a simmer over medium heat, stirring occasionally until the sugar has dissolved and the glaze is slightly thickened, about 5 minutes.
- Apply the Glaze: Pour half of the glaze over the ham, using a brush to coat evenly. Reserve the remaining glaze for basting.
- Add Pineapple Slices: Arrange the pineapple slices over the ham, securing them with toothpicks if necessary. This will add a burst of flavor and an attractive presentation.
- Roast the Ham: Place the ham in the preheated oven and roast for approximately 1 1/2 to 2 hours, or until the internal temperature reaches 140°F (60°C). Baste the ham with the reserved glaze every 30 minutes to keep it moist and flavorful.
- Finish and Serve: Once cooked, remove the ham from the oven and let it rest for 10 minutes before slicing. Serve with the caramelized pineapple slices and any additional sides of your choice.
Extra Tips:
For an even more flavorful glaze, consider adding a splash of bourbon or rum to the glaze mixture before simmering. If you prefer a thicker glaze, allow it to reduce further on the stove for a few more minutes.
Always use a meat thermometer to guarantee the ham reaches the safe internal temperature of 140°F (60°C). This dish can be prepared a day ahead and reheated gently in the oven, saving you time on the day of your gathering. Enjoy your festive feast!
Creamy Butternut Squash Soup
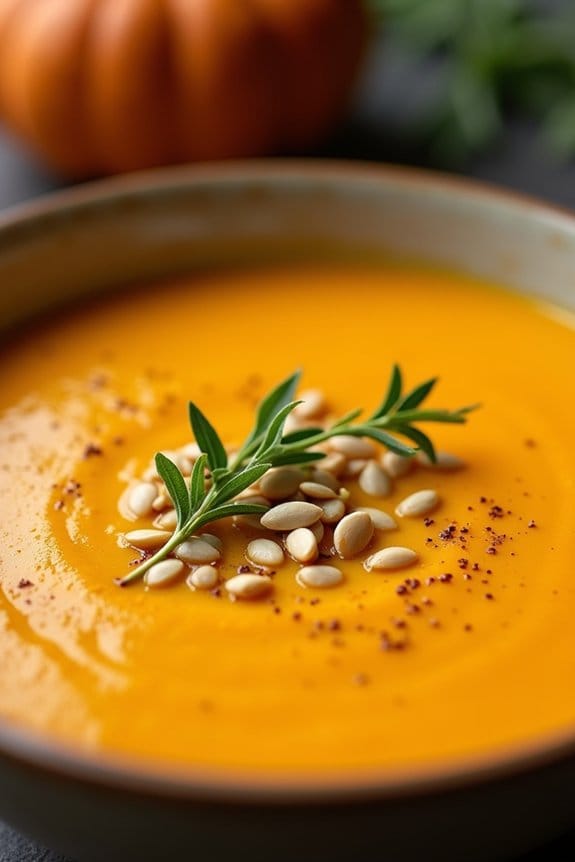
There’s nothing quite like a warm, velvety bowl of Creamy Butternut Squash Soup to bring comfort and cheer to your Christmas lunch. This delightful dish combines the rich, sweet flavors of roasted butternut squash with aromatic herbs and spices, creating a soup that’s both nourishing and indulgent.
Perfect for a cozy family gathering, this soup isn’t only a treat for the taste buds but also a feast for the eyes with its vibrant orange hue, echoing the warmth and joy of the holiday season.
The Creamy Butternut Squash Soup is an excellent choice for a festive starter or a light main course, offering a perfect balance of creaminess and spice. The recipe is straightforward and ideal for both novice and experienced cooks, allowing you to focus on the magic of the season without spending hours in the kitchen.
Serve it with a slice of crusty bread or a sprinkle of toasted pumpkin seeds for added texture and flavor.
Ingredients (Serves 4-6)
- 1 large butternut squash, peeled, seeded, and cubed
- 2 tablespoons olive oil
- Salt and pepper to taste
- 1 large onion, chopped
- 2 cloves garlic, minced
- 4 cups vegetable broth
- 1 teaspoon ground cinnamon
- 1/2 teaspoon ground nutmeg
- 1/2 cup heavy cream
- Fresh thyme leaves for garnish
Instructions
- Prepare the Butternut Squash: Preheat your oven to 400°F (200°C). Place the cubed butternut squash on a baking sheet, drizzle with 1 tablespoon of olive oil, and season with salt and pepper. Roast in the oven for 25-30 minutes, or until the squash is tender and lightly caramelized.
- Sauté the Aromatics: In a large pot, heat the remaining tablespoon of olive oil over medium heat. Add the chopped onion and minced garlic, cooking until the onion becomes translucent and fragrant, about 5 minutes.
- Combine Ingredients: Add the roasted butternut squash to the pot with the sautéed onions and garlic. Stir in the vegetable broth, cinnamon, and nutmeg, bringing the mixture to a gentle simmer. Allow it to cook for about 10-15 minutes.
- Blend the Soup: Using an immersion blender, puree the soup until smooth and creamy. If you don’t have an immersion blender, carefully transfer the soup in batches to a countertop blender, blending until smooth before returning it to the pot.
- Add the Cream: Stir in the heavy cream and adjust the seasoning with additional salt and pepper if needed. Heat the soup gently, being careful not to let it boil, until warmed through.
- Serve: Ladle the soup into bowls and garnish with fresh thyme leaves. Serve hot with crusty bread or a side of your choice.
Extra Tips
For an even deeper flavor, consider roasting the squash with a sprinkle of cinnamon and nutmeg before blending. This step enhances the natural sweetness of the squash and adds a warm, spicy aroma to the soup.
Additionally, if you prefer a dairy-free version, you can substitute the heavy cream with coconut milk or a non-dairy cream alternative. Remember to adjust the seasoning as needed, and feel free to experiment with toppings like toasted nuts or a swirl of sour cream for added richness.
Garlic and Rosemary Roast Lamb
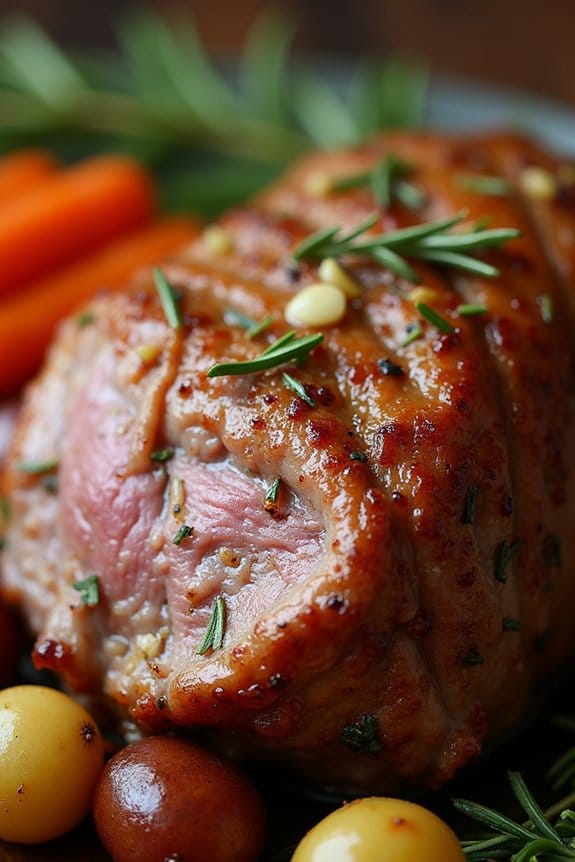
The Garlic and Rosemary Roast Lamb is a classic dish that brings warmth and comfort to any Christmas lunch. With its tender, juicy meat and aromatic herbs, this roast is sure to be the centerpiece of your festive table. The combination of garlic and rosemary infuses the lamb with a fragrant, savory flavor that perfectly complements its natural richness.
Whether you’re hosting a small gathering or a larger family affair, this dish is designed to impress with minimal effort. Roasting lamb requires a gentle touch and a bit of patience, but the results are well worth it. The key is to allow the flavors of garlic and rosemary to penetrate the meat while it cooks to perfection. This recipe is tailored for 4-6 people, guaranteeing there’s enough to go around while creating a cozy, intimate dining experience.
Ingredients (Serves 4-6):
- 1.5 kg (approximately 3.3 lbs) leg of lamb, bone-in
- 4 cloves of garlic, minced
- 3 tablespoons fresh rosemary, chopped
- 2 tablespoons olive oil
- Salt and freshly ground black pepper to taste
- 2 tablespoons lemon juice
- 1 cup of chicken or beef stock
- Optional: vegetables such as carrots, potatoes, and onions for roasting
Instructions:
- Preheat the Oven:
- Preheat your oven to 180°C (350°F). This temperature is ideal for roasting the lamb evenly and guaranteeing a tender result.
- Prepare the Lamb:
- Pat the leg of lamb dry with paper towels. Use a sharp knife to make small slits all over the surface of the lamb.
- In a small bowl, mix the minced garlic, chopped rosemary, olive oil, salt, and pepper to form a paste.
- Rub this mixture all over the lamb, guaranteeing it gets into the slits. This will help the flavors penetrate the meat.
- Add Lemon and Stock:
- Drizzle the lemon juice over the lamb, enhancing the brightness and depth of the flavor.
- Place the lamb in a roasting pan. Pour the chicken or beef stock around the base of the lamb to keep it moist during roasting.
- Roast the Lamb:
- Roast the lamb in the preheated oven for approximately 1 hour and 30 minutes, or until it reaches an internal temperature of 60°C (140°F) for medium-rare. Adjust the time based on your preferred level of doneness.
- Rest the Lamb:
- Remove the lamb from the oven and cover it loosely with aluminum foil. Allow it to rest for 15-20 minutes before carving. This resting period lets the juices redistribute throughout the meat, guaranteeing each slice is juicy.
- Optional: Roast Vegetables:
- If desired, add chopped vegetables such as carrots, potatoes, and onions to the roasting pan about halfway through cooking. They’ll absorb the lamb’s flavors and make a delicious side dish.
Extra Tips:
For the best results, consider marinating the lamb with garlic, rosemary, and olive oil a few hours before cooking or even overnight to deepen the flavors.
Always use a meat thermometer to check the internal temperature of the lamb for your desired level of doneness. If you prefer a more well-done lamb, increase the roasting time accordingly.
Letting the lamb rest after roasting is essential for juicy, tender meat. When serving, slice the lamb against the grain to guarantee each piece remains tender and easy to eat.
Cranberry and Brie Pastry Bites
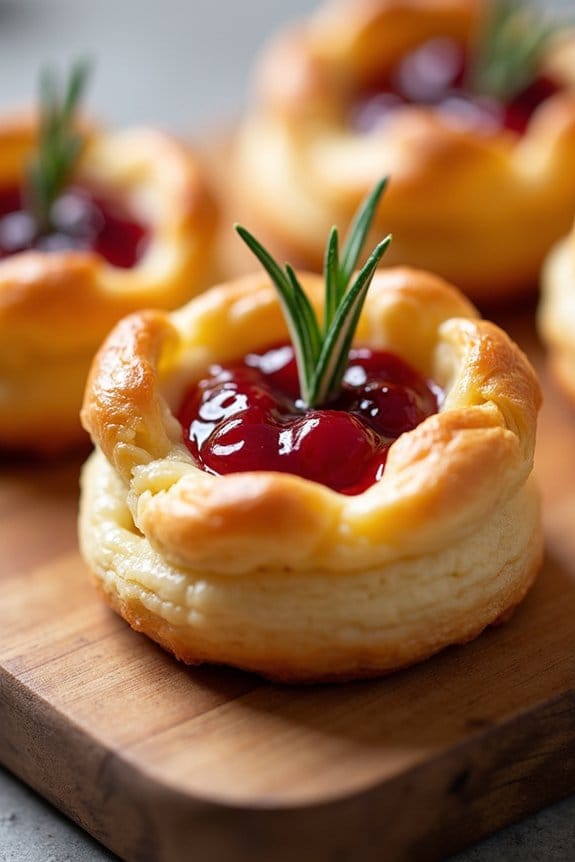
Cranberry and Brie Pastry Bites are the perfect addition to your cozy Christmas lunch spread. These delightful bites combine the creamy richness of Brie cheese with the tartness of cranberry sauce, all encased in a flaky pastry shell. They aren’t only delicious but also present beautifully on any holiday table.
Whether you’re hosting a grand Christmas feast or just a small gathering, these pastry bites are sure to impress your guests with their elegant yet simple appeal. The warm, gooey Brie perfectly complements the sweet and tangy cranberry sauce, creating a harmonious balance of flavors in every bite.
This recipe is easy to prepare and can be made ahead of time, allowing you to enjoy the festivities without being stuck in the kitchen. Serve them as an appetizer or alongside a main course, and watch them disappear within minutes. Designed for a serving size of 4-6 people, these pastry bites are a festive and delicious way to celebrate the holiday season.
Ingredients (serving size: 4-6 people):
- 1 sheet of puff pastry, thawed
- 1/2 cup cranberry sauce (homemade or store-bought)
- 8 oz Brie cheese, cut into small cubes
- 1 egg, beaten
- Fresh rosemary or thyme sprigs for garnish (optional)
Cooking Instructions:
- Preheat the Oven: Preheat your oven to 375°F (190°C) and line a baking sheet with parchment paper to prevent sticking.
- Prepare the Puff Pastry: Roll out the thawed puff pastry sheet on a lightly floured surface until it’s smooth and slightly larger than its original size. Cut the pastry into 12 equal squares for even baking.
- Assemble the Bites: Place a cube of Brie cheese in the center of each pastry square. Top each Brie cube with a teaspoon of cranberry sauce. Be careful not to overfill as this may cause the bites to burst open during baking.
- Seal the Pastry: Bring the corners of each pastry square up to the center, pinching them together to seal the filling inside. You can use a bit of beaten egg as an adhesive if needed.
- Brush with Egg Wash: Using a pastry brush, gently coat each assembled pastry bite with the beaten egg. This will give them a beautiful golden color as they bake.
- Bake the Pastry Bites: Place the prepared bites on the lined baking sheet, leaving a little space between each one. Bake in the preheated oven for 15-20 minutes, or until the pastry is golden brown and puffed.
- Cool and Serve: Remove from the oven and let them cool slightly on a wire rack. Garnish with a small sprig of fresh rosemary or thyme if desired, and serve warm.
Extra Tips: To make these Cranberry and Brie Pastry Bites even more flavorful, consider adding a pinch of crushed walnuts or pecans on top of the cranberry sauce for a bit of crunch.
If you prefer a more savory bite, a few dashes of cracked black pepper on the Brie before adding the cranberry sauce can add a subtle spice. These bites can be prepared a few hours ahead and stored in the refrigerator; just pop them in the oven when your guests arrive for fresh, warm appetizers.
Cheesy Scalloped Potatoes

When the holiday season rolls around, there’s nothing quite like the comforting and indulgent flavors of Cheesy Scalloped Potatoes. This dish is perfect for a cozy Christmas lunch, with layers of tender potatoes smothered in a rich, creamy cheese sauce. It pairs beautifully with roasted meats and seasonal vegetables, creating a festive spread that’s sure to impress your family and friends.
The golden-brown crust that forms on top as it bakes is just the icing on the cake, making this dish a delightful addition to any holiday gathering. This recipe serves 4-6 people, guaranteeing that everyone at the table gets a generous helping. The combination of cheeses used in this dish brings out a depth of flavor that’s both savory and satisfying.
Whether you’re an experienced cook or a novice in the kitchen, this recipe is straightforward yet delivers a gourmet touch to your Christmas menu. As the potatoes bake, your kitchen will be filled with the fragrant aroma of melted cheese and herbs, setting the perfect mood for a cozy, festive meal.
Ingredients:
- 2 pounds of russet potatoes
- 1 tablespoon of unsalted butter
- 1 small onion, finely chopped
- 2 cloves of garlic, minced
- 2 cups of heavy cream
- 1 cup of whole milk
- 1 teaspoon of salt
- 1/2 teaspoon of black pepper
- 1/4 teaspoon of nutmeg
- 2 cups of grated cheddar cheese
- 1 cup of grated Gruyere cheese
- 2 tablespoons of chopped fresh parsley (optional, for garnish)
Cooking Instructions:
- Prepare the Potatoes: Peel the potatoes and slice them into 1/8-inch thick rounds. You can use a mandolin slicer to guarantee even thickness, which will help the potatoes cook uniformly.
- Preheat the Oven: Set your oven to 375°F (190°C) to guarantee it’s hot and ready for the baking process.
- Sauté the Aromatics: In a large saucepan, melt the butter over medium heat. Add the chopped onion and garlic, sautéing until they become translucent and fragrant, about 3-4 minutes.
- Make the Cheese Sauce: Pour in the heavy cream and whole milk, stirring continuously. Add the salt, pepper, and nutmeg, and bring the mixture to a gentle simmer. Gradually stir in 1 1/2 cups of cheddar cheese and all the Gruyere cheese until they’re fully melted and the sauce is smooth.
- Assemble the Dish: In a greased 9×13-inch baking dish, arrange half of the potato slices in an even layer. Pour half of the cheese sauce over the potatoes. Repeat with the remaining potatoes and cheese sauce, guaranteeing all the potatoes are well-coated.
- Bake the Potatoes: Sprinkle the remaining 1/2 cup of cheddar cheese over the top layer. Cover the dish with aluminum foil and bake for 30 minutes. Remove the foil and continue baking for an additional 25-30 minutes, or until the potatoes are tender and the top is golden and bubbly.
- Garnish and Serve: Allow the dish to cool for 10 minutes before serving. Garnish with chopped fresh parsley, if desired, and enjoy your cheesy scalloped potatoes.
Extra Tips:
For the best results, choose a mixture of cheddar and Gruyere cheese as it provides a perfect balance of sharpness and creaminess. If you prefer a thicker sauce, consider adding a tablespoon of cornstarch mixed with water to the cheese sauce before pouring it over the potatoes.
Also, letting the dish rest for a few minutes before serving helps the sauce thicken up, making it easier to serve. If you want to add some extra flavor, consider incorporating some cooked and crumbled bacon or diced ham into the layers.
Festive Brussels Sprouts With Bacon
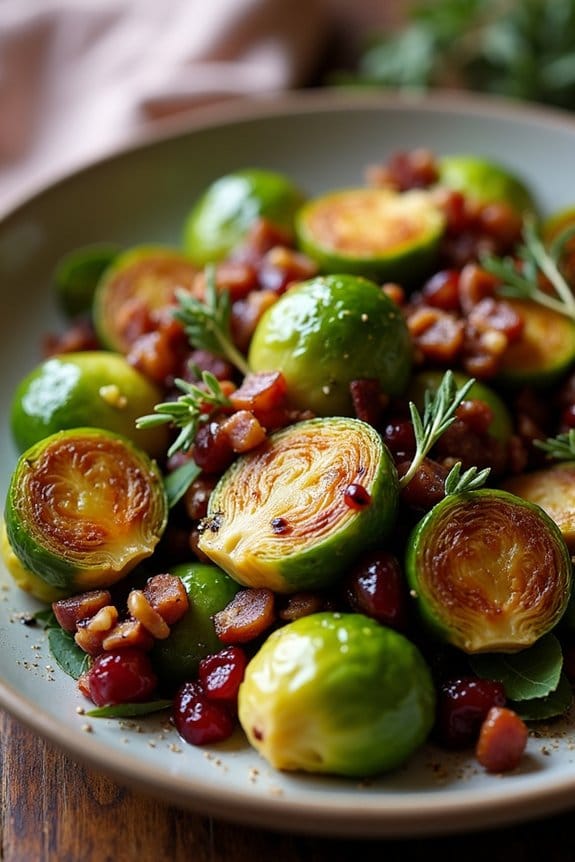
Brussels sprouts are a staple on many holiday tables, but they can often be overlooked in favor of more decadent dishes. However, when paired with crispy bacon, these humble sprouts transform into a delightful side dish that’s perfect for a cozy Christmas lunch. The combination of the Brussels sprouts‘ natural nuttiness and the savory, smoky flavor of bacon is certain to win over even the most skeptical diners.
This recipe adds a touch of festive flair with the addition of fresh herbs and a hint of balsamic glaze, making it both visually appealing and deliciously flavorful. This dish serves 4-6 people and is designed to be straightforward yet impressive, guaranteeing minimal stress during the busy holiday season.
The use of simple, high-quality ingredients allows the natural flavors to shine, while the straightforward preparation keeps you out of the kitchen and enjoying time with your loved ones. Whether you’re hosting a small family gathering or a larger festive feast, these Festive Brussels Sprouts With Bacon are sure to be a hit on your Christmas lunch menu.
Ingredients:
- 1 ½ pounds Brussels sprouts, trimmed and halved
- 6 slices of thick-cut bacon, diced
- 2 tablespoons olive oil
- Salt and freshly ground black pepper, to taste
- 1 tablespoon balsamic glaze
- 1 tablespoon fresh thyme leaves
- ¼ cup chopped toasted walnuts (optional)
- ¼ cup dried cranberries (optional)
Cooking Instructions:
- Prepare the Brussels Sprouts: Begin by trimming the ends off the Brussels sprouts and cutting them in half lengthwise. This guarantees even cooking and allows them to absorb more flavor.
- Cook the Bacon: In a large skillet over medium heat, cook the diced bacon until it’s crispy and golden brown, about 8-10 minutes. Once cooked, remove the bacon with a slotted spoon and place it on a paper towel-lined plate to drain, leaving the bacon fat in the skillet.
- Sauté the Brussels Sprouts: Add the olive oil to the skillet with the bacon fat and increase the heat to medium-high. Place the Brussels sprouts cut side down in the skillet and season with salt and pepper. Sauté for about 5-7 minutes, or until the sprouts are nicely browned on the cut side.
- Combine Ingredients: Add the cooked bacon back into the skillet along with the fresh thyme leaves. If using, stir in the chopped walnuts and dried cranberries. Cook for an additional 3-4 minutes, stirring occasionally, until the Brussels sprouts are tender.
- Finish with Balsamic Glaze: Drizzle the balsamic glaze over the Brussels sprouts and toss everything together to confirm it’s evenly coated. Taste and adjust seasoning if necessary.
- Serve: Transfer the Brussels sprouts to a serving dish and garnish with additional thyme leaves if desired. Serve immediately while warm.
Extra Tips:
To guarantee the best results, select Brussels sprouts that are similar in size for even cooking. Fresh thyme can be substituted with rosemary or sage for a different flavor profile. If you prefer a less sweet dish, you can omit the dried cranberries.
Preparing this dish in advance is possible by cooking the bacon and trimming the sprouts ahead of time, then simply reheating and combining the ingredients on the day of your celebration. Additionally, for a vegetarian version, omit the bacon and use a tablespoon of butter for added richness.
Rustic Sourdough Bread
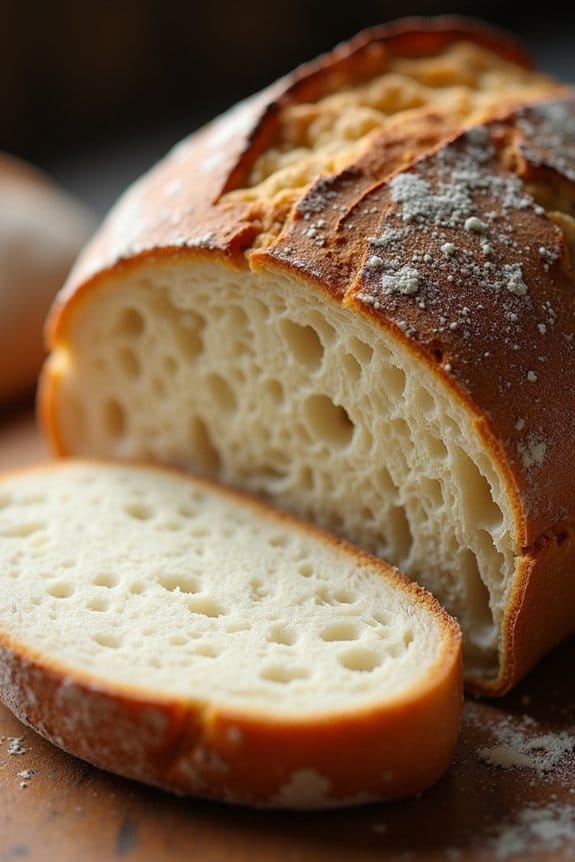
Rustic Sourdough Bread is a timeless classic that brings comfort and warmth to any Christmas lunch. With its tangy flavor, chewy texture, and beautifully crisp crust, it complements a variety of festive dishes. Whether you’re pairing it with a creamy soup or using it as a base for a hearty sandwich, this bread is sure to be a crowd-pleaser at your cozy Christmas gathering.
The magic of sourdough lies in its simplicity and the natural fermentation process that gives it its unique taste and texture.
Crafting the perfect loaf of Rustic Sourdough Bread takes some time and patience, but the end result is worth every minute. This recipe is designed for a serving size of 4-6 people, guaranteeing everyone gets to enjoy a slice (or two) of homemade goodness. By using a sourdough starter, you allow wild yeast and bacteria to raise the dough, resulting in a more flavorful and digestible bread.
Follow the steps carefully, and you’ll be rewarded with a loaf that has a slightly sour flavor, a light and airy crumb, and a delightfully crunchy crust.
Ingredients for 4-6 Servings:
- 500g bread flour
- 300g water, at room temperature
- 100g active sourdough starter
- 10g fine sea salt
- Extra flour for dusting
Cooking Instructions:
1. Prepare the Starter: Confirm your sourdough starter is active by feeding it 4-6 hours before you plan to make the dough. It should be bubbly and double in size.
2. Mix the Dough: In a large mixing bowl, combine the bread flour and water. Mix until no dry flour remains, cover with a damp cloth, and let it rest for 30 minutes. This process is called autolyse and allows the flour to fully hydrate.
3. Add Starter and Salt: Add the active sourdough starter and salt to the dough. Using your hands, mix until all the ingredients are well combined. The dough will be sticky, which is normal.
4. Kneading and Bulk Fermentation**: Perform a series of stretch and folds** every 30 minutes for 2 hours. To stretch and fold, wet your hand to prevent sticking, then grab one side of the dough, stretch it upwards, and fold it over itself. Rotate the bowl and repeat on all sides.
After the folds, let the dough rest for 4-5 hours at room temperature until it has grown by about 50%.
5. Shape the Dough: Gently turn the dough onto a lightly floured surface. Shape it into a round or oval loaf by folding the edges into the center. Flip it over and let it rest for 10 minutes.
6. Final Shaping and Proofing: Reshape the dough, guaranteeing tension on the surface for a smooth finish. Place it seam side up in a floured proofing basket or a bowl lined with a floured cloth. Cover and refrigerate for 12-18 hours.
7. Preheat the Oven: Preheat your oven to 250°C (482°F) with a Dutch oven inside for at least 30 minutes to confirm it’s thoroughly heated.
8. Bake the Bread: Carefully transfer the dough onto a piece of parchment paper and score the top with a sharp blade. Place the dough into the hot Dutch oven, cover with the lid, and bake for 20 minutes.
Then, remove the lid and reduce the temperature to 230°C (446°F). Bake for another 20-25 minutes until golden brown and crusty.
9. Cool the Bread: Allow the bread to cool on a wire rack for at least an hour before slicing. This helps the interior set properly.
Extra Tips:
For best results, use a kitchen scale to measure your ingredients accurately. The water temperature is essential for fermentation; aim for a dough temperature of around 24°C (75°F) after mixing.
If your kitchen is particularly cool, consider extending the bulk fermentation time to confirm the dough has risen sufficiently. Also, for a more pronounced flavor, you can extend the cold proofing time up to 24 hours.
Spiced Apple and Cranberry Crumble
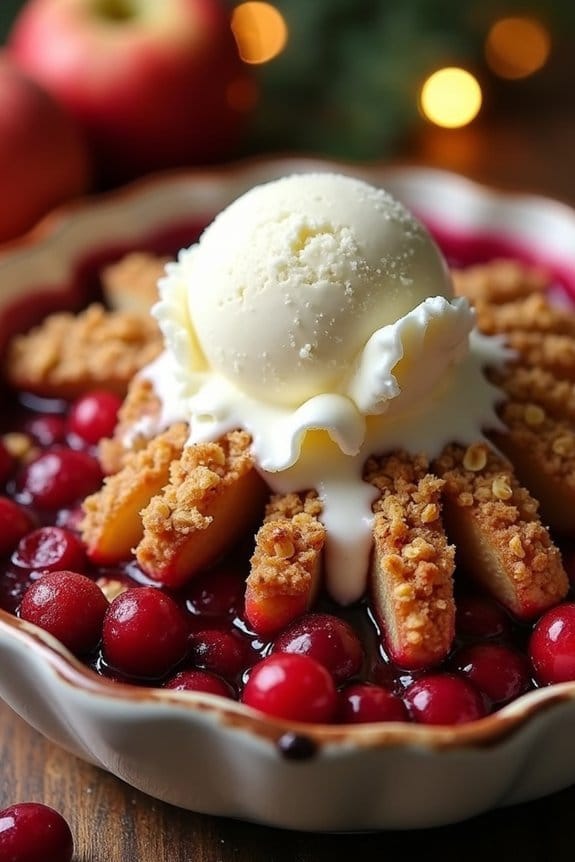
The Spiced Apple and Cranberry Crumble is the perfect dessert to enjoy after a cozy Christmas lunch. This dish combines the tartness of cranberries with the sweetness of apples, all enveloped in a warm, spiced crumble topping. The blend of cinnamon, nutmeg, and clove brings a festive flavor to the dessert that will delight your taste buds and fill your home with the comforting aroma of holiday spices.
This crumble isn’t only delicious but also simple to prepare, making it an ideal choice for both novice and experienced cooks. Perfect for serving 4-6 people, this dessert is a wonderful addition to your Christmas lunch menu. The combination of textures—from the soft, juicy fruit to the crisp, buttery topping—provides a delightful contrast.
The dish is easy to prepare ahead of time and can be popped into the oven as you sit down to lunch, guaranteeing it’s at its best when you’re ready to serve. Whether you pair it with a scoop of vanilla ice cream or a dollop of whipped cream, this Spiced Apple and Cranberry Crumble is sure to be a hit with your family and friends.
Ingredients (Serves 4-6):
- 4 large apples, peeled, cored, and sliced
- 1 cup fresh or frozen cranberries
- 1/2 cup granulated sugar
- 1 teaspoon ground cinnamon
- 1/2 teaspoon ground nutmeg
- 1/4 teaspoon ground cloves
- 1 tablespoon lemon juice
- 1 cup all-purpose flour
- 1 cup rolled oats
- 1/2 cup brown sugar
- 1/2 cup unsalted butter, melted
- A pinch of salt
Cooking Instructions:
- Preheat the Oven: Begin by preheating your oven to 350°F (175°C) to guarantee it’s hot enough to bake the crumble evenly.
- Prepare the Fruit Filling: In a large mixing bowl, combine the sliced apples, cranberries, granulated sugar, cinnamon, nutmeg, cloves, and lemon juice. Mix well to guarantee the fruit is evenly coated with the spices and sugar.
- Transfer to Baking Dish: Pour the fruit mixture into a 9×13-inch baking dish, spreading it out evenly across the bottom.
- Make the Crumble Topping: In another bowl, combine the flour, rolled oats, brown sugar, and a pinch of salt. Pour the melted butter over the dry ingredients and stir until the mixture resembles coarse crumbs.
- Top the Fruit Filling: Evenly sprinkle the crumble mixture over the prepared fruit in the baking dish, ensuring all the fruit is covered.
- Bake: Place the dish in the preheated oven and bake for 40-45 minutes, or until the topping is golden brown and the fruit is bubbling underneath.
- Cool Slightly Before Serving: Remove the crumble from the oven and allow it to cool for about 10 minutes before serving. This will help the juices thicken and make it easier to serve.
Extra Tips:
For an added flavor twist, consider adding a handful of chopped nuts, such as walnuts or pecans, to the crumble topping for extra crunch. If you prefer a less sweet dessert, you can reduce the sugar amount in both the filling and the topping.
This dish is also versatile and can be adapted to include other fruits like pears or raspberries. If using frozen cranberries, there’s no need to thaw them before adding to the dish. Serve the crumble with a side of your favorite creamy accompaniment for the ultimate cozy Christmas treat.
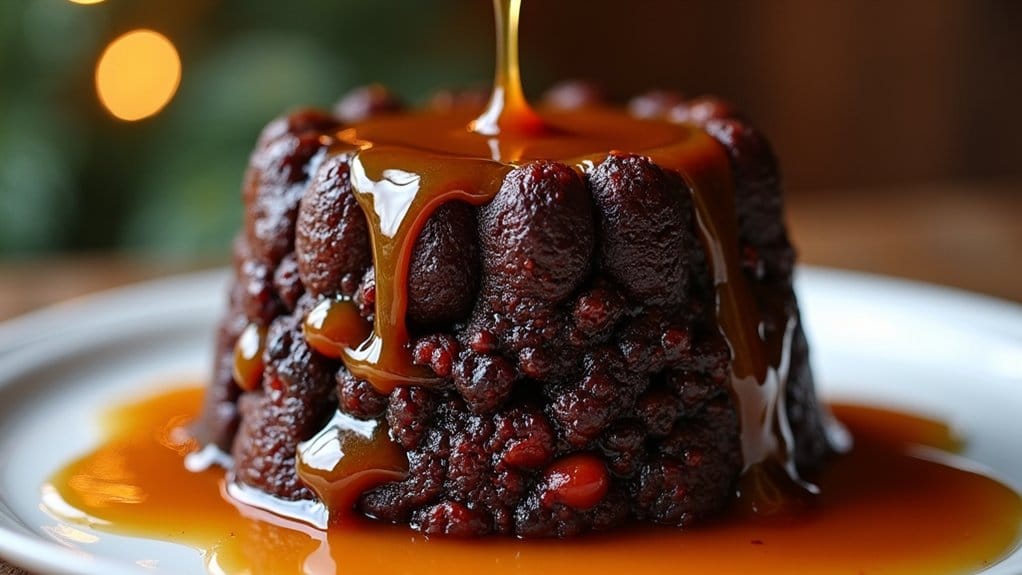
Traditional Christmas Pudding With Brandy Sauce
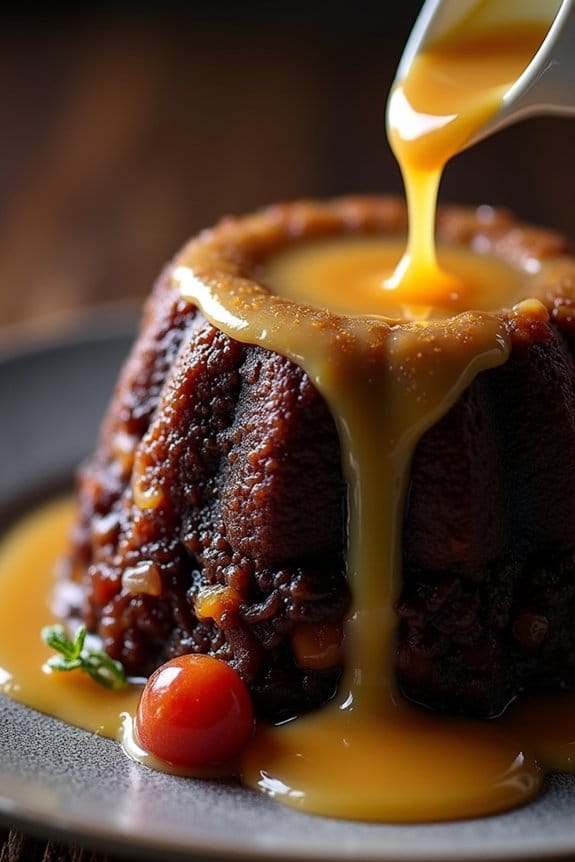
Christmas Pudding is a quintessential part of the festive season, steeped in tradition and rich flavors. This dessert is known for its dense texture, filled with dried fruits, spices, and a hint of citrus, all brought together with suet or butter. The pudding is typically steamed for several hours, resulting in a moist, dark, and flavorful treat that’s often served flaming with a splash of brandy.
To make it extra special, a smooth and decadent brandy sauce accompanies the pudding, perfectly complementing its rich flavors with a creamy touch.
Preparing Traditional Christmas Pudding is a delightful experience that involves a bit of planning and patience. It’s a wonderful opportunity to gather the family around the kitchen as you mix the ingredients and prepare the pudding. The brandy sauce, made with butter, sugar, brandy, and cream, adds a luxurious finish to this dessert. This recipe serves 4-6 people, guaranteeing everyone gets a taste of this festive classic.
Ingredients for Christmas Pudding:
- 150g suet or butter
- 125g dark brown sugar
- 150g breadcrumbs
- 100g self-raising flour
- 1 teaspoon ground mixed spice
- 1 teaspoon ground cinnamon
- 1 teaspoon ground nutmeg
- 200g currants
- 200g sultanas
- 150g raisins
- 50g chopped mixed peel
- Zest of 1 orange
- Zest of 1 lemon
- 3 large eggs
- 150ml dark beer or stout
- 2 tablespoons black treacle
- 1 tablespoon brandy
Ingredients for Brandy Sauce:
- 50g unsalted butter
- 50g caster sugar
- 100ml brandy
- 100ml double cream
Cooking Instructions:
- Prepare the Pudding Mixture:
- In a large mixing bowl, combine the suet (or butter), brown sugar, breadcrumbs, self-raising flour, mixed spice, cinnamon, and nutmeg. Mix well to ascertain all dry ingredients are evenly distributed.
- Add the Fruits and Zest:
- Stir in the currants, sultanas, raisins, chopped mixed peel, and the zest of the orange and lemon. Make sure the fruits are well coated with the dry mixture to prevent them from sinking during cooking.
- Mix the Wet Ingredients:
- In a separate bowl, beat the eggs and mix in the beer or stout, black treacle, and brandy. Pour this liquid mixture into the dry ingredients and mix thoroughly until everything is well combined.
- Steam the Pudding:
- Grease a 1.2-liter pudding basin and spoon the mixture into it. Cover the top with a double layer of greaseproof paper and secure with string. Place the basin in a large saucepan and fill with boiling water halfway up the sides of the basin. Cover the pan and steam for 5-6 hours, topping up with boiling water as needed.
- Prepare the Brandy Sauce:
- In a saucepan, melt the butter over low heat and stir in the sugar until dissolved. Add the brandy and allow the mixture to simmer for a few minutes. Finally, stir in the double cream and heat gently until the sauce is smooth and slightly thickened.
- Serve:
- Unmold the pudding onto a serving plate. Warm a little extra brandy, pour it over the pudding, and ignite carefully for a flaming presentation. Serve slices of the pudding with the warm brandy sauce drizzled over.
Extra Tips:
It’s important to steam the pudding well in advance, ideally several weeks before Christmas, to allow the flavors to mature. Store it in a cool, dry place.
If you don’t have suet, butter is a perfect substitute, but it will change the texture slightly. When making the brandy sauce, be cautious when igniting the brandy on the pudding. Guarantee safety measures are in place, like having a lid or damp cloth nearby to extinguish the flame if necessary.
Enjoy the process and the delightful aromas that will fill your kitchen!
