

Halloween is a great time to bake some cookies for parties or family nights. These recipes stick to everyday ingredients and basic steps. You will find 13 different cookie ideas here. Each one is quick to put together and works for beginners. They suit busy schedules and last minute plans.
Helpful Tips Before You Start
These tips will help your Halloween cookies bake evenly and look festive with little effort.
Start with Chilled Dough
Roll and cut your cookie shapes while the dough is cold. This keeps the edges sharp during baking.
Pick Easy Decorations
Use candy eyes, black sanding sugar, or melted chocolate instead of intricate icing work.
Bake One Test Cookie
Place a single cookie on the sheet first. Check it at the minimum time to avoid overbrowning.
Cool Completely Before Storing
Let the cookies reach room temperature on a rack. Warm cookies will soften any decorations you add later.
Double Chocolate Spiderweb Cookies
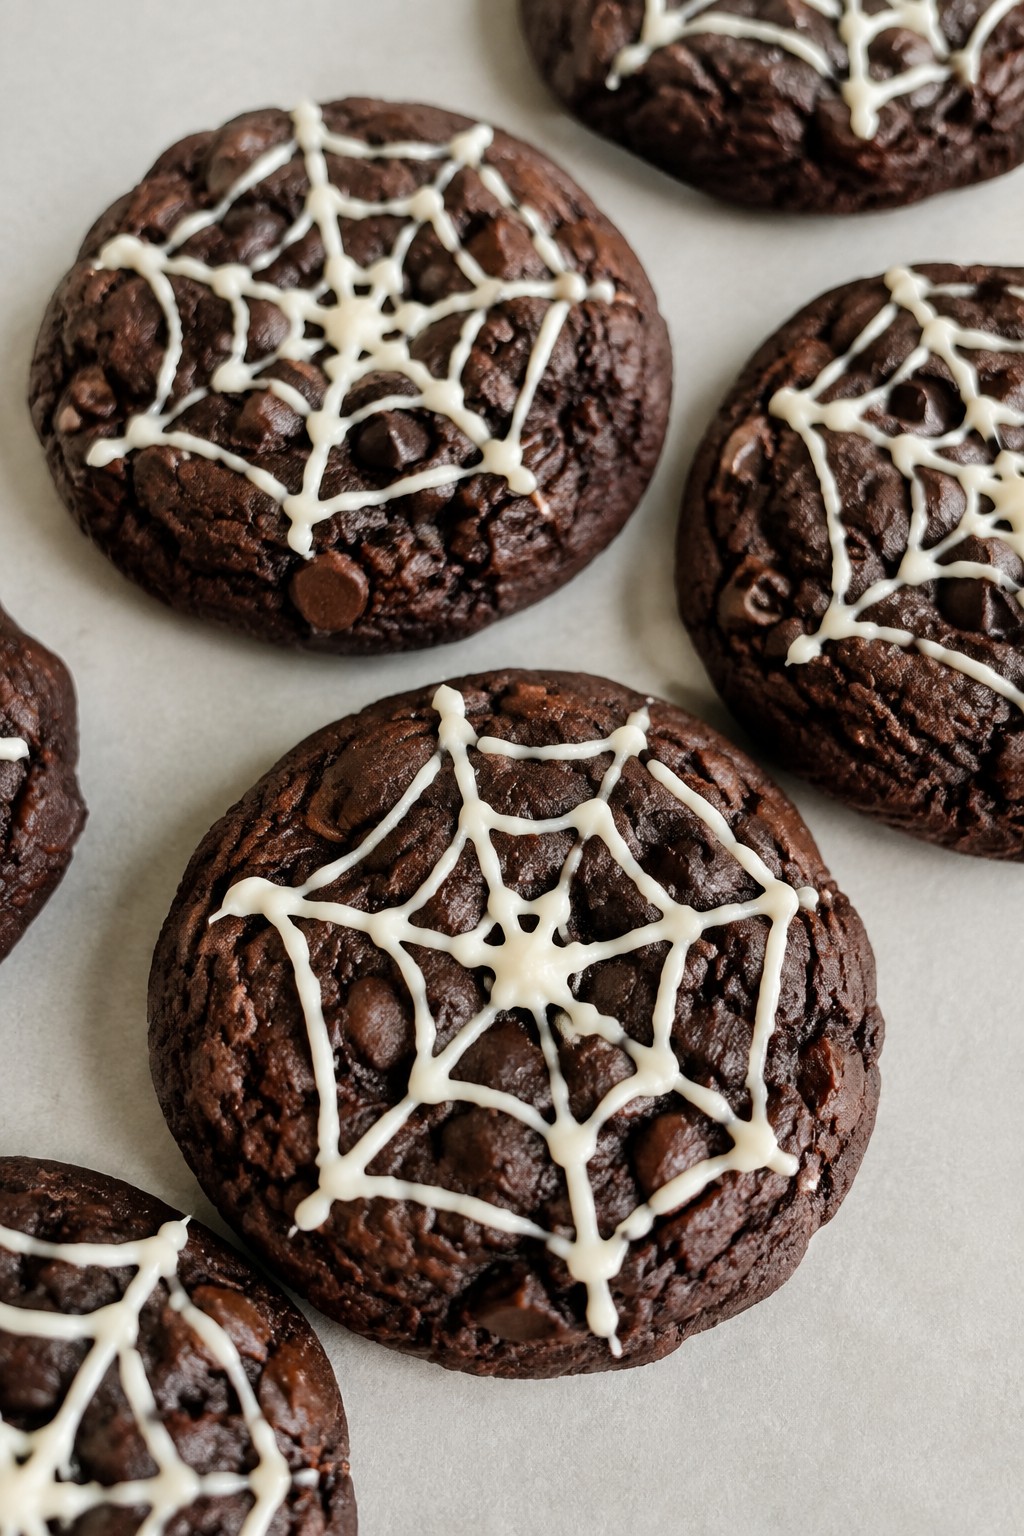
These cookies bring a fun Halloween twist with rich chocolate flavor and a simple spiderweb design on top. They work well for last-minute parties or school events because the dough comes together quickly and the icing sets fast. The texture stays soft in the center with slightly crisp edges, and the double chocolate taste comes from cocoa in the dough plus plenty of chips.
They make a good choice when you want something sweet that looks themed without needing fancy tools or hours in the kitchen.
Serves 4 people.
Ingredients
- 1 cup all-purpose flour
- 1/2 cup cocoa powder
- 1/2 teaspoon baking soda
- 1/4 teaspoon salt
- 1/2 cup butter, softened
- 3/4 cup sugar
- 1 egg
- 1 teaspoon vanilla extract
- 1 cup chocolate chips
- 4 ounces white chocolate
Instructions
- Preheat the oven to 350 degrees and line a baking sheet with parchment paper.
- Whisk together the flour, cocoa powder, baking soda, and salt in a medium bowl.
- In a larger bowl, beat the softened butter and sugar until light and fluffy.
- Add the egg and vanilla extract to the butter mixture and stir until combined.
- Gradually mix the dry ingredients into the wet ingredients until a dough forms.
- Fold in the chocolate chips, then scoop rounded tablespoons of dough onto the prepared baking sheet.
- Bake for 10 to 12 minutes, then let the cookies cool completely on the sheet.
- Melt the white chocolate in a microwave-safe bowl in short bursts, stirring until smooth.
- Transfer the melted white chocolate to a piping bag or zip-top bag with a small corner cut off.
- Pipe concentric circles on each cooled cookie, then drag a toothpick from the center outward to create the web pattern.
Extra Tips
Melt the white chocolate in 15-second intervals to avoid seizing, and work quickly once it is smooth since it sets fast on the cookies. Store leftovers in an airtight container at room temperature for up to three days. If the dough feels too soft after mixing, chill it for 15 minutes before scooping.Course: Dessert Cuisine: American Equipment: Mixing Bowl, Baking Sheet, Piping Bag
Cream Cheese Stuffed Pumpkin Cookies
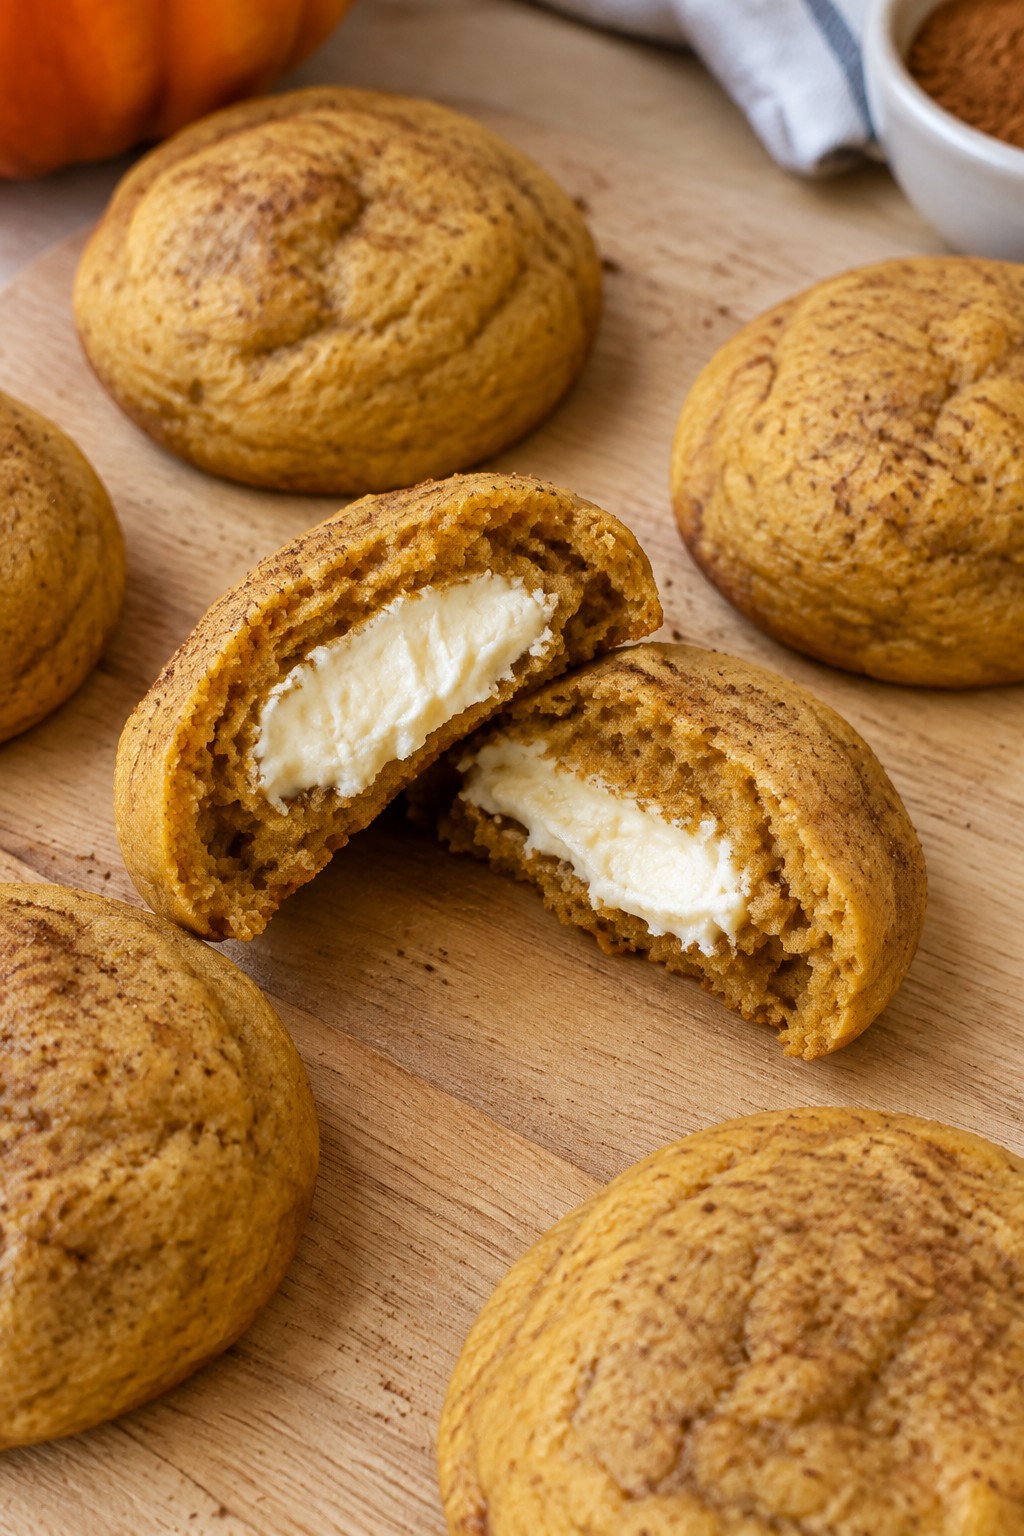
These cookies bring a creamy surprise inside a soft pumpkin spiced shell. They work well for Halloween gatherings or simple fall afternoons when you want something a bit different from plain cookies. The texture stays tender with warm spices and a tangy cream cheese center.
Serves 4 people.
Ingredients
- 1 1/2 cups all-purpose flour
- 1/2 cup pumpkin puree
- 1/4 cup unsalted butter, softened
- 1/4 cup brown sugar
- 1/4 cup granulated sugar
- 1 teaspoon pumpkin pie spice
- 1/2 teaspoon baking soda
- 1/4 teaspoon salt
- 1 teaspoon vanilla extract
- 4 ounces cream cheese, softened
- 2 tablespoons powdered sugar
Instructions
- Heat the oven to 350 degrees and line a baking sheet with parchment paper.
- In a mixing bowl, beat the butter, brown sugar, and granulated sugar until smooth. Add the pumpkin puree and vanilla extract and mix well.
- Stir in the flour, pumpkin pie spice, baking soda, and salt until a soft dough forms.
- In a separate bowl, mix the cream cheese and powdered sugar until combined.
- Scoop tablespoon portions of dough and flatten each slightly. Place a small spoonful of the cream cheese mixture in the center and fold the dough around it to seal.
- Place the stuffed dough balls on the baking sheet and bake for 12 to 14 minutes until the edges turn lightly golden.
- Cool the cookies on the sheet for a few minutes before moving them to a rack.
Extra Tips
Chill the filled dough balls for 15 minutes before baking if the kitchen feels warm, which helps the centers stay neat. These cookies taste best the day they are made but hold up for two days in an airtight container at room temperature.Course: Dessert Cuisine: American Equipment: Mixing Bowl, Baking Sheet, Oven
Candy Corn M&M Drop Cookies
These cookies bring together soft dough with pops of chocolate from the M&Ms and chewy sweetness from the candy corn. They work well for quick Halloween baking when you want something festive without much fuss. The result is a simple drop cookie with crisp edges and a tender center.

Serves 4 people.
Ingredients
- 1 cup all-purpose flour
- 1/2 teaspoon baking soda
- 1/4 teaspoon salt
- 1/2 cup unsalted butter, softened
- 1/4 cup granulated sugar
- 1/4 cup brown sugar
- 1 large egg
- 1 teaspoon vanilla extract
- 1/2 cup M&M’s candies
- 1/2 cup candy corn, chopped
Instructions
- Preheat the oven to 350 degrees and line a baking sheet with parchment paper.
- Stir together the flour, baking soda, and salt in a bowl. Set the mixture aside.
- Beat the butter with the granulated sugar and brown sugar until light and creamy.
- Add the egg and vanilla extract to the butter mixture and mix until smooth.
- Gradually stir the dry ingredients into the wet mixture until a dough forms.
- Fold in the M&M’s and chopped candy corn until evenly distributed.
- Drop rounded spoonfuls of dough onto the prepared baking sheet, spacing them a few inches apart.
- Bake for 10 to 12 minutes until the edges turn golden. Let the cookies cool on the sheet for a few minutes before moving them to a rack.
Extra Tips
Chop the candy corn into smaller pieces so it blends into the dough without melting too much during baking. For a softer texture, remove the cookies from the oven as soon as the edges set. These keep well in an airtight container for up to three days.Course: Dessert Cuisine: American Equipment: Mixing Bowl, Baking Sheet, Oven
Ghostly Lemon Shortbread Cookies
These Ghostly Lemon Shortbread Cookies add a light citrus note to a classic buttery base. The dough comes together quickly and bakes into tender cookies with a subtle tang. They suit Halloween parties, school events, or any time you want a simple treat that looks festive with little extra work.
Shape the cookies with a ghost cutter and finish them with a light coating of powdered sugar. The pale surface and crumbly texture give them an airy look that fits the season while keeping the flavor bright and balanced.

Serves 4 people.
Ingredients
- 1 cup all-purpose flour
- ½ cup unsalted butter, softened
- ¼ cup granulated sugar
- Zest and juice of 1 lemon
- ¼ teaspoon salt
- ¼ cup powdered sugar
Instructions
- Heat the oven to 325°F and line a baking sheet with parchment paper.
- In a mixing bowl, beat the softened butter and granulated sugar until smooth.
- Stir in the lemon zest and lemon juice until fully combined.
- Add the flour and salt to the bowl and mix until a soft dough forms.
- Place the dough on a lightly floured surface and roll it to about ¼-inch thickness.
- Cut out ghost shapes with a cookie cutter and transfer them to the prepared baking sheet.
- Bake for 12 to 15 minutes until the edges are lightly golden.
- Let the cookies cool on the sheet for 5 minutes, then move them to a wire rack.
- Once completely cool, dust the tops with powdered sugar.
Extra Tips
Roll the dough between two sheets of parchment to prevent sticking and keep the ghosts neat. If the dough feels too soft after mixing, chill it for 15 minutes before rolling. Store cooled cookies in an airtight container at room temperature for up to three days.Course: Dessert Cuisine: American Equipment: Mixing Bowl, Baking Sheet, Rolling Pin, Ghost-shaped Cookie Cutter
Black Cocoa Crinkle Cookies
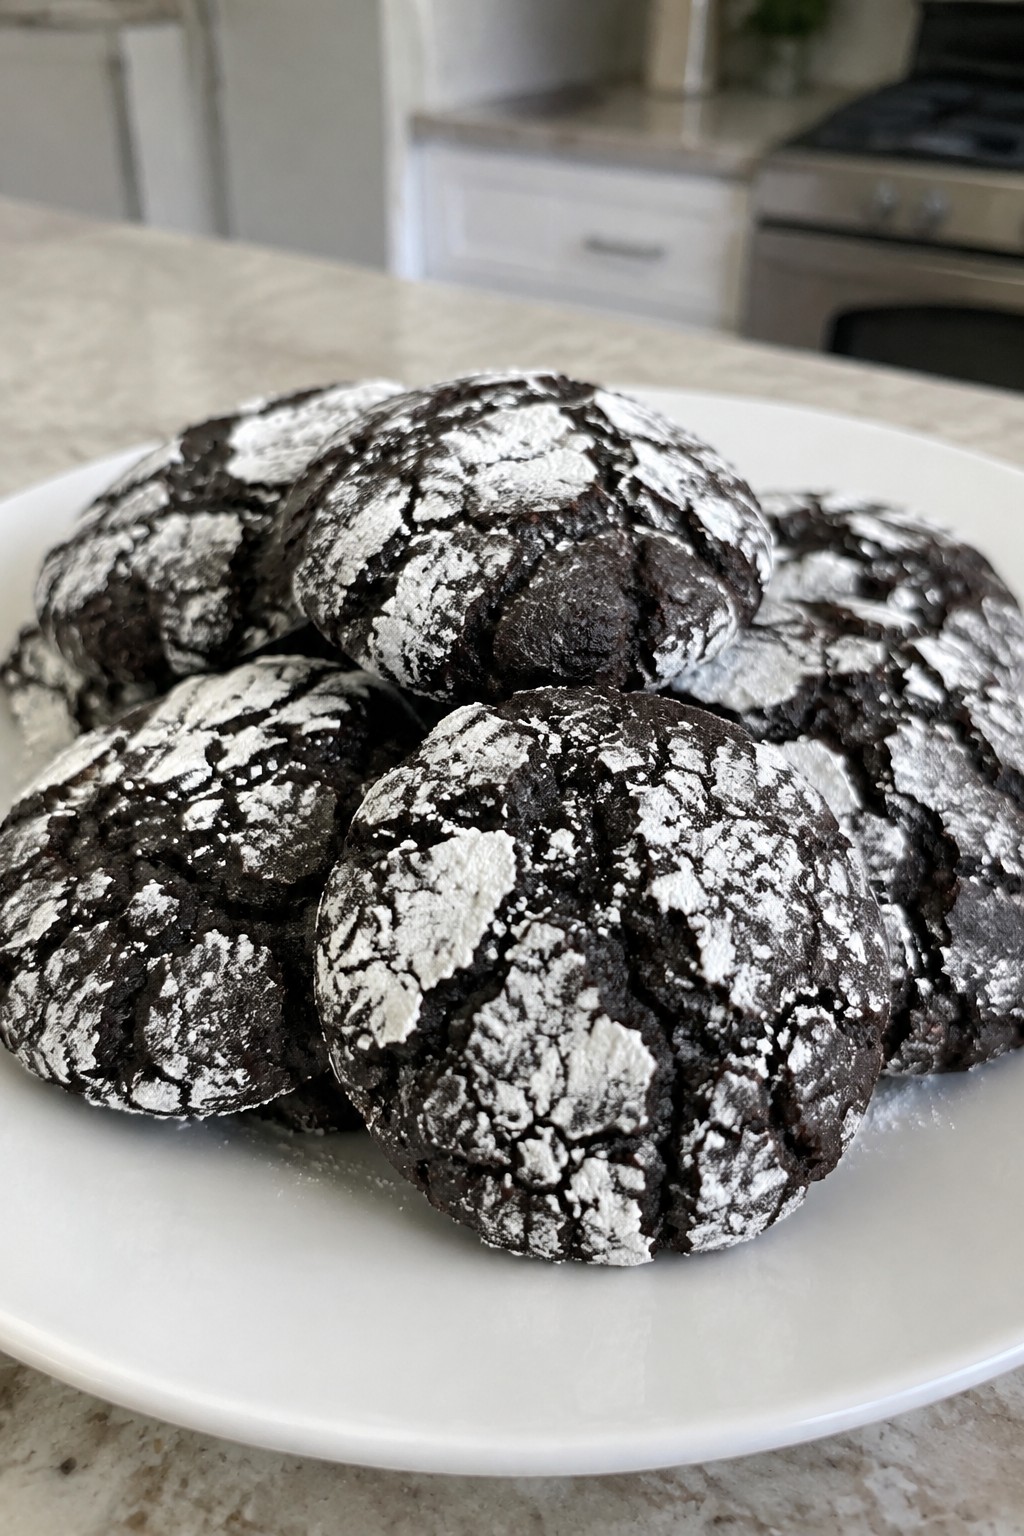
These cookies stand out with their deep black color and signature crinkles, making them a simple choice for Halloween gatherings. They deliver a rich chocolate taste with a chewy center and slightly crisp edges that hold up well on a cookie tray.
The black cocoa gives them a bold look without extra effort, and they bake quickly once the dough is ready. They work nicely for last-minute treats or when you want something a bit different from standard chocolate cookies.
Serves 4 people.
Ingredients
- 3/4 cup all-purpose flour
- 1/3 cup black cocoa powder
- 1/3 cup granulated sugar
- 2 tablespoons brown sugar
- 1/2 teaspoon baking powder
- 1/8 teaspoon salt
- 1 large egg
- 3 tablespoons vegetable oil
- 1/2 teaspoon vanilla extract
- 1/3 cup powdered sugar
Instructions
- Heat the oven to 350 degrees and line a baking sheet with parchment paper.
- In a medium bowl, whisk together the flour, black cocoa powder, baking powder, and salt until evenly mixed.
- In a separate bowl, stir the granulated sugar, brown sugar, egg, vegetable oil, and vanilla extract until smooth.
- Add the dry mixture to the wet mixture and stir until a thick dough forms.
- Scoop the dough into 8 portions and roll each one into a ball.
- Place the powdered sugar in a small bowl and roll each dough ball in it until fully coated.
- Arrange the coated balls on the baking sheet, spacing them a few inches apart.
- Bake for 10 to 12 minutes until the cookies have spread and developed visible cracks.
- Let the cookies cool on the sheet for 5 minutes before moving them to a wire rack.
Extra Tips
Chill the dough for 30 minutes if it feels too soft to roll cleanly. The black cocoa creates a darker color than regular cocoa, so avoid swapping it out if you want the full effect. Store cooled cookies in an airtight container at room temperature for up to three days.Course: Dessert Cuisine: American Equipment: Mixing Bowls, Baking Sheet, Whisk
Caramel Apple Oatmeal Cookies
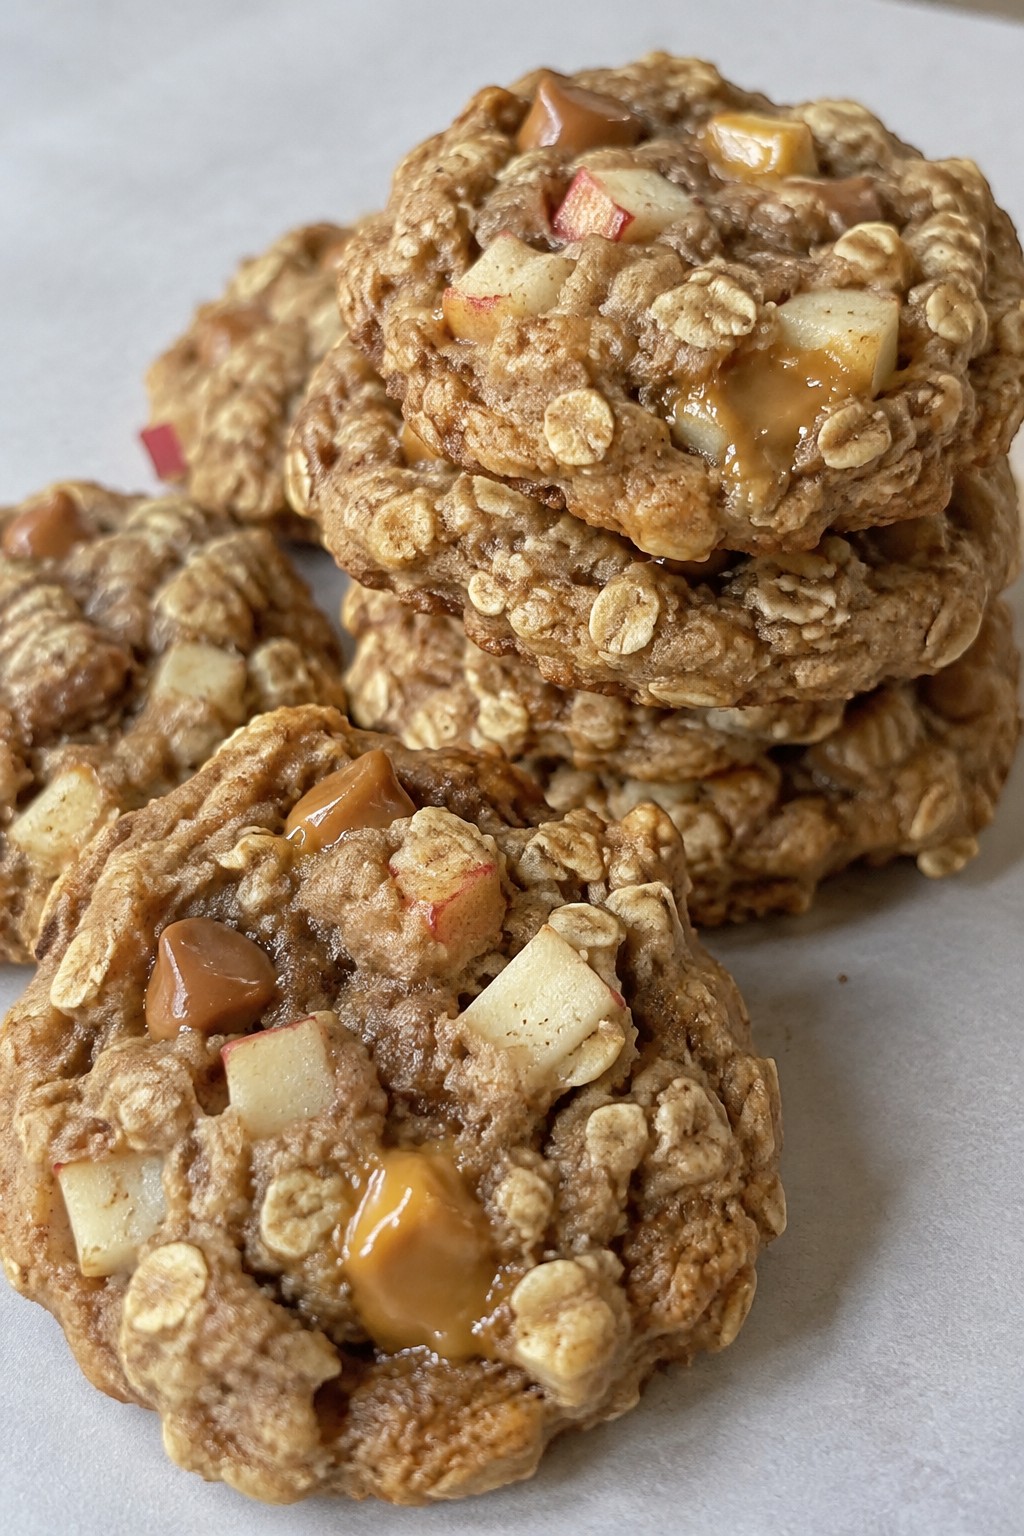
These cookies combine chewy oats with fresh apple pieces and pockets of melted caramel. They bring the flavors of fall into a simple treat that works well for Halloween parties or after-school snacks. The texture stays soft in the center with lightly crisp edges.
The recipe uses everyday pantry items and comes together in one bowl. Kids can help stir or drop the dough while adults handle the oven. The result is a cookie that tastes like a caramel apple in handheld form.
Serves 4 people.
Ingredients
- 3/4 cup rolled oats
- 1/2 cup all-purpose flour
- 1/4 cup unsalted butter, softened
- 1/4 cup brown sugar
- 2 tablespoons granulated sugar
- 1 large egg yolk
- 1/2 teaspoon vanilla extract
- 1/2 teaspoon ground cinnamon
- 1/4 teaspoon baking soda
- 1/4 teaspoon salt
- 1 small apple, peeled and finely diced
- 1/3 cup caramel chips
Instructions
- Preheat the oven to 350 degrees and line a baking sheet with parchment paper.
- In a mixing bowl, cream the softened butter with brown sugar and granulated sugar until smooth.
- Add the egg yolk and vanilla extract. Stir until fully combined.
- Add the rolled oats, flour, cinnamon, baking soda, and salt. Mix until a dough forms.
- Fold in the diced apple and caramel chips until evenly distributed.
- Scoop rounded tablespoons of dough onto the prepared baking sheet, spacing them 2 inches apart.
- Bake for 10 to 12 minutes until the edges turn golden brown.
- Let the cookies cool on the sheet for 5 minutes before moving them to a wire rack.
Extra Tips
Use a firm apple like Granny Smith so the pieces hold their shape and add a slight tart note that balances the caramel. If the dough feels too soft after mixing, chill it for 15 minutes before scooping. Store cooled cookies in an airtight container at room temperature for up to three days.
Course: Dessert Cuisine: American Equipment: Mixing Bowl, Baking Sheet, OvenWitch Finger Almond Biscotti
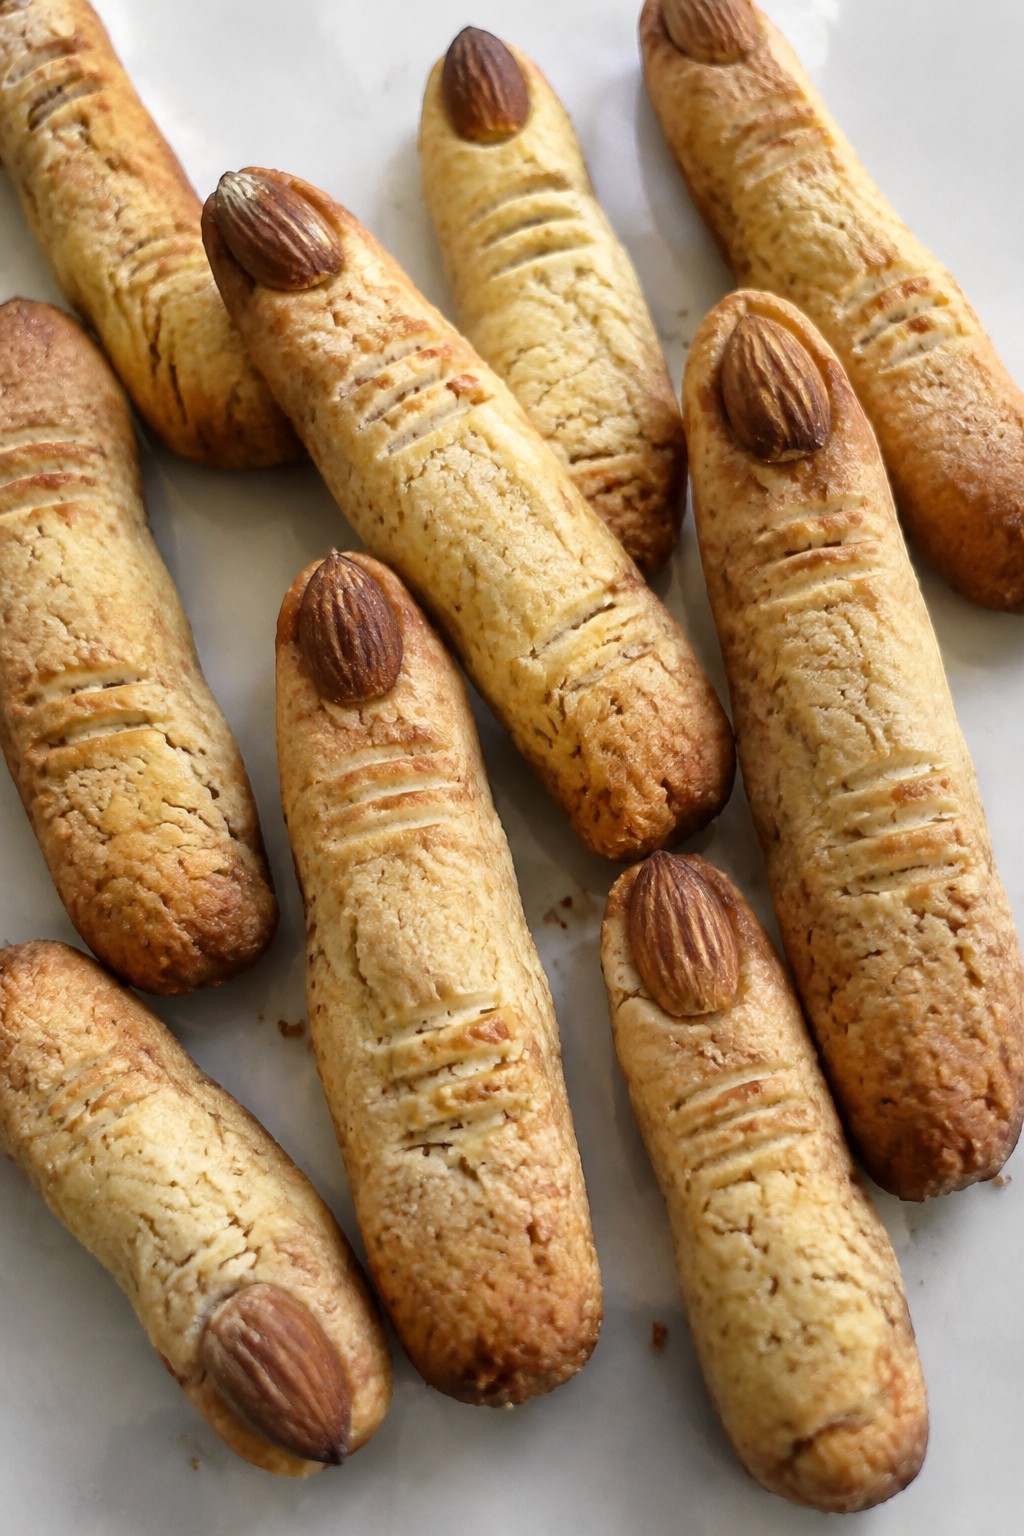
These witch finger almond biscotti add a playful Halloween detail to any cookie tray. They come together with basic pantry items and require only basic shaping skills. The result is a crunchy, nutty cookie that looks like a witch finger thanks to the almond tip.
The flavor is straightforward almond with a firm texture that holds up well for dipping or snacking. They work nicely for parties, school events, or simple afternoon treats when you want something a little different from standard drop cookies.
Serves 4 people.
Ingredients
- 1 cup all-purpose flour
- 1/2 cup granulated sugar
- 1/4 cup unsalted butter, softened
- 1 large egg
- 1 teaspoon almond extract
- 1/2 teaspoon baking powder
- 1/4 teaspoon salt
- 8 whole almonds
Instructions
- Preheat the oven to 350 degrees and line a baking sheet with parchment paper. In a mixing bowl, stir together the flour, baking powder, and salt.
- In a separate bowl, cream the butter and sugar until light. Add the egg and almond extract and mix until smooth.
- Combine the wet and dry mixtures until a stiff dough forms. Divide the dough into 8 equal pieces.
- Roll each piece into a thin log about 4 inches long. Place the logs on the baking sheet and press one whole almond into the end of each log to form a fingernail.
- Bake until the logs are lightly golden, then remove from the oven and let cool for 10 minutes. Slice each log in half on a slight diagonal to create finger shapes.
- Return the slices to the baking sheet, cut side up, and bake again until dry and crisp.
Extra Tips
Shape the dough logs slightly crooked before baking to give the fingers a more natural, witch-like look. Cool the biscotti completely on a wire rack so they stay crunchy. Store them in an airtight tin at room temperature for up to a week. If the dough feels too sticky while shaping, chill it for 15 minutes before rolling.Course: Dessert Cuisine: Italian Equipment: Mixing Bowl, Baking Sheet, Parchment Paper
Monster Eye Peanut Butter Cookies
These monster eye peanut butter cookies turn a simple dough into a fun Halloween treat. They work well for parties or quick baking sessions with kids who want to help decorate.
The cookies bake up with a chewy texture and strong peanut butter taste. Candy eyes pressed on top create the monster look without extra steps.

Serves 4 people.
Ingredients
- 1 cup creamy peanut butter
- 1/2 cup granulated sugar
- 1 large egg
- 1 teaspoon vanilla extract
- 1/2 teaspoon baking soda
- 12 candy eyeballs
Instructions
- Preheat the oven to 350 degrees and line a baking sheet with parchment paper.
- Combine the peanut butter, sugar, egg, vanilla extract, and baking soda in a mixing bowl. Stir until a smooth dough forms.
- Scoop the dough into 12 portions and roll each into a ball. Place the balls on the baking sheet and flatten them slightly with a fork.
- Bake for 10 to 12 minutes until the edges turn light golden.
- Remove the cookies from the oven and immediately press two candy eyeballs onto each one while they are still warm.
Extra Tips
Press the candy eyeballs right after baking so they stick firmly without melting. Use creamy peanut butter for the smoothest dough texture. Store cooled cookies in an airtight container at room temperature for up to three days.Course: Dessert Cuisine: American Equipment: Mixing Bowl, Baking Sheet, Oven
Cinnamon Sugar Bat Wing Cookies
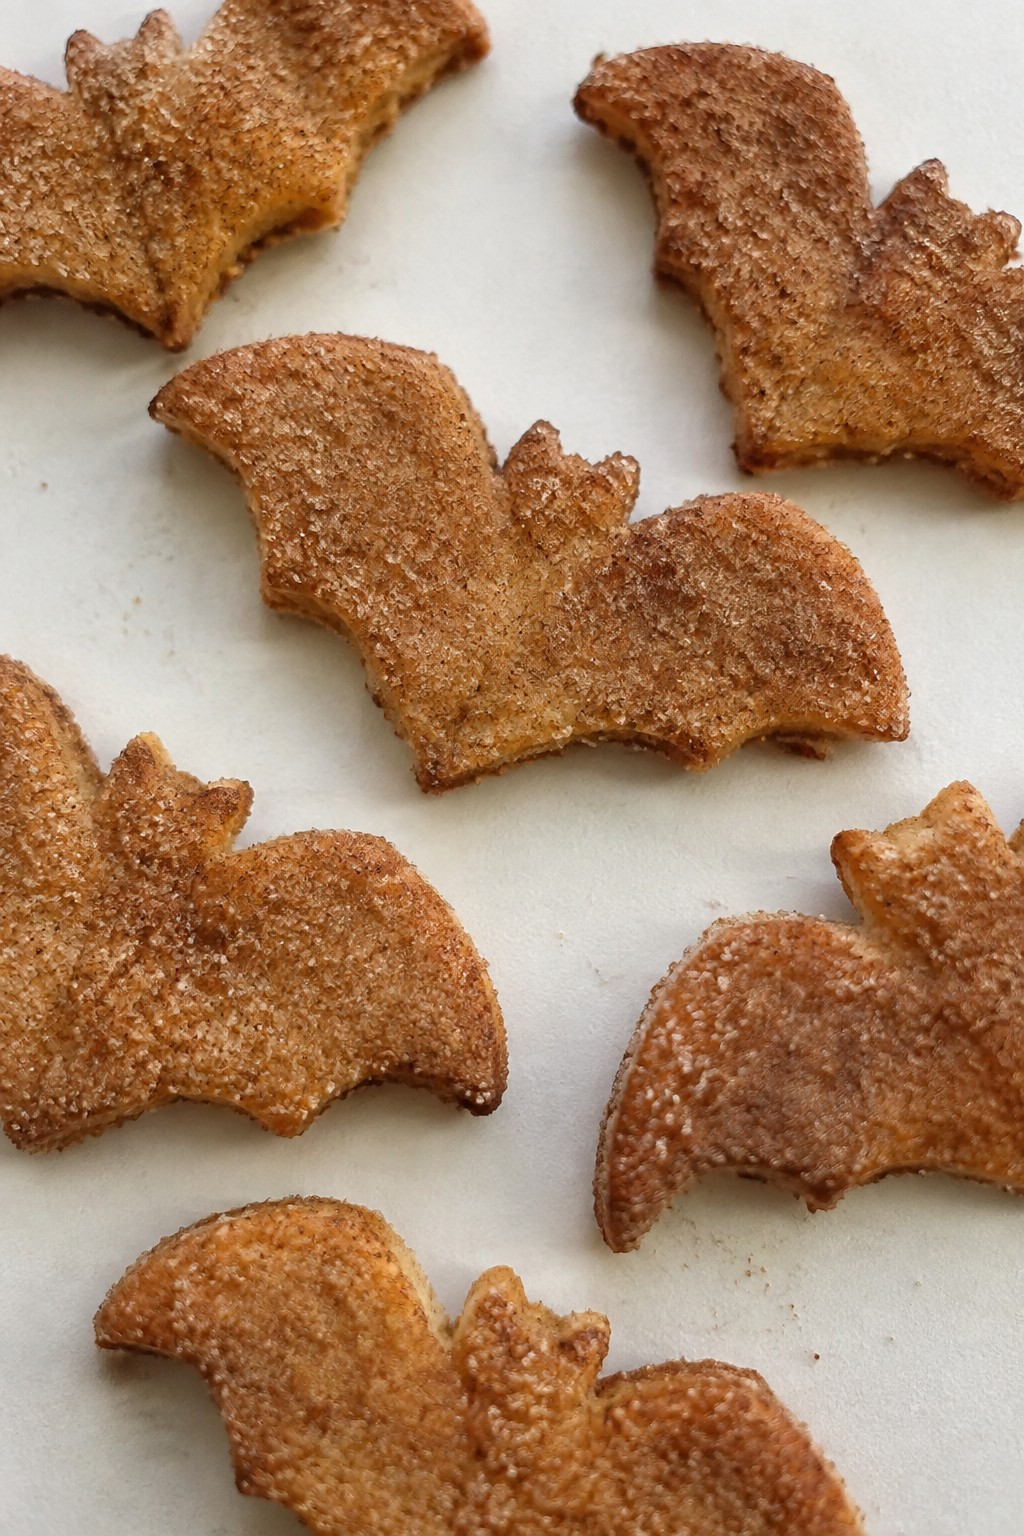
These cookies bring a simple twist to classic cinnamon sugar treats with their bat wing shape. They work well for Halloween gatherings or quick weeknight baking when you want something festive without much fuss. The result is a crisp edge with a soft center and warm spice flavor.
Serves 4 people.
Ingredients
- 1 cup all-purpose flour
- ½ cup unsalted butter, softened
- ¼ cup granulated sugar
- 1 large egg yolk
- ½ teaspoon vanilla extract
- 1 teaspoon ground cinnamon
- ¼ teaspoon baking powder
- ⅛ teaspoon salt
- 2 tablespoons granulated sugar
- 1 teaspoon ground cinnamon (for coating)
Instructions
- Heat the oven to 350 degrees and line a baking sheet with parchment paper.
- In a mixing bowl, beat the softened butter and ¼ cup sugar until light and fluffy.
- Add the egg yolk and vanilla extract, then mix until combined.
- Stir in the flour, 1 teaspoon cinnamon, baking powder, and salt until a soft dough forms.
- Roll the dough out on a lightly floured surface to about ¼ inch thick.
- Cut the dough into bat wing shapes using a sharp knife or cookie cutter.
- Mix the remaining 2 tablespoons sugar with 1 teaspoon cinnamon in a small bowl.
- Press both sides of each cut cookie into the cinnamon sugar mixture.
- Place the coated cookies on the prepared baking sheet and bake for 10 to 12 minutes until the edges turn golden.
- Cool the cookies on the sheet for 5 minutes before moving them to a wire rack.
Extra Tips
Roll the dough between two sheets of parchment to keep it from sticking without extra flour. If the shapes lose definition during baking, chill the cut cookies on the sheet for 10 minutes first. Store cooled cookies in an airtight container at room temperature for up to three days to maintain their crisp texture.Course: Dessert Cuisine: American Equipment: Mixing Bowl, Baking Sheet, Rolling Pin, Parchment Paper
Orange Cranberry Linzer Cookies
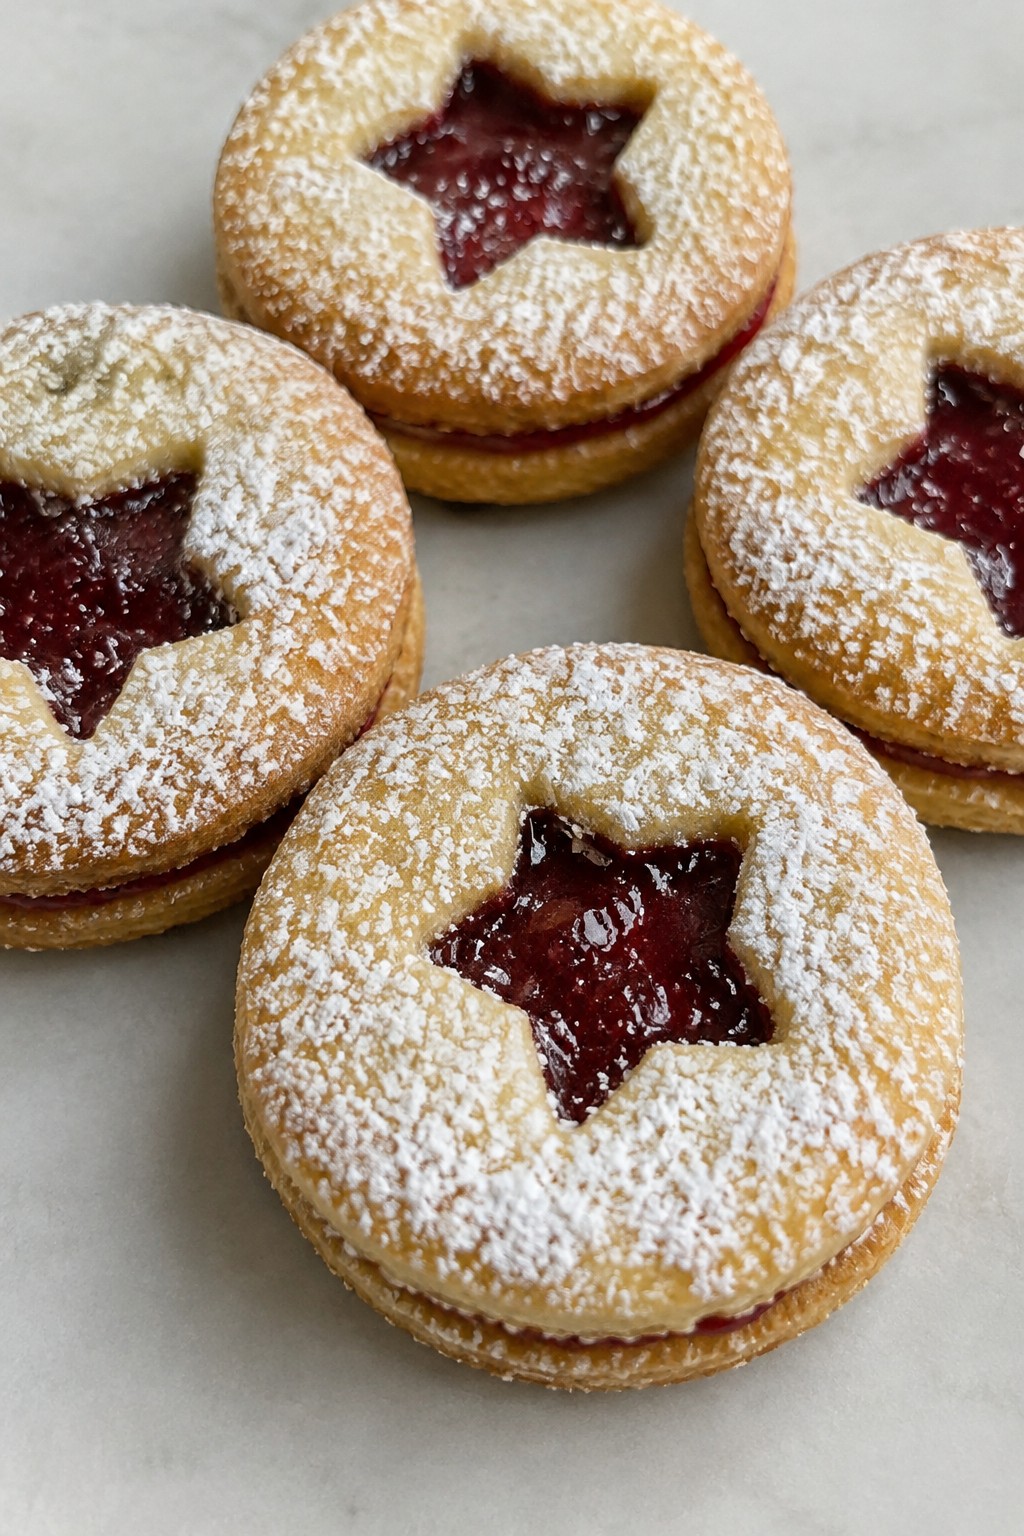
These cookies bring a bright citrus note to the classic Linzer style with tart cranberry filling between buttery rounds. They work well for Halloween gatherings because the orange flavor feels seasonal without needing extra decorations. The texture stays crisp on the edges and soft in the middle once filled.
The cutout tops let a bit of the red jam show through, which fits the holiday look. They travel easily to parties and hold up for a day or two once assembled.
Serves 4 people.
Ingredients
- 1 cup all-purpose flour
- ½ cup almond flour
- ½ cup unsalted butter, softened
- ¼ cup granulated sugar
- 1 large egg yolk
- Zest from 1 orange
- ½ teaspoon vanilla extract
- ½ cup cranberry jam
- Powdered sugar, for dusting
Instructions
- Whisk the all-purpose flour and almond flour in a bowl and set aside.
- Beat the butter and granulated sugar until light. Add the egg yolk, orange zest, and vanilla extract and mix until smooth.
- Stir the dry mixture into the wet ingredients until a dough forms. Shape into a disk, wrap, and chill for 30 minutes.
- Heat the oven to 350°F and line a baking sheet with parchment. Roll the dough to ¼-inch thickness on a lightly floured surface.
- Cut 16 circles with a 2-inch cutter. Use a smaller cutter to make a window in 8 of them. Place all pieces on the sheet.
- Bake for 10 to 12 minutes until the edges turn golden. Cool completely on the sheet.
- Spread cranberry jam on the solid circles. Top each with a windowed cookie and press gently. Dust with powdered sugar before serving.
Extra Tips
Chill the dough a second time after rolling if it feels soft so the cutouts stay sharp. Use a good quality cranberry jam with visible bits of fruit for the best texture between the layers. Dust the finished cookies right before serving so the powdered sugar stays visible.Course: Dessert Cuisine: American Equipment: Mixing Bowl, Baking Sheet, Rolling Pin, Cookie Cutters
White Chocolate Cranberry Halloween Cookies
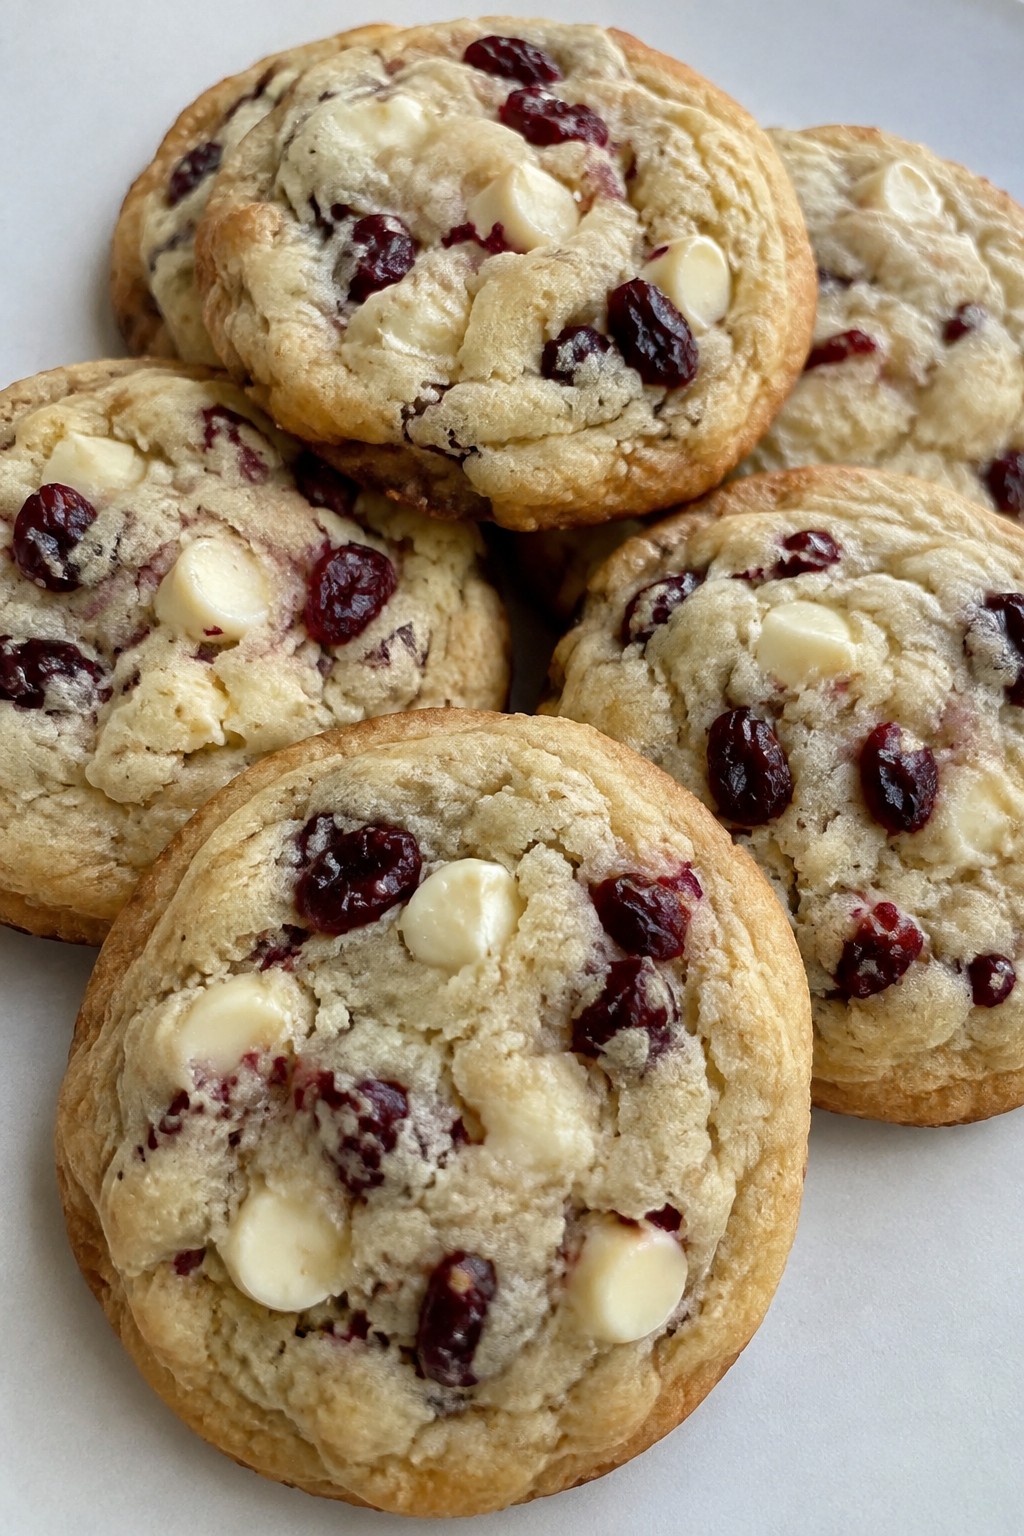
These white chocolate cranberry Halloween cookies combine creamy white chocolate with tart dried cranberries for a soft, chewy treat. The simple dough comes together quickly and produces cookies that hold up well at parties or as take-home favors.
The balance of sweet and tangy flavors makes them a reliable choice when you need something festive without extra steps. They bake up with lightly golden edges and stay moist in the center.
Serves 4 people.
Ingredients
- 1 cup all-purpose flour
- ½ teaspoon baking soda
- ¼ teaspoon salt
- ½ cup unsalted butter, softened
- ⅓ cup granulated sugar
- 1 large egg
- 1 teaspoon vanilla extract
- ½ cup white chocolate chips
- ⅓ cup dried cranberries
Instructions
- Preheat the oven to 350°F and line a baking sheet with parchment paper.
- In a medium bowl, whisk together the flour, baking soda, and salt.
- In a separate bowl, beat the softened butter and sugar until light. Add the egg and vanilla extract and mix until smooth.
- Stir the dry ingredients into the wet mixture until a dough forms.
- Fold in the white chocolate chips and dried cranberries until evenly distributed.
- Scoop rounded tablespoons of dough onto the prepared baking sheet, spacing them a few inches apart.
- Bake for 10 to 12 minutes until the edges are lightly golden. Cool on the sheet for 5 minutes before moving to a wire rack.
Extra Tips
Chill the dough for 15 minutes if it feels too soft to hold shape. The cranberries stay chewy after baking, so avoid overmixing once they are added. Store cooled cookies in an airtight container at room temperature for up to three days.Course: Dessert Cuisine: American Equipment: Mixing bowls, Baking sheet, Oven
Spiced Ginger Molasses Cookies
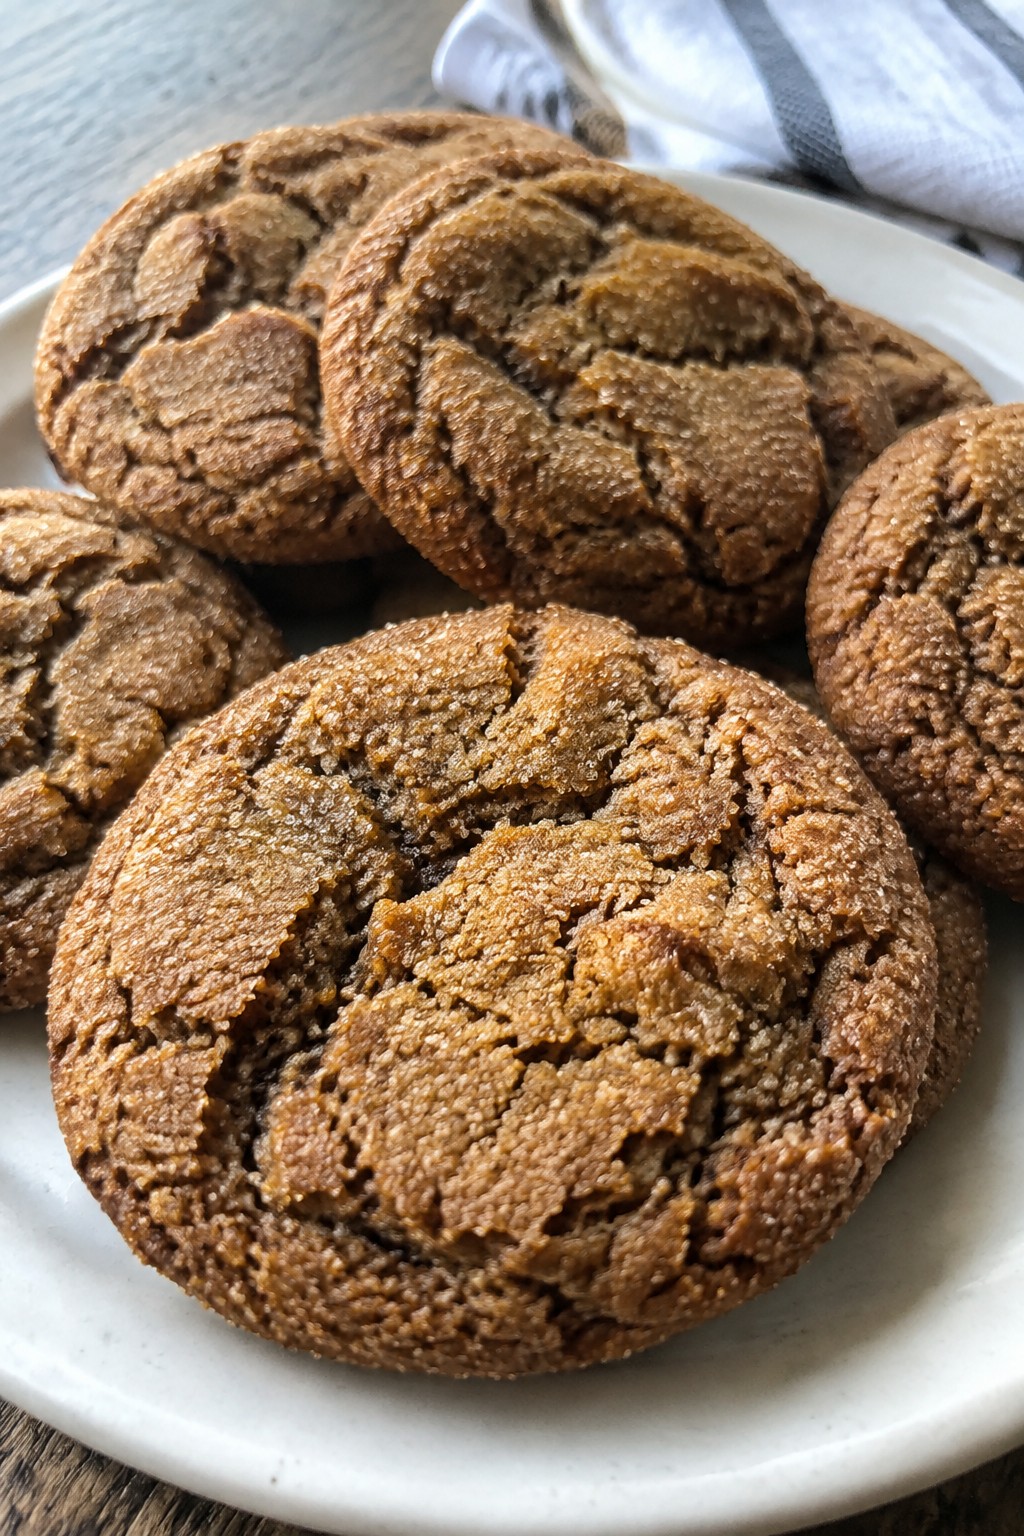
These spiced ginger molasses cookies bring cozy fall flavors that suit Halloween gatherings. The chewy centers and lightly crisp edges hold up well for cookie platters or lunchbox treats. Warm spices make them feel seasonal without extra fuss.
They deliver bold ginger and molasses taste with a touch of cinnamon and clove. A quick roll in sugar before baking creates the signature crackled top that home bakers like.
Serves 4 people.
Ingredients
- 1 1/2 cups all-purpose flour
- 2 teaspoons ground ginger
- 1 teaspoon ground cinnamon
- 1/2 teaspoon baking soda
- 1/4 teaspoon ground cloves
- 1/4 teaspoon salt
- 1/2 cup unsalted butter, softened
- 3/4 cup granulated sugar, divided
- 1/4 cup molasses
- 1 large egg
Instructions
- Preheat the oven to 350 degrees and line a baking sheet with parchment paper.
- In a medium bowl, whisk together the flour, ground ginger, cinnamon, baking soda, cloves, and salt. Set the bowl aside.
- In a large bowl, beat the softened butter with 1/2 cup of the sugar until light and creamy. Add the molasses and egg, then mix until smooth.
- Stir the dry ingredients into the wet mixture until a soft dough forms. Avoid overmixing.
- Place the remaining 1/4 cup sugar in a small bowl. Scoop the dough into 12 portions and roll each into a ball, then coat it in the sugar.
- Arrange the balls on the baking sheet and bake for 10 to 12 minutes until the edges are set but the centers still look soft.
- Let the cookies cool on the sheet for 5 minutes before moving them to a wire rack.
Extra Tips
For the chewiest texture, pull the cookies out as soon as the edges firm up. Store cooled cookies in an airtight container at room temperature for up to four days. If the dough feels sticky, chill it for 20 minutes before rolling in sugar.Course: Dessert Cuisine: American Equipment: Mixing Bowls, Baking Sheet, Oven
Sprinkle Funfetti Sugar Cookies
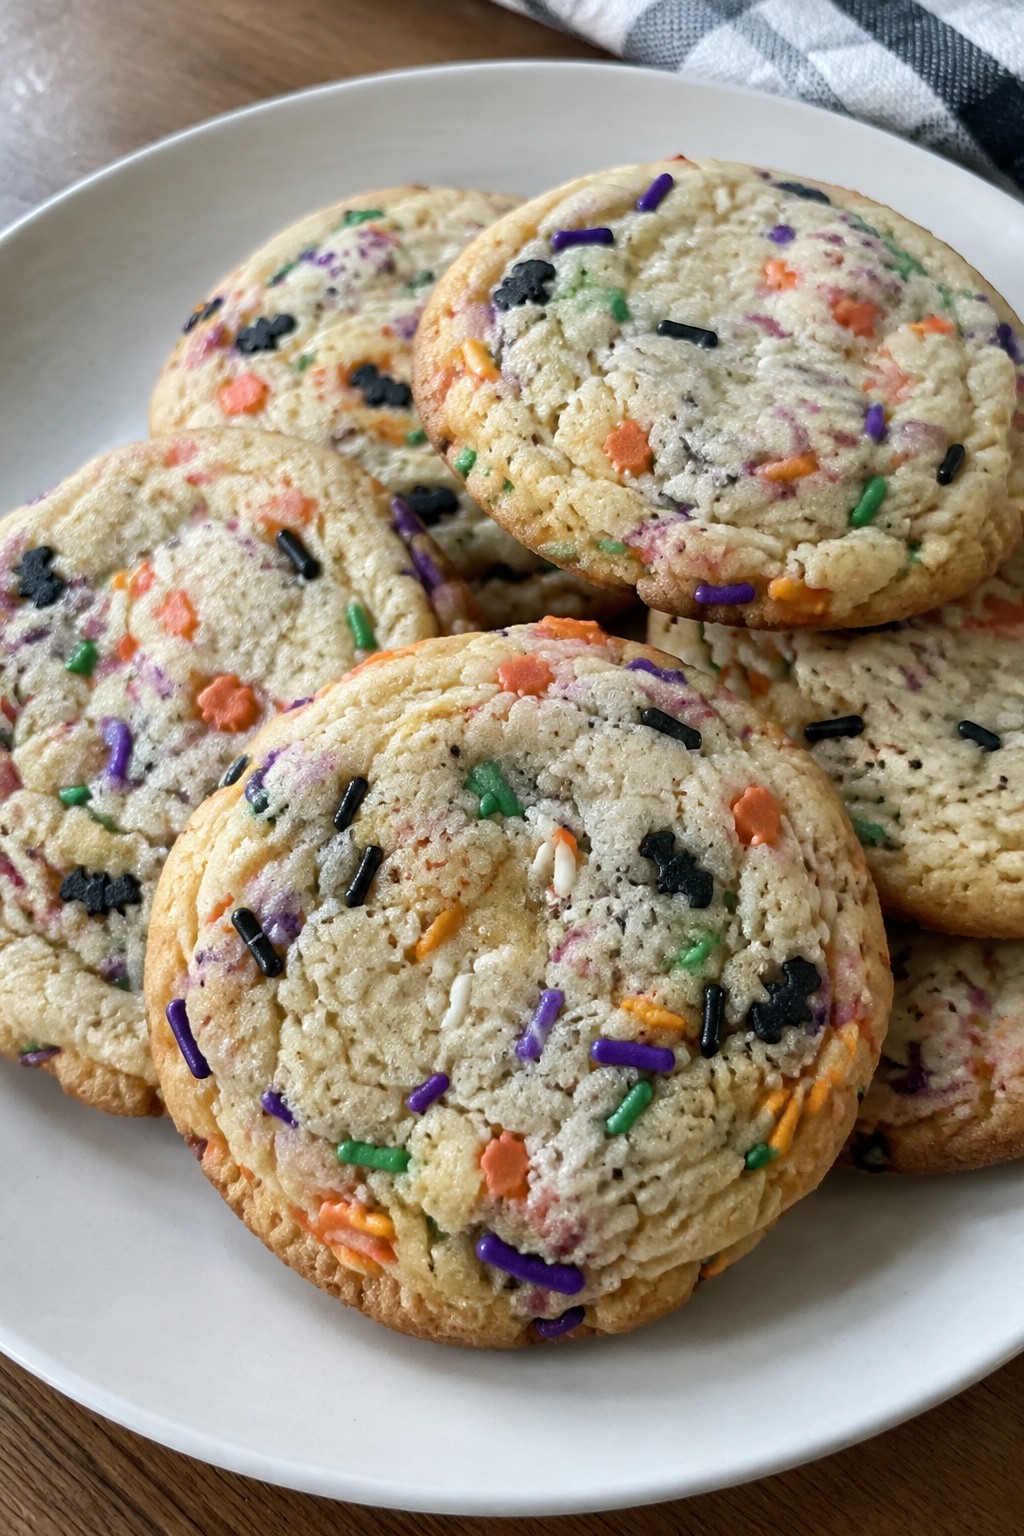
These Sprinkle Funfetti Sugar Cookies bring bright color and simple sweetness to Halloween baking. The sprinkles bake right into the dough for a cheerful look that stands out on a cookie tray. Each cookie turns out soft in the center with a light, crisp edge.
They suit quick after-school treats or last-minute party platters. The vanilla flavor stays mild so the funfetti sprinkles shine through without overpowering the taste.
Serves 4 people.
Ingredients
- 1/2 cup unsalted butter, softened
- 1/2 cup granulated sugar
- 1 large egg
- 1 teaspoon vanilla extract
- 1 1/4 cups all-purpose flour
- 1/2 teaspoon baking powder
- 1/4 teaspoon salt
- 1/3 cup Halloween funfetti sprinkles
- 2 tablespoons extra Halloween funfetti sprinkles for rolling
Instructions
- Heat the oven to 350°F and line a baking sheet with parchment paper.
- In a mixing bowl, beat the softened butter and granulated sugar until the mixture looks pale and fluffy.
- Add the egg and vanilla extract, then mix until fully combined.
- In a separate bowl, stir together the flour, baking powder, and salt.
- Slowly add the dry ingredients to the wet mixture and stir until a soft dough forms.
- Fold in the 1/3 cup of Halloween funfetti sprinkles until they are evenly scattered through the dough.
- Scoop the dough into small balls, roll each one in the extra sprinkles, and place them on the prepared baking sheet.
- Bake for 10 to 12 minutes until the edges turn lightly golden. Let the cookies cool on the sheet for a few minutes before moving them to a rack.
Extra Tips
Roll the dough balls gently in the extra sprinkles right before baking so they stick well without sinking into the dough. If the dough feels too soft to handle, chill it for 15 minutes to keep the cookies from spreading too much. Store cooled cookies in an airtight container at room temperature for up to four days.Course: Dessert Cuisine: American Equipment: Mixing Bowl, Baking Sheet, Oven
