
Halloween snacks do not need to be complicated. These ideas focus on simple steps and everyday ingredients. You can make most of them with what you already have in the kitchen. They work well for last minute plans or busy evenings. Here are 12 quick options to consider.
Helpful Tips Before You Start
A few quick checks will keep the process smooth and fast.
Pull Out Ingredients First
Set everything on the counter before you begin. This avoids extra trips to the fridge or pantry mid-recipe.
Choose No-Bake Options
Focus on assembly only snacks when time is tight. Skip any that require oven time or chilling.
Prep in Batches
Make two or three of the same snack together. It cuts down on repeated steps like slicing or spreading.
Keep Shapes Simple
Use a knife or small cutter for basic Halloween outlines. Avoid detailed designs that take extra minutes.
Ghostly Banana Yogurt Pops
These Ghostly Banana Yogurt Pops bring a playful Halloween touch to snack time with minimal effort. They work well for last-minute party prep or an after-school treat when you want something light and fun.
The frozen banana stays soft inside a creamy yogurt layer, while chocolate chip faces add a simple spooky detail. Kids can help decorate them before they go into the freezer.

Serves 4 people.
Ingredients
- 4 bananas
- 2 cups vanilla yogurt
- 1/4 cup chocolate chips
- 4 popsicle sticks
Instructions
- Peel the bananas and cut each one in half crosswise. Push a popsicle stick into the cut end of every banana half.
- Spoon the vanilla yogurt into a bowl and dip each banana half to coat it fully.
- Set the coated bananas on a baking sheet and press chocolate chips into the yogurt to make eyes and a mouth on each pop.
- Place the baking sheet in the freezer until the yogurt is firm.
Extra Tips
Use a thick yogurt so the coating stays put on the banana. If you want a stronger vanilla flavor, stir a drop of extract into the yogurt before dipping. Store the finished pops in a freezer bag for up to a week and serve them straight from the freezer.Course: Snack Cuisine: American Equipment: Baking sheet, Popsicle sticks, Freezer
Mummy Sausage Crescent Bites
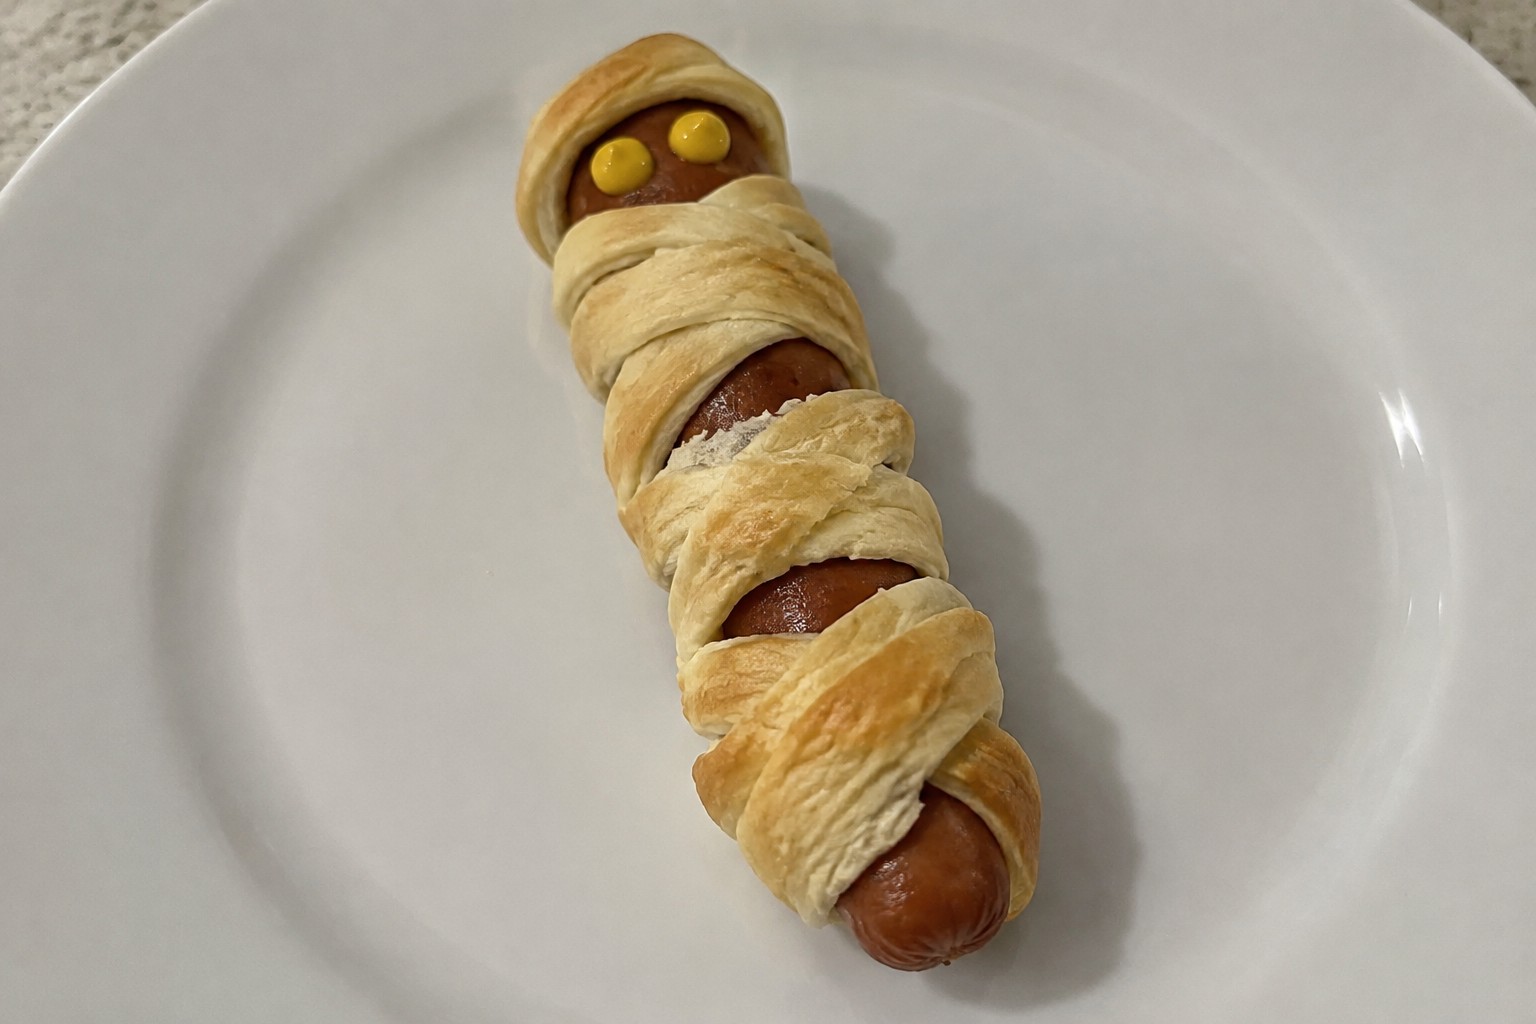
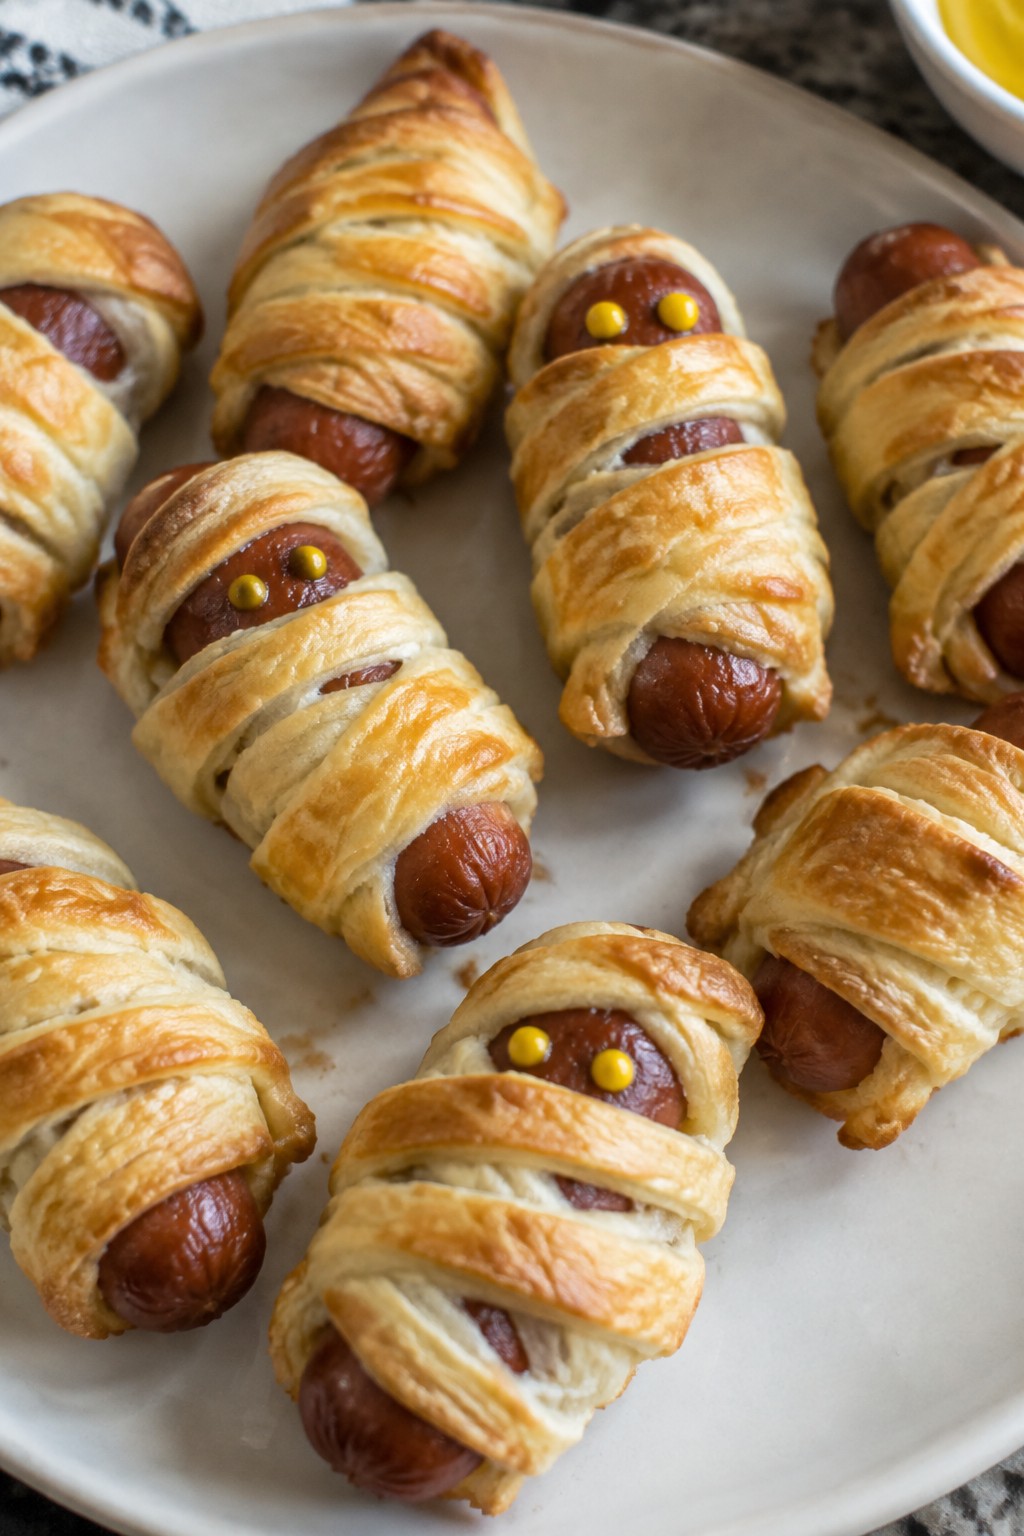
These sausage bites use crescent roll strips to create a quick mummy effect that fits right into a Halloween spread. They come together fast with just a few items from the fridge, making them a good choice for last-minute snacks or kids’ parties.
The flaky dough bakes up crisp around the savory sausage, while a touch of mustard adds a mild tangy note. They work well as finger food that feels festive without much effort.
Serves 4 people.
Ingredients
- 1 can (8-ounce) refrigerated crescent rolls
- 8 fully cooked cocktail sausages
- 2 tablespoons yellow mustard
Instructions
- Heat the oven to 375 degrees F and line a baking sheet with parchment paper.
- Unroll the crescent dough on a clean surface and cut it into 16 thin strips using a knife or pizza cutter.
- Wrap two strips around each sausage in a crisscross pattern, leaving small gaps near one end for the eyes.
- Arrange the wrapped sausages on the prepared baking sheet.
- Bake for 10 to 12 minutes until the dough turns golden brown.
- Remove from the oven and let them cool for 2 minutes.
- Dot the mustard in the open spaces to form eyes on each mummy.
Extra Tips
Wrap the strips loosely so the dough has room to puff during baking. These bites taste best warm, so bake them just before serving. Leftovers can be reheated in a 350 degree F oven for 5 minutes to restore crispness.Course: Appetizer Cuisine: American Equipment: Baking sheet, Oven, Knife
Spiderweb Hummus Veggie Platter
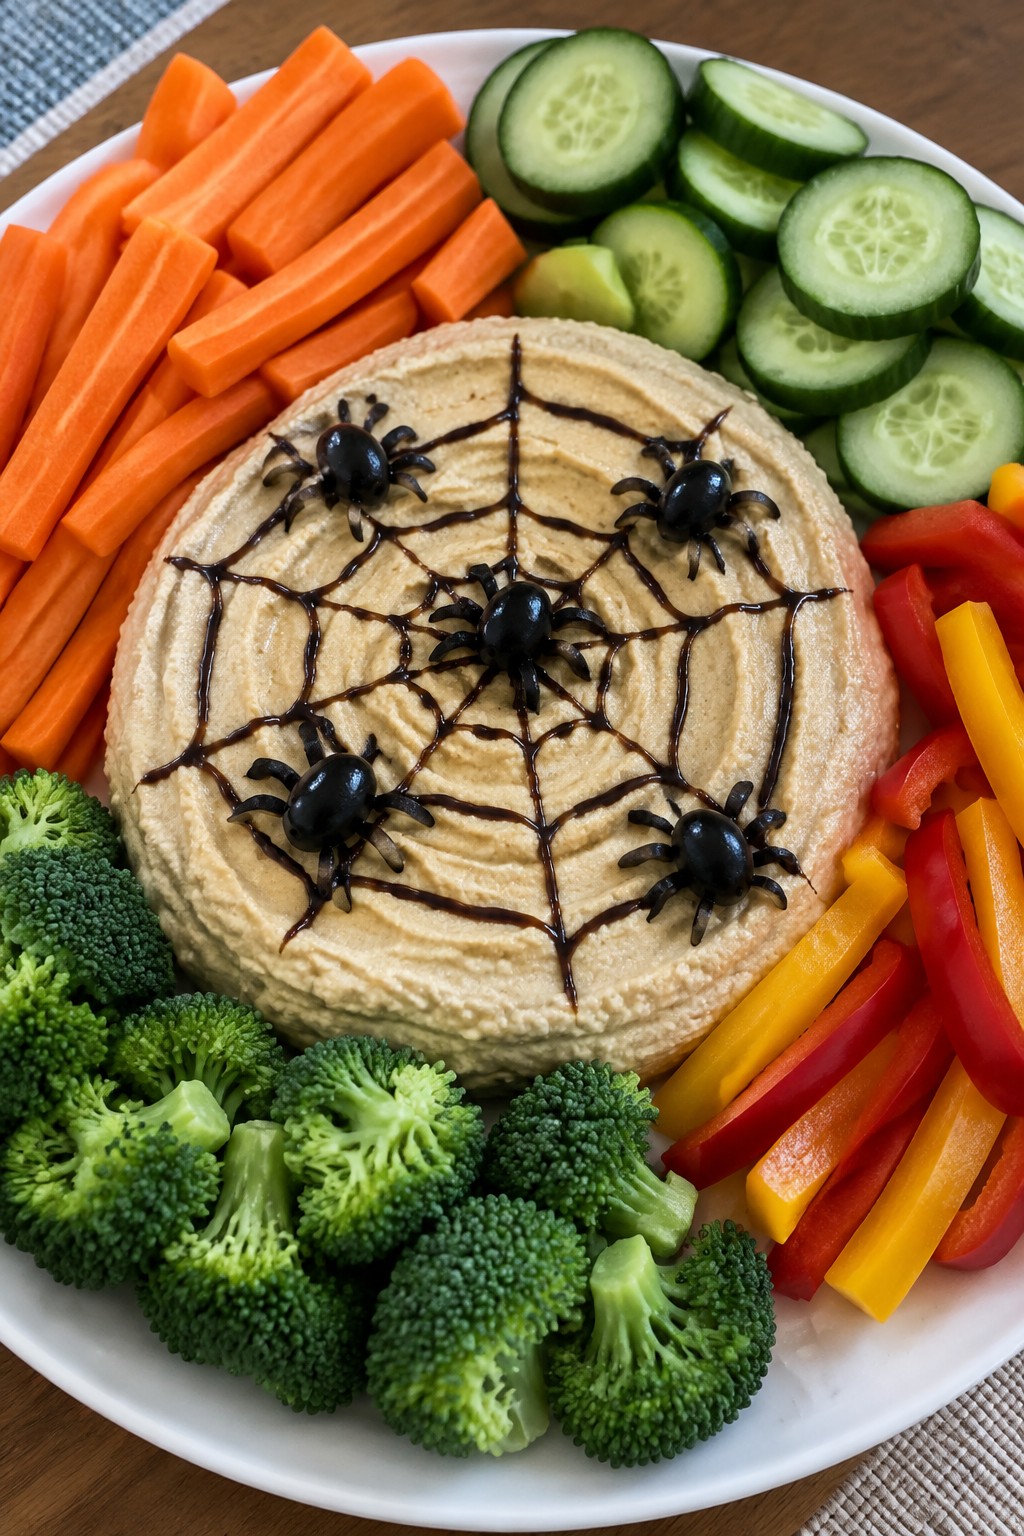
This snack turns a simple hummus platter into a fun Halloween centerpiece. The spiderweb design takes just minutes to create and gives kids and adults something to talk about while they dip. Creamy hummus pairs with crisp, fresh vegetables for a mix of smooth and crunchy textures.
The flavor stays mild and savory, so it works well alongside sweeter treats at a party. It comes together fast with store-bought hummus and whatever vegetables you already have on hand.
Serves 4 people.
Ingredients
- 16-ounce container plain hummus
- 2 tablespoons balsamic glaze
- 8 black olives
- 3 carrots, peeled and cut into sticks
- 1 large cucumber, sliced
- 2 bell peppers, cut into strips
- 2 cups broccoli florets
Instructions
- Spread the hummus in an even layer across a large round platter.
- Drizzle the balsamic glaze in four or five concentric circles over the hummus.
- Drag a toothpick from the center outward through the circles to form the spiderweb pattern.
- Slice one olive in half lengthwise for the spider body and cut the remaining olives into thin strips for the legs. Arrange them on the web.
- Place the carrot sticks, cucumber slices, bell pepper strips, and broccoli florets around the edge of the hummus.
Extra Tips
Chill the hummus for 30 minutes before adding the glaze so the web lines stay sharp. If balsamic glaze is too thick, stir in a drop of water to make it easier to drizzle. Cut vegetables ahead of time and store them in cold water so they stay crisp until serving.Course: Appetizer Cuisine: Mediterranean Equipment: Large platter, Toothpick, Knife, Cutting board
Candy Corn Fruit Skewers
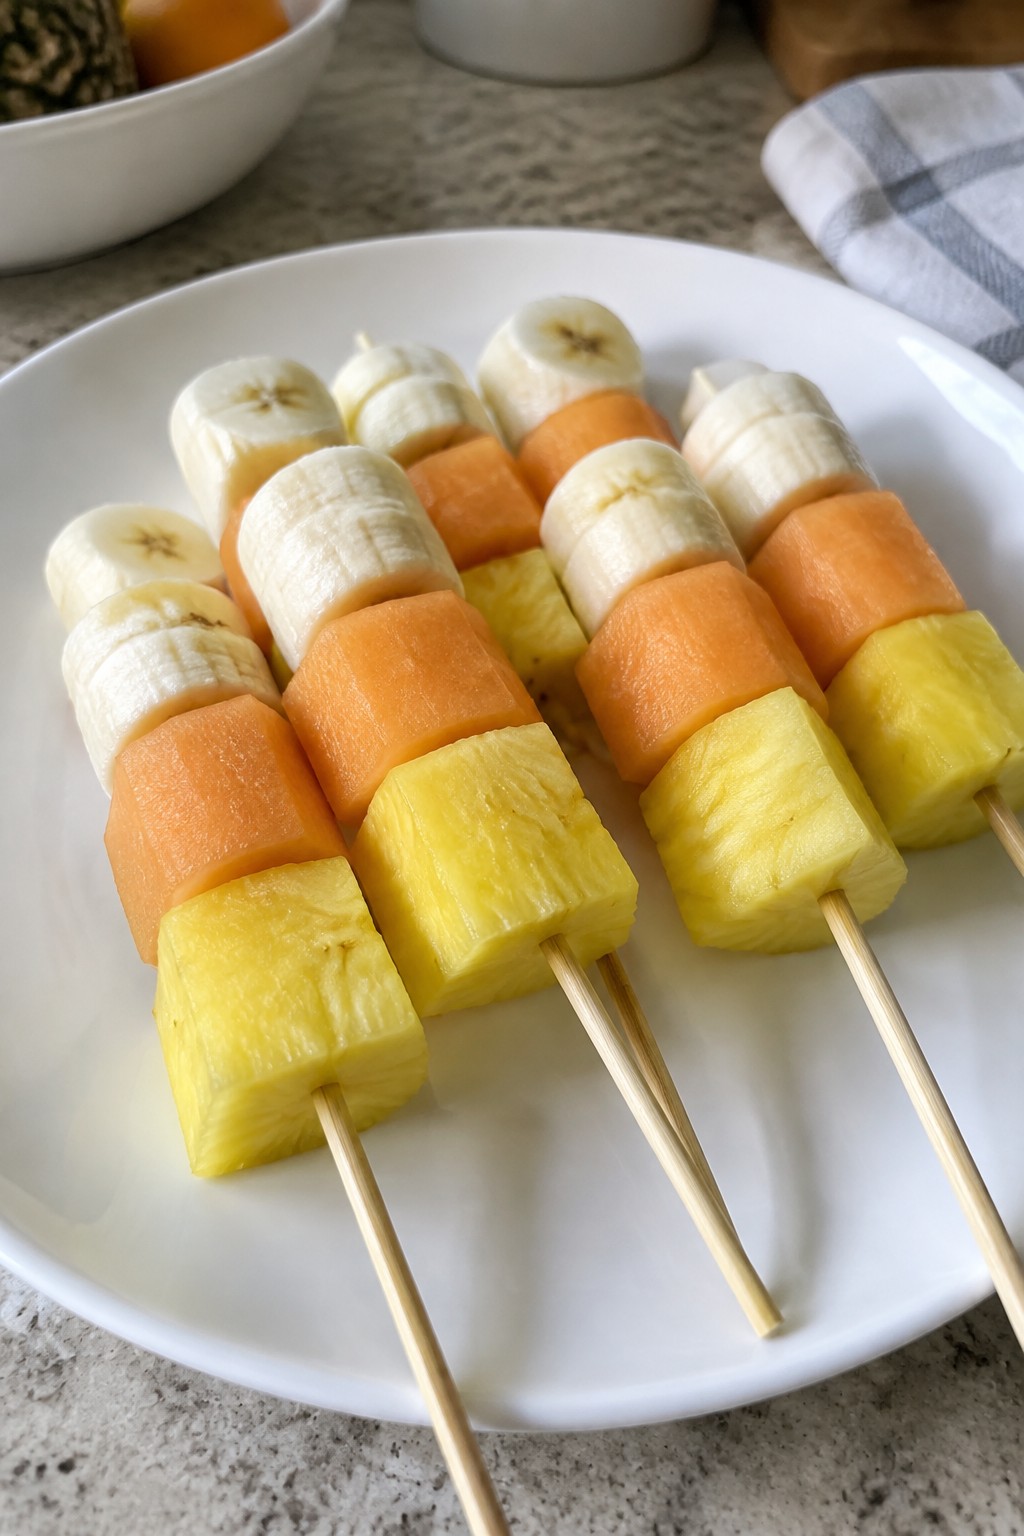
These skewers copy the bright layers of candy corn using simple fruit. Yellow pineapple sits at the bottom, orange cantaloupe comes next, and banana finishes the top. The result is a sweet, juicy snack that feels festive without any cooking.
They work well for last-minute Halloween gatherings or quick after-school treats. Kids can help thread the pieces, and the colors look cheerful on a platter.
Serves 4 people.
Ingredients
- 12 wooden skewers
- 2 cups fresh pineapple chunks
- 2 cups cantaloupe chunks
- 2 bananas, sliced into thick rounds
Instructions
- Lay out the wooden skewers on a clean surface. Start each skewer by sliding on one pineapple chunk to form the bottom yellow layer.
- Add one cantaloupe chunk directly above the pineapple to create the middle orange layer.
- Place two or three banana slices on top to finish the white layer. Repeat the process with the remaining skewers and fruit until all twelve are complete.
- Arrange the finished skewers on a serving plate with the pineapple end down so the colors stack like candy corn.
Extra Tips
Assemble the skewers right before serving so the banana stays bright. Choose firm bananas to avoid mushy pieces when threading. If you need to prep the fruit ahead, keep the banana slices separate and add them at the last minute.Course: Snack Cuisine: American Equipment: Wooden skewers, Cutting board, Knife
Pumpkin Patch Cheese Ball Crackers
These little cheese balls bring a fun fall touch to any snack table. Shaped with pretzel stems and served on crackers, they look like a tiny pumpkin patch without much effort. The mix of creamy cheese and light seasoning gives a smooth bite with a bit of crunch from the crackers.
This snack works well for quick Halloween gatherings or after-school treats when you need something ready fast. It stays simple and handheld, so kids and adults can grab a few without plates.
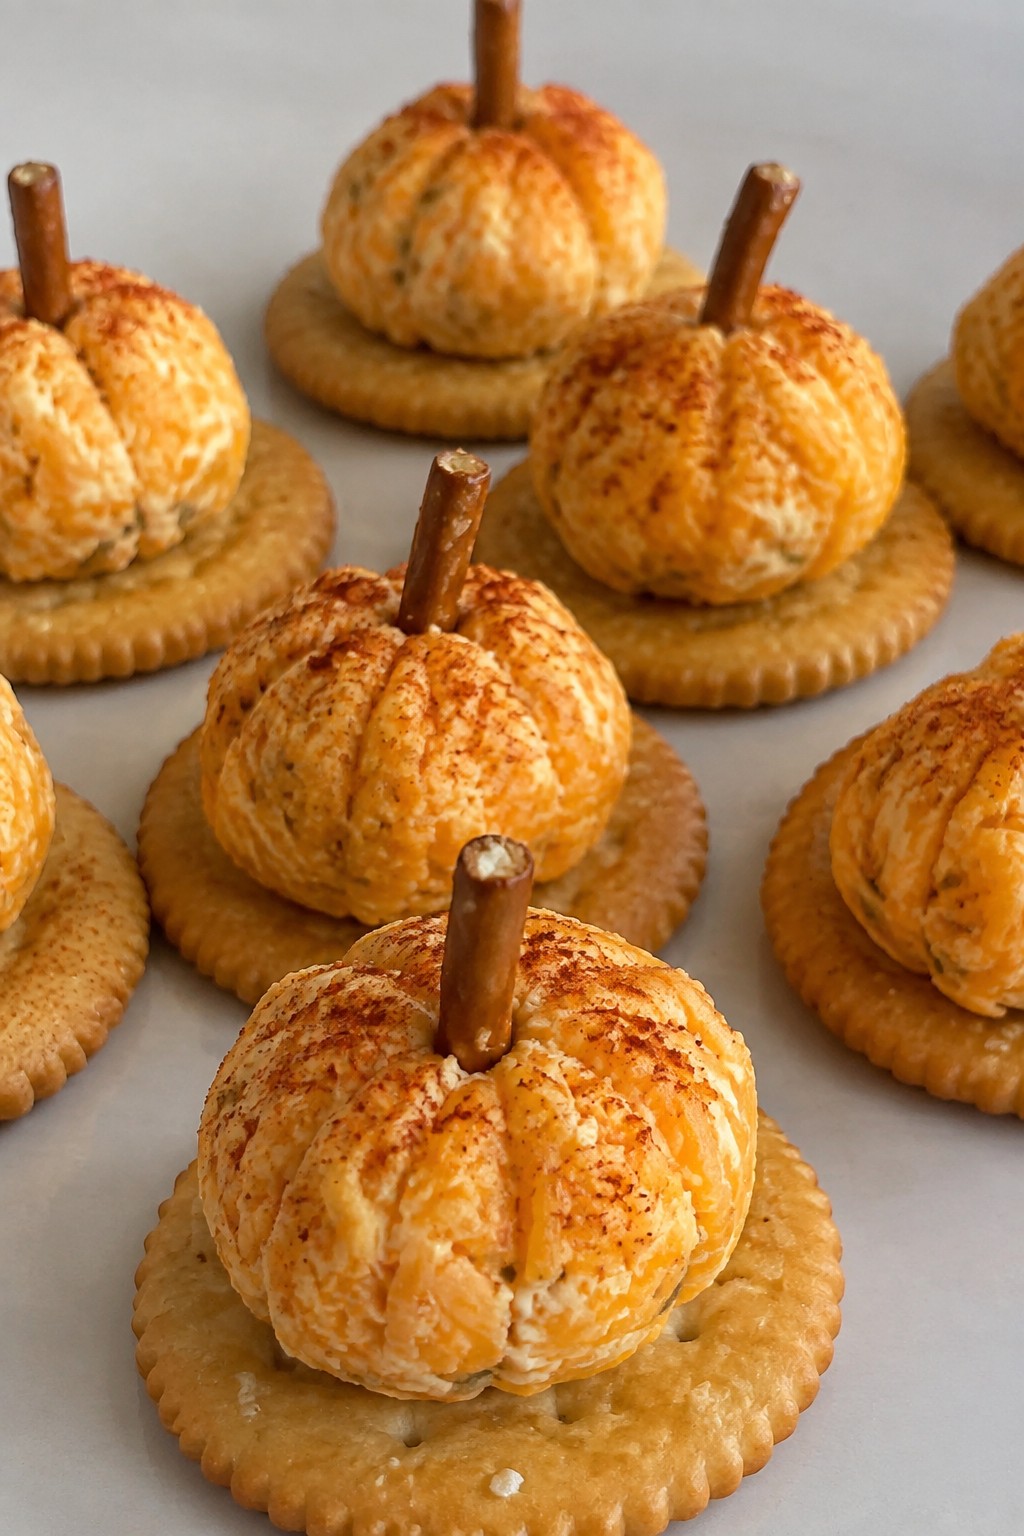
Serves 4 people.
Ingredients
- 8 oz cream cheese, softened
- 1 1/2 cups shredded cheddar cheese
- 1 tsp garlic powder
- 1/2 tsp paprika
- 8 pretzel sticks
- 16 round crackers
Instructions
- Place the softened cream cheese, shredded cheddar cheese, and garlic powder in a mixing bowl. Stir until the mixture is evenly combined and holds together.
- Scoop out the cheese mixture and divide it into 8 equal portions. Roll each portion between your hands to form small balls.
- Sprinkle the paprika on a plate. Roll each cheese ball in the paprika to coat the outside evenly for color.
- Push one pretzel stick into the top of each cheese ball to act as a stem.
- Set two cheese balls on each cracker and arrange them on a serving plate.
Extra Tips
Make the cheese mixture a few hours ahead and keep it covered in the fridge so the balls hold their shape better when you roll them. If the mixture feels too soft, chill it for 15 minutes before forming the balls. Skip the paprika if you want a milder look and roll them in finely chopped parsley instead.Course: Snack Cuisine: American Equipment: Mixing Bowl
Monster Eyeball Deviled Eggs
These Monster Eyeball Deviled Eggs give a classic snack a quick Halloween twist. They work well for parties or after-school snacks because they need only a few steps and common ingredients.
The filling stays creamy with a light mustard tang. Green olives on top create a simple eyeball look that fits the theme without extra work.
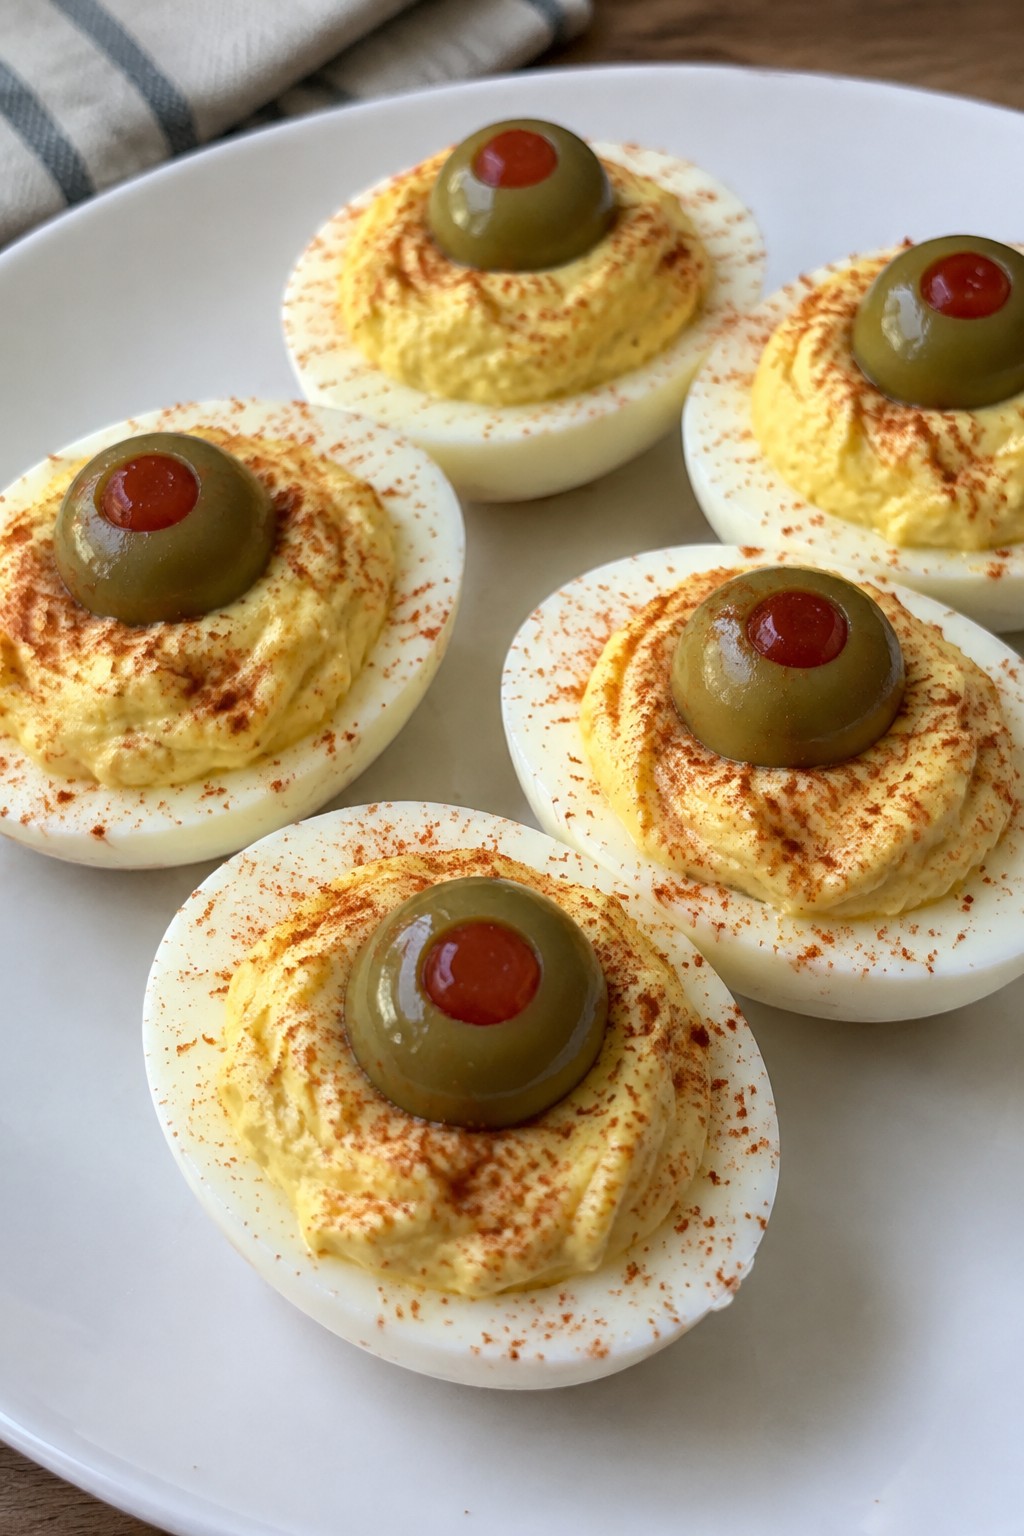
Serves 4 people.
Ingredients
- 6 large eggs
- 3 tablespoons mayonnaise
- 1 teaspoon Dijon mustard
- 1/2 teaspoon salt
- 1/4 teaspoon black pepper
- 12 green olives stuffed with pimentos
- Paprika for sprinkling
Instructions
- Place the eggs in a pot and cover them with water. Bring the water to a boil, then reduce heat and simmer for 10 minutes.
- Drain the eggs and transfer them to a bowl of ice water. Let them cool for 5 minutes, then peel off the shells.
- Slice each egg in half lengthwise. Remove the yolks and place them in a mixing bowl.
- Add the mayonnaise, Dijon mustard, salt, and black pepper to the yolks. Mash everything together until smooth.
- Spoon or pipe the yolk mixture back into the egg white halves.
- Press one green olive into the center of each filled egg half so the pimento faces upward.
- Lightly sprinkle paprika over the eggs before serving.
Extra Tips
Make the eggs a day ahead and store them covered in the fridge, then add the olives just before serving so they stay firm. If you want a stronger color contrast, use a bit more paprika on the edges of the whites. Leftovers keep well for one day in an airtight container.Course: Appetizer Cuisine: American Equipment: Pot, Mixing Bowl, Knife
Bat Wing Apple Nachos
These apple nachos turn a simple fruit into a fun Halloween snack with minimal effort. The dark chocolate drizzle and nutty toppings create a sweet and slightly salty bite that feels festive without extra work. They come together fast when you need something quick for a party or after-school treat.
The crisp apple slices act as the base while warm toppings add richness and crunch. Kids enjoy helping arrange the slices into wing shapes on the plate.
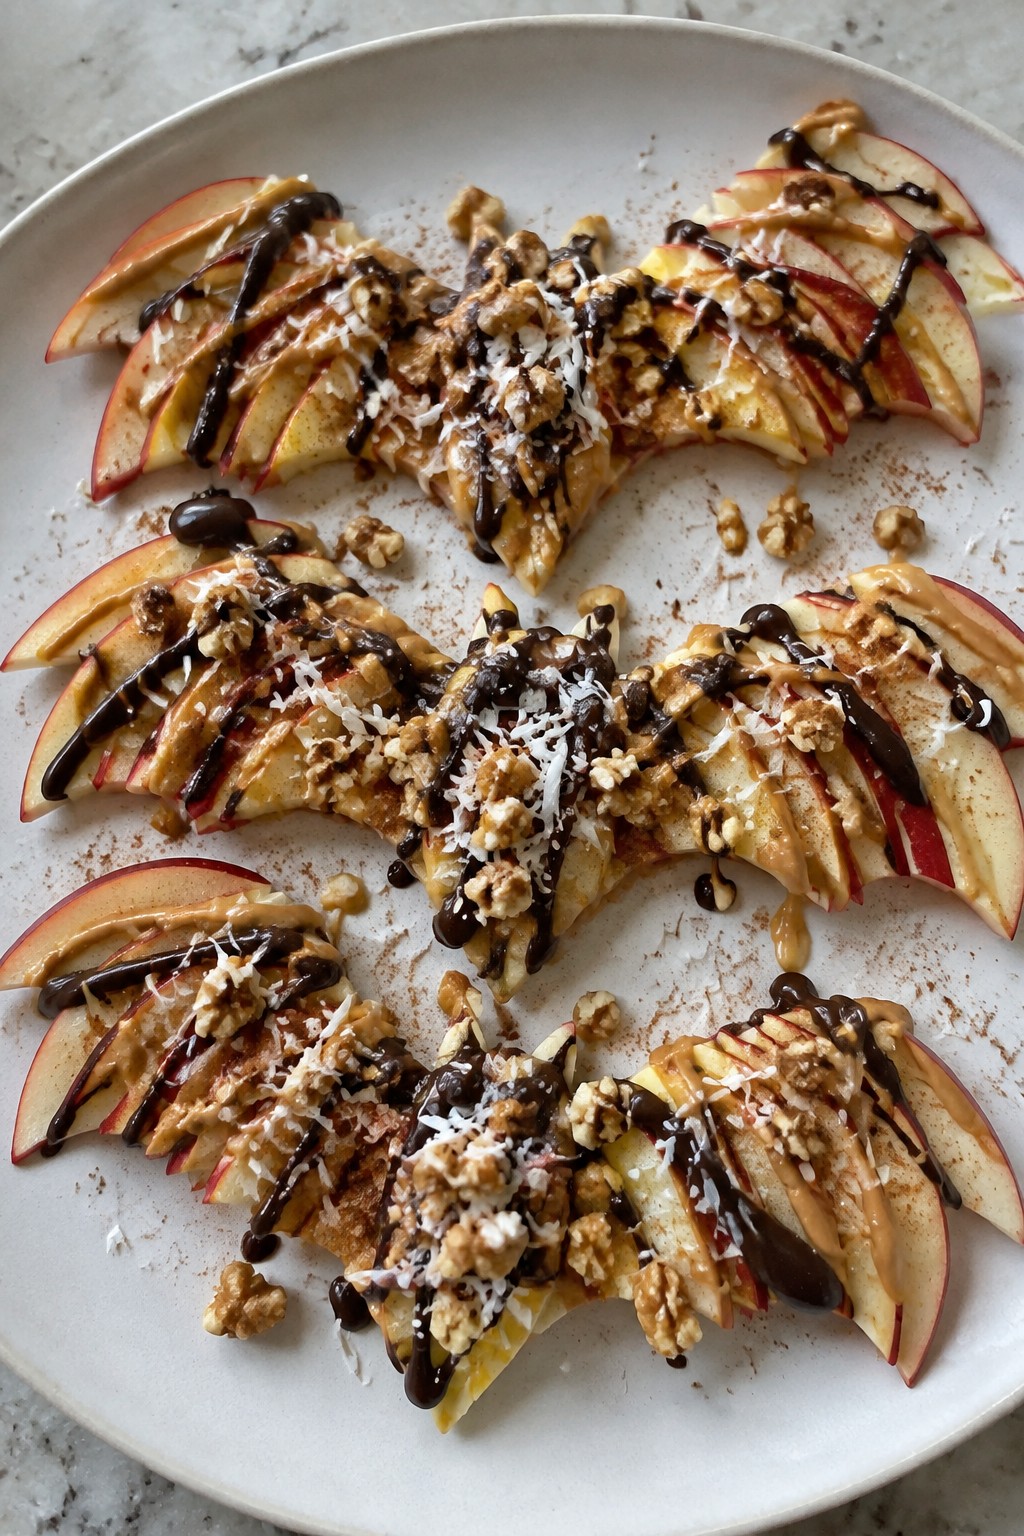
Serves 4 people.
Ingredients
- 4 medium apples, thinly sliced
- 1/2 cup dark chocolate chips
- 3 tablespoons creamy peanut butter
- 1/4 cup chopped walnuts
- 2 tablespoons shredded coconut
- 1 teaspoon ground cinnamon
Instructions
- Arrange the apple slices on a large serving plate in two overlapping rows to form bat wing shapes.
- Place the dark chocolate chips in a microwave-safe bowl and heat in 20-second bursts until melted, stirring between each burst.
- Drizzle the melted chocolate evenly over the apple slices.
- Place the peanut butter in a small bowl and warm it in the microwave for 10 seconds to make it easier to drizzle.
- Drizzle the warmed peanut butter over the apples.
- Sprinkle the chopped walnuts, shredded coconut, and ground cinnamon across the top.
Extra Tips
Warm the peanut butter just enough to drizzle smoothly so it does not seize up on the cold apples. Use firm apples like Granny Smith or Honeycrisp so the slices stay crisp under the toppings. If you prepare these ahead, add the chocolate and peanut butter right before serving to keep the apples from browning.Course: Snack Cuisine: American Equipment: Microwave-safe bowl, Serving plate, Knife
Skeleton Pretzel Rods with Dip
These pretzel rods get a quick white chocolate coating and a few dark chocolate lines to look like tiny bones. The sweet cream cheese dip on the side makes them an easy finger food for Halloween parties or after-school snacks. Kids enjoy helping with the drizzle step, and everything comes together fast with basic pantry items.
The finished rods stay crisp under the chocolate shell while the dip adds a smooth, tangy contrast. Serve them on a platter for a simple spooky touch without any complicated decorating.
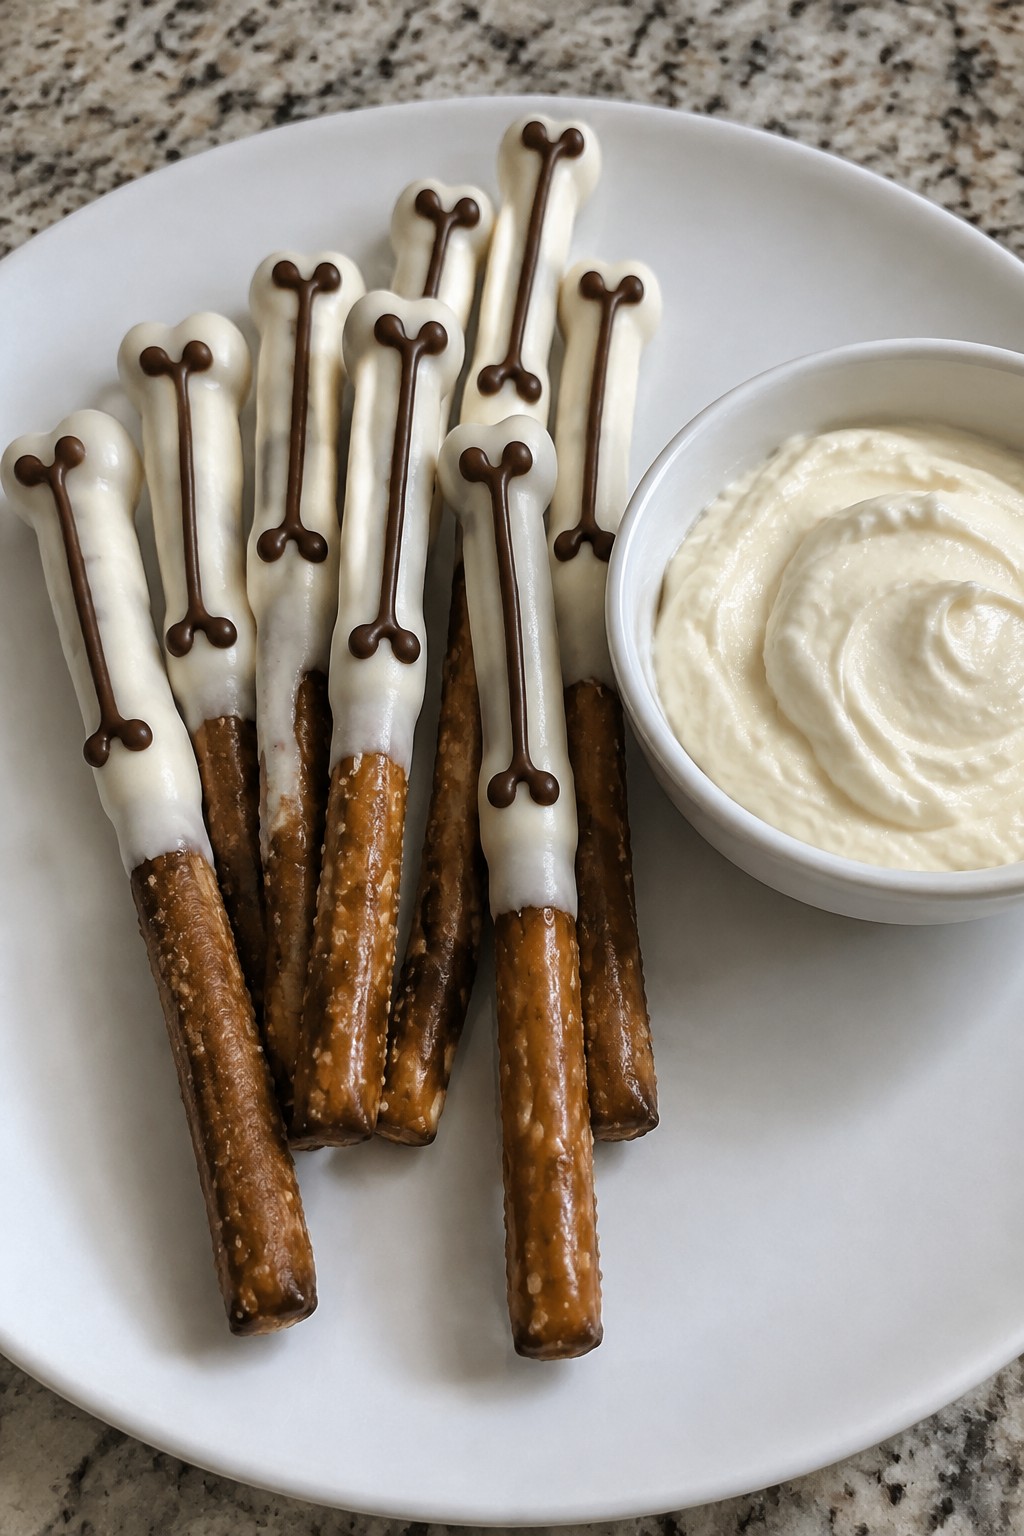
Serves 4 people.
Ingredients
- 12 pretzel rods
- 1 cup white chocolate chips
- 1/4 cup dark chocolate chips
- 4 ounces cream cheese, softened
- 1/4 cup powdered sugar
- 1/2 teaspoon vanilla extract
Instructions
- Line a baking sheet with parchment paper. Place the white chocolate chips in a microwave-safe bowl and heat in 20-second bursts, stirring between each, until fully melted and smooth.
- Dip each pretzel rod halfway into the melted white chocolate. Let excess chocolate drip off, then lay the rods on the prepared baking sheet. Place the sheet in the refrigerator for 10 minutes to set the coating.
- Melt the dark chocolate chips in the same way. Spoon the melted dark chocolate into a small zip-top bag, snip a tiny corner, and pipe short lines across the white chocolate to create a simple bone pattern on each rod. Return the sheet to the refrigerator for another 5 minutes.
- While the chocolate sets, combine the cream cheese, powdered sugar, and vanilla extract in a small bowl. Beat with a spoon or electric mixer until the mixture is smooth and creamy. Transfer the dip to a serving bowl.
Extra Tips
Make the dip first so it has time to chill while you work on the pretzels. If the white chocolate thickens during dipping, warm it for a few seconds in the microwave. Store any leftovers in an airtight container in the refrigerator for up to two days and let the rods sit at room temperature for a few minutes before serving again.Course: Snack Cuisine: American Equipment: Microwave-safe bowl, Baking sheet, Mixing bowl
Vampire Strawberry Chocolate Bites
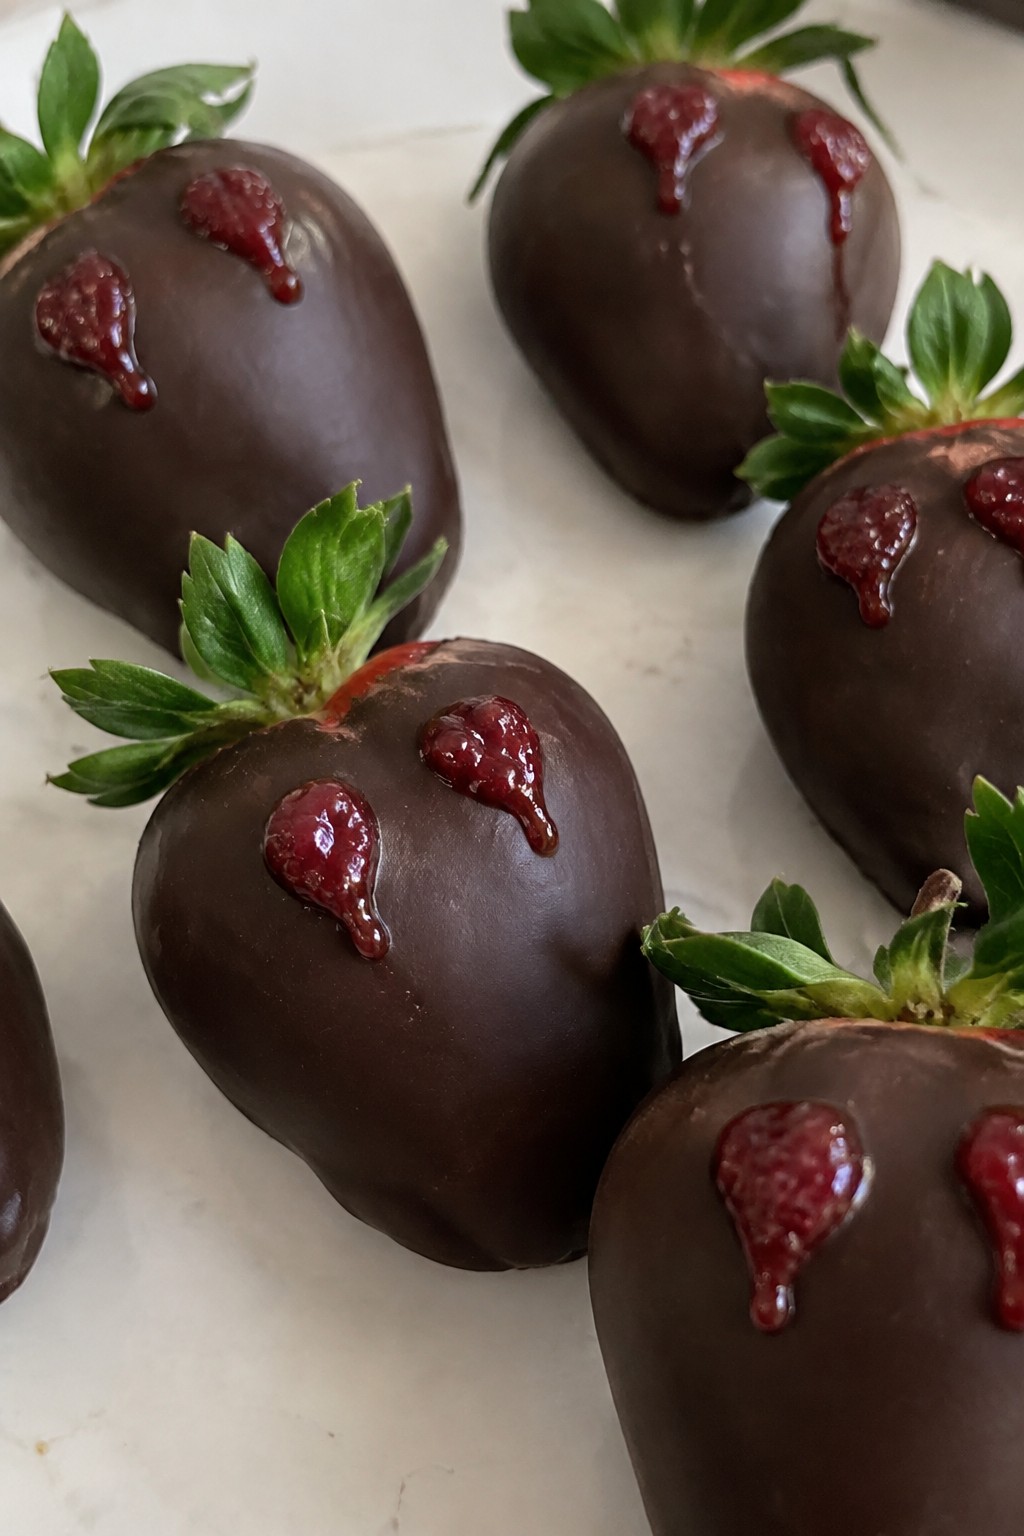
These Vampire Strawberry Chocolate Bites bring a quick Halloween twist to fresh fruit and chocolate. Juicy strawberries get coated in dark chocolate, then finished with small dabs of raspberry jam that look like bite marks.
The result is a sweet, slightly tart snack with a smooth chocolate shell and bright berry flavor. They work well for last-minute party trays or after-school treats.
Serves 4 people.
Ingredients
- 12 large strawberries
- 1 cup dark chocolate chips
- 1 tablespoon coconut oil
- 2 tablespoons raspberry jam
Instructions
- Rinse the strawberries under cold water and pat them dry completely with paper towels.
- Place the dark chocolate chips and coconut oil in a microwave-safe bowl. Heat in 30-second intervals, stirring after each, until the mixture is smooth.
- Dip each strawberry into the melted chocolate to coat the bottom two-thirds. Let the excess drip off, then set the berries on a parchment-lined plate.
- Dip a toothpick into the raspberry jam and add two small dots to the chocolate coating on each strawberry to create the vampire bite marks.
Extra Tips
Work with room-temperature strawberries so the chocolate sets evenly without cracking. If the jam feels too thick to apply, stir in a drop of warm water. These bites taste best the same day they are made.Course: Snack Cuisine: American Equipment: Microwave-safe bowl, Parchment paper, Toothpick
Witch Finger Carrot Sticks
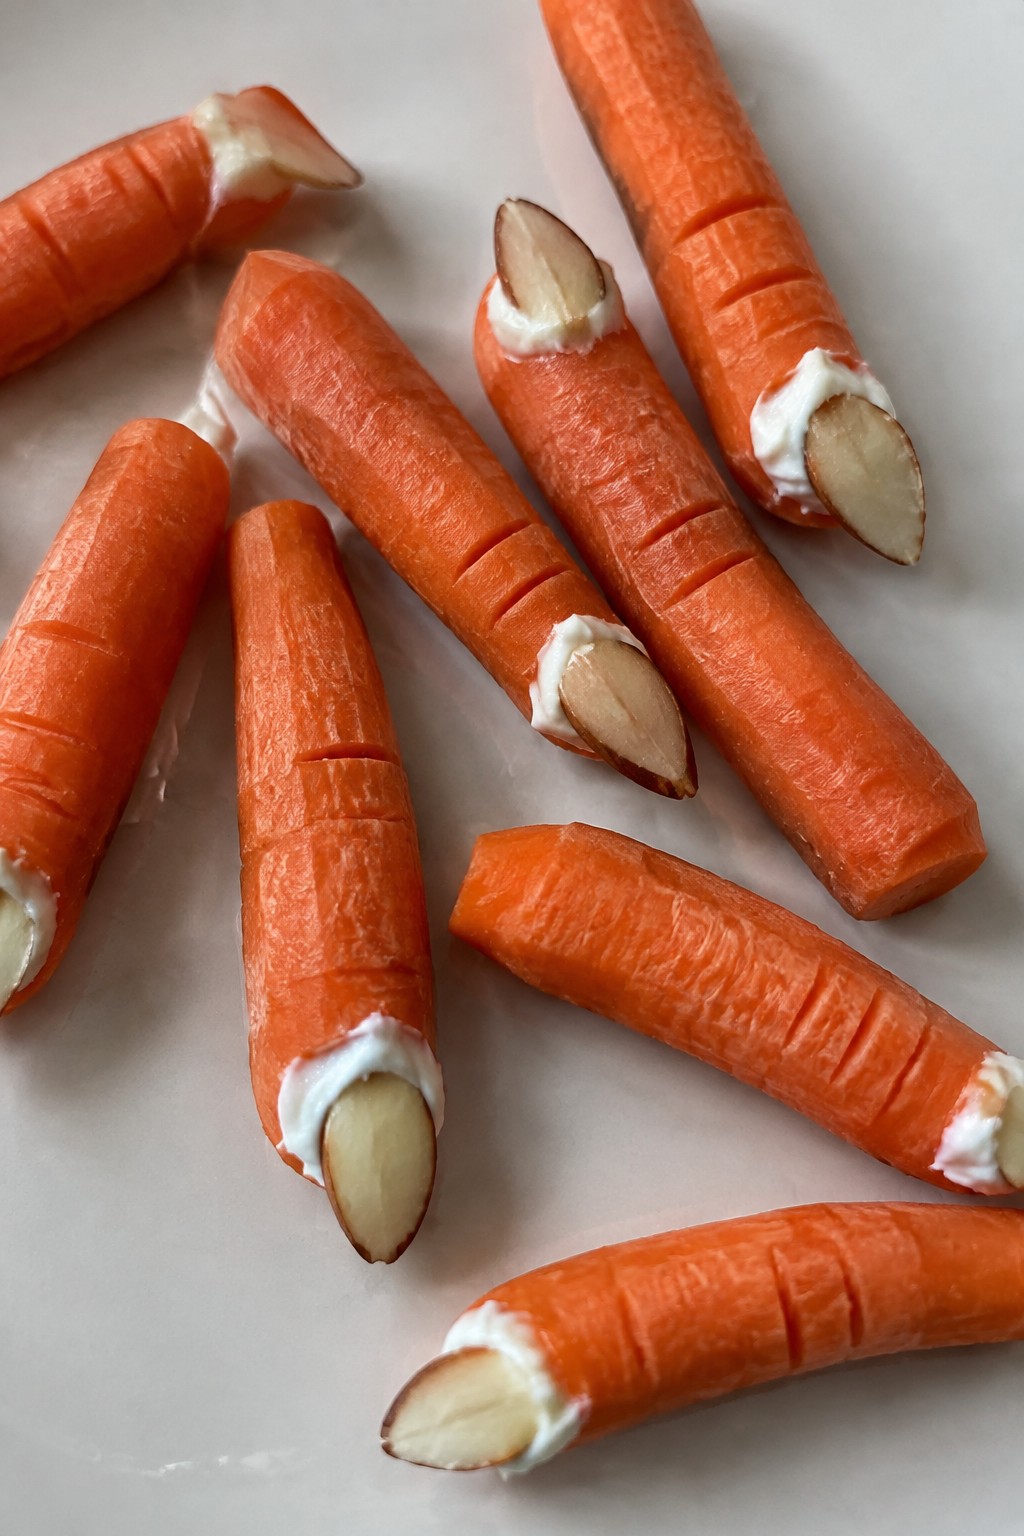
These carrot sticks turn a basic vegetable into a fun Halloween snack that comes together fast. They work well for last-minute party trays or after-school treats when you need something crunchy and simple. The carrots stay crisp while the almonds add a light, nutty contrast.
Serves 4 people.
Ingredients
- 8 medium carrots
- 3 tablespoons cream cheese, softened
- 1/4 cup sliced almonds
Instructions
- Peel the carrots and trim off the ends. Cut each carrot into 3- to 4-inch lengths, then shape one end of each piece into a slight point to look like a fingertip.
- Spread a small dab of cream cheese on the pointed end of each carrot piece. Press one almond slice onto the cream cheese to act as a fingernail.
- Repeat with all carrot pieces until each one has an almond attached. Place the finished fingers on a serving plate.
Extra Tips
Prep the carrots ahead and keep them in a covered container in the fridge so you can attach the almonds right before serving. If the cream cheese feels too firm, let it sit at room temperature for a few minutes to make spreading easier. These stay crisp for a couple of hours at room temperature, so they travel well to parties without getting soggy.Course: Snack Cuisine: American Equipment: Peeler, Knife, Cutting board
Frankenstein Avocado Toast Bites
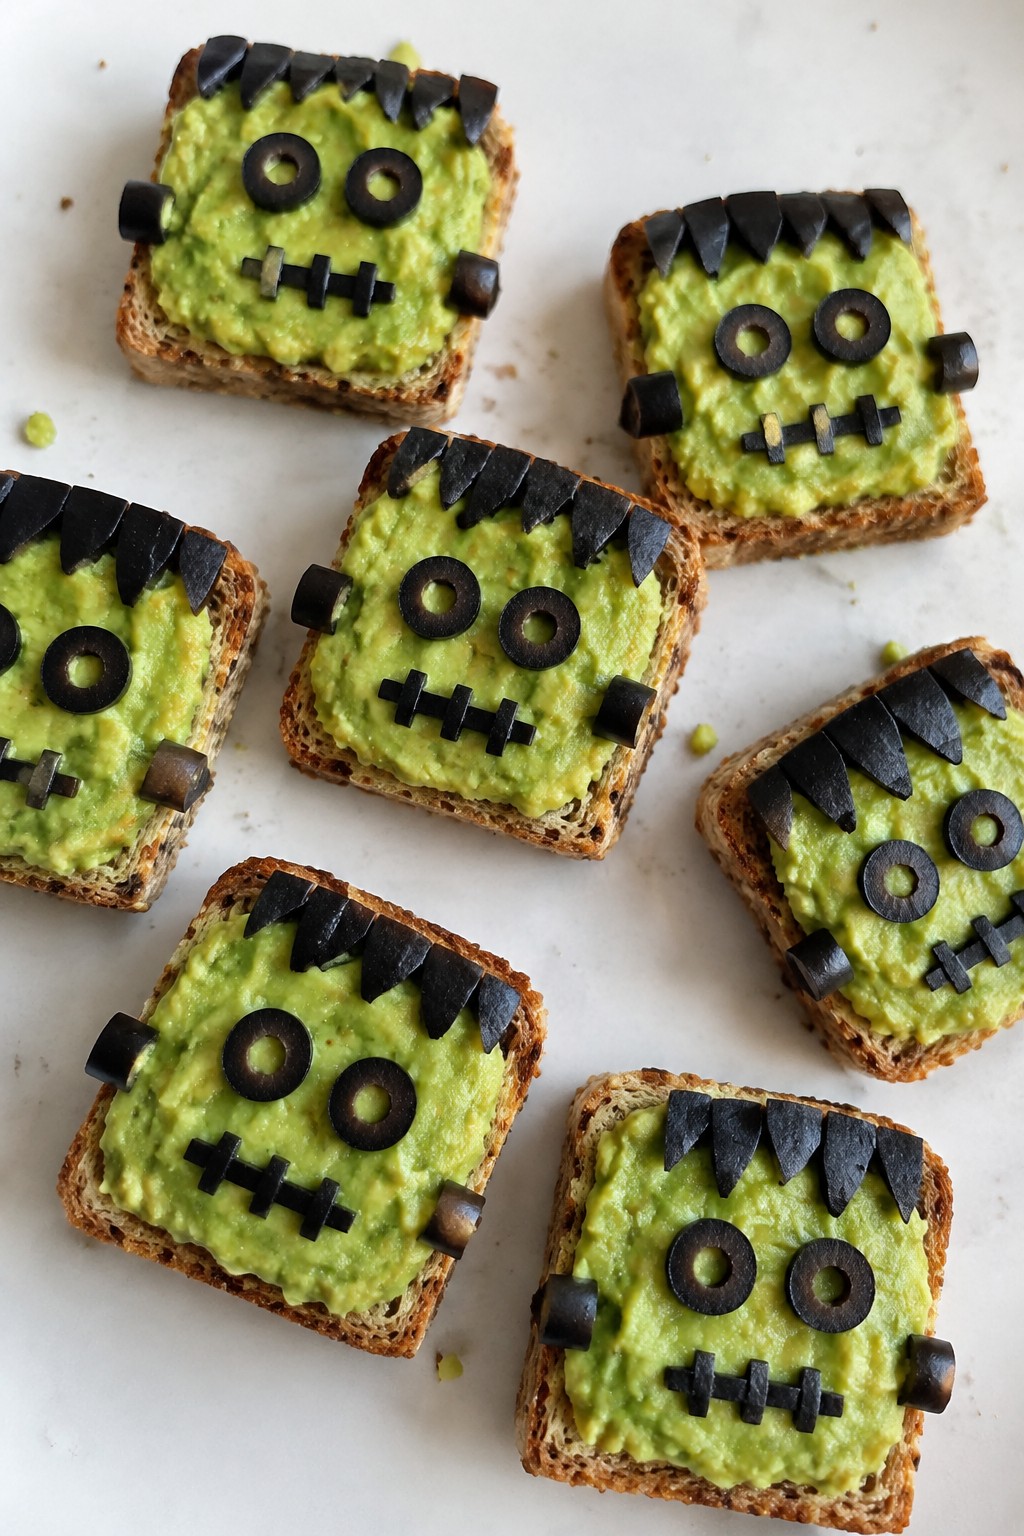
These Frankenstein Avocado Toast Bites give classic avocado toast a playful Halloween twist. They work well for quick party prep or a fun after-school snack. Creamy avocado sits on crisp toast, finished with simple olive details that create a monster face on each bite.
Serves 4 people.
Ingredients
- 4 slices whole grain bread
- 2 ripe avocados
- 1 tablespoon lime juice
- 1/4 teaspoon salt
- 12 black olives
Instructions
- Toast the 4 slices of bread until golden and firm.
- Cut each slice into 3 small rectangles to make 12 bites total.
- Mash the avocados in a bowl with the lime juice and salt until smooth.
- Spread the avocado mixture evenly over each toast rectangle.
- Slice the black olives and use the pieces to form eyes, a mouth, and side bolts on each bite.
Extra Tips
Slice the olives thinly so they stay in place on the avocado without sliding. Serve the bites right after assembling to keep the toast crisp. If you need to make them ahead, prepare the avocado spread and toast separately, then assemble just before serving.Course: Snack Cuisine: American Equipment: Toaster, Mixing bowl, Knife
Bloody Orange Jell-O Cups
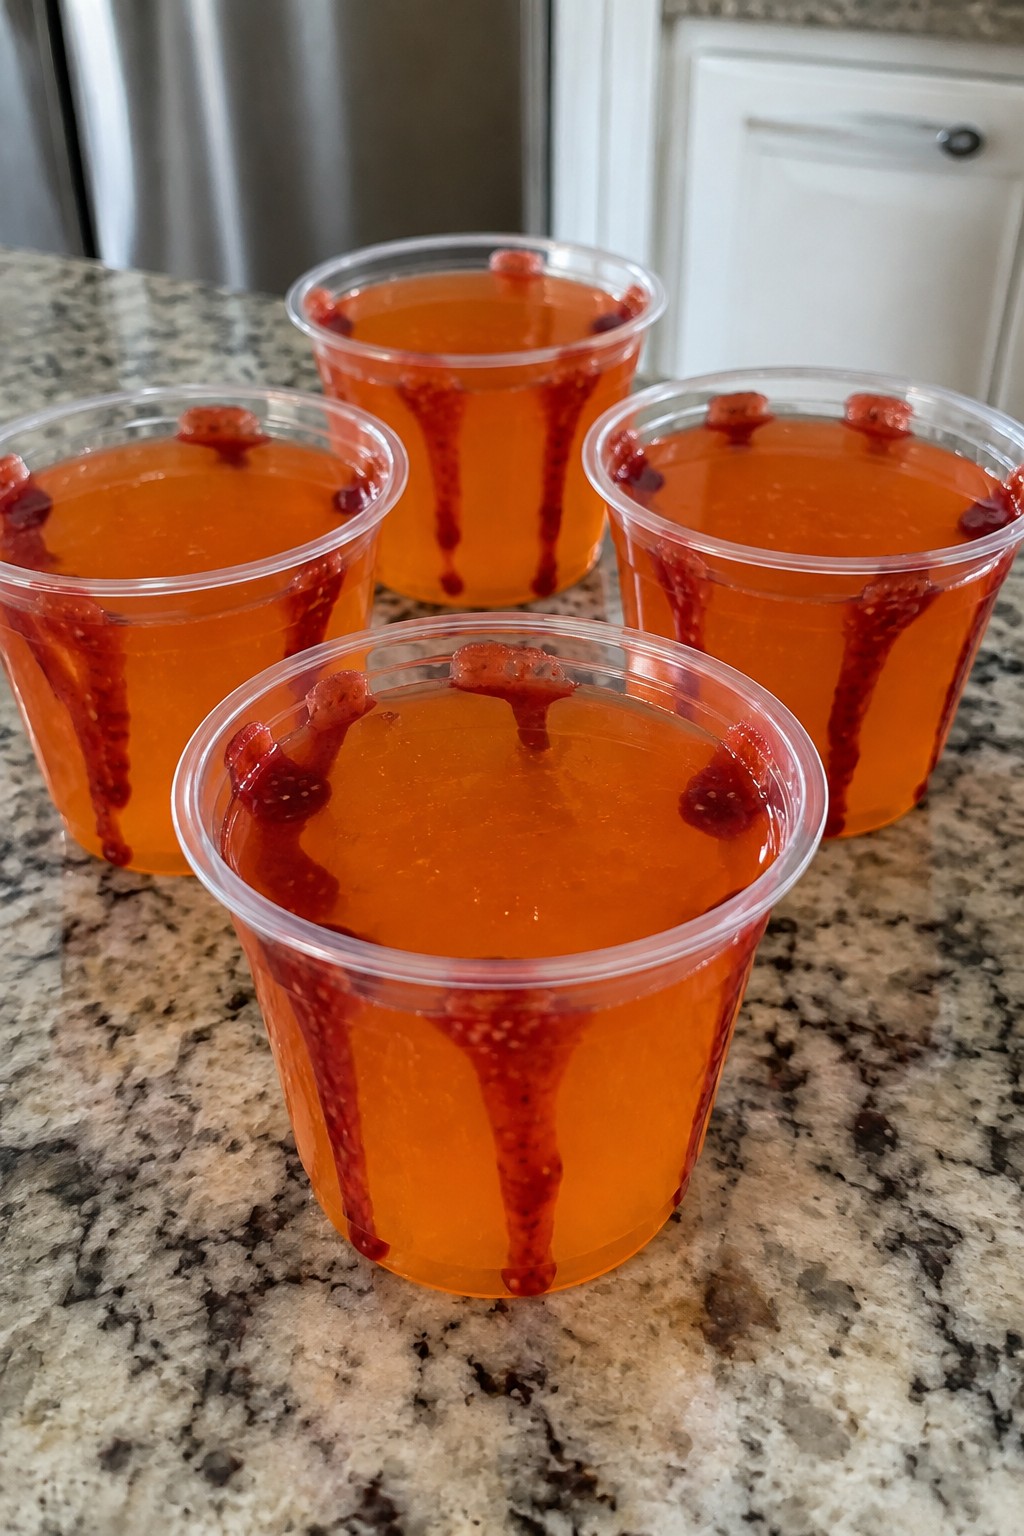
These cups give a quick Halloween touch with bright orange Jell-O and a simple red drizzle that looks like blood. They come together fast for parties or after-school snacks and offer a light citrus flavor with a fun wobbly texture.
They work well when you need something festive without much effort. Kids and adults both enjoy the playful look and the familiar Jell-O taste.
Serves 4 people.
Ingredients
- 1 package (3 ounces) orange gelatin mix
- 1 cup boiling water
- 1 cup cold water
- 1/4 cup raspberry jam
- 4 small clear cups
Instructions
- Pour the orange gelatin mix into a mixing bowl and add the boiling water. Stir until the powder fully dissolves.
- Add the cold water and stir again until the mixture is smooth.
- Divide the gelatin evenly among the four clear cups.
- Place the cups in the refrigerator and chill until the Jell-O is fully set.
- Thin the raspberry jam with a small splash of water if needed, then drizzle it over the top of each cup to create the bloody effect.
Extra Tips
Chill the cups on a tray so they are easy to move in and out of the fridge. The raspberry jam gives a nice tart contrast to the sweet orange flavor. If you want a stronger fruit taste, replace the cold water with cold orange juice. Leftovers keep covered in the fridge for up to two days.Course: Snack Cuisine: American Equipment: Mixing Bowl, Whisk, Measuring Cup
