
Halloween is a good time to have some kid friendly appetizers on hand. These recipes use ingredients you probably already have and do not take long to put together. They focus on simple shapes and flavors that appeal to children. You can find 15 ideas here that work for parties or everyday snacks.
Helpful Tips Before You Start
A little planning keeps these appetizers simple and enjoyable for everyone.
Let Kids Join In
Set out bowls of toppings like cheese cubes or olive slices so children can add their own details. They stay interested when they help create the snacks.
Use Cookie Cutters for Shapes
Cut bread, cheese, or melon with small cutters to make pumpkins, bats, or ghosts. This step takes little time and makes the food look playful.
Prep Parts Ahead
Chop vegetables, mix dips, or bake bases the day before. Store them in the fridge so final assembly stays quick and low stress.
Keep Portions Small
Serve bites on small plates or skewers sized for little hands. Kids eat more when the servings feel easy to manage.
Ghostly Cheese and Cracker Skewers
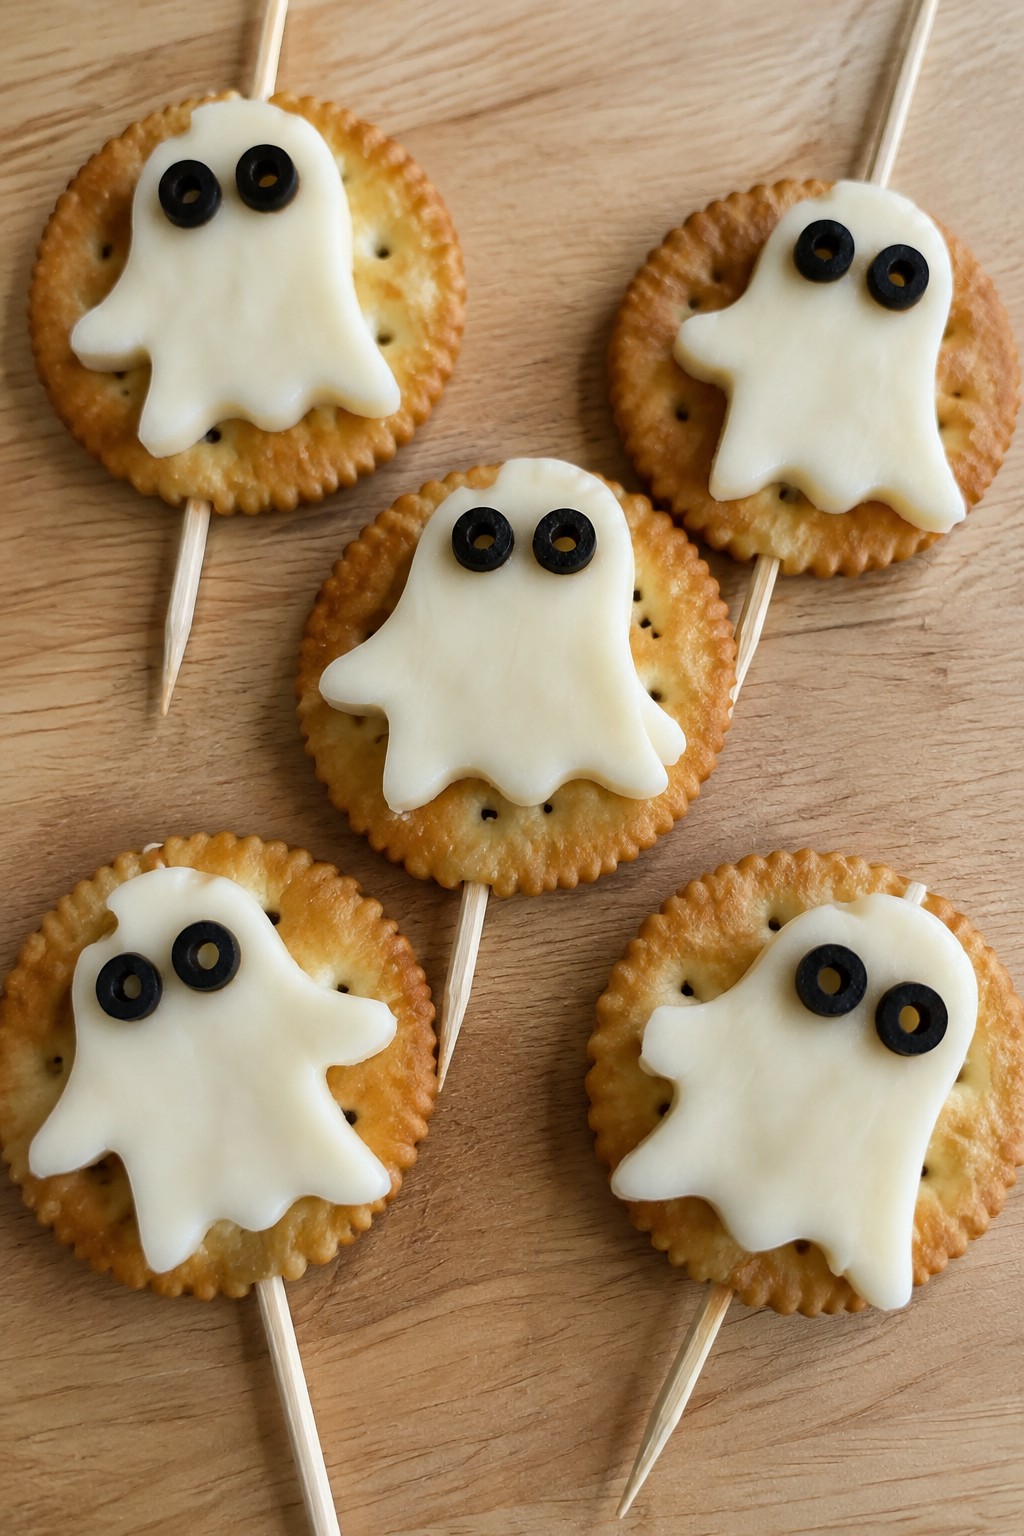
Ghostly Cheese and Cracker Skewers give kids a playful snack that fits right into any Halloween gathering. The white cheese stands out against the crackers and creates an easy ghost shape that feels festive without extra work. They offer a mild flavor and a mix of creamy and crisp textures that most children enjoy.
These skewers work well for lunch boxes, after-school snacks, or a party platter. They come together quickly and need no cooking, which keeps the process simple for busy days.
Serves 4 people.
Ingredients
- 8 ounces mozzarella cheese block
- 16 round crackers
- 8 wooden skewers
- 16 black olive slices
Instructions
- Slice the mozzarella block into eight ghost shapes using a small cookie cutter or a sharp knife. Aim for pieces about 1/4 inch thick so they hold their shape on the skewer.
- Place one cracker on each wooden skewer, followed by one cheese ghost. Repeat the pattern once more to use two crackers and two cheese pieces per skewer.
- Press two black olive slices onto the front of each cheese ghost to form eyes. Adjust the positions so the faces look clear and even.
Extra Tips
Cut the cheese ghosts ahead of time and store them in an airtight container in the fridge until you are ready to assemble. This keeps the crackers from softening. If you need more or fewer skewers, simply adjust the totals while keeping the two-cracker, two-cheese pattern per skewer.Course: Appetizer Cuisine: American Equipment: Cookie cutter, Knife, Cutting board
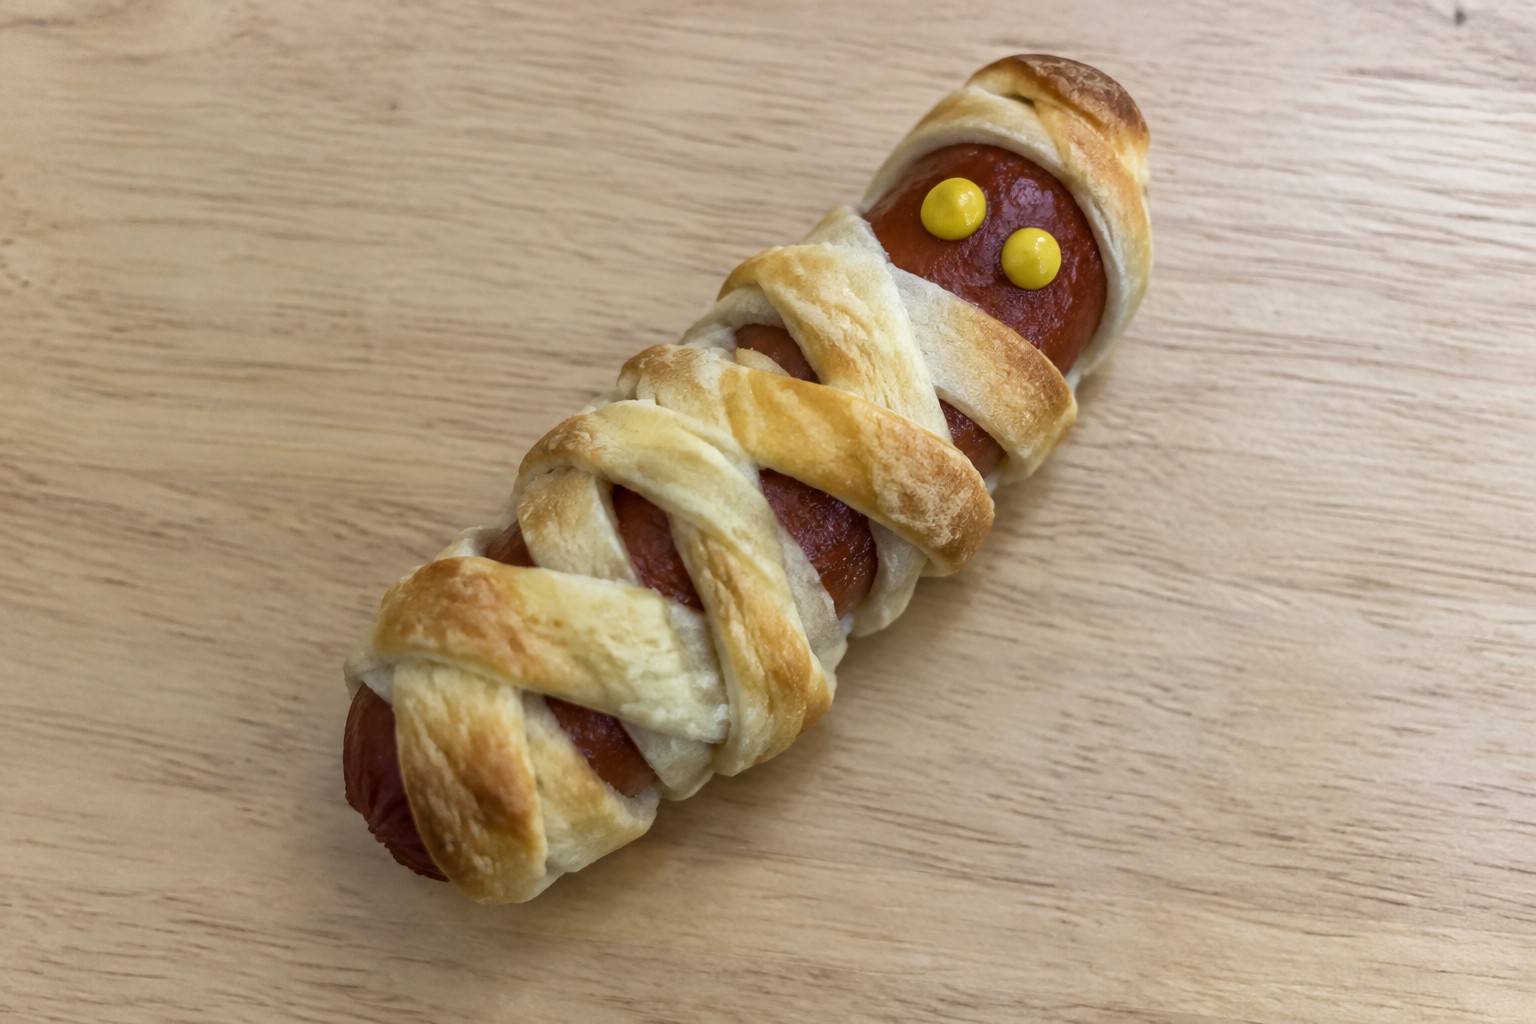
Mummy-Wrapped Pigs in a Blanket
These mummy-wrapped pigs in a blanket turn a classic snack into a playful Halloween treat. Kids enjoy the bandage-like strips of dough and the chance to help assemble them. The result is a warm bite with flaky layers around a savory hot dog.
The recipe works well for parties or after-school snacks in October. It keeps things simple while adding just enough visual fun to fit the holiday.

Serves 4 people.
Ingredients
- 8 all-beef hot dogs
- 1 can (8 oz) refrigerated crescent roll dough
- 16 candy eyeballs
Instructions
- Preheat the oven to 375 degrees and line a baking sheet with parchment paper.
- Unroll the crescent dough on a clean surface and press the seams together to form one sheet.
- Cut the dough into thin strips about half an inch wide.
- Wrap the strips around each hot dog in a crisscross pattern, leaving small gaps for the face.
- Place the wrapped hot dogs on the baking sheet and bake for 12 to 15 minutes until the dough is golden.
- Remove from the oven and let cool for two minutes, then press two candy eyeballs onto each hot dog while the dough is still warm.
Extra Tips
Use the leftover dough scraps to make extra bandages if any hot dogs need more coverage. The candy eyeballs stick best right after baking, so add them while the dough is still soft. Leftovers reheat well in a 300-degree oven for five minutes to restore crispness.Course: Appetizer Cuisine: American Equipment: Baking sheet, Oven, Knife
Pumpkin-Shaped Cheese Ball with Veggie Dippers
This cheese ball brings a playful pumpkin shape to the table that kids notice right away. It sits well at Halloween gatherings or as a quick snack after school.
The mix of cream cheese and cheddar gives a smooth, rich bite while the veggie dippers add crunch. The light seasoning keeps the flavor mild enough for young tastes.

Serves 4 people.
Ingredients
- 8 oz cream cheese, softened
- 2 cups shredded cheddar cheese
- 1 tsp garlic powder
- 1/2 tsp onion powder
- 1 green bell pepper
- 4 carrots, cut into sticks
- 2 celery stalks, cut into sticks
- 1 cup broccoli florets
Instructions
- Place the softened cream cheese, shredded cheddar cheese, garlic powder, and onion powder in a mixing bowl. Stir until the mixture is evenly combined and smooth.
- Cover the bowl and chill the cheese mixture for 30 minutes so it firms up enough to shape.
- Remove the mixture from the bowl and form it into a round ball with your hands. Gently press vertical lines around the sides to create a pumpkin look.
- Cut the top off the green bell pepper and trim a small piece to use as the stem. Press the stem lightly into the top of the cheese ball.
- Arrange the carrot sticks, celery sticks, and broccoli florets on a serving plate around the cheese ball.
Extra Tips
Chill the shaped cheese ball for another 15 minutes before serving so the ridges hold their form. Cold hands make shaping easier and prevent sticking. If the mixture feels too soft, add an extra handful of shredded cheddar before the first chill.Course: Appetizer Cuisine: American Equipment: Mixing Bowl, Plastic Wrap, Serving Plate
Spiderweb Guacamole with Tortilla Chips
This spiderweb guacamole adds a simple Halloween touch to a kid-friendly dip. The creamy avocado base gets a fun design on top that draws kids to the table without any complicated steps.
It keeps the fresh taste of lime and smooth texture that pairs well with crisp tortilla chips. The recipe works for parties or quick after-school snacks.

Serves 4 people.
Ingredients
- 3 ripe avocados, peeled and pitted
- 2 tablespoons fresh lime juice
- 1/2 teaspoon salt
- 1/4 cup sour cream
- Tortilla chips, for serving
Instructions
- Place the avocados in a mixing bowl. Add the lime juice and salt. Mash everything together with a fork until mostly smooth with a few small chunks remaining.
- Spread the guacamole evenly across a serving plate in a round shape.
- Spoon the sour cream into a small plastic bag and snip off one corner. Pipe the sour cream in three or four concentric circles over the guacamole.
- Drag a knife from the center outward in straight lines to create the spiderweb pattern. Repeat around the plate until the design is complete.
- Set the plate on the table with a bowl of tortilla chips nearby for dipping.
Extra Tips
Use room-temperature sour cream so it pipes smoothly without tearing the guacamole surface. Ripe avocados give the best creamy texture, and you can adjust the salt after mashing if needed. Leftovers keep in the fridge for one day if pressed with plastic wrap directly on the surface.Course: Appetizer Cuisine: Mexican Equipment: Mixing Bowl, Fork, Knife, Plastic Bag
Bat-Winged Mini Chicken Sliders
These mini sliders turn simple ground chicken into a fun Halloween snack. Kids enjoy the bat wing look created by sticking tortilla chips into each bun, while the juicy patties and melted cheese keep the flavor familiar and satisfying.
They work well for parties or quick weeknight dinners during the holiday season. The result is a handheld bite with soft bread, savory chicken, and a bit of crunch from the chips.

Serves 4 people.
Ingredients
- 1 pound ground chicken
- 1 teaspoon garlic powder
- 1/2 teaspoon salt
- 1/4 teaspoon black pepper
- 1 tablespoon olive oil
- 8 mini slider buns
- 4 slices American cheese
- 16 black olive slices
- 8 blue corn tortilla chips
Instructions
- Place the ground chicken in a bowl and mix in the garlic powder, salt, and black pepper until evenly combined.
- Divide the mixture into 8 small patties, each about 2 inches wide.
- Heat the olive oil in a large skillet over medium heat. Add the patties and cook for 4 minutes per side until fully cooked through.
- Place one slice of American cheese on each hot patty so it melts slightly, then set the patties aside.
- Open the mini slider buns and place one patty inside each bun.
- Add two black olive slices to the top of each bun to create eyes.
- Insert one blue corn tortilla chip on each side of the bun to form bat wings.
Extra Tips
Use room temperature chicken for easier mixing and even cooking. Blue corn chips give the best contrast for the wings, but any sturdy tortilla chip works if you press them in gently right before serving so they stay upright.Course: Appetizer Cuisine: American Equipment: Mixing bowl, Large skillet
Witch Finger Carrot Sticks with Ranch Dip
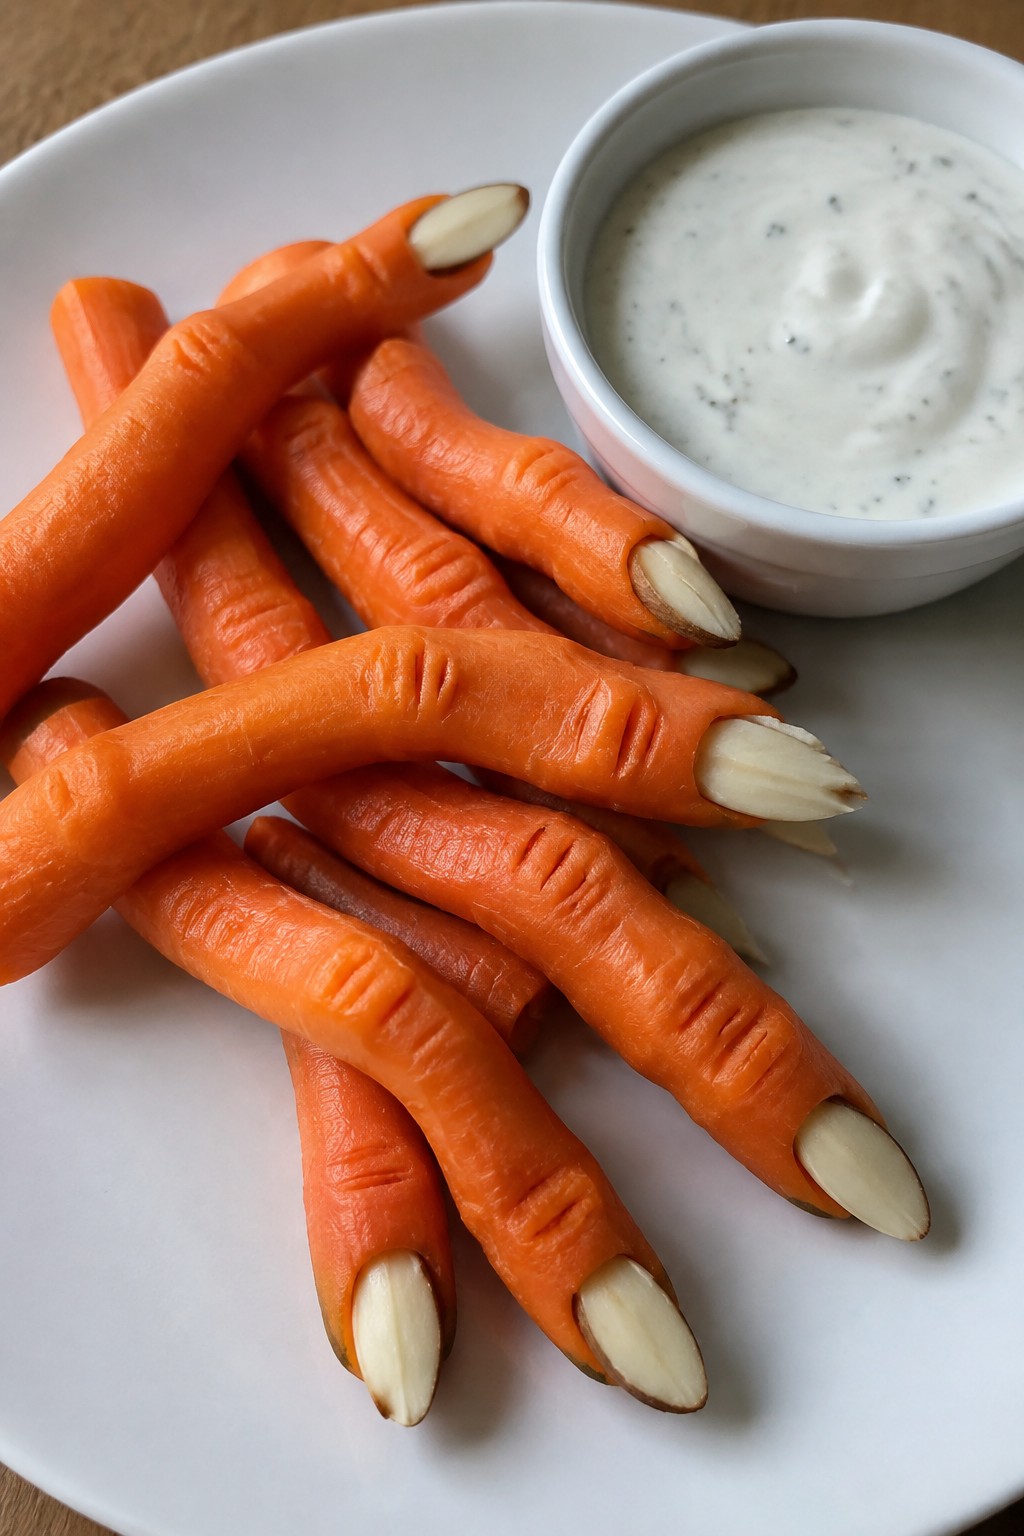
These carrot sticks turn a simple vegetable into a playful Halloween snack that kids enjoy making and eating. The shape gives them a spooky look while the crunch pairs well with creamy ranch. They work well for after-school snacks or party platters when you need something quick that still feels themed.
The carrots stay crisp and the dip adds coolness without overpowering the natural sweetness. It is an easy way to get kids to eat more vegetables during the holiday season.
Serves 4 people.
Ingredients
- 8 large carrots
- 20 sliced almonds
- 1 cup ranch dressing
Instructions
- Peel the carrots and trim the ends. Cut each carrot into pieces about 3 inches long to form the finger shapes.
- Use a small knife to carve shallow lines across the middle of each piece to create knuckle marks.
- Slice a thin tip off one end of each carrot piece to make room for the nail.
- Place a sliced almond on the cut tip of each carrot and press gently to secure it. Add a small dab of ranch dressing to help it stay in place if needed.
- Arrange the finished fingers on a serving plate with the remaining ranch dressing in a bowl for dipping.
Extra Tips
Cut the carrots ahead of time and store them in cold water in the fridge to keep them crisp until serving. If the almonds slip, chill the carrots for ten minutes first so the surface is drier. Skip any extra seasoning on the carrots since the ranch already brings the flavor.Course: Appetizer Cuisine: American Equipment: Vegetable peeler, Knife, Cutting board, Serving plate, Small bowl
Monster Eyeball Meatball Skewers
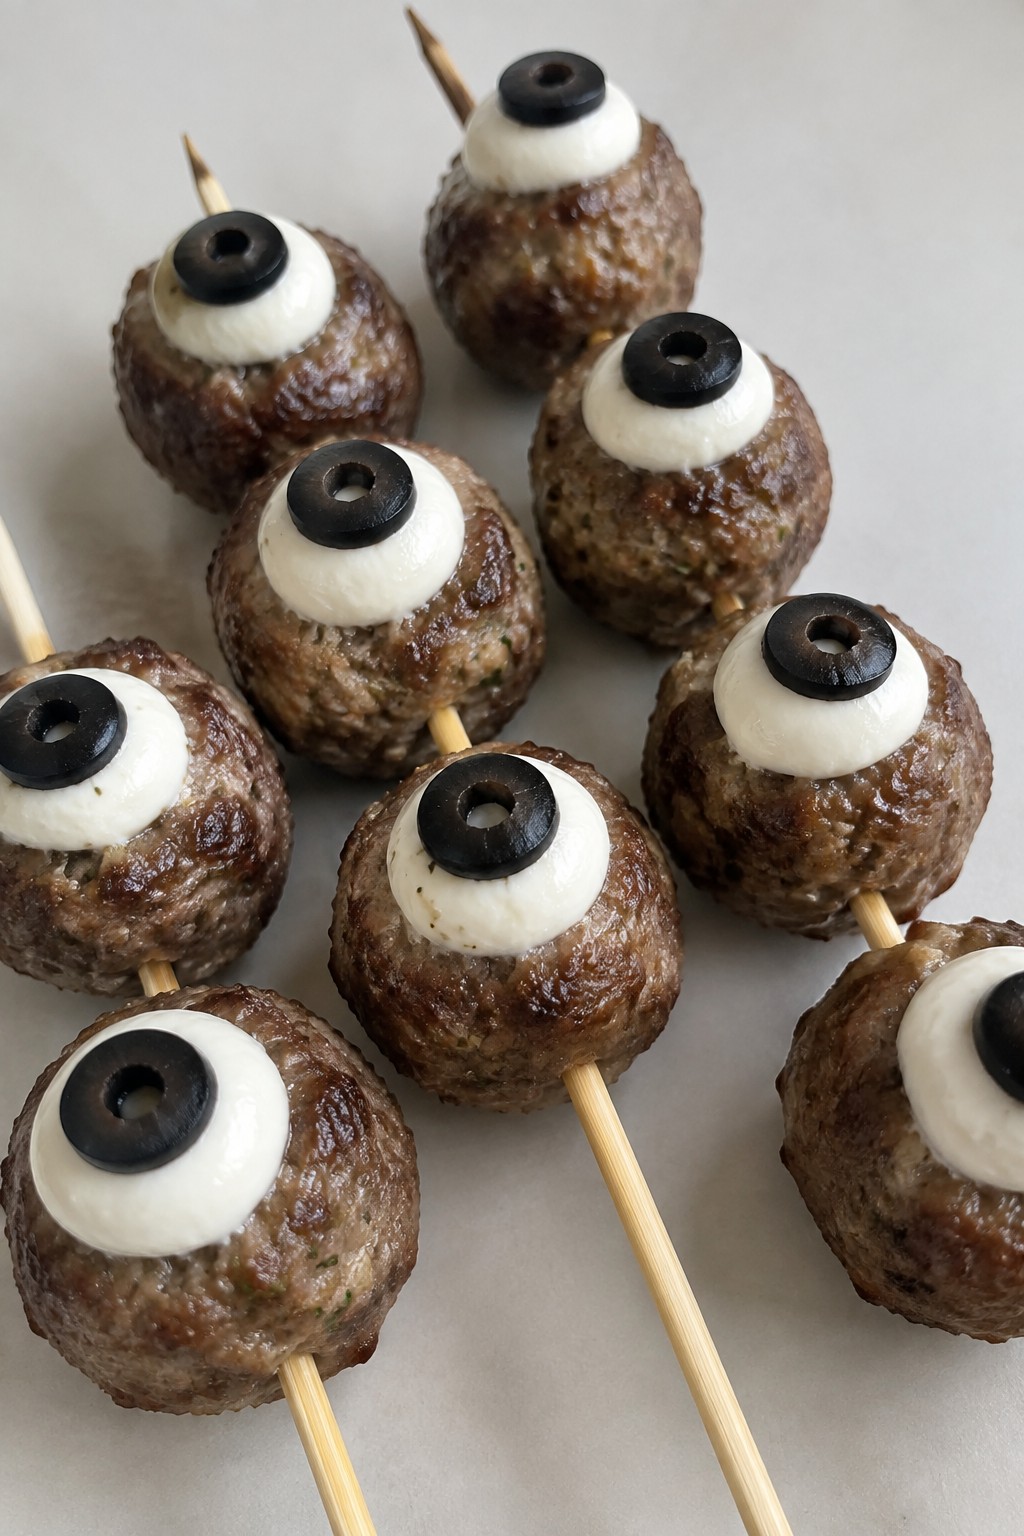
These skewers turn ordinary meatballs into a playful Halloween snack that kids can grab and eat. The meatballs stay juicy while the cheese and olive topping creates a simple eyeball look that fits the theme without extra fuss.
They work well for parties or weeknight dinners because they come together with basic pantry items and cook quickly. The flavor stays mild and savory with a bit of tomato sauce on the side for dipping.
Serves 4 people.
Ingredients
- 1 pound ground beef
- ½ cup breadcrumbs
- 1 large egg
- 2 cloves garlic, minced
- 1 teaspoon dried oregano
- ½ teaspoon salt
- ¼ teaspoon black pepper
- 8 mozzarella pearls
- 8 black olive slices
- 8 wooden skewers
- 1 cup marinara sauce
Instructions
- Preheat the oven to 400°F and line a baking sheet with parchment paper.
- In a mixing bowl, combine the ground beef, breadcrumbs, egg, minced garlic, oregano, salt, and black pepper. Mix until the ingredients are evenly distributed.
- Shape the mixture into 8 meatballs and place them on the prepared baking sheet. Bake for 18 minutes until cooked through.
- Remove the meatballs from the oven. Press one mozzarella pearl onto the top of each meatball while they are still hot. Add one black olive slice in the center of each mozzarella pearl to form the eyeball.
- Thread two meatballs onto each wooden skewer. Serve warm with marinara sauce on the side for dipping.
Extra Tips
Press the olive slice firmly into the mozzarella so it stays in place while kids handle the skewers. You can form the meatballs a day ahead and keep them covered in the fridge before baking. If the mozzarella does not soften enough after baking, return the topped meatballs to the oven for two minutes.Course: Appetizer Cuisine: American Equipment: Mixing Bowl, Baking Sheet, Wooden Skewers
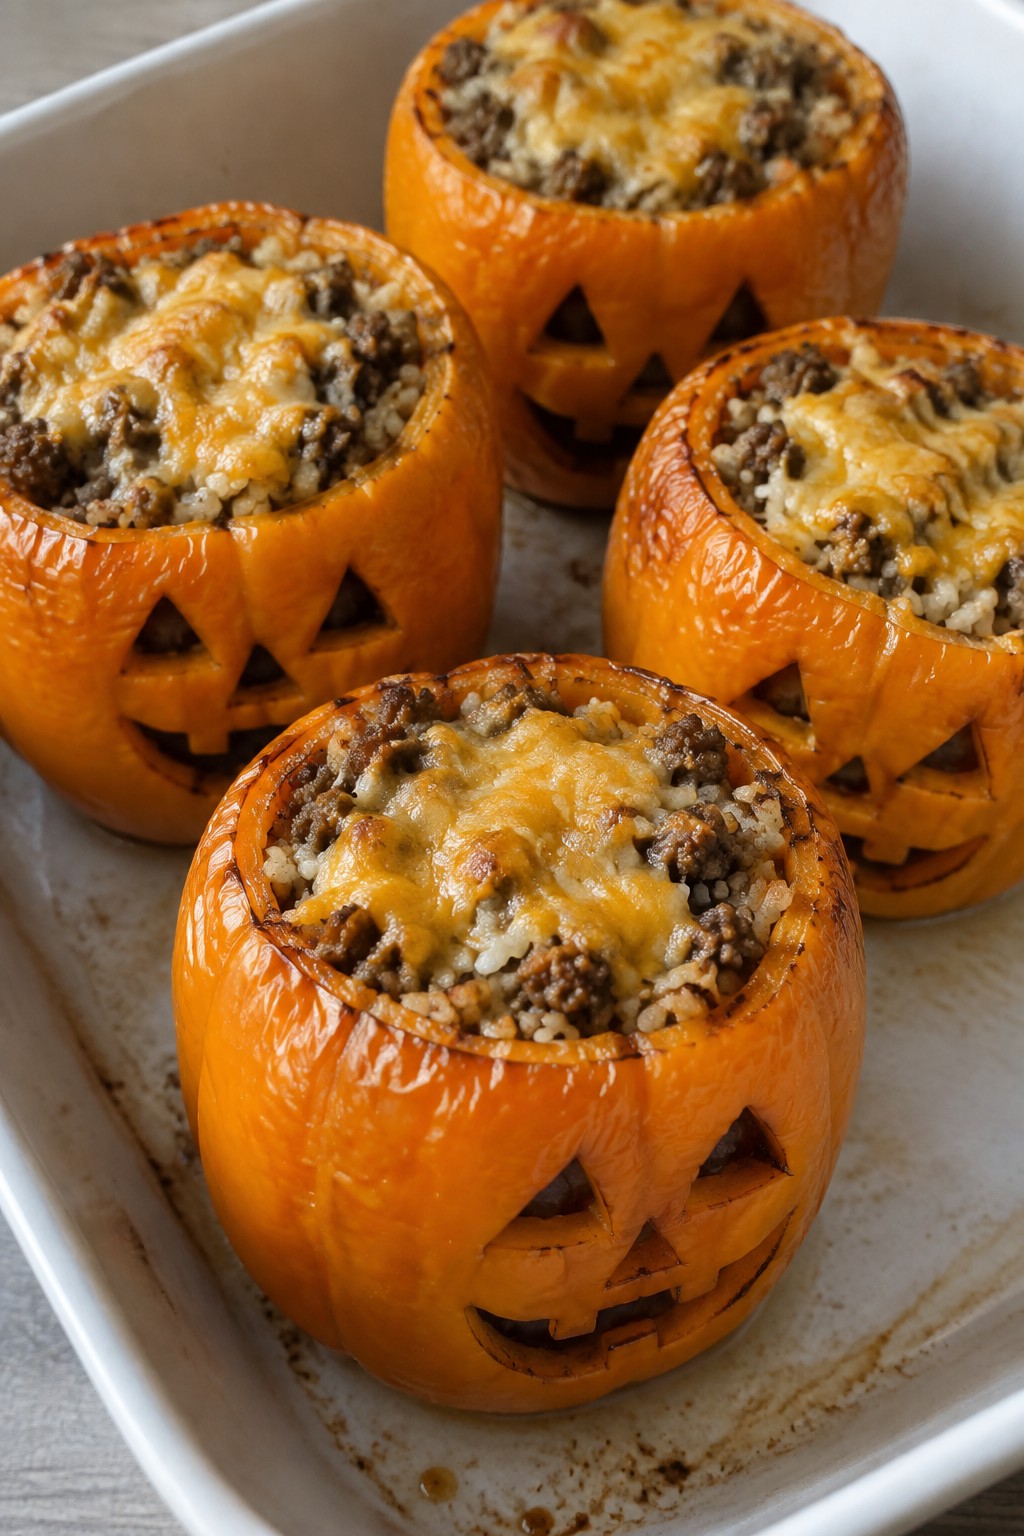
Jack-o’-Lantern Stuffed Bell Peppers
These jack-o’-lantern stuffed bell peppers add a lighthearted element to Halloween parties. Children like pointing out the carved faces before trying the warm filling.
The peppers stay tender after baking while the inside holds a simple mix of beef, rice, and cheese. The result gives a mild taste and soft bite that works well for younger guests.
Serves 4 people.
Ingredients
- 4 large orange bell peppers
- 1 pound ground beef
- 1 cup cooked white rice
- 1 1/2 cups shredded cheddar cheese, divided
- 1 small onion, finely diced
- 1 cup tomato sauce
- 1 teaspoon garlic powder
- 1/2 teaspoon salt
- 1/4 teaspoon black pepper
Instructions
- Heat the oven to 375°F. Slice the tops off the bell peppers and scoop out the seeds and membranes. Use a small knife to carve simple jack-o’-lantern faces on the front of each pepper.
- Place a skillet over medium heat and add the ground beef with the diced onion. Cook until the beef is browned and the onion is soft, then drain any excess liquid.
- Stir the cooked rice, tomato sauce, garlic powder, salt, and black pepper into the skillet. Let the mixture simmer for 5 minutes.
- Remove the skillet from the heat and mix in 1 cup of the cheddar cheese until it melts into the filling.
- Spoon the filling evenly into the carved peppers and set them upright in a baking dish. Sprinkle the remaining cheese over the tops.
- Bake for 20 to 25 minutes until the peppers soften and the cheese on top turns bubbly and lightly golden.
Extra Tips
Carve the faces before stuffing so the peppers hold their shape during baking. Leftovers keep in the fridge for two days and reheat well in the microwave with a damp paper towel over the top to keep the filling moist.Course: Appetizer Cuisine: American Equipment: Baking dish, Skillet, Knife
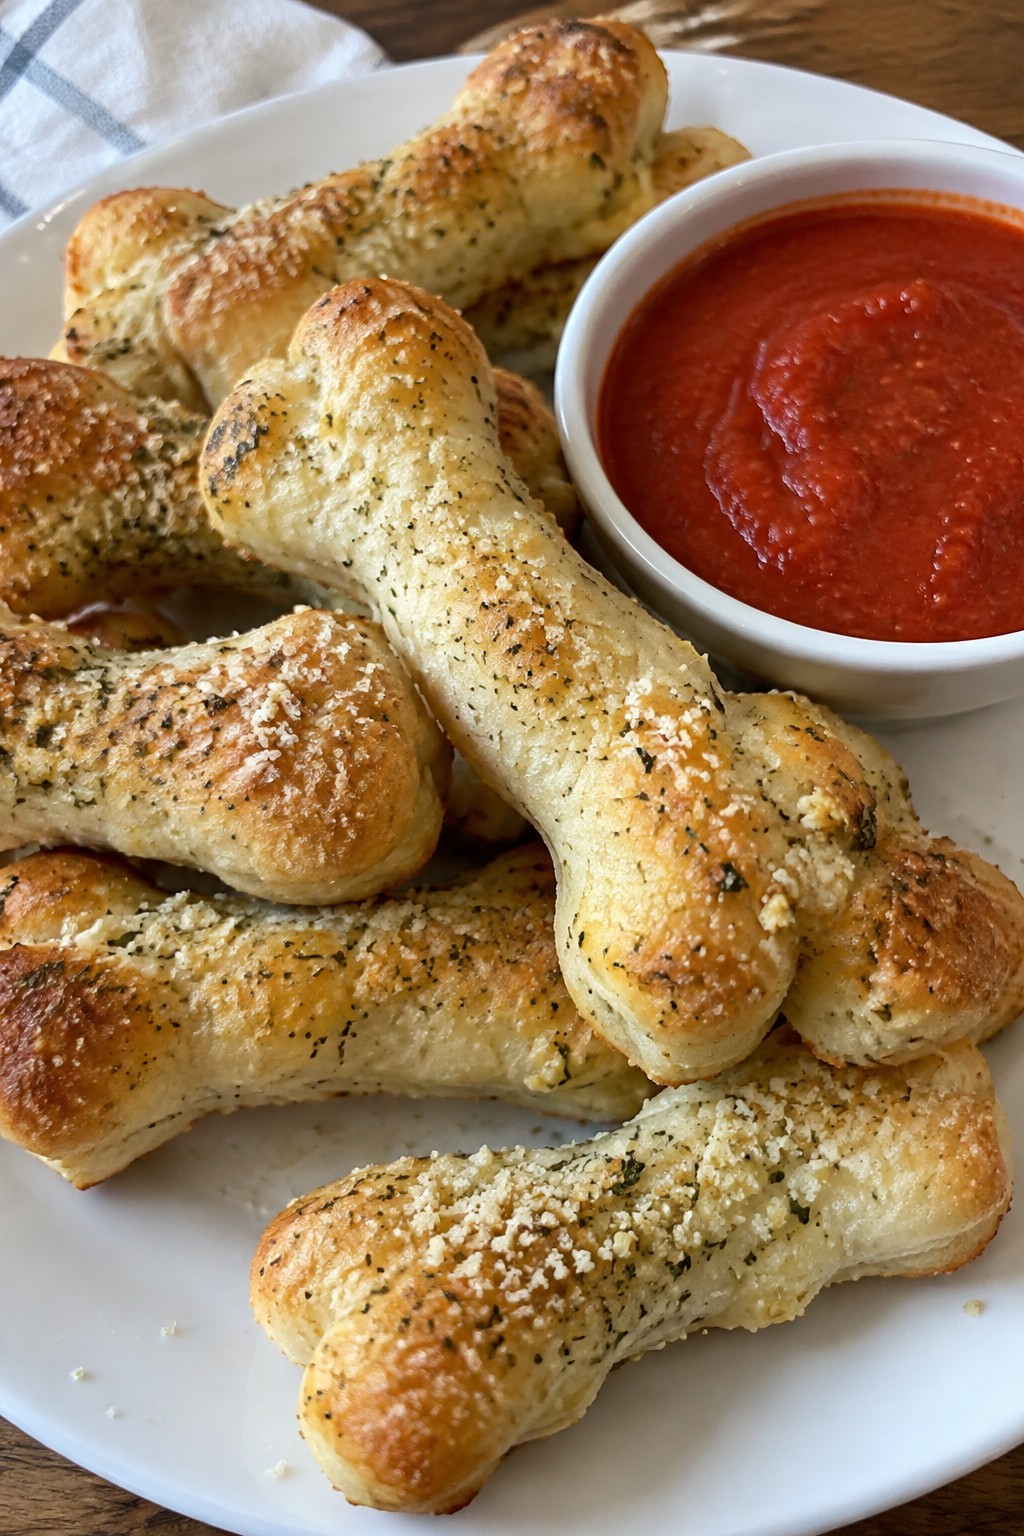
Skeleton Bone Breadsticks with Marinara
These breadsticks turn store-bought dough into Halloween fun by shaping each piece like a bone. Kids enjoy the playful look while the garlic and cheese flavor keeps them coming back for more. They pair well with a simple marinara dip and work as a quick snack before trick-or-treating or at a small party.
The finished breadsticks come out golden and lightly crisp on the outside with a soft center. The marinara adds a bright, savory contrast that balances the cheesy topping.
Serves 4 people.
Ingredients
- 1 (11-ounce) can refrigerated breadstick dough
- 2 tablespoons olive oil
- 1 teaspoon garlic powder
- 1/2 cup grated Parmesan cheese
- 1 cup marinara sauce
Instructions
- Heat the oven to 375 degrees and line a baking sheet with parchment paper.
- Unroll the breadstick dough and separate it into 8 strips. Gently stretch each strip and shape the ends into small knobs so the piece resembles a bone.
- Place the shaped pieces on the baking sheet. Brush each one lightly with olive oil.
- Sprinkle the garlic powder evenly over the breadsticks, then top with the grated Parmesan cheese.
- Bake for 12 to 15 minutes until the breadsticks are golden brown.
- Warm the marinara sauce in a small saucepan or microwave while the breadsticks bake. Serve the sauce in a bowl alongside the warm breadsticks for dipping.
Extra Tips
Shape the dough ends a little thicker than the middle so the bone look holds after baking. If the Parmesan browns too quickly, loosely cover the pan with foil for the last few minutes. Leftovers keep in an airtight container for one day and reheat best in a 300-degree oven for five minutes.Course: Appetizer Cuisine: American Equipment: Baking sheet, parchment paper, small saucepan
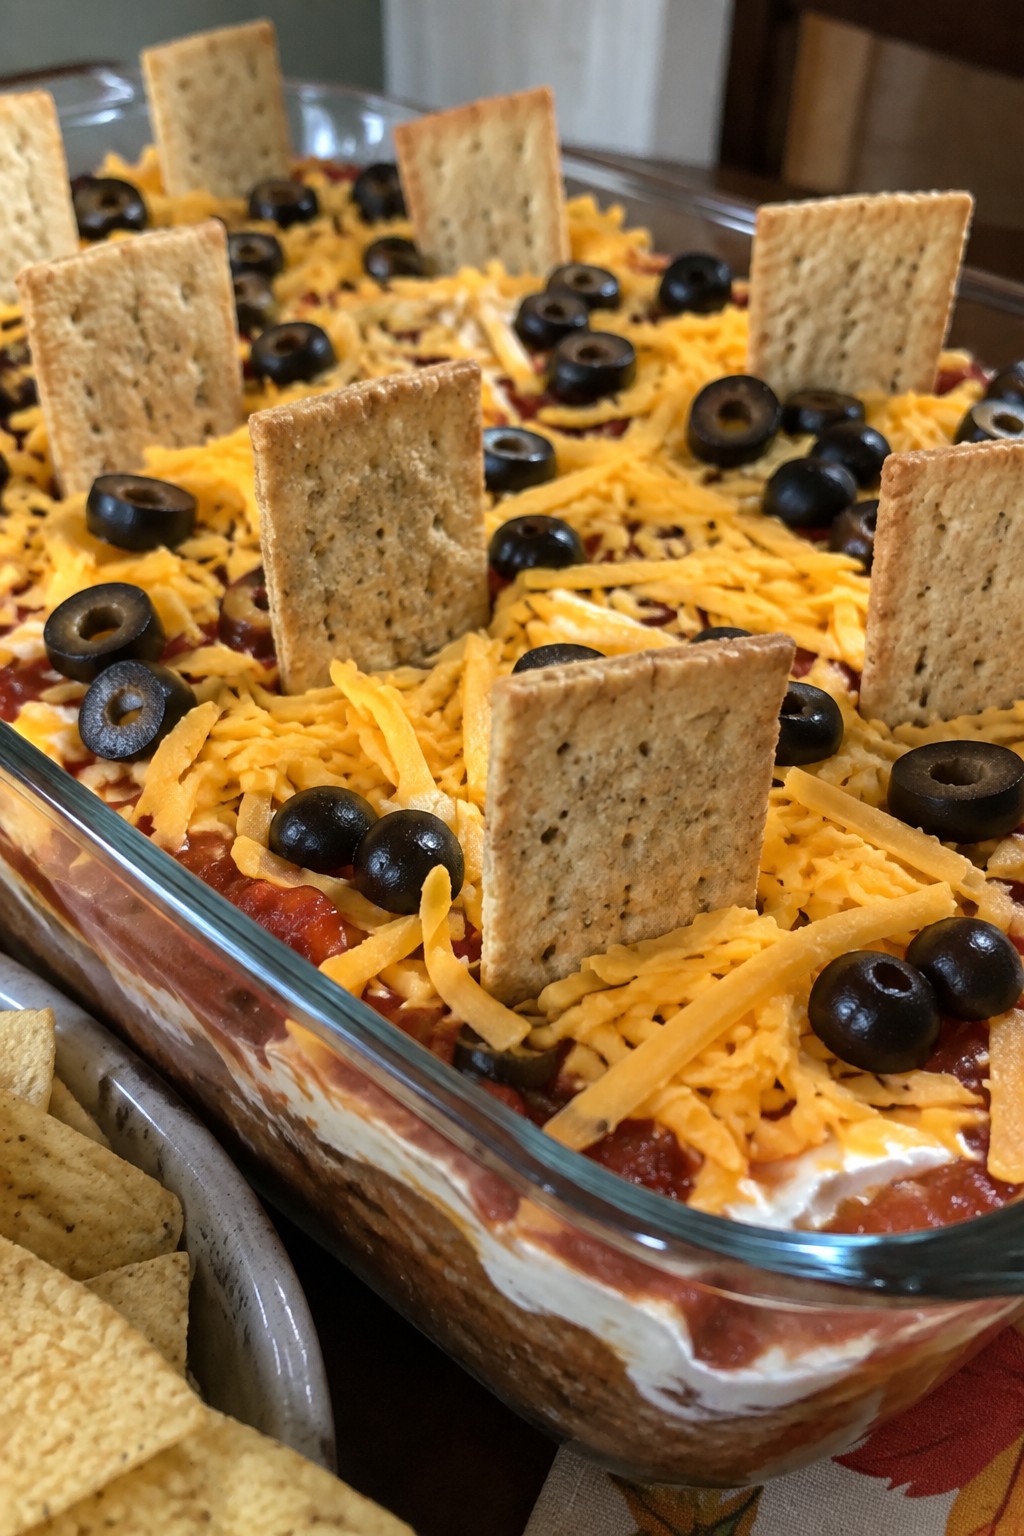
Graveyard Layered Taco Dip
This layered taco dip turns a classic party favorite into a Halloween centerpiece that kids enjoy assembling and eating. The graveyard theme comes from standing crackers upright in the top layer to look like tombstones, while the creamy, cheesy base stays familiar and mild enough for young palates. It works well for after-school snacks, classroom parties, or a quick family dinner starter.
Serves 4 people.
Ingredients
- 1 can (16 oz) refried beans
- 8 oz ground beef
- 1 packet taco seasoning
- 1 cup sour cream
- 1 cup salsa
- 1 cup shredded cheddar cheese
- 1/2 cup sliced black olives
- 8 rectangular crackers
- Tortilla chips for serving
Instructions
- Brown the ground beef in a skillet over medium heat until no pink remains. Drain any excess fat, then stir in the taco seasoning and cook for one more minute. Remove from heat and let cool slightly.
- Spread the refried beans evenly across the bottom of an 8×8 inch dish. Spoon the seasoned beef over the beans in an even layer.
- Mix the sour cream with the salsa in a bowl until combined. Spread this mixture over the beef layer.
- Sprinkle the shredded cheddar cheese evenly across the top. Scatter the sliced black olives over the cheese.
- Press the rectangular crackers upright into the cheese layer to create tombstones. Serve with tortilla chips on the side.
Extra Tips
Prepare the dip up to the cheese layer a few hours ahead and add the crackers right before serving so they stay crisp. If you want less heat for kids, use mild salsa and skip any extra spices. Leftovers keep in the fridge for one day, though the crackers will soften.Course: Appetizer Cuisine: Mexican Equipment: Skillet, Mixing Bowl, 8×8 inch dish
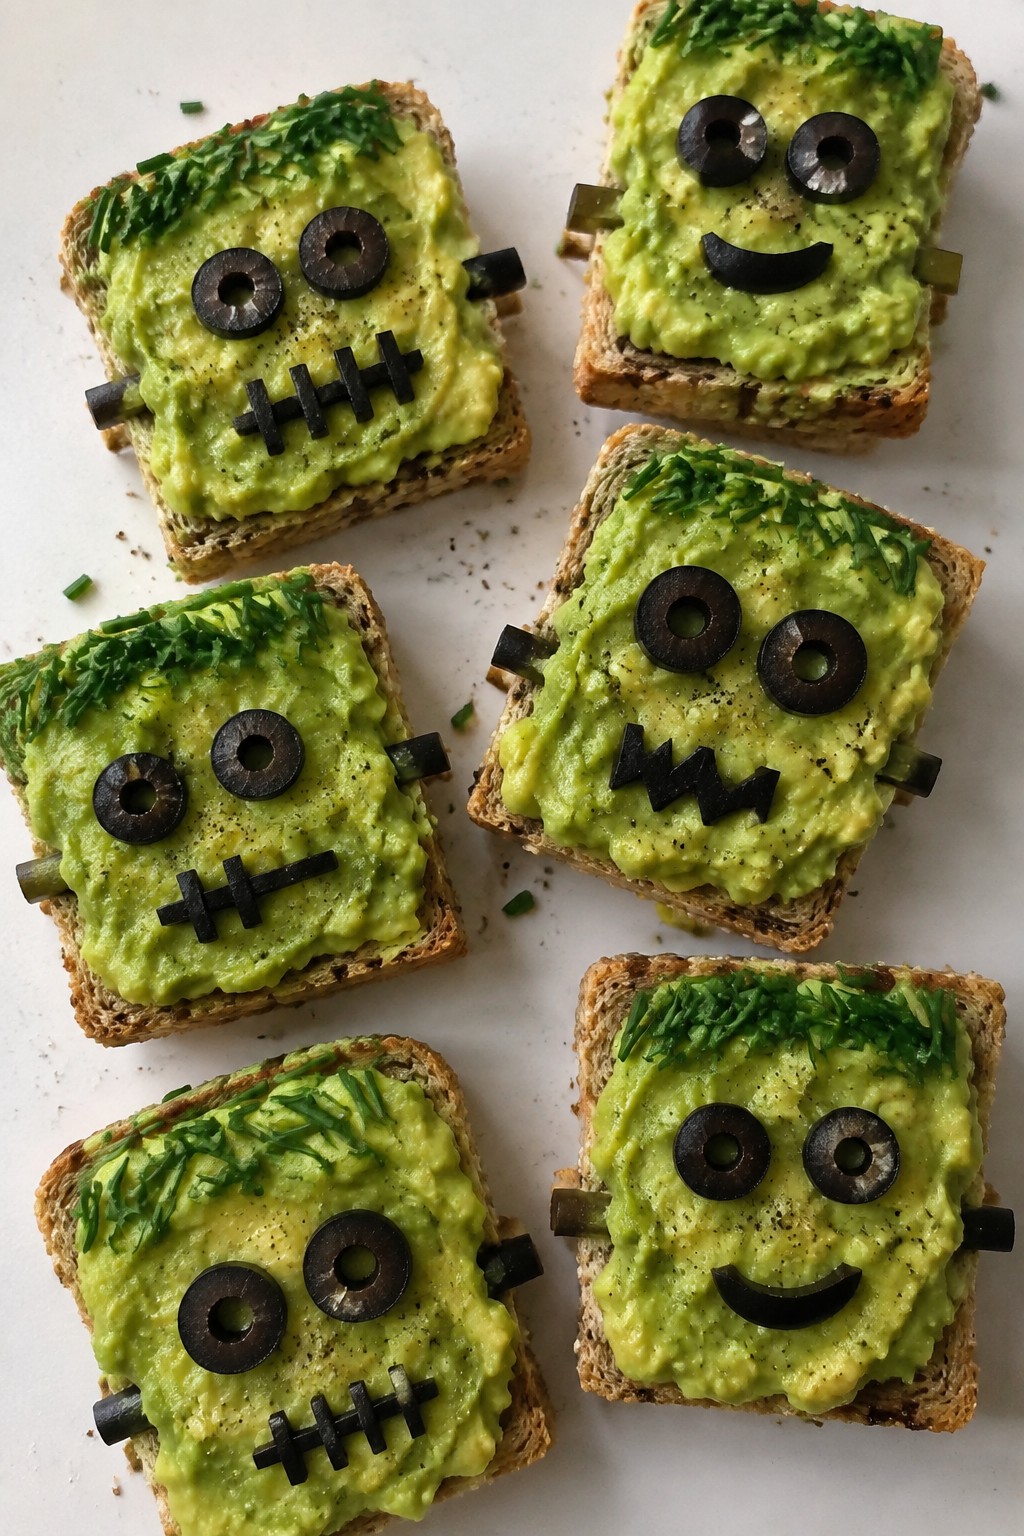
Frankenstein Avocado Toast Bites
These Frankenstein Avocado Toast Bites turn basic avocado toast into a playful Halloween snack. The bright green mash and olive details create monster faces that kids enjoy making and eating. They fit well for parties or quick after-school bites when you want something colorful and simple.
The avocado stays creamy with a light citrus note while the toast adds crunch. Each small piece delivers mild flavor that appeals to young eaters without being too strong.
Serves 4 people.
Ingredients
- 4 slices whole grain bread
- 2 ripe avocados
- 1 tablespoon fresh lemon juice
- 1/4 teaspoon salt
- 1/4 teaspoon black pepper
- 12 black olives
- 2 tablespoons chopped chives
Instructions
- Toast the 4 slices of whole grain bread until they reach a light golden color and feel crisp.
- Cut each avocado in half, remove the pits, and scoop the flesh into a mixing bowl.
- Add the lemon juice, salt, and black pepper to the avocado. Mash everything together with a fork until the mixture is mostly smooth with a few small chunks left.
- Spread the mashed avocado evenly across the toasted bread slices.
- Slice each piece of toast into 3 rectangular bites for a total of 12 pieces.
- Press 2 olive slices onto each bite to form eyes. Add 2 more olive slices on the sides as neck bolts.
- Arrange small pieces of chopped chives across the avocado to create stitch lines.
Extra Tips
Cut the toast while it is still warm so the avocado spreads smoothly without tearing the bread. Use firm but ripe avocados to keep the mash from turning watery. If the chives seem too strong, swap in thin strips of green onion tops for a milder taste.Course: Appetizer Cuisine: American Equipment: Toaster, Mixing Bowl, Knife
Vampire Bite Cherry Tomato Poppers
These cherry tomato poppers give kids a playful bite-sized snack that looks like tiny vampire marks. The small slits in each tomato reveal a creamy white filling, making them easy to spot on a party table and fun to pop in one bite. They bring a fresh tomato taste balanced by mild garlic and herb flavors that most children enjoy.
The recipe works well for Halloween gatherings or after-school snacks when you need something quick that still feels themed. The soft filling contrasts with the juicy tomato for a pleasant texture without any fuss.

Serves 4 people.
Ingredients
- 24 cherry tomatoes
- 1/2 cup cream cheese, softened
- 1/4 cup shredded mozzarella cheese
- 1 tablespoon chopped fresh basil
- 1/2 teaspoon garlic powder
- 1/4 teaspoon salt
Instructions
- Place the cream cheese, mozzarella, basil, garlic powder, and salt in a small bowl. Stir until the mixture is smooth and evenly combined.
- Use a small knife to cut a short slit across the top of each cherry tomato, keeping the tomato mostly intact.
- Spoon or pipe a small amount of the cheese mixture into each slit until the filling shows through the opening.
- Arrange the filled tomatoes on a serving plate with the slits facing up so the white filling is visible.
Extra Tips
Chill the filled tomatoes for 15 minutes before serving if you want the cheese to firm up slightly. Skip the basil and use dried Italian seasoning instead if fresh herbs are not on hand. Leftovers keep in an airtight container in the fridge for one day, though the tomatoes may release some juice.Course: Appetizer Cuisine: American Equipment: Mixing Bowl, Knife, Spoon
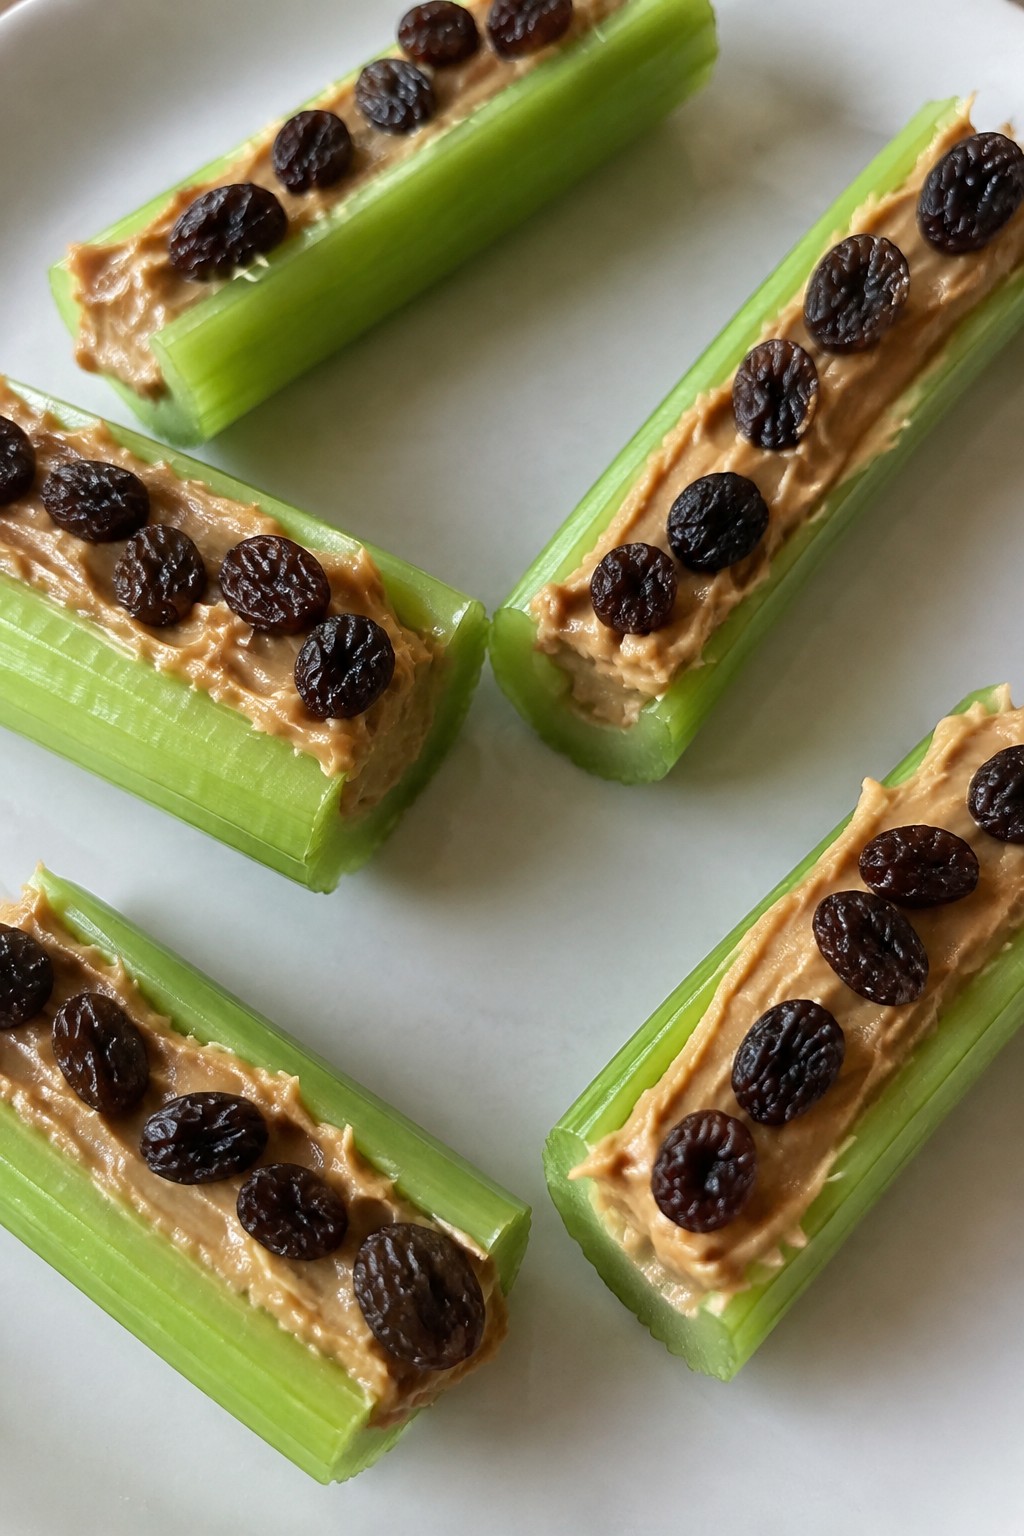
Creepy Crawly Ants on Celery Logs
This recipe turns a simple snack into a playful Halloween bite. Kids enjoy the idea of raisins acting as ants on the celery logs. The mix of crisp celery, creamy peanut butter, and chewy raisins gives a nice balance of textures and flavors that works well for parties or afternoon snacks.
Serves 4 people.
Ingredients
- 4 large celery stalks
- 1/2 cup creamy peanut butter
- 1/4 cup raisins
Instructions
- Wash the celery stalks under cold water and pat them dry.
- Trim the ends and cut each stalk into three equal logs.
- Spoon the peanut butter into a small bowl and stir it until smooth.
- Fill the groove of each celery log with peanut butter using a spoon or knife.
- Press raisins gently into the peanut butter so they sit like ants along the log.
Extra Tips
Choose firm, fresh celery to keep the logs crisp. Stir the peanut butter well before spreading so it sits evenly. Make these close to serving time since the celery can soften if it sits too long with the filling.Course: Appetizer Cuisine: American Equipment: Knife, Cutting Board, Spoon
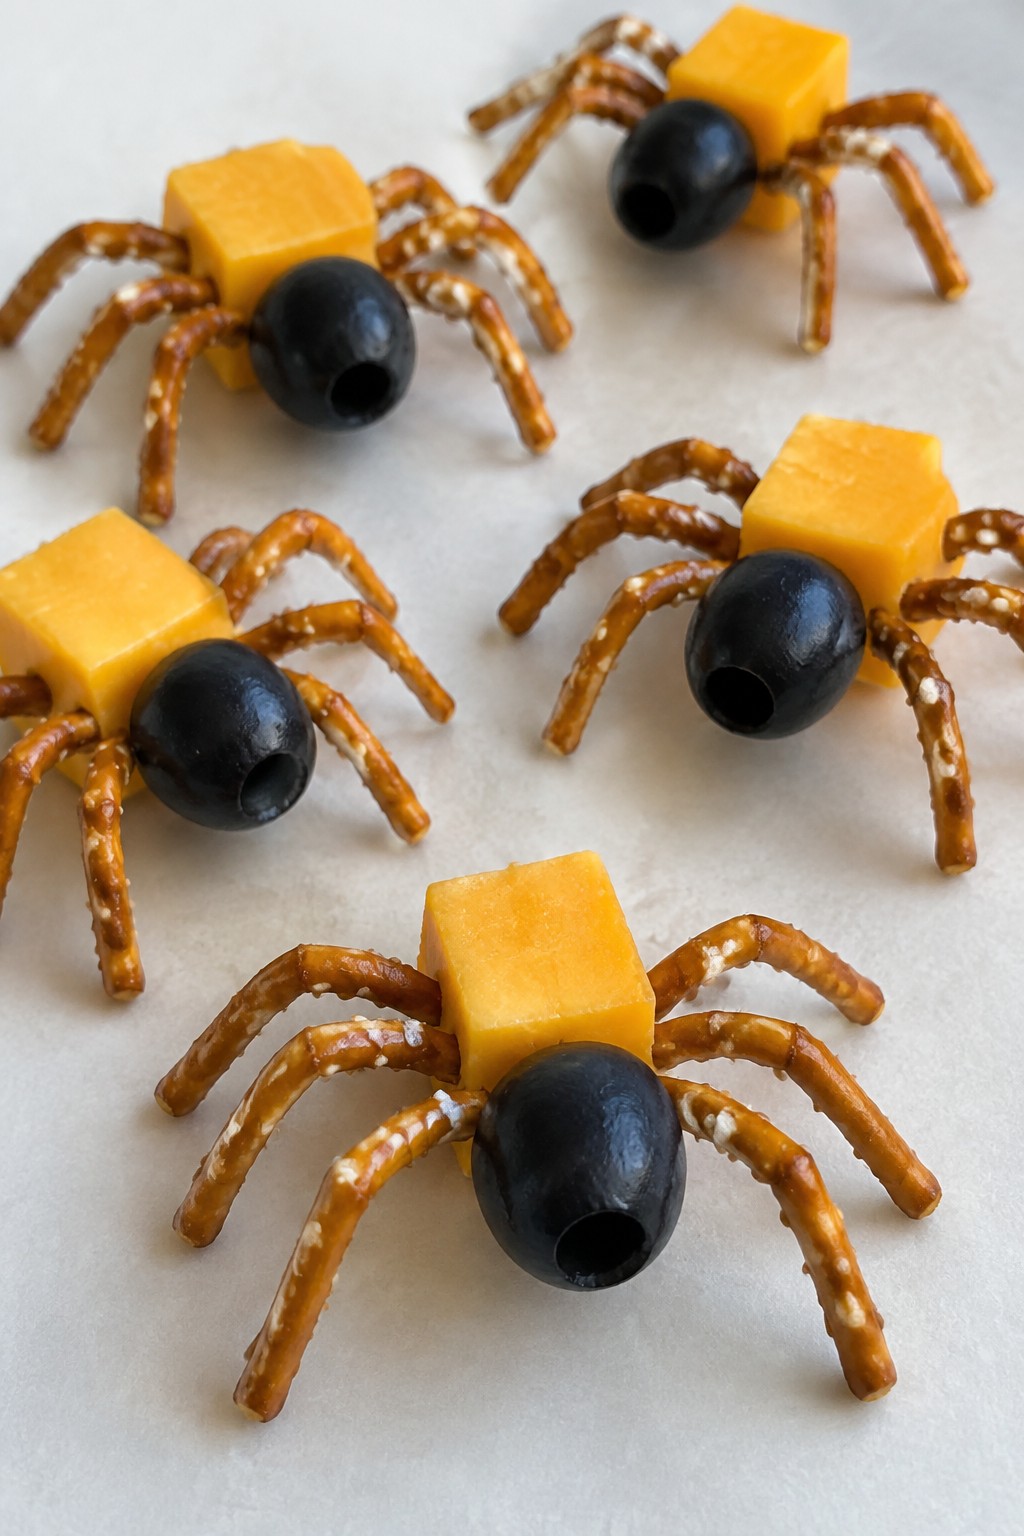
Spooky Olive and Cheese Spider Bites
These bites turn basic cheese cubes and olives into spiders that kids can help put together for a Halloween party. They fit well as a no-cook starter that holds up during a busy evening of costumes and games.
The result is a salty olive bite against mild cheddar, with a crisp snap from the pretzel legs.
Serves 4 people.
Ingredients
- 12 (1-inch) cubes of cheddar cheese
- 12 large pitted black olives
- 48 pretzel sticks
Instructions
- Arrange the cheddar cheese cubes on a serving plate with space between each one.
- Slice a small slit into the side of each black olive.
- Set one olive on top of each cheese cube, using the slit to help it stay in place as the spider body.
- Push four pretzel sticks into one side of each olive and four into the other side to form the legs.
Extra Tips
Assemble the spiders right before serving so the pretzels stay crisp and do not soften from the moisture in the olives. If the pretzel sticks feel too long, break them in half before inserting the legs. Use firm cheddar cubes so they hold the weight of the olive and pretzels without crumbling.Course: Appetizer Cuisine: American Equipment: Knife, Serving Plate
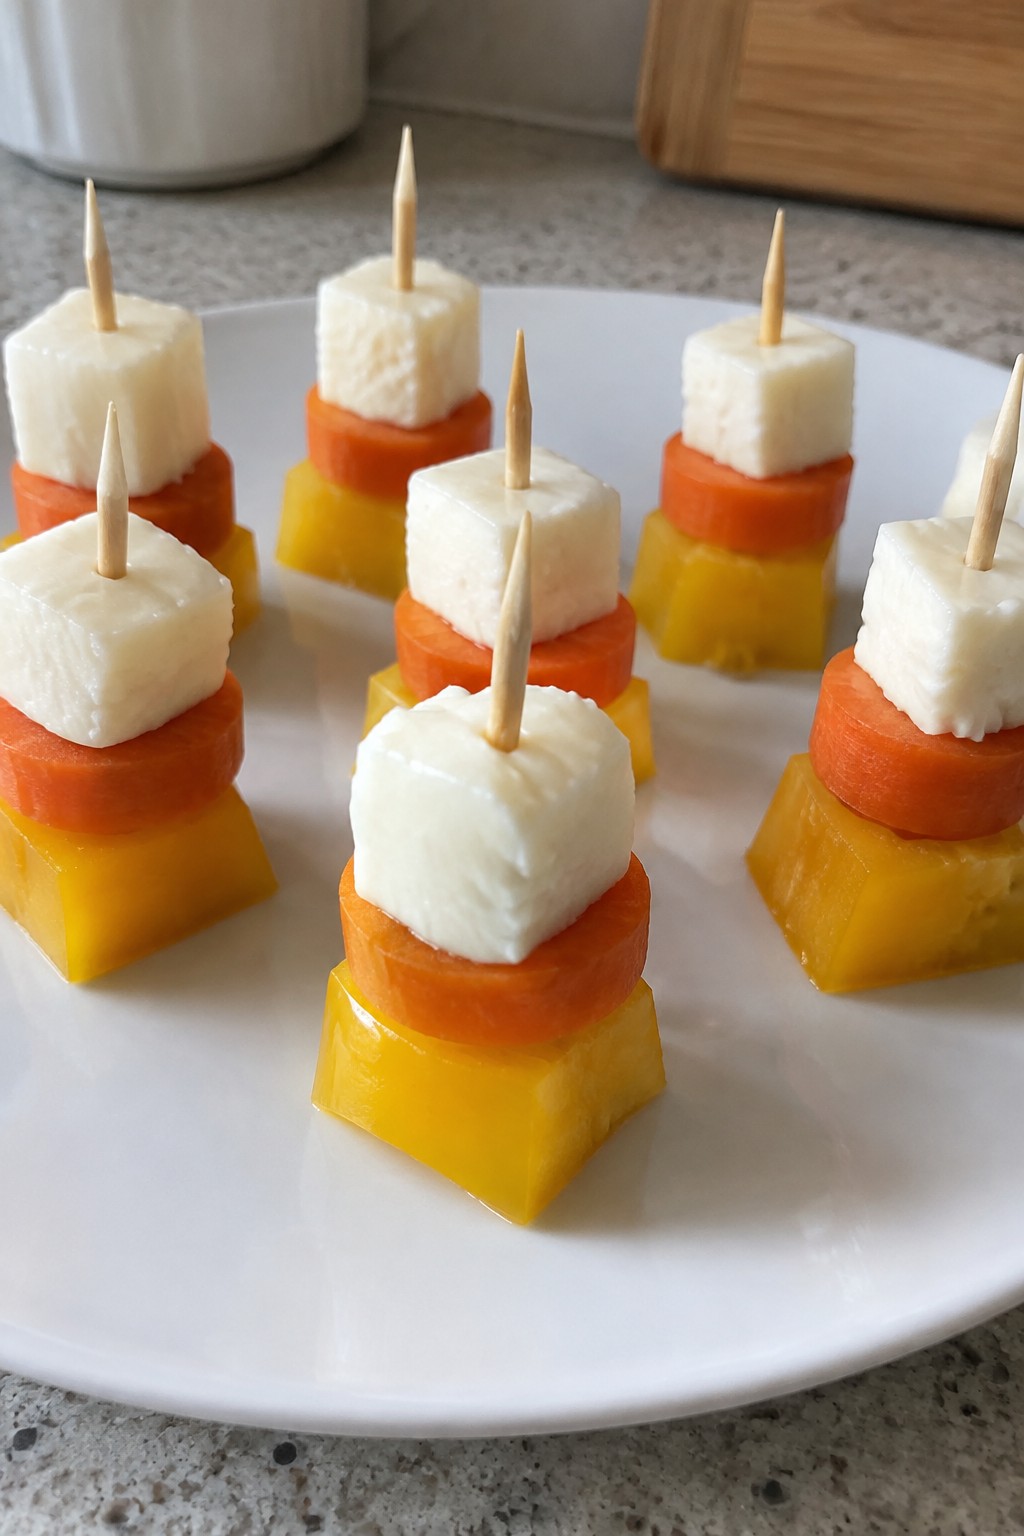
Candy Corn Veggie and Cheese Stacks
These stacks turn simple veggies and cheese into a playful Halloween snack that kids recognize right away. The layers copy the yellow, orange, and white bands of candy corn without any sugar, so they fit right into a party spread of fun finger foods. The result is crisp pepper and carrot against mild, creamy cheese that holds together easily on a toothpick.
This recipe works well before a meal or as part of a larger appetizer table. Kids can help thread the pieces once the cutting is done, and the bright colors keep the whole plate looking festive.
Serves 4 people.
Ingredients
- 8 ounces mozzarella cheese, cut into 1-inch cubes
- 4 medium carrots, peeled and cut into 1/2-inch rounds
- 2 yellow bell peppers, cut into 1-inch squares
- 12 toothpicks
Instructions
- Cut the mozzarella into 1-inch cubes and set them aside.
- Peel the carrots and slice them into rounds about 1/2 inch thick.
- Remove the seeds from the yellow bell peppers and cut the flesh into 1-inch squares.
- Take one toothpick and slide a mozzarella cube onto it first to form the bottom white layer.
- Add one carrot round on top of the cheese for the middle orange layer.
- Finish with a yellow bell pepper square at the top to create the final yellow layer.
- Repeat with the remaining pieces until you have 12 finished stacks.
Extra Tips
Make the stacks shortly before serving so the cheese stays firm and the vegetables keep their crunch. If the carrot rounds feel too thick to stay on the toothpick, slice them a little thinner. Yellow bell peppers give the brightest top color, but any mild sweet pepper works if that is what you have on hand.Course: Appetizer Cuisine: American Equipment: Knife, Cutting board, Toothpicks
