
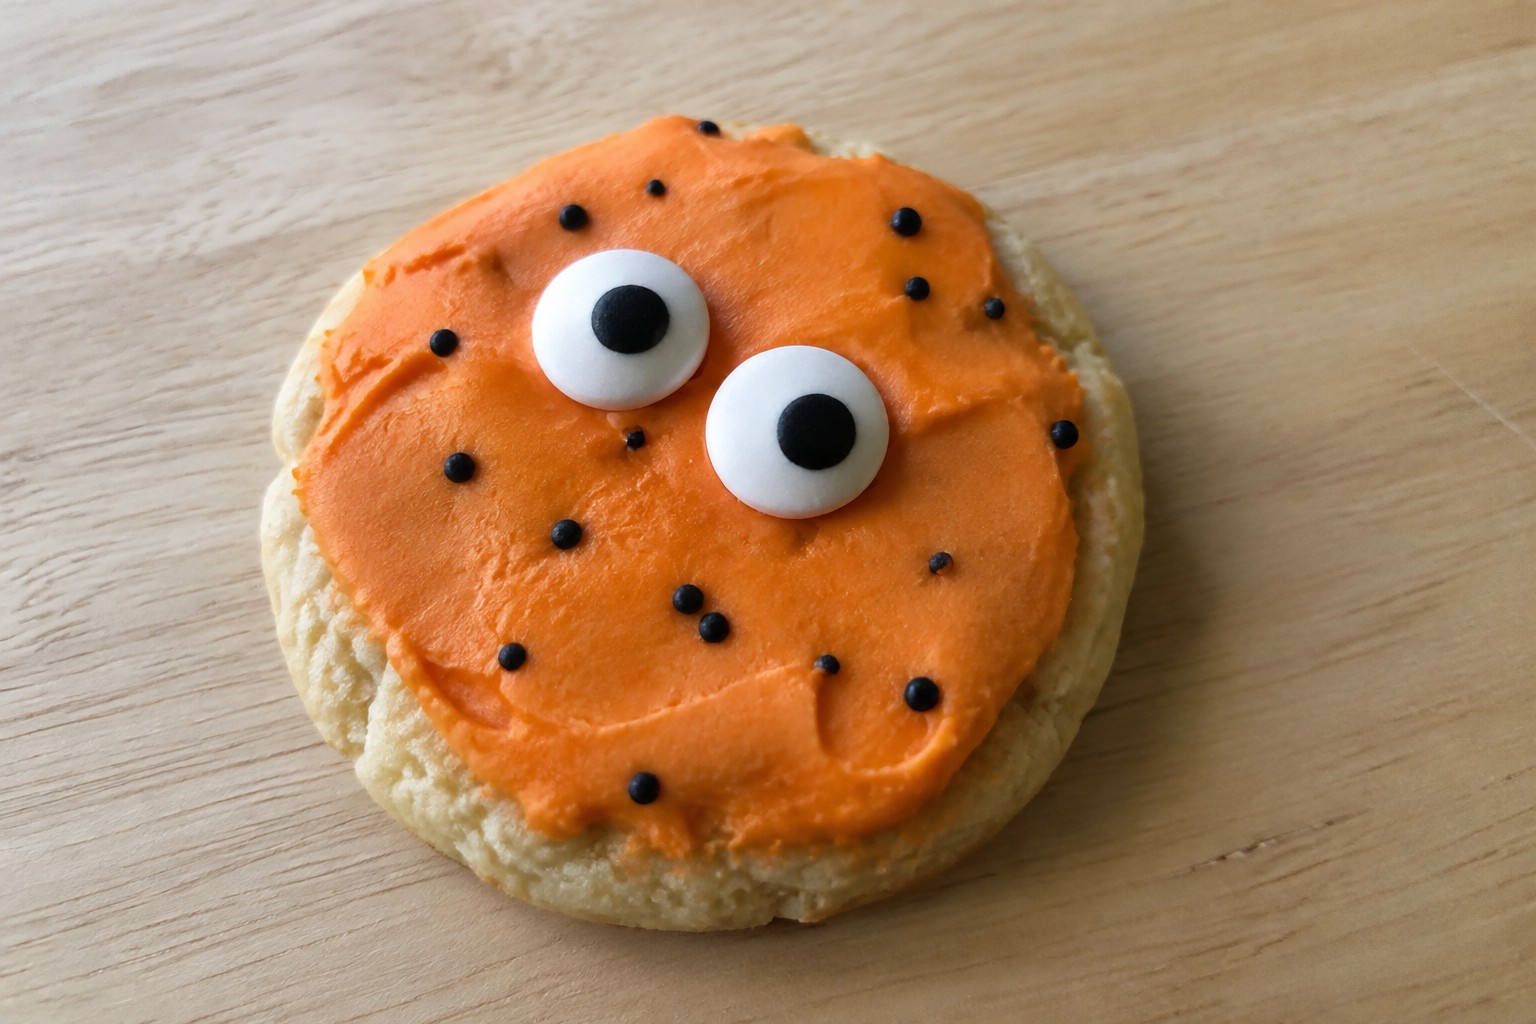
Halloween cookies are easy to make and fun to share at parties or with family.
Adding eyes gives them a simple playful look that works for both kids and adults.
This roundup includes 12 different cookie recipes that focus on that detail.
Each one uses basic ingredients and clear steps for the decorations.
You can choose recipes based on what you like to bake or have on hand.
Helpful Tips Before You Start
These tips will help your Halloween cookies hold their eyes in place and look neat.
Attach Candy Eyes to Wet Icing
Press candy eyes into the icing right after piping or spreading it. Waiting even a minute can cause them to slide or fall off later.
Chill the Cut Dough Shapes
Place cut cookie shapes in the fridge for 15 minutes before baking. This keeps edges sharp so eye placement stays precise after baking.
Use a Small Piping Tip for Homemade Eyes
A number 1 or 2 tip gives better control when making pupils with black icing. Larger tips make eyes look uneven on small cookies.
Store Cookies in a Single Layer
Place finished cookies in one layer inside airtight containers. Stacking can press on the eyes and leave dents or smudges.
Googly-Eyed Monster Chocolate Chip Cookies
These cookies turn classic chocolate chip dough into playful monsters with bright green color and candy eyes on top. They work well for Halloween parties or afternoon baking with kids who want to help add the final details. The cookies bake up chewy in the center with crisp edges and plenty of chocolate throughout.

Serves 4 people.
Ingredients
- 4 tablespoons unsalted butter, softened
- 1/4 cup brown sugar
- 2 tablespoons granulated sugar
- 1 large egg
- 1 teaspoon vanilla extract
- 1-2 drops green food coloring
- 3/4 cup all-purpose flour
- 1/2 teaspoon baking soda
- 1/4 teaspoon salt
- 1/2 cup chocolate chips
- 16 candy eyeballs
Instructions
- Preheat the oven to 350 degrees and line a baking sheet with parchment paper.
- In a mixing bowl, beat the softened butter with the brown sugar and granulated sugar until smooth.
- Add the egg, vanilla extract, and green food coloring. Stir until the mixture turns evenly green.
- In a separate bowl, whisk together the flour, baking soda, and salt.
- Combine the dry ingredients with the wet mixture and stir until a dough forms.
- Fold in the chocolate chips, reserving a small handful for later use.
- Scoop the dough into 8 portions and place them on the prepared baking sheet.
- Bake for 10 to 12 minutes until the edges turn golden.
- Let the cookies cool for 5 minutes, then melt the reserved chocolate chips and use a small dab to attach two candy eyeballs to each cookie.
Extra Tips
Press the candy eyeballs into the cookies while they are still slightly warm so they stick without extra chocolate. If the dough feels too soft after adding food coloring, chill it for 10 minutes before scooping. Store cooled cookies in an airtight container at room temperature for up to three days.Course: Dessert Cuisine: American Equipment: Mixing bowl, Baking sheet, Oven
Owl-Faced Pumpkin Spice Cookies with Candy Eyes
These cookies turn classic pumpkin spice flavors into a simple Halloween treat. They suit an afternoon baking session with family or a quick addition to a party spread. Each cookie bakes up soft with a light crumb and carries warm notes of cinnamon and nutmeg.
The owl faces come from candy eyes pressed into the tops after baking. A single chocolate chip forms the beak on each one. The result feels playful without extra decorating steps.

Serves 4 people.
Ingredients
- 1 cup all-purpose flour
- 1/2 cup pumpkin puree
- 1/4 cup brown sugar
- 1/4 cup unsalted butter, softened
- 1 teaspoon pumpkin pie spice
- 1/2 teaspoon baking soda
- 1 large egg
- 8 candy eyes
- 4 chocolate chips
Instructions
- Heat the oven to 350 degrees and line a baking sheet with parchment paper.
- Stir the flour, pumpkin pie spice, and baking soda together in a bowl.
- In a second bowl, beat the butter and brown sugar until smooth. Add the pumpkin puree and egg, then mix until combined.
- Pour the dry ingredients into the wet mixture and stir until a soft dough forms.
- Divide the dough into four equal portions and place them on the baking sheet. Gently flatten each portion into a round shape.
- Bake for 12 minutes until the edges look set.
- Remove the cookies from the oven and immediately press two candy eyes and one chocolate chip into each cookie to create the owl face. Let them cool on the sheet for five minutes before moving to a rack.
Extra Tips
Press the candy eyes in while the cookies are still warm so they stick without frosting. If the dough feels too sticky to shape, chill it for ten minutes first. Store cooled cookies in an airtight container at room temperature for up to three days.Course: Dessert Cuisine: American Equipment: Mixing Bowl, Baking Sheet, Oven
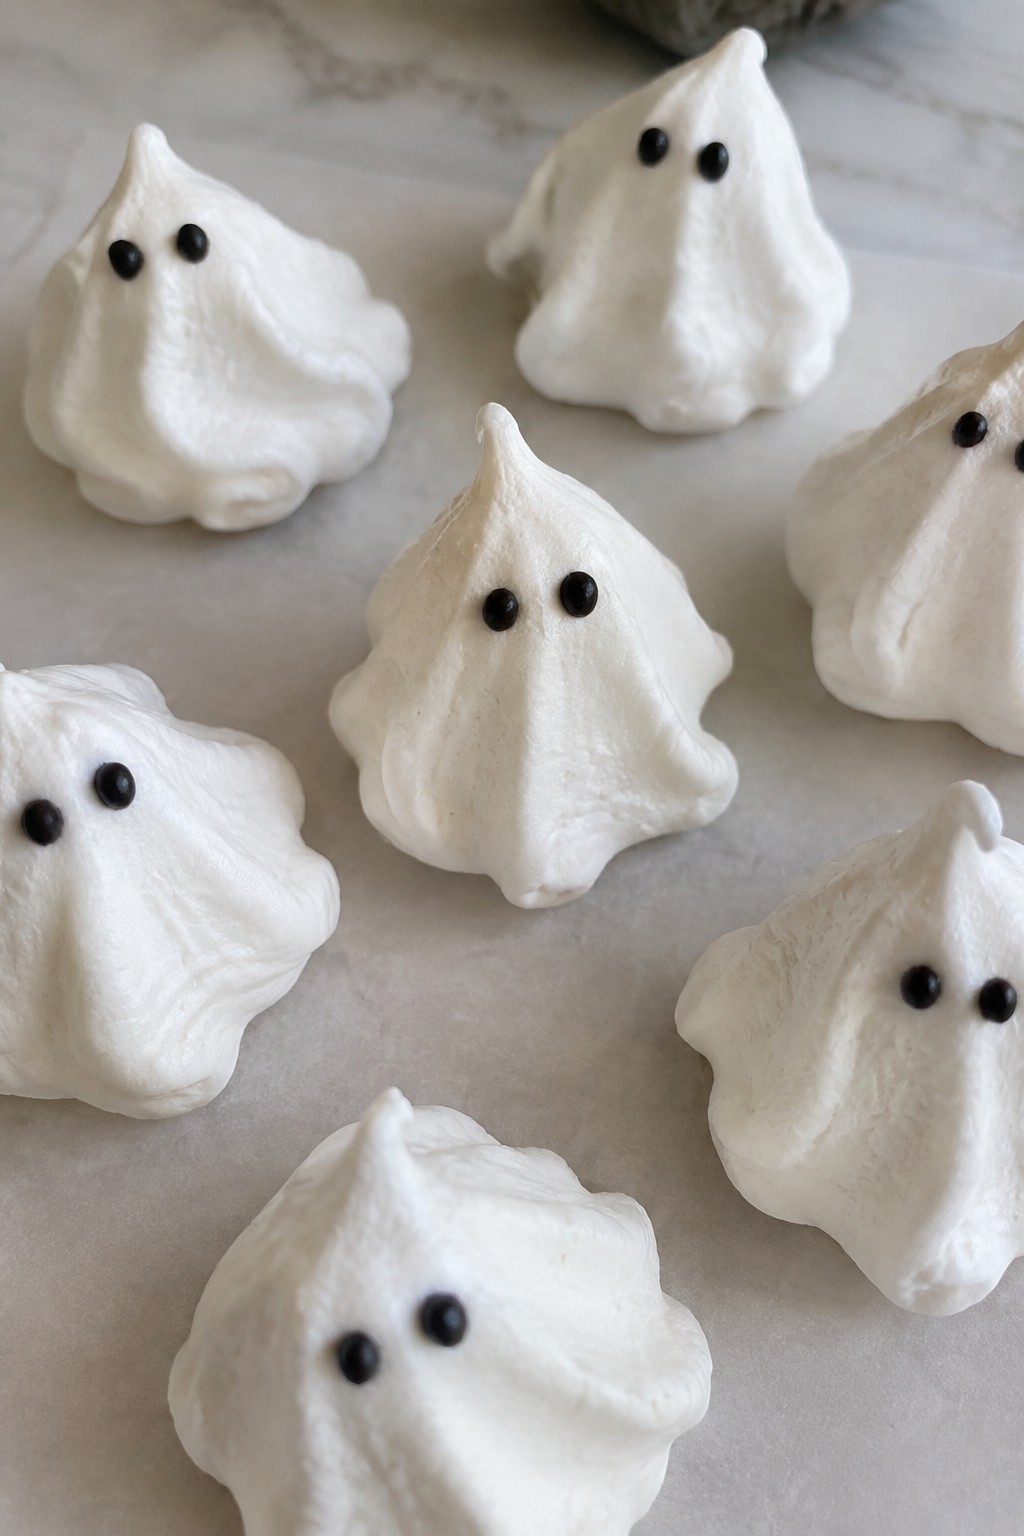
Ghostly Vanilla Meringue Cookies with Icing Eyes
These light cookies bring a simple spooky element to any Halloween spread. Their airy shape and small icing faces make them easy to serve at parties or tuck into lunchboxes for a seasonal surprise. The meringue bakes up crisp on the outside with a soft center that melts quickly.
The flavor stays mild and sweet from vanilla, while the texture stays delicate and dry. They pair well with coffee or hot cocoa and hold their form once cooled.
Serves 4 people.
Ingredients
- 2 large egg whites
- 1/2 cup granulated sugar
- 1/4 teaspoon cream of tartar
- 1 teaspoon vanilla extract
- 1/2 cup powdered sugar
- 2 teaspoons milk
- 2 drops black food coloring
Instructions
- Preheat the oven to 200 degrees F and line a baking sheet with parchment paper.
- Place the egg whites and cream of tartar in a clean mixing bowl. Beat on medium speed until soft peaks form.
- Add the granulated sugar one tablespoon at a time while beating on high speed until stiff, glossy peaks form.
- Mix in the vanilla extract on low speed until just combined.
- Spoon the meringue into a piping bag fitted with a round tip. Pipe small ghost shapes onto the prepared baking sheet, leaving space between each one.
- Bake for 90 minutes, then turn off the oven and let the cookies cool inside with the door closed for one hour.
- Stir the powdered sugar and milk together in a small bowl until smooth. Add the black food coloring and mix until the color is even.
- Use a toothpick or small brush to dot eyes onto each cooled cookie. Let the icing set for 10 minutes before serving.
Extra Tips
Pipe the ghosts with a steady upward motion to create a tapered top that looks more like a floating sheet. Store the finished cookies in an airtight container at room temperature for up to three days to keep them crisp. If the icing feels too thick, add one extra drop of milk at a time until it flows smoothly from the brush.Course: Dessert Cuisine: American Equipment: Electric Mixer, Piping Bag, Baking Sheet
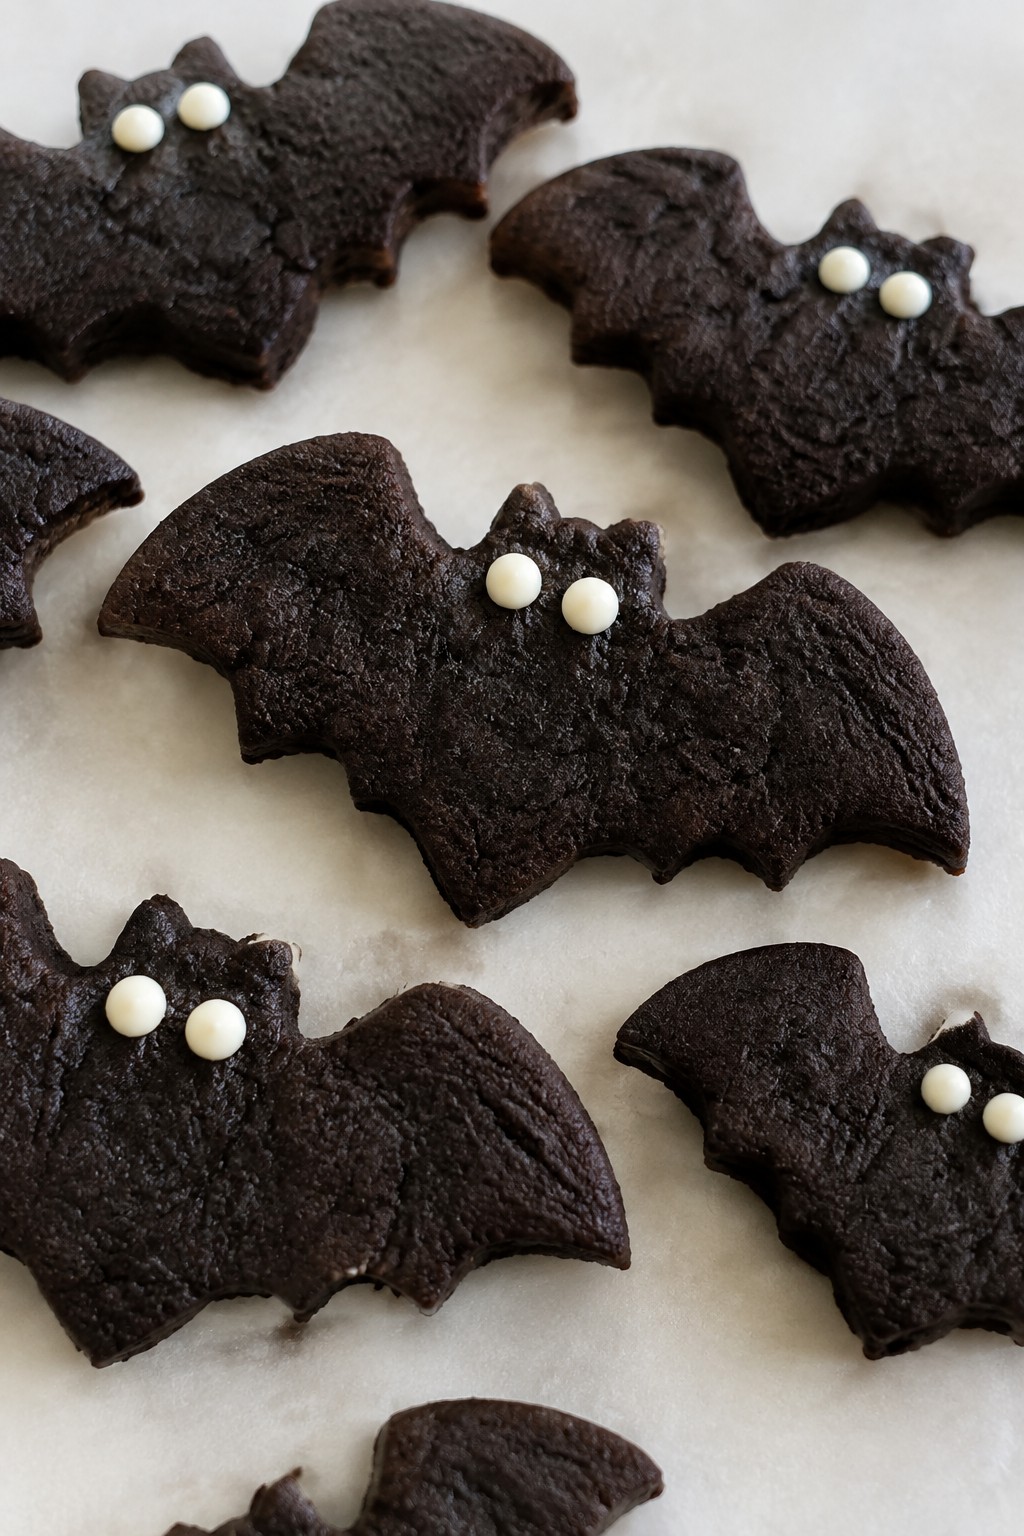
Black Cocoa Bat Cookies with White Chocolate Eyes
These cookies stand out at Halloween gatherings because the black cocoa gives them a deep, dark color that makes the white chocolate eyes pop. They work well for parties or school events where you want something simple yet themed. The flavor is rich and mildly chocolatey with a crisp edge and soft center.
The white chocolate adds a sweet contrast that balances the cocoa. Kids and adults both enjoy spotting the little faces on each bat.
Serves 4 people.
Ingredients
- 1 cup all-purpose flour
- 1/4 cup black cocoa powder
- 1/2 cup unsalted butter, softened
- 1/2 cup granulated sugar
- 1 large egg
- 1 teaspoon vanilla extract
- 1/2 teaspoon baking powder
- 1/4 teaspoon salt
- 1/2 cup white chocolate chips
Instructions
- Preheat the oven to 350 degrees and line a baking sheet with parchment paper.
- In a mixing bowl, cream the softened butter and sugar until light. Add the egg and vanilla extract, then stir until smooth.
- In a separate bowl, whisk the flour, black cocoa powder, baking powder, and salt. Gradually add this dry mix to the wet ingredients and combine into a dough.
- Roll the dough out on a lightly floured surface to about 1/4 inch thick. Use a bat-shaped cookie cutter to cut out shapes and place them on the baking sheet.
- Bake for 10 to 12 minutes until the edges are set. Let the cookies cool on the sheet for 5 minutes, then move them to a wire rack.
- Melt the white chocolate chips in a microwave-safe bowl in 20-second bursts, stirring between each. Use a toothpick or piping bag to add two small dots as eyes on each cooled cookie.
Extra Tips
Roll the dough between two sheets of parchment to keep it from sticking and to make cleaner bat shapes. Add the white chocolate eyes only after the cookies have fully cooled so the dots hold their round form. Store leftovers in an airtight container at room temperature for up to three days.Course: Dessert Cuisine: American Equipment: Mixing bowl, baking sheet, cookie cutter, wire rack
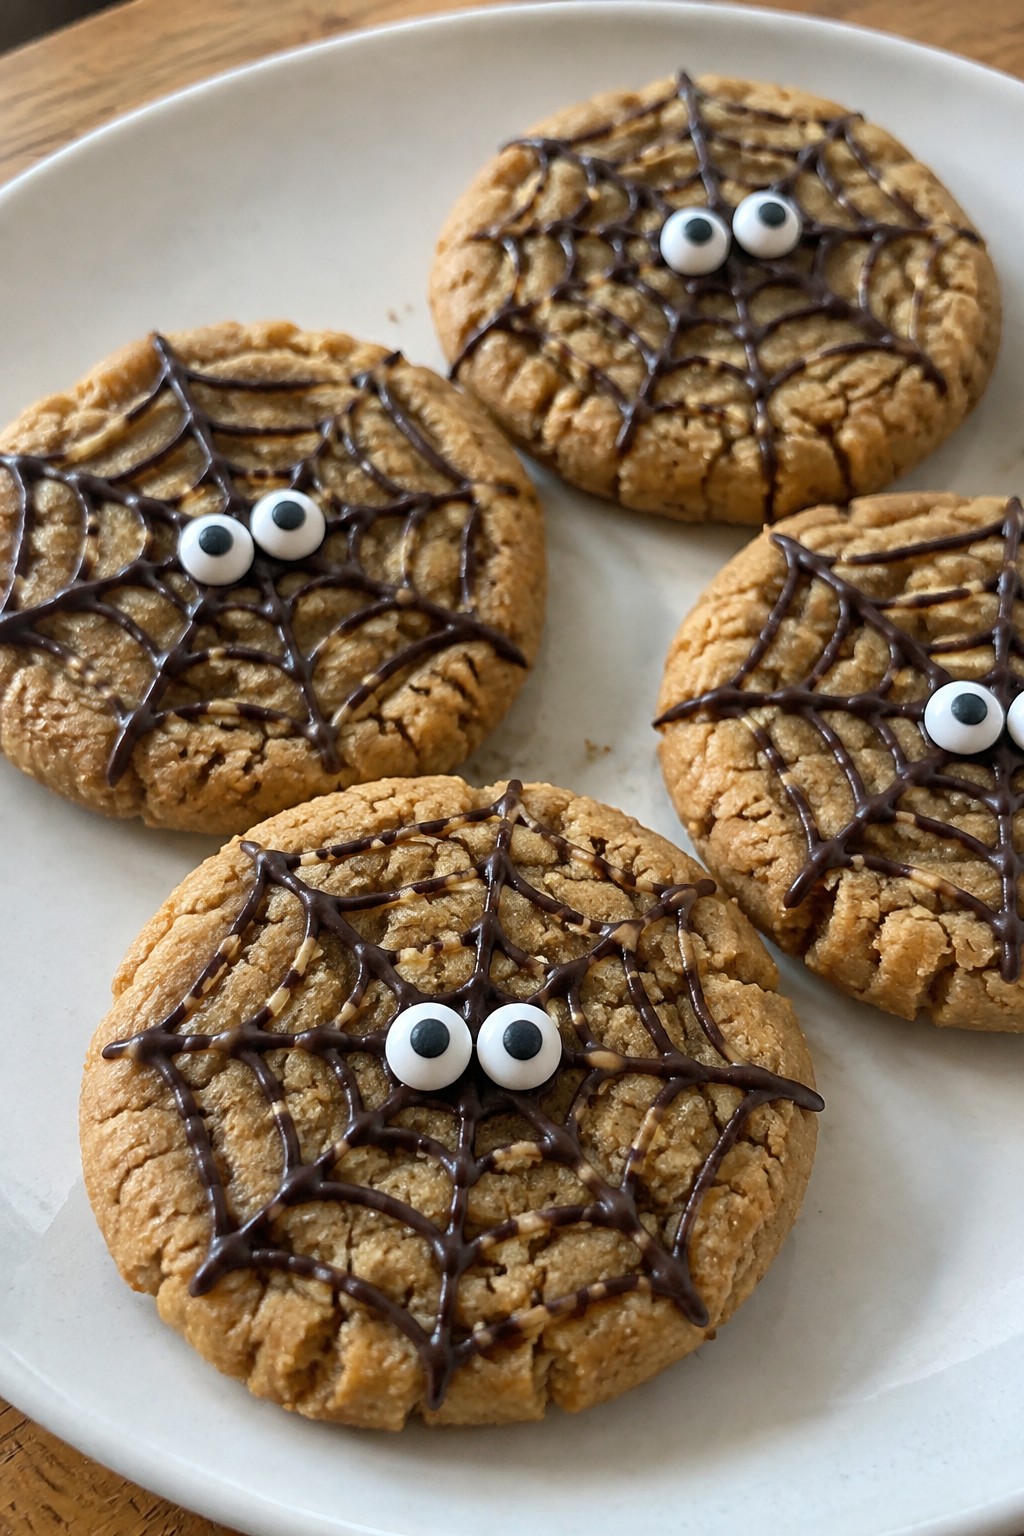
Spiderweb Peanut Butter Cookies with Googly Eyes
These cookies bring a fun Halloween twist with a chocolate spiderweb design and candy eyes on top. They work well for school parties, family gatherings, or a simple weekend bake when you want something playful without much fuss. The peanut butter base stays rich and slightly chewy, while the chocolate adds a smooth contrast.
The eyes give each cookie a friendly look that appeals to kids and adults alike. You can make them ahead and store them for a few days without losing texture.
Serves 4 people.
Ingredients
- 1/2 cup creamy peanut butter
- 1/4 cup unsalted butter, softened
- 1/2 cup granulated sugar
- 1 large egg
- 1 teaspoon vanilla extract
- 3/4 cup all-purpose flour
- 1/2 teaspoon baking soda
- 1/4 teaspoon salt
- 2 tablespoons semisweet chocolate chips, melted
- 8 candy googly eyes
Instructions
- Preheat the oven to 350 degrees and line a baking sheet with parchment paper.
- In a mixing bowl, beat the peanut butter, softened butter, and sugar until smooth and creamy.
- Add the egg and vanilla extract, then mix until fully combined.
- Stir in the flour, baking soda, and salt until a soft dough forms.
- Scoop the dough into eight portions and roll each into a ball. Place them on the baking sheet and flatten slightly with a fork in a crisscross pattern.
- Bake for 10 to 12 minutes until the edges turn light golden. Let the cookies cool completely on the sheet.
- Drizzle the melted chocolate in a spiral pattern over each cookie. Use a toothpick to drag lines outward from the center to form a web.
- Press two googly eyes into the chocolate on each cookie while it is still soft.
Extra Tips
Melt the chocolate chips in short microwave bursts to keep it smooth for piping. Press the eyes on right after drawing the web so they stick without sliding. Store the finished cookies in an airtight container at room temperature for up to four days.Course: Dessert Cuisine: American Equipment: Mixing Bowl, Baking Sheet, Piping Bag or Toothpick
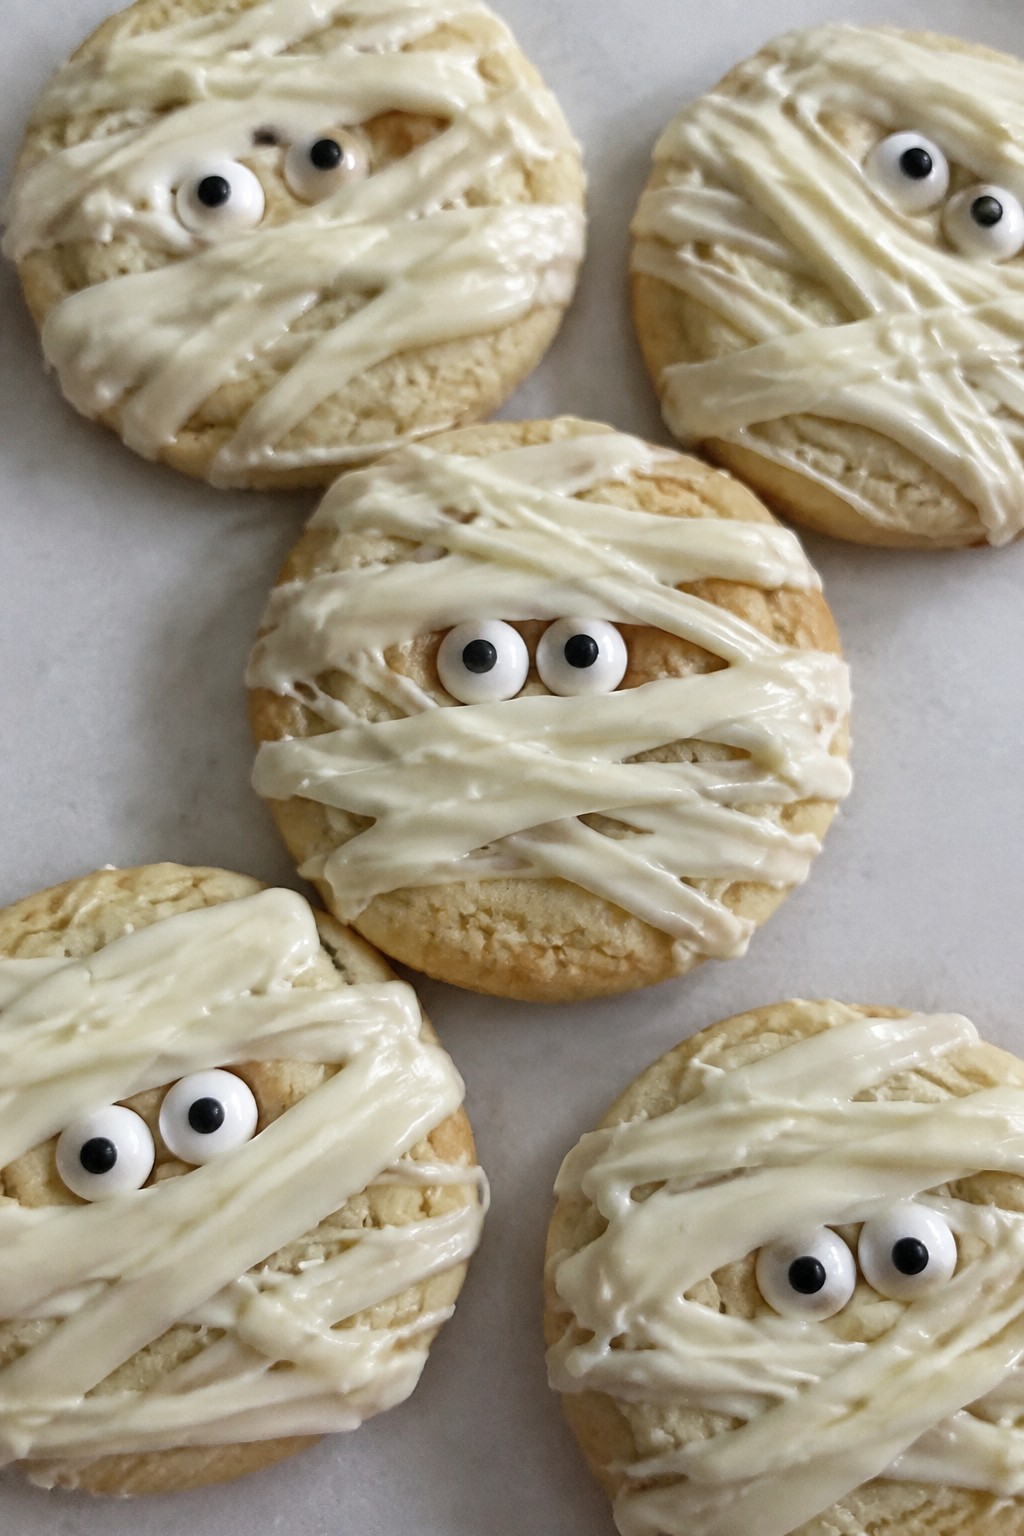
Mummy-Wrapped Sugar Cookies with Peeking Candy Eyes
These cookies stand out with their bandaged look and candy eyes that peek through the white chocolate strips. They suit Halloween parties, school events, or a simple afternoon baking session with family. The base offers a soft vanilla sugar cookie texture that pairs with the smooth snap of the chocolate topping.
The flavor stays mild and sweet, making the playful design the main draw. Kids enjoy adding the eyes, and the finished cookies hold up well for gifting or a dessert table.
Serves 4 people.
Ingredients
- 1 1/2 cups all-purpose flour
- 1/2 teaspoon baking powder
- 1/4 teaspoon salt
- 1/2 cup unsalted butter, softened
- 1/2 cup granulated sugar
- 1 large egg
- 1 teaspoon vanilla extract
- 3/4 cup white chocolate chips
- 16 candy eyes
Instructions
- Heat the oven to 350 degrees and line a baking sheet with parchment paper.
- Whisk the flour, baking powder, and salt in a bowl.
- In another bowl, beat the butter and sugar until light, then mix in the egg and vanilla.
- Combine the wet and dry ingredients to form a dough.
- Roll the dough into eight small oval shapes and place them on the baking sheet.
- Bake for 10 to 12 minutes until the edges turn lightly golden, then let the cookies cool completely.
- Melt the white chocolate chips in a microwave-safe bowl in 20-second bursts, stirring between each.
- Spoon the melted chocolate into a small zip-top bag, snip a corner, and pipe thin strips across each cookie to create a wrapped effect.
- Press two candy eyes onto each cookie while the chocolate is still soft.
Extra Tips
Melt the white chocolate in short bursts to avoid seizing. If the strips set too fast, work in batches of two or three cookies. Store leftovers in an airtight container at room temperature for up to three days.Course: Dessert Cuisine: American Equipment: Mixing Bowl, Baking Sheet, Microwave-Safe Bowl
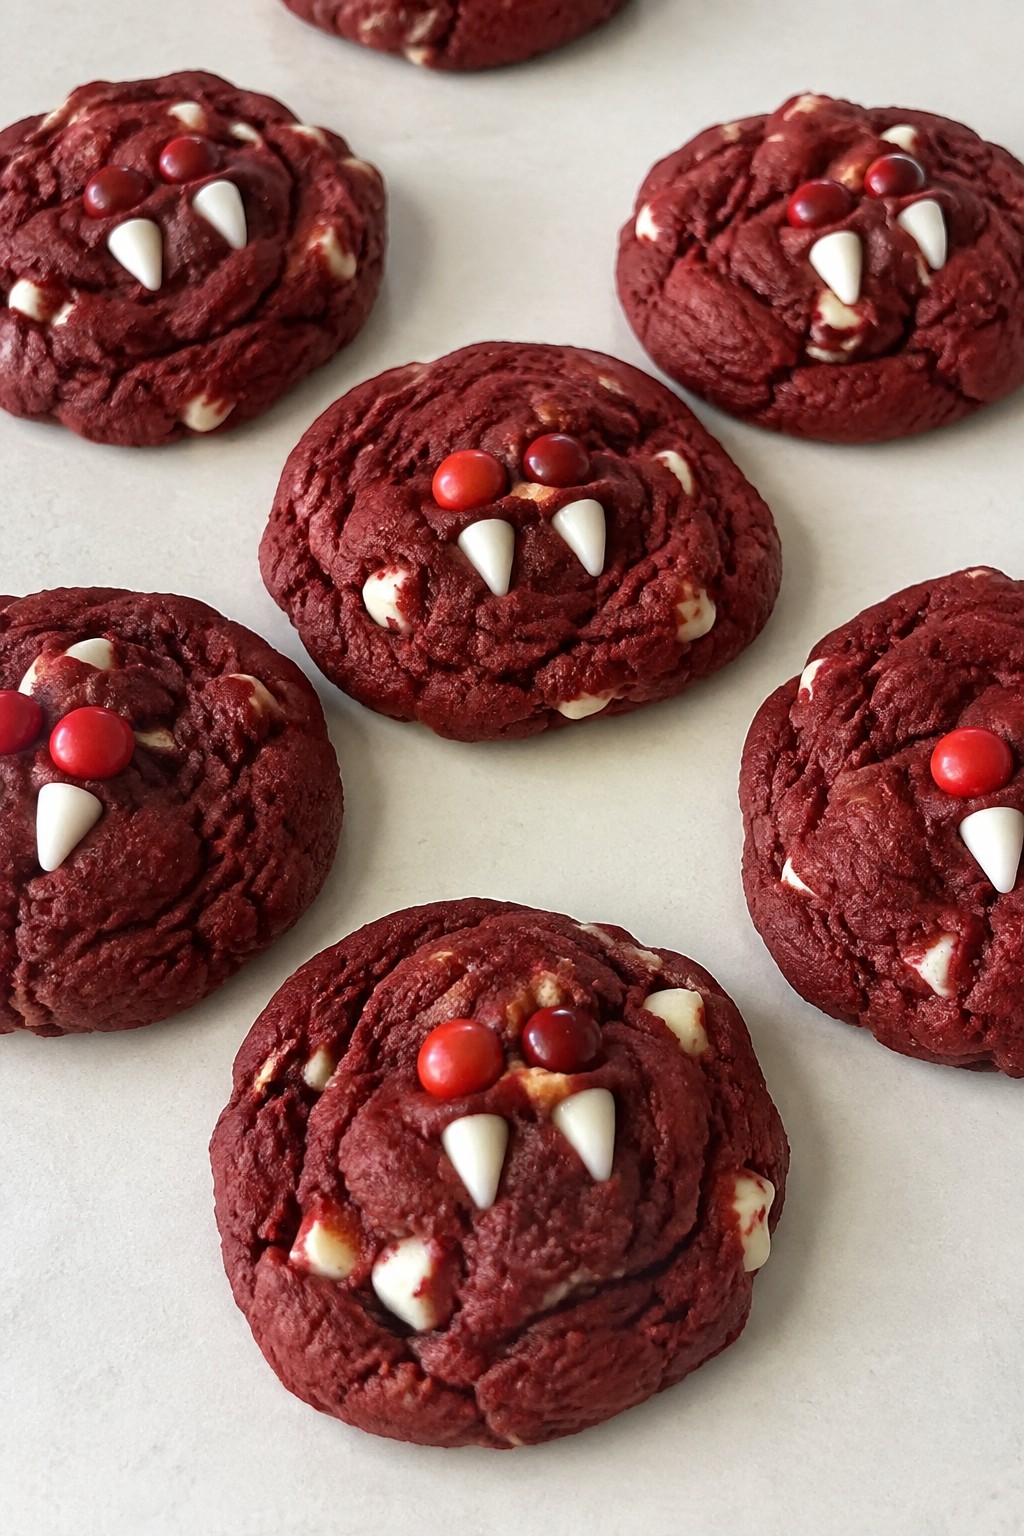
Vampire Fang Red Velvet Cookies with Red Candy Eyes
These cookies bring a fun Halloween twist with their bright red color and playful candy features. They work well for parties or after-school treats when you want something simple yet themed. The red velvet base gives a mild chocolate flavor with a soft, chewy texture.
Serves 4 people.
Ingredients
- 1 1/4 cups all-purpose flour
- 2 tablespoons unsweetened cocoa powder
- 1/2 teaspoon baking soda
- 1/4 teaspoon salt
- 1/2 cup unsalted butter, softened
- 3/4 cup granulated sugar
- 1 large egg
- 1 teaspoon vanilla extract
- 1 tablespoon red food coloring
- 1/2 cup white chocolate chips
- 16 red candy eyes
Instructions
- Preheat the oven to 350 degrees F and line a baking sheet with parchment paper. Whisk together the flour, cocoa powder, baking soda, and salt in a medium bowl. In a separate bowl, beat the butter and sugar until light and fluffy. Add the egg, vanilla extract, and red food coloring, then mix until combined. Gradually stir the dry ingredients into the wet mixture until a dough forms. Fold in the white chocolate chips. Scoop tablespoon-sized portions of dough onto the baking sheet, spacing them apart. Bake for 10 to 12 minutes until the edges are set. Remove from the oven and immediately press two red candy eyes into each cookie while still warm. Let the cookies cool on the sheet for 5 minutes before transferring to a wire rack.
Extra Tips
Press the candy eyes in right after baking so they stick without frosting. If the white chocolate chips sink too much during mixing, chill the dough for 20 minutes first to help them stay visible on top. Store cooled cookies in an airtight container at room temperature for up to three days.Course: Dessert Cuisine: American Equipment: Mixing Bowl, Baking Sheet, Oven
Jack-o’-Lantern Gingerbread Cookies with Candy Eyes
These jack-o’-lantern cookies bring a fun Halloween twist to classic gingerbread. The spiced dough bakes into chewy cookies that hold their shape well for cutting. Candy eyes add a playful face without extra decorating steps.
They work nicely for an afternoon baking project with kids or as a simple treat to share at a party. The warm spices balance the sweetness, and the cookies stay soft in the center with slightly crisp edges.

Serves 4 people.
Ingredients
- 2 1/4 cups all-purpose flour
- 2 teaspoons ground ginger
- 1 teaspoon ground cinnamon
- 1/2 teaspoon baking soda
- 1/4 teaspoon salt
- 3/4 cup unsalted butter, softened
- 1/2 cup granulated sugar
- 1/4 cup molasses
- 1 large egg
- 24 candy eyes
Instructions
- Preheat the oven to 350 degrees F and line a baking sheet with parchment paper.
- In a medium bowl, whisk together the flour, ground ginger, cinnamon, baking soda, and salt.
- In a large bowl, beat the softened butter and sugar until light and fluffy. Add the molasses and egg, then mix until smooth.
- Gradually stir the dry ingredients into the wet mixture until a dough forms. Divide the dough in half and chill for 30 minutes.
- Roll out one portion of dough on a lightly floured surface to about 1/4 inch thick. Cut out pumpkin shapes using a cookie cutter.
- Place the shapes on the prepared baking sheet and bake for 8 to 10 minutes until the edges are set.
- Remove the cookies from the oven and immediately press two candy eyes onto each one while still warm. Let the cookies cool completely on the baking sheet.
Extra Tips
Chill the dough fully to prevent spreading so the jack-o’-lantern shapes stay sharp. Press the candy eyes in right after baking for the best hold without any added icing. Store cooled cookies in an airtight container at room temperature for up to four days.Course: Dessert Cuisine: American Equipment: Mixing Bowl, Baking Sheet, Rolling Pin, Cookie Cutter
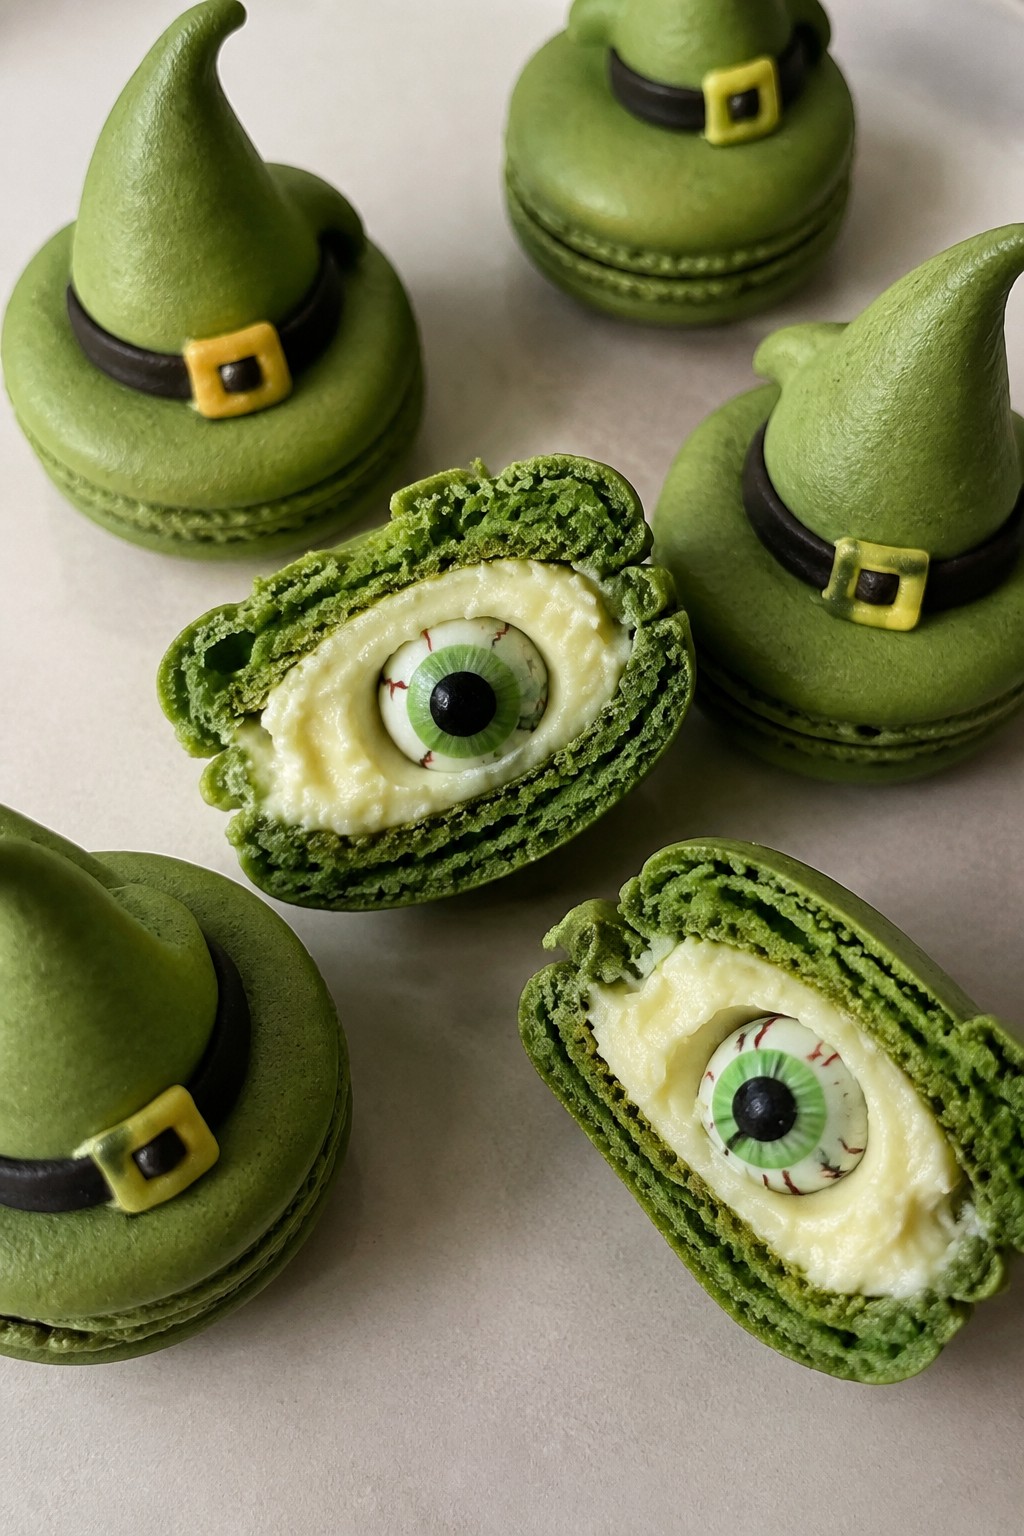
Witch Hat Matcha Macarons with Eyeball Centers
These matcha macarons stand out on a Halloween table with their bright green shells and hidden candy eyeballs in the center. The witch hat shape comes from piping the tops into a simple pointed form before baking. They suit a party spread or a small batch to enjoy with family.
The shells turn out crisp on the outside with a tender chew. White chocolate ganache fills them and keeps the eyeball secure, while matcha gives a mild earthy taste against the sweet filling.
Serves 4 people.
Ingredients
- 100g almond flour
- 100g powdered sugar
- 2 teaspoons matcha powder
- 2 large egg whites
- 50g granulated sugar
- 100g white chocolate
- 60ml heavy cream
- 4 candy eyeballs
Instructions
- Sift the almond flour, powdered sugar, and matcha powder into a bowl and set the dry mix aside.
- Whip the egg whites in a clean bowl until they form soft peaks, then add the granulated sugar a little at a time and continue whipping until stiff peaks form.
- Fold the dry mix into the meringue in two additions until the batter flows off the spatula in a thick ribbon.
- Transfer the batter to a piping bag and pipe 8 shells onto a lined baking sheet, shaping four of them into a pointed witch hat form.
- Let the shells rest until a skin forms on top, then bake at 150°C for 15 minutes and cool completely.
- Heat the heavy cream until steaming, pour it over the white chocolate, and stir until smooth to make the ganache.
- Pipe a small amount of ganache onto the flat shells, press one candy eyeball into the center of each, then top with the witch hat shells.
Extra Tips
Pipe the ganache in a thin layer so the eyeball sits flat and does not shift when the top shell is added. Store the finished macarons in an airtight container in the fridge for up to two days to keep the filling firm.Course: Dessert Cuisine: French Equipment: Mixing Bowl, Electric Mixer, Piping Bag, Baking Sheet
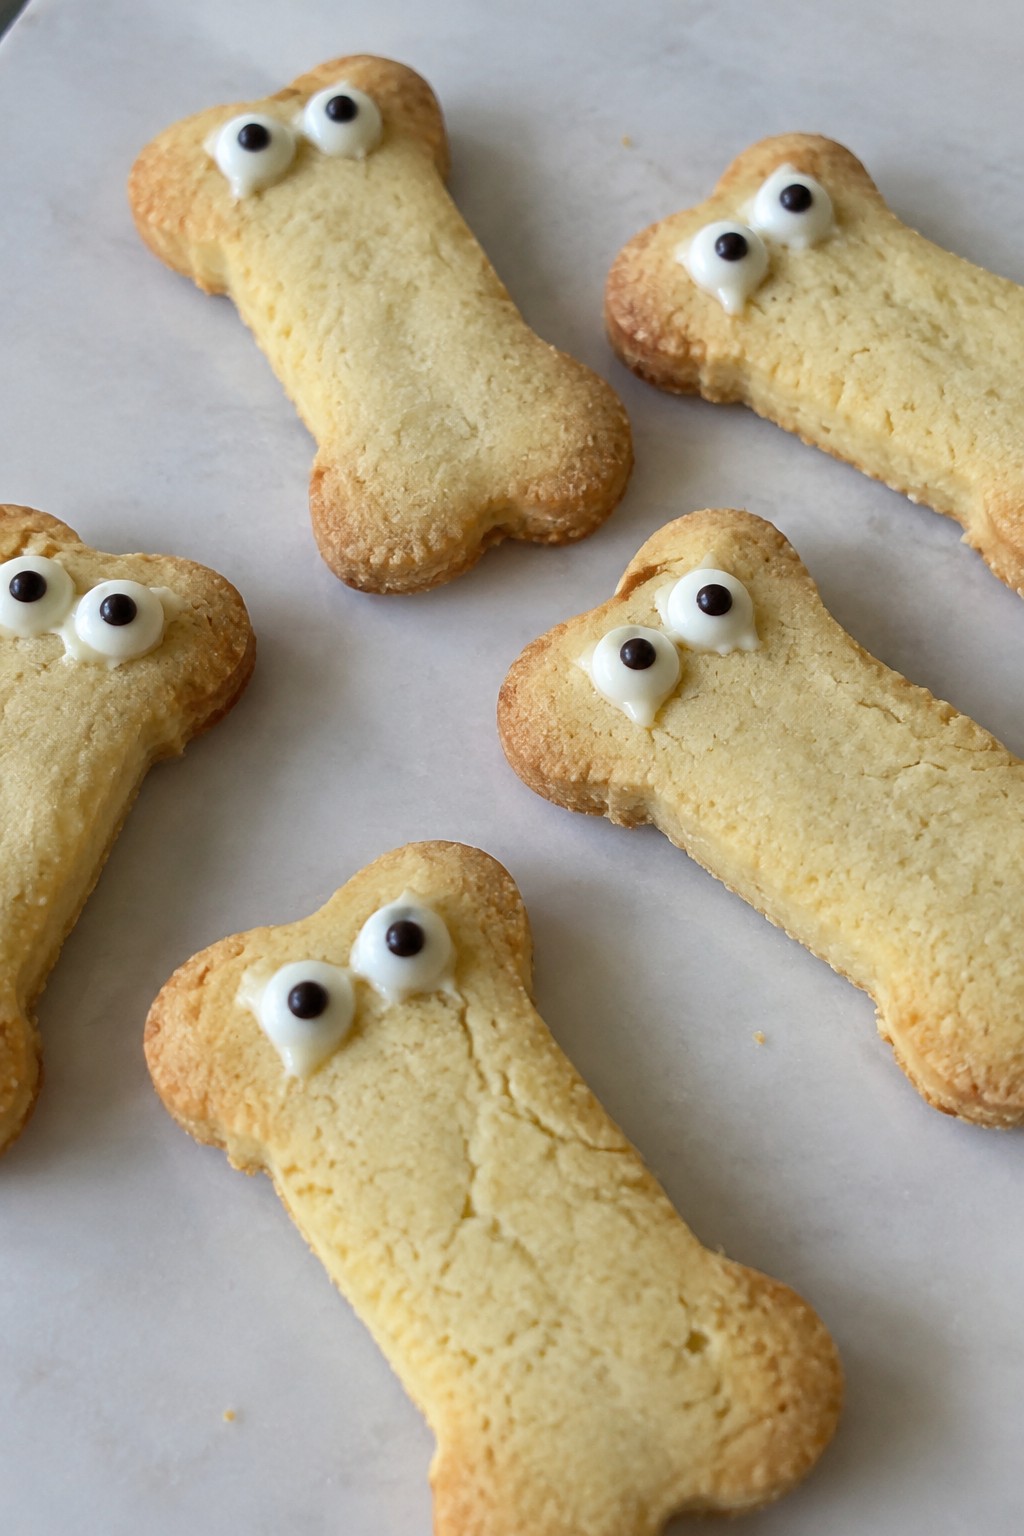
Skeleton Bone Shortbread Cookies with Eye Details
These shortbread cookies bring a fun Halloween twist with their bone-like shapes and small candy eyes attached for detail. They work well for a party spread or as a simple baking project with kids. The cookies have a classic buttery shortbread texture that stays tender inside with lightly crisp edges.
Serves 4 people.
Ingredients
- ½ cup unsalted butter, softened
- ¼ cup powdered sugar
- 1 teaspoon vanilla extract
- 1 cup all-purpose flour
- Pinch of salt
- 12 candy eyes
- 2 tablespoons white chocolate chips, melted
Instructions
- Preheat the oven to 350°F and line a baking sheet with parchment paper.
- In a mixing bowl, beat the softened butter and powdered sugar together until smooth and creamy.
- Stir in the vanilla extract and salt, then gradually mix in the flour until a soft dough forms.
- Divide the dough into 12 equal pieces. Roll each piece into a small log and pinch the ends to create bone shapes.
- Place the shaped cookies on the prepared baking sheet and bake for 12 to 14 minutes until the edges are lightly golden.
- Let the cookies cool completely on the baking sheet.
- Use a small amount of melted white chocolate to attach two candy eyes to each cookie.
Extra Tips
Press the candy eyes onto the cookies while the white chocolate is still soft so they stay in place. If the dough feels too crumbly after mixing, let it rest at room temperature for five minutes before shaping. Store cooled cookies in an airtight container at room temperature for up to three days.Course: Dessert Cuisine: American Equipment: Mixing Bowl, Baking Sheet, Parchment Paper
Zombie Brain Oatmeal Cookies with Raisin Eyes
These oatmeal cookies bring a fun Halloween twist with their textured look and raisin eyes. They work well for kids parties or casual gatherings where you want something playful but still simple to make. The cookies turn out chewy from the oats with a mild sweetness from brown sugar and cinnamon.
They hold their shape after baking so the eyes stay visible. The raisins add little bursts of flavor that match the oatmeal base.

Serves 4 people.
Ingredients
- 1 cup rolled oats
- ¾ cup all-purpose flour
- ½ teaspoon baking soda
- ½ teaspoon ground cinnamon
- ¼ teaspoon salt
- ½ cup unsalted butter, softened
- ½ cup packed brown sugar
- 1 large egg
- 1 teaspoon vanilla extract
- ¾ cup raisins
Instructions
- Preheat the oven to 350°F and line a baking sheet with parchment paper.
- Stir together the rolled oats, flour, baking soda, cinnamon, and salt in a mixing bowl.
- In a second bowl, beat the softened butter and brown sugar until smooth. Add the egg and vanilla extract and mix until combined.
- Pour the dry mixture into the wet mixture and stir until a dough forms. Fold in ½ cup of the raisins.
- Scoop the dough into 8 portions and shape each into a small oval. Place the ovals on the baking sheet and press two raisins into the top of each one to form eyes.
- Bake for 12 to 14 minutes until the edges turn golden. Let the cookies cool on the sheet for 5 minutes before moving them to a rack.
Extra Tips
Shape the dough ovals slightly longer than wide so the raisin eyes sit naturally at one end. Store cooled cookies in an airtight container at room temperature for up to three days. If the dough feels too soft to hold the eyes in place, chill it for 15 minutes before shaping.Course: Dessert Cuisine: American Equipment: Mixing Bowls, Baking Sheet, Wooden Spoon
Frankenstein Brownie Cookies with Bolt Eyes
These Frankenstein brownie cookies add a playful Halloween detail with their green tint and bolt-style candy eyes. The chewy brownie base offers deep chocolate flavor that holds up well at fall gatherings or school events. They come together with basic pantry items and make a nice change from plain sugar cookies.
This recipe serves 4 people. – ½ cup unsalted butter, softened – ¾ cup granulated sugar – 2 large eggs – 1 teaspoon vanilla extract – ½ cup unsweetened cocoa powder – 1 cup all-purpose flour – ¼ teaspoon salt – Green food coloring – ¼ cup dark chocolate chips – 12 candy eyes
### Instructions 1. Heat the oven to 350°F and line a baking sheet with parchment paper. 2. Cream the butter and sugar in a mixing bowl until light. Add the eggs and vanilla extract, then mix until smooth. 3. Stir in the cocoa powder, flour, and salt until a thick dough forms. Add green food coloring a few drops at a time until the dough reaches a bright green shade. 4. Scoop rounded tablespoons of dough onto the prepared sheet, spacing them a few inches apart. Flatten each slightly with your fingers. 5. Bake for 10 to 12 minutes until the edges look set. Let the cookies cool on the sheet for 5 minutes, then move them to a wire rack. 6. Melt the dark chocolate chips in a small bowl. Use a dab of melted chocolate to attach two candy eyes to each cookie, placing them near the top edge to look like bolts.
### Extra Tips Melt the chocolate in short microwave bursts and work quickly so it stays fluid for attaching the eyes. If the dough feels too sticky after adding color, chill it for 15 minutes before scooping. Store cooled cookies in an airtight container at room temperature for up to three days to keep the chewy texture.
Course: Dessert Cuisine: American Equipment: Mixing Bowl, Baking Sheet, Parchment Paper, Wire Rack

Serves 4 people.
Instructions
- Heat the oven to 350°F and line a baking sheet with parchment paper.
- Cream the butter and sugar in a mixing bowl until light. Add the eggs and vanilla extract, then mix until smooth.
- Stir in the cocoa powder, flour, and salt until a thick dough forms. Add green food coloring a few drops at a time until the dough reaches a bright green shade.
- Scoop rounded tablespoons of dough onto the prepared sheet, spacing them a few inches apart. Flatten each slightly with your fingers.
- Bake for 10 to 12 minutes until the edges look set. Let the cookies cool on the sheet for 5 minutes, then move them to a wire rack.
- Melt the dark chocolate chips in a small bowl. Use a dab of melted chocolate to attach two candy eyes to each cookie, placing them near the top edge to look like bolts.
Extra Tips
Melt the chocolate in short microwave bursts and work quickly so it stays fluid for attaching the eyes. If the dough feels too sticky after adding color, chill it for 15 minutes before scooping. Store cooled cookies in an airtight container at room temperature for up to three days to keep the chewy texture.Course: Dessert Cuisine: American Equipment: Mixing Bowl, Baking Sheet, Parchment Paper, Wire Rack
