

Halloween is the perfect time to get creative in the kitchen with treats that are both spooky and delightful. Think Ghostly Cupcakes with marshmallow phantoms on top or Mummy Rice Krispie Treats that are almost too cute to eat. These sweet creations will not only satisfy your sweet tooth but also ignite your imagination. They’re perfect for creating memorable family moments. Ready to be inspired by these charming concoctions?
Ghostly Cupcakes
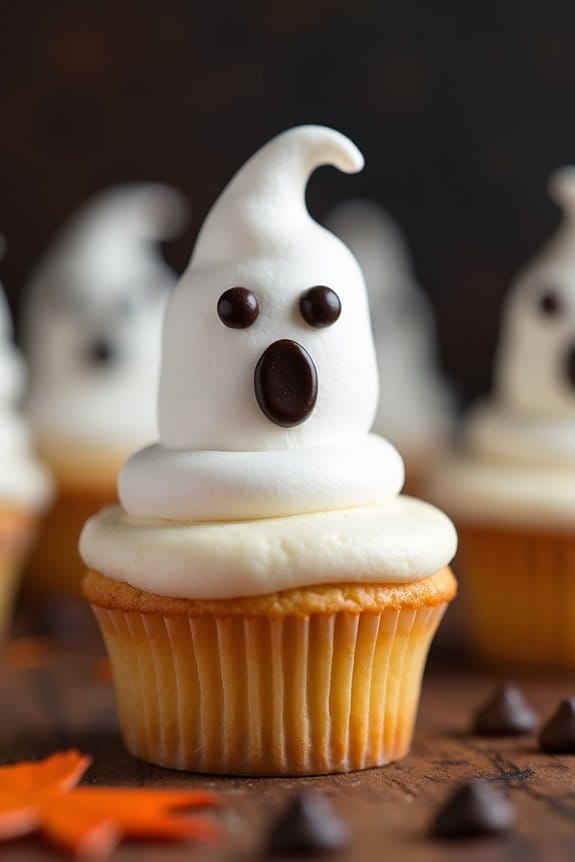
Ghostly Cupcakes are the perfect spooky treat for kids during Halloween. These cupcakes aren’t only delicious but also a fun activity for the little ones to get involved in decorating. With fluffy vanilla cupcakes as the base, these treats are topped with a hauntingly delightful marshmallow ghost that will surely bring a smile to any child’s face.
Ghostly Cupcakes are a spooky, tasty treat and a fun decorating activity for kids this Halloween.
This recipe is simple enough for kids to help with the baking and decorating process, making it an ideal family activity. The ghostly appearance is achieved by using basic ingredients that you likely have at home or can easily find at the store. The vanilla cupcakes provide a classic and neutral base that pairs well with the sweet marshmallow topping.
By following the step-by-step instructions, you’ll be able to create a batch of cupcakes that look like they came straight out of a Halloween party. This recipe yields 12 cupcakes, serving 4-6 people, depending on how many each person devours!
Ingredients:
- 1 ½ cups all-purpose flour
- 1 cup granulated sugar
- 1 ½ teaspoons baking powder
- ½ teaspoon salt
- ½ cup unsalted butter, softened
- ½ cup whole milk
- 2 large eggs
- 1 teaspoon vanilla extract
- 12 large marshmallows
- ½ cup mini chocolate chips
- Black decorating gel (optional)
Cooking Instructions:
- Preheat and Prepare: Preheat your oven to 350°F (175°C). Line a 12-cup muffin tin with paper cupcake liners.
- Mix Dry Ingredients: In a medium bowl, whisk together the flour, baking powder, and salt. Set aside.
- Cream Butter and Sugar: In a large mixing bowl, beat the softened butter and granulated sugar together using an electric mixer until light and fluffy.
- Add Wet Ingredients: Beat in the eggs one at a time, then add the vanilla extract. Mix until well combined.
- Combine Mixtures: Gradually add the dry ingredients to the wet mixture, alternating with the milk, beginning and ending with the flour mixture. Mix until just combined.
- Fill and Bake: Spoon the batter into the prepared muffin tin, filling each cup about two-thirds full. Bake in the preheated oven for 18-20 minutes or until a toothpick inserted into the center comes out clean.
- Cool Cupcakes: Allow the cupcakes to cool in the tin for 5 minutes, then transfer them to a wire rack to cool completely.
- Create Ghost Toppers: Once the cupcakes are cool, place one large marshmallow on top of each cupcake. Use mini chocolate chips to create eyes and a mouth on each marshmallow, pressing them gently into the marshmallow.
- Add Final Touches: If desired, use black decorating gel to add additional spooky expressions or details on the marshmallow ghosts.
Extra Tips:
To guarantee your cupcakes are perfectly moist, make sure not to overmix the batter as this can lead to dense cupcakes. Also, keep an eye on them while baking to avoid over-browning.
For an extra touch of Halloween fun, consider adding a few drops of orange food coloring to the cupcake batter. If you don’t have black decorating gel, melted chocolate can be used to draw faces on the marshmallows. Enjoy your Ghostly Cupcakes with a glass of milk or a spooky-themed punch!
Monster Marshmallow Pops

Monster Marshmallow Pops are a fun and spooky treat that kids will love to make and eat. These colorful and creative desserts are perfect for Halloween parties or any festive occasion. The best part is that they’re incredibly easy to make, requiring minimal ingredients and effort. Kids can let their imaginations run wild by decorating each marshmallow pop to look like their favorite monster or creature.
These Monster Marshmallow Pops aren’t only delightful to look at, but they also taste delicious. The combination of fluffy marshmallows, sweet candy coating, and crunchy decorations creates a wonderfully satisfying treat. Whether you’re hosting a Halloween gathering or simply want to surprise your little ones with a special snack, these adorable pops are sure to be a hit. Let’s get started on making these delightful Monster Marshmallow Pops for 4-6 people!
Ingredients:
- 12 large marshmallows
- 12 lollipop sticks
- 2 cups of candy melts (assorted colors such as green, purple, and orange)
- Assorted candy eyeballs
- Sprinkles
- Mini chocolate chips
- Wax paper
Instructions:
1. Prepare the Work Area:
Begin by setting up a clean work area. Lay a sheet of wax paper on a flat surface to place the decorated marshmallow pops as they dry. This will help prevent them from sticking.
2. Melt Candy Coating:
In separate microwave-safe bowls, melt the candy melts according to the package instructions. Typically, this involves microwaving in 30-second increments, stirring in between, until smooth. Confirm each color is well-melted and ready for dipping.
3. Assemble Marshmallow Pops:
Insert a lollipop stick into each marshmallow, confirming they’re secure but not poking through the other end.
4. Dip and Decorate:
Dip each marshmallow into the melted candy coating, allowing any excess to drip off. Immediately decorate with candy eyeballs, sprinkles, and mini chocolate chips to create fun monster faces before the coating hardens.
5. Set and Dry:
Place each decorated marshmallow pop onto the wax paper and let them sit until the candy coating is completely set, which usually takes around 15-20 minutes.
6. Serve and Enjoy:
Once the candy coating is firm, the Monster Marshmallow Pops are ready to be served. Enjoy these delightful treats with your little monsters!
Extra Tips:
For a more vibrant and varied selection of Monster Marshmallow Pops, experiment with different colors of candy melts and decorations. You can also use edible markers to draw unique designs or facial expressions on the hardened candy coating.
If you’re working with younger children, have them focus on adding the decorations while you handle the dipping process to avoid any messes or burns. Store any leftovers in an airtight container at room temperature to keep them fresh.
Mummy Rice Krispie Treats
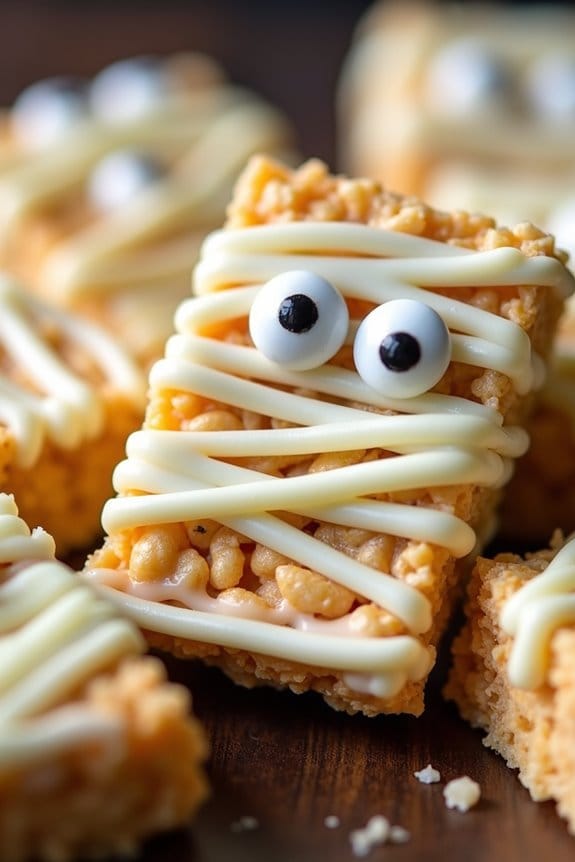
Mummy Rice Krispie Treats are a fun and spooky dessert perfect for Halloween parties or simply as a festive treat for the kids. These treats combine the classic, chewy texture of Rice Krispies with a playful, Halloween-themed twist. Shaped like little mummies, these treats are decorated with white chocolate “bandages” and candy eyes, making them both adorable and delicious. Not only are they a hit with kids, but they’re also easy to make, requiring minimal ingredients and time.
Ideal for a serving size of 4-6 people, Mummy Rice Krispie Treats are a great choice for a small gathering or family celebration. The recipe can be scaled up easily for larger parties, making it a versatile option for any Halloween occasion. Not only do they look impressive on a dessert table, but they’re also a hit with taste buds young and old. Follow this simple recipe to create a batch of these charming treats and delight your little ones this Halloween season.
Ingredients:
- 3 tablespoons unsalted butter
- 10 ounces (about 40) regular-sized marshmallows
- 6 cups Rice Krispies cereal
- 1 cup white chocolate chips or candy melts
- Candy eyes
Instructions:
- Prepare the Baking Dish: Start by lining an 8×8-inch baking dish with parchment paper. This will make it easier to remove the treats once they’re set.
- Melt the Butter and Marshmallows: In a large saucepan, melt the unsalted butter over low heat. Once melted, add the marshmallows and stir continuously until completely melted and smooth. Remove from heat immediately to prevent burning.
- Mix with Rice Krispies: Add the Rice Krispies cereal to the melted marshmallow mixture, stirring until all the cereal is evenly coated.
- Shape the Treats: Pour the mixture into the prepared baking dish. Use a greased spatula or your hands (lightly buttered) to press the mixture down evenly into the dish. Let it cool for about 30 minutes.
- Cut into Shapes: Once set, remove the Rice Krispie slab from the dish and cut into rectangular bars or desired shapes that resemble mummies.
- Prepare the White Chocolate: Melt the white chocolate chips or candy melts in a microwave-safe bowl. Heat in 20-second intervals, stirring in between, until fully melted and smooth.
- Decorate the Mummies: Drizzle the melted white chocolate over the Rice Krispie bars in a zigzag pattern, mimicking mummy bandages. Stick candy eyes onto the bars before the chocolate sets completely.
- Cool and Serve: Allow the chocolate to set completely at room temperature or in the refrigerator. Once set, your Mummy Rice Krispie Treats are ready to serve!
Extra Tips:
When melting the marshmallows, it’s essential to use low heat to avoid burning, which can affect the texture and flavor of the treats.
Also, when decorating, consider using a piping bag or a plastic bag with a small corner snipped off for more precise control over the white chocolate drizzle.
If you’re making these ahead of time, store them in an airtight container to keep them fresh.
If you prefer, you can use different colored candy melts to customize the look of your mummies or add more decorations to enhance their spooky appearance.
Witch Hat Cookies

Witch Hat Cookies are a delightful and festive treat perfect for Halloween. These cookies are both fun to make and delicious to eat, making them an ideal activity for kids and adults alike. The whimsical design of the witch hats will add a touch of magic to your Halloween spread, and the combination of chocolate and cookies will satisfy any sweet tooth.
Best of all, they’re simple enough to make with your little ones, turning cookie-baking into a memorable Halloween tradition. Not only are Witch Hat Cookies easy to prepare, but they also require minimal ingredients and can be made in under an hour. This makes them a great option for busy families looking to whip up something special for a Halloween party or just to enjoy at home.
Simple and quick Witch Hat Cookies make Halloween baking a fun family tradition.
Whether you’re a seasoned baker or a beginner, you’ll find that these cookies are a breeze to create and will quickly become a Halloween staple.
Ingredients (serving size: 4-6 people):
- 24 chocolate wafer cookies
- 1 cup semi-sweet chocolate chips
- 24 Hershey’s Kisses
- Orange decorating icing
- Sprinkles (optional)
Instructions:
- Prepare the Chocolate: In a microwave-safe bowl, melt the semi-sweet chocolate chips in the microwave. Heat them in 30-second intervals, stirring after each interval, until the chocolate is completely melted and smooth.
- Assemble the Hats: Take a chocolate wafer cookie and place it on a clean surface. Use a spoon to spread a small amount of melted chocolate onto the center of the cookie.
- Attach the Kiss: Unwrap a Hershey’s Kiss and press it firmly onto the chocolate-covered center of the wafer cookie. The melted chocolate will act as glue to hold the Kiss in place.
- Decorate the Hat: Pipe a ring of orange decorating icing around the base of the Hershey’s Kiss to mimic a hatband. You can also add sprinkles for an extra touch of fun and color.
- Repeat and Set: Repeat the process with the remaining cookies and chocolate. Once all the witch hats are assembled, allow them to set by placing them in the refrigerator for about 15 minutes, or until the chocolate hardens.
Extra Tips:
For an extra spooky touch, consider using different colored icing to create varied hatbands or even use edible glitter to make the witch hats sparkle.
If you want to make the process even more kid-friendly, prepare the chocolate and icing in advance so the little ones can focus on decorating. Additionally, you can substitute the chocolate wafer cookies with any round cookie of your choice, such as shortbread or sugar cookies, to suit your taste preferences.
Enjoy your magical Halloween creations!
Bat Brownie Bites

Bat Brownie Bites are a delightful Halloween treat that combines the rich, fudgy goodness of brownies with the spooky fun of bat decorations. These bite-sized desserts are perfect for kids, as they’re easy to hold and enjoy without the need for plates or utensils. The whimsical bat design is sure to capture the imaginations of children and adults alike, and with a little creativity, this recipe allows for some customization to suit different tastes.
Whether you’re hosting a Halloween party or looking for a fun activity to do with your kids, Bat Brownie Bites are a fantastic choice. This recipe makes enough Bat Brownie Bites to serve 4-6 people, making it ideal for small gatherings or a family Halloween night. The key to these treats is using a simple brownie mix to save time, paired with some creative decorating to bring the bats to life. With the right ingredients and a bit of imagination, you’ll have a platter of spooky and delicious Bat Brownie Bites ready in no time.
Ingredients:
- 1 box of brownie mix (plus ingredients specified on the box, usually eggs, oil, and water)
- 1/2 cup of chocolate frosting
- 12 chocolate sandwich cookies (like Oreos)
- 24 candy eyeballs
- Black food coloring (optional)
- Cupcake liners
Instructions:
- Prepare the Brownie Mix: Preheat your oven according to the brownie mix package instructions. In a mixing bowl, prepare the brownie batter as directed on the box, which usually involves adding eggs, oil, and water.
- Bake the Brownies: Line a muffin tin with cupcake liners and fill each liner halfway with the brownie batter. This will help create the perfect bite-sized brownie. Bake in the preheated oven for the time specified on the box, usually around 18-20 minutes. Use a toothpick to test for doneness; it should come out mostly clean.
- Cool and Decorate: Allow the brownie bites to cool completely in the pan. Meanwhile, twist apart the chocolate sandwich cookies and carefully remove the cream filling. Cut each cookie half into two to create the bat wings.
- Assemble the Bats: Once the brownies are cool, remove them from the liners. Use a small amount of chocolate frosting to attach two cookie wings to the top of each brownie bite, pressing gently to adhere. If you’d like, you can tint the frosting with black food coloring to enhance the bat look.
- Add the Candy Eyes: Use a dab of frosting to attach two candy eyeballs to the front of each brownie bite, just below the wings, to complete the bat face.
Extra Tips:
For an even spookier effect, consider adding a little edible glitter or sprinkle some black sanding sugar over the bat wings for a touch of sparkle. If you want to make these treats a little healthier, you can substitute the brownie mix with a homemade version using whole wheat flour and unsweetened cocoa powder.
To save some time, you can prepare the brownie bites a day in advance and store them in an airtight container, adding the decorations just before serving.
Pumpkin Patch Pudding Cups

Halloween is the perfect time to get creative in the kitchen, especially when it comes to treats for kids. One delightful and festive dessert that’s sure to be a hit is Pumpkin Patch Pudding Cups.
These adorable cups aren’t only visually appealing, with their mini pumpkin patch theme, but they also combine delicious flavors and fun textures. Perfect for Halloween parties or a family after-dinner treat, these pudding cups are easy to prepare and can be made ahead of time.
Visually stunning and delectably textured, these pudding cups are perfect for Halloween gatherings or family treats.
The concept is simple: chocolate pudding serves as the “soil,” crumbled chocolate cookies represent the “dirt,” and candy pumpkins create the patch. This makes it a fun and interactive dessert that kids can help assemble. With just a few ingredients, you can whip up this delightful treat that will surely capture the Halloween spirit.
Here’s how to make Pumpkin Patch Pudding Cups for a serving size of 4-6 people.
Ingredients:
- 2 cups cold milk
- 1 package (3.9 ounces) instant chocolate pudding mix
- 1 cup whipped topping, thawed
- 12 chocolate sandwich cookies, crushed
- 12 candy pumpkins
- Clear plastic cups or small glass jars (4-6 cups, depending on size)
Cooking Instructions:
- Prepare the Pudding: In a large mixing bowl, whisk together the cold milk and instant chocolate pudding mix. Continue whisking for about 2 minutes until the mixture begins to thicken.
- Add Whipped Topping: Gently fold in the whipped topping into the pudding mixture until fully combined. This will give the pudding a lighter, creamier texture.
- Set the Base Layer: Divide the pudding mixture evenly among your clear plastic cups or glass jars, filling each cup about two-thirds full.
- Create the Dirt Layer: Sprinkle a generous layer of the crushed chocolate sandwich cookies on top of the pudding in each cup. This will resemble the dirt of a pumpkin patch.
- Decorate with Pumpkin Candies: Place 2-3 candy pumpkins on top of the cookie crumbs in each cup to create your pumpkin patch scene.
- Chill and Serve: Refrigerate the pudding cups for at least 30 minutes to allow them to set. Serve chilled, and enjoy!
Extra Tips:
For added fun and flavor, consider adding gummy worms or edible grass to your Pumpkin Patch Pudding Cups to enhance the Halloween theme.
If you want to make the dessert even more interactive, set up a “build your own” station and let the kids assemble their own cups. This can be a fun activity at a Halloween party.
Additionally, if you wish to make these ahead of time, complete the pudding step and store it in the refrigerator, then add the cookie crumbs and candies right before serving to keep them crisp and fresh.
Frankenstein Pretzel Rods

Frankenstein Pretzel Rods are a spooky and fun treat that kids will love during the Halloween season. These ghoulish snacks aren’t only entertaining to look at, but they’re also delicious and easy to make. With their bright green candy coating and silly candy eyes, these pretzel rods make for a perfect party treat or a fun afternoon activity with the kids.
Whether you’re planning a Halloween party or just want to surprise your little ones with a festive snack, Frankenstein Pretzel Rods are sure to be a hit.
Making these Frankenstein Pretzel Rods requires minimal ingredients and effort, making it a great project for kids to help with. The combination of sweet and salty flavors is irresistible, as the salty crunch of the pretzel rods is perfectly complemented by the sweet, creamy candy coating.
Not only are they fun to eat, but they also make for a creative and playful presentation. Getting the kids involved in decorating the pretzel rods with candy eyes and funny faces can be a wonderful way to spend some quality time together.
Now, let’s explore the ingredients and steps needed to create these monstrous treats.
Ingredients (Serves 4-6):
- 12 pretzel rods
- 1 cup green candy melts
- 24 candy eyes
- 1/4 cup mini chocolate chips
- 1/4 cup black decorating gel
- 1/4 cup shredded coconut (optional, for hair)
Instructions:
- Prepare the Workspace: Line a baking sheet with parchment paper or wax paper. This will guarantee that the pretzel rods don’t stick after they’ve been coated and decorated.
- Melt the Candy: In a microwave-safe bowl, melt the green candy melts according to the package instructions. Typically, you’ll microwave in 30-second intervals, stirring in between, until fully melted and smooth.
- Coat the Pretzel Rods: Dip each pretzel rod into the melted candy, covering about 2/3 of the rod. Use a spoon to help coat the pretzel evenly. Gently shake off any excess candy coating back into the bowl.
- Add the Eyes and Hair: While the candy coating is still wet, place two candy eyes near the top of the coated section of each pretzel rod. For hair, sprinkle some shredded coconut on top, if using.
- Decorate the Faces: Use the black decorating gel to draw a scar or mouth on each Frankenstein face. Place mini chocolate chips as bolts on the sides of each pretzel rod for a more authentic look.
- Set the Candy: Place the decorated pretzel rods onto the prepared baking sheet and let them sit until the candy coating has completely set, which will take about 30 minutes.
- Serve and Enjoy: Once the candy coating is firm, the Frankenstein Pretzel Rods are ready to be served. Arrange them in a festive manner on a platter for a Halloween treat.
Extra Tips:
When making Frankenstein Pretzel Rods, consider using different colored candy melts to create a variety of monsters. If you don’t have candy eyes, small chocolate chips or even white icing dots can work as a substitute.
Be sure to work quickly when adding decorations to the wet candy coating, as it hardens fast. If the candy melts start to thicken while coating the pretzels, simply reheat them in the microwave for a few seconds to return to a smooth consistency.
Enjoy the process and have fun with the designs – each Frankenstein can have its own unique personality!
Candy Corn Parfaits
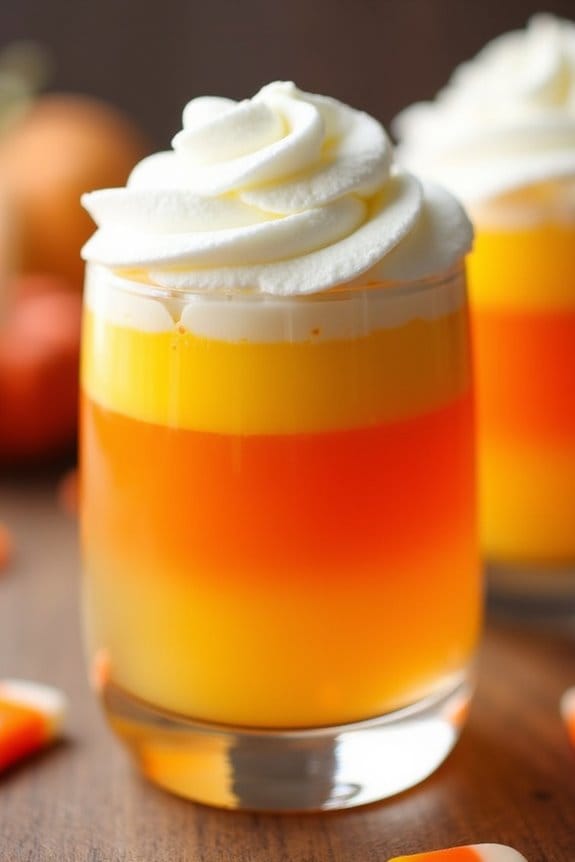
Candy corn is a quintessential Halloween treat, and Candy Corn Parfaits are a fun and festive dessert that kids will love. These parfaits are a whimsical nod to the classic candy with layers of color that mimic the iconic candy corn look. Not only are they visually appealing, but they’re also delicious and easy to make, involving minimal cooking, which makes them perfect for little helpers in the kitchen.
This dessert combines bright layers of orange-flavored gelatin, vanilla pudding, and whipped cream to create a sweet treat that resembles candy corn. The key is to layer each component carefully to achieve the desired candy corn effect. These parfaits can be served in individual cups or glasses, making them ideal for a Halloween party, or simply as a special treat to enjoy at home. This recipe serves 4-6 people, making it perfect for a small gathering or a family dessert night.
Ingredients:
- 1 package (3 oz) of orange-flavored gelatin
- 2 cups boiling water
- 1 package (3.4 oz) of instant vanilla pudding mix
- 2 cups cold milk
- 1 cup whipped topping (such as Cool Whip)
- Yellow food coloring
- 1 cup candy corn (optional for garnish)
Instructions:
- Prepare the Gelatin Layer:
- In a medium bowl, dissolve the orange-flavored gelatin in 2 cups of boiling water. Stir until completely dissolved.
- Pour the gelatin into an 8×8-inch pan or individual serving glasses and let it set in the refrigerator for about 1 hour, or until firm.
- Prepare the Pudding Layer:
- While the gelatin is setting, prepare the vanilla pudding by combining the pudding mix with 2 cups of cold milk in a mixing bowl.
- Whisk for about 2 minutes until the pudding thickens. Add a few drops of yellow food coloring to achieve a bright yellow color, then mix well.
- Assemble the Parfaits:
- Once the gelatin is set, spoon a layer of the yellow pudding on top of the gelatin in each serving glass, filling about half the glass.
- Top the pudding layer with a generous dollop of whipped topping to resemble the white tip of a candy corn.
- Chill and Serve:
- Chill the parfaits in the refrigerator for at least 30 minutes to let the layers set.
- Just before serving, optionally garnish with candy corn on top of the whipped cream.
Extra Tips:
When preparing the parfaits, make sure each layer is fully set before adding the next to prevent mixing of the colors. If you want to add a crunch, consider layering crushed cookies or graham crackers between the layers.
For a healthier twist, use sugar-free pudding and gelatin. Finally, get creative with the serving glasses; clear plastic cups work well for kids, while mason jars add a rustic charm for a party. Enjoy your festive creation!
Spider Web Donuts
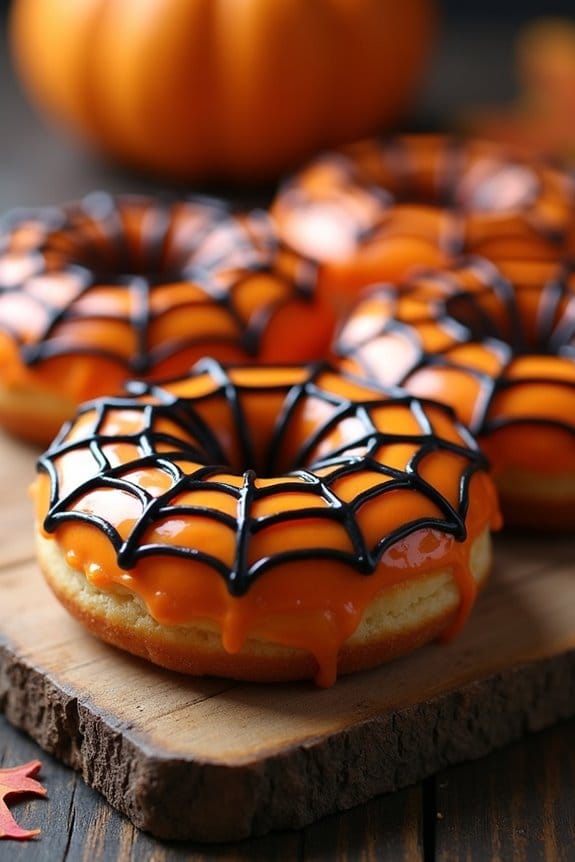
Halloween is a time for spooky fun, and what better way to celebrate than with delicious Spider Web Donuts? These eerie treats are perfect for kids and will definitely add a creepy-cute touch to your Halloween festivities. With their webbed icing design and delightful taste, these donuts are both a feast for the eyes and the taste buds. They aren’t only fun to make but also an excellent way to get creative with your little ones in the kitchen.
Spider Web Donuts are surprisingly simple to prepare and require only a few ingredients that you may already have in your pantry. These donuts are a fantastic choice for a Halloween party or as a special treat after a day of trick-or-treating. The recipe is designed to serve 4-6 people, making it ideal for small gatherings or family fun. Follow the step-by-step instructions below to create these spooktacular donuts that are sure to be a hit with kids and adults alike.
Ingredients:
- 2 cups all-purpose flour
- 1/2 cup granulated sugar
- 1 tablespoon baking powder
- 1/2 teaspoon salt
- 3/4 cup milk
- 2 large eggs
- 1/4 cup unsalted butter, melted
- 1 teaspoon vanilla extract
- 1 cup powdered sugar
- 2 tablespoons milk (for icing)
- Black food coloring
- Orange food coloring
Cooking Instructions:
- Preheat the Oven: Begin by preheating your oven to 350°F (175°C) and lightly grease a donut pan to prevent sticking.
- Prepare the Batter: In a large mixing bowl, whisk together the all-purpose flour, granulated sugar, baking powder, and salt. In another bowl, combine the milk, eggs, melted butter, and vanilla extract. Pour the wet ingredients into the dry ingredients and stir until just combined, being careful not to overmix.
- Fill the Donut Pan: Spoon the batter into the prepared donut pan, filling each cavity about 3/4 full. This will assure the donuts have enough room to rise while baking.
- Bake the Donuts: Place the donut pan in the preheated oven and bake for 10-12 minutes, or until the donuts are lightly golden and a toothpick inserted comes out clean. Allow the donuts to cool in the pan for a few minutes before transferring them to a wire rack to cool completely.
- Create the Icing: In a small bowl, mix the powdered sugar with 2 tablespoons of milk to create a smooth icing. Divide the icing into two separate bowls. Add black food coloring to one bowl and orange food coloring to the other, mixing until you achieve your desired colors.
- Decorate the Donuts: Once the donuts are cool, dip the tops of each donut into the orange icing, allowing any excess to drip off. Using a piping bag or a small zip-top bag with a tiny corner snipped off, pipe the black icing in a spiral pattern on top of the orange icing. Use a toothpick to drag lines from the center to the edge, creating a spider web effect.
Extra Tips: When making Spider Web Donuts, make sure the donuts are completely cool before decorating, as warm donuts can cause the icing to melt and run. If you don’t have a donut pan, you can use a muffin tin and roll small balls of foil to place in the center of each cup to create the donut hole.
Additionally, for a more pronounced spider web design, you can experiment with contrasting icing colors or even add edible glitter for a sparkly effect. Enjoy your spooky creations!
Scarecrow Cupcake Cones

Scarecrow Cupcake Cones are a delightful and festive treat perfect for celebrating Halloween with kids. These whimsical desserts combine the fun of cupcakes with the unique presentation of ice cream cones, transforming them into adorable scarecrows that are both delicious and eye-catching. Kids will love helping out in the kitchen to create these sweet treats, decorating the cupcake cones with candy eyes, candy corn, and other spooky embellishments to bring their scarecrows to life.
The recipe for Scarecrow Cupcake Cones is simple and requires only a few basic ingredients found in most kitchens. The cupcakes are baked directly in the cones, making them easy to handle and eat. This recipe is designed for a serving size of 4-6 people, making it perfect for a small Halloween gathering or party. With a little creativity and imagination, these Scarecrow Cupcake Cones are sure to be a hit with kids and adults alike.
A simple, fun recipe perfect for Halloween gatherings, enchanting both kids and adults with creativity.
Ingredients for Scarecrow Cupcake Cones (Serves 4-6):
- 12 flat-bottomed ice cream cones
- 1 box of yellow cake mix (plus ingredients needed for the mix, typically eggs, oil, and water)
- 1 can of vanilla frosting
- 1 package of candy eyes
- 1 package of candy corn
- Black decorating gel or icing
- Orange food coloring
- Assorted sprinkles and edible decorations (optional)
Cooking Instructions:
- Preheat the Oven: Preheat your oven to 350°F (175°C). Line a muffin tin with aluminum foil and cut small crosses in the foil to hold the cones upright.
- Prepare the Cake Batter: Follow the instructions on the cake mix box to prepare the batter. Mix thoroughly until smooth.
- Fill the Cones: Carefully fill each ice cream cone with cake batter until it’s about 2/3 full. Be cautious not to overfill, as the batter will expand during baking.
- Bake the Cupcakes: Place the filled cones in the prepared muffin tin, ensuring they remain upright. Bake in the preheated oven for about 18-20 minutes, or until a toothpick inserted into the center comes out clean.
- Cool the Cupcakes: Remove the cupcakes from the oven and let them cool completely while still in the cones.
- Prepare the Frosting: Divide the vanilla frosting into two bowls. Add a few drops of orange food coloring to one bowl and mix until the desired orange color is achieved.
- Decorate the Scarecrow Faces: Using a small spatula or butter knife, spread a thin layer of the orange frosting over the top of each cupcake to create the scarecrow’s face.
- Add Candy Decorations: Use candy eyes for the scarecrow’s eyes and a piece of candy corn for the nose. Draw a mouth using black decorating gel.
- Add Final Touches: Decorate with assorted sprinkles and edible decorations to give each scarecrow its own unique personality.
Extra Tips:
When making Scarecrow Cupcake Cones, it’s important to verify the cones are stable during baking to prevent tipping. You can also place the cones in a square baking dish if you don’t have a suitable muffin tin.
If you want to add more flavor, consider adding a teaspoon of vanilla or almond extract to the batter. Encourage children to get creative with decorating, allowing them to choose their favorite candies and colors to personalize their scarecrows. This not only makes the process more enjoyable but also creates a memorable experience for everyone involved.
Skeleton Sugar Cookies
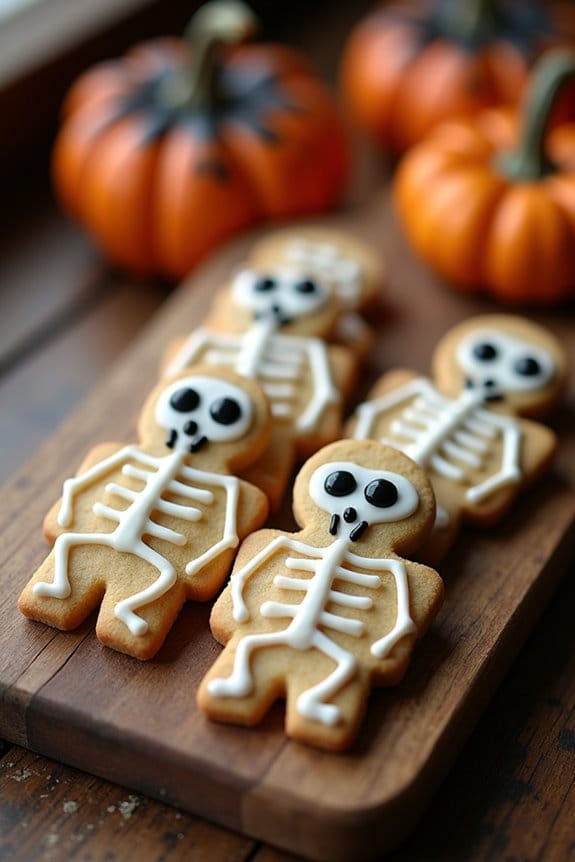
Skeleton Sugar Cookies are a fun and spooky treat perfect for Halloween celebrations. These cookies aren’t only delicious but also an engaging activity for kids, as they can participate in decorating their own edible skeletons.
Made from a classic sugar cookie base, these treats are then adorned with icing to create bone-chilling designs that will delight children and adults alike during the Halloween season. Whether you’re hosting a party or simply indulging in some festive baking, Skeleton Sugar Cookies are sure to be a hit.
The process of making Skeleton Sugar Cookies involves preparing a simple dough that’s easy to handle and shape. Using cookie cutters, you can create bone, skull, or any other Halloween-themed shapes.
Once baked to perfection, the cookies are then decorated with royal icing to create intricate skeleton designs. The combination of sweet, buttery cookies and the decorative icing makes for an irresistibly creepy yet tasty treat. This recipe yields approximately 24 cookies, making it ideal for serving 4-6 people.
Ingredients:
- 2 3/4 cups all-purpose flour
- 1 teaspoon baking powder
- 1/2 teaspoon salt
- 1 cup unsalted butter, softened
- 1 1/2 cups granulated sugar
- 1 large egg
- 2 teaspoons vanilla extract
- 1/2 teaspoon almond extract
- 3-4 cups confectioners’ sugar
- 2 tablespoons meringue powder
- 6 tablespoons water
- Black food coloring gel
Instructions:
- Prepare the Dough: In a medium bowl, whisk together the flour, baking powder, and salt. In a separate large bowl, beat the butter and granulated sugar with an electric mixer on medium speed until light and fluffy, about 2-3 minutes. Add the egg, vanilla extract, and almond extract, and mix until combined.
- Combine Ingredients: Gradually add the dry ingredients to the butter mixture, mixing on low speed until a smooth dough forms. Divide the dough into two portions, flatten each into a disk, wrap in plastic wrap, and refrigerate for at least 1 hour.
- Preheat and Roll Out: Preheat your oven to 350°F (175°C). On a floured surface, roll out one disk of dough to about 1/4 inch thickness. Use cookie cutters to cut out skeleton shapes and place them on a baking sheet lined with parchment paper.
- Bake the Cookies: Bake the cookies in the preheated oven for 8-10 minutes, or until the edges are lightly golden. Remove from the oven and allow them to cool completely on a wire rack.
- Make the Royal Icing: In a bowl, combine the confectioners’ sugar, meringue powder, and water. Beat with an electric mixer on high speed until stiff peaks form. Divide the icing into two portions, and tint one portion with black food coloring.
- Decorate the Cookies: Using a piping bag fitted with a small round tip, outline and fill the skeleton shapes with the white icing. Allow to dry slightly, then use the black icing to add details like eyes, mouth, and bone lines. Let the icing set completely before serving.
Extra Tips: When decorating your Skeleton Sugar Cookies, be sure to work in a cool, dry environment to prevent the royal icing from becoming too runny. If you’re new to using a piping bag, practice on a piece of parchment paper before starting on the cookies.
You can also use toothpicks for finer details. To make the experience more interactive for kids, set up a decorating station with various colors of icing and sprinkles, allowing them to express their creativity.
Vampire Fang Apples

Halloween is a time for spooky fun and delicious treats, and what better way to celebrate than with Vampire Fang Apples? This ghoulishly delightful dessert is perfect for kids and adds an eerie touch to your Halloween spread. The combination of crisp apples, creamy peanut butter, and sweet marshmallows creates a fang-tastic snack that’s both healthy and fun to eat.
It’s a simple recipe that can be whipped up in no time, ensuring that you have more time to enjoy the festivities with your little monsters. Vampire Fang Apples aren’t only visually appealing but also a great way to sneak a bit of nutrition into Halloween treats.
This recipe is perfect for a party or a fun afternoon activity with the kids, allowing them to get creative with their own vampire creations. With just a few ingredients, you can create a batch that serves 4-6 people, making it ideal for small gatherings or family fun nights. So grab your ingredients and get ready to sink your teeth into these frightfully fun snacks!
Ingredients (Serves 4-6):
- 3 large apples (any variety you prefer)
- 1 cup smooth peanut butter (or any nut butter of choice)
- 1 cup mini marshmallows
- 1 tablespoon lemon juice (optional, to prevent browning)
- Red food coloring (optional, for extra spooky effect)
Cooking Instructions:
- Prepare the Apples: Start by washing the apples thoroughly to remove any wax or residues. Once clean, slice each apple into quarters and remove the core and seeds. Each quarter will be used to create two vampire mouths.
- Prevent Browning: If desired, brush each apple slice lightly with lemon juice to prevent them from browning. This step is optional but helps maintain the fresh look of the apples for a longer time.
- Create the Mouths: Take one apple quarter and spread a generous layer of peanut butter on one of the cut sides. This will act as the “gums” for the vampire fangs. Repeat this step for each apple quarter.
- Add the Fangs: Push mini marshmallows into the peanut butter along the edge of the apple slice to resemble teeth. Use about 4-5 mini marshmallows per slice, depending on the size of the apple and your desired tooth spacing.
- Assemble the Vampire Fangs: Take another apple quarter with peanut butter and gently press it onto the marshmallow-lined slice, peanut butter side down, creating a sandwich. This should hold the marshmallows in place and form a gaping vampire mouth.
- Add Spooky Effects (Optional): For an extra spooky touch, use a small brush or toothpick to add a drop of red food coloring on the marshmallows, resembling blood stains or gums.
Extra Tips: To make the Vampire Fang Apples even more engaging for kids, you can set up a “decorate your own apple” station where they can customize their own creations.
For variations, consider using different nut butters or adding chocolate chips as fillings for a twist. Additionally, if you’re preparing these treats in advance, store them in an airtight container in the fridge to maintain freshness and prevent the apples from browning. Enjoy your hauntingly delicious Vampire Fang Apples!
