
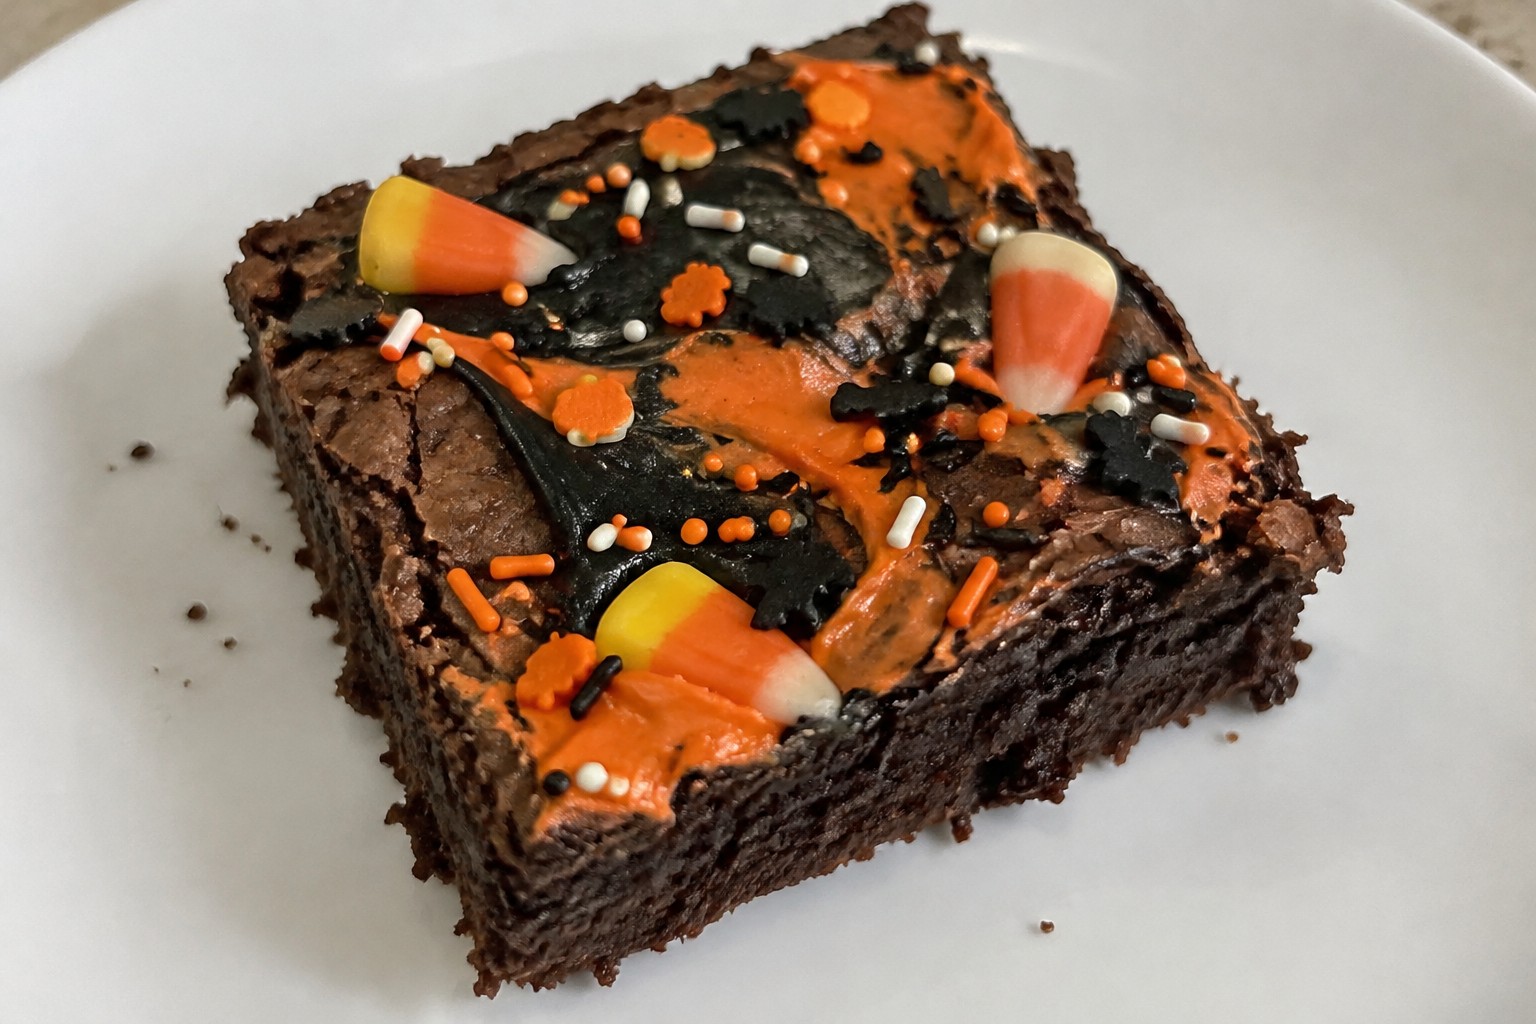
Finding the right dessert for a Halloween potluck gets easier with recipes that use basic ingredients. These ideas focus on treats you can make ahead and take without much fuss. Each one is chosen because it tends to get finished first at gatherings. You will see options that work for different group sizes and time limits. They keep things simple while still fitting the season.
Helpful Tips Before You Start
These pointers will help your Halloween desserts travel well and get picked first at the potluck.
Make Individual Portions
Cut or shape treats into single servings so guests can grab them without plates or utensils. This speeds up serving and keeps lines short.
Use Sturdy Containers
Pack items in firm, stackable boxes to prevent crushing or shifting during the drive. Lid tightly to hold in freshness.
Add Easy Halloween Details
Drizzle with orange or black icing or press on candy eyes right before leaving. Small touches draw people in without extra time.
Double the Recipe
Plan for more servings than the guest count suggests. Popular potluck desserts often run out early when portions are generous.
Skip Items That Melt Fast
Choose recipes without whipped cream or soft chocolate coatings if the event is outdoors or in a warm room. Sturdier options hold up better.
Spooky Spiderweb Pumpkin Cheesecake
This Spooky Spiderweb Pumpkin Cheesecake brings a festive touch to any Halloween potluck. The creamy filling combines pumpkin with warm spices, while the chocolate web on top adds a fun visual that guests love.
It works well because it travels easily and slices into neat portions. The texture is smooth and rich, with a crunchy crust that balances the flavors.

Serves 4 people.
Ingredients
- 3/4 cup graham cracker crumbs
- 2 tablespoons unsalted butter, melted
- 8 ounces cream cheese, softened
- 1/2 cup pumpkin puree
- 1/4 cup granulated sugar
- 1 large egg
- 1 teaspoon vanilla extract
- 1 teaspoon ground cinnamon
- 1/2 teaspoon ground nutmeg
- 1/4 cup semi-sweet chocolate chips
Instructions
- Preheat the oven to 325 degrees. Mix the graham cracker crumbs with the melted butter until evenly coated, then press the mixture into the bottom of a 6-inch springform pan.
- In a mixing bowl, beat the cream cheese until smooth. Add the pumpkin puree, sugar, egg, vanilla extract, cinnamon, and nutmeg. Beat again until fully combined and creamy.
- Pour the filling over the crust and smooth the top. Bake for 35 minutes, then remove from the oven and let cool to room temperature.
- Melt the chocolate chips in a microwave-safe bowl in 20-second bursts, stirring between each until smooth. Spoon the melted chocolate into a small zip-top bag, snip a tiny corner, and pipe concentric circles on top of the cooled cheesecake.
- Drag a toothpick from the center outward through the circles to form a spiderweb pattern. Chill the cheesecake for at least 2 hours before slicing.
Extra Tips
Chill the cheesecake fully before transporting so the spiderweb stays intact. If you want a stronger spice note, add an extra pinch of cinnamon to the filling before baking. Leftovers keep covered in the fridge for up to three days.Course: Dessert Cuisine: American Equipment: Mixing bowls, 6-inch springform pan, Electric mixer, Piping bag or zip-top bag
Chocolate Graveyard Brownie Bites
These brownie bites bring a playful graveyard theme to any Halloween potluck. The rich chocolate base pairs with crunchy cookie topping that looks like fresh dirt, making them fun to serve and quick to grab. They work well for parties because the small size keeps portions easy and the spooky look draws people in right away.
The texture stays fudgy inside with a slight chew on the edges. Crushed cookies add crunch while the whole cookies stand upright as simple tombstones. Candy accents give a sweet finish that balances the dark chocolate.

Serves 4 people.
Ingredients
- 1/2 cup unsalted butter
- 3/4 cup semisweet chocolate chips, divided
- 2/3 cup granulated sugar
- 2 large eggs
- 1/2 cup all-purpose flour
- 1/4 cup unsweetened cocoa powder
- 1/4 teaspoon salt
- 1 teaspoon vanilla extract
- 1 cup crushed chocolate sandwich cookies
- 8 whole chocolate sandwich cookies
- 12 candy pumpkins
Instructions
- Preheat the oven to 350 degrees and line a small 8-inch square baking pan with parchment paper.
- Melt the butter with 1/2 cup of the chocolate chips in a microwave-safe bowl, stirring until smooth.
- Stir in the sugar, then add the eggs one at a time and mix until combined.
- Add the flour, cocoa powder, salt, and vanilla extract. Stir until the batter is thick and uniform.
- Fold in the remaining 1/4 cup chocolate chips, then spread the batter evenly in the prepared pan.
- Bake for 20 to 22 minutes until a toothpick inserted in the center comes out with a few moist crumbs. Let the brownies cool completely in the pan.
- Cut the cooled brownies into 8 bite-sized squares and arrange them on a serving plate.
- Sprinkle the crushed chocolate sandwich cookies over the tops to create the dirt layer.
- Press two whole chocolate sandwich cookies upright into each brownie bite to form tombstones.
- Add one or two candy pumpkins beside each tombstone for color.
Extra Tips
Let the brownies cool fully before adding the crushed cookies so the topping stays crisp instead of sinking in. If the whole cookies feel loose, press them in at a slight angle or use a dab of melted chocolate to help them stand. Store leftovers in an airtight container at room temperature for up to two days.Course: Dessert Cuisine: American Equipment: Mixing Bowl, Microwave, 8-inch Baking Pan, Oven
Caramel Apple Crumble Slab Pie
This slab pie brings together soft spiced apples, sticky caramel, and a crisp oat topping on a flaky crust. It travels easily to potlucks and cuts into neat squares that guests can grab without fuss.
The filling stays juicy while the crumble adds texture and the caramel ties everything together with a sweet finish. It works well for Halloween gatherings because the flavors feel seasonal without any extra decoration needed.

Serves 4 people.
Ingredients
- 1 refrigerated pie crust
- 3 large apples, peeled, cored, and thinly sliced
- 2 tablespoons granulated sugar
- 1 teaspoon ground cinnamon
- 1/4 cup caramel sauce, plus more for drizzling
- 1/2 cup all-purpose flour
- 1/4 cup brown sugar
- 1/4 cup old-fashioned oats
- 3 tablespoons unsalted butter, cold and cubed
Instructions
- Preheat the oven to 375 degrees and line a baking sheet with parchment paper. Unroll the pie crust onto the sheet and gently press it into a rough rectangle.
- In a bowl, toss the apple slices with granulated sugar and cinnamon until evenly coated. Spread the apples in a single layer over the crust, leaving a small border around the edges.
- Drizzle the 1/4 cup caramel sauce evenly over the apples.
- In a separate bowl, combine the flour, brown sugar, and oats. Add the cold butter cubes and rub the mixture with your fingers until it forms coarse crumbs.
- Sprinkle the crumble topping evenly over the caramel-coated apples.
- Bake for 30 to 35 minutes until the crust is golden and the topping is crisp. Remove from the oven and let cool slightly before drizzling with extra caramel sauce.
Extra Tips
Let the pie cool for at least 15 minutes after baking so the caramel sets and the slices hold their shape when you pack them for a potluck. If the apples you use are very tart, add an extra tablespoon of granulated sugar to the filling. Store leftovers in an airtight container at room temperature for up to one day or in the fridge for two days, then warm individual slices briefly in the microwave to refresh the crumble.Course: Dessert Cuisine: American Equipment: Baking Sheet, Mixing Bowls
Ghost Meringue Trifle Cups
These Ghost Meringue Trifle Cups add a light and fun element to a Halloween potluck spread. The crisp white meringue ghosts rest on creamy chocolate layers, giving guests a treat that feels festive without extra effort.
The texture combines airy meringue with smooth pudding and a bit of cookie crunch. The flavor stays simple with chocolate and vanilla notes that appeal to most crowds.

Serves 4 people.
Ingredients
- 4 large egg whites
- 1 cup granulated sugar
- 1/2 teaspoon vanilla extract
- 1 package (3.4 oz) instant chocolate pudding mix
- 2 cups cold milk
- 1 cup heavy whipping cream
- 2 tablespoons powdered sugar
- 8 chocolate sandwich cookies, crushed
- Mini chocolate chips, for decorating
Instructions
- Preheat the oven to 200 degrees F and line a baking sheet with parchment paper.
- In a clean mixing bowl, beat the egg whites on medium speed until foamy. Gradually add the granulated sugar while beating on high until stiff peaks form. Mix in the vanilla extract.
- Spoon the meringue into a piping bag fitted with a round tip. Pipe ghost shapes onto the prepared baking sheet, leaving space between each one. Press two mini chocolate chips into each ghost to form eyes.
- Bake the meringues for 2 hours, then turn off the oven and let them cool inside with the door closed for 1 hour.
- In a separate bowl, whisk the chocolate pudding mix with the cold milk until it thickens. Set aside.
- In another bowl, beat the heavy whipping cream with the powdered sugar until soft peaks form.
- To assemble, divide the pudding among 4 small trifle cups. Add a layer of whipped cream, then sprinkle crushed cookies on top. Finish each cup with a meringue ghost.
Extra Tips
Make the meringue ghosts a day ahead and store them in an airtight container at room temperature to keep them crisp. Assemble the cups no more than an hour before serving so the cookies stay crunchy and the meringue does not soften.Course: Dessert Cuisine: American Equipment: Mixing Bowl, Hand Mixer, Piping Bag, Baking Sheet, Trifle Cups
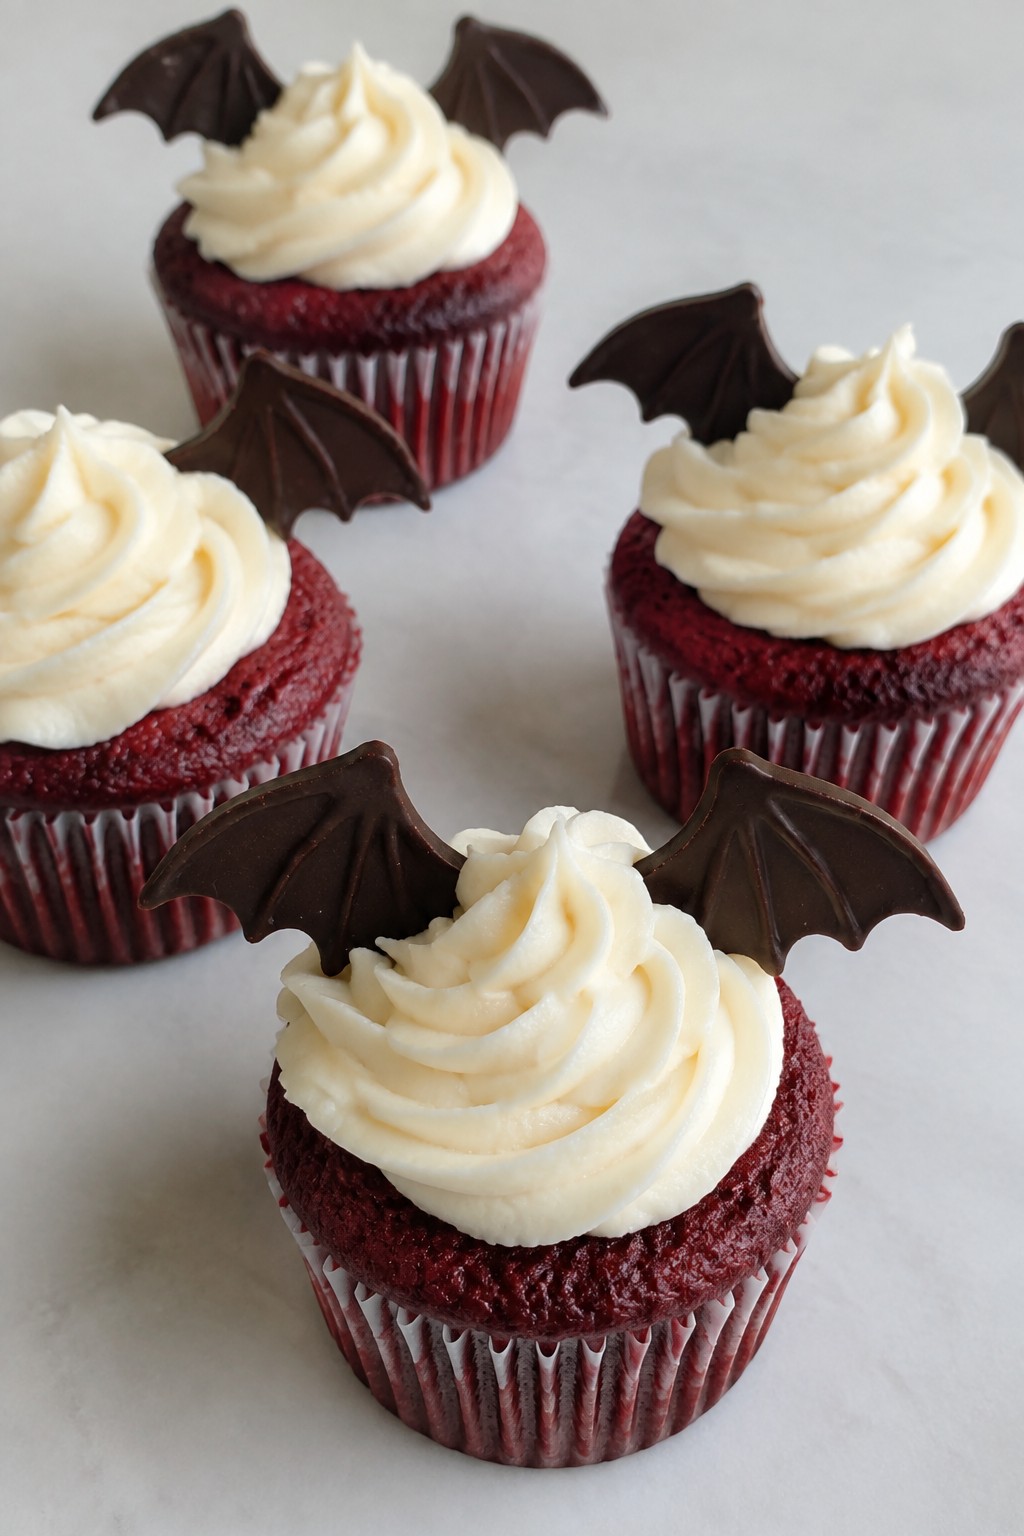
Red Velvet Bat Wing Cupcakes
These red velvet bat wing cupcakes add a fun Halloween touch to potluck tables. The cocoa-based cake stays moist with a light tang from buttermilk, while cream cheese frosting provides a smooth contrast. Dark chocolate wings on top give each cupcake a clear bat shape without much extra work.
They travel well in a single layer and hold up during a short car ride. The deep red color shows through the frosting just enough to match the spooky theme while keeping the flavor familiar.
Serves 4 people.
Ingredients
- 1/2 cup all-purpose flour
- 1/4 cup granulated sugar
- 1 tablespoon unsweetened cocoa powder
- 1/4 teaspoon baking soda
- 1/8 teaspoon salt
- 1/4 cup buttermilk
- 1 large egg
- 2 tablespoons vegetable oil
- 1 teaspoon vanilla extract
- 1 teaspoon red food coloring
- 4 ounces cream cheese, softened
- 2 tablespoons unsalted butter, softened
- 1/2 cup powdered sugar
- 1/4 cup dark chocolate chips
Instructions
- Heat the oven to 350 degrees and line a muffin tin with four cupcake liners.
- In a medium bowl, whisk together the flour, granulated sugar, cocoa powder, baking soda, and salt.
- In a separate bowl, mix the buttermilk, egg, oil, vanilla extract, and red food coloring until smooth.
- Pour the wet mixture into the dry ingredients and stir until just combined.
- Divide the batter evenly among the four liners and bake for 18 minutes, or until a toothpick comes out clean.
- Cool the cupcakes completely on a wire rack.
- Beat the cream cheese and butter together until creamy, then add the powdered sugar and mix until smooth.
- Spread or pipe the frosting over each cooled cupcake.
- Melt the dark chocolate chips in the microwave in 20-second bursts, stirring between each until smooth.
- Spoon the melted chocolate into a small zip-top bag, snip a tiny corner, and pipe four pairs of bat wings onto parchment paper. Let them set for 10 minutes.
- Press one pair of wings gently into the frosting on each cupcake.
Extra Tips
Pipe the chocolate wings a few hours ahead so they firm up fully before you place them on the cupcakes. If the frosting feels too soft after mixing, chill it for 10 minutes before spreading. Store any leftovers in a single layer in an airtight container at room temperature for one day or in the fridge for up to three days.Course: Dessert Cuisine: American Equipment: Mixing Bowls, Muffin Tin, Oven, Piping Bag
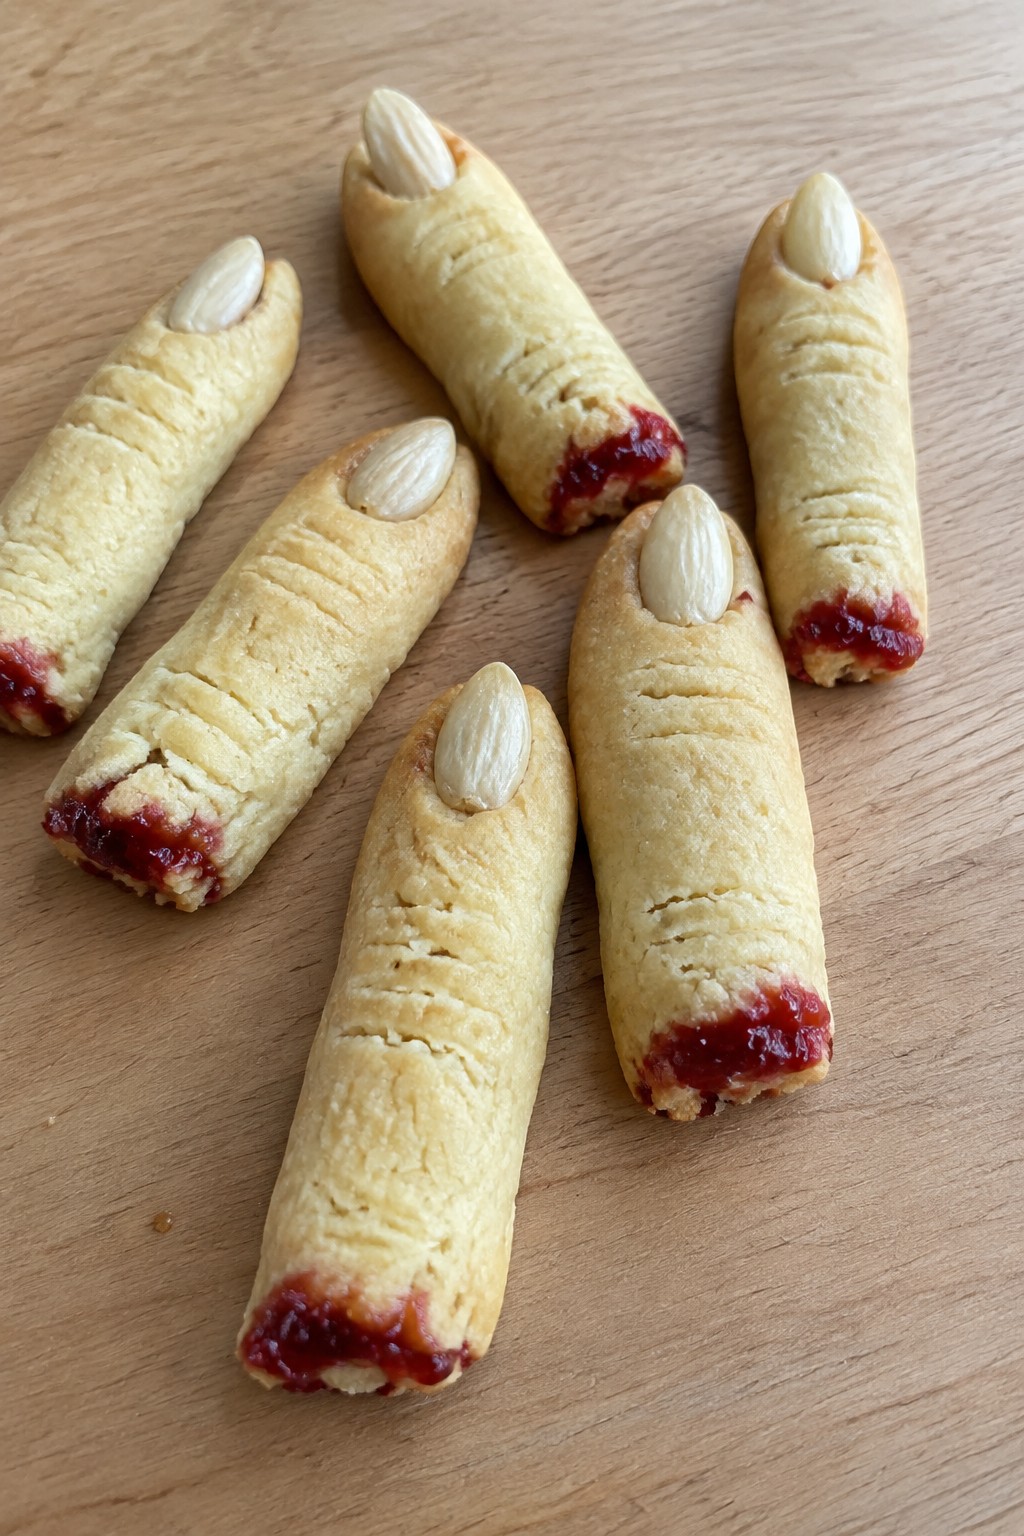
Witch Finger Shortbread Cookies
These witch finger shortbread cookies bring a spooky touch to any Halloween potluck without much effort. The buttery shortbread dough holds its shape well after baking, and the almond nails plus red jam details give them a fun, eerie look that guests notice right away. They travel easily in a container and tend to vanish quickly from the dessert table.
The flavor is classic shortbread with a light sweetness and tender crumb. They pair nicely with coffee or hot cider and work as both a dessert and a conversation starter at gatherings.
Serves 4 people.
Ingredients
- ½ cup unsalted butter, softened
- ¼ cup granulated sugar
- 1 teaspoon vanilla extract
- 1 cup all-purpose flour
- ¼ teaspoon salt
- 12 whole blanched almonds
- 2 tablespoons strawberry jam
Instructions
- Preheat the oven to 325°F and line a baking sheet with parchment paper.
- In a mixing bowl, beat the softened butter and sugar together until light and creamy.
- Stir in the vanilla extract until combined.
- Add the flour and salt to the bowl and mix until a soft dough forms.
- Divide the dough into 12 equal pieces and roll each into a finger shape about 3 inches long.
- Press one almond into the end of each finger to create a nail.
- Use a knife to make two or three light indentations across each finger for knuckles.
- Place the fingers on the prepared baking sheet and bake for 18 to 20 minutes until the edges are lightly golden.
- Remove from the oven and let cool for 5 minutes, then gently press the almonds in again if needed.
- Spoon a small amount of strawberry jam into the knuckle indentations and let the cookies cool completely.
Extra Tips
Chill the shaped fingers for 15 minutes before baking if your kitchen is warm, as this helps them keep their finger shape. Use seedless jam so the red color shows clearly without bits of fruit. Store cooled cookies in an airtight container at room temperature for up to three days.Course: Dessert Cuisine: American Equipment: Mixing Bowl, Baking Sheet, Parchment Paper
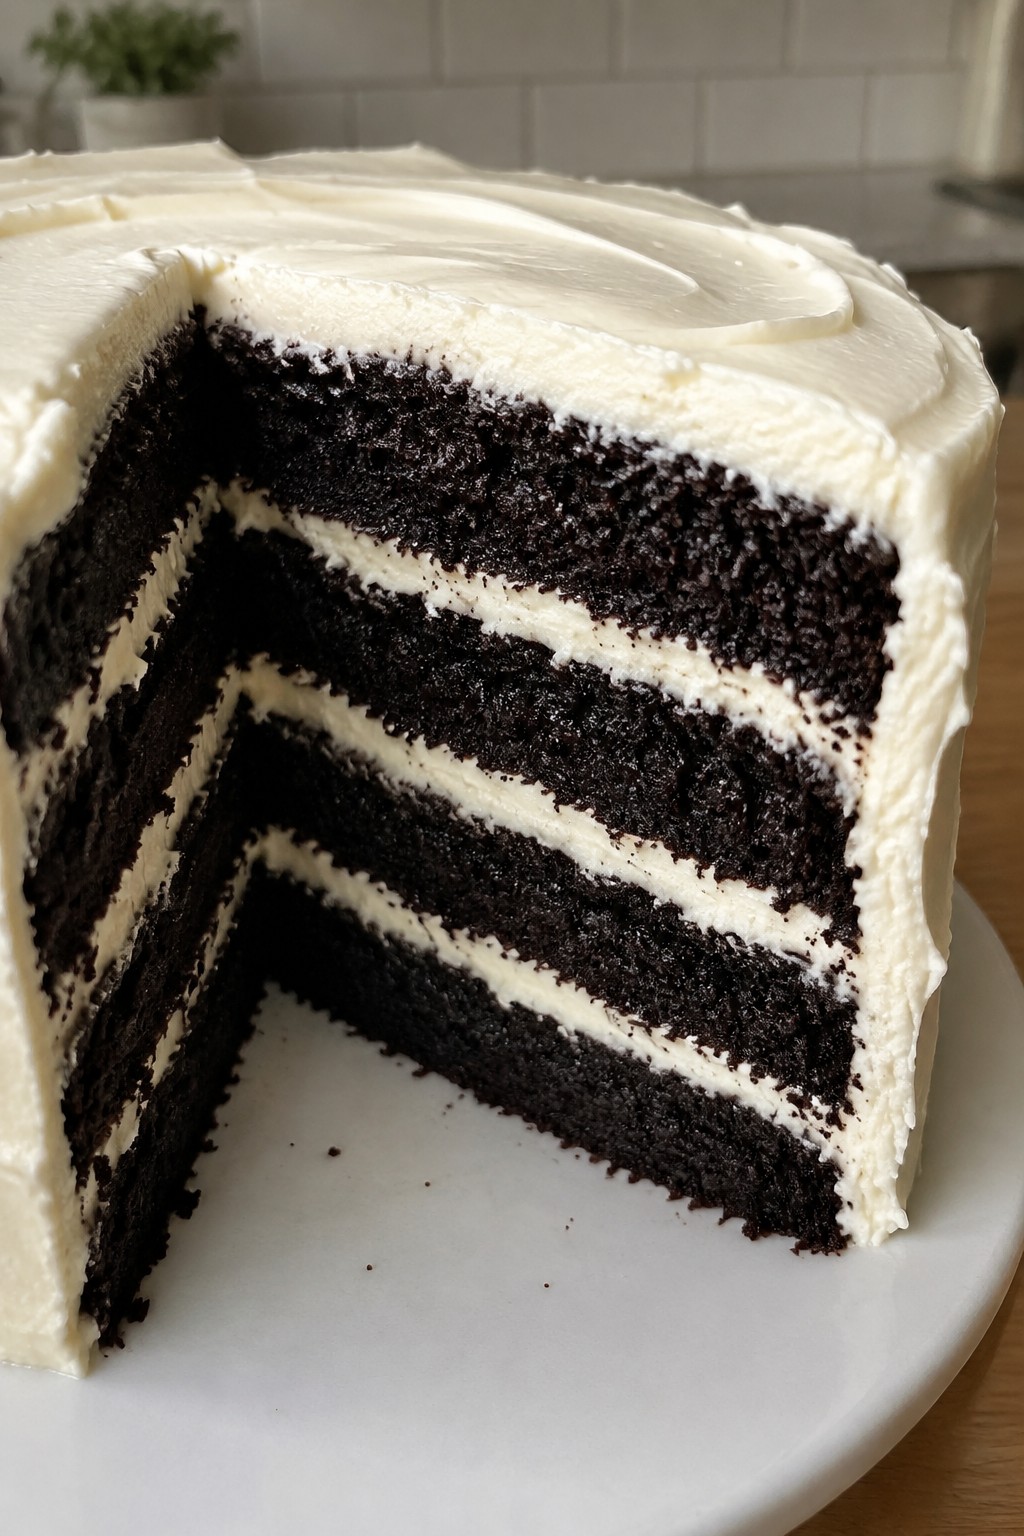
Black Magic Chocolate Layer Cake
This cake brings a deep, dark chocolate flavor and striking black color to any Halloween potluck. The rich layers stay moist thanks to buttermilk and oil, making it a dessert that guests reach for again before the night ends.
It works well when you need something simple yet impressive to share. The frosting adds creaminess that balances the bold cocoa taste without extra fuss.
Serves 4 people.
Ingredients
- 1 cup all-purpose flour
- 3/4 cup black cocoa powder
- 1 cup granulated sugar
- 1 teaspoon baking soda
- 1/2 teaspoon salt
- 1/2 cup vegetable oil
- 1 cup buttermilk
- 2 large eggs
- 1 teaspoon vanilla extract
- 1/2 cup hot water
- 1/2 cup unsalted butter, softened
- 1 1/2 cups powdered sugar
- 2 tablespoons milk
Instructions
- Preheat the oven to 350 degrees and grease two 6-inch round cake pans.
- In a large bowl, whisk together the flour, 3/4 cup black cocoa powder, granulated sugar, baking soda, and salt.
- In a separate bowl, mix the vegetable oil, buttermilk, eggs, and vanilla extract until smooth.
- Pour the wet mixture into the dry ingredients and stir until just combined.
- Slowly add the hot water and mix until the batter is thin but uniform.
- Divide the batter evenly between the prepared pans and bake for 25 to 30 minutes, or until a toothpick comes out clean.
- Let the cakes cool in the pans for 10 minutes, then remove them to a wire rack to cool completely.
- In a medium bowl, beat the softened butter with the remaining 1/4 cup black cocoa powder and powdered sugar.
- Add the milk a little at a time and beat until the frosting reaches a spreadable consistency.
- Place one cooled cake layer on a plate, spread with half the frosting, top with the second layer, and frost the top and sides.
Extra Tips
Bake the layers a day ahead and wrap them tightly so they stay moist for easy assembly on potluck day. Use black cocoa for the darkest color and richest taste. If the frosting feels too thick, add milk one teaspoon at a time until it spreads smoothly.Course: Dessert Cuisine: American Equipment: Mixing Bowls, Two Cake Pans, Oven, Whisk, Electric Mixer
Pumpkin Spice Cookie Dough Dip Cups
These individual dip cups bring the cozy taste of pumpkin spice in a no-bake cookie dough form. They work well for Halloween potlucks because they travel easily and give guests their own portion without extra plates or utensils. The texture stays thick and scoopable, with warm spices balanced by sweet chocolate chips.
The flavor profile leans creamy and lightly spiced rather than overly sweet. It pairs nicely with simple dippers like graham crackers for a quick grab-and-go dessert.
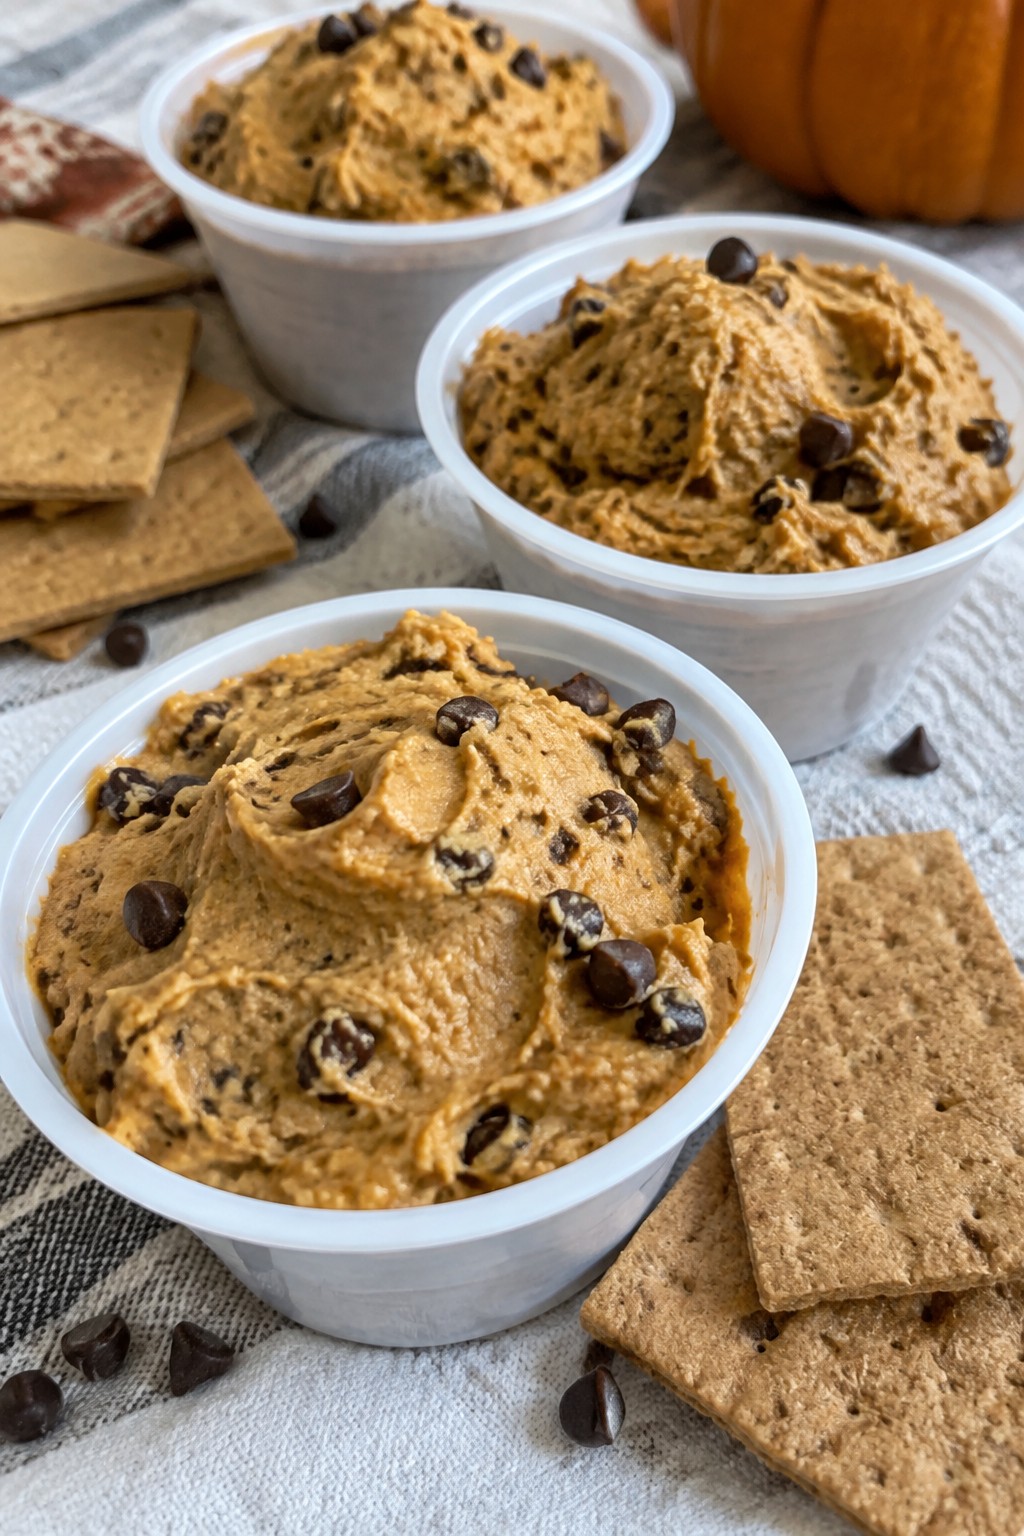
Serves 4 people.
Ingredients
- 4 oz cream cheese, softened
- 1/2 cup canned pumpkin puree
- 1/4 cup brown sugar
- 1 teaspoon pumpkin pie spice
- 1/2 teaspoon vanilla extract
- 1/3 cup all-purpose flour, heat-treated
- 1/4 cup mini chocolate chips
- 12 graham cracker squares
Instructions
- Place the softened cream cheese in a mixing bowl and beat until smooth.
- Add the pumpkin puree, brown sugar, pumpkin pie spice, and vanilla extract. Mix until fully combined.
- Stir in the heat-treated flour until no dry streaks remain.
- Fold in the mini chocolate chips.
- Divide the mixture evenly among four small cups or ramekins.
- Serve each cup with three graham cracker squares on the side.
Extra Tips
Heat-treat the flour first by microwaving it in 30-second bursts until it reaches 165 degrees to keep the dip safe to eat. Chill the filled cups for at least 30 minutes before serving so the dip firms up. If the mixture seems too thick after mixing, add one teaspoon of milk at a time until it reaches a scoopable consistency.Course: Dessert Cuisine: American Equipment: Mixing Bowl, Measuring Cups, Measuring Spoons
Candy Corn Cheesecake Parfait
This no-bake parfait brings together creamy cheesecake filling, sweet graham cracker layers, and plenty of candy corn for a festive Halloween touch. It travels well to potlucks and looks appealing in clear glasses, making it easy for guests to grab and enjoy. The texture stays light with whipped cream folded into the filling, while the candy corn adds chewy bursts throughout.
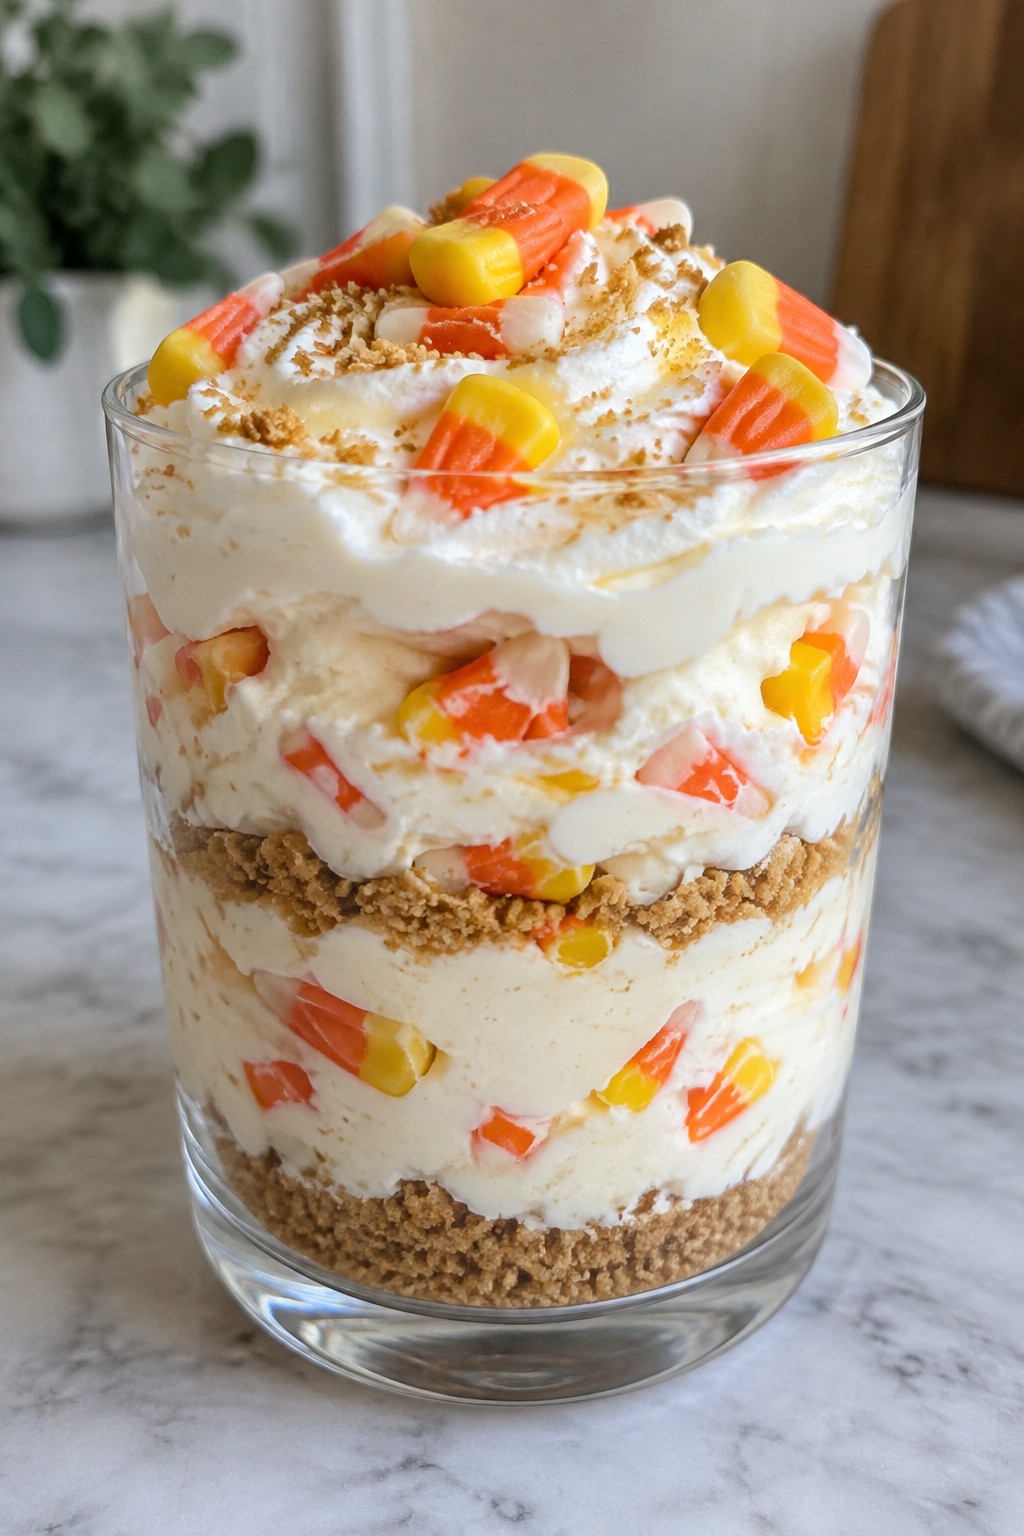
Serves 4 people.
Ingredients
- 8 ounces cream cheese, softened
- 1/2 cup powdered sugar
- 1 teaspoon vanilla extract
- 1 cup heavy whipping cream
- 1 cup graham cracker crumbs
- 2 tablespoons unsalted butter, melted
- 1 1/2 cups candy corn, divided
Instructions
- Beat the cream cheese, powdered sugar, and vanilla extract in a large bowl until smooth.
- In a separate bowl, whip the heavy whipping cream until stiff peaks form.
- Fold the whipped cream into the cream cheese mixture until fully combined.
- Stir the graham cracker crumbs and melted butter together in another bowl until the crumbs are evenly moistened.
- Spoon a layer of the graham cracker mixture into the bottom of four serving glasses.
- Add a layer of the cheesecake filling over the crumbs, then scatter some of the candy corn on top.
- Repeat the layers once more, ending with a final layer of cheesecake filling.
- Top each parfait with the remaining candy corn.
Extra Tips
Prepare the parfaits up to one day ahead and keep them covered in the refrigerator so the layers stay neat. Use clear glasses to show off the candy corn colors. If the cheesecake filling feels too thick after chilling, give it a quick stir before serving.Course: Dessert Cuisine: American Equipment: Mixing bowls, Hand mixer, Parfait glasses
Monster Marshmallow Cereal Treats
These Monster Marshmallow Cereal Treats bring a playful Halloween twist to the classic cereal bar. The bright green color and candy eyeballs make them stand out on a potluck table, and the crispy yet chewy texture keeps people coming back for more. They travel well and hold their shape, which makes them a reliable choice when you need a dessert that serves a crowd without much fuss.
The flavor stays simple and sweet, with plenty of toasted marshmallow notes against the light cereal crunch. A few Halloween sprinkles add extra color without complicating the process.
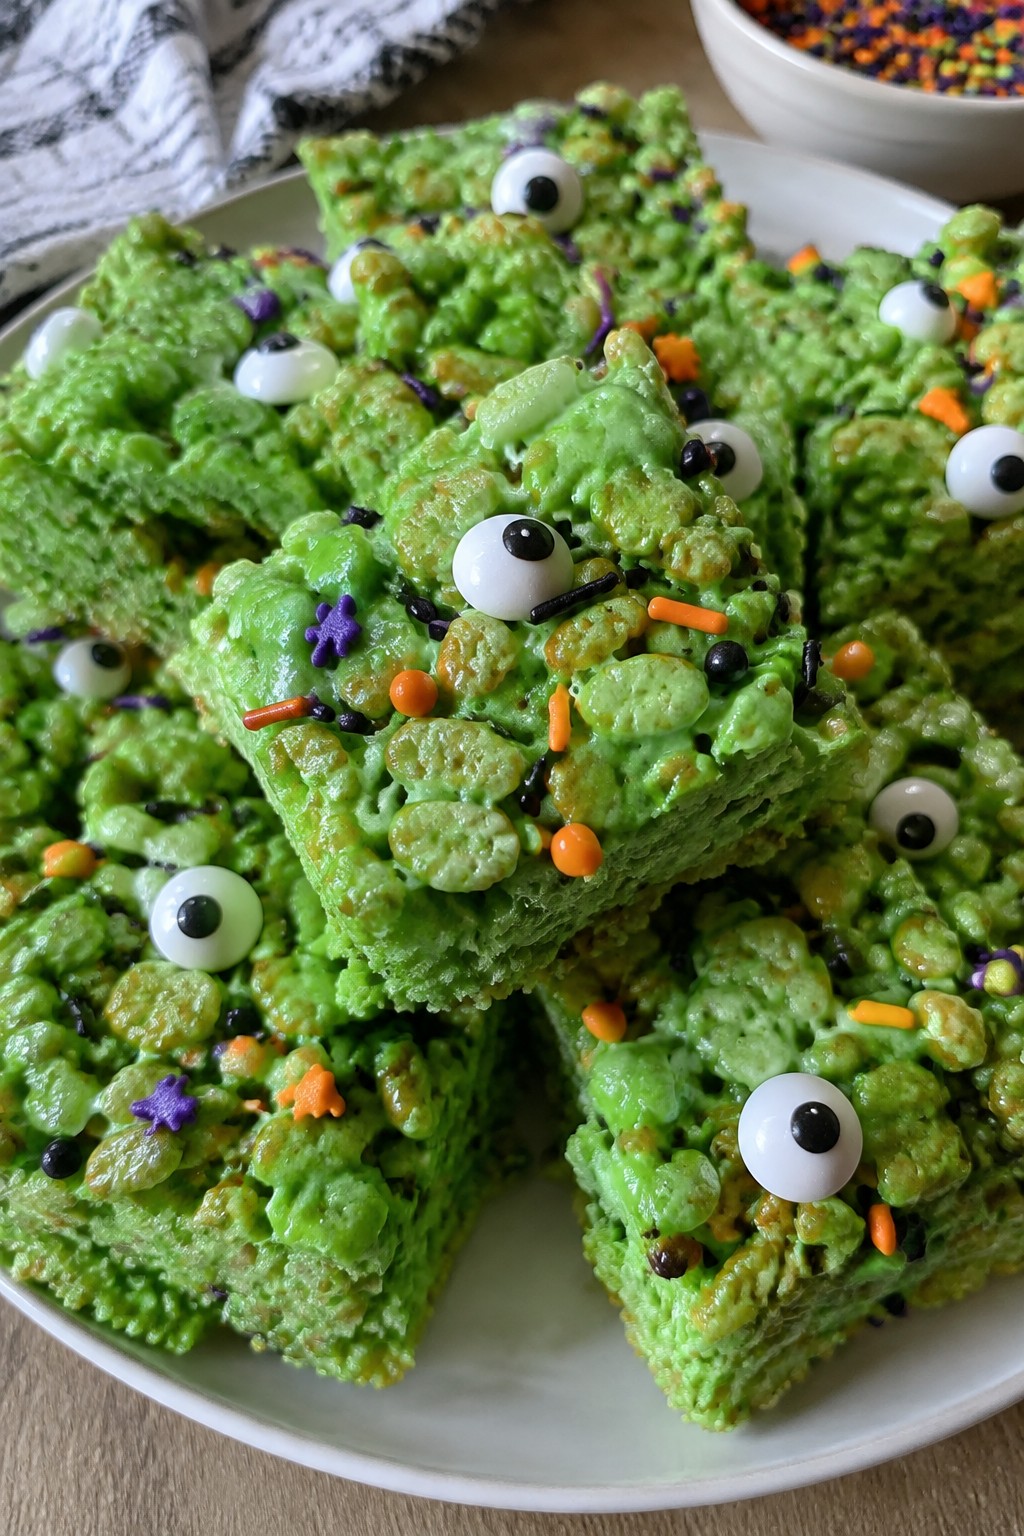
Serves 4 people.
Ingredients
- 3 tablespoons unsalted butter
- 4 cups mini marshmallows
- 1/2 teaspoon green food coloring
- 5 cups crisp rice cereal
- 1/4 cup candy eyeballs
- 2 tablespoons Halloween sprinkles
Instructions
- Melt the butter in a large saucepan over low heat.
- Add the mini marshmallows and stir until fully melted and smooth.
- Stir in the green food coloring until the marshmallow mixture turns evenly green.
- Remove the pan from the heat and quickly fold in the crisp rice cereal until every piece is coated.
- Press the mixture firmly into a lightly greased 8×8 inch pan.
- While the treats are still warm, press the candy eyeballs and Halloween sprinkles evenly across the top.
- Let the pan cool completely at room temperature before cutting into squares.
Extra Tips
Press the candy eyeballs on right after spreading the mixture so they stick without extra frosting. Store leftovers in an airtight container at room temperature for up to three days. If the treats feel too soft when you cut them, chill the pan for 15 minutes first.Course: Dessert Cuisine: American Equipment: Large saucepan, Mixing spoon, 8×8 inch baking pan
Blood Orange Chocolate Tart
This tart pairs a crisp cocoa crust with a smooth dark chocolate filling and fresh blood orange slices on top. The bright citrus cuts through the richness and gives the dessert a bold look that stands out on a Halloween potluck table. It travels well in a pan and needs no last-minute work once chilled.
The finished tart has a firm yet creamy center and a slightly bitter edge from the dark chocolate. Blood oranges add natural color and a sweet-tart note that keeps each bite balanced.

Serves 4 people.
Ingredients
- 1 cup all-purpose flour
- 1/4 cup unsweetened cocoa powder
- 2 tablespoons granulated sugar
- 1/4 teaspoon salt
- 1/2 cup cold unsalted butter, cubed
- 8 ounces dark chocolate, chopped
- 3/4 cup heavy cream
- 2 blood oranges, segmented
- 1 teaspoon flaky sea salt
Instructions
- Heat the oven to 350 degrees. In a mixing bowl, whisk together the flour, cocoa powder, granulated sugar, and salt. Cut in the cold butter until the mixture looks like coarse crumbs. Press the dough evenly into a 9-inch tart pan with a removable bottom. Bake for 15 minutes, then let the crust cool completely.
- Place the chopped dark chocolate in a heatproof bowl. Heat the heavy cream in a small saucepan until it just begins to simmer. Pour the hot cream over the chocolate and let it sit for one minute, then stir until smooth and glossy.
- Pour the chocolate mixture into the cooled crust. Tap the pan gently to release any air bubbles. Refrigerate for at least two hours until the filling is set.
- Just before serving, arrange the blood orange segments over the top of the tart. Sprinkle with flaky sea salt.
Extra Tips
Chill the tart until right before transport so the filling stays firm. If blood oranges are out of season, use regular oranges and add a few drops of red food coloring to the segments for color. The flaky sea salt is important because it balances the sweetness without overpowering the chocolate.Course: Dessert Cuisine: French Equipment: Tart pan, Mixing bowl, Saucepan
Haunted Gingerbread Truffle Balls
These gingerbread truffle balls bring warm spices and a creamy center to any Halloween potluck table. They hold up well at room temperature for a few hours and travel easily in a single layer, so they suit a shared dessert spread without fuss.
The flavor leans toward classic gingerbread with a smooth chocolate shell that sets firm. Candy eyes add a simple haunted touch that fits the season.
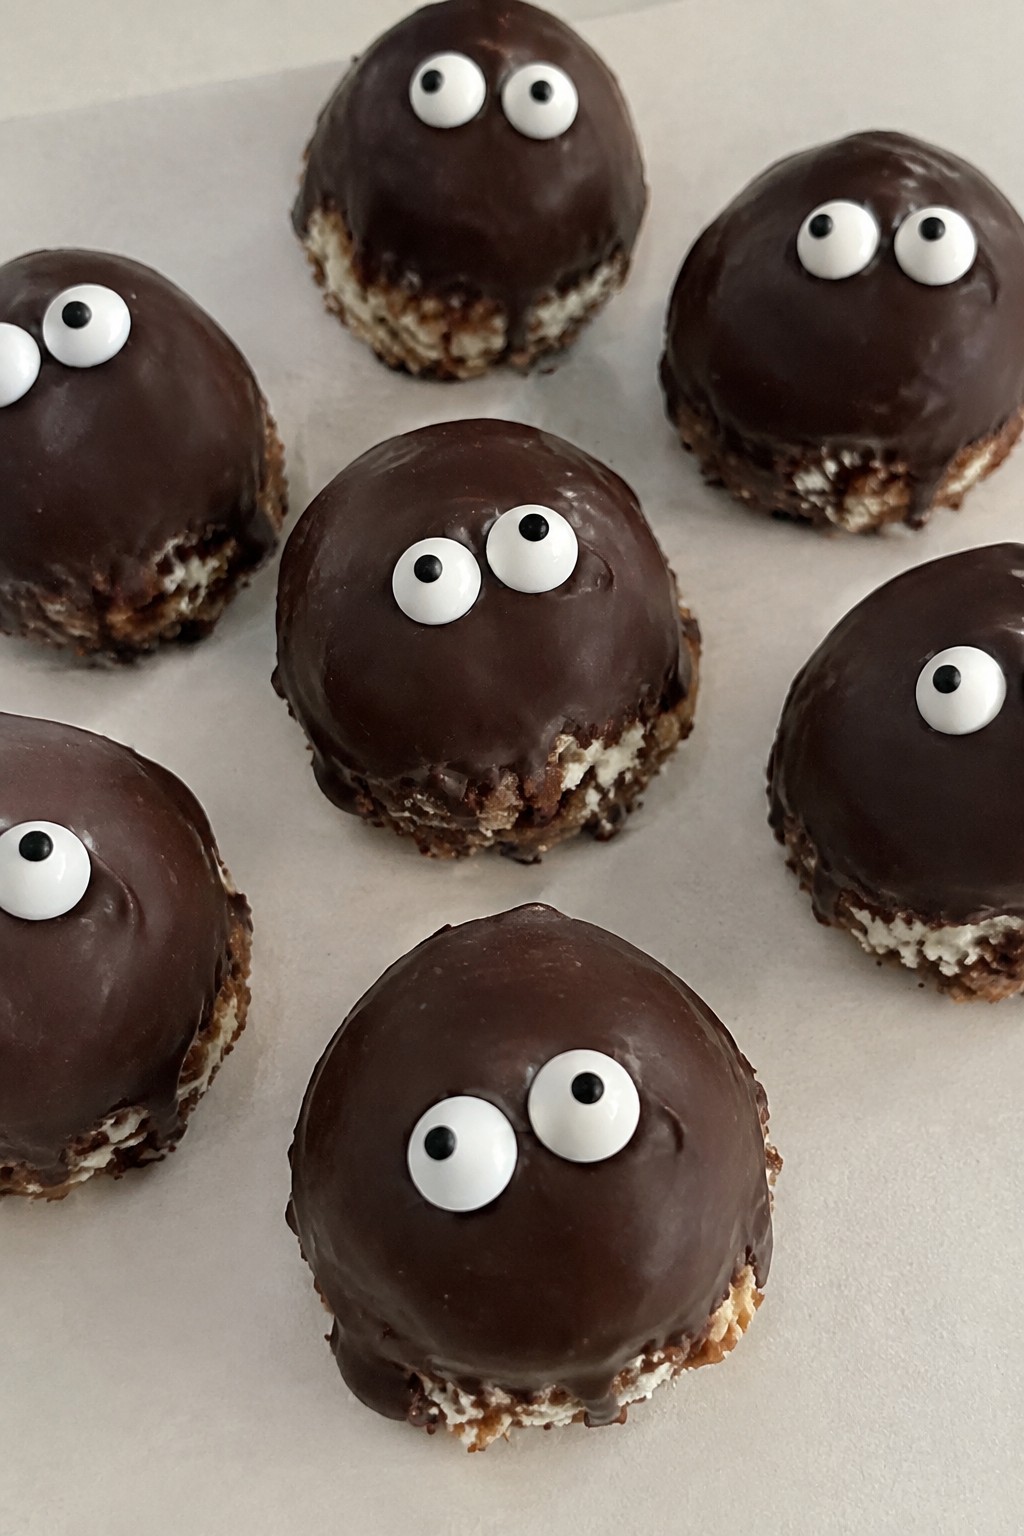
Serves 4 people.
Ingredients
- 1 1/2 cups finely crushed gingerbread cookies
- 4 ounces cream cheese, softened
- 1/2 teaspoon ground cinnamon
- 1 cup semisweet chocolate chips
- 1 tablespoon vegetable oil
- 8 candy eyes
Instructions
- Combine the crushed gingerbread cookies, softened cream cheese, and cinnamon in a mixing bowl until the mixture holds together.
- Scoop out tablespoon-sized portions and roll them into smooth balls between your palms. Place the balls on a parchment-lined baking sheet.
- Melt the semisweet chocolate chips with the vegetable oil in a microwave-safe bowl in 20-second bursts, stirring until smooth.
- Dip each ball into the melted chocolate to coat completely, then return it to the baking sheet.
- Press two candy eyes onto the top of each truffle while the coating is still soft. Chill the sheet in the refrigerator until the chocolate sets.
Extra Tips
Chill the truffles for at least 30 minutes before serving so the coating stays firm during transport. If the chocolate thickens while dipping, warm it for a few seconds and stir in a drop more oil. Store leftovers in an airtight container in the fridge for up to three days.Course: Dessert Cuisine: American Equipment: Mixing Bowl, Baking Sheet, Microwave-Safe Bowl
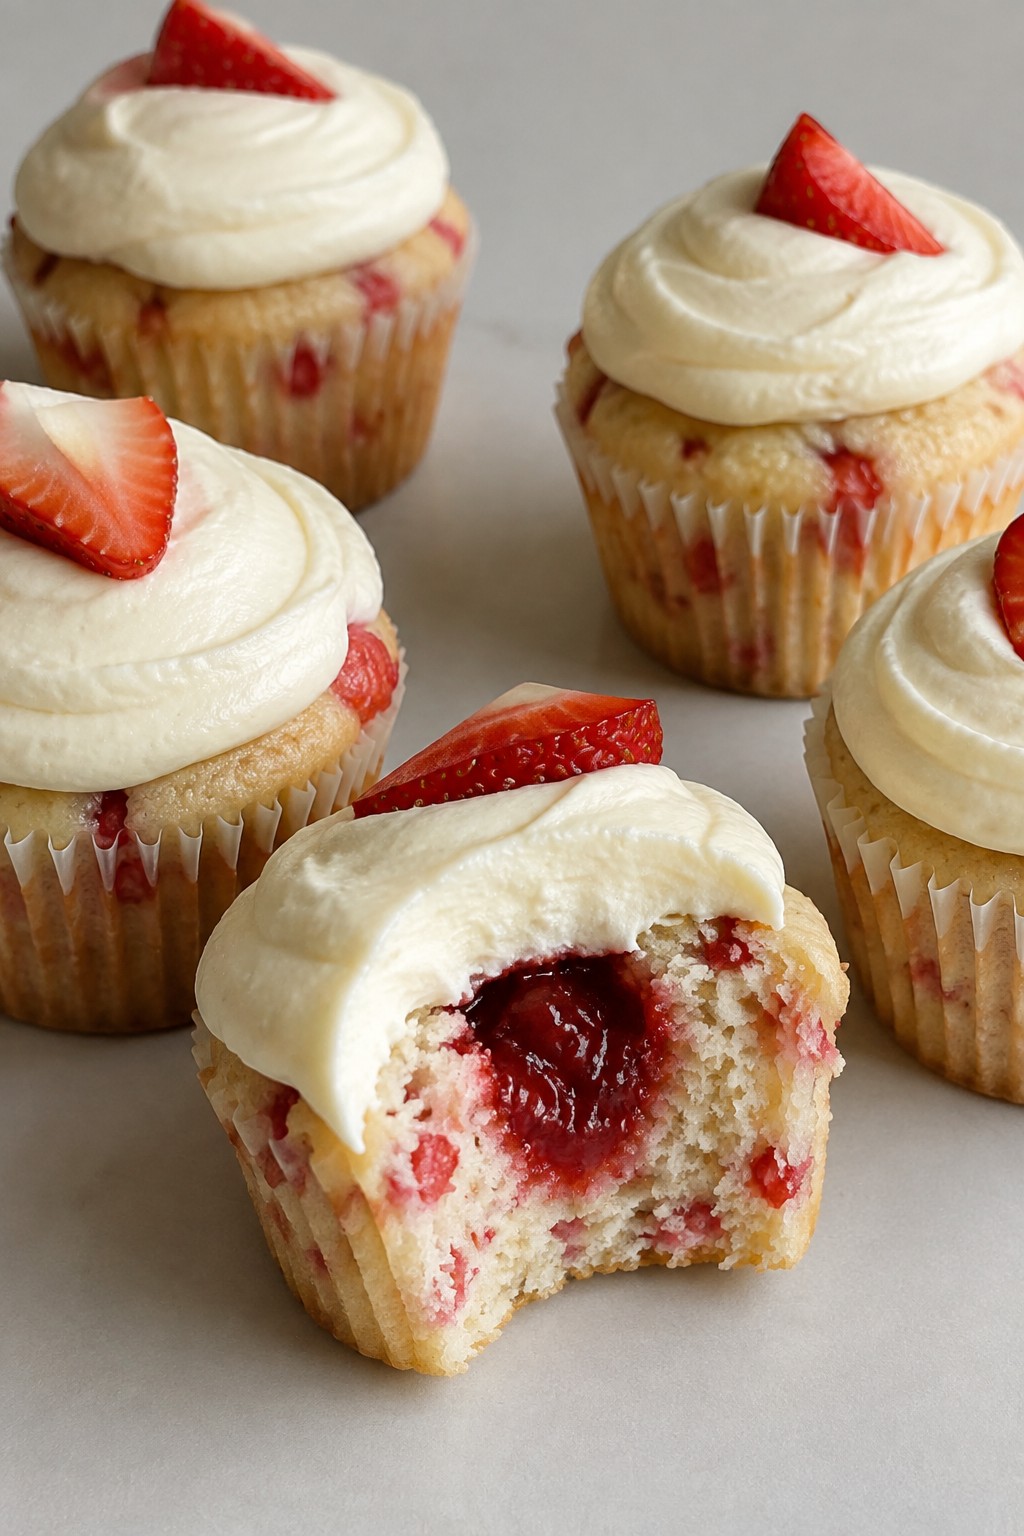
Vampire Bite Strawberry Cupcakes
These cupcakes bring a fun twist to a strawberry dessert with a hidden red center that shows up when you take a bite. They travel well to potlucks and tend to go quickly because of the bright flavor and simple look. The cake stays light while the filling adds a juicy burst that pairs with sweet frosting.
The recipe works best for small gatherings or as one of several dessert options on a shared table. Fresh strawberry pieces and jam keep the taste bright without needing fancy tools.
Serves 4 people.
Ingredients
- 1 cup all-purpose flour
- 1/2 cup granulated sugar
- 1 teaspoon baking powder
- 1/4 teaspoon salt
- 1/4 cup unsalted butter, softened
- 1/2 cup milk
- 1 large egg
- 1/2 cup diced fresh strawberries
- 1/4 cup strawberry jam
- 1/2 cup powdered sugar
- 2 tablespoons unsalted butter, softened
- 1/2 teaspoon vanilla extract
Instructions
- Preheat the oven to 350 degrees and line a cupcake pan with four paper liners.
- In a mixing bowl, stir together the flour, granulated sugar, baking powder, and salt.
- Add the softened butter, milk, and egg to the dry mix. Beat until the batter is smooth.
- Fold in the diced strawberries until they are evenly spread through the batter.
- Spoon the batter into the prepared liners, filling each about two-thirds full.
- Bake for 18 to 20 minutes until a toothpick comes out clean. Let the cupcakes cool completely.
- Use a small knife to cut a shallow hole in the center of each cooled cupcake. Fill each hole with one tablespoon of strawberry jam.
- In a clean bowl, beat the powdered sugar, remaining butter, and vanilla until the frosting is creamy.
- Spread or pipe the frosting over the filled cupcakes.
Extra Tips
Pipe the frosting in a thin layer so the jam center stays visible when someone bites into the cupcake. If the jam seems too thick, stir in a teaspoon of water before filling. Store leftovers in an airtight container at room temperature for up to two days.Course: Dessert Cuisine: American Equipment: Mixing Bowl, Cupcake Pan, Whisk
