
Halloween parties need treats that are easy to put together and that people will actually eat. I gathered 14 ideas here that work well for a crowd and do not require fancy skills. Most use common ingredients and can be made ahead so you are not stuck in the kitchen all day. You will find a mix of sweet options that fit different tastes and party sizes. Pick the ones that match what you already have planned for the night.
Helpful Tips Before You Start
A few simple steps will help your Halloween treats hold up well at a party.
Prep Components Early
Mix doughs, bake bases, or prepare fillings the day before. This cuts down on last-minute work when you need to finish multiple recipes.
Keep Portions Small
Make treats in two-bite sizes so guests can try several options without committing to one large item.
Choose Sturdy Options
Focus on recipes that stay firm at room temperature and do not need constant refrigeration once set out on the table.
Note Common Allergens
Label each treat with key ingredients like nuts or gluten. This helps guests with restrictions pick safely and quickly.
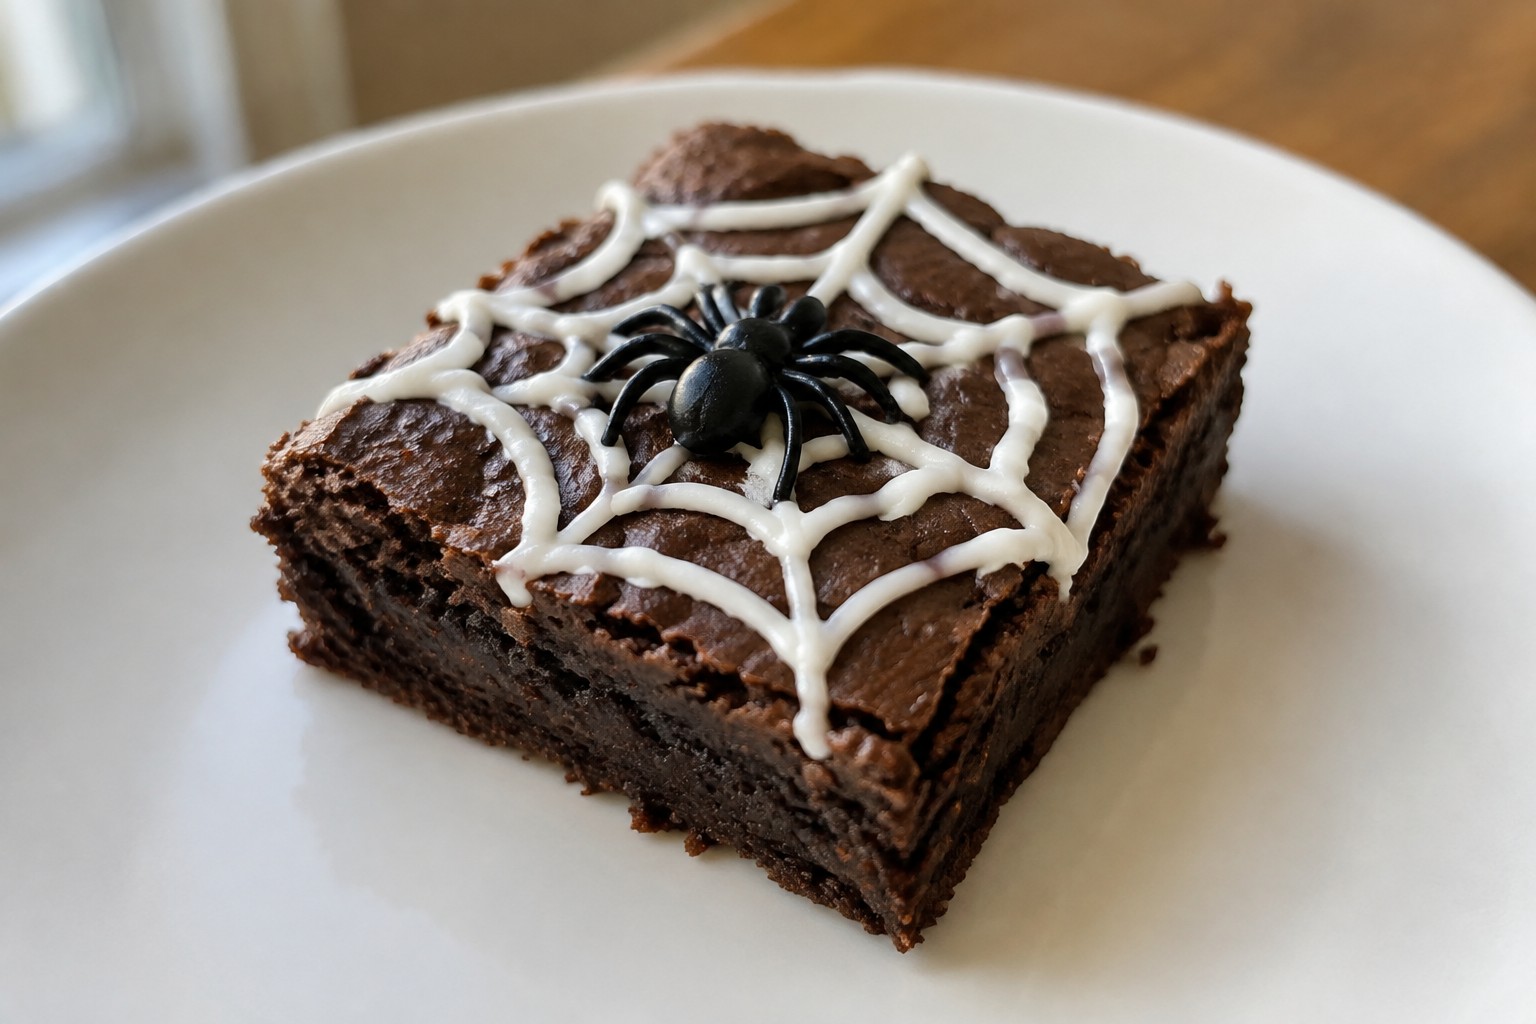
Spooky Spiderweb Fudge Brownies
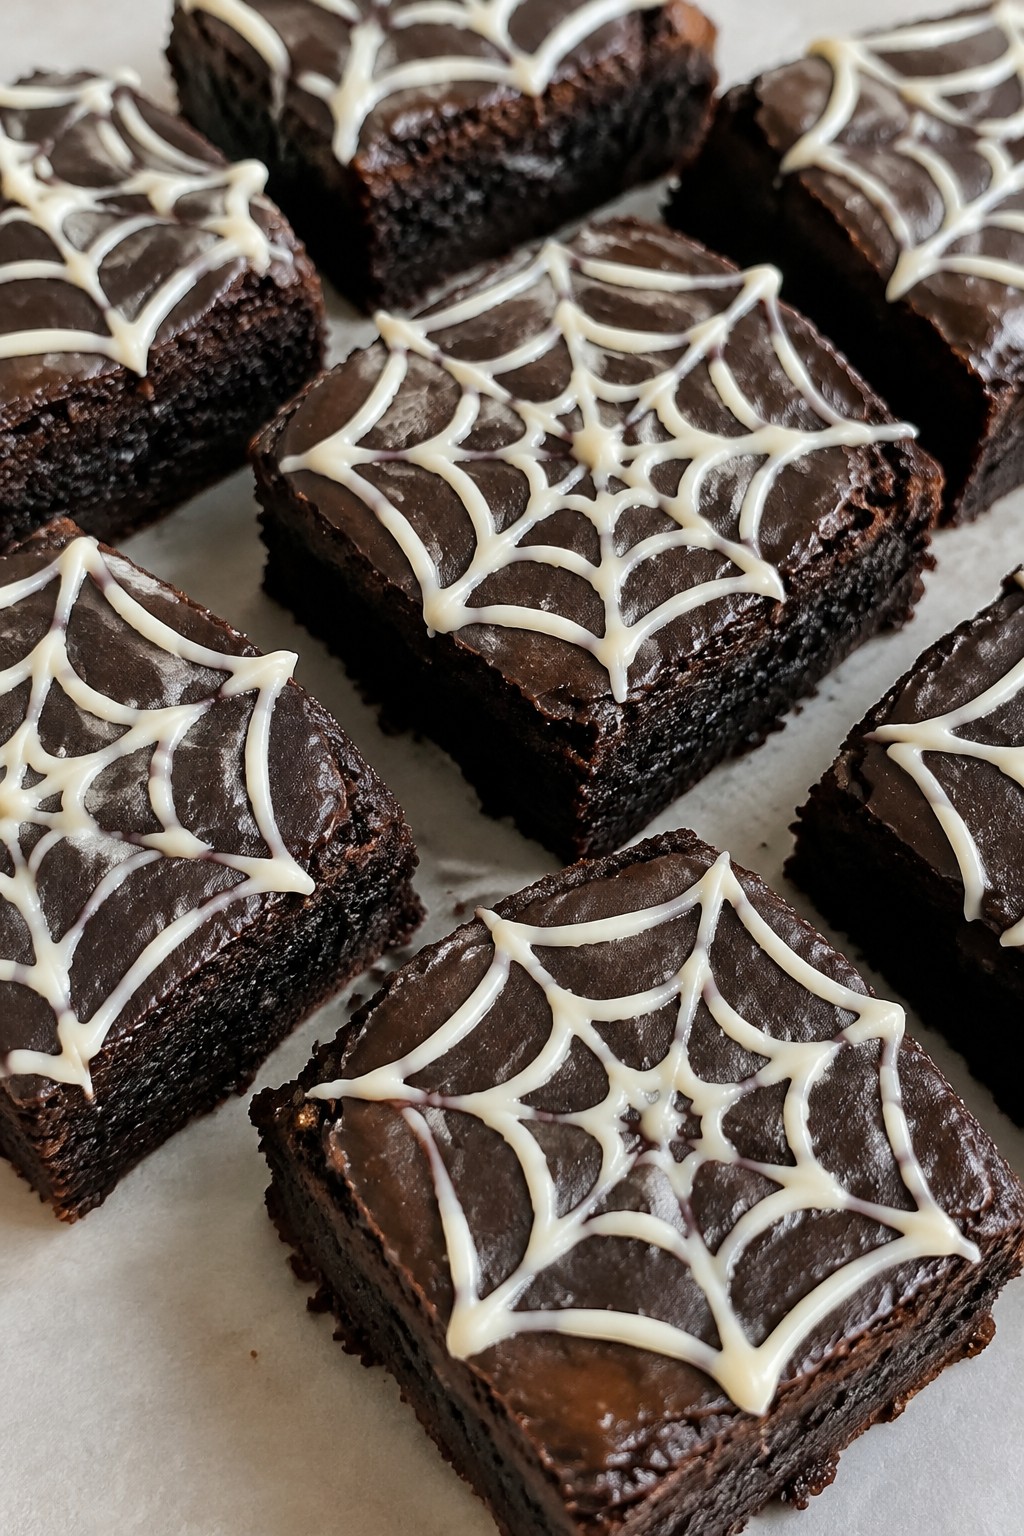
These brownies stand out at Halloween parties with a simple white chocolate web piped over the top. The base stays dense and fudgy with plenty of chocolate flavor, so they feel like a treat guests reach for first.
They work well when you need a make-ahead dessert that travels easily to a gathering. The web design holds up once the brownies cool, giving a clear Halloween look without extra decorations.
Serves 4 people.
Ingredients
- ½ cup unsalted butter
- 1 cup semisweet chocolate chips
- ¾ cup granulated sugar
- 2 large eggs
- 1 teaspoon vanilla extract
- ½ cup all-purpose flour
- ¼ cup unsweetened cocoa powder
- ¼ teaspoon salt
- ⅓ cup white chocolate chips
Instructions
- Preheat the oven to 350°F and line a small 8×8 baking pan with parchment paper.
- In a saucepan over low heat, melt the butter and semisweet chocolate chips together, stirring until smooth. Remove from heat.
- Stir the sugar into the chocolate mixture until combined. Add the eggs one at a time, mixing well after each. Stir in the vanilla extract.
- Add the flour, cocoa powder, and salt. Mix just until no dry streaks remain.
- Pour the batter into the prepared pan and spread evenly. Bake for 22-25 minutes until a toothpick comes out with a few moist crumbs.
- Let the brownies cool completely in the pan. Melt the white chocolate chips in the microwave in 20-second bursts, stirring between each until smooth.
- Spoon the melted white chocolate into a small zip-top bag, snip a tiny corner, and pipe concentric circles over the brownies. Drag a toothpick from the center outward to form the web pattern. Cut into squares once set.
Extra Tips
Melt the white chocolate slowly to keep it thick enough for clean lines on the web. Store leftovers in an airtight container at room temperature for up to three days. If the brownies feel too soft when cutting, chill them for 20 minutes first to firm the chocolate web.Course: Dessert Cuisine: American Equipment: Saucepan, Mixing Bowl, 8×8 Baking Pan, Piping Bag or Zip-top Bag
Mummy Jalapeño Popper Skulls
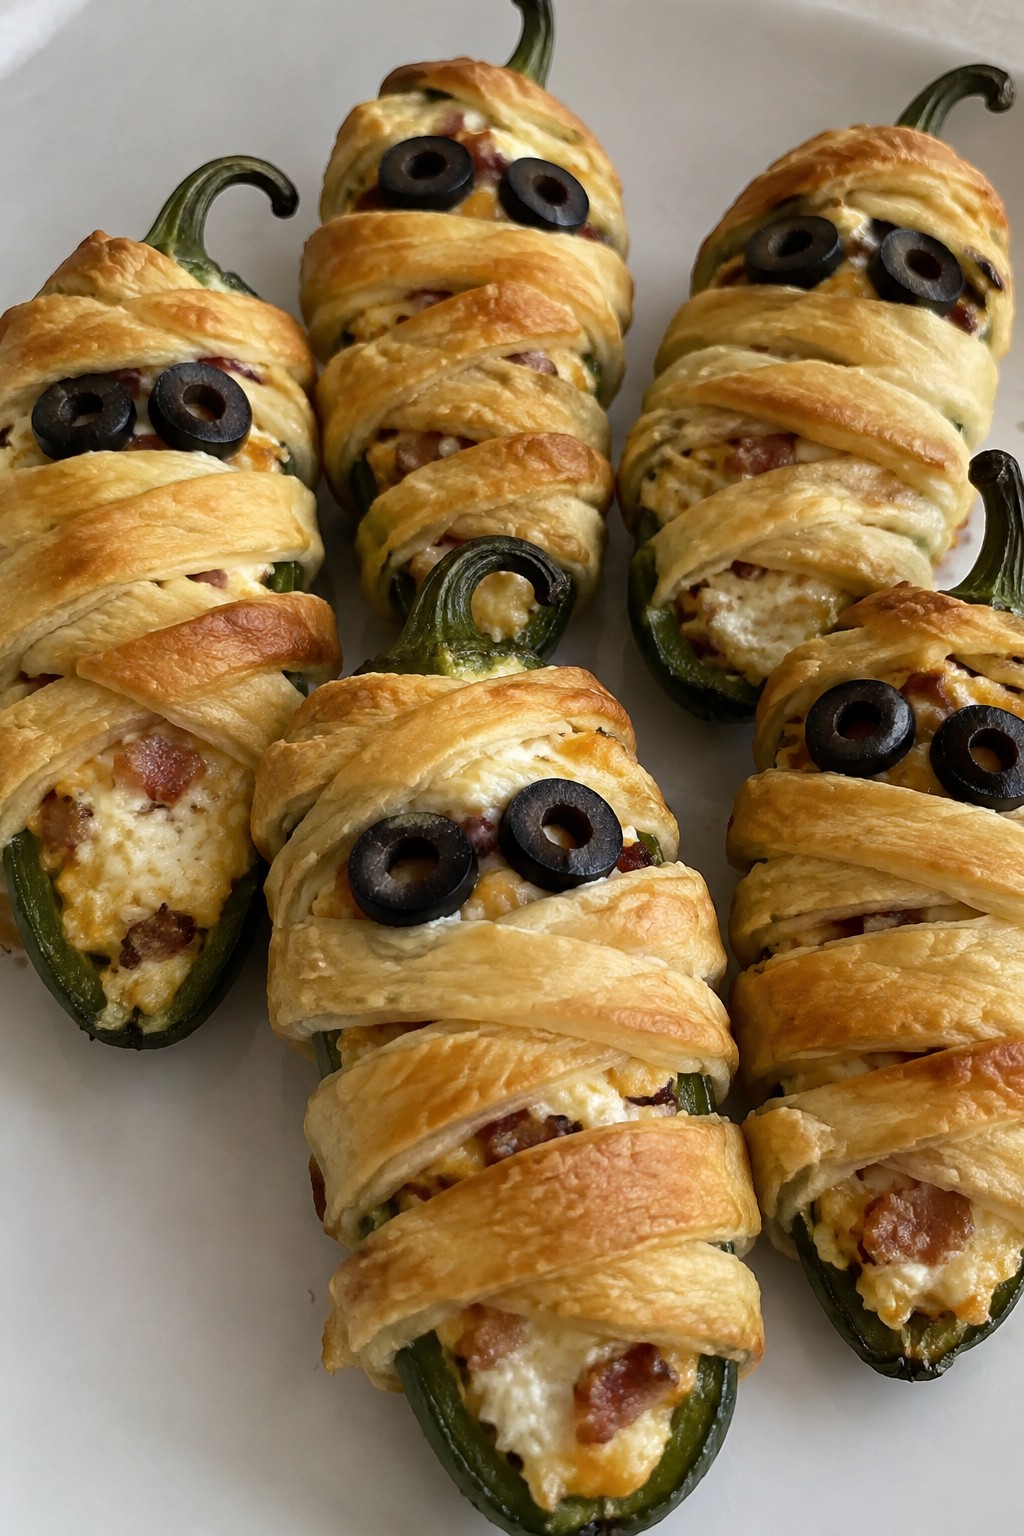
These mummy jalapeño popper skulls bring a fun Halloween twist to a classic appetizer. The creamy, spicy filling stays tucked inside each pepper while strips of dough create a wrapped look that fits the theme. They work well for parties because they bake in one batch and hold up on a platter.
The texture combines a soft, cheesy center with a crisp outer layer. Guests get the familiar popper taste with added visual appeal that suits spooky gatherings.
Serves 4 people.
Ingredients
- 8 large jalapeño peppers
- 8 ounces cream cheese, softened
- 1 cup shredded cheddar cheese
- 1/2 cup cooked bacon, crumbled
- 1 teaspoon garlic powder
- 1 package crescent roll dough
- 16 sliced black olives
Instructions
- Preheat the oven to 375 degrees and line a baking sheet with parchment paper.
- Cut each jalapeño in half lengthwise and remove the seeds and membranes.
- In a mixing bowl, combine the cream cheese, cheddar cheese, crumbled bacon, and garlic powder until evenly mixed.
- Spoon the filling into each jalapeño half and smooth the tops.
- Unroll the crescent roll dough and cut it into thin strips.
- Wrap the dough strips across each filled pepper to create a mummy effect, leaving space for the olive eyes.
- Place the wrapped peppers on the baking sheet and add two olive slices to each one as eyes.
- Bake for 15 to 18 minutes until the dough turns golden brown and the peppers soften.
Extra Tips
Use room temperature cream cheese so it mixes smoothly with the other fillings. If you want less heat, soak the cleaned peppers in cold water for 10 minutes before stuffing. These taste best served warm right after baking, and any leftovers can be reheated in a 350 degree oven for a few minutes to restore crispness.Course: Appetizer Cuisine: American Equipment: Baking sheet, Mixing bowl, Knife
Ghostly Meringue Kisses with Chocolate Dip
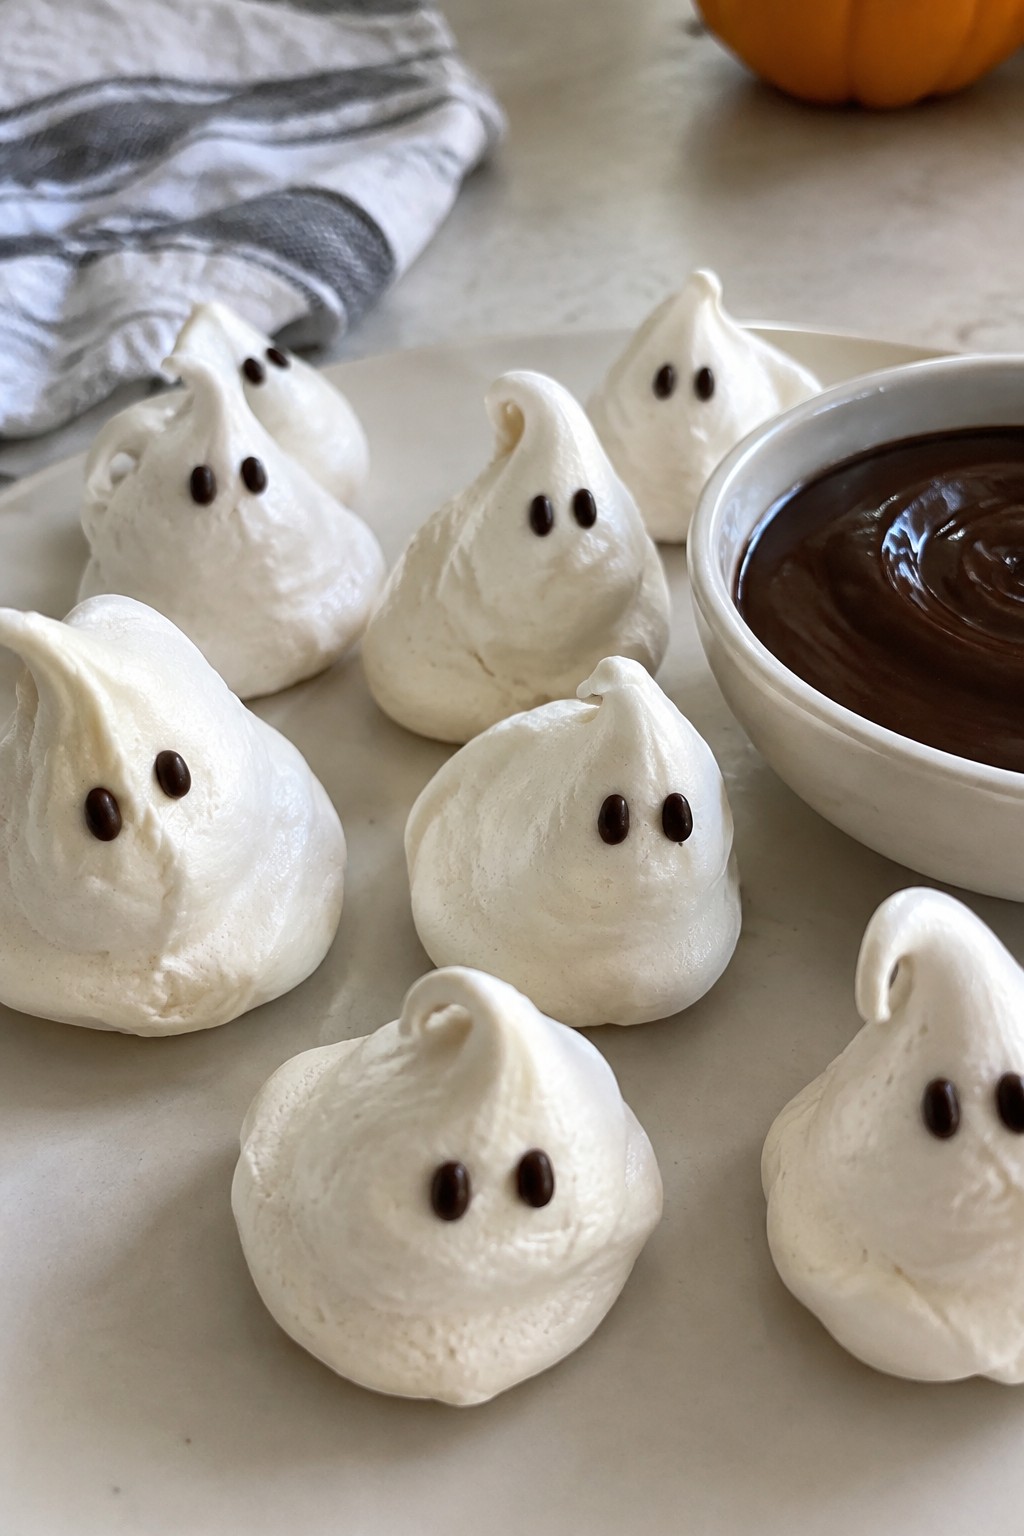
These ghostly meringue kisses add a light, spooky element to any Halloween party table. Shaped into small ghost forms and served with a simple chocolate dip, they give guests a hands-on treat that feels festive without much fuss.
The meringues turn out crisp on the outside with a soft center. Vanilla keeps the flavor mild and sweet, while the chocolate provides a rich contrast that works well for dipping.
Serves 4 people.
Ingredients
- 2 large egg whites
- 1/2 cup granulated sugar
- 1/2 teaspoon vanilla extract
- 1 cup semisweet chocolate chips
Instructions
- Preheat the oven to 200 degrees Fahrenheit and line a baking sheet with parchment paper.
- In a clean mixing bowl, beat the egg whites with an electric mixer on medium speed until soft peaks form.
- Gradually add the sugar while beating on high speed until stiff, glossy peaks form, then mix in the vanilla extract.
- Spoon the meringue into a piping bag fitted with a round tip and pipe small ghost shapes onto the prepared baking sheet.
- Bake for 1 hour and 30 minutes, then turn off the oven and let the meringues cool inside with the door closed for 30 minutes.
- Place the chocolate chips in a microwave-safe bowl and heat in 20-second intervals, stirring between each, until fully melted and smooth.
- Serve the cooled meringue kisses with the melted chocolate for dipping.
Extra Tips
Pipe the ghosts with a slightly wider base and two small peaks for the head to help them hold their shape during baking. Store any leftovers in an airtight container at room temperature to keep the meringues crisp. If the chocolate thickens while sitting, rewarm it briefly in the microwave before serving.Course: Dessert Cuisine: American Equipment: Electric mixer, Mixing bowl, Piping bag, Baking sheet, Microwave-safe bowl
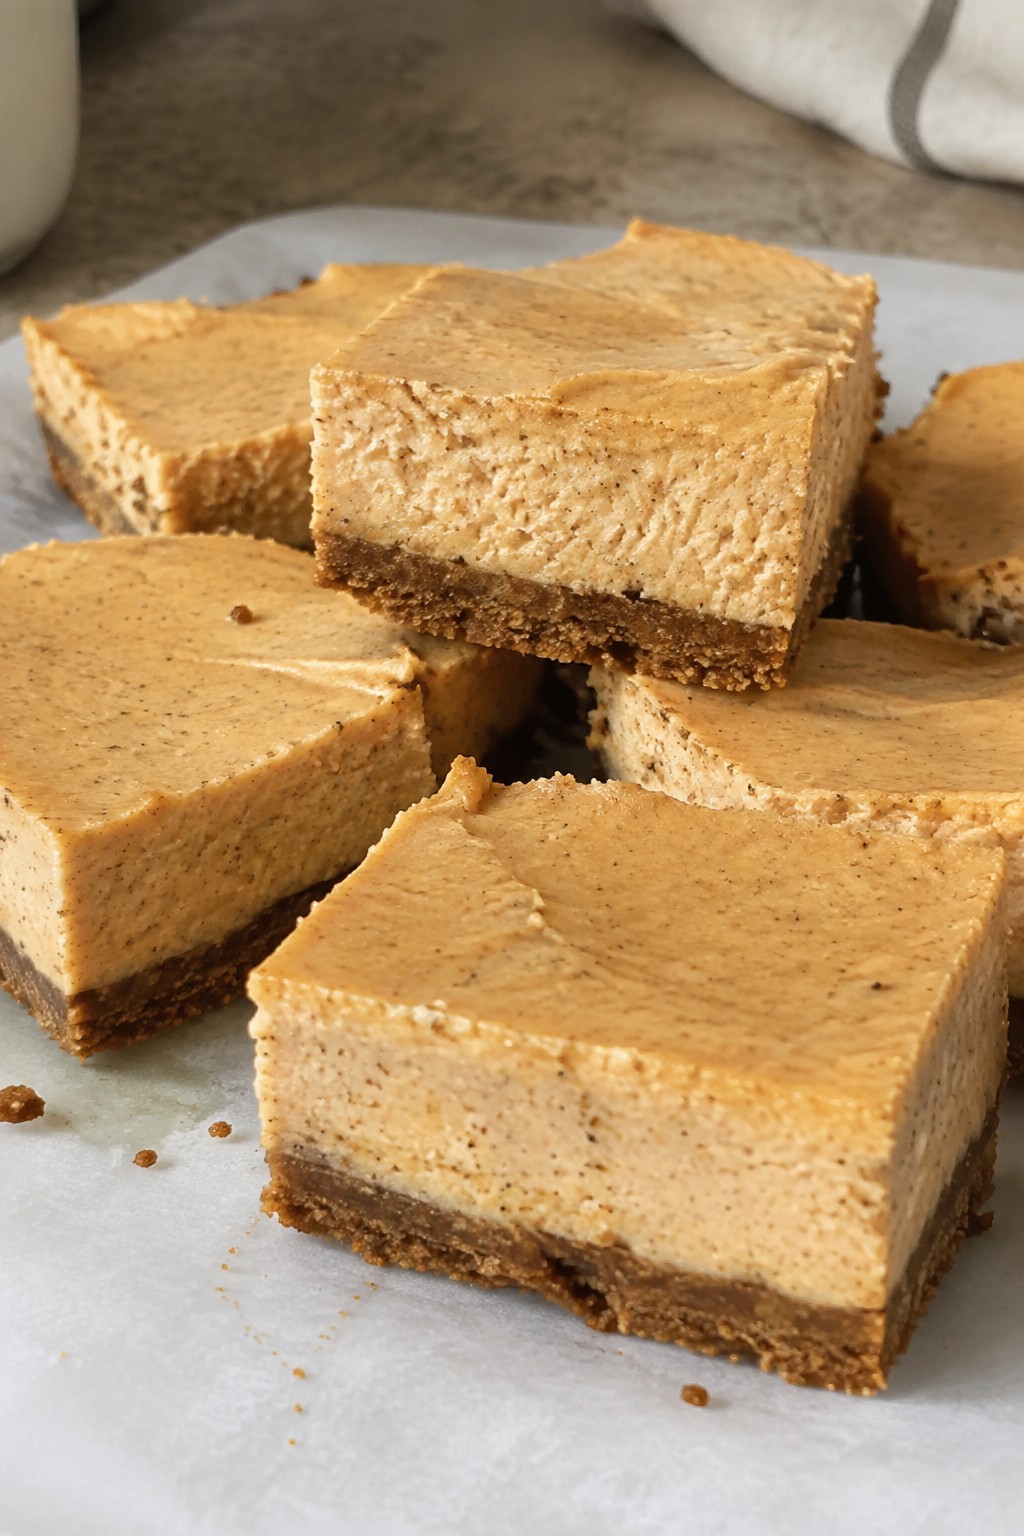
Pumpkin Spice Cheesecake Bars
These Pumpkin Spice Cheesecake Bars combine a spiced pumpkin filling with a simple graham crust. They fit well at Halloween parties because guests can grab one without needing a plate or fork. The bars offer a creamy center and a crisp base with warm spice notes.
The flavor balances sweet pumpkin with cream cheese tang. This makes them a reliable choice when you want a seasonal dessert that travels easily to a gathering.
Serves 4 people.
Ingredients
- 1 cup graham cracker crumbs
- 4 tablespoons unsalted butter, melted
- 8 ounces cream cheese, softened
- 1/3 cup granulated sugar
- 3/4 cup pumpkin puree
- 1 large egg
- 1 1/2 teaspoons pumpkin pie spice
- 1 teaspoon vanilla extract
Instructions
- Preheat the oven to 350 degrees F and line an 8×8 inch baking pan with parchment paper.
- Stir the graham cracker crumbs and melted butter together in a bowl until the crumbs are evenly coated. Press the mixture firmly into the bottom of the prepared pan.
- Beat the cream cheese and sugar in a mixing bowl until smooth. Add the pumpkin puree, egg, pumpkin pie spice, and vanilla extract. Mix until fully combined and no streaks remain.
- Pour the filling over the crust and spread it into an even layer.
- Bake for 25 to 28 minutes, until the center is set but still slightly jiggly. Remove the pan from the oven and let the bars cool to room temperature.
- Transfer the pan to the refrigerator and chill for at least two hours before cutting into four bars.
Extra Tips
Chill the bars fully before slicing so the filling holds its shape when you lift them from the pan. Store leftovers in an airtight container in the refrigerator for up to three days. If the pumpkin pie spice blend tastes mild after baking, a light dusting of extra spice on top before serving can sharpen the flavor without changing the texture.Course: Dessert Cuisine: American Equipment: Mixing Bowl, 8×8 Inch Baking Pan, Electric Mixer
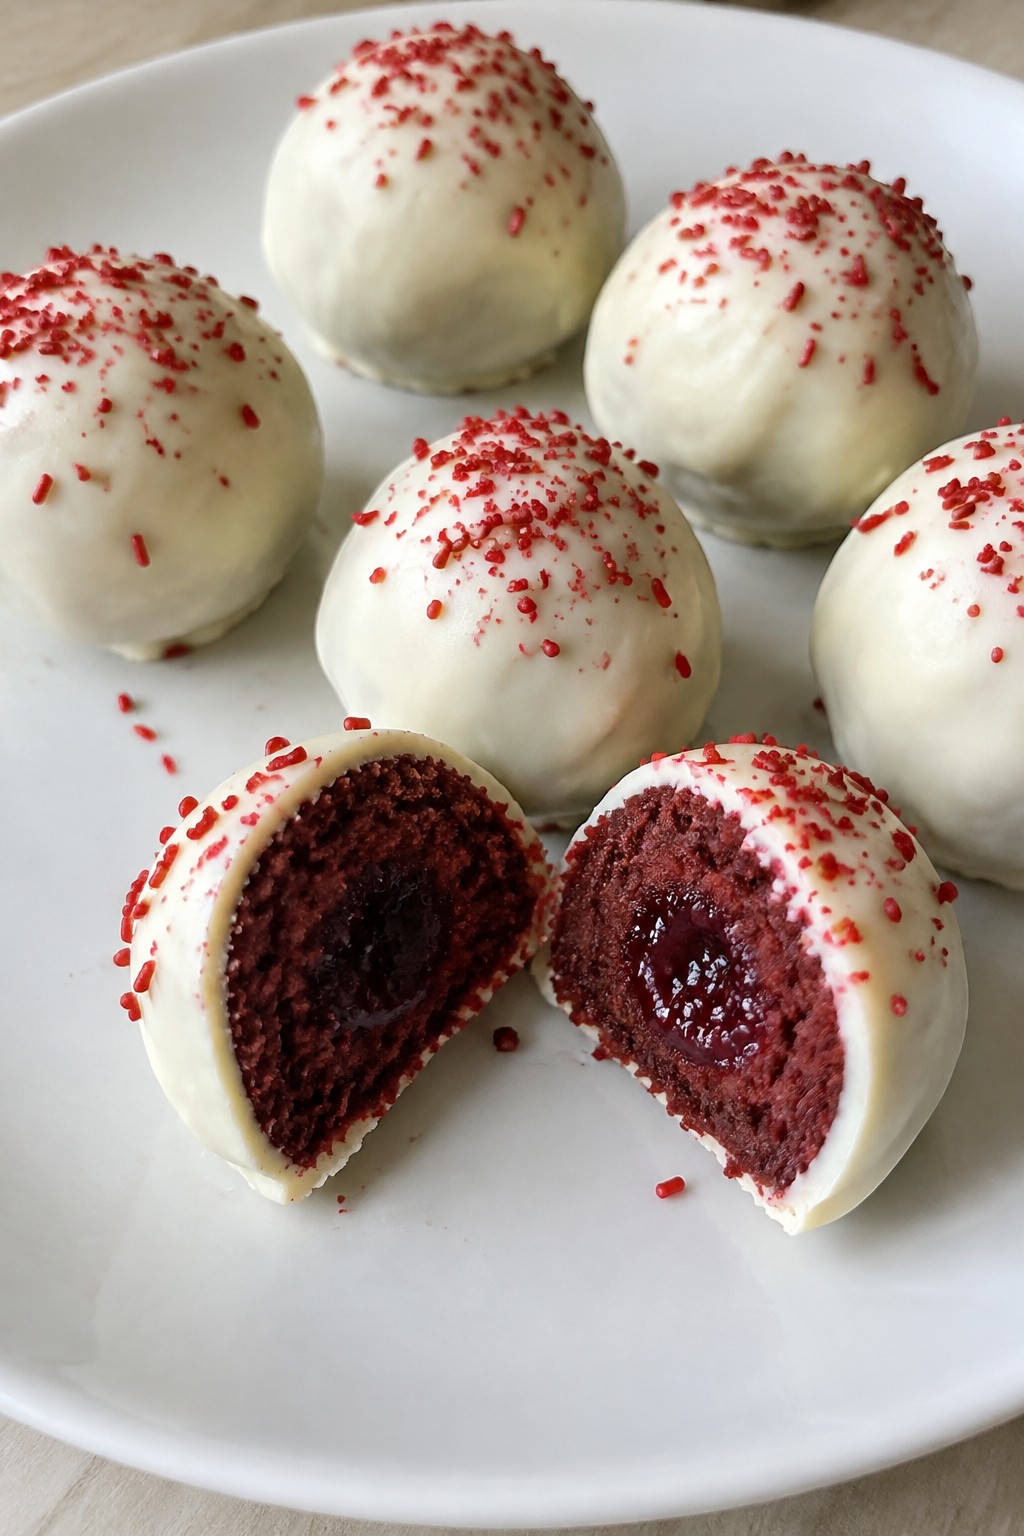
Vampire Bite Red Velvet Truffles
These Vampire Bite Red Velvet Truffles add a fun twist to a classic party dessert. The red velvet base stays moist and creamy thanks to the cream cheese, while a hidden raspberry center gives each bite a bright fruit note that fits the Halloween theme. They hold up well on a dessert table and travel easily to gatherings.
The white chocolate coating sets firm, making them simple to pick up without mess. Red sprinkles on top keep the look festive without extra work.
Serves 4 people.
Ingredients
- 2 cups red velvet cake crumbs
- 4 ounces cream cheese, softened
- 1/4 cup raspberry jam
- 8 ounces white chocolate chips
- 1 tablespoon coconut oil
- 2 tablespoons red sprinkles
Instructions
- Combine the red velvet cake crumbs and softened cream cheese in a mixing bowl until the mixture holds together when pressed.
- Scoop out portions of the mixture and flatten each one slightly. Place a small amount of raspberry jam in the center, then fold the mixture around it and roll into a ball. Repeat until all the mixture is used.
- Place the formed balls on a baking sheet lined with parchment paper and chill in the refrigerator for at least 30 minutes to firm up.
- Melt the white chocolate chips with the coconut oil in a microwave-safe bowl, stirring every 30 seconds until smooth.
- Dip each chilled ball into the melted white chocolate using a fork, letting excess drip off before returning it to the baking sheet.
- Immediately sprinkle red sprinkles over the tops of the coated truffles while the chocolate is still wet.
- Return the tray to the refrigerator until the coating sets completely.
Extra Tips
Chill the truffles longer if your kitchen is warm so the jam stays sealed inside during dipping. Use a fork rather than your fingers for even coating and less mess. Store any leftovers in an airtight container in the fridge for up to three days.Course: Dessert Cuisine: American Equipment: Mixing Bowl, Baking Sheet, Microwave-Safe Bowl
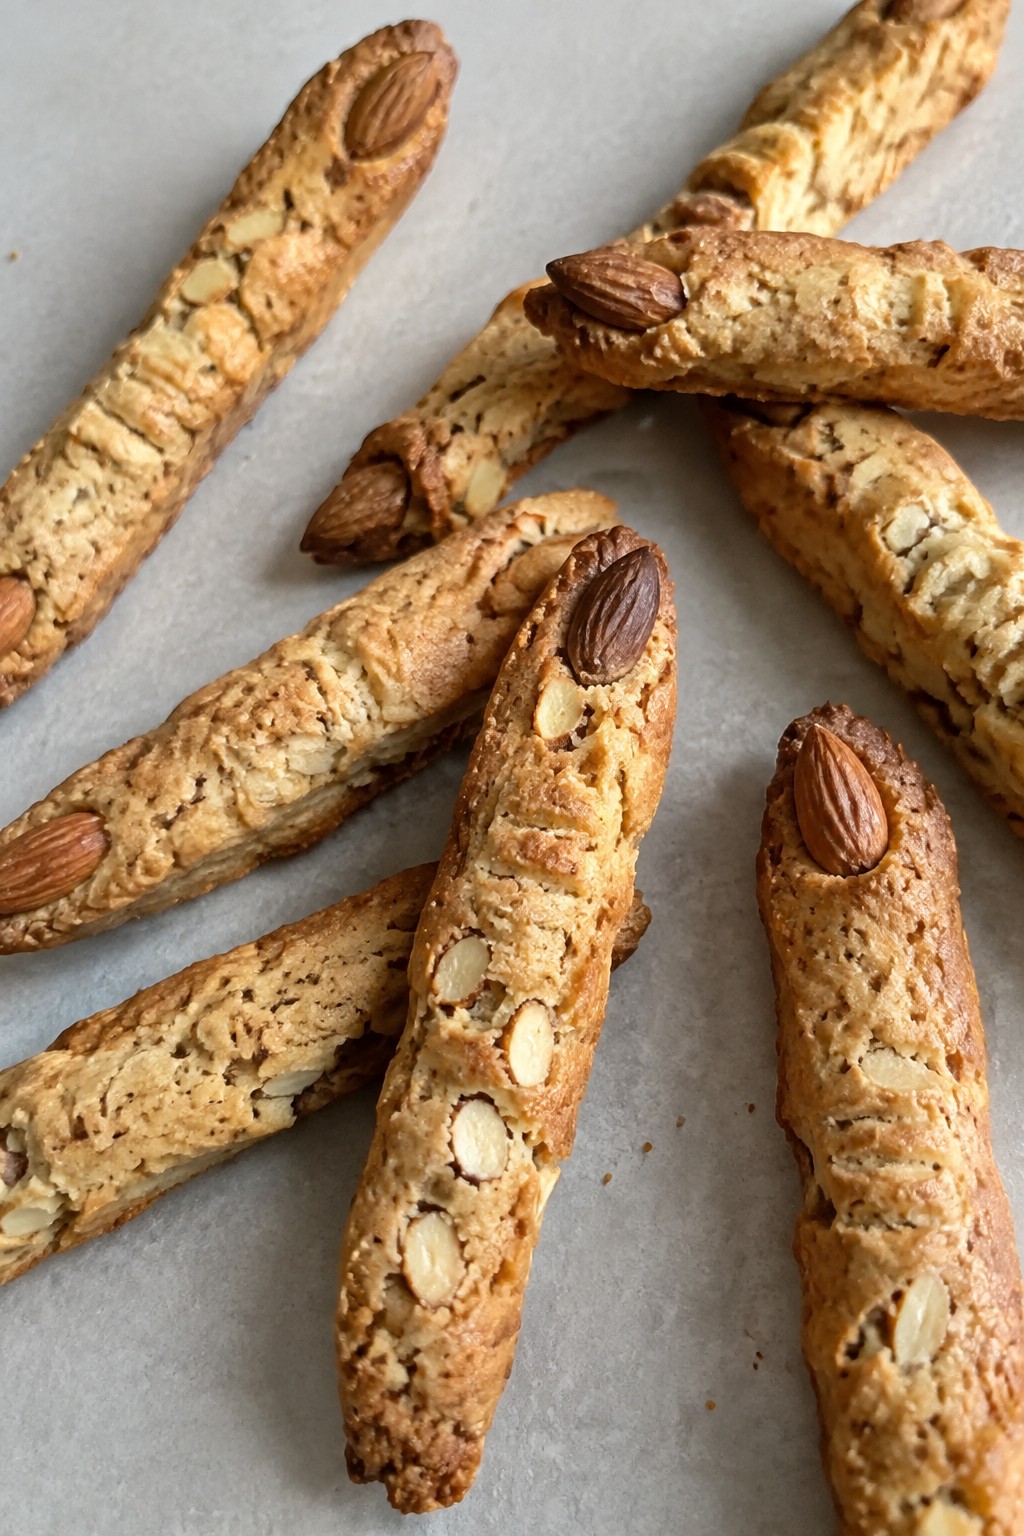
Witch Finger Almond Biscotti
These witch finger almond biscotti add a fun Halloween element to any party table. Shape the dough into long fingers and use whole almonds as nails for a simple spooky look that still tastes like a classic treat.
The biscotti bake up crisp with a light almond flavor. They hold up well on a dessert platter and pair nicely with coffee or hot chocolate for guests to grab.
Serves 4 people.
Ingredients
- 1 cup all-purpose flour
- 1/2 cup granulated sugar
- 1 large egg
- 1/4 cup unsalted butter, softened
- 1/2 cup whole almonds
- 1 teaspoon almond extract
- 1/2 teaspoon baking powder
- 1/4 teaspoon salt
Instructions
- Preheat the oven to 350 degrees and line a baking sheet with parchment paper.
- In a mixing bowl, whisk together the flour, baking powder, and salt.
- In a separate bowl, cream the softened butter with the sugar until light. Add the egg and almond extract and mix until smooth.
- Combine the wet and dry mixtures to form a dough. Divide the dough into four equal portions.
- Roll each portion into a long, thin log about the length of a finger. Place the logs on the prepared baking sheet and press one almond firmly into the tip of each log to resemble a fingernail.
- Bake for 20 minutes until the logs are lightly golden. Remove from the oven, let cool for 10 minutes, then slice each log on a diagonal into finger segments.
- Return the slices to the baking sheet and bake for another 10 minutes to crisp both sides.
Extra Tips
Press the almonds in place before the first bake so they stay secure once the biscotti cool. For extra crunch, use raw almonds rather than roasted ones. Store leftovers in an airtight container at room temperature for up to a week to keep them crisp.Course: Dessert Cuisine: Italian Equipment: Mixing Bowl, Baking Sheet, Parchment Paper
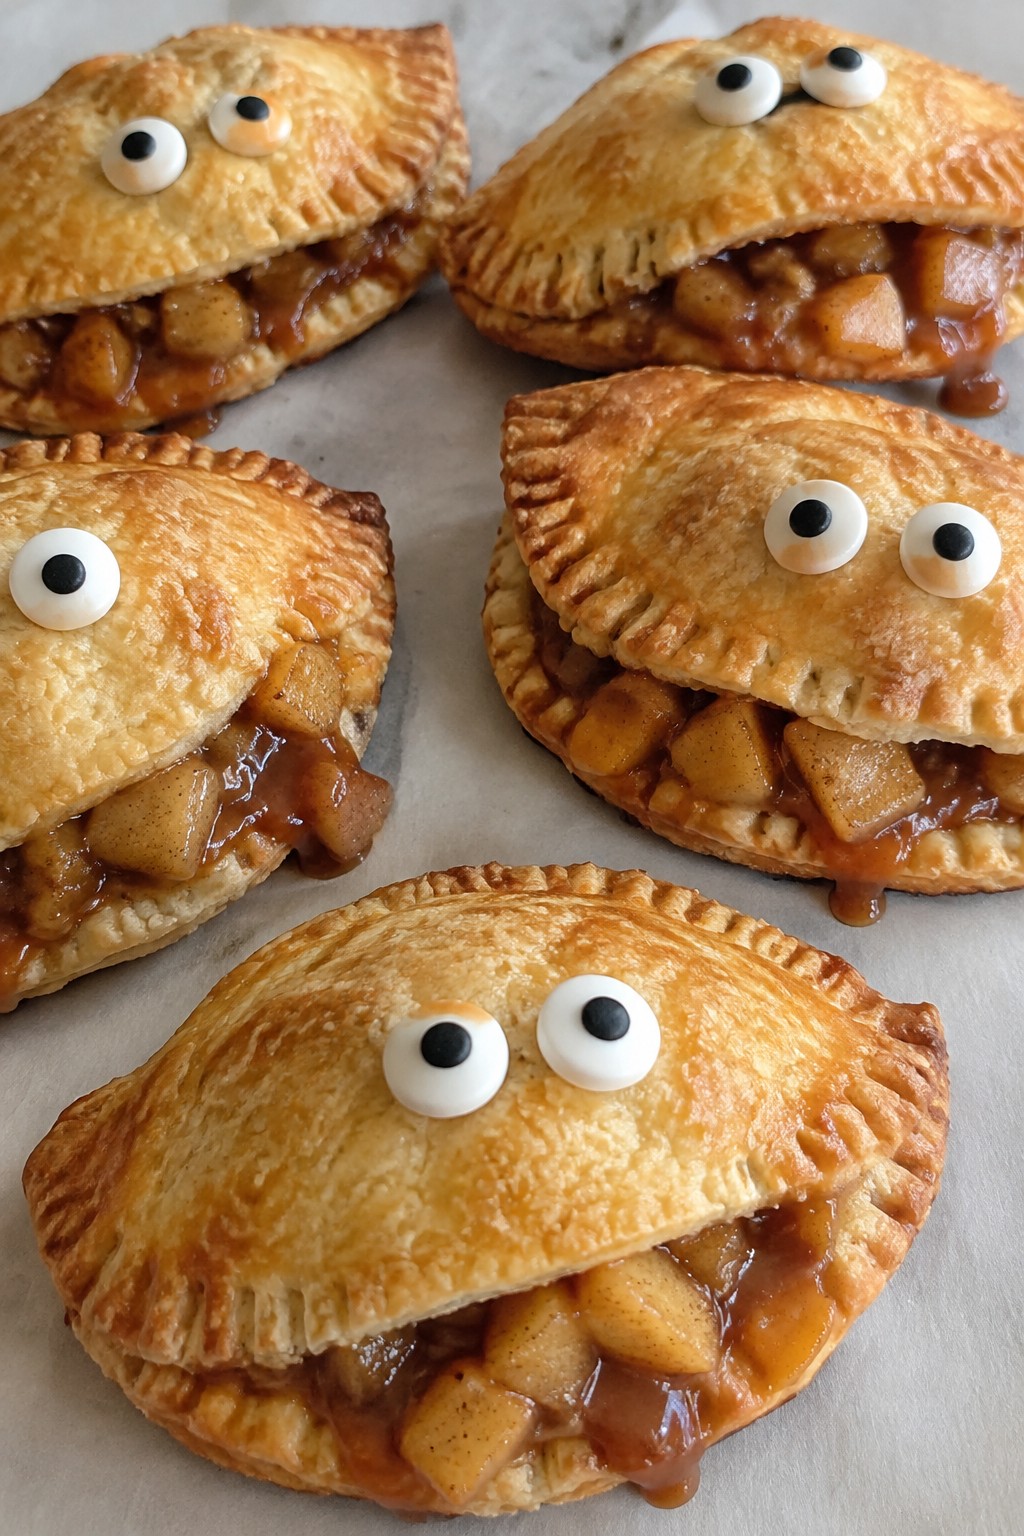
Caramel-Stuffed Monster Apple Hand Pies
These hand pies combine tart apples and gooey caramel in a flaky crust. The monster theme comes from simple candy eyes added after baking, which makes them stand out on a party table without extra effort.
They work well for Halloween because they are easy to hold and eat while guests mingle. The balance of sweet caramel and spiced apple gives them a familiar fall taste that feels festive.
Serves 4 people.
Ingredients
- 2 refrigerated pie crusts
- 2 medium apples, peeled and diced
- 1/2 cup caramel bits
- 1 teaspoon ground cinnamon
- 1 tablespoon sugar
- 1 egg, beaten
- 8 candy eyes
Instructions
- Preheat the oven to 375 degrees and line a baking sheet with parchment paper.
- Unroll both pie crusts on a lightly floured surface and cut out eight 4-inch circles.
- In a bowl, toss the diced apples with cinnamon and sugar until evenly coated.
- Place four circles on the baking sheet. Spoon a small amount of apple mixture into the center of each, then add about 1 tablespoon of caramel bits on top.
- Brush the edges of each filled circle with beaten egg. Top with the remaining circles and crimp the edges with a fork to seal.
- Cut small slits in the top of each pie for steam. Brush the tops with more egg wash and sprinkle lightly with sugar.
- Bake for 18 to 22 minutes until the crust is golden brown. Remove from the oven and let cool for 10 minutes.
- Press two candy eyes onto each warm pie to create the monster faces.
Extra Tips
Use a thick caramel sauce or bits that hold their shape during baking so the filling stays inside the pies. If the candy eyes do not stick well after cooling, add a small dot of extra caramel as glue. Store leftovers in an airtight container at room temperature for up to two days and warm briefly in the microwave before serving.Course: Dessert Cuisine: American Equipment: Baking sheet, Mixing bowl, Knife
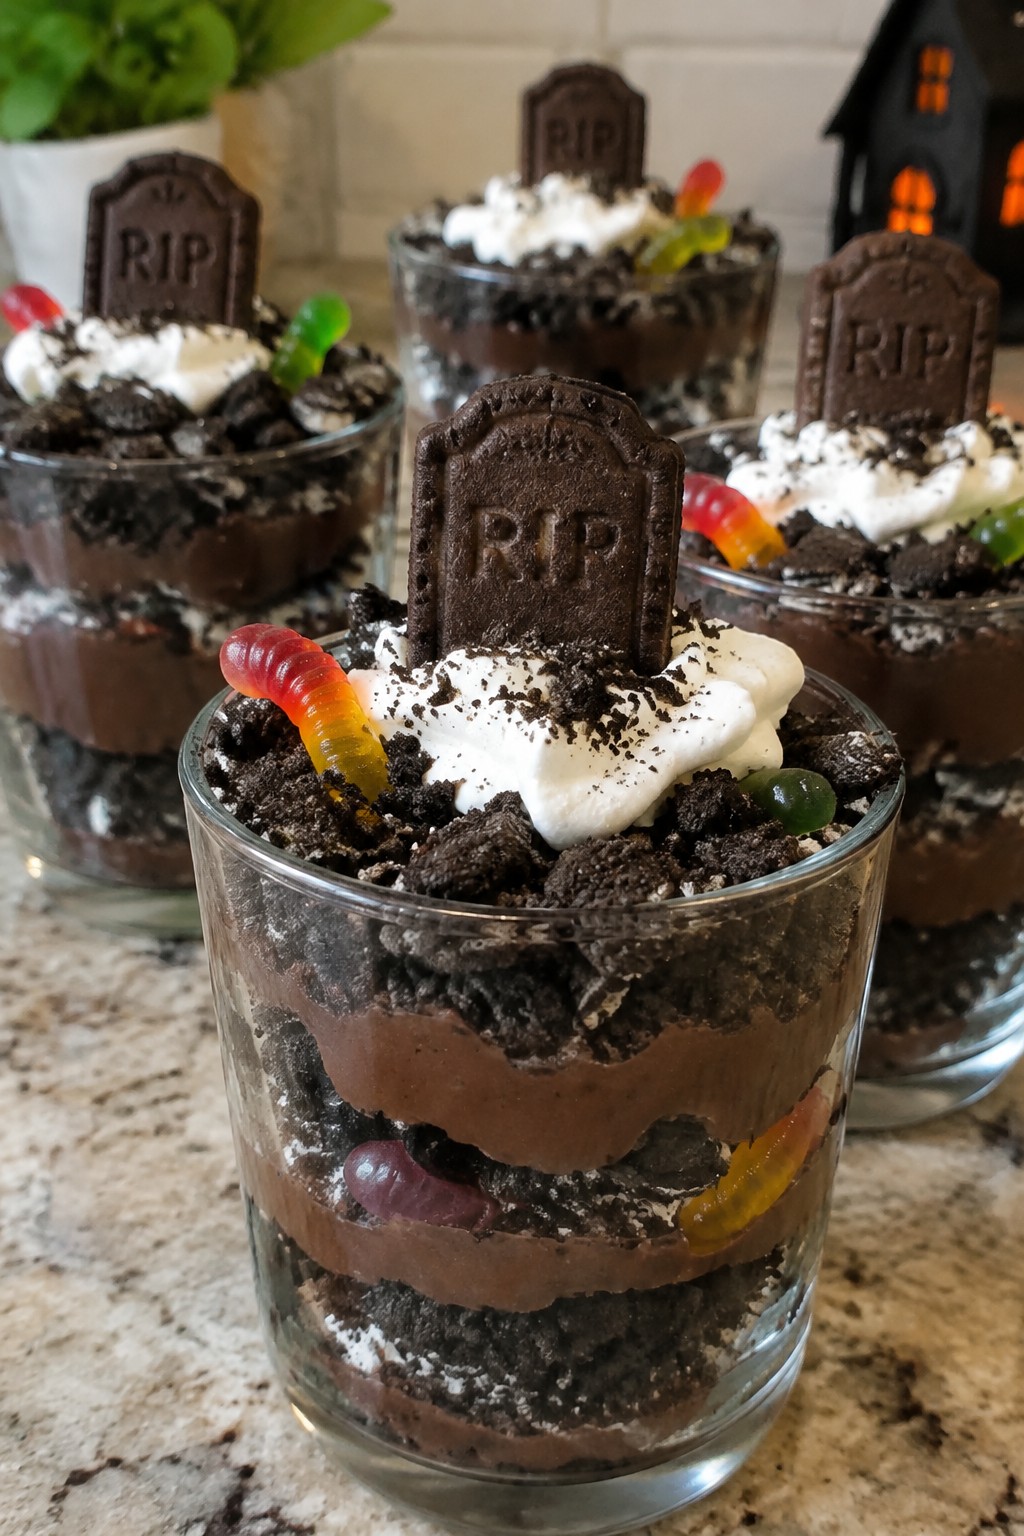
Graveyard Dirt Pudding Parfaits
These parfaits bring a fun graveyard theme to any Halloween party table. Layers of chocolate pudding and crushed cookies create a rich, creamy base with a crunchy contrast that guests enjoy. They work well for make-ahead prep and fit easily into a spread of spooky sweets.
The flavor stays classic with deep chocolate notes and a light whipped topping. Gummy worms add a playful touch that ties into the theme without overpowering the dessert.
Serves 4 people.
Ingredients
- 1 (3.9-ounce) package instant chocolate pudding mix
- 2 cups cold milk
- 20 chocolate sandwich cookies, crushed and divided
- 1 cup whipped topping
- 12 gummy worms
- 4 rectangular chocolate cookies
Instructions
- Pour the cold milk into a mixing bowl and add the instant chocolate pudding mix. Whisk for two minutes until the mixture thickens.
- Place eight crushed chocolate sandwich cookies into the bottom of each of four parfait glasses.
- Spoon a layer of pudding over the cookies in each glass. Repeat with another layer of the remaining crushed cookies and then more pudding.
- Top each parfait with a dollop of whipped topping.
- Insert three gummy worms into the topping on each glass. Stand one rectangular chocolate cookie upright in the back of each glass to act as a gravestone.
Extra Tips
Crush the cookies just before assembly to keep them from absorbing moisture and losing crunch. If the rectangular cookies do not stand well, press them gently into the whipped topping. These parfaits hold up in the fridge for a few hours before serving, but add the gummy worms right before guests arrive to prevent them from softening.Course: Dessert Cuisine: American Equipment: Mixing Bowl, Whisk, 4 Parfait Glasses
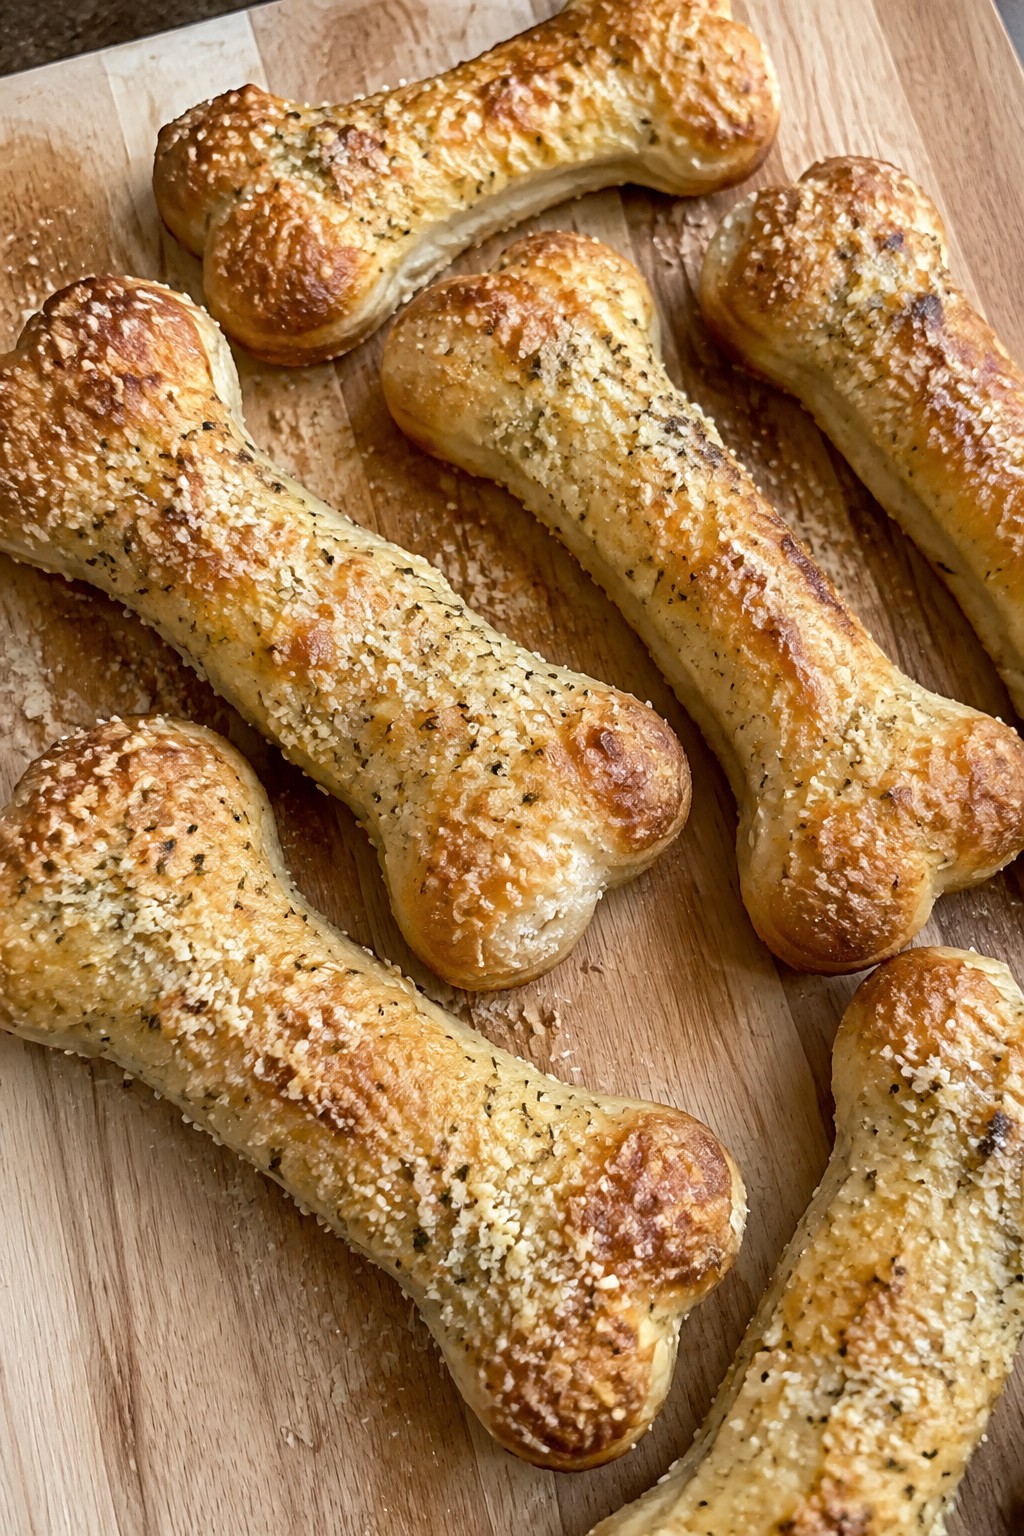
Skeleton Bone Parmesan Breadsticks
These skeleton bone Parmesan breadsticks bring a playful Halloween element to any party table. Shaped to look like bones and finished with a savory cheese coating, they stand out among sweet treats while still feeling festive and fun.
They bake up with a crisp edge and a soft, chewy center that guests enjoy warm. The garlic and Parmesan flavor keeps them simple yet satisfying for snacking throughout the evening.
Serves 4 people.
Ingredients
- 1 pound pizza dough
- 3 tablespoons unsalted butter, melted
- 1/3 cup grated Parmesan cheese
- 1 teaspoon garlic powder
- 1/2 teaspoon salt
Instructions
- Preheat the oven to 400°F and line a baking sheet with parchment paper.
- Divide the pizza dough into 8 equal pieces. Roll each piece into a 6-inch rope, then gently press the ends to create bone-like knobs while keeping the center slightly thinner.
- Arrange the shaped dough pieces on the prepared baking sheet, spacing them evenly.
- Brush each breadstick with the melted butter, then sprinkle evenly with the garlic powder, salt, and grated Parmesan cheese.
- Bake for 12 to 15 minutes until the breadsticks turn golden brown. Remove from the oven and let them cool for a few minutes before serving.
Extra Tips
Room-temperature dough shapes more easily into the bone form without tearing. For extra crunch, press a little more Parmesan on top right after baking while the surface is still warm. These breadsticks lose crispness if stored, so make them close to serving time and keep any leftovers in a loosely covered container at room temperature for up to one day.Course: Appetizer Cuisine: American Equipment: Baking Sheet, Parchment Paper, Pastry Brush
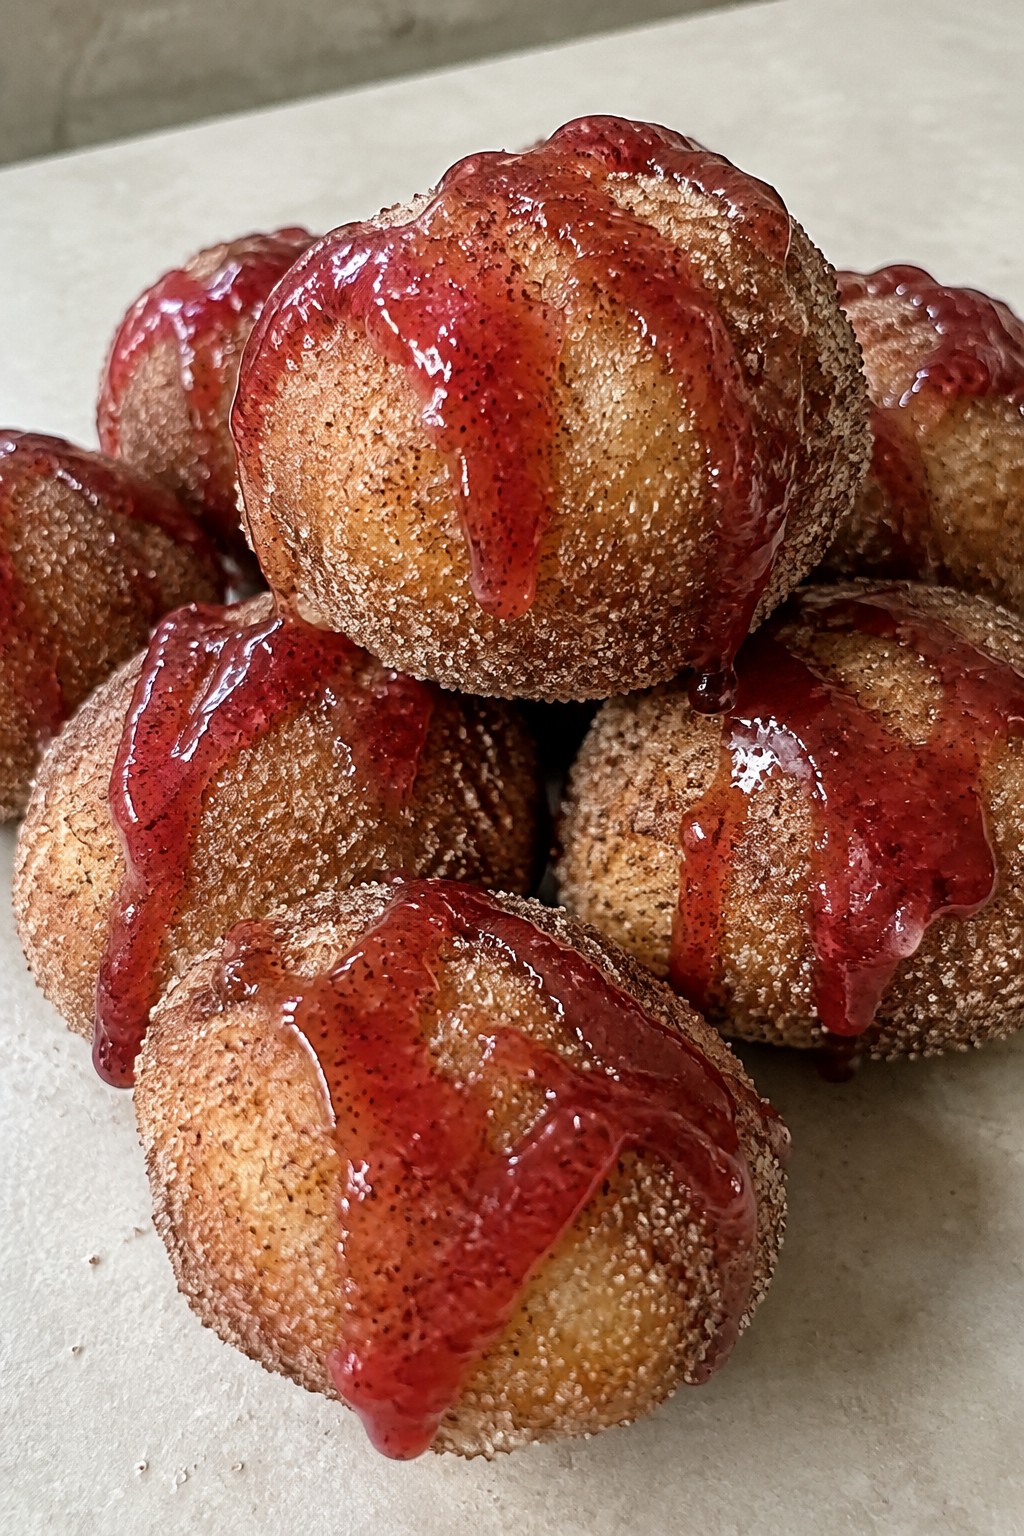
Poison Apple Cinnamon Donut Holes
These Poison Apple Cinnamon Donut Holes combine warm cinnamon with tart apple cider for a treat that fits right into any Halloween spread. The red glaze gives them a glossy, eerie look that stands out on a party table. Guests enjoy the soft centers and the slight crunch from the cinnamon sugar coating.
The recipe keeps things simple with pantry staples and a quick fry. It works well as a make-ahead snack that still feels fresh when served.
Serves 4 people.
Ingredients
- 1 cup all-purpose flour
- 2 tablespoons granulated sugar
- 1 teaspoon ground cinnamon
- 1 1/2 teaspoons baking powder
- 1/2 cup apple cider
- 1 large egg
- 2 tablespoons unsalted butter, melted
- Vegetable oil, for frying
- 1 cup powdered sugar
- 3 tablespoons apple cider
- Red food coloring
- 1/4 cup cinnamon sugar
Instructions
- Whisk the flour, granulated sugar, ground cinnamon, and baking powder in a medium bowl until evenly mixed.
- Stir in the apple cider, egg, and melted butter until a thick batter forms.
- Heat vegetable oil in a deep pot to 350 degrees. Drop rounded teaspoonfuls of batter into the oil and fry in batches until golden on all sides.
- Remove the donut holes with a slotted spoon and drain briefly on paper towels.
- While still warm, roll each donut hole in cinnamon sugar.
- Mix the powdered sugar with the remaining apple cider and a few drops of red food coloring to make a smooth glaze.
- Dip the tops of the coated donut holes into the red glaze and let the excess drip off. Place on a rack until the glaze sets.
Extra Tips
Fry in small batches so the oil temperature stays steady and the donut holes cook evenly inside. If the glaze thickens while you work, add a splash more apple cider to loosen it. Store leftovers in an airtight container at room temperature and refresh them for a minute in a warm oven before serving.
Course: Dessert Cuisine: American Equipment: Mixing bowl, Deep pot, Slotted spoon, Wire rackBat-Shaped Black Cocoa Cookies
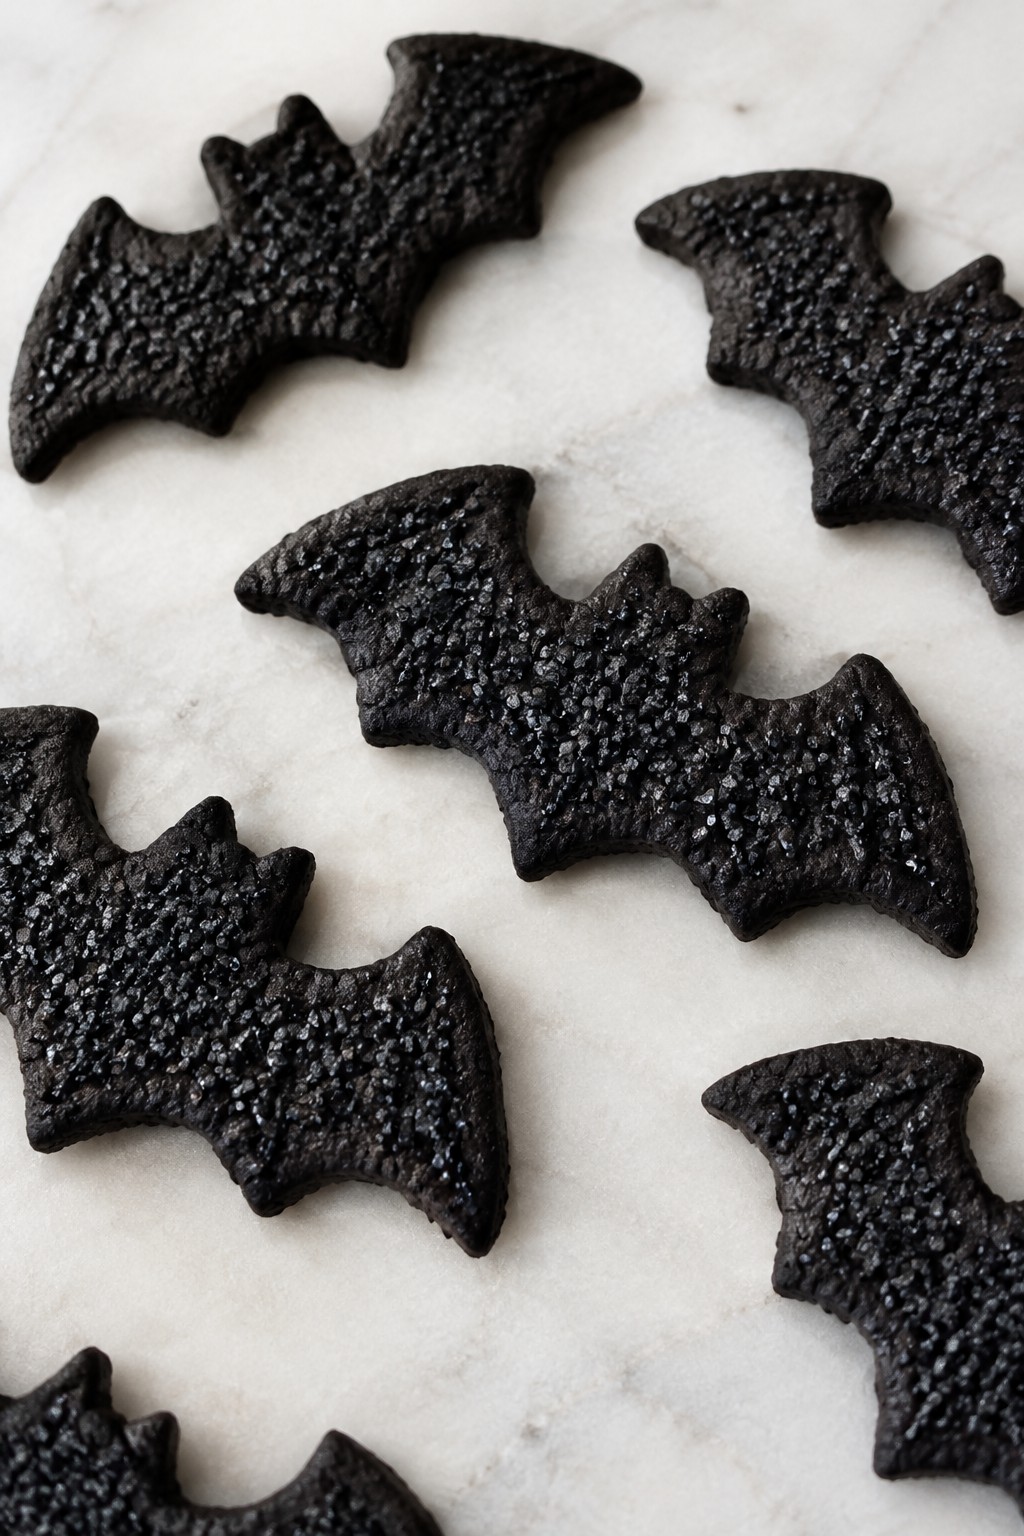
These cookies stand out at Halloween parties because the black cocoa gives them a deep dark color that looks striking on a dessert table. They bake up with crisp edges and a slightly chewy center that holds up well when stacked on platters or packed into treat bags.
They suit casual gatherings or kid-friendly events where you want something simple to make ahead and easy for guests to grab.
Serves 4 people.
Ingredients
- 1 cup all-purpose flour
- 1/4 cup black cocoa powder
- 1/2 teaspoon baking powder
- 1/4 teaspoon salt
- 1/2 cup unsalted butter, softened
- 1/2 cup granulated sugar
- 1 large egg
- 1 teaspoon vanilla extract
- 2 tablespoons black sanding sugar
Instructions
- Whisk the flour, black cocoa powder, baking powder, and salt in a medium bowl until evenly combined.
- In a separate bowl, beat the softened butter and granulated sugar together until light and fluffy.
- Add the egg and vanilla extract to the butter mixture and stir until smooth.
- Gradually mix the dry ingredients into the wet ingredients until a soft dough forms.
- Place the dough between two sheets of parchment paper and roll it to about 1/4 inch thick.
- Cut out bat shapes with a cookie cutter, place them on a baking sheet lined with parchment, and sprinkle the tops with black sanding sugar.
- Bake at 350 degrees Fahrenheit for 10 to 12 minutes until the edges feel firm. Let the cookies cool on the sheet for 5 minutes before moving them to a rack.
Extra Tips
Roll the dough between parchment to keep it from sticking and to make clean bat cutouts without extra flour. Store cooled cookies in an airtight container at room temperature for up to four days to maintain their crisp texture. If the dough feels too soft after mixing, chill it for 20 minutes before rolling.Course: Dessert Cuisine: American Equipment: Mixing Bowl, Baking Sheet, Rolling Pin, Cookie Cutter
Bloody Eyeball Caprese Skewers
These Bloody Eyeball Caprese Skewers add a light, fresh option to a Halloween party table. They keep the familiar Caprese flavors while using a simple trick to create an eye-like look that fits the holiday theme.
The skewers work well as an easy appetizer that guests can grab without plates. Juicy tomatoes and creamy mozzarella stay balanced with the basil, and the balsamic adds a slight tang without overpowering the dish.

Serves 4 people.
Ingredients
- 12 bocconcini mozzarella balls
- 12 pitted black olives
- 24 cherry tomatoes
- 12 fresh basil leaves
- 12 wooden skewers
- 2 tablespoons balsamic glaze
- Salt and black pepper to taste
Instructions
- Slice each black olive crosswise to make thin rounds. Press one round gently onto the top of each mozzarella ball to form the pupil of the eyeball.
- Thread one cherry tomato onto a skewer, followed by a basil leaf, then one prepared mozzarella eyeball, and finish with a second cherry tomato.
- Repeat with the remaining ingredients until all 12 skewers are assembled.
- Arrange the skewers on a serving platter. Drizzle the balsamic glaze evenly over the tops.
- Sprinkle lightly with salt and black pepper just before serving.
Extra Tips
Make the eyeballs right before assembly so the olive slices stay in place. If you prepare the skewers ahead, cover them loosely and add the balsamic glaze at the last minute to keep the mozzarella from softening. Use a thick glaze rather than thin vinegar so it clings and creates the bloody look without running.Course: Appetizer Cuisine: Italian Equipment: Sharp knife, Wooden skewers, Serving platter
Frankenstein Matcha Rice Krispie Squares
These green squares give the classic Rice Krispie treat a Halloween makeover with a subtle matcha flavor. The bright color and simple face details make them stand out on a party table without much extra work.
They come together quickly and hold their shape well, so you can prepare them a day ahead. The crispy cereal and chewy marshmallow base stay light while the matcha adds a mild earthiness that balances the sweetness.

Serves 4 people.
Ingredients
- 2 tablespoons unsalted butter
- 2 cups mini marshmallows
- 1 tablespoon matcha powder
- 3 cups Rice Krispies cereal
- 1/4 cup dark chocolate chips
- 8 candy eyes
Instructions
- Grease a small square pan or line it with parchment paper. Set it aside.
- Melt the butter in a medium saucepan over low heat. Add the mini marshmallows and stir until fully melted and smooth.
- Remove the pan from the heat and stir in the matcha powder until the mixture turns an even green color.
- Add the Rice Krispies cereal and stir quickly until every piece is coated.
- Press the mixture firmly into the prepared pan using a greased spatula or your hands. Let it cool and set for 20 minutes.
- Cut the cooled block into four squares. Melt the dark chocolate chips in a microwave or small bowl. Use a spoon or piping bag to draw hair and stitch lines on each square, then press two candy eyes into place on each one.
Extra Tips
Press the mixture firmly so the squares hold their shape when you add the chocolate details. Melt the chocolate just until smooth to avoid a thick layer that cracks when you cut or serve. Store any leftovers in an airtight container at room temperature for up to two days.Course: Dessert Cuisine: American Equipment: Medium saucepan, Mixing bowl, Square pan, Spatula
Cauldron Caramel Popcorn Clusters
These clusters bring a fun Halloween twist to classic caramel popcorn. The dark coating gives them a cauldron-like look that fits right in at any party spread. Guests like the mix of crunchy popcorn and sticky caramel in easy-to-grab bites.
The recipe works well for make-ahead snacks or last-minute party additions. It delivers sweet, buttery flavor with a light crisp texture that holds up in bowls or on platters.

Serves 4 people.
Ingredients
- 8 cups popped popcorn
- 1/2 cup unsalted butter
- 1 cup packed brown sugar
- 1/4 cup light corn syrup
- 1/2 teaspoon salt
- 1 teaspoon vanilla extract
- 1/2 teaspoon baking soda
- 1/4 teaspoon black gel food coloring
- 2 tablespoons Halloween sprinkles
Instructions
- Preheat the oven to 250 degrees F and line a baking sheet with parchment paper.
- Place the popped popcorn in a large bowl and set it aside.
- In a medium saucepan, melt the butter over medium heat. Stir in the brown sugar, corn syrup, and salt. Bring the mixture to a boil and cook for 4 minutes without stirring.
- Remove the pan from the heat. Stir in the vanilla extract, baking soda, and black gel food coloring until the mixture turns smooth and dark.
- Pour the caramel over the popcorn and toss quickly to coat every piece.
- Spread the coated popcorn onto the prepared baking sheet. Bake for 20 minutes, stirring once halfway through.
- Remove the sheet from the oven and let the popcorn cool for 10 minutes. While it is still slightly warm, break it into clusters and scatter the Halloween sprinkles on top.
Extra Tips
Let the clusters cool fully before storing them in an airtight container so they stay crisp. If the caramel firms up too fast while mixing, work in batches to keep the coating even. Skip the sprinkles if you want a simpler look, or swap them for a light chocolate drizzle once the clusters have cooled.Course: Snack Cuisine: American Equipment: Large bowl, Medium saucepan, Baking sheet, Parchment paper
