
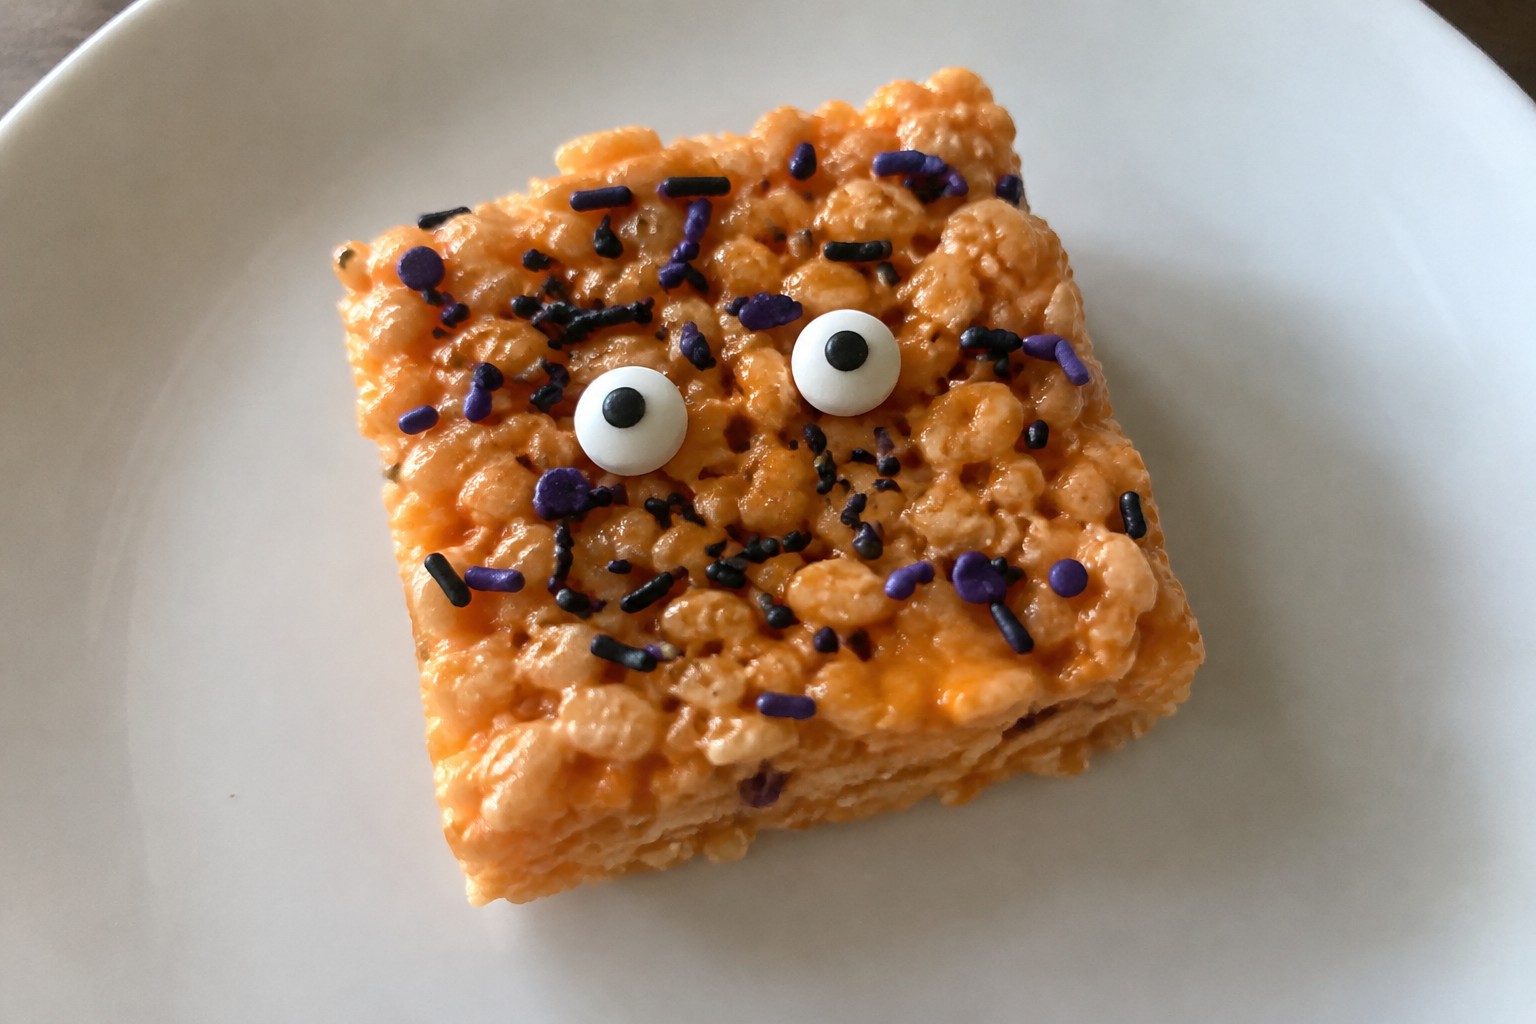
Halloween is coming up fast and it helps to have some simple treat ideas on hand. These recipes use basic ingredients and take little time to put together. You can make them for parties, school events, or just for fun at home. Each one is quick enough to fit into a busy day.
Helpful Tips Before You Start
These steps will keep your Halloween treats moving quickly from start to finish.
Pull Out Everything First
Set all ingredients and tools on the counter before you begin. This avoids stops to hunt for items mid recipe.
Start With Store Bought Bases
Use cookies, pretzels, or candy melts as your foundation. They remove the need for baking and speed up assembly.
Measure Toppings Ahead
Portion out sprinkles, chocolate chips, and candies into small bowls. Quick access makes decorating go faster.
Chill Instead of Waiting
Place finished treats in the fridge or freezer to set. This cuts waiting time compared to room temperature.
Spooky Spiderweb Cupcakes
These cupcakes come together fast with a small batch of chocolate batter and a simple frosting trick that creates the spiderweb look. They work well for quick Halloween gatherings or after-school snacks when you want something festive without spending hours in the kitchen. The moist chocolate base stays balanced by the smooth vanilla frosting on top.

Serves 4 people.
Ingredients
- 1 cup chocolate cake mix
- 1/3 cup water
- 1 egg
- 2 tablespoons vegetable oil
- 1 cup vanilla frosting
- 1/4 cup semisweet chocolate chips
Instructions
- Preheat the oven to 350 degrees and line a cupcake pan with four paper liners.
- In a mixing bowl, combine the chocolate cake mix, water, egg, and vegetable oil. Stir until the batter is smooth.
- Divide the batter evenly among the four liners. Bake until a toothpick inserted in the center comes out clean.
- Let the cupcakes cool completely on a wire rack.
- Spread the vanilla frosting over each cooled cupcake in an even layer.
- Place the semisweet chocolate chips in a microwave-safe bowl and heat in short bursts until melted. Transfer to a small zip-top bag and snip off one corner.
- Pipe three concentric circles of melted chocolate onto each frosted cupcake. Drag a toothpick from the center outward through the circles to form the spiderweb pattern.
Extra Tips
Melt the chocolate chips just until smooth so the lines pipe cleanly without breaking. If the frosting feels too stiff, stir in a teaspoon of milk to make spreading easier. Store any leftovers in an airtight container at room temperature for up to two days.Course: Dessert Cuisine: American Equipment: Mixing Bowl, Cupcake Pan, Wire Rack, Microwave-Safe Bowl
Pumpkin Spice Mug Cakes
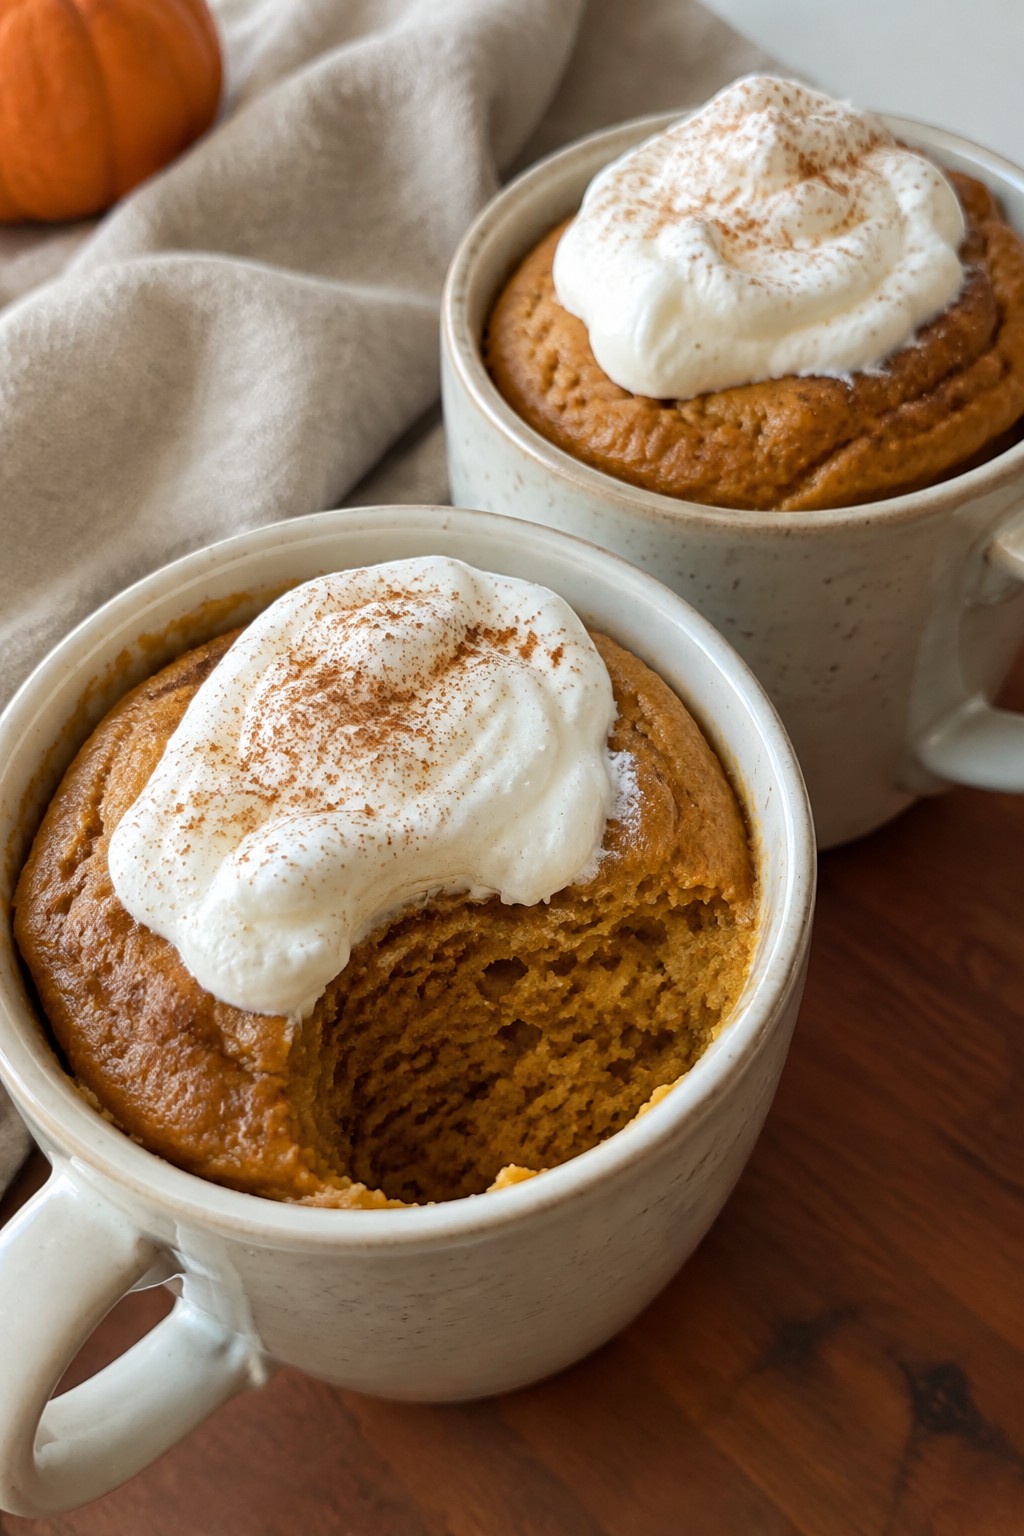
These mug cakes deliver warm pumpkin spice flavor in minutes, making them a smart choice for last-minute Halloween gatherings or cozy nights at home. They come together with pantry staples and cook right in the microwave, so you can skip the oven and still enjoy a fresh dessert.
Each cake turns out soft and moist with a tender crumb that highlights the pumpkin and spices without being overly sweet.
Serves 4 people.
Ingredients
- 1/2 cup all-purpose flour
- 1/4 cup brown sugar
- 2 teaspoons pumpkin pie spice
- 1 teaspoon baking powder
- 1/2 cup pumpkin puree
- 1/4 cup milk
- 3 tablespoons melted butter
- 1 teaspoon vanilla extract
- Whipped cream for topping
Instructions
- In a mixing bowl, stir together the flour, brown sugar, pumpkin pie spice, and baking powder until evenly combined.
- Add the pumpkin puree, milk, melted butter, and vanilla extract to the dry ingredients. Mix until the batter is smooth and no dry streaks remain.
- Divide the batter evenly among four microwave-safe mugs, filling each about halfway.
- Microwave one mug at a time on high for 60 to 90 seconds, or until the cake has risen and the top looks set. Repeat with the remaining mugs.
- Let the cakes cool for a minute, then top each with a spoonful of whipped cream before serving.
Extra Tips
Microwave times can vary by wattage, so start with 60 seconds and add 10-second bursts if the center still looks wet. The brown sugar helps keep the cakes moist, but avoid overmixing the batter or the texture can turn dense. These cakes taste best warm, so serve them right after cooking.Course: Dessert Cuisine: American Equipment: Microwave, Mixing Bowl, Microwave-safe mugs
Ghostly Meringue Kisses
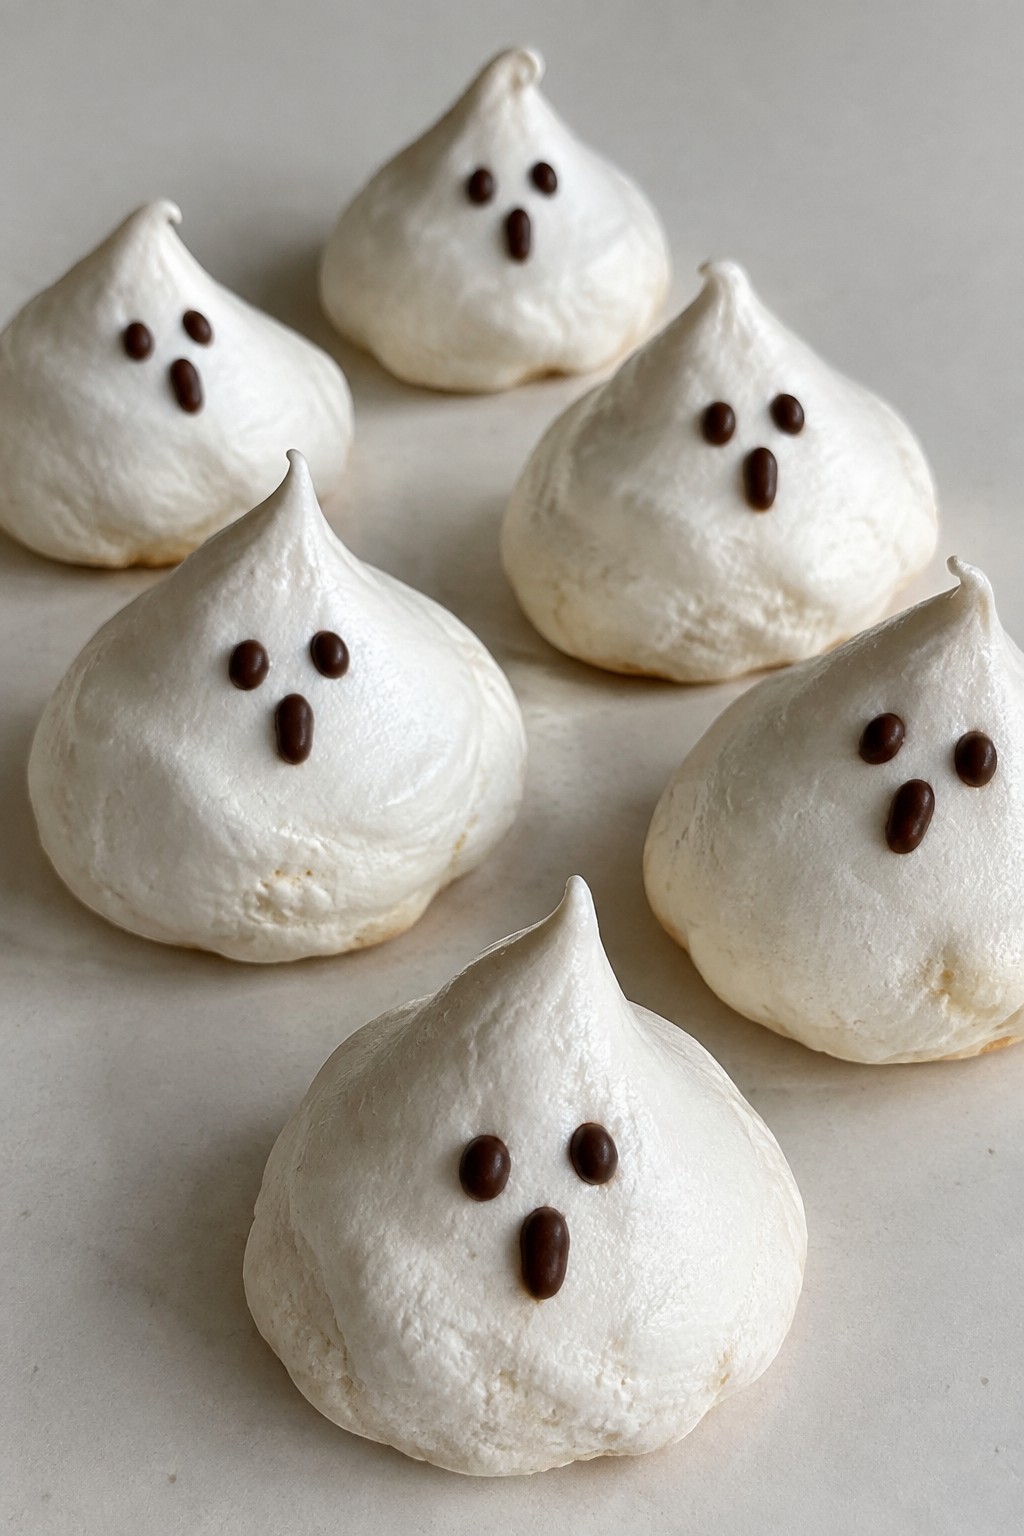
These light meringue treats come together with just a few staples and bake into cute ghost shapes that fit right into a Halloween spread. They work well when you need something sweet that looks festive without much hands-on time.
The result is crisp on the outside with a soft center and a mild vanilla sweetness. Kids and adults both enjoy piping the shapes and adding simple faces.
Serves 4 people.
Ingredients
- 2 large egg whites
- 1/2 cup granulated sugar
- 1/4 teaspoon cream of tartar
- 1 teaspoon vanilla extract
- 2 tablespoons mini chocolate chips
Instructions
- Preheat the oven to 200 degrees F and line a baking sheet with parchment paper.
- Place the egg whites and cream of tartar in a clean mixing bowl. Beat on medium speed until the mixture turns foamy.
- Slowly add the sugar a tablespoon at a time while beating. Continue until stiff peaks form and the mixture looks glossy.
- Mix in the vanilla extract on low speed until just combined.
- Spoon the meringue into a piping bag fitted with a round tip. Pipe small ghost shapes onto the prepared baking sheet, leaving space between each one.
- Bake for 1 hour and 30 minutes until the ghosts feel dry and lift easily from the paper. Turn off the oven and leave the meringues inside to cool completely.
- Press two mini chocolate chips into each cooled ghost to form eyes.
Extra Tips
Pipe the ghosts with a slightly wider base and a pointed top so they stand upright once baked. Store any leftovers in an airtight container at room temperature to keep them crisp. If the meringue feels too soft after cooling, return it to a low oven for 10 more minutes to dry it out further.Course: Dessert Cuisine: American Equipment: Mixing Bowl, Electric Mixer, Piping Bag, Baking Sheet
Chocolate Bat Truffles
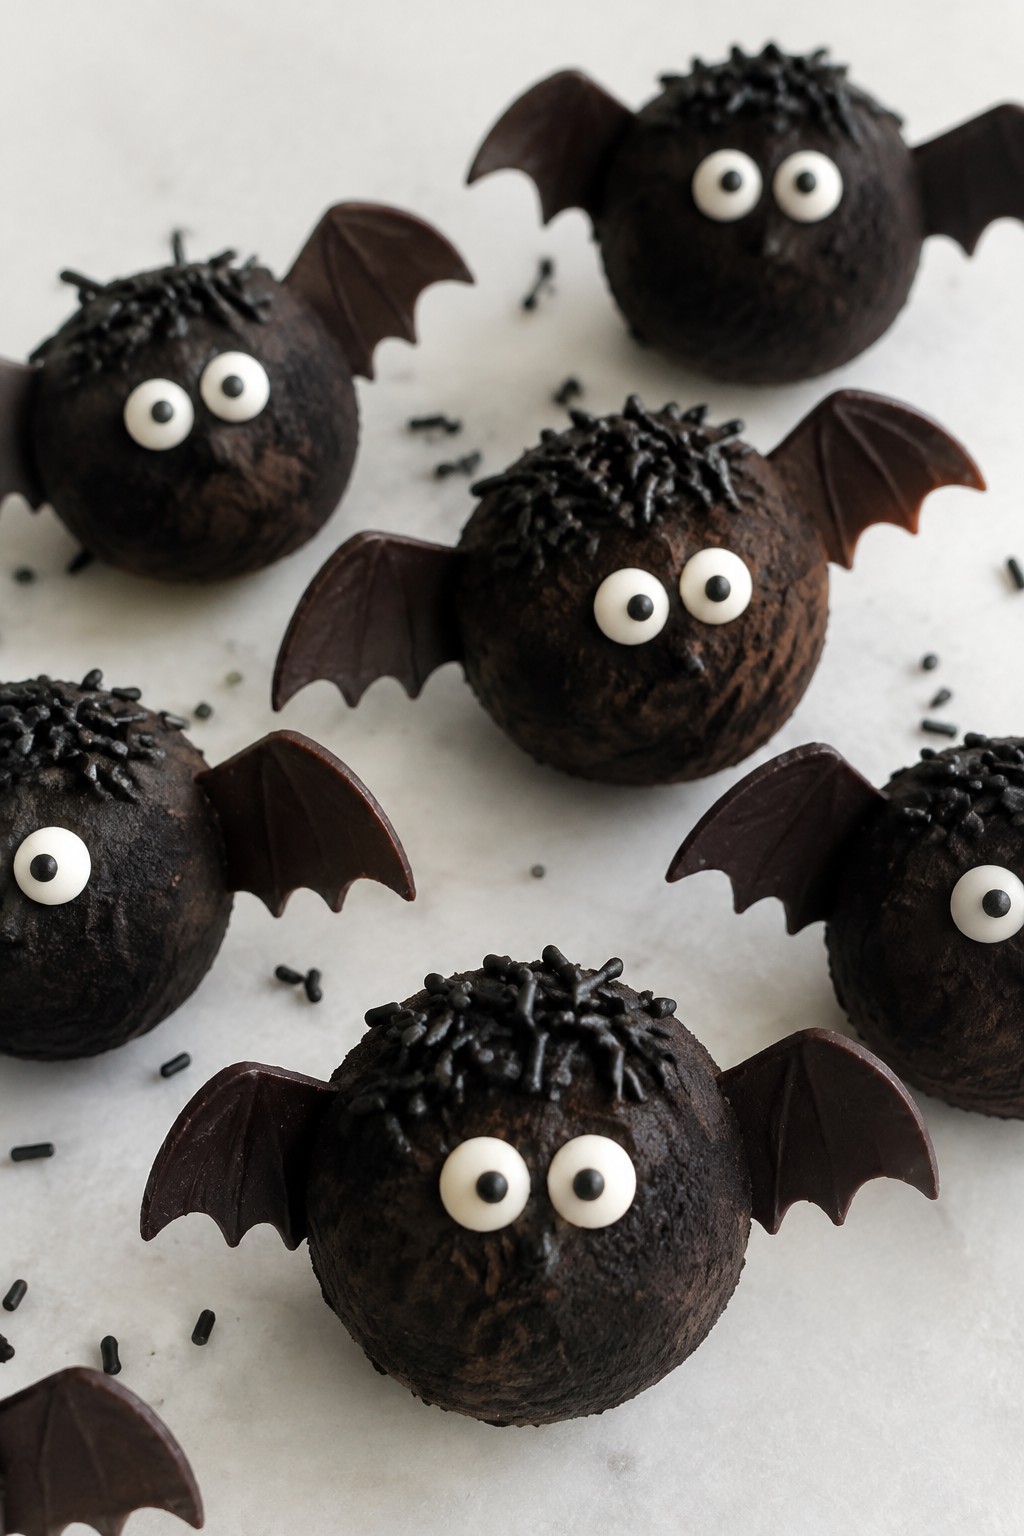
These chocolate bat truffles come together in minutes and need only a short chill time before serving. They work well for last-minute Halloween parties or quick after-school snacks with their smooth, rich centers and dark finish.
The flavor is deeply chocolate with a creamy texture that holds up well at room temperature for a few hours.
Serves 4 people.
Ingredients
- 8 ounces semisweet chocolate chips
- ½ cup heavy cream
- 2 tablespoons unsalted butter
- 1 teaspoon vanilla extract
- ¼ cup black cocoa powder
- 2 tablespoons black sprinkles
- 8 candy eyes
Instructions
- Place the chocolate chips, heavy cream, and butter in a medium saucepan over low heat. Stir until the mixture melts into a smooth ganache.
- Remove the pan from heat and stir in the vanilla extract. Pour the ganache into a bowl and refrigerate for 1 hour until firm.
- Scoop the chilled ganache into 8 equal portions and roll each into a ball between your palms.
- Roll four balls in black cocoa powder and the remaining four in black sprinkles to create a dark, textured surface.
- Press two candy eyes onto each truffle to finish the bat faces.
Extra Tips
Chill the ganache a little longer if your kitchen is warm so the balls hold their shape during rolling. The black cocoa gives a deeper color than regular cocoa while the sprinkles add a slight crunch that contrasts the creamy centers. Store leftovers in an airtight container in the fridge for up to three days.Course: Dessert Cuisine: American Equipment: Medium saucepan, Mixing bowl, Baking sheet
Candy Corn Fudge Squares
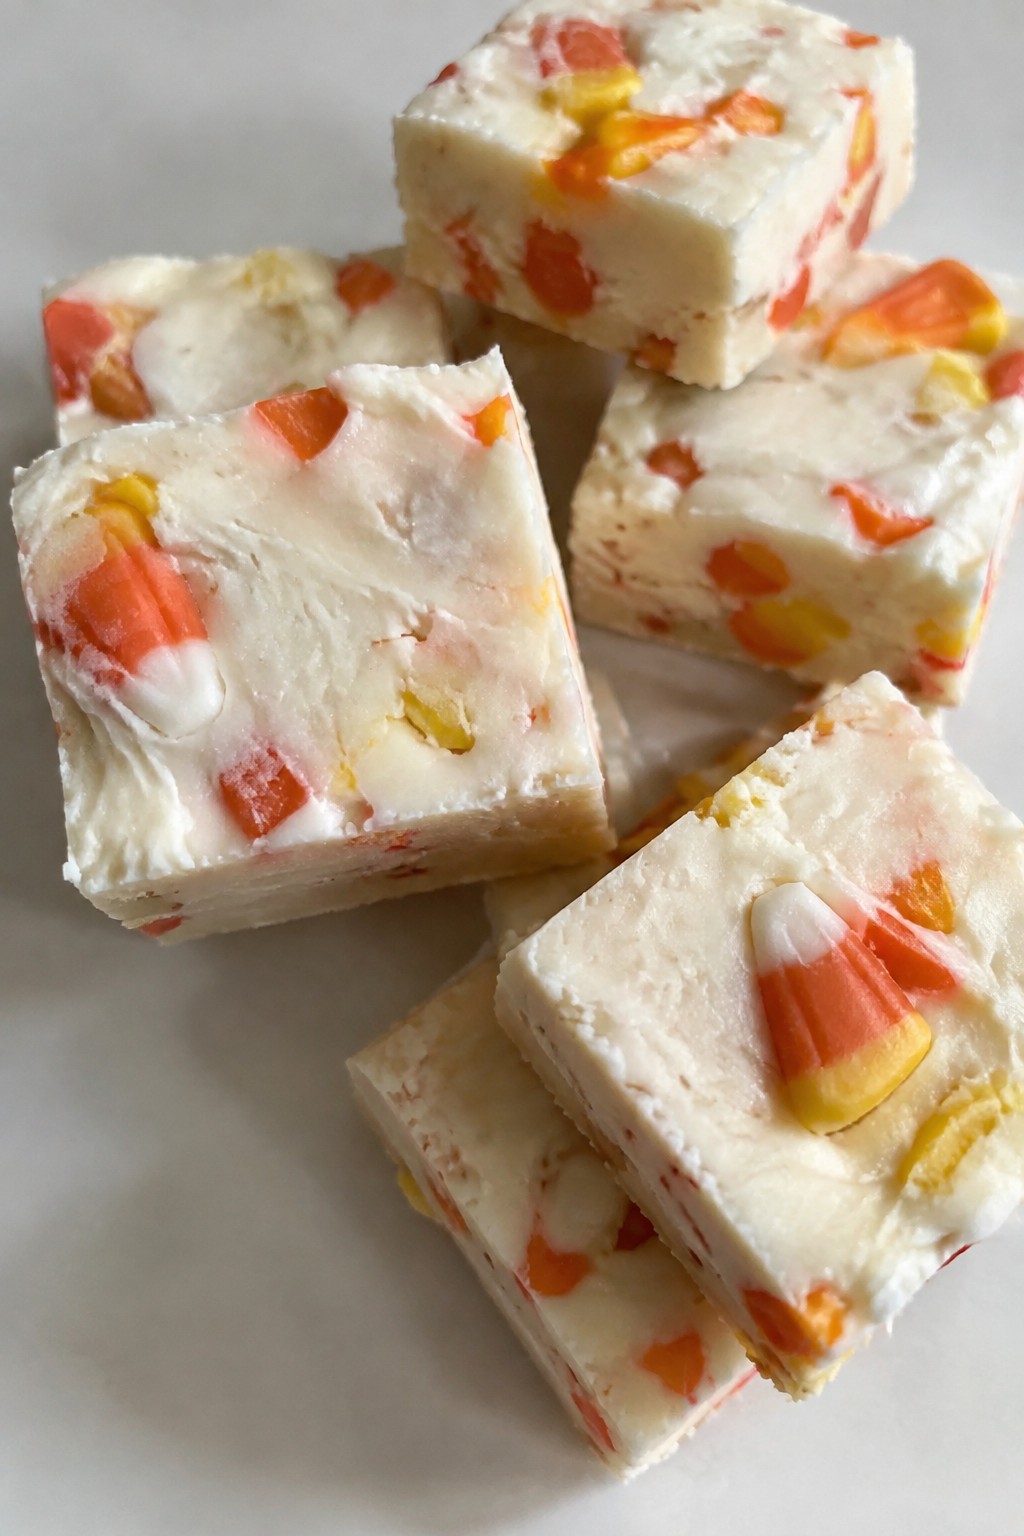
These fudge squares come together quickly with melted white chocolate and condensed milk. They make a good choice for Halloween when you want something sweet and colorful without spending much time in the kitchen.
The finished squares have a creamy texture with chewy candy corn pieces mixed in. The mild white chocolate base lets the candy corn stand out in both flavor and appearance.
Serves 4 people.
Ingredients
- 2 cups white chocolate chips
- 1 (14-ounce) can sweetened condensed milk
- 1 teaspoon vanilla extract
- Pinch of salt
- 1 cup candy corn
Instructions
- Line an 8-inch square pan with parchment paper and set it aside.
- Combine the white chocolate chips and sweetened condensed milk in a microwave-safe bowl.
- Microwave the mixture in 30-second intervals, stirring after each one, until the chocolate is fully melted and smooth.
- Stir in the vanilla extract and salt until evenly blended.
- Fold in the candy corn, mixing just enough to distribute the pieces without breaking them.
- Pour the mixture into the prepared pan and spread it into an even layer.
- Refrigerate for at least one hour until the fudge is firm, then cut into squares.
Extra Tips
Press a few extra candy corn pieces on top right after spreading the mixture if you want more color on the surface. Store leftovers in an airtight container in the refrigerator to keep the fudge from softening. For a slightly firmer texture, let the squares sit at room temperature for five minutes before serving.Course: Dessert Cuisine: American Equipment: Microwave-safe bowl, Square baking pan, Spatula
Witch Hat Macarons
These Witch Hat Macarons turn store-bought shells into a quick Halloween snack. They work well for last-minute parties or after-school treats. Each one has a crisp shell, smooth chocolate filling, and a pointed hat on top.
The flavor stays light and cocoa-forward with a bit of crunch from the cone. Kids enjoy helping with the assembly, and the whole batch comes together without special equipment.

Serves 4 people.
Ingredients
- 8 store-bought vanilla macaron shells
- 1 cup semisweet chocolate chips
- 4 chocolate wafer cones
- 2 tablespoons orange sprinkles
- 1/4 cup black candy melts
Instructions
- Place the chocolate chips in a microwave-safe bowl and heat in 20-second bursts, stirring between each, until fully melted and smooth.
- Spread a thin layer of melted chocolate on the flat side of four macaron shells. Press one chocolate wafer cone onto each to form the hat shape. Set aside to harden.
- Melt the black candy melts in the same way as the chocolate. Transfer to a small piping bag or zip-top bag with one corner snipped.
- Pipe a thin black band around the base of each cone where it meets the shell to create the hat brim.
- Sprinkle orange sprinkles onto the wet black candy while it is still soft. Let the hats set for five minutes.
- Spread the remaining melted chocolate on the flat sides of the four plain shells. Sandwich each with a finished hat shell.
Extra Tips
Use a small offset spatula to spread the chocolate evenly so the hats sit straight. If the cones feel too tall, trim the tips slightly before attaching. Store finished macarons in an airtight container at room temperature for up to one day.Course: Dessert Cuisine: French Equipment: Microwave-safe bowl, Baking sheet, Piping bag
Monster Mash Popcorn Balls
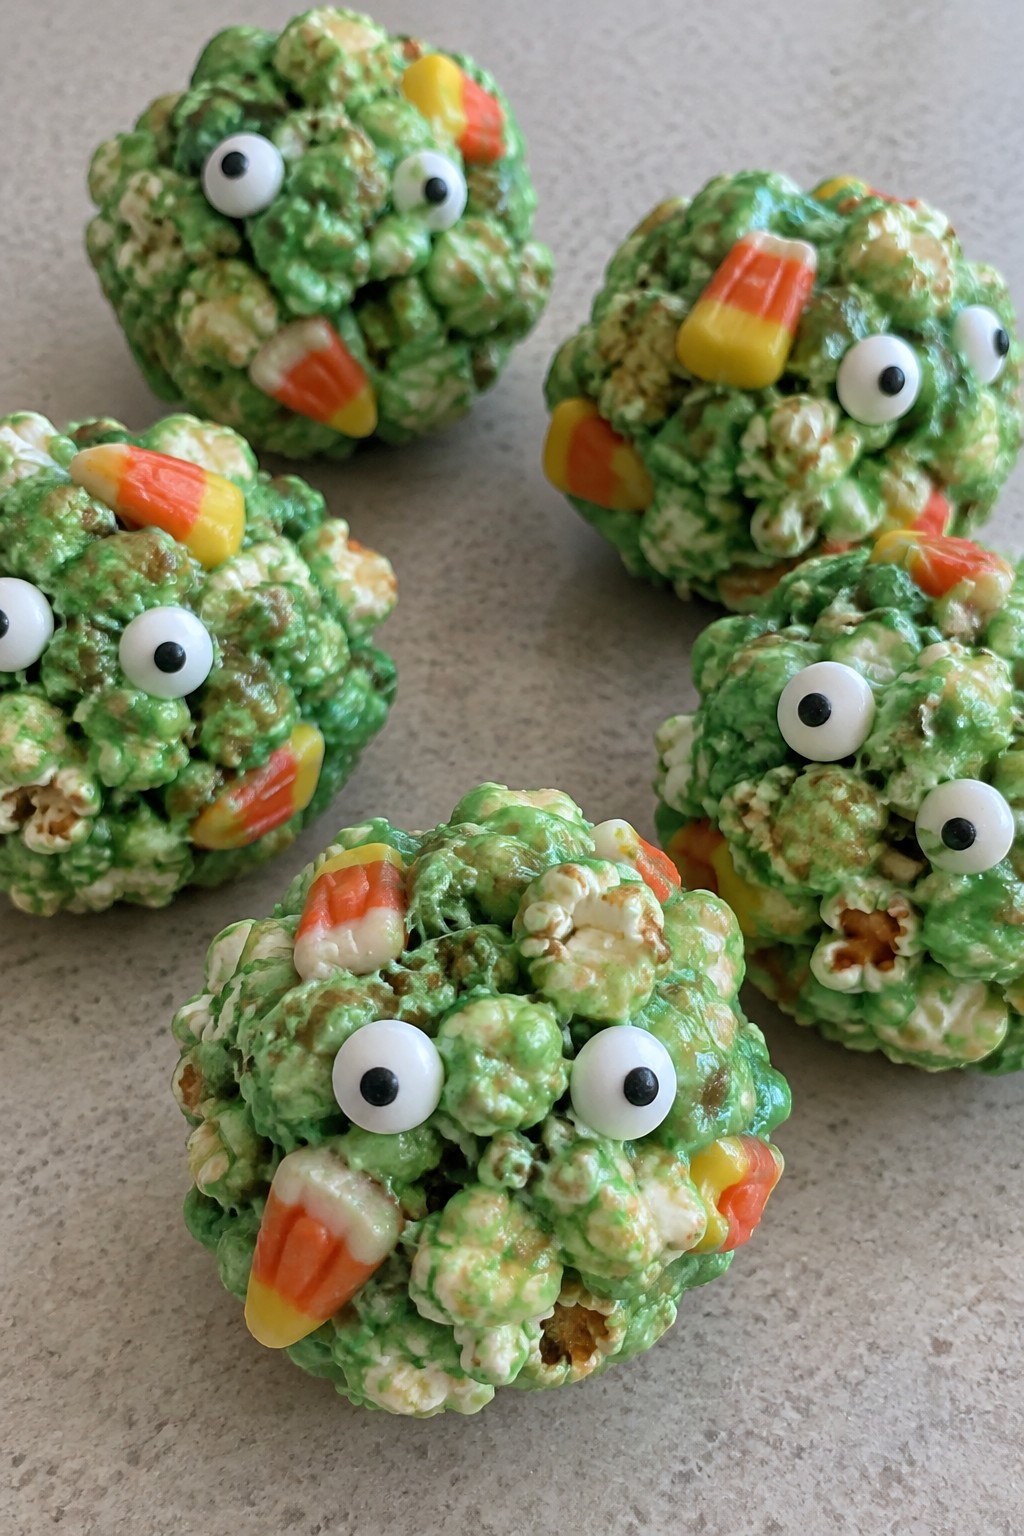
These popcorn balls bring a playful green monster look to any Halloween spread. They come together quickly with pantry staples and make a good option for last-minute treats or school parties. The texture stays chewy from the marshmallow coating with plenty of crunch from the popcorn and candy corn.
They work well when you need something sweet that travels easily and holds up at room temperature. The flavor is simple and sweet with a light vanilla note from the marshmallows.
Serves 4 people.
Ingredients
- 8 cups popped popcorn
- 3 tablespoons unsalted butter
- 3 cups mini marshmallows
- 4 drops green food coloring
- 1/2 cup candy corn
- 12 candy eyes
Instructions
- Place the popped popcorn and candy corn in a large mixing bowl and set it aside.
- Add the butter and mini marshmallows to a microwave-safe bowl. Microwave in 30-second bursts, stirring after each, until the mixture is fully melted and smooth.
- Stir the green food coloring into the melted marshmallow mixture until the color is even.
- Pour the green marshmallow mixture over the popcorn and candy corn. Stir quickly with a spatula until everything is coated.
- Lightly grease your hands with butter or cooking spray. Scoop the mixture and shape it into 4 balls, pressing gently so they hold together.
- Press three candy eyes onto each ball while the mixture is still warm.
Extra Tips
Work fast once the marshmallow mixture is poured because it sets quickly and becomes harder to shape. If the mixture cools too much while forming the balls, warm it for 10 seconds in the microwave to soften it again. Store the finished balls in an airtight container at room temperature for up to two days.Course: Snack Cuisine: American Equipment: Microwave, Large mixing bowl, Microwave-safe bowl
Orange Creamsicle Chocolate Bark
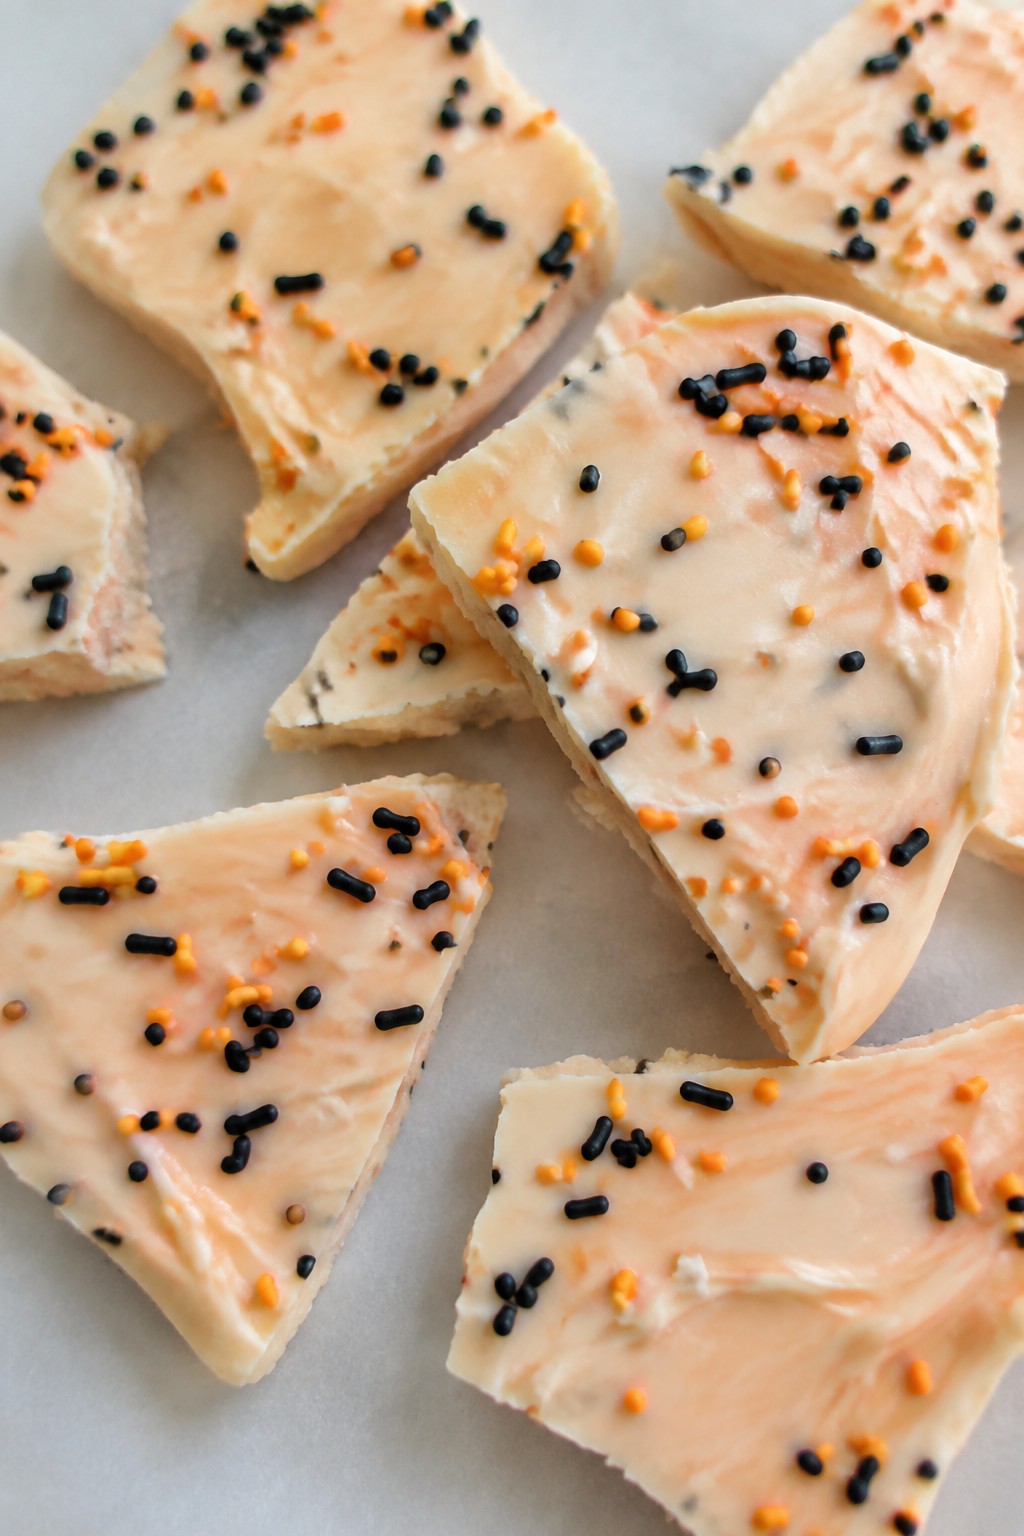
This orange creamsicle chocolate bark combines creamy white chocolate with bright citrus flavor for a quick Halloween treat. It sets in the fridge with almost no hands-on time, making it easy to prepare ahead of parties or school events.
The finished bark has a smooth texture and a balance of sweet vanilla and tangy orange that feels like a frozen creamsicle in solid form. Colorful sprinkles on top give it a festive look without extra work.
Serves 4 people.
Ingredients
- 12 ounces white chocolate chips
- 1 tablespoon coconut oil
- 2 teaspoons orange extract
- ¼ cup orange and black sprinkles
Instructions
- Line a baking sheet with parchment paper and set it aside.
- Place the white chocolate chips and coconut oil in a microwave-safe bowl. Heat in 30-second bursts, stirring after each, until fully melted and smooth.
- Stir the orange extract into the melted chocolate mixture until evenly combined.
- Pour the mixture onto the prepared baking sheet and spread it into an even layer about ¼ inch thick.
- Immediately scatter the orange and black sprinkles over the top while the chocolate is still soft.
- Transfer the baking sheet to the refrigerator and chill for 30 minutes, or until the bark is firm.
- Break the chilled bark into pieces by hand and serve.
Extra Tips
Use good-quality white chocolate chips for the smoothest melt. If the chocolate starts to thicken while spreading, pop it back in the microwave for 10 seconds. Store leftover bark in an airtight container in the fridge to keep the texture crisp.Course: Dessert Cuisine: American Equipment: Microwave, Baking Sheet, Mixing Bowl
Black Velvet Whoopie Pies
These whoopie pies bring a dark twist to a classic treat. The black cocoa gives them a rich chocolate flavor and deep color that fits right into Halloween spreads. They come together quickly with pantry staples and make a fun handheld dessert for parties or after-school snacks.
The texture stays soft and cake-like with a creamy filling that balances the cocoa. Kids and adults both enjoy the contrast between the dark cookies and the sweet center.

Serves 4 people.
Ingredients
- 1 cup all-purpose flour
- 1/4 cup black cocoa powder
- 1/2 teaspoon baking soda
- 1/4 teaspoon salt
- 1/2 cup granulated sugar
- 1/4 cup unsalted butter, softened
- 1 large egg
- 1/4 cup milk
- 1 teaspoon vanilla extract
- 1 teaspoon black food coloring
- 4 ounces cream cheese, softened
- 1/4 cup unsalted butter, softened
- 1 cup powdered sugar
Instructions
- Preheat the oven to 350 degrees F and line a baking sheet with parchment paper.
- Whisk together the flour, black cocoa powder, baking soda, and salt in a medium bowl.
- In a separate bowl, beat the granulated sugar and 1/4 cup softened butter until light. Add the egg, milk, vanilla extract, and black food coloring. Mix until smooth.
- Stir the dry ingredients into the wet mixture until a thick batter forms. Drop rounded tablespoons onto the prepared baking sheet, spacing them 2 inches apart. You should get 8 cookies.
- Bake for 8 to 10 minutes until the edges are set. Let the cookies cool completely on the sheet.
- While the cookies cool, beat the cream cheese, remaining 1/4 cup butter, and powdered sugar until fluffy.
- Spread the filling on the flat side of four cookies. Top each with a second cookie and press gently to seal.
Extra Tips
Chill the assembled whoopie pies for 15 minutes if the filling feels too soft. You can swap the black food coloring for more black cocoa if you prefer a natural color, though the shade will be slightly lighter. Store leftovers in an airtight container in the fridge for up to two days.
Course: Dessert Cuisine: American Equipment: Mixing Bowls, Baking Sheet, Electric MixerPumpkin Pie Cheesecake Bites
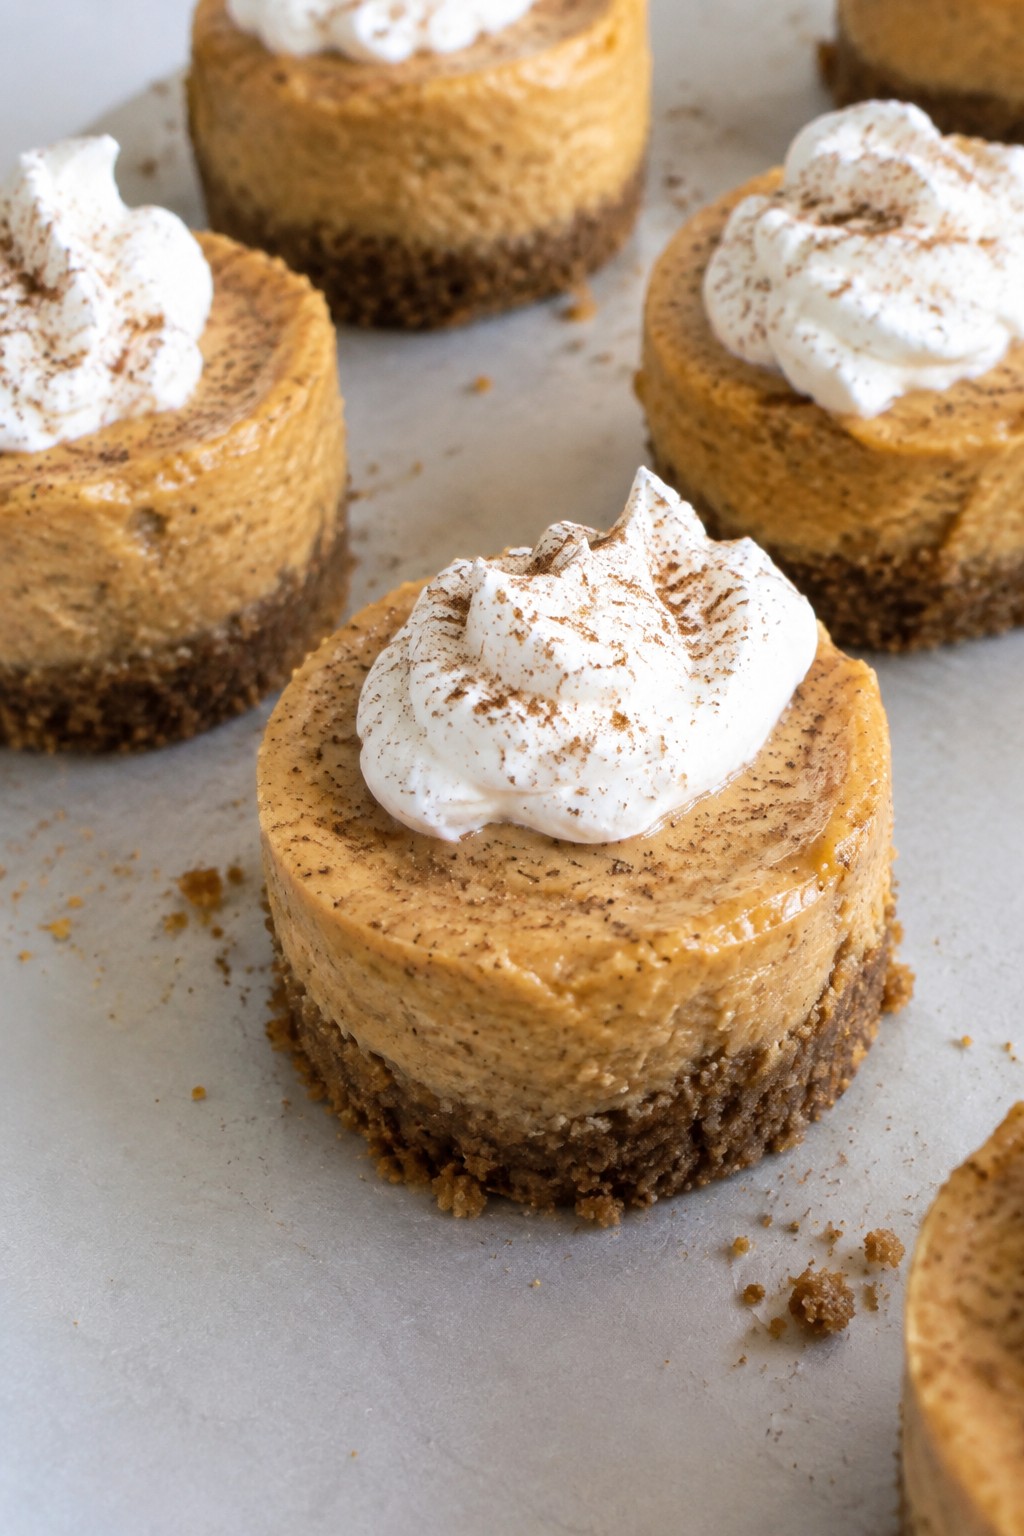
These bites pack the creamy texture of cheesecake with the spiced flavor of pumpkin pie. They come together quickly for Halloween gatherings or a fast weeknight treat. The contrast between the crumbly base and smooth filling makes them easy to enjoy in one or two bites.
Serves 4 people.
Ingredients
- 8 ounces cream cheese, softened
- 1/2 cup pumpkin puree
- 1/4 cup granulated sugar
- 1 teaspoon pumpkin pie spice
- 3/4 cup graham cracker crumbs
- 3 tablespoons butter, melted
Instructions
- Stir the graham cracker crumbs and melted butter together in a bowl until the crumbs are evenly coated.
- Divide the mixture among 8 mini muffin liners and press it down firmly to form a base.
- In the same bowl, beat the cream cheese, pumpkin puree, sugar, and pumpkin pie spice until the mixture is smooth and well combined.
- Spoon the cream cheese mixture evenly over the crumb bases.
- Place the muffin tin in the refrigerator and chill for at least 1 hour until the bites are firm.
Extra Tips
Chill the bites a little longer if your kitchen is warm to keep the filling set. You can swap the pumpkin pie spice for cinnamon and nutmeg if that is what you have on hand. These store well in an airtight container in the fridge for up to two days.Course: Dessert Cuisine: American Equipment: Mixing Bowl, Mini Muffin Tin
Caramel Apple Cracker Nachos
This treat turns classic caramel apples into shareable nachos using crunchy graham crackers. It comes together in minutes, making it ideal for last-minute Halloween gatherings or after-school snacks.
The mix of crisp crackers, juicy apple slices, and rich caramel creates a fun texture contrast with sweet and slightly tart flavors.
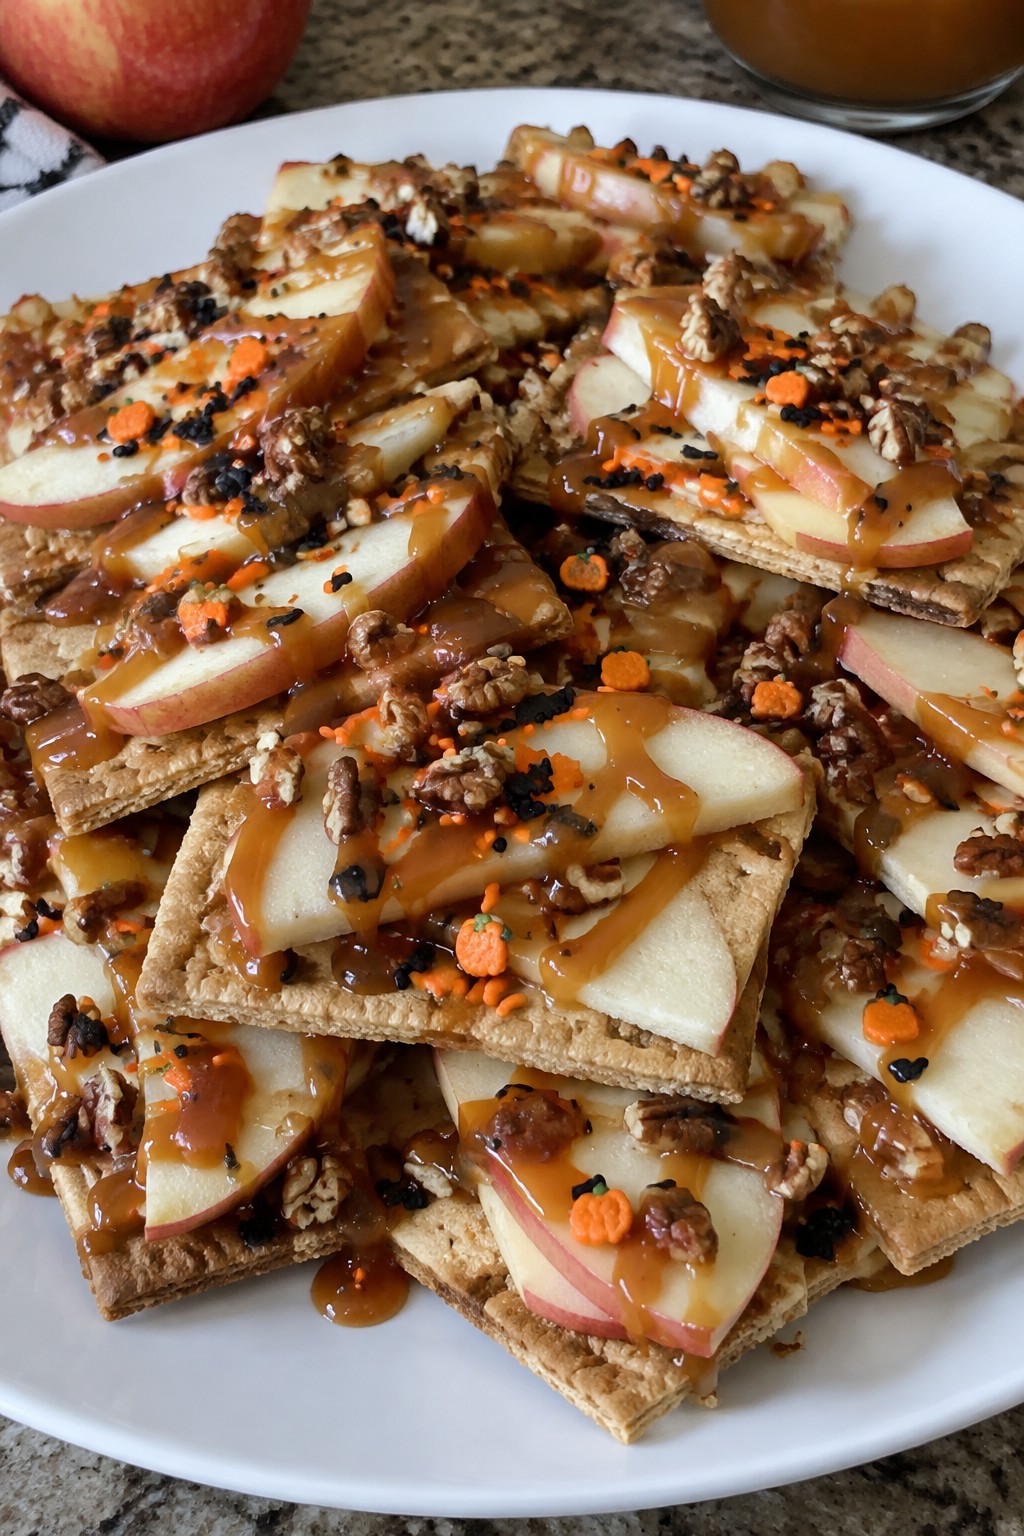
Serves 4 people.
Ingredients
- 16 graham crackers
- 3 apples, thinly sliced
- 3/4 cup caramel sauce
- 1/4 cup chopped pecans
- 2 tablespoons Halloween sprinkles
Instructions
- Arrange the graham crackers in a single layer on a large platter to form the base.
- Scatter the apple slices evenly over the crackers.
- Warm the caramel sauce slightly in the microwave if needed, then drizzle it over the apples and crackers.
- Sprinkle the chopped pecans across the top.
- Finish with the Halloween sprinkles scattered over everything.
Extra Tips
Warm the caramel just enough to make drizzling easy without making the apples soggy. Use crisp, tart apples like Granny Smith to balance the sweetness. If you prepare this ahead, add the caramel and sprinkles right before serving to keep the crackers crisp.Course: Snack Cuisine: American Equipment: Large platter, Knife, Microwave
Graveyard Dirt Pudding Parfaits
These parfaits bring a fun Halloween twist to classic chocolate pudding. They come together quickly with no baking required, making them a good choice for last-minute parties or after-school snacks. Each glass layers creamy pudding with crushed cookie "dirt," topped with gummy worms and a cookie tombstone for a playful look.
The texture combines smooth pudding with crunchy cookie pieces and chewy candy. The flavor stays rich and chocolatey without being overly sweet.
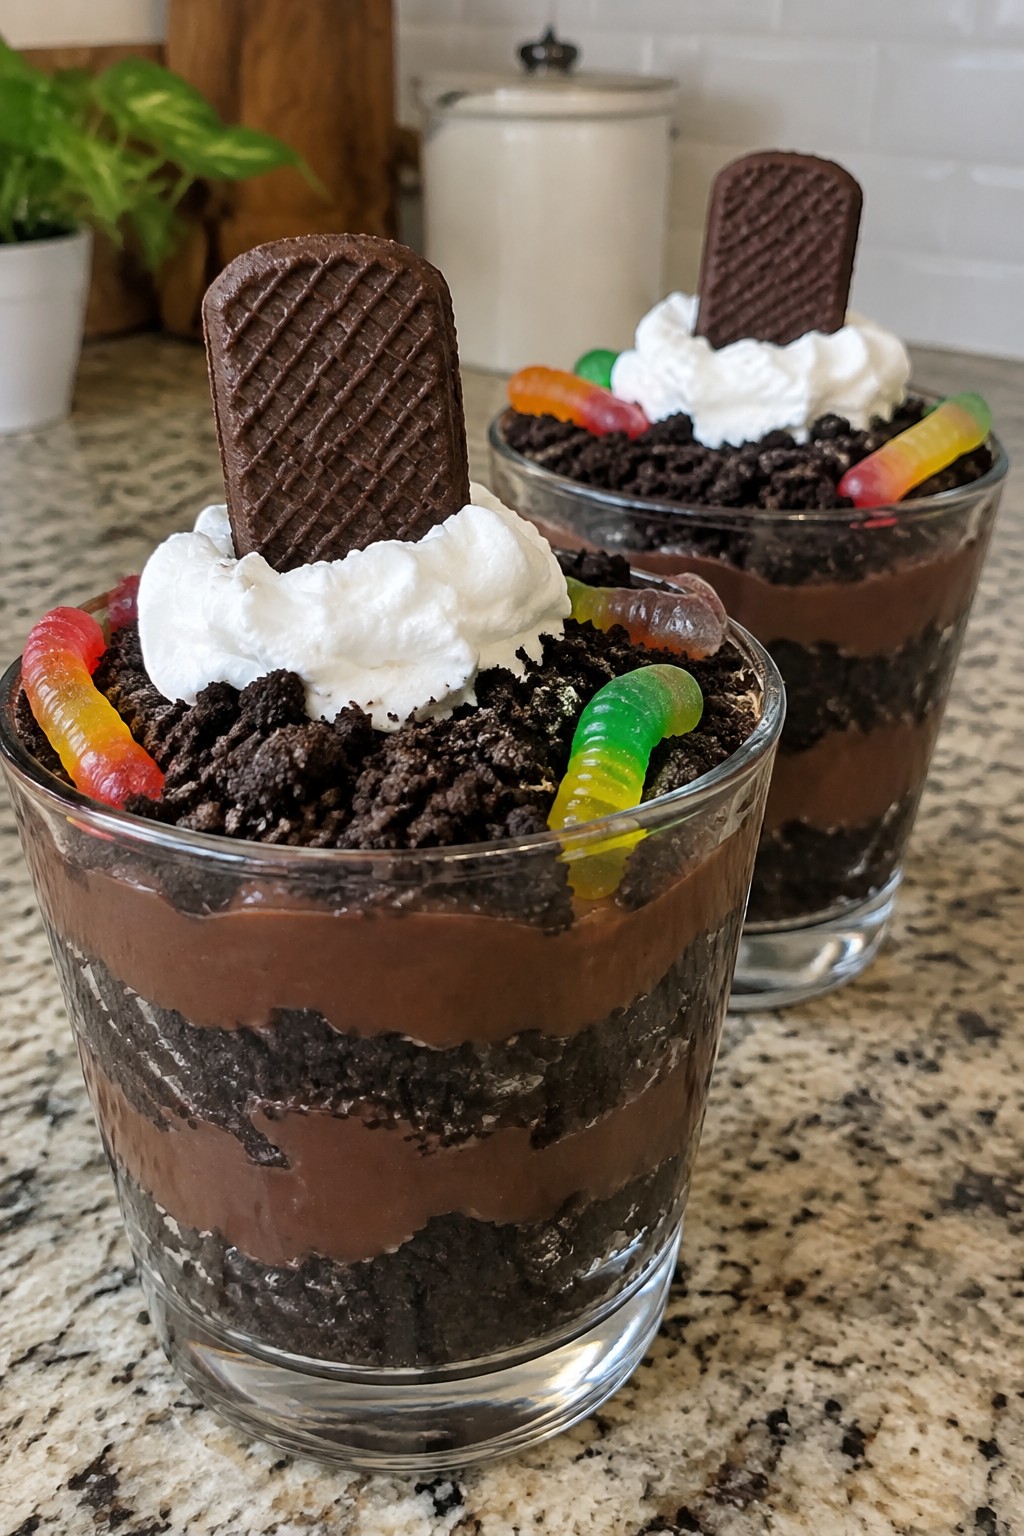
Serves 4 people.
Ingredients
- 1 package (3.9 oz) instant chocolate pudding mix
- 2 cups cold milk
- 20 chocolate sandwich cookies
- 1 cup whipped topping
- 12 gummy worms
- 4 rectangular chocolate wafer cookies
Instructions
- Pour the instant chocolate pudding mix and cold milk into a mixing bowl. Whisk for two minutes until the mixture thickens.
- Place the chocolate sandwich cookies in a zip-top bag and crush them with a rolling pin until they resemble fine dirt. Set aside one tablespoon of crumbs for topping.
- Spoon a layer of pudding into the bottom of each of four parfait glasses. Add a layer of crushed cookies on top.
- Repeat with another layer of pudding and cookies in each glass. Finish with a dollop of whipped topping on each parfait.
- Press two gummy worms into the whipped topping on each glass. Stand one chocolate wafer cookie upright in the topping to act as a tombstone. Sprinkle the reserved cookie crumbs over the top.
Extra Tips
Crush the cookies right before assembling so they stay crisp against the pudding. If you need to make these ahead, prepare the pudding and store it covered in the fridge, then layer everything just before serving. Swap the gummy worms for candy bones if you want a different decoration style.Course: Dessert Cuisine: American Equipment: Mixing Bowl, Whisk, Parfait Glasses
Halloween Sprinkle Thumbprint Cookies
These thumbprint cookies add a fun pop of color to any Halloween spread. They come together fast with everyday ingredients and deliver a buttery base with a sweet jam center.
The sprinkle coating gives them a festive look without extra work. Kids and adults both enjoy the simple flavor and soft texture.

Serves 4 people.
Ingredients
- 1/2 cup unsalted butter, softened
- 1/4 cup granulated sugar
- 1 teaspoon vanilla extract
- 1 cup all-purpose flour
- 1/4 cup Halloween-themed sprinkles
- 2 tablespoons raspberry jam
Instructions
- Preheat the oven to 350 degrees and line a baking sheet with parchment paper.
- In a mixing bowl, cream the softened butter and sugar until light and fluffy.
- Stir in the vanilla extract until combined.
- Add the flour and mix until a soft dough forms.
- Roll tablespoon-sized portions of dough into balls, then roll each ball in the Halloween sprinkles to coat.
- Place the coated balls on the baking sheet and press a thumb into the center of each to create an indentation.
- Spoon a small amount of raspberry jam into each indentation.
- Bake for 10 to 12 minutes until the edges are lightly golden.
- Cool the cookies on the baking sheet for a few minutes before transferring to a wire rack.
Extra Tips
Use a small spoon to add the jam so it stays neatly in the center. If the dough feels too soft to handle, chill it for 10 minutes before rolling. Store cooled cookies in an airtight container at room temperature for up to three days.Course: Dessert Cuisine: American Equipment: Mixing Bowl, Baking Sheet, Oven
