
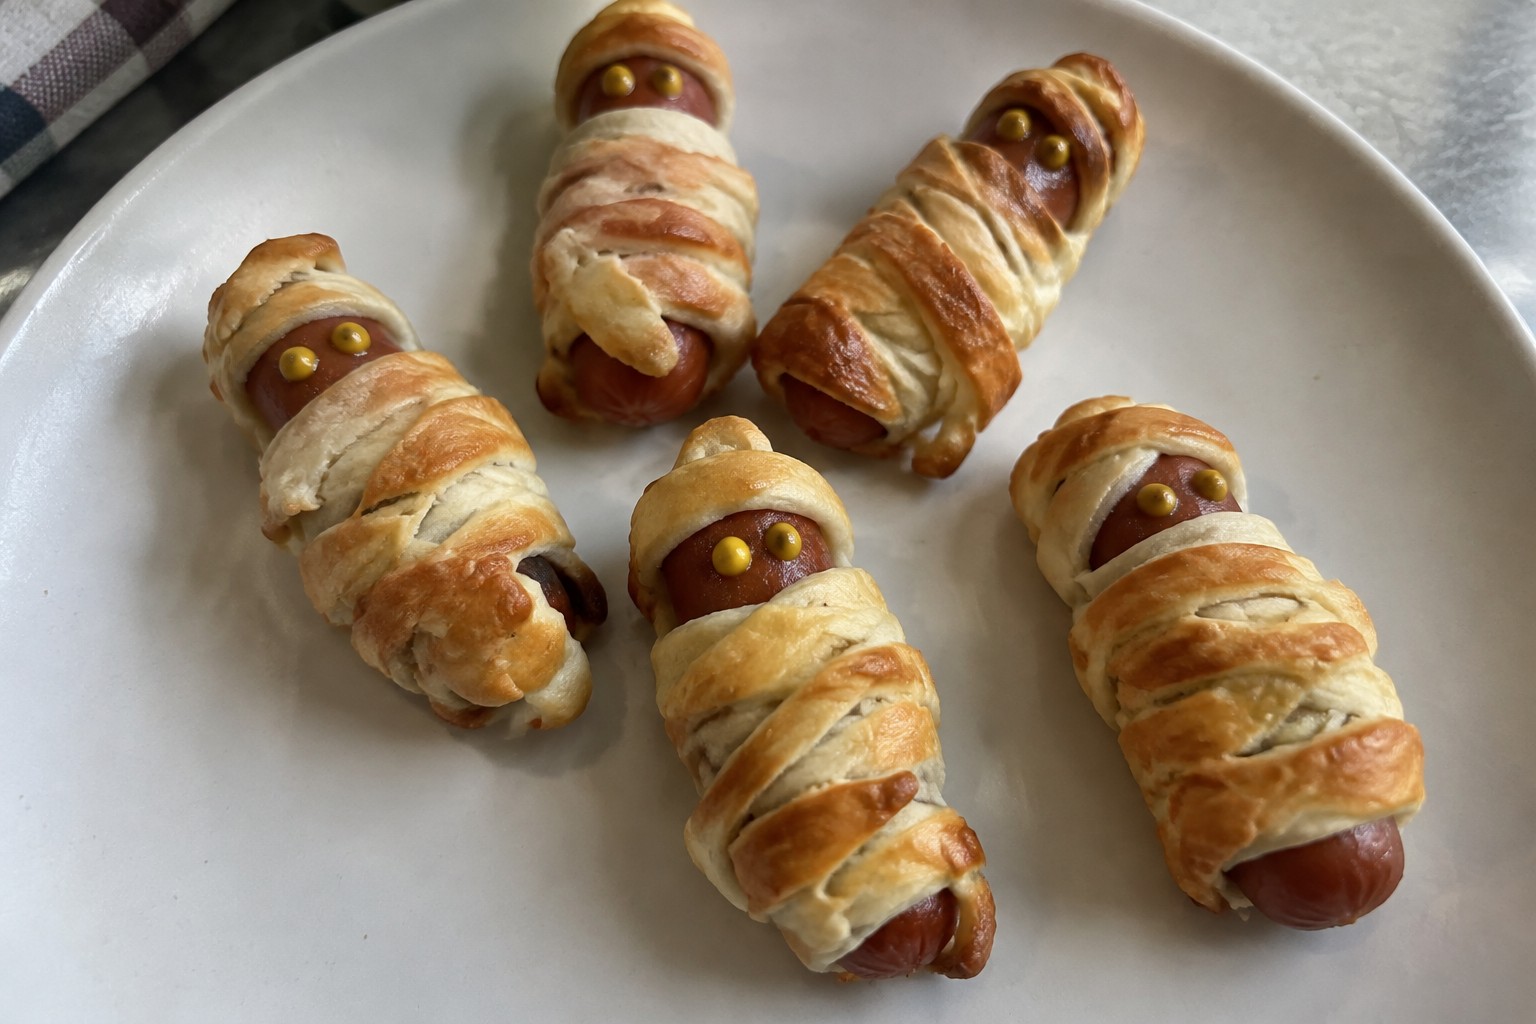
Halloween spreads tend to lean sweet, so it helps to add some savory bites for balance. These appetizers use basic ingredients and come together without much fuss. They work well for parties or family nights when you want something easy to prep ahead. Most rely on store staples like cheese, dough, and veggies. The recipes below give you plenty of options to try.
Helpful Tips Before You Start
These tips will help you create a savory spread that stays festive without leaning on sweets.
Use sturdy bases
Choose crackers, toast points, or cucumber rounds that hold toppings well during a party. This keeps items neat as guests serve themselves.
Prep components ahead
Make dips, spreads, and fillings the day before so flavors develop. Assemble just before serving to maintain texture.
Add color with savory ingredients
Use black olives, roasted peppers, or herbs to create spooky shapes and dark tones. Skip dyes when possible for cleaner flavor.
Keep portions small
Cut items into two-bite sizes so they stay easy to eat while mingling. This also lets guests sample more options without filling up fast.
Mummy Hot Dogs with Dijon Dipping Sauce
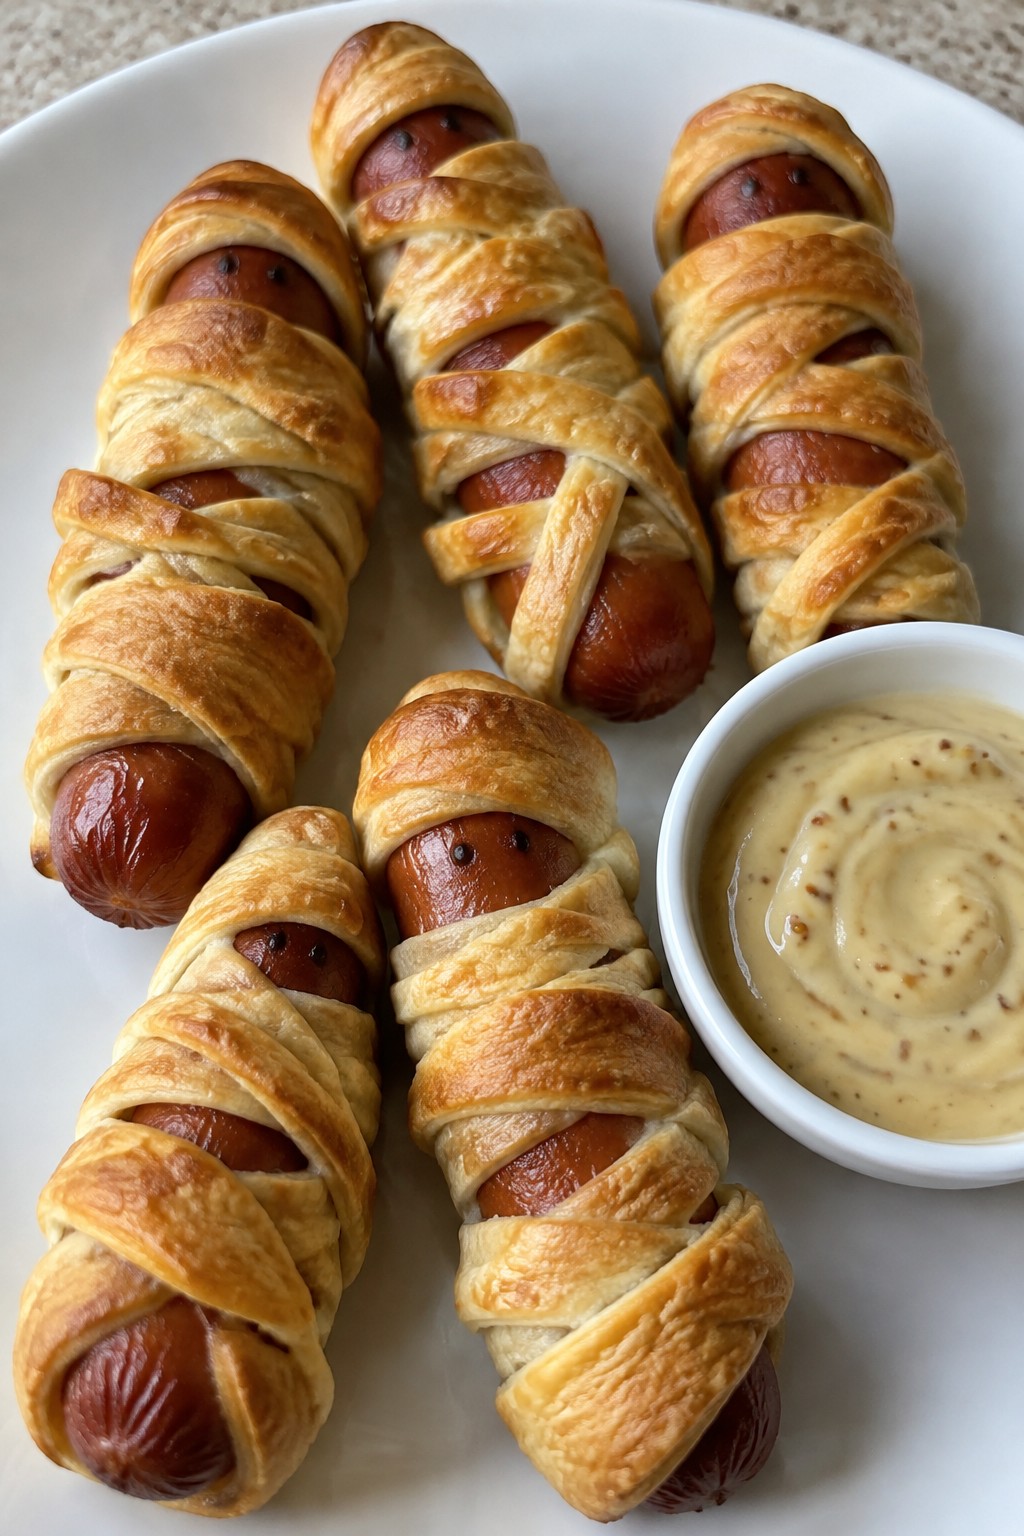
These mummy hot dogs turn a simple package of hot dogs into a fun savory bite for Halloween parties. The dough wraps create a playful look while the Dijon dipping sauce adds a tangy contrast that keeps the whole thing from feeling too heavy or sweet. They work well as a quick starter before trick-or-treating or as part of a larger spread when you want something warm and easy.
The finished hot dogs come out crisp on the outside with juicy centers. The sauce brings sharp mustard flavor balanced by a touch of creaminess so guests can dip or drizzle as they like.
Serves 4 people.
Ingredients
- 8 hot dogs
- 1 can refrigerated crescent roll dough
- ¼ cup Dijon mustard
- 2 tablespoons mayonnaise
- 1 teaspoon honey
Instructions
- Preheat the oven to 375°F and line a baking sheet with parchment paper.
- Unroll the crescent roll dough and cut it into thin strips about ½ inch wide. Wrap the strips around each hot dog in a crisscross pattern, leaving small gaps near the top for the eyes.
- Place the wrapped hot dogs on the baking sheet. Bake for 12 to 15 minutes until the dough is golden and puffed.
- While the hot dogs bake, stir together the Dijon mustard, mayonnaise, and honey in a small bowl until smooth.
- Remove the hot dogs from the oven. Use a small dab of the dipping sauce to make two dots for eyes on each hot dog. Serve the rest of the sauce on the side for dipping.
Extra Tips
If the dough feels too sticky to cut into clean strips, chill it for five minutes first. The sauce can be made a day ahead and kept covered in the fridge. Leftovers reheat well in a 350°F oven for five minutes to restore crispness without drying out the hot dogs.Course: Appetizer Cuisine: American Equipment: Baking sheet, Oven, Small bowl
Black Olive Spider Deviled Eggs
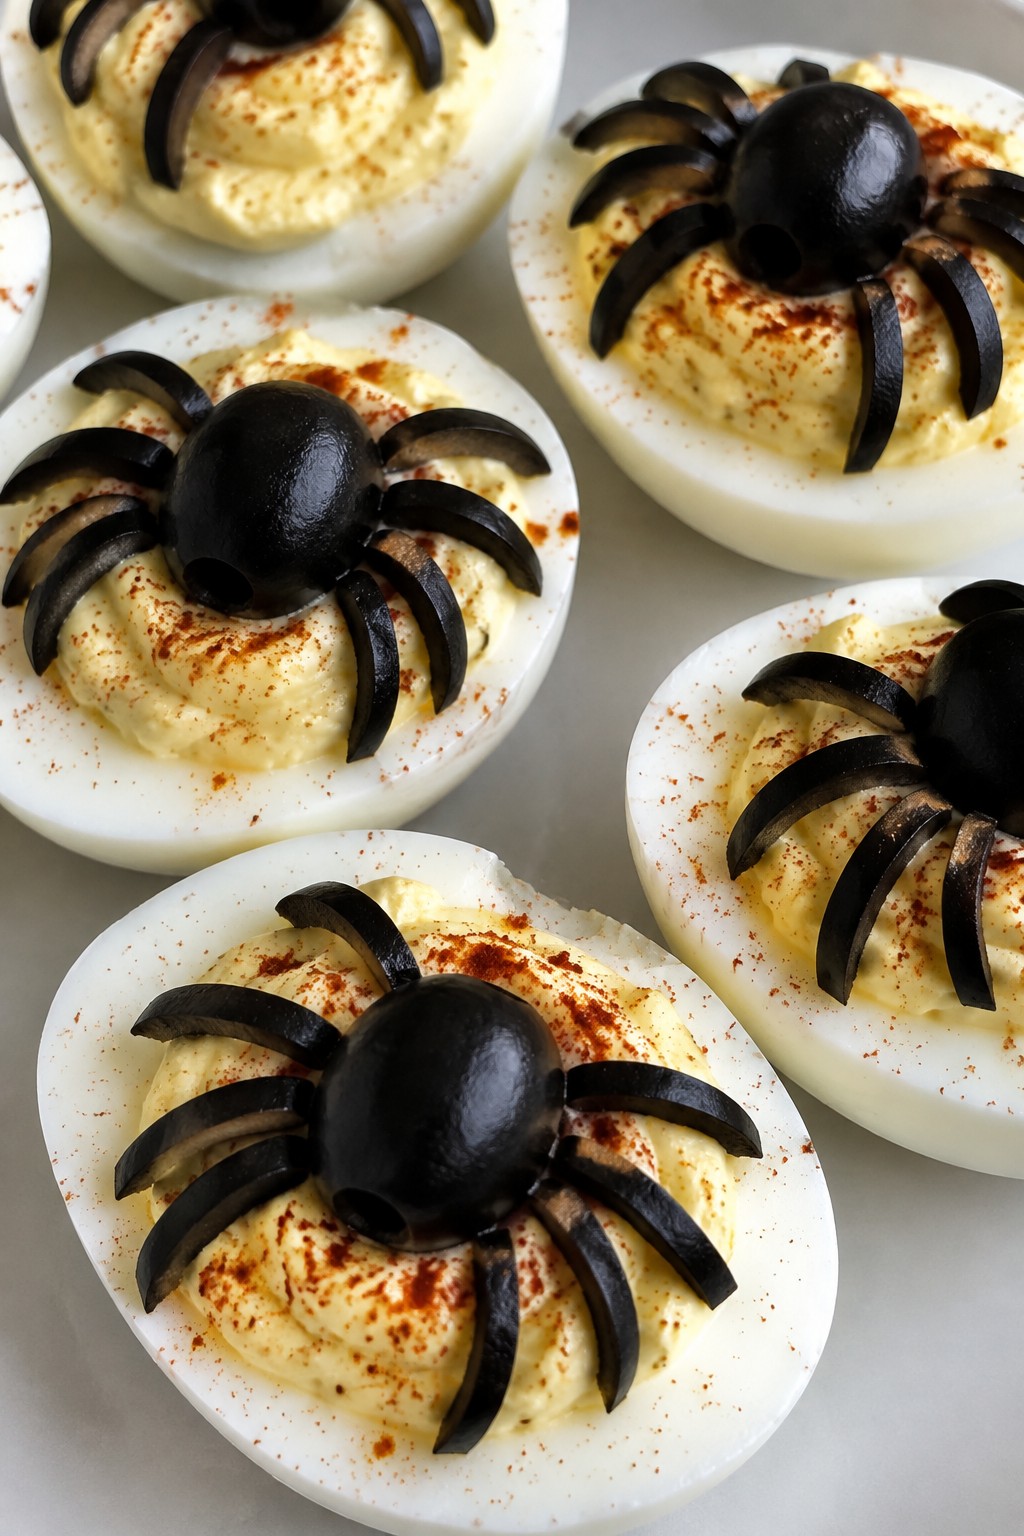
These deviled eggs add a fun Halloween touch without any sweetness. The black olives form simple spider shapes on top, which makes them stand out on a savory appetizer spread. They work well for parties where guests want something salty and creamy instead of more candy.
The flavor stays classic with a tangy yolk filling and a bit of paprika. The olives bring a salty bite that pairs nicely with the smooth texture of the eggs. Serve them as finger food when you need a quick savory option.
Serves 4 people.
Ingredients
- 6 large eggs
- 3 tablespoons mayonnaise
- 1 teaspoon Dijon mustard
- 1 teaspoon white vinegar
- 1/4 teaspoon paprika
- 1/4 teaspoon salt
- 1/8 teaspoon black pepper
- 12 pitted black olives
Instructions
- Place the eggs in a large pot and cover them with cold water. Bring the water to a boil over medium-high heat, then remove the pot from the heat, cover it, and let the eggs sit for 12 minutes.
- Drain the hot water and transfer the eggs to a bowl of ice water. Let them cool for 5 minutes, then peel off the shells.
- Slice each egg in half lengthwise. Scoop the yolks into a mixing bowl and arrange the whites on a serving plate.
- Mash the yolks with a fork. Add the mayonnaise, Dijon mustard, white vinegar, paprika, salt, and black pepper. Stir until the mixture is smooth.
- Spoon or pipe the yolk mixture back into the egg white halves.
- Cut 6 olives in half lengthwise to form the spider bodies. Slice the remaining 6 olives into thin strips for the legs. Place one olive half in the center of each filled egg and arrange 4 to 6 olive strips around it to look like legs.
Extra Tips
Make the eggs a day ahead and store the filled halves in the fridge without the olive spiders. Add the olives right before serving so they stay firm. If you want less tang, swap the Dijon for yellow mustard. Leftovers keep in an airtight container for up to two days.Course: Appetizer Cuisine: American Equipment: Large pot, Mixing bowl, Knife
Vampire Garlic Knots with Marinara
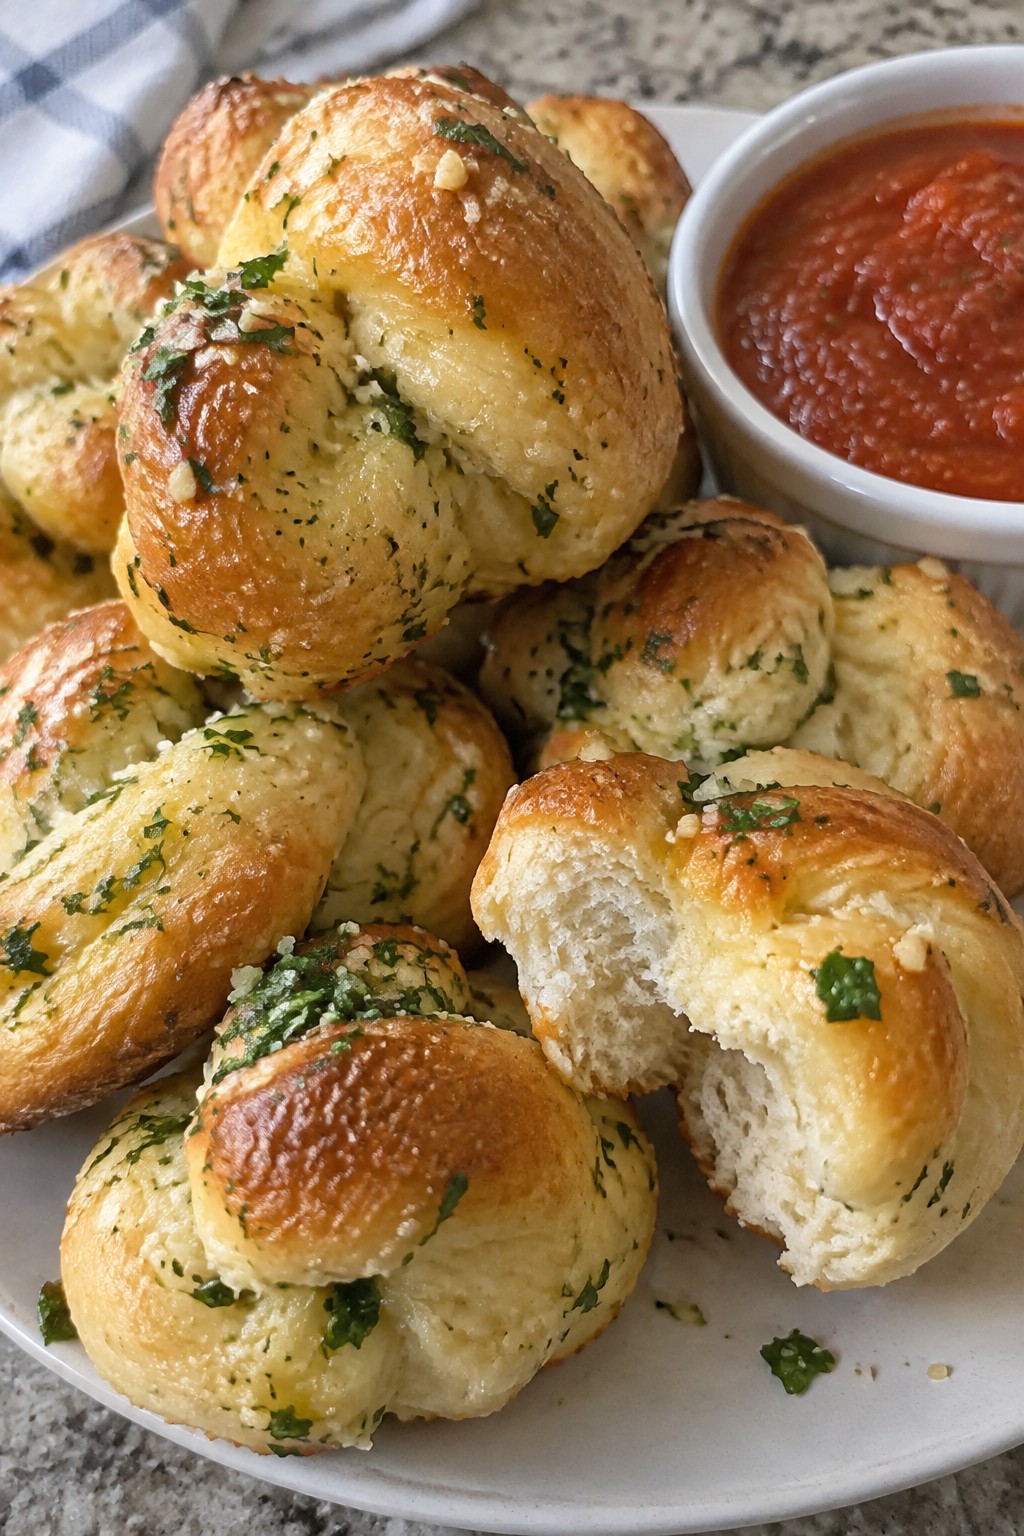
These Vampire Garlic Knots with Marinara deliver a savory, garlic-forward bite that fits right into a Halloween spread. The knots stay soft on the inside with golden edges, and the warm marinara gives a simple tangy dip that balances the richness.
They work well for parties or casual gatherings when guests want something warm and handheld instead of sweets. The strong garlic flavor keeps things interesting while the marinara adds familiar comfort.
Serves 4 people.
Ingredients
- 1 pound pizza dough, at room temperature
- 4 tablespoons unsalted butter
- 6 garlic cloves, minced
- 1 teaspoon Italian seasoning
- 1/2 teaspoon kosher salt
- 1 cup marinara sauce
- 1 tablespoon chopped fresh parsley
Instructions
- Preheat the oven to 400 degrees and line a baking sheet with parchment paper.
- Divide the pizza dough into 8 equal pieces. Roll each piece into a rope about 6 inches long, then tie into a simple knot and tuck the ends under. Place the knots on the prepared baking sheet.
- Melt the butter in a small bowl. Stir in the minced garlic, Italian seasoning, and kosher salt until combined.
- Brush the garlic butter mixture generously over each dough knot, using all of the mixture.
- Bake for 12 to 15 minutes until the knots turn golden brown on top.
- While the knots bake, warm the marinara sauce in a small saucepan over low heat.
- Remove the knots from the oven and sprinkle with the chopped parsley. Serve immediately with the warm marinara for dipping.
Extra Tips
Room-temperature dough makes knotting easier and helps the knots rise evenly. For a stronger garlic taste, let the butter and garlic sit together for a few minutes before brushing. Leftovers reheat well in a 350-degree oven for 5 minutes to restore crisp edges.Course: Appetizer Cuisine: Italian Equipment: Baking sheet, Oven, Small bowl, Pastry brush, Small saucepan
Jack-O’-Lantern Beef and Rice Stuffed Peppers
These stuffed peppers bring a fun Halloween touch to any appetizer table. Orange bell peppers get carved into jack-o’-lantern faces and filled with a simple beef and rice mixture that stays savory and satisfying.
The filling combines seasoned ground beef with rice and tomato sauce for a balanced bite. Cheese melts over the top to hold everything together without overpowering the other flavors.
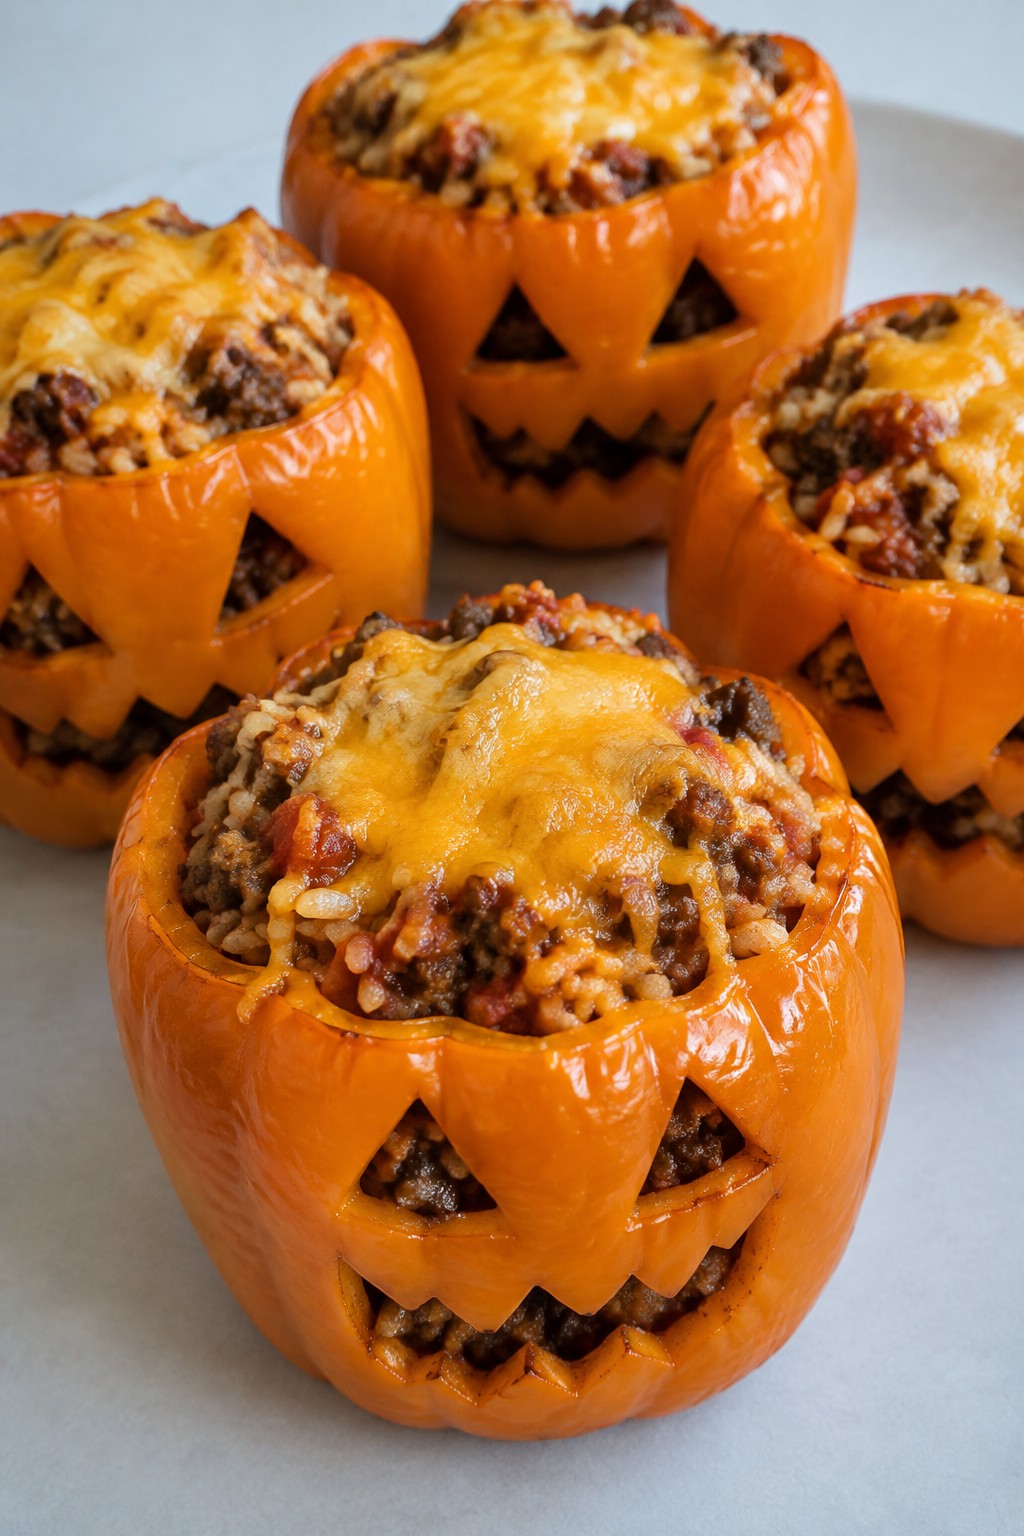
Serves 4 people.
Ingredients
- 4 orange bell peppers
- 1 tablespoon olive oil
- 1 pound ground beef
- 1 small onion, diced
- 2 cloves garlic, minced
- 1 cup cooked rice
- 1 cup tomato sauce
- 1 teaspoon paprika
- Salt and pepper to taste
- 1 cup shredded cheddar cheese
Instructions
- Preheat the oven to 375 degrees F. Slice the tops off each pepper and carve simple jack-o’-lantern faces into the sides. Scoop out the seeds and membranes, then set the peppers aside.
- Heat the olive oil in a large skillet over medium heat. Add the diced onion and minced garlic and cook until the onion turns soft.
- Add the ground beef to the skillet and cook until it browns completely. Drain any excess fat from the pan.
- Stir the cooked rice, tomato sauce, paprika, salt, and pepper into the beef mixture. Let it simmer for 3 to 4 minutes so the flavors combine.
- Spoon the beef and rice mixture into the carved peppers until they are full. Place the peppers upright in a baking dish.
- Sprinkle the shredded cheddar cheese evenly over the top of each pepper. Bake for 20 to 25 minutes until the peppers soften and the cheese melts.
Extra Tips
Carve the faces on the thicker sides of the peppers so they hold their shape during baking. The filling can be made a day ahead and stored in the fridge, then stuffed into the peppers right before they go into the oven. Leftovers reheat well in a 350-degree oven for 10 minutes to keep the cheese from drying out.Course: Appetizer Cuisine: American Equipment: Baking dish, Large skillet, Knife
Crispy Fried Ravioli with Bloody Marinara Dip
These crispy fried ravioli make a fun, savory option for Halloween parties. The golden breadcrumb coating gives way to warm, cheesy centers, while the marinara dip adds a rich tomato flavor that fits the spooky theme without any sweetness. Serve them hot at game nights or potlucks when you want something handheld and satisfying.
This recipe keeps things simple with store-bought ravioli and pantry staples. The result is a crunchy exterior that holds up well on a platter, paired with a smooth dip that guests can scoop easily.

Serves 4 people.
Ingredients
- 20 oz package cheese ravioli
- 1 cup all-purpose flour
- 2 large eggs
- 1 cup panko breadcrumbs
- 1/2 cup grated Parmesan cheese
- 1 teaspoon Italian seasoning
- Vegetable oil, for frying (about 4 cups)
- 2 cups marinara sauce
- Fresh parsley, for garnish
Instructions
- Lay the ravioli on a baking sheet and pat them dry with a paper towel. Dredge each piece in flour, shaking off the excess.
- Beat the eggs in a shallow bowl. Dip the floured ravioli into the eggs, letting the extra drip off.
- Mix the panko breadcrumbs, Parmesan cheese, and Italian seasoning in another bowl. Coat each ravioli evenly in the breadcrumb mixture and place them back on the baking sheet.
- Heat the vegetable oil in a large pot or deep skillet to 350°F. Fry the ravioli in batches for 2 to 3 minutes per side until golden brown.
- Remove the ravioli with a slotted spoon and drain on a paper towel-lined plate. Warm the marinara sauce in a small saucepan or microwave.
- Transfer the sauce to a serving bowl and sprinkle the fried ravioli with chopped fresh parsley before serving.
Extra Tips
Fry in small batches to keep the oil temperature steady and avoid soggy spots. If the breadcrumbs need more grip, press them gently onto the ravioli. Leftovers reheat best in a 375°F oven for 8 minutes to restore crispness. Skip the parsley if you prefer a simpler finish.Course: Appetizer Cuisine: Italian Equipment: Large pot, Mixing bowls, Baking sheet, Slotted spoon
Bacon-Wrapped Jalapeño Popper Mummies
These bacon-wrapped jalapeño poppers get a simple Halloween twist that makes them stand out on a party table. The creamy filling balances the heat from the peppers, while the bacon crisps around the edges for a satisfying bite. They work well as a make-ahead option for game nights or casual gatherings when you want something savory instead of sweet.
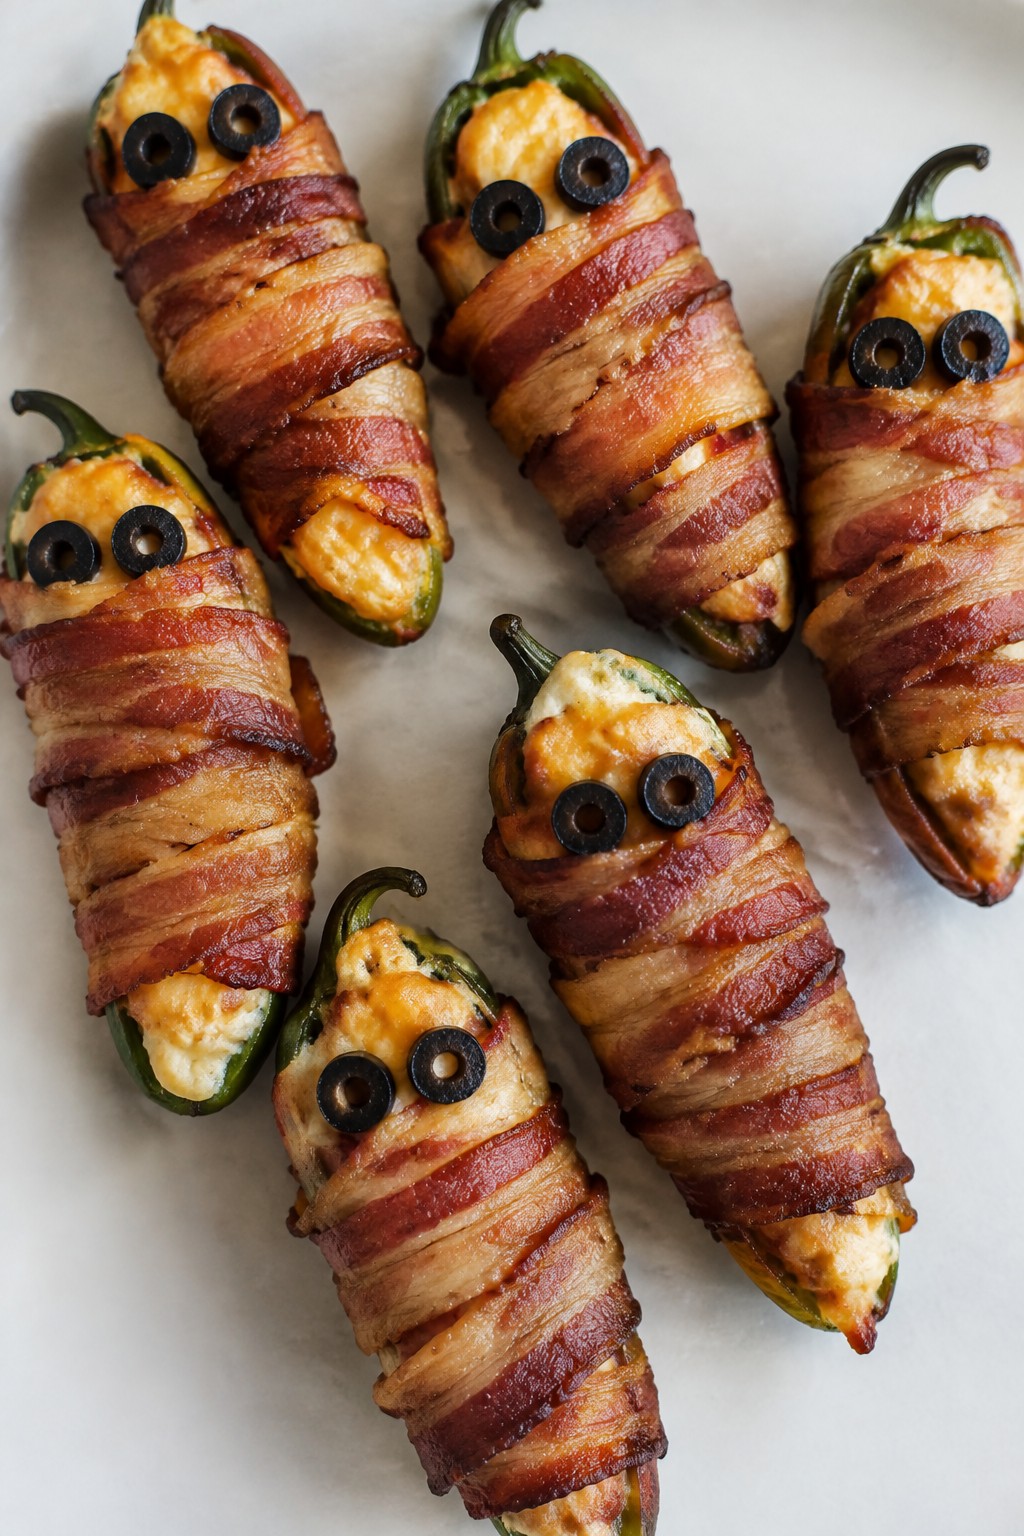
Serves 4 people.
Ingredients
- 8 large jalapeño peppers
- 8 ounces cream cheese, softened
- 1 cup shredded cheddar cheese
- 1 teaspoon garlic powder
- 16 slices bacon
- 16 black olive slices
Instructions
- Preheat the oven to 400 degrees F and line a baking sheet with parchment paper.
- Slice each jalapeño in half lengthwise and remove the seeds and membranes.
- Mix the cream cheese, shredded cheddar cheese, and garlic powder in a bowl until evenly combined.
- Spoon the cheese mixture into each jalapeño half and smooth the tops.
- Wrap each stuffed jalapeño half with two bacon slices in a crisscross pattern to resemble mummy bandages, leaving a small gap near one end for the face.
- Place the wrapped halves on the prepared baking sheet and bake for 20 to 25 minutes until the bacon is crisp and the filling is hot.
- Remove from the oven and press two black olive slices into the gap on each popper to create eyes.
Extra Tips
Cut the bacon slices in half lengthwise if they seem too wide for a neat wrap. These taste best served warm right after baking, but you can reheat leftovers in a 350 degree F oven for five minutes to restore crispness. Skip the olive slices if you prefer a milder look without added brininess.Course: Appetizer Cuisine: American Equipment: Baking Sheet, Mixing Bowl, Knife
Ghostly Prosciutto-Wrapped Asparagus Spears
These ghostly prosciutto-wrapped asparagus spears give a savory option that cuts through sweet Halloween treats. The thin prosciutto adds a salty, crisp layer around tender asparagus for a warm bite that feels light but filling.
They suit party platters because they require little hands-on time and cook while other dishes come together. The finished spears have a balance of salty and earthy notes with a mix of soft centers and crisp edges.
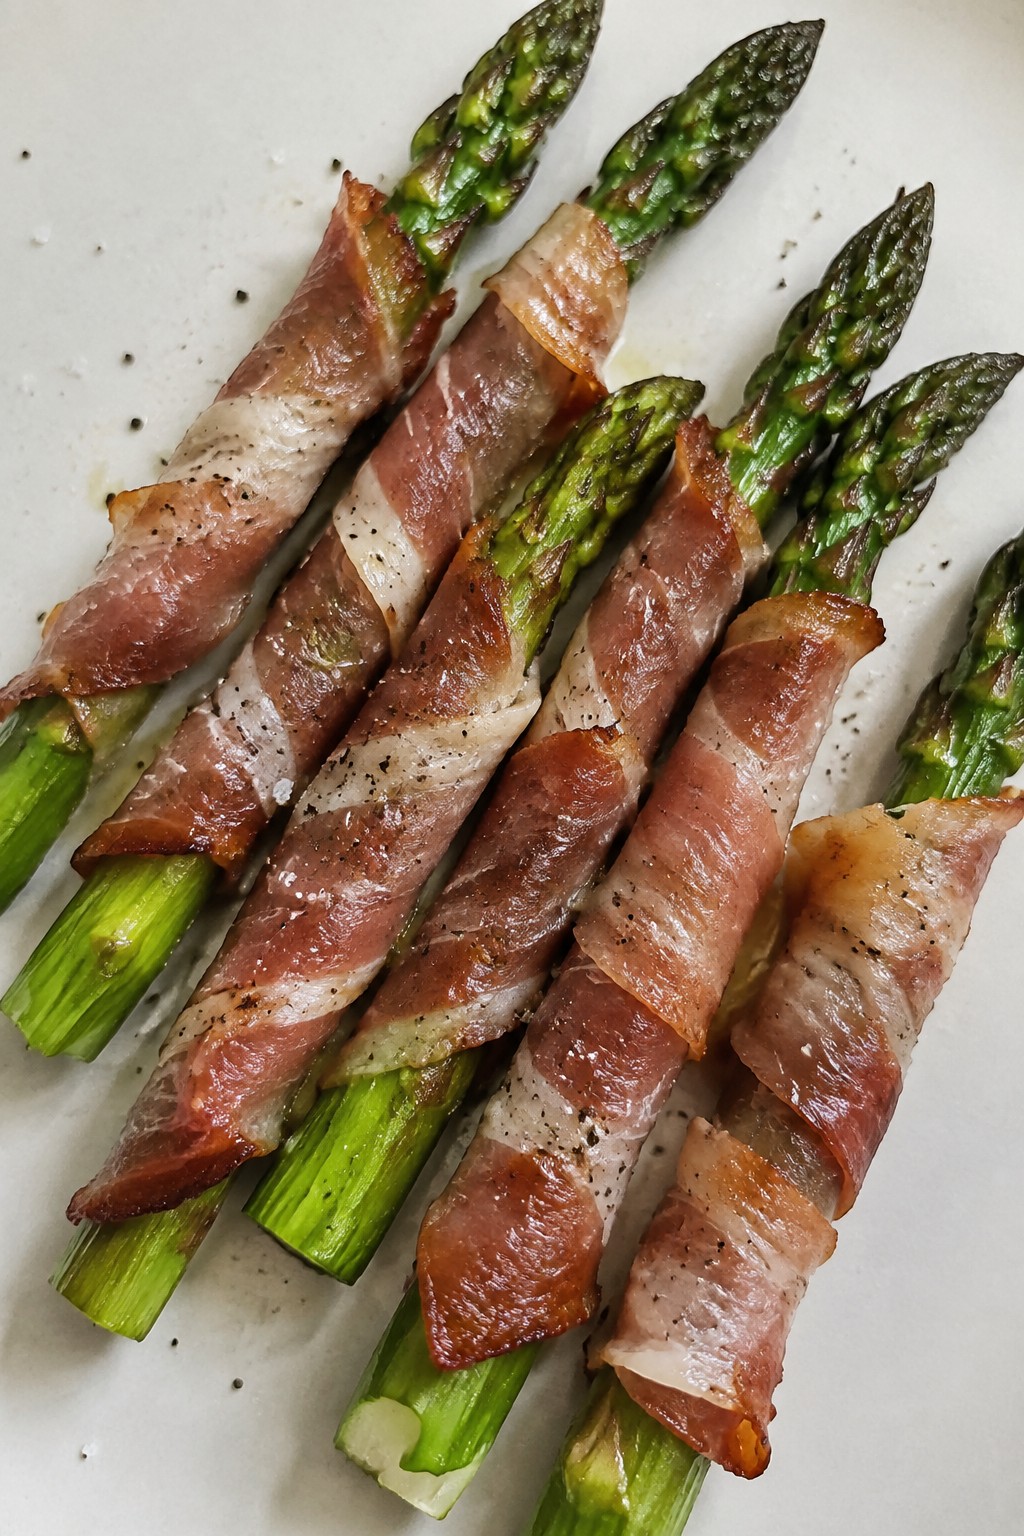
Serves 4 people.
Ingredients
- 12 asparagus spears, trimmed
- 6 slices prosciutto
- 2 tablespoons olive oil
- 1/4 teaspoon salt
- 1/4 teaspoon black pepper
Instructions
- Preheat the oven to 400°F and line a baking sheet with parchment paper.
- Lay two asparagus spears together and wrap one prosciutto slice around the middle of each pair. Repeat with the remaining spears and slices.
- Place the wrapped bundles on the prepared baking sheet in a single layer.
- Drizzle the olive oil evenly over the bundles, then sprinkle with the salt and black pepper.
- Bake for 10 to 12 minutes until the asparagus is tender and the prosciutto edges turn crisp.
- Remove from the oven and let the bundles rest for one minute before serving.
Extra Tips
Wrap the prosciutto just once around the spears so it stays visible and creates a light, flowing look on the plate. These bundles lose crispness if held too long, so bake them right before guests arrive. Leftovers can be stored in the fridge for one day and reheated in a 350°F oven for a few minutes to restore texture.Course: Appetizer Cuisine: Italian Equipment: Baking Sheet, Oven, Parchment Paper
Pumpkin Arancini with Marinara Dipping Sauce
These pumpkin arancini turn leftover risotto into a savory bite that fits right into a Halloween spread. The pumpkin adds a subtle sweetness that balances the cheese and herbs, while the crispy coating gives way to a soft center. They hold up well on a platter and pair naturally with warm marinara for dipping.
Serve them at the start of a party when guests want something hearty before the sweets arrive. The golden color also ties into autumn themes without extra decoration.
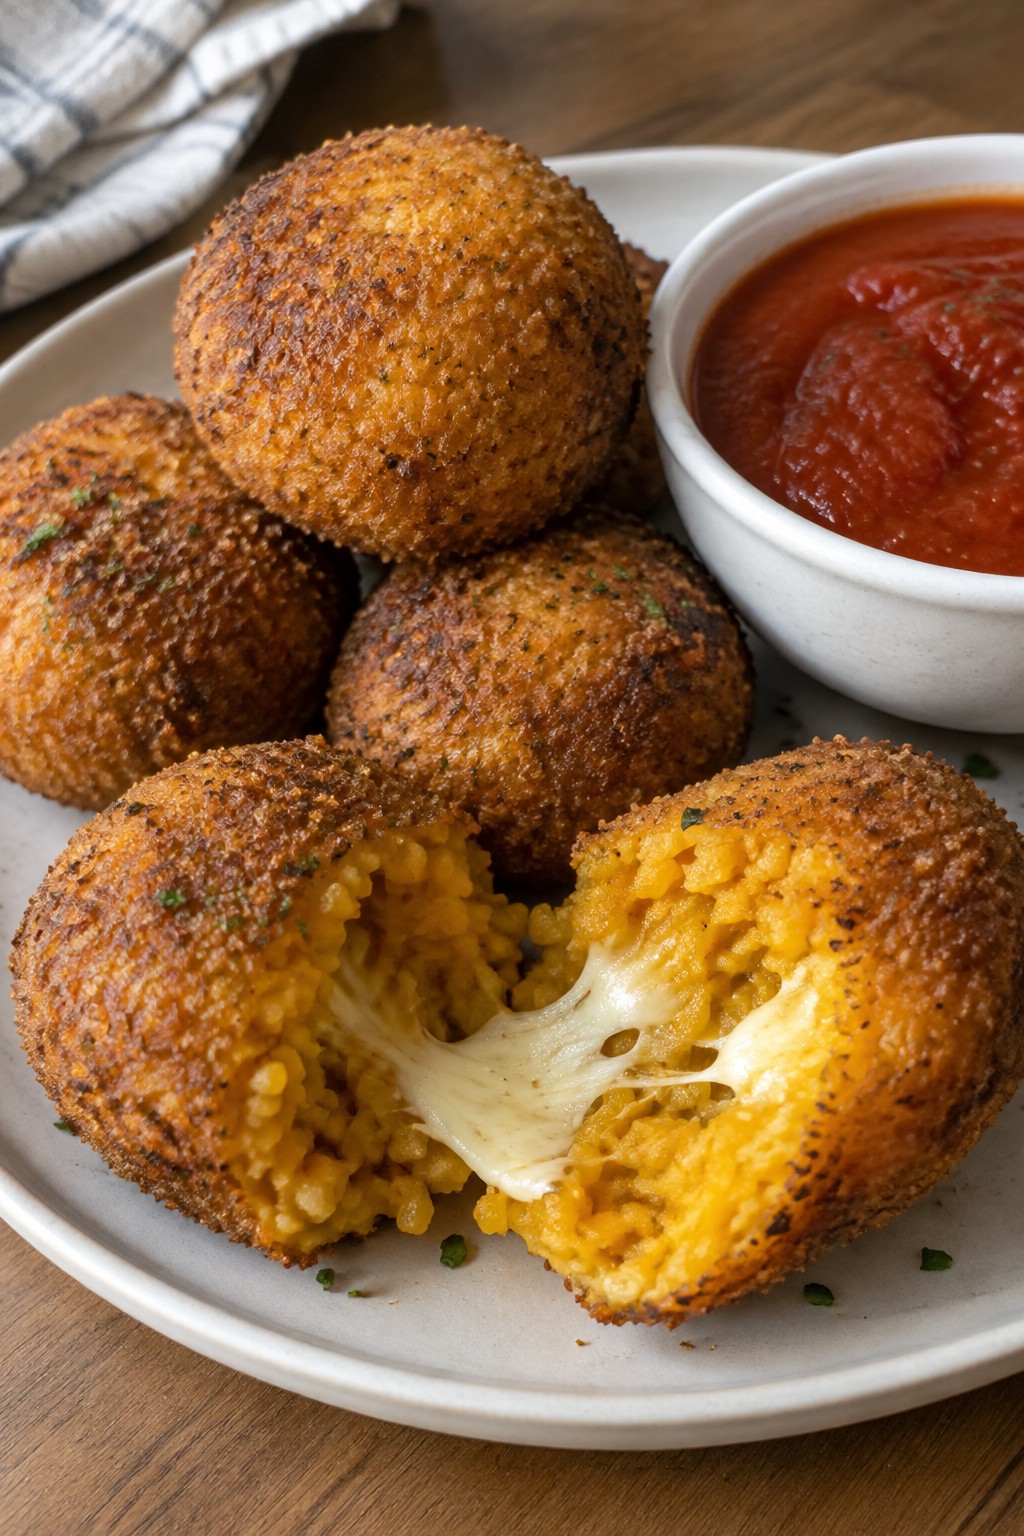
Serves 4 people.
Ingredients
- 1 cup arborio rice
- 4 cups vegetable broth
- 1 cup pumpkin puree
- 1 small onion, finely diced
- 2 cloves garlic, minced
- 1/2 cup grated Parmesan cheese
- 4 ounces fresh mozzarella, cut into small cubes
- 2 large eggs
- 1 cup plain breadcrumbs
- 2 cups marinara sauce
- Vegetable oil, for frying
- 1 teaspoon dried sage
- Salt and black pepper
Instructions
- Bring the vegetable broth to a simmer in a large saucepan. Keep it warm over low heat.
- In a separate large pot, cook the onion and garlic over medium heat until soft. Add the arborio rice and stir for one minute until the grains look slightly translucent.
- Ladle in the warm broth one cup at a time, stirring often. When each addition is absorbed, add the next. After all the broth is used, stir in the pumpkin puree, Parmesan, sage, salt, and pepper. Cook until the mixture thickens and the rice is tender. Spread the risotto on a baking sheet and let it cool completely.
- Once cooled, scoop about two tablespoons of risotto into your hand. Press a mozzarella cube into the center and shape into a ball. Repeat with the remaining mixture.
- Beat the eggs in one bowl and place the breadcrumbs in another. Dip each ball into the egg, then roll in breadcrumbs to coat fully.
- Heat vegetable oil in a deep pot to 350 degrees. Fry the arancini in batches until golden brown on all sides. Drain on paper towels.
- Warm the marinara sauce and serve it alongside the hot arancini for dipping.
Extra Tips
Fry in small batches so the oil temperature stays steady and the coating turns evenly crisp. If you make the risotto ahead, store it covered in the fridge overnight before forming the balls. Reheat leftovers in a 375-degree oven for ten minutes to restore crunch without added oil.Course: Appetizer Cuisine: Italian Equipment: Large saucepan, Large pot, Baking sheet, Mixing bowls, Deep pot
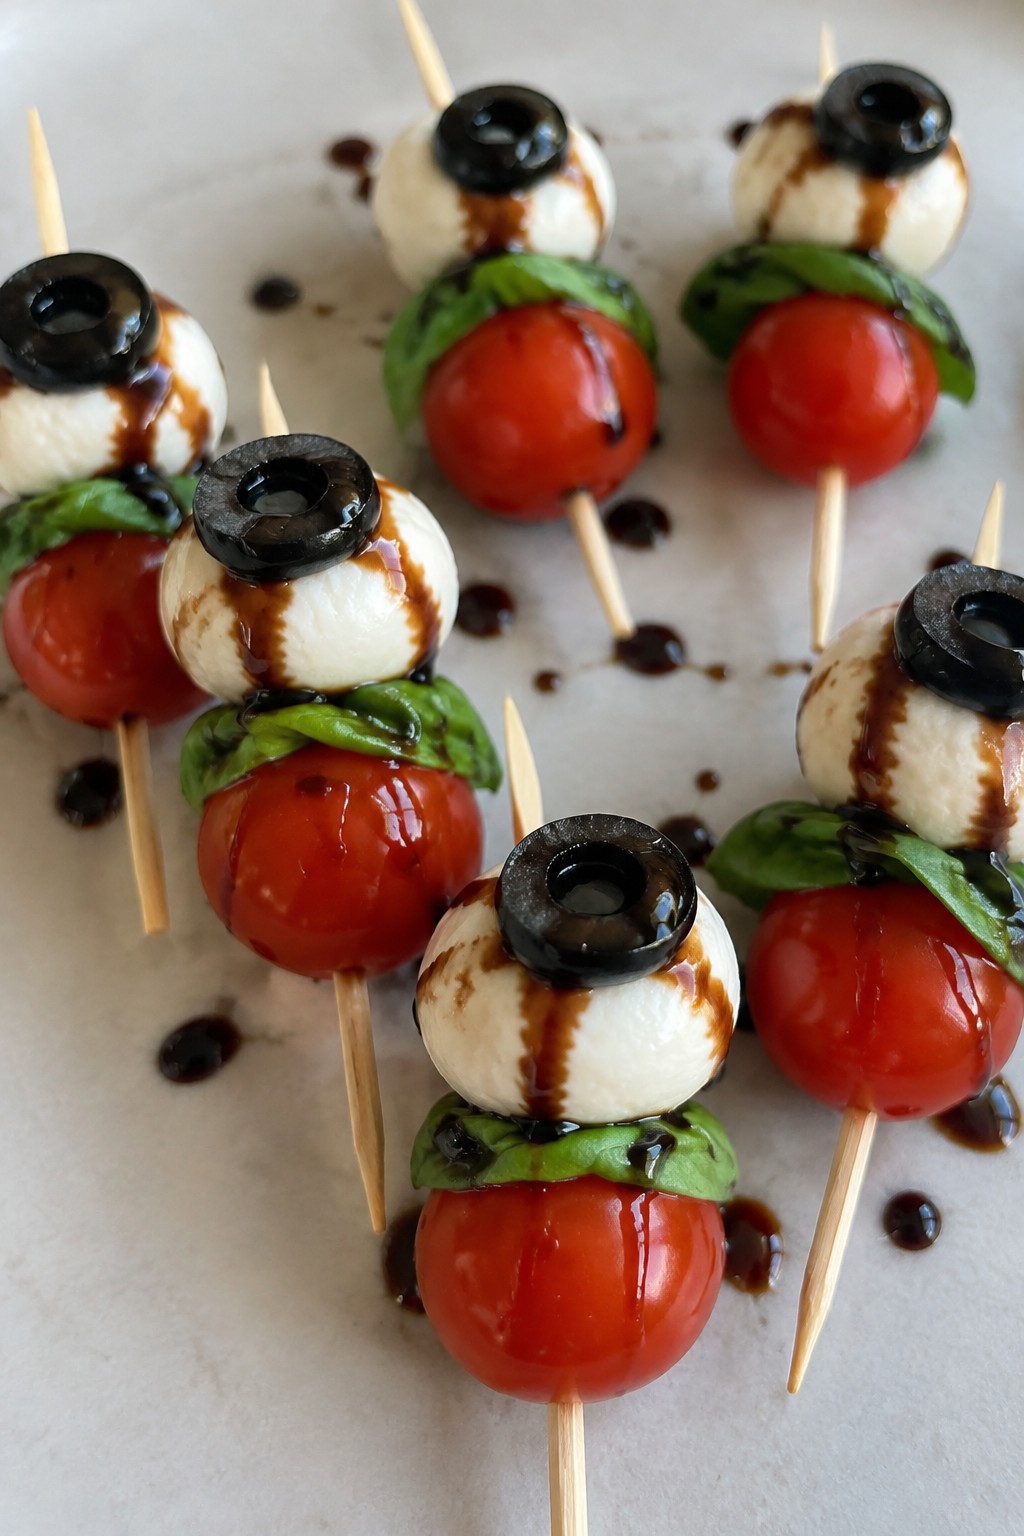
Eyeball Caprese Skewers with Balsamic Glaze
These skewers turn a classic Caprese into a simple Halloween appetizer. The mozzarella balls double as eyeballs when topped with olive halves, while the tomato and basil keep the familiar fresh flavors. They work well for parties because they come together quickly and stay light compared to heavier snacks.
The taste is bright from the tomatoes, creamy from the cheese, and slightly sweet-tangy from the balsamic glaze. The olives add a salty bite that balances everything without overpowering the other ingredients.
Serves 4 people.
Ingredients
- 12 cherry tomatoes
- 12 small fresh mozzarella balls
- 12 large fresh basil leaves
- 6 pitted black olives, halved
- ¼ cup balsamic glaze
- 12 wooden skewers
- 2 tablespoons olive oil
- Salt and black pepper to taste
Instructions
- Rinse the cherry tomatoes and pat them dry. Set them aside with the mozzarella balls and basil leaves.
- Thread one cherry tomato, one basil leaf, and one mozzarella ball onto each wooden skewer in that order.
- Press one olive half onto the top of each mozzarella ball to create the eyeball effect.
- Arrange the finished skewers on a serving plate. Drizzle the balsamic glaze evenly over the top.
- Finish with a light brush of olive oil and a sprinkle of salt and black pepper.
Extra Tips
Make these a few hours ahead and keep them covered in the fridge so the mozzarella stays firm. If the balsamic glaze is too thick, warm it slightly in the microwave for easier drizzling. Use the smallest mozzarella balls you can find so the olive stays centered on top without sliding.Course: Appetizer Cuisine: Italian Equipment: Wooden skewers, Serving plate
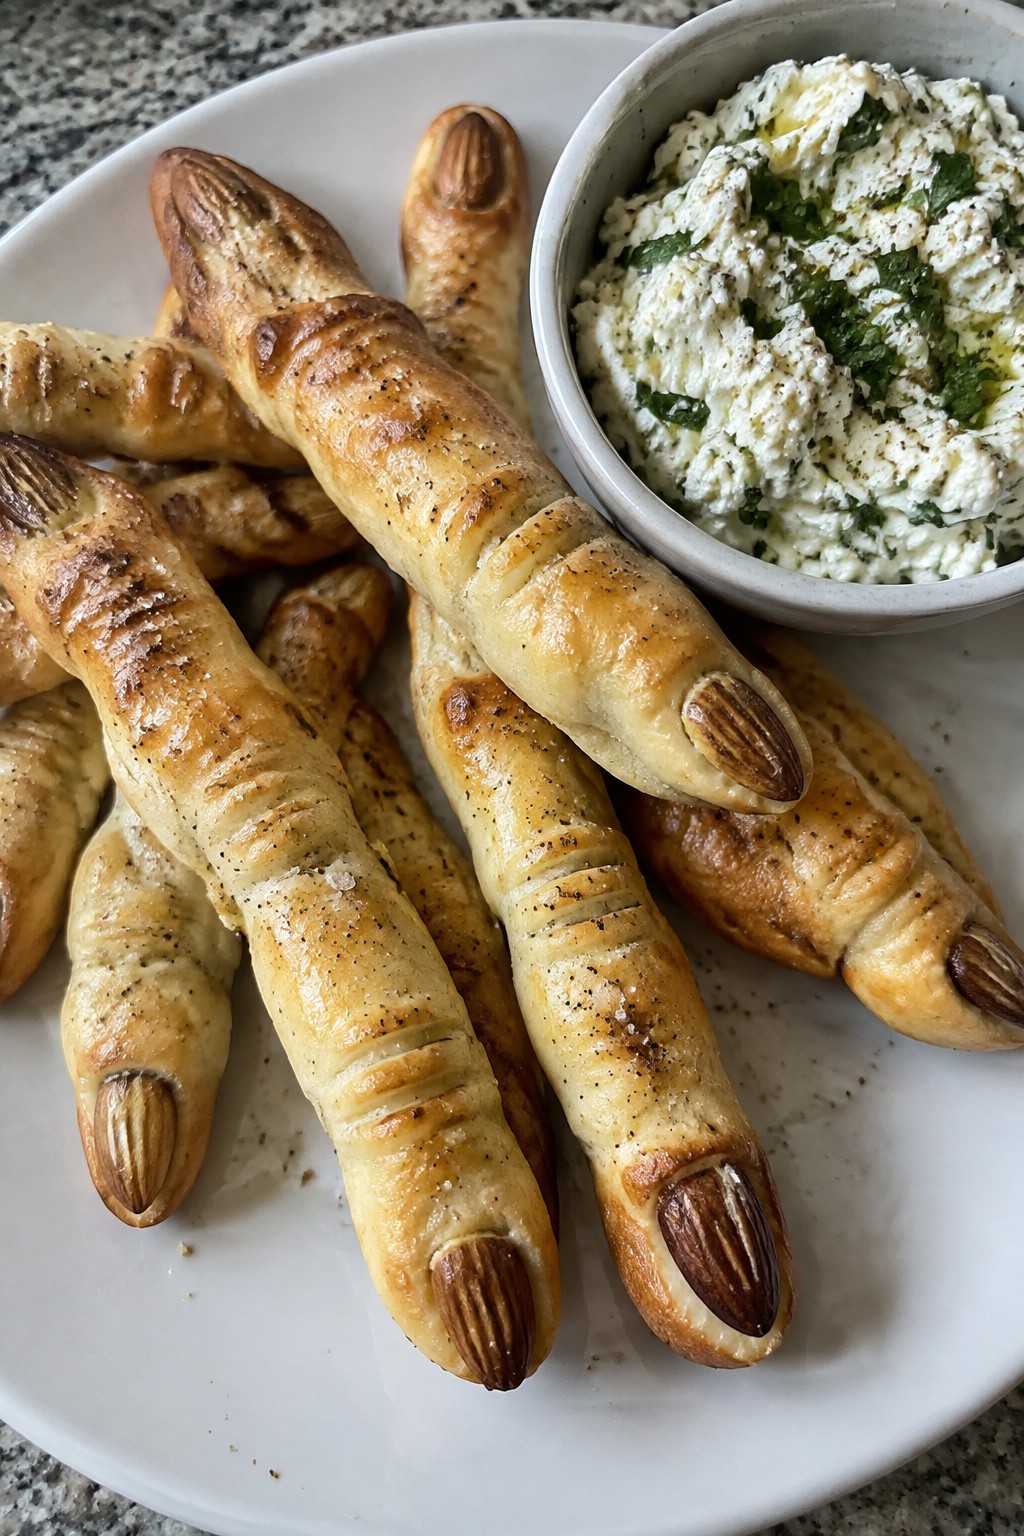
Witch Finger Breadsticks with Herbed Ricotta
These breadsticks bring a playful shape to a simple dough base while the herbed ricotta adds a creamy contrast. They work well for Halloween parties where guests want something savory to offset sweet treats. The result is crisp on the outside with a tender center and a bright, garlicky dip on the side.
They fit easily into a snack spread and hold up well at room temperature for a couple of hours. Fresh herbs keep the flavor light rather than heavy, and the almond nails give each piece a clear visual tie to the theme.
Serves 4 people.
Ingredients
- 1 pound pizza dough
- 1 cup ricotta cheese
- 2 tablespoons chopped fresh basil
- 1 tablespoon chopped fresh parsley
- 1 garlic clove, minced
- 2 tablespoons olive oil
- 12 almonds
- 1 teaspoon salt
- 1/2 teaspoon black pepper
Instructions
- Preheat the oven to 425°F and line a baking sheet with parchment paper.
- In a mixing bowl, combine the ricotta cheese, basil, parsley, garlic, 1 tablespoon olive oil, salt, and pepper. Set the mixture aside.
- Divide the pizza dough into 12 equal pieces. Roll each piece into a 5-inch log and taper one end to form a finger shape.
- Press one almond into the rounded end of each log to create a fingernail.
- Place the shaped breadsticks on the prepared baking sheet. Brush them with the remaining tablespoon of olive oil.
- Bake for 12 to 15 minutes until the breadsticks turn golden. Serve warm alongside the herbed ricotta.
Extra Tips
Room-temperature dough shapes more easily without tearing. Make the ricotta mixture up to one day ahead and keep it covered in the fridge. If the almonds loosen during baking, press them back in gently right after the breadsticks come out of the oven.Course: Appetizer Cuisine: American Equipment: Baking Sheet, Mixing Bowl
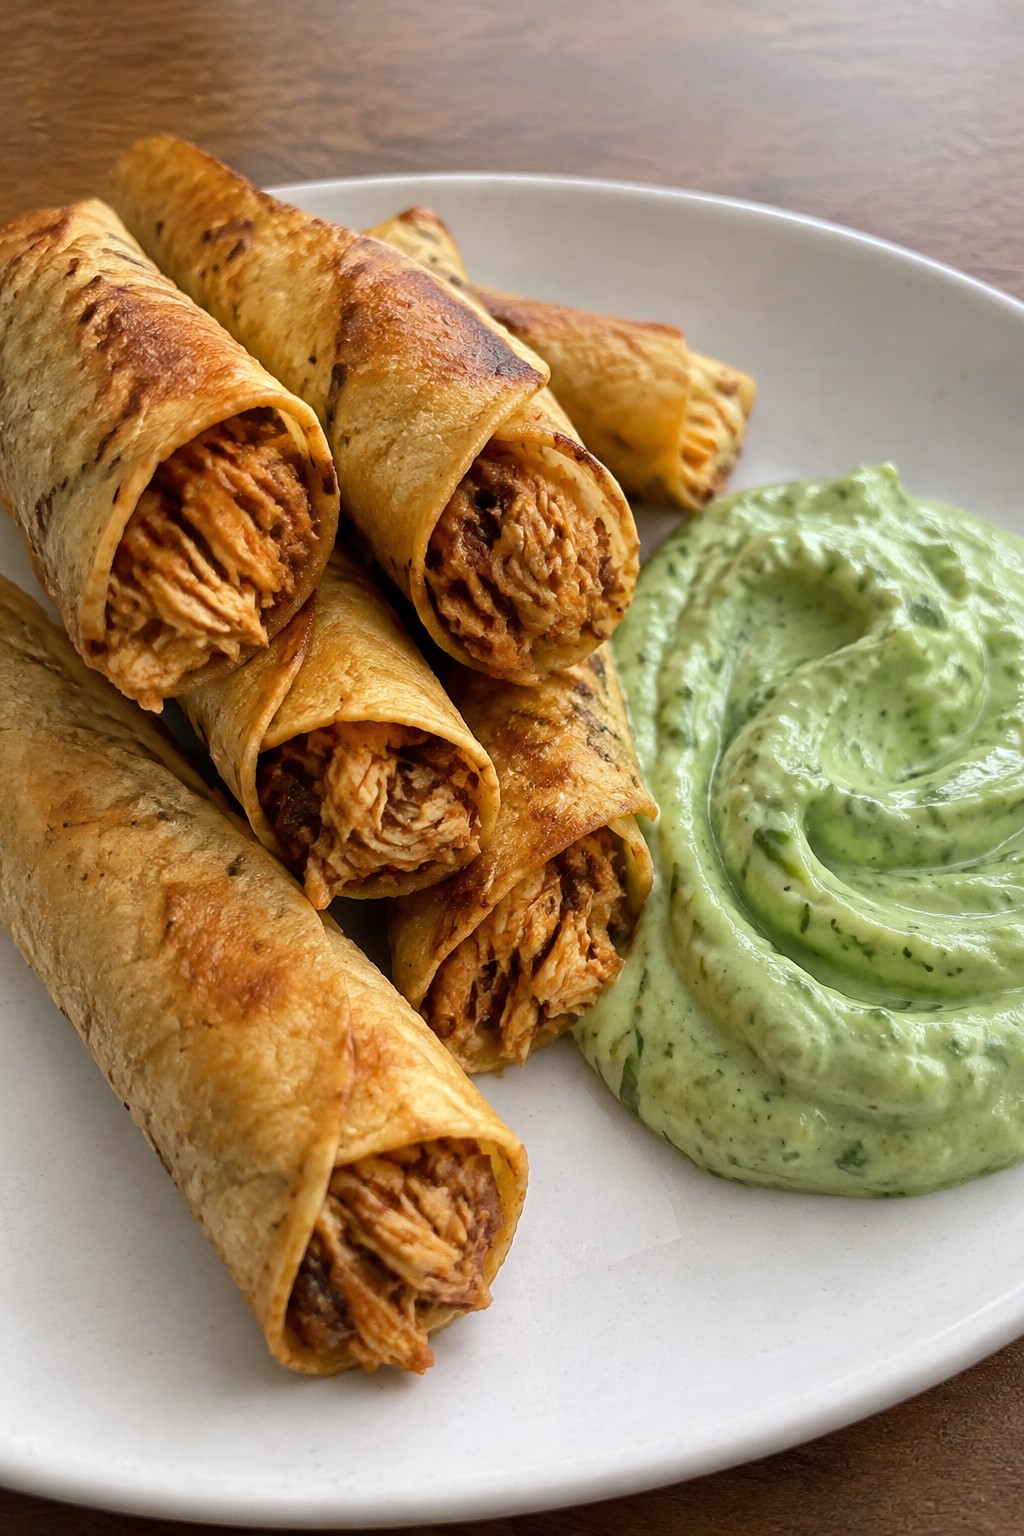
Smoky Chipotle Chicken Taquitos with Avocado Crema
These taquitos bring a smoky, mildly spicy kick that stands out on a Halloween spread. The crispy tortilla shells wrap tender chicken while the cool avocado crema balances the heat. They work well as a make-ahead appetizer for parties where guests want something savory between sweet treats.
The filling comes together quickly with pantry staples, and baking keeps the process simple. Each bite delivers a contrast of crunchy exterior and creamy topping that holds up even after sitting out for a bit.
Serves 4 people.
Ingredients
- 2 cups shredded cooked chicken
- 2 chipotle peppers in adobo sauce, minced
- 1 teaspoon smoked paprika
- 1/2 teaspoon ground cumin
- 1/2 teaspoon salt
- 8 small corn tortillas
- 1 tablespoon olive oil
- 2 ripe avocados
- 1/2 cup sour cream
- Juice of 1 lime
- 1/4 cup fresh cilantro leaves
- 1 garlic clove
Instructions
- Preheat the oven to 400°F and line a baking sheet with parchment paper.
- In a bowl, combine the shredded chicken, minced chipotle peppers, smoked paprika, cumin, and salt. Stir until the chicken is evenly coated.
- Warm the corn tortillas briefly in a dry skillet to make them flexible. Place about 1/4 cup of the chicken mixture along one edge of each tortilla and roll tightly. Place seam-side down on the baking sheet.
- Brush the tops lightly with olive oil. Bake for 18 to 20 minutes until the tortillas are golden and crisp.
- While the taquitos bake, make the crema. Add the avocados, sour cream, lime juice, cilantro, and garlic clove to a blender or food processor. Blend until smooth. Add a pinch of salt if needed.
- Serve the taquitos warm with the avocado crema on the side or drizzled over the top.
Extra Tips
Make the chicken filling a day ahead and store it in the fridge so assembly goes faster on party day. If the crema thickens while sitting, stir in a teaspoon of water or lime juice to loosen it. Corn tortillas hold their shape best here. Leftovers reheat well in a 350°F oven for 8 minutes to restore crispness.Course: Appetizer Cuisine: Mexican Equipment: Baking sheet, Skillet, Blender
Roasted Beet and Goat Cheese Tartlets
These roasted beet and goat cheese tartlets bring an earthy, tangy bite that stands out on a savory spread. The flaky pastry holds roasted beets and creamy cheese together in a way that feels substantial without being heavy. They work well for Halloween gatherings when guests want options beyond sweets.
The deep color of the beets adds visual interest while the goat cheese keeps each bite balanced. A sprinkle of walnuts gives a little crunch at the end.

Serves 4 people.
Ingredients
- 2 medium beets
- 1 sheet puff pastry, thawed
- 4 ounces goat cheese
- 2 tablespoons olive oil
- 1 teaspoon fresh thyme leaves
- 1/4 cup chopped walnuts
- Salt
- Black pepper
Instructions
- Preheat the oven to 400 degrees. Peel the beets and cut them into small cubes. Toss the cubes with 1 tablespoon of olive oil, salt, and pepper. Spread them on a baking sheet and roast for 25 minutes until tender.
- While the beets roast, roll out the puff pastry on a lightly floured surface. Cut it into four circles that fit a muffin tin or small tartlet pans. Press the circles into the pans and prick the bottoms with a fork.
- Bake the pastry shells for 12 minutes until lightly golden. Remove them from the oven and let them cool slightly.
- Crumble the goat cheese into the warm shells. Top each one with the roasted beets. Drizzle with the remaining tablespoon of olive oil and sprinkle with thyme, walnuts, and a little more salt and pepper if needed.
Extra Tips
Roast the beets a day ahead and store them in the fridge so assembly goes faster on the day of serving. If the goat cheese feels too firm, let it sit at room temperature for 15 minutes before crumbling. Skip the walnuts if you need a nut-free version and add an extra pinch of thyme instead.Course: Appetizer Cuisine: American Equipment: Baking Sheet, Muffin Tin, Mixing Bowl
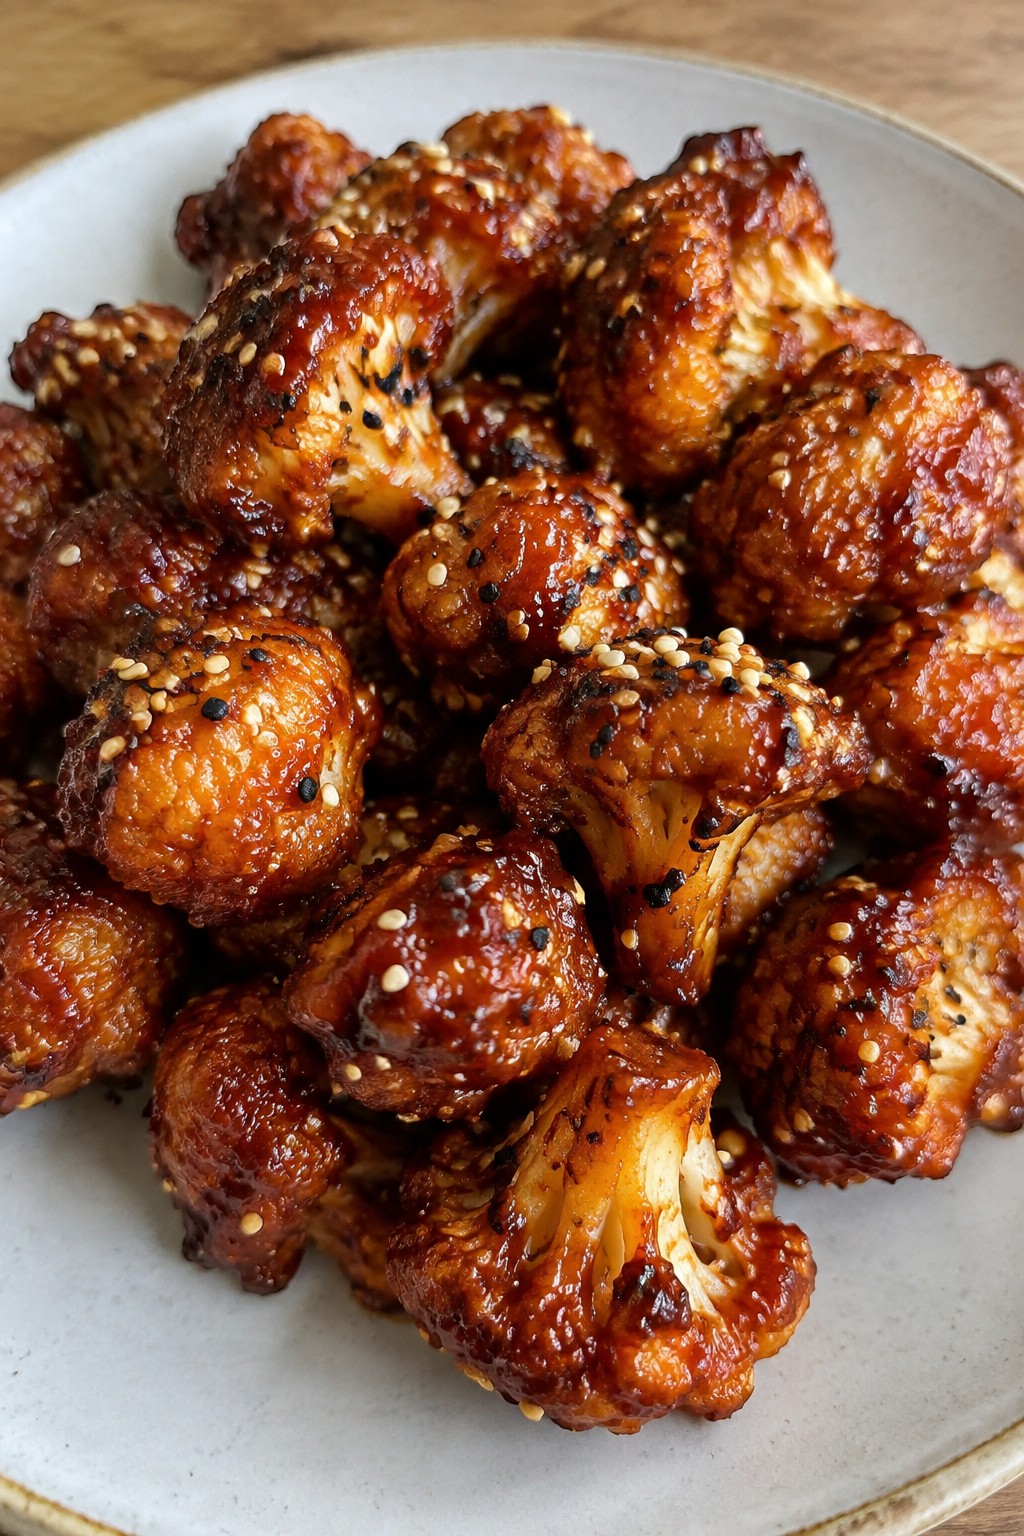
Korean Gochujang Cauliflower Bites with Sesame Seeds
These Korean Gochujang Cauliflower Bites bring bold flavor to a Halloween spread without any sweetness. They work well for parties or casual get-togethers where guests want something savory to balance out the usual treats.
The cauliflower turns crisp after baking, then gets coated in a spicy, savory glaze. Sesame seeds add a light crunch and nutty note at the end.
Serves 4 people.
Ingredients
- 1 large head cauliflower, cut into bite-sized florets
- 1/4 cup gochujang paste
- 2 tablespoons soy sauce
- 1 tablespoon honey
- 1 tablespoon rice vinegar
- 2 teaspoons sesame oil
- 1/2 cup cornstarch
- 2 tablespoons vegetable oil
- 2 tablespoons sesame seeds
- 1/2 teaspoon salt
Instructions
- Preheat the oven to 425°F and line a baking sheet with parchment paper.
- In a large bowl, toss the cauliflower florets with the cornstarch and salt until evenly coated.
- Drizzle the vegetable oil over the coated florets and toss again to distribute.
- Spread the florets in a single layer on the prepared baking sheet. Bake for 25 minutes, flipping halfway, until golden and crisp.
- While the cauliflower bakes, whisk together the gochujang paste, soy sauce, honey, rice vinegar, and sesame oil in a small bowl.
- Remove the cauliflower from the oven and transfer it to a clean large bowl. Pour the sauce over the hot florets and toss gently until fully coated.
- Sprinkle the sesame seeds over the coated bites and toss once more before serving.
Extra Tips
Toss the cauliflower in the sauce right after it comes out of the oven so the glaze sticks without making the coating soggy. If you want less heat, use a milder gochujang or reduce the amount by one tablespoon. Leftovers reheat best in a 400°F oven for five minutes to restore crispness.Course: Appetizer Cuisine: Korean Equipment: Baking Sheet, Large Bowl, Small Bowl
