
Pumpkins become the easiest way to create a clear Halloween focal point without rearranging an entire room.
I tend to notice first the ones with patterns that feel unexpected rather than the usual faces everyone has seen before.
A single well carved pumpkin can anchor a porch or entry table while still leaving room for normal furniture and daily use.
Many people stop at the basic templates but pushing toward something more original keeps the display from blending into ordinary fall decorations.
The right design can draw attention from the street or across a living room without covering every surface.
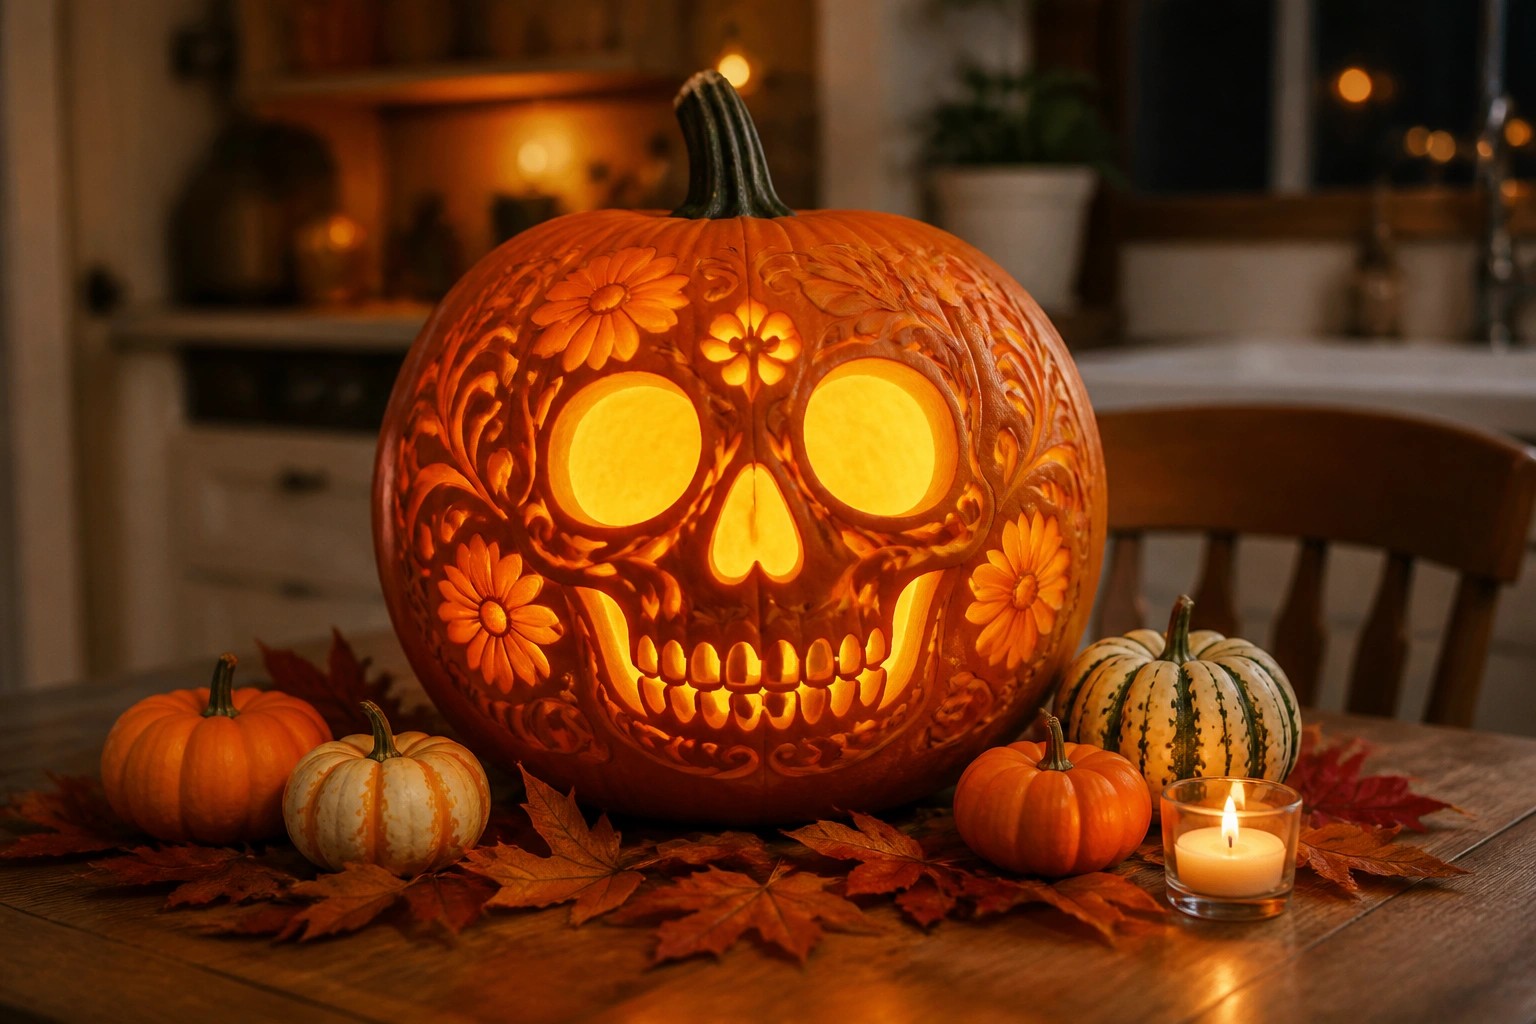
Carve Intricate Swirls And Flowers Into A Pumpkin

A large pumpkin with flowing swirls and small flowers cut into the surface makes a strong centerpiece. The pattern shows up clearly once the candle is lit inside, and the design feels more finished than a basic face.
Set the carved pumpkin on a wooden slab in the middle of the dining table. Add two or three small white pumpkins and a couple of candles around the base. One detailed pumpkin is usually enough to carry the look.
Carve A Skull With Swirling Details
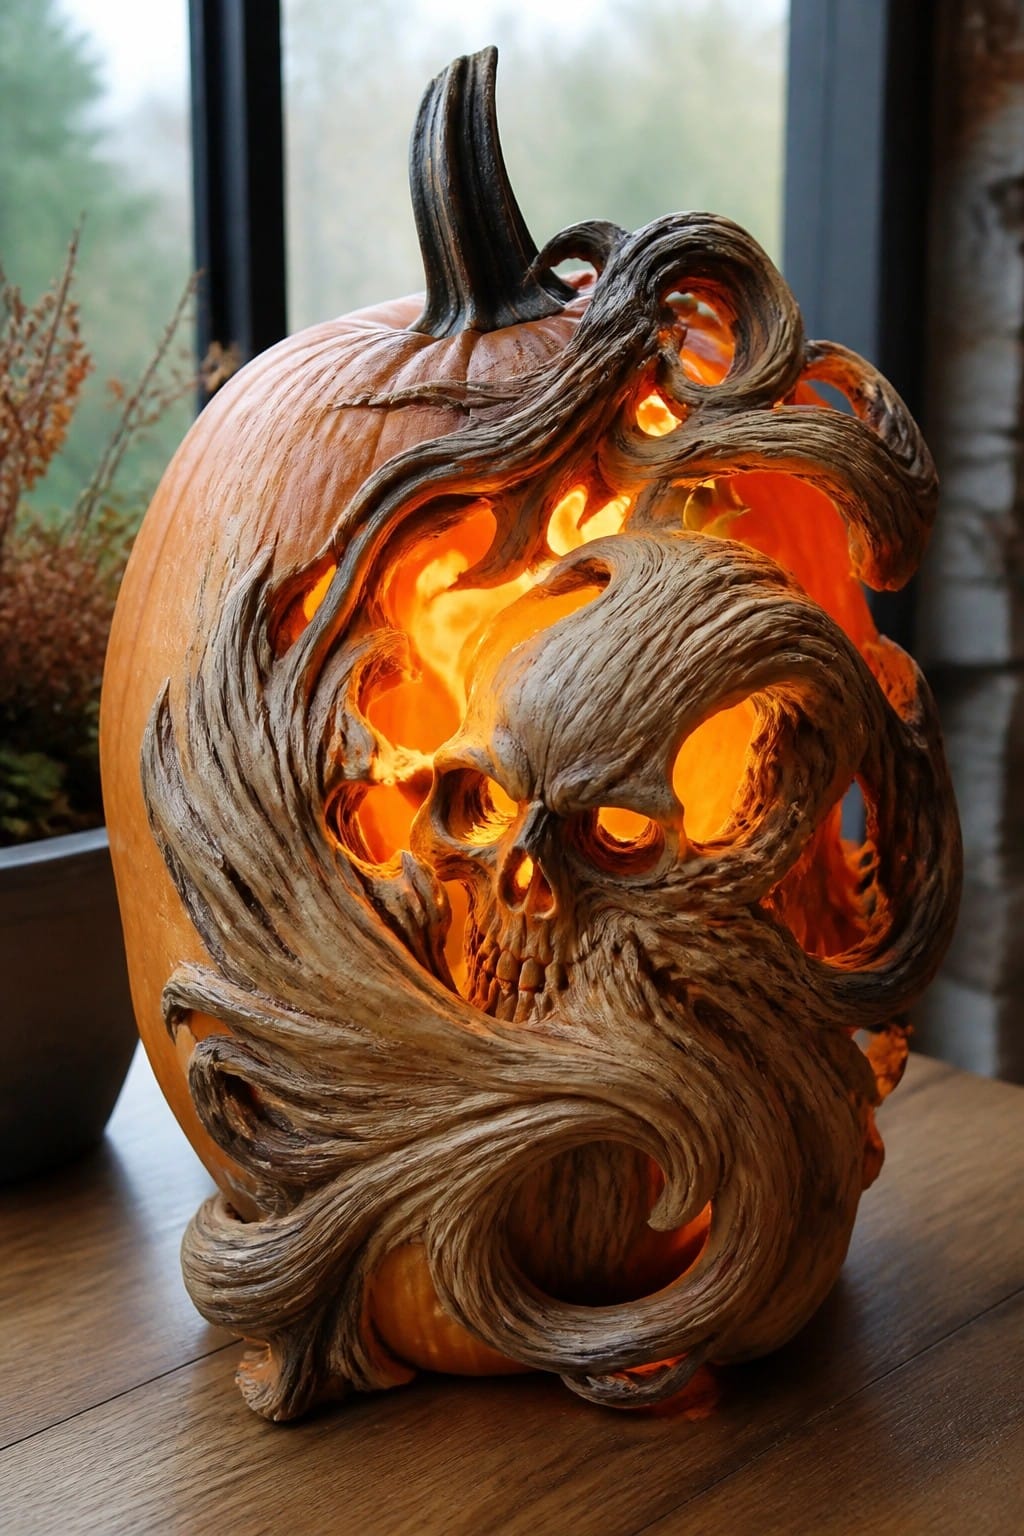
A pumpkin carved with a clear skull in the center and thick swirling lines around it creates a strong focal point. The open sections let the light shine through in interesting shapes, making the whole design feel more dramatic than a standard face.
Start with a large smooth pumpkin, sketch the skull first, then add the flowing lines around it. Keep the cuts clean so the light can pass through evenly and place the finished piece where it can be seen from the front.
Group Several Carved Pumpkins On The Steps
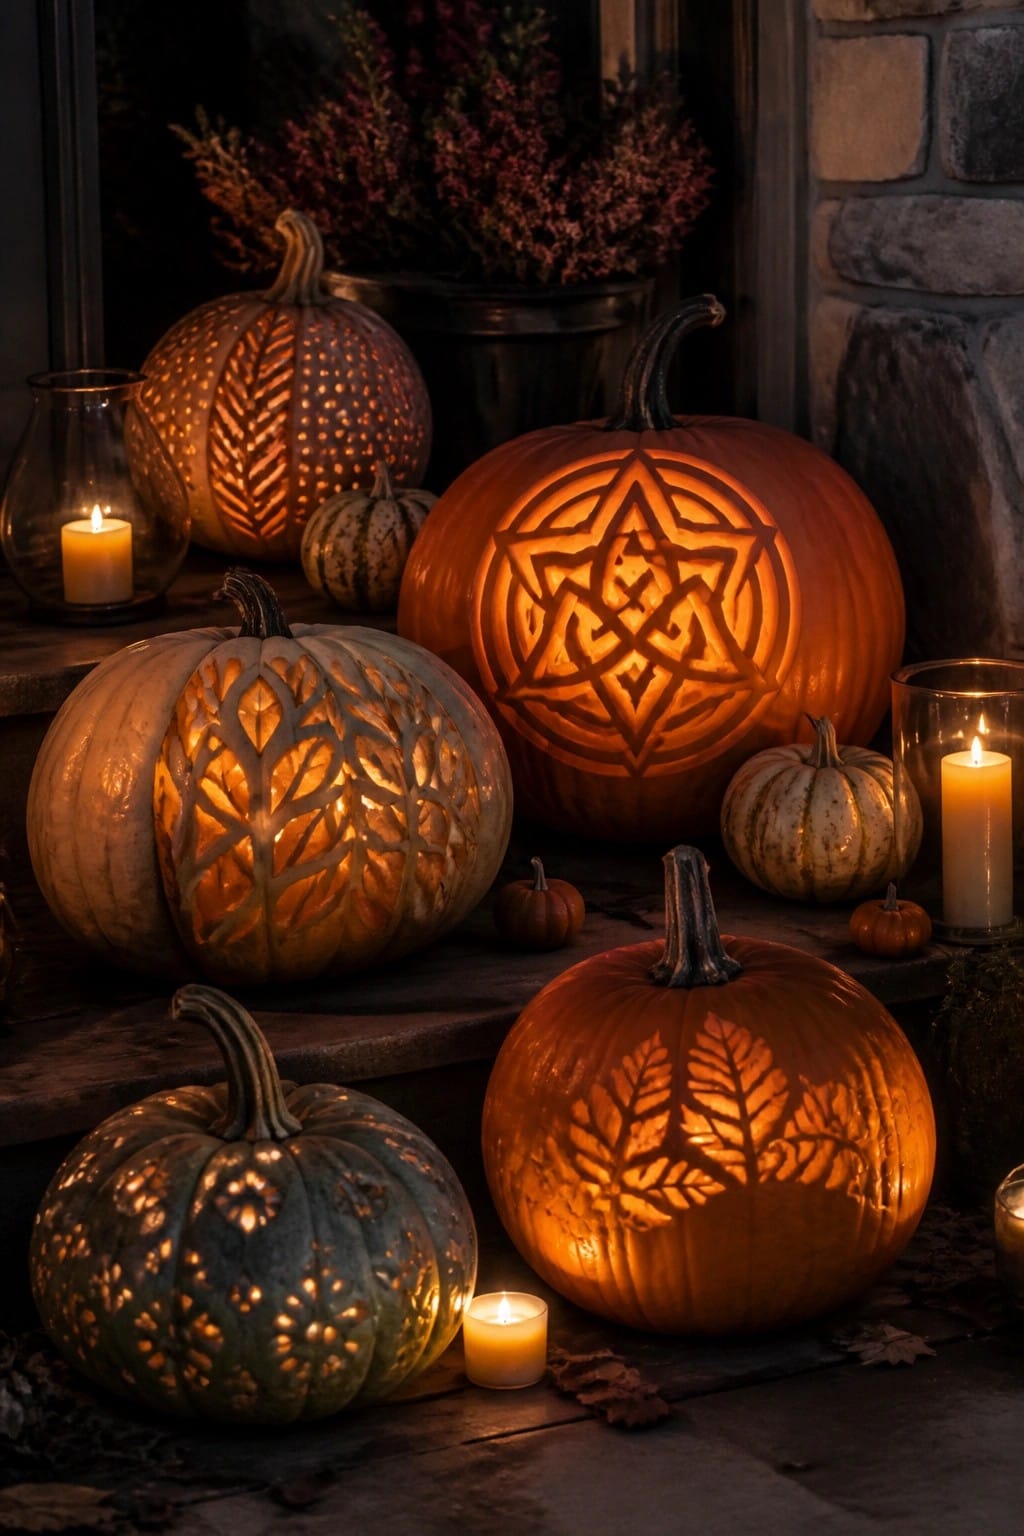
Placing a mix of carved pumpkins together on the front steps creates an easy focal point that shows off different designs at once. The variety of patterns stands out more when the pumpkins sit side by side instead of scattered around the yard.
Use four to six pumpkins with contrasting cuts and set them at different heights on the steps. Add a few plain candles nearby to keep the focus on the carvings without crowding the space. This works well on any set of stairs that gets foot traffic at night.
Carve A Detailed Face Into A Large Pumpkin
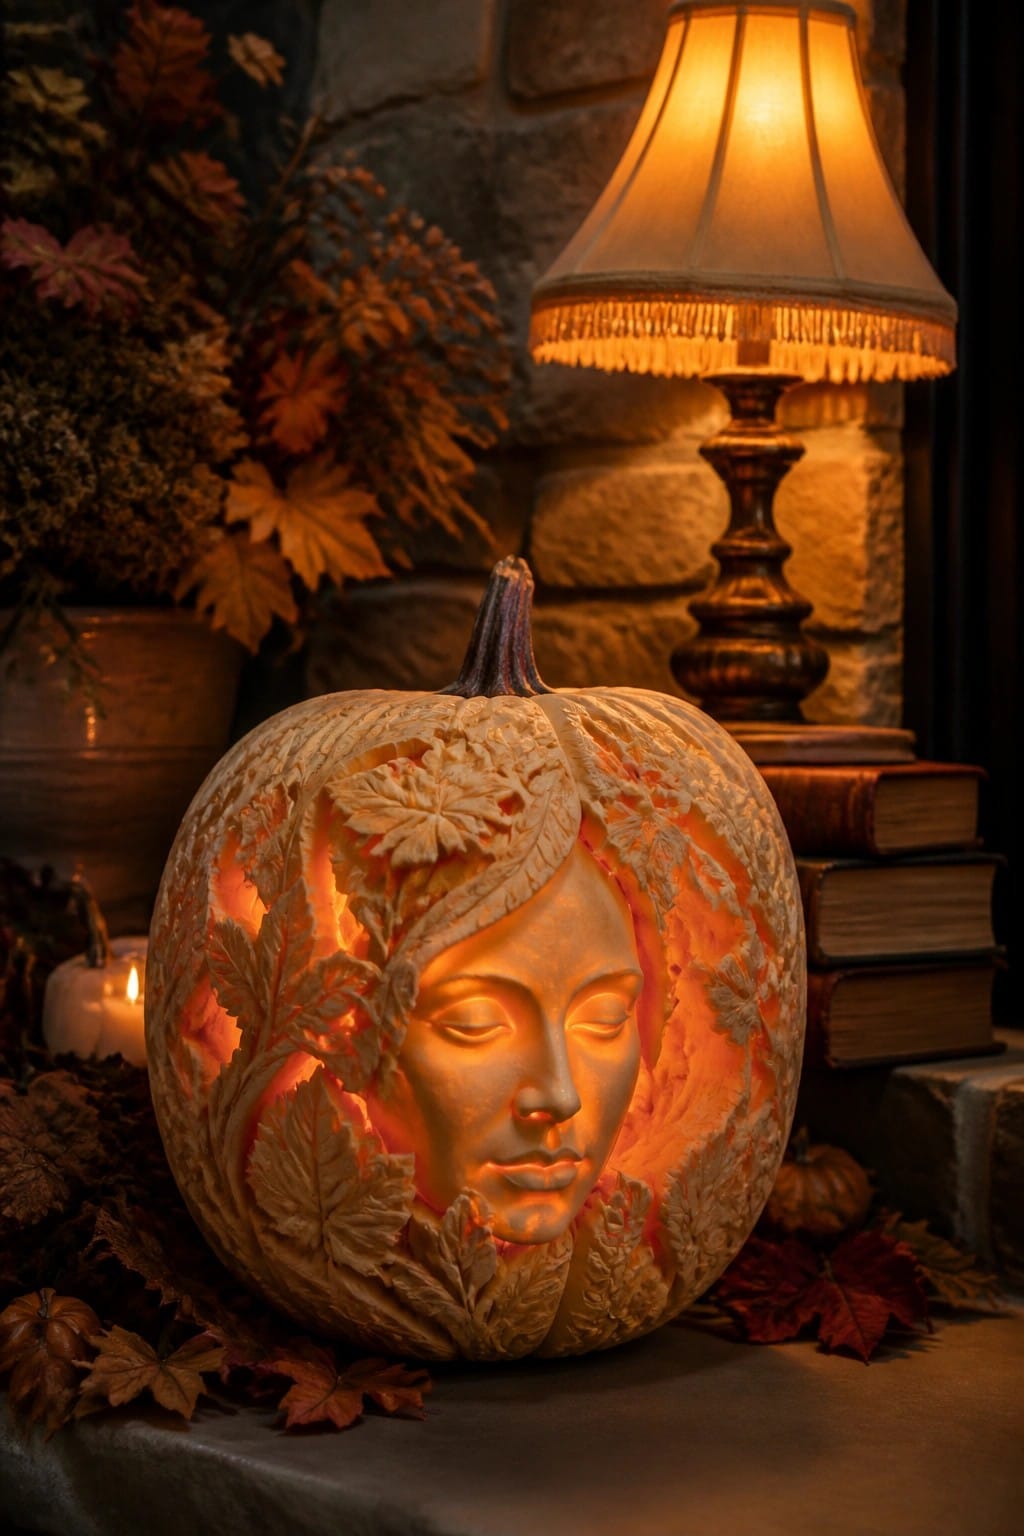
A carved pumpkin with a calm woman’s face surrounded by layered leaves makes a strong focal point. The fine cuts around the eyes, nose, and foliage let the inner light create soft highlights that stand out even in a dim room.
Set the finished pumpkin on a low table or hearth and keep the rest of the display simple. A single lamp or a few small candles nearby is enough to keep the carving visible without crowding the space.
Mix Different Pumpkin Carving Patterns Together
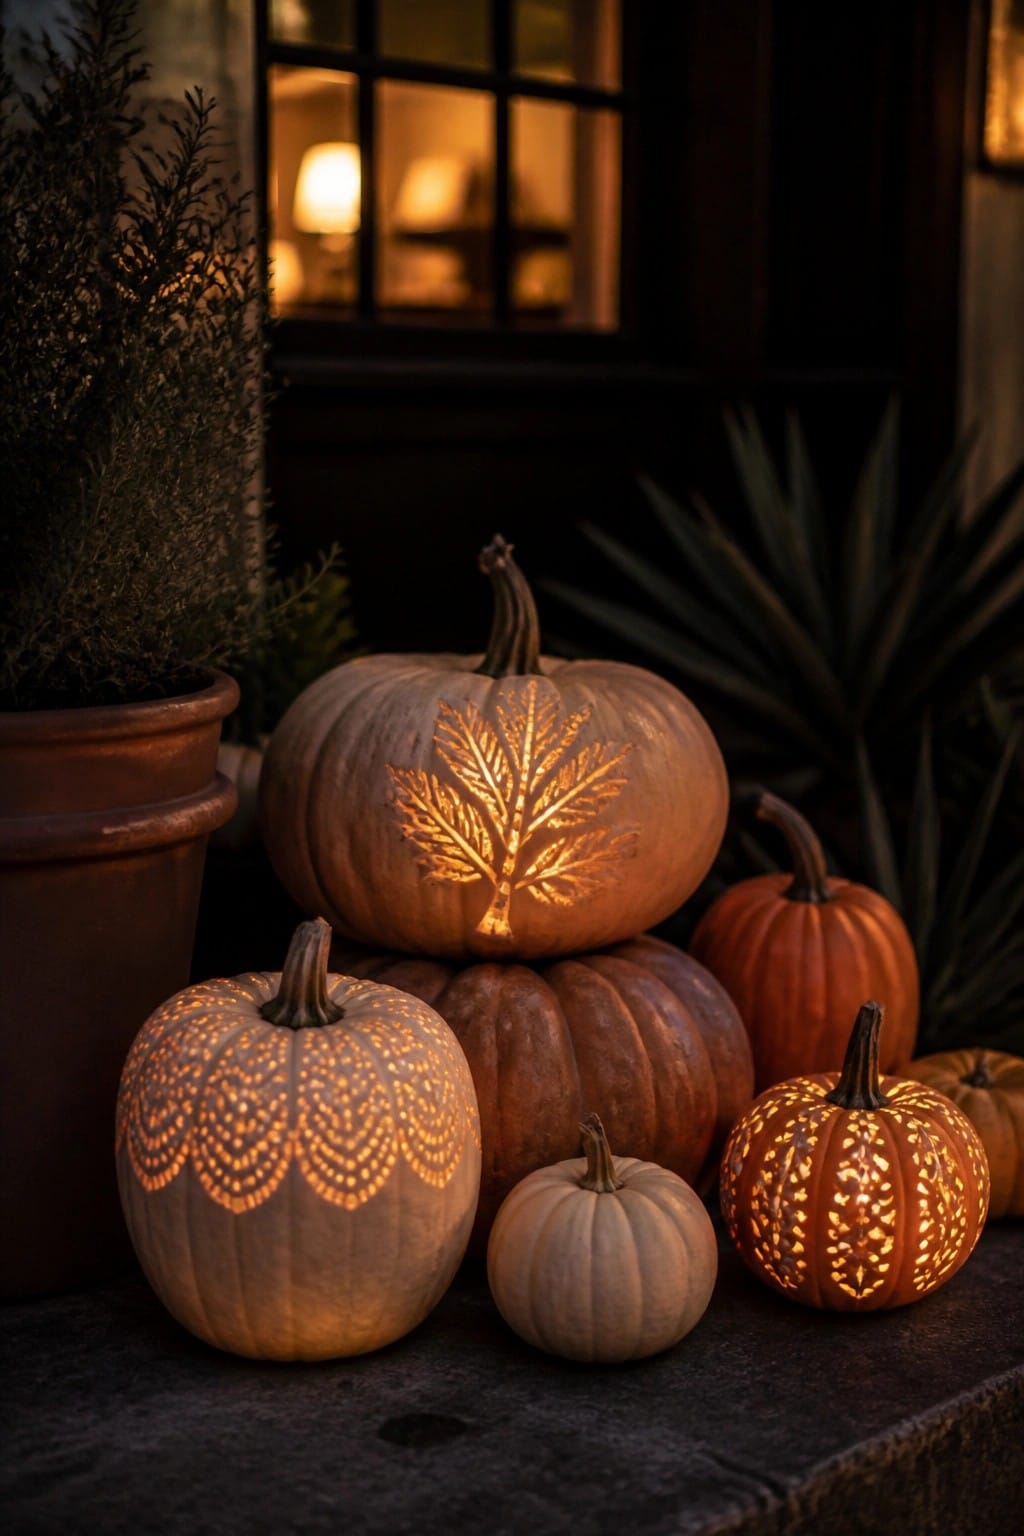
Placing several carved pumpkins together lets each design stand out without needing extra decorations. One large pumpkin with a simple leaf cutout sits above smaller ones that use dotted edges and tighter geometric patterns. The mix keeps the display interesting even when viewed from a short distance.
This works best on a porch or front step where the carvings can be seen at eye level once the candles are lit. Use three to five pumpkins and vary the styles so the patterns do not repeat. Keep the rest of the area simple so the carved details remain the focus.
Carve A Glowing Eye Into A Black Pumpkin
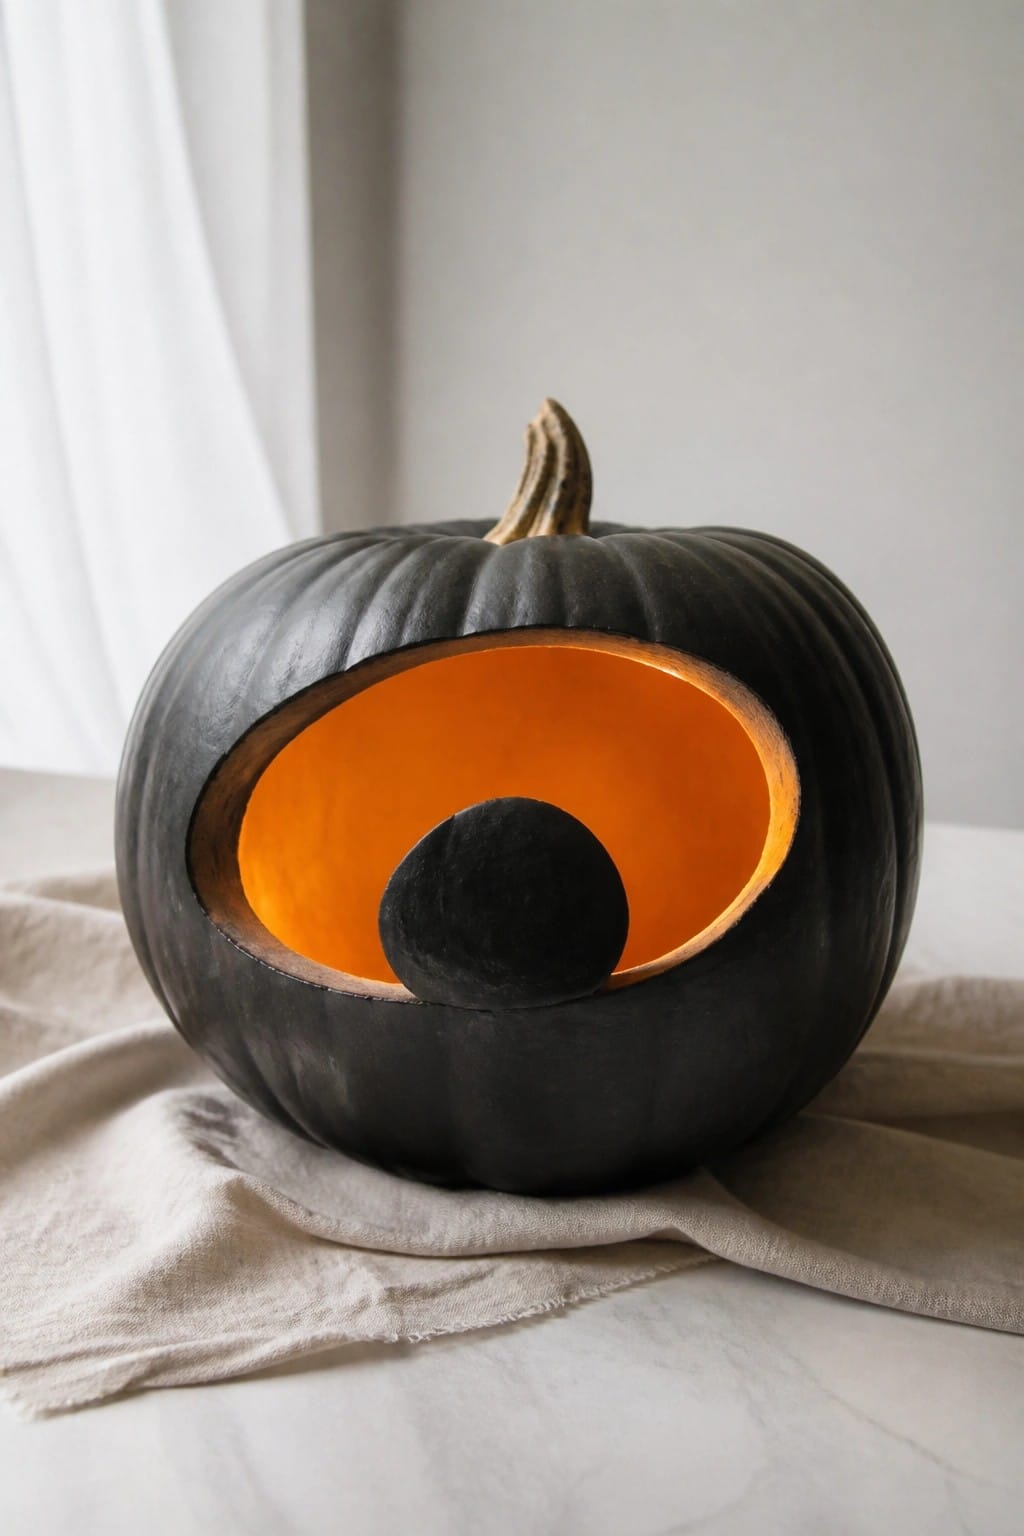
This pumpkin carving turns the whole gourd into one large eye. The oval opening lets the light shine through in a clean shape, and the small black circle inside acts as a pupil to give it a finished look.
Set the carved pumpkin on a table or low surface near a window so the glow shows up well after dark. One or two of these is enough. Keep the surrounding area plain so the eye shape stays the main focus.
Display Intricately Carved Pumpkins On Your Porch Steps

Large pumpkins with detailed cutouts stand out when you light them from inside. The circular patterns let the glow show through clearly and turn ordinary pumpkins into the main feature on the steps.
Set two or three similar pumpkins side by side on the porch or front steps so the carvings face outward. Use battery candles or small lights inside each one and keep any extra decor simple so the carved designs stay the focus.
Stack Carved Pumpkins By The Front Door

Placing several pumpkins with different carvings in one tall stack draws attention right away. The mix of leaf patterns, grid cuts, and dotted designs makes each pumpkin stand out while the whole group feels like one strong display. Lighting them from inside turns the arrangement into the main feature of the entry.
This works best on porch steps or right beside the door where people walk past. Start with a few larger pumpkins at the base and add smaller carved ones on top. You only need five or six to get the same layered look, and the variety of cuts keeps it interesting without extra props.
Carve A Deer Silhouette Into Your Pumpkin
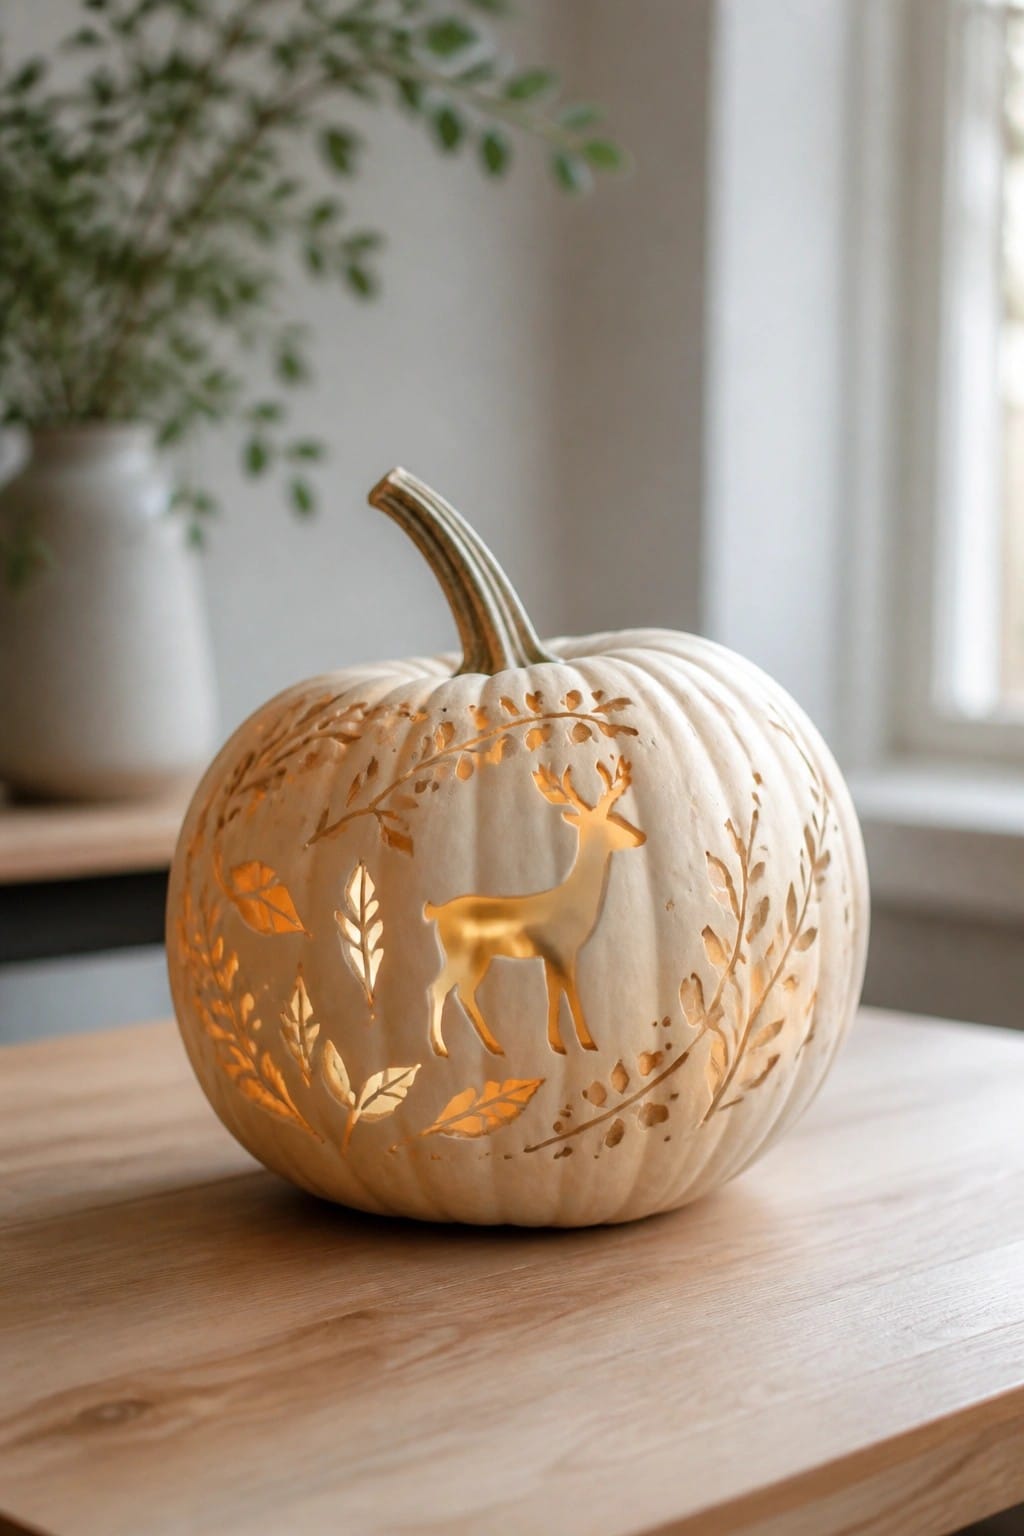
A deer cutout surrounded by leafy vines gives this pumpkin a clean, nature-inspired look that still reads as Halloween. The simple outlines let the light glow through without needing complicated details, so the design stays visible even from across the room.
Set the finished pumpkin on a table or windowsill where the light can pass through the cuts. One well-carved piece like this works on its own, so you can keep the rest of the display minimal.
Carve Scattered Circles Into A Pumpkin
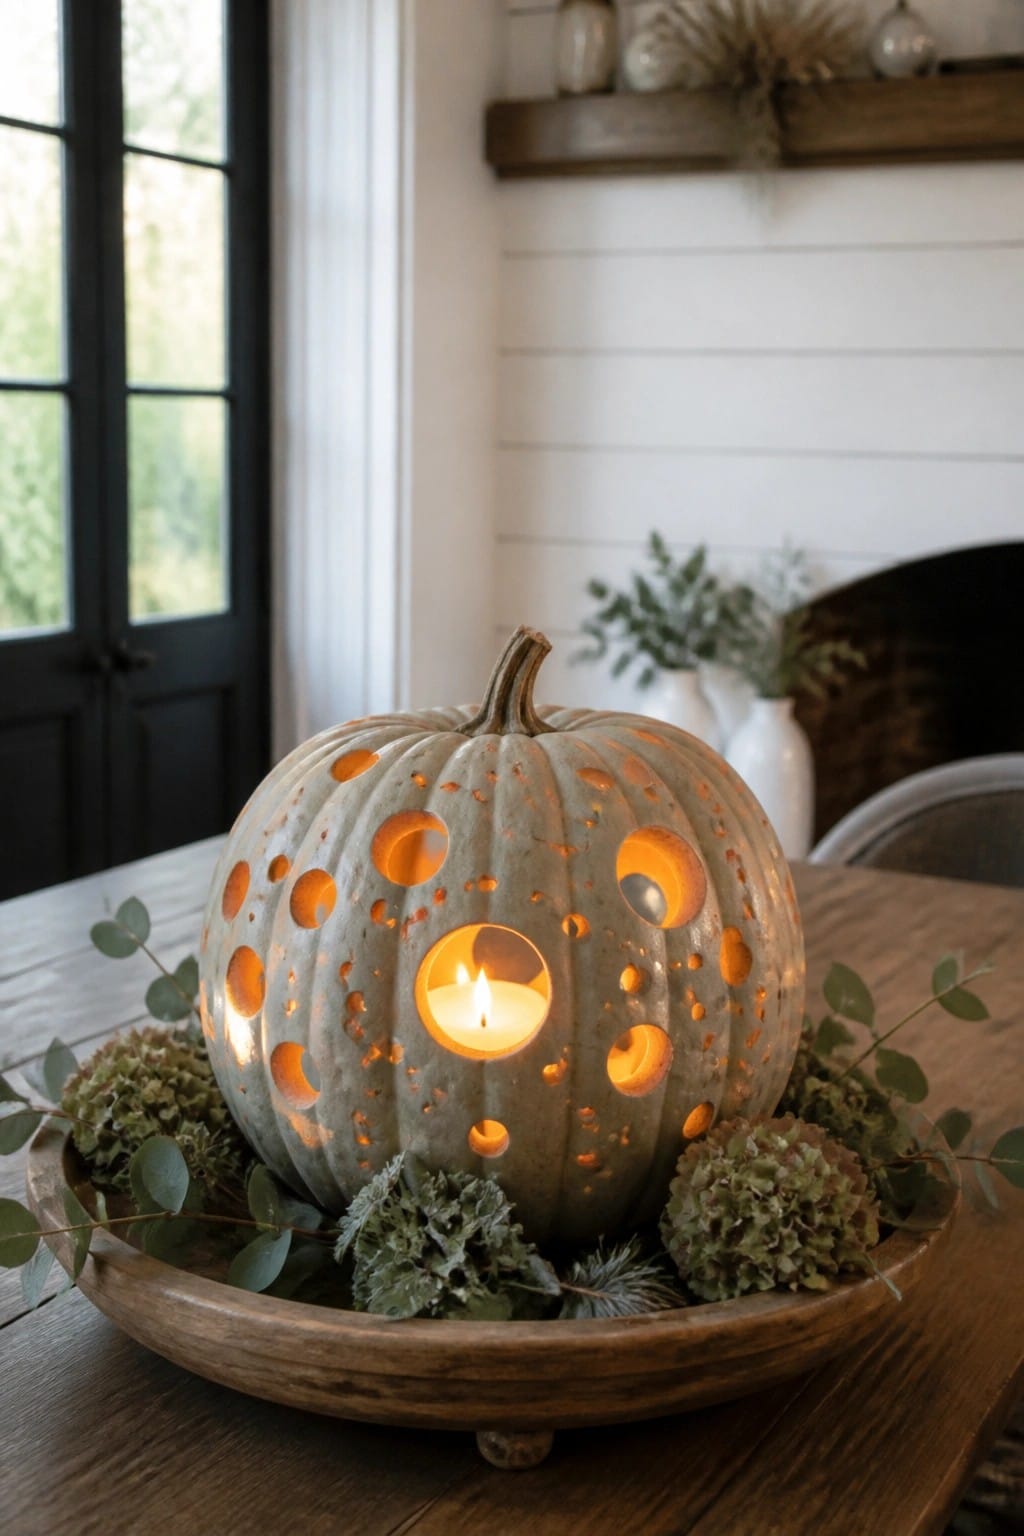
This carving style stands out because it turns one pumpkin into a soft glowing lantern without needing a traditional face. The many different sized circles let light shine through in a scattered pattern that feels simple yet distinctive on a table.
Place the finished pumpkin in a low bowl with a few stems of greenery around the base. It works well as a dining table centerpiece or on a sideboard where the light can show through the holes at night.
Carve Leaves And Vines Around The Face

Carving leaves and vines into the pumpkin adds detail that makes a simple face look more finished. The pattern frames the eyes and mouth without taking over, so the design still reads clearly from a distance.
Place the carved pumpkin on the ground or a low step and add a couple of lanterns nearby. Keep the rest of the grouping simple with a few smaller pumpkins so the carved one stays the main focus.
Group Carved Pumpkins On The Front Steps

Placing several jack o lanterns together on the steps creates a strong focal point that shows off different carving styles at once. The mix of classic faces, star cutouts, and dotted patterns makes the display feel more interesting than using just one or two pumpkins.
This setup works well on any set of stairs leading to the door. Start with three to five larger carved pumpkins and fill in with a few smaller ones to keep the look balanced without crowding the walkway.
Carve Simple Silhouettes Into Your Pumpkins
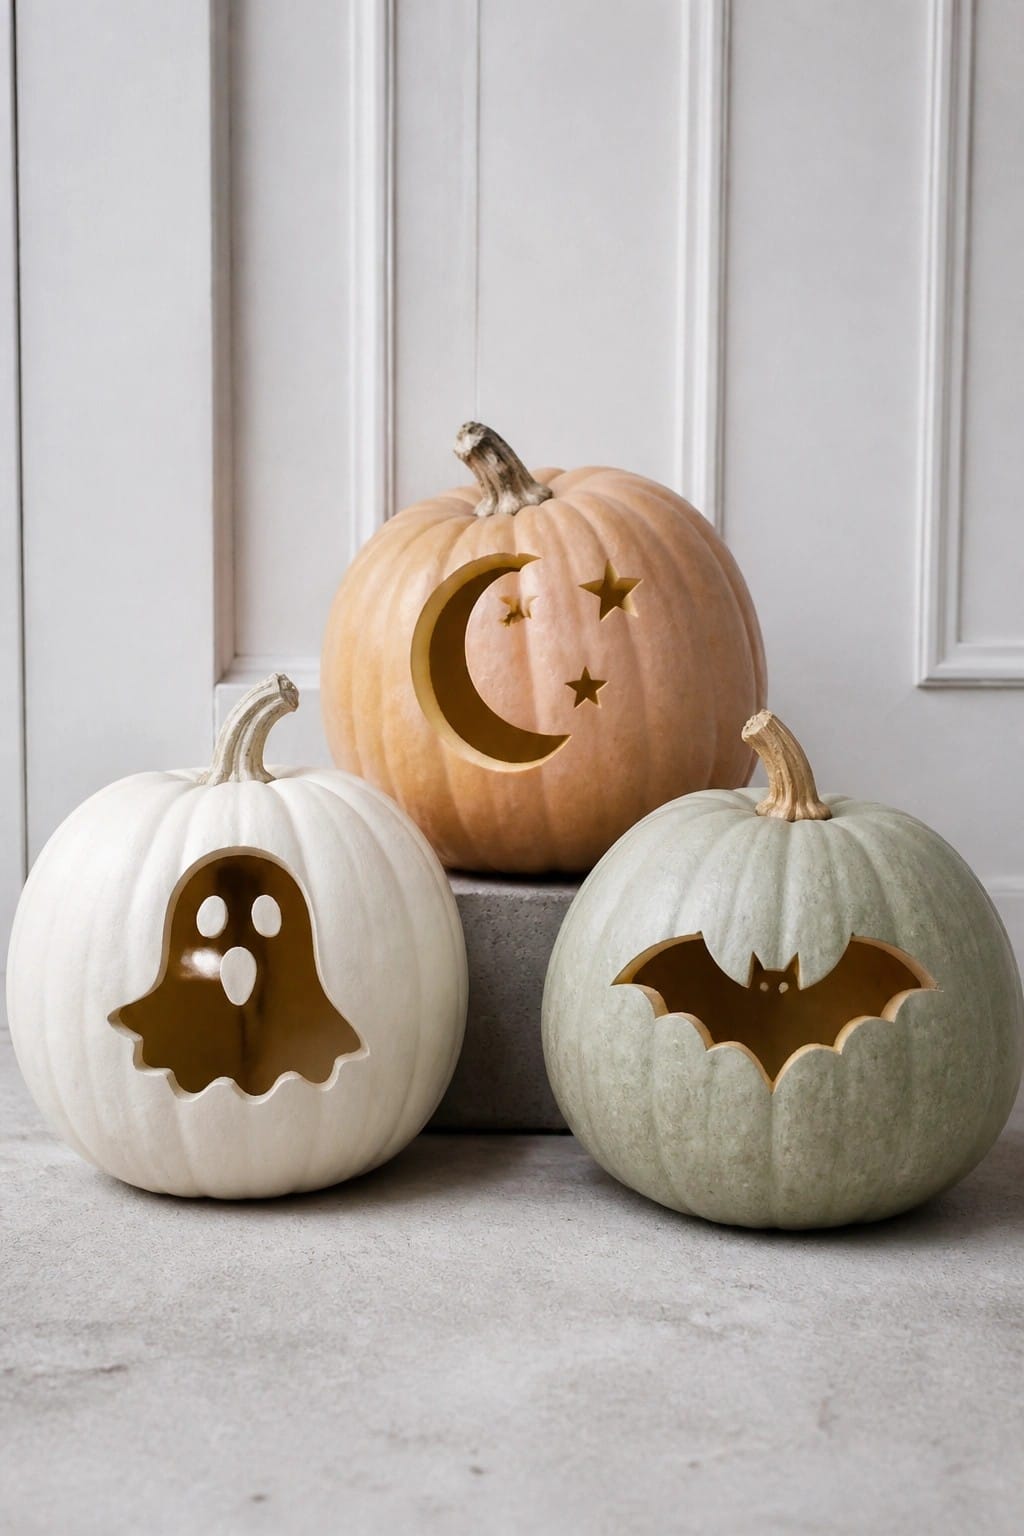
Grouping a few pumpkins with clean cutout shapes makes the designs stand out without much extra effort. A ghost on one, a bat on another, and a moon with stars on the third create variety while keeping the whole display easy to read from a distance.
Choose pumpkins in different sizes or soft colors so the carved areas show up clearly once lit. Sketch your shapes first, cut them out carefully, and set the finished pumpkins together on a step or low surface where people will notice the patterns right away.
Carve A Masquerade Mask Onto Your Pumpkin
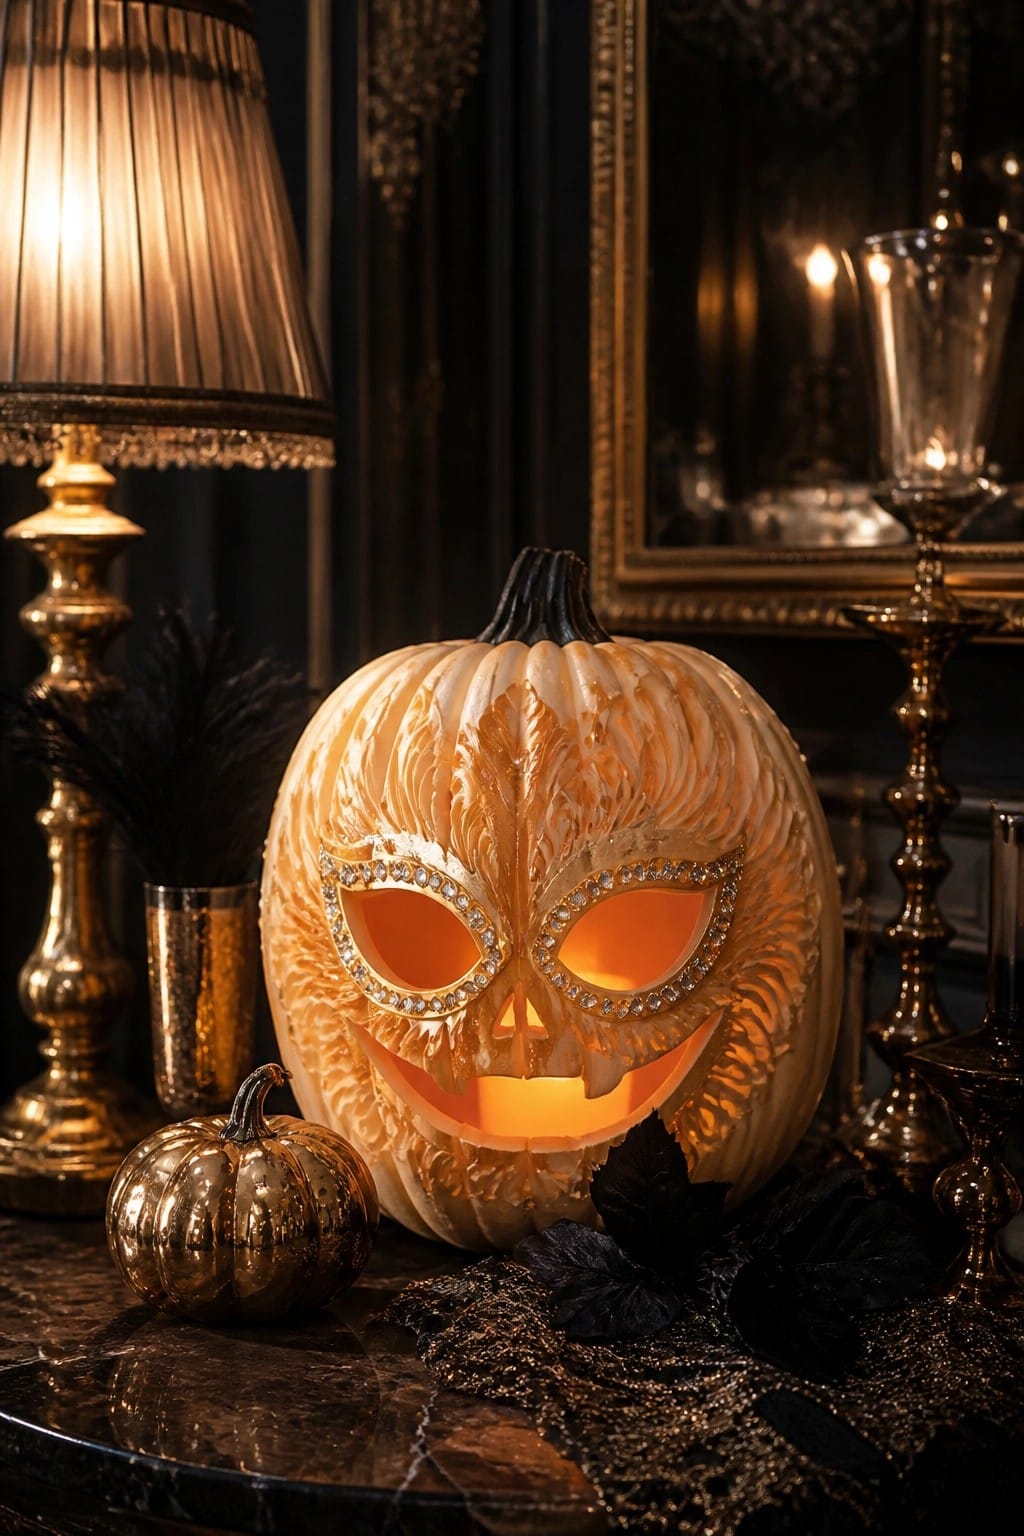
A carved pumpkin with a detailed mask face and crystal trim around the eyes gives the usual jack o lantern a more dressed up look. The layered carving and open glowing sections make the design easy to recognize from across the room.
Set the finished pumpkin on a tabletop or mantel where the light inside can show through the mask. Keep the rest of the surface simple so the carved face stays the main focus.
Group Carved Pumpkins Along The Entry Ledge
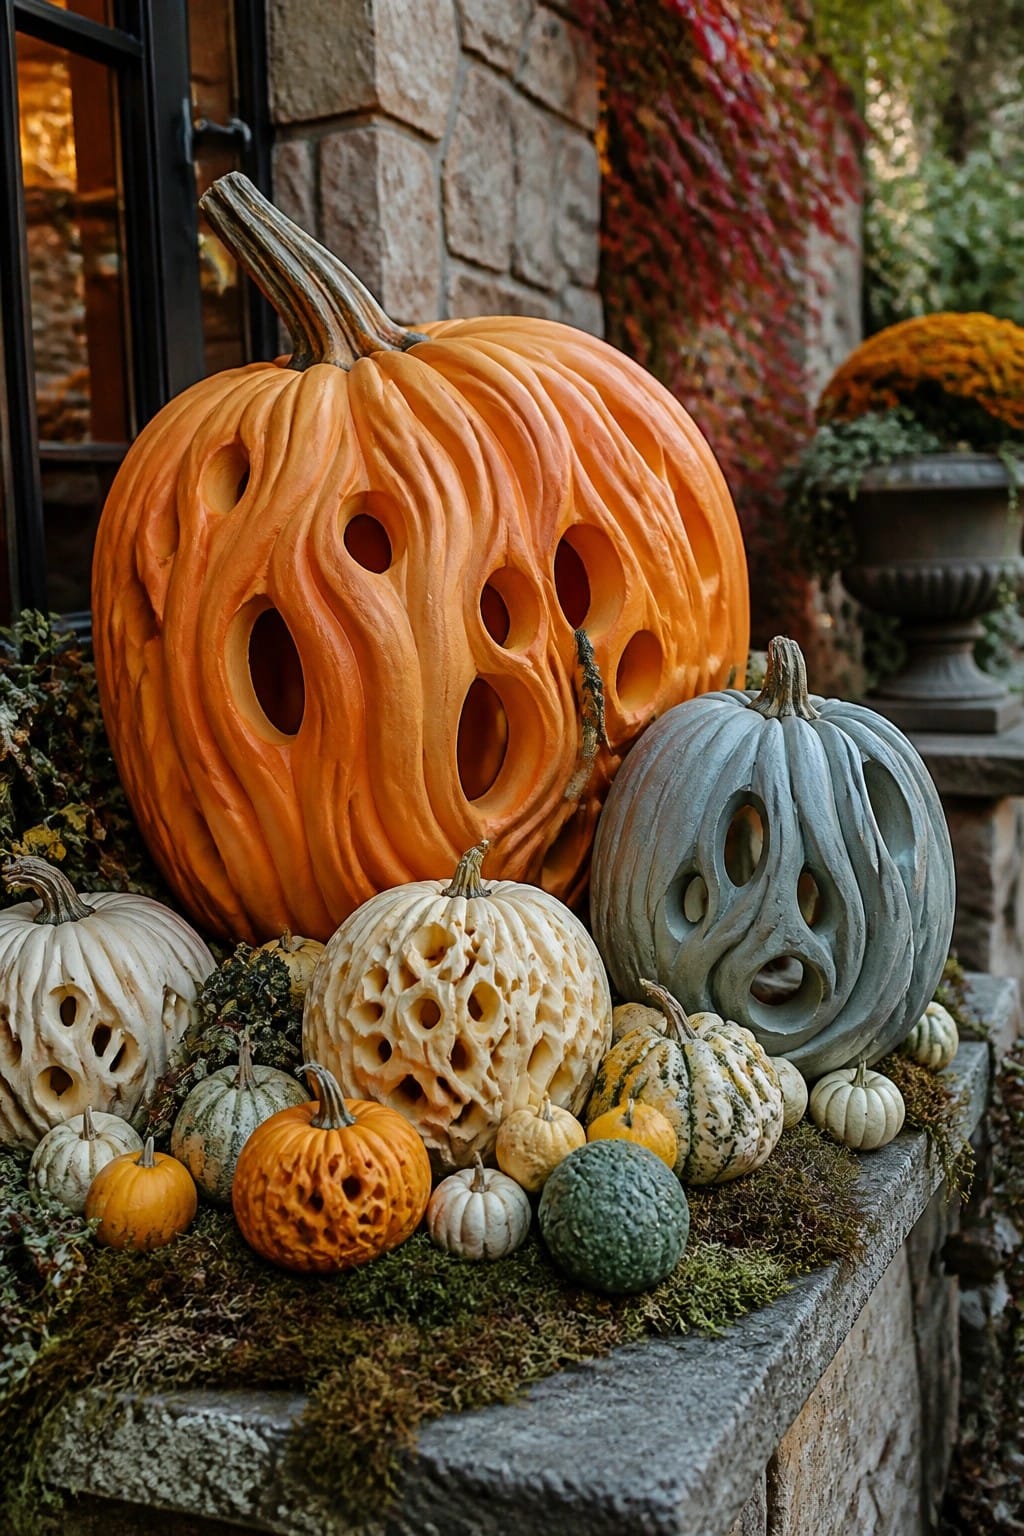
Placing several pumpkins with flowing, abstract carvings together makes the designs stand out more than if they were scattered. The large orange one with its sweeping cutouts draws the eye first, while the smaller ones around it keep the look balanced without feeling crowded.
This works well on a front step or low stone wall where people pass by. Use three to five pumpkins in different sizes and let the carving patterns do most of the work. Add a little moss or greenery underneath if you want, but keep extra items minimal so the carved shapes remain the focus.
Carve Intricate Leaf Patterns Into A Pumpkin

A large pumpkin carved with overlapping leaves and delicate cutouts makes a strong focal point when placed on a low wooden stand. The design lets light shine through in interesting shapes, and the natural stem keeps the look grounded without extra props. It stands out even in a simple setup because the pattern is detailed enough to catch attention from a distance.
Set the carved pumpkin outdoors on a porch or patio table and add a few glass candle holders around the base. Use battery candles inside the pumpkin so the light stays steady, and keep the surrounding area simple so the carving remains the main feature. One well-executed pumpkin often works better than a crowded group.
Group Unique Carved Pumpkins On The Steps
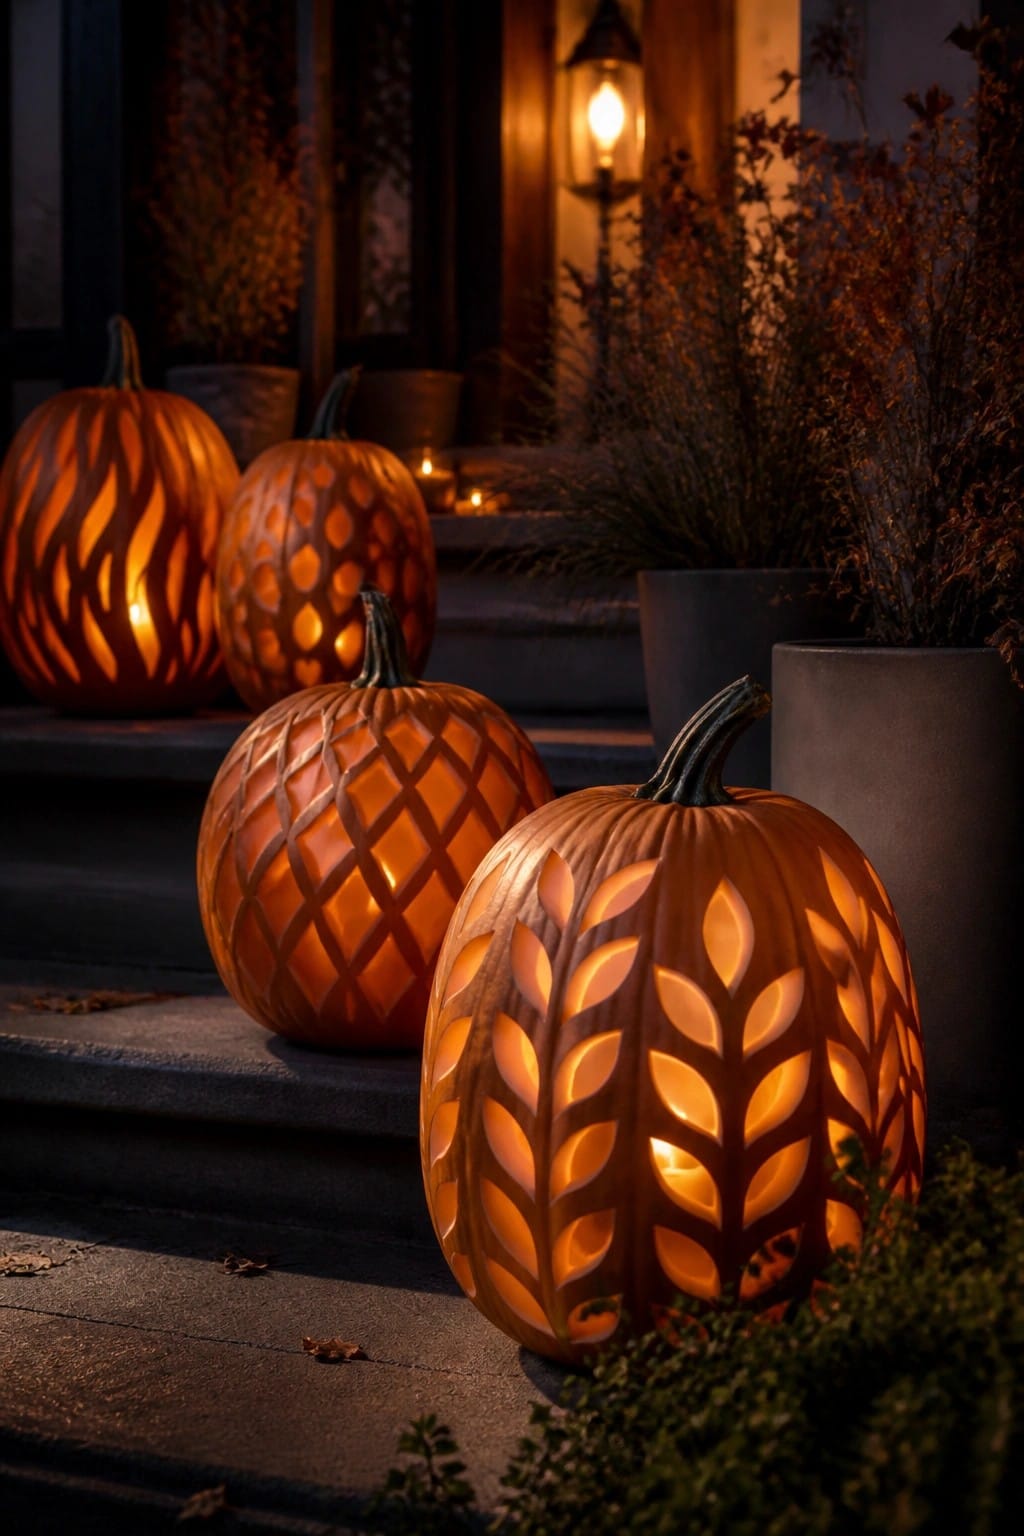
Placing several jack o lanterns with different carving patterns together on the front steps creates a strong focal point. The variety in the designs, like the grid style and the leaf pattern, makes each one stand out while the whole group feels connected.
This works well on any set of steps or low porch area. Use three to five pumpkins with contrasting cuts, and keep the rest of the space simple so the carvings do the main work.
Group Jack O Lanterns On The Staircase
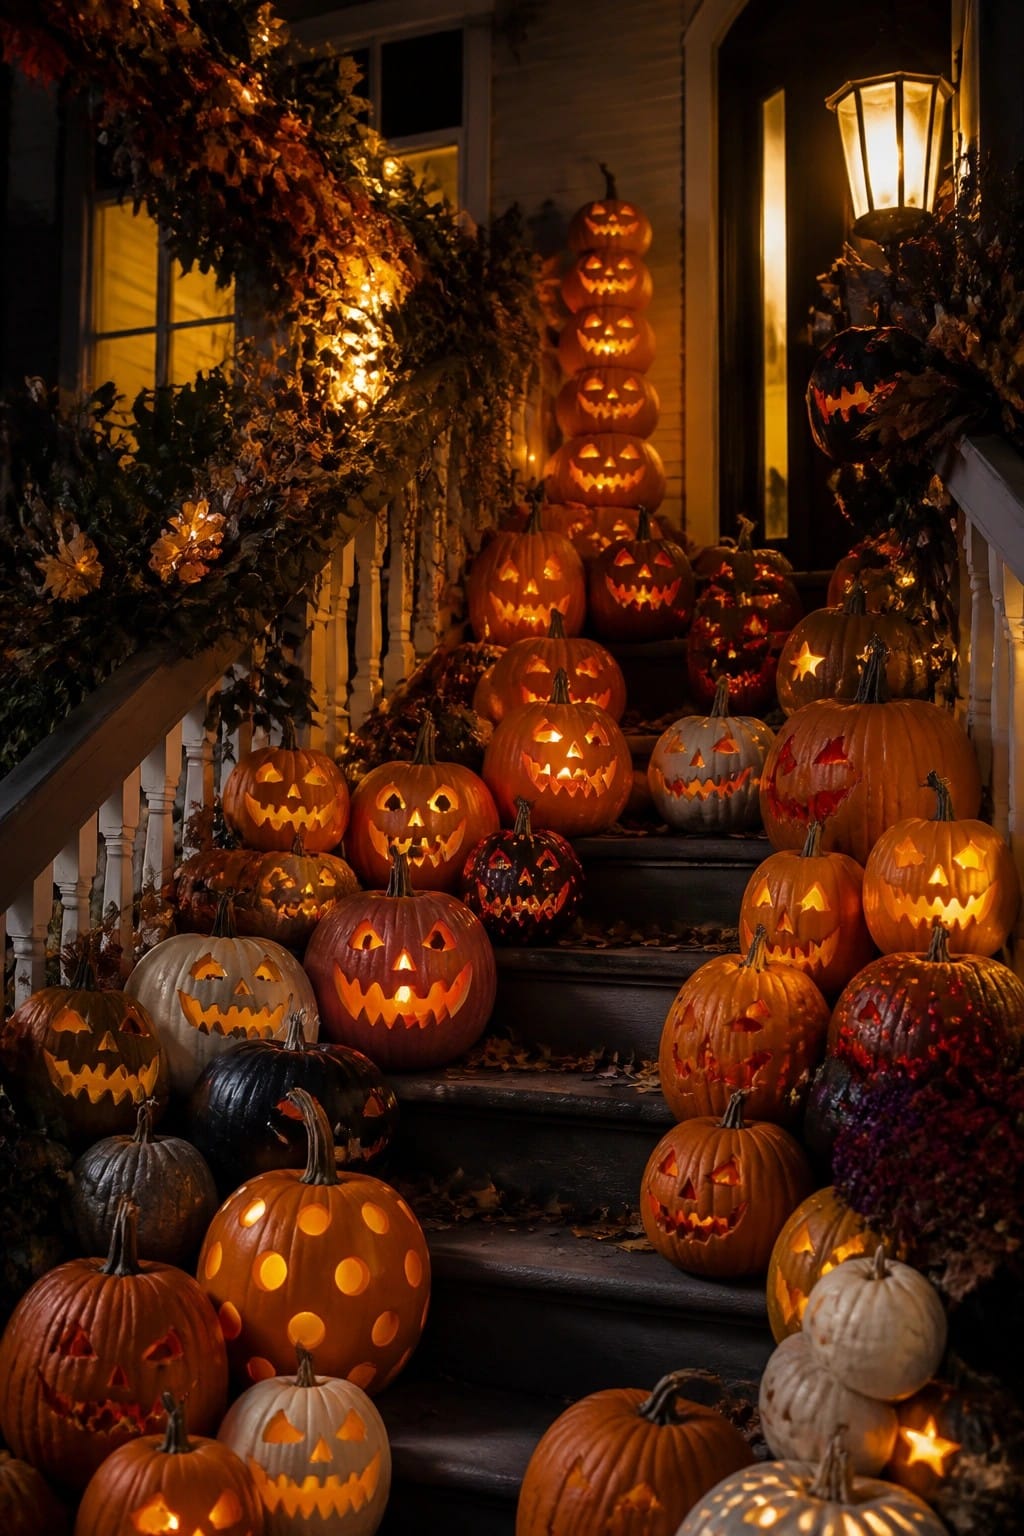
A big collection of carved pumpkins lined up on the stairs turns the whole area into a showcase for different designs. The variety of faces, from simple triangles to more detailed patterns, makes each pumpkin stand out while the whole group feels connected.
This idea works best on front steps or any outdoor staircase where people can see it from a distance. Start with a few larger pumpkins at the bottom and add smaller ones as you go up. Keep the rest of the porch fairly simple so the carved pumpkins stay the main focus.
Carve An Intricate Floral Pattern Into Your Pumpkin
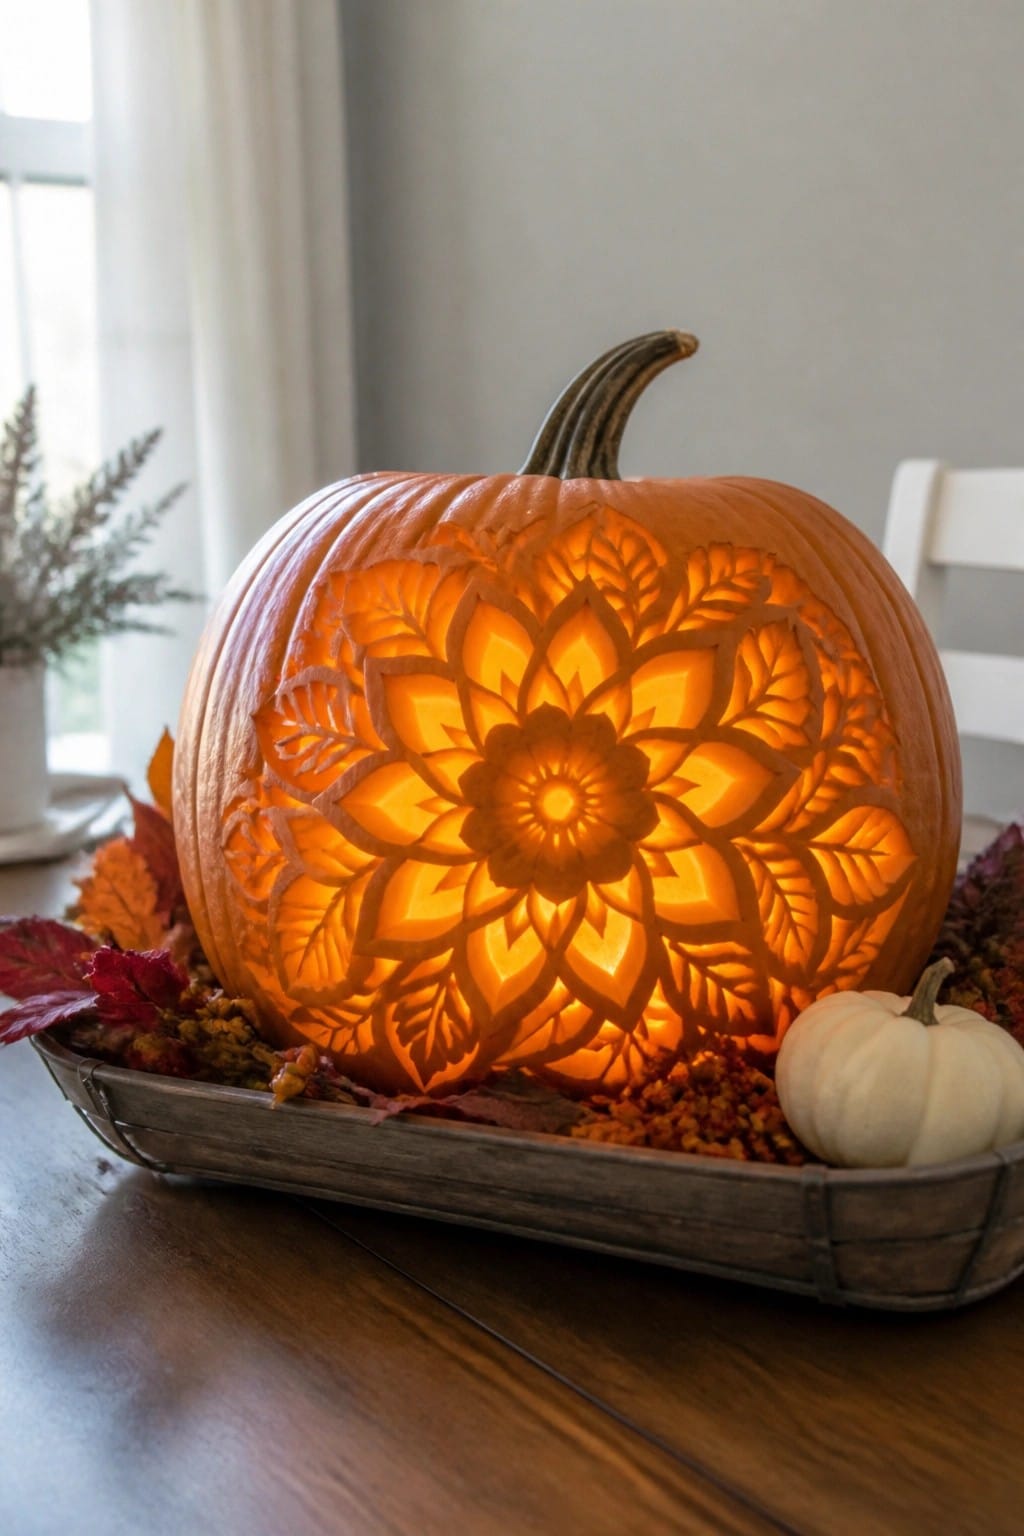
A large pumpkin carved with a detailed mandala-style flower design stands out as a focal point when lit from within. The layered petals and leaves create depth that shows up clearly once the candle or light is added, turning a single pumpkin into the main decoration instead of just another seasonal accent.
Set the carved pumpkin in a low tray with a few leaves and a small white pumpkin nearby. This works well on a dining table or entry surface where the glow can be seen from across the room. Keep the rest of the table simple so the carving remains the main feature.
Group Carved Pumpkins On The Front Steps
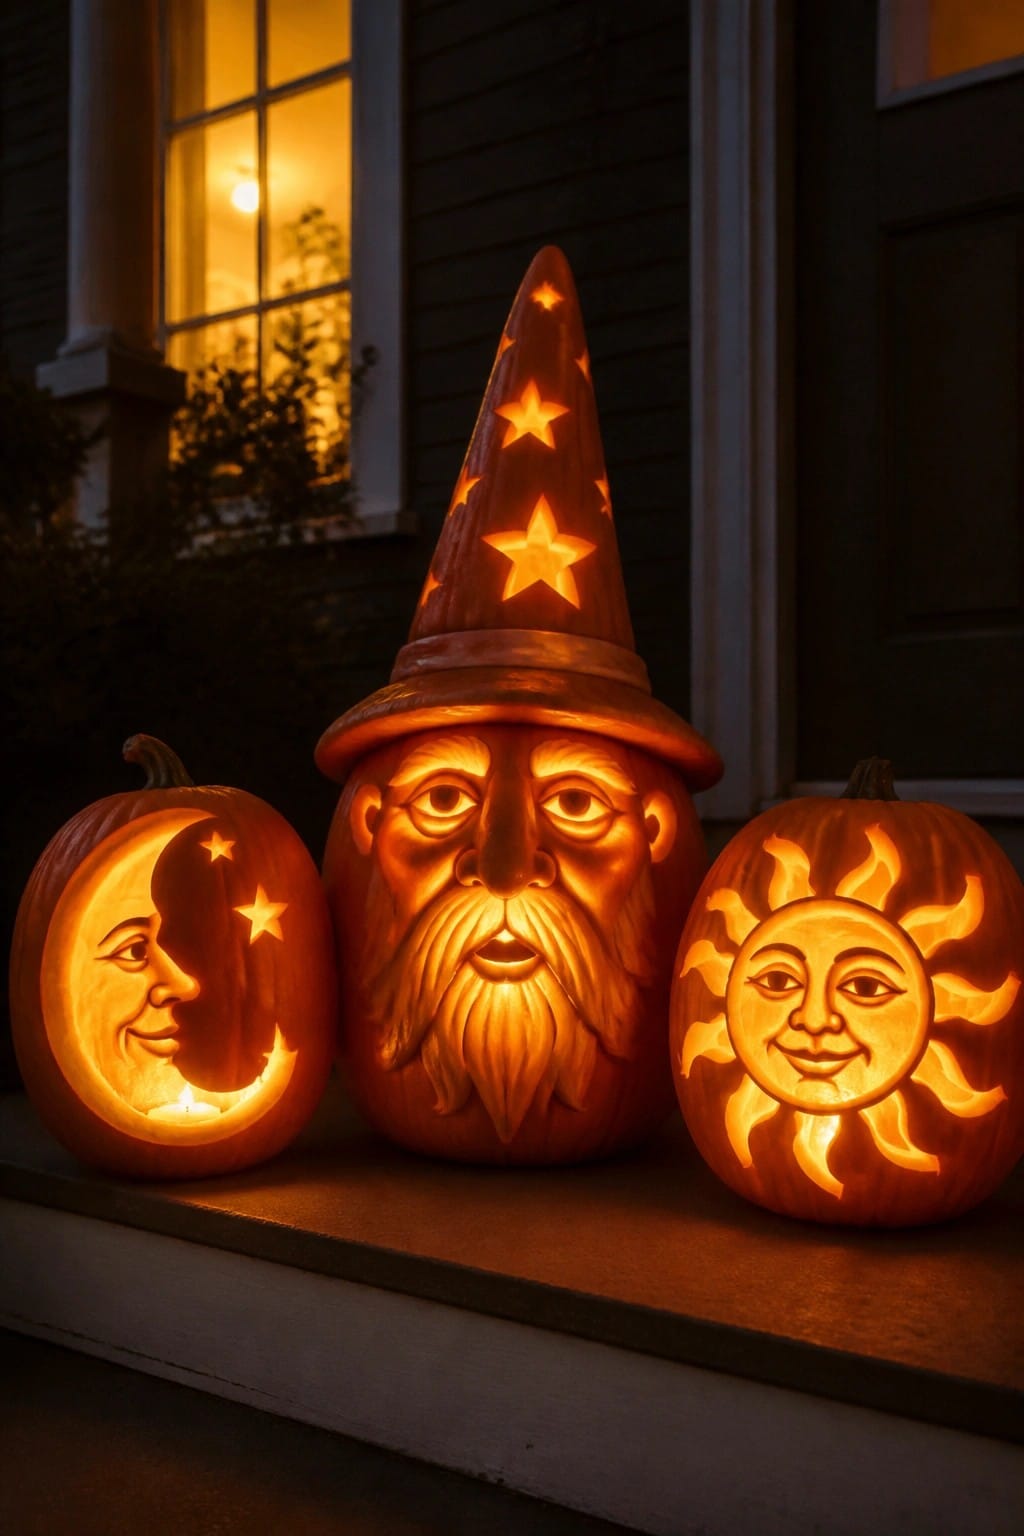
Carving a few pumpkins with completely different designs and setting them side by side makes a simple but strong display. The contrast between the moon and stars, the wizard face, and the smiling sun keeps the arrangement interesting without needing extra props.
This works best right on the front steps where people walk by. Use three or four pumpkins max so the carvings stay easy to see, and light them from inside so the details show up after dark.
Cluster Carved Pumpkins On The Steps

Grouping several carved pumpkins together makes each design stand out while creating one strong focal point. The mix of faces here, from narrow angry eyes to wide jagged grins, shows how different carving styles can work side by side without clashing. Placing them on steps or crates keeps the display at eye level and lets the light from inside each pumpkin show clearly after dark.
This idea works well on a front porch, back steps, or any low outdoor surface where people walk past. Use three to five pumpkins with varied expressions and leave a little space between them so each face reads on its own. Add one small light source nearby if you want extra glow, but the carved pumpkins themselves do most of the work.
Carve A Cat And Tree Silhouette
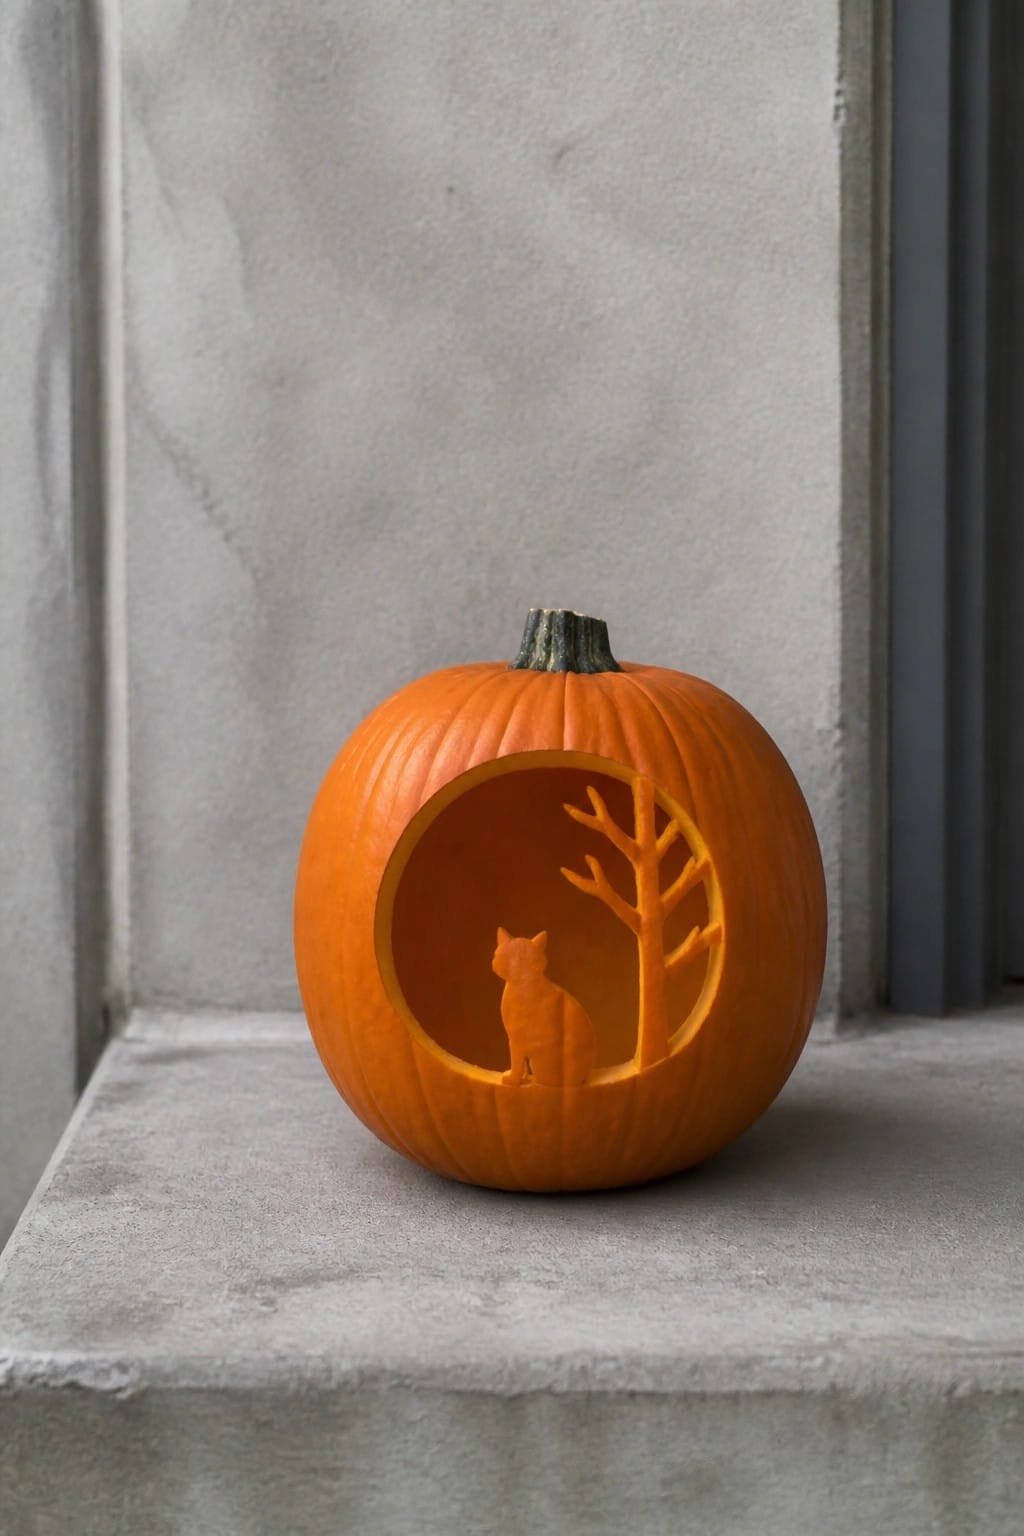
A pumpkin carved with a round opening and a cat sitting next to a bare tree makes a simple but memorable display. The light inside highlights the shapes without any extra props or wiring, and the scene feels complete on its own.
Place the finished pumpkin on a front step, windowsill, or low wall where it can be seen from the side. Use a medium pumpkin so the details stay clear, and keep the cuts smooth so the light passes through evenly at night.
Carve A Detailed Portrait Into A Pumpkin

A single large pumpkin carved with a woman’s face and swirling floral details makes a striking focal point. The fine lines and soft glow from inside turn the carving into something more refined than a typical jack o lantern face.
Set the pumpkin on a table or surface near other neutral items so the design stands out without extra clutter. Choose a pumpkin with a smooth surface and work slowly on the thinner areas around the eyes and hair to keep the light even once it is lit.
Display Multiple Carved Pumpkin Designs

Placing several pumpkins with different carving patterns together makes each design stand out without needing extra props. The mix of a large mandala style, a herringbone pattern, and simpler dotted or leaf cuts creates variety that draws attention once the candles are lit inside.
This works well on a porch, steps, or any flat outdoor surface where the pumpkins can sit close. Start with three to five pumpkins in different sizes, carve one bold pattern and keep the others simpler, then add a few plain candles around the edges to keep the focus on the carvings.
Group Carved Pumpkins On The Front Steps

Placing several pumpkins with different carved patterns together on the steps makes each design stand out more clearly. The mix of floral, leaf, and mandala styles creates a layered look that feels intentional without needing extra props.
Try arranging four to six pumpkins at varying heights along the steps, with the most detailed ones toward the front. This setup works best in a spot where people walk past at night so the glowing patterns can be seen up close.
Frequently Asked Questions
Q: How do I transfer one of these fancy designs onto my pumpkin without it sliding around? A: Print the pattern and tape it firmly to the surface. Poke small holes along the lines with a pin to create a guide you can follow as you cut. This method keeps the details sharp from the start.
Q: What tool gives the cleanest results on those thin detailed sections? A: Grab a small serrated knife for better control on tight curves. Outline the shape lightly first before cutting all the way through.
Q: How do I keep my pumpkins from molding after just a couple days? A: Scoop out every bit of stringy pulp and rinse the inside with a quick bleach mix. Let the shell dry fully before you start carving (a fan helps speed this up).
Q: Can I adapt these ideas if I have never carved anything beyond a basic face? A: Start with one of the simpler patterns in the group to get comfortable. Cut away tiny pieces at a time instead of trying to finish a whole section in one go.
