
As the holiday season approaches, the craving for desserts that are both delicious and nourishing is inevitable. I’ve gathered 14 wholesome Christmas dessert recipes that offer indulgence without the guilt. Picture the rich taste of a dark chocolate avocado mousse or the festive flair of almond flour sugar cookies. These treats are crafted with natural sweeteners and whole grains, making each bite feel like a hug. Ready to explore these delightful creations?
Decadent Dark Chocolate Avocado Mousse

Decadent Dark Chocolate Avocado Mousse is a delightful and healthy dessert option perfect for the festive season. This mousse combines the rich flavors of dark chocolate with the creamy texture of ripe avocados, resulting in a luscious treat that’s both satisfying and nutritious.
Avocados are known for their heart-healthy fats and vitamins, while dark chocolate is packed with antioxidants, making this indulgence a guilt-free way to celebrate Christmas.
The recipe is simple and requires minimal ingredients, allowing you to whip up a batch in no time. The natural creaminess of the avocado creates a smooth and velvety base, while the dark chocolate adds a deep, intense flavor that will satisfy any chocolate lover’s cravings.
Sweetened with a touch of maple syrup or honey, this dessert isn’t only delicious but also free from refined sugars. Serve it in elegant glasses, perhaps with a garnish of fresh berries or a sprinkle of cacao nibs, to impress your guests this holiday season.
Ingredients (Serves 4-6):
- 3 ripe avocados
- 1/2 cup unsweetened cocoa powder
- 1/2 cup dark chocolate chips, melted
- 1/4 cup maple syrup or honey
- 1/4 cup unsweetened almond milk
- 1 teaspoon vanilla extract
- A pinch of sea salt
- Fresh berries or cacao nibs for garnish (optional)
Cooking Instructions:
- Prepare Ingredients: Start by gathering all your ingredients. Make sure the avocados are ripe for a smooth texture. Melt the dark chocolate chips either by using a double boiler or in the microwave in short bursts, stirring until completely melted.
- Blend the Avocados: Scoop the flesh from the avocados into a food processor. Blend until they’re completely smooth with no lumps remaining.
- Add Remaining Ingredients: Add the unsweetened cocoa powder, melted dark chocolate, maple syrup (or honey), unsweetened almond milk, vanilla extract, and a pinch of sea salt to the avocado mixture. Blend until everything is well combined and the mixture is creamy.
- Taste and Adjust: Taste the mousse and adjust sweetness if needed by adding more maple syrup or honey. If the mousse is too thick, add a bit more almond milk to reach your desired consistency.
- Chill the Mousse: Once the mousse is blended to your satisfaction, transfer it into serving glasses or bowls. Refrigerate for at least 30 minutes to allow the flavors to meld and the mousse to firm up slightly.
- Serve: Before serving, garnish with fresh berries or a sprinkle of cacao nibs for added texture and flavor.
Extra Tips:
For the best results, verify your avocados are perfectly ripe; they should yield slightly to gentle pressure when squeezed.
If you prefer a sweeter mousse, feel free to add more maple syrup or honey according to your taste. You can also experiment with different toppings, such as chopped nuts or a dusting of powdered cocoa, to add variety to your presentation.
Finally, this mousse can be made a day ahead, allowing you to save time on the day of your event.
Festive Almond Flour Sugar Cookies

Festive Almond Flour Sugar Cookies are the perfect way to indulge in holiday treats without compromising on health. These cookies are gluten-free, thanks to the almond flour, and they offer a delightful nutty flavor that complements the sweetness perfectly. Ideal for a Christmas gathering or a cozy family dessert, these cookies are easy to make and can be decorated with your favorite festive toppings. They provide a healthier alternative to traditional sugar cookies, guaranteeing that everyone, including those with dietary restrictions, can enjoy the holiday cheer.
The almond flour in these cookies not only makes them gluten-free but also adds a rich texture and flavor that pairs beautifully with the vanilla and almond extracts. The dough is easy to work with, making it fun for both kids and adults to shape and decorate. A hint of salt balances the sweetness, while eggs and butter lend a tender crumb to the cookies.
Whether you’re an experienced baker or a beginner, these Festive Almond Flour Sugar Cookies are sure to be a hit at any Christmas celebration.
Ingredients (Serves 4-6):
- 2 ½ cups almond flour
- ½ cup unsalted butter, softened
- ½ cup granulated sugar
- 1 large egg
- 1 teaspoon vanilla extract
- ½ teaspoon almond extract
- ½ teaspoon baking soda
- ¼ teaspoon salt
- Decorative sugar or sprinkles (optional)
Instructions:
- Prepare the Dough: In a large mixing bowl, cream together the softened butter and granulated sugar until light and fluffy. This should take about 2-3 minutes using an electric mixer.
- Add Wet Ingredients: Beat in the egg, vanilla extract, and almond extract until well combined. Make sure the egg is fully incorporated for a smooth dough.
- Mix Dry Ingredients: In a separate bowl, whisk together the almond flour, baking soda, and salt. Confirm there are no lumps in the almond flour for a finer texture.
- Combine Ingredients: Gradually add the dry ingredients to the wet ingredients, mixing until a dough forms. The dough should be slightly sticky but manageable.
- Chill the Dough: Wrap the dough in plastic wrap and refrigerate for at least 30 minutes. This helps to firm up the dough, making it easier to roll out.
- Preheat the Oven: Preheat your oven to 350°F (175°C) and line a baking sheet with parchment paper.
- Roll Out the Dough: On a lightly floured surface, roll out the dough to about ¼ inch thickness. Use cookie cutters to cut out festive shapes.
- Bake the Cookies: Place the cut-out cookies on the prepared baking sheet, spacing them about 1 inch apart. Bake for 10-12 minutes or until the edges are lightly golden.
- Cool and Decorate: Allow the cookies to cool on the baking sheet for a few minutes before transferring them to a wire rack to cool completely. Decorate with decorative sugar or sprinkles as desired.
Extra Tips:
To guarantee the best texture, make sure to chill the dough adequately before rolling it out. This will prevent the cookies from spreading too much while baking. If you prefer a softer cookie, reduce the baking time slightly. For a crisper texture, let them bake a little longer.
Store the cookies in an airtight container to keep them fresh for several days. You can also prepare the dough in advance and freeze it, making it a convenient option for busy holiday schedules.
Guilt-Free Peppermint Brownies

Indulge in the rich and invigorating flavors of Guilt-Free Peppermint Brownies this Christmas season without compromising your healthy eating goals. These decadent brownies are a delightful twist on a classic holiday treat, made with wholesome ingredients that won’t weigh you down. Perfectly infused with the cool, crisp taste of peppermint, these brownies deliver a festive flair that’s bound to satisfy your sweet tooth.
Whether you’re serving them as a dessert for your holiday gatherings or enjoying them as a personal treat, these brownies are sure to be a hit.
The secret to these guilt-free brownies lies in the smart ingredient swaps that maintain flavor and texture while reducing calories and added sugars. Using whole wheat flour instead of all-purpose flour increases the fiber content, while unsweetened applesauce replaces some of the fat, keeping the brownies moist and tender.
With a hint of peppermint extract and a sprinkle of crushed candy canes, these brownies offer a rejuvenating holiday touch without overloading on sugar. Here’s how to make a batch that serves 4-6 people:
Ingredients:
- 1 cup whole wheat flour
- 1/2 cup unsweetened cocoa powder
- 1/2 teaspoon baking powder
- 1/4 teaspoon salt
- 1/2 cup unsweetened applesauce
- 1/4 cup coconut oil, melted
- 1/2 cup honey or maple syrup
- 2 large eggs
- 1 teaspoon vanilla extract
- 1 teaspoon peppermint extract
- 1/4 cup dark chocolate chips
- 2 tablespoons crushed candy canes (optional, for garnish)
Cooking Instructions:
- Preheat the Oven: Start by preheating your oven to 350°F (175°C). Prepare an 8×8-inch baking pan by lining it with parchment paper, leaving some overhang on the sides for easy removal of the brownies later.
- Mix Dry Ingredients: In a medium bowl, whisk together the whole wheat flour, unsweetened cocoa powder, baking powder, and salt until well combined. Set aside.
- Combine Wet Ingredients: In a large mixing bowl, blend the unsweetened applesauce, melted coconut oil, and honey (or maple syrup) until smooth. Add in the eggs, vanilla extract, and peppermint extract, stirring until everything is well incorporated.
- Combine Dry and Wet Mixtures: Gradually add the dry ingredients to the wet ingredients, mixing gently until just combined. Be careful not to overmix to guarantee the brownies remain light and tender.
- Add Chocolate and Pour Batter: Fold in the dark chocolate chips to the batter. Pour the mixture into the prepared baking pan, spreading it out evenly with a spatula.
- Bake: Place the pan in the preheated oven and bake for 20-25 minutes, or until a toothpick inserted in the center comes out with a few moist crumbs. Don’t overbake, as the brownies will continue to set as they cool.
- Cool and Garnish: Once baked, remove the brownies from the oven and let them cool in the pan for about 15 minutes. Use the parchment paper overhang to lift the brownies out of the pan and transfer them to a wire rack to cool completely. If using, sprinkle the crushed candy canes on top before serving for a festive touch.
Extra Tips:
For an extra fudgy texture, try underbaking the brownies slightly, as they’ll firm up a bit more once cooled. If you prefer a less sweet option, you can reduce the amount of honey or maple syrup.
Additionally, to add more depth of flavor, consider adding a pinch of espresso powder to the dry ingredients. Store any leftovers in an airtight container at room temperature for up to three days, or refrigerate them for up to a week for a longer shelf life.
Serve these delicious brownies with a dollop of Greek yogurt or a scoop of dairy-free ice cream for an extra special treat!
Spiced Cranberry Apple Crisp
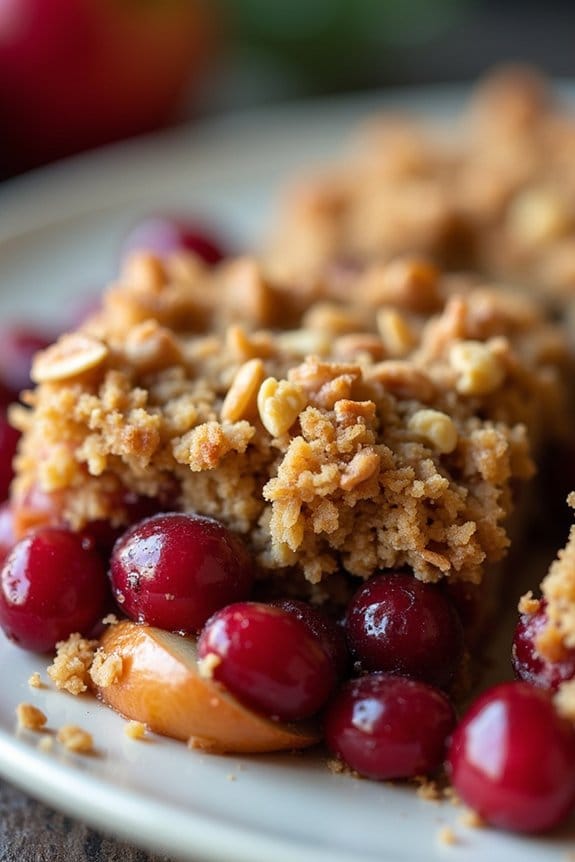
As the holiday season arrives, it’s time to indulge in festive yet healthy desserts that capture the essence of Christmas. One such delightful treat is the Spiced Cranberry Apple Crisp. This dessert combines the tartness of cranberries with the sweetness of apples, all topped with a crunchy oat topping infused with warm spices. It’s a perfect balance of flavors and textures, making it a crowd-pleaser for any holiday gathering.
This recipe isn’t only delicious but also health-conscious, incorporating whole ingredients and natural sweetness. The use of whole grains and reduced sugar content makes it a guilt-free treat, while still offering that comforting, cozy feeling we all crave during the festive season.
This crisp is best served warm, perhaps with a dollop of Greek yogurt or a scoop of low-fat ice cream for an added touch of luxury.
Ingredients for 4-6 servings:
- 4 medium-sized apples, peeled, cored, and sliced
- 1 1/2 cups fresh or frozen cranberries
- 1/4 cup maple syrup
- 1 tablespoon lemon juice
- 1 teaspoon vanilla extract
- 1 teaspoon ground cinnamon
- 1/4 teaspoon ground nutmeg
- 1/4 teaspoon ground ginger
- 1 cup rolled oats
- 1/2 cup almond flour
- 1/3 cup chopped nuts (such as walnuts or pecans)
- 1/4 cup coconut oil, melted
- 1/4 cup brown sugar or coconut sugar
- Pinch of salt
Cooking Instructions:
- Preheat and Prepare: Preheat your oven to 350°F (175°C). Lightly grease a baking dish with a little coconut oil to prevent sticking.
- Mix the Fruit Filling: In a large bowl, combine the sliced apples and cranberries. Add the maple syrup, lemon juice, vanilla extract, cinnamon, nutmeg, and ginger. Toss everything together until the fruit is well coated with the spices and syrup.
- Prepare the Crisp Topping: In another bowl, mix the rolled oats, almond flour, chopped nuts, and a pinch of salt. Add the melted coconut oil and brown sugar. Stir until the mixture becomes crumbly and all ingredients are well combined.
- Assemble the Crisp: Spread the fruit mixture evenly in the prepared baking dish. Sprinkle the oat topping evenly over the fruit layer, ensuring all the fruit is covered.
- Bake: Place the baking dish in the preheated oven and bake for about 35-40 minutes. The topping should be golden brown, and the fruit should be bubbling around the edges.
- Cool Slightly: Allow the crisp to cool for about 10 minutes before serving. This will help the juices thicken and make it easier to serve.
Extra Tips:
For an added burst of flavor, consider adding a splash of orange zest to the fruit mixture. If you prefer a sweeter dessert, you can increase the amount of maple syrup slightly.
When choosing apples, opt for a mix of sweet and tart varieties such as Granny Smith and Honeycrisp to enhance the depth of flavor. The crisp can be stored in the refrigerator for up to three days and reheats beautifully in the oven.
Enjoy this Spiced Cranberry Apple Crisp as a wholesome dessert or even a special holiday breakfast treat!
Vegan Chocolate Hazelnut Truffles

Vegan Chocolate Hazelnut Truffles are a delightful treat that brings together the rich, creamy flavors of chocolate and the nutty goodness of hazelnuts. These truffles aren’t only delicious but also healthy, making them a perfect dessert option for Christmas celebrations.
Being vegan, they cater to a variety of dietary preferences without compromising on taste or texture. The combination of cacao and hazelnuts creates a decadent, melt-in-your-mouth experience that’s sure to impress your family and friends during the festive season.
These truffles are easy to make and require only a few simple ingredients. They’re naturally sweetened and contain no dairy or refined sugars, making them a guilt-free indulgence. The recipe yields enough truffles to serve 4-6 people, making it an ideal choice for intimate holiday gatherings.
Whether you’re serving them as a post-dinner treat or gifting them as homemade holiday presents, these Vegan Chocolate Hazelnut Truffles are sure to be a hit.
Ingredients (Serving Size: 4-6 people):
- 1 cup raw hazelnuts
- 1 cup Medjool dates, pitted
- 1/3 cup raw cacao powder
- 1 teaspoon vanilla extract
- 1/4 teaspoon sea salt
- 2 tablespoons coconut oil, melted
- 1/4 cup finely chopped dark chocolate
- 1/4 cup crushed hazelnuts (optional, for rolling)
Cooking Instructions:
- Prepare the Hazelnuts: Preheat your oven to 350°F (175°C). Spread the raw hazelnuts on a baking sheet and roast them for about 10 minutes, or until they’re fragrant and the skins begin to crack. Remove from the oven and let them cool slightly.
- Remove Hazelnut Skins: Once the hazelnuts are cool enough to handle, place them in a clean kitchen towel and rub them together vigorously to remove the skins. It’s okay if some skins remain; just remove as much as possible.
- Blend the Ingredients: In a food processor, combine the roasted hazelnuts, pitted Medjool dates, cacao powder, vanilla extract, sea salt, and melted coconut oil. Blend the mixture until it becomes a smooth, sticky dough. Scrape down the sides of the processor as needed.
- Shape the Truffles: Using your hands, scoop out small amounts of the mixture and roll them into 1-inch balls. If the mixture is too sticky, dampen your hands slightly with water to help shape the truffles.
- Coat with Chocolate: Melt the chopped dark chocolate in a double boiler or microwave until smooth. Dip each truffle into the melted chocolate, ensuring it’s evenly coated. Place the truffles on a parchment-lined baking sheet.
- Optional Hazelnut Coating: If desired, roll the chocolate-coated truffles in crushed hazelnuts while the chocolate is still warm. This adds an extra layer of texture and flavor.
- Chill the Truffles: Place the baking sheet with the truffles in the refrigerator for about 30 minutes, or until the chocolate has set and the truffles are firm.
Extra Tips:
For an even richer flavor, consider adding a pinch of cinnamon or a splash of hazelnut liqueur to the mixture before blending.
If you’re short on time, you can skip the roasting step and use pre-roasted hazelnuts, but be sure to check for added oils or salt.
To make the truffles more festive, decorate them with a sprinkle of edible gold dust or a drizzle of white chocolate.
Store the truffles in an airtight container in the refrigerator for up to a week, or freeze them for longer storage.
Gluten-Free Gingerbread Loaf
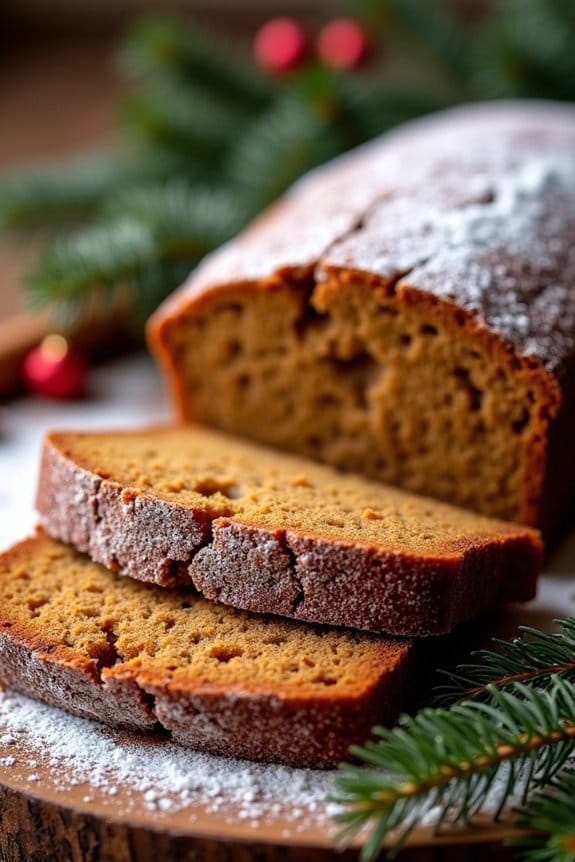
Embrace the warm, spicy aroma of gingerbread with this delectable Gluten-Free Gingerbread Loaf, perfect for the festive season. This loaf captures the essence of holiday cheer, while catering to those with gluten sensitivities. It’s moist, flavorful, and infused with a delightful blend of spices like ginger, cinnamon, and nutmeg, creating a cozy treat that pairs wonderfully with a hot cup of tea or coffee.
Whether you’re hosting a Christmas gathering or looking for a healthy dessert option, this gingerbread loaf is sure to delight your family and friends.
This recipe isn’t only gluten-free but also uses wholesome ingredients to bring you a guilt-free indulgence. Almond flour and a touch of coconut flour replace traditional wheat flour, making certain the loaf is both satisfying and nutritious.
The natural sweetness from molasses and maple syrup imparts a rich, deep flavor, while applesauce adds moisture without the need for excessive fats. Topped with a simple glaze or enjoyed plain, this gingerbread loaf will become a staple in your holiday baking repertoire.
Ingredients (Serves 4-6):
- 1 ½ cups almond flour
- ¼ cup coconut flour
- 1 tablespoon ground ginger
- 1 teaspoon ground cinnamon
- ½ teaspoon ground nutmeg
- ½ teaspoon baking soda
- ½ teaspoon salt
- 2 large eggs
- ½ cup unsweetened applesauce
- ⅓ cup molasses
- ¼ cup maple syrup
- ¼ cup melted coconut oil
- 1 teaspoon vanilla extract
Cooking Instructions:
- Preheat the Oven: Begin by preheating your oven to 350°F (175°C). Prepare a 9×5 inch loaf pan by lining it with parchment paper or greasing it lightly with coconut oil to prevent sticking.
- Mix Dry Ingredients: In a large mixing bowl, whisk together the almond flour, coconut flour, ground ginger, cinnamon, nutmeg, baking soda, and salt. Make sure the spices are well distributed for an even flavor throughout the loaf.
- Combine Wet Ingredients: In a separate bowl, whisk the eggs until they’re well beaten. Then add the applesauce, molasses, maple syrup, melted coconut oil, and vanilla extract. Mix until all wet ingredients are thoroughly combined.
- Combine Wet and Dry Mixtures: Pour the wet ingredients into the bowl with the dry ingredients. Gently fold the mixtures together using a spatula until just combined. Be careful not to overmix as this can affect the texture of the loaf.
- Transfer to Loaf Pan: Pour the batter into the prepared loaf pan, spreading it out evenly with the spatula. Smooth the top to make certain the loaf bakes uniformly.
- Bake the Loaf: Place the loaf pan in the preheated oven and bake for 45-50 minutes, or until a toothpick inserted into the center comes out clean. The loaf should be golden brown and firm to the touch.
- Cool and Serve: Once baked, remove the loaf from the oven and allow it to cool in the pan for about 10 minutes. Then, transfer it to a wire rack to cool completely before slicing and serving.
Extra Tips:
For an added burst of flavor, consider adding a teaspoon of freshly grated ginger to the wet ingredients for a more intense ginger taste. If you prefer a sweeter loaf, you can increase the maple syrup by a tablespoon or two.
This loaf can be stored in an airtight container for up to 3 days, or it can be frozen for up to a month. Just make sure it’s fully cooled before wrapping and freezing. Finally, try serving the gingerbread loaf with a dusting of powdered sugar or a simple glaze made from powdered sugar and a splash of almond milk for an extra festive touch.
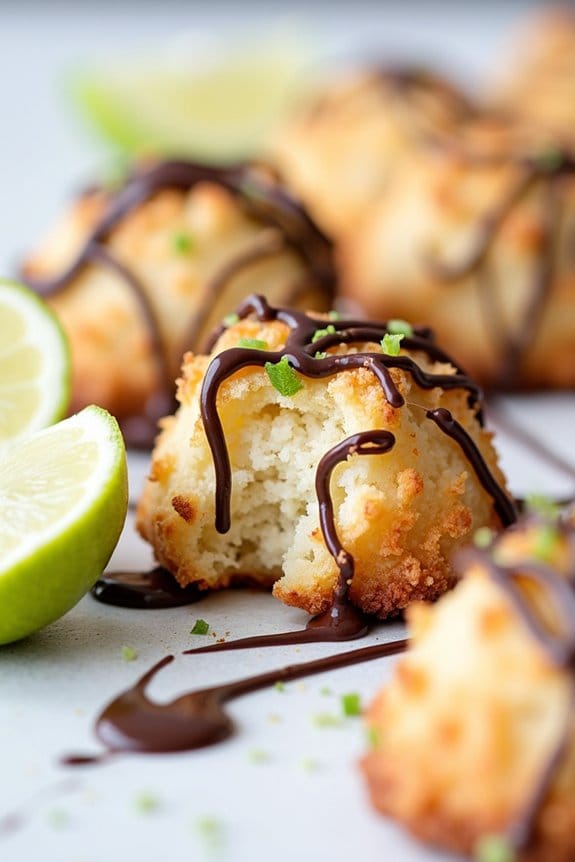
Coconut Macaroons With a Twist
The holiday season is a time for indulgence, but that doesn’t mean you have to compromise on health. These Coconut Macaroons With a Twist offer a delightful balance of flavor and nutrition, perfect for satisfying your sweet tooth without the guilt.
This recipe takes the classic coconut macaroon and adds a unique spin by incorporating a hint of almond and a dash of lime zest, elevating the dish to a new level of sophistication. Ideal for those who want to enjoy a sweet treat while keeping it light, these macaroons are sure to be a hit at any holiday gathering.
Crafted with wholesome ingredients, these macaroons are naturally gluten-free and can be made dairy-free by swapping out a few components. The addition of almond extract and lime zest not only adds depth to the flavor profile but also introduces a rejuvenating twist that complements the richness of the coconut.
With a crispy exterior and a chewy center, these macaroons are the perfect festive dessert to share with family and friends. This recipe serves 4-6 people, making it a great option for small gatherings or a cozy night in with loved ones.
Ingredients:
- 3 cups unsweetened shredded coconut
- 1/2 cup almond flour
- 1/2 cup pure maple syrup
- 1 teaspoon vanilla extract
- 1/2 teaspoon almond extract
- Zest of 1 lime
- 3 large egg whites
- 1/4 teaspoon salt
- Optional: 1/2 cup dark chocolate chips for drizzling
Cooking Instructions:
- Preheat the Oven: Begin by preheating your oven to 325°F (165°C). Line a baking sheet with parchment paper to prevent sticking and guarantee easy cleanup.
- Combine Dry Ingredients: In a large mixing bowl, combine the unsweetened shredded coconut, almond flour, and salt. Stir well to confirm the ingredients are evenly distributed.
- Add Wet Ingredients: In a separate bowl, whisk together the egg whites, maple syrup, vanilla extract, almond extract, and lime zest until well combined. Pour this mixture into the bowl with the dry ingredients.
- Mix Thoroughly: Use a spatula to fold the wet ingredients into the dry ingredients until everything is well incorporated. The mixture should be sticky but not too wet.
- Shape the Macaroons: Using a tablespoon or cookie scoop, form small mounds of the mixture and place them on the prepared baking sheet, about 2 inches apart.
- Bake: Place the baking sheet in the preheated oven and bake for 18-20 minutes, or until the macaroons are golden brown on the edges. Be sure to rotate the sheet halfway through baking for even cooking.
- Cool: Remove the macaroons from the oven and allow them to cool on the baking sheet for a few minutes before transferring them to a wire rack to cool completely.
- Optional Chocolate Drizzle: If desired, melt the dark chocolate chips in a microwave-safe bowl, stirring every 30 seconds until smooth. Drizzle the melted chocolate over the cooled macaroons and let it set before serving.
Extra Tips:
To guarantee your macaroons turn out perfectly chewy and delicious, make sure the egg whites are at room temperature before whisking them into the mixture. This helps them blend more easily and evenly with the other ingredients.
Additionally, feel free to experiment with different flavor variations by trying orange zest instead of lime, or adding a touch of cinnamon for a warm, spicy note. If you’re making these ahead of time, store them in an airtight container at room temperature for up to four days, or freeze them for up to a month for longer freshness.
Holiday Spiced Chia Seed Pudding
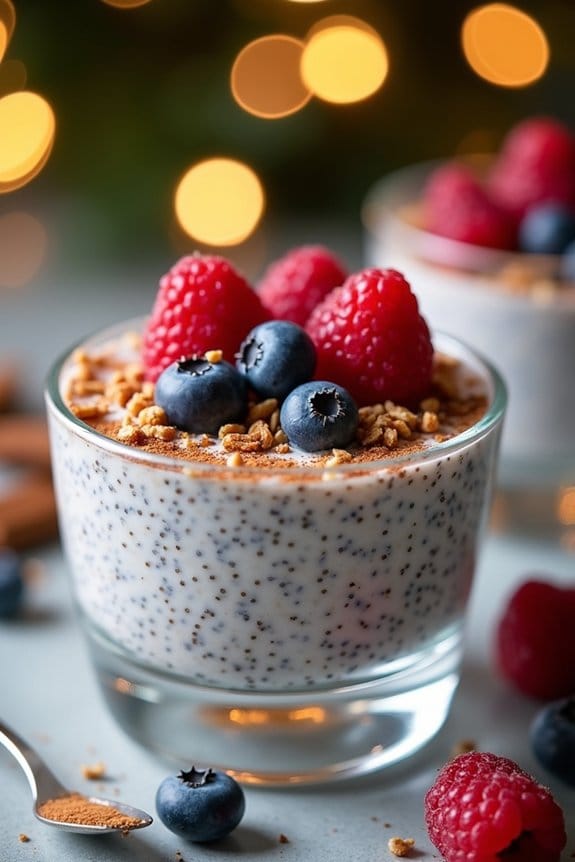
Holiday Spiced Chia Seed Pudding is a festive and nutritious dessert that embodies the warm and cozy flavors of the holiday season. This delightful pudding is a healthier alternative to traditional holiday sweets, while still delivering a rich and satisfying treat. The creamy texture of chia seeds, soaked in a spiced milk mixture, perfectly complements the aromatic notes of cinnamon, nutmeg, and ginger, making it an ideal dessert to enjoy during Christmas celebrations.
Plus, it’s incredibly easy to make and can be prepared in advance, allowing you to spend more time with loved ones.
Perfect for those who are health-conscious or have dietary restrictions, this pudding is naturally gluten-free and can easily be made vegan by using plant-based milk. Packed with fiber, protein, and omega-3 fatty acids from the chia seeds, this dessert isn’t only delicious but also nutritious.
Whether you serve it as a light finish to a holiday meal or as a sweet snack during the day, Holiday Spiced Chia Seed Pudding is sure to become a staple in your festive recipe repertoire.
Ingredients for 4-6 servings:
- 1 cup chia seeds
- 3 cups almond milk (or any preferred milk)
- 1/4 cup maple syrup (or honey for non-vegan)
- 1 teaspoon vanilla extract
- 1 teaspoon ground cinnamon
- 1/2 teaspoon ground ginger
- 1/4 teaspoon ground nutmeg
- Pinch of salt
- Optional toppings: fresh berries, chopped nuts, shredded coconut, or a sprinkle of cinnamon
Cooking Instructions:
- Mix the Ingredients: In a large mixing bowl, combine the almond milk, maple syrup, vanilla extract, ground cinnamon, ground ginger, ground nutmeg, and a pinch of salt. Whisk these ingredients together until well blended.
- Add Chia Seeds: Gradually add the chia seeds into the spiced milk mixture, stirring continuously to prevent clumping. Confirm that the seeds are evenly distributed throughout the liquid.
- Soak the Mixture: Cover the bowl with plastic wrap or a lid and refrigerate for at least 2 hours, or overnight for best results. This allows the chia seeds to absorb the liquid and expand, forming a pudding-like consistency.
- Stir and Serve: Before serving, give the pudding a good stir to redistribute any seeds that may have settled. Spoon the pudding into individual serving dishes and top with your choice of fresh berries, chopped nuts, shredded coconut, or a sprinkle of cinnamon for added flavor and texture.
- Enjoy: Serve the Holiday Spiced Chia Seed Pudding chilled, and enjoy the festive flavors with each bite.
Extra Tips:
For an even creamier texture, consider blending the pudding in a blender after it has soaked, which will break down the chia seeds and create a smoother consistency.
You can also experiment with different milk alternatives, such as coconut milk or oat milk, to suit your taste preferences. If you prefer a sweeter pudding, adjust the amount of sweetener to your liking.
Finally, prepare this dessert a day in advance to allow the flavors to meld together beautifully, enhancing the overall taste of the pudding.
Maple Pecan Sweet Potato Bars
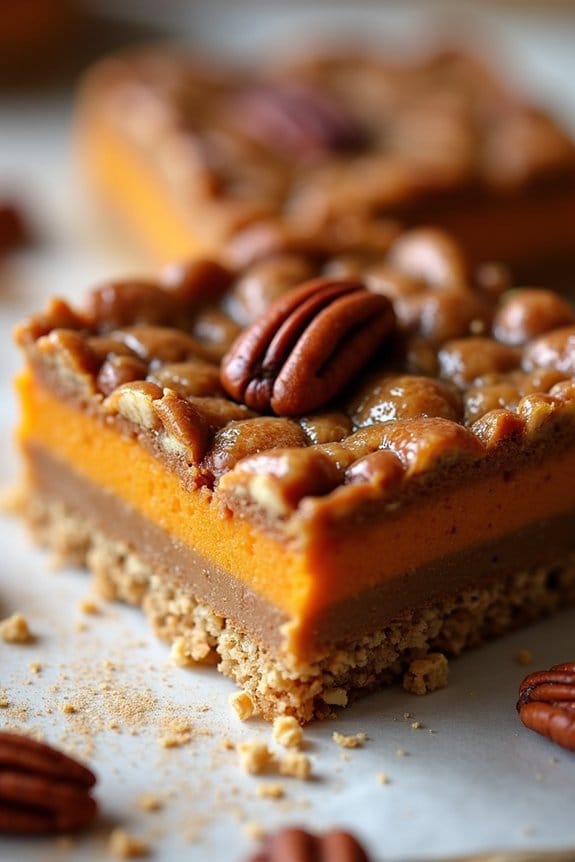
Maple Pecan Sweet Potato Bars are a delightful holiday treat that combines the natural sweetness of sweet potatoes with the rich flavors of maple syrup and crunchy pecans. These bars aren’t only delicious but also healthier than many traditional holiday desserts, making them an excellent choice for those who want to indulge without the guilt.
With a creamy sweet potato filling and a nutty pecan topping, these bars are sure to become a favorite at your Christmas gathering. Perfect for serving 4-6 people, these bars are easy to prepare and require simple ingredients that you likely already have in your pantry.
The combination of sweet potatoes and maple syrup provides a natural sweetness that eliminates the need for refined sugars, while the pecans add a satisfying crunch and depth of flavor. Whether you serve them as a dessert or a sweet snack, Maple Pecan Sweet Potato Bars are sure to impress your guests and leave them wanting more.
Ingredients:
- 2 medium sweet potatoes, peeled and cubed
- 1/2 cup pure maple syrup
- 1/4 cup coconut oil, melted
- 1 teaspoon vanilla extract
- 1 teaspoon ground cinnamon
- 1/2 teaspoon ground nutmeg
- 1/4 teaspoon salt
- 1 cup rolled oats
- 1 cup pecans, chopped
- 1/4 cup almond flour
- 1/4 cup unsweetened shredded coconut
Cooking Instructions:
- Preheat the oven: Start by preheating your oven to 350°F (175°C). This will guarantee it’s ready for baking once your mixture is prepared.
- Prepare the sweet potatoes: Place the cubed sweet potatoes in a medium saucepan, cover with water, and bring to a boil. Cook for 15-20 minutes until the sweet potatoes are fork-tender.
- Mash the sweet potatoes: Drain the sweet potatoes and return them to the pan. Mash them until they’re smooth and free of lumps.
- Mix the sweet potato filling: In a large bowl, combine the mashed sweet potatoes, maple syrup, melted coconut oil, vanilla extract, cinnamon, nutmeg, and salt. Mix well until all ingredients are fully incorporated.
- Prepare the crust: In a separate bowl, mix together the rolled oats, almond flour, and shredded coconut. Press this mixture into the bottom of a greased 8×8 inch baking dish to form an even crust layer.
- Add the sweet potato filling: Spread the sweet potato mixture evenly over the oat crust in the baking dish.
- Prepare the pecan topping: Combine the chopped pecans with a tablespoon of maple syrup. Sprinkle this mixture evenly over the sweet potato filling.
- Bake the bars: Place the baking dish in the preheated oven and bake for 25-30 minutes, or until the edges are golden brown and the center is set.
- Cool and serve: Allow the bars to cool in the baking dish for at least 10 minutes before cutting them into squares. Serve warm or at room temperature.
Extra Tips:
For best results, confirm your sweet potatoes are fully cooked and mashed smooth for a creamy filling. If you prefer a sweeter bar, you can add a tablespoon or two of coconut sugar to the sweet potato mixture.
Additionally, feel free to experiment with spices such as ginger or allspice for a more complex flavor profile. These bars can be stored in an airtight container in the refrigerator for up to 3 days, making them a perfect make-ahead dessert for your holiday festivities.
Zesty Lemon Raspberry Tart

Zesty Lemon Raspberry Tart is a delightful and invigorating dessert that brings a burst of tangy and sweet flavors to your holiday table. This tart combines a crisp, buttery crust with a luscious lemon filling and a topping of fresh raspberries that adds a vibrant splash of color and taste.
Perfect for a Christmas gathering, this healthy dessert option guarantees you can indulge without the guilt, as it uses natural sweeteners and wholesome ingredients that align with healthier eating habits.
This tart isn’t only visually appealing but also simple to prepare, making it a great choice for both novice and experienced bakers. The combination of zesty lemon and juicy raspberries creates a harmonious balance of flavors that’s sure to impress your guests.
Whether you’re looking to complement a festive meal or simply enjoy a sweet treat, the Zesty Lemon Raspberry Tart is a delightful addition to your holiday menu.
Ingredients for 4-6 servings:
- 1 1/2 cups almond flour
- 1/4 cup coconut oil, melted
- 1/4 cup maple syrup
- 1/4 teaspoon salt
- 3 large eggs
- 1/2 cup fresh lemon juice (about 2 large lemons)
- Zest of 2 lemons
- 1/3 cup honey or agave syrup
- 1/4 cup coconut cream
- 1 teaspoon vanilla extract
- 1 1/2 cups fresh raspberries
Cooking Instructions:
1. Prepare the Tart Crust: Preheat your oven to 350°F (175°C). In a medium bowl, combine almond flour, melted coconut oil, maple syrup, and salt. Mix well until the mixture forms a dough.
Press this dough evenly into the bottom and up the sides of a 9-inch tart pan. Prick the bottom with a fork to prevent bubbling. Bake for 10-12 minutes or until the edges are a light golden brown. Remove from the oven and let it cool.
2. Make the Lemon Filling: In a medium saucepan, whisk together eggs, fresh lemon juice, lemon zest, honey, and coconut cream. Place the saucepan over medium heat and cook, stirring constantly, until the mixture thickens and coats the back of a spoon (about 8-10 minutes).
Once thickened, remove from heat and stir in the vanilla extract.
3. Assemble the Tart: Pour the lemon filling into the cooled crust, spreading it evenly. Allow the tart to sit at room temperature for about 20 minutes, then refrigerate for at least 2 hours or until the filling is set.
4. Add the Raspberry Topping: Once the tart is set, arrange fresh raspberries in a circular pattern on top of the lemon filling. You can also gently press them into the filling for a more secure topping.
5. Serve: Before serving, you may dust the tart with a light sprinkle of powdered sugar or garnish with fresh mint leaves for extra flair. Slice and enjoy this invigorating dessert!
Extra Tips:
To guarantee the best flavor, use fresh, ripe raspberries and freshly squeezed lemon juice. If you prefer a sweeter tart, you can adjust the amount of honey in the filling to taste.
For a nut-free version, consider using oat flour instead of almond flour for the crust. Make sure to refrigerate the tart long enough for the filling to set properly; otherwise, it may be too runny.
Store any leftovers in the refrigerator, covered, for up to three days.
Creamy Cashew Cheesecake Bites

Creamy Cashew Cheesecake Bites are a delightful and indulgent treat perfect for your holiday dessert spread. These bite-sized cheesecakes are made with a rich and creamy cashew filling, layered over a simple but flavorful crust. Not only are they delicious, but they’re also a healthier alternative to traditional cheesecake, making them an excellent choice for those looking to indulge without the guilt.
The natural sweetness from dates and maple syrup, combined with the creaminess of cashews, creates a dessert that feels luxurious and satisfying. These cheesecake bites are ideal for those who are vegan or lactose intolerant, as they’re completely dairy-free. They offer a smooth, velvety texture that’s sure to please any palate.
Whether you’re serving them at a festive gathering or enjoying them as a mid-week treat, these creamy cashew cheesecake bites are sure to become a favorite. They’re easy to prepare and can be made ahead of time, allowing you to focus on celebrating the holiday season with your loved ones.
Ingredients for 4-6 servings:
- 1 ½ cups raw cashews (soaked overnight)
- 1 cup Medjool dates, pitted
- 1 cup raw almonds
- ¼ cup coconut oil, melted
- ¼ cup maple syrup
- 2 tablespoons lemon juice
- 1 teaspoon vanilla extract
- 1/8 teaspoon sea salt
- Fresh berries or fruit of choice for topping (optional)
Instructions:
- Prepare the Cashews: Drain and rinse the soaked cashews thoroughly. Set them aside to use for the cheesecake filling.
- Make the Crust: In a food processor, combine the pitted dates and almonds. Pulse until the mixture becomes a sticky, crumbly texture. This will form the base for your cheesecake bites.
- Press the Crust: Line a muffin tin with paper liners or use silicone molds for easy removal. Evenly divide the crust mixture among the molds, pressing it down firmly to create an even layer at the bottom.
- Blend the Filling: In a high-speed blender, combine the soaked cashews, melted coconut oil, maple syrup, lemon juice, vanilla extract, and sea salt. Blend until the mixture is smooth and creamy, scraping down the sides as needed.
- Assemble the Cheesecake Bites: Pour the cashew filling over the prepared crust in each muffin mold, filling them almost to the top. Smooth the surface with a spatula for an even finish.
- Chill and Set: Place the muffin tin or molds in the freezer for at least 2 hours, or until the cheesecake bites are firm and set.
- Serve and Enjoy: Once set, remove the cheesecake bites from the molds. Top with fresh berries or fruit of choice, if desired, and serve chilled.
Extra Tips:
For the best results, verify that the cashews are soaked overnight. This step is essential for achieving a smooth and creamy filling. If you’re short on time, soak them in hot water for at least 2 hours.
When pressing the crust into the molds, use the back of a spoon to pack it tightly, making sure it holds together. Feel free to experiment with different toppings such as shaved chocolate, coconut flakes, or a sprinkle of cinnamon to personalize your cheesecake bites.
Store any leftovers in an airtight container in the freezer, and allow them to thaw for a few minutes before serving.
No-Bake Chocolate Almond Butter Cups

No-Bake Chocolate Almond Butter Cups are a delightful and healthier alternative to traditional holiday treats. These cups combine the rich flavors of chocolate with the creamy texture of almond butter, creating a perfect balance that’s certain to satisfy any sweet tooth. The best part? They’re incredibly easy to make and don’t require any baking, making them a convenient option for those busy holiday schedules.
Whether you’re looking to indulge in a guilt-free dessert or impress your guests with a unique treat, these almond butter cups are an excellent choice.
These cups aren’t only delicious but also packed with wholesome ingredients that make them a better option than most store-bought candies. With natural sweeteners, dark chocolate, and almond butter, they offer a source of healthy fats and antioxidants. The combination of these ingredients guarantees that you get a burst of flavor without the overload of sugar and processed additives.
Prepare these cups ahead of time and have them ready to serve as a delightful addition to your Christmas dessert spread.
Ingredients (serving size: 4-6 people):
- 1 cup almond butter
- 1/4 cup coconut oil
- 1/4 cup pure maple syrup
- 1 teaspoon vanilla extract
- 1/4 teaspoon sea salt
- 1 cup dark chocolate chips
- 1 tablespoon coconut oil (for chocolate)
- Sea salt flakes (for topping, optional)
Cooking Instructions:
- Prepare the Almond Butter Mixture: In a medium-sized bowl, combine the almond butter, 1/4 cup of coconut oil, pure maple syrup, vanilla extract, and 1/4 teaspoon sea salt. Mix well until all the ingredients are thoroughly combined and the mixture is smooth.
- Melt the Chocolate: In a microwave-safe bowl, combine the dark chocolate chips and 1 tablespoon of coconut oil. Microwave in 30-second intervals, stirring after each interval, until the chocolate is completely melted and smooth. Be careful not to overheat the chocolate, as it can burn easily.
- Assemble the Cups: Line a muffin tin with paper liners. Pour a small spoonful of the melted chocolate into the bottom of each liner, just enough to cover the base. Place the muffin tin in the freezer for about 10 minutes, or until the chocolate has set.
- Add the Almond Butter Layer: Once the chocolate base has hardened, scoop a generous spoonful of the almond butter mixture on top of each chocolate layer. Use the back of a spoon to gently spread the almond butter evenly.
- Top with Chocolate: Pour the remaining melted chocolate over the almond butter layer, making sure it covers the almond butter completely. Sprinkle a pinch of sea salt flakes on top of each cup if desired.
- Chill and Set: Return the muffin tin to the freezer and allow the cups to set for at least 30 minutes, or until firm. Once set, remove the cups from the tin and store them in an airtight container in the refrigerator until ready to serve.
Extra Tips: For an added festive touch, you can sprinkle crushed peppermint or roasted almond pieces on top of the chocolate before it sets. If you prefer a sweeter cup, adjust the maple syrup to taste, but remember that the chocolate also adds sweetness.
When melting chocolate, make certain no water comes into contact with it, as this can cause the chocolate to seize and become grainy. These cups can be stored in the refrigerator for up to two weeks, making them a great make-ahead dessert option for your holiday gatherings.
Warm Cinnamon Baked Pears

Warm Cinnamon Baked Pears are a delightful and healthy dessert option that perfectly complements the festive spirit of Christmas. These pears are infused with the warm, spicy flavors of cinnamon and nutmeg, adding a comforting aroma to your home as they bake. The natural sweetness of ripe pears is enhanced through baking, and the addition of a crunchy topping adds texture to each bite.
Whether served as a cozy family dessert or as a lighter option at a holiday gathering, these baked pears offer a deliciously satisfying end to any meal.
What makes Warm Cinnamon Baked Pears particularly appealing is their simplicity and the minimal ingredients required to create a dish that feels both indulgent and nourishing. This recipe is perfect for those who want to enjoy a sweet treat without the guilt, as it focuses on natural ingredients and avoids excessive sugar or heavy creams.
With just a few easy steps, you can prepare a dessert that will impress your guests and leave them feeling satisfied and festive.
Ingredients for 4-6 people:
- 4 ripe pears
- 3 tablespoons maple syrup
- 1 teaspoon ground cinnamon
- 1/2 teaspoon ground nutmeg
- 1/4 cup chopped walnuts or pecans
- 2 tablespoons unsalted butter, melted
- 1 teaspoon vanilla extract
- Optional: Greek yogurt or vanilla ice cream for serving
Cooking Instructions:
- Preheat the Oven: Begin by preheating your oven to 350°F (175°C). This will guarantee the oven is at the right temperature when you place the pears in, allowing them to cook evenly.
- Prepare the Pears: Wash the pears thoroughly, then slice them in half lengthwise. Use a spoon or melon baller to scoop out the core and seeds, creating a small cavity in each half for the filling.
- Mix the Filling: In a small bowl, combine the maple syrup, ground cinnamon, ground nutmeg, chopped walnuts or pecans, melted butter, and vanilla extract. Stir until all ingredients are well incorporated.
- Stuff the Pears: Arrange the pear halves in a baking dish, cut side up. Spoon the filling mixture into the cavity of each pear half, guaranteeing that the filling is evenly distributed.
- Bake the Pears: Place the baking dish in the preheated oven and bake the pears for 25-30 minutes, or until they’re tender and the topping is golden brown. The pears should be soft to the touch but not mushy.
- Serve: Once baked, remove the pears from the oven and allow them to cool for a few minutes. Serve warm, optionally topping with a dollop of Greek yogurt or a scoop of vanilla ice cream for an added touch of creaminess.
Extra Tips:
Selecting ripe pears is vital for this recipe; they should yield slightly to gentle pressure, indicating they’re ready to bake. If your pears aren’t quite ripe, you can leave them at room temperature for a day or two to soften.
For added flavor, consider sprinkling a little extra cinnamon on top after baking. You can also experiment with different types of nuts or add a handful of raisins or dried cranberries to the filling for a festive twist. This recipe is easily adaptable, allowing you to adjust sweetness and spice levels to suit your taste preferences.
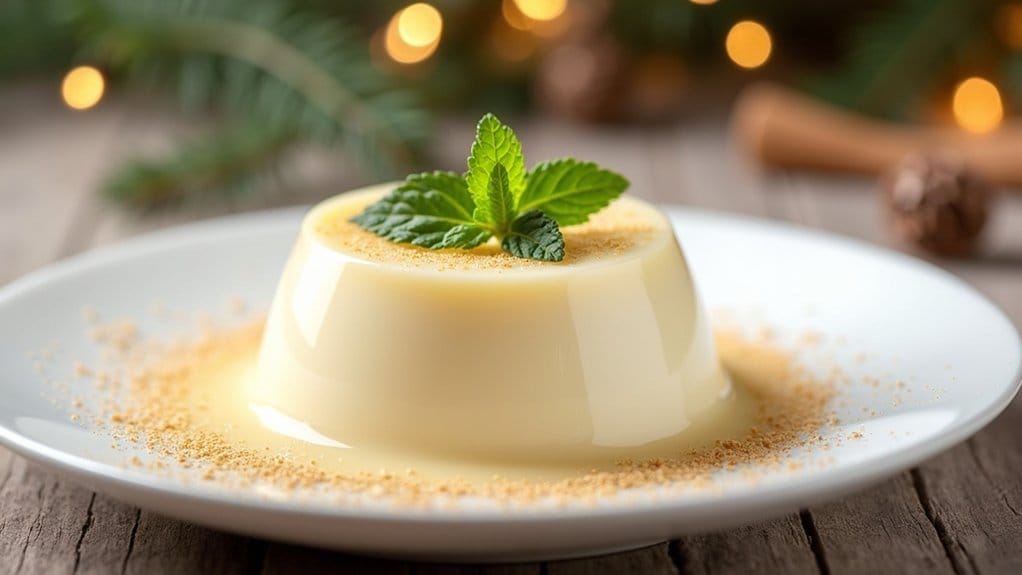
Dairy-Free Eggnog Panna Cotta
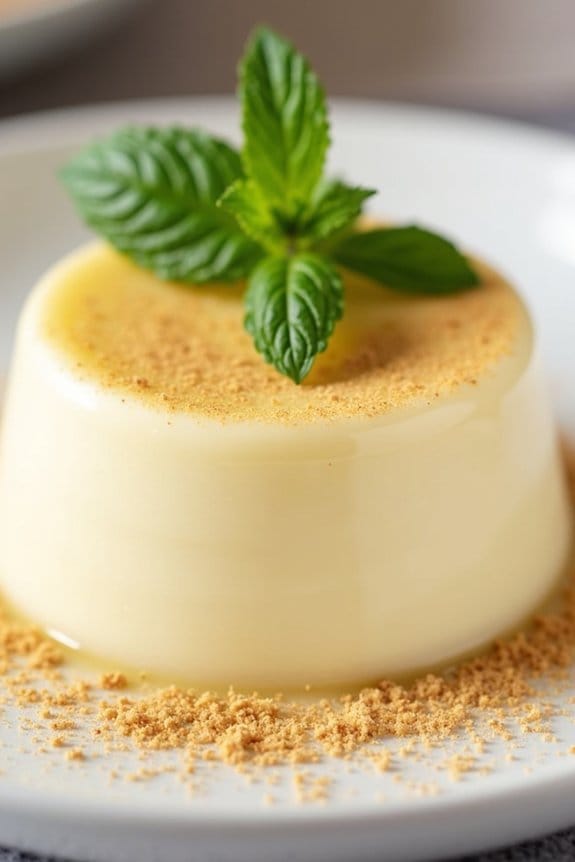
Dairy-Free Eggnog Panna Cotta is a delightful twist on a classic Italian dessert, perfect for those looking to enjoy a festive treat without the dairy. This creamy and smooth dessert captures the rich and warming flavors of traditional eggnog, using plant-based ingredients to accommodate lactose intolerant guests or those following a vegan diet.
With its subtle vanilla and nutmeg undertones, this panna cotta is sure to add a touch of elegance to your holiday table, while remaining light and healthy.
The secret to this indulgent yet dairy-free dessert lies in the use of coconut milk and almond milk, which provides a luscious texture reminiscent of conventional panna cotta. Agar-agar, a plant-based gelatin substitute, helps to set the dessert while maintaining a silky consistency.
This Dairy-Free Eggnog Panna Cotta isn’t only easy to prepare but can also be made ahead of time, allowing you to focus on other holiday festivities. Serve chilled with a dusting of nutmeg and a sprig of fresh mint for a revitalizing dessert that will impress your guests with its taste and presentation.
Ingredients for 4-6 servings:
- 1 can (13.5 oz) full-fat coconut milk
- 1 cup unsweetened almond milk
- 1/3 cup maple syrup
- 1 teaspoon pure vanilla extract
- 1/2 teaspoon ground nutmeg, plus more for garnish
- 1/4 teaspoon ground cinnamon
- 1/4 teaspoon ground cloves
- 1/4 teaspoon turmeric (optional for color)
- 1 tablespoon agar-agar powder
- Fresh mint leaves (for garnish)
Cooking Instructions:
- Prepare the Mixture: In a medium saucepan, combine the coconut milk, almond milk, maple syrup, vanilla extract, ground nutmeg, cinnamon, cloves, and turmeric. Stir until all the ingredients are well combined.
- Heat the Mixture: Place the saucepan over medium heat and bring the mixture to a gentle simmer, stirring occasionally to prevent sticking. Once simmering, reduce the heat to low.
- Incorporate Agar-Agar: Sprinkle the agar-agar powder evenly over the surface of the milk mixture. Whisk continuously for about 5 minutes until the agar-agar is completely dissolved and the mixture begins to thicken slightly.
- Simmer and Stir: Allow the mixture to simmer for an additional 5-10 minutes to guarantee the agar-agar is fully activated, continuing to stir frequently to maintain a smooth consistency.
- Pour into Molds: Remove the saucepan from the heat and carefully pour the hot mixture into lightly greased ramekins or silicone molds. Let them cool slightly on the counter before transferring them to the refrigerator.
- Chill and Set: Refrigerate the panna cotta for at least 4 hours, or until fully set. The dessert should have a firm yet wobbly consistency.
- Serve and Garnish: Once set, remove the panna cotta from the molds by gently loosening the edges with a knife. Invert the molds onto serving plates. Garnish with a light dusting of ground nutmeg and a sprig of fresh mint before serving.
Extra Tips:
When making Dairy-Free Eggnog Panna Cotta, it’s essential to verify the agar-agar is fully dissolved to achieve the desired texture. If you notice any grains or particles in the mixture, continue to simmer and stir until smooth.
If you prefer a sweeter panna cotta, you can adjust the amount of maple syrup according to your taste. Additionally, you can experiment with different plant-based milk alternatives, such as oat milk or cashew milk, to find your preferred flavor profile.
This dessert can be prepared a day in advance, making it a convenient option for holiday gatherings.
